Working with natural curls means finding hairstyles that enhance your texture rather than fight against it. The most frustrating part of managing curly hair isn’t the curl pattern itself — it’s figuring out how to style it in ways that look intentional, polished, and effortless without requiring hours of manipulation or heat styling. The good news? Some of the easiest and most flattering hairstyles for natural curls are also the ones that require the least amount of effort.
The challenge most people with curly hair face is discovering which styling approaches actually work with their texture instead of working against it. Generic hairstyling advice written for straight or wavy hair often falls flat when applied to natural curls, leaving you frustrated and your curls frizzy. But when you understand the mechanics of how your curl pattern moves and settles, you unlock a whole range of styling possibilities that look effortlessly beautiful while keeping your curls healthy and defined.
What makes a hairstyle “easy” for natural curls is different than it is for straight hair. An easy curly hairstyle respects the natural movement of your curls, doesn’t require constant pulling or tension, and works with your curl pattern rather than forcing it into a different shape. These styles are low-manipulation, protective of your curl structure, and practical for everyday wear — they’re the ones you can recreate every single time without guesswork.
Let’s explore ten hairstyles that genuinely work for natural curls, require minimal styling effort, and look intentionally put-together rather than haphazardly thrown together.
1. The Pineapple Updo
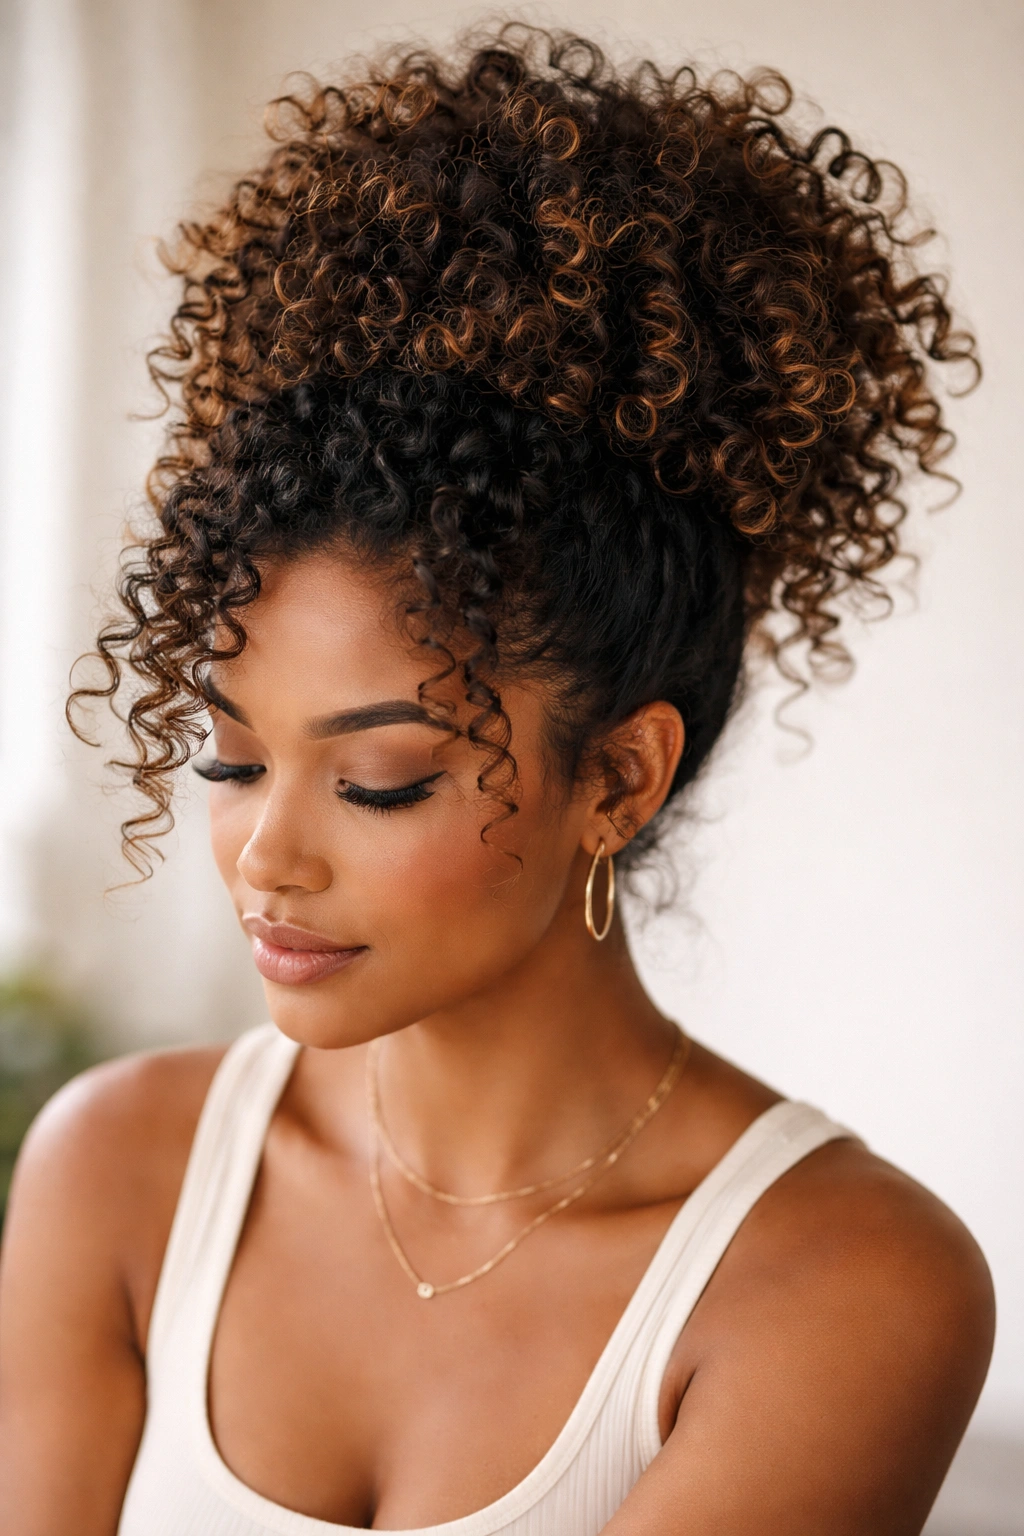
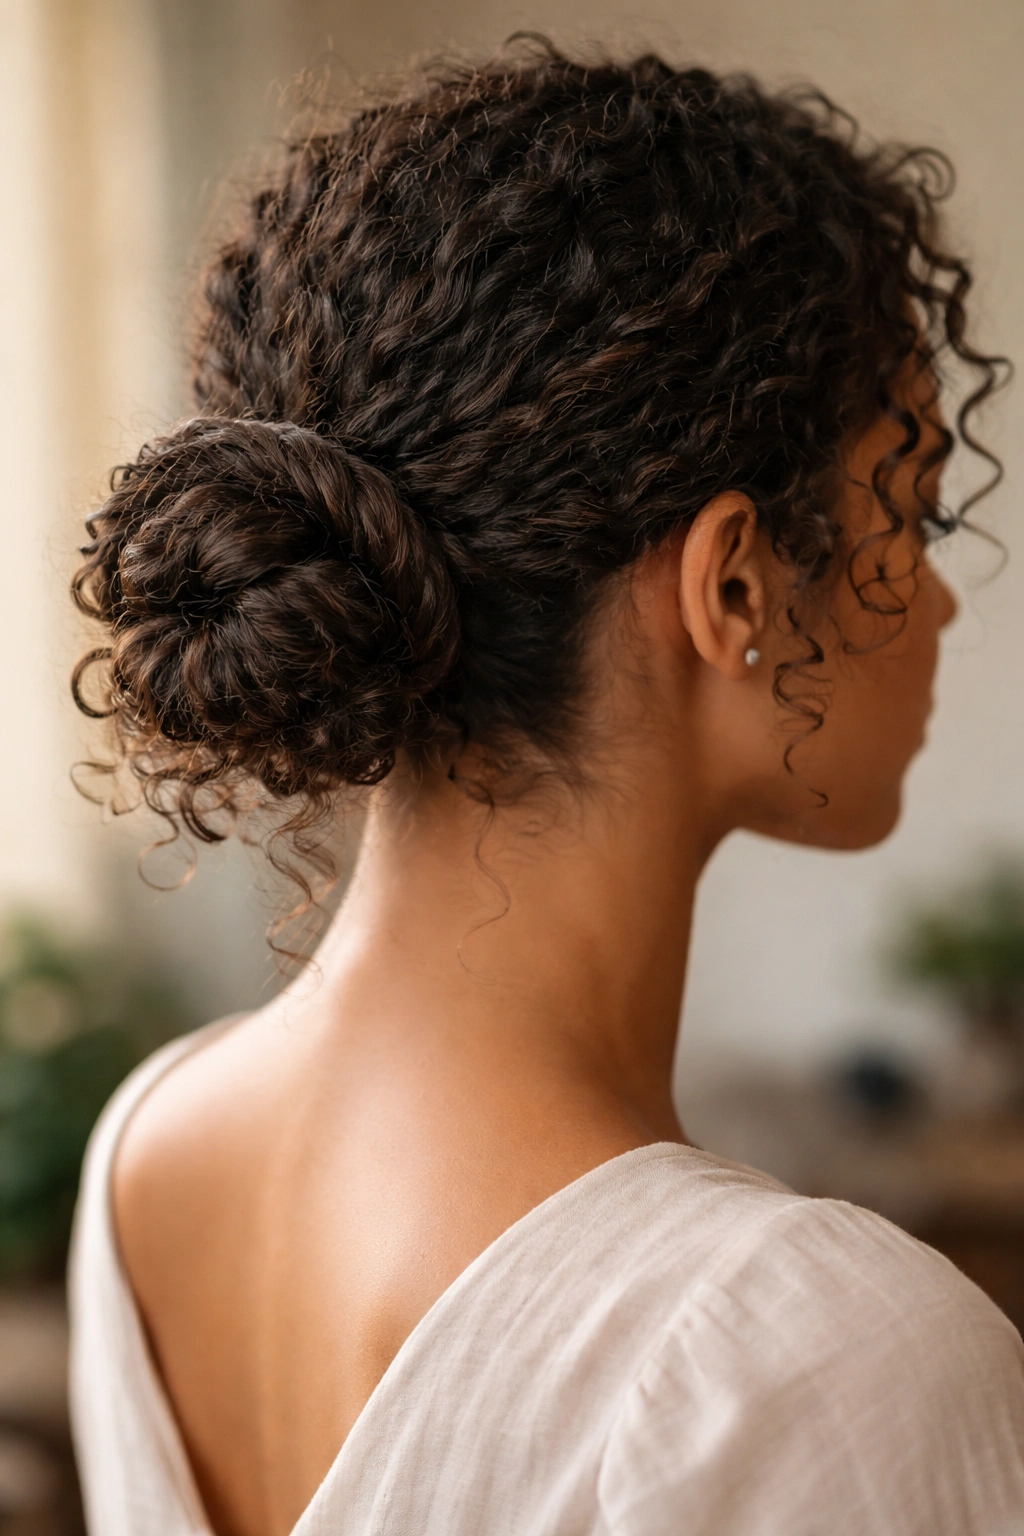
The pineapple updo is perhaps the single most popular hairstyle in the curly-hair community, and for good reason — it takes about ninety seconds to create, protects your curl definition overnight, and looks polished enough to wear in public without a second thought. The style gets its name from the shape your hair creates when you gather curls loosely on top of your head: a high, rounded collection that genuinely resembles a pineapple.
The genius of this hairstyle is its simplicity and its dual purpose. You can create it in the evening before bed to preserve your curl pattern overnight, or in the morning to refresh and control curls while giving yourself an intentional, styled look. The style works for every curl type, from loose waves to coils, because it doesn’t manipulate or reshape your natural curl pattern — it simply gathers it.
Why This Works for Natural Curls
The pineapple updo succeeds because it uses gravity and gentle gathering rather than tight pulling or wrapping. When you secure curls loosely at the crown, they drape naturally and keep their shape. The loose gathering prevents the flattening that happens when you sleep with curls down, but the lack of tension means your curls don’t get creased or deformed the way a tight ponytail would.
How to Create the Perfect Pineapple
- Use a silk or satin scrunchie — never elastic with metal, which creates creases and causes breakage at the point of contact
- Flip your head upside down and gather hair loosely at the very crown of your head, as high as you can reach without pulling uncomfortably
- Secure the scrunchie gently — tight enough to hold all your curls, but loose enough that you can slide a finger underneath without resistance
- Let curls drape naturally down from the base; don’t arrange or manipulate them further
- In the morning, remove the scrunchie and lightly separate curls with your fingers rather than a comb
- If curls feel flat on one side from sleeping, refresh them by misting with water and scrunching gently upward
Pro tip: The height at which you secure your pineapple makes a visible difference. Securing at the very crown creates volume at the top; securing slightly lower creates a sleeker look.
2. Two-Strand Twists
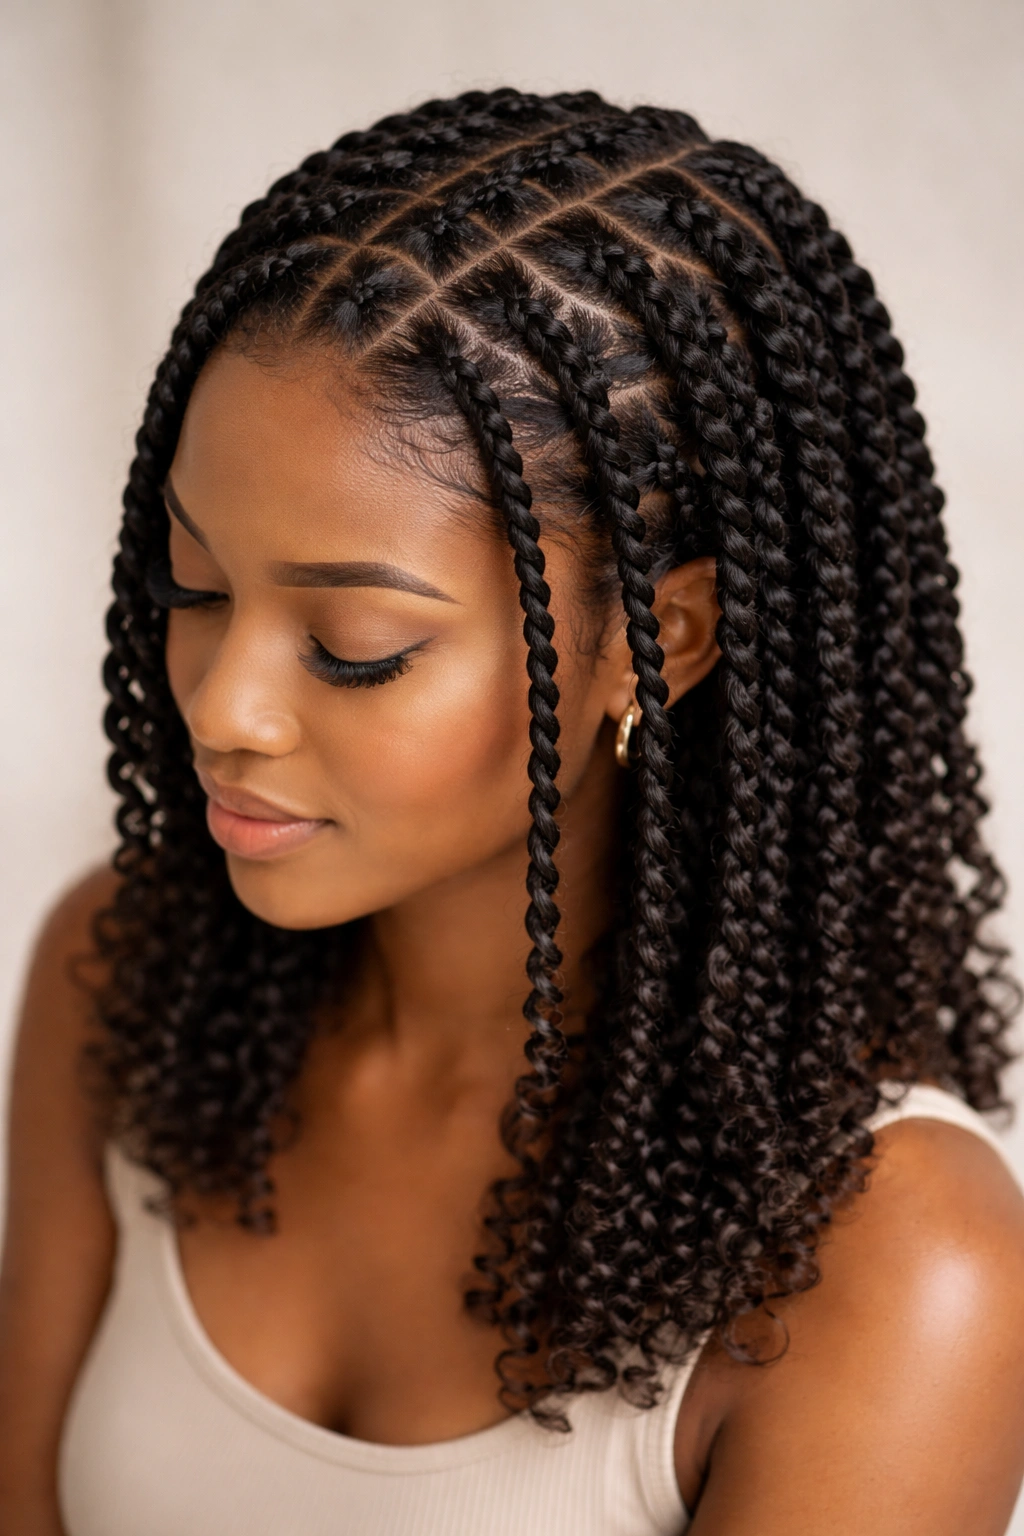
Two-strand twists are a classic natural-hair protective style that doubles as an intentional everyday hairstyle. Instead of hiding twists under a wig or wearing them as a purely protective style, wearing them out as your primary hairstyle lets them become a striking, dimensional look that complements your curl pattern beautifully.
Creating two-strand twists involves taking two sections of hair and wrapping them around each other from root to end. The visual effect is intricate, textured, and layered — your curls weave together in a way that creates definition and movement. What makes them easy as a day-to-day hairstyle is that they don’t require products, heat, or the same level of curl-refreshing maintenance that some other styles demand.
Why Two-Strand Twists Look More Complex Than They Are
Two-strand twists have an elaborate, carefully-styled appearance, which makes people assume they take hours to create. In reality, once you develop the muscle memory for the twisting motion, you can create a full head of twists in 30 to 45 minutes depending on your hair length and the number of twists you want. The payoff is a hairstyle that looks intentional and beautifully textured while actually requiring minimal daily maintenance.
Creating Twists That Last and Look Polished
- Section hair into 8 to 12 large sections using clips to separate each one clearly — larger sections create bigger twists and faster styling time
- Working with one section at a time, divide it into two equal strands
- Starting at the root, twist the two strands around each other, keeping tension consistent as you move toward the ends
- Seal the twist by either tucking the ends under and securing with a small clip, or wrapping the final inch with thread to lock the twist in place
- Sleep with your twists loosely gathered in a pineapple or wrapped in a silk scarf to maintain definition
- Refresh twists by misting with water and re-twisting just the roots where new growth has loosened them
Worth knowing: Two-strand twists last longer when you don’t unravel and re-twist them too frequently. Most people keep their twists in place for two to four weeks before taking them down and starting fresh.
3. The High Ponytail
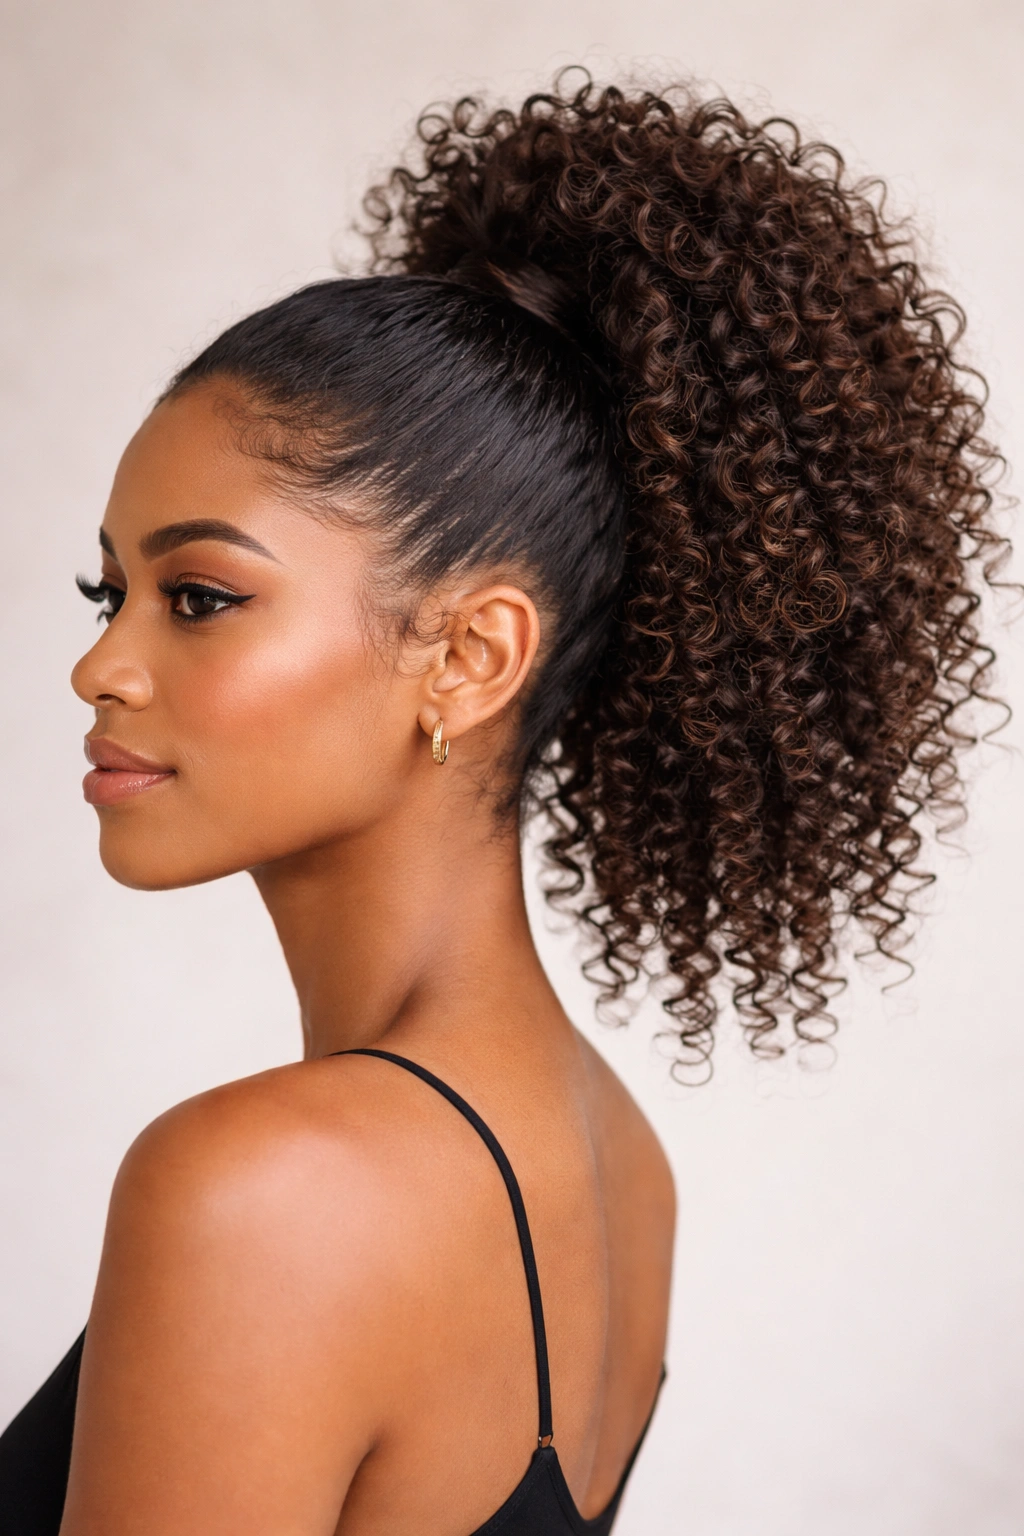
A high ponytail seems almost too simple to mention, but there’s a specific technique for creating one with natural curls that actually looks intentionally styled rather than hastily thrown together. The key difference between a careless ponytail and a polished one is where you secure it, how loosely you gather it, and how you treat the curls once they’re gathered.
Natural curls in a high ponytail have a completely different visual impact than straight hair in the same style. Your curls cluster together, creating volume and texture, and the ponytail itself becomes a sculptural element rather than a sleek, controlled feature. This is actually an advantage — it means your high ponytail looks full, dimensional, and effortlessly chic without requiring the smoothing and flattening that straight hair sometimes needs.
The Real Difference Between Polished and Unkempt
The distinction comes down to three factors: the height of your ponytail, the tightness of your gather, and the intentionality of how your curls settle. A polished high ponytail sits at your crown with a gentle, non-damaging gather. An unkempt one sits too low, pulls too tightly, or has loose pieces falling all over the place without any design to it.
How to Create a High Ponytail That Looks Intentional
- Flip your head upside down and use your fingers to gather hair loosely at the very top and back of your crown
- Secure with a silk scrunchie or claw clip — tight enough to hold all your hair, but not so tight that you’re creating tension at your edges or hairline
- Once secured, use your fingers to gently separate and shape your curls so they have some movement and don’t look compressed
- Smooth any flyaways around your face and hairline with a light edge control product or styling cream, not a full gel
- Curl your ponytail curls slightly away from your face if you want a finished look, or let them fall naturally if you prefer effortless texture
- Check the base of your ponytail — it should sit high enough that you can feel it at the crown with your hand
Insider note: The highest, most visually striking high ponytails are secured above where your natural crown bump is, not at the bump itself. This takes practice to find on your own head, but once you locate it, all your high ponytails will look noticeably more polished.
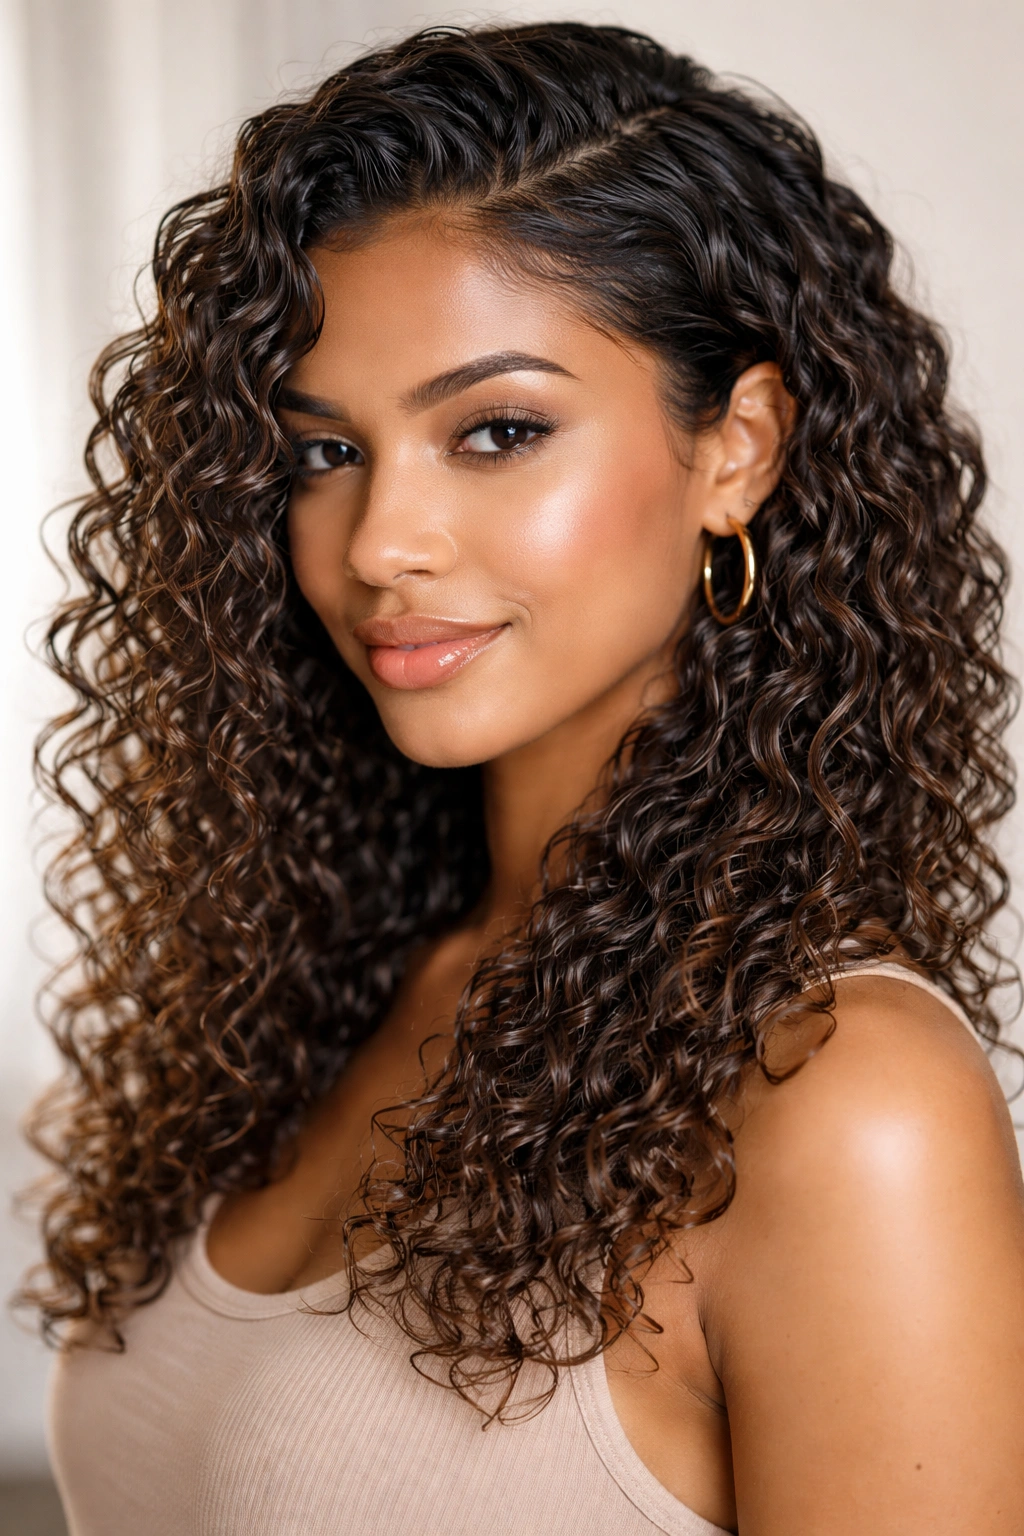
4. Wash and Go
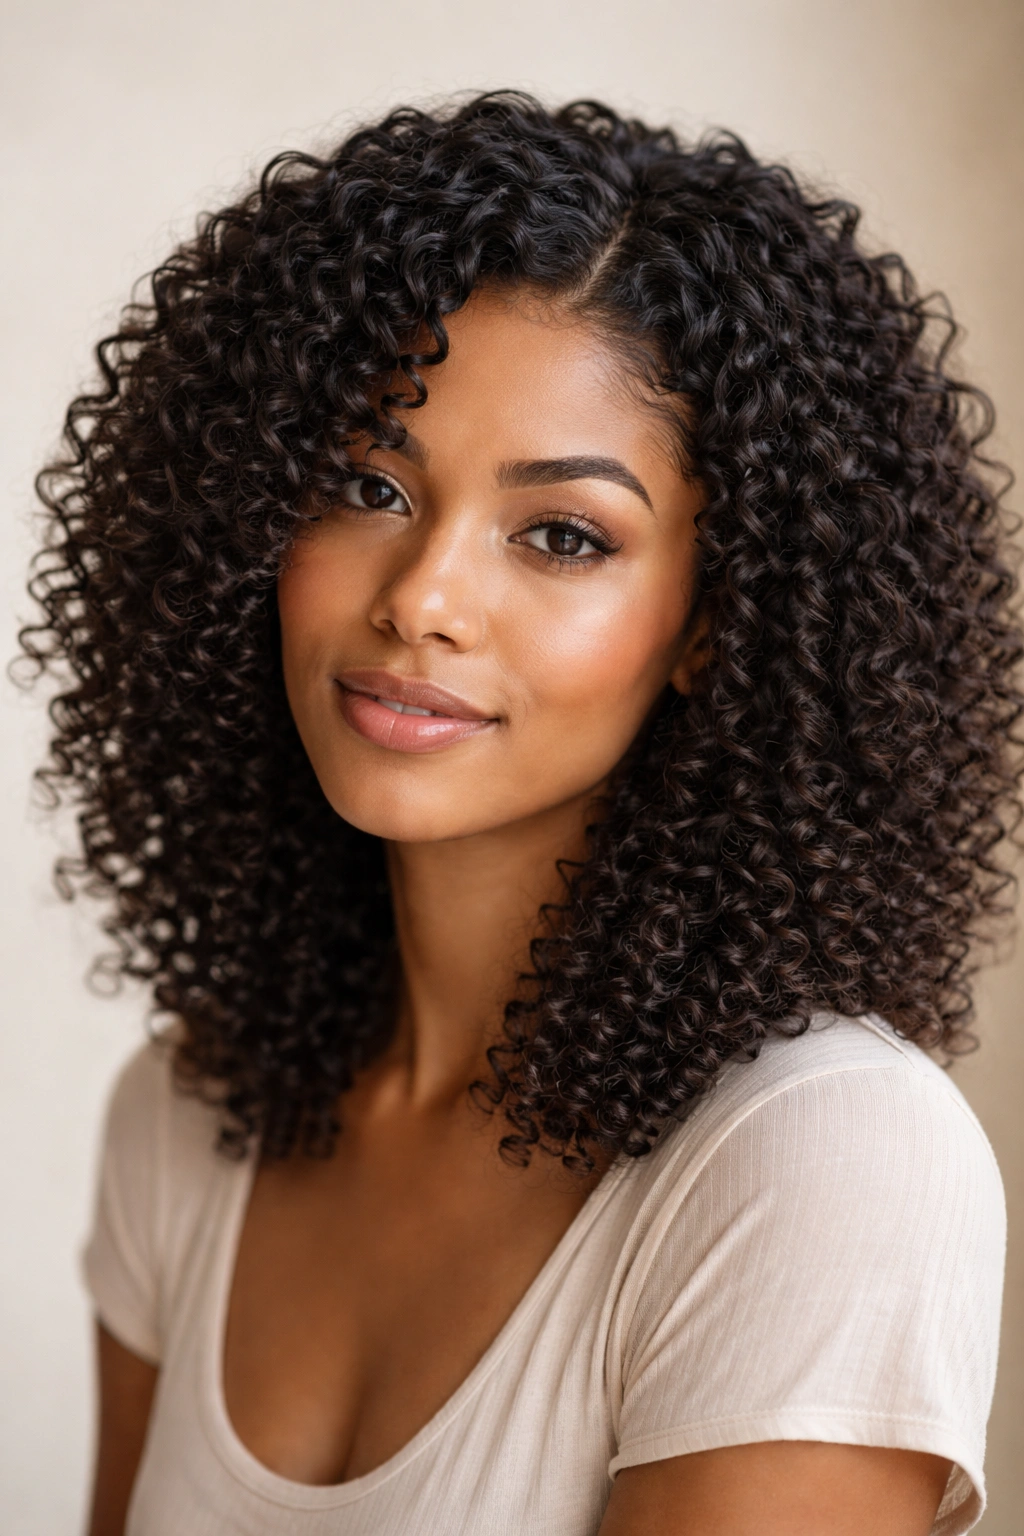
The wash and go is the ultimate easy natural-curl hairstyle — you shampoo, condition, apply products to wet curls, and let them air-dry without any manipulation. The result is naturally defined curls that look intentional and effortless because they actually are effortless. No blow-drying, no scrunching, no setting products, no re-twisting required.
What makes a wash and go look polished rather than messy is understanding which products your curls respond to and how to apply them so your curls clump together and define rather than frizz. Not everyone’s curls will wash-and-go successfully — it depends on your curl pattern, your hair porosity, and your water type — but if your curls are amenable to this method, it’s genuinely the easiest hairstyle possible.
Why Wash and Gos Require the Right Product Match
The common misconception is that a wash and go is just about shampooing and letting your hair dry. The reality is that the product combination matters enormously. You need a leave-in conditioner that provides slip and definition, a styling cream or gel that encourages curl clumping, and possibly a gel that provides hold without crunch. If you use the wrong combination, you end up with frizz and undefined waves instead of clean, sculpted curls.
Creating a Wash and Go That Actually Works
- Shampoo gently with a sulfate-free, curl-friendly shampoo, massaging your scalp with your fingertips rather than nails
- Apply a rich conditioner and leave it in while you finish your shower, allowing it to deeply hydrate your curls
- Rinse thoroughly with cool water to seal your cuticle and enhance shine
- While your hair is still soaking wet, apply a leave-in conditioner to your entire head, focusing on mid-lengths and ends
- Apply your styling cream or curl-defining product by scrunching it into sections of wet hair rather than smoothing it on
- Scrunch gently upward repeatedly to encourage curl definition and encourage individual curls to clump together
- Allow your hair to air-dry completely — or use a diffuser on low heat if you need faster drying — without touching it while it dries
- Once completely dry, lightly separate curls with your fingers to remove any crunch and fluff the style
Pro tip: Plopping — wrapping wet hair in a cotton t-shirt or microfiber towel for 10 to 20 minutes before air-drying — can speed up dry time and enhance definition in curls that take forever to air-dry completely.
5. Braided Crown
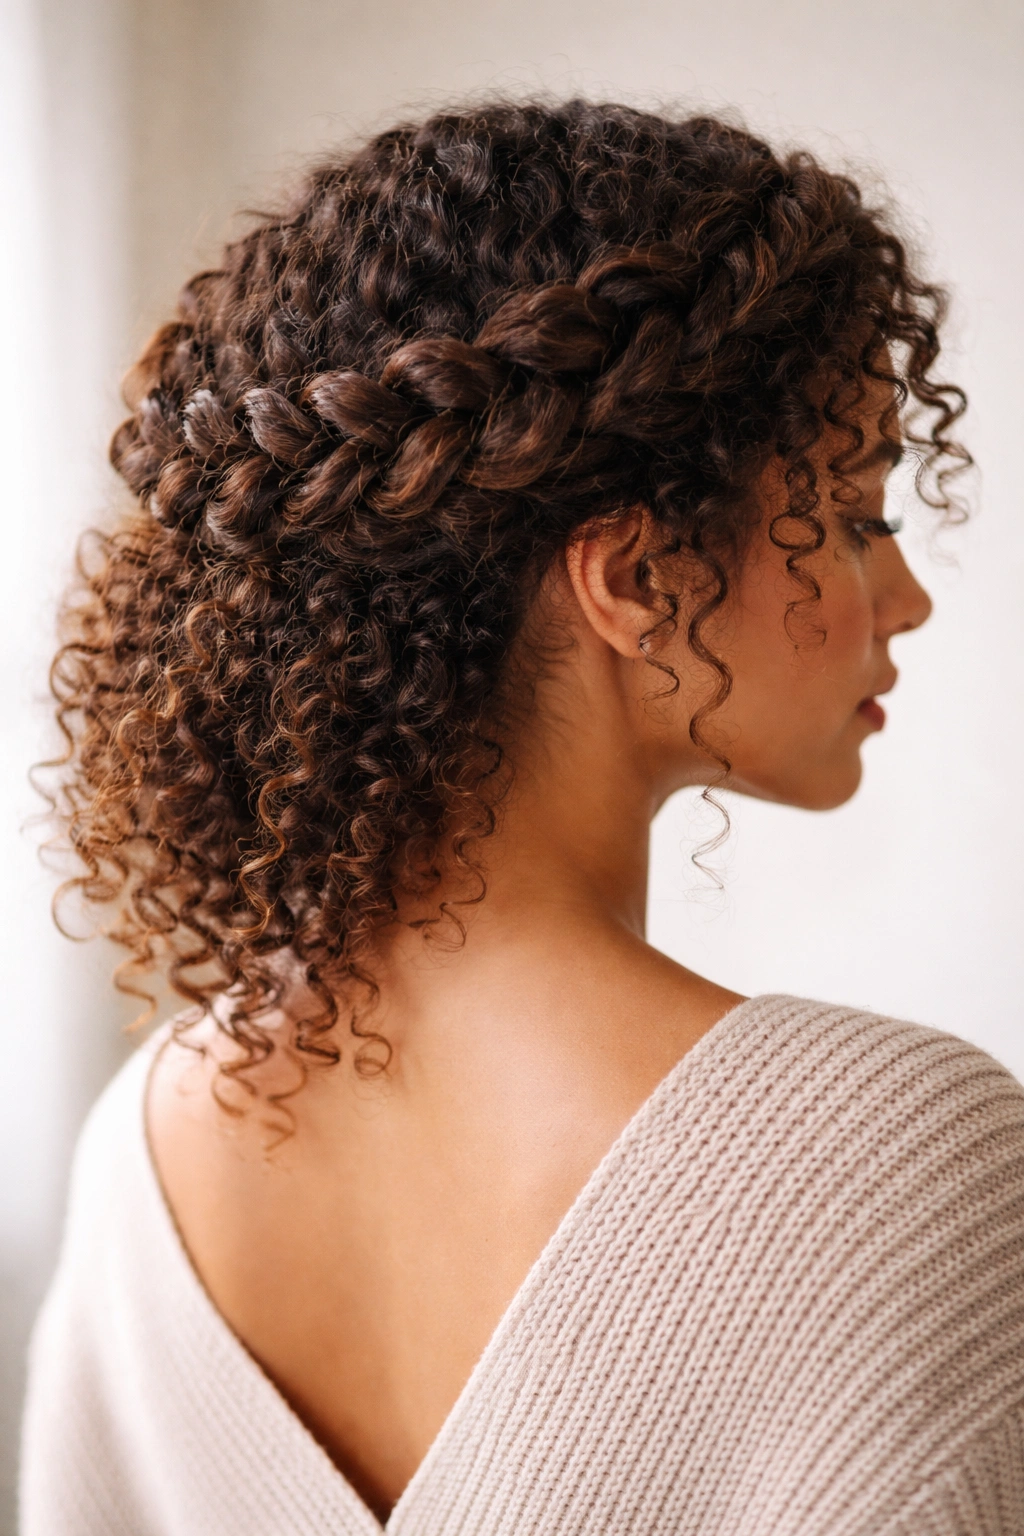
A braided crown (also called a halo braid when it wraps fully around) weaves a section of hair into a braid that wraps around the crown of your head, creating a romantic, intentional look that works for both casual and polished occasions. The braid doesn’t need to be intricate or perfectly executed — in fact, slightly loose, textured braids often look more interesting with natural curls than tight, polished ones.
What makes this easy as a natural-curly hairstyle is that your curls create the texture and visual interest for you. Braiding curly hair is actually easier than braiding straight hair in many ways because the texture holds the braid shape without requiring tight tension. Your natural curl pattern becomes part of the braid’s visual design rather than something you’re trying to hide or smooth away.
Why Textured Braids Work Better With Natural Curls
A common frustration with braiding straight hair is that the braid can look thin or boring without perfect technique. With curly hair, the braid’s texture is inherently interesting. Your curls create dimension and movement in the braid, making even a simply three-strand braid look dimensional and intentional. This is one of the advantages of styling with your natural texture.
Creating a Braided Crown on Natural Curls
- Start with moisturized, slightly damp curls so they hold their texture and don’t dry out during the braiding process
- Section off the hair you want to braid — typically starting at one temple or from behind one ear
- Divide that section into three strands and begin braiding, incorporating small sections of new hair as you move around your head
- Keep your tension loose enough that you’re not creating stress on your hairline or scalp
- As you braid, allow some curls to escape from the braid rather than pulling them all tightly into the structure
- When you reach the opposite side of your head, secure the braid with a small clip or bobby pin that matches your hair color
- Gently loosen the braid by pulling out small sections along its length — this creates a softer, more textured appearance
- Use a light styling spray to lock the style in place without creating crunch
Worth knowing: Braiding slightly damp curls (not soaking wet, not completely dry) gives you the best of both worlds — the curls are pliable enough to braid easily, but they dry in place and hold the braid shape throughout the day.
6. Top Knot Bun
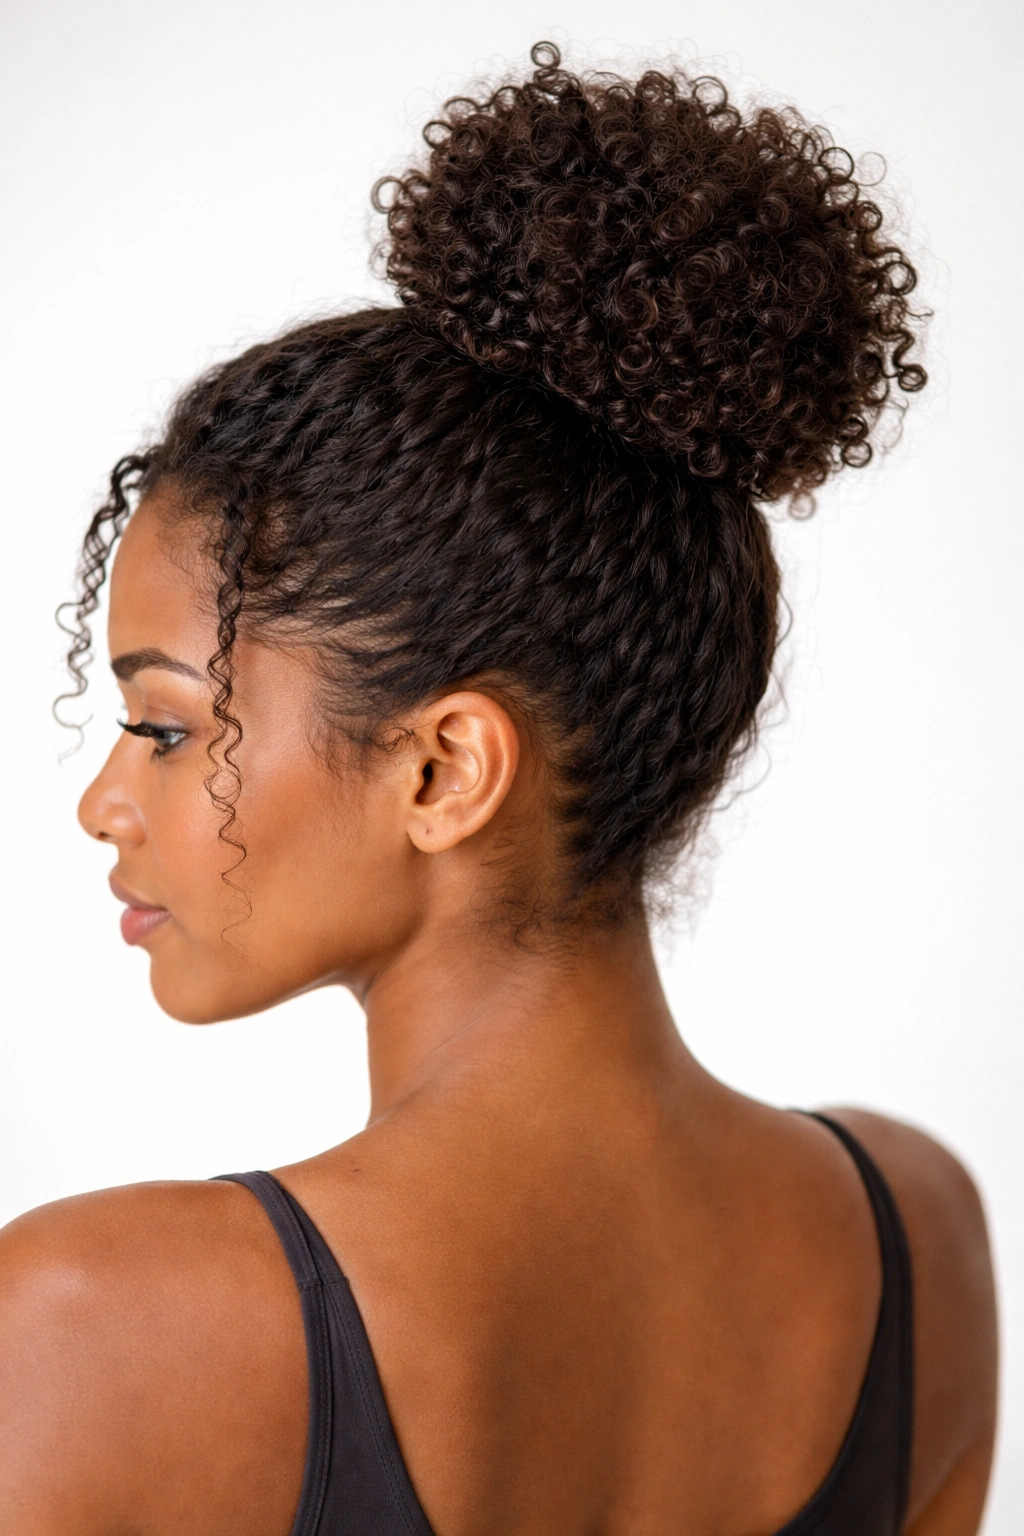
A top knot bun is a high, rounded bun created by gathering hair at the very crown of your head and securing it into a knot or twisted shape. With natural curls, this style has a perfectly imperfect texture that looks intentionally effortless. It’s protective, low-manipulation, and works equally well as a gym hairstyle, a lazy-day style, or a polished weekend look depending on how you approach it.
The real advantage of a top knot with curly hair is that you don’t need your bun to look sleek or perfectly smooth to look intentional. The texture and volume from your curls become part of the style’s visual design. A top knot with natural curls can look chic and put-together even when a top knot with straight hair might look messy without serious product and effort.
Making Your Top Knot Look Intentionally Textured
The difference between a stylish, textured top knot and one that looks like you overslept is the height and how deliberately you’ve arranged your curls around the base. A top knot positioned as high as possible on your crown looks intentional; one that slips down looks careless.
Creating a Polished Top Knot
- Gather hair loosely at the very crown of your head, high enough that you can see the knot when you look down
- Secure with a silk scrunchie or smooth clip to prevent breakage and creasing
- Take the gathered section and twist it loosely around the base, forming a knot or twisted shape
- Tuck the ends underneath and secure with bobby pins that match your hair color
- Use your fingers to gently pull out a few curl strands around the base and around your face for softness
- Smooth your hairline with a light edge control if desired, but leave enough texture to avoid looking too severe
- Allow some curls to escape from the bun rather than pulling everything tightly — this creates a soft, lived-in aesthetic
Insider note: The fluffier and less controlled your top knot looks, the more intentionally effortless it appears. If your instinct is to smooth and perfect every strand, resist it — the imperfection is what makes it work.
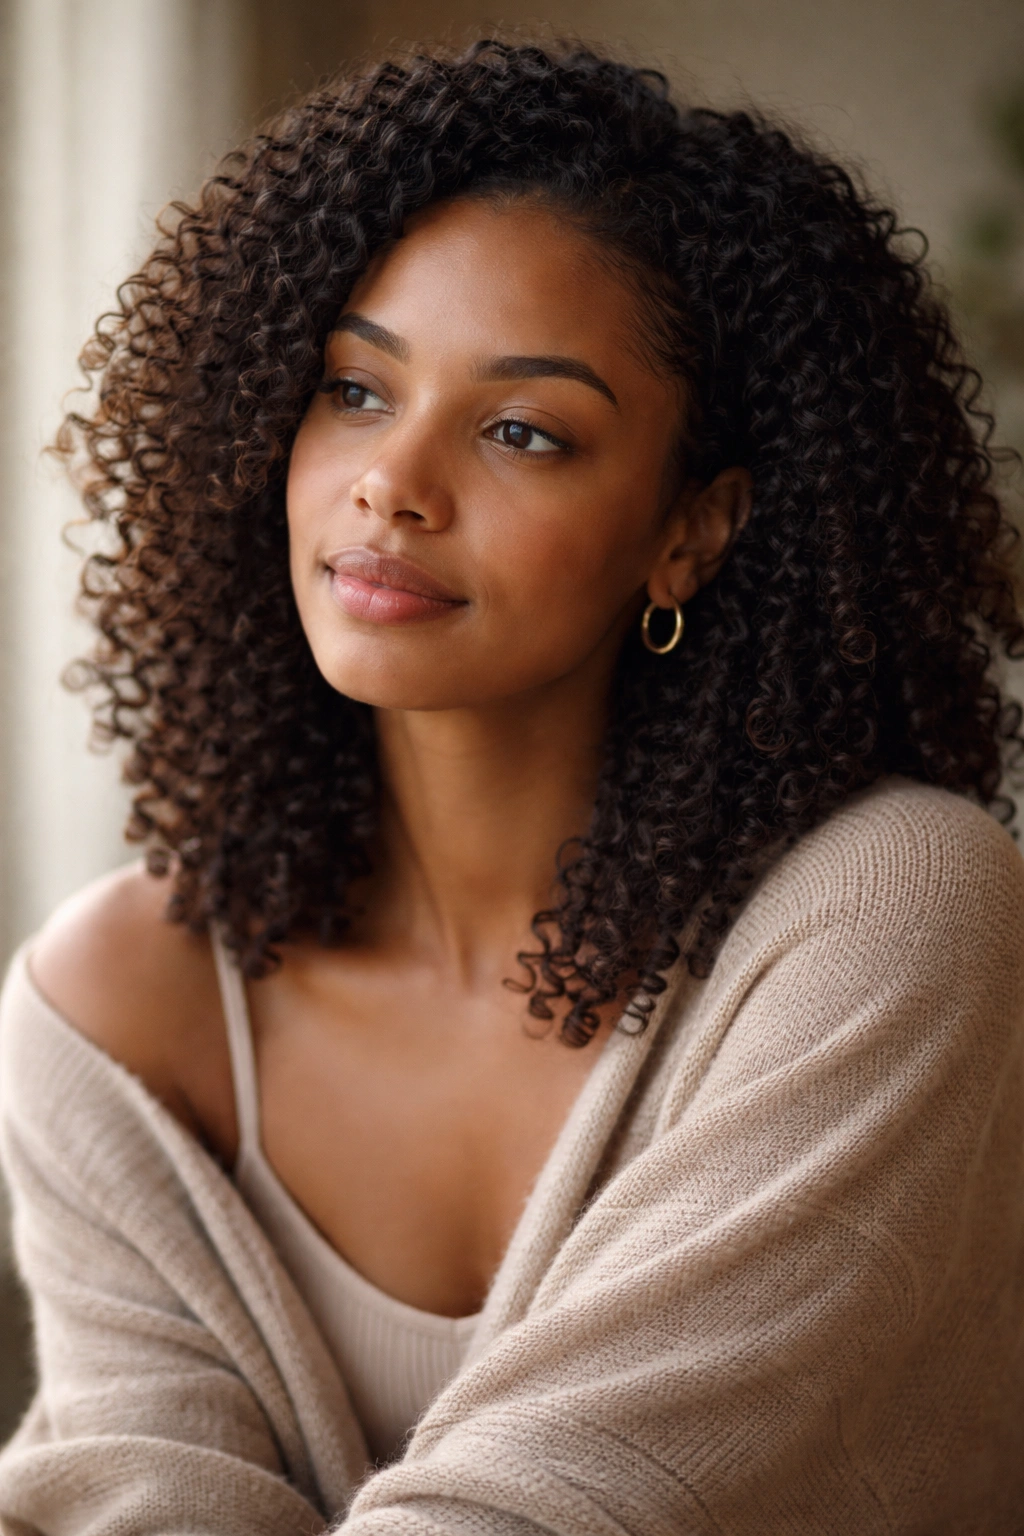
7. Half-Up Half-Down
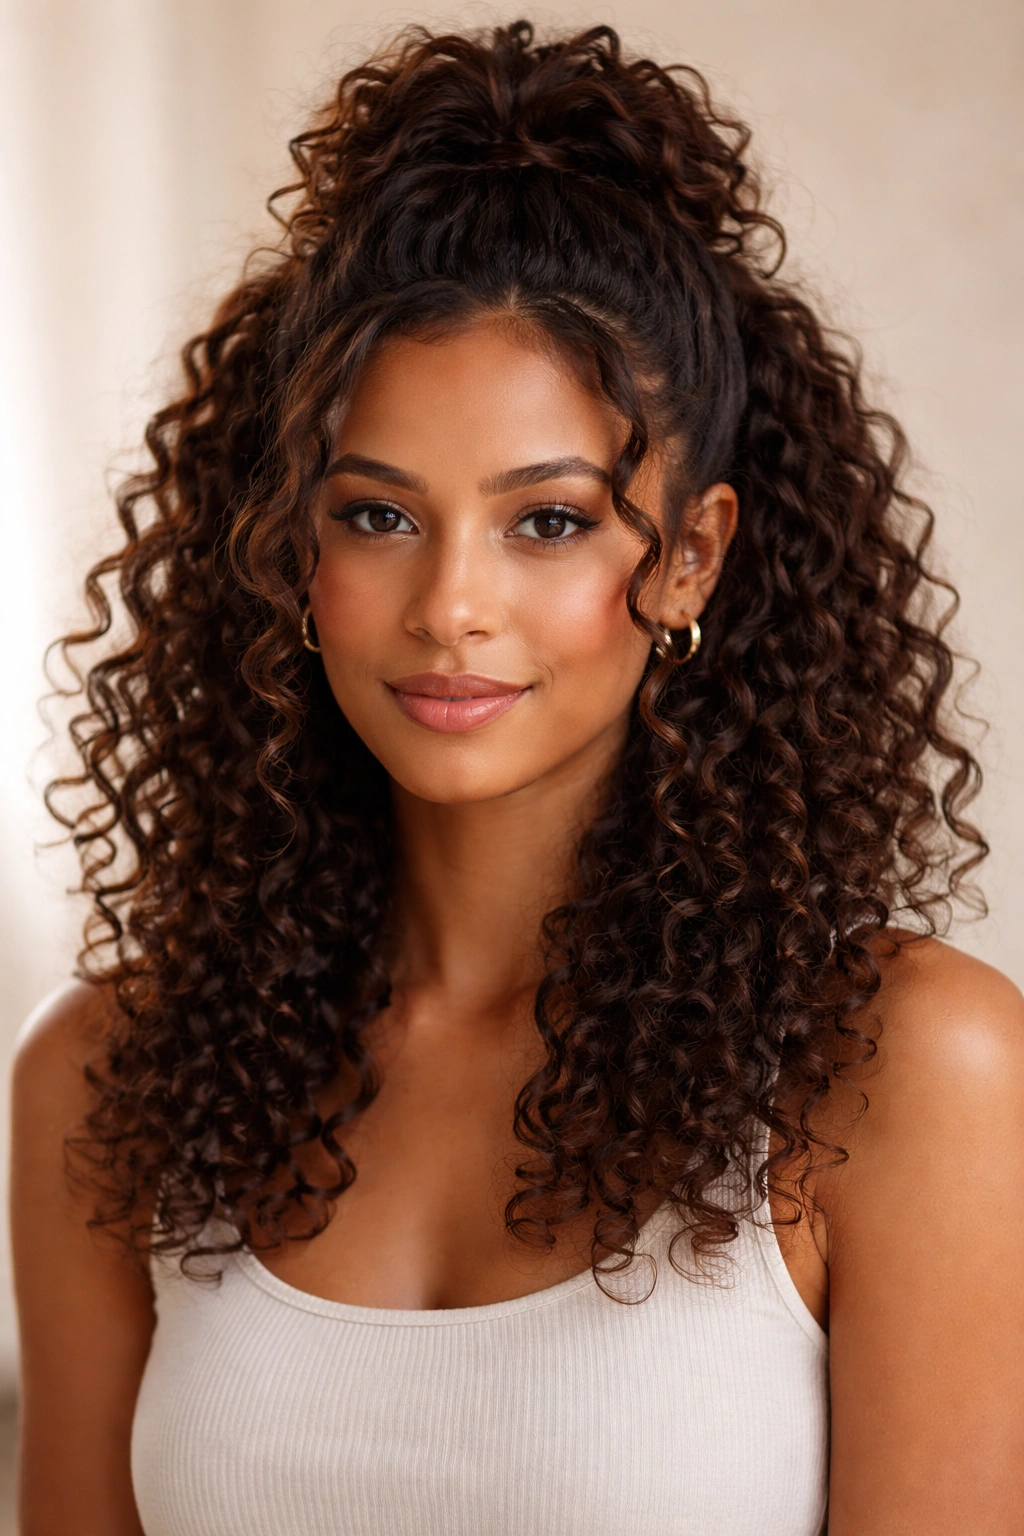
A half-up half-down style takes your curls down around your shoulders while securing a portion from the crown or sides, creating the effect of a pulled-back look without fully committing to an updo. This style works beautifully with natural curls because it showcases your curl length and pattern while also keeping hair out of your face.
The beauty of this style is its versatility. You can create it sleek and polished with smooth sections, or textured and effortless with your natural curl pattern visible throughout. You can add volume by backcombing the section you’re securing, or keep it soft and gentle. You can wrap the secured section with a strand of hair for a finished look, or leave it simple and understated.
Why This Style Suits Every Curl Type and Length
A half-up half-down works whether your curls are tight coils or loose waves, whether your hair is shoulder-length or beyond waist-length. The proportions work for different face shapes because you have control over how much hair you’re pulling back and from where you’re pulling it.
Styling a Half-Up Half-Down With Natural Curls
- Start with curls that are either freshly refreshed with water and products, or from a style you’ve been wearing for a few days
- Section off hair from one side of your head, roughly from your temple back to behind your ear
- You can take this section all the way across the back, or stop at the opposite side and create a smaller secured section
- Gather this section gently and secure with a clip, claw clip, or scrunchie
- If desired, take a small strand from the secured section and wrap it around the base where it’s secured to create a more finished look
- Allow your down curls to fall and drape naturally — adjust them with your fingers if you want them falling in a specific pattern
- For a more polished version, apply a light defining product or gel to smooth any flyaways while keeping your curl texture visible
Pro tip: Creating your half-up section from slightly damp curls helps it hold its shape throughout the day. The moisture helps your curls clump together and maintain definition in the secured section.
8. Curly Bangs Styled Back
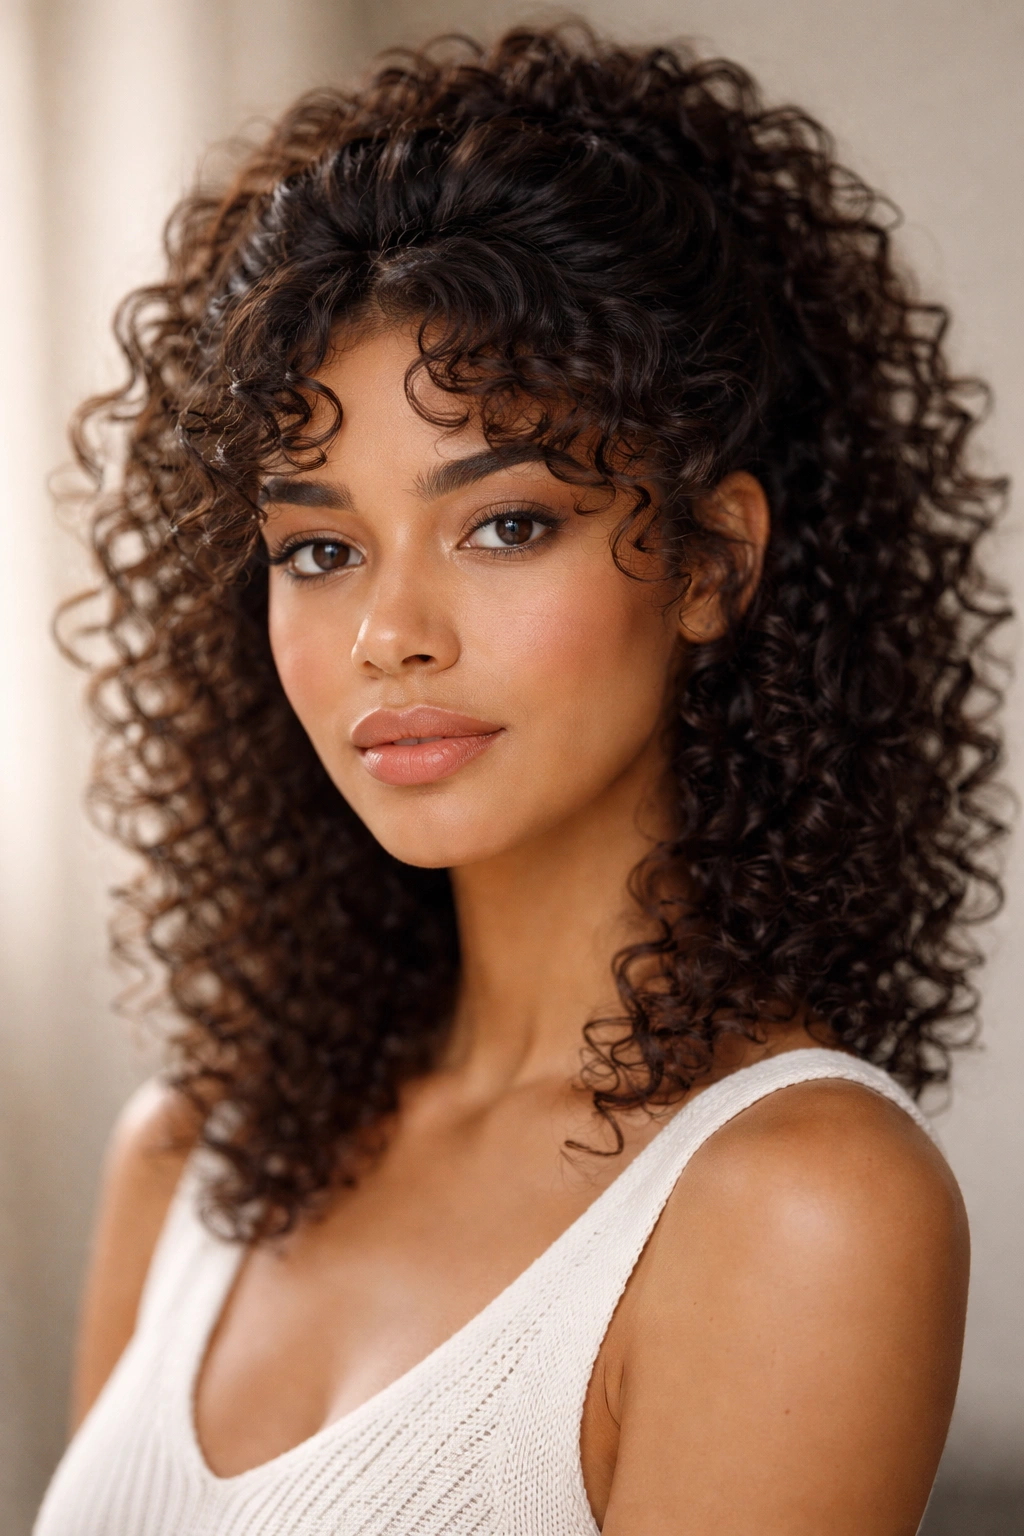
If you wear bangs or curtain-framing layers with your natural curls, you can create an intentional hairstyle by styling those pieces back and off your face, either clipping them back, braiding them, or twisting them. This approach is particularly genius when you have a textured bang situation that tends to be unpredictable or frizzy — redirecting the pieces transforms them from a frustration into a styling feature.
This style works because it acknowledges that your bangs or face-framing layers might not fall perfectly straight or smooth, and instead of fighting that texture, it incorporates it into an intentional design. You end up with volume and dimension at your crown, defined curls framing your face, and a look that appears carefully styled rather than like you were just managing flyaways.
Using Bang Texture as a Design Element
Rather than viewing curly bangs as a problem to control, treating them as a textural element creates a more cohesive, intentional look. Your curly bangs become part of your overall curl aesthetic rather than an outlier that doesn’t match the rest of your style.
Styling Curly Bangs Back and Off Your Face
- Allow your bangs or face-framing layers to curl naturally after washing or refreshing
- Create a small twist or braid from one side of your bangs, pulling it back and securing with a small clip
- Alternatively, gather your bangs into a small ponytail at the crown and secure it there, allowing the curls to drape gracefully
- For a softer approach, gently push your bangs back and secure them with a thin headband or hair accessory
- Let some individual curl strands escape from whatever securing method you choose — these loose pieces create dimension
- Apply a light defining product to your curls to enhance definition without creating crunch
- Check throughout the day that your securing method hasn’t created uncomfortable tension on your hairline
Worth knowing: The looser you secure your bangs when pulling them back, the more natural and intentional the look. If you pull too tightly, you create tension on your hairline and the style looks forced rather than effortless.
9. Twisted Low Bun
A twisted low bun is created by gathering hair at the nape of your neck, twisting it into a rope-like section, and coiling it into a bun shape. With natural curls, this creates a textured, dimensional bun that looks polished and intentional without requiring sleek styling or smoothing.
This style is particularly protective because the low position means less tension at your edges, and the twisting motion (rather than brushing and pulling) means minimal manipulation of your curls. It’s a style you can create in under five minutes, which makes it perfect for days when you want an intentional look without spending time on your hair.
Why Twisted Buns Look Better Than Brushed Buns With Natural Curls
Creating a bun by twisting your hair rather than brushing or combing it preserves your curl clumps and creates a naturally textured bun. A twisted bun doesn’t require product or styling tools — just your hands and a securing clip or scrunchie.
Creating a Twisted Low Bun
- Gather hair loosely at the nape of your neck, as low as you’re comfortable securing it
- Divide the gathered section into two parts
- Twist the two parts around each other, creating a rope-like twisted section
- Coil this twisted section around the base where it’s gathered, forming a bun shape
- Tuck the ends underneath and secure with bobby pins that match your hair color
- Allow some curl strands to escape around the bun and around your face
- Smooth your hairline with edge control if desired, but keep enough texture to look intentional
Pro tip: Twisting rope-style creates a smoother, more polished look than the chaos of a chaotic bun. The twist keeps your curls organized and clumped together rather than scattered.
10. Curl Definition Sweeps
A curl definition sweep is a styling approach where you apply a defining product (like a gel or styling cream) in sweeping motions to encourage your curls to clump together and define, then allow them to air-dry in that pattern. This creates sculpted, intentional-looking curls that appear carefully styled even though you’re just working with your natural curl pattern.
The magic of this approach is that it’s about enhancing curls that are already there rather than creating new shapes or styles. You’re not blow-drying, braiding, twisting, or manipulating your curls — you’re simply encouraging them to clump together more distinctly. The result looks polished and intentional while actually being low-manipulation and protective.
What Makes Curl Definition Sweeps Look Polished
This approach creates curls that look cohesive and deliberate because you’re directing them with intention rather than letting them fall randomly. Even though you’re working with your natural curl pattern, the conscious direction of the defining product creates a styled appearance.
Creating Intentional Curl Definition
- Start with damp hair and apply a leave-in conditioner or moisturizer to your entire head
- Apply your defining product (gel or styling cream) in sweeping upward motions, working section by section
- As you apply the product, use your fingers to encourage curls to clump together — gently scrunch upward
- Work in smaller sections so you can ensure you’re covering all your hair and encouraging definition throughout
- Allow your hair to air-dry completely without touching it — disrupting it while wet will disrupt the clumps
- Once completely dry, gently separate curls with your fingers to remove any crunch and fluff the style
- Check your definition by running your fingers through your curls — you should feel distinct clumps rather than frizz
Insider note: The product combination matters significantly here. A leave-in conditioner alone often won’t create enough definition or hold. A gel alone can create crunch. Finding the right combination of products for your specific curl pattern is what creates the polished look.
Final Thoughts
The easiest natural-curl hairstyles are the ones that work with your curl pattern rather than against it, that require minimal manipulation or heat, and that look intentional without demanding perfection. Whether you’re reaching for a quick pineapple updo before bed, creating a textured braided crown for the weekend, or simply refreshing your curls with a wash and go, the goal is the same: honoring your natural texture while creating a look that makes you feel confident and polished.
What makes styling natural curls genuinely easier than it seems is shifting from fighting your texture to enhancing it. When you stop trying to straighten, smooth, or control your curls and instead focus on defining them, encouraging them to clump together, and letting them settle into their natural shape, you unlock hairstyles that are effortless, protective, and beautiful. These ten styles are just the beginning — once you understand the principles behind them, you can adapt and create variations that work specifically for your curl pattern, length, and lifestyle.