Curly hair on kids is absolutely beautiful, but getting it ready for school every morning can feel like a real challenge. Between fighting frizz, managing tangles, and creating something that’ll actually stay put through recess, lunch, and gym class, parents of curly-haired kids know the daily struggle is real. The good news? There are tons of adorable, practical hairstyles designed specifically to work with your child’s curls, not against them—styles that look polished enough for school while being protective and low-maintenance enough to survive an active day.
The secret to successful school hairstyles for curly hair is understanding that you’re not trying to straighten or drastically change the curl pattern. Instead, you’re working with what your child’s hair naturally does and choosing styles that actually enhance curls while keeping them secure, frizz-free, and looking intentional. The best school hairstyles for curly kids are ones that go into the day clean and moisturized, feature some kind of securing element (braids, twists, or elastics in strategic spots), and don’t require constant touching up or adjustment throughout the day.
What makes these styles school-appropriate is that they’re neat without being overly complicated, they stay put during active play, and they work within typical school dress codes and culture. They also tend to be quicker to create than you’d think once you get the technique down—many can be done in under 10 minutes on a school morning. Let’s walk through ten hairstyles that’ll have your curly-haired kid looking great and feeling confident from drop-off through pickup.
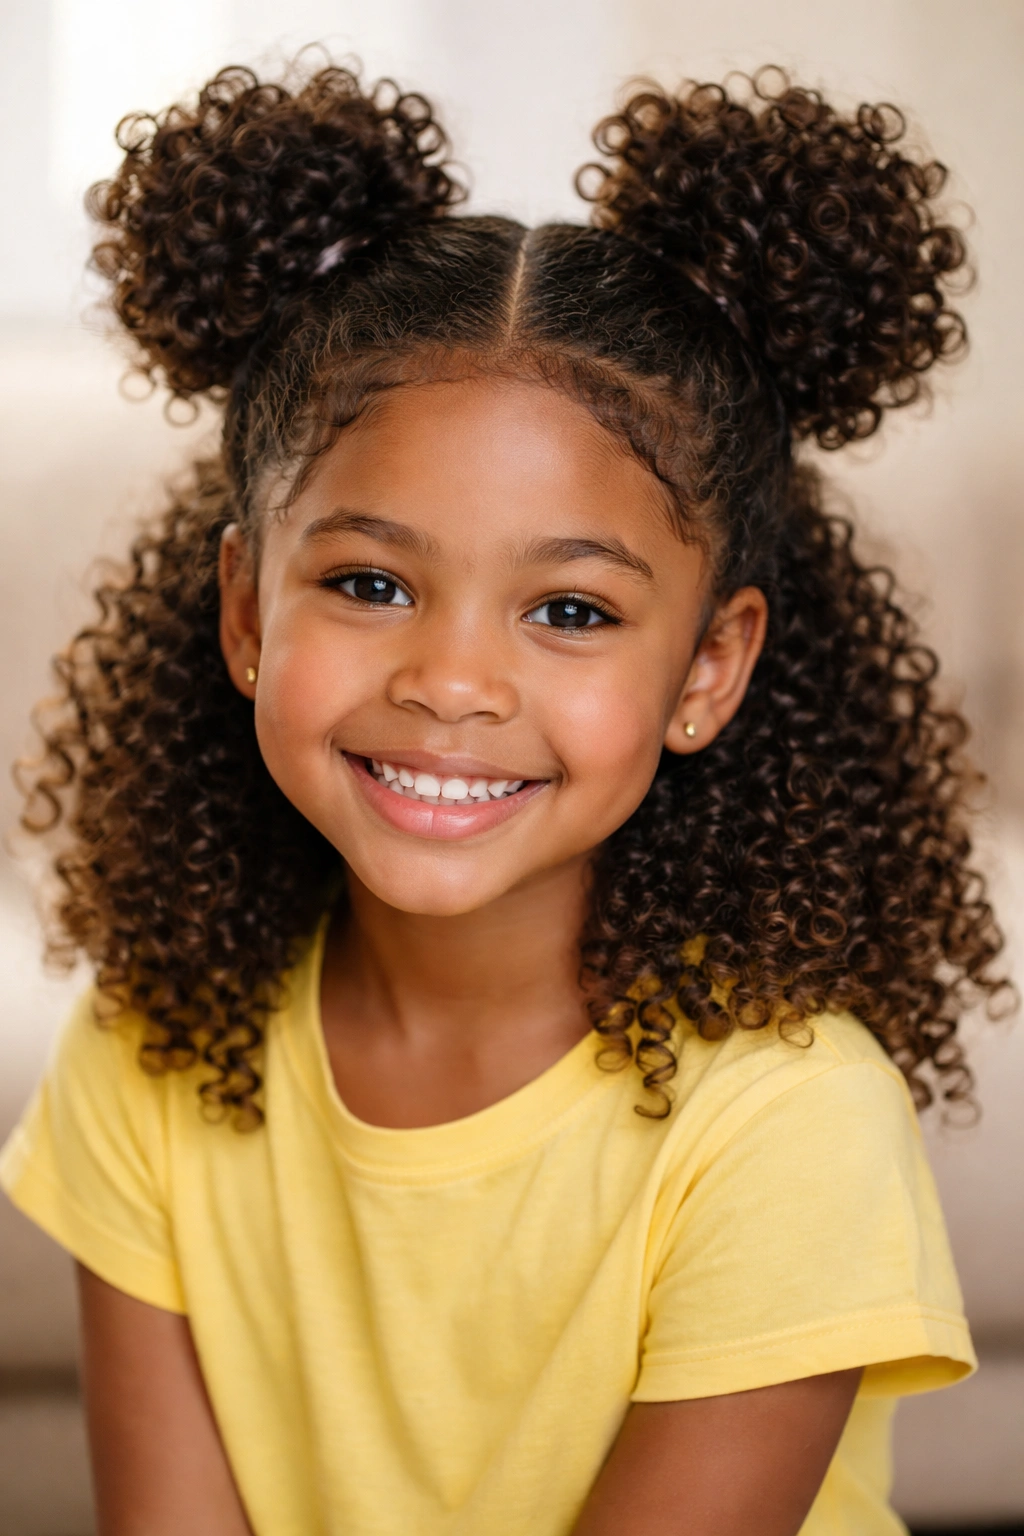
1. High Puffs With Colorful Scrunchies
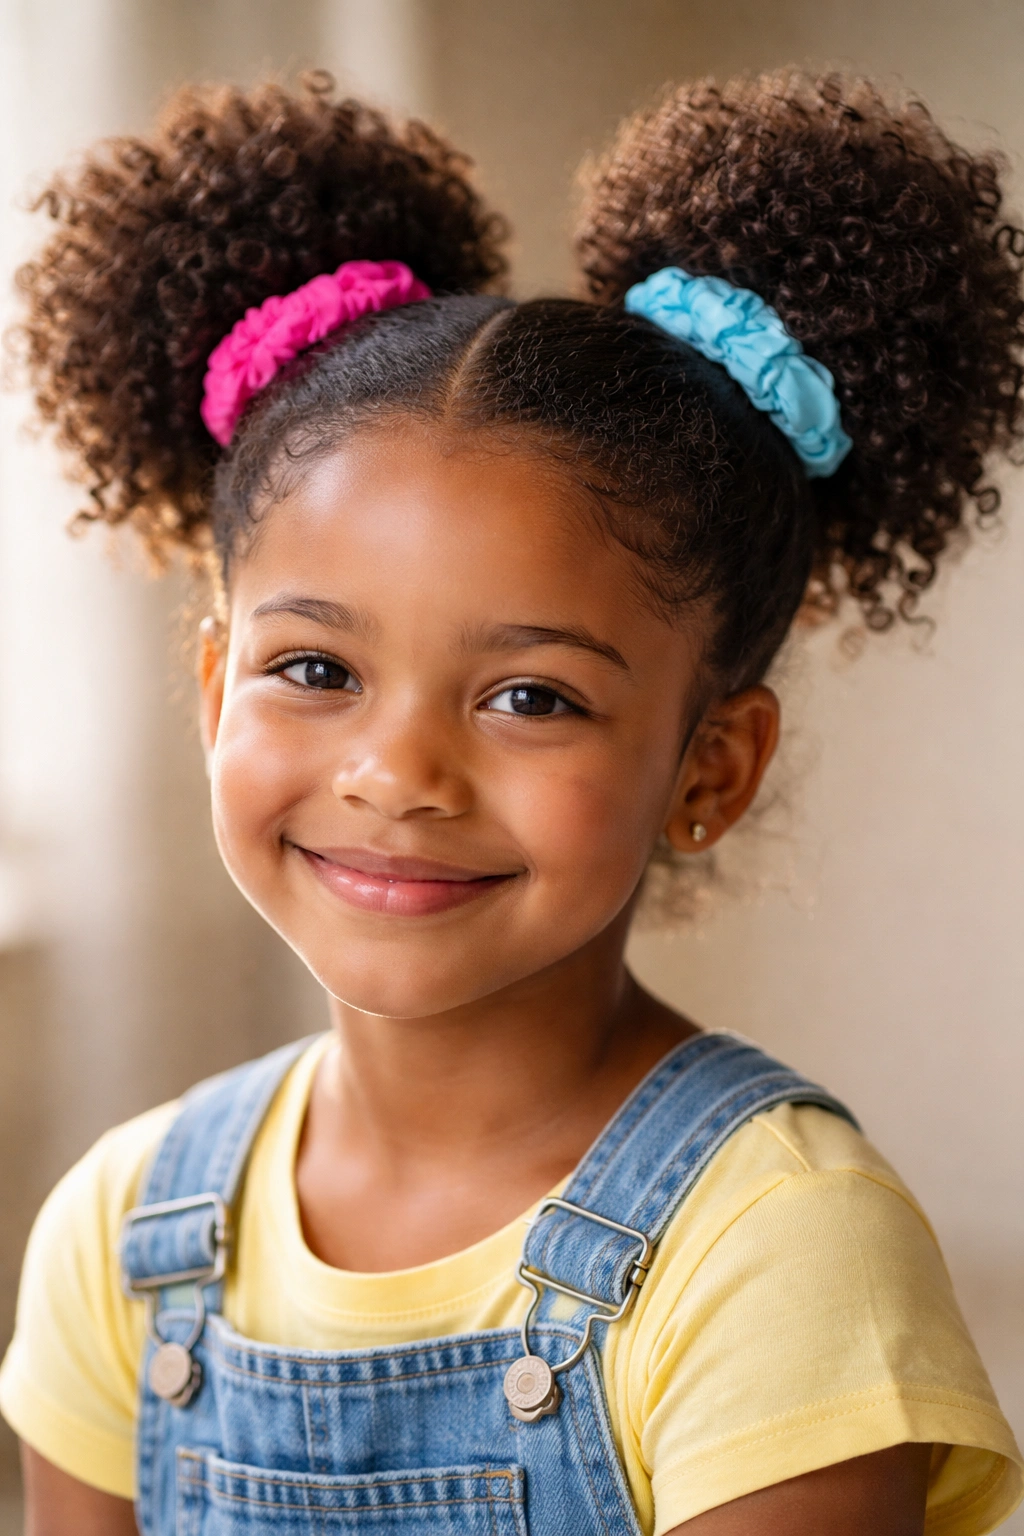
High puffs are a classic for a reason—they’re fun, they work beautifully with curly hair, and they’re nearly impossible to mess up. The style uses your child’s natural curl texture by gathering hair into two sections on the crown of the head, creating two rounded, voluminous puffs that sit high and proud. This isn’t just a cute look; it’s genuinely practical for school because the gathered sections keep hair off the face and neck while the loose curls below still get to do their thing.
Why It Works for School
Puffs are exceptionally secure, which means your child won’t spend the school day pushing hair out of their face or dealing with loose sections coming undone. The high placement keeps hair away from their eyes during focus time and from getting in the way during physical activity. Teachers also appreciate that this style keeps curls contained in a way that still looks intentional and polished—it’s clearly a style choice, not messy hair.
How to Create It
Start with clean, moisturized curls. Section the hair into two halves by creating a vertical line down the center of the head from the crown to the nape. Take the first section and gather it into a high ponytail on one side of the crown, then secure with a scrunchie. Repeat on the other side. The puffs should sit where you’d normally place pigtails, but higher and using more hair for volume.
What You’ll Need and Pro Tips
- Two soft hair scrunchies in colors your kid loves (metallic, patterned, or thick scrunchies are more secure)
- Leave-in curl cream or mousse to define the loose curls below the puffs
- A light hairspray if needed for humidity control
The real magic here is the scrunchie choice—thick ones with strong elastic actually hold better in curly hair and won’t slip throughout the day like thin elastics do.
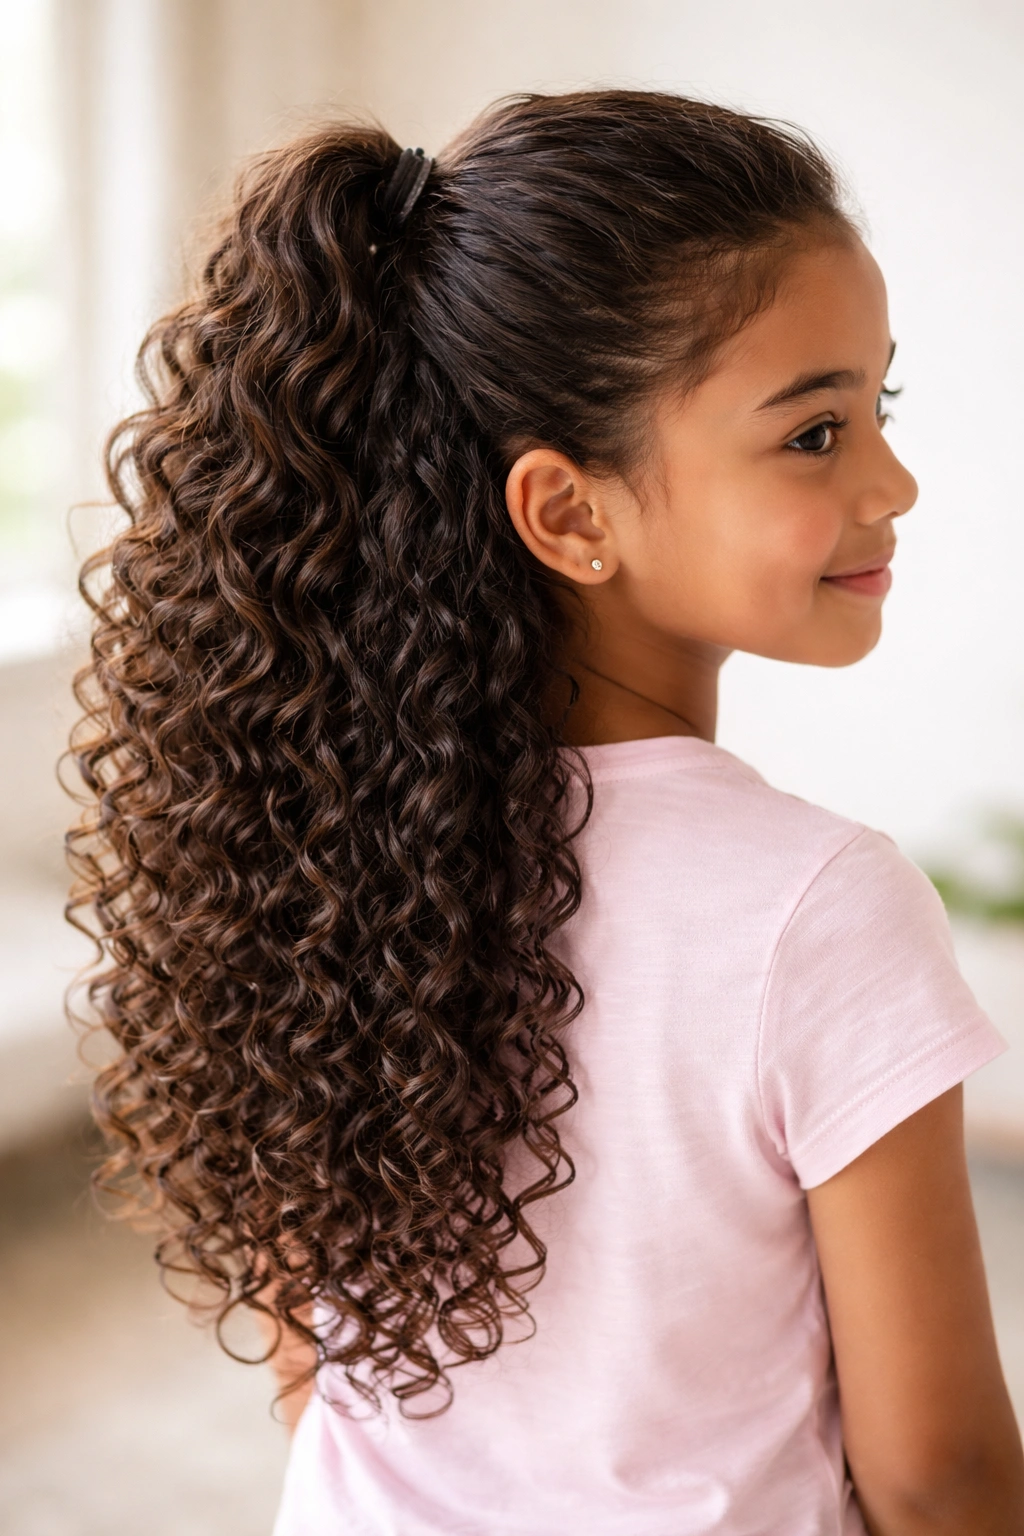
2. Side-Swept Curly Ponytail With Texture
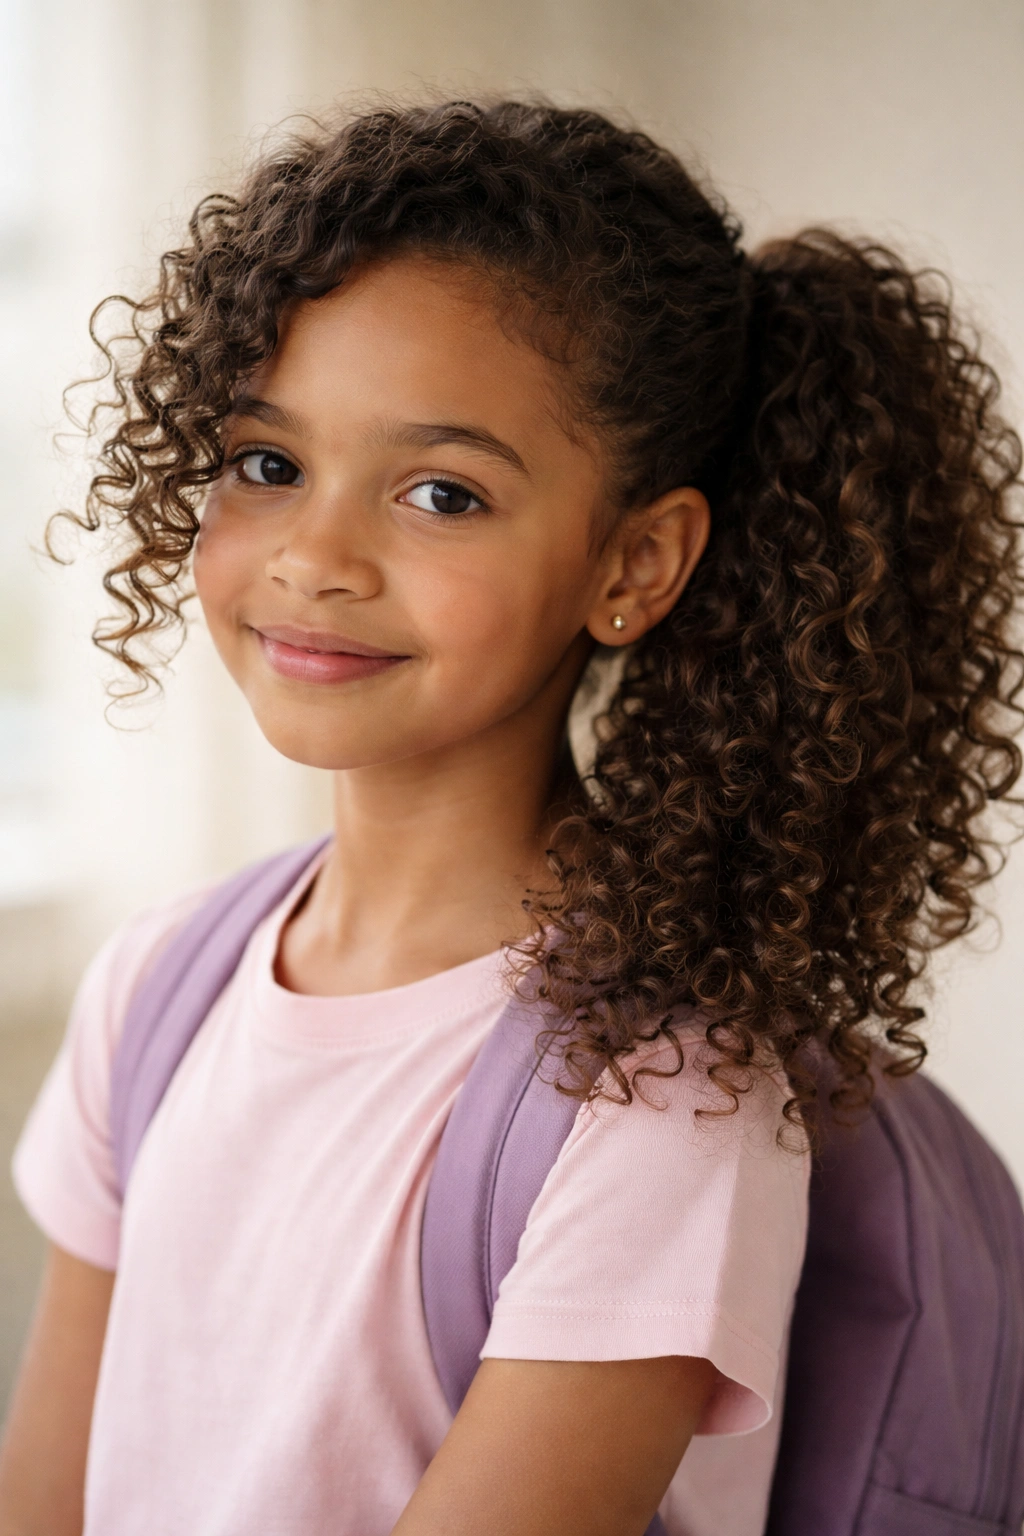
This style takes the basic ponytail concept and adapts it perfectly for curly hair by placing it to the side, which looks more intentional and modern than a centered pony, and by keeping the texture loose and defined rather than smoothing everything back. The side placement also means the ponytail isn’t sitting directly where your child’s head rests against the classroom chair, so it stays fresher-looking all day and isn’t prone to that flattened section that happens with center ponytails.
Why It Works for School
A side ponytail feels more grown-up than pigtails while still keeping hair completely out of the face—ideal for school where kids need clear sightlines for board work and taking notes. The side placement is also flattering on most face shapes and works with curl patterns of varying tightness. Hair stays secure but still looks soft and textured rather than slicked back and severe.
How to Create It
Brush through moisturized curls gently with a wide-tooth comb or your fingers. Tilt your child’s head slightly to one side and gather hair at about ear level on the chosen side, pulling it back into a low-to-mid ponytail. Secure with a scrunchie or elastic. For extra texture definition, you can apply curl cream to the gathered section or lightly separate the ponytail into two or three sections and twist them together before securing.
What You’ll Need and Pro Tips
- Wide-tooth comb for gentle detangling
- Leave-in curl cream or styling gel
- Fabric scrunchie or elastic band
- Optional: decorative clip or small hair accessory to disguise the elastic
The key is not pulling the ponytail too tightly—curly hair breaks more easily when pulled tight, and you want this to feel secure but not strained.
3. Braided Crown With Loose Curls
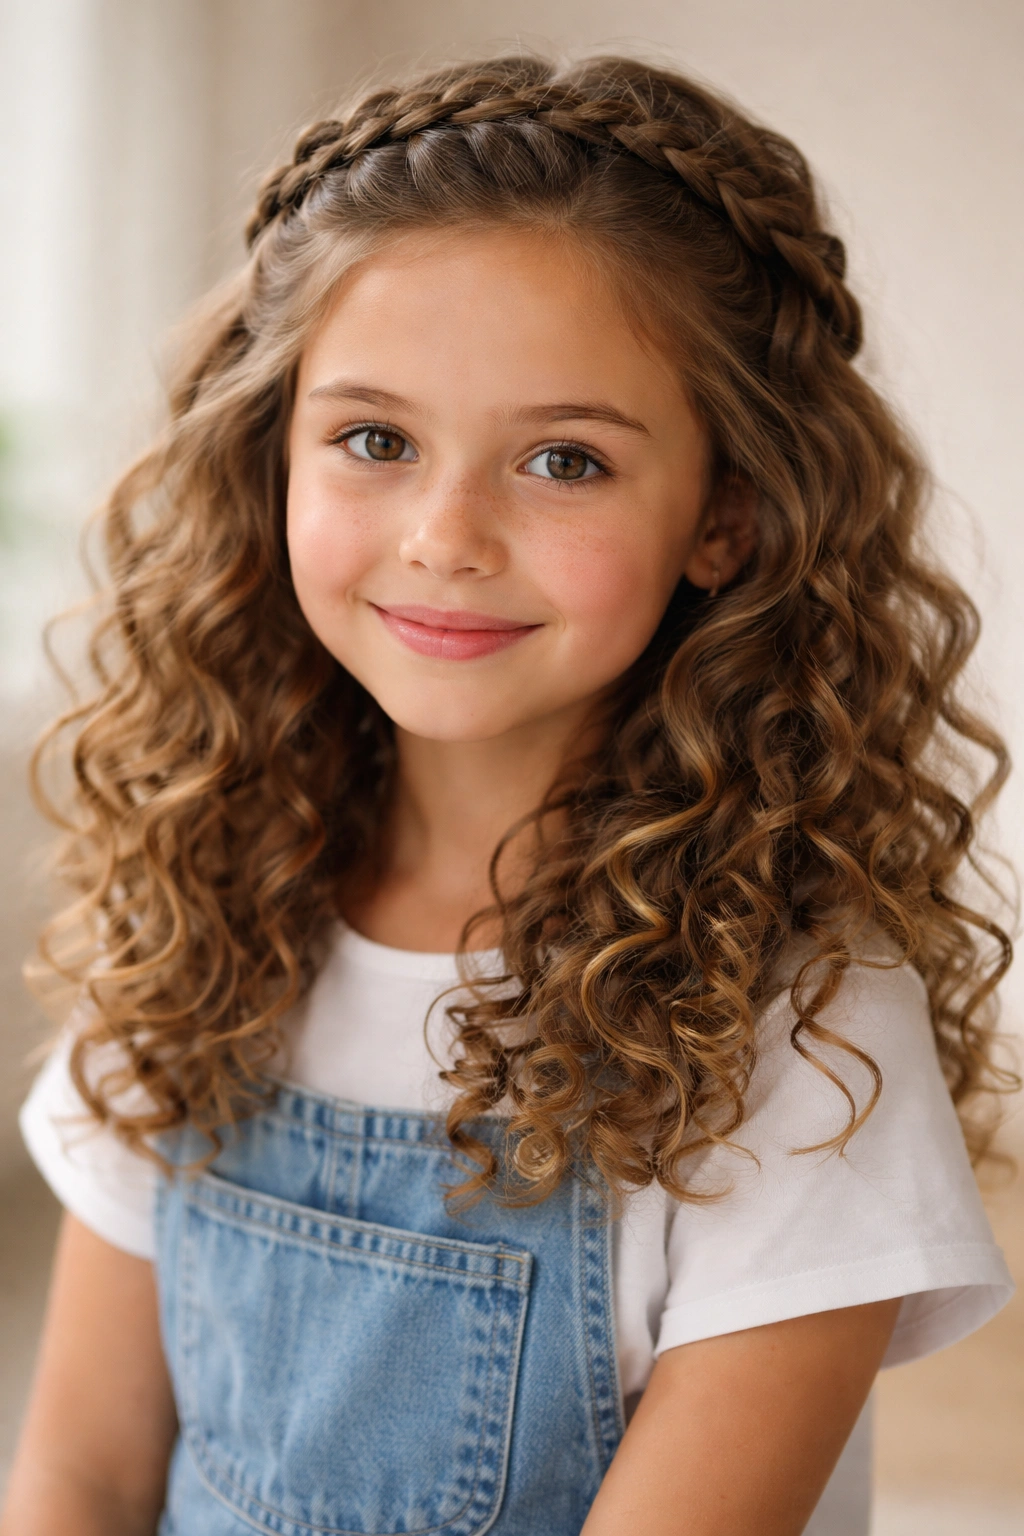
A braided crown is where a Dutch or French braid runs across the top of the head like a headband, creating an elegant, put-together look while leaving the curls below completely loose and defined. This style is genuinely beautiful enough for picture day, but also practical enough for everyday school wear because the braid keeps the hair on top secured and out of the face while celebrating the natural curl pattern of the length below.
Why It Works for School
The braided crown works for school because it solves the real problem of curly hair that wants to come forward and frame the face—the braid manages that section while looking intentional and artistic rather than like you’re forcing the curls into submission. It also takes what could feel like a messy or undefined look and turns it into an actual hairstyle. Kids love how this looks in photos and mirrors, which builds confidence about their natural texture.
How to Create It
Start with damp, moisturized hair. Create a part from ear to ear across the top of the head, then take a section from one ear and begin a Dutch braid (where the braid sits on top of the hair, not underneath like a French braid). Braid across to the opposite ear and secure the end with a small elastic. The curls below the braid should fall loose and free. You can apply curl cream or mousse to encourage definition.
What You’ll Need and Pro Tips
- Wide-tooth comb
- Leave-in curl product for definition
- Small elastic band in a matching color
- Spray bottle of water if starting with dry hair
This style is actually easier with slightly damp hair than bone-dry curls, because damp curls are more manageable for braiding but still dry enough to hold their curl pattern by the time school starts.
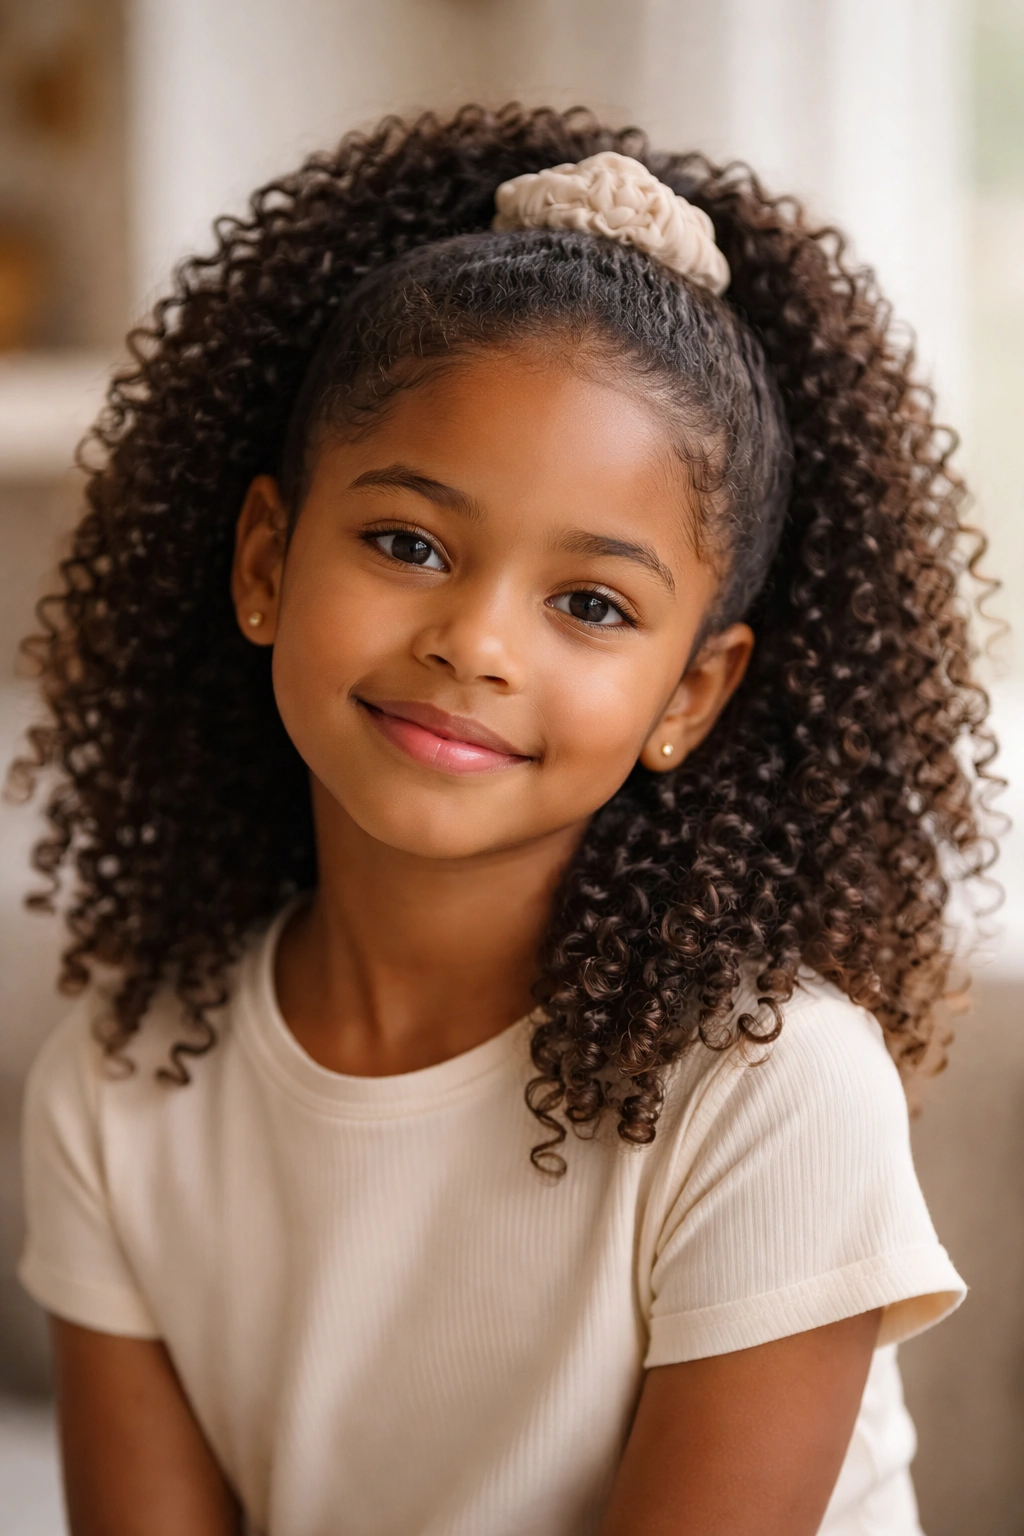
4. Half-Up, Half-Down Style With Definition
The half-up look is the perfect middle ground for school—it gets enough hair away from the face to look intentional and neat, but leaves the bulk of the curls down to show off that beautiful texture. This style works on virtually every curl pattern from loose waves to tight coils, and it can be as simple or as embellished as you want depending on whether you add braids, twists, or decorative clips to the gathered section.
Why It Works for School
Half-up styles are the definition of practical-meets-pretty for school. They keep hair off the forehead and away from the eyes without creating the fully-pulled-back look that some curly-haired kids (and their parents) don’t love. The style also shows that the hair is intentionally arranged, which reads as neat and school-appropriate, while still celebrating the natural curl pattern that makes curly hair so beautiful.
How to Create It
Brush through moisturized curls gently. Take a section of hair from temple to temple across the crown of the head (roughly the top third) and gather it into a ponytail or half-pony at the back of the head. Secure with a scrunchie. Leave the bottom section completely loose. Optional: before securing, you can twist or braid the gathered section for extra interest, or add a decorative clip where the ponytail gathers.
What You’ll Need and Pro Tips
- Wide-tooth comb or detangling spray
- Leave-in curl cream
- Scrunchie or elastic band
- Optional decorative clip, bow, or hair accessory
The height of where you gather matters—gathering too far back can look straggly, while gathering too high can look babyish. Aim for the natural crown of the head.
5. Protective Twisted Buns
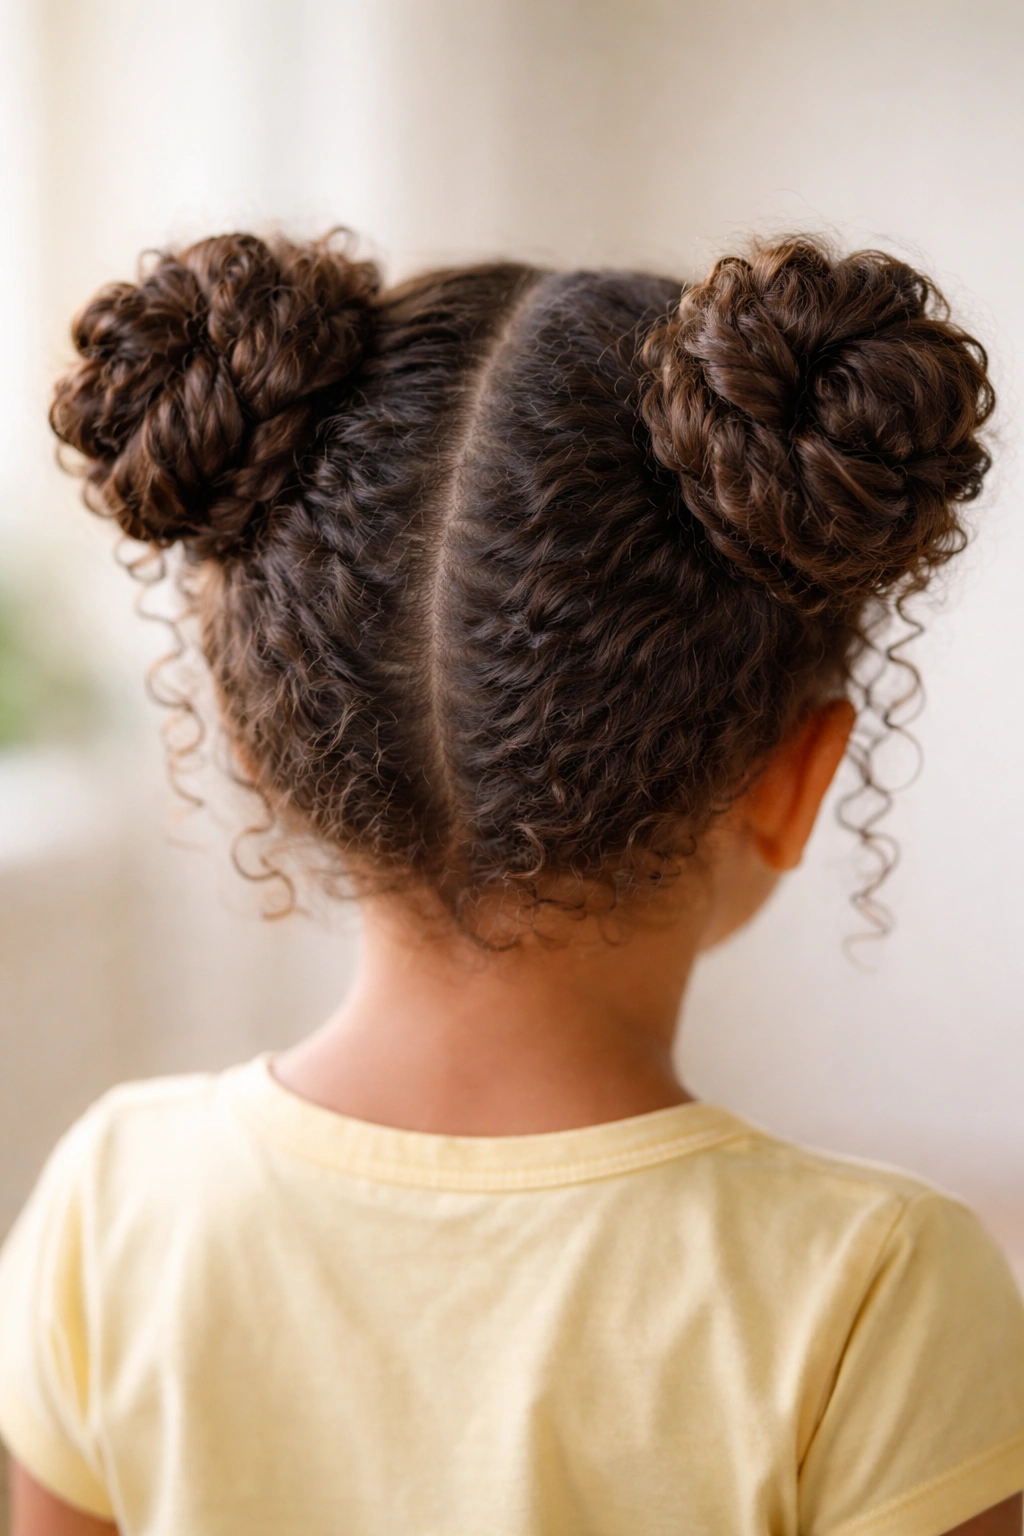
Two twisted buns placed on either side of the head are a genuinely protective style for curly hair while also being adorable for school. When you twist hair gently (as opposed to braiding tightly) and coil it into a bun, you’re creating a style that keeps each curl’s integrity intact while being secure enough to handle an active day. This style is especially good for finer or more delicate curls that might feel fragile or prone to breakage.
Why It Works for School
Twisted buns protect curly hair better than many other styles because the gentle twist doesn’t put tension on individual strands, and the bun positioning keeps hair from rubbing against shoulders, backpack straps, or being tugged during play. The style also looks intentionally cute rather than accidental, which matters to school-age kids who care about how they look. Two buns read as purposeful styling in a way that loose curls sometimes don’t.
How to Create It
Start with clean, moisturized curls. Create a center part down the back of the head. Take one section and gather it into a low ponytail on one side of the nape. Instead of securing it straight, gently twist the entire section and coil it around the base of the ponytail, creating a bun. Secure with bobby pins and a scrunchie. Repeat on the other side.
What You’ll Need and Pro Tips
- Wide-tooth comb
- Leave-in curl product for definition
- Bobby pins
- Two scrunchies
- Light hairspray for hold (optional)
The key is gentle twisting, not tight wrapping—you want the twist loose enough that you could fit a pencil through the twisted section without much pressure. This protects the curl pattern inside the twist.
6. Curly Pigtails With Volume
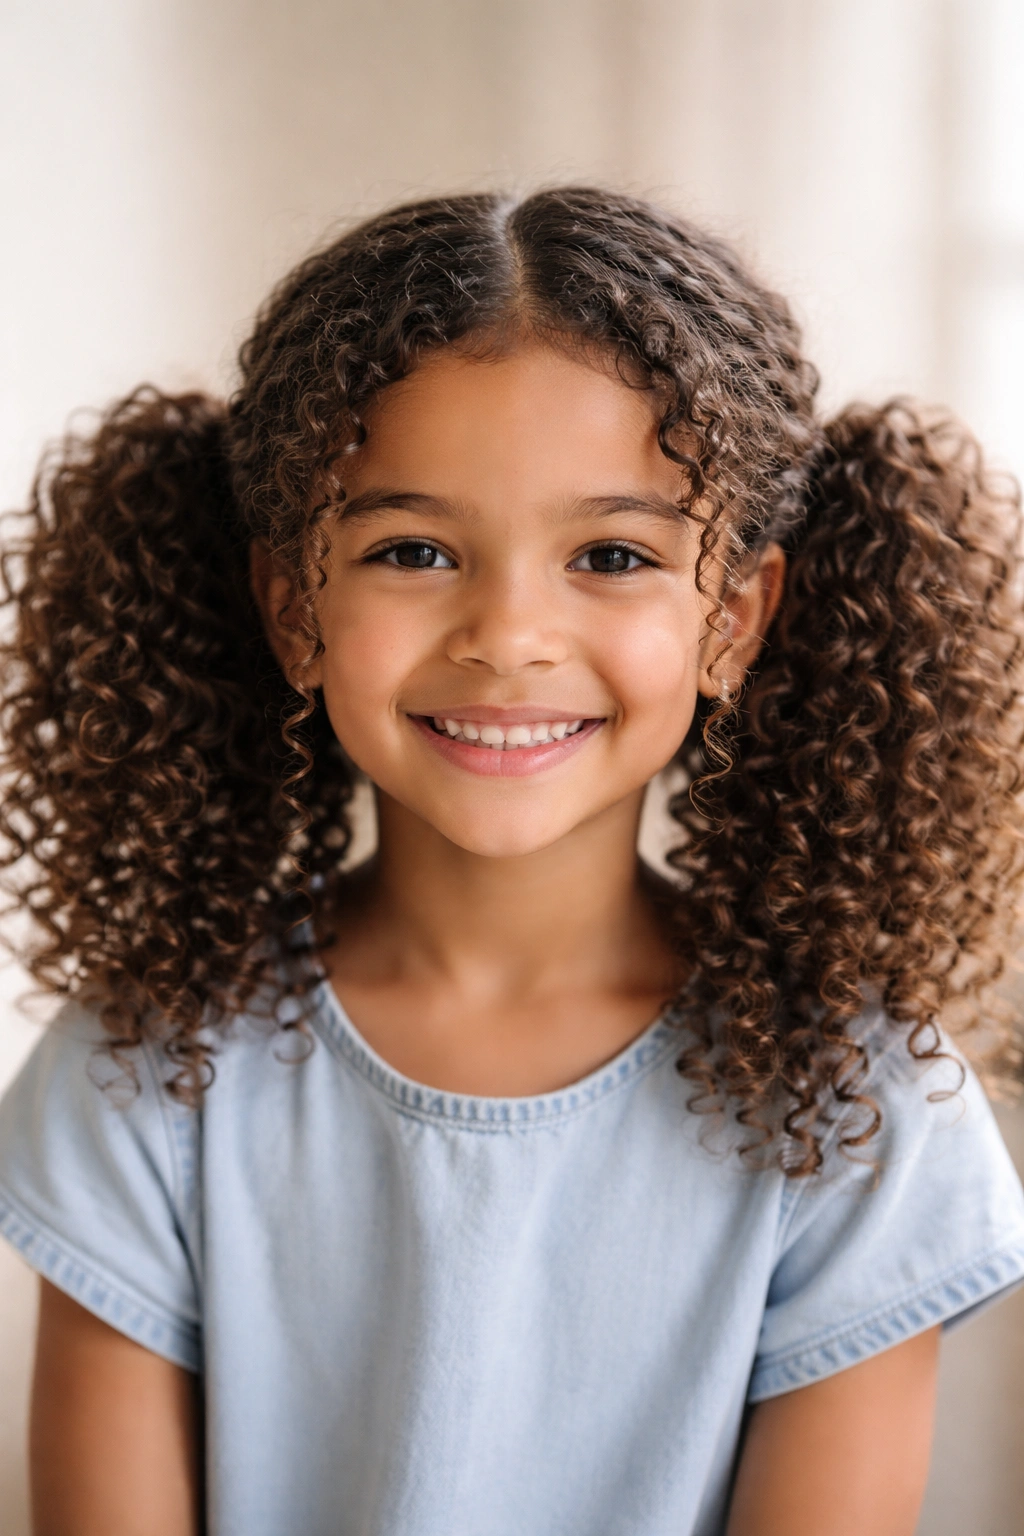
Pigtails are a timeless kid hairstyle, and when you do them right for curly hair, they’re surprisingly sophisticated. The trick is placing them lower than traditional pigtails (at ear level or below rather than high on the crown) and keeping them loose enough that the curls have room to puff out and show their texture rather than getting flattened by too-tight gathering.
Why It Works for School
Pigtails work beautifully for school because they keep hair completely off the face and neck while celebrating the voluminous, textured nature of curly hair. Kids genuinely love how this looks and how it feels—the pigtails are secure but light, and they don’t require the level of tightness that can cause headaches or hair breakage. The style also works on multiple curl patterns and doesn’t require any additional styling skills beyond gathering and securing.
How to Create It
Section the hair into two halves with a center part. Gather one section at about ear level (or lower, depending on hair length and density) and secure with a scrunchie. The pigtail itself should be loose—don’t try to smooth back every single curl. Repeat on the other side. The beauty of this style is in the controlled looseness, not in having every strand perfectly in place.
What You’ll Need and Pro Tips
- Wide-tooth comb
- Two scrunchies (in fun colors if you want to add personality)
- Leave-in curl cream applied to damp hair before creating the pigtails
The scrunchie placement matters more than you’d think—slightly lower pigtails that use the natural thicker section of hair at ear level stay more secure than pigtails placed higher up on the crown.
7. Low Bun With Face-Framing Layers
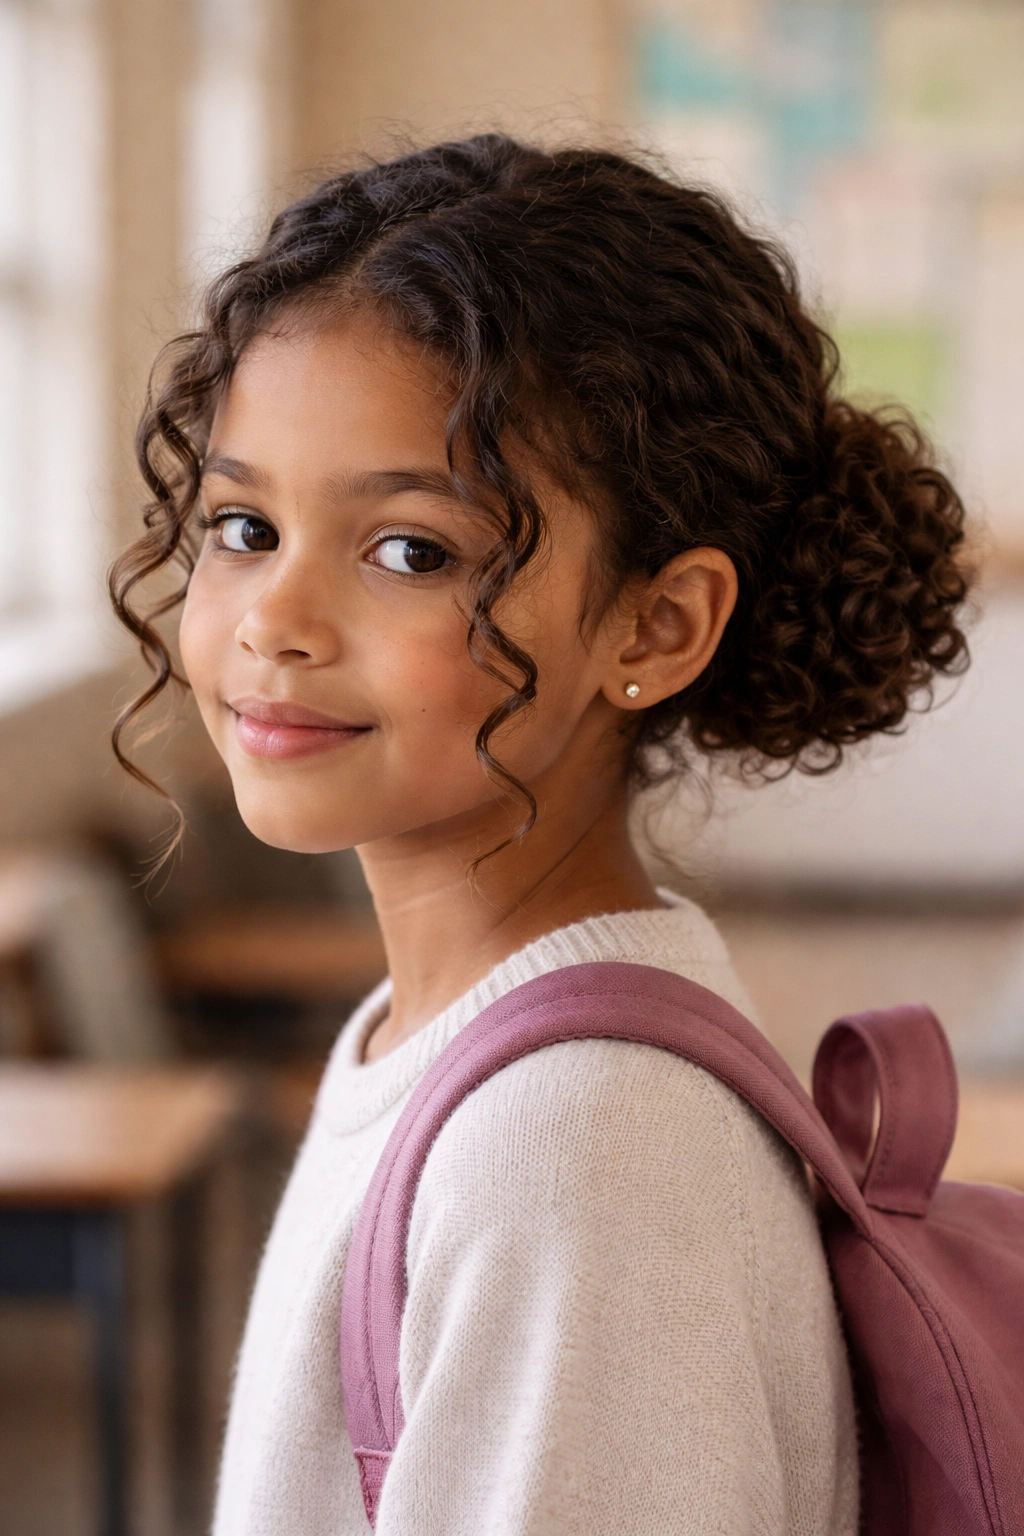
A low bun is genuinely sophisticated and works wonderfully for curly hair when you leave face-framing pieces down intentionally, creating an elegant, purposeful look rather than a hairstyle where pieces are falling out because it’s coming undone. This style is perfect for school days when your child wants to look more grown-up, or for events like school assemblies or performances.
Why It Works for School
Low buns are neat and polished enough to fit any school’s dress code or expectations, but the face-framing texture makes it feel intentional and pretty rather than severe. Because curly hair naturally has movement and texture, a curly bun looks more interesting and beautiful than a smooth one would. The style also works incredibly well for curly hair because you don’t need to smooth everything into submission—the bun can be purposefully slightly textured and still look complete.
How to Create It
Brush through damp, moisturized curls. Gather hair into a low ponytail at the nape of the neck, but before securing, separate out two small sections from either side of the face to leave as face-framing pieces. Secure the main ponytail with an elastic. Twist or wrap the ponytail around the elastic to create the bun, then secure with bobby pins. Define the face-framing pieces with curl cream.
What You’ll Need and Pro Tips
- Wide-tooth comb or detangling brush
- Leave-in curl cream
- Small elastic band
- Bobby pins
- Optional: decorative clips or a small hair stick/bun pin for extra hold and style
The face-framing pieces are what elevate this from basic to intentional—make sure those pieces are clearly defined and styled, not just random strays.
8. Braided Sides Into a Back Pony
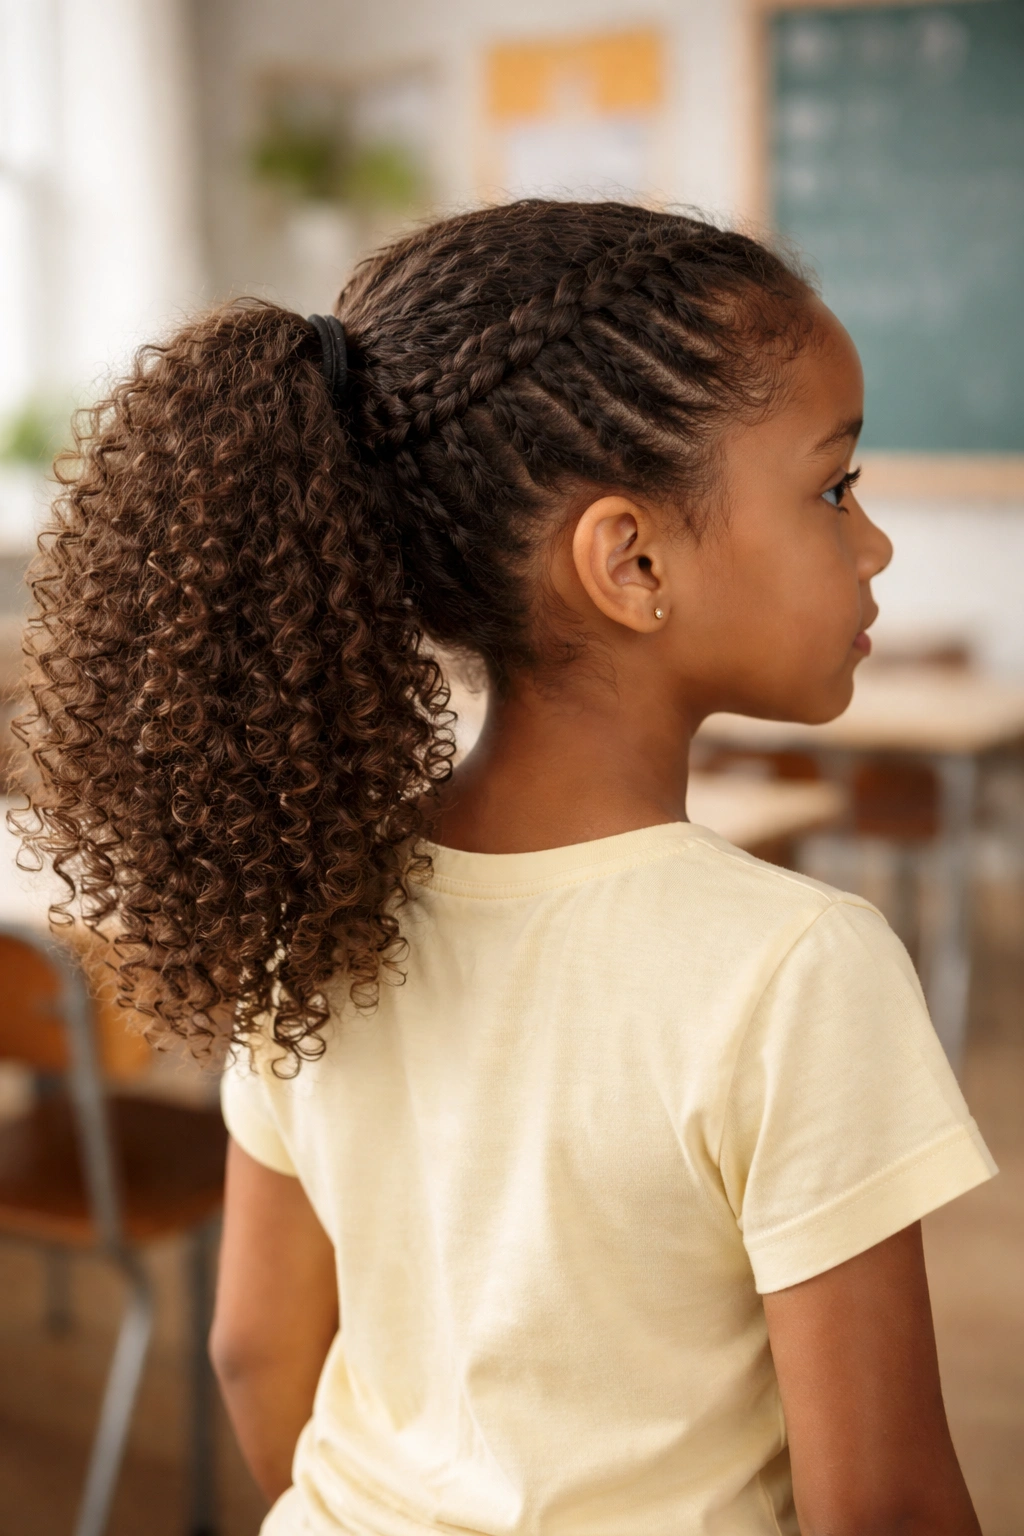
This style combines the best of braids and ponytails by taking sections from either side of the head and braiding them, then incorporating those braids into a back ponytail. It’s more intricate-looking than it actually is, and it creates a style that’s both fancy enough for special school events and practical enough for regular days.
Why It Works for School
The braided-sides-into-pony combination keeps the style secure because the braids add extra grip and stability, while still looking elegant and intentional. It’s one of those styles that looks like you spent 30 minutes styling, but actually takes about 5-10 minutes once you get the hang of it. Teachers and other parents consistently comment on how cute this looks, which builds your kid’s confidence about their curly hair.
How to Create It
Starting on one side, take a section of hair near the temple and create a Dutch or French braid going back toward the middle of the head. Stop about halfway back and secure the braid end temporarily with a small clip. Repeat on the other side. Then gather all hair into a back ponytail (incorporating the braids) and secure everything together with one larger elastic.
What You’ll Need and Pro Tips
- Wide-tooth comb
- Leave-in curl product
- Small clips or elastics
- One main elastic band for the back ponytail
- Bobby pins if needed to tuck any loose sections
This style is easier than it sounds once you practice it twice—muscle memory kicks in and you can do it almost without thinking.
9. Space Buns for a Fun Look
Space buns (two round buns placed on the top of the head) are playful and genuinely adorable, while still being appropriate for school. This style works especially well for kids with medium to thick curly hair because the natural curl pattern creates those perfect round shapes without you needing to tightly wrap the sections. Space buns also work on virtually every curl type because you’re working with the hair’s natural volume, not against it.
Why It Works for School
Space buns work for school because they look intentionally cute and fun without being disruptive or inappropriate. They keep hair completely away from the face and neck, which means kids can move freely and comfortably throughout the day. The style also tends to be quite secure because you’re using two separate sections, each with its own gathering point, so there’s less chance of the whole style coming undone.
How to Create It
Create a center part down the middle of the head. Take one section from the crown and gather it high on one side, then gently twist it and coil it into a bun, securing with bobby pins and a small elastic. Repeat on the other side. The buns should sit roughly where space bun pigtails would, creating that iconic look. The natural curl texture does a lot of the work—you don’t need perfect smoothness.
What You’ll Need and Pro Tips
- Wide-tooth comb
- Small scrunchies or elastics
- Bobby pins
- Leave-in curl cream for definition
The magic is in the twisting rather than tight wrapping—a gently twisted bun that uses the natural curl pattern will look fuller and more beautiful than a tightly wrapped one.
10. Slicked-Back Top Knot With Loose Curls
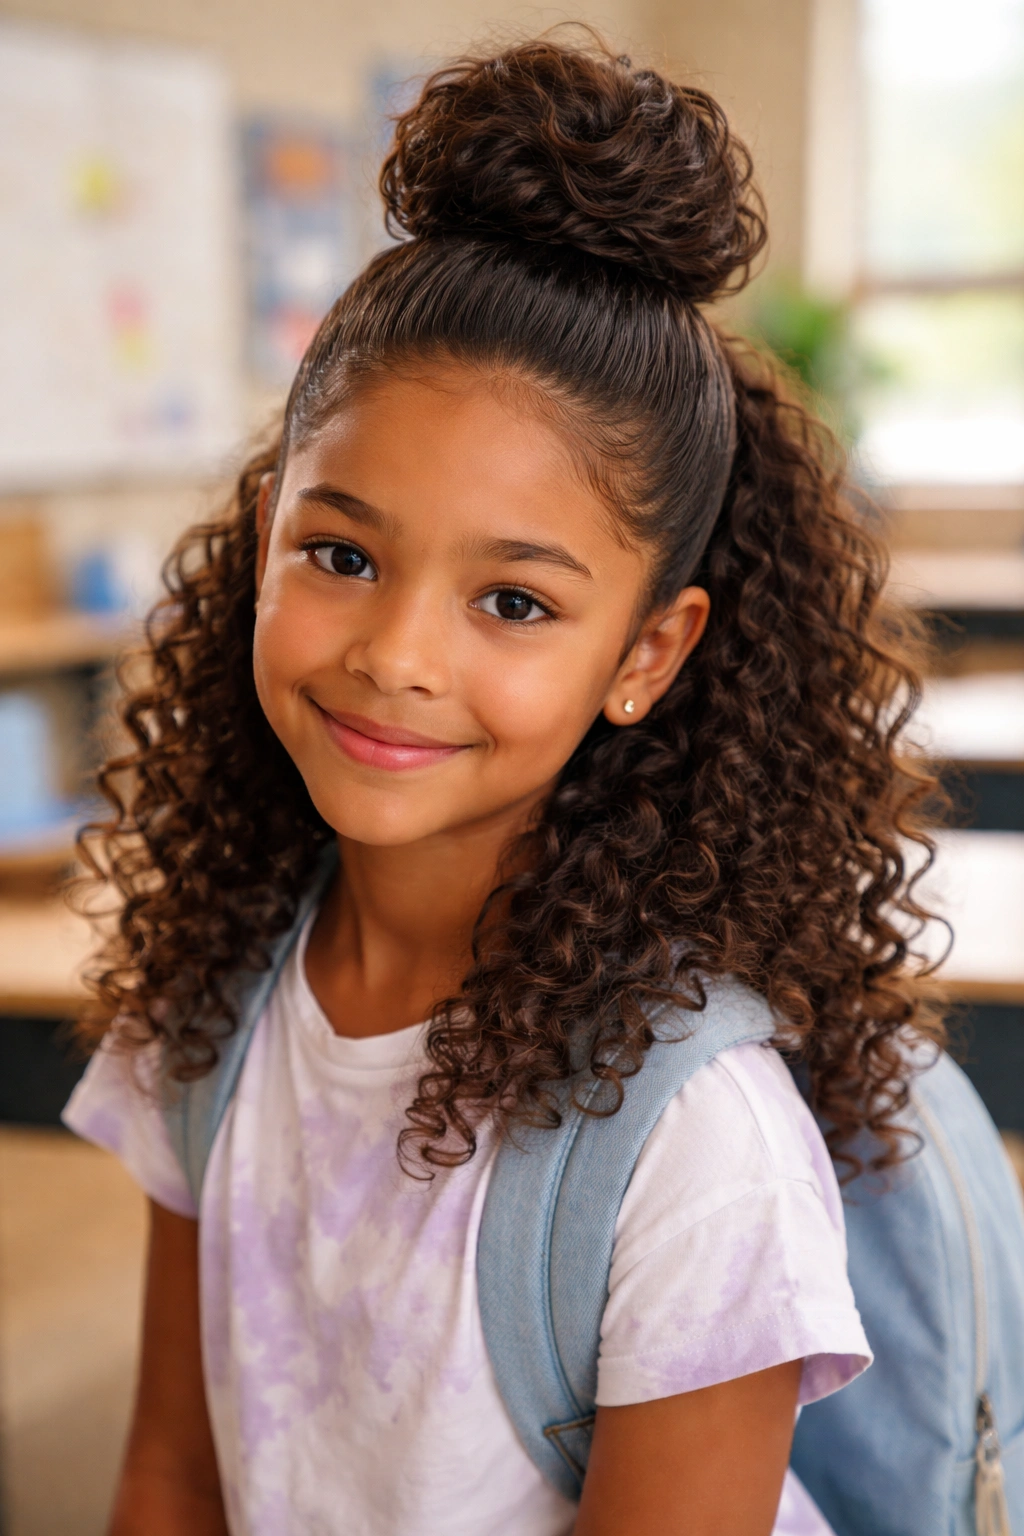
A slicked-back top knot is the ultimate polished-but-relaxed style—it takes the natural curls and gathers them into a secure knot at the very top of the head, creating clean lines while celebrating all the texture below. This style works beautifully for curly hair because you’re not trying to fight the texture; you’re just managing the top portion while letting the rest cascade down.
Why It Works for School
This style reads as intentionally elegant while still feeling relaxed and age-appropriate for kids. It’s secure enough that you don’t need to worry about it coming undone during an active school day, but it still celebrates the natural curl pattern. The style also works on a wide range of curl types and is quick enough to do on a weekday morning without stress.
How to Create It
Apply a smoothing gel or cream to damp hair. Gather all hair to the very top of the head and secure into a high ponytail. Then gently twist or wrap the ponytail around the base to create a compact knot, securing with bobby pins. The key is not pulling so tightly that it causes discomfort—the knot should feel secure but not strained.
What You’ll Need and Pro Tips
- Smoothing gel or leave-in cream
- Hair tie or scrunchie
- Bobby pins
- Optional: a decorative hair stick or bun pin to add interest and secure the knot
*The “slicked-back” element doesn’t mean slicked tight*—it just means you’ve applied enough product to define the top portion while the bottom curls stay completely loose and bouncy.
Final Thoughts
The best school hairstyle for your curly-haired kid is the one that makes them feel confident, keeps them comfortable, and doesn’t require constant adjustments throughout the day. All of these styles accomplish those goals while looking intentionally styled and polished enough to work in any school setting.
The real secret isn’t about complicated techniques—it’s about starting with clean, well-moisturized curls and choosing a gathering method (twists, braids, or simple elastics) that works with your child’s curl pattern rather than fighting it. Most of these styles become genuinely quick once you’ve done them a handful of times, and rotating through them keeps your morning routine from feeling monotonous while giving your kid variety and something to look forward to.
Pay attention to what your child actually likes wearing and which styles stay put best throughout their active day—that feedback is gold. A hairstyle that’s cute but constantly needs fixing will frustrate both of you, while one that’s secure and comfortable becomes the default choice. Trust the curl pattern, invest in good products that keep curls moisturized and defined, and give these styles a try.