Curly hair is an absolute canvas for creativity, yet so many people with curls find themselves rotating between the same handful of styles out of habit or uncertainty. The truth is that curly hair demands variety — not just for aesthetics, but for scalp health, moisture balance, and keeping your natural texture from getting monotonous. The beautiful secret that most curl enthusiasts eventually discover is that the real versatility isn’t in straightening your curls or fighting them into rigid shapes. It’s in learning the alternative approaches that celebrate your curl pattern while giving you completely different looks that feel fresh and intentional.
This isn’t about abandoning your favorite go-to style. It’s about building a repertoire of techniques that work with your curl pattern, not against it. When you know multiple ways to wear your curls, you gain freedom — freedom to change your look based on your mood, the occasion, or simply because you need a break from the same old routine. Some of these styles are low-effort everyday wears. Others are strategic protective styles that give your curls a break from daily manipulation. A few are statement-making looks that transform how you feel in a single morning.
The styles in this guide work across different curl types — from loose waves to tight coils. What changes is the technique, timing, and product strategy, not the fundamental principle. Each one teaches your hands and your curls something new, and each one solves a different problem or mood. Whether you’re looking for a quick grab-and-go option, a way to extend your wash day results, a protective style that locks in moisture, or a totally transformed look that turns heads, you’ll find something here that fits your life and your curls.
1. The Pineapple
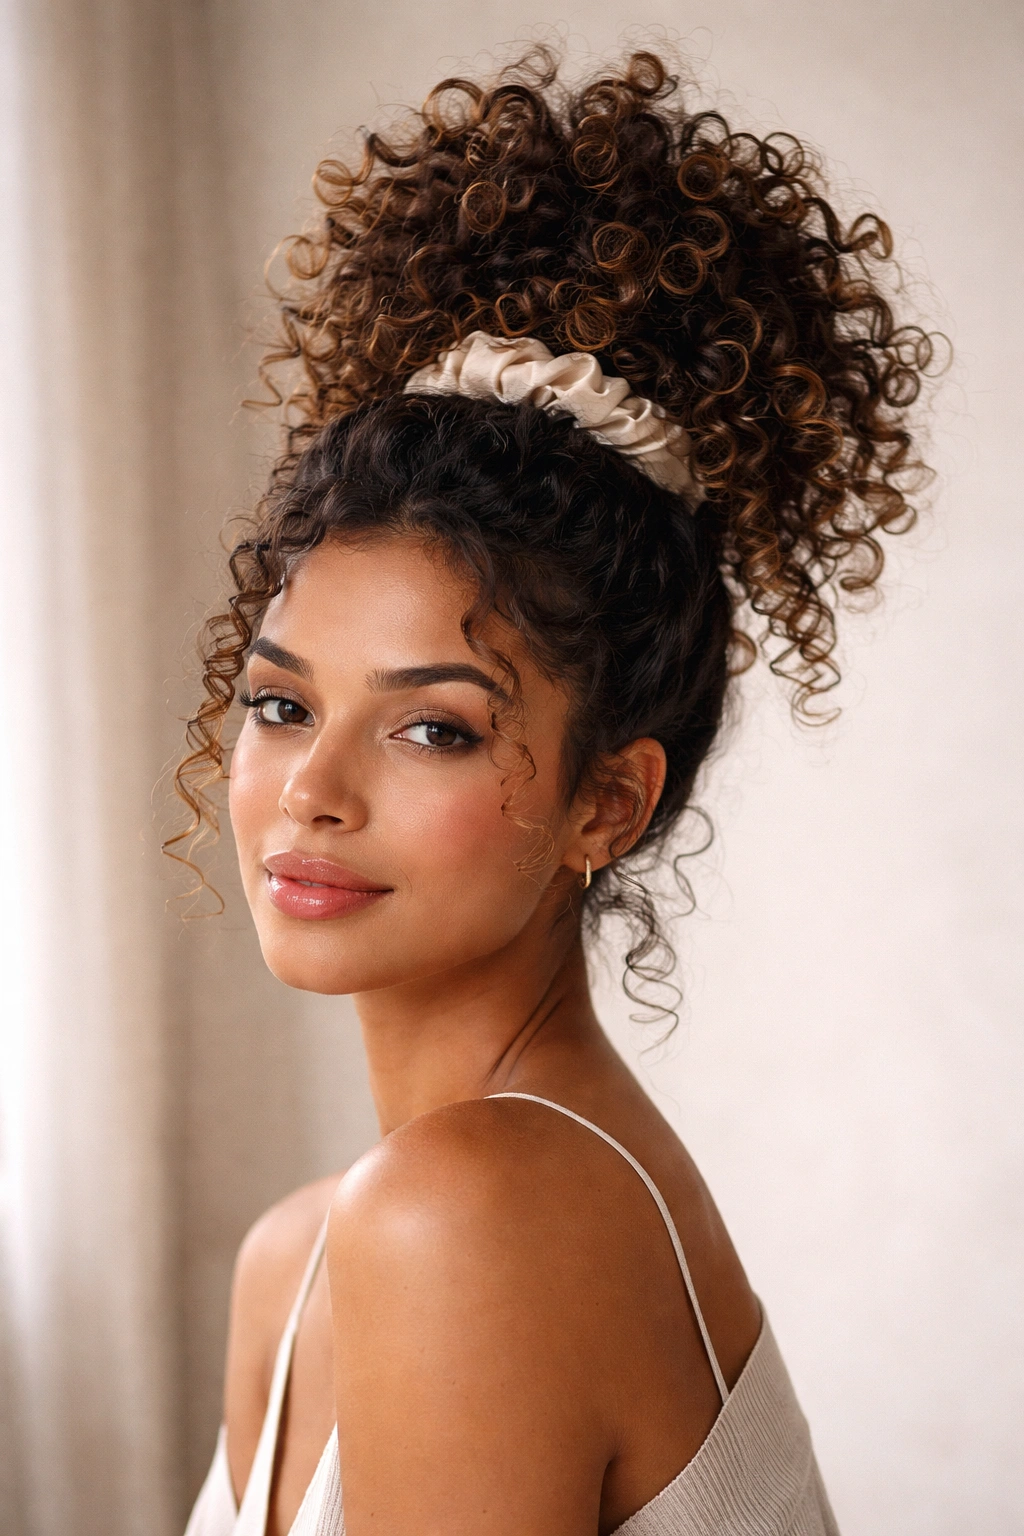
The pineapple is the foundational nighttime style that somehow doesn’t get nearly enough credit for how brilliantly simple it is. Instead of letting your curls sleep flat on a pillow (which ruins everything you worked for during wash day), you gather your curls high on top of your head in a loose, elevated ponytail using a silk or satin scrunchie. The name comes from the shape — your gathered curls sit on top of your head like the crown of a pineapple. Sleep on that, and your curls stay elevated, undisturbed, and dramatically fresher the next morning.
Why This Works for Curls While Sleeping
The pineapple prevents the friction that normally crushes and tangles your curls against a pillow throughout the night. Cotton pillowcases absorb moisture from your curls and create friction that causes frizz, breakage, and that flattened, deflated look that requires a full wash to fix. When your curls sit elevated and loose in a pineapple, they stay mostly untouched for eight hours. You wake up with defined curls that look almost as fresh as they did the day before — sometimes better, because your curls had time to fully set and harden. This is why pineappling is non-negotiable if you’re trying to stretch your style between wash days.
How to Perfect Your Pineapple
- Use a silk or satin scrunchie, never elastic — regular hair ties create crease marks and breakage that’ll show up the next morning
- Gather your curls at the very crown of your head, high enough that they’re genuinely elevated and not resting on your pillow at any point
- Keep it loose — this isn’t a tight ponytail — you want enough give that your curls can still move and set into their natural shape
- If you have longer curls, you might need to use a larger scrunchie or even a silk hair tie to avoid tension and breakage
- Try this alongside a silk or satin pillowcase for maximum protection — the combination keeps frizz to an absolute minimum
Pro tip: If your pineapple creates a crease or dent in your curls, try repositioning it slightly higher or moving the scrunchie to a different spot each night so creases don’t set in the same place. Some people alternate between a high pineapple and a side pineapple to vary where pressure points sit.
2. High Puff with a Twist
A high puff is essentially a high ponytail that celebrates your curl volume rather than trying to slick everything down. Unlike a tight, polished ponytail, a high puff embraces the fullness and texture of your curls — you’re gathering them, yes, but leaving them loose and fluffy rather than compressed. The twist version adds dimension by sectioning and twisting portions of your hair before gathering it up, creating a style that reads as intentionally textured rather than simply “hair tied up.”
The Textured Appeal of a Twisted High Puff
A regular high puff is already bold and beautiful, but adding twisted sections transforms it from casual to deliberately styled. By twisting 2-4 sections of your curls before gathering them into the puff, you create visual interest and definition that makes the style feel more refined. The twists also help your curls hold their shape throughout the day — instead of one big fluffy mass, you’ve got organized sections that maintain structure. This style works particularly well if your curls are on the looser side or if you have a mix of curl patterns, because the twists create uniformity and texture that reads as intentional.
Steps to Build a Structured High Puff
- Start with slightly damp curls that have some grip (day-two curls often work better than day-one when curl pattern is already set)
- Section your hair into 3-4 quadrants, depending on your hair density
- Twist each section loosely (not tightly — you want to maintain curl definition) and pin or clip it temporarily out of the way
- Gather all sections at your crown and secure them into a high ponytail with a silk scrunchie
- Gently fluff and massage the puff to release it and restore volume — you want it big and rounded, not compressed
- Leave a few face-framing curls loose if you want a softer, less sleek look
Pro tip: Apply a light curl cream or gel to your twisting hands to enhance definition and keep the twists from unraveling, but don’t use so much product that the puff feels stiff or crunchy. You want structure with softness.
3. Bantu Knots

Bantu knots are a beautiful protective style that works on virtually any curl type, and they’re absolutely gorgeous as a statement look in their own right. Small coiled knots of hair wrapped tightly around the base create a sculptural style that protects your curls while giving you defined, springy curls when you unravel them. Unlike braids that can take hours, Bantu knots work more quickly (especially if you section your hair into larger knots), and they deliver impressive curl definition with minimal heat or manipulation.
Why Bantu Knots Protect and Define Your Curls
Each knot is essentially a mini protective pocket where your hair is coiled around itself and secured — there’s no tension pulling on your roots, and the curl is supported and maintained throughout wear. When you unravel them after a few days, your curls spring back with defined coils and volume that looks like you’ve just stepped out of the salon. The style works because you’re not using external tools to create curl definition — you’re using the natural structure of your hair to lock the pattern in place. For this reason, they work beautifully on tighter curl patterns (3C-4C textures) but also create gorgeous definition on looser curls (2C-3A patterns).
The Process of Creating Secure Bantu Knots
- Start with clean, damp hair and apply a moisturizing curl cream or butter to enhance grip and definition
- Section your hair into 6-12 knots (depending on how much time you have and how defined you want the curls)
- Take one section and, starting at the root, twist the hair tightly around itself into a coil, wrapping it around the base to secure it
- Pin or clip the knot so it stays secure while you move through the rest of your hair
- Leave the knots in for 4-8 hours (or overnight) to allow them to fully set
- Gently unravel each knot carefully — don’t pull too hard or you’ll disrupt the curl pattern
Pro tip: Apply a light oil or serum to your hands when unraveling to reduce frizz and add shine. If you want even more defined curls, dampen your hair slightly before unraveling and let the knots air-dry for an hour or two longer.
4. Twist-Outs

A twist-out is one of the most reliable ways to achieve defined, elongated curls with minimal damage or stress to your hair. You section your clean, damp hair into 2-12 twists (the number depends on how thick and defined you want the curl), let them set while drying, and then unravel them to reveal beautifully defined twisted curls. It’s a fundamental technique that works on almost every curl type, and it teaches your curls to hold a specific shape and definition that lasts through multiple days.
How Twist-Outs Create Long-Lasting Curl Definition
When you twist damp hair and allow it to fully dry in that twisted state, you’re training your curl pattern to take that shape. Unlike blow-drying or other heat methods, you’re using moisture and time to set the pattern, which means less damage and more longevity. A twist-out typically holds its shape for 3-5 days, and with each day your curls settle further into the shape they’ve learned. This is why twist-outs are so popular — they’re a style that actually improves with time rather than deflating by day two.
Creating Twist-Outs That Last Through the Week
- Shampoo and deep condition your hair to prepare it for styling and moisture retention
- Apply a leave-in conditioner to damp hair (not soaking wet — damp enough to work with, but not dripping)
- Divide your hair into 4-12 sections depending on your desired definition level and hair density
- Take each section and twist it tightly from root to tip using a two-strand twist or a single-strand twist
- Allow the twists to air-dry completely (or accelerate with a diffuser) — this is crucial, as unraveling before they’re fully dry will disrupt the curl pattern
- Gently unravel each twist and finger-comb to separate and define the curls
- Scrunch a lightweight oil or curl serum through the curls to enhance shine and tame frizz
Pro tip: If your twist-out doesn’t have enough definition or spring, you can lightly mist your curls with water the next morning and gently scrunch to reactivate the curl pattern. This trick extends the life of your twist-out by 1-2 days.
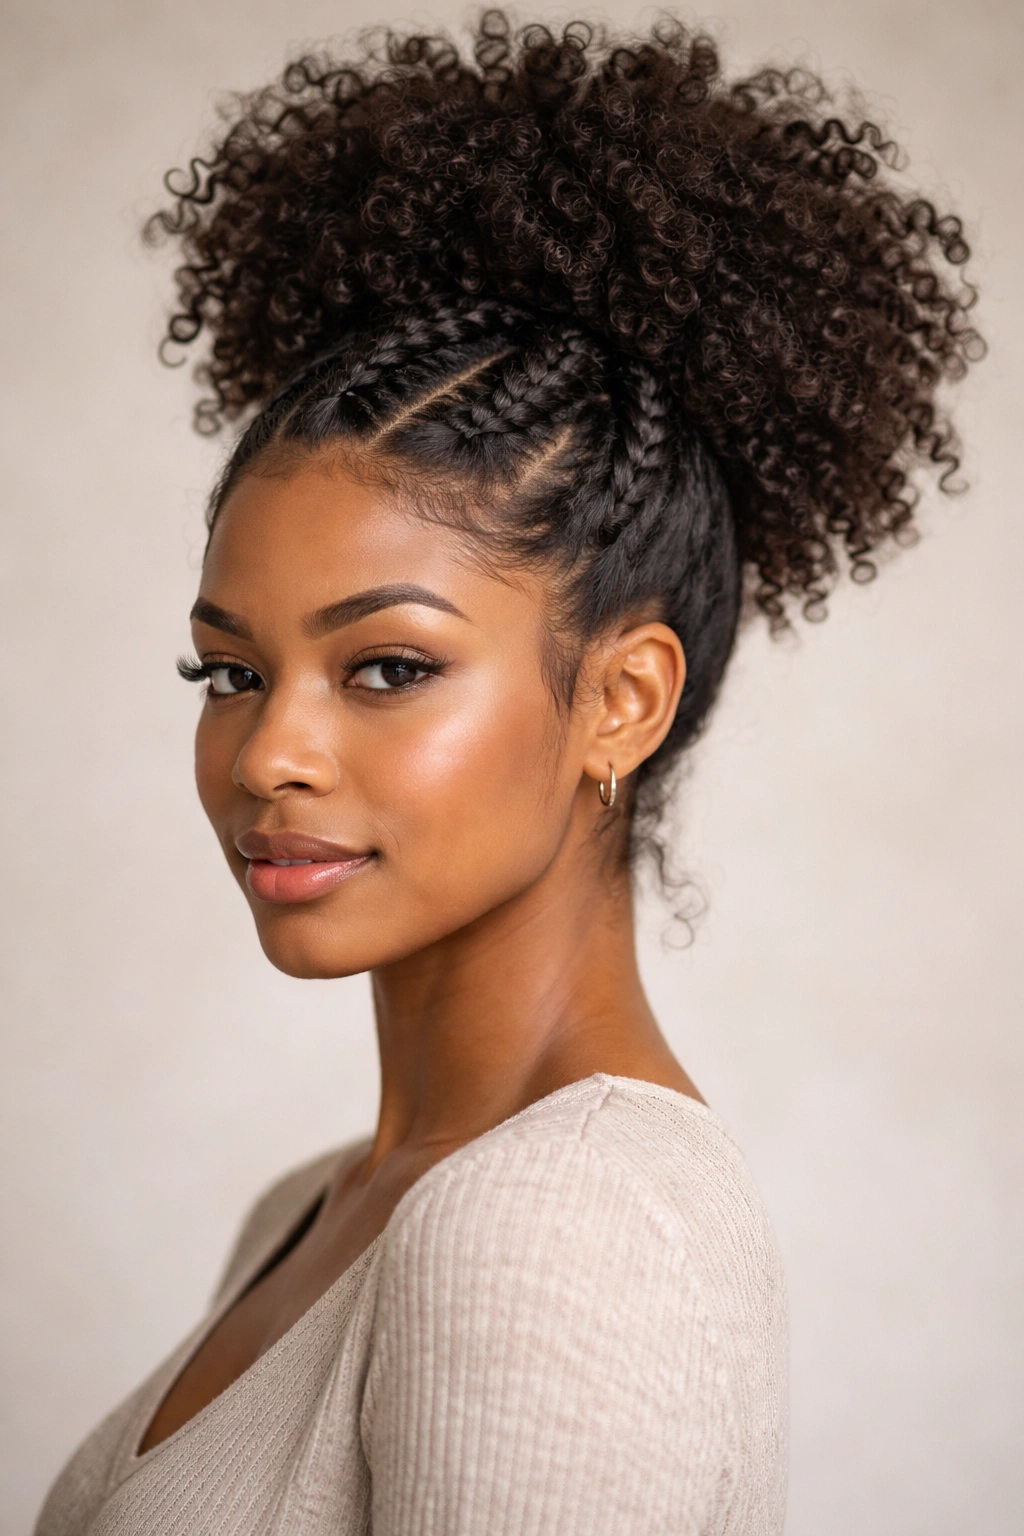
5. Braided Updo
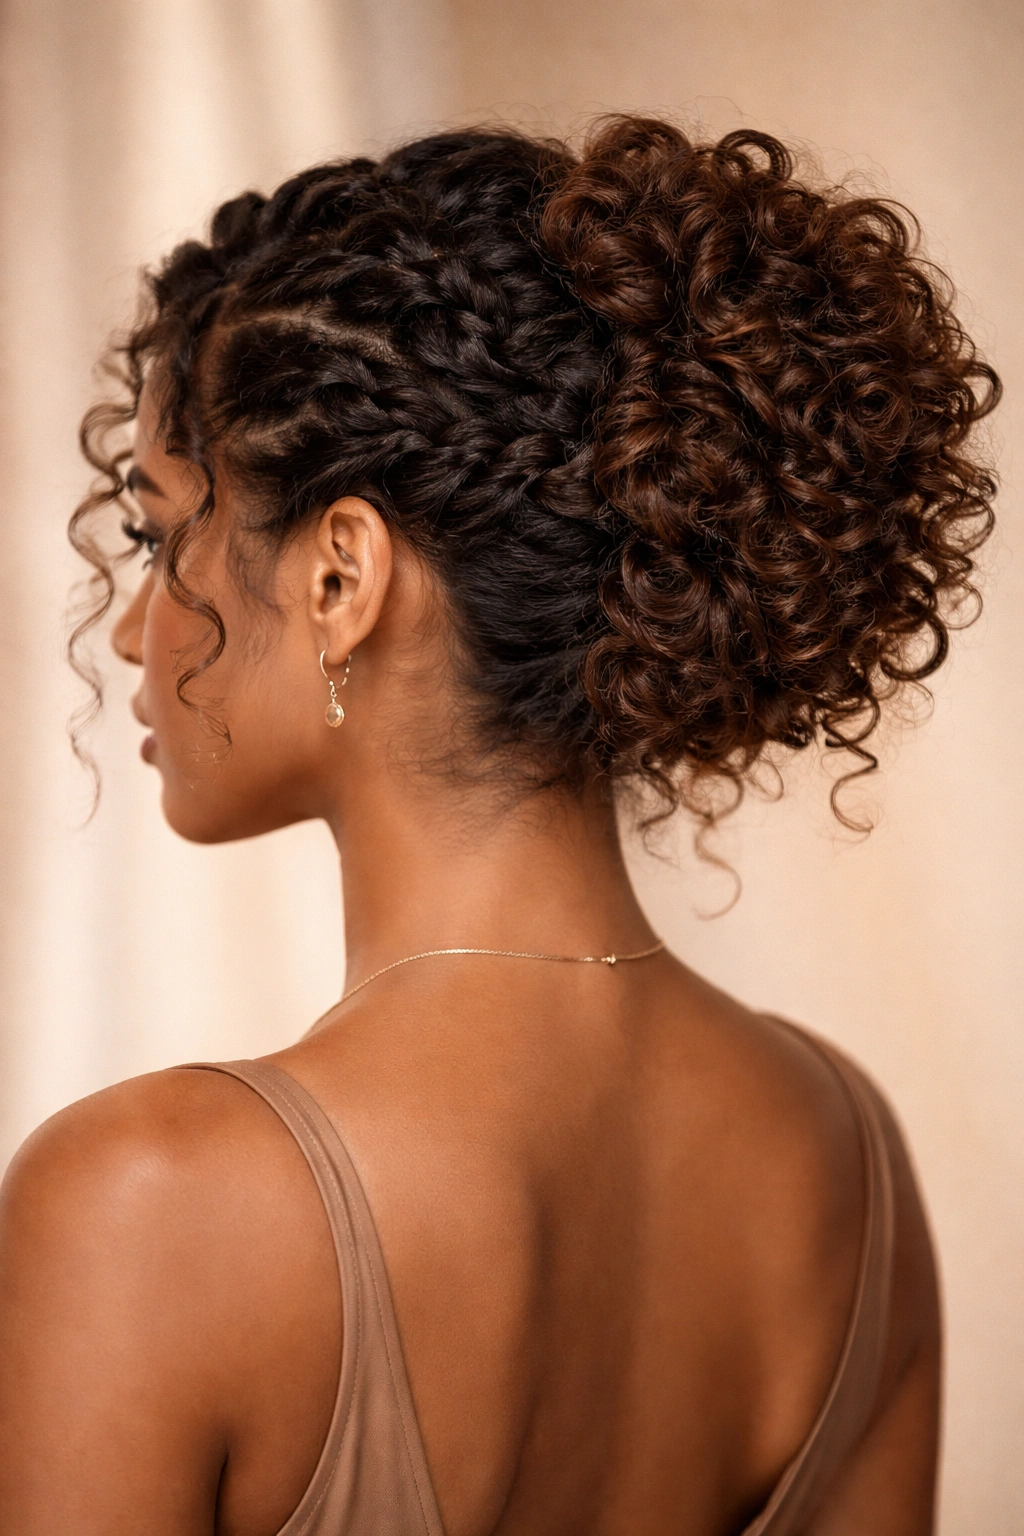
A braided updo transforms your everyday curls into an elegant, intentional style that works for almost any occasion — from casual outings to formal events. You can incorporate your natural curls into the braids themselves, braid sections of your hair and pin them up into a low or high bun, or create an intricate braided crown that frames your face while keeping curls lifted and off your neck. The versatility here is enormous because braids work with your curl texture rather than against it, and they create visual interest without requiring heat or additional manipulation.
Why Braids Work Beautifully With Curls
Braids grip your natural curl texture, which means they stay intact much longer than they would on straight hair. Your curls provide natural hold and bounce that makes braids look fuller and more textured than flat, sleek braids on straight hair. When you braid curly hair, you’re not fighting against texture — you’re harnessing it. A braid that might fall out of straight hair after a few hours will stay put in curls for most of the day because your curl pattern creates friction and grip within the braid itself.
Building a Braided Updo Your Curls Will Support
- Start with curly hair that has some grip and hold — day-two curls often work better than freshly washed hair because the curl pattern is already set
- Apply a light styling cream or gel to damp sections as you work to enhance grip and definition
- Braid 2-4 sections of your hair (Dutch braids or French braids work best) starting from the front or sides
- Gather the braided sections along with any remaining loose curls at the nape of your neck or crown
- Pin the entire gathered section into a low or high bun, tucking the braids around the base to create a cohesive, sculpted look
- Pull a few face-framing curls loose if you want a softer, more romantic vibe
- Secure the updo with bobby pins hidden within the braids and curls, using at least 4-6 pins for long-lasting hold
Pro tip: Use braids as a protective style underneath — you can wear a braided updo for 2-3 days in a row because it’s protective and low-manipulation, and your curls underneath stay moisturized and undisturbed.
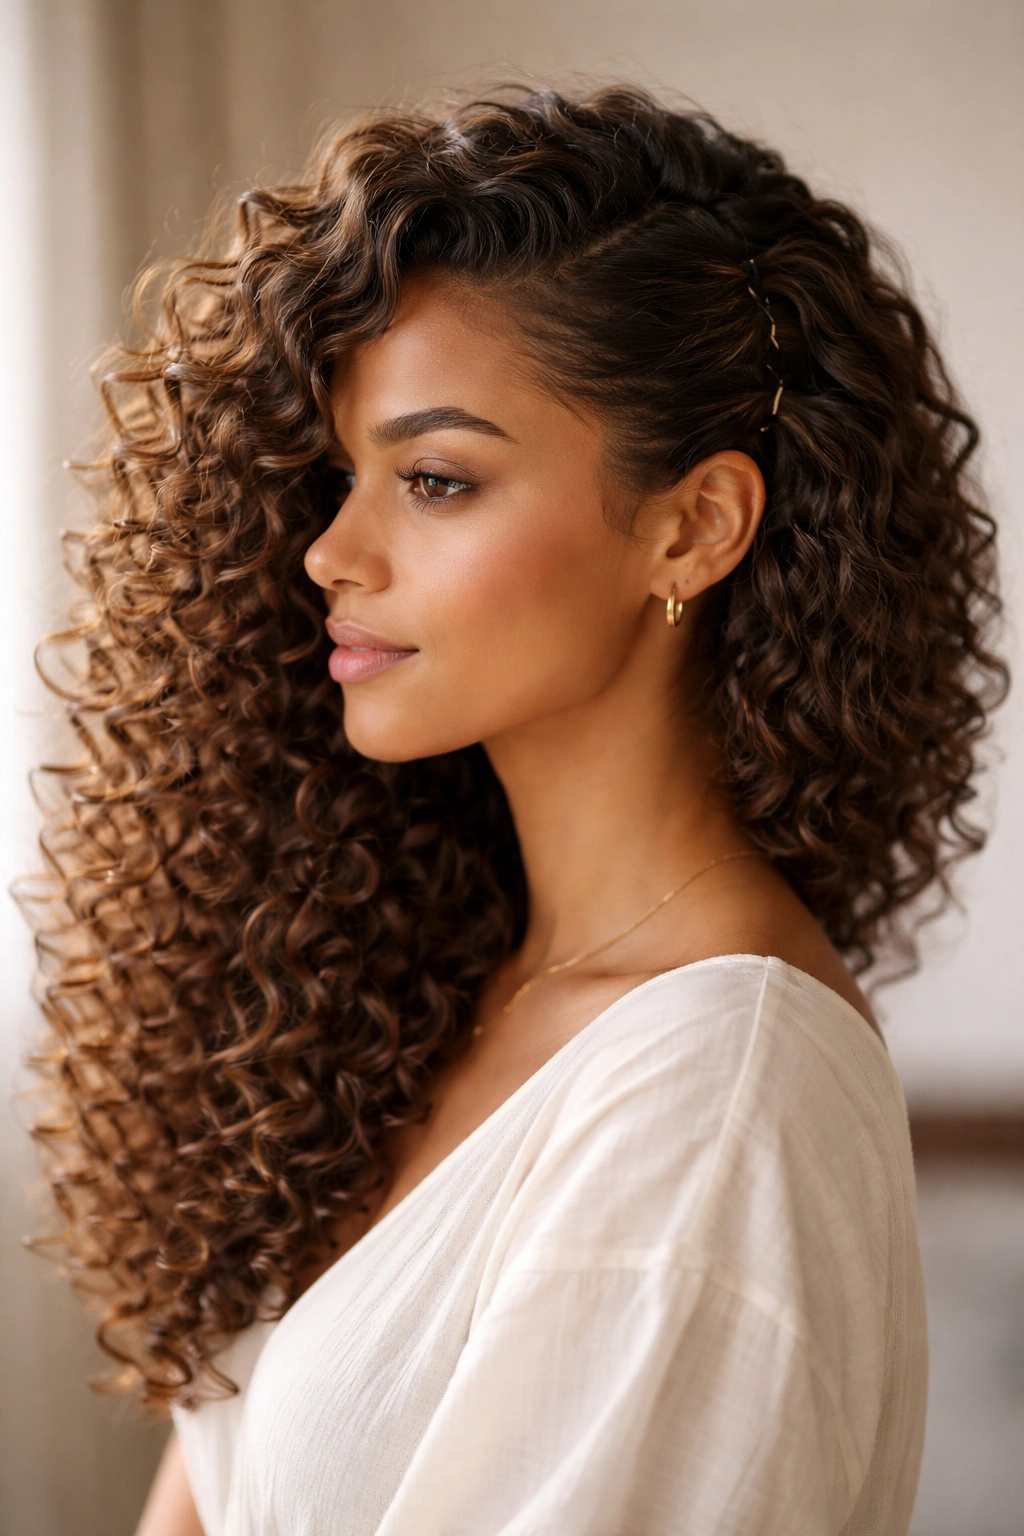
6. Wash and Go
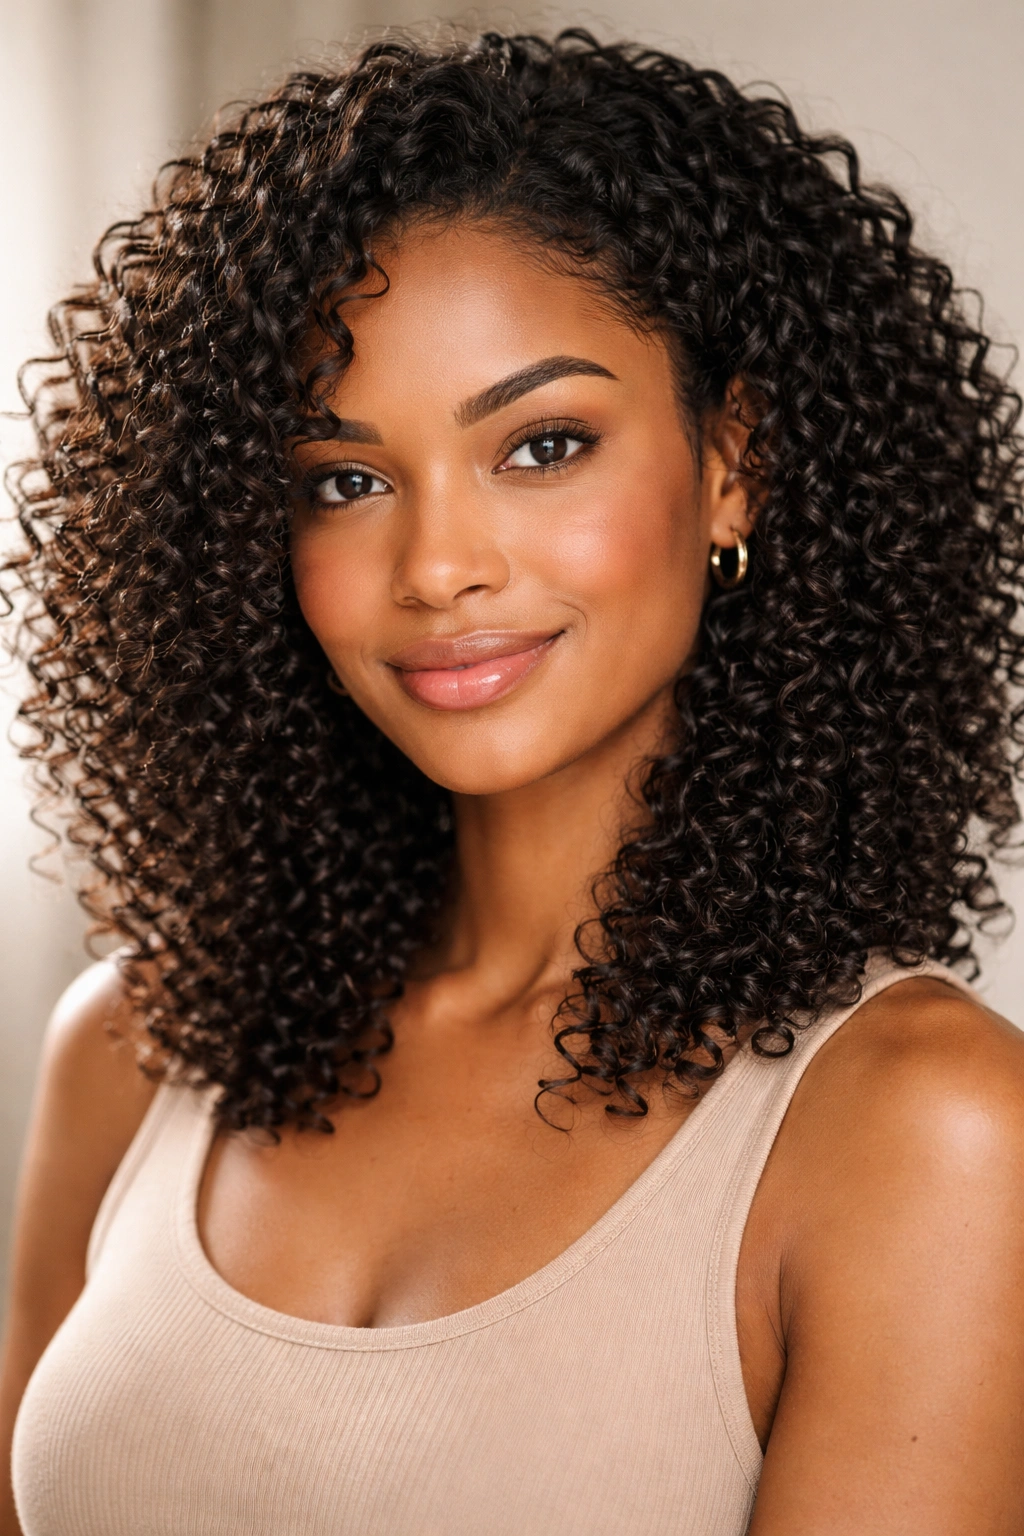
A wash and go is the quintessential low-effort, high-impact curly hair style that celebrates your curls exactly as they are, with no styling required beyond product and air-drying. You shampoo, apply conditioner, add a curl cream or gel to soaking-wet hair, scrunch and define the curls with your hands, and let them air-dry naturally (or with a diffuser). The result is a completely natural, textured look that requires no manipulation and minimal heat — just you and your actual curl pattern.
The Freedom of Embracing Your Natural Curl Pattern
A true wash and go is radical simplicity. There’s no twisting, braiding, or manipulating your hair into shapes. You’re not trying to achieve a specific curl definition or pattern — you’re letting your curls do what they naturally want to do when they’re clean, conditioned, and properly hydrated. This works best if you have a curl pattern you genuinely like (or are learning to like), because there’s nowhere to hide. But that’s also what makes it powerful. A wash and go takes 15 minutes total, requires no skill, and shows the world exactly who you are, curl-wise.
Perfecting a Wash and Go That Holds for Days
- Use a sulfate-free shampoo that cleanses without stripping moisture, or try a cleansing conditioner if your curls are particularly dry
- Apply a rich, hydrating conditioner and let it sit for 5-10 minutes to ensure deep moisture
- While hair is still soaking wet, apply a leave-in conditioner to lock in moisture
- Apply a curl cream or gel to dripping-wet hair (water is your best styler) and work it through gently with your hands
- Scrunch your curls upward from the ends toward your scalp, encouraging definition and clumping
- Plop with a microfiber towel or t-shirt to remove excess water without disturbing curls
- Air-dry completely or use a diffuser to speed the process — curls must be fully dry before you touch them, or they’ll frizz
- Once dry, gently touch and shape your curls as needed, but avoid raking your fingers through them
Pro tip: Use the “praying hands” method to apply product — rub the product between your palms and then gently clap your hands over sections of hair, smoothing the product through without disrupting clumping. This distributes product evenly while maintaining curl definition.
7. Protective Styles and Locs
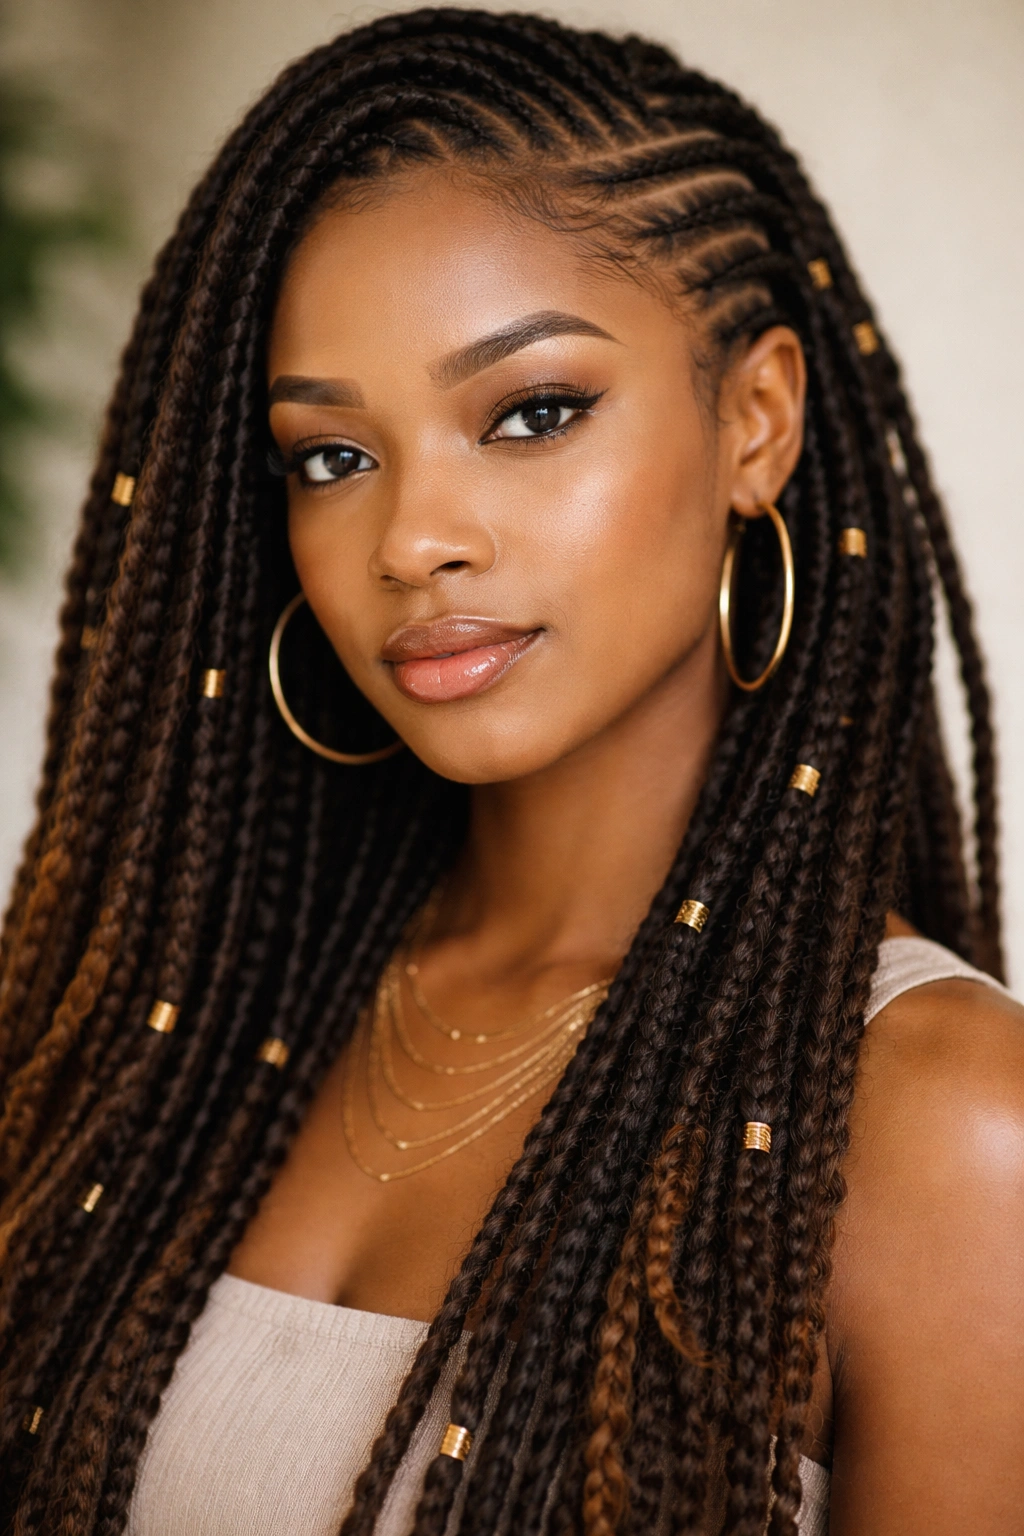
Protective styling — wearing your hair in styles that minimize daily manipulation and environmental stress — is one of the most important concepts in curly hair care. Locs (whether you’re committed to permanent locs or exploring temporary loc extensions) represent one end of the protective styling spectrum, but protective styles also include protective braids, crocheted styles, and other options that tuck your curl ends away and reduce breakage over time.
How Protective Styling Supports Long-Term Curl Health
Every time you manipulate your curls — styling, stretching, combing, even handling — you risk breakage, especially at the delicate ends. Protective styles reduce daily manipulation by keeping your curls in a secured, contained state where they’re not exposed to friction, weather, or repeated handling. Over weeks and months, this dramatically reduces breakage and allows your curls to grow longer and stronger. Protective styles also lock in moisture — when curls are braided, twisted, or locs’d, the moisture can’t evaporate as quickly as it would with loose curls.
Exploring Protective Styles That Match Your Commitment Level
- Temporary protective styles (box braids, Senegalese twists, crochet styles): Installed and removed every 4-8 weeks, these give you protection without permanent commitment
- Semi-permanent protective styles (faux locs, braided locs): These blend the look and benefits of permanent locs with the removability of temporary styles, lasting 2-3 months
- Permanent locs: A long-term commitment where your curls are physically locked together, creating thick, rope-like strands that require minimal daily styling and maximum protection
- Braided protective styles (cornrows, box braids, Kanekalon braids): Incredibly versatile, affordable, and can be worn for weeks while protecting your natural curls
Each protective style carries different maintenance requirements and time commitments, but all of them reduce daily stress on your curls and allow you to go longer between wash days.
Pro tip: Before installing a protective style, deep condition your curls intensively — the style will lock in that moisture for weeks. When you remove the style, your curls will be noticeably softer and healthier than they were going in.
8. Side-Swept Curls
A side-swept style sweeps your curls to one side, secured with bobby pins or a clip, creating an asymmetrical, romantic look that works for everything from casual days to special events. It’s elegant without being fussy, and it transforms your everyday curls into something that feels intentional and styled. The beauty of this approach is that you’re not trying to fight your curl texture — you’re just redirecting where the curls fall and emphasizing one side of your face.
The Versatility of Directional Styling
Side-sweeping your curls creates depth and dimension because it plays with how light hits your hair and how volume sits on your head. When curls fall all around evenly, the effect is balanced but sometimes uniform. When you sweep them to one side, you’re creating a focal point and drawing attention to one side of your face. This works beautifully if you want to emphasize your eyes, cheekbones, or jawline — the asymmetry is intentional and flattering. You can keep a side-sweep casual and loose or make it more dramatic by incorporating a braid or twist into the side that’s swept.
Creating a Side-Swept Style That Holds Throughout the Day
- Start with curls that already have some hold and definition (day-two curls are ideal)
- Using your fingers or a wide-tooth comb, gently sweep your curls to one side of your head
- Secure the swept side with 3-4 bobby pins hidden within the curls, or use a decorative hair clip if you want to make the securing piece part of the style
- Leave some curls loose and face-framing on the unsswept side for balance
- If you want added hold and definition, spray lightly with a flexible hold spray — avoid over-spraying, which makes curls stiff and crunchy
- Gently massage and fluff the swept curls to maintain volume and prevent them from looking too slicked or plastered
Pro tip: Try a side-swept style with a small braid woven into the swept section — as you sweep, you’ll gather the braid along with the curls, creating a more intricate, deliberate look that feels special without requiring much additional skill.
9. Half-Up Half-Down with Face-Framing Detail
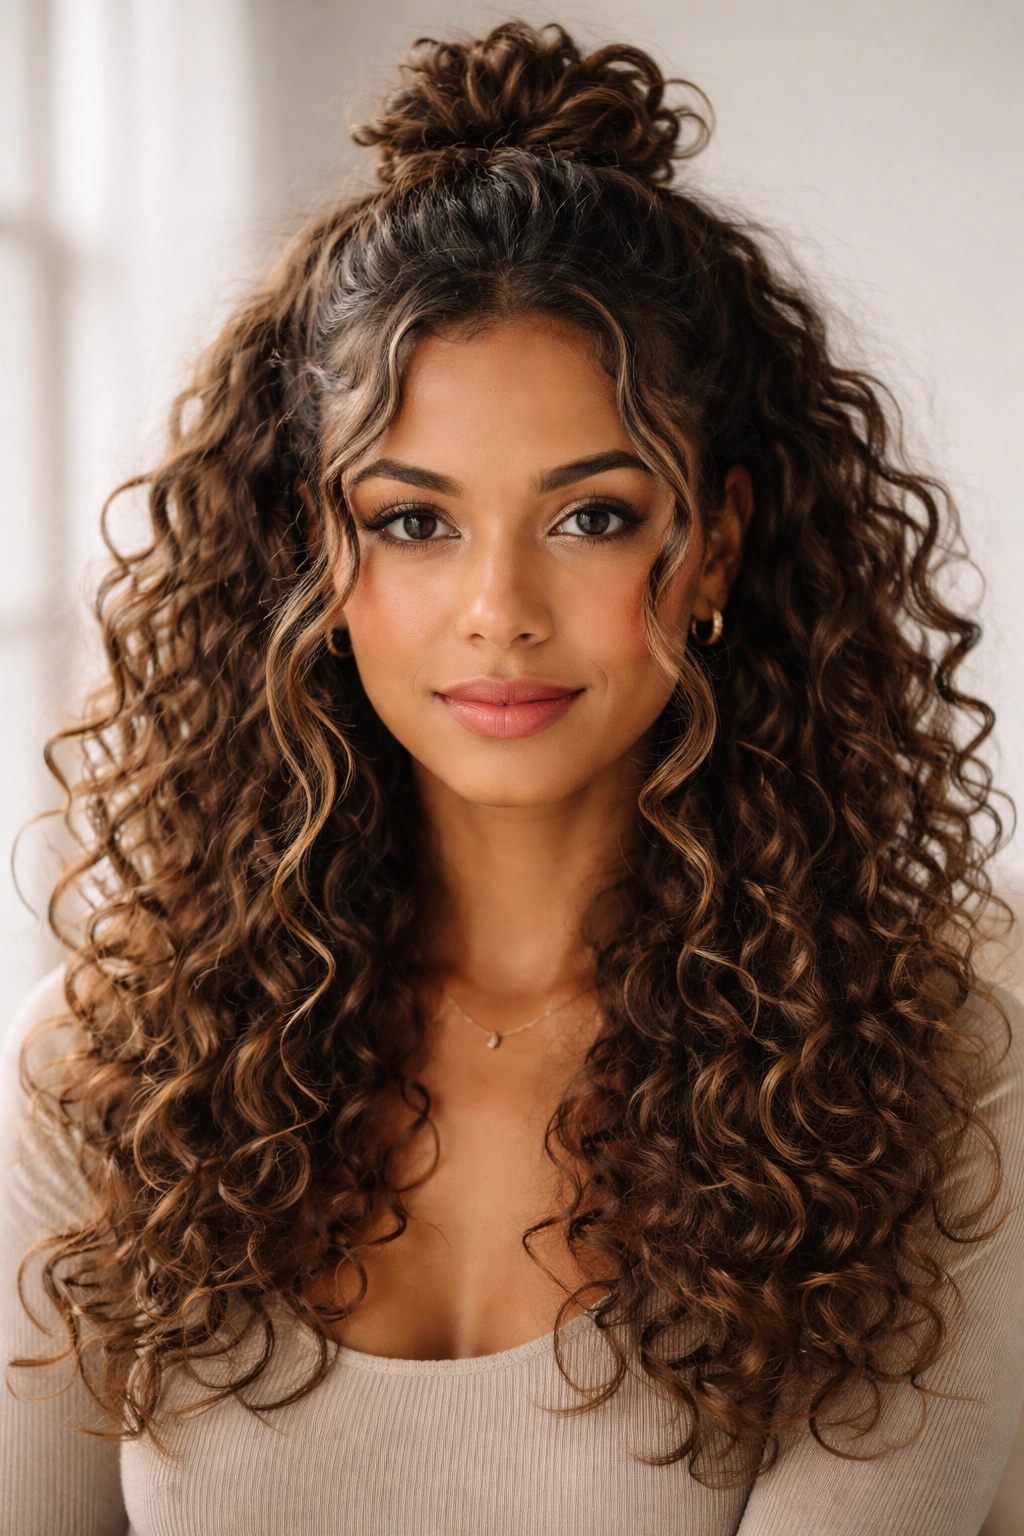
A half-up half-down style keeps some of your curls lifted and off your face while allowing the rest to flow down, creating a balance between control and freedom. This is perfect for days when you want your curls visible and celebrated but also want them somewhat contained, especially if your curls are particularly voluminous or if you’re doing an activity where completely loose curls would be in the way.
Why Half-Up Half-Down Works Across All Curl Types
This style works because it doesn’t require all your hair to cooperate at once. You’re securing the top section, which is easy, and letting the bottom half do its natural thing. You can add braids, twists, or clips to the top section to make it feel more intentional, or keep it simple and direct. The effect is polished enough for work or casual outings, but it’s also casual enough for everyday wear. Half-up half-down reads as “I styled my hair on purpose” without actually requiring much styling skill.
Building a Half-Up Half-Down with Staying Power
- Determine how much hair you want in the “up” section — typically this is the hair from your ears up, but you can go higher or lower depending on your preference
- If you want added definition, lightly spray or apply a touch of gel to the section you’re about to secure
- Gather the section at the crown and secure it with a silk scrunchie or claw clip — avoid elastics that create creases
- Leave 2-3 inches of face-framing curls loose on each side for softness and dimension
- For added polish, incorporate a small braid or twist into the gathered section before securing it
- Gently massage the gathered section to add volume and prevent it from looking too tight or slicked
- Fluff the loose curls hanging down to maximize volume and definition
Pro tip: Use a decorative clip or hair comb to secure your half-up section — this adds visual interest and makes it feel less casual. A metallic clip, tortoiseshell claw, or decorative hair stick instantly elevates the look.
10. Chunky Twist-Ups
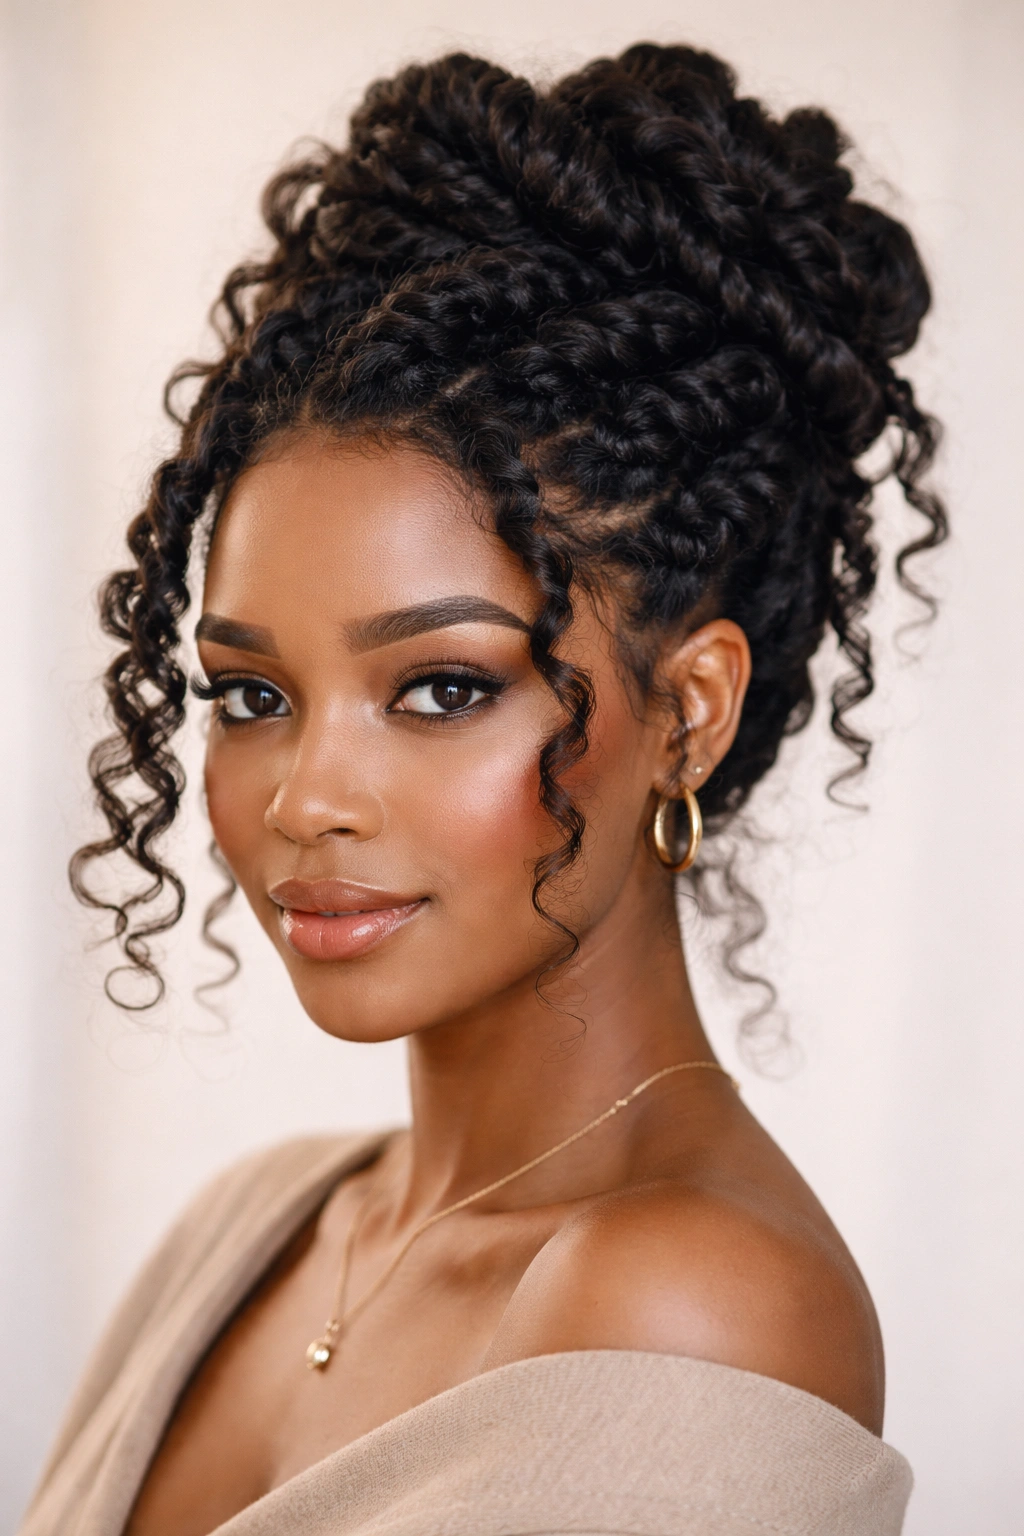
Chunky twist-ups are larger, more sculptural versions of Bantu knots — you’re creating 3-6 thick twisted coils instead of 8-12 smaller ones, which gives you a bolder, more statement-making look. These work beautifully as both a protective style and as a completed look in themselves. The coils are visually striking, they protect your curl ends, and when you unravel them, you get gorgeously defined, voluminous curls.
Why Chunky Twists Make a Statement
Large twists command attention in a way small twists don’t. They’re sculptural and intentional, and they celebrate the fact that you’re wearing a protective style deliberately rather than apologetically. Chunky twist-ups work on virtually every curl type, from loose waves to tight coils, but they’re particularly striking on tighter textures where the individual twist sections are really pronounced. You can wear them up in a bun, let them hang, pin them to the side — the versatility is real.
Executing Chunky Twist-Ups That Hold and Look Intentional
- Start with clean, damp hair that’s been conditioned and moisturized
- Apply a curl cream or butter to your hair and work it through thoroughly — this is crucial for definition and hold
- Divide your hair into 3-6 large sections (fewer sections mean chunkier twists and faster installation)
- Take one section and create a two-strand twist by dividing the section in half and twisting the two halves around each other all the way to the ends
- Wrap the end of the twist around the base to create a coil, or simply secure it with a small clip to hold the twist while it sets
- Repeat with all remaining sections
- Allow twists to set for 4-8 hours or overnight for maximum definition
- Unravel each twist by gently sliding your fingers down the twist from base to end, allowing the twisted curl to spring open
- Apply a light oil or serum to reduce frizz and add shine
Pro tip: If you want your chunky twist-ups to look even more intentional, gather them at the crown or nape and secure them into a high or low bun using pins and clips. This transforms them from a protective hairstyle into a fully realized, polished look.
Final Thoughts
The real power of exploring alternative hairstyles for curly hair isn’t just about having more looks to choose from — though that’s certainly nice. It’s about building a relationship with your curls where you understand how they respond to different techniques, products, and styling approaches. Each of these styles teaches your curls something different. A pineapple teaches them to hold their shape while you sleep. A twist-out teaches them to cling to a specific pattern for days. Protective styles teach them to thrive when you give them a break from daily manipulation.
When you cycle through different styles regularly, your curls stay healthier because you’re varying where tension sits and how often you manipulate them. You’ll also discover which techniques work best with your specific curl pattern, density, and porosity. The wash-and-go that looks incredible on someone else might take some tweaking before it works for you — that’s not a failure, it’s just part of understanding your unique hair. That understanding is what creates the confidence to wear your curls proudly in whatever style you choose.
Start with one new style this week. Maybe it’s the pineapple if you’re not sleeping well with your curls, or the wash-and-go if you’re looking for simplicity. Try it a few times, adjust based on how your curls respond, and then add another style to your rotation. Within a few months, you’ll have a complete arsenal of looks that work for your life, your curls, and your personal style. That’s when curly hair stops feeling like something you have to manage and starts feeling like something genuinely fun to experiment with.