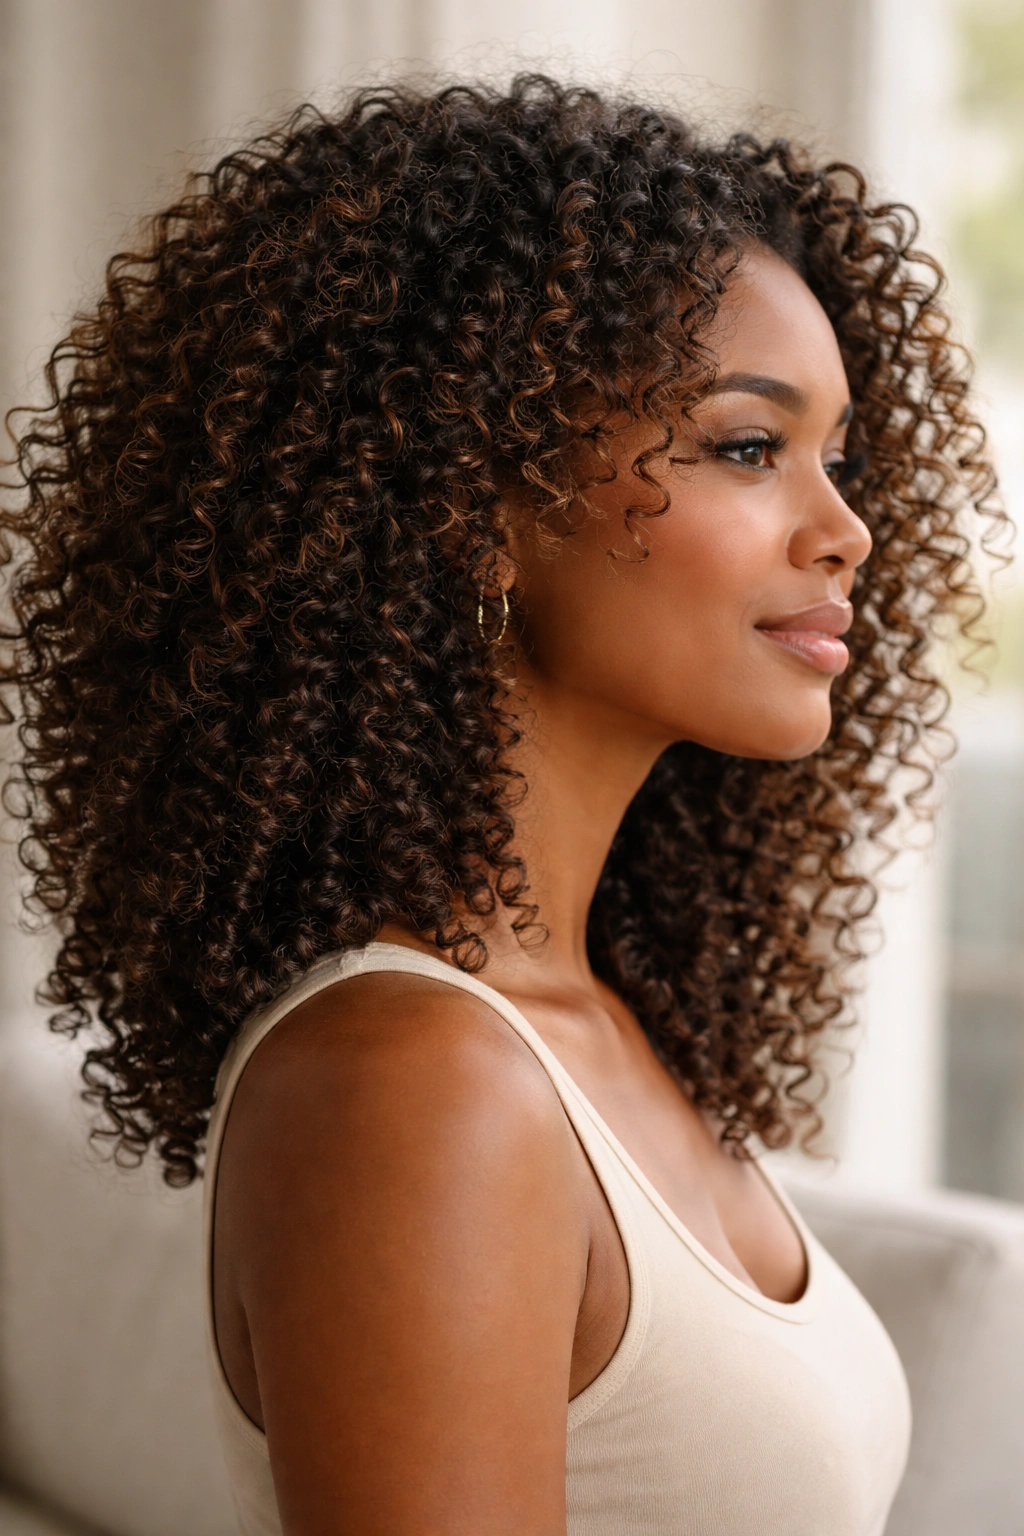
Curly hair thrives when you stop fighting it and start protecting it. The harsh truth? Many traditional hairstyles pull, tug, and create tension at the scalp and hairline that leaves curls damaged and prone to breakage. But here’s what most people miss: low tension hairstyles aren’t just gentler — they actually help your curls grow stronger, healthier, and more defined over time.
The thing is, curly hair is naturally delicate. Each strand has a unique texture with natural bends and coils that respond beautifully to methods designed to work with that structure rather than against it. When you eliminate unnecessary tension, you’re not just preventing damage — you’re creating an environment where your curls can flourish without constant stress at the roots.
Low tension styling is particularly powerful because it accomplishes two things simultaneously. You get to express your personal style and experiment with different looks, and you’re simultaneously protecting your hair’s health and longevity. It’s not a trade-off between looking good and keeping your hair intact — it’s having both.
Whether you’re recovering from years of high-tension styling, trying to grow your curls longer, or simply wanting to give your hair a break, these 12 low tension hairstyles deliver gorgeous results while keeping your scalp, hairline, and curls safe. Each one is designed to be worn comfortably without tugging, pulling, or creating visible tension lines.
1. The Pineapple Method
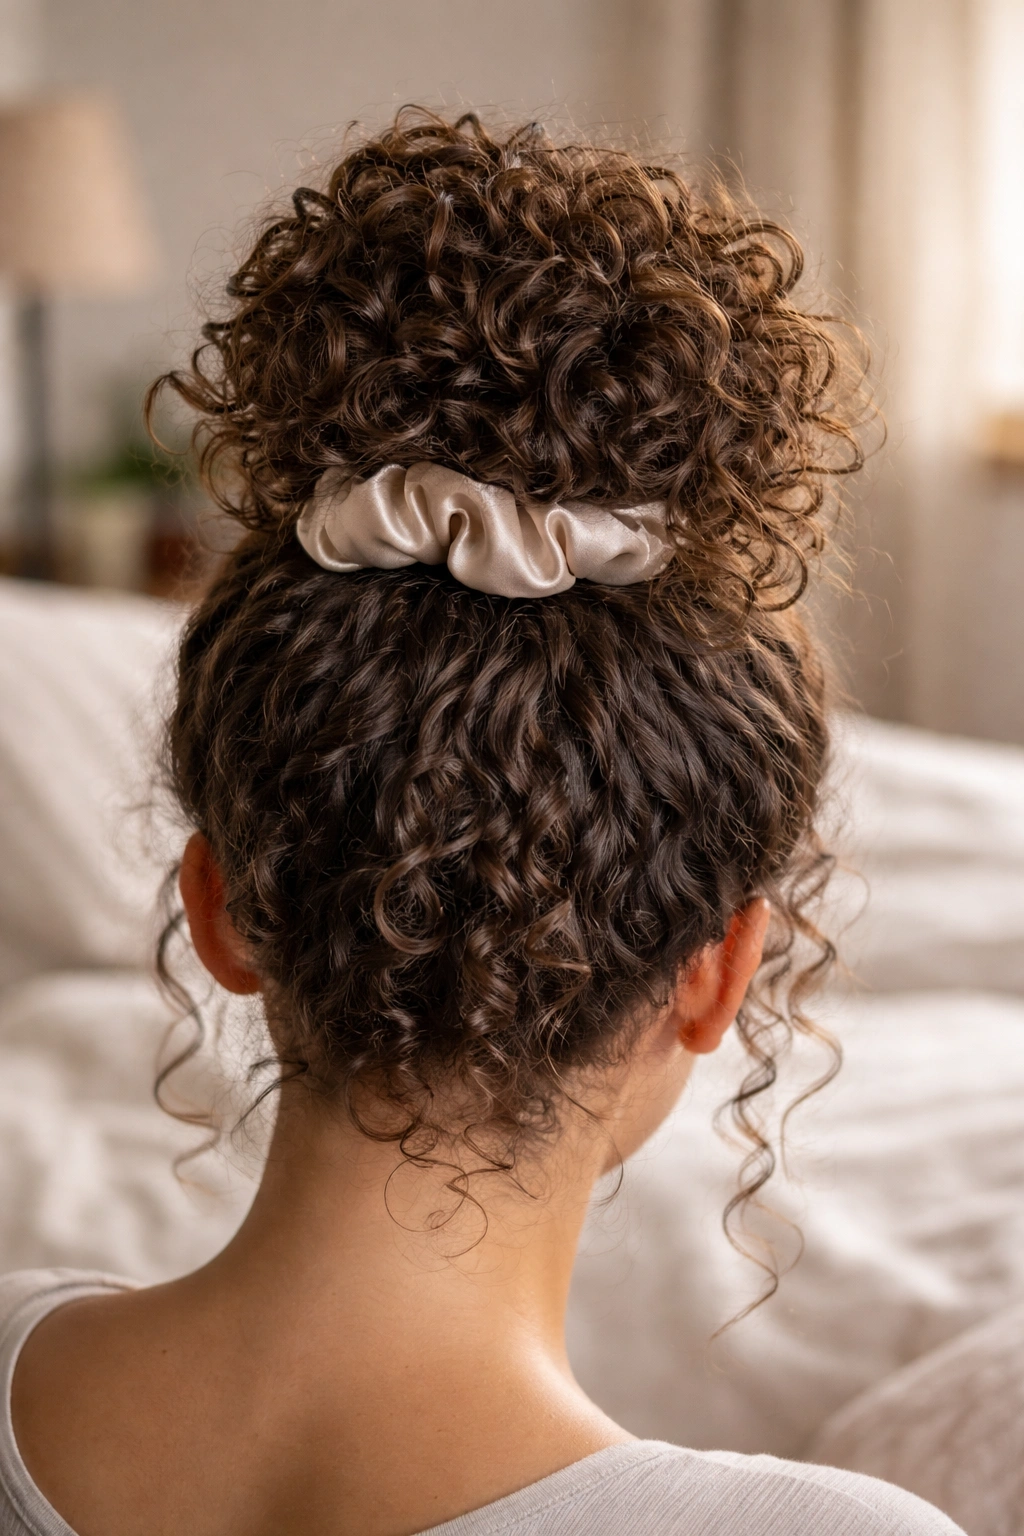
The pineapple is one of the gentlest protective styling methods available, and it takes literally 30 seconds to create. You gather your curls loosely on top of your head using a silk or satin scrunchie, positioning it so the bulk of your hair sits high like a pineapple fruit, leaving the ends free to cascade down slightly. The magic is in the looseness — if your scrunchie is tight enough to leave a mark on your wrist, it’s too tight for your hair.
Why This Protects Your Curls While You Sleep
The pineapple method keeps your curls from getting flattened, matted, or frizzy during the night while eliminating the tension of traditional updos. Because you’re not twisting, braiding, or sectioning your hair, there’s no strain on individual strands or your scalp. Your curls maintain their pattern and definition overnight while staying compressed just enough to prevent friction damage.
How to Get It Right
- Use a silk or satin scrunchie, never a elastic hair tie or rubber band — metal or friction-causing materials cause breakage every single time
- Gather your hair loosely at the crown so the scrunchie sits approximately 2-3 inches above the top of your head
- Leave the front hairline completely untouched and tension-free — this is the most fragile area and never needs to be involved in any styling
- You should be able to fit two fingers easily inside the scrunchie without compression — if it feels snug, loosen it immediately
- This method works best when your curls are already set (not freshly washed), so nighttime styling is ideal
Pro tip: If you find that your pineapple is still causing slight marks on your curls, try using a silk pillowcase and the pineapple method together — the combination creates the ultimate low-tension sleep situation.
2. Bantu Knots for Curl Definition
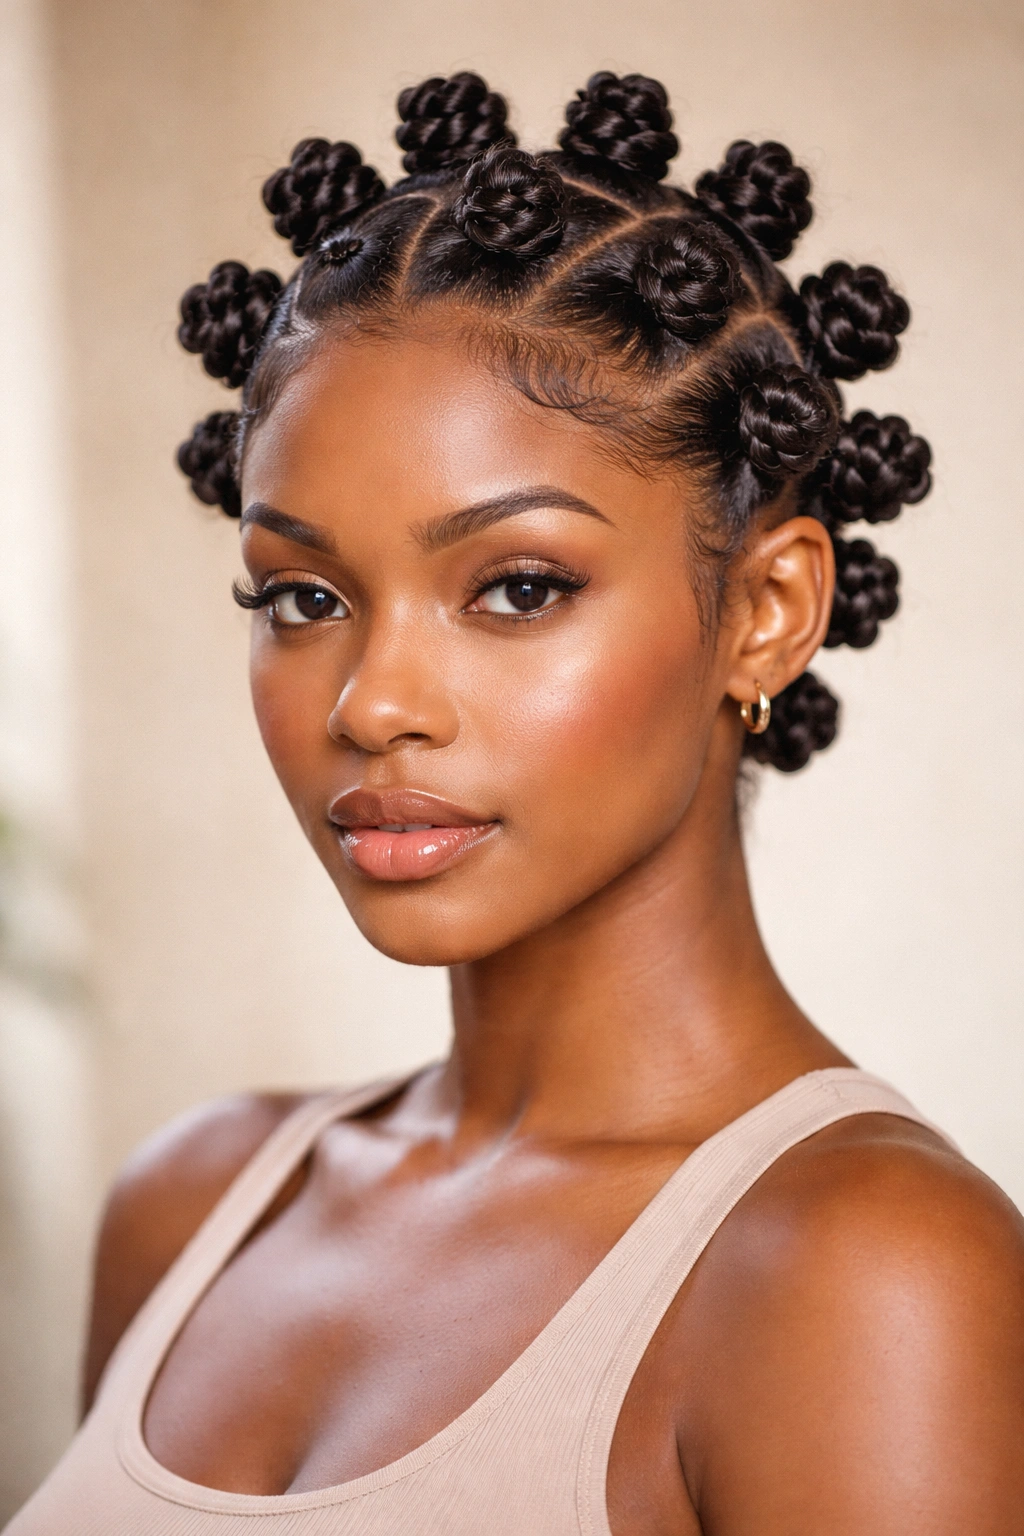
Bantu knots are a classic African styling technique where small sections of hair are twisted and then wrapped around themselves to create knot-like formations. They’re exceptionally gentle because each knot uses a small section of hair, distributing any tension evenly rather than creating pressure points. The result is beautifully defined curls that emerge when you release the knots, plus a striking aesthetic that works as a finished style or as a protective base for other looks.
The Curl-Enhancement Magic
Bantu knots work by setting your curl pattern in a more compact form, which means when you release them, your curls emerge with enhanced bounce, definition, and shape. Unlike tight braids or twists that can create artificial kinks, bantu knots work with your natural curl pattern to amplify what’s already there. The size of each knot determines your final curl size — smaller knots equal tighter, bouncier curls; larger knots give you looser, wavier results.
Setting Perfect Bantu Knots
- Section your hair into 8-12 sections (depending on how defined you want your curls to be) using clip-in sections to keep them organized
- Take one section and gently twist it from root to tip, keeping the twist loose and relaxed — this shouldn’t feel tight or strain your scalp
- Once twisted, wrap the twisted section around itself in a circular motion and secure the end with a small bobby pin or fabric wrap
- Mist each knot lightly with water or a light leave-in conditioner to help set the pattern
- Allow to dry completely (or sleep on them wet if you have time) before gently unraveling each knot to reveal defined, voluminous curls
- Avoid creating tension at the scalp by never pulling the hair taut while twisting — your twist should feel relaxed and soft
Insider note: Bantu knots look stunning as a finished style on their own, which means you can wear them as a statement look or as a protective style that actually celebrates your curls rather than hiding them.
3. Loose, Chunky Braids
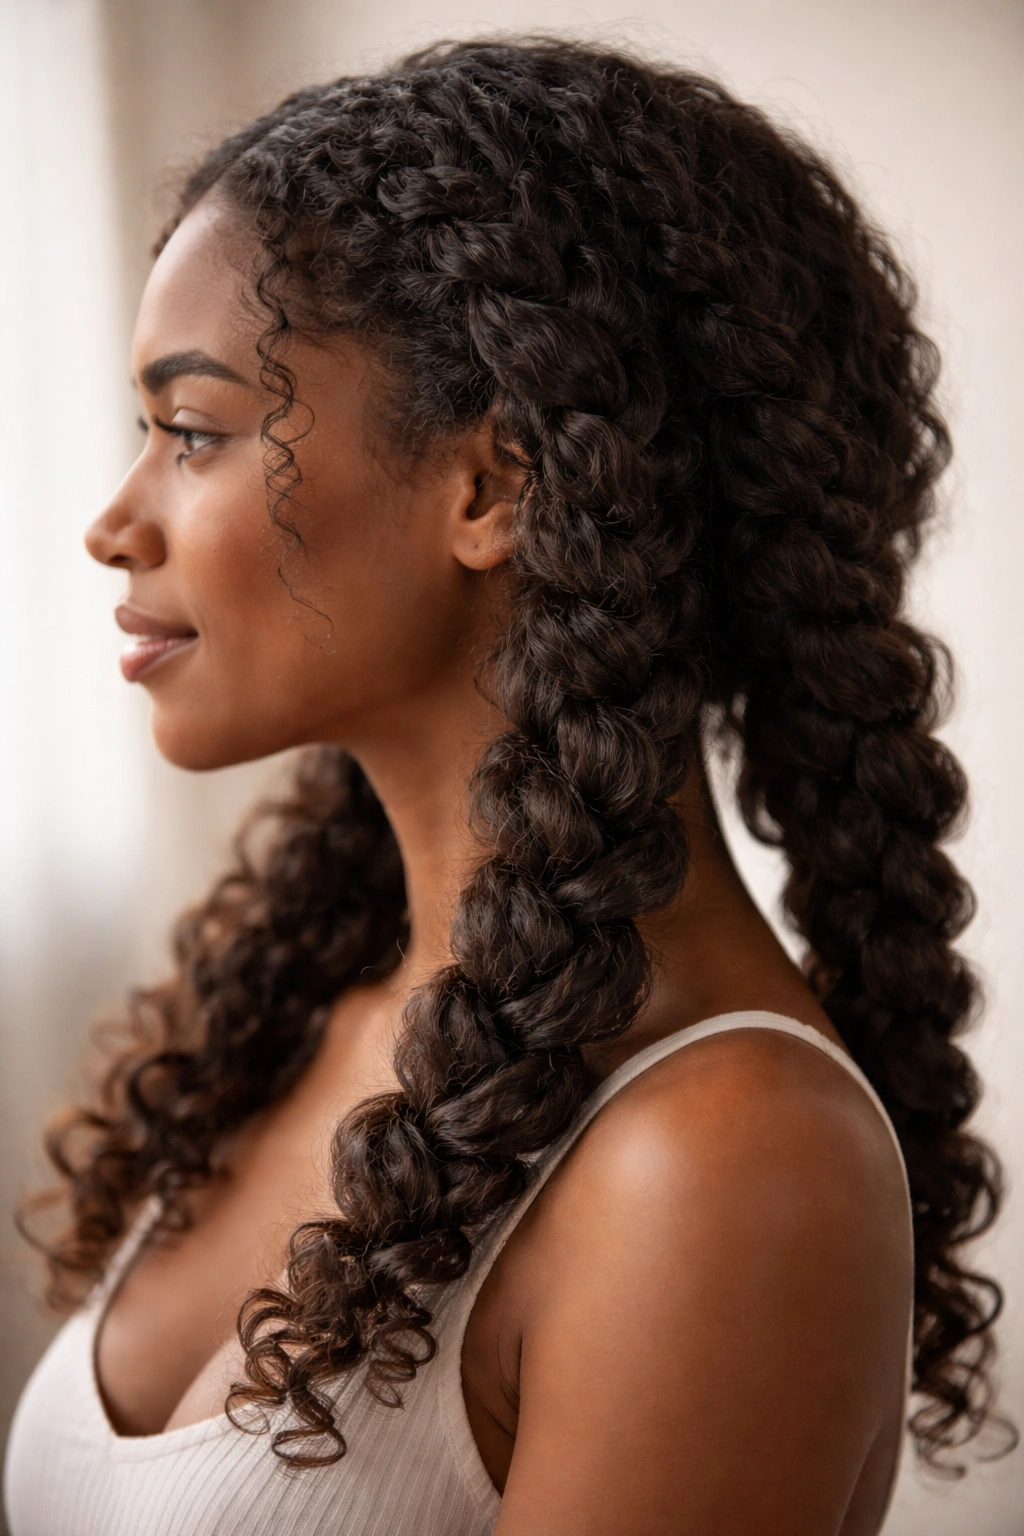
Loose braids are fundamentally different from tight, protective braids — and that difference is everything. Instead of creating uniform, tight sections that compress your curls, chunky braids use thicker sections and maintain a relaxed tension throughout, which means your curls stay somewhat visible even within the braid and experience zero scalp stress. A true low-tension braid should feel gentle enough that you forget you’re wearing one, yet structured enough to protect your curls from friction.
Why Braids Matter for Curly Hair
Braids protect the individual strands along the length of your hair by keeping them from rubbing against each other or against your shoulders and clothing. Curly hair is prone to friction damage because the bent structure means strands rub against each other more than straight hair does. A loose braid lets your curls express themselves while providing that protective barrier — it’s basically a gentle container for your curl pattern.
Creating Braids Without Tension
- Start with clean, detangled curls that are already defined or have product in them for grip
- Divide your hair into three chunky sections (much thicker than traditional braids) — think roughly 2-3 inches per section
- Begin braiding slowly, keeping each crossing of sections relaxed and loose — you should be able to fit two fingers inside the braid without resistance at any point
- Never pull the sections taut or compress them; instead, let them naturally interlock and hold their position through their own weight
- Braid all the way down or braid only halfway and secure, then leave the bottom half out for a half-braid, half-down look
- Secure with a silk scrunchie, never a tight elastic
Worth knowing: You can braid damp hair and let it air dry for a beautiful texture that combines braided definition with curly movement, or braid dry set curls for a more sculptural look.
4. Twist Outs for Texture and Hold
A twist out starts with two-strand twists that are created while your hair is damp, left to set and dry (either overnight or for several hours), and then gently unraveled to reveal beautifully defined curls with incredible texture and hold. The beauty of twist outs is that the twisting process itself can be completely tension-free, and the results are some of the most defined, long-lasting curls you can create without heat or manipulation. The relaxed twisting creates structure without stress.
How Twists Create Definition Without Damage
When you twist damp hair, you’re essentially teaching your curls to take on a specific pattern. Unlike braids that compress, twists interlock two strands around each other, which means your curls stay relatively separated and visible even while twisted. The tension comes entirely from the grip you’re creating — if you twist gently, there’s minimal tension; if you twist tightly, tension increases. For low-tension styling, gentle twisting is non-negotiable.
The Complete Twist-Out Process
- Start with damp (not soaking) hair and apply a light leave-in conditioner or curl cream to add slip and hold
- Section your hair into 4-8 sections depending on how defined you want your results and your hair’s thickness
- Take two strands from one section and gently twist them around each other from root to tip, maintaining relaxed tension throughout — your fingers should be guiding, not gripping
- Once twisted, coil the entire twist around itself at the ends and secure with a small clip or fabric tie
- Allow to air dry completely (this takes 8-24 hours depending on thickness and humidity) before gently unraveling each twist
- For maximum definition, unravel slowly and deliberately from bottom to top, allowing each curl to separate fully
Quick fact: Two-strand twists typically last 7-14 days as a protective style, which means you get extended wear and continuous curl definition without repeatedly styling or manipulating your hair.
5. The Wash-and-Go Method
A wash and go is deceptively simple: you wash your hair, apply products to damp curls, let them air dry, and go about your day with minimal additional manipulation. The low-tension magic happens because you’re not creating any style structure at all — no twisting, braiding, or gathering. Your hair sits completely loose and unrestricted while drying, which means zero tension anywhere on your scalp or hairline. It’s the ultimate hands-off approach.
Why Wash-and-Gos Work for Curl Health
The wash and go respects your hair’s natural curl pattern and allows it to set into its authentic shape without any external manipulation. Your curls are free to form their own structure based on their own unique DNA. This method works best for hair that has a defined curl pattern and responds well to moisture, since the definition comes entirely from your curl’s natural texture rather than from styling technique. There’s zero pulling, zero tension, zero stress.
Nailing Your Wash-and-Go
- Shampoo or co-wash your hair gently, focusing on your scalp without aggressive rubbing — let the water do the cleaning
- While hair is still dripping wet, apply a leave-in conditioner and a curl-defining cream or gel to each section, scrunching upward to encourage curl formation
- You can gently finger-comb or use a wide-tooth comb for detangling while wet, but avoid brushing once curls start forming
- Allow your hair to air dry completely, undisturbed (avoid touching, fluffing, or arranging while it dries) — disruption breaks curl clumps
- Once completely dry, you can gently shake out your curls with your fingers if needed, but otherwise leave them as they set
- Refresh on non-wash days using a spray bottle of water and a light product to reactivate your curls
Pro tip: The wash and go works even better when you sleep on a silk pillowcase, which prevents friction damage and helps your curls maintain their shape and definition overnight.
6. Stretched Styles Using Hair Banding
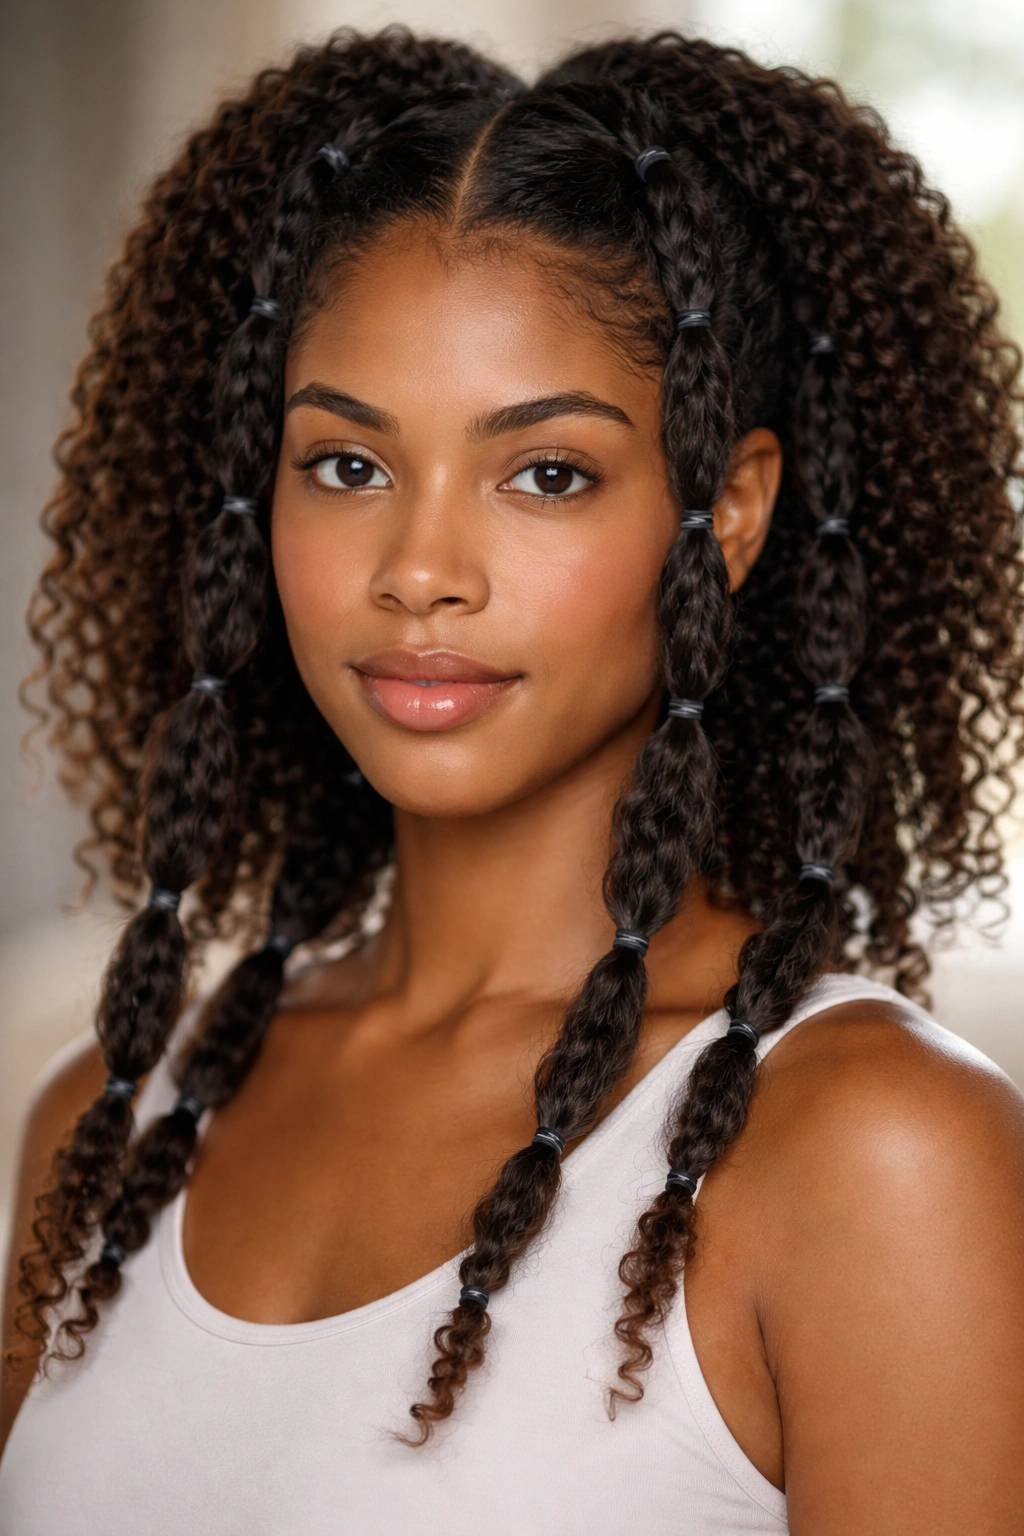
Hair banding is a technique where you wrap small sections of hair with elastic bands, creating temporary tension that stretches your curls without the permanent damage that heat-stretching causes. When the bands are removed, your curls emerge looser and more elongated than their natural state, which means you get a style variation without any heat damage. The key to low tension is using gentle bands and not leaving them on so long that they create permanent creases or break your hair.
The Curl-Stretching Science
Banding works by using temporary compression to physically stretch curl patterns. This is completely different from heat-stretching because there’s no thermal damage to the cuticle layer. Your hair simply takes on a stretched position temporarily, then returns to its natural form when the bands are removed. This is an excellent technique when you want elongated curls without looking dramatically different, or when you want to achieve straighter-looking styles without relaxers or permanent damage.
The Right Way to Band Your Hair
- Start with clean, damp curls and apply a leave-in conditioner for slip and hold
- Create 4-8 sections depending on desired stretch (more sections = more texture; fewer sections = smoother appearance)
- Take one section and use a small elastic band to compress it about one inch from the roots, then add another band 1-2 inches down, continuing down the entire length
- The bands should be snug enough to hold the stretched position but loose enough that you don’t feel tension or discomfort — you should be able to slide your finger under each band easily
- Leave bands in for 6-8 hours (or overnight for maximum stretching) before gently removing them
- Avoid sleeping with bands too tightly positioned, and never leave them on for more than 12 hours, as extended compression can cause breakage
Insider note: Banding works beautifully on twist outs or braid outs — you can braid or twist damp hair, let it dry, release it, then add bands for even more texture variation and styles.
7. Loose Space Buns Positioned Without Tension
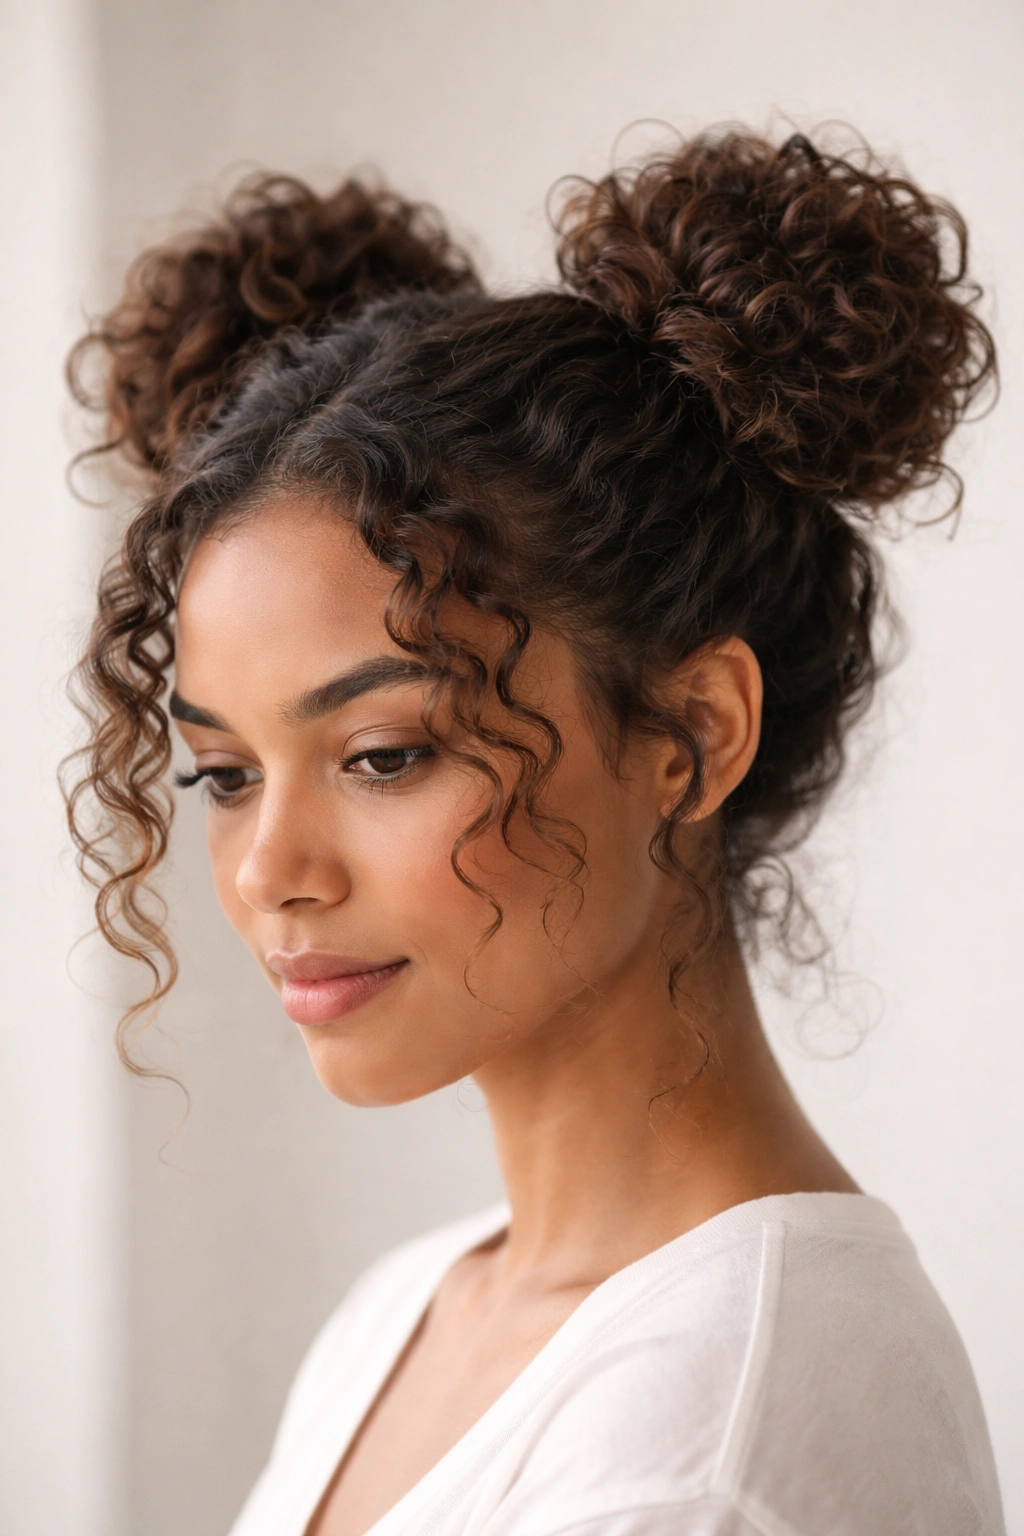
Space buns (two buns positioned on the crown) are playful and protective, but they only qualify as low-tension when positioned correctly and created loosely. The mistake people make is gathering the hair too tightly at the center or positioning the buns so they pull on the hairline. A true low-tension space bun is positioned higher on the crown, gathered loosely, and sits completely comfortable without any pulling sensation anywhere on your scalp.
Creating Buns That Protect Without Pulling
Space buns work because they’re a contained upstyle that keeps your curls from experiencing friction with shoulders, clothing, or external surfaces while you go about your day. The key is creating them with zero tension and positioning them away from your hairline. Your front hairline, temples, and the nape of your neck should all be completely untouched and free of any styling, which is where most scalp stress occurs with traditional updos.
The Low-Tension Space Bun Method
- Start with clean or refreshed curls that have definition (freshly washed curls work best)
- Create a deep side part so that one side has significantly more hair than the other — this asymmetry actually reduces overall tension by using natural hair distribution
- Gather the larger side loosely at approximately the mid-crown area with a silk scrunchie — loose enough that you can fit two fingers inside the scrunchie
- Form that gathered section into a bun by coiling it around itself, then secure with bobby pins placed at the base with minimal tension
- Repeat on the smaller side, gathering it at approximately the same height or slightly lower for asymmetry
- Make sure both your hairline and temples feel completely relaxed and untouched — if you feel any pulling, loosen both buns immediately
- Leave wisps and baby hairs down intentionally for a soft, effortless look
Worth knowing: This style works beautifully as a nighttime protective style, a gym or activity style, or a cute casual look depending on how you finish it.
8. Flexi Rods for Bouncy Curls
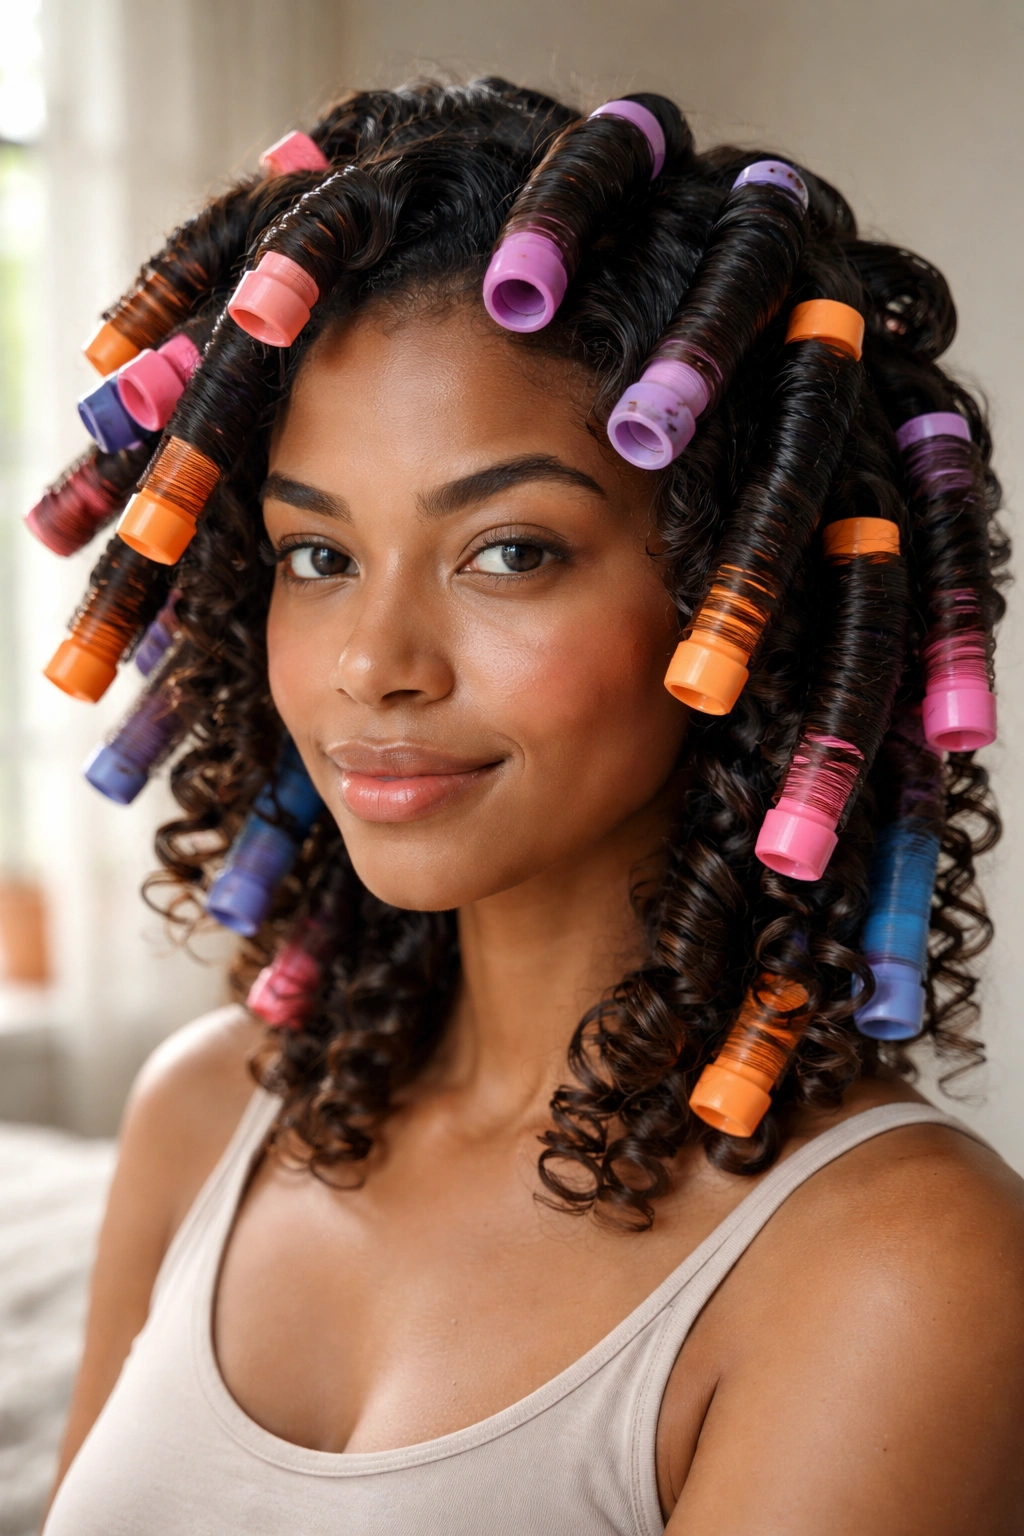
Flexi rods are soft, foam-covered rods that come in various diameters and allow you to wrap sections of damp hair around them for heat-free curl setting. Unlike rigid rollers, flexi rods are gentle because they’re flexible and conform to your head shape rather than digging in. You can sleep on them comfortably, wear them while going about your day, or leave them in while your hair air-dries. When removed, they create bouncy, defined curls without any heat damage or tension.
Why Flexi Rods Create Effortless Curls
Flexi rods work by setting your curl pattern in a more uniform, voluminous structure. Unlike braids or twists that create texture through intertwining, rods create curls through compression around a form. The advantage is that even fine or loosely-textured curls can achieve noticeable definition and bounce. The rods stay in place through their own grip and flexibility, with minimal need for tension or securing.
Using Flexi Rods Without Discomfort
- Apply flexi rods to damp (not soaking) hair that has leave-in conditioner or curl cream for slip and hold
- Choose rod size based on your desired curl size: larger rods create looser waves, smaller rods create tighter curls
- Take a section of hair and gently wrap it around the rod from ends to roots, keeping the tension relaxed — the hair should wrap smoothly without pulling
- The rod should sit comfortably against your scalp without digging in; if it feels uncomfortable, adjust it or choose a smaller or larger rod
- Allow to dry completely before gently unwrapping each rod by bending it and sliding the hair off — never pull the rod straight out
- For overnight wear, use smaller sections so rods don’t put pressure on any one area of your scalp
Pro tip: Smaller, thinner flexi rods actually create less scalp contact and are gentler than larger rods, so they’re ideal for anyone with a sensitive scalp.
9. Claw Clip Half-Up Styles
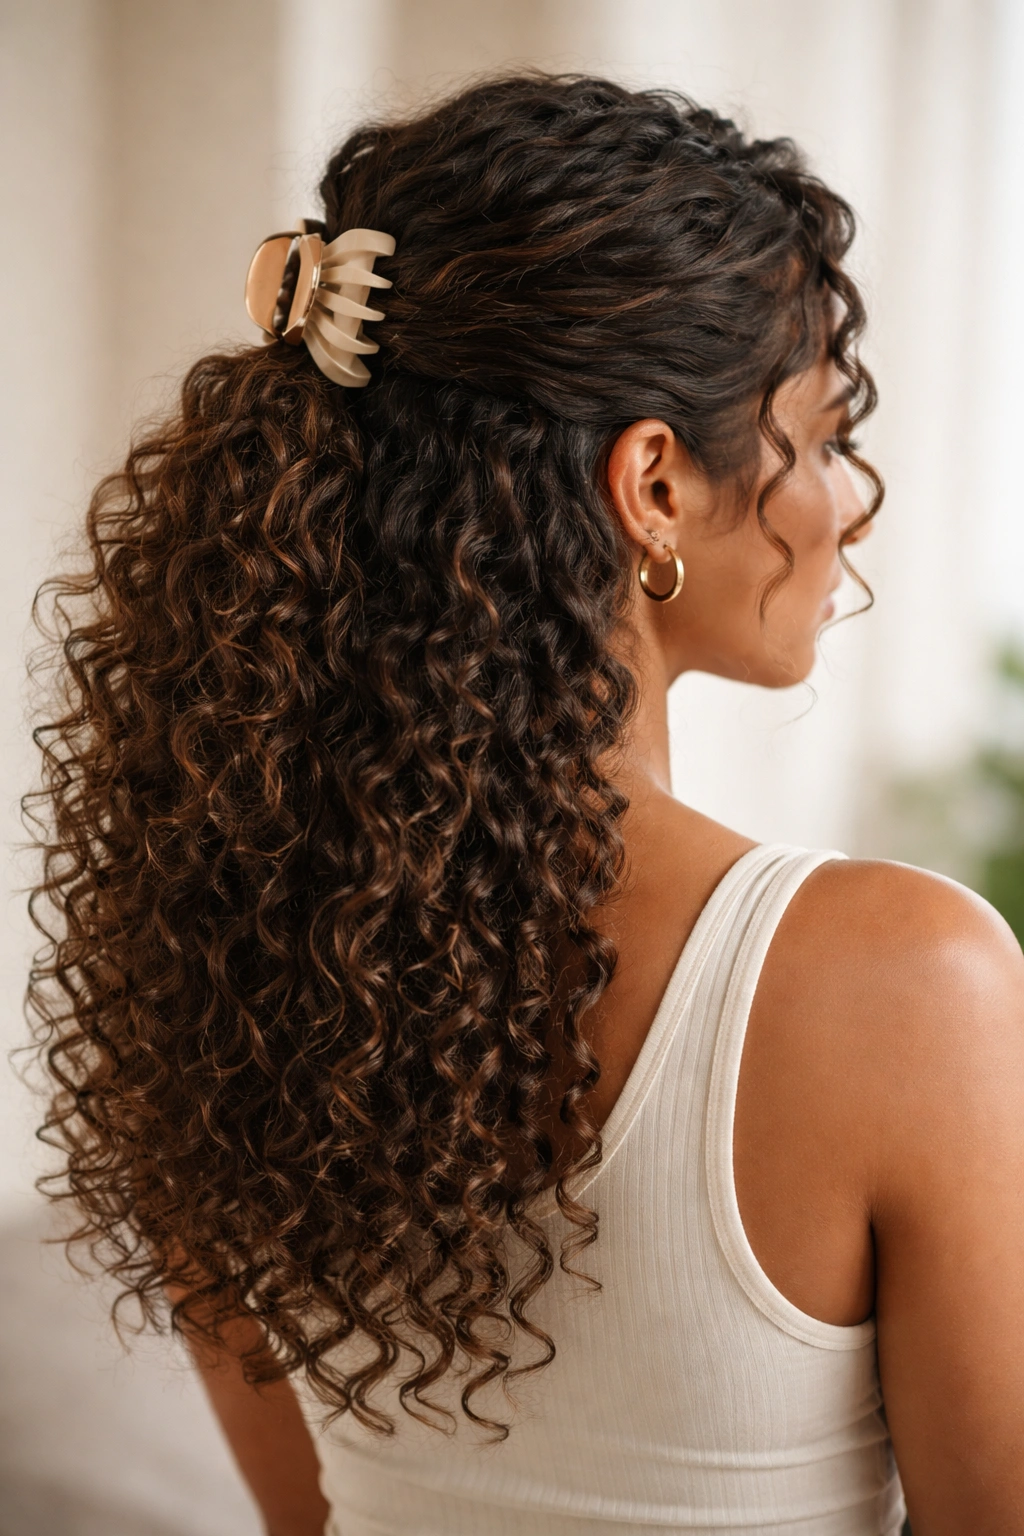
The claw clip half-up uses a large, smooth claw clip to secure only the top half of your hair while leaving the bottom half down and free. This style works because you’re only gathering a small amount of hair (the top section), which means minimal pressure on any one area of your scalp. Claw clips are gentler than scrunchies because they grip without compressing, and the smooth surface doesn’t catch or fray your hair the way elastic bands do. The result is a romantic, pulled-together look without the tension of traditional half-up updos.
The Low-Tension Half-Up Aesthetic
The claw clip half-up has become popular because it works beautifully for curly hair and actually shows off your curl definition rather than hiding it. The top section is secured just enough to look intentional, while your bottom curls cascade freely. This isn’t a tight, structured half-updo — it’s a relaxed half-up that uses gentle gathering and minimal compression. Your curls stay visible and unrestricted while still being off your face and neck.
Creating the Perfect Claw Clip Half-Up
- Start with curls that are already defined (same-day curls or refreshed second-day curls work best)
- Take only the top portion of your hair — imagine a line from one ear to the other ear and gather everything above that line
- Gather this section loosely at the crown without any tension or pulling; you’re not trying to create a sleek look but rather a soft, gathered appearance
- Use a large claw clip (at least 3-4 inches) to secure this gathered section; the clip’s weight should hold it in place without compression
- The front hairline, temples, and lower curls should all feel completely free and untouched
- You can leave some face-framing sections out intentionally for a softer, more effortless appearance
Pro tip: Tortoiseshell or metallic claw clips add visual interest and look intentional, making this style feel less like “I’m just holding my hair up” and more like a deliberate styling choice.
10. Low Ponytails Positioned for Zero Tension

A low ponytail is a classic style that becomes genuinely protective when positioned correctly and gathered loosely. The key difference between a tension-causing ponytail and a low-tension one is positioning and tightness. A true low-tension ponytail sits at the nape of your neck (not high on your crown), is gathered loosely with a silk scrunchie, and leaves your entire hairline and temple area completely untouched and stress-free. It’s a style you can wear daily without worry about damage.
Why Low Positioning Makes All the Difference
A high ponytail pulls and creates constant tension on the hairline, particularly at the temples and crown where breakage is most common. A low ponytail, positioned much closer to your neck, distributes any pressure much lower on the scalp where hair is thicker and more resilient. Additionally, by leaving your hairline completely untouched, you’re protecting the fragile hair around your face — this area is always most vulnerable to tension damage and breakage.
The Correct Low Ponytail Method
- Start with curls that are already set and defined (freshly washed or refreshed curls work beautifully)
- Position your hand at the very nape of your neck, roughly centered between your two ears
- Gather all your hair at this low position using only gentle pressure — think of loosely collecting your hair rather than tightly gathering it
- Secure with a silk scrunchie, ensuring it’s loose enough that you can fit two fingers inside without resistance
- Your front hairline, temples, and the sides of your face should feel completely free and untouched; if anything feels tight, loosen the ponytail immediately
- You can leave some curls out around your face intentionally for a softer look, or let some shorter layers fall out naturally for a romantic, undone appearance
Insider note: A low ponytail becomes even gentler if you loosely braid it or twist it, turning it into a low twisted ponytail or low braided ponytail — you get even more protection without creating tension.
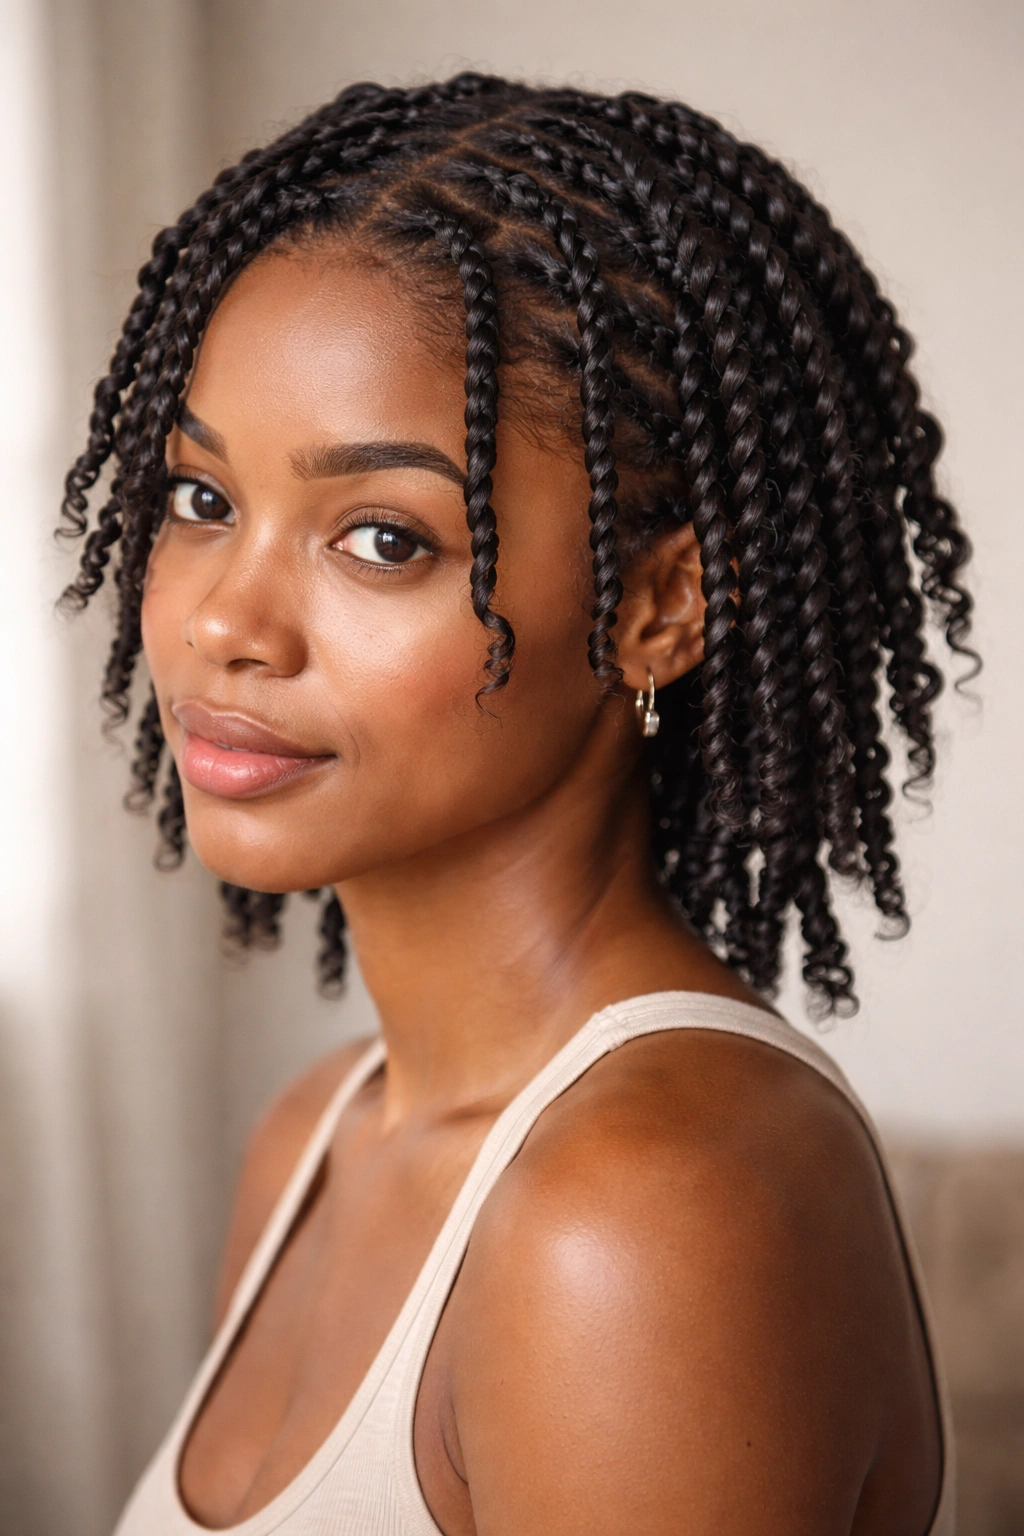
11. Chunky Two-Strand Twists as a Finished Style
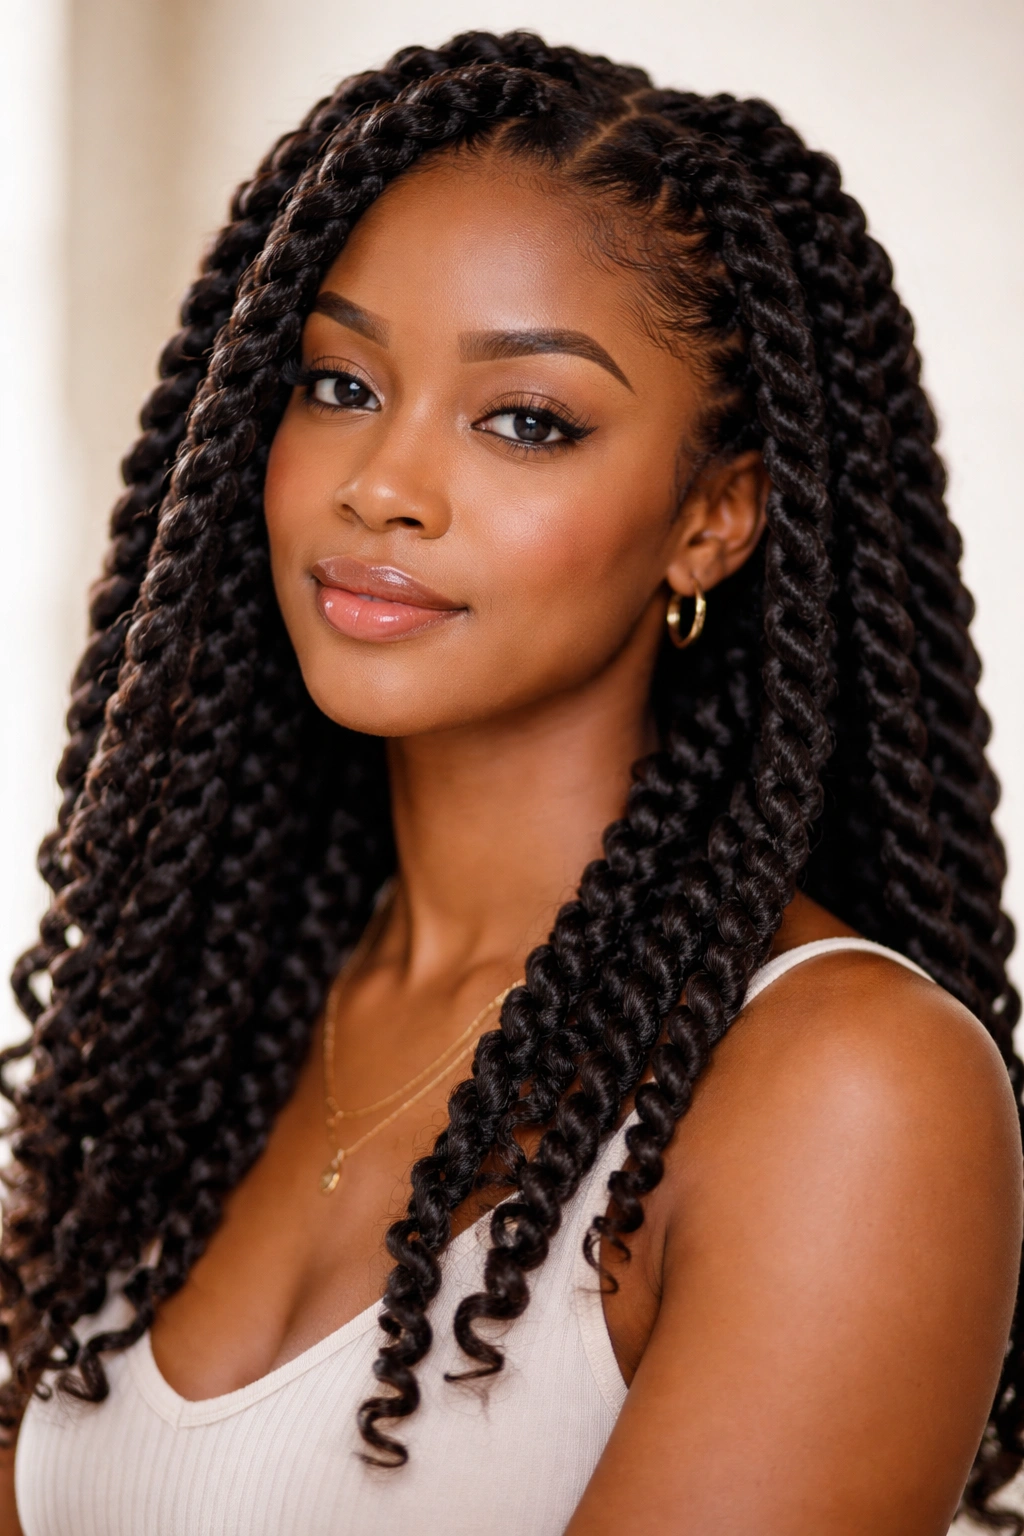
Two-strand twists are typically thought of as a protective style that you wear for 1-2 weeks and then take down. But chunky twists can also be a finished style that you wear for just a few days or a week as your primary look. The difference is in the chunking — instead of creating many small twists, you create fewer, thicker twists that are easier to manage, faster to install, and genuinely look like an intentional hairstyle rather than a protective base for another style. Chunky twists are effortless, low-tension, and strikingly beautiful.
The Chunky Twist Advantage
Chunky two-strand twists use thick sections of hair, which means fewer twists overall, less time spent installing them, and less manipulation to your hair. The larger twists showcase your curl texture within the twist structure itself, making this style feel more intentional and polished than traditional protective twists. Each section is twisted loosely and gently, and the final look is sophisticated enough to wear anywhere — to work, out socially, or casually around town.
Creating Chunky Twists as a Style
- Apply leave-in conditioner or a twist cream to damp or slightly damp hair for slip and definition
- Section your hair into 4-6 large sections (much thicker than traditional twists) — think roughly 3-4 inches per section depending on hair thickness
- Take two strands from one section and gently twist them around each other from roots to tip, keeping the twist relaxed and loose throughout
- You should be able to see your curl texture within the twist, which means the twist is relaxed enough that your natural pattern shows through
- Once twisted all the way down, you can leave the ends loose and fuzzy, or coil the ends slightly and clip them to prevent unraveling
- Allow to set for 2-4 hours (or overnight) before gently fluffing and separating the twists slightly for definition
- Wear as-is for 5-7 days as an effortless, low-manipulation protective style
Worth knowing: Chunky twists look even better on day 2 or 3 after installation when they’ve relaxed slightly and your curl pattern shows through more prominently.
12. Curl Clips for Gentle Uplift
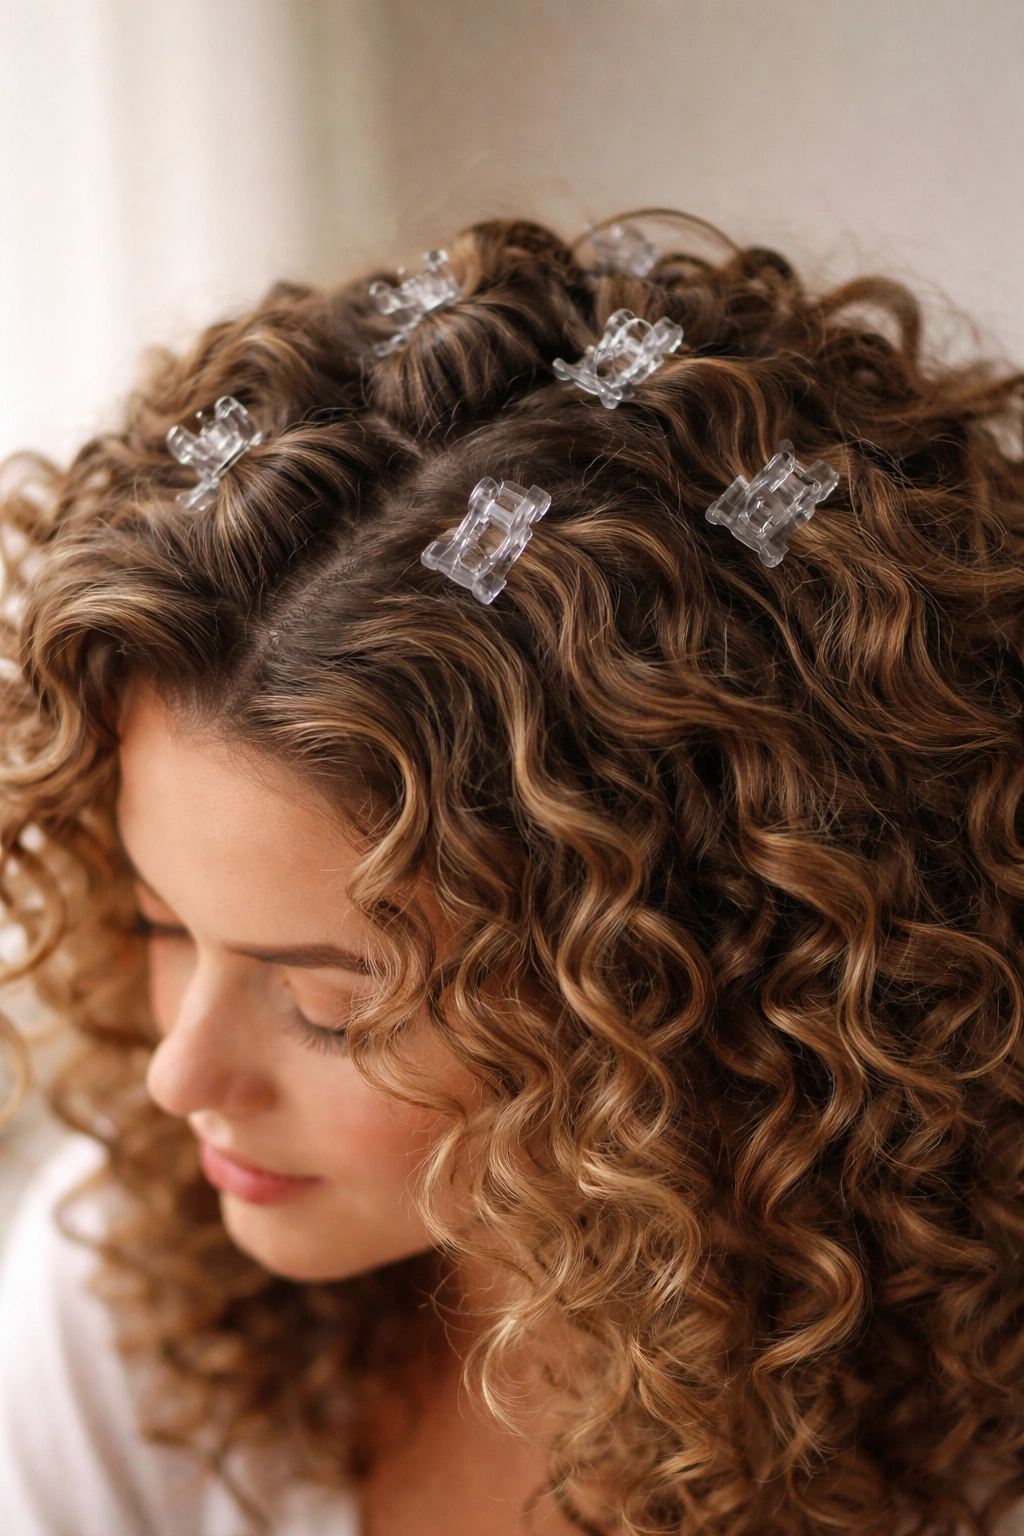
Curl clips (also called butterfly clips or claw clips in various sizes) can be used to gently lift and secure sections of curls without gathering them tightly or creating compression. Unlike buns or ponytails that compress all your hair into one gathered point, curl clips hold curls in place by gripping them individually or in small groups. You can use multiple clips throughout your hair to create volume, definition, and lift without any tension at your scalp or hairline. This technique is particularly gentle because clips rest on your hair rather than pulling it.
How Clips Create Support Without Tension
Curl clips work by using gentle grip to hold curls in their desired position while they set. This is fundamentally different from tension-based styling because the clip isn’t compressing or pulling — it’s simply holding. You can position clips at the roots to create lift and volume, use them throughout to define curl clumps, or strategically place them to create a particular shape. Your scalp remains untouched and stress-free the entire time.
Using Clips for Low-Tension Support
- Start with damp or freshly refreshed curls that you want to set or shape
- Identify areas where you want lift, volume, or definition — typically at the roots for lift, throughout the length for clump definition, or strategically at the sides for shape
- Take a curl clump and gently clip it in your desired position using a small to medium clip that holds without crushing the curl
- The clip should sit securely but not pinch or compress your curls — if your clip is creating a dent or flat spot, loosen it or use a gentler clip
- Leave clips in place while your curls set (1-3 hours) or overnight, then gently remove for voluminous, defined curls
- You can use anywhere from 2-6 clips depending on your hair thickness and desired definition
- This method works beautifully on wet hair for gentle setting, or on refreshed second or third-day curls for re-definition
Pro tip: Smaller clips are generally gentler than large clips because they distribute pressure over a smaller surface area, making them ideal for fine or fragile curls.
Final Thoughts
Low tension styling isn’t just about preventing damage — it’s about embracing your natural curl pattern while giving your hair the respect and gentleness it deserves. Every single one of these styles eliminates unnecessary pulling, compression, or stress at your scalp and hairline, which means you can style your curls freely without guilt or worry about long-term damage.
The beautiful truth that changes everything: your curls will actually grow faster, stronger, and more resilient when you stop stressing them with tight styles. You’re not sacrificing style variety or aesthetic when you choose low tension — you’re actually gaining it. These methods offer you more options, not fewer, because your healthier hair can handle more styling without breaking. Your curls become stronger and more forgiving.
Start by trying whichever style resonates with your routine and lifestyle. If you sleep hot, maybe the pineapple or loose braid suits you better. If you love defined curls, bantu knots or twist outs deliver. If you’re short on styling time, wash and go or claw clip half-ups are your friends. Your hair will tell you what’s working — it will feel healthier, break less, grow longer, and hold style better. That’s how you know you’ve found your low-tension rhythm.