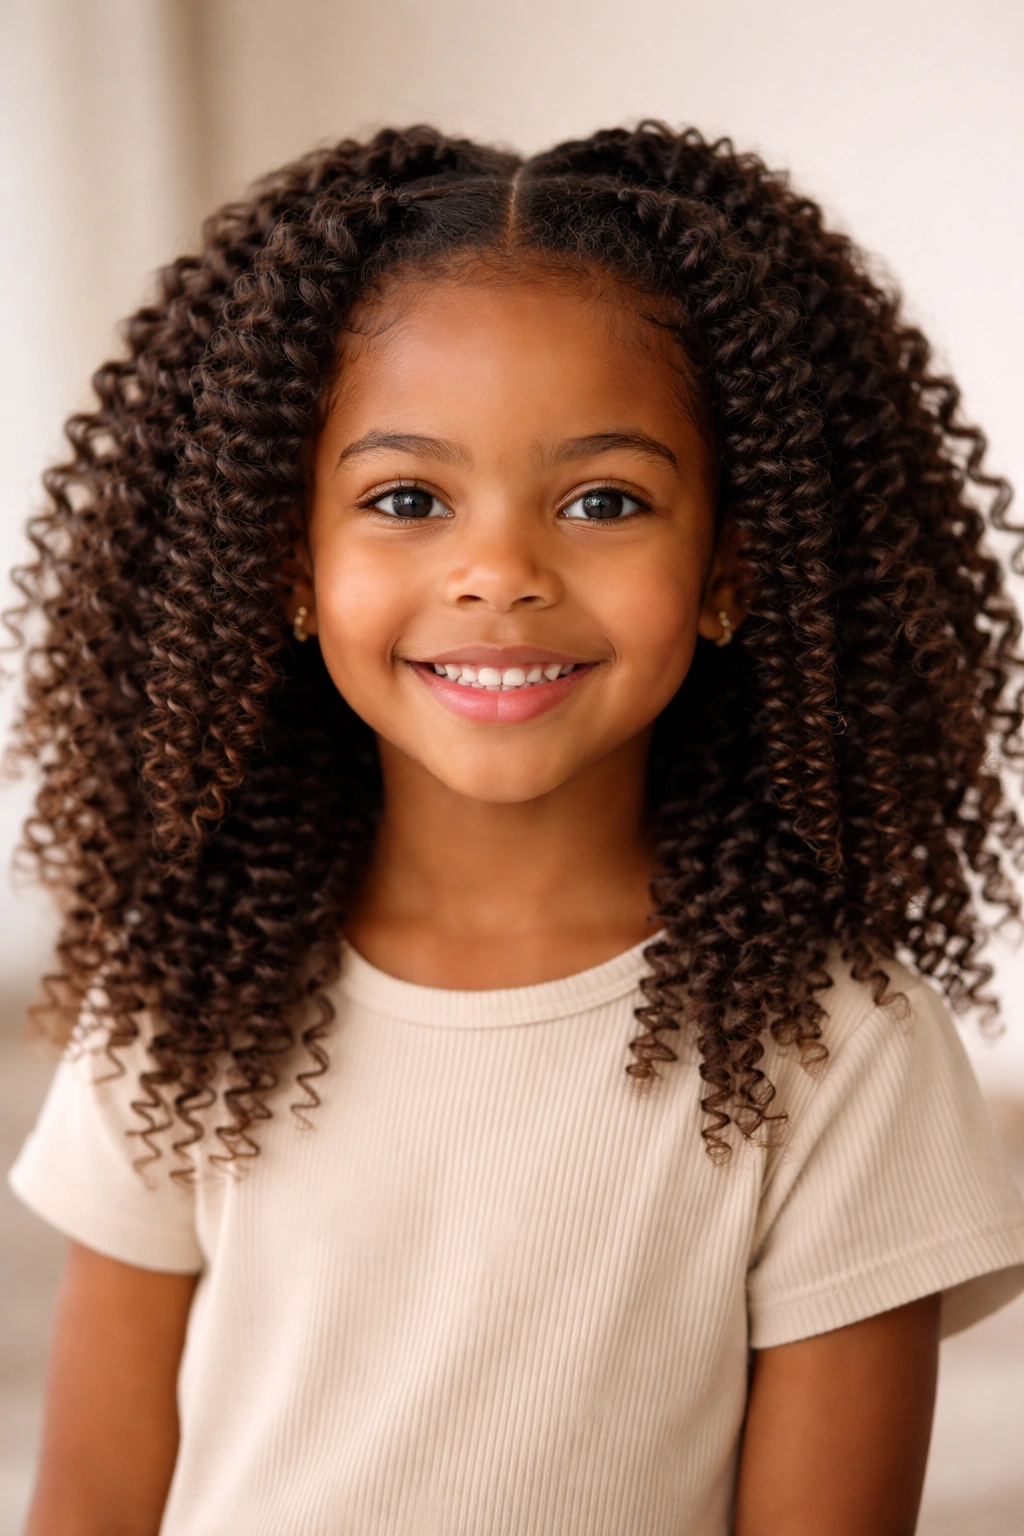
Kids with curly hair have such a beautiful canvas to work with, but finding hairstyles that are both cute and practical can feel overwhelming. The challenge isn’t just making it look good — it’s finding styles that protect the curls, stand up to active play, and don’t become a matted mess by day three. The right cut and styling approach can turn curly hair from a daily stress into your child’s best feature, and it opens up way more styling options than most parents realize.
The key to successful curly hairstyles for kids is understanding that curly hair needs moisture, defined boundaries (like braids or twists to set the curl pattern), and products that work with the texture rather than against it. Not every style works for every curl type or length, but the twelve hairstyles below cover everything from quick everyday looks to special occasion options that’ll make other parents ask for your secrets. Most of these can be maintained for several days between wash days, which means less manipulation and healthier curls in the long run.
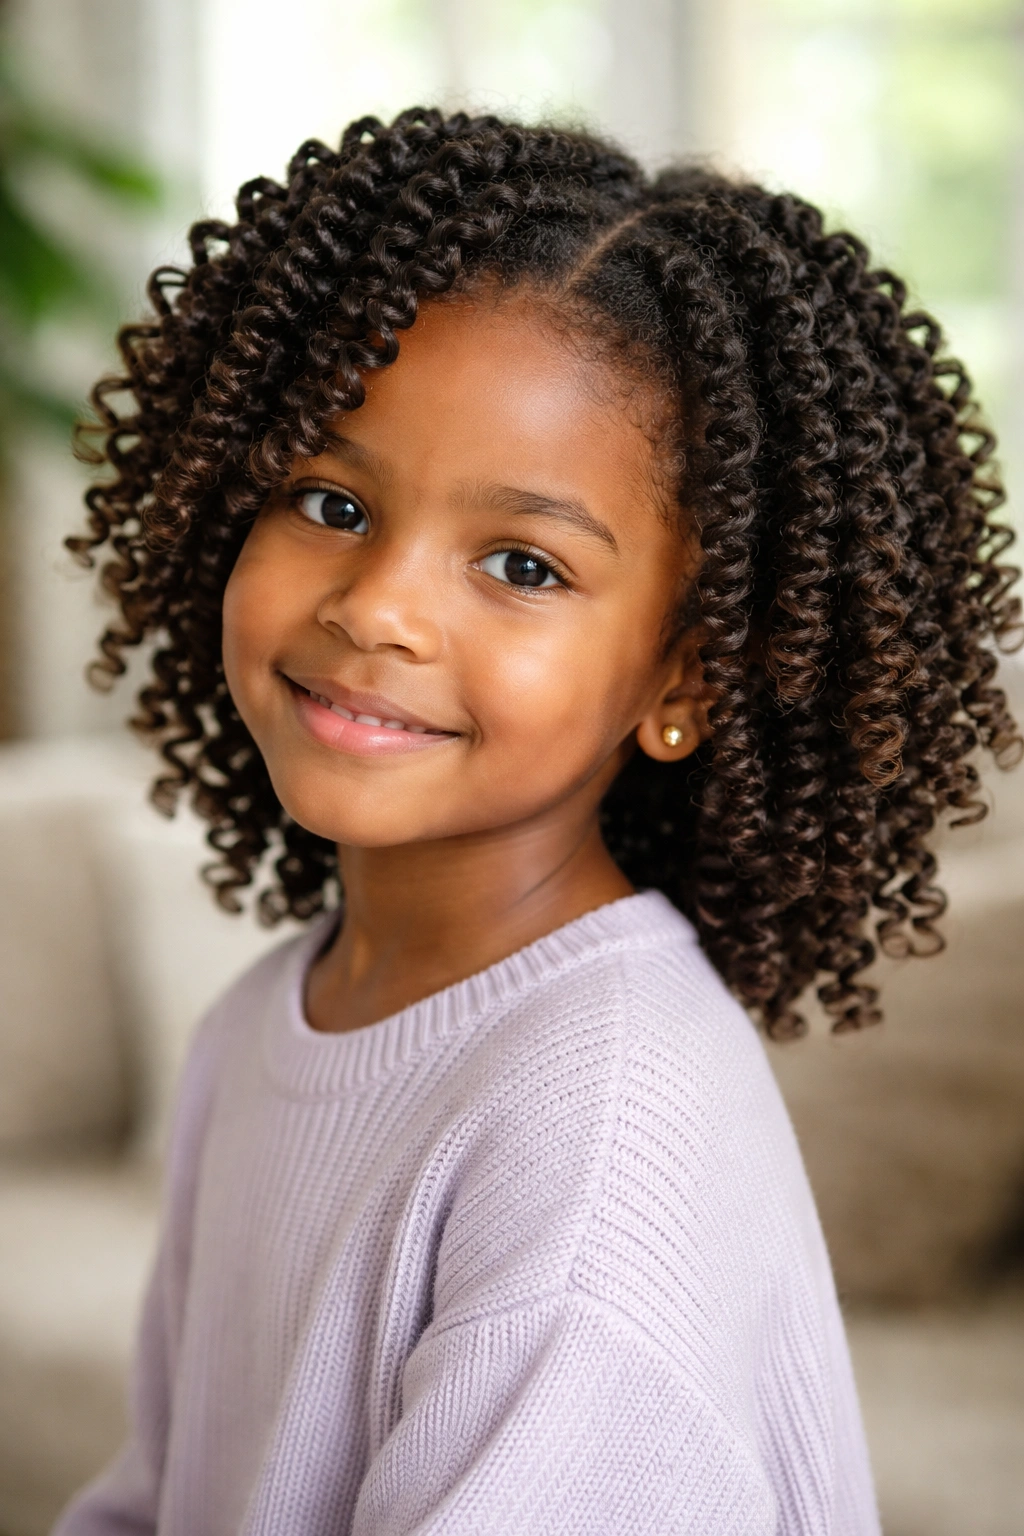
1. Braid-Out Style
A braid-out is one of the most reliable ways to stretch curly hair while adding definition and volume. You start with damp hair, section it into 4 to 8 braids (depending on how much curl definition you want), let them dry or air dry overnight, then unravel them the next morning for gorgeous crimped waves. The beauty of this style is that it actually works better for curly hair than straight hair — the braids grip the curls and set them into a specific pattern, so your child’s hair holds the look for days.
Why Braid-Outs Work So Well for Curly Hair
Braids create a controlled stretch that shapes the curl pattern while the hair sets. This gives you more volume at the roots and elongates the curl without using heat or harsh manipulation. For kids with medium to thick curls, a braid-out can make hair look fuller and more styled than wearing the curls loose would. Plus, it’s protective — the braids contain the hair and prevent frizz and breakage that come from constant friction against clothes or during sleep.
How to Create a Braid-Out
Start with damp (not soaking wet) hair and apply a curl-defining cream or leave-in conditioner to each section before braiding. Divide the hair into even sections — four large braids create a wavy effect, while six to eight braids give tighter waves. Braid from roots to ends and secure with a small elastic. Let the hair air dry completely or put your child to bed with the braids in. The next morning, gently unravel each braid starting at the bottom, then separate the curl pattern with your fingers for more texture. A light misting of water can refresh the style on day two or three.
Pro tip: A satin or silk scarf wrapped around the braids overnight helps them hold better and reduces frizz.
2. Twisted Updo
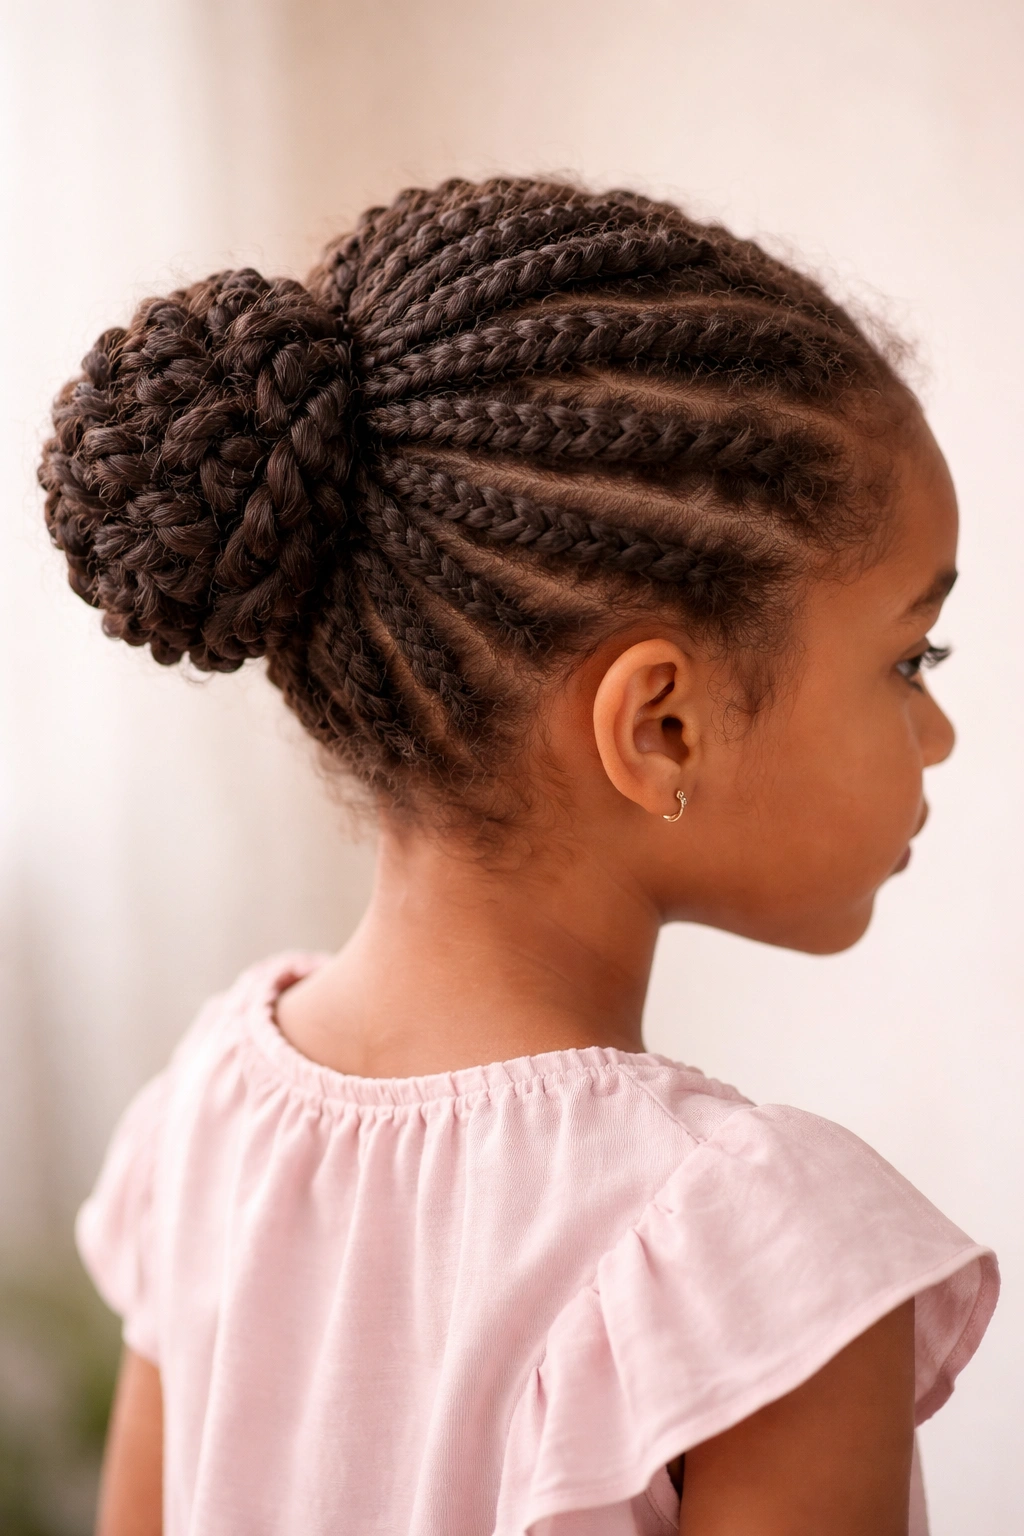
Two-strand twists are one of the most versatile and protective styles for curly-haired kids, and when you wrap them into an updo, you get something that’s fancy enough for school pictures but practical enough for everyday wear. You create individual two-strand twists throughout the hair, then coil them into a bun at the back of the head — it’s elegant without being fussy, and it keeps hair off the face and neck.
Why Updos Are Great for Active Kids
Updos keep curly hair contained, which means less tangling, less frizz, and less daily manipulation. For kids who play sports, attend dance class, or just move around a lot during the day, a twisted updo keeps hair secured without needing elastic bands that can cause breakage or leave marks. The style also looks polished enough for school events but doesn’t require redoing every single day — you can refresh it with a light spray of water and smooth any flyaways.
Steps to Create a Twisted Updo
Divide damp hair into 6 to 10 sections depending on thickness. Take one section and twist it into a two-strand twist all the way to the end, then wrap it around the base of your chosen bun area and secure with bobby pins. Continue twisting and wrapping each section until all the hair is incorporated. Use a light gel or edge control to smooth any baby hairs or flyaways around the hairline. The twists themselves add beautiful definition and texture to the look.
Worth knowing: This style lasts 4 to 7 days with proper care, making it genuinely low-maintenance despite how polished it looks.
3. Bantu Knots
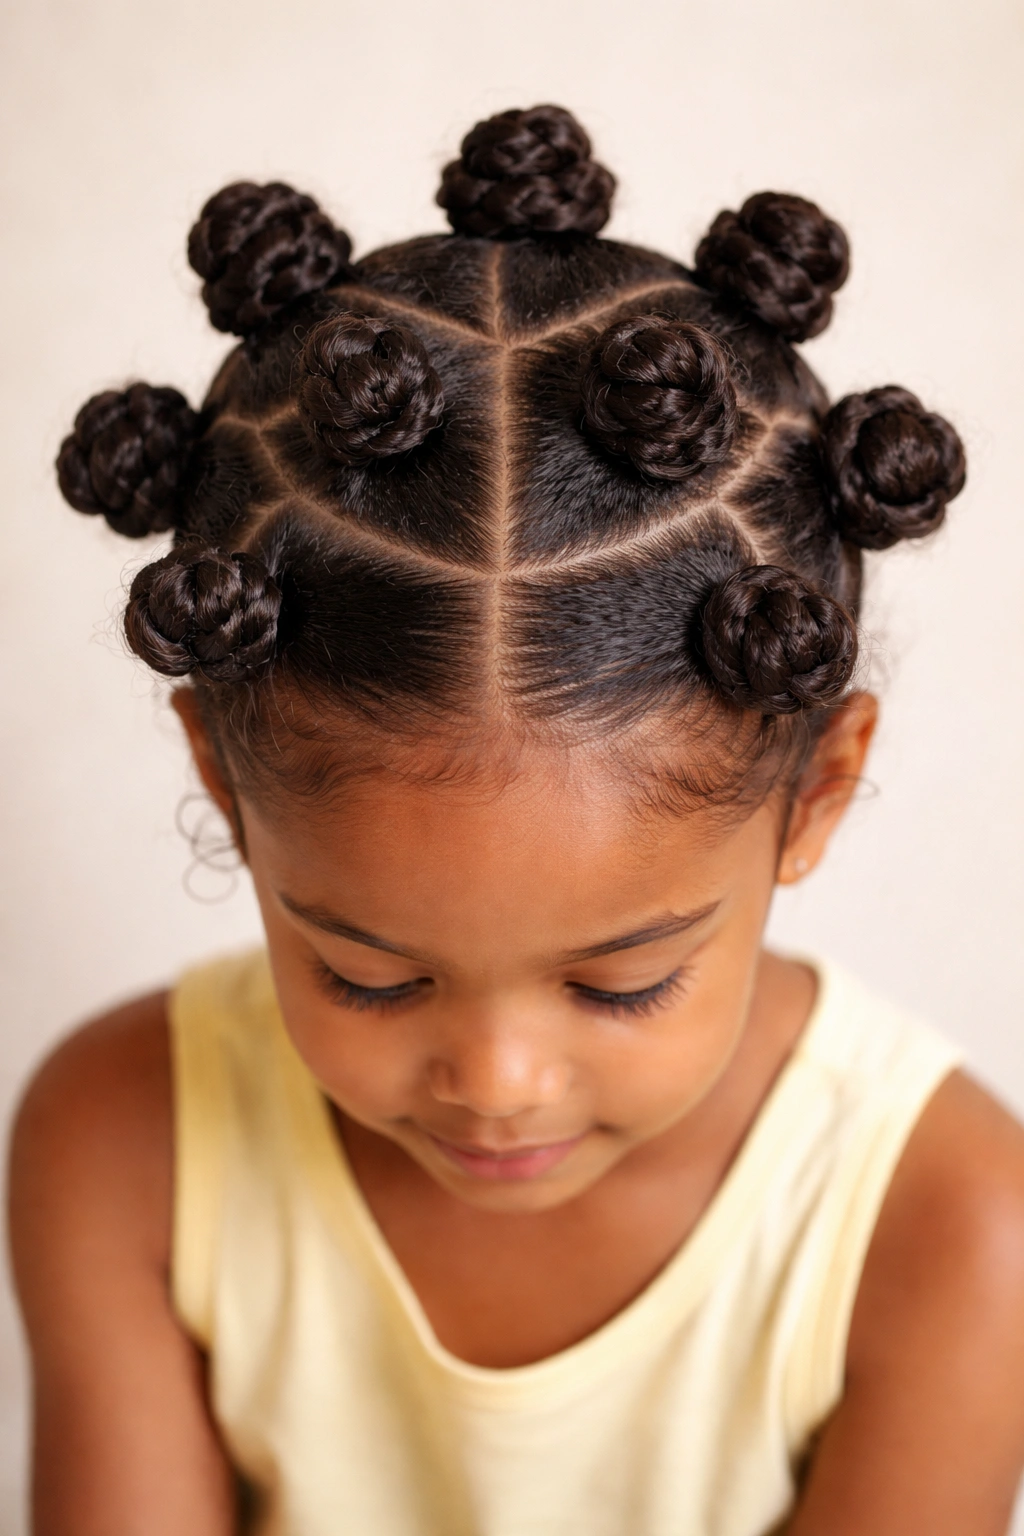
Bantu knots are fun, playful, and honestly adorable on kids — they’re small coiled knots that sit close to the scalp and create tight, defined curls when unraveled. Kids often actually enjoy having them because they feel secure and look pretty cool, plus they’re a style that celebrates the natural curl texture rather than trying to straighten or loosen it. The best part is that bantu knots double as a protective style and a curl-setting method all at once.
The Cultural and Practical Appeal of Bantu Knots
Bantu knots have deep roots in African culture and represent a beautiful way to celebrate curly and coily hair. Beyond the cultural significance, they’re just plain practical — they protect the ends of the hair, they create defined curls, and your child can wear them as-is for a few days before unraveling them. They’re also great for kids who have trouble sitting still for long styling sessions because once the knots are in, you’re done — no weekly re-twisting needed like with some other protective styles.
How to Section and Create Bantu Knots
Start with freshly washed, damp hair that’s been conditioned. Apply a curl-defining cream to each section. Divide the hair into 8 to 16 sections depending on size and texture. Take one section, twist it into a two-strand twist, then wrap it around itself at the base to form a knot, securing it with a bobby pin. The knot should sit close to the scalp and be tight enough that it won’t unravel. Let the hair dry completely — preferably overnight. Gently remove the pins and unravel the twists to reveal defined curls.
Quick facts about bantu knots:
- Work best on hair that’s at least 2 inches long
- Offer curl definition that lasts 3 to 5 days after unraveling
- Can be worn as a finished style for days before unraveling
- Create beautiful coily texture that celebrates natural curl patterns
4. High Puff or Top Knot
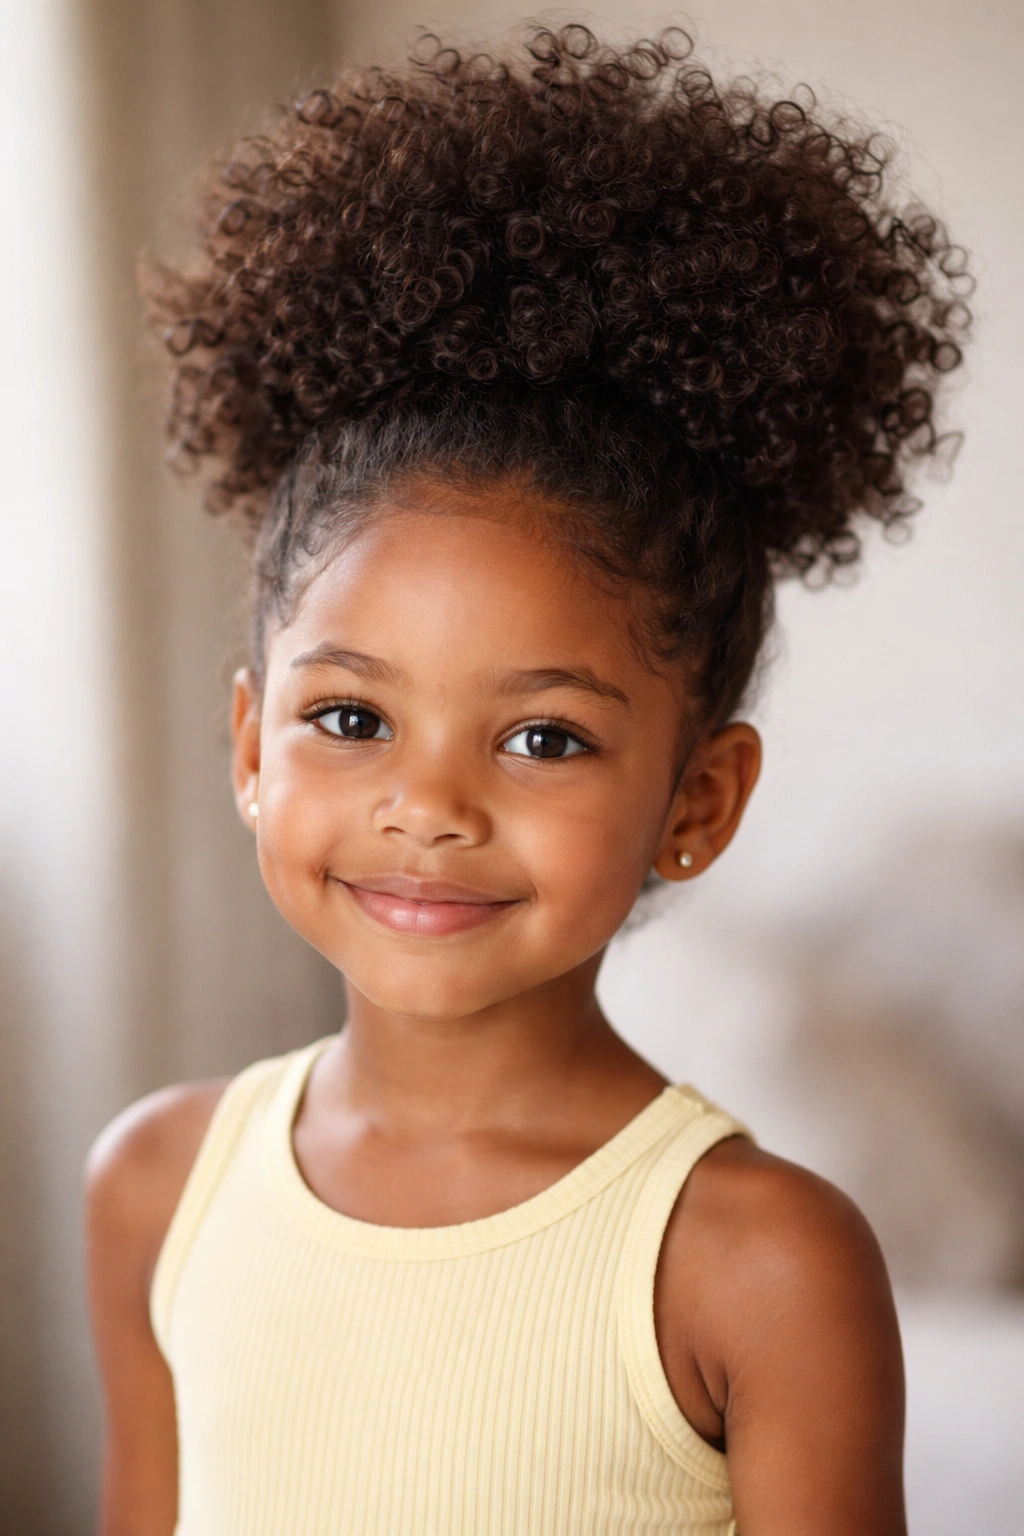
A high puff is probably the easiest protective style you can do — it’s just all the hair gathered at the crown and secured into a bun or puff shape — but don’t let the simplicity fool you. For curly-haired kids, a high puff with the bulk of the curl pattern exposed looks intentional and polished, keeps hair off the face and neck, and can be refreshed every morning with a spray bottle of water and a quick fluff with your fingers.
Why High Puffs Are Perfect for Busy Mornings
A puff takes about two minutes to create, which matters when you’re trying to get a kid out the door. You can create it with wet or dry hair, and it works on basically any curl type. The style keeps hair protected from friction and breakage, which is especially important for kids who move around a lot or sleep restlessly. Plus, it’s cute enough for school and formal enough that you wouldn’t hesitate to send your child to a birthday party wearing one.
Creating a Sleek or Textured High Puff
For a sleek puff, use an edge control gel or smoothing cream on the hairline, brush the hair straight back toward the crown, and secure with a strong elastic (a coil or spiral elastic works better than standard elastics because it grips without yanking). For a more textured look that celebrates the curls, just gather the hair at the crown, roughen it up a bit to show off the curl pattern, and secure. You can leave the hair fully loose for a big, voluminous puff, or you can do smaller braids or twists underneath to add dimension.
Pro tip: A satin or silk bonnet over the puff at night keeps it fresher longer and prevents flattening where the elastic sits.
5. Two-Strand Twists
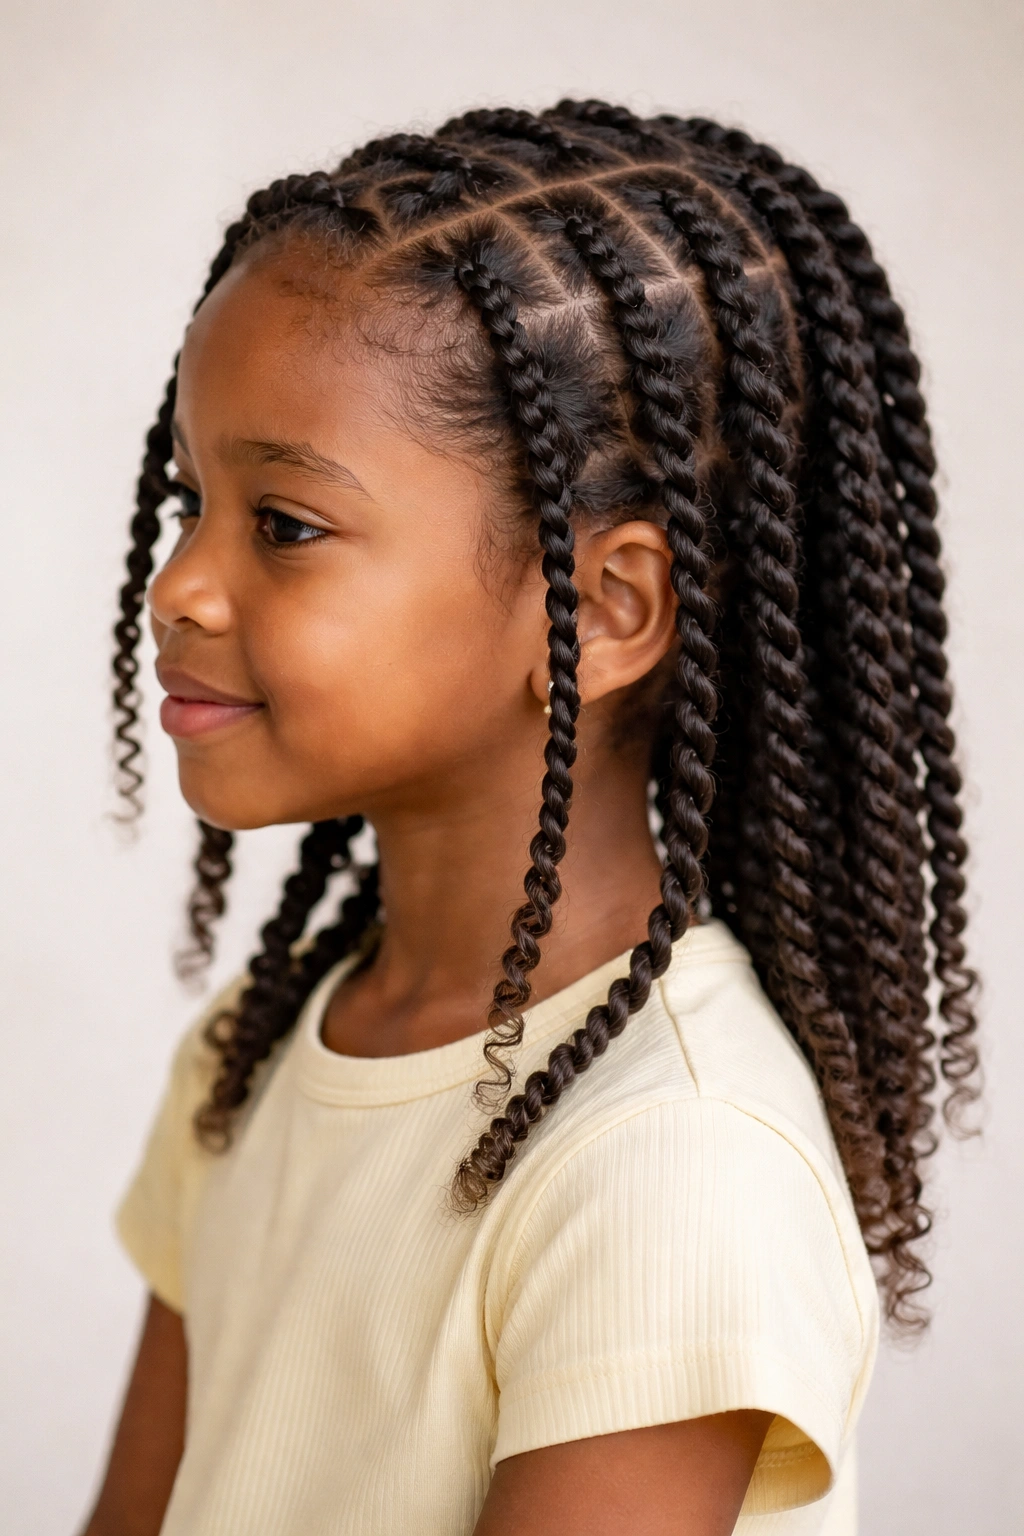
Two-strand twists are the gateway protective style for curly-haired kids — they’re the easiest to learn, work on most curl types, offer protection while still showing off the curl pattern, and can last 5 to 7 days or even longer with proper care. Each twist is just two sections of hair twisted around each other from root to end, which sounds simple but creates a beautifully defined and organized look that’s both protective and visually interesting.
Why Twists Are Ideal for Kids
Twists sit somewhere between a style that’s fully protective and a style that celebrates the natural curl pattern — they’re protective because they contain the hair and prevent tangling and frizz, but they’re also loose enough that the curls can still breathe. Kids can wear twists as a finished style for several days, or unravel them for a second style (twist-outs, which we’ll cover later). The style requires no heat, no braiding skill, and minimal styling products.
The Two-Strand Twist Technique
Divide damp hair into even sections — usually 6 to 12 depending on desired thickness. Apply a light curl cream or leave-in conditioner to each section. Take two strands and twist them around each other all the way to the end, keeping the tension even. Secure the end with a small elastic or twine. You can make the twists small and tight for a refined look or larger and looser for a bouncier, more casual feel. Let them air dry or put your child to bed with them in, and they’ll set into a beautiful twisted pattern.
Quick facts:
- Twists hold for 5 to 7 days easily with proper moisturizing
- Can be unraveled for a twist-out style
- Work on all curl patterns from loose waves to tight coils
- Require just one product (a leave-in conditioner or cream) to look polished
6. Cornrows

Cornrows are a classic protective style that braids the hair close to the scalp in straight lines or creative patterns. For kids, cornrows offer serious staying power — they can last 2 to 3 weeks — which makes them ideal for kids who are hard on their hair, or for times when you need a low-maintenance style that you don’t want to have to redo weekly. They also look intentional and beautiful, especially when you get creative with the pattern or add beads for extra flair.
The Protective Benefits of Cornrows for Growing Hair
Cornrows contain the hair completely, which means minimal friction, minimal manipulation, and minimal breakage at the ends. The braided structure also means less daily styling stress — you braid them once and you’re done for weeks. For kids with finer or more fragile curls, this protection matters a lot. Cornrows also work on all hair lengths and textures, and they’re a style that has deep cultural significance in Black communities.
How to Plan and Braid Cornrows
Start with damp, conditioned hair. Plan your pattern first — straight rows down the back are the easiest, but you can also do diagonal rows, curved patterns, or feed-in braids for a softer look. Apply a protective product to each section before braiding. Cornrows are braided starting at the roots and adding hair as you go down the length, keeping the braid tight enough that it won’t slip but not so tight it causes discomfort or pulls on the scalp. Secure the ends with small elastics or thread.
Adding beads or cuffs:
- Wooden beads, metal cuffs, or colorful bands add a playful element kids love
- Thread them onto the end of each braid before securing
- Change them out easily to refresh the look without redoing the braids
7. Braided Crown

A braided crown is an elegant style where you create one or two braids that wrap around the head like a crown, leaving the rest of the curls loose and beautifully framed. It’s fancy enough for special occasions, photos, or events, but also casual enough that you can do it on a regular day. The braid pulls hair back from the face without requiring a full updo, so it’s perfect for kids who want their curls visible but need some hair out of their way.
Why Crown Braids Work for All Curl Types
Crown braids work because they use the structure of the braid to manage the hair while letting the natural curls shine through. For kids with looser waves, the braid adds an intentional design element. For kids with tighter curls, the braid looks beautiful next to the coiled texture. The style is also versatile — you can do a simple three-strand braid, a more intricate five-strand braid, or even Dutch braids (where the braid goes over the hair instead of under, creating a raised effect).
Creating a Crown Braid on Curly Hair
Start with damp, detangled hair. If the hair is already dry, lightly mist it with water. Apply a light cream or gel to smooth the section you’re braiding. For a simple crown, take a section from one temple, braid it across to the other temple, and secure at the end with bobby pins tucked under the remaining curls. You can braid tightly for a polished look or loosely for a more romantic, undone feel. Leave the majority of the curl pattern visible and bouncy around the crown and face.
Pro tip: Braiding damp hair helps the braid stay defined longer, and using a light product makes it look polished without looking stiff or heavily gelled.
8. Half-Up Half-Down
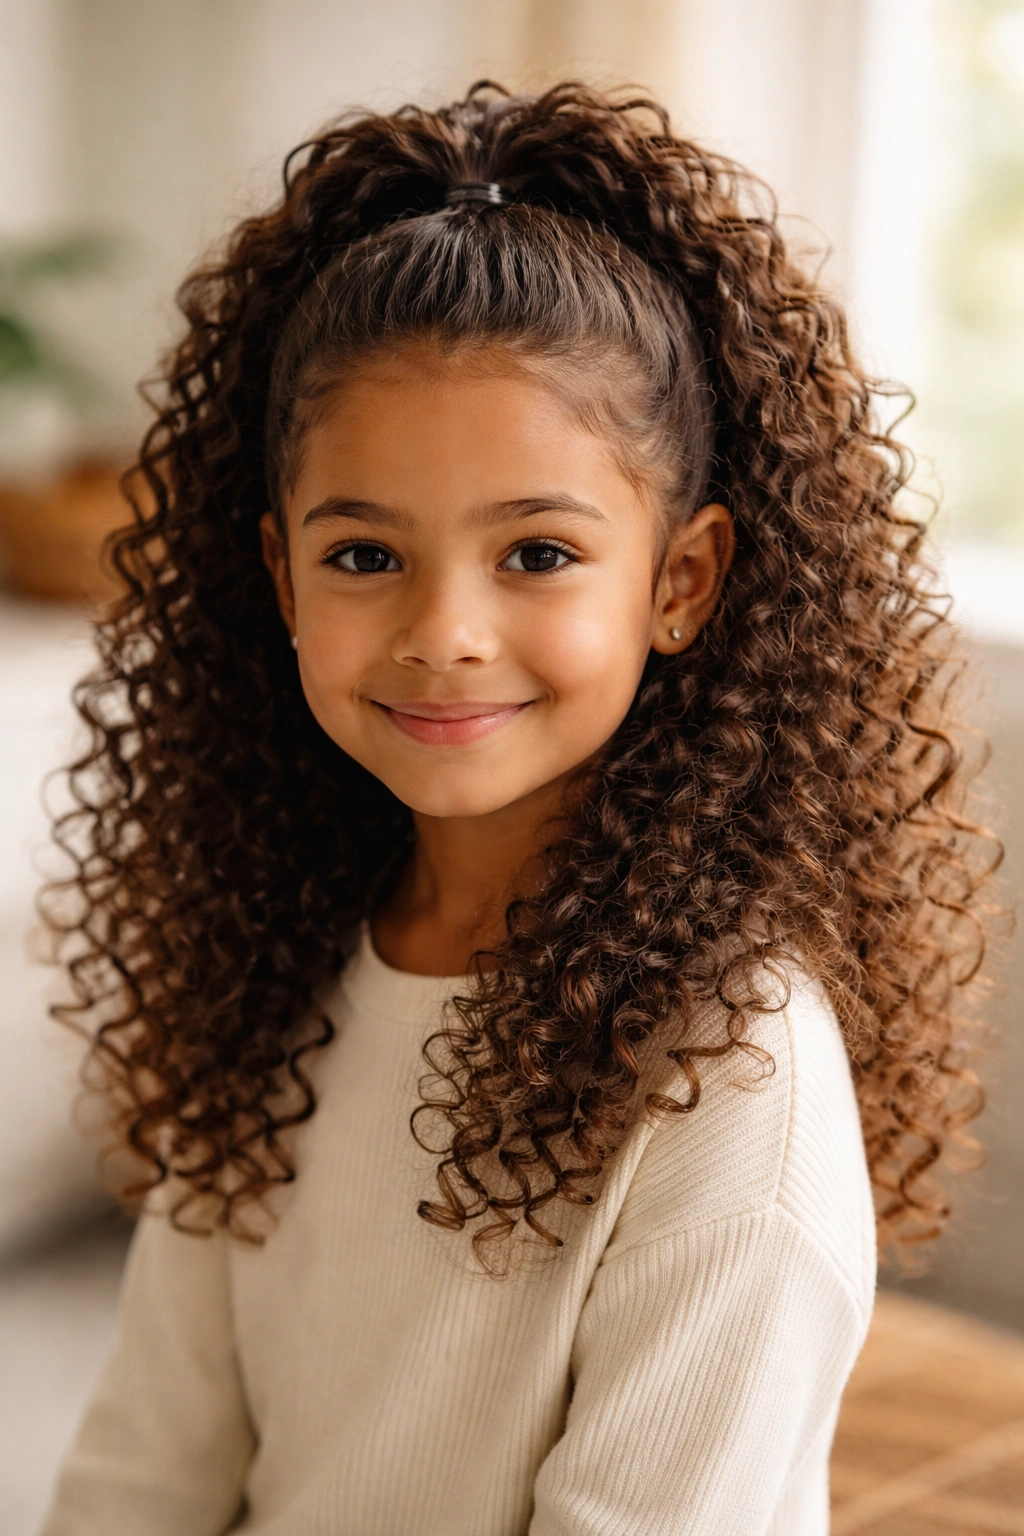
Half-up half-down styles work beautifully on curly-haired kids because they strike a perfect balance — you’re managing some of the hair for practicality (keeping it out of the face and neck) while still celebrating the full curl pattern in the down portion. You can keep it simple with a ponytail or twist, or you can braid the top section for something more polished. This style is particularly great for kids who have longer hair but still want it off their face.
The Practical Beauty of Half-Up Styles
Half-up styles are genuinely useful for curly-haired kids in ways that upstyles aren’t. The down portion of the curls can breathe and move naturally, which means less stress on the hair and healthier curls overall. The up portion keeps hair off the face, neck, and shoulders, which reduces frizz and tangles from fabric friction. This style is also endlessly adaptable — you can do a simple ponytail, a braided section, twists, or even a combination.
Different Half-Up Methods
For a simple half-up ponytail, gather the top section of hair (roughly from temple to temple across the crown) and secure it with an elastic at the base. You can leave the ponytail loose or braid it for more polish. For a twisted version, divide the top section into two parts and twist them around each other, then secure at the back. For a braided version, section the top third of the hair and create one or more braids, securing them all together at the back. The key is making sure the elastic or clip sits securely without pulling or creating breakage.
Quick variations:
- Add small braids on either side and secure them together for an elegant effect
- Create two half-up sections instead of one for a more playful look
- Use a decorative clip instead of an elastic for a dressier appearance
9. Curly Bun
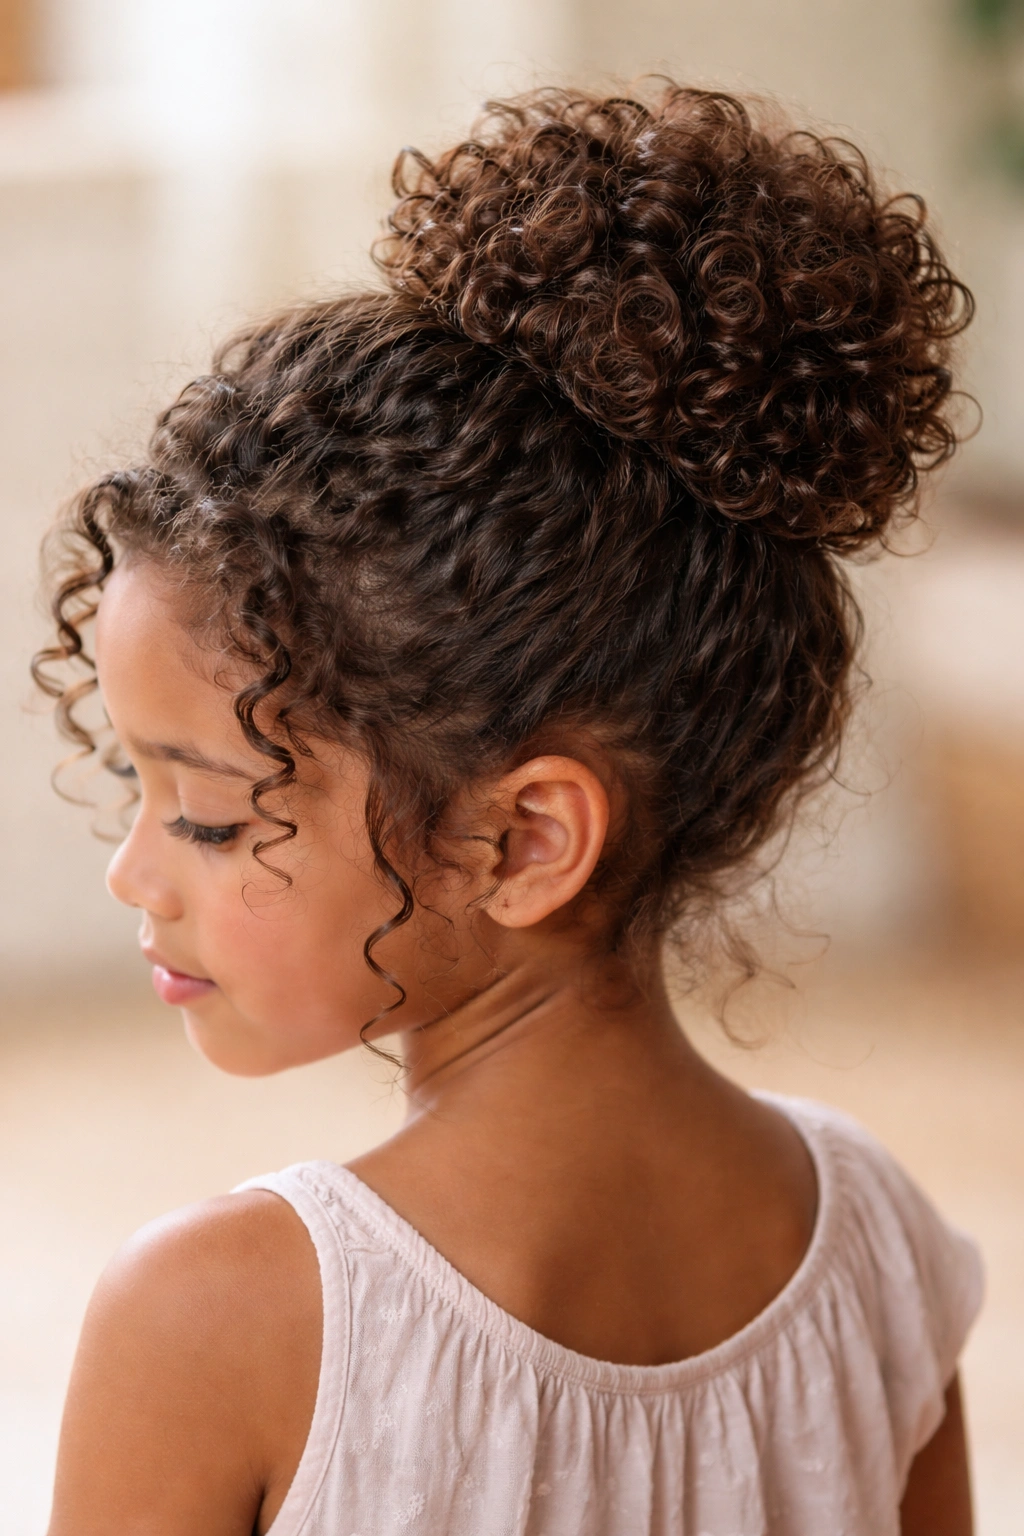
A simple curly bun that celebrates the natural curl pattern (rather than a sleek, smoothed bun) is surprisingly easy to create on kids and looks intentional and beautiful. You gather the hair into a ponytail, then twist or coil the ponytail around itself at the base of the tail, securing it with bobby pins. The natural curls in the bun create beautiful texture, and the style works on short, medium, or long hair.
Why Textured Buns Suit Curly Hair
Buns made from curly ponytails look full, interesting, and definitely intentional in a way that smooth buns don’t. You’re not fighting the curl pattern — you’re working with it. This style also offers genuine protection to the ends of the hair while keeping everything off the face and neck. For kids with longer curly hair, a textured bun is one of the easiest ways to manage it quickly without requiring special braiding skills.
Creating a Textured Curly Bun
Gather the hair into a high or medium ponytail and secure it with an elastic. Take the ponytail and twist it, coil it, or wrap it around the base of the elastic, tucking the end underneath and securing with bobby pins. Let the curls in the bun do their thing — don’t try to smooth or control them too much. You can make a tight, compact bun or a looser, messier one depending on the vibe you want. Some parents like to section the ponytail into 2 to 4 smaller twists, then coil those around the base for more texture and definition.
Pro tip: Securing with bobby pins that match your child’s hair color makes them nearly invisible, so the bun looks polished and intentional.
10. Side Part With Curls
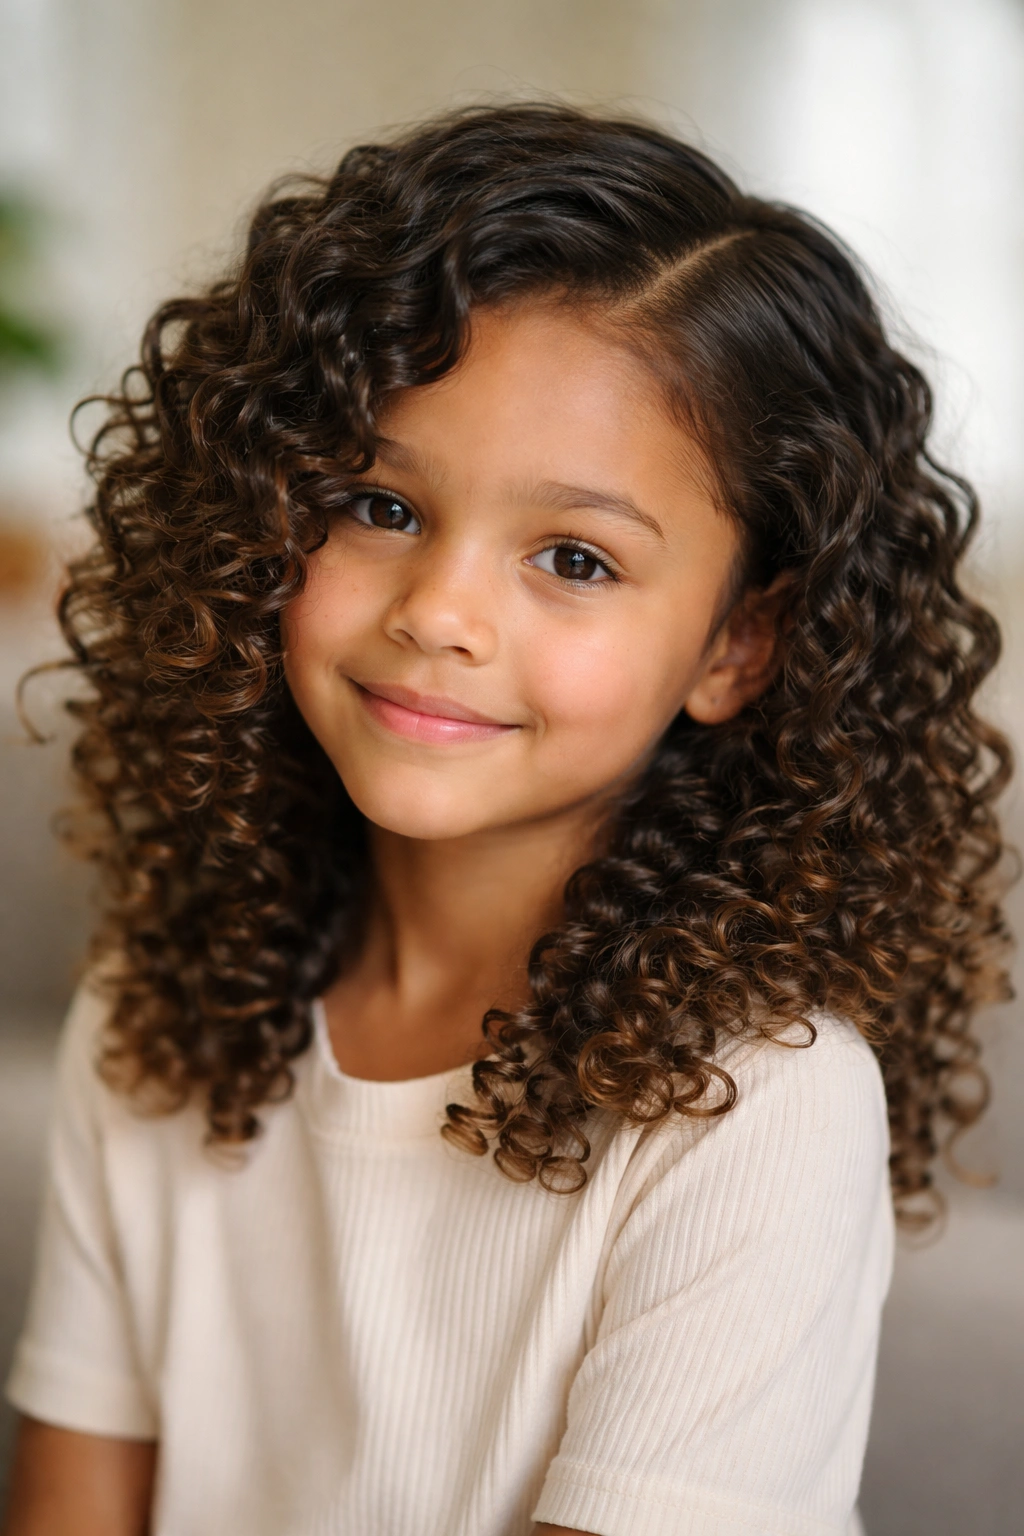
A simple side part that shows off the natural curl pattern is honestly one of the prettiest and easiest styles for curly-haired kids, and it requires zero styling skill — you’re basically just parting the hair and letting the curls fall where they may. This works especially well for kids with medium to long curly hair and can be dressed up or down depending on whether you add accessories or leave it natural.
The Effortless Elegance of a Side Part
A deep side part creates nice visual balance on a round face, and it allows the full curl pattern to be visible while still creating an intentional, polished look. For curly hair, this is perfect because you’re not fighting the texture — you’re just directing it. The style also works on all curl types, all hair lengths (even shorter hair with a deeper side part looks intentional), and requires basically zero maintenance once the part is in.
Creating a Flattering Side Part
Use a rattail comb to create a clean, deep side part — one side should have significantly more hair than the other. Run the comb straight back from the part line to maintain it. You can smooth the part with a tiny bit of edge control or leave it natural. For a polished version, you can add a single braid to the smaller side and tuck it behind the ear, or add a decorative clip or hairpin. Leave the majority of the curls loose and bouncy on the larger side.
Adding definition to curls:
- Use a light curl-defining cream applied to damp hair
- Scrunch curls upward as they dry to activate the pattern
- A light mist of water refreshes curls if they flatten overnight
11. Twist-Out Style
A twist-out is what you get when you create two-strand twists while your child’s hair is damp, let them dry completely, then unravel them for gorgeous defined curls. It’s one of the most popular styles for curly-haired kids because it gives you twice the styling options from one protective style — you get a few days of wear from the twists, then you get a fresh new curl pattern when you unravel them.
How Twist-Outs Maximize Your Styling Options
When you unravel two-strand twists, the curl pattern they’ve set into is beautiful, defined, and completely different from how the hair looked loose. The curl pattern holds for several days, so you’re basically getting two weeks of polished styles from one application of twists. It’s efficient and protective, which makes it great for busy parents and growing kids.
Creating Defined Curls From a Twist-Out
After your twists are completely dry (wait a full day if possible), gently unravel each twist starting at the bottom. Work slowly so you don’t disrupt the curl pattern. Once all twists are unraveled, gently separate and fluff the curls with your fingers or a wide-tooth comb for more volume. You can apply a light curl cream or refresher spray to revive the pattern, but honestly, twist-outs usually look great without additional product once they’re unraveled. The style will continue to look good for 3 to 5 days with minimal refreshing.
To make the style last longer:
- Sleep with a satin or silk bonnet or scarf to reduce frizz and flatten
- Refresh curls in the morning with a light mist of water
- Avoid excessive touching or running hands through the curls, which breaks up the pattern
12. Braided Pigtails
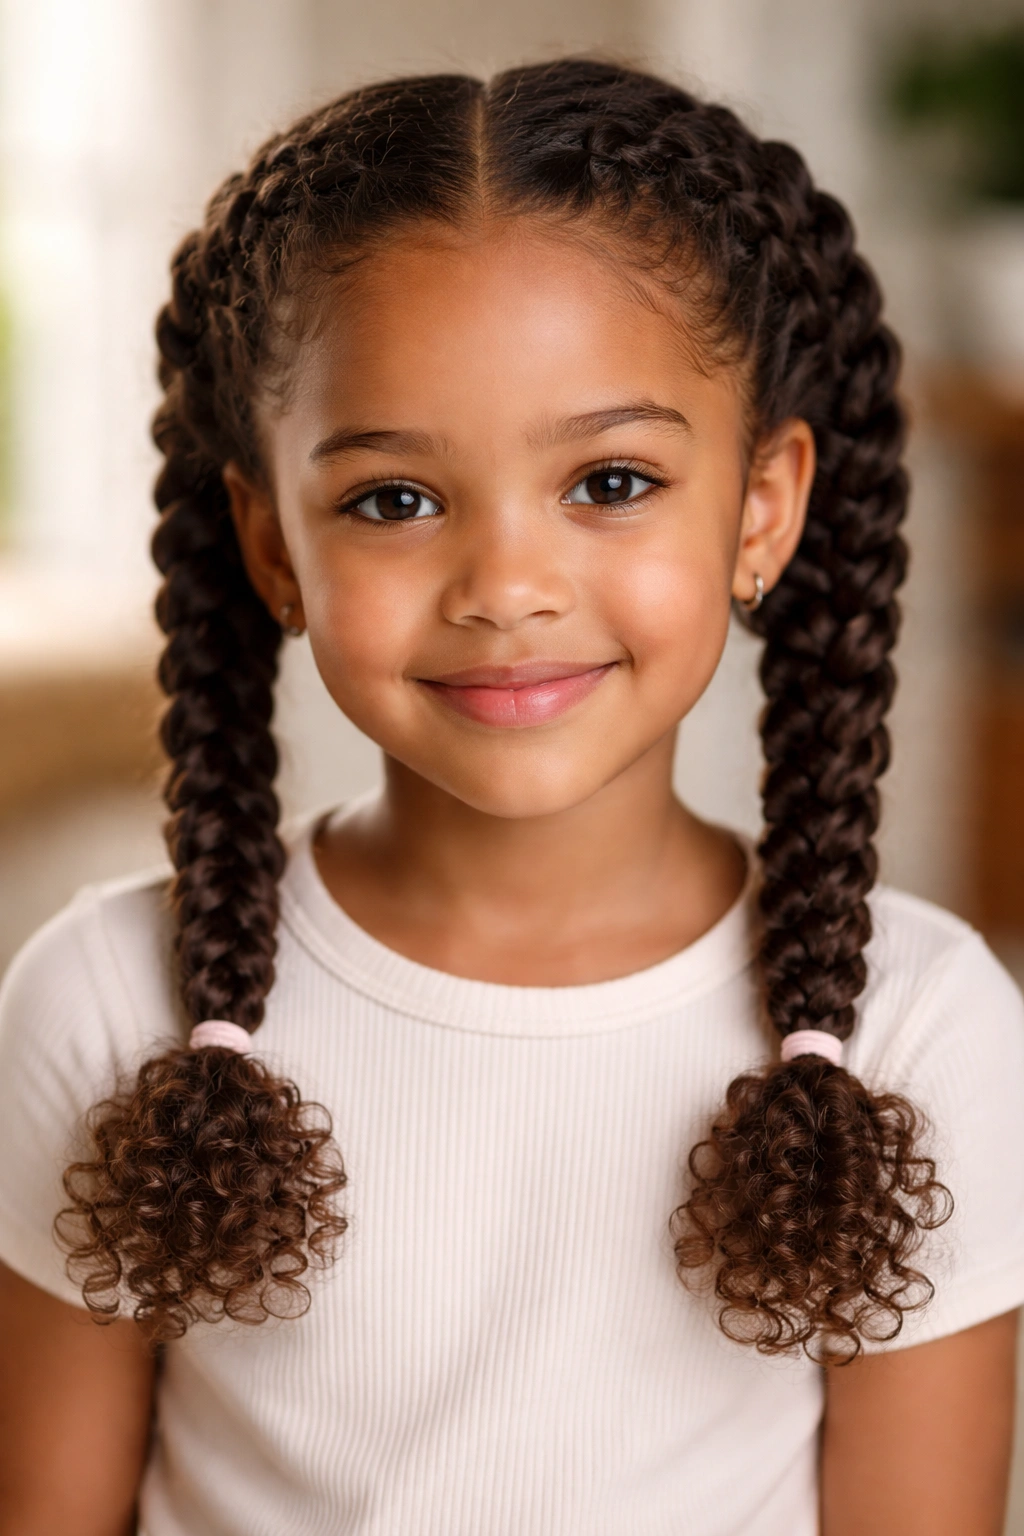
Braided pigtails are fun, playful, and incredibly practical for kids with curly hair — they’re low enough that they don’t require intricate sectioning skills, they keep hair off the face and back from the neck, and they look intentional and polished rather than like you just threw the hair back. For medium to long curly hair, braided pigtails are honestly adorable and genuinely protective at the same time.
Why Pigtails Work for Active, Curly-Haired Kids
Pigtails contain the hair on both sides of the head, which means maximum protection and minimum daily fussing. If one braid comes slightly loose or looks messier, it’s less noticeable than with a single back braid, which gives you more flexibility in terms of styling maintenance. Kids often like the way pigtails look too, which means they’re more likely to keep them in and care for them properly.
Creating Neat or Textured Braided Pigtails
Divide the hair down the center back from the crown to the nape. Create one braid on each side — these can be simple three-strand braids for a neat look, or you can do French braids, Dutch braids, or even two-strand twists for a different texture. Secure the ends with small elastics. You can make them tight and neat for a polished effect or looser and more textured to celebrate the curl pattern. Some kids like beads or cuffs on the ends for extra flair.
Styling ideas:
- Wrap a decorative ribbon around each braid while it’s wet so it dries into the braid
- Create loosely braided pigtails that show curl texture between the plaits
- Do Dutch braids (where braids sit on top of the hair) for a raised, sculptural effect
Key Takeaways
Curly-haired kids have amazing styling options, and most of them are actually easier to maintain than you’d think — the key is choosing styles that work with the curl pattern rather than against it. The twelve styles above cover everything from quick everyday looks (a high puff or side part) to elaborate protective styles (cornrows or bantu knots) that give you weeks of wear from one styling session.
The most important thing to remember is that curly hair needs moisture, gentle handling, and a defined structure (like braids or twists) to look its best. Once you understand that, you can feel confident choosing styles based on what works for your child’s specific curl type, hair length, and lifestyle. Most of these styles can be refreshed overnight with a light mist of water and a satin bonnet, which means they genuinely last longer than they would on other hair types.
Start with whichever style feels easiest for you to learn, then build from there. Your child’s curls are genuinely beautiful, and finding the right hairstyle isn’t about fighting the texture — it’s about enhancing it and protecting it at the same time.