Curly hair doesn’t always need to be down—in fact, some of the most stunning styles for curly texture are the updos you can actually wear without everything falling flat by noon. The trick isn’t fighting your curls; it’s learning how to work with them, stack them, twist them, and pin them in ways that keep your texture looking intentional and gorgeous from every angle. Whether you’re heading to work, a special event, or just want a fresh look on a regular Tuesday, these updos are specifically designed for the way curly hair actually behaves—not against it.
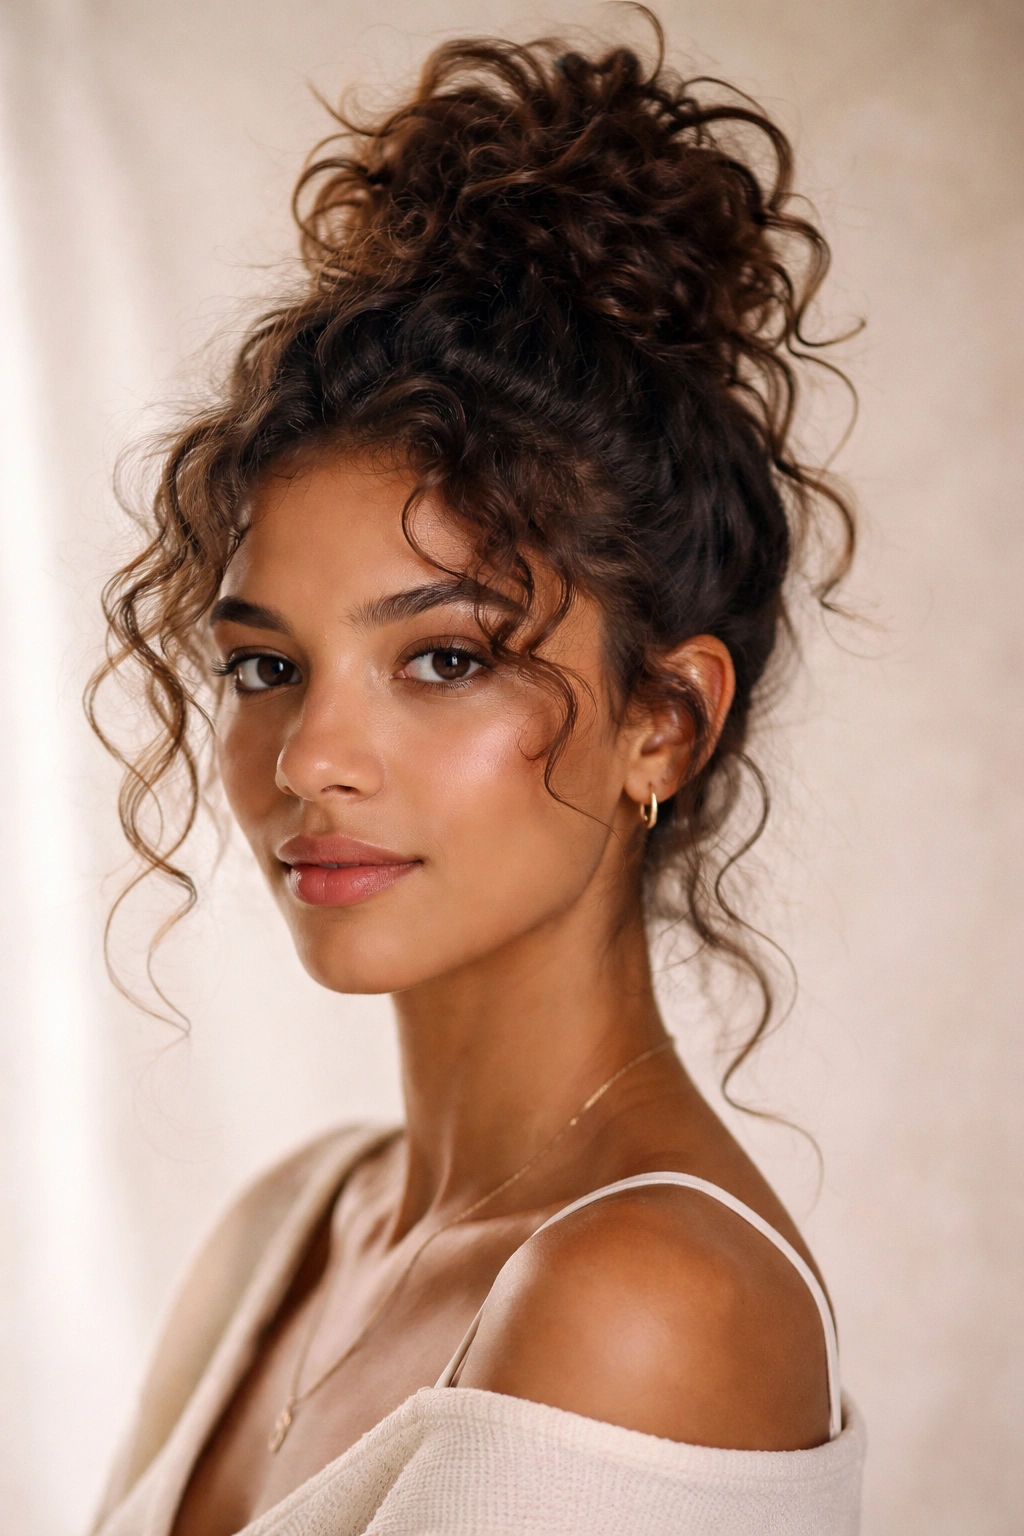
1. The High Textured Bun
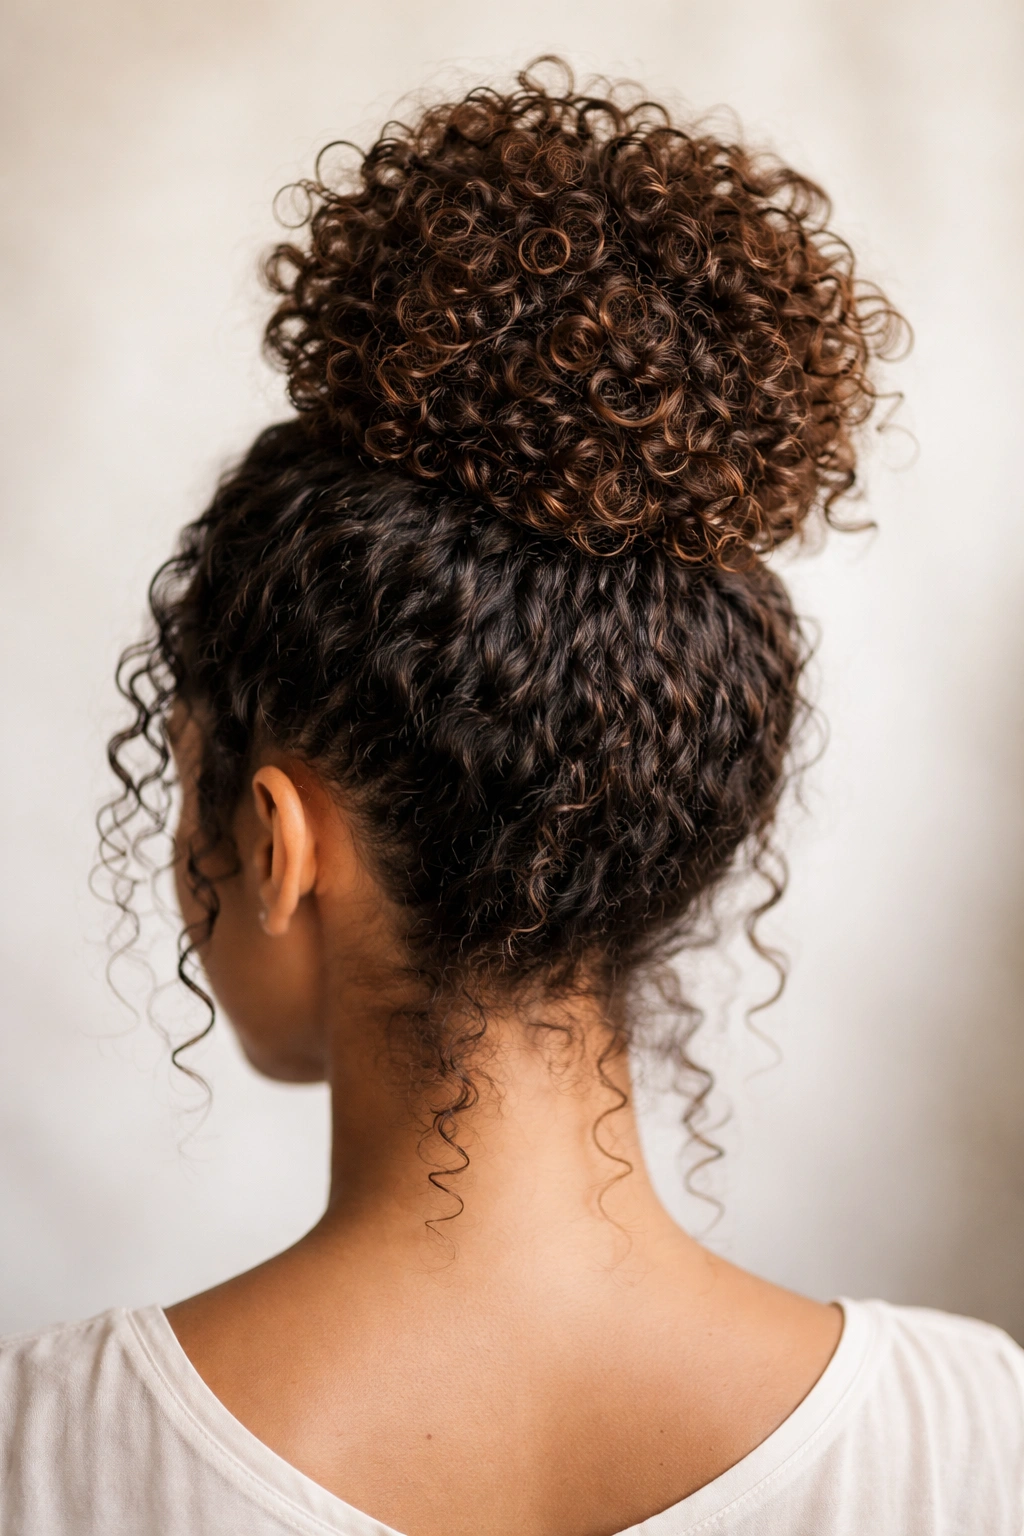
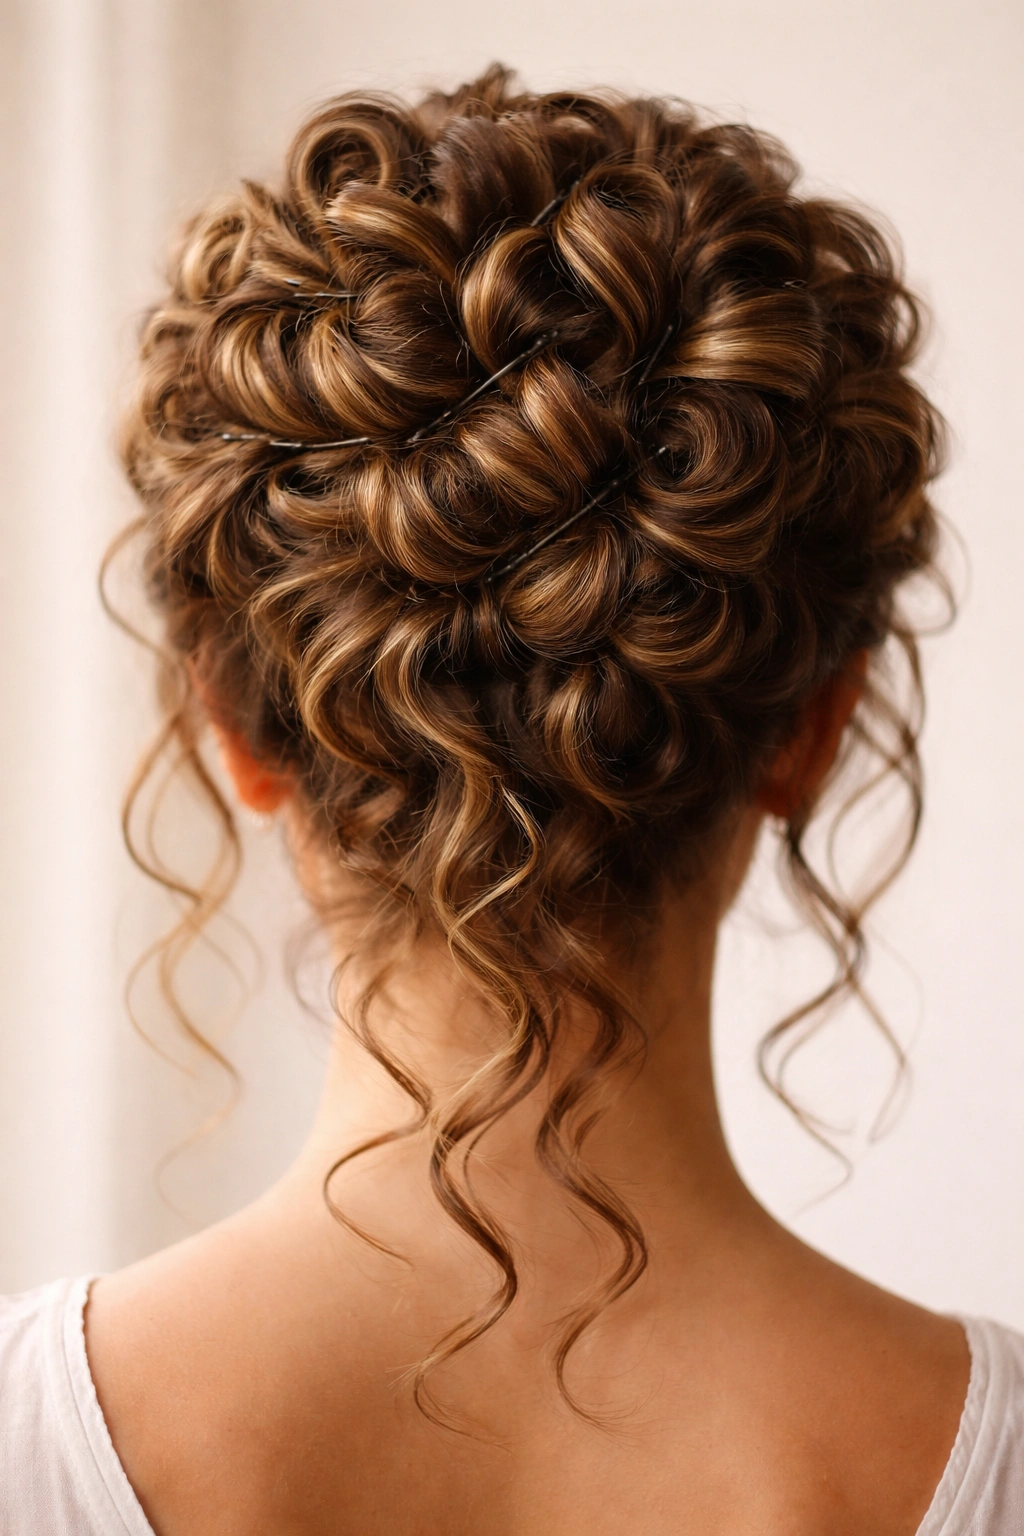
This is your go-to everyday updo that celebrates your curl pattern instead of smoothing it away. The high textured bun sits at the crown of your head and showcases the individual spirals and coils throughout, creating dimension and movement even though it’s technically “up.” You’re not aiming for a sleek, polished look here; you want texture visible and intentional.
Why This Style Works for Curls
The high placement keeps hair off your face and neck while the textured finish means you don’t need it to look perfect to look good. This updo actually holds better throughout the day on curly hair because you’re not trying to force all your curls into an unnaturally smooth dome—you’re letting them do what they naturally do.
How to Create It
- Start with curls that have been styled and set (either air-dried or diffused dry)
- Flip your head upside down and gather hair loosely at the crown using just your fingers, not a brush
- Twist the gathered section loosely 2-3 times around itself into a coiled shape
- Secure with bobby pins inserted horizontally through the coils, tucking ends under and around the main bun shape
- Leave some shorter pieces or face-framing curls loose if you have them, or gently pull a few curls from the bun for a softer effect
- Mist lightly with a flexible-hold hairspray that won’t make your curls crunchy
Pro tip: Do this style on day-two or day-three curls when they’re already set and hold their shape better—fresh, wet curls will struggle to stay pinned.
2. The Twisted Spiral Crown
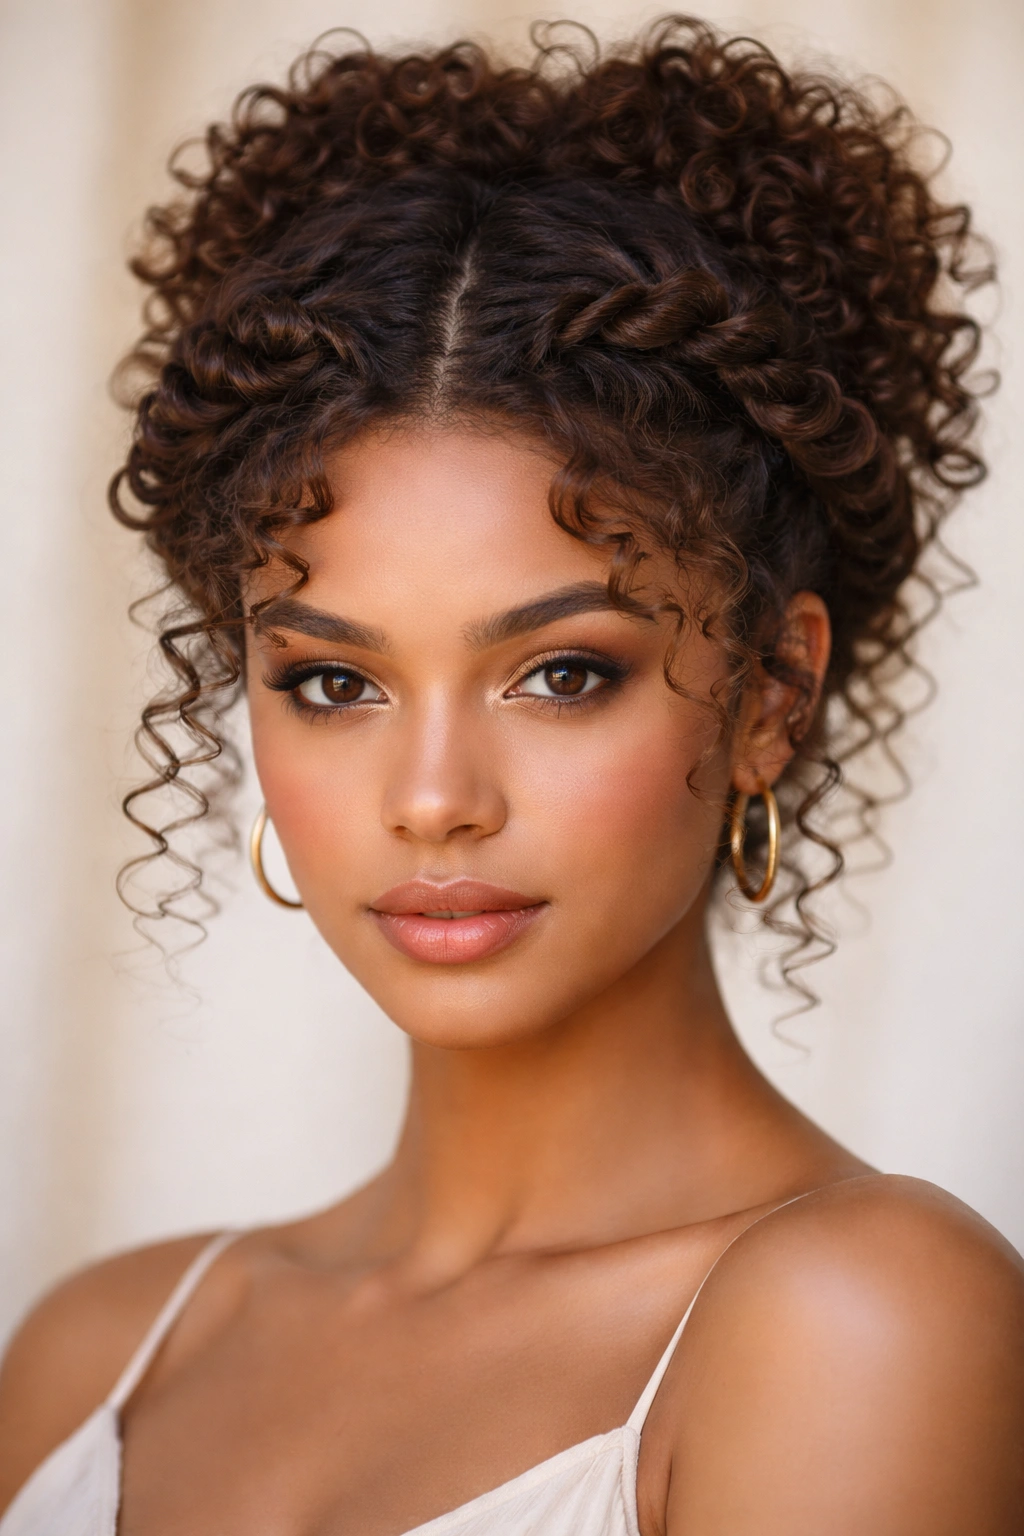
Imagine a crown that wraps around your head made entirely of twisted curls. This updo is romantic, intricate-looking, and surprisingly easy to master once you understand the twist technique. It works especially well if your curls are medium-length or longer and you have at least a medium amount of density.
What Sets This Apart
Unlike simple buns, the spiral crown shows off individual curl definition while creating an elegant frame around your face. It photographs beautifully and feels special enough for events, but casual enough for everyday wear once you’ve done it a few times.
Step-by-Step Method
- Section your hair into two equal halves down the center back of your head from ear to ear
- Take a small section from one side near your ear and begin twisting it snugly, adding small pieces of hair as you twist backward toward the nape
- When you reach the center back, secure that twisted section with bobby pins
- Repeat the same process on the other side, twisting toward the center and overlapping slightly with the first twist
- The two twists should meet and interlock at the back—secure both together with additional pins
- Gently pull pieces of the twist slightly outward to show curl definition and soften the look
Worth knowing: This style holds better if you’ve applied a curl cream or lightweight gel to your hair before twisting—it gives the twists grip without making them look wet.
3. The Loose Bohemian Updo
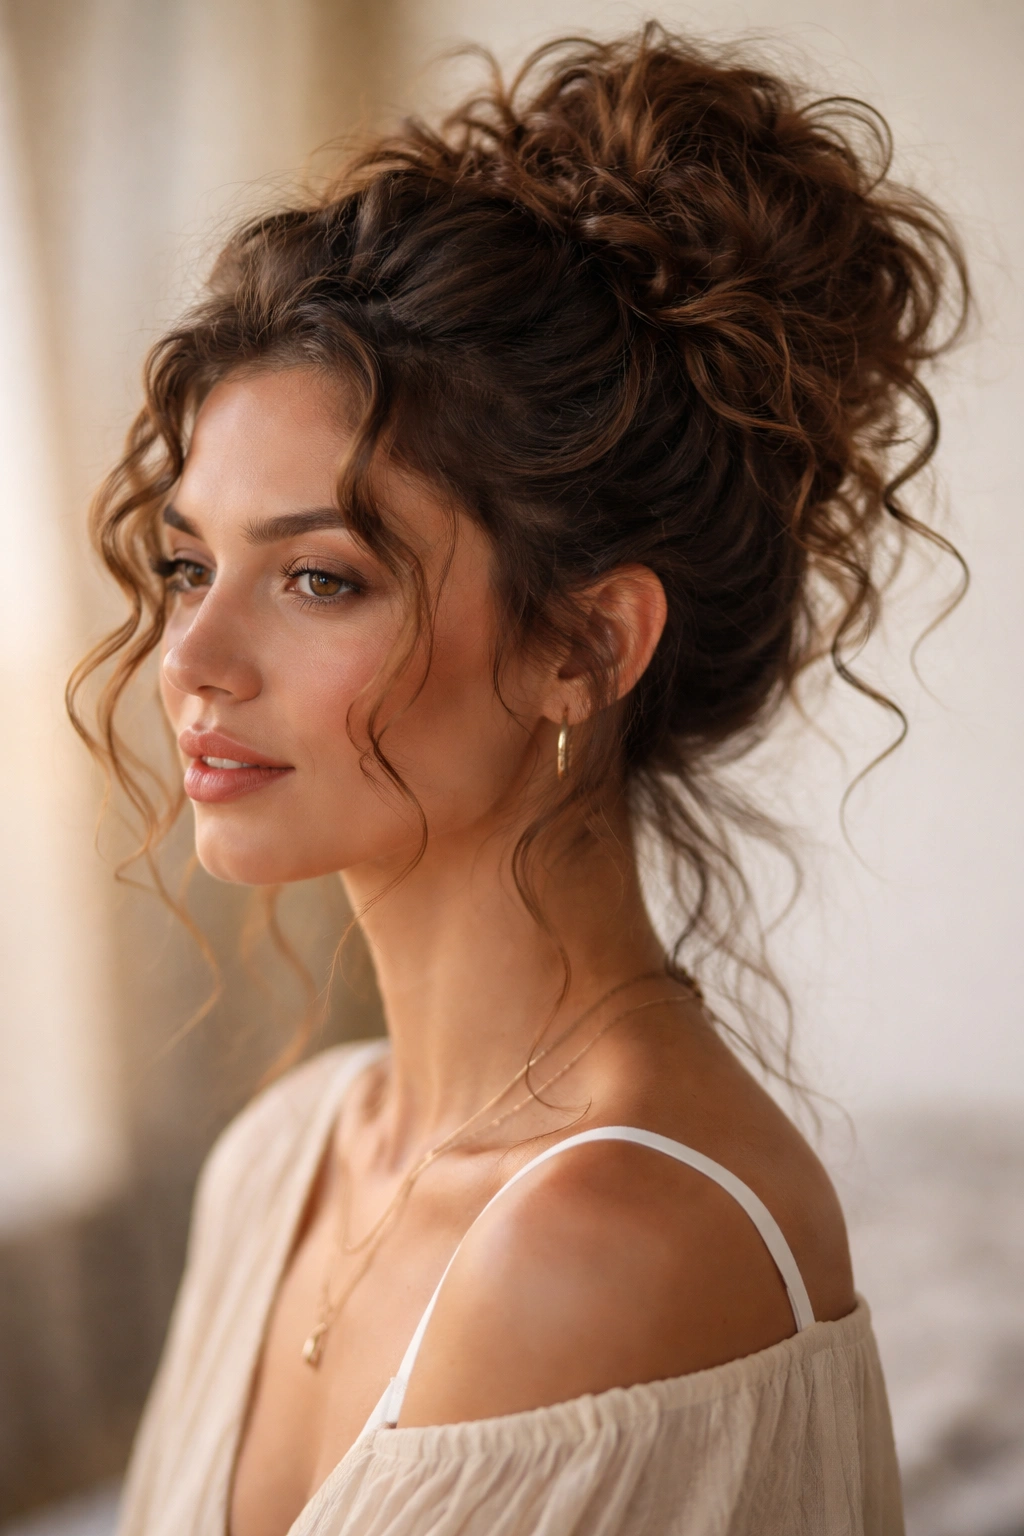
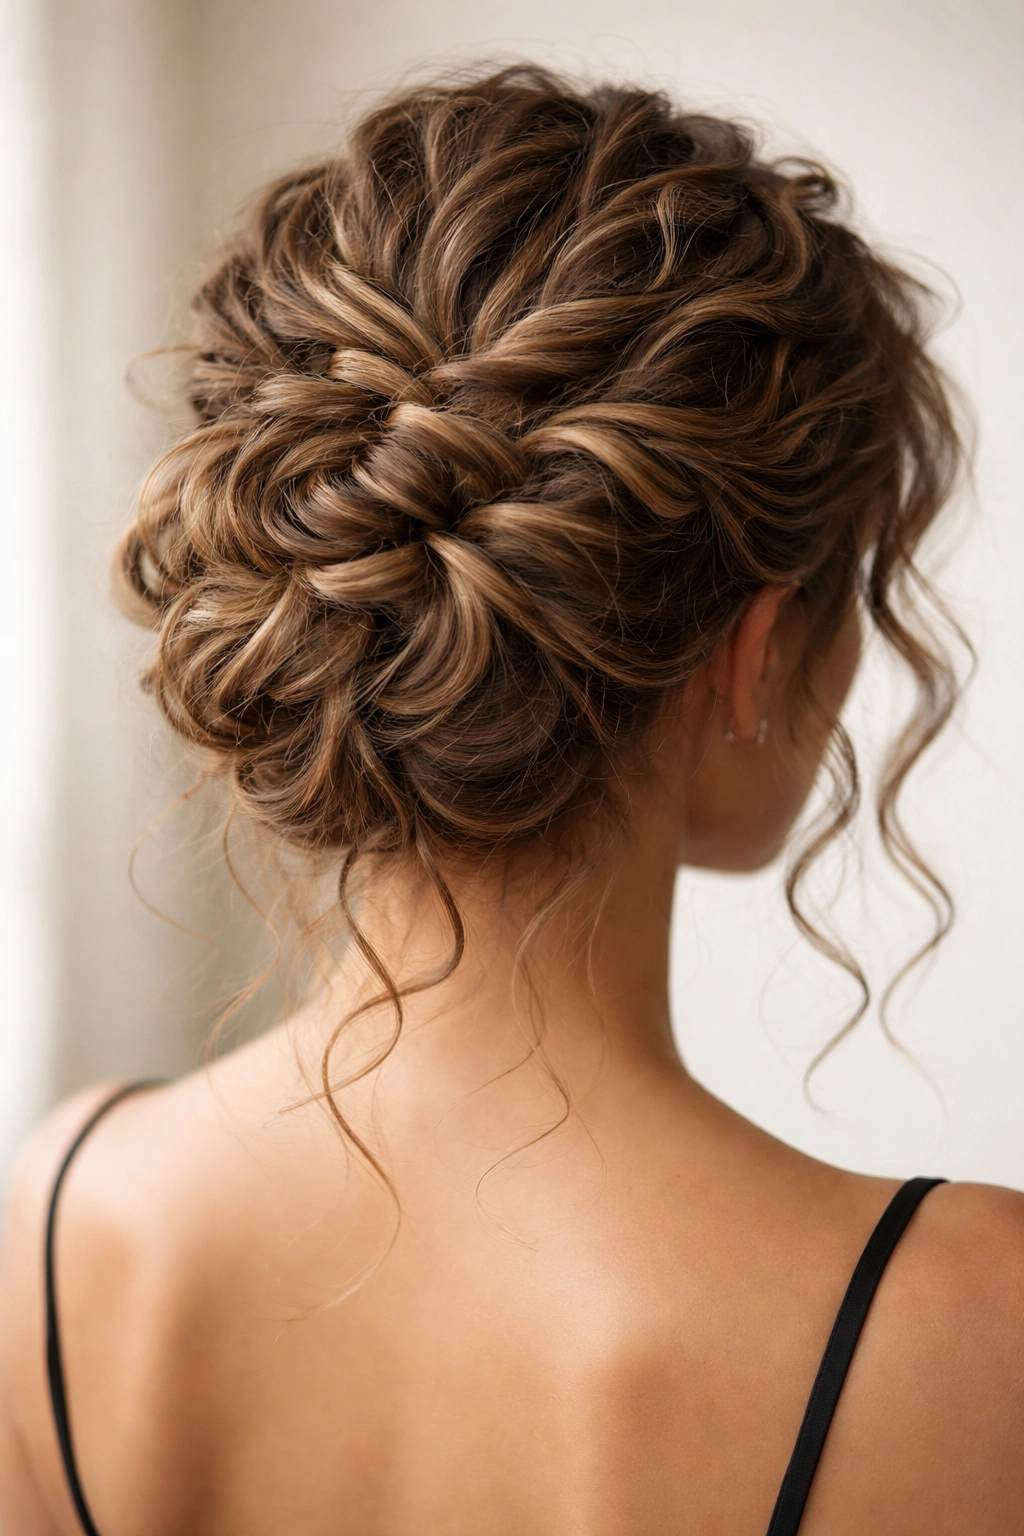
This is the “I didn’t try too hard but actually I did” updo that feels effortless and romantic. It’s a higher, looser bun with curls intentionally falling out and around it, paired with strategic pins that seem almost accidental but are absolutely deliberate.
Why Curly Hair Loves This Look
Curly hair is made for this style because the texture naturally falls in beautiful patterns and spirals. You’re not fighting to keep everything in place; you’re embracing the movement and letting pieces frame your face and neck in that undone-but-chic way.
Construction Details
- Flip head upside down and gather hair loosely into a high ponytail, but don’t pull it tight
- Secure with a clear elastic that blends with your curls
- Divide the ponytail into 2-3 sections and loosely twist each section around the base to create a relaxed, bulbous shape
- Don’t worry about it being perfect—lumpy is part of the aesthetic
- Secure with bobby pins pushed into the twists, leaving plenty of curls falling out naturally
- Pull out face-framing pieces and individual curls around the sides and back
- Spritz with flexible-hold spray to keep shape without crunch
Insider note: The key is securing it loosely enough that you can still see individual curl spirals within the bun shape—if it looks too tight or smooth, add more curls and loosen pins slightly.
4. The Double-Stacked Bun
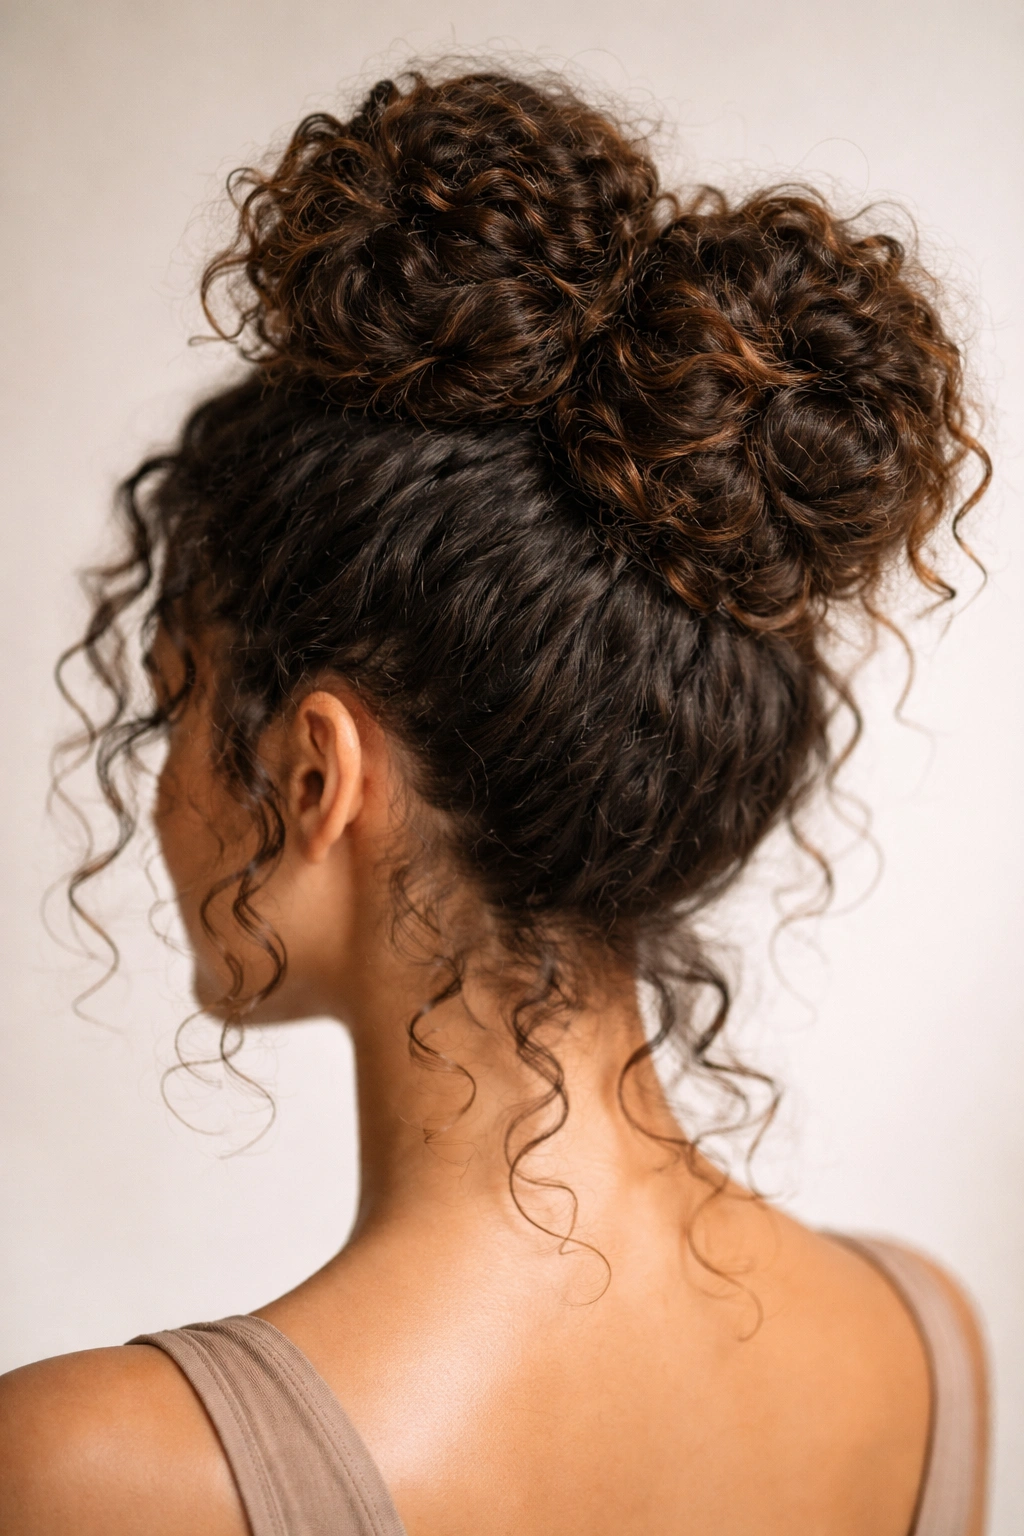
Two buns are better than one, especially for those with thicker curly hair that’s too much volume for a single bun. This style works on medium to longer curls and creates a modern, playful look that’s also incredibly practical because it distributes weight and keeps hair off your neck completely.
The Appeal for Curly Textures
Double buns actually showcase curl pattern beautifully because you’re creating two focused points of texture rather than one. Each bun can be textured and intentionally imperfect, which reads as intentional styling rather than messy on curly hair.
How to Build It
- Create a center part from your forehead to your nape
- Divide hair into two equal sections from the part
- Gather the right section into a high ponytail at the temple-crown area and secure with an elastic
- Repeat on the left side, creating two high ponytails at roughly equal height
- Twist each ponytail loosely and wrap the twist around its base to form a coiled bun
- Secure each bun separately with bobby pins pushed through the coils
- Gently pull and fluff both buns so they look textured, not sleek
- Leave a few curls around your face and at the nape unclipped for softness
What to watch for: Make sure both buns are at exactly the same height—even a half-inch difference reads as unintentional rather than intentional styling.
5. The Sleek Low Ponytail Wrap
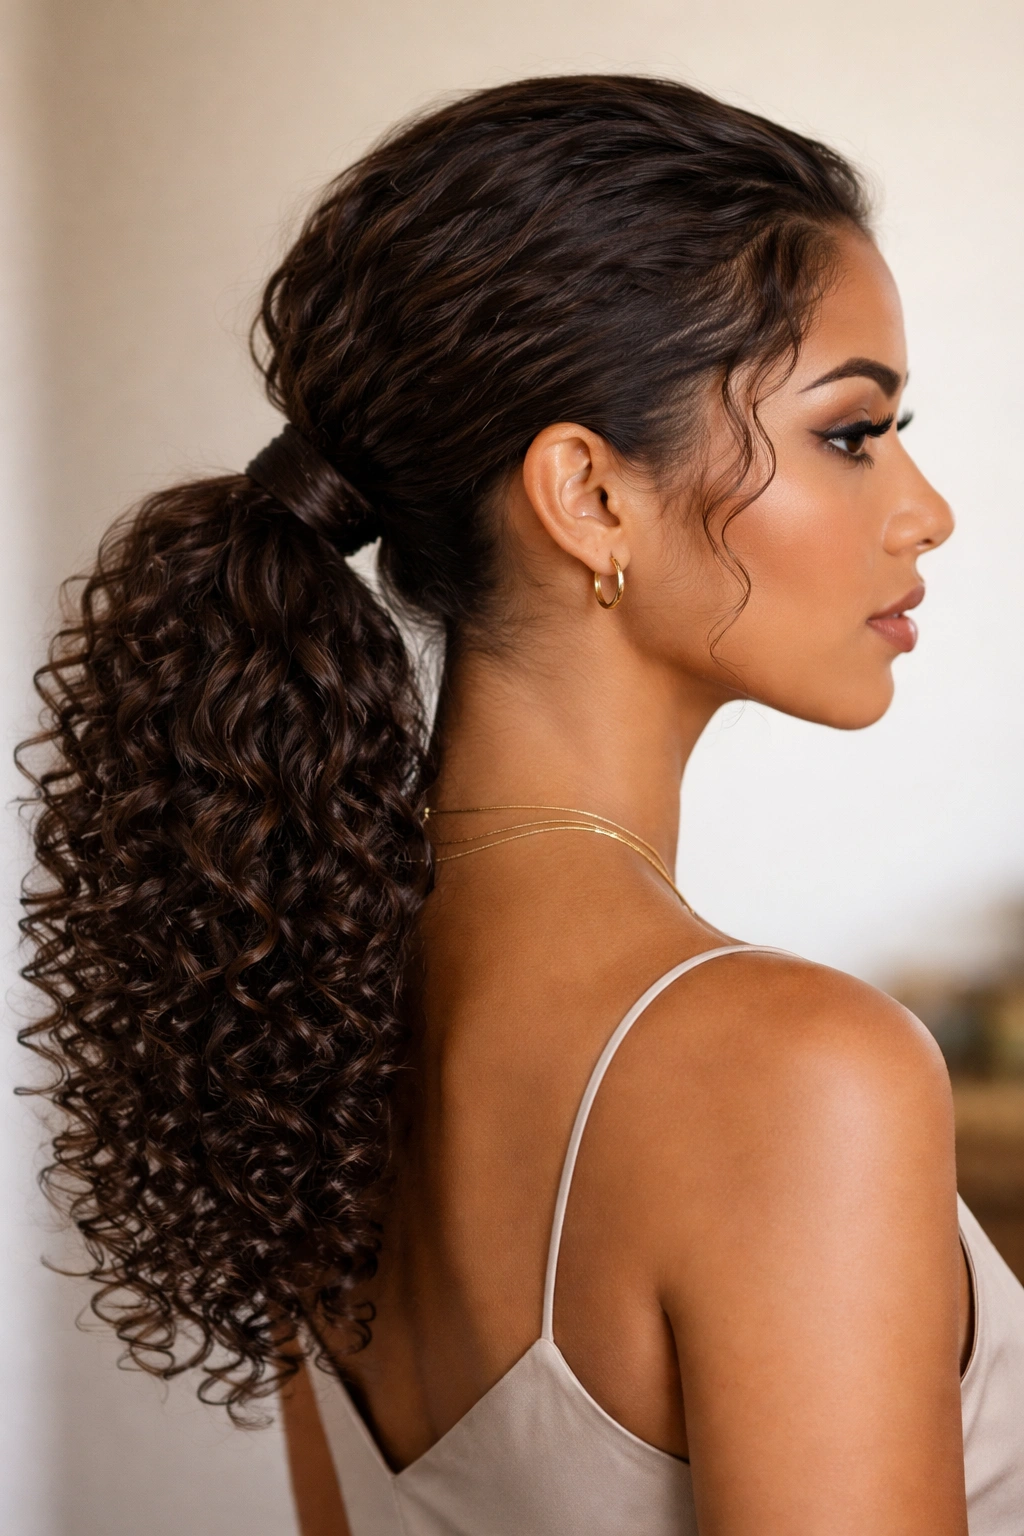
If you have curls that respond well to smoothing products and you want an updo that reads as polished without being boring, this low ponytail with a wrapped base is your answer. The wrap—a section of hair twisted and pinned around the elastic—elevates a basic ponytail into something intentional and finished.
Why This Works
This is one of the few updos where you’re actually smoothing your curls slightly, which works beautifully if your texture is fine or medium. The low placement feels sophisticated, and the wrapped base prevents that awkward elastic-line look that sometimes happens with curly hair.
Building the Style
- Apply a lightweight smoothing cream or serum to slightly tame frizz and define your curl pattern
- Brush gently or use a wide-tooth comb to gather hair into a low ponytail at the nape (not completely smooth, but smoothed enough to see individual curl shapes)
- Secure with an elastic that matches your hair color
- Take a small, thin section from the ponytail itself and wrap it tightly around the base of the elastic, covering it completely
- Secure the wrap with a bobby pin tucked underneath so it’s hidden
- Let the ponytail fall naturally, showing off your curl definition below the wrap
- Smooth the wrapped section slightly with a tiny bit of gel for a polished appearance
Pro tip: This works best on curls that are at least shoulder-length—shorter curls don’t give you enough hair to wrap around the base cleanly.
6. The Cascading Curly Knot
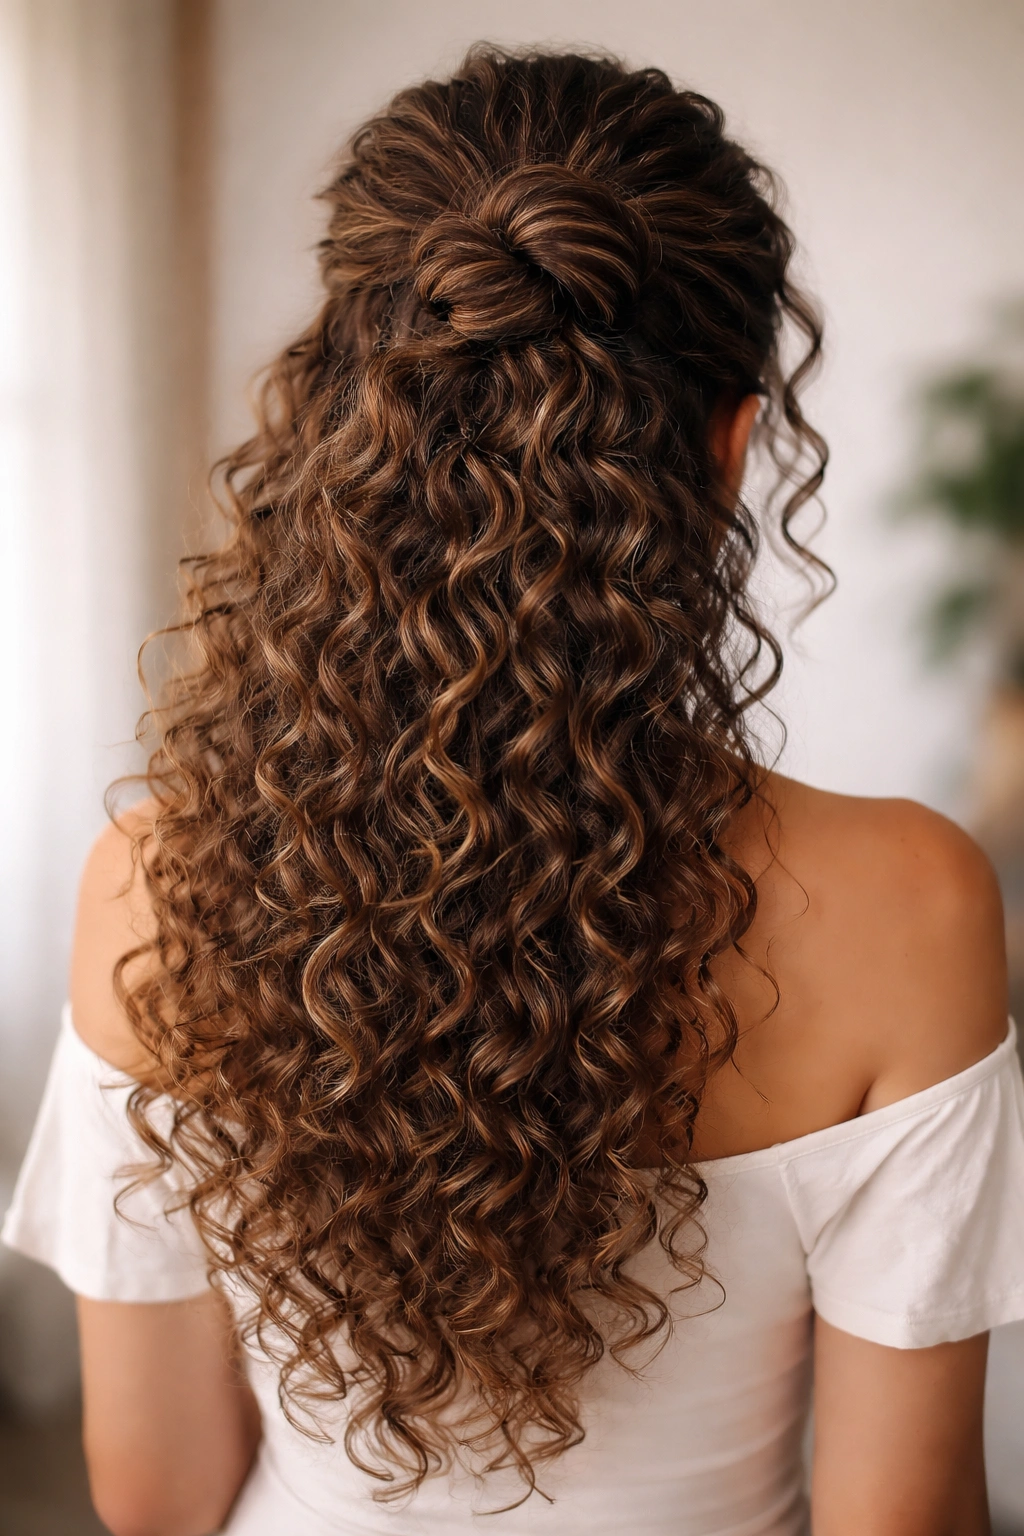
Think of this as a half-updo with the top section tied into a knot and the bottom left down to cascade. It’s intricate-looking but actually simple, and it works beautifully for curly hair because the cascading portion shows off your best curl definition.
What Makes It Special
The knot detail at the back of your head creates visual interest and feels more intentional than a simple half-up style. For curly hair, this is perfect because you’re using your best-looking curls to frame your face and shoulders while keeping hair off your face.
How to Create It
- Section hair horizontally from ear to ear across the back of your head, clipping away the bottom section
- Divide the top section into two equal parts (left and right of center)
- Tie these two sections into a simple knot—not pulling tight, but loose enough that you can see the knot texture
- Secure the knot with bobby pins pushed through the knot center, hidden within it
- Leave the bottom section down and unclipped, letting your full curl pattern show
- Gently pull at the knot slightly to soften it and show curl definition within the knot itself
- Flip head upside down briefly and fluff the bottom section for maximum volume
Quick facts:
- Works on curls that are at least bra-strap length
- Best done on curls with existing definition and hold
- The knot can be positioned lower or higher depending on hair length and personal preference
- Pairs perfectly with lightweight jewelry since your neck and shoulders are visible
7. The Half-Up, Half-Down Twist
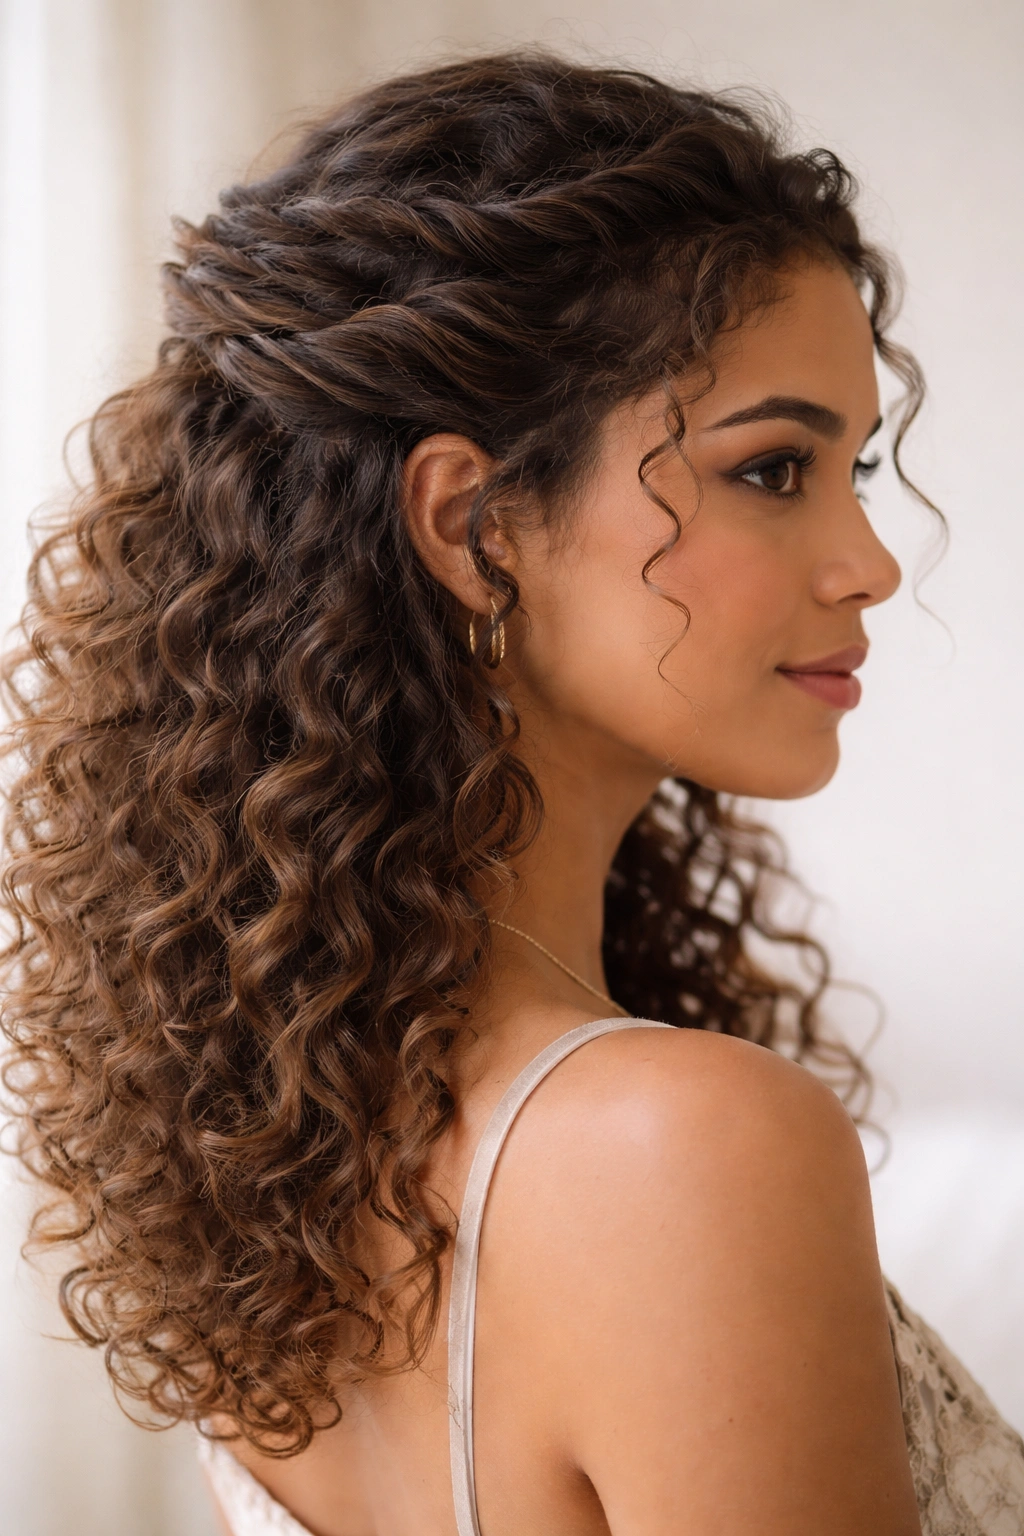
This is the updo for people who don’t want a full updo—you’re keeping curls down where they can show off your full length while pulling back the top portion with a twist element that adds structure and polish.
Why Curly Hair Excels at This Style
Half-up styles are the signature curly-hair move because you get the best of both worlds: a styled, pulled-together top and the full dramatic effect of long curls below. The twist is more interesting than a simple clip and shows more intention.
Execution Method
- Leave the bottom third of your hair completely down and unclipped
- Section the top two-thirds of your hair into two sections (left and right of center)
- Twist the left section tightly from scalp to ear, securing the twist temporarily with a small clip
- Repeat on the right side, creating a matching twist
- Unclip both twists and bring them to the center back of your head, overlapping them slightly
- Secure both together with bobby pins pushed through the overlap point
- Loosen the twists slightly by gently pulling at them to show more texture and curl definition
- Leave a few face-framing pieces loose around your temples for softness
- Mist lightly with flexible-hold spray to prevent the twists from loosening
Worth knowing: If your twists start to fall apart, a tiny dab of lightweight gel at the scalp before twisting will give you much better grip without looking wet.
8. The Braided Halo Updo
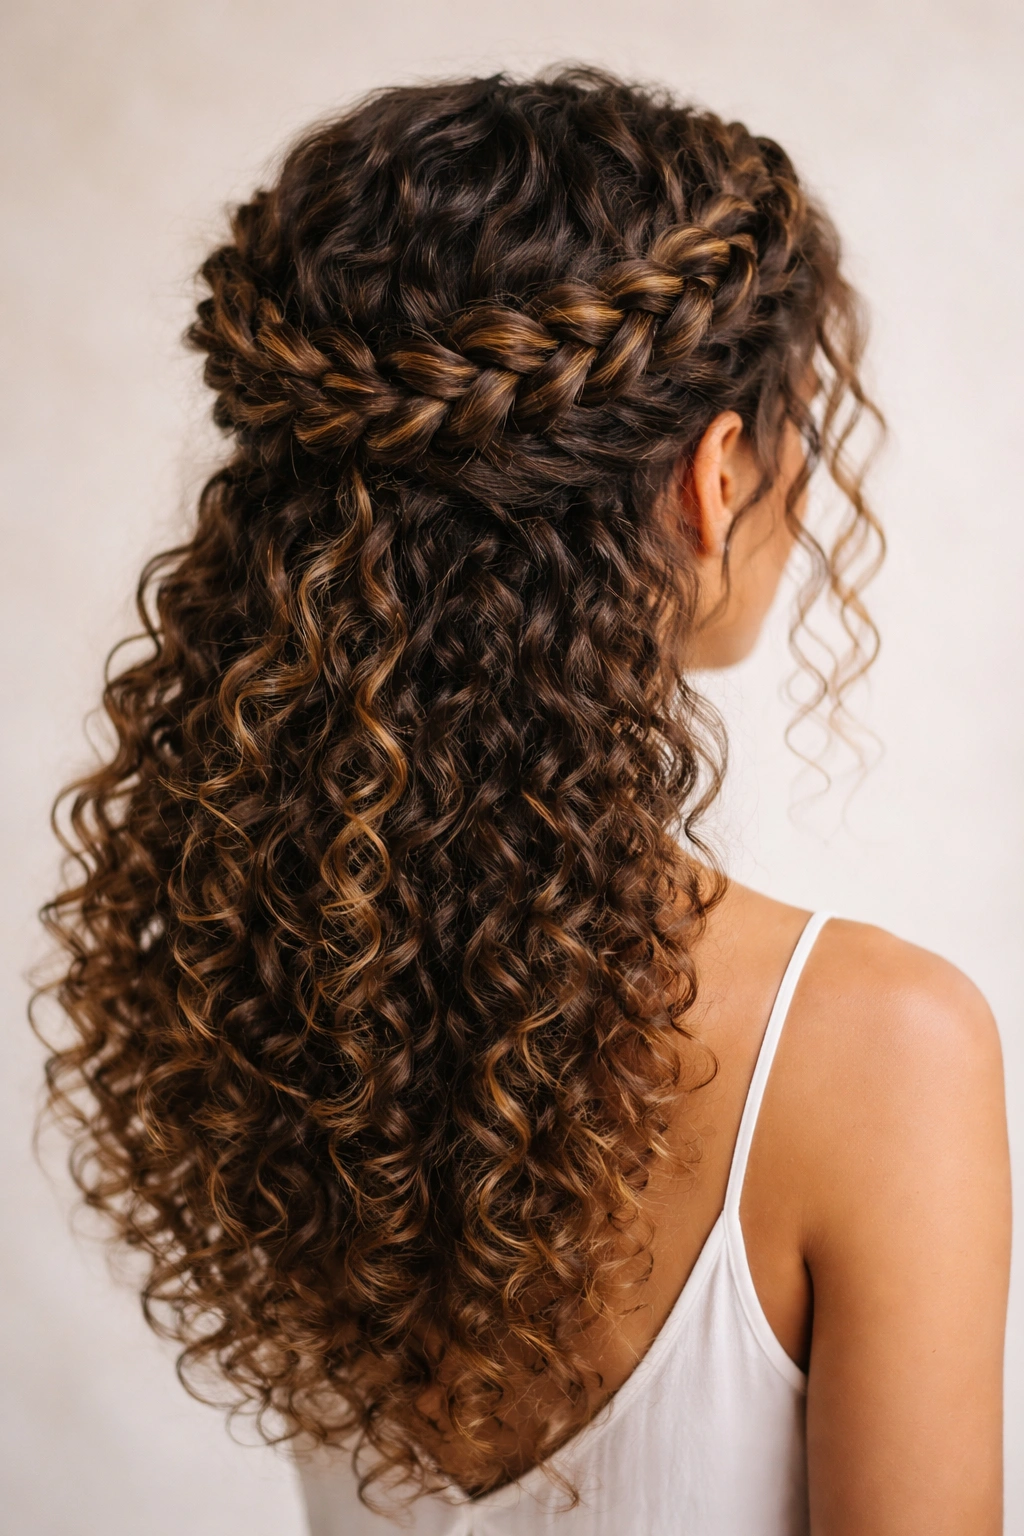
A braid that circles your head is inherently romantic, and when that braid is made from curly hair, it’s absolutely stunning. This updo works on longer curls and creates a bohemian, almost bridal aesthetic that’s wearable for everyday occasions too.
What This Style Offers
The braided halo draws attention upward and creates a polished but not stiff look. For curls, the braid itself shows off individual curl definition, and you’re creating a crown effect that flatters most face shapes and hair lengths.
How to Build It
- Begin at one side near your ear with a small section of hair
- Create a Dutch braid (braiding under rather than over) that travels from one ear, across the back of your head, to the other ear—essentially creating a half-circle or halo
- Keep the braid relaxed and loose so you can see individual curls within the braid itself
- Secure the end of the braid with a small elastic or bobby pin
- Leave all hair below the halo down and loose, showing full curl length
- Gently tug at the braid sections to widen and loosen them, creating a fuller, more textured appearance
- Curl or fluff the remaining down hair so it coordinates with the textured braid
Quick facts:
- Requires at least medium-length curls that reach past the shoulder
- Dutch braid holds better than a regular braid on curly hair because the under-braiding creates more tension
- You can braid all the way around your head if you prefer a full halo, but the half-circle is easier to manage on thick curly hair
9. The Messy Topknot
This is the “I actually just rolled out of bed but made it intentional” updo. It’s genuinely messy in the best way—lumpy, textured, with pieces falling out strategically—and it’s easier to create on curly hair because messy texture reads as intentional rather than unkempt.
Why Curls Win at Messy Topknots
Straight hair has to work to look intentionally messy. Curly hair is basically born for this look because texture is already built in. The messier and more textured your topknot, the better it typically looks on curly hair.
Building Your Messy Topknot
- Flip your head upside down and gather all your hair loosely at the very crown with just your fingers
- Secure with an elastic, but don’t pull it tight—let it sit loosely so hair is already a bit bumpy
- Divide the ponytail into 3-4 sections
- Twist each section loosely and wrap it around the base in different directions, creating an organic, multi-directional knot shape
- Use bobby pins to secure all the twists where they overlap, but don’t pin everything—leave some movement
- Intentionally pull curls and pieces out of the knot so it looks textured and lived-in
- Don’t touch it after this point—the movement and imperfection is the whole point
Pro tip: Do this style on slightly damp curls or on day-two curls that already have texture—freshly styled curls can actually look too neat for this purposefully undone aesthetic.
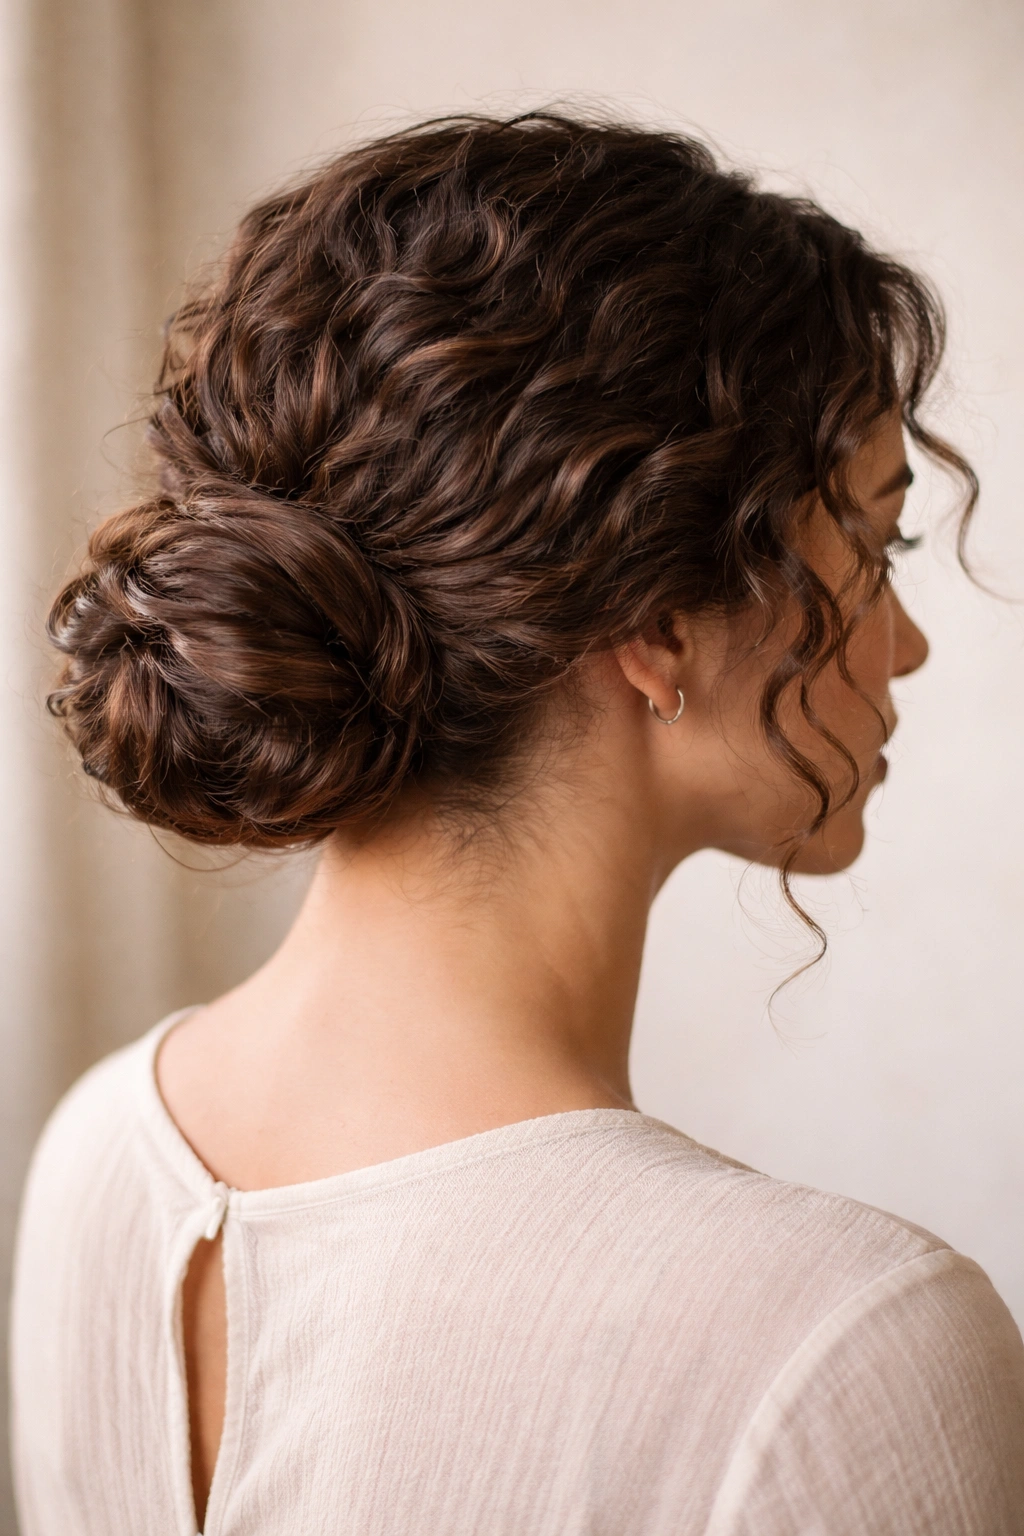
10. The Wrapped Low Bun
A low bun at the nape of your neck with a wrapped base is one of the most polished updos you can create on curly hair, and it’s still relaxed enough for everyday wear. The wrapping detail transforms a basic bun into something that looks more intentional and finished.
Why Curly Hair Looks Great Here
When you keep a bun at the nape, you’re creating a focal point that showcases the beautiful, intricate spiral pattern of your curls. The wrap adds definition and prevents that fuzzy, undefined elastic line that sometimes happens at the base.
Step-by-Step Creation
- Apply a lightweight curl cream or serum to your hair for definition and to slightly tame frizz
- Brush or comb hair into a low ponytail at the nape, positioning it directly at the base of your skull
- Secure with an elastic that matches your hair color
- Take a thin section from the ponytail itself—about the thickness of your pinky finger
- Wrap this section tightly around the elastic base multiple times until the elastic is completely covered
- Secure the wrap with a bobby pin tucked underneath and hidden
- Twist the remaining ponytail loosely and wrap it around the wrapped base to create the bun shape
- Secure the bun with additional bobby pins pushed through the twists, hidden within the texture
- Leave a few curls slightly loose around the wrapped base for softness
What to watch for: If the wrap is too thick, it will look bulky. If it’s too thin, you’ll see the elastic showing through. One thin section wrapped multiple times is the sweet spot.
11. The Curl-Out Ponytail
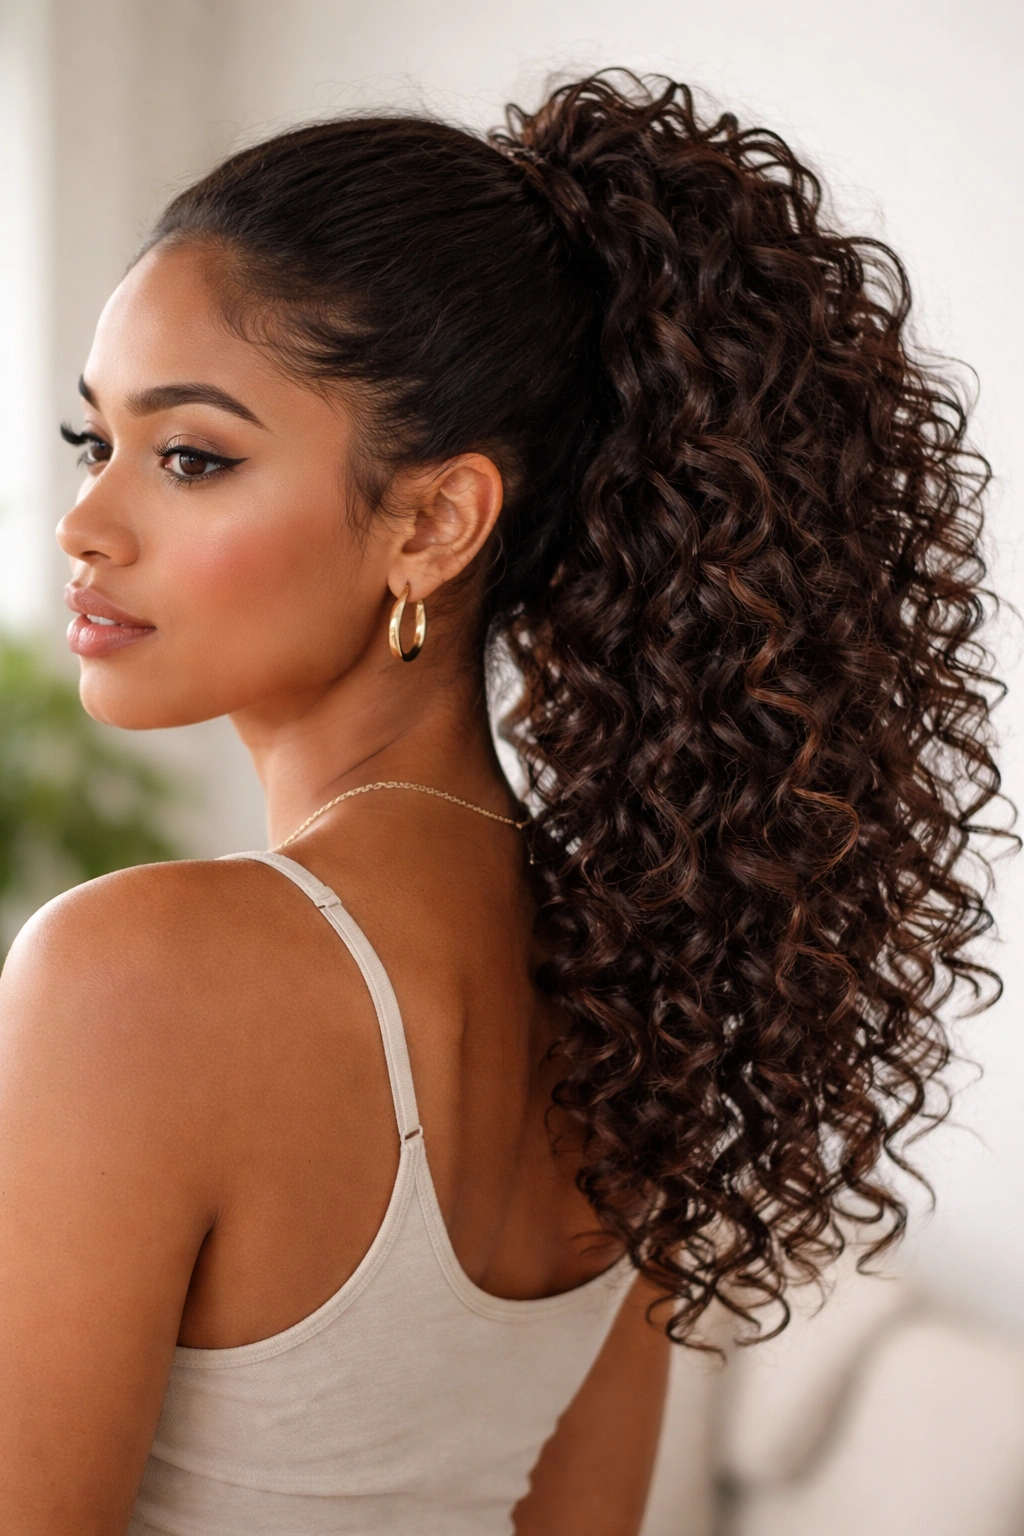
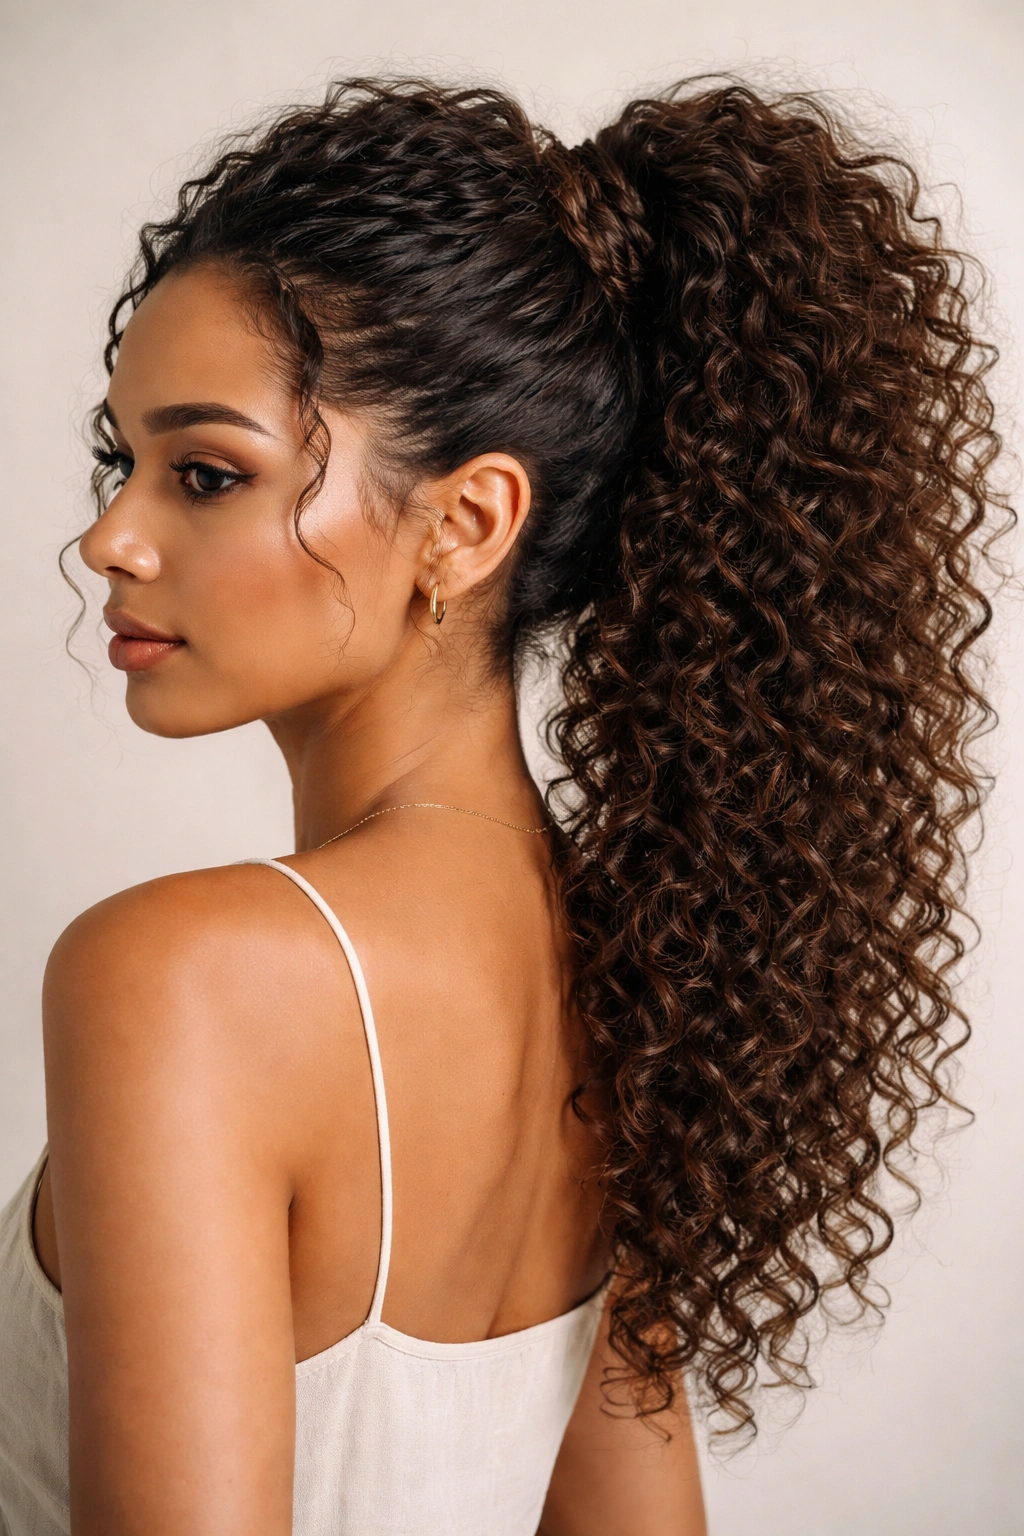
This is a high or mid-height ponytail where you intentionally leave the bottom section untwisted and unpinned so your curls cascade out and down. It’s a modern take on the traditional ponytail that works beautifully on curly hair because the cascading curls are the whole point.
What Makes This Modern
A regular ponytail can look sleek or casual depending on how you style it. A curl-out ponytail is specifically designed to show off your texture, making it feel intentional and on-trend. This is perfect if you want the pulled-together feel of an updo without actually putting everything up.
How to Execute It
- Gather hair into a high or mid-height ponytail depending on your preference and hair length
- Secure with an elastic, but not pulled completely tight—let it sit with a bit of movement
- Leave the elastic unsecured by pins; you want the ponytail to be able to move slightly
- Let the ponytail section cascade down your back, showing full curl definition and length
- Gently flip your head and flip back to encourage the curls to spiral outward rather than clumping together
- Separate any clumped curls with your fingers to show individual spiral definition
- Add a second elastic about halfway down the ponytail if you want to create a stacked or segmented look, leaving space between the two elastics
- Mist with flexible-hold spray to keep the curls from collapsing but not so much that they look stiff
Quick facts:
- Works on any curl length from shoulder-length and longer
- Best done on curls that already have good definition and hold
- You can add a wrapped base around the first elastic for a more polished look, or leave it simple and casual
- Perfect for transitioning from day to night by just adding earrings or a hair accessory
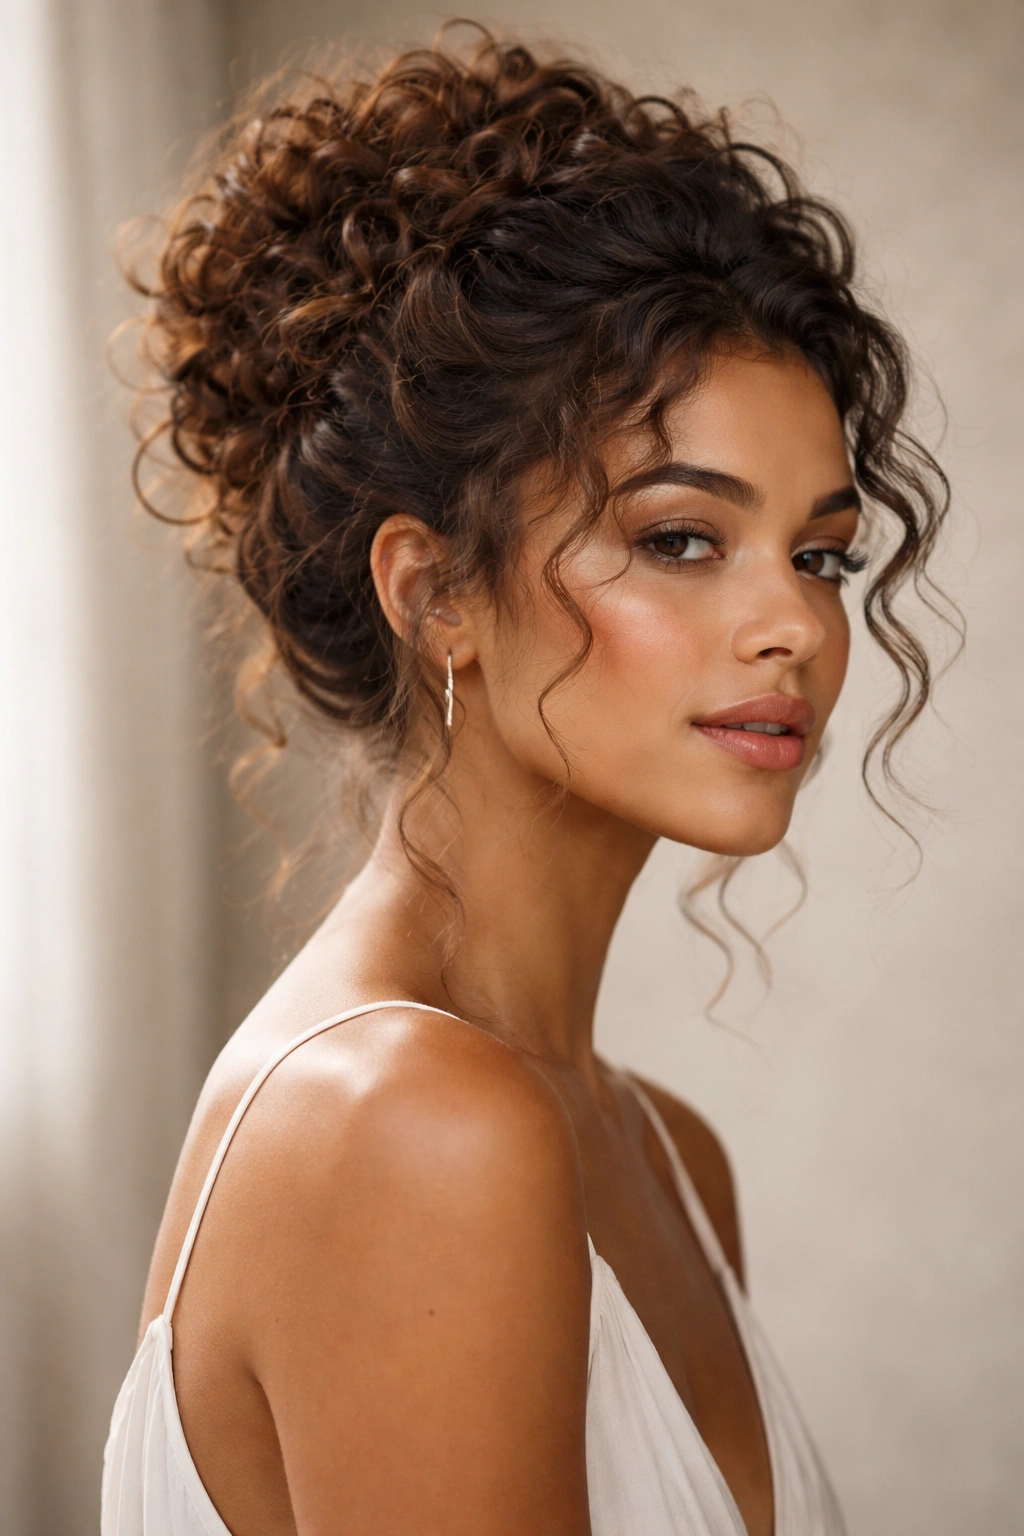
12. The Side-Swept Romantic Updo
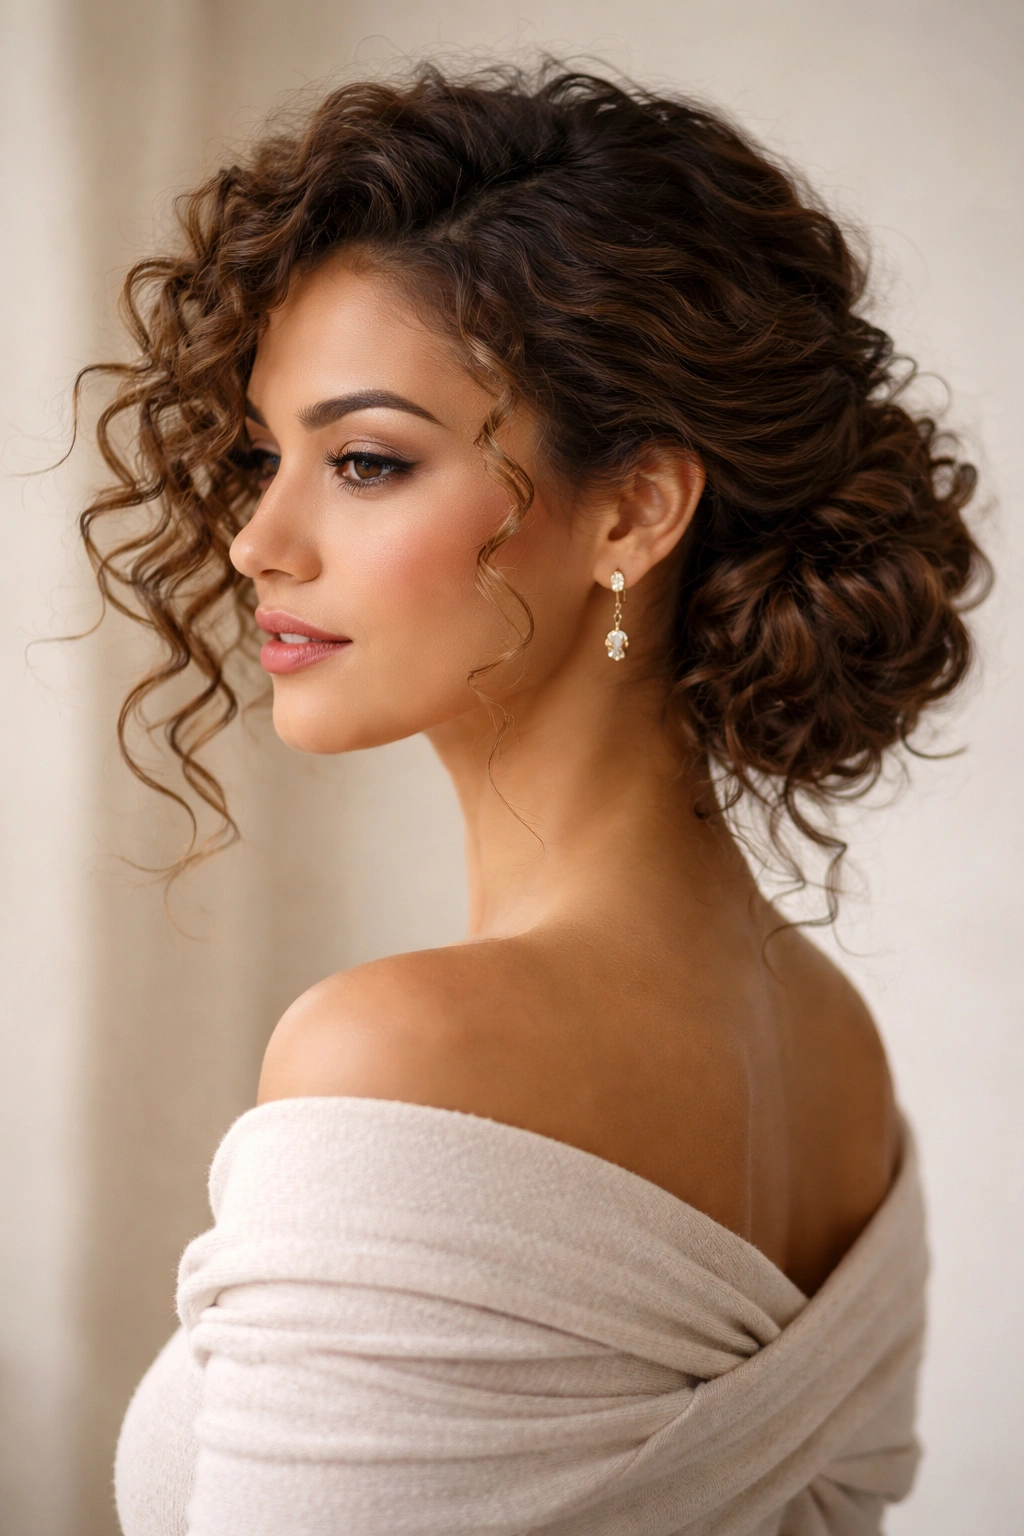
All the hair is swept to one side of your head, gathered low, and twisted into a loose, romantic knot shape. This updo is inherently flattering, elegant, and works beautifully on curly hair because the side sweep shows off one side of your face while the texture of the knot adds softness.
Why This Updo Feels Special
The asymmetry of a side-swept style is automatically more interesting than a centered updo. For curly hair, the one-sided placement means you’re showcasing your curl pattern on one side of your head, creating beautiful visual depth and dimension.
How to Create It
- Brush or comb your curls to one side—let’s say the right side—gathering them loosely as you go
- Don’t smooth them completely; you want to see curl definition even as you gather them
- Position the gathered hair low, near the left side of your nape
- Loosely twist the gathered section 2-3 times around itself to create a coiled shape
- Secure with bobby pins pushed through the coil, anchoring it at the back of your head
- Leave the left side of your head and face completely free and showing your full curl pattern
- Pull out a few curls strategically from the twisted knot to soften it
- Let some curls fall from the knot down your back for a romantic, undone feel
- Light hairspray keeps everything in place without crunch
Insider note: This style photographs beautifully from the side because the asymmetry creates visual interest that a centered updo sometimes lacks.
13. The Pinned Curl Pattern
Instead of twisting or braiding, you’re sectioning your curls and strategically pinning them in place to create an updo where each individual curl is visible, celebrated, and pinned precisely. This is more involved than other styles but absolutely stunning on curls with great definition.
What Sets This Apart
This updo is architectural and intentional in a way that shows you know your curl pattern inside and out. It works on any curl type—coils, spirals, waves—because you’re literally mapping out where each curl goes and pinning it there.
Method and Process
- Section hair into 4-6 larger sections (depending on density and desired effect)
- Within each section, identify 3-5 individual well-defined curls
- Pin each curl up and back toward the crown, securing with a bobby pin inserted at the base of the curl
- Each pin should anchor one curl, so if you have 20 beautiful curls, you’re using approximately 20 bobby pins
- Leave some curls loose and unpinned at the very crown for softness and to avoid a too-structured look
- The overall effect should look like organized chaos—each curl is placed but not smoothed or tamed
- From the front, people see volume and texture; from the back, they see the architectural curl arrangement
Worth knowing: This style requires curls that hold their shape well. It works best on second-day or third-day curls that already have product in them and are set.
14. The High Twisted Pony
A high ponytail becomes an updo when you twist the ponytail section and coil it around the base. It’s a hybrid between a ponytail and a bun, giving you the pulled-together feel of an updo while still showing significant curl length and definition.
Why Curly Hair Thrives with This
The high placement suits most face shapes, and twisting the ponytail before coiling it adds visual interest and texture. For curly hair, you get the benefit of a styled, pulled-back look without sacrificing the ability to show off your curl definition.
Building This Style
- Gather hair into a high ponytail at the crown, holding it snugly with an elastic
- Twist the ponytail section tightly from the elastic down to about halfway through the ponytail length
- Stop twisting and leave the bottom half of the ponytail untwisted and loose
- Wrap the twisted section around the base of the elastic, creating a coiled shape
- Secure the twisted coil with bobby pins pushed through the twist, hidden within it
- The bottom half of the ponytail hangs loose below the coiled base, showing full curl definition
- Gently pull at the coiled section to loosen it and show texture
- Flip your head briefly to encourage the hanging section to spiral outward
Pro tip: If your high ponytail feels too tight after a few hours, loosen the elastic slightly by gently pulling at the base. This redistributes the tension and prevents headache.
15. The Tucked and Pinned Updo
This is less about twisting and braiding and more about strategically pinning curls up and under to create volume and shape at the crown. It requires patience and bobby pins, but the result is an updo that looks sculptural and intentional.
What Makes This Different
Rather than gathering all your hair and securing it with one elastic, you’re working section by section, pinning each section under and up. This distributes weight more evenly across your scalp and creates an updo that’s more stable and comfortable for all-day wear.
How to Execute It
- Divide your hair into 6-8 vertical sections running from your forehead to your nape
- Starting with one side section, lift it up and pin it horizontally, tucking the ends under and back toward the crown
- Move to the next section and repeat, overlapping the pinned sections slightly
- Work your way around your entire head, pinning each section up and under
- The pinning creates a rounded, sculptural shape at the back of your head
- Leave face-framing pieces unpinned on both sides for softness
- The overall effect should feel textured and curved, not flat or smooth
- Use at least 10-12 bobby pins total, distributed throughout to balance weight
Quick facts:
- Takes longer than other updos but holds incredibly well all day
- Works on any curl length from shoulder-length up
- Best done on curls with some product already in them for better grip
- You can loosen it slightly by gently pulling at various sections if you want a less structured look
Final Thoughts
The best curly updo for you is the one that works with your curl pattern, not against it. Whether you’re drawn to the polished elegance of a wrapped low bun, the bohemian romance of a braided halo, or the playful energy of double buns, the key is choosing a style that you’ll actually wear repeatedly because it feels good and looks great on your curls specifically.
Start with one or two styles that match your comfort level—if you’re new to updos, the loose bohemian or high textured bun are forgiving places to begin. Once you’ve mastered the basics, you’ll find yourself naturally gravitating toward certain techniques and placements. Your curls will tell you what works best. The stunning thing about curly hair is that texture is an asset for updos, not a limitation. Every time you try a new style, you’re learning more about how your specific curls behave, hold, and look best. That knowledge compounds, and before long, you’ll be creating variations and combinations that are entirely your own.