Medium length curly hair sits in that sweet spot where you have enough length to experiment with different styling options, but short enough that you’re not wrestling with tangles all day. It’s the Goldilocks zone of curl styling — you can go bold with statement styles one day, then pull everything back into a practical updo the next. The trick is finding cuts and styles that work with your natural texture instead of against it, because curls have opinions about how they want to fall.
The styling possibilities for medium curly hair are honestly underrated. Most people either think they’re stuck wearing their curls the same way every single day, or they assume they need to go really short to make maintenance easier. Neither is true. With the right haircut, some styling know-how, and a willingness to embrace what your curls actually want to do, you can create a different look almost every day of the week. Some styles emphasize your natural curl pattern, while others encourage stretch and movement. Some are practical enough for work or school, while others are dressy enough for special occasions.
The styles in this guide work specifically for medium length curls — roughly chin-length to collarbone-length, which gives you the perfect canvas. You’ll find options for every hair type, from loose waves to tight coils, and every lifestyle need, from low-maintenance to more involved. Some of these styles take five minutes; others are weekend projects when you have time to really play with your hair. The key is knowing your curl pattern, your porosity, and your tolerance for styling time so you can pick what actually works for your life.
1. Shaggy Layers with Wispy Ends
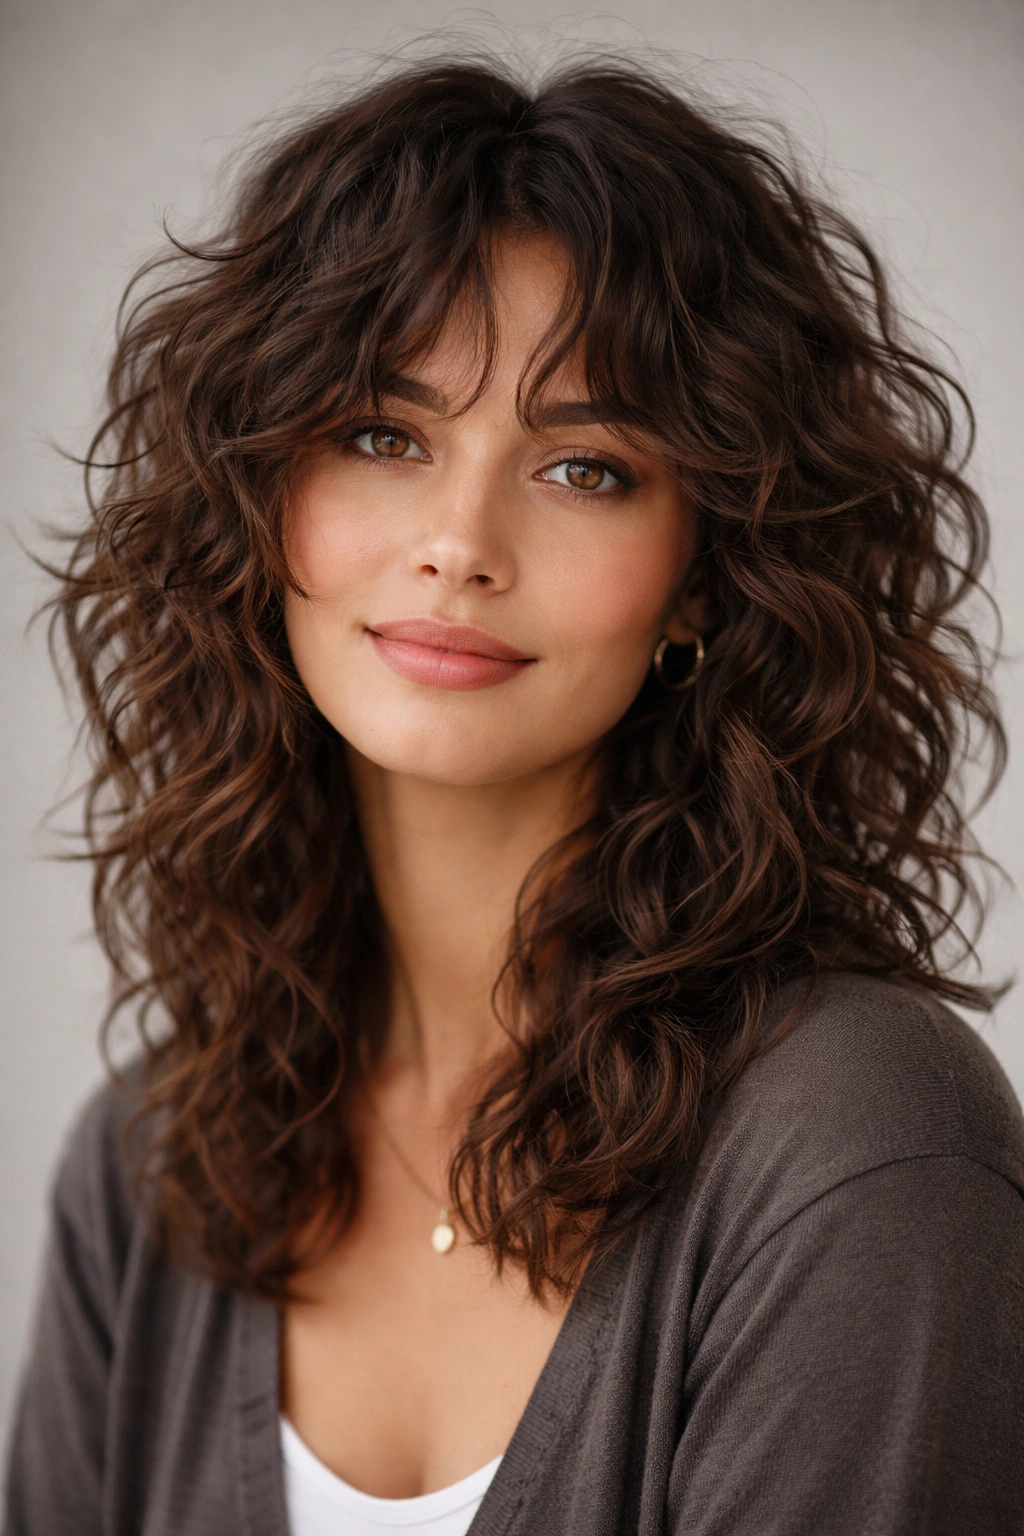
Shaggy, heavily layered cuts are having a major moment, and for good reason — they’re essentially built for curly hair. Layers break up bulk and create natural texture and movement that curls provide naturally. With this style, your stylist cuts in lots of choppy, face-framing layers throughout the cut, starting higher up and working toward longer pieces at the bottom. The result feels effortlessly undone, like you just woke up with perfect texture.
Why This Cut Works So Well for Curls
Layers remove weight from curly hair without actually removing much length, which means your curls get to bounce and define themselves rather than pulling down under their own heaviness. The choppy texture mingles beautifully with your natural curl pattern — you’re not fighting against it or trying to smooth it down. Each layer catches at a slightly different point, creating this dimensional, almost piecey effect that looks intentional and styled even when you’re just wearing your curls naturally. This is the style that makes people think you spend two hours on your hair when you really just applied product and let it air dry.
How to Style and Maintain It
- Use a curl-defining cream or gel applied to soaking wet hair, scrunching upward to encourage curl formation
- Diffuse your hair or let it air dry — movement and height happen naturally with this cut
- Refresh curls on day two or three with a light mist of water and a bit more product on the ends
- Get trims every 8-10 weeks to maintain the layer shape and keep ends from looking scraggly
- Avoid brushing when dry; use a wide-tooth comb on wet hair or your fingers to separate curl clumps
Pro tip: Ask your stylist to cut the layers a bit longer around your face if you want some length you can tuck behind your ears, but shorter layers throughout the back and crown for maximum movement and curl definition.
2. Textured Bun or Puff on Top

A textured bun or high puff is basically curly hair’s easiest power move. You pull everything up, secure it loosely at the crown, and let your curls do their thing poking out from the elastic. It’s not trying to be sleek or polished — the whole point is that it’s full of texture and movement. This works whether your curls are tight coils, loose waves, or somewhere in between.
Why Curly Girls Love This Style
This style is the definition of low-effort, high-impact. You’re not fighting your curls; you’re actually celebrating them by putting them front and center. The puff shows off your natural texture in a way that feels modern and intentional. Plus, it keeps everything off your face while still looking way more deliberate than just throwing your hair in a regular ponytail. It’s also incredibly versatile — you can dress it up with a cute claw clip or leave it bare for a casual vibe. And it genuinely takes maybe 90 seconds.
How to Make It Work for You
- Start with damp or dry curls — both work, but damp curls will be bouncier
- Flip your head upside down and gather hair at the crown using a loose elastic or scrunchie
- Gently flip back and adjust so the puff sits where you want it — higher for more drama, lower for subtlety
- Use a silk or satin scrunchie instead of regular elastics to prevent breakage and frizz
- Pull some baby hairs or face-framing pieces loose if you want a softer, less severe look
- Refresh the style by misting lightly with water if it falls flat during the day
Worth knowing: This style actually gets better on day-two or day-three hair because older curls have more texture and hold their shape better in the elastic. Fresh curls sometimes look a bit droopy in a puff until they’ve set in.
3. Side-Swept Waves
This style sweeps most of your hair dramatically to one side, creating an asymmetrical, romantic look that works beautifully with medium curly hair. It’s polished enough for a date or a more formal event, but still celebrates your natural curl pattern instead of fighting it. The sweeping motion adds an elegant, elongating effect that flatters most face shapes.
What Makes This Style So Flattering
Side-swept waves create movement and flow that draws the eye downward, which is incredibly flattering. The asymmetrical placement means you’re showing off one side of your face while adding softness and dimension on the other side. With curly hair specifically, this style lets you showcase your curl definition on the side that’s most visible while still keeping everything off one ear. It feels intentional and put-together without looking overly done.
How to Create and Keep This Look
- Start with curly hair that’s mostly dry or just damp
- Use your fingers or a wide-tooth comb to gently separate curl clumps and create a deeper side part
- Rake styling cream or light gel through the curls on your sweeping side, encouraging them to fall in the direction you want
- Use a diffuser or let air dry, occasionally guiding the hair with your hand so it dries sweeping in the right direction
- Secure the back with a small bobby pin hidden underneath if you need the style to stay in place (useful for longer events)
- Let one or two face-framing pieces fall softly around your face rather than tucking everything back
Pro tip: This style looks especially stunning if you have some shorter, face-framing layers cut into your medium length curls — they’ll catch the light and add even more dimension to the sweep.
4. Curly Bob with Bangs
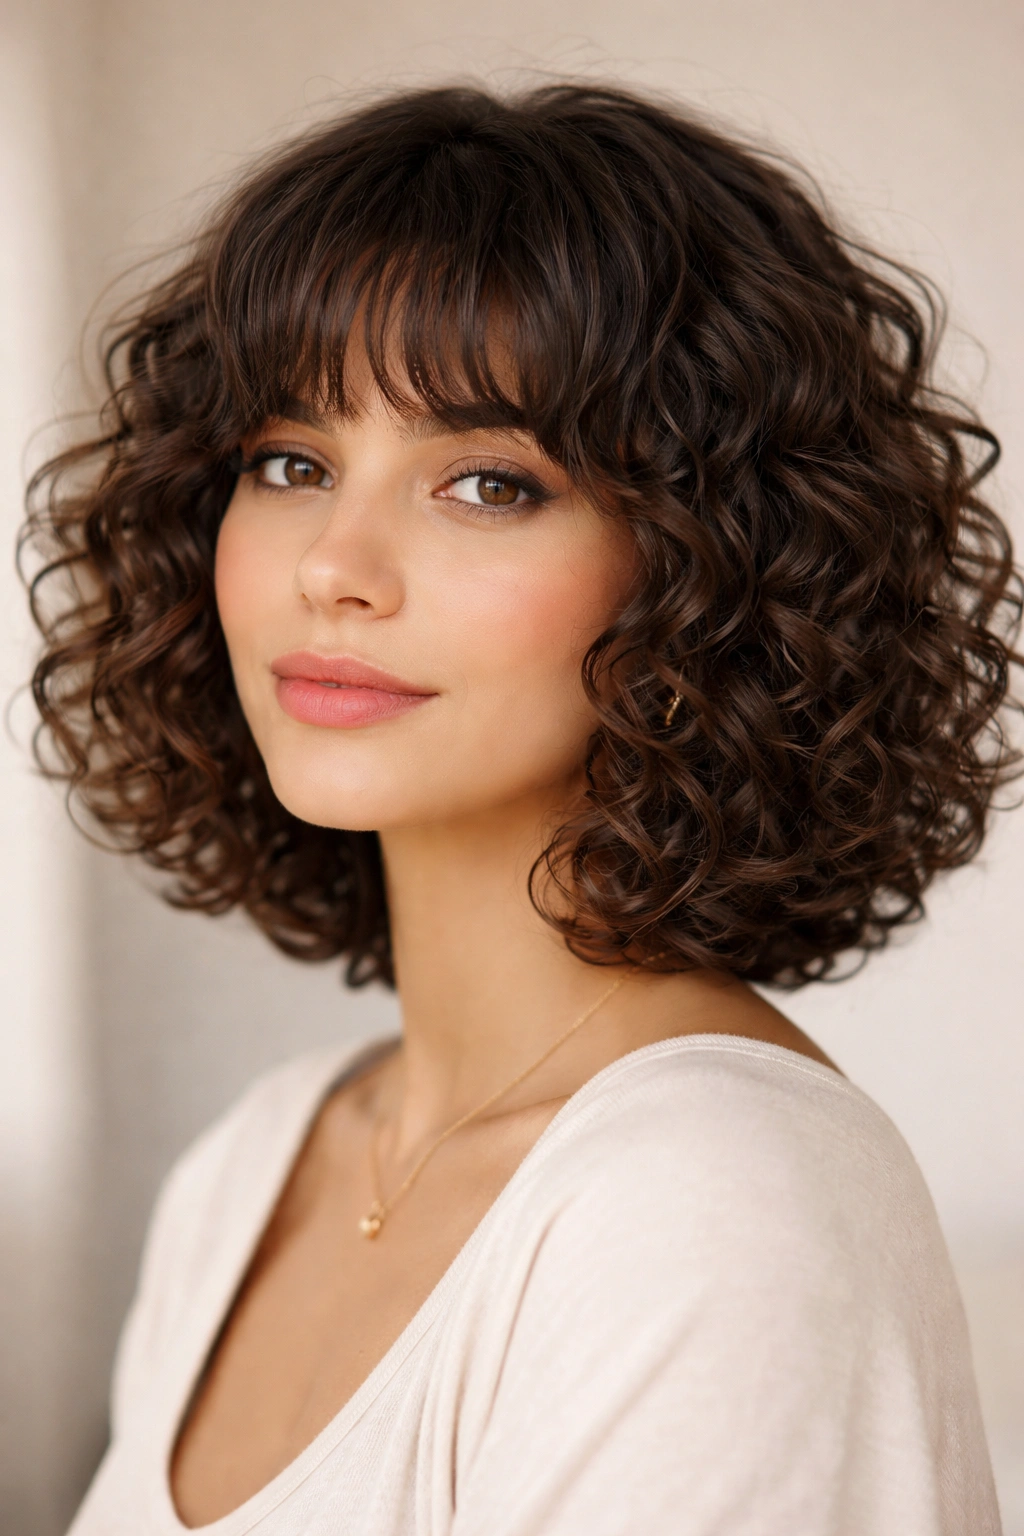
A curly bob is a classic for a reason — it’s a genuinely flattering length that works with curly hair instead of against it. Add some bangs, and suddenly you have a style that looks modern, chic, and intentional. The key is finding the right bob length and bang style for your specific curl type and face shape. This isn’t a blunt, super-straight Instagram bob — it’s textured and playful.
Why Bobs Work So Well for Curly Hair
Bobs sit at a length where curly hair is naturally full and bouncy, but not so short that you look like you’re battling frizz. The cut gives you defined shape without requiring blow-drying or a ton of styling time. Bangs add a fashion-forward element that makes the whole look feel intentional and styled. With curls, bangs have movement and softness that straight-haired people have to work harder to achieve. You’re getting a trendy look that actually suits your hair type perfectly.
Tips for Making Your Curly Bob Shine
- Ask your stylist for a textured, choppy bob rather than a blunt cut — layers help curls define themselves
- Consider a longer fringe (that grazes your eyelids) rather than super-short bangs, which can look less flattering with shorter curl patterns
- Side-swept bangs often look better than center-part bangs with curly hair, since they have more movement
- Style with a curl cream applied to damp hair, scrunching and plopping (wrapping in a towel) to encourage definition
- Dry with a diffuser or let air dry — styling time is minimal with a good cut
- Refresh bangs throughout the day with a light spray bottle and a quick finger-comb
Worth knowing: Bangs need more frequent trims than the rest of your hair — plan on a trim every 3-4 weeks if you want them to look intentionally styled rather than overgrown.
5. Half-Up, Half-Down with Clips
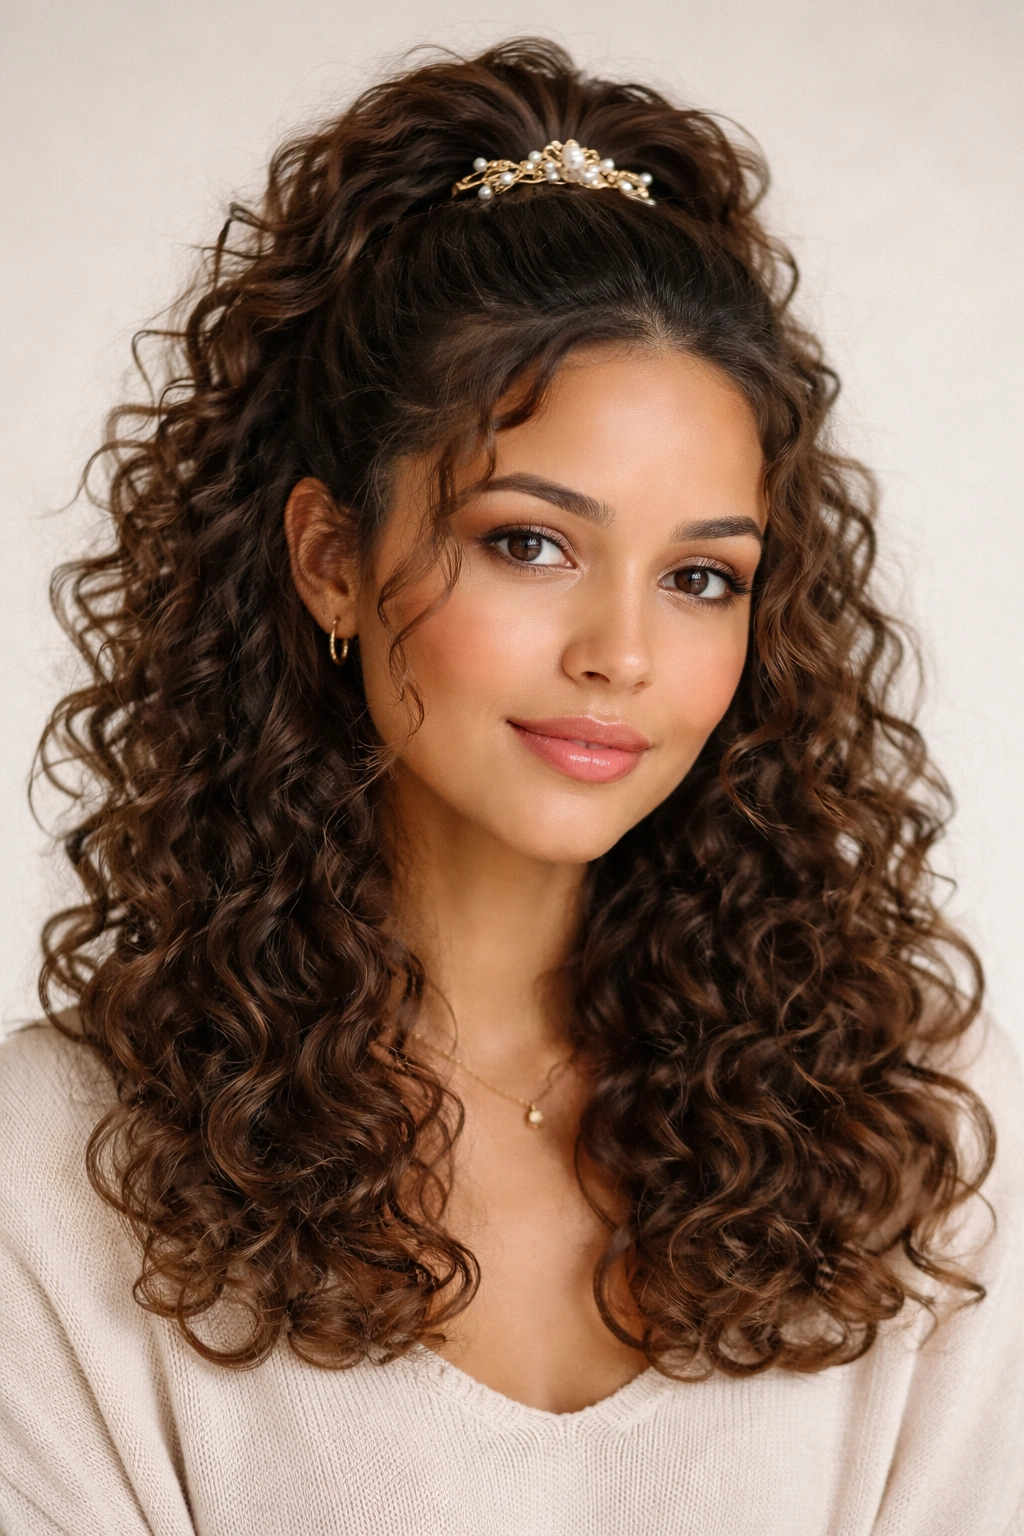
This style is basically the perfect “I tried but I didn’t try too hard” option. You’re taking the top half of your hair (or just a small section from each side of your head) and securing it with clips while letting the rest cascade down. It’s practical enough to keep hair out of your face but still shows off your full curl pattern. It’s also incredibly quick to achieve.
Why This Style Is So Versatile
Half-up styles work for every occasion and every hair type, but they’re especially gorgeous with curly hair because the clip-secured section creates texture and dimension while the loose curls below show off your full curl pattern. You get the best of both worlds — a styled, intentional look without sacrificing the drama of your full curly mane. This style works whether you’re going to work, running errands, or heading somewhere dressier. Switch out your clips, and suddenly the whole vibe changes.
How to Master This Look
- Take a section of hair from one side of your head (starting at your temple) and twist or braid it gently back toward the crown
- Repeat on the other side so you have two sections being held back
- Secure both sections with a decorative clip at the back of your head, or cross them and clip them together
- Alternatively, take just the top layer of curls at your crown and clip them up, leaving all the hair below down
- Adjust the clip placement and how much hair you’re securing based on your face shape and how much of your face you want framed
- Leave some face-framing pieces loose for softness
- Smooth any flyaways with a light smoothing cream, but don’t over-polish — some texture is the point
Pro tip: Use clips with grip instead of metal barrettes — they’ll actually hold curly hair in place rather than sliding around.
6. Twisted Crown Braid
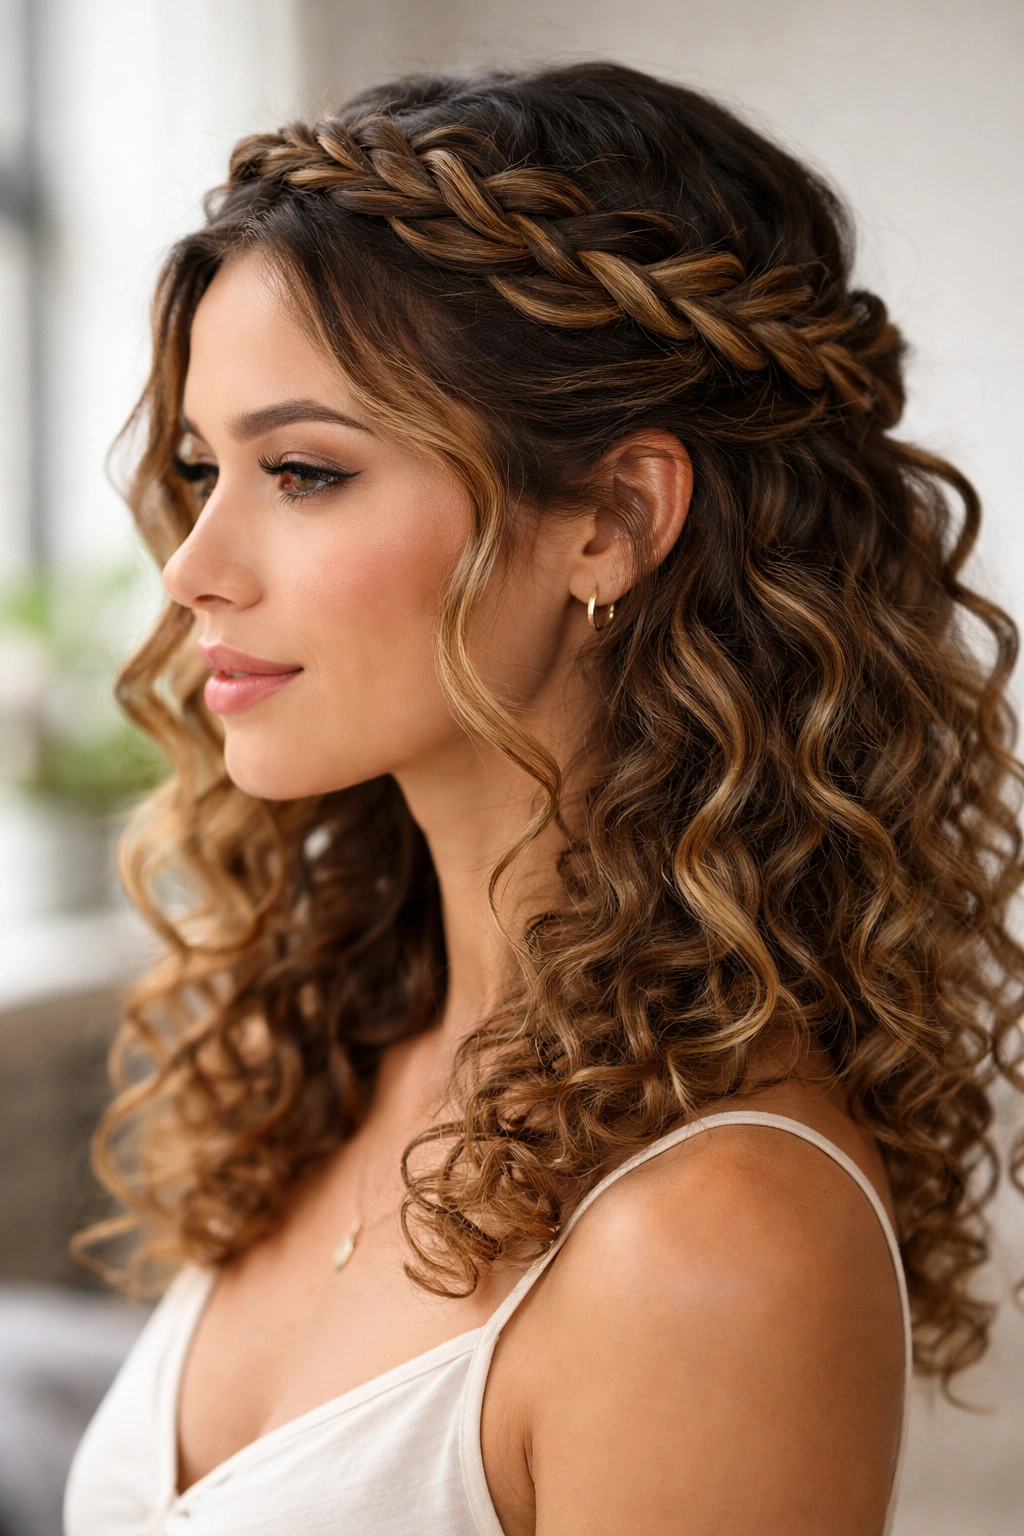
This style wraps your curls around your head in a twisted or braided crown, making you look effortlessly sophisticated. It’s perfect for days when you want your curls off your face and neck but don’t want to look like you’re just pulling your hair up. It takes a bit more time than a simple ponytail, but it’s absolutely worth it for the payoff.
What Makes Crown Styles So Special
Crown braids or twists frame your face beautifully while keeping hair completely off your neck — perfect for warmer weather or if you just want your curl pattern visible from the back. This style works with literally any outfit, from jeans and a t-shirt to something dressy. It reads as intentional and polished without being overly formal. And honestly, there’s something really nice about knowing your hair is secured and you don’t have to worry about it falling in your face.
How to Create a Twisted Crown
- Start with hair that’s mostly dry (damp curls can slip and unravel more easily)
- Section off a portion of hair on one side of your head near your ear
- Gently twist this section as you move it across the back of your head toward the opposite side
- As you twist, pick up small sections of hair from underneath, incorporating them into the twist
- Continue until you reach the opposite side of your head
- Secure the end with bobby pins, tucking the ends into the twist so they’re hidden
- Gently pull and loosen the twist slightly so it looks full and has texture
- Leave some loose curls around your face if you want, or tuck everything in for a more polished look
Worth knowing: This style actually looks better on day-two or day-three hair because settled curls have more grip and hold the twist better. Fresh wash day curls can sometimes slip out of twists.
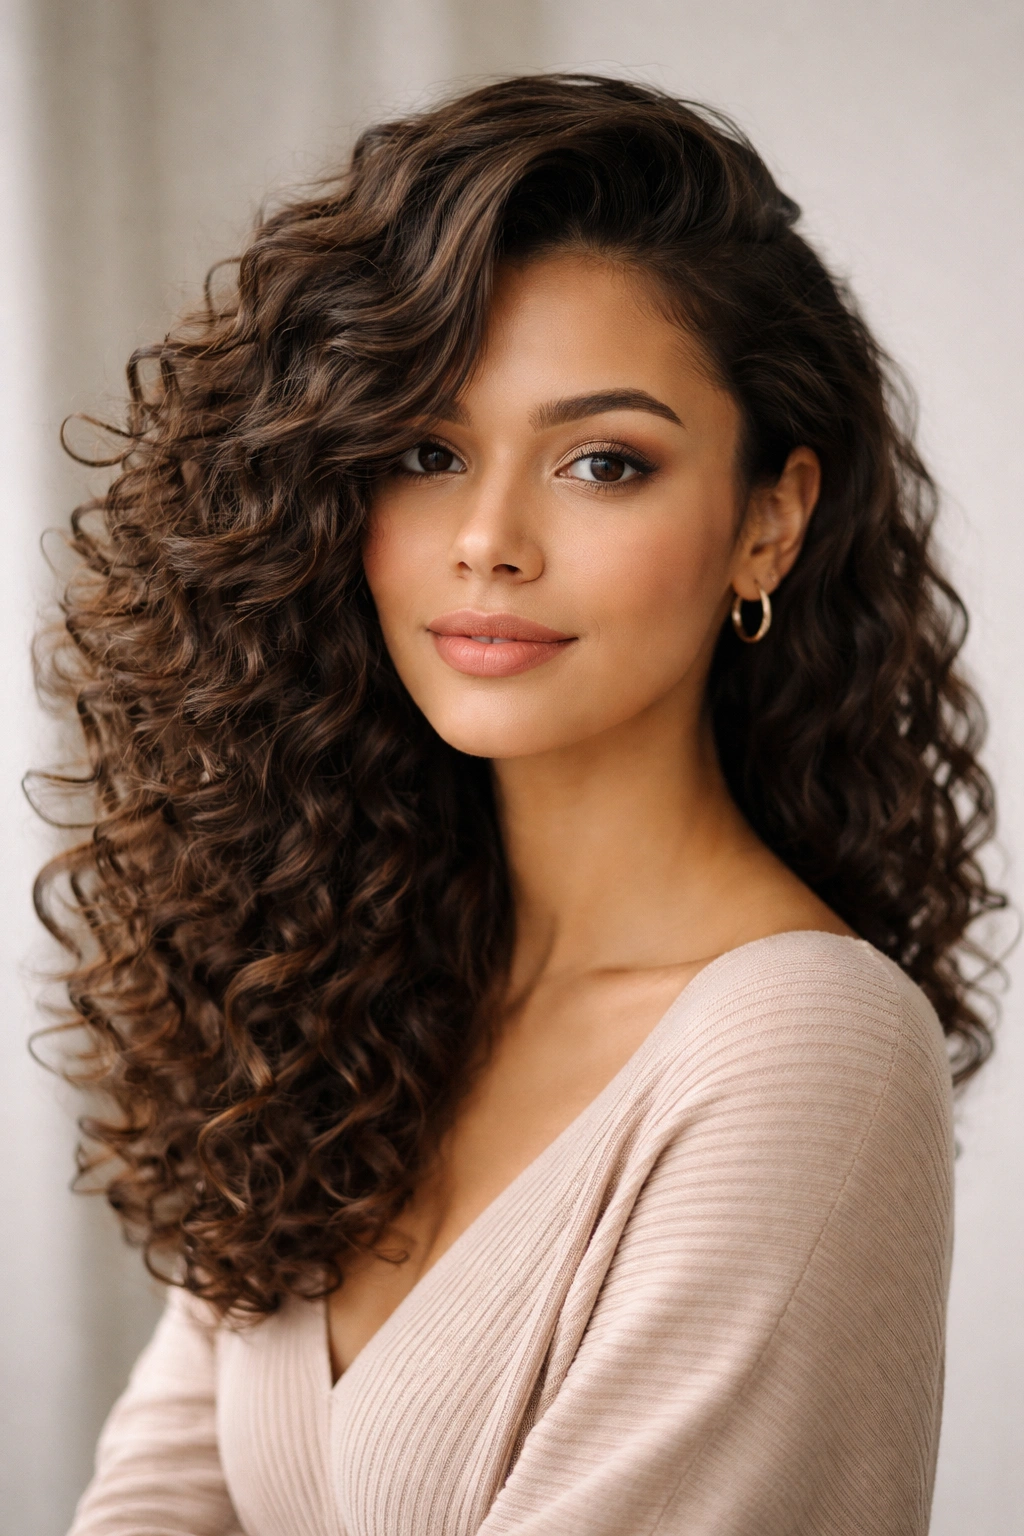
7. Bouncy Ringlets with Gel Cast
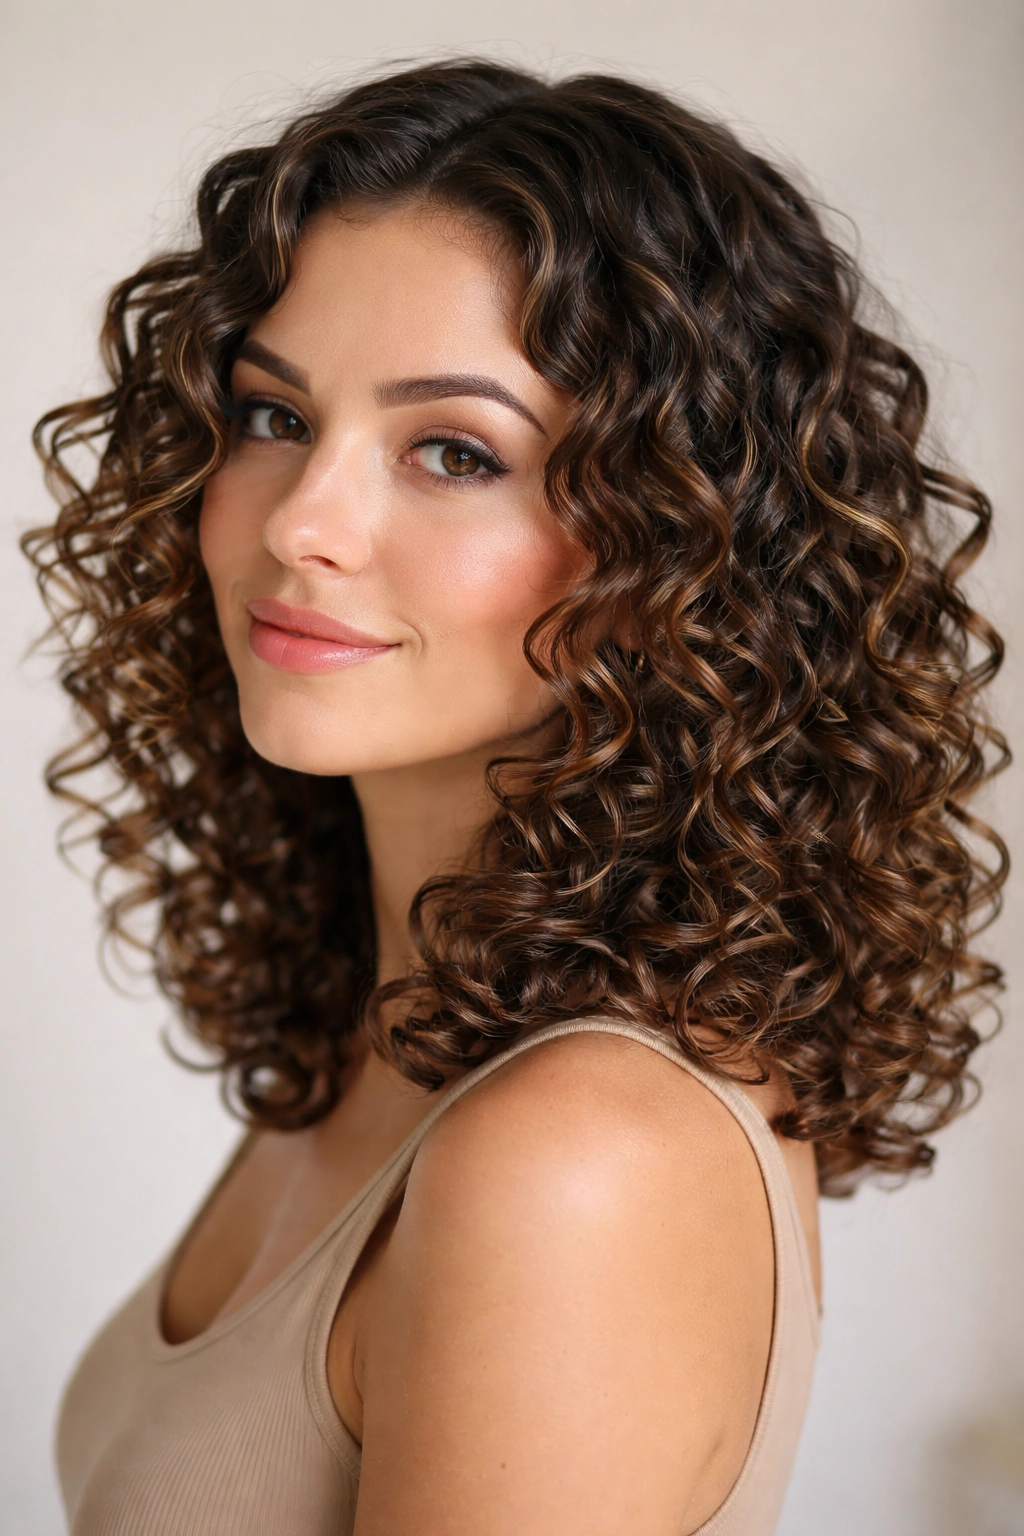
This is the style for when you want your natural curl pattern to be the absolute star. You’re applying gel or styler to saturated curls, using a diffuser to dry them, and then scrunching out the gel cast to reveal soft, bouncy, defined ringlets. This style is all about letting your curls be 100% themselves without any mixing or blending — each curl gets to be its most beautiful, bounciest self.
Why Curl Definition Matters
Well-defined ringlets are genuinely stunning. When each curl is clearly separated and bouncy, it shows off your hair’s natural texture in a way that feels luxe and intentional. This style makes people think you have the most beautiful curly hair they’ve ever seen, even if it’s the same curls you’ve always had — you’re just showing them off properly. The key is using the right products and technique to enhance what you already have.
How to Get Defined Ringlets
- Start with freshly washed, soaking wet hair
- Apply a lightweight curl cream throughout, concentrating on the mid-length and ends
- Layer a curl gel or styler on top, scrunching it in using an upward motion
- Use a microfiber towel or cotton t-shirt to plopped your hair (wrap it up for 10-20 minutes) to remove excess water
- Use a diffuser on low to medium heat, working in sections and cupping the curls gently
- Let the hair mostly dry, then do a final 30 seconds on cool setting to set the style
- Once completely dry, gently scrunch out the gel cast with your hands or a microfiber towel to soften and separate curls
- Mist lightly with finishing spray if you want to fight humidity or frizz
Pro tip: The gel cast (that slightly stiff feeling) is actually protecting your curls — scrunch it out only once the hair is completely dry, not before.
8. Sleek Stretched or Straightened Look
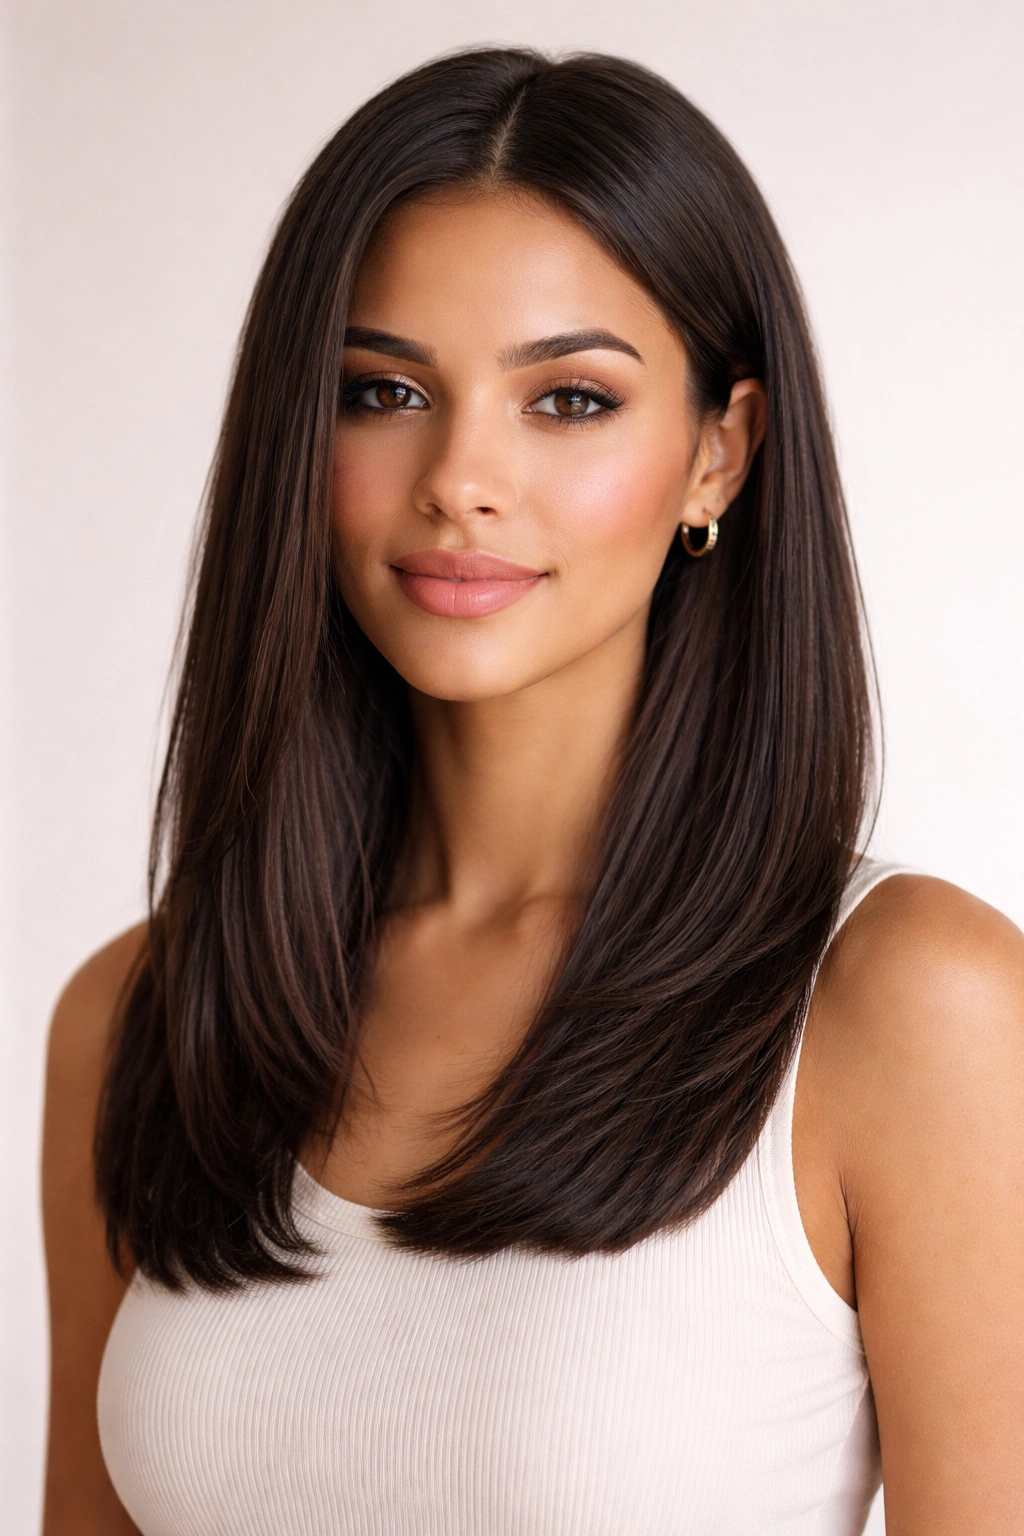
Sometimes you want a break from curls, and that’s completely valid. A stretched or straightened version of your medium curly hair is like having an entirely different hairstyle. You can stretch curls using smoothing products and blow-drying techniques, or go fully straight with a flat iron. Either way, you’re trading bouncy curls for sleek smoothness, which is a genuinely different aesthetic.
When You Want to Switch It Up
Switching between curly and straight versions of your hair gives you the flexibility to match different moods, outfits, or occasions. Straight medium-length hair has a different vibe than curly — it’s sleeker, sometimes more polished, and definitely easier to style into smooth ponytails or waves. Taking a break from your natural pattern occasionally also gives your curls a rest and a chance to refresh. Plus, it’s just fun to have options.
How to Stretch or Straighten Safely
- Use a smoothing cream or serum on damp hair to reduce frizz and protect from heat
- For stretched curls: blow-dry with a blow-dryer and paddle brush, gently pulling sections straight as you dry
- For fully straight: use a flat iron on medium heat (never max heat with curly hair), working in small sections
- Always use a heat protectant product before using heat tools
- Work in sections and take your time — rushing leads to frizz and damage
- Smooth any flyaways with a light finishing serum
- Use a silk pillowcase at night to keep your straight style smooth longer
Worth knowing: Straightening curly hair regularly, especially with heat, can gradually change your curl pattern. If you’re straightening frequently, deep condition weekly and get regular trims to keep hair healthy.
9. Curly Mullet with Modern Texture
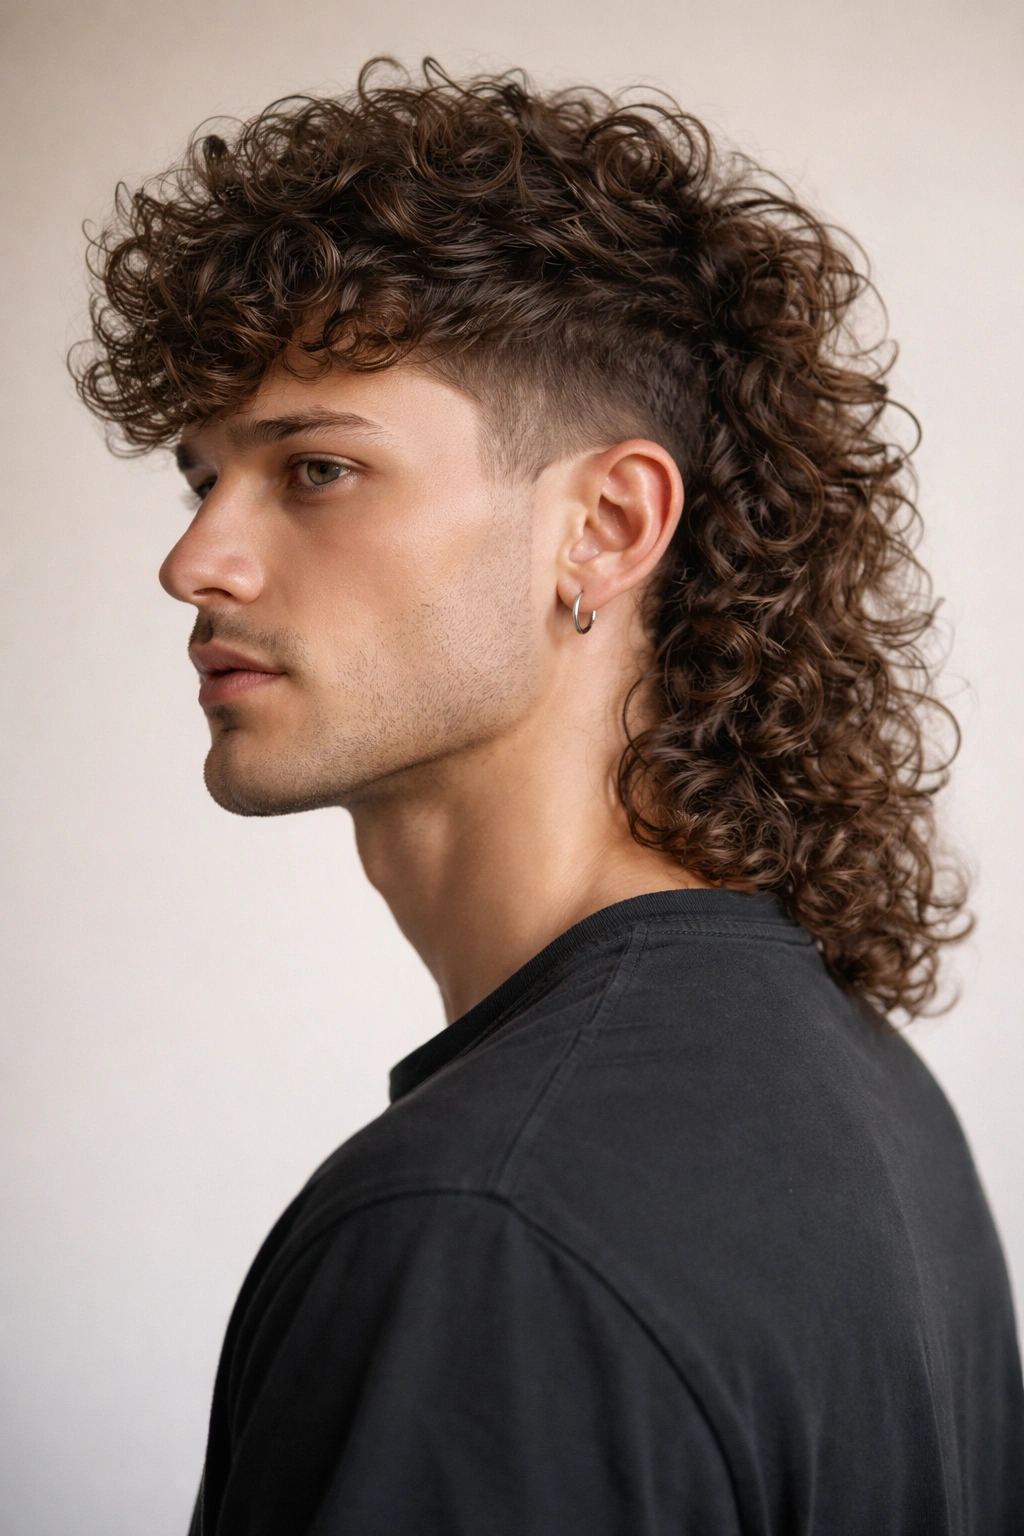
Yes, mullets are back, and they actually look incredible on curly hair. A modern curly mullet keeps things short and textured on top with length in the back. It’s edgy, fashion-forward, and celebrates your curl texture in a totally unexpected way. This is the style for someone who wants to make a statement.
Why Mullets Work for Curly Hair
The contrast between shorter, fuller curls on top and longer curls in the back creates a really dynamic, interesting silhouette. The shorter top actually shows off curl definition beautifully because there’s less weight pulling curls down. The longer back lets you keep some length and shows off the full journey of your curl pattern. It’s a bold, modern style that actually suits curly hair perfectly — way better than it ever suited straight hair.
How to Style a Curly Mullet
- Apply curl cream to damp hair, scrunching and plopping to encourage curl formation
- Dry with a diffuser, working the top section to add height and volume
- The back will naturally be longer and bouncier since there’s more of it
- Style the top for texture and separation — you want individual curls visible, not one big mop
- Use a curl-defining product on the longer back section to keep it defined and bouncy
- Get trims every 6-8 weeks to maintain the distinct length difference between front and back
- Play with the proportions — some people prefer a more dramatic difference, others want it subtler
Pro tip: This cut requires a stylist who really understands curly hair and modern styling. Find someone who’s done curly mullets before, because the technique is different from cutting straight hair.
10. Low Ponytail with Face-Framing Pieces
A low ponytail is practical, flattering, and works beautifully with medium curly hair. The key to making it look intentional rather than just “I didn’t have time for my hair” is letting some softer pieces frame your face and securing the ponytail low at the nape of your neck. This style keeps curls off your shoulders while showing off your curl pattern.
Why Low Ponytails Suit Curls
Low ponytails have an elegance that comes from the softness and movement of the loose pieces around your face. With straight hair, you have to work to create that softness. With curly hair, it’s automatic — your face-framing pieces will have natural waves and curls that are super flattering. The ponytail itself can be sleek or textured depending on your mood and what you’re doing.
How to Create a Flattering Low Pony
- Start with dry or damp curls, depending on how textured you want the ponytail to look
- Pull hair back into a low ponytail positioned at the nape of your neck (not at the crown)
- Secure with a silk or satin elastic to prevent breakage
- Gently pull some pieces out around your face — aim for one piece on each side framing your cheekbones
- Loosen the ponytail slightly by gently pulling small sections out, so it looks relaxed and full rather than super sleek
- Use a smoothing serum on the face-framing pieces if you want them slightly sleeker, or leave them textured
- Smooth any flyaways with a bit of smoothing cream
- If you want the ponytail itself to have texture, scrunch it gently with your hands or a microfiber towel
Worth knowing: A textured, “imperfect” low ponytail actually looks more modern and intentional than a super-tight, smooth one — your face-framing pieces should look soft and undone.
11. Curly Lob with Undercut Detail

A lob (long bob) sits somewhere between a bob and longer hair, making it incredibly versatile. Add an undercut detail — where the underneath layers are noticeably shorter than the top — and you have a style that looks modern and intentional. The undercut creates movement and removes weight without making you lose your length.
What an Undercut Brings to a Lob
Undercuts are genius for curly hair because they remove bulk from underneath while keeping visible length on top. This means you get the best of both worlds: the sleekness of less hair and the visual impact of longer locks. The undercut creates a subtle surprise element when you move or put your hair up. It also makes styling easier because there’s less total hair to dry and manage.
How to Style a Lob with Undercut
- Ask your stylist to keep the top layers longer while cutting significantly shorter layers underneath
- Style the top layers with your usual curl products for definition
- The shorter underneath layers will often look extra bouncy and textured because there’s less weight
- When you wear your hair down, the undercut is mostly hidden, so it just looks like a regular lob
- If you put your hair up in a ponytail or bun, the undercut becomes visible and adds visual interest
- Dry with a diffuser for maximum curl definition — the undercut means faster drying time
- Get trims every 8-10 weeks to maintain the length difference between top and bottom layers
Pro tip: Make sure your stylist understands that you want the undercut to be noticeable but not dramatic — you’re looking for movement and weight removal, not a statement cut.
12. Spiral Curls with Volume at the Crown
This is the style for when you want maximum impact and drama. Spiral curls are tight, bouncy, and super defined — they’re basically what happens when you let your natural curl pattern shine at its most voluminous. This style pairs beautifully with extra volume at the crown, creating height and bounce that’s genuinely stunning.
Why Spiral Curls Command Attention
Spiral curls are undeniably beautiful. When each curl is tight, defined, and bouncy, it creates an almost three-dimensional effect. Adding height at the crown means you’re not just showing off your curls — you’re making them look as gorgeous and voluminous as possible. This is the style that makes people ask what products you use or who your stylist is.
How to Create Maximum Spiral Curl Definition
- Start with freshly washed, soaking wet hair
- Apply a lightweight curl cream or custard to dripping wet hair, squishing it in with your hands
- Layer a strong-hold gel on top, scrunching and squishing it in upward motions
- Plop your hair (wrap it in a microfiber towel or t-shirt) for 15-20 minutes to remove excess water
- Use a diffuser on low heat, working in sections and focusing on lifting the crown area for volume
- Cup your curls gently in the diffuser, holding for a few seconds before releasing
- Work toward the roots at the crown to create height and lift
- Once hair is about 80% dry, flip your head upside down and diffuse the roots for maximum volume
- Let hair finish drying completely before disturbing the curls
- Once fully dry, gently scrunch out the gel cast to soften the spirals slightly
Worth knowing: Spiral curls look best when they’re completely dry before you touch them — any handling while damp will disrupt the spiral shape and create frizz.
Final Thoughts
Medium length curly hair is genuinely one of the most versatile hair lengths you can have. You’ve got enough length to create shape and movement, but not so much that you’re overwhelmed by styling time or weight. Whether you want to lean into your natural curl pattern with bouncy ringlets, try something bold like a curly mullet, or switch things up with a sleek straightened style, medium length gives you that flexibility.
The truth about styling curly hair is that it’s less about complicated techniques and more about understanding your curl pattern and working with it instead of against it. A good cut makes 80% of the difference — layers, texture, and strategic length placement matter way more than products or styling tools. Once you have a cut that works for your specific curls, styling becomes genuinely easy.
Pick one or two of these styles to start with, then experiment as you get comfortable. You might find that half-up clips become your go-to, or you might discover that you love changing your style every day. The beautiful thing about medium curly hair is that you have the length and texture to make almost any style work. Your curls aren’t a limitation — they’re your superpower.