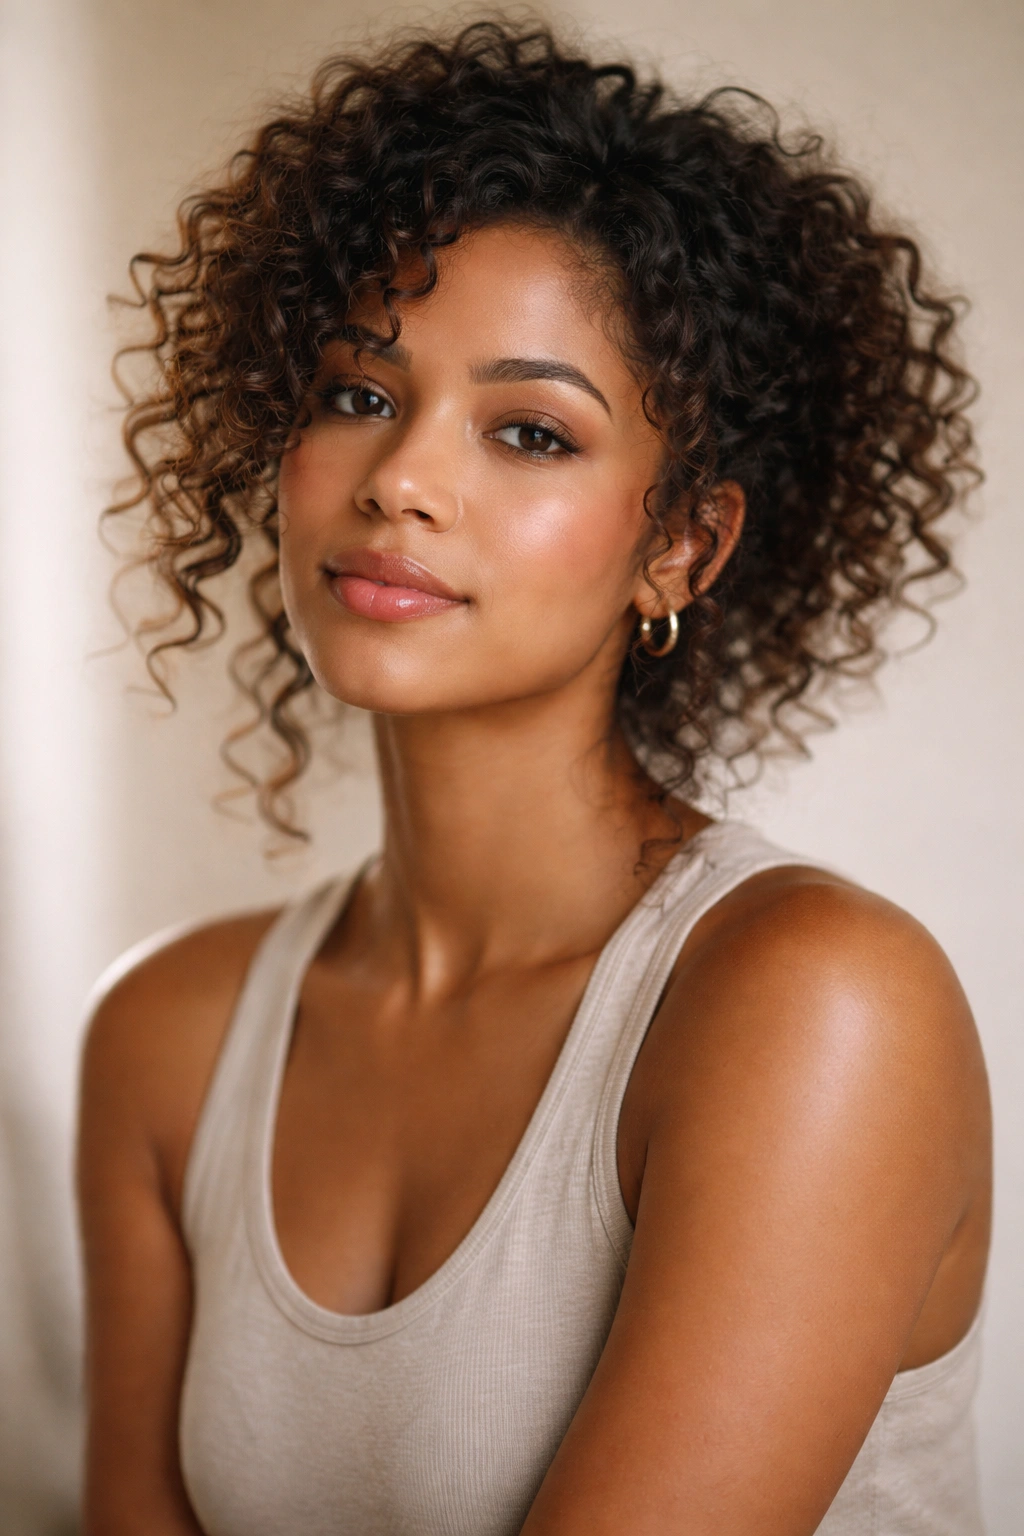
Bad hair days are a universal struggle, but they hit differently when you have curly hair. On those mornings when your curls have deflated, frizzed out, or simply refused to cooperate, it’s tempting to reach for a hat or cancel your plans altogether. The reality is that curly hair bad hair days are actually the perfect opportunity to wear some of your most polished and intentional styles. When your curls aren’t doing their natural thing, you have an excuse to style them in ways that often feel too put-together for everyday wear—and honestly, that’s the secret to surviving and thriving on those difficult curl days.
The trick is knowing which styles will actually work with your curl texture rather than against it, using the moisture level and shape your hair naturally wants to take on that particular day. The best bad hair day styles for curls aren’t about fighting your hair into submission or pretending your texture doesn’t exist. Instead, they’re about redirecting what you’ve got, adding intentionality through styling techniques, and choosing updos and half-up styles that celebrate your curl pattern while keeping the messier pieces under control. These aren’t complicated, salon-level styles that require 30 minutes and three different products—they’re practical, everyday styles that work when your curls are being temperamental.
What makes a style work on a curly hair bad hair day is its ability to either contain the chaos in a flattering way, or deliberately lean into the texture for a deliberately undone aesthetic. Whether you’re dealing with frizz, undefined curls, or sections that just won’t cooperate, these ten styles will get you through the day looking intentional and polished instead of like you didn’t try.
1. The High Pineapple
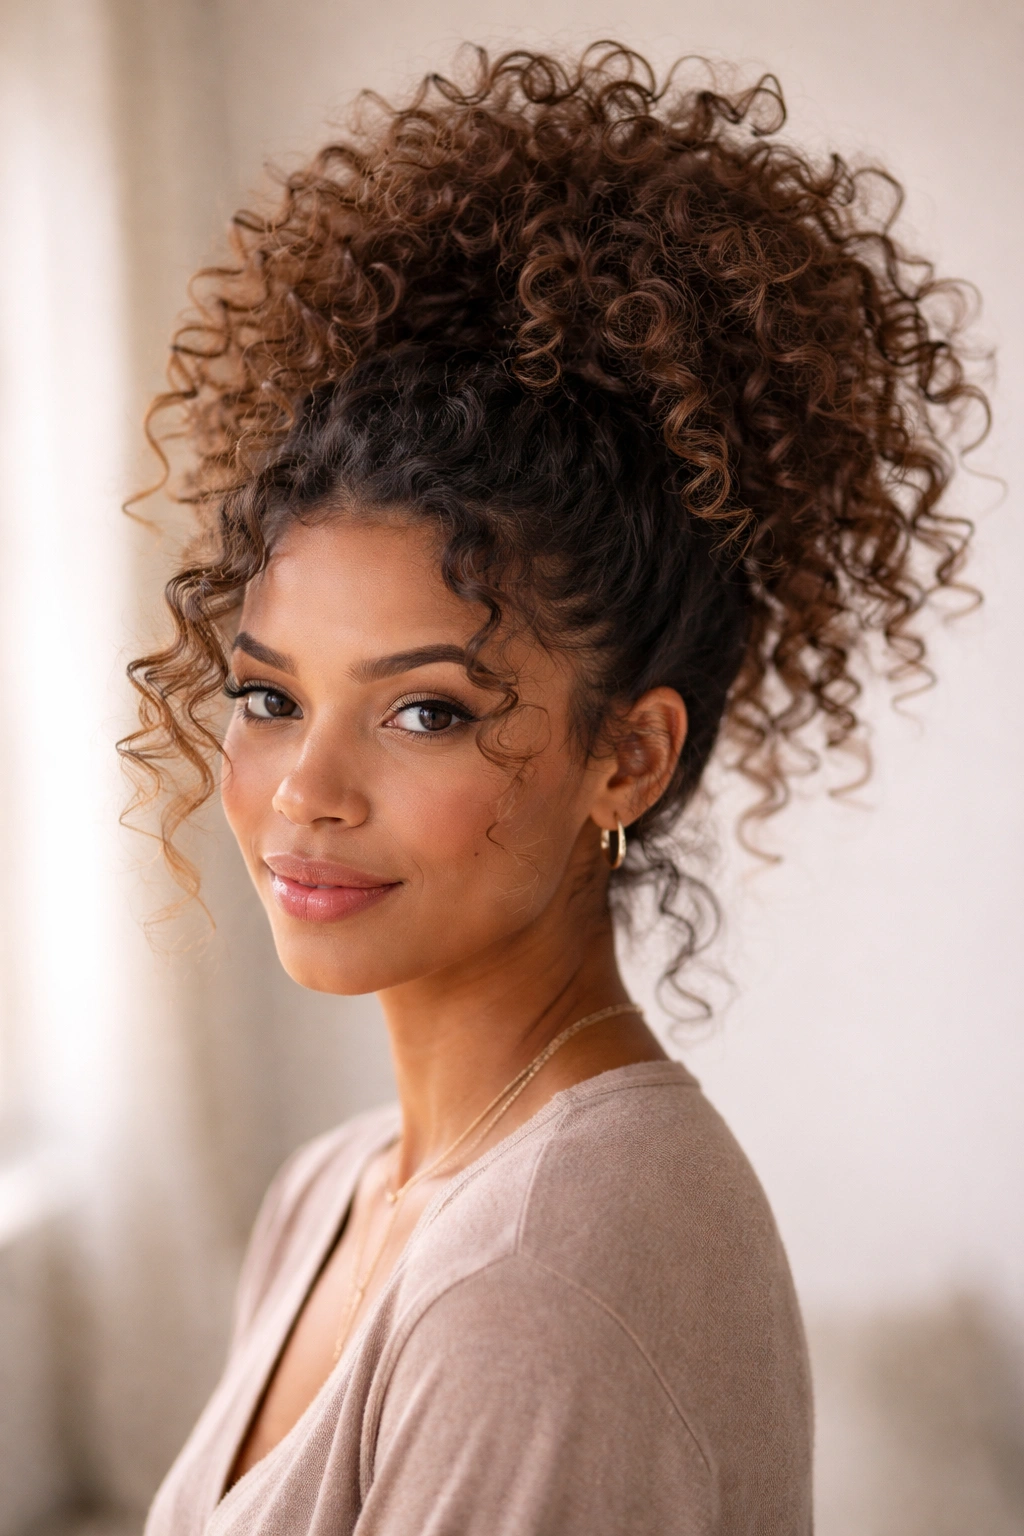
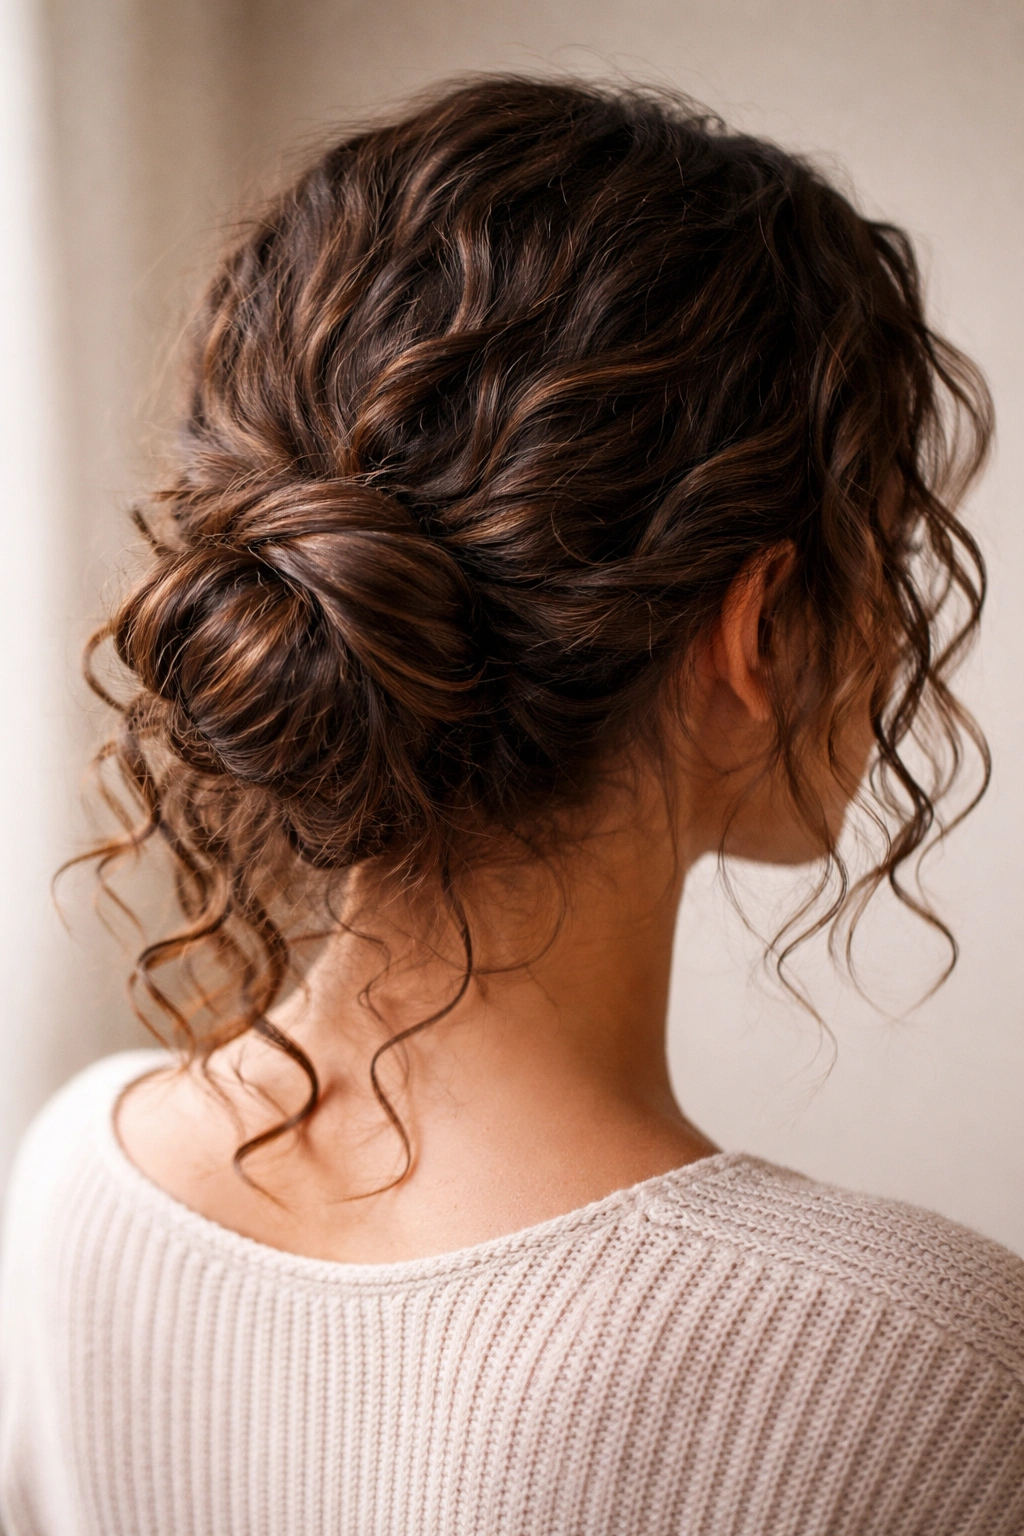
The pineapple is the most iconic curly hair protective style, and it’s absolutely a secret weapon for bad hair days. This isn’t the sleek ponytail you’d wear to an office—it’s a loose, gathered ponytail positioned at the crown that preserves curl definition while making that “I didn’t do anything with my hair” situation look intentional. The placement at the top of your head creates height and shape, even if your curls have lost volume overnight or become deflated throughout the day.
Why It Works for Texture and Shape
The high pineapple works because it gathers all your hair in one place while keeping it loose enough that your individual curls can still show through. Unlike a tight ponytail that would crease your curls and flatten them against your head, the pineapple uses a soft elastic or hair clip positioned high enough that the weight of your hair naturally creates a lifted silhouette. The gathered curls at the crown still have room to expand and define themselves, so even if individual sections look less defined than usual, the overall shape is fuller and more intentional than leaving your hair down on a bad curl day.
How to Achieve the Perfect Pineapple
- Use a soft silk or satin scrunchie instead of a standard elastic—this prevents creasing and breakage on already stressed curls
- Flip your head upside down and gather all your hair loosely at the crown, rather than smoothing it back from the face
- Position the elastic high enough that you can see defined curls below it, but loose enough that the ponytail can move and bounce
- Leave a few face-framing pieces out if your curls feel particularly rough—this softens the overall look and hides imperfect sections
Pro tip: Sleep in your pineapple the night before to help reset and refresh your curls for the next day, especially if you’re dealing with overnight frizz.
2. Sleek High Bun
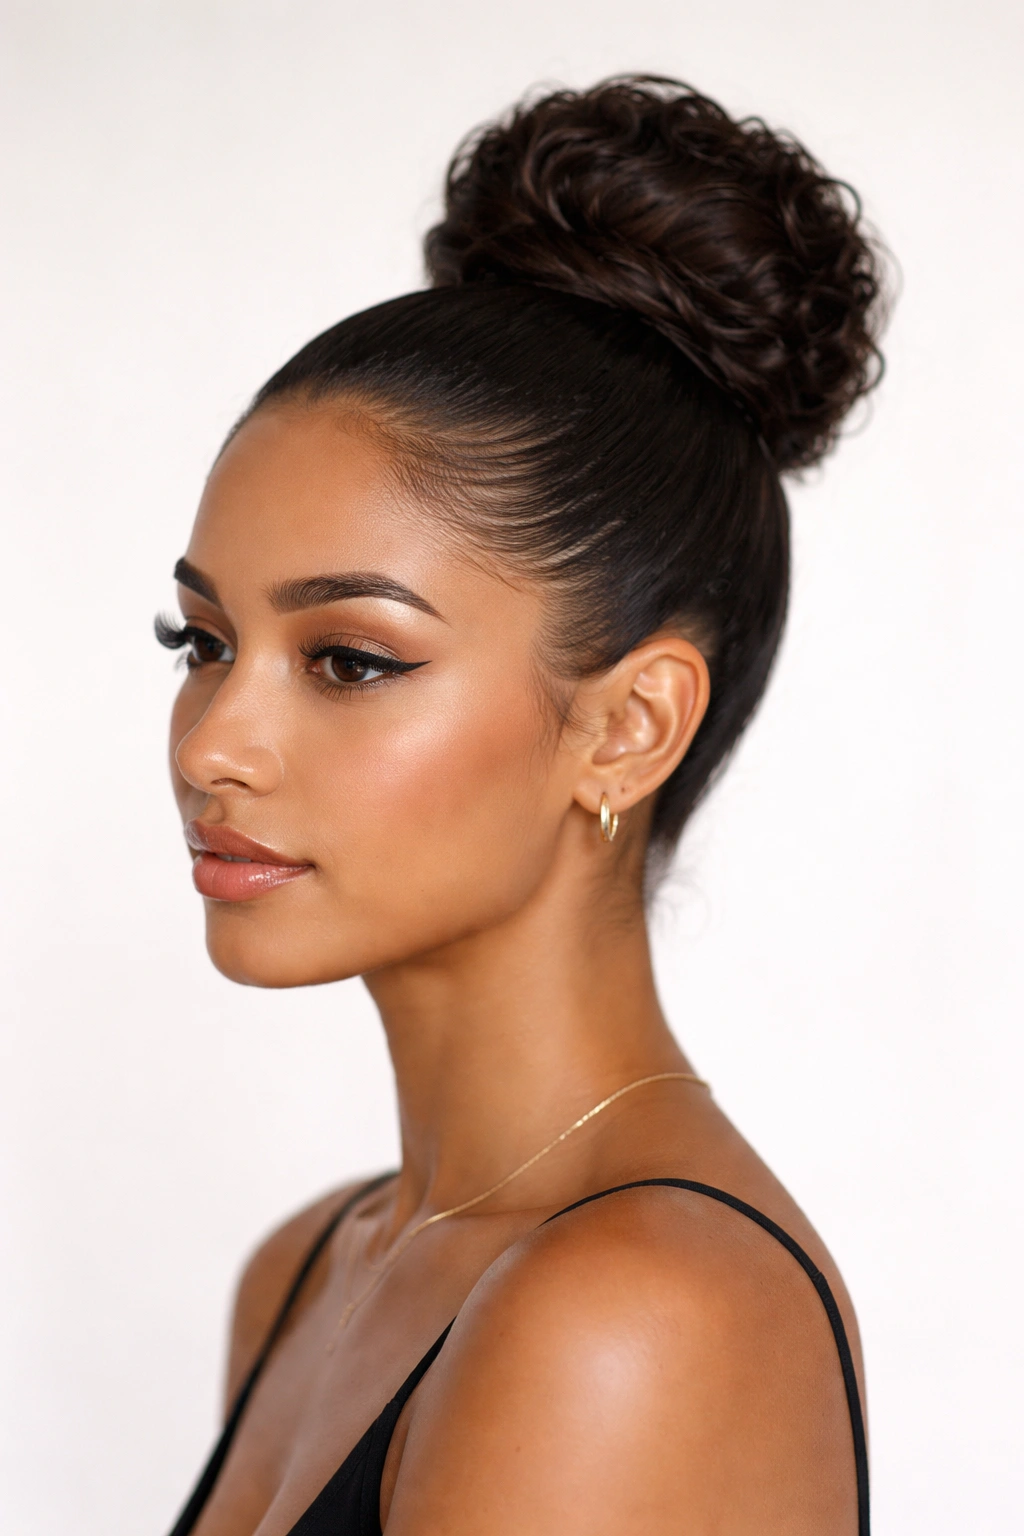
When your curls are refusing to cooperate, sometimes the most elegant solution is to deliberately style them into something completely different—a sleek high bun that feels polished and intentional rather than like a desperate attempt to hide bad curls. This works particularly well on days when your curls are puffy, frizzed, or have lost definition, because you’re not trying to preserve curl pattern; you’re smoothing everything into a clean, controlled shape that reads as deliberately styled rather than neglected.
Building a Smooth Base
The key to a sleek bun on curly hair is using smoothing products strategically rather than trying to flatten every curl individually. Start with damp hair and apply a smoothing cream or gel to the top section of your hair—the part you’ll be pulling into the bun—focusing on the roots where frizz and flyaways tend to start. You don’t need to slick everything back like it’s been chemically straightened; you just need enough product to create visual smoothness and prevent frizz from escaping the bun. Use a fine-tooth comb or a brush designed for curly hair to gently smooth the section, working from your face backward toward the crown.
Creating Structure and Texture
- Gather your hair into a high ponytail using a silk elastic, positioning it where you want the base of your bun to sit
- Twist the ponytail loosely or braid it gently, then wrap it around the base to form the bun shape
- Secure with bobby pins that match your hair color, tucking any loose ends underneath so they’re not visible
- Use a firm-hold hairspray to set flyaways in place, creating a finished, polished look
Worth knowing: If your curls are particularly resistant to smoothing, lightly mist your hair with water before applying product—damp hair is much more receptive to smoothing products than completely dry hair.
3. Curly Ponytail with Face-Framing Pieces
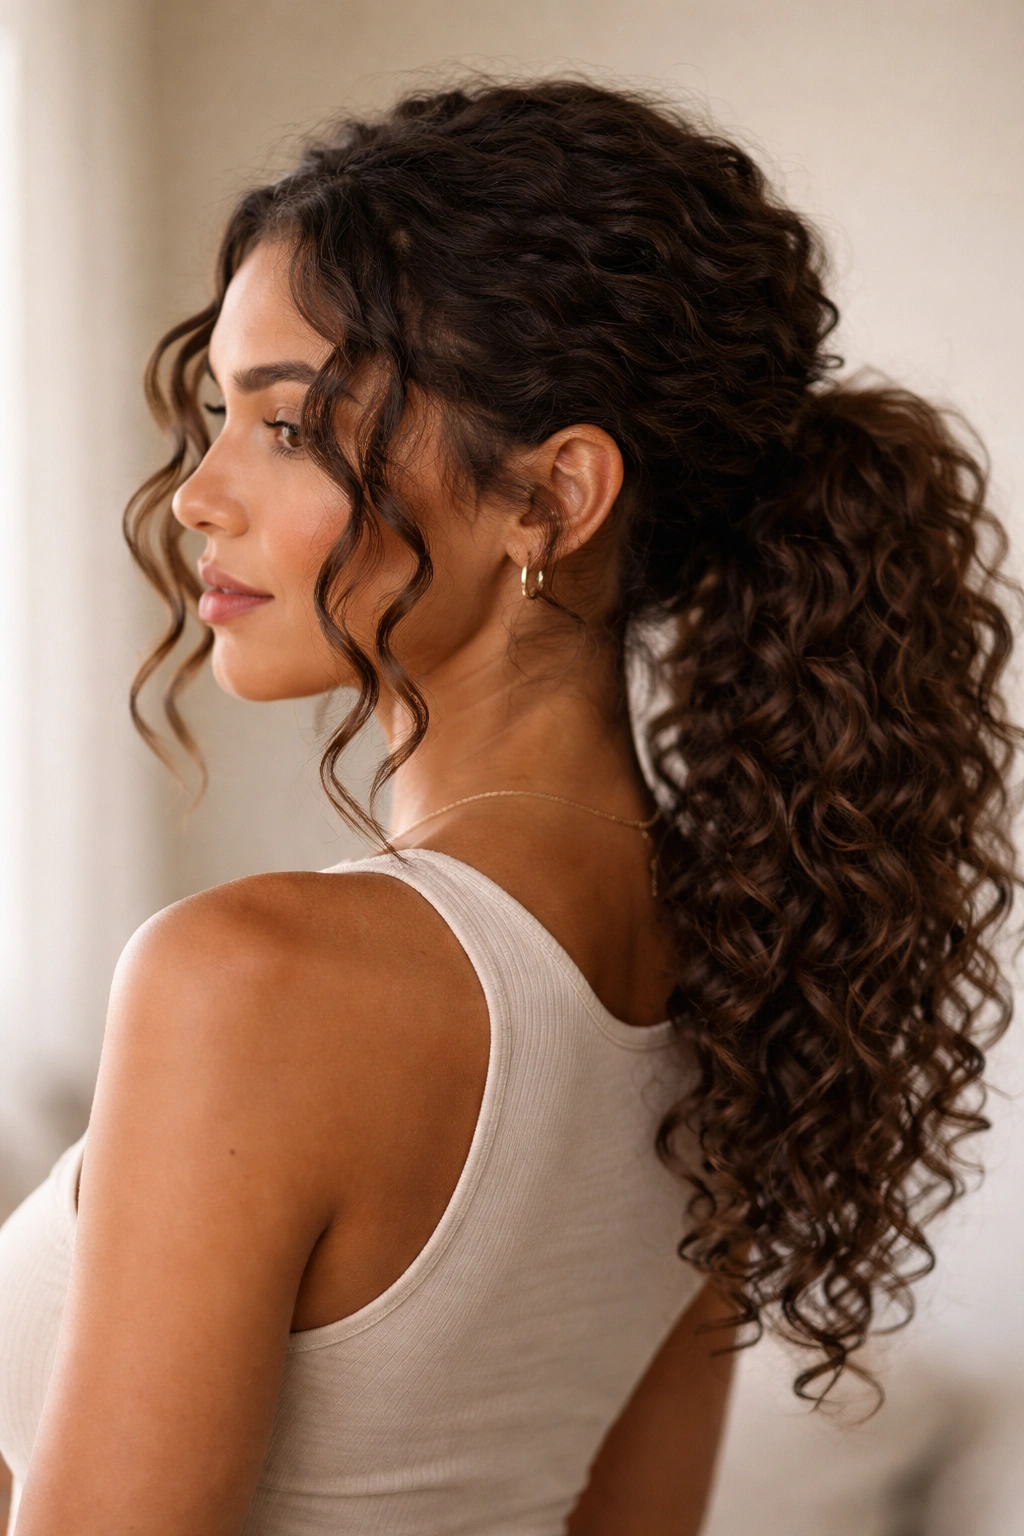
This style sits somewhere between “I’m letting my curls be” and “I’ve intentionally styled my hair,” which is perfect for bad hair days when you want to look like you tried without actually working against your natural texture. A loose, low ponytail gathered at the nape of your neck allows your curls to maintain definition and movement while keeping everything off your face and creating a deliberately undone aesthetic. The key is leaving strategic pieces out to frame your face, which draws attention to your features and away from any sections of curl that aren’t performing.
The Art of Strategic Face-Framing
Leave out a piece of hair on each side of your face—ideally a natural section that will fall where your curl pattern already wants it to go. These pieces should be thick enough to be intentional (not just wisps that look accidental) but small enough that they frame your face without interfering with the ponytail. Let these sections air-dry or set them with light product so they maintain their curl definition while the bulk of your hair is gathered. The face-framing pieces instantly make a simple ponytail look more stylized and less like a desperate grab-and-go situation.
Securing the Ponytail
- Flip your head to one side, which helps you see exactly where you want to gather the ponytail—usually at the base of your skull where it’s most flattering
- Use a soft elastic that matches your hair color and won’t create obvious creasing
- Gently shake the ponytail to redistribute the curls so they’re not clumped together in the elastic
- Leave the face-framing pieces completely out of the elastic—don’t try to tuck them in
Pro tip: Create more visual texture in your ponytail by gently pulling a few small sections of curl outward after you’ve secured the elastic, which loosens the overall shape and makes it look more intentionally undone.
4. Half-Up Half-Down with Jaw Clips
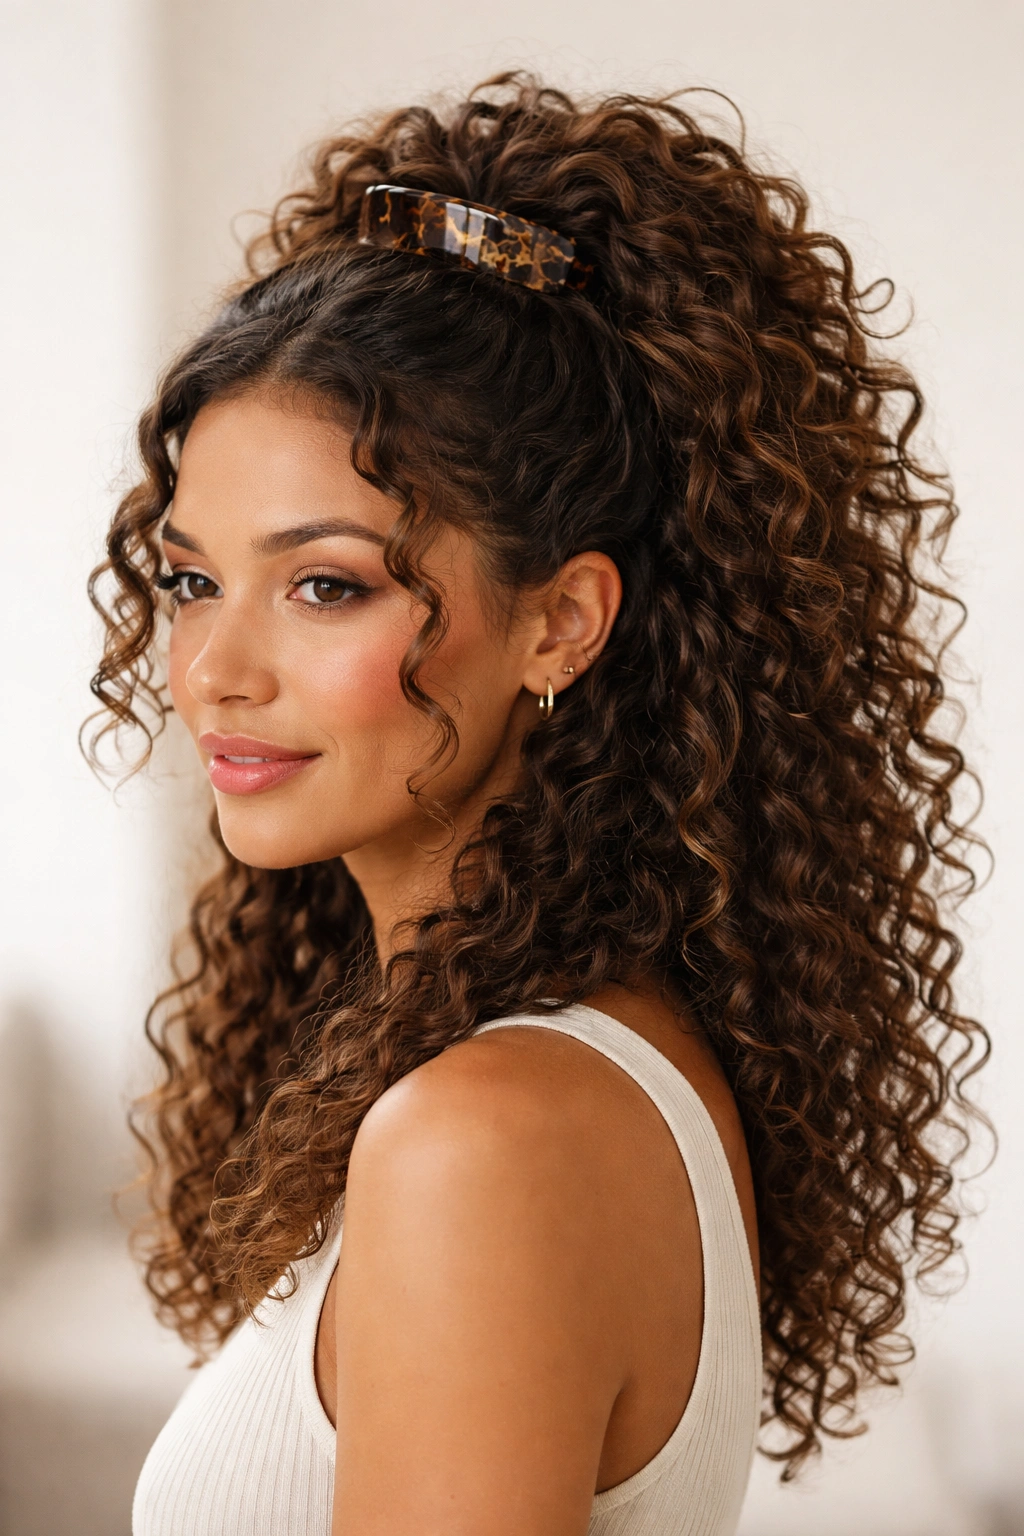
Jaw clips are a game-changer for bad curly hair days because they give you the security of having hair off your face without requiring you to actually do anything with your hair. This style works on days when your curls look uneven, when some sections are defined and others have completely fallen flat, or when you just need to get your hair away from your face without committing to a full updo. The half-up style with a jaw clip reads as intentionally styled rather than desperately practical, and it creates the illusion of more volume at the crown.
Choosing the Right Clip and Placement
Use a clip that’s large enough to actually hold your hair securely but not so large that it looks cartoonish. Tortoiseshell or a color that complements your hair works better than a clip that contrasts sharply with your curl color, which tends to look obviously like a “bad hair day” move rather than a deliberate style choice. Position the clip at the crown where you’d create a half-up ponytail, but instead of smoothing everything back, gather just enough hair to feel intentional—roughly the top third to half of your hair, depending on your hair density.
Creating Texture and Movement
- Section your hair before clipping so you’re gathering a clean, defined upper section rather than randomly grabbing strands
- Don’t smooth the hair going into the clip—let your curls maintain their natural texture and shape
- Flip the clipped section upside down briefly to add volume, then let it fall back into place
- Leave face-framing pieces out for softness, or pull them back into the clip depending on how undone you want the style to look
- For extra polish, pull a small section of hair from underneath the clip and wrap it around the base to hide the clip mechanism
Insider note: Wear your hair a bit wavier or frizzier on top and the half-up clip style instantly looks like you created intentional volume rather than like you’re dealing with a humidity disaster.
5. Twisted Crown Wrap
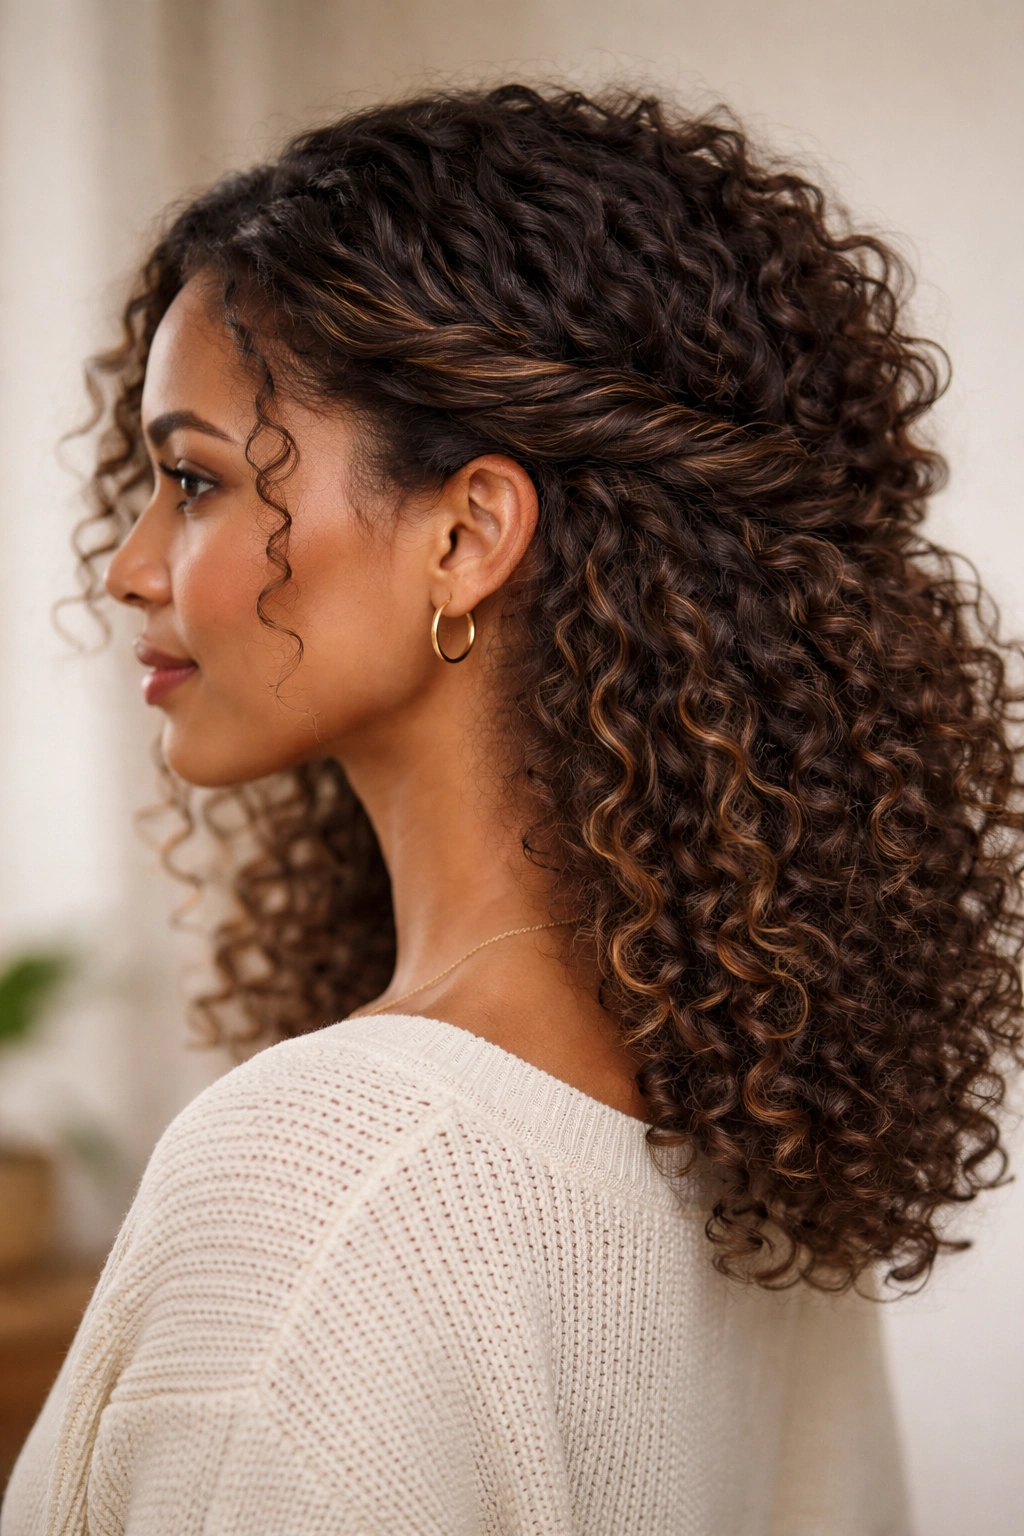
A twisted crown wrap uses your existing curl texture to create an intentional, polished style that works beautifully on days when your curls have lost definition or when the top of your head is particularly frizzy. This style involves taking a section from one side of your face, twisting it loosely as it travels around the back of your head, and securing it behind your opposite ear. It’s simple enough to do in under two minutes, but it reads as a deliberate styling choice rather than a desperate quick fix.
Executing the Twist
Start with a section of hair at one temple—aim for something thick enough to be visible but not so large that you’re removing a huge portion of hair from the side of your head. Twist this section loosely as you guide it toward the back of your head, following your natural hair line. The twist doesn’t need to be perfectly tight or symmetrical; some looseness and texture actually makes it look more intentionally undone and less like a gymnastics move. As you twist, you’re naturally gathering and securing the layers of hair around your head without requiring any elastics or clips.
Finishing the Style
- Continue the twist until you reach behind your opposite ear, where you’ll secure it with a bobby pin that matches your hair color
- Let the remaining hair in that section fall loosely—don’t tuck it all in, as some softness and movement makes the style less severe
- Leave your front pieces completely out for a softened frame around your face
- For extra security, use a lightweight hairspray to keep any flyaways in place
Worth knowing: This style works best when you don’t overthink the twist—the more relaxed and imperfect it is, the more intentional it actually looks, rather than like you’re trying to hide something.
6. Messy Top Knot
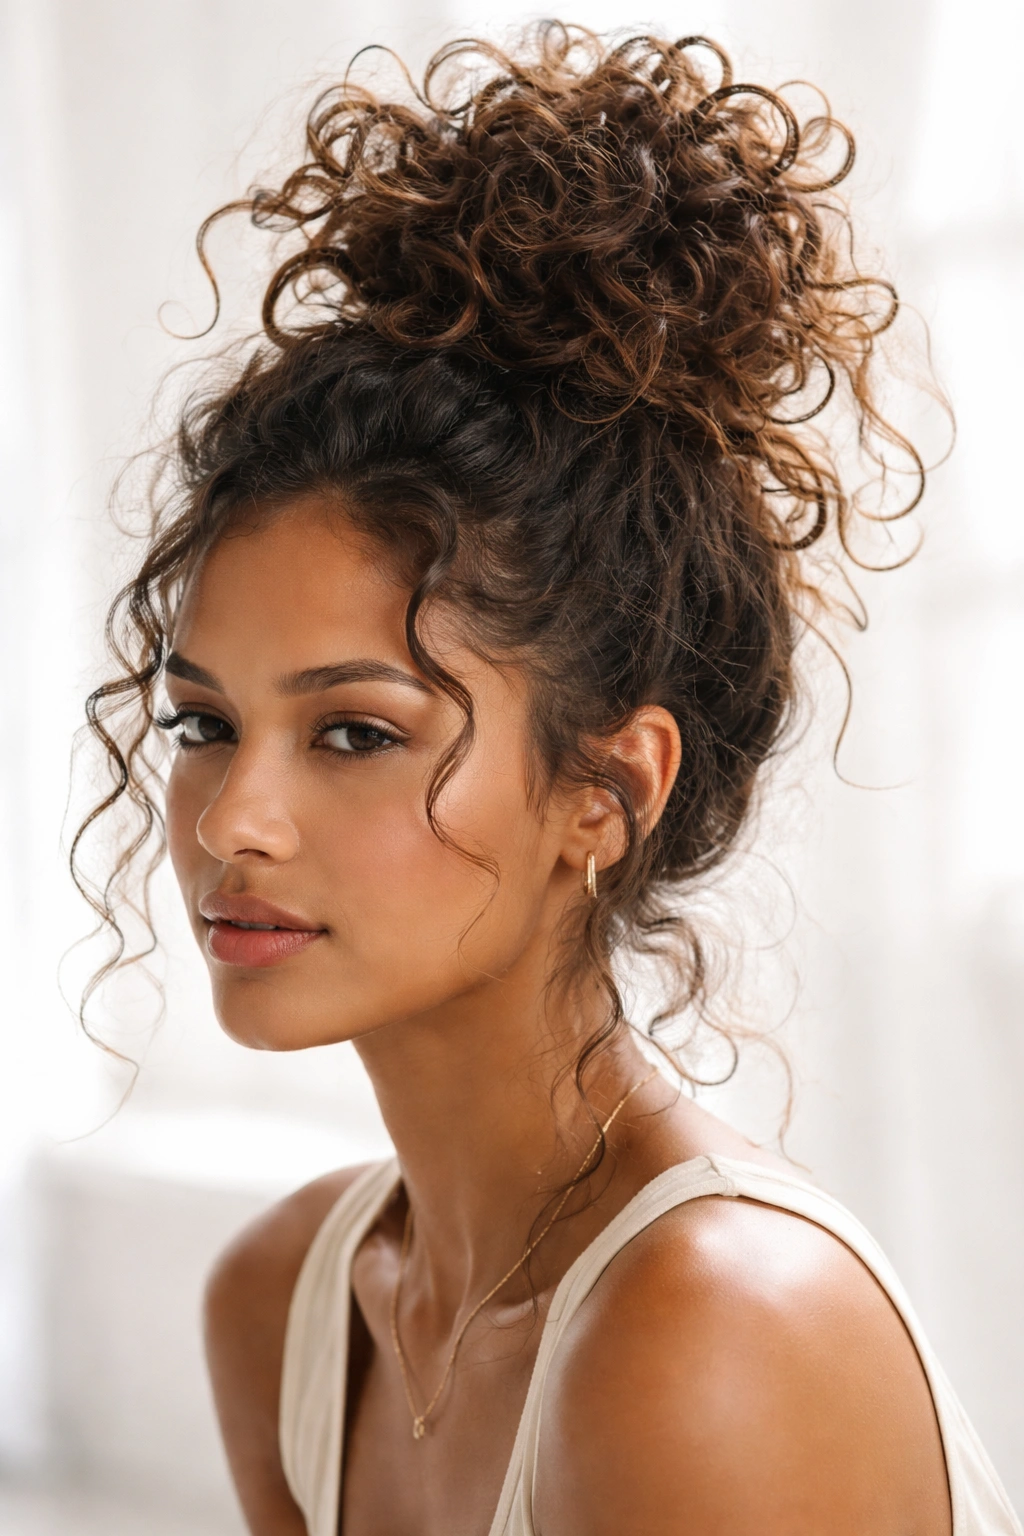
A deliberately messy top knot is the ultimate bad hair day style because it transforms the chaos into an aesthetic choice rather than a problem. Unlike the sleek bun that requires smoothing and control, a messy top knot celebrates the texture, volume, and imperfection of your curls. This style works on days when your hair is particularly poofy, when your curls have lost definition and expanded outward, or when you just need everything contained but don’t have the energy to create a polished look.
Creating Intentional Messiness
The messiness in a top knot needs to feel deliberately styled rather than actually disheveled—there’s a meaningful difference. Start by gathering your hair into a high ponytail at the very crown of your head, using a soft elastic. Rather than twisting this ponytail and wrapping it neatly, loosely loop the ponytail and secure it with bobby pins in a way that allows the curls to expand outward and create volume. Pull sections of the looped curls gently outward, creating a fuller, more textured silhouette. The goal is a knot that looks intentionally relaxed and full of personality, not accidentally messy.
Building the Aesthetic
- Don’t use a tight elastic—use a soft scrunchie or silk elastic that will allow your curls to expand
- Leave face-framing pieces out, especially smaller pieces that add softness and movement
- Use bobby pins strategically to secure the main structure while allowing the loops and curls to escape intentionally
- Embrace the flyaways and frizz as part of the style rather than trying to tame them with product
- For extra texture, pull a few strands completely out of the knot and let them frame your face
Pro tip: A lightweight texturizing spray or dry shampoo can add extra grip and hold to your curls, making the top knot feel more secure while maintaining that deliberately undone aesthetic.
7. Deep Side Part with Tuck
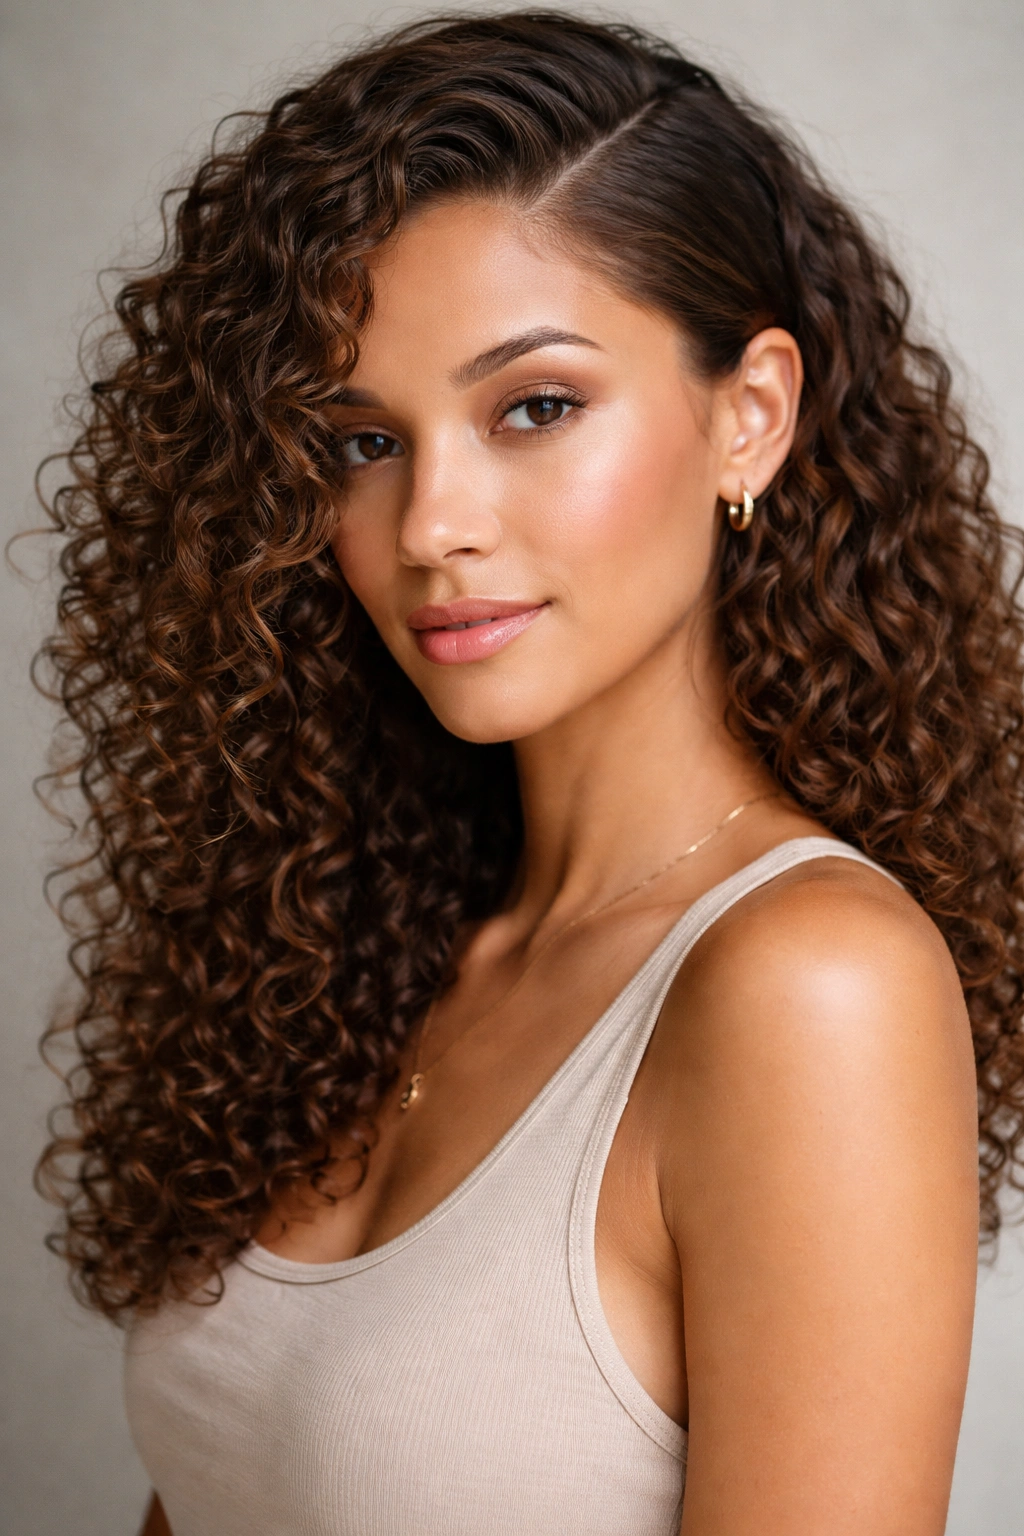
A deep side part is a remarkably simple way to transform how your hair looks on a bad curl day—it’s literally just moving your part, but it can completely change which sections of hair are prominent and which are slightly hidden. When your curls are uneven or less defined than usual, a deep side part allows you to tuck the less cooperative section slightly behind your ear or under the other side of your hair, making the style look intentional rather than like certain sections just didn’t cooperate that day.
Creating the Deep Part
Rather than parting your hair down the middle (which puts the least flattering or most frizzy sections front and center), create a part that starts at your temple on one side and travels back toward your ear. This deep side part allows a significant portion of hair to sweep across your head, partially covering one side and creating layers and depth. The sweeping motion of the hair naturally smooths some of the texture while creating visual interest through movement.
Securing the Tuck
- Create the part by using a comb and a bit of smoothing serum or gel, encouraging the hair to fall on either side
- On the side that has more hair, use bobby pins to tuck a small section behind your ear, creating a deliberate frame around your face
- You can let the rest fall loosely, or use a small clip to secure the tucked section more permanently
- If you want more hold, use a lightweight hairspray to set the part in place
Worth knowing: A deep side part is particularly effective on days when the crown of your head is frizzy or poofy, because the swept-across nature of the part creates a sleeker, more controlled overall silhouette.
8. Braided Headband Style
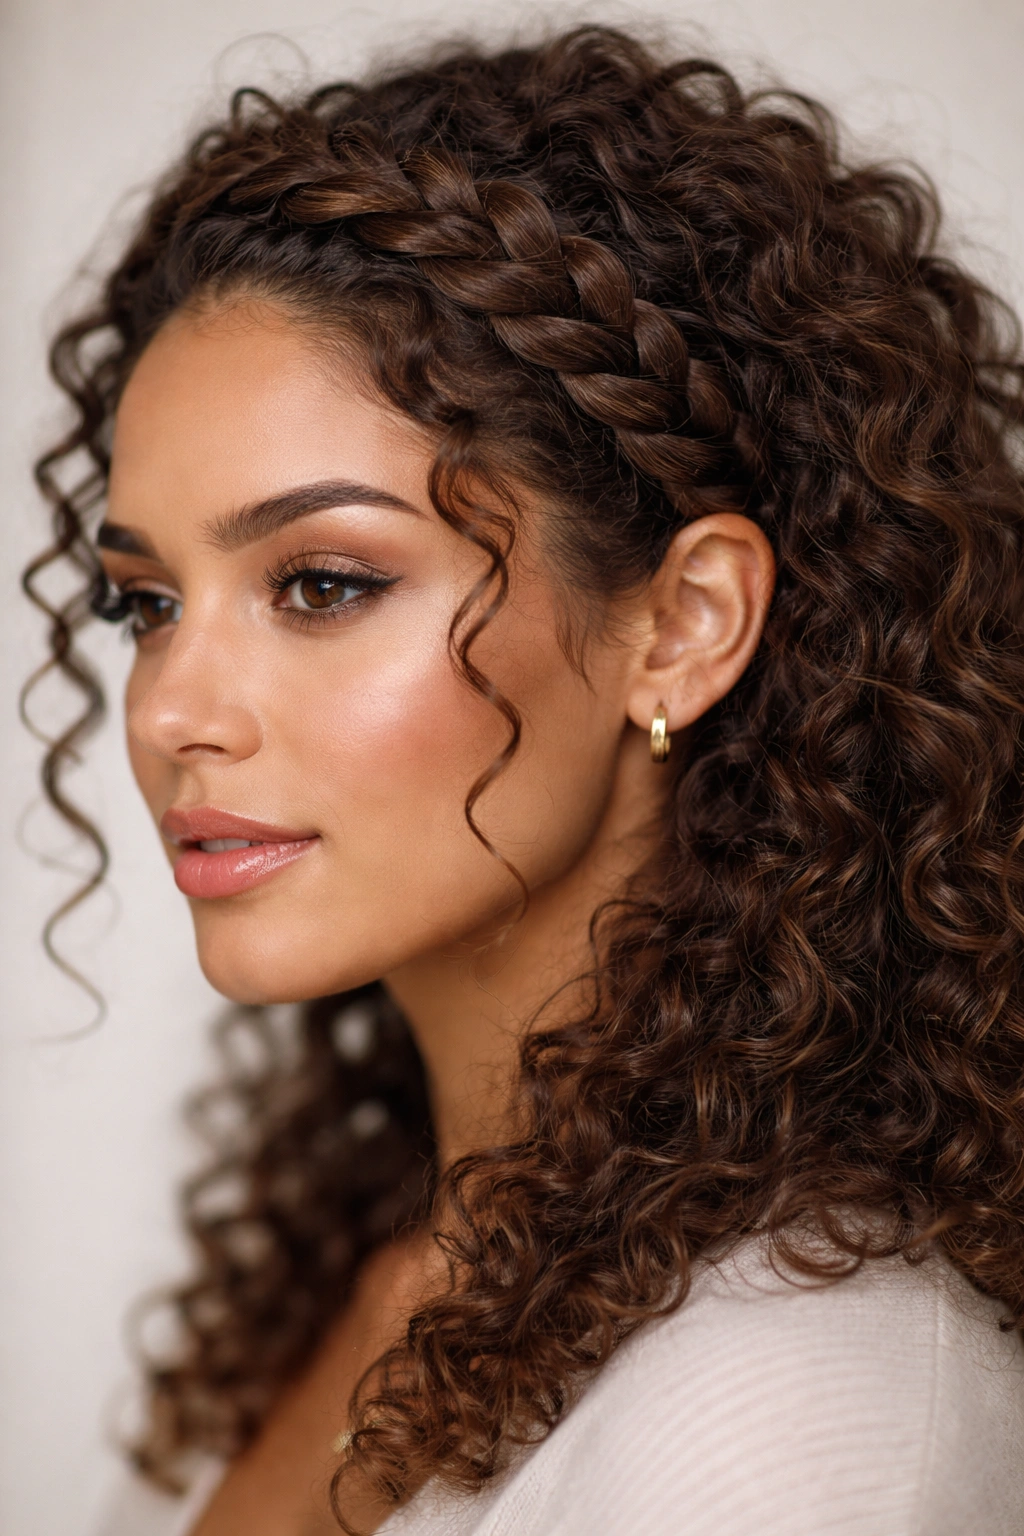
A braided headband transforms your curly hair into something that looks deliberately styled and creative, while simultaneously keeping the top of your head controlled and polished. This style works particularly well on days when your crown is frizzy or poofy, and you want to draw attention to your face and away from less-cooperative curl sections. The braid creates a structured element that contrasts beautifully with loose, textured curls in the back and sides.
Creating the Braid
Start with a section of hair at your temple on one side of your head—this should be thick enough to braid but not so large that you’re removing tons of hair from the side. Create a three-strand or Dutch braid (depending on your skill level and how textured you want it to look) that travels along your hairline toward your opposite ear. A Dutch braid creates more visible texture and dimension, which actually looks better on days when your curls are less defined, because the braid structure itself becomes part of the visual interest.
Securing and Styling
- Braid loosely—tight braids on curly hair can look harsh and unforgiving, whereas loose braids allow some texture to escape and create softness
- Once you reach the opposite side of your head, secure the end of the braid with a small elastic
- You can either tuck the end of the braid into your hair at that ear and pin it, or leave it loose and let it fall
- Leave face-framing pieces completely out on both sides, which softens the overall look and adds movement
- For extra texture and a deliberately undone aesthetic, gently pull sections of the braid outward to loosen it slightly
Pro tip: A braided headband is one of the few styles where having frizz and flyaways actually works with you rather than against you—all that texture makes the braid look more interesting and intentional.
9. Twisted Low Bun
A low bun at the nape of your neck is deeply flattering on bad curl days because it keeps everything off your face while allowing you to maintain the softness and texture of your curls in the back. Unlike a high bun that requires smoothing and control, a low bun can be messier and more textured while still reading as polished and intentional. This style is perfect for days when you want something slightly dressier than a ponytail but still relaxed enough to feel natural.
Creating the Twist and Bun
Gather your hair into a low ponytail at the nape of your neck, positioning it where you want the bun to sit—typically an inch or two above the nape. Rather than smoothing the section, let your natural curl texture show. Twist the ponytail loosely, then wrap the twisted section around itself to create a bun shape. The twist naturally contains the curls while allowing them to maintain some definition and texture. Secure with bobby pins that match your hair color, tucking any loose ends under the bun so they’re invisible.
Adding Softness and Movement
- Don’t pull the bun too tight—leave some softness in the twist so the curls aren’t all the way controlled
- Leave a few face-framing pieces out, especially smaller ones that create softness and draw attention to your face
- Once the bun is secured, gently pull a few curls outward to create texture and prevent it from looking overly slicked
- Use bobby pins strategically so you’re securing the structure without trying to control every single curl
Worth knowing: A low bun works beautifully with more textured, less-defined curls because the looseness in the style actually complements curls that have lost their shape throughout the day.
10. Scarf-Wrapped Updo

Adding a scarf or headwrap to your updo instantly elevates the style and gives your bad hair day a completely intentional, editorial feel. A scarf wrapped around the base of a high bun or woven through a twisted crown transforms something quick and practical into a sophisticated style choice. This works on any kind of curly hair day, but it’s particularly helpful on days when your curls look particularly undefined or frizzy, because the scarf becomes the visual focal point rather than the texture of your hair.
Incorporating a Scarf
Choose a scarf in a color or pattern that complements your skin tone and outfits. Silk or satin scarves are particularly good because they don’t absorb moisture from your hair the way cotton does, and they look more polished than cotton. Wrap the scarf around your head just below your bun or updo, positioning it so that it covers any frizzy hairline sections while framing your face. Tie it in a knot at the nape of your neck, or weave it through your hair for a more integrated look.
Styling Options
- Wrap the scarf loosely around the base of a high bun, creating a polished frame around your updo
- Tie the scarf on one side of your head and let the ends flow down your shoulder for a more relaxed aesthetic
- Weave a thin scarf through a braided crown or twisted style to add color and intentionality without bulk
- For maximum polish, match your scarf to your outfit’s color palette, which makes the entire look feel more coordinated and deliberate
Pro tip: A scarf-wrapped style is one of the few times you can style your hair knowing it looks unfinished or textured, and the scarf actually elevates the entire look instead of appearing like you’re trying to hide something.
Final Thoughts
Bad hair days with curly hair are inevitable, but they’re absolutely not a reason to abandon your appearance or settle for feeling less confident. The styles that work best on those difficult curl days aren’t about fighting your texture or pretending your hair is something it’s not—they’re about redirecting what you’ve got into shapes and styles that feel intentional and polished. Whether you’re working with deflated curls, overwhelming frizz, or sections that simply decided not to cooperate, there’s a style in this list that will transform your hair into something you’re genuinely excited to wear.
The real secret to surviving bad curl days is realizing that they’re actually opportunities to wear styles you might not otherwise make time for. These updos, half-up styles, and textured looks are beautiful because of their imperfection and movement, not in spite of it. Once you shift your mindset from “my curls are being difficult” to “today is a perfect day for a different kind of style,” you’ll find that those bad hair days become creative challenges rather than catastrophes. The confidence you gain from showing up looking intentional, regardless of what your curls decided to do, absolutely matters.