There’s something inherently freeing about a hairstyle that doesn’t demand perfection—and messy curly hairstyles are the absolute masters of that energy. These are the styles that look intentionally undone, yet somehow impossibly chic, whether you’re heading to brunch, running errands, or meeting friends for a casual evening out. The beauty of embracing a messy curly look is that it actually plays to your hair’s natural strengths instead of fighting against them.
Curly hair has texture, movement, and personality built in—you don’t need to tame it or slick it down to make it look polished. In fact, the most striking curly hairstyles are the ones that lean into that natural volume and dimension, letting a few pieces fall exactly where they want. Messy curly styles celebrate the spiral, the frizz, the unexpected curl that breaks free, turning what might feel like a hair mishap into a deliberate fashion choice.
The real secret? Most of these styles take less time to create than you’d think. A few strategic pins, some texture spray, and the confidence to let your curls do their thing—that’s truly all you need. Whether your curls are bouncy ringlets, loose waves, or springy coils, there’s a messy curly hairstyle here that’ll make you excited to leave the house with your hair down.
1. Messy Curly Top Knot with Face-Framing Pieces
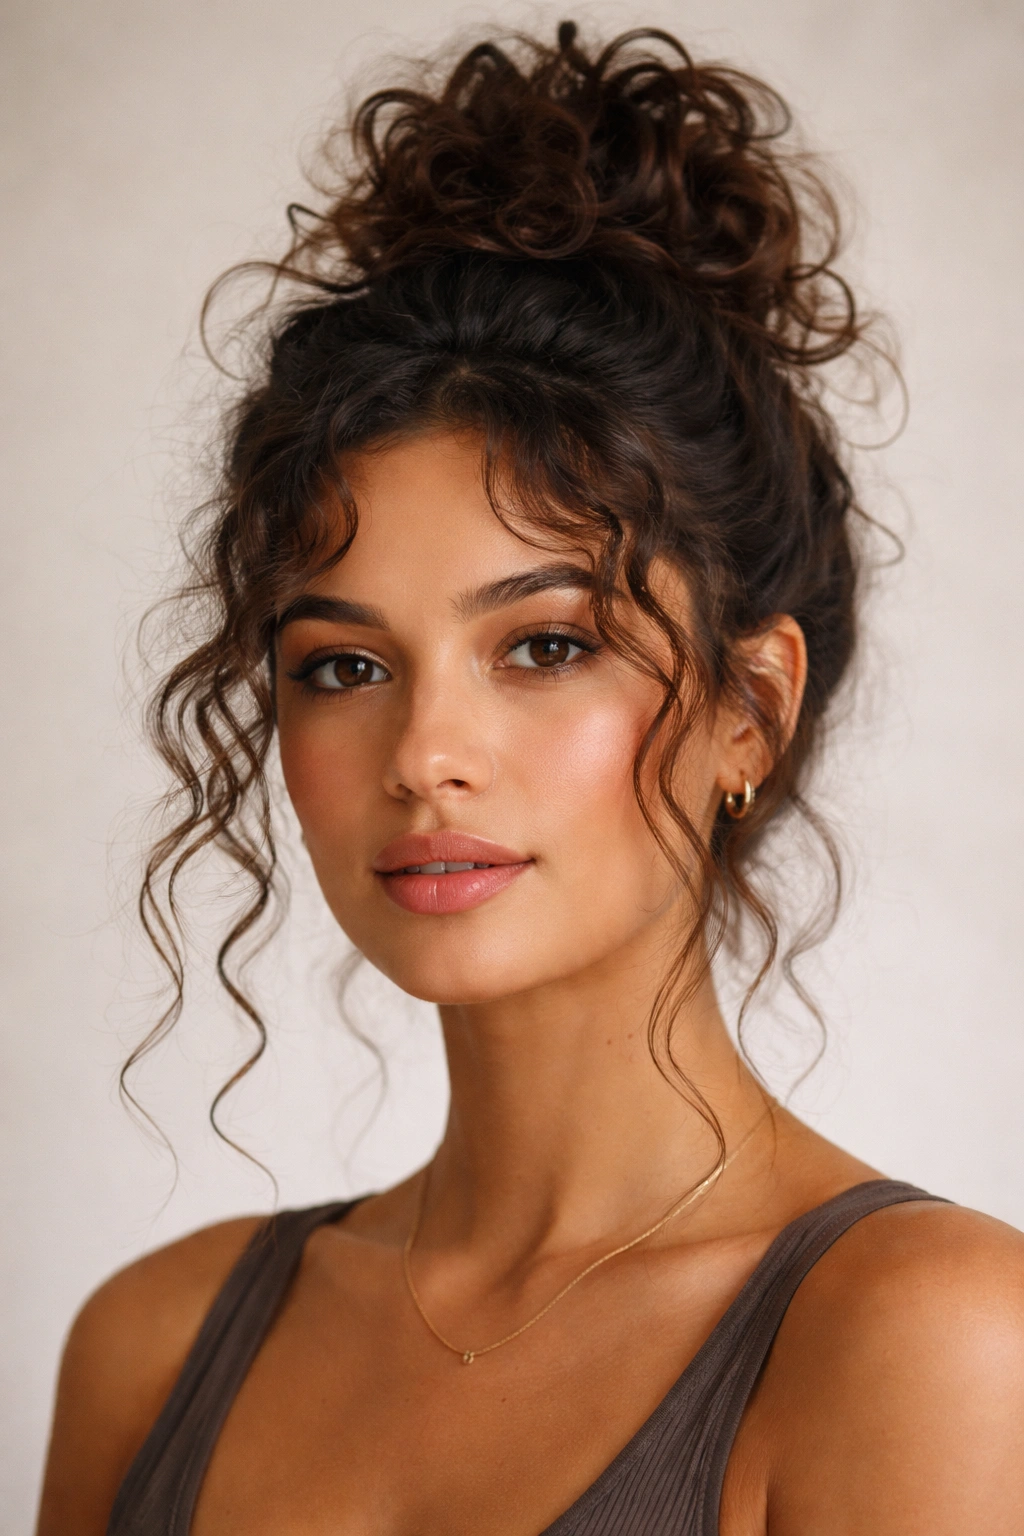
This is the go-to hairstyle when you want your curls to feel intentionally effortless without looking like you’ve given up. Start with curls that have been defined and dried (either with a diffuser or air-dried), then gather most of your hair into a high ponytail at the crown. Twist the ponytail loosely and wrap it around the base to form a knot, securing it with bobby pins as you go. The key is leaving several face-framing sections loose—pull out pieces from near your temples and cheekbones before you secure the knot, letting them cascade down and frame your face with soft, curly definition.
Why This Style Works for Every Occasion
The top knot works because it keeps hair off your face while showing off your curl pattern where it matters most. The loose tendrils draw attention to your features and add movement to the entire look, making it feel fresh and intentional rather than rushed. This hairstyle photographs beautifully too, since the asymmetry of the face-framing pieces creates visual interest that a tight, symmetrical style simply can’t match.
How to Style and Maintain It
- Mist face-framing pieces with texture spray before pulling your hair up to enhance curl definition and hold
- Use bobby pins that match your hair color so they become invisible within the knot
- Don’t pull your ponytail too tight—loose and relaxed is the entire vibe
- Let the knot sit slightly off-center rather than dead center for that “I didn’t plan this” aesthetic
- Refresh curl definition on loose pieces with a curling iron or curling wand if they’ve relaxed by midday
Pro tip: Sleep on this style with a silk pillowcase or sleep bonnet and it’ll look even more textured and interesting the next morning—your curls will have shifted slightly, creating more dimension.
2. Tousled Curly Shag Cut with Textured Layers
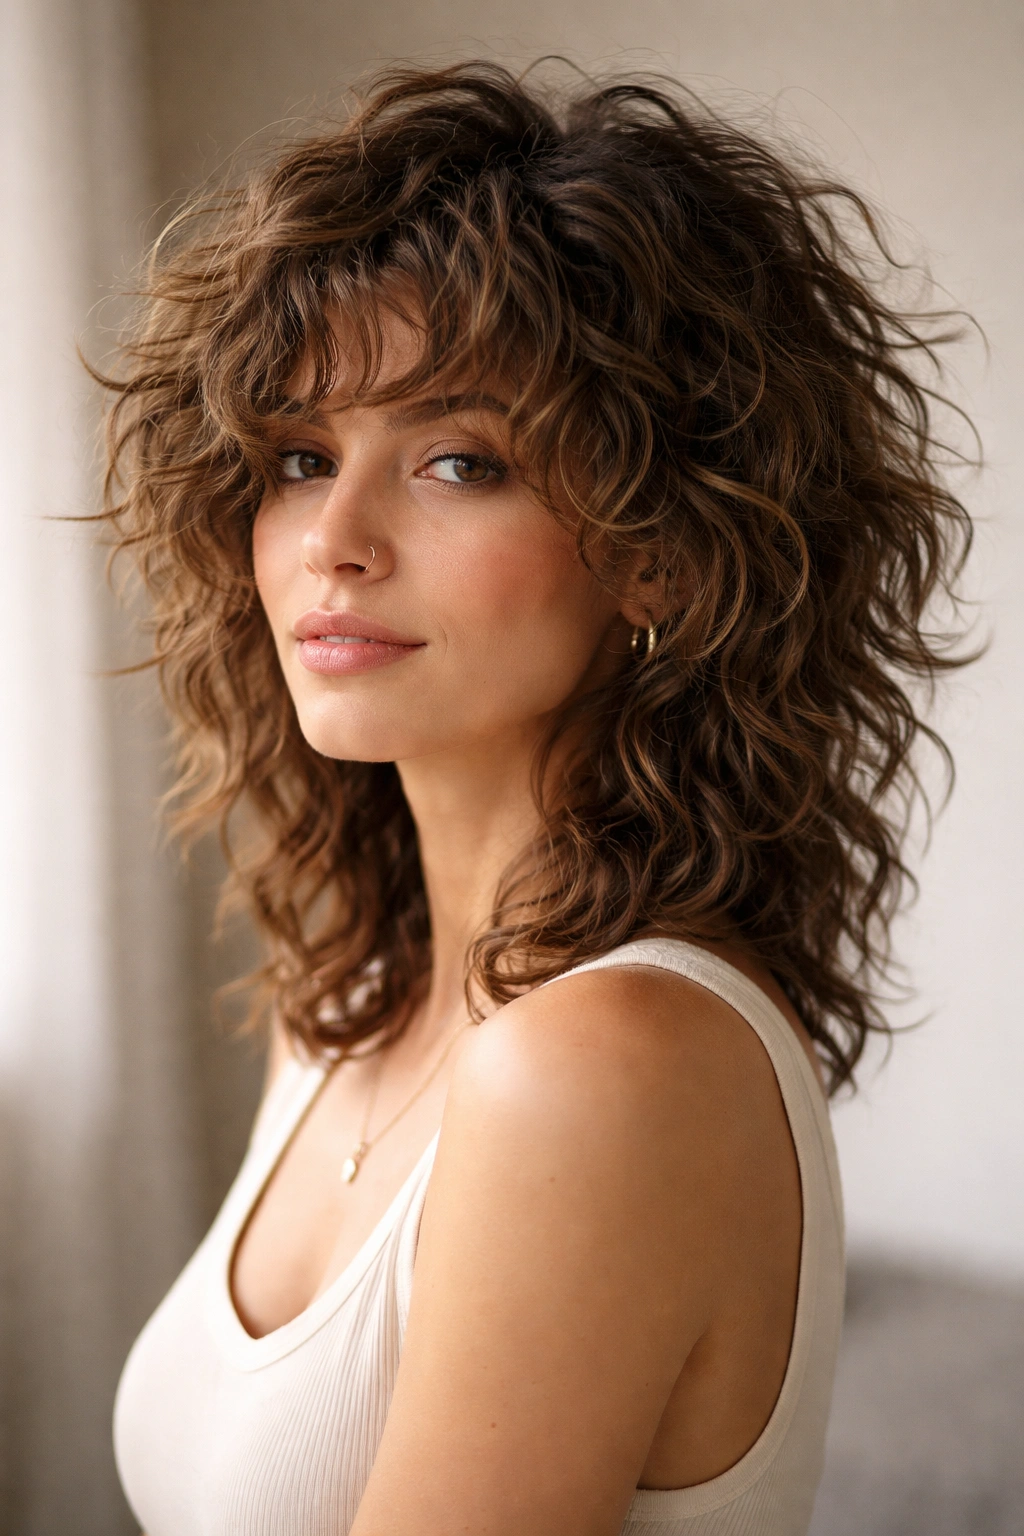
A shag cut is purpose-built for messy curly hair—it’s the rare haircut where layers aren’t something you’re fighting against but rather the entire point. The shag works by cutting shorter, choppy layers throughout your hair, especially concentrated at the crown and face, with longer pieces at the back and sides. When you have curls, those short choppy layers create texture and movement without adding bulk, and the longer underneath pieces still give you length where you want it.
How the Shag Cut Creates Built-In Texture
The genius of a shag on curls is that the layers catch light differently depending on how your curls fall that day. Some days the shorter pieces will cluster together; other days they’ll separate and create this wild, textured effect. You’re not really styling this—you’re just drying it with a diffuser, separating curls with your fingers, and letting the cut itself do the heavy lifting. This is the rare haircut that actually looks better slightly undone.
Styling Tips for Maximum Impact
- Scrunch curls while they’re still damp with a curl-defining cream or gel, then diffuse dry
- Flip your head upside down while diffusing to encourage lift at the roots
- Use a pick or your fingers to gently separate curls once they’re fully dry, never a brush
- Arm yourself with a texturizing spray for days when you want extra grip and definition
- Lean into the shaggy nature—the wilder it looks, the more intentional it feels
Worth knowing: This cut requires a stylist who understands curly hair and isn’t afraid of choppy layers. A traditional blunt cut will look terrible on curls; you specifically want disconnected, choppy layering.
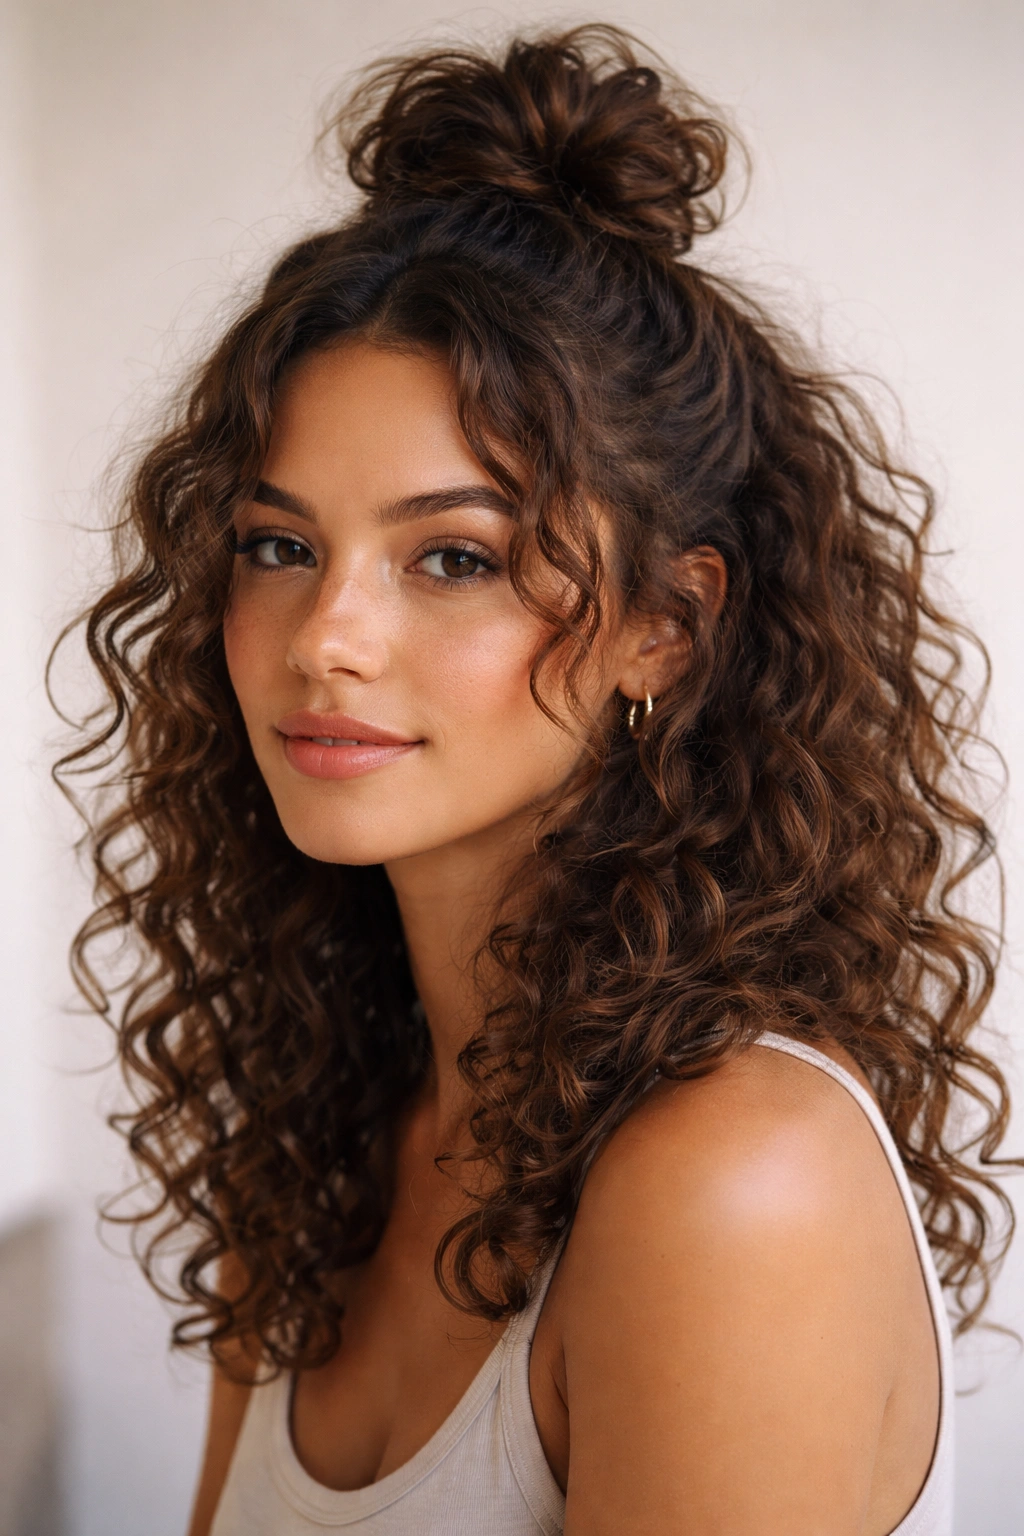
3. Half-Up Messy Curly Bun with Loose Tendrils

This style splits the difference between putting your hair up and wearing it down, making it perfect for days when you want movement without total hair everywhere. Take the top half of your curly hair (starting from about ear-level and moving upward) and gather it into a half-ponytail at the crown. Twist that ponytail loosely and wrap it into a bun, pinning it so it stays put but still looks delightfully undone. The magic happens with the bottom half of your hair—leave it completely down and let those curls frame your shoulders.
Why This Works Better Than a Standard Half-Up Style
With straight hair, a half-up style can feel too neat, too polished for a casual day. But with curls, that half-up bun becomes something else entirely—it’s the perfect balance of “I put effort in” and “I’m not taking myself too seriously.” The curls hanging down move independently from the bun above, creating depth and visual interest that a single-texture look just can’t match. You get the benefits of both a styled updo and flowing curls in one.
Creating the Perfect Imperfect Bun
- Don’t gather the top section too tightly—loose and slightly messy is the entire goal
- Leave a few pieces around your face completely out of the half-ponytail for maximum face-framing
- Use 2-3 bobby pins in an X pattern to secure the bun rather than one elastic, which creates that tumbled, unpinned look
- Gently tug on the bun to loosen it after pinning—you want it to look soft and organic
- Let curls in the bottom half air dry or diffuse dry for maximum definition and bounce
Pro tip: This style works best when your curls have been defined already. If you’re starting with undefined wave, add a curl cream before styling to encourage curl pattern.
4. Curly Bubble Ponytail with Intentional Flyaways
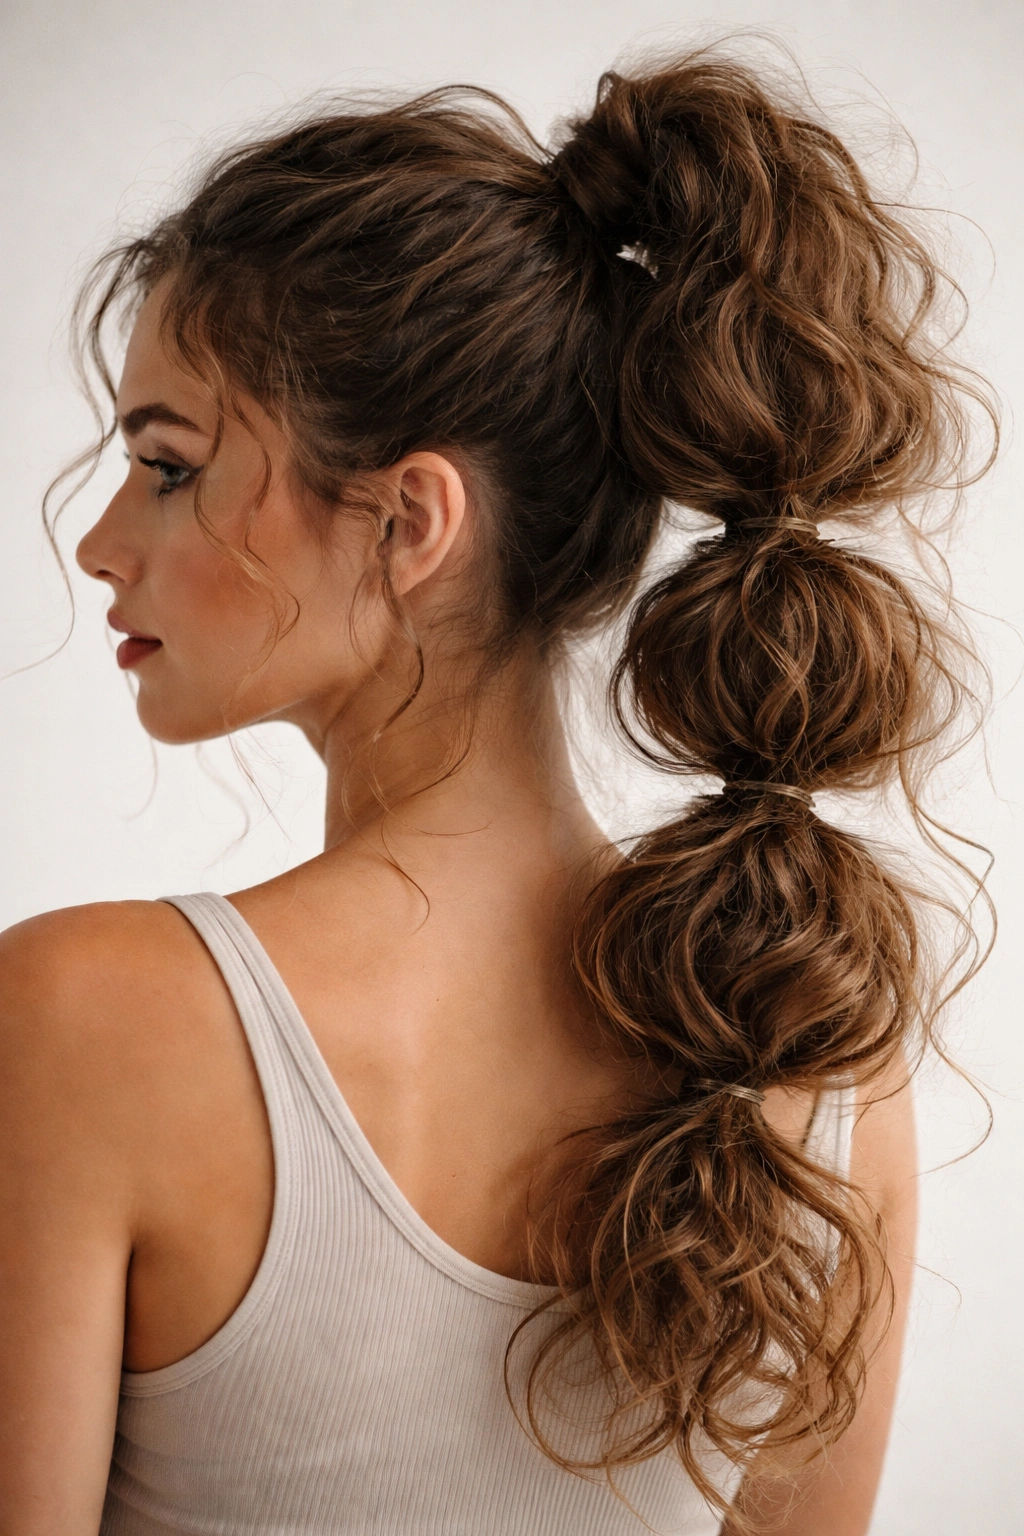
A bubble ponytail might sound polished, but with curly hair and deliberate flyaways, it becomes something messier and way more interesting. Gather your curls into a high ponytail at the crown and secure it with an elastic. Then, about an inch down the ponytail, wrap another elastic around to create the first “bubble.” Continue adding elastics every inch or so down the length of the ponytail, creating 4-5 distinct bubbles. Gently scrunch each bubble upward to puff it out slightly, and—this is the crucial part—tease out loose pieces from each bubble to create intentional flyaways.
Why Flyaways Aren’t a Problem Here
On a sleek, straight bubble ponytail, flyaways look like a mistake. But on a curly bubble ponytail, they’re the entire aesthetic. Those loose curls soften the structured look of the elastics and make the style feel playful and deliberate rather than trying-too-hard. You’re not fighting against the natural texture of your hair; you’re leaning into it and using it as part of the design.
Getting the Bubble Effect Right
- Use clear or color-matched elastics so they blur into your curls rather than looking like a stark graphic element
- Curl your hair the night before or use a curl cream so you’re starting with defined, bouncy texture
- Scrunch each bubble fairly gently—you want volume, not a completely separated balloon effect
- Pull flyaway curls from around the elastics and near the scalp for a face-framing, undone vibe
- This style works best on longer curls that have enough length to create distinct bubbles with separation
Worth knowing: The bubble ponytail trend can feel very on-trend and temporary, but on curls it reads as playful and fun rather than trend-chasing.
5. Loose Curly Beach Waves with Undone Texture

This is the messiest on the list—and also possibly the easiest to achieve. Loose beach waves are about letting your natural curl pattern relax into soft, elongated waves that have movement but not tight definition. To get here, apply a sea salt spray or texturizing spray to damp curls, then either air dry or diffuse dry on a lower heat setting. You want enough texture that it’s clearly not straight, but enough relaxation that the curls have opened up into waves.
Creating Waves Versus Maintaining Curls
Beach waves occupy this interesting middle ground where you’re not trying to define and tighten your curl pattern, but you’re also not letting it get completely flat. You’re aiming for something with bounce and movement but a softer, more relaxed appearance. This works beautifully for people with naturally wavy or loose-curl hair who want to lean into their texture without the intensity of fully-defined curls.
Maintaining Your Waves Throughout the Day
- Apply texturizing spray while your curls are still slightly damp for the best hold
- Use your fingers, not a brush or comb, to separate waves once they’re dry
- Refresh waves the next day by misting with texturizing spray and re-diffusing for 2-3 minutes
- Sleep on a silk pillowcase or in a silk bonnet to preserve your wave pattern
- Add dry shampoo or sea salt spray the next day to increase texture and grip
Pro tip: The messier your waves look, the better this style works. Don’t aim for uniformity or perfection—let some pieces curve more than others and embrace the asymmetry.
6. Messy Curly Lob with Choppy, Disconnected Layers
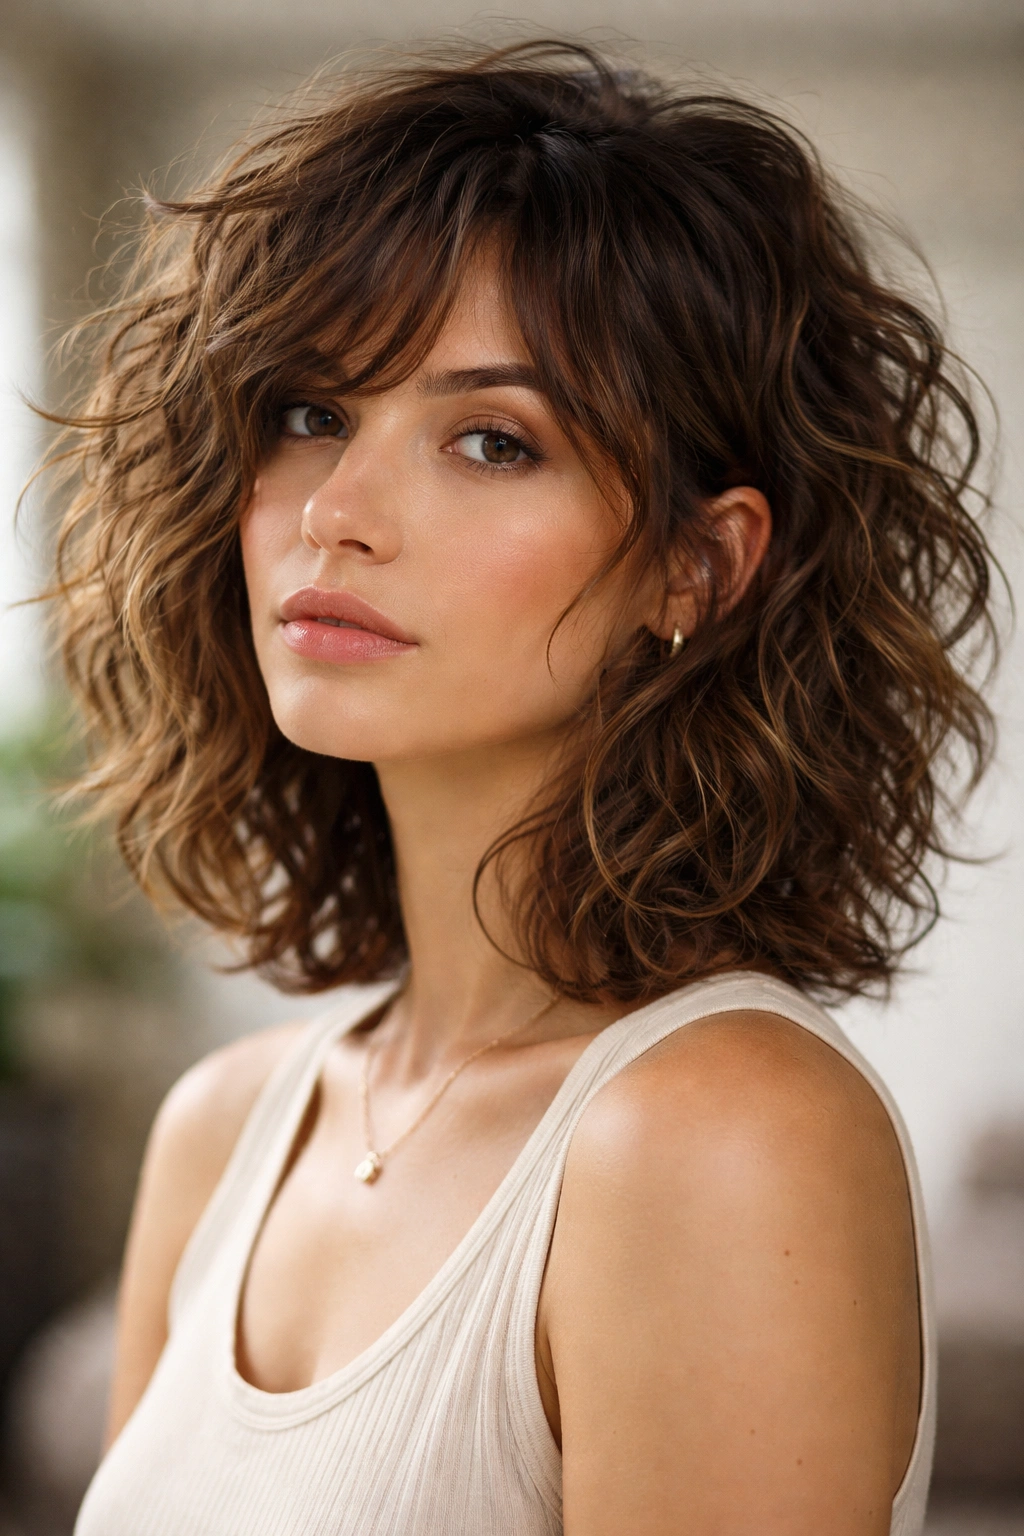
A lob (long bob) on curls is automatically more interesting than a blunt-cut lob on straight hair, especially when it’s cut with choppy, disconnected layers. Ask your stylist for a lob that hits around shoulder-length, with shorter choppy layers at the crown that create movement, and longer pieces throughout the back that maintain length. The disconnection is key—you don’t want the layers to blend seamlessly; you want them to be visibly distinct and slightly jarring, which creates that intentional messiness.
Why This Cut Works for Curly Hair
Curly hair has its own texture and movement—a blunt, seamless lob fights against that and often ends up looking heavy and dull. But a lob with choppy, disconnected layers gives your curls somewhere to go. The layers catch light differently, the shorter pieces create lift at the crown, and the longer pieces still give you the length you might be craving. This cut works with your curl pattern instead of against it.
Styling Your Choppy Lob
- Diffuse dry your curls rather than air drying, which gives you more definition and separation between layers
- Use a curl cream or gel to enhance definition, focusing it on the shorter crown layers for lift
- Tousle the shorter layers with your fingers once fully dry to separate them and create texture
- This cut works best with a bit of intentional frizz—use a texturizing spray to add movement
- Schedule trims every 6-8 weeks to maintain the choppy layer effect as your curls grow
Worth knowing: A choppy lob requires a stylist who understands curly hair and isn’t trying to make your curls look smooth and uniform. You want someone who embraces texture.
7. Curly High-Ponytail with Stray Ringlets
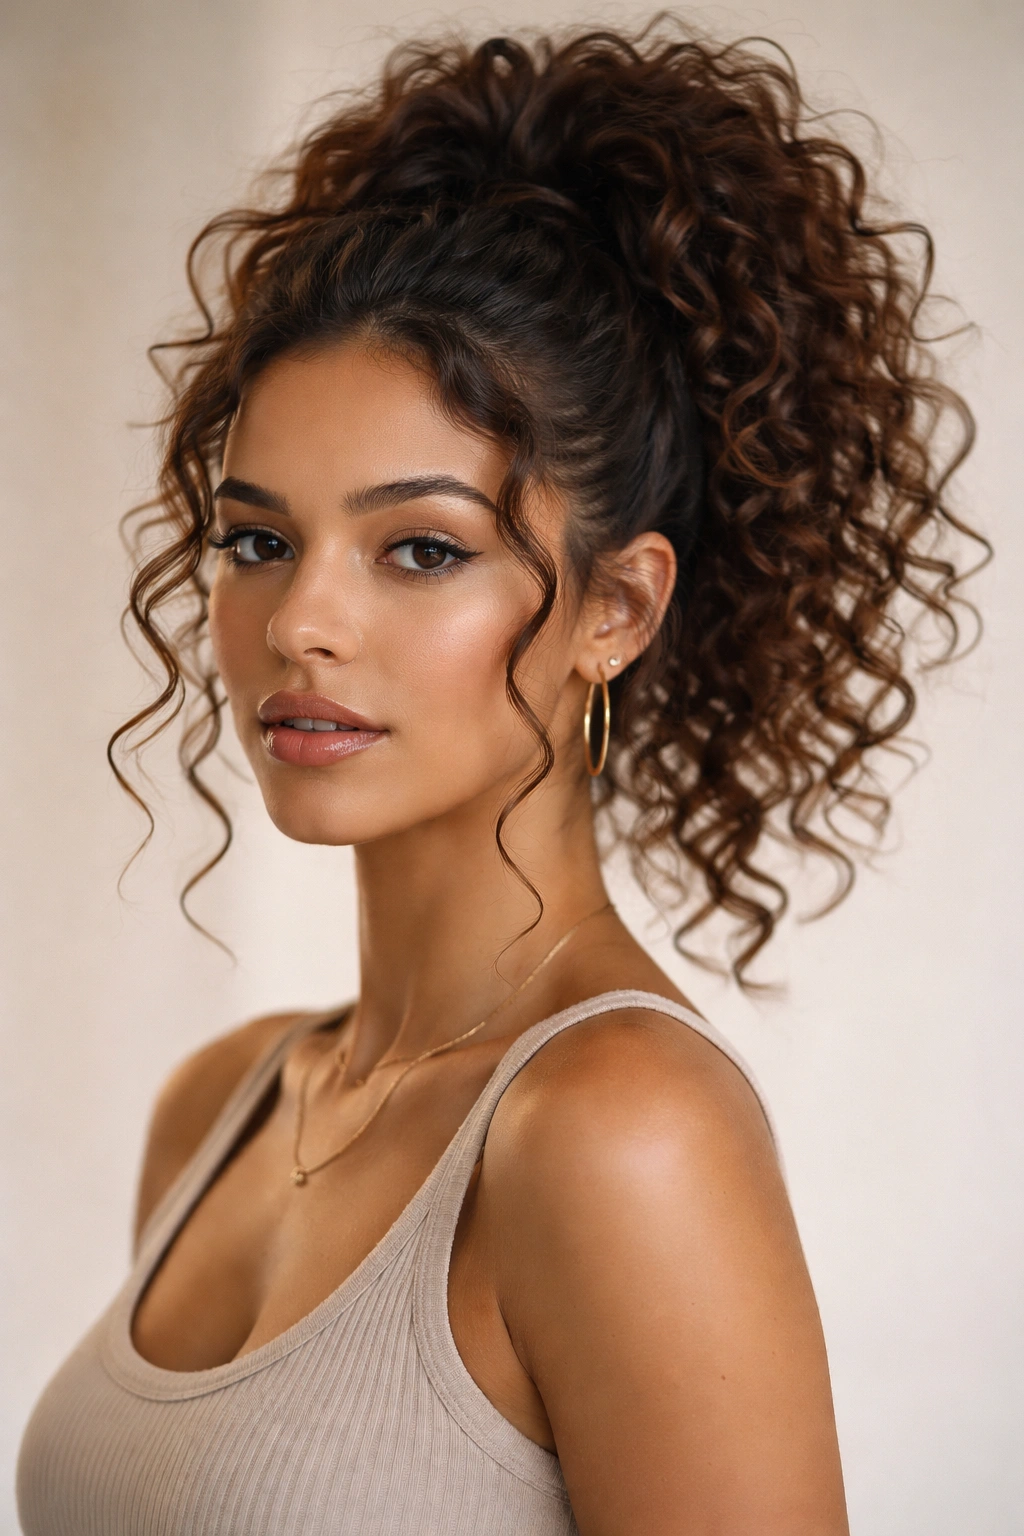
A high ponytail is inherently energetic and youthful, but adding curly stray ringlets around the face makes it feel effortlessly cool rather than aggressively polished. Gather your curls into a high, voluminous ponytail at the crown and secure it with an elastic. Then, pull out 4-5 individual ringlets from around your face—near your temples, cheekbones, and the nape of your neck—letting them frame your features. These stray curls are the opposite of polished; they’re the curls that escaped, and that’s exactly what makes this style work.
Building Volume in Your High Ponytail
The key to a non-stringy high ponytail on curls is starting with textured, voluminous curls. If you begin with flat, undefined hair, your ponytail will look thin no matter what you do. Use a curl cream or gel on damp hair, then diffuse dry with your head flipped to encourage root lift. Once your ponytail is secured, gently scrunch it upward from the elastic outward to add more volume and puff.
Styling Stray Ringlets for Maximum Effect
- Choose ringlets that are still clearly curled and defined, not frizzy or undefined
- Let them fall naturally rather than pinning them into place—they should look like they want to be loose
- Use a small curling wand to tighten any ringlets that have relaxed, or apply curl cream for extra definition
- Arrange them so they’re visible from the front but not overwhelming—usually 1-2 per side and 1 at the nape is perfect
- Refresh ringlets with a spritz of water and a quick diffuse if they drop halfway through your day
Pro tip: This style photographs beautifully because the contrast between the polished ponytail and the loose ringlets creates visual interest and movement.
8. Tousled Curly Updo with Soft Escaping Curls
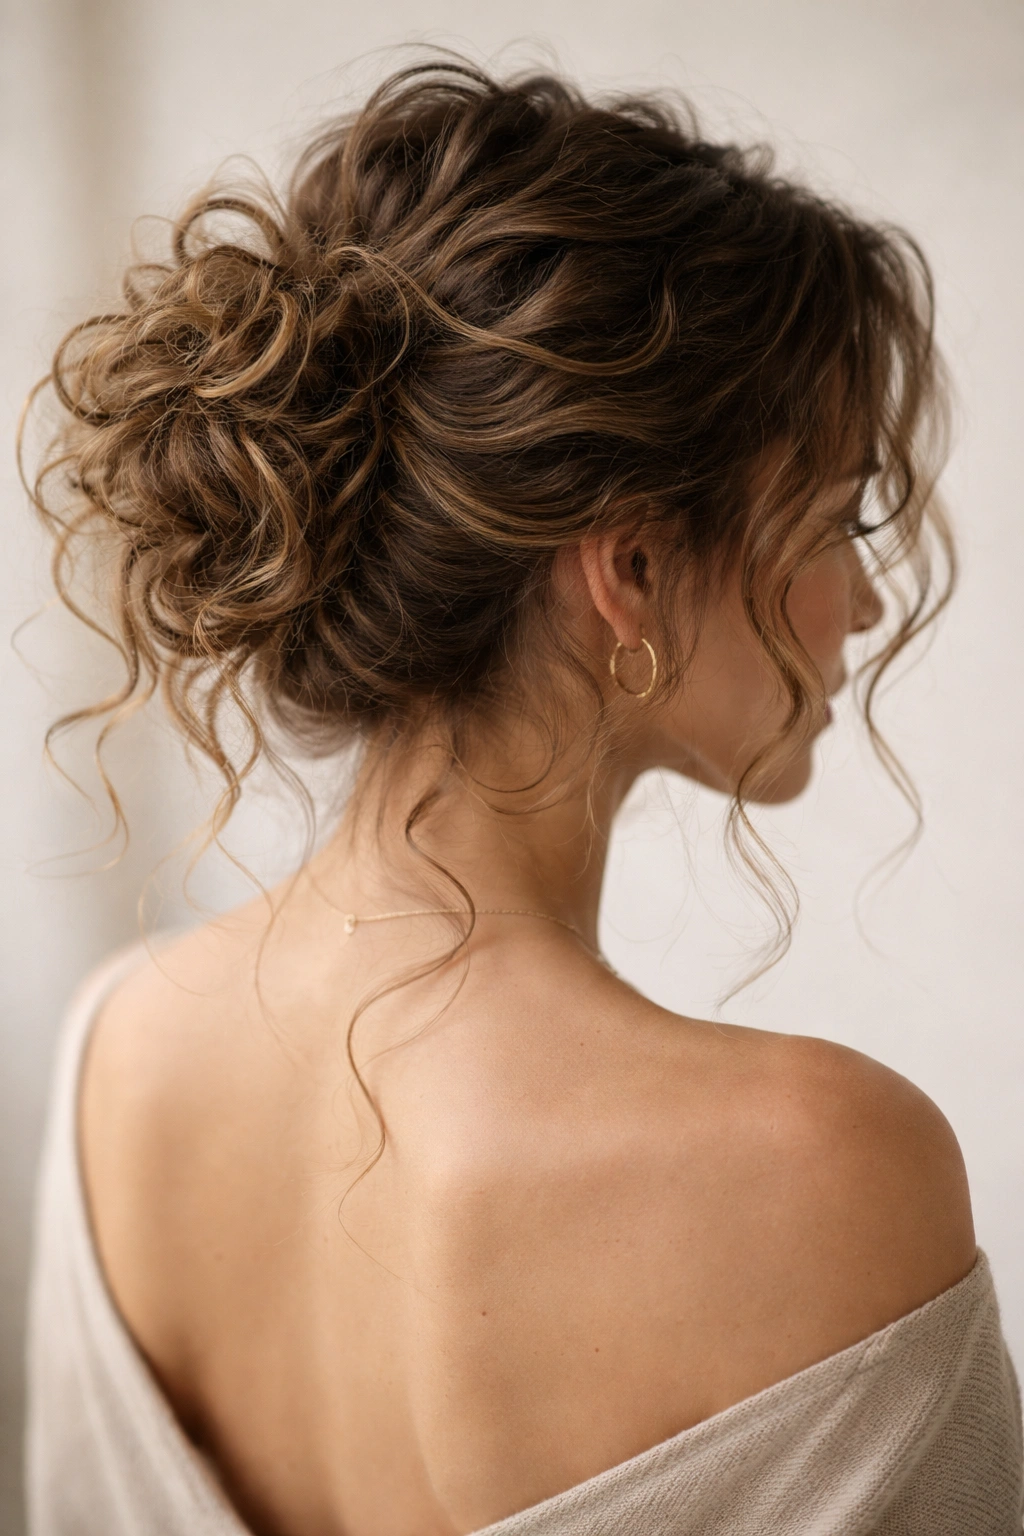
An updo is typically associated with formal occasions and controlled, polished styling, but a curly updo breaks all those rules. Create a loose, slightly twisted updo by gathering your curls into a low or mid-height ponytail, then gently twisting and wrapping that ponytail around itself to form a soft bun or twisted knot. Secure it loosely with bobby pins so it stays put but doesn’t look locked down. The critical element: let curls escape from the base, the sides, and the very top of your updo, creating a soft, romantic vibe that formal updos usually lack.
When to Wear a Curly Updo
This style exists in that sweet spot between casual and elevated—it works for everything from a nice dinner out to a wedding where you want elegance without rigidity. The escaping curls prevent it from feeling too formal or too try-hard, keeping it grounded in that intentional-mess aesthetic. It’s essentially a fancy messy bun with curly-hair rules applied.
Creating an Updo That Feels Effortless
- Start with curls that are already defined and have some hold—use a curl cream or light gel
- Don’t twist too tightly when creating the updo—you want it to feel soft and organic
- Pull out a generous amount of curls around the face and sides before considering it done
- Use bobby pins that match your hair color to secure, focusing them at the base rather than visible throughout
- Finish with a light texture spray to enhance any frizz and create that soft-focus effect
Worth knowing: This updo works better on longer curls (shoulder-length or longer) because you need enough hair to create a full, lush look with escaping pieces.
9. Messy Curly Pixie with Textured Layers on Top
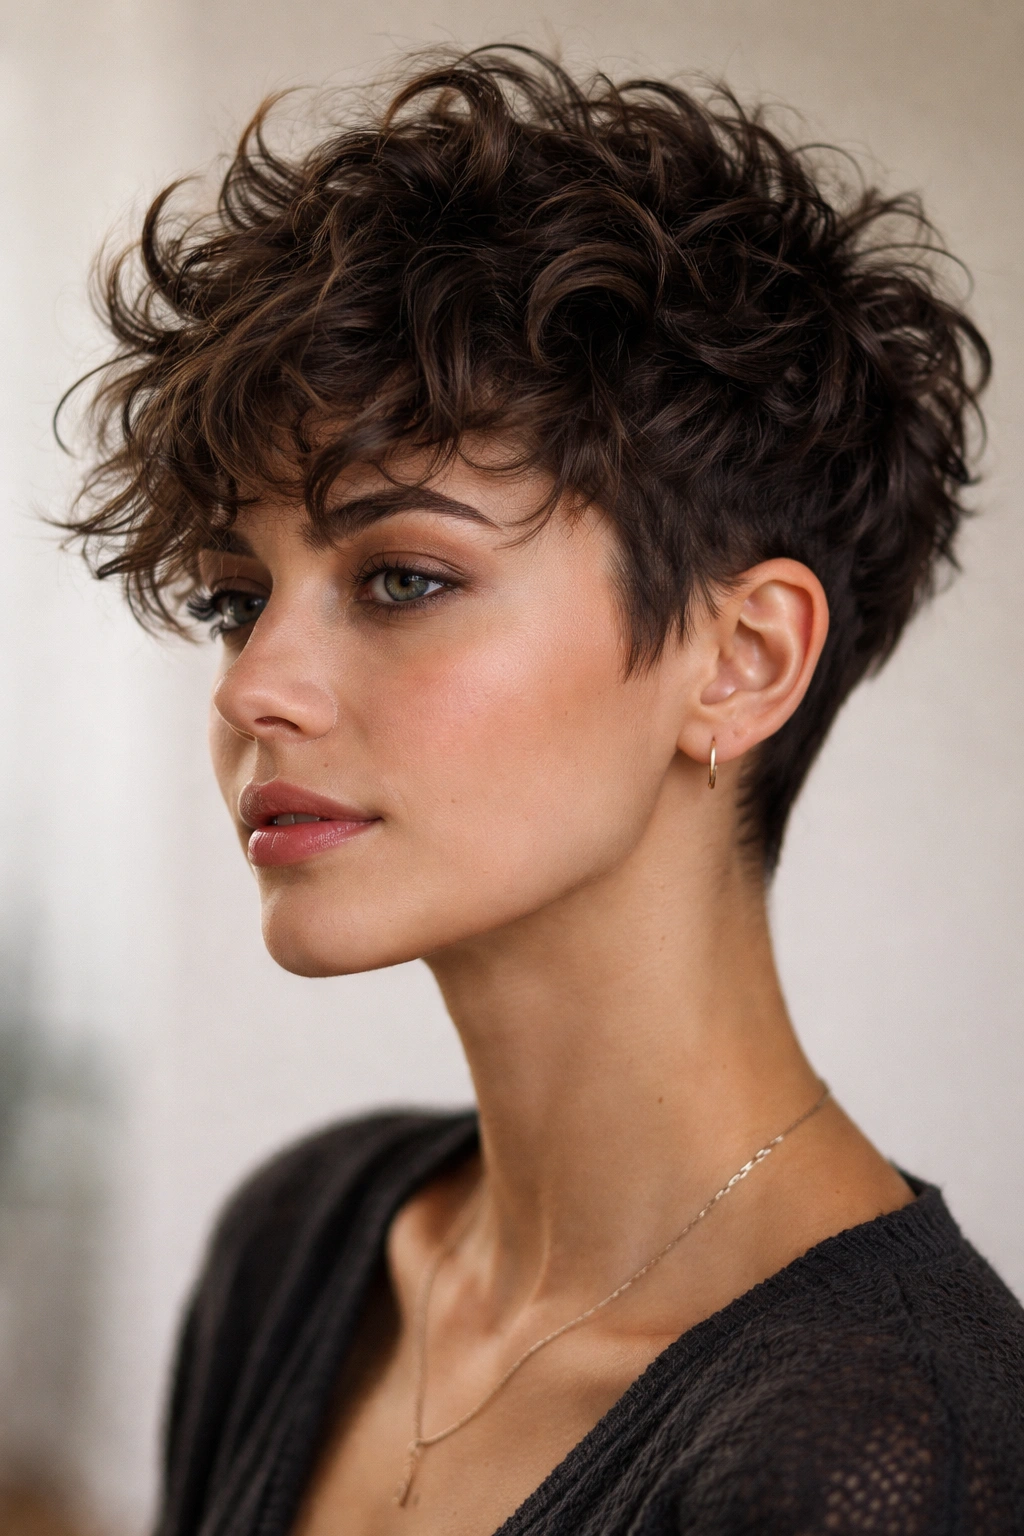
A pixie cut seems like it would be the enemy of curly hair—short, controlled, precise. But a textured pixie on curls is an entirely different beast. Ask your stylist for a short pixie that’s slightly longer on top (about 3-4 inches) with textured, choppy layers concentrated there, and shorter, more faded sides. On curls, those layers on top create amazing texture and movement, and the tight curls actually enhance the cut rather than working against it. This is a bold choice, but it’s genuinely striking.
The Bold Beauty of a Curly Pixie
A curly pixie announces that you’re not here to apologize for your hair or tone it down. It’s the opposite of hiding your texture—it’s leading with it. The shorter length means less weight pulling your curls down, so they spring up with pure, undeniable texture. It’s a look that reads as both low-maintenance and undeniably stylish, which is a rare combination.
Styling Your Curly Pixie
- Apply curl cream to very damp hair and scrunch upward to encourage curl formation
- Diffuse dry with your head upright or slightly flipped for maximum root lift
- Use your fingers to separate and define curls as they’re drying
- This cut actually looks better when it has a few days of texture built up, so skip the daily wash
- Refresh curls with a spritz of water and texturizing spray on non-wash days
Pro tip: A curly pixie requires a stylist who truly understands curly hair and won’t over-short your curls trying to create a “neat” pixie. You want length and texture, not a tight, close crop.
10. Curly Half-Bun with Perfectly Imperfect Fall
This final style might be the most universally flattering messy curly look because it works on nearly any curl type and length. Gather about three-quarters of your hair (starting from around mid-scalp height) and twist it loosely, wrapping it into a half-bun at the crown. Secure with bobby pins and gently tug on the bun to loosen it and create a deliberately undone appearance. The remaining quarter of your hair—specifically the bottom layer and sides—falls completely loose, creating a frame of curls around your face and shoulders.
Why This Style Is Infinitely Customizable
You can wear this half-bun high or low, tight or impossibly loose, with a few escaped pieces or with tons of flyaway curls. It works on shoulder-length curls and on curls down to your mid-back. It works on tight coils and on loose waves. It’s the hairstyle equivalent of a white t-shirt—it’s always appropriate and always works, but you can style it a thousand different ways.
Mastering the Perfect Imperfection
- Tease the bun section slightly before twisting it—this adds volume and prevents a flat appearance
- Use 3-4 bobby pins in an X or zigzag pattern rather than all in one spot
- Pull gently on the bun from all angles to create a soft, loose appearance
- Leave face-framing pieces completely out of the bun before you secure it
- Refresh the style by flipping your head upside down and gently shaking—curls will reshuffle naturally
Worth knowing: This style works best when you don’t overthink it. The more you fuss with trying to make it “perfect,” the less intentionally imperfect it becomes. Set it, step back, and leave it alone.
Final Thoughts
The truth about messy curly hairstyles is that they’re a full permission slip to stop fighting your hair’s natural texture. Every single style here works because it leans into curl, embraces movement, and celebrates the beautiful imperfection of undone waves. Your curls don’t need to be tamed or smoothed or made to look like they belong on someone else’s head—they need to be shown off exactly as they are.
These styles also share something else: they’re genuinely low-maintenance once they’re styled. You’re not spending an hour every morning trying to recreate perfect waves or pin every strand into submission. You’re diffusing, you’re scrunching, you’re letting gravity and your natural texture do the heavy lifting. That ease is part of what makes them beautiful—they look intentionally styled, but they feel effortless to create.
Start with whichever style calls to you, but know that you can adapt any of these based on your specific curl pattern, hair length, and daily mood. The most important ingredient isn’t a special product or an expensive technique—it’s the confidence to let your curls exist exactly as they want to.