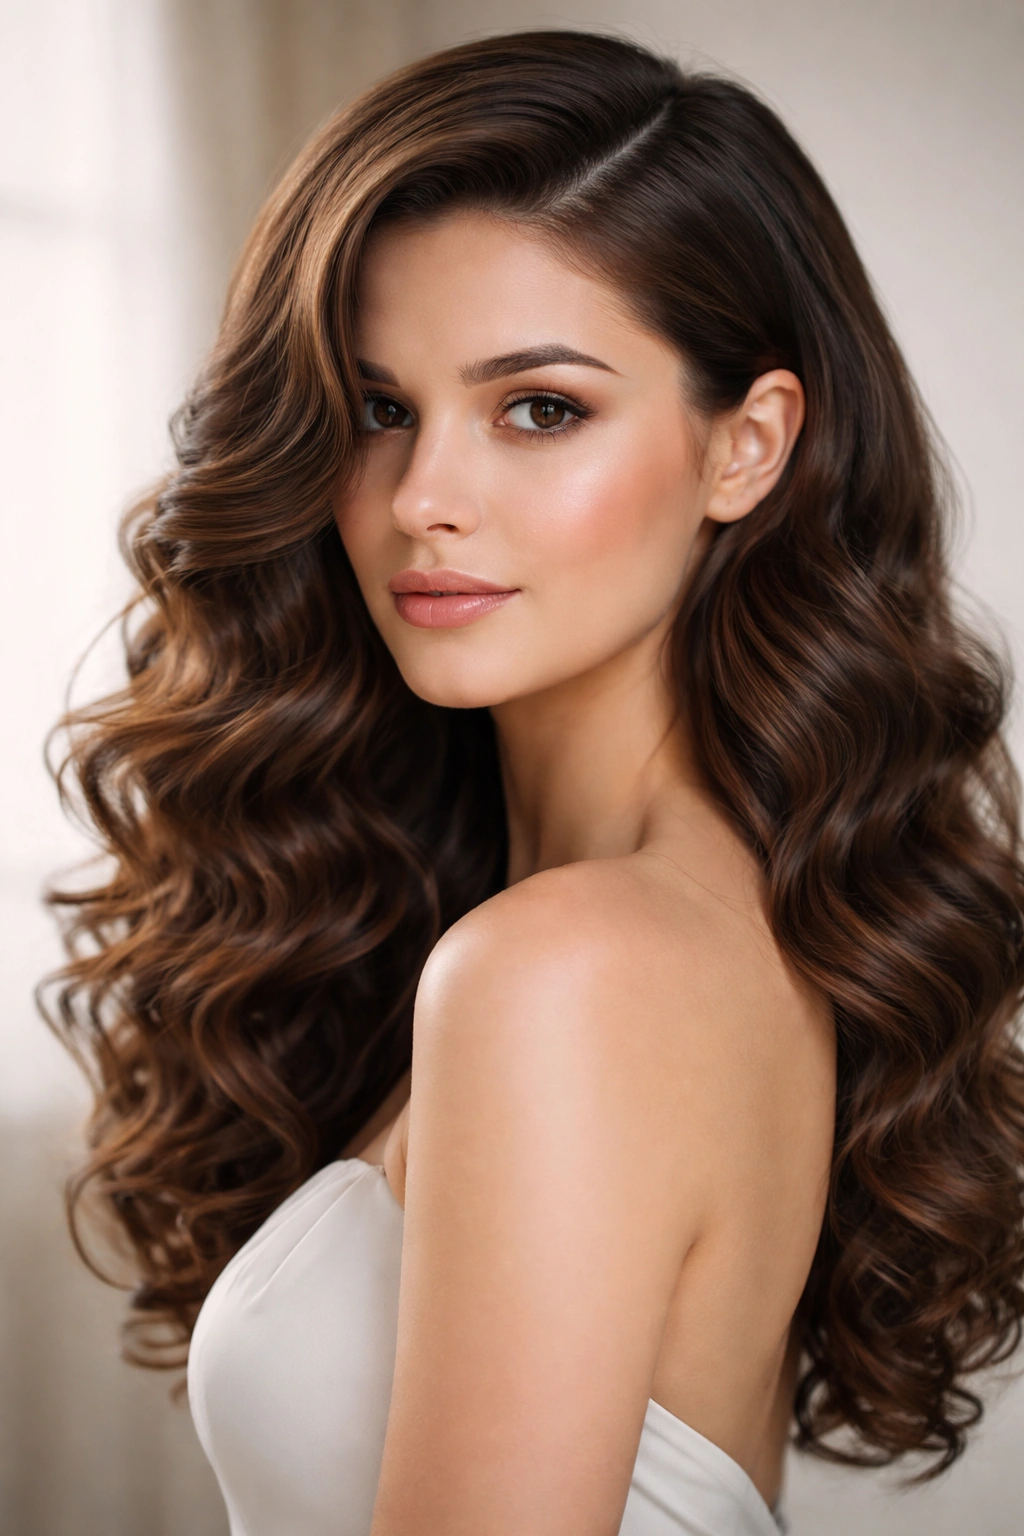
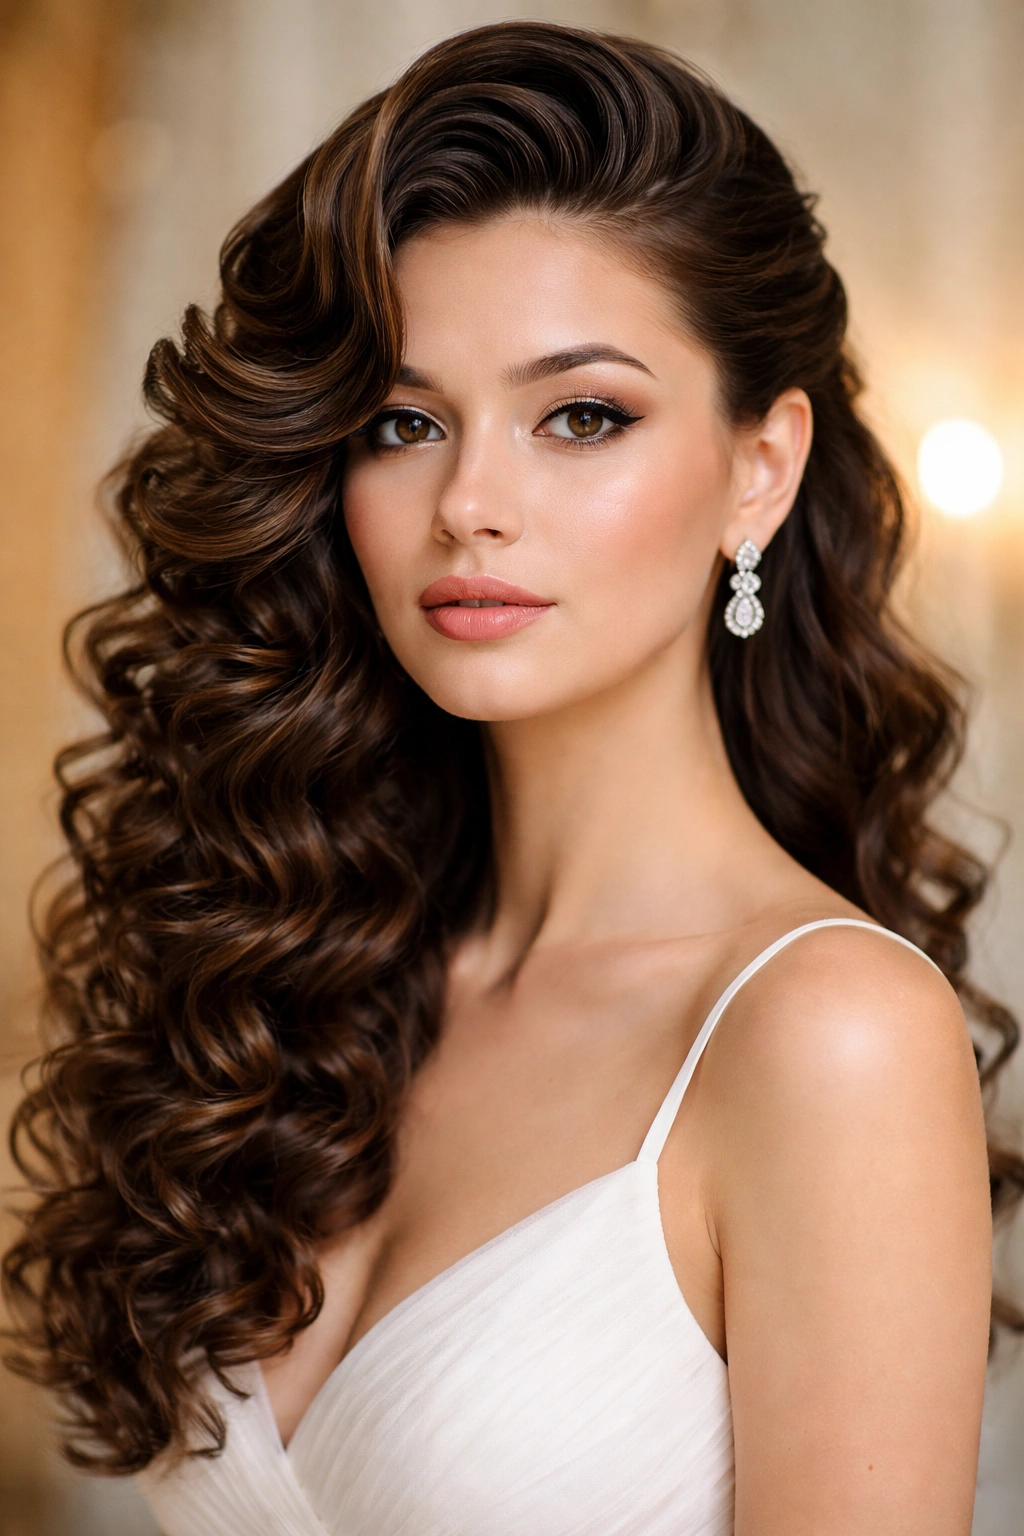
Curly hair at a formal event doesn’t have to mean fighting your texture or spending hours trying to force it into submission. The truth is, your curls have a natural advantage when it comes to formal styling — they hold shape, create depth, and photograph beautifully under professional lighting. The catch? A formal curl style needs structure, intentional definition, and the right product strategy to go from everyday-bouncy to truly polished.
What separates a casual curl moment from a formal statement is how deliberately you define, set, and pin your curls into place. A stunning formal hairstyle for curly hair plays with strategic pinning, lightweight hold, and techniques that emphasize your curl pattern instead of fighting it. Whether you’re heading to a wedding, gala, or black-tie event, your curls can absolutely be the focal point — you just need the right approach.
The styles below cover everything from romantic half-up arrangements to sculptural updos, each one designed specifically for how curly hair actually behaves. You’ll find practical details about products that won’t weigh curls down, pinning techniques that last all evening, and how to prep your curls the day before so they’re ready to style without frizz or flatness. Let’s dive into formal styles that celebrate your curl pattern instead of hiding it.
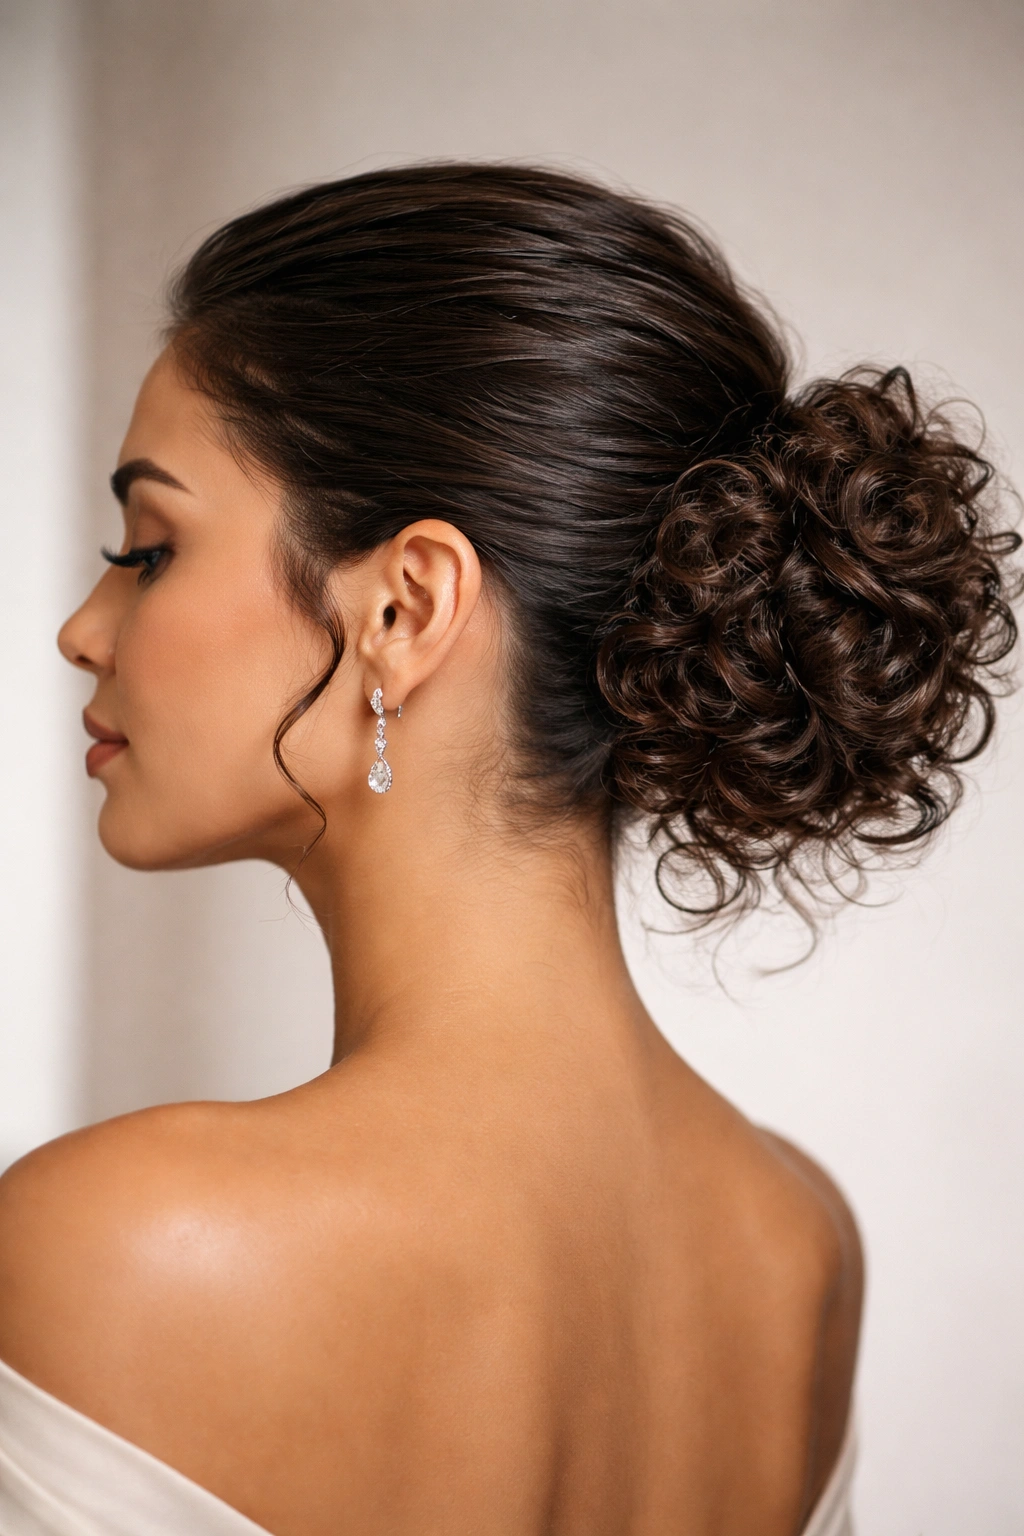
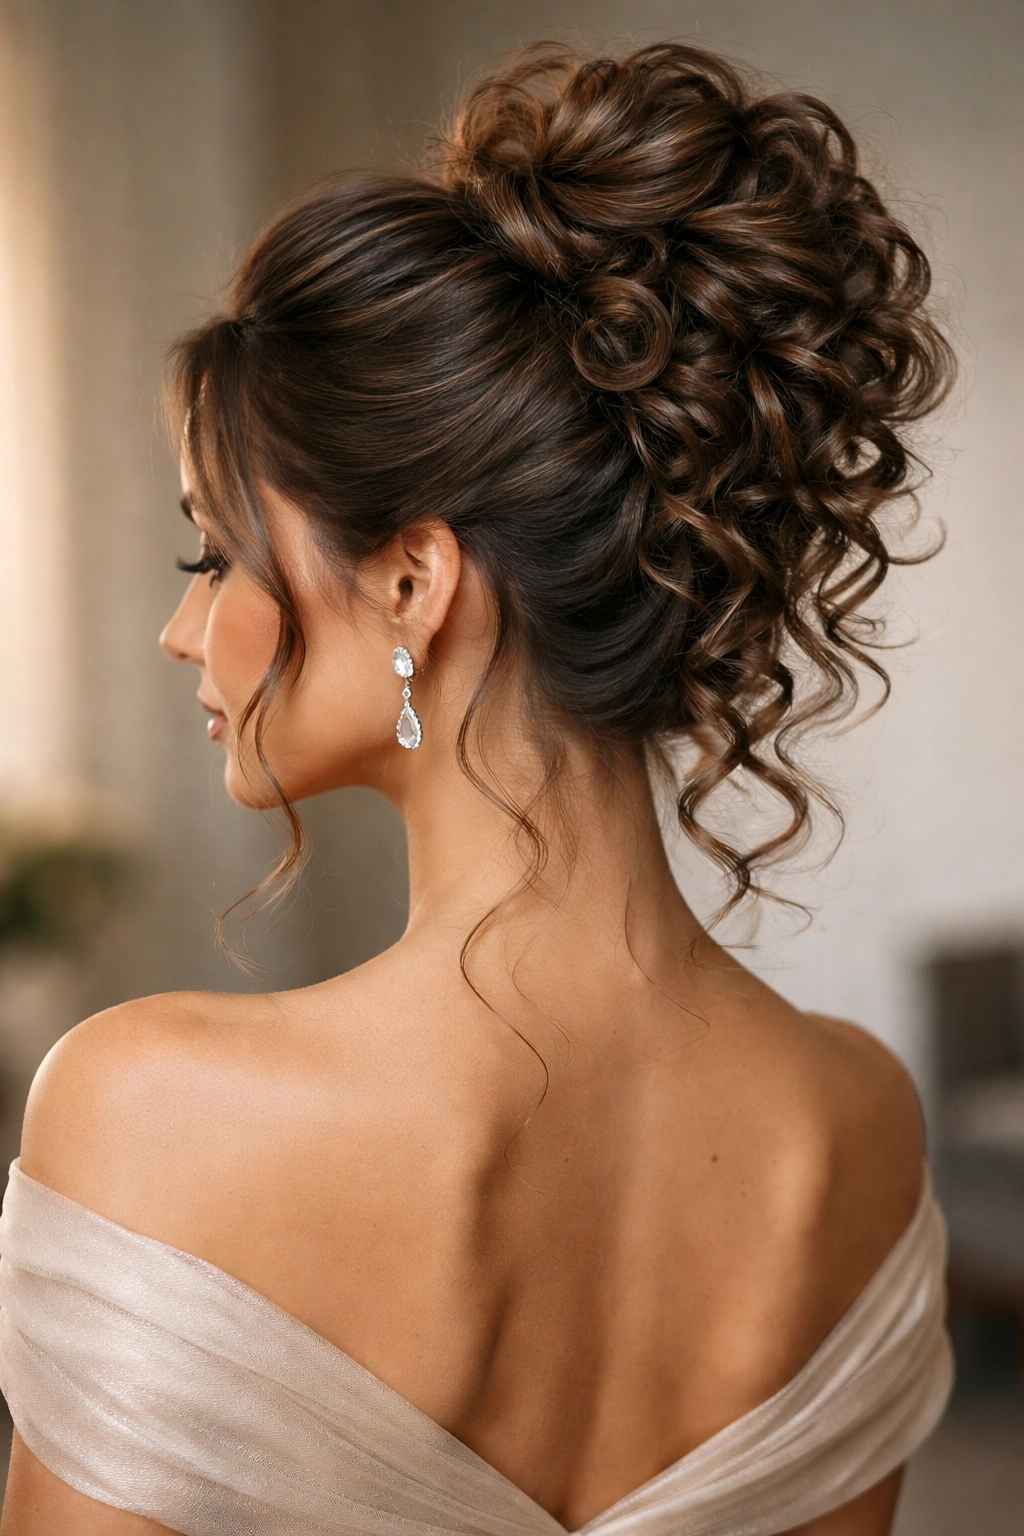
1. Elegant Low Bun with Defined Curls
A low bun works beautifully for curly hair because it keeps your curls away from your neck and shoulders while letting you display them prominently at the back of your head. The key difference between a casual low bun and a formal one is intentionality — formal curls should feel sculpted and deliberately arranged, not just gathered randomly.
How to Create the Look
Start with curls that are 2-3 days old rather than freshly washed; day-old curls have more grip and hold shape far better. Apply a lightweight curl cream or mousse to damp hair before styling, then style your curls into their natural pattern. Once dry, gather hair into a low ponytail at the nape of your neck and loosely twist or braid it as you wrap it around itself to form the bun base. Pin individual curl sections strategically so they stay defined and separated rather than melting into a blob. Use a medium-hold hairspray on individual sections as you go — avoid spraying the entire bun at once, which can clump curls together.
Key Details to Perfect It
- Use bobby pins that match your curl color to secure the bun invisibly
- Leave 2-3 face-framing curls loose before gathering — this softens the look and is deeply romantic
- Don’t compress the bun too tightly; formal curly buns should feel slightly voluminous and relaxed
- Smooth any flyaways with a lightweight anti-frizz serum, never heavy gel
- The bun sits lower than a casual bun — aim for 2-3 inches above your collar
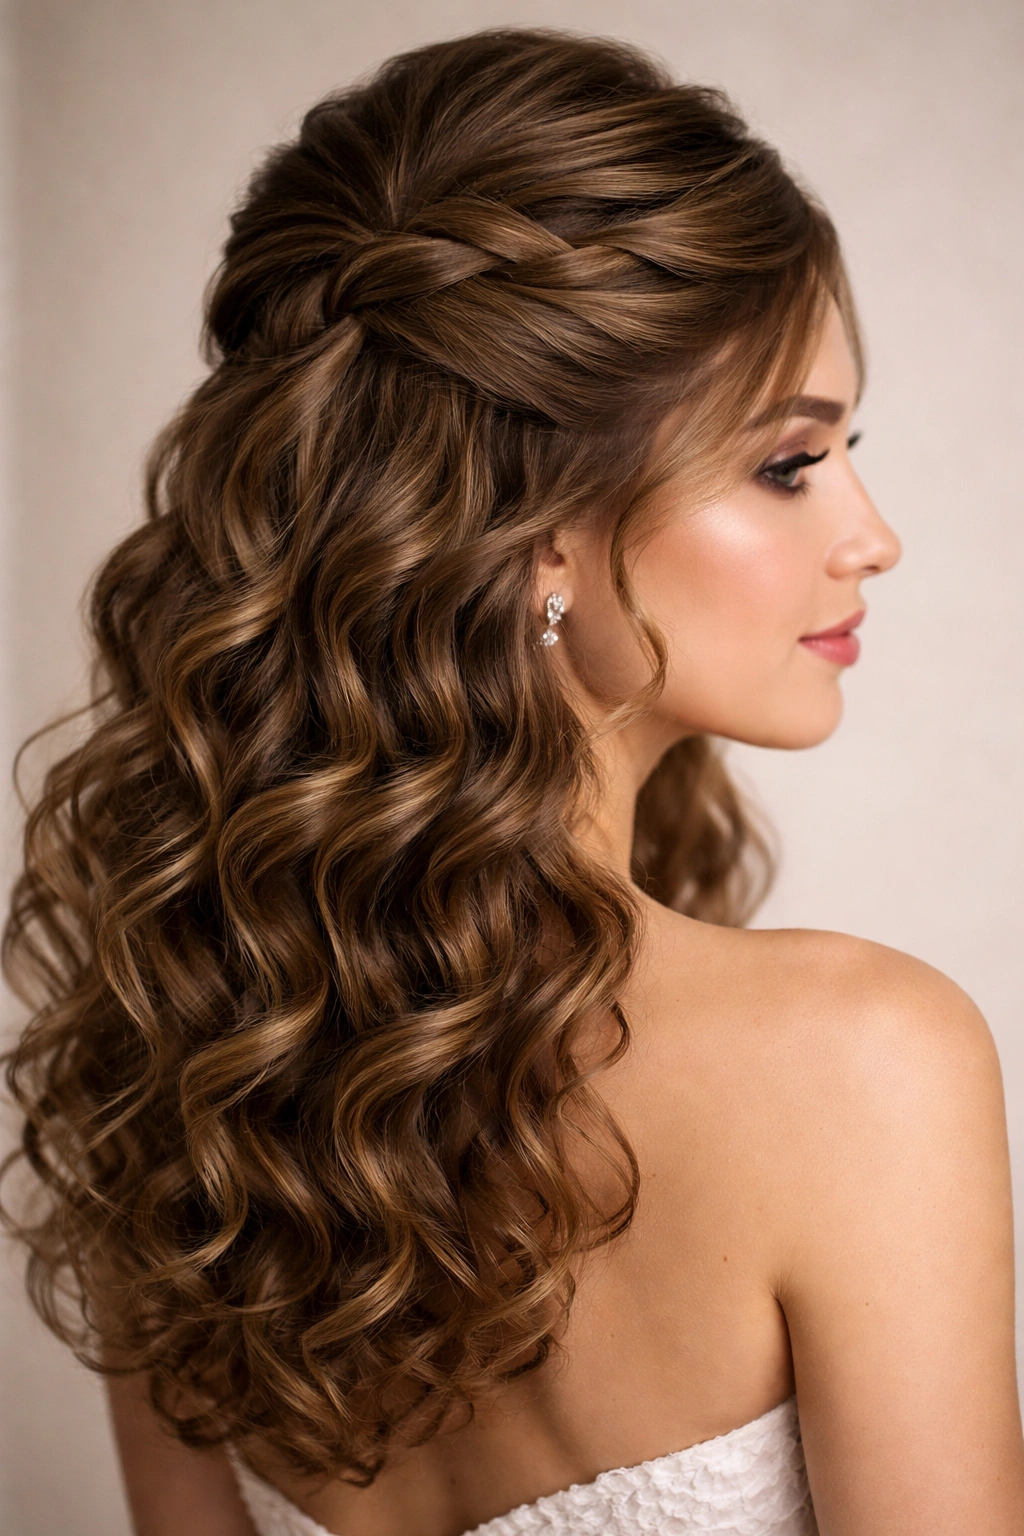
2. Romantic Half-Up, Half-Down with Pinned Curls
This style gives you the elegance of an updo while showcasing your full curl pattern. The half-up arrangement keeps hair off your face and neck while allowing your curls to flow freely down your back — it’s formal enough for any event but romantic enough for a wedding or date.
How to Create the Look
Flip your head upside down and apply a curl-refreshing spray to wake up your curl pattern and add grip. Let it dry, then flip back up. Take a section of hair from each temple and twist gently as you bring it toward the back of your head. Secure those two sections together with bobby pins at the crown, creating an X pattern where they cross. Gently pull and tease the pinned sections slightly to create volume and texture. Leave the bottom two-thirds of your hair down and free, arranged so your best-defined curls frame your face.
Key Details to Perfect It
- Don’t pull the half-up section tight — some softness and texture here looks more intentional and formal than slick
- Use 3-4 bobby pins, positioned so they’re hidden by the surrounding curl texture
- Arrange 2-3 curls from the half-up section to fall forward around your face after pinning
- Apply a light hairspray to the pinned section only — the down curls should remain touchable and natural-feeling
- This style works best when your curls are freshly defined; second-day curls may feel loose in the half-up section
3. Structured Twisted Updo with Hidden Pins
A twisted updo is more formal than a bun because the twisted structure creates visual drama and keeps the style feeling architectural rather than relaxed. The twist technique is especially forgiving for curly hair because the natural texture hides pin placement and adds to the intentional, sculpted feeling.
How to Create the Look
Prepare your curls the night before with a curl cream and let them air dry or diffuse dry. In the morning, finger-comb your curls gently to refresh them. Create a deep side part and gather the larger side of hair into a low ponytail. Divide that ponytail into two sections and twist them around each other as you bring them up and around your head, forming a crown-like twisted structure. Pin the twisted section as you go, placing pins every 2-3 inches and hiding them completely within the twist texture. Leave the smaller side of hair down and arranged in front of your shoulder — this asymmetry is what makes it feel formal and intentional.
Key Details to Perfect It
- Twist loosely; tight twists can flatten curls and look severe rather than elegant
- Pin from the underside so the pins are invisible when looking at your face
- Backcomb the twist very gently where you want extra volume — curly hair already has texture, so just a touch adds drama
- Spray the updo section only, leaving the side-swept curls natural and moveable
- This style photographs exceptionally well because the twisted structure catches light beautifully
4. Sleek High Ponytail with Curl Definition
A formal high ponytail is an entirely different beast from a casual one. It requires the ponytail base to be smooth and sculpted while the curls within the ponytail are deliberately defined and separated — you’re creating intentional contrast between sleek and textured.
How to Create the Look
Apply a lightweight gel or cream to damp hair, focusing on the root area and crown. Blow-dry your hair with a paddle brush to create a smooth base, then style the lengths into curls using a curling iron or by finger-coiling and diffusing. Create a deep side part and smooth the hair closest to your scalp with a fine-tooth comb and a touch of gel. Gather all hair into a high, clean ponytail positioned at the crown. Smooth the ponytail base with the comb and apply an anti-frizz serum to any flyaways. The curls inside the ponytail should feel defined and springy, not flat.
Key Details to Perfect It
- The contrast between the sleek base and textured curls is what makes this look formal
- Use an elastic wrapped with a section of hair from the ponytail to hide the band completely
- Arrange 2-3 of your best curls to frame your face from the ponytail section
- A light hairspray keeps flyaways at bay without dulling the curl definition
- Backcomb very gently at the crown under the ponytail base to create a subtle lift
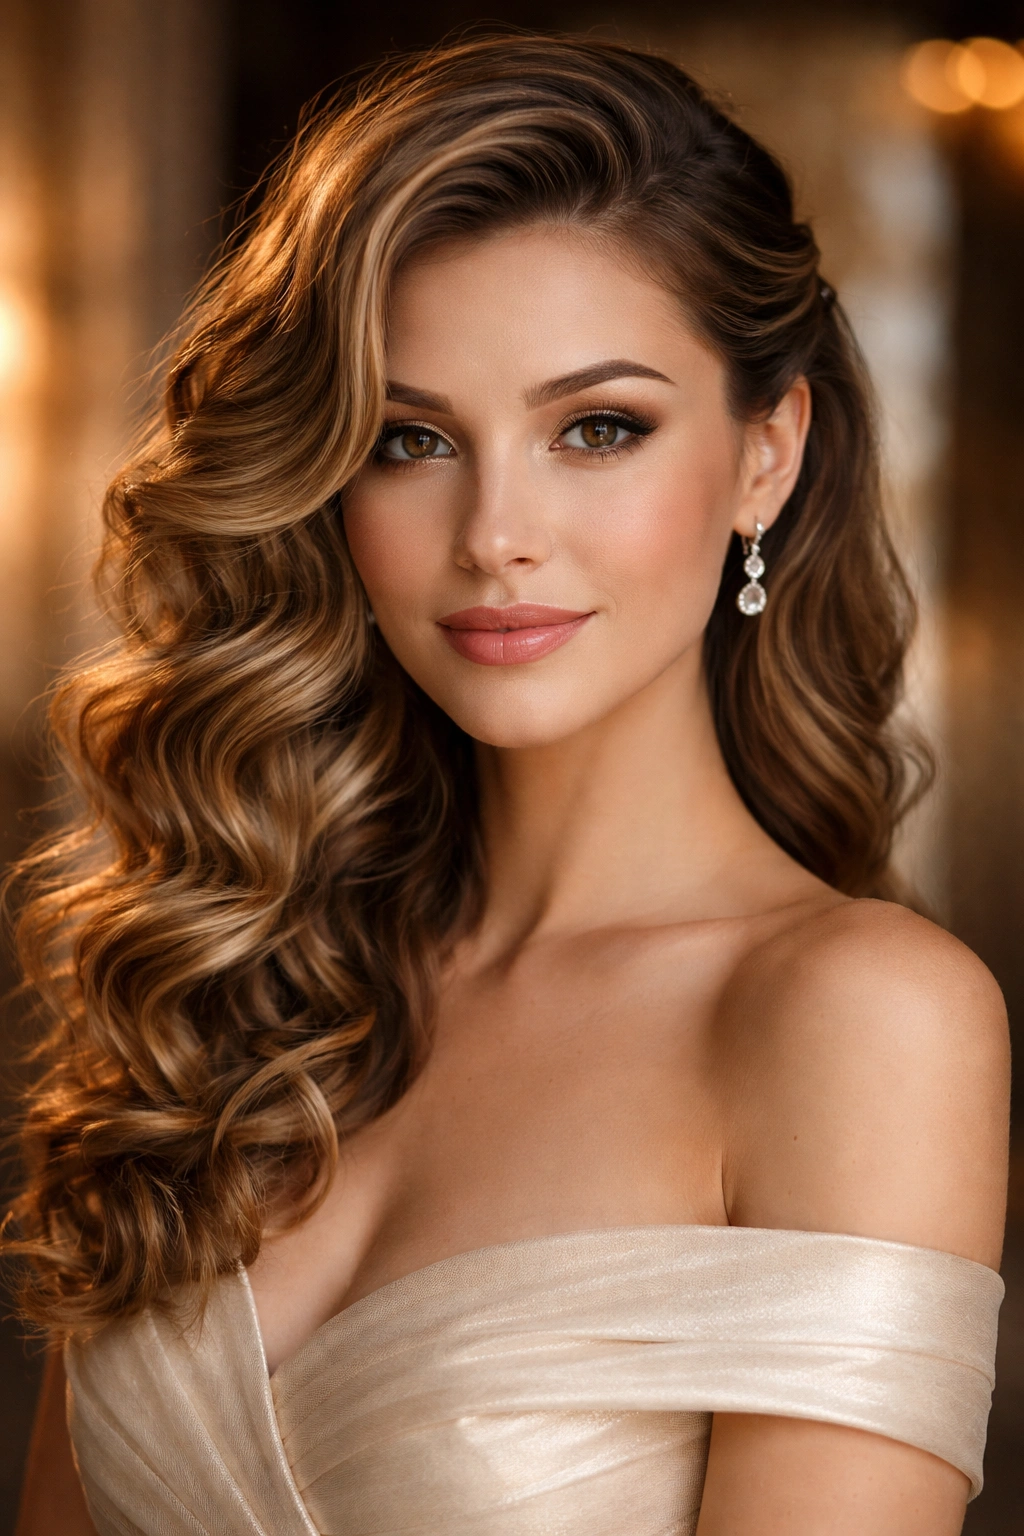
5. Deep Side Part with Softly Swept Curls
This is the most understated formal style on this list, but don’t mistake subtlety for simplicity. A deep side part with intentionally arranged curls reads as effortlessly elegant — the kind of style that looks like you were born with perfect hair, even though it’s entirely deliberate.
How to Create the Look
Create a very deep side part, starting from above one ear and sweeping to the opposite side of your head. Refresh your curls with a curl spray or light mousse, focusing on separating them with your fingers rather than combing. Arrange the larger side of the part to sweep across and back, tucking the ends behind your opposite ear. Use one bobby pin to secure it there, hidden completely. Pin a few curls strategically along the sweep to create a gentle but intentional wave pattern. Leave the smaller side of the part to frame your face naturally.
Key Details to Perfect It
- This style works beautifully with second or third-day curls that have lost some volume
- Don’t overpin — you want 3-4 strategically placed pins creating a soft suggestion of shape, not a sculpted structure
- A light mist of hairspray keeps the swept arrangement in place without looking stiff
- Wear your hair off one shoulder to show off the sculptural sweep
- This style is forgiving and adaptable; you can rearrange it throughout the evening if sections come loose
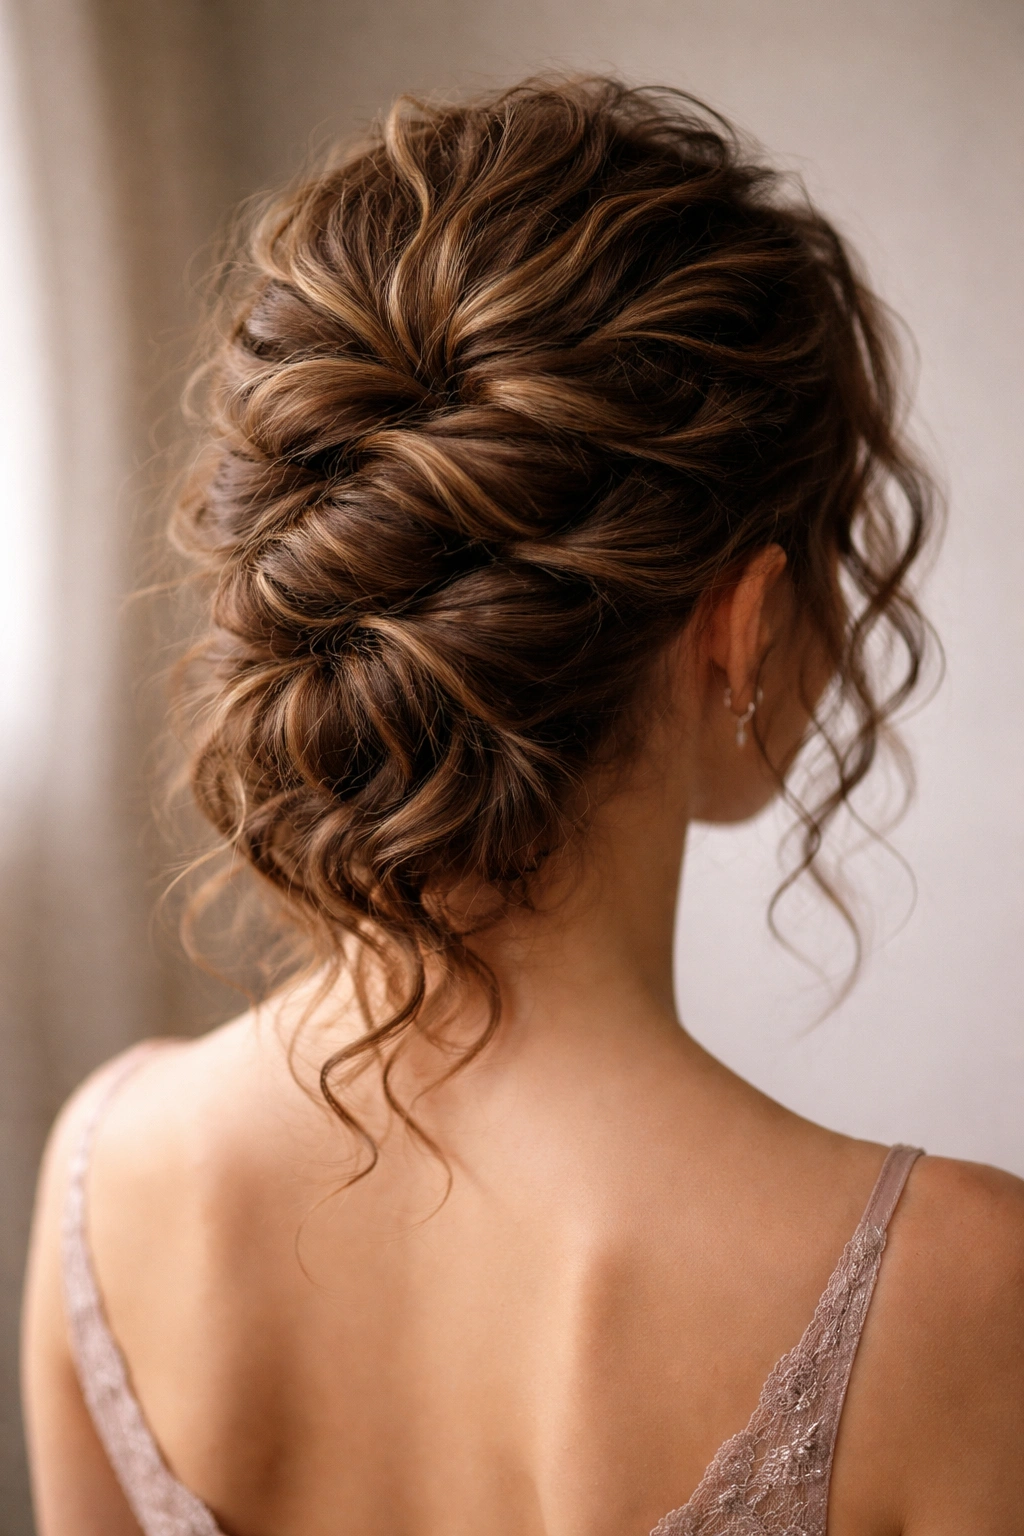
6. Braided Crown Updo with Loose Curls

A braid crown transforms curly hair from standard to show-stopping because the braid creates a visual frame and the loose curls spill out from underneath, creating height and movement. This style reads as formal and put-together while celebrating your curl pattern prominently.
How to Create the Look
Style your curls and let them dry completely — second-day curls work beautifully here because they have more texture. Take a section of hair from one temple and begin a loose French braid, incorporating hair as you move toward the back of your head. Braid all the way across the back, creating a subtle crown effect. Secure the braid end with a small elastic and tuck it under the bulk of the remaining loose curls at the back of your head. Pin the braid to your head in 2-3 places so it stays secure. The remaining curls should fall freely, creating a waterfall effect of defined curl texture.
Key Details to Perfect It
- The braid should be loose enough that you can see the curl texture within it
- Gently backcomb sections of the braid to add volume and texture
- Loose curls underneath should be your most defined curls; position your best-looking spirals to be visible
- Apply a dry shampoo or texturizing spray to the base of the crown braid for grip and added volume
- This style handles movement beautifully; it’s perfect if you’ll be dancing
7. Slicked-Back Curly Bun with Movement
A slicked-back bun sounds severe, but with curly hair, you’re creating something far more interesting — the sleek beginning gives way to textured, dimensional curls clustered at the back of your head, creating sophisticated contrast.
How to Create the Look
Apply a strong-hold gel to damp hair, focusing on smoothing everything back from your face and away from your scalp. Use a fine-tooth comb to smooth the gel through your hair, creating a neat, wet-look base. Blow-dry with the comb to set this smooth foundation. Once dry, gather all hair into a low ponytail and twist it as you wrap it around itself to form a bun. The curls at the ends of this twist will naturally bunch and cluster, creating texture and movement at the back. Pin the bun securely with 4-5 bobby pins placed around the base.
Key Details to Perfect It
- This style requires a strong-hold gel on the base; any frizz at the roots will be visible with the sleek styling
- The bun itself should feel voluminous and dimensional, not compressed
- Leave 1-2 curls loose to fall around the nape of your neck; this softens the look
- A light hairspray on the bun prevents flyaways without making it look stiff
- This style is exceptionally elegant when worn with an upswept makeup look and statement earrings
8. Curly Half-Up with Strategic Pinning and Waves
This variation on the half-up creates more structure than a simple half-up by pinning individual curl sections and arranging them in a wave pattern. It’s more formal than a casual half-up because the pinning creates intentional shape and movement.
How to Create the Look
Refresh your curls with a curl spray or mousse. Take a section from each temple and bring it toward the back of your head, crossing the two sections to create an X at the crown. Pin them with bobby pins placed where they cross. Now take individual curl sections from just below this X and pin them to one side or the other, creating a subtle wave pattern in the half-up section. The effect is like your curls are gently swaying despite being pinned in place. Leave the bottom half of your hair loose and arranged around your shoulders.
Key Details to Perfect It
- Use 6-8 bobby pins total to create the half-up base and the wave pattern within it
- Don’t make the waves too geometric; they should look naturally falling into place
- The pinned section should have visible texture and definition, not look compressed
- Apply hairspray to the pinned section only
- This style works best when you have at least medium-density curls; very fine curly hair may not hold the pinned wave pattern all evening
9. Structured Wave Styling with Side Arrangement
Wave styling isn’t technically an updo, but it’s absolutely formal enough for black-tie events when executed with intention. The key is sculpting your natural curls into wave formations and pinning them strategically so they stay arranged throughout the evening.
How to Create the Look
Apply a curl cream to damp hair and style your curls. Once completely dry, take sections of your curl pattern and gently pin them to one side of your head, creating S-wave formations that flow from your crown toward your shoulders. Think of it like you’re creating a sculptural wave pattern with your own curls as the medium. Use bobby pins hidden within the curl texture to anchor these waves. Leave one side of your hair pinned and arranged, while the other side flows more naturally.
Key Details to Perfect It
- This style requires patience and a strategic pinning plan; sketch it out mentally before you start
- Use lightweight pins that match your hair color for invisibility
- The waves should feel organic and flowing, not rigid or mathematical
- Backcomb gently within the wave sections to add volume and texture
- Light hairspray keeps the waves in place without stiffening them
10. Multi-Tiered Bun with Cascading Curl Sections
A multi-tiered bun creates dramatic height and visual interest by stacking curl sections, each pinned at a slightly different level. It looks intricate and formal while actually being quite manageable with curly hair, which naturally clumps into sections.
How to Create the Look
Section your hair into four distinct areas: two side sections, a crown section, and a lower-back section. Start by twisting and pinning the side sections at ear level, just below and behind your ears. Next, take the crown section and twist it, wrapping it over and around the side sections and pinning it in place to create the second tier. Finally, gather the lower-back section, twist it, and wrap it around the existing structure, creating a third tier. The effect is a bun that has height, movement, and multiple points of visual interest. Pin everything securely with 6-8 bobby pins.
Key Details to Perfect It
- Each tier should be visible and distinct; don’t let them blur together
- Leave 1-2 curls loose from each tier to create softness and movement
- This style works best on curly hair with medium to thick density
- Backcomb very gently at the base of the crown tier to create lift
- The bottom tier should sit quite low, nearly at the nape of your neck
11. Side-Swept Romantic Curls with Subtle Pinning
This style feels like your curls are naturally arranged in a romantic cascade to one side, but it’s entirely pinned and intentional. It’s perfect for a wedding, formal dinner, or any event where you want to look effortlessly romantic.
How to Create the Look
Create a deep side part and sweep the larger section of hair to one side, pinning it very subtly at strategic points along the sweep. The idea is that the curls appear to be flowing naturally, but they’re gently guided by hidden pins. Use 4-5 bobby pins placed about 2-3 inches apart along the swept section. Tuck the ends behind your opposite ear and pin them lightly. Leave the smaller side of the part to frame your face naturally, with 2-3 curls falling forward.
Key Details to Perfect It
- This style demands that your pins be completely invisible; they should disappear into the curl texture
- Use a light hand with pinning; you’re guiding curls, not controlling them
- Backcomb gently at the crown for added volume, but not at the side section
- A minimal hairspray keeps flyaways at bay without stiffening the arrangement
- Wear this style off one shoulder to show off the sculptural sweep
12. Twisted and Pinned Updo with Layered Height
This updo creates height and dimension by twisting sections of hair and pinning them at different levels, building up from the nape of your neck to the crown. It’s formal, intricate-looking, and surprisingly durable for a full evening.
How to Create the Look
Flip your head upside down and gather all hair at the nape of your neck, securing it with a loose elastic. Flip back up. Divide that gathered section into three subsections. Twist the first subsection and pin it horizontally across the back of your head, creating the base layer. Twist the second subsection and pin it above the first, slightly overlapping. Twist the third subsection and pin it at the crown, creating the highest layer. Each twist should be visible and distinct. Gently backcomb along the seams between twists to blur them slightly and add volume.
Key Details to Perfect It
- The three twists should create a sense of building height from bottom to top
- Pin each twist with 2-3 bobby pins placed along its length
- Leave individual curl ends loose from each twist to create softness; don’t compress the twists flat
- Backcomb extremely gently; you’re adding volume, not creating texture
- This style photographs beautifully from behind, making it ideal for ceremonies where you’ll be seen from the back
- The updo should feel substantial and sculptural, taking up visible space on your head
Final Thoughts
Formal curly hair styling is less about fighting your texture and more about amplifying it strategically. Every style here works because it treats your curls as an asset rather than an obstacle — it defines them, arranges them intentionally, and lets them be the visual focal point.
The product strategy matters as much as the technique. Skip anything heavy that will weigh curls down; instead use lightweight creams, curl sprays, and medium-hold products that let your curl pattern breathe. Preparation is equally important — styling curly hair for a formal event works best when you’ve given your curls at least 24-48 hours to settle into their pattern. Freshly washed curls often feel looser and less defined; slightly older curls hold shape far better throughout a long evening.
Most importantly, choose a style that genuinely makes you feel confident and beautiful. The best formal hairstyle is the one you’ll stop thinking about halfway through the event because it feels secure, looks stunning in photos, and lets you focus on actually enjoying yourself.