Curly hair and early school mornings have a complicated relationship. You’re already navigating alarm clocks, packed lunches, and the eternal debate over whether breakfast is actually worth the extra ten minutes — and then your curls decide they have their own agenda. The real frustration isn’t that curly hair is difficult to style. It’s that most style advice out there was written with straight hair in mind, leaving people with textured hair to figure out adaptations on their own.
The good news? Curly hair is one of the most versatile hair types when you know how to work with it instead of against it. Styles that take 30 minutes on straight hair can take 5 on second-day curls that already have definition built in. Volume that straight-haired people pay good money for shows up naturally. And hairstyles that would look flat or dull on straight hair have genuine character and dimension when done on textured curls.
What separates a great school hairstyle for curly hair from a frustrating one is staying power. A style that requires repositioning between every class isn’t actually a style — it’s a project. The 15 looks below were chosen because they hold up through gym class, humidity shifts, a full backpack ride home, and everything in between. They work across curl types, from looser 2C waves to tighter 4C coils, and most of them take under 10 minutes once you’ve done them a couple of times.
One last thing before you scroll: do your heavy lifting the night before. Wash, condition, and set your curls the evening before school. Sleep in a satin bonnet or on a silk pillowcase. By morning, your curls are already defined and all you’re doing is arranging them — not starting from scratch. That single habit cuts the average curly-hair school morning from 30 minutes to about 5.
What Makes School Hairstyles for Curly Hair Different

School hairstyles have to clear a bar that casual weekend styles don’t. They need to last 6-8 hours without constant adjustment, look intentional enough to feel confident in, and do all of this without putting excessive tension on the scalp or breakage on the hair strands.
Tension is the single biggest mistake in curly hair styling — and it’s one that adds up over time. Styles that pull too tightly at the root, especially on a regular basis, can contribute to traction alopecia, which is gradual hair loss along the hairline caused by chronic strain. Very tight ponytails, tightly secured buns, and braids installed with too much force are the most common culprits. The fix is choosing styles that work with the natural weight of your curls rather than fighting against them.
Moisture retention is the other major factor. Curly hair tends to be drier than straight hair because the natural oils from the scalp struggle to travel down the spiral of the curl shaft. A style that looks polished at 7 a.m. but collapses into frizz by noon is almost always a moisture issue, not a styling technique issue. Applying a leave-in conditioner before styling — and occasionally misting with water during the day — is what keeps curl definition stable.
Protective elements make a genuine difference for school days specifically. Styles that tuck away the ends reduce friction from backpack straps, chair backs, and clothing, which means less breakage accumulated over a full school week. That’s why many of the looks below incorporate some element of protection for the lengths and ends.
Curl Products and Prep That Actually Matter
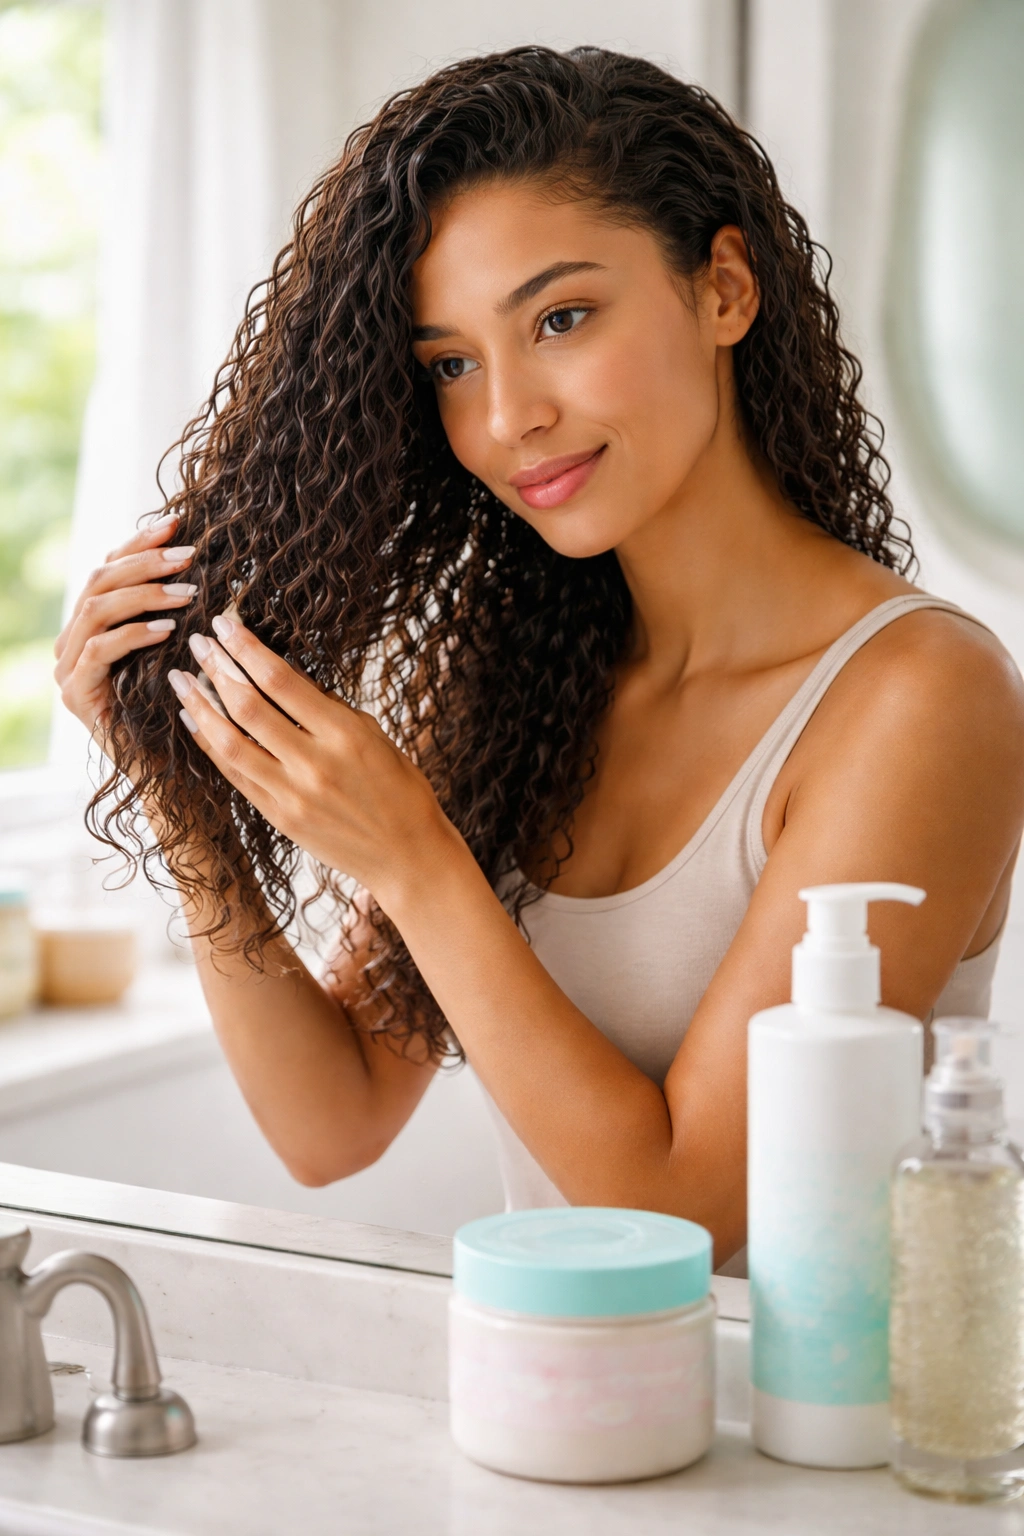
The difference between a curly style that holds all day and one that dissolves by second period usually comes down to two products and five minutes of prep. This isn’t about spending money on a complicated routine — it’s about understanding what curly hair actually needs.
Leave-in conditioner is the starting point. Apply it to damp hair before styling, or lightly mist dry hair with water first to reactivate the curls, then apply the leave-in. It provides the moisture that gives curls their bounce, softness, and ability to hold a shape throughout the day. Without it, most curl styles start to separate and frizz within a few hours.
A curl cream or light hold gel layered on top of the leave-in adds definition and longevity. Look for glycerin-based gels if your hair tends to drink up moisture quickly — glycerin pulls moisture from the air and keeps curls hydrated longer. Apply the gel by scrunching it upward into the curls rather than raking it through, which preserves the natural curl clump structure.
One tool to retire from your curly hair routine: the fine-tooth brush on dry curls. A wide-tooth comb or just your fingers on damp hair does everything you need without breaking apart the curl pattern or creating frizz. Brushing dry curly hair turns defined curls into a cloud — which isn’t useful for most school styles.
1. The Pineapple Ponytail
The pineapple is the curly hair protective style — and it’s genuinely one of the fastest school looks on this entire list. Done right, it takes under two minutes, looks deliberate, and works best on second or third-day curls when your curl definition is already fully set in from the previous wash.
Why the Position Changes Everything
The magic of the pineapple comes from where the ponytail sits: at the very top of the head, gathered loosely with a scrunchie. This position prevents curls from being flattened or crushed, which is exactly what happens when a ponytail is tied lower on the head. The volume from the curl mass falls naturally forward, creating a full, bouncy crown effect that’s hard to replicate with any other style.
How to Do It in Two Minutes
- Use a satin or fabric scrunchie — rubber elastics cut into the hair shaft at the point of contact and cause breakage over time
- Gather all hair at the highest point on the head, directly above the center of the forehead
- Keep the gather loose — the looser the hold, the better the curl definition stays intact underneath
- Let a few curls fall free at the temples for a softer, more intentional frame around the face
- Refresh with a light mist of water or curl refresher spray if the curls feel dry before gathering
Pro tip: Sleeping in a loose pineapple overnight — with a satin bonnet over it — is also the best way to preserve your curl pattern between washes, making the morning style even easier.
2. Twisted Half-Up, Half-Down
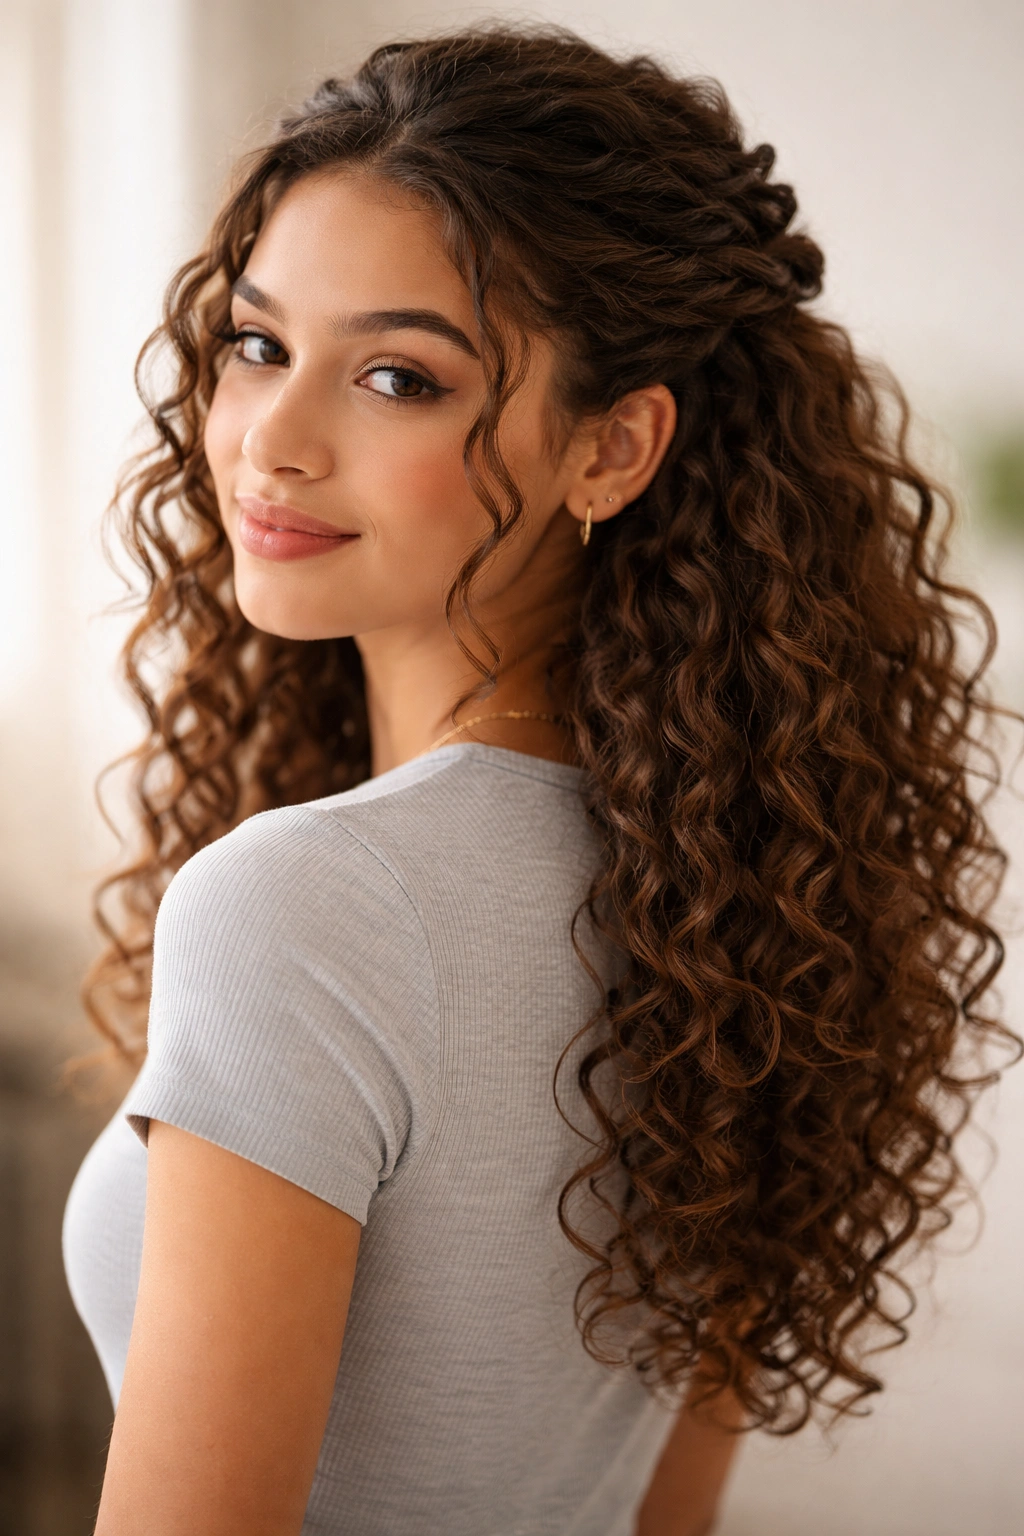
This style threads the needle between casual and put-together, and it’s one of those looks that genuinely gets better as the day progresses rather than worse. You’re taking two small sections from either side of the front hairline, twisting them back, and securing them together at the center of the back of the head — leaving everything else loose.
The Appeal for School Days
It keeps hair off your face without pulling everything back, so you get the comfort and freedom of wearing your curls down while still looking styled. The two front twists frame the face in a way that’s flattering across essentially every face shape. Because you’re only touching a small portion of the hair, the rest of your curl definition stays completely intact — no flattening, no frizz from handling.
What You’ll Need
- A leave-in conditioner or curl cream applied to the two front sections before twisting for smooth, frizz-free twists
- Two small clip pins to hold each section temporarily during styling
- One hair tie, small barrette, or two to three bobby pins to secure the joined twists at the back
- Twist each front section away from your face, angling it toward the back of the head
- Join both twists at the center, layer them over each other, and secure — this takes about 30 seconds once you’re practiced
Worth knowing: A small amount of edge control gel along each twist keeps it crisp and prevents the twists from loosening throughout the day.
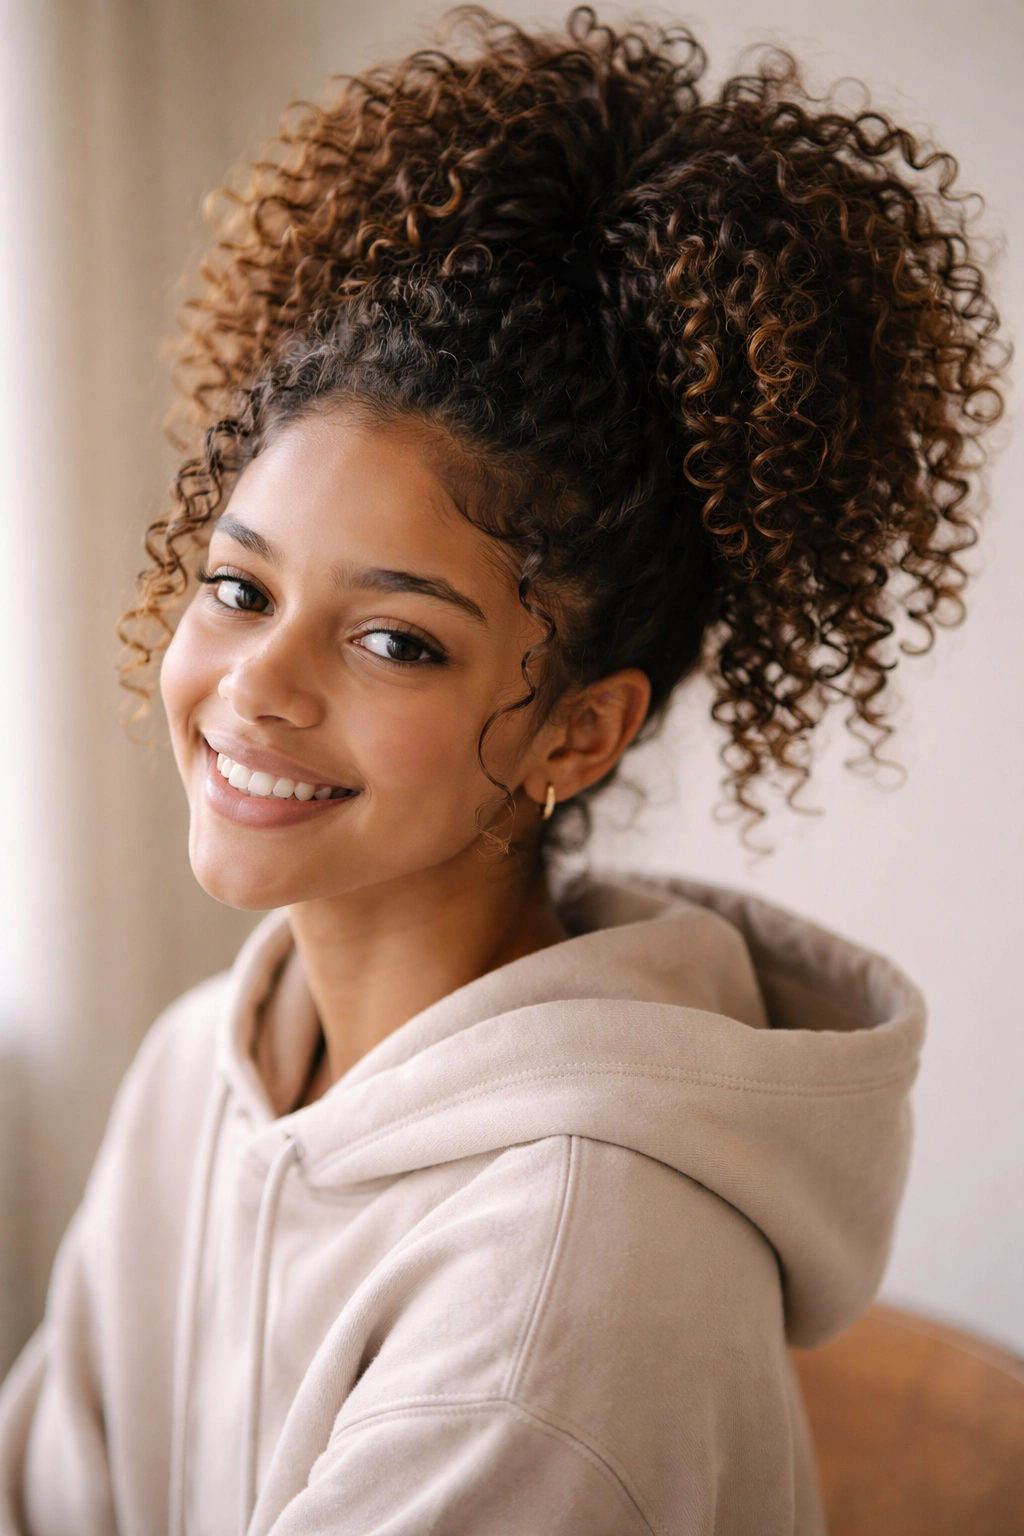
3. The Curly High Puff
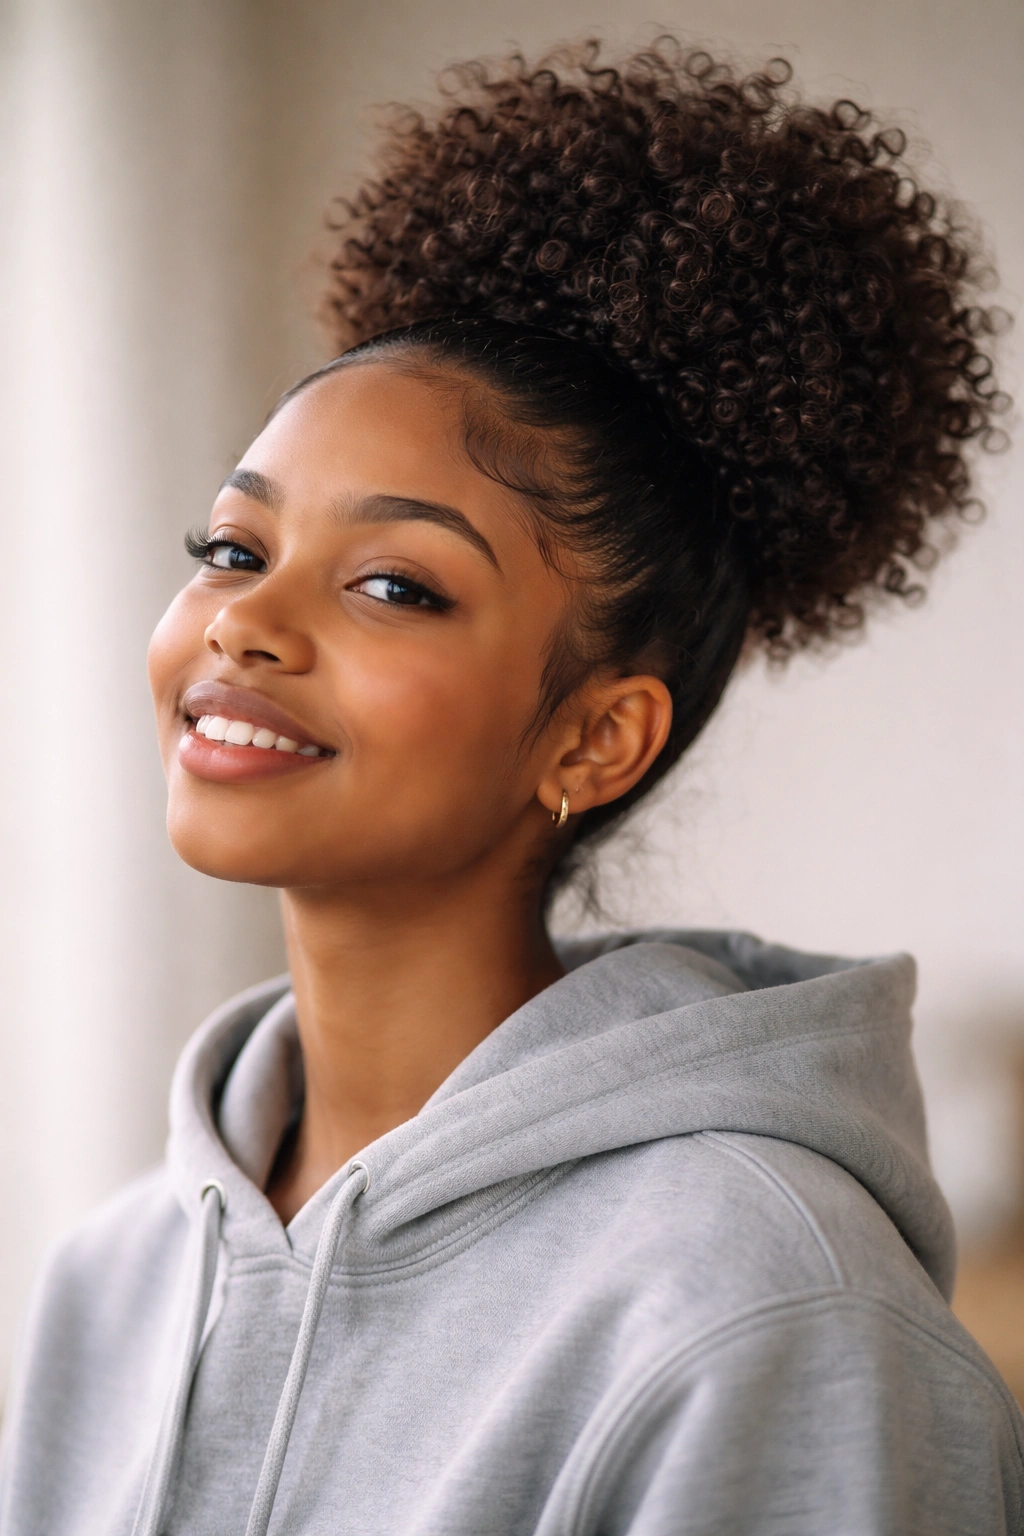
The high puff is a rounded, full, deliberate updo that’s one of the most iconic natural hair styles for good reason. Where the pineapple is casual and relaxed, the high puff reads as intentional and polished — which makes it a strong choice for school picture days, presentations, or any morning you want your hair to feel like a genuine statement.
Building a Puff That Holds All Day
The difference between a puff that stays round and lifted all day versus one that droops by lunch is the amount of edge control or holding gel used at the hairline during styling. Apply a small amount of gel along the edges, smooth with a soft bristle brush or the back of a fine-tooth comb, then gather the hair into the puff using a thick, wide fabric hair tie rather than a thin elastic. Wide ties distribute pressure more evenly, which means no dented spot in your curls where the elastic sat.
Fine-Tuning the Shape
- Apply gel to the hairline first and smooth before gathering — this is what gives the style its clean, sculpted perimeter
- Place the hair tie slightly forward of where you want the finished puff to sit — the curl mass will fall back into position naturally once the tie is in place
- Lightly fluff the puff with your fingers after securing to separate and lift the curls outward
- Use a few bobby pins at the base of the puff if it feels heavy or starts to tilt to one side during the day
The bigger your curl density, the bigger and more dramatic the puff — consider this a feature, not a complication.
4. Two-Strand Twists with a Headband

Two-strand twists worn down with a simple headband are a school-friendly style that does double duty: they protect the hair’s length and ends throughout the day while looking completely put-together without needing to be technically perfect. The twists can be done the night before — and they look better after they’ve had overnight to set.
Why Twists Hold Up Better Than Loose Curls at School
Unlike wash-and-go styles where every curl is on its own, two-strand twists lock the hair into the twist structure. This means humidity changes and light rain don’t significantly affect the look. There’s no touch-up needed throughout the day, and the headband — whether it’s a thick knitted band, a satin wrap, or a padded cloth style — contains any fly-aways without adding tension to the scalp.
Getting the Twists Right
- Section damp hair into the number of twists you want (larger sections create chunkier twists; smaller sections create more refined, detailed texture)
- Apply curl cream or a twisting butter to each section before twisting for smooth, defined results that resist frizz
- Twist each section by dividing it into two pieces and wrapping them around each other from root to tip
- Let the twists dry completely overnight in a satin bonnet, or use a diffuser to dry them before school
- In the morning, position a headband about 1-2 inches back from the hairline and place it over the twists
Pro tip: A few drops of lightweight oil — jojoba and argan are both good options — pressed over the finished twists adds a healthy sheen that lasts through the school day without feeling heavy.
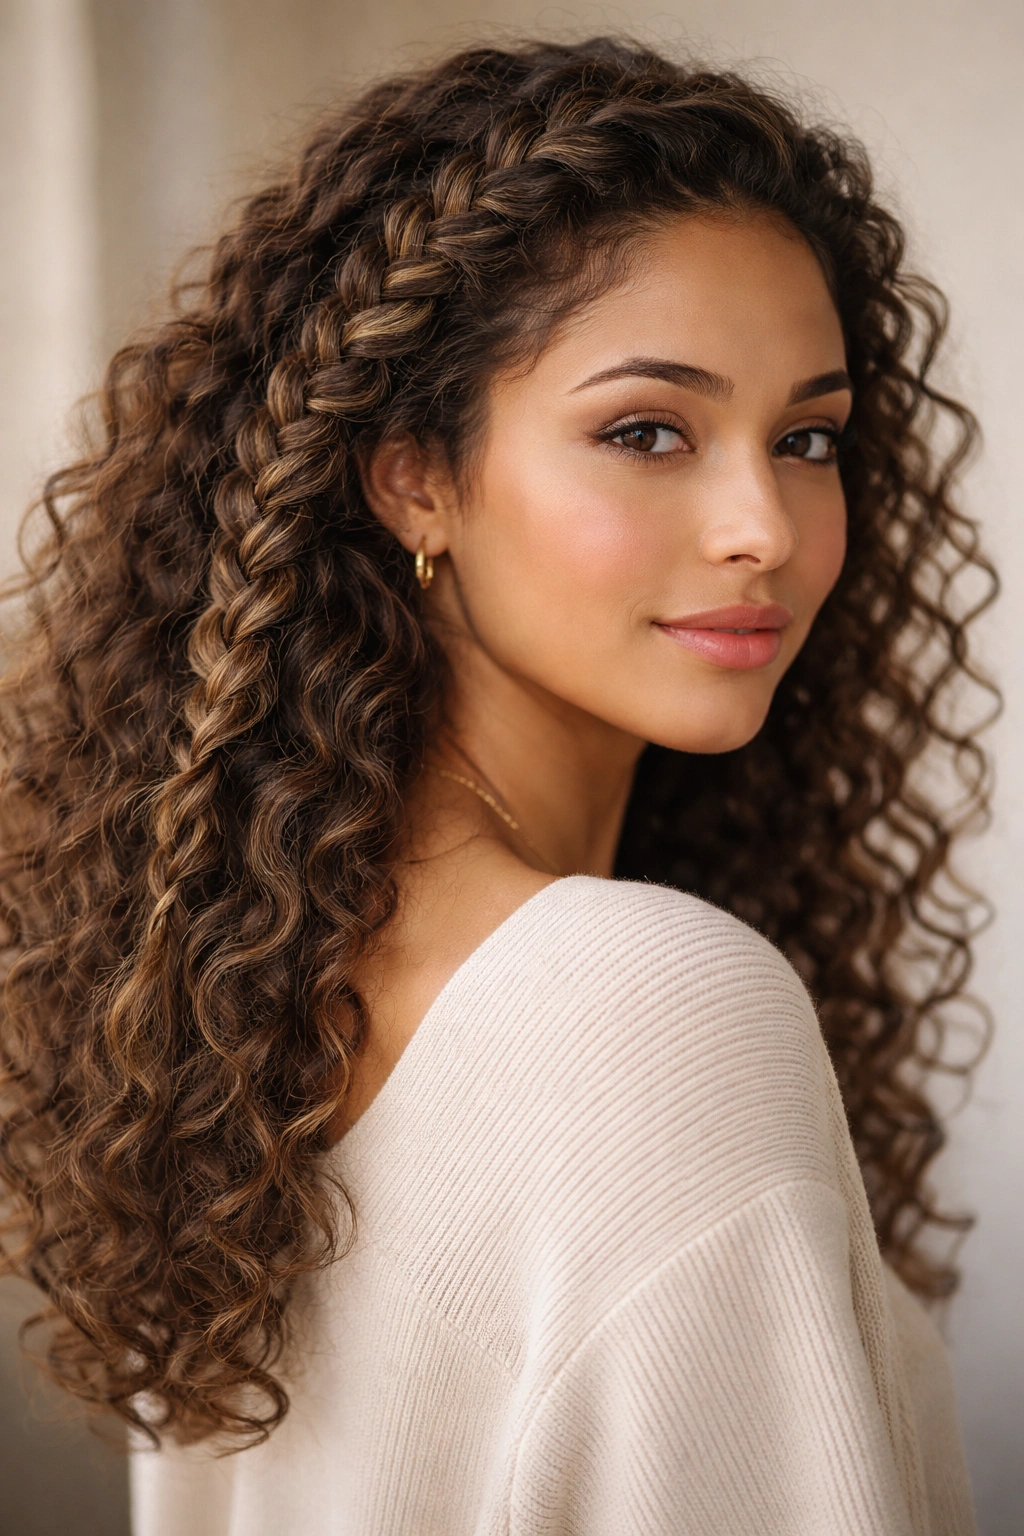
5. The Braided Crown Halo
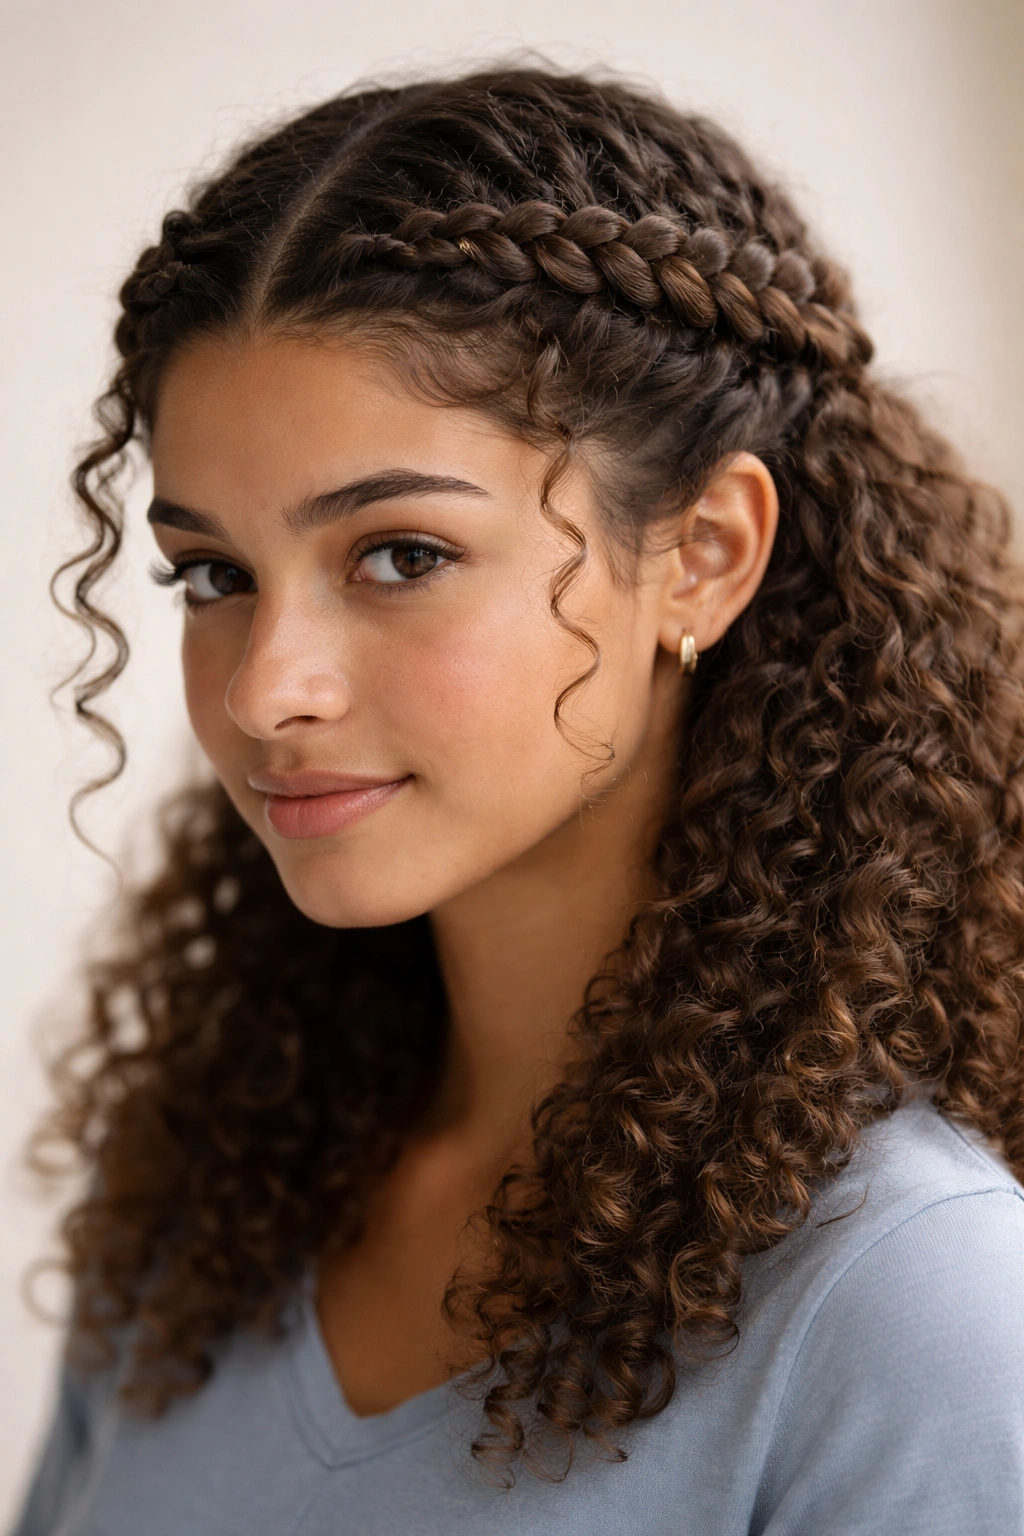
A braid crown looks like it took forever. With a little practice, it actually takes about 10 minutes — and the payoff is a style so secure that it requires zero adjustments between first class and the bus ride home. The style works by creating one or two braids that wrap around the perimeter of the head, framing the face with a structured band of woven hair.
Why It’s One of the Most Secure School Styles
Once the braid crown is pinned in place, it doesn’t move. There’s no puff to fluff, no ponytail to reposition, no twists to smooth. It also keeps hair completely off the neck, which matters on warm days or during any physical activity. For school environments specifically — leaning back in chairs, wearing headphones, putting on a hood — the braid crown handles all of it without shifting.
Creating the Braid Crown Step by Step
- Divide hair into two sections: left half and right half. Clip one side while you braid the other
- Begin a regular three-strand braid (or Dutch braid, if you prefer it to sit above the hair) at the nape on one side, braiding upward toward the opposite ear
- Wrap the finished braid across the top of the head and secure it with bobby pins every 1-2 inches to keep it flat
- Tuck the ends of the braid underneath the opposite braid and pin them hidden
- Repeat with the second section, filling in any gaps left by the first braid
- Gently pull a few small curls free at the temples or nape for a softer, more lived-in finish
An imperfect braid crown with some texture and character looks more natural on curly hair than a slicked-down version — embrace the organic quality of it.
6. Low Twisted Ponytail
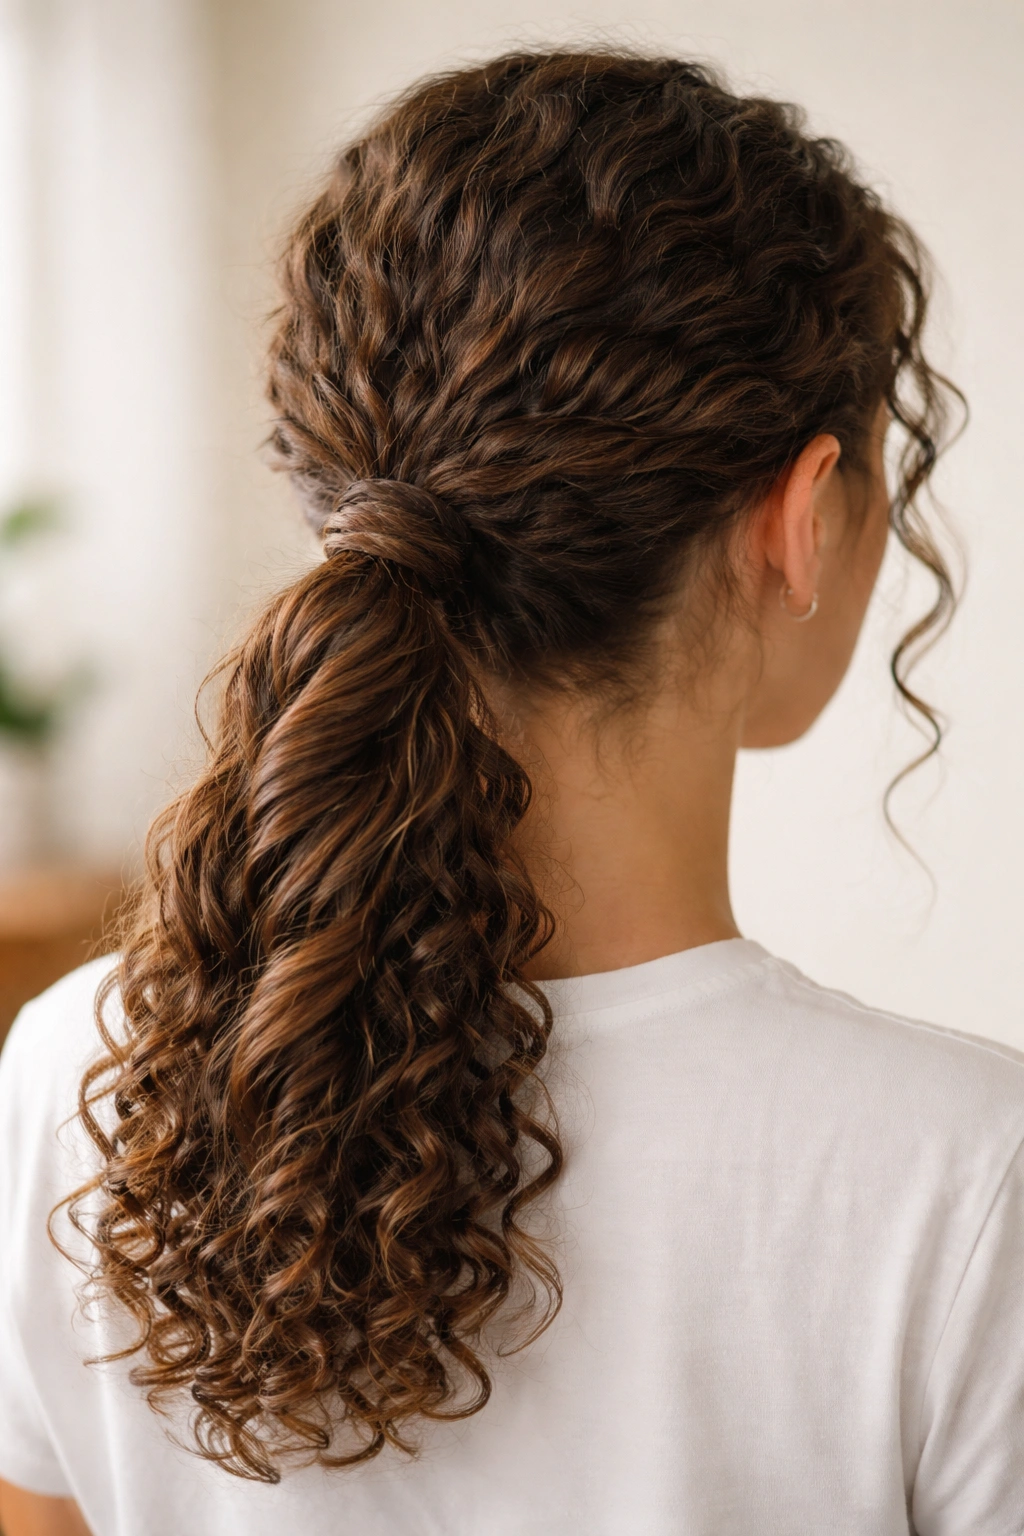
The low twisted ponytail is a polished take on a style that usually gets underestimated. The twist applied to the ponytail itself is what elevates it from ordinary to intentional — and the whole thing takes about three minutes once you’ve done it a handful of times.
What the Twist Actually Does for Curly Hair
A standard low ponytail on curly hair can look flat and undefined, especially if the hair was gathered dry. Adding a twist to the ponytail gives it visible texture and dimension that suits curly hair’s natural personality. The twist also creates an internal structure that holds the ponytail together better as curls continue to dry or shift throughout the day — it stays neater longer than a plain ponytail would.
Styling This the Right Way
- Gather all hair low at the nape of the neck using a wide fabric scrunchie or a curl-safe elastic — avoid thin rubber elastics
- Apply a small amount of curl cream to the ponytail section before gathering if the curls feel dry
- Take the ponytail in both hands and twist it firmly in one direction until the full length forms a rope-like spiral
- Either wrap the twisted tail around its own base and pin for a tucked variation, or let it hang loose in the twisted shape
- Smooth the crown with a light gel or pomade to reduce any surface frizz at the top
Worth knowing: This style handles outdoor PE, wind, and physical activity better than most — it keeps everything contained without putting heavy elastic pressure directly on the hairline.
7. Side-Parted Curls with a Bobby Pin Cluster

Sometimes the simplest solution is the right one. A deep side part with loose curls and a small cluster of decorative bobby pins placed just above one ear takes about 90 seconds and looks completely deliberate. The pin cluster is the detail that separates “hair just happening” from “hair that was actually done.”
Bobby Pins as a Styling Element, Not Just a Tool
Bobby pins aren’t only functional — on curly hair, they act as a visual focal point. A cluster of three or four pins placed in a deliberate pattern (an X shape, a fan arrangement, or three parallel pins) serves two purposes: it keeps the heavier side of the part from falling forward into your face, and it draws the eye to a specific area in a way that makes the style look considered. Metallic, pearl-tipped, or decorated pins elevate the look further without being overdone for school.
Making a Side Part Work on Curly Hair
- Create the part with a finger or the pointed end of a rat-tail comb — a deep side part (2-3 inches from the outer edge of the eyebrow) has the most visual impact on curly hair
- Mist lightly with a curl refresher spray before parting to reactivate the curl definition
- Tuck the lighter side of the part behind the ear and place the pin cluster just above or on the ear, pressing pins in at a slight downward angle so they grip
- Apply 2-3 drops of shine oil over the finished style to make the curl definition pop under classroom lighting
The pin arrangement can vary — an X cluster one day, a chevron the next — which gives this one basic style weeks of variation without any extra effort.
8. French Braid with Curly Ends
A French braid that transitions into loose, free curls at the bottom pairs structure with softness in a way that genuinely suits curly hair’s personality. The braid controls the crown and the sides, while the curls at the ends get to behave however they want. The result reads as polished without being stiff or overdone.
Why Curly Hair Makes a French Braid Look Better
On straight hair, a French braid lays flat and uniform. On curly hair, it has natural volume and dimension — smaller curl sections that poke slightly out of the braid structure give it a fuller, more textured appearance that looks intentional rather than messy. The transition from tight braid to loose curly ends is especially striking on naturally textured hair because the contrast is so defined.
Step-by-Step for a French Braid on Curly Hair
- Start at the crown of the head with a small three-strand section
- Add small pieces of hair from each side as you work downward, keeping each added section small and consistent
- Work with lightly moistened hair or freshly product-applied hair — French braiding bone-dry curly hair creates friction and frizz that makes the sections harder to control
- Once you reach the nape, continue with a standard three-strand braid to the ends of the hair and secure with a small elastic
- Leave the curly ends completely free — the natural curl bounce at the tip of the braid is the style’s signature finishing touch
Pro tip: A thin layer of gel applied along your scalp part before braiding gives you a cleaner braid line that holds its definition from morning through the end of the school day.
9. Space Buns with Defined Curls

Space buns were made for curly hair. The bun shape amplifies natural volume, the symmetrical placement is flattering, and the style brings genuine energy to a school look — which counts for something on long, repetitive days. You can build them tight and graphic or loose and maximalist depending on your curl density and your mood.
Getting the Position and Shape Right
Curly space buns don’t need to be perfect spheres — that’s actually not the goal. The aim is two roughly equal sections placed at the upper sides of the head (think 10 and 2 o’clock rather than straight above the ears), each gathered, coiled into a bun shape, and secured. Natural curl density causes the bun to puff outward, which gives the style its volume. The bigger your curl density, the bigger and more striking the buns.
Building Space Buns That Stay Secure
- Divide hair precisely down the center and clip one side while you work on the other — symmetry matters here more than in most styles
- Gather one section into a high-side ponytail and secure with a thick fabric scrunchie
- Coil the ponytail around its own base, tucking the end underneath or letting it fan out
- Secure the bun with three or four bobby pins pushed in at opposing angles — this locked structure won’t loosen throughout the day
- Repeat on the opposite side, matching the height and position as closely as possible
- Pull a few small curls free at the hairline for an intentional, softened frame
Pair with hoop earrings or simple studs for a school look that has genuine style presence without being overdone.
10. Knotless Box Braid Pigtails

Knotless box braids are a protective style that can be installed by a loctician or an experienced family member, and worn in pigtails they’re one of the most school-appropriate looks on this list. They’re tidy, require absolutely no morning styling, and protect your natural curls underneath for weeks at a time — making them one of the most time-efficient options available for school-day hair.
Why Knotless Over Traditional Box Braids
Knotless braids begin with your own natural hair and gradually incorporate extension hair rather than starting with a large knot of extension hair tied directly to the root. The practical difference is significant: the knotless technique puts less tension on the scalp, reduces the risk of traction alopecia along the hairline, causes far less scalp soreness in the first few days after installation, and creates a more natural-looking, flatter root. For school-age wearers who wear protective styles regularly, knotless is the more scalp-safe choice.
Care and Styling at School
- Divide braids down the center and tie each side at the nape or mid-length with a scrunchie for the classic pigtail look
- Moisturize the scalp with a lightweight scalp oil every two to three days — braids don’t seal in moisture, so scalp hydration still needs attention
- Keep the pigtails loosely tied rather than pulled tightly, which reduces any additional strain on the braid roots
- Wrap hair nightly in a satin scarf or bonnet to prevent the braid surface from developing frizz
- Most knotless box braid installations last four to eight weeks with proper nighttime care
Worth knowing: After removing any braided protective style, give your natural hair at least two weeks of breathing room before the next installation — this recovery period matters for long-term hair health.
11. The Bantu Knot Out Style
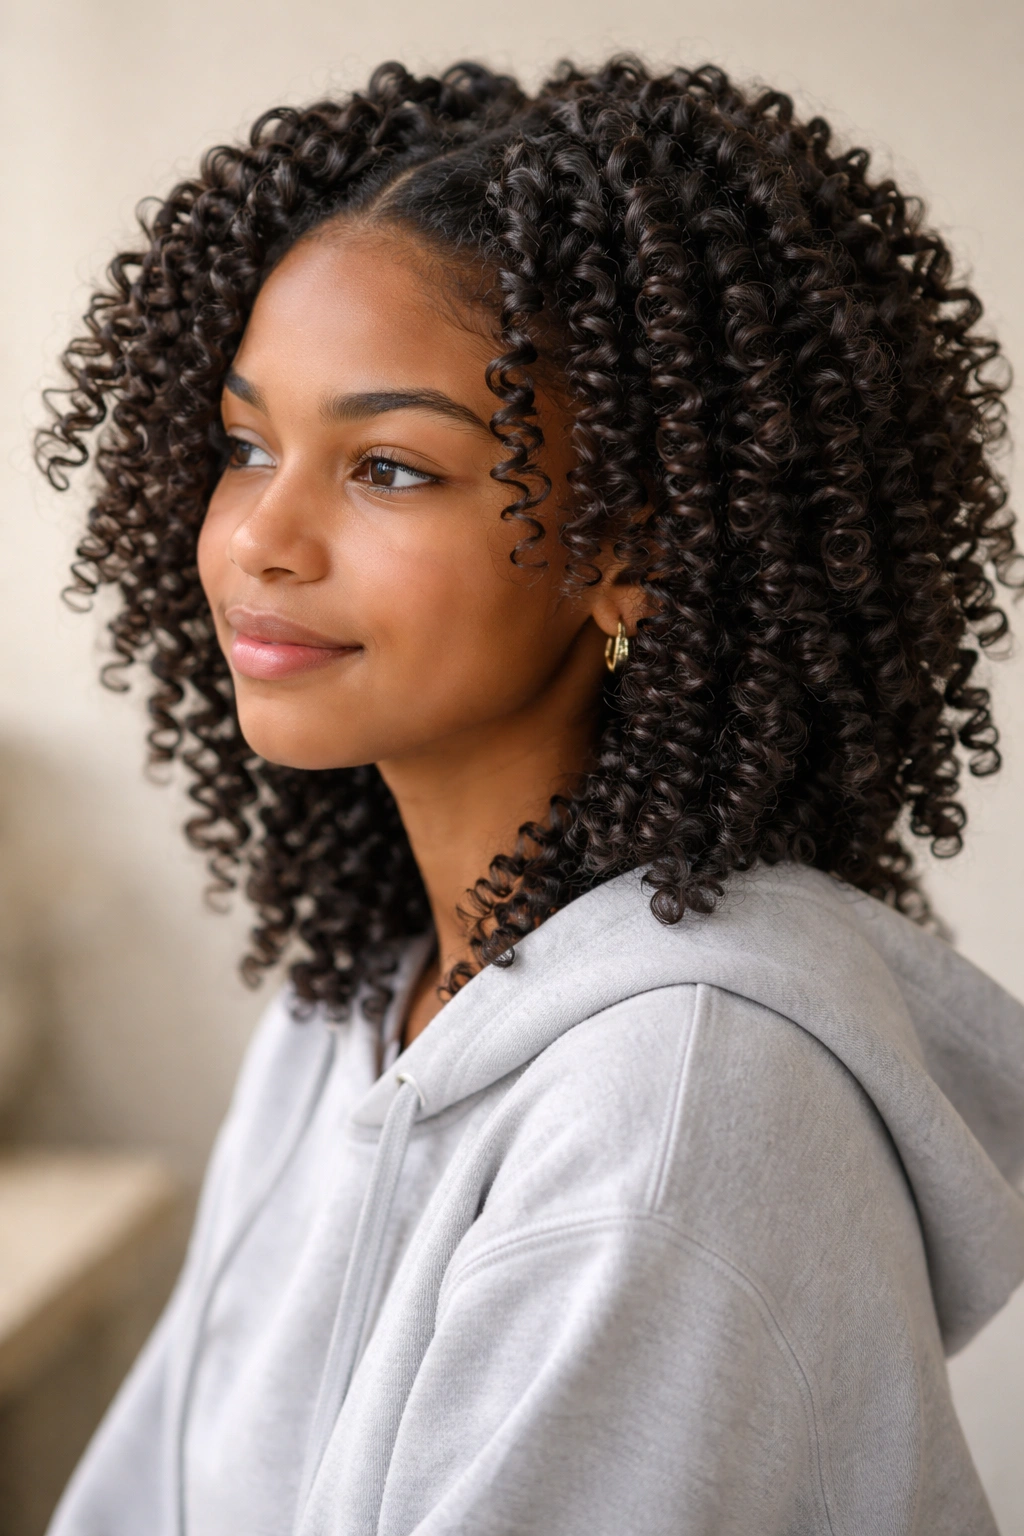
A Bantu knot out is both a styling technique and a finished hairstyle — and it’s one of the most effective ways to achieve defined, uniform curls without any heat. You set the Bantu knots the night before, and in the morning you unravel them to reveal springy, beautifully coiled curls that hold their shape across a full school day.
Setting the Knots the Night Before
Start with damp or lightly misted hair and apply a generous amount of curl cream or twisting butter to each section before coiling. The product you use during the set is what gives the resulting curls their definition and longevity — don’t be stingy here. Divide hair into sections (larger sections create looser waves, smaller sections create tighter coils), then twist each section from root to tip and coil it around itself into a flat knot shape at the scalp, pinning the end to the base.
The Morning Unravel
- Wait until hair is completely dry before unraveling — slightly damp Bantu knots release too quickly and lose curl definition within an hour
- Unravel each knot slowly, twisting your fingers lightly in the direction of the curl as you release to maintain the spiral
- Once all knots are open, use your fingers only to separate and shape the curls — avoid any comb or brush, which breaks the curl clumps apart and creates unwanted frizz
- Finish with a light hold spray or a small amount of shine oil pressed across the top of the style
Pro tip: Unraveling each knot in the same direction it was wound — rather than in reverse — gives you the tightest, most defined curl pattern possible.
12. The Sleek Curly Low Bun
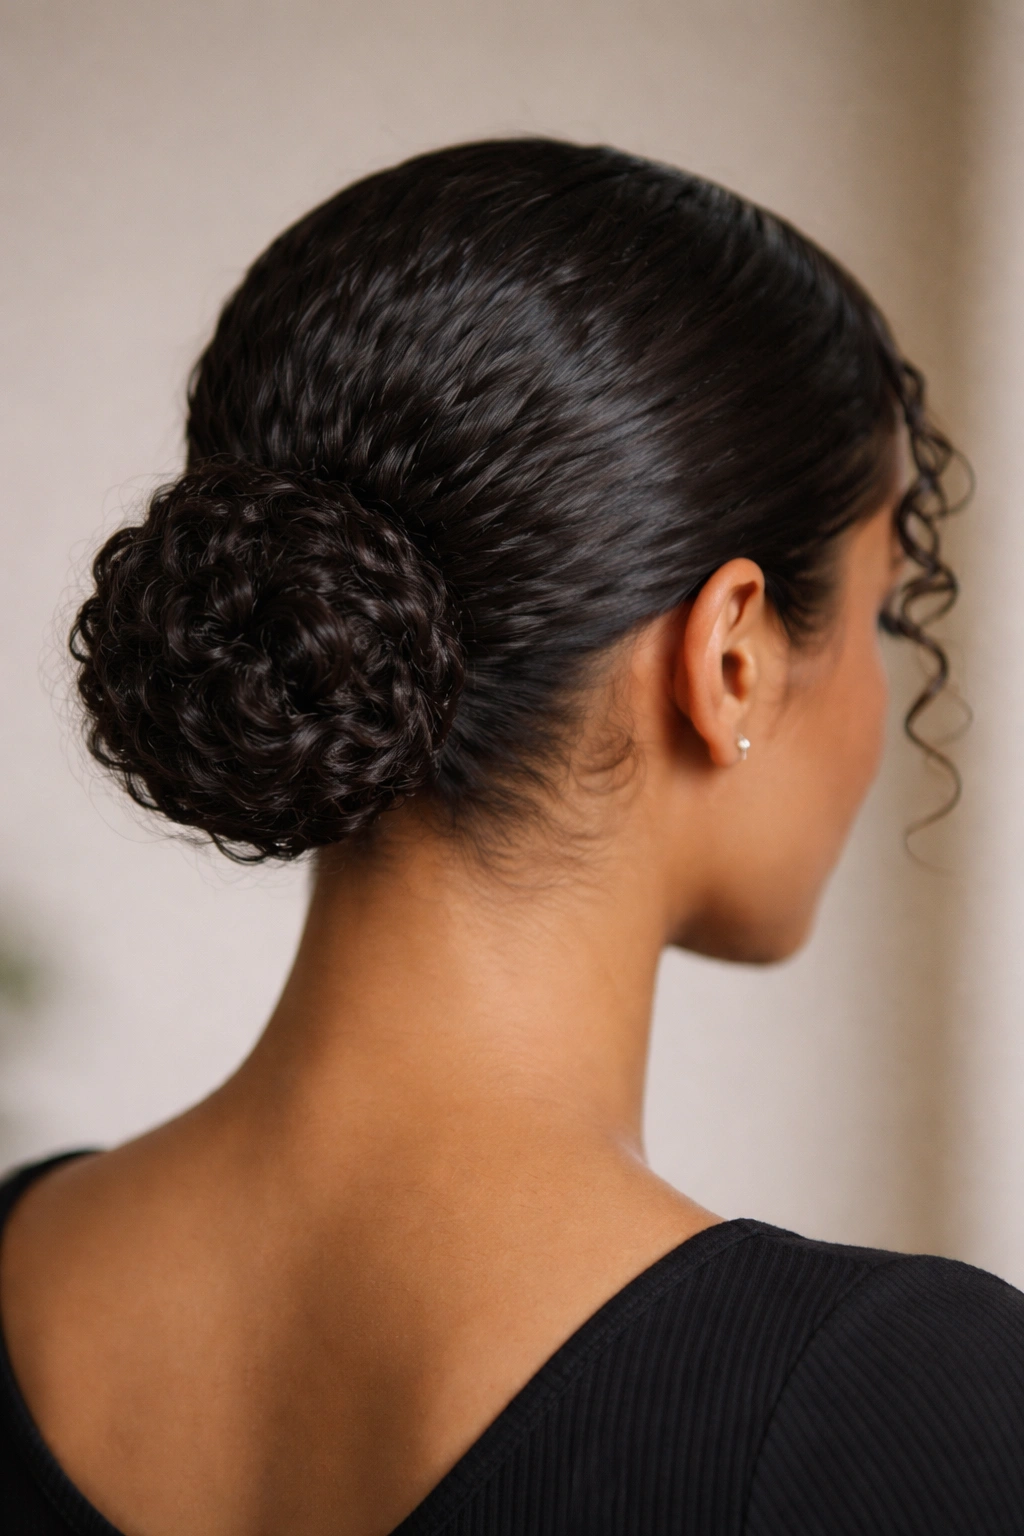
The sleek low bun is the go-to for formal school moments: picture day, academic presentations, concerts, or any occasion where looking particularly composed matters. Done right on curly hair, it has a sculptural quality that flat-ironed straight hair genuinely can’t replicate — there’s a density and polish to a well-executed curly bun that’s entirely its own aesthetic.
Getting the Sleek Look Without Heat
You don’t need to straighten your hair to get a sleek bun — you need strong-hold gel and a little patience. Apply a generous amount of water-based, strong-hold gel to damp hair, smooth it back toward the nape using your hands or a soft bristle brush, then gather it into a low ponytail at the center of the back of the head. Coil the ponytail around its own base and pin it in place. The gel does the smoothing work that a flat iron usually would, and the result looks purposeful rather than processed.
Sculpting the Edges
- Apply edge control or firm-hold pomade to the hairline and smooth with a soft bristle brush or an edge brush, working in small circular sections around the perimeter
- Lay a satin or silk scarf over the edges for five to ten minutes while the product dries — this is the step that takes edge smoothing from decent to genuinely polished
- Remove the scarf carefully and secure any remaining fly-aways with a light water mist and a quick brush pass
- For a more decorated version, wrap a thin ribbon or satin strip around the base of the bun before pinning the ends underneath
The sleek low bun is the one style on this list that rewards an extra five minutes of effort with a result that holds up perfectly for a full school day.
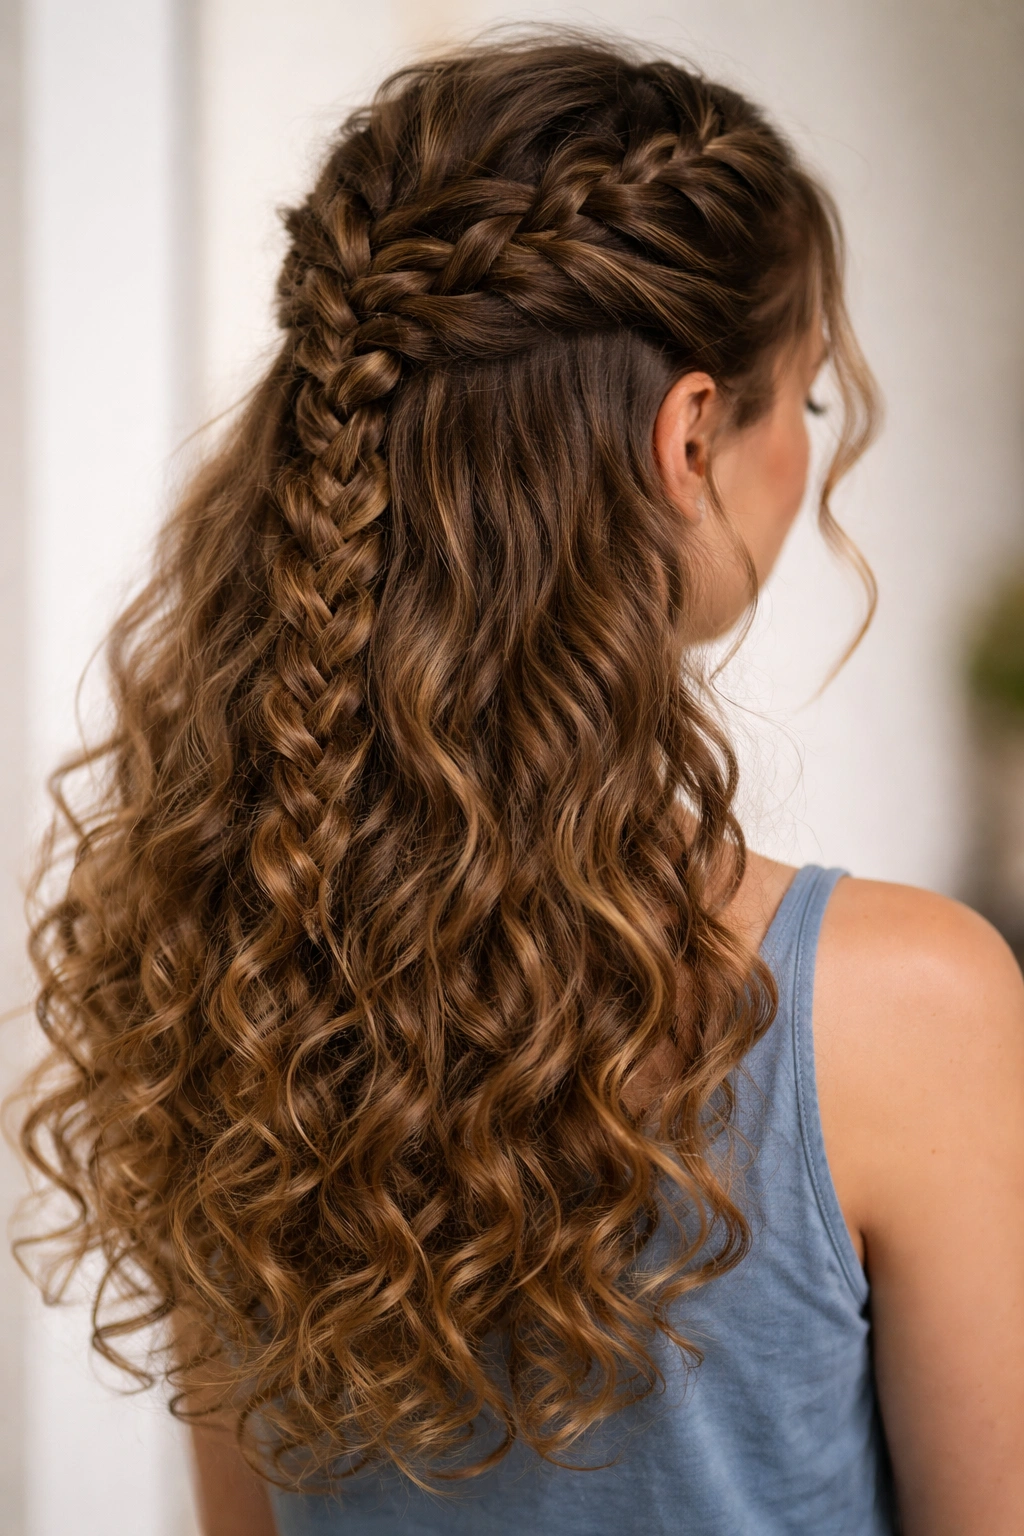
13. Loose Dutch Braid on One Side
A single loose Dutch braid starting above one ear and traveling diagonally across the back of the head toward the opposite shoulder is an understated style that consistently gets complimented despite being genuinely straightforward to do. Dutch braiding produces a braid that sits above the hair rather than below it, which gives it more visual presence and texture than a French braid.
The Dutch Braid Difference
In a French braid, sections of hair cross over the center strand, which tucks the braid below the surface of the hair. In a Dutch braid, sections cross under the center strand, which pushes the braid forward and on top. On curly hair, this produces a visually thick, dimensional braid — because each curly section has more surface area than a straight section, the Dutch braid looks fuller and more defined than it would on any other hair type.
Styling the One-Sided Dutch Braid
- Start above one ear and gather a small three-strand section to begin — keep the starting section close to the hairline for the most dramatic diagonal line
- Braid diagonally across the back of the head, adding hair from only the scalp-side as you go to keep the braid sitting on the surface
- Work with slightly damp or product-moistened hair for better section control throughout
- When you reach behind the opposite ear, continue braiding straight down without adding more sections, then secure with a small elastic
- Leave the remaining curls on the unbraided side completely free — the contrast between the structured braid and the loose curls on the other side is what makes this style so striking
14. Twisted Rope Braid Ponytail
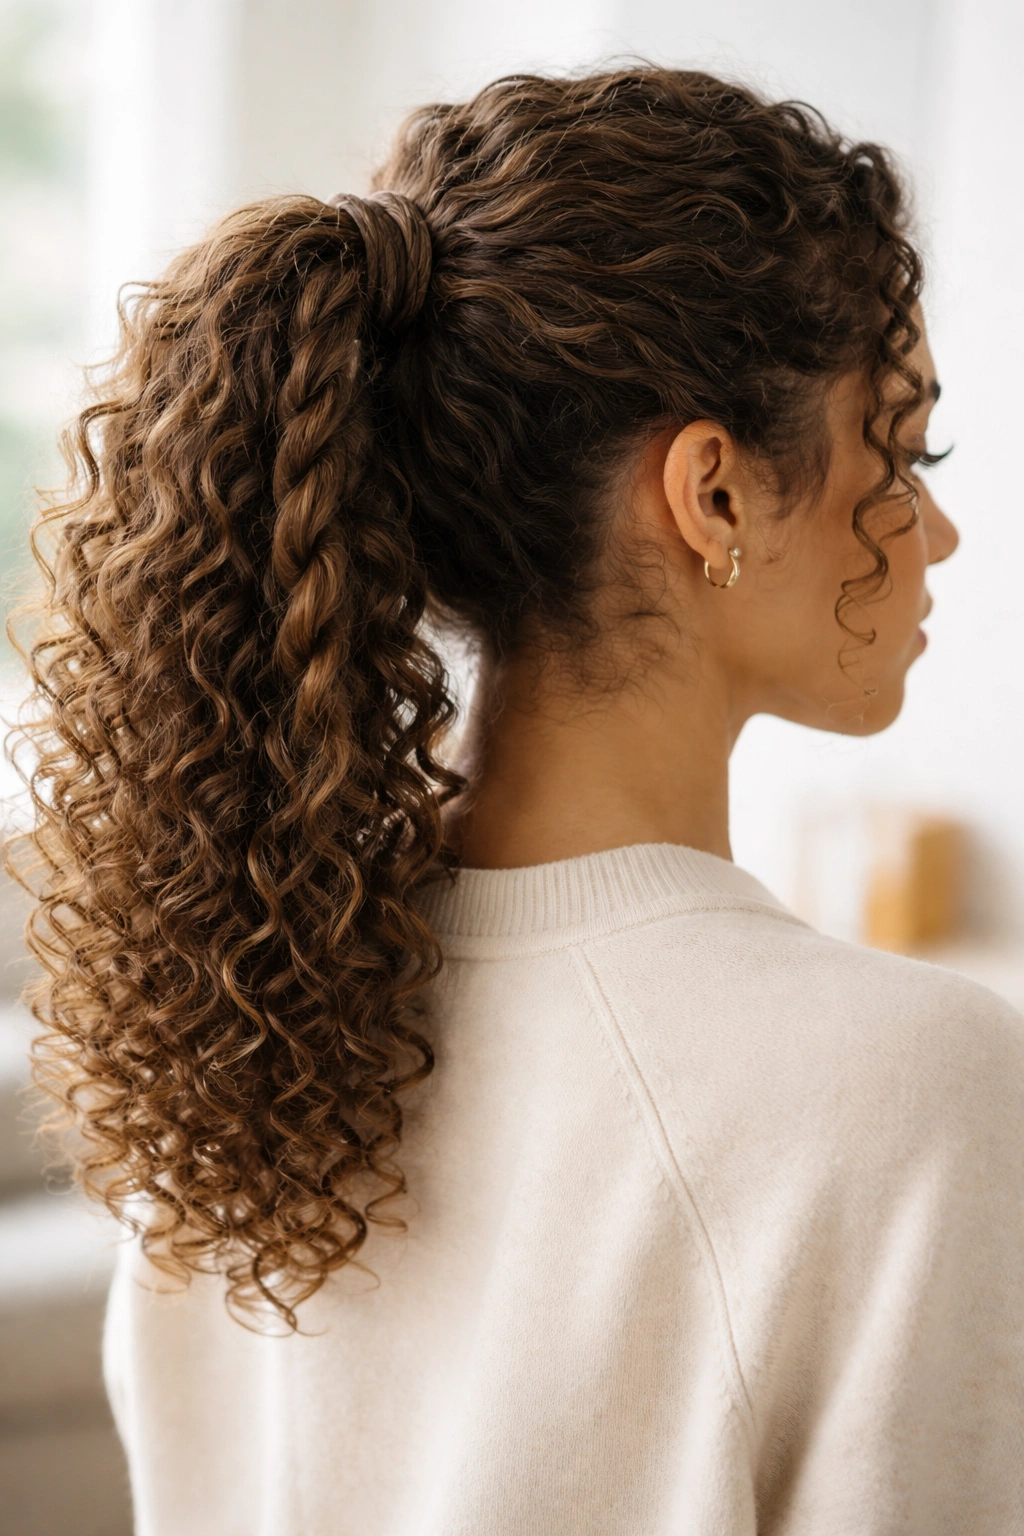
The rope braid ponytail is the more interesting, more textured version of a standard ponytail — and it’s built using a technique that actually leverages how curly hair behaves. You gather the hair into a ponytail first, then divide and twist the ponytail into a rope structure that holds itself together through opposing tension rather than relying entirely on an elastic.
How the Rope Structure Works on Curly Hair
A three-strand braid holds together because sections weave over and under each other alternately. A rope braid works differently: both sections are twisted in the same direction, then wrapped around each other in the opposite direction — and this opposing tension is what locks the rope in place. For curly hair, this structure works particularly well because the twist of the rope complements the natural spiral of the individual curls, giving the whole style a visually cohesive, textured look.
Building the Rope Ponytail
- Gather all hair into a ponytail at your preferred height — mid-height sits cleanly for school and keeps the nape cool
- Secure with a thick scrunchie or a no-damage elastic before beginning the rope
- Divide the ponytail into two equal sections
- Twist each section individually in the same direction — say, clockwise for both
- Then wrap both twisted sections around each other in the opposite direction (counterclockwise) from root to end
- Secure the finished rope with a small elastic or a decorative clip
Pro tip: After finishing the rope, gently tug on the outer edges of the braid to loosen and widen it slightly — this gives the rope a more textured, relaxed look that suits curly hair’s natural personality perfectly.
15. The Curly Messy Bun with Loose Tendrils
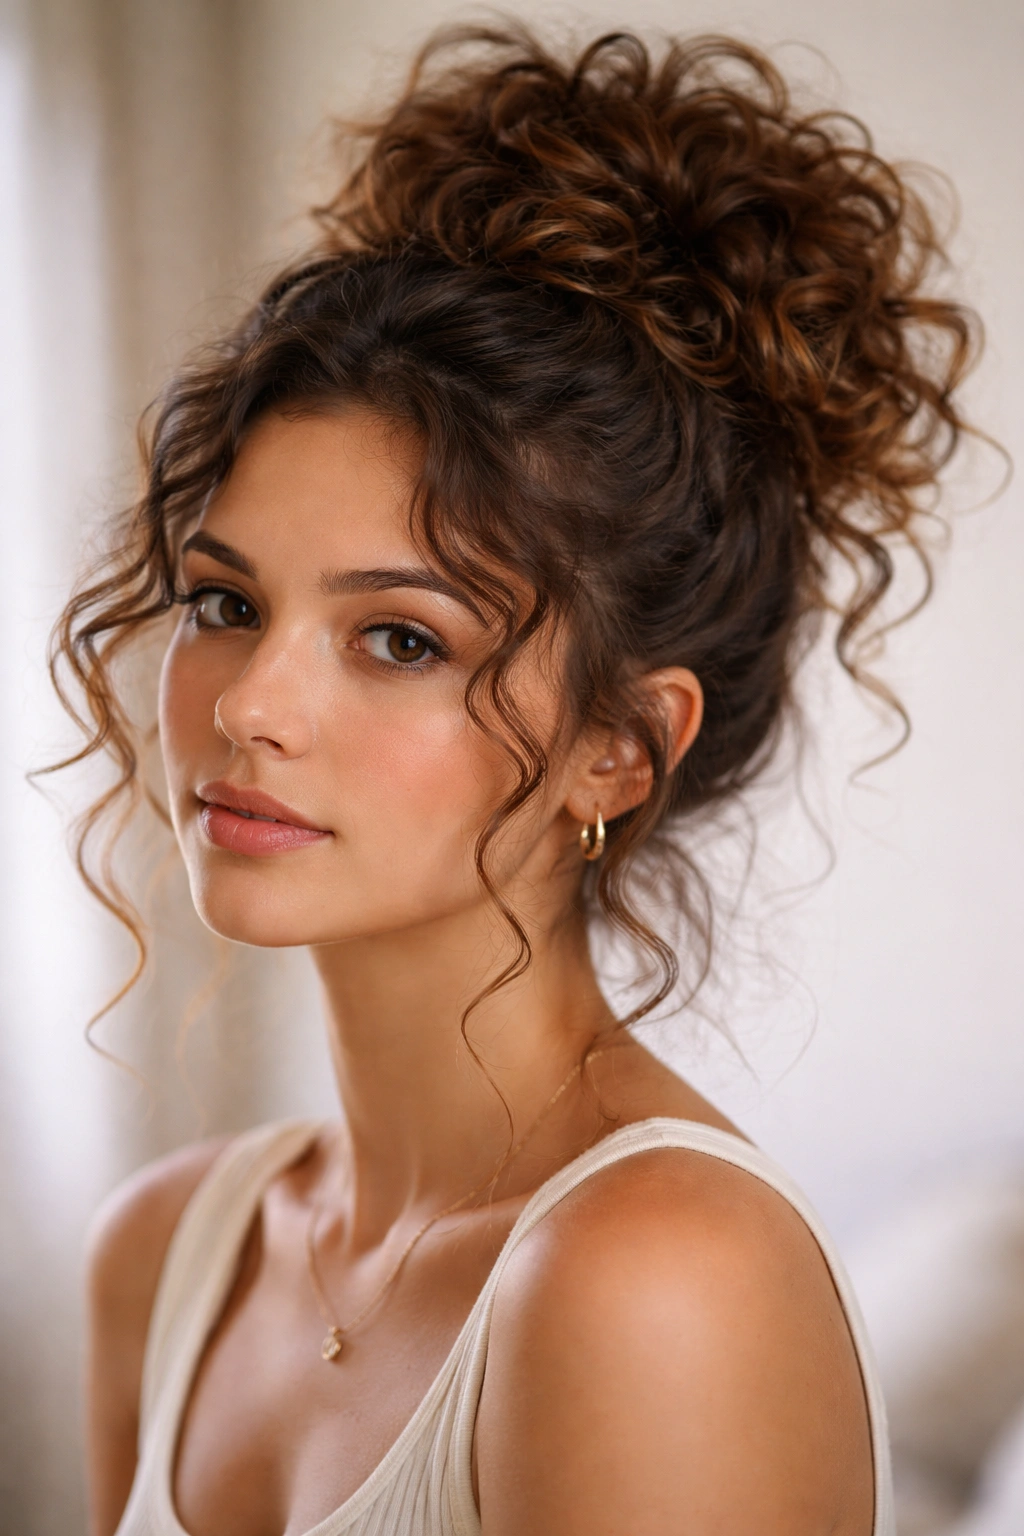
The curly messy bun looks effortless because — done correctly — it is. Unlike the sleek low bun, this style fully embraces what curly hair does naturally: curls poke out at unexpected angles, tendrils fall loose at the hairline, and the bun itself has an organic, layered shape that flat hair simply can’t achieve. And here’s the real advantage for school: minor loosening throughout the day makes it look better, not worse.
Building a Messy Bun That Doesn’t Actually Fall Apart
The difference between a messy bun that looks intentionally undone and one that’s just collapsing is how you build the internal structure. Gather hair into a loose ponytail, twist the ponytail around its own base one or two times, tuck the ends into the base, and secure with two to four bobby pins pushed in at opposing angles — this creates a locked foundation that won’t unravel on its own. The messy part comes from deliberately pulling sections loose, not from a weak foundation.
Finishing and Perfecting the Look
- Pull two to four small sections from the front hairline before securing the bun — these become your face-framing tendrils once everything is pinned
- Wrap each tendril once around your finger and release to define the curl shape before letting it fall naturally
- Gently pull the outer edges of the bun in different directions to widen and volumize — the goal is full and layered, not tight and flat
- Use a light hairspray or a quick water mist over the finished bun to set any sections that need settling
- If the bun shifts during the day, one extra bobby pin pushed straight through the center of the bun is almost always enough to restore it
This is also the style that photographs well — if school picture day catches you off guard, a well-executed curly messy bun photographs with genuine dimension and character.
Final Thoughts
The most important shift in approaching school hairstyles for curly hair is moving away from the idea that curly hair needs to be controlled or tamed. The styles that work best — and stay best — are the ones that give curls structure without fighting their natural shape, volume, or texture.
Do your prep the night before, keep your products simple (leave-in conditioner plus one hold product is genuinely enough), and give yourself a week of practice with any new style before expecting it to be fast. Almost every style on this list feels awkward the first time and second-nature by the fifth. That learning curve is normal — it’s not a reflection of how difficult curly hair is.
If you’re building a school-week routine, it helps to match the style to the day. A high puff or Bantu knot out for a regular Wednesday, a braided crown for picture day, space buns for a Friday when you want something fun — rotating through a small rotation of four or five styles you know well is far less stressful than attempting something new under morning time pressure.
Curly hair at its best isn’t polished into submission — it’s styled to show exactly what it is. The looks above let the texture, the volume, and the natural character of your curls be the point, not the problem.