Styling curly hair on kids presents a completely different challenge than managing straight strands. Those gorgeous curls can tangle quickly, frizz up at the slightest humidity, and turn a simple morning into a frustration if you’re fighting against the hair’s natural texture rather than working with it. The good news? When you use techniques that embrace curl patterns instead of trying to flatten or straighten them, styling becomes significantly easier—and honestly more fun for kids, who love seeing their curls celebrated rather than seen as something to fix.
The hairstyles that work best for curly-haired children are ones that keep the curls intact, reduce manipulation that causes breakage, and actually look better when the curls are left undisturbed. You don’t need heat tools, endless products, or complicated multi-step routines. What you need are styles that work with your child’s curl pattern—whether they have tight coils, springy ringlets, loose waves, or something in between—and that can be created in under 10 minutes on a regular morning.
The styles in this list are specifically chosen because they work beautifully on curly hair, they minimize daily styling stress, they hold throughout the day without constant re-adjusting, and they actually look more polished the curlier and more textured your child’s hair is. Many of these styles can be created while your kid watches a show or eats breakfast, and several can even be partially done the night before. Whether you’re dealing with a toddler’s wild curls or a school-age child who’s ready to help style their own hair, these 10 options give you reliable, beautiful choices for every day and every occasion.
1. Simple Two-Strand Twist Buns
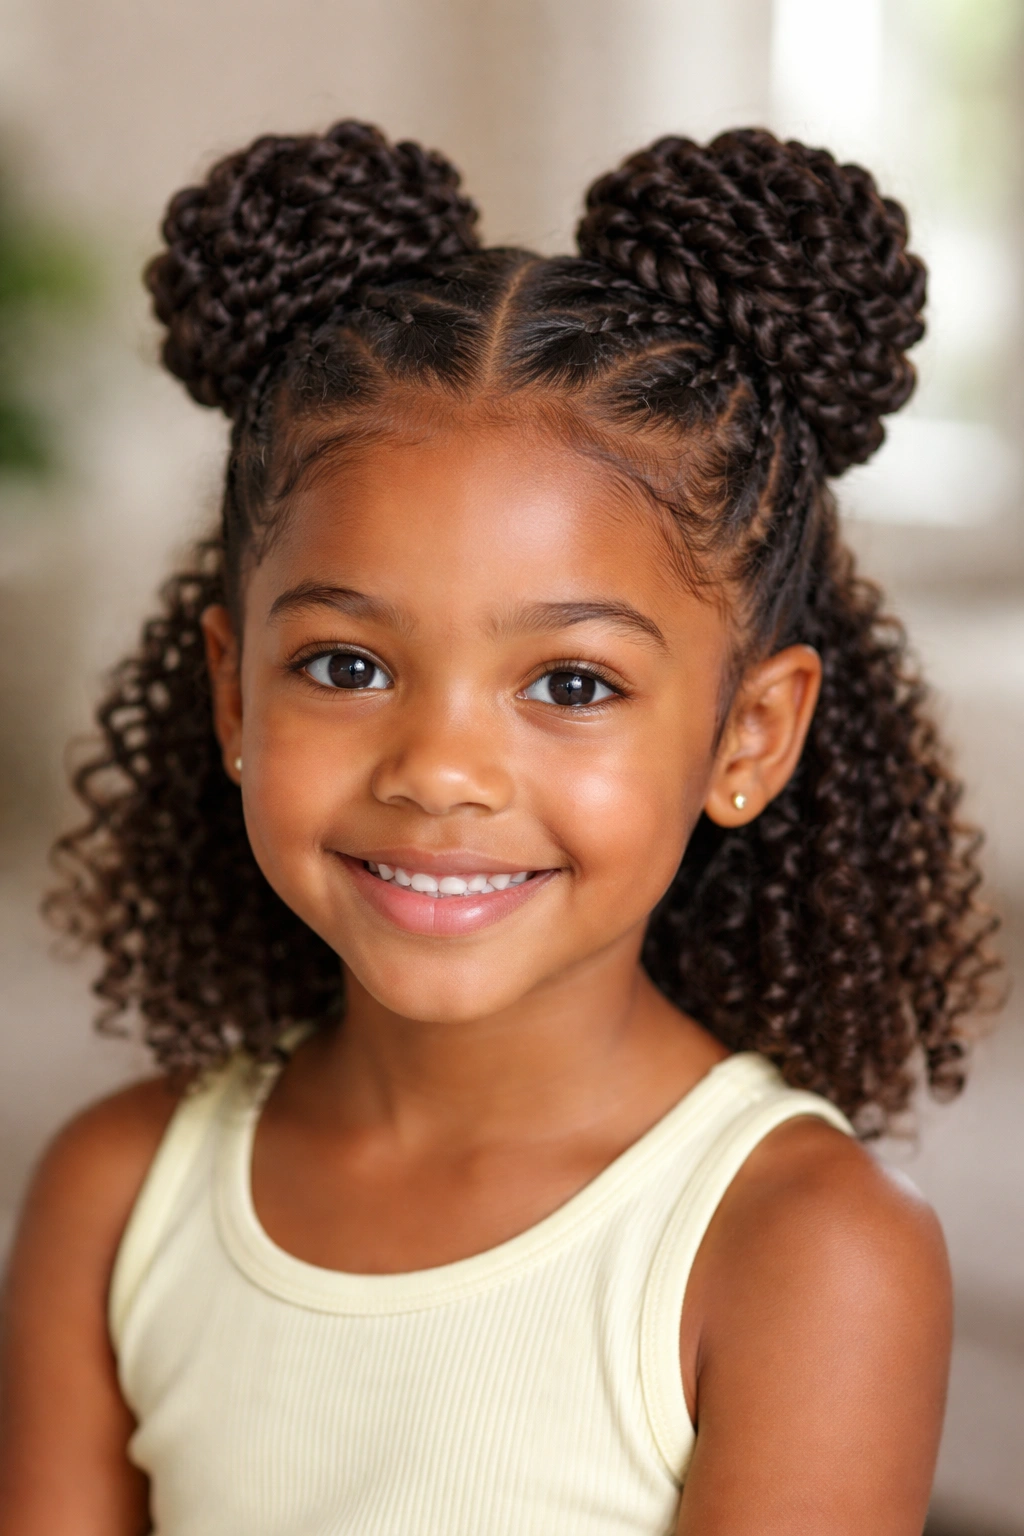
Two-strand twists are one of the most protective and elegant styles for curly hair, and when you coil them into little buns at the crown, you get something that looks intentional and beautifully polished while requiring almost no skill. This style works on every single curl type—from loose waves to tight coils—and the twists actually enhance the curl pattern rather than fighting against it.
Why This Works So Well for Curly Hair
Two-strand twists follow the natural spiral of each curl, which means you’re essentially amplifying what’s already there instead of trying to create something artificial. The twists stay intact throughout the day because they’re working with the hair’s structure, not against it. Unlike braids that can look messy when they start to loosen, twists on curly hair actually look intentionally textured and charming as the day goes on. Because you’re twisting the entire length of the hair from root to tip, you’re also creating a protective style that shields the hair from friction and keeps moisture locked in.
How to Create the Look Step by Step
Start with freshly moisturized hair—slightly damp is ideal, as this helps the twists hold better and allows the curls to re-curl as they dry. Section the hair into 4-6 sections, depending on your child’s hair density and the look you want (more sections create more, smaller buns; fewer sections create bigger, chunkier buns). Take one section and divide it cleanly into two equal subsections. Twist these two strands around each other, working from the scalp all the way down to the ends, making sure to keep consistent tension—not too tight, but not loose either.
As you reach the end of the twist, you can either secure it with a small elastic and then wrap the secured tail around the base to form a bun, or coil the entire twist loosely on itself at the crown and pin it in place with bobby pins. Repeat with each section until your child has a crown of little twisted buns.
What You’ll Need and Quick Tips
- A spray bottle of water or a curl refresher spray to dampen the hair
- Small elastics in a color that matches your child’s hair
- 6-8 bobby pins, ideally the same color as the hair
- A wide-tooth comb to gently detangle before starting
- A light leave-in conditioner to add slip and reduce frizz while you work
Pro tip: If your child has very tightly coiled hair, slightly damp hair holds better. If they have looser waves, you can work with hair that’s completely dry, and the twists will look slightly more defined.
2. High Puff or Top Knot
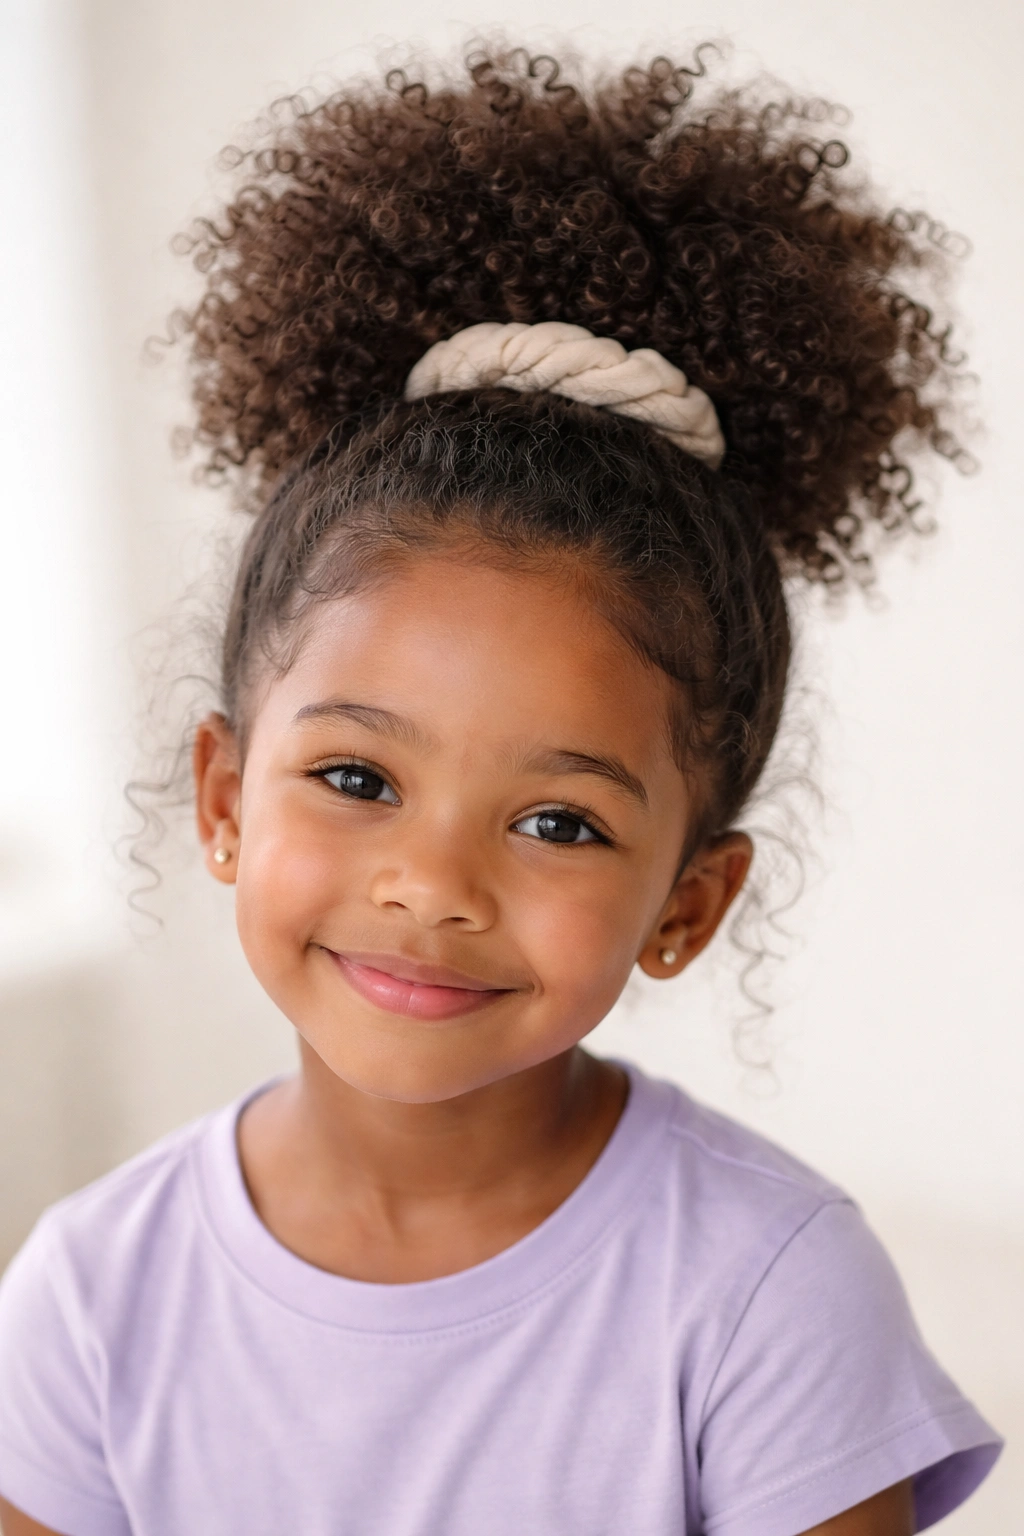
The high puff—a knot of curly hair gathered at the very crown and secured with a scrunchie or hair tie—is possibly the fastest, easiest curly-hair style there is, and it looks genuinely cute, intentional, and effortless. There’s a reason this style has stayed popular for so long: it works, it’s fast, and it makes any curl pattern look beautiful because you’re literally just gathering the curls upward and letting them do their thing.
Why Kids Love This Style
This style takes about 90 seconds to create, which matters enormously on busy mornings or when you have multiple kids to get ready. Your child can help create it once they’re old enough to understand “gather your hair up,” which builds confidence and independence. The high puff keeps hair completely off the face and neck, making it perfect for active kids, sports, or outdoor play. Because you’re not manipulating the curls at all—just gathering them up—the curls stay intact and actually look fuller and bouncier throughout the day as they continue to set and define.
The Basic Technique
Comb or finger-comb the hair to remove tangles, working gently from the ends upward. Gather all the hair together at the crown—literally the highest point on top of the head—using your fingers or a wide-tooth comb to smooth everything back. You want a clean, smooth base with no flyaways or loose pieces, but you’re not pulling so hard that it’s uncomfortable. Secure the gathered hair with a scrunchie, hair tie, or silk elastic, making sure it’s tight enough to hold throughout the day but not so tight that it’s pulling on the scalp and causing discomfort.
Once it’s secured, you can fluff out the puff by gently pulling on sections of the gathered curls to make it look fuller and more voluminous. Some curl patterns naturally create a perfect sphere; others are more of a cloud. Both look beautiful.
Variations That Keep It Fresh
A side puff moved to one side of the head gives a different silhouette and works particularly well for kids with looser curl patterns. A two-puff look with matching sections on either side of the head is playful and fun, especially for younger children. A puff with a braid (gather some hair into a high puff, then braid the remaining hair underneath) adds complexity without actually taking much longer. A puff wrapped with a scarf or ribbon threaded through the base transforms it from casual to special-occasion-ready.
Quick fact: Puffs actually last longer on curly hair because the curl pattern holds everything in place naturally. Once that elastic is secure, you’re pretty much done for the day.
3. Half-Up Curly Pigtails
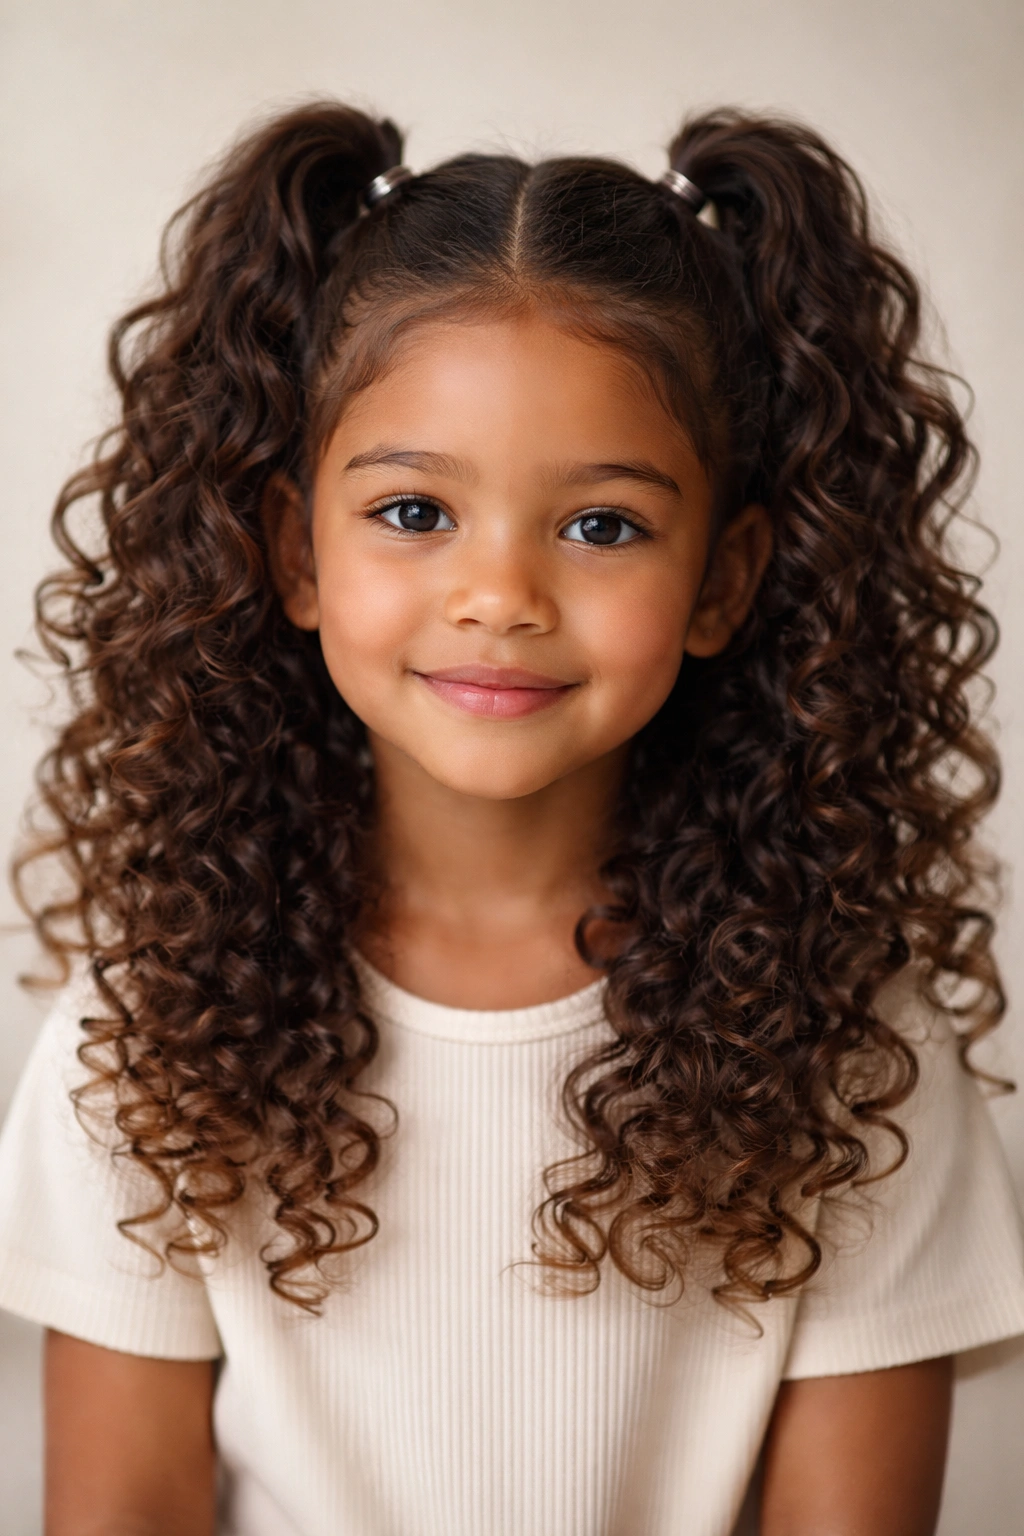
Half-up pigtails—where you gather the top section of hair into two ponytails while leaving the bottom section down—are the sweet spot between “easy” and “styled.” This style looks intentional and cute without requiring any braiding, twisting, or complicated technique. The half-up style also keeps hair partially back from the face, which kids appreciate, while still showing off all those beautiful curls down the length of the hair.
Why This Style Works on Curly Hair
Half-up pigtails look exponentially better on curly hair than on straight hair because the curls fill in the sides of the face naturally in a way that looks soft and flattering. Where the style might look a bit bare or thin on straight hair, on curly hair it looks intentionally voluminous and textured. You’re also using the hair’s natural fullness to create shape, which means you don’t have to blow-dry, tease, or artificially puff anything up.
Creating the Look
Start with hair that’s either freshly washed and curled, or refresh-sprayed and re-curled from a previous wash day. Section the top portion of the hair—from the temples up to the crown—by imagining a horizontal line from ear to ear across the back of the head. Everything above that line is your top section; everything below stays down. Divide this top section into two equal parts, one on each side of the head, using a clean vertical line from the forehead straight back.
Gather one side into a ponytail at the side of the crown and secure with a small elastic. Repeat on the other side, making sure both ponytails are the same height and tension. Gently fluff out each ponytail and the curls around the face to create a soft, voluminous look. You can leave it here for a simple version, or continue to the next step for something a bit more polished.
Making It Extra Special
Wrap a small piece of hair around the base of each elastic to hide it—take a thin strand from inside each ponytail, wrap it around the base where the elastic sits, and pin the wrapped piece underneath. This gives a more finished, polished appearance. Add ribbons, bows, or hair clips threaded through the ponytails. Braid each ponytail loosely from the base down the length of the hair for a more intricate look. Spiral each ponytail loosely around your finger and secure with a bobby pin to create little buns at the crown while keeping the rest of the hair down.
Real talk: This style genuinely looks better and lasts longer when you leave the bottom section of hair down in its natural curls. Trying to add waves or curls to the bottom section usually backfires and creates frizz. Just let those curls be, and you’re done.
4. Braided Crowns
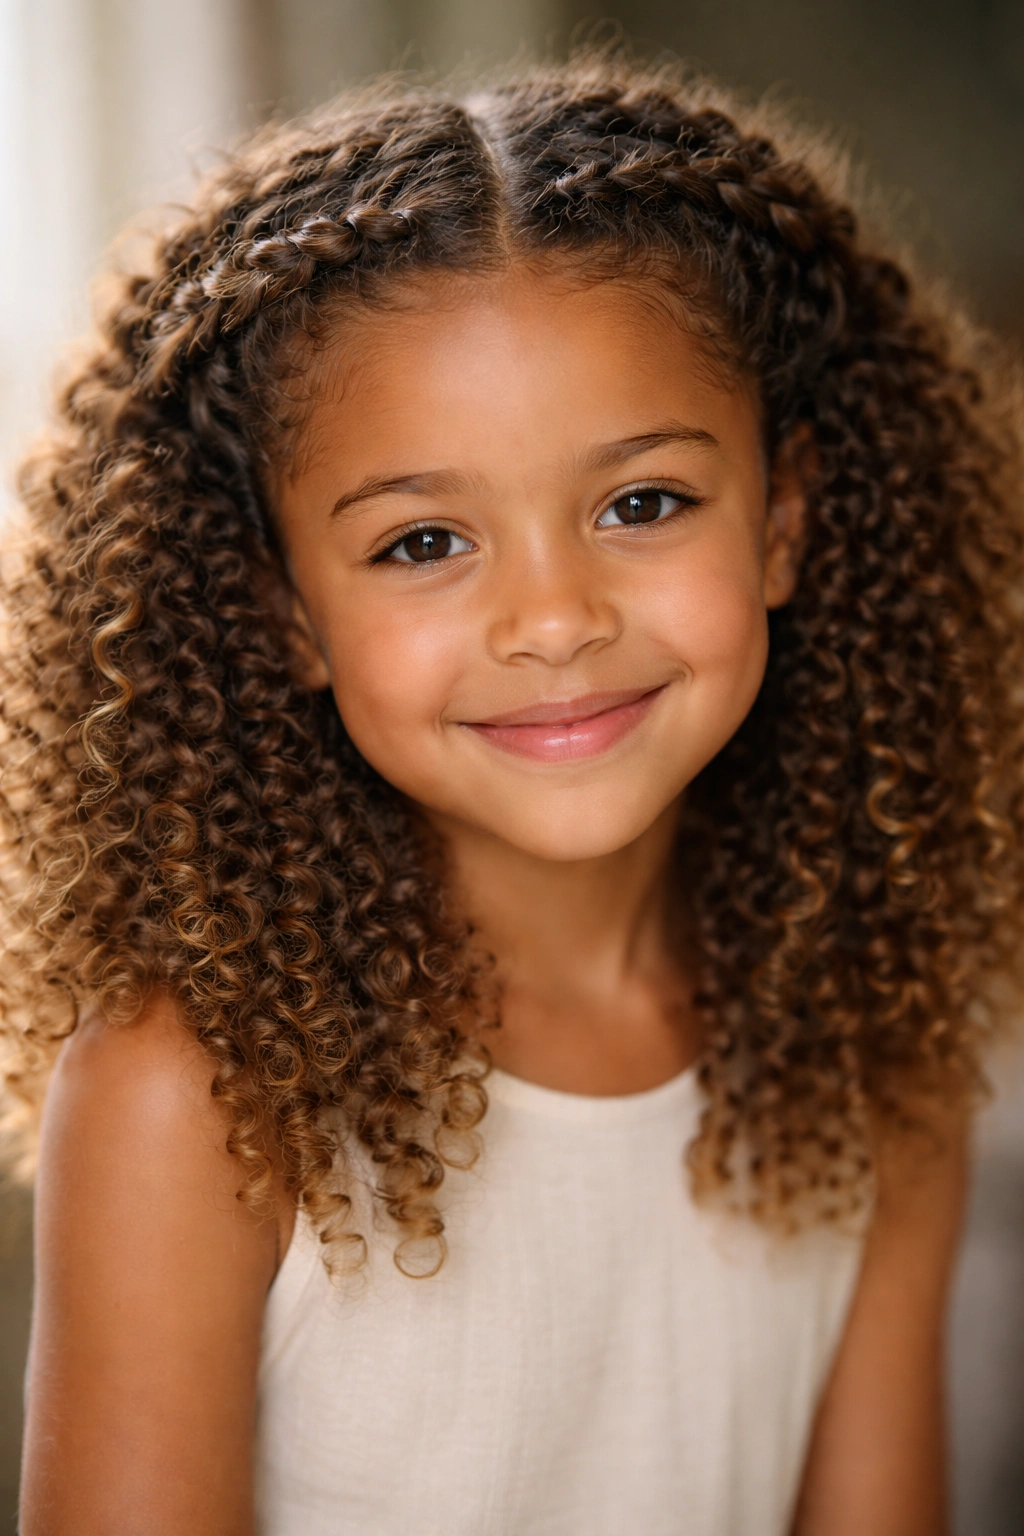
A braided crown—a single braid or double braids woven across the head from one side to the other—looks absolutely lovely on curly-haired kids and actually becomes easier to create as the hair gets curlier. The texture of curly hair naturally fills in the braid and makes it look fuller and more intricate than it actually is, which means you don’t have to be a braid expert to pull this off.
How Curly Hair Makes Braiding Easier
Here’s something most people don’t realize: braiding curly hair is often easier and more forgiving than braiding straight hair. The curl pattern gives you natural grip and texture, which means the braid stays put without you having to pull super tight. Loose strands and flyaways that would look messy in a straight braid actually look intentionally textured and charming in curly hair. If your sections aren’t perfectly even or your braid isn’t perfectly tight, the curls will fill in the gaps and make the whole thing look intentionally thick and beautiful.
Creating a Crown Braid
Comb or finger-detangle the hair gently, then decide whether you want a single braid or double braids. For a single crown, start on one side at the temple area. Section off a piece of hair about the width of three fingers and divide it into three equal subsections. Begin a standard three-strand braid, working across the head from one temple to the other. As you braid, you can either do a French braid (adding hair from the crown as you go) or a simple braid (keeping the three strands the same and not adding hair). A simple braid is faster; a French braid that picks up hair as it goes looks more intricate.
Once the braid reaches the other side of the head, secure the end with a small elastic, then gently pull on the braid sections to make it look fuller and more textured. Pin the secured end underneath on the other side for a seamless look.
The Double-Braid Crown
For a double-braid crown, part the hair down the center from forehead to nape. Create a separate braid on each side of the head, starting from one temple and working back to the same side. Once both braids are complete and secured, bring them up and across the back of the head, pinning each end down on the opposite side to create a woven crown effect.
Tips for Success
Slightly damp hair braids more smoothly and holds better throughout the day than completely dry hair. If you’re using a French braid technique, add hair in small pieces as you braid rather than large chunks—this keeps the braid looking neat and intentional. For very young children who won’t sit still, a simple three-strand braid takes about 5 minutes per side, while a French braid might take 7-8 minutes. It’s worth spending the extra time if your child can be patient, because the result is genuinely stunning.
Worth knowing: Braided crowns hold beautifully overnight, which means you can often redo them with just a few bobby pins the next morning rather than re-braiding completely. This is a major time-saver.
5. Side Sweep with an Accessory

A side sweep—sweeping the hair to one side and securing it with a hair clip, barrette, or bow—is almost absurdly simple, yet it looks put-together and intentional. This style takes about a minute to create, which makes it perfect for days when you’re running late, and it looks equally good on toddlers and elementary-school-age kids. The beauty of this style on curly hair is that you’re not trying to make it smooth or sleek; you’re just gathering the voluminous curls to one side and letting them cascade down the shoulder.
Why a Side Sweep Works
This style completely changes how a child’s face looks by moving all the hair away from one side, which is flattering and practical. It keeps hair off the face without requiring any braiding or twisting. For curly hair, a side sweep showcases the curl pattern beautifully because you’re moving the bulk of the hair to one side while the other side of the face stays clear and visible. The style works on every curl type and every hair length.
The One-Minute Technique
Comb the hair gently, then use your fingers or a wide-tooth comb to sweep the hair to one side of the head—typically toward the back of the shoulder. Secure it with a clip, barrette, bow, or elastic. That’s genuinely it. You can make it look slightly more polished by tucking the secured hair under slightly and making sure no pieces are falling into the face, but you’re not trying to create anything elaborate or perfect-looking.
Making It a Statement
Choose a clip or accessory that matches an outfit or adds a pop of color. Use a silk or satin scrunchie instead of a regular elastic to reduce friction and frizz. Secure the side sweep lower, closer to the nape of the neck, for a more sophisticated look, or higher, closer to the crown, for a more playful, youthful appearance. Twist or braid the swept section loosely before securing it for added visual interest. Add multiple clips or a combination of clips and bows if your child likes a more decorated, whimsical look.
Pro tip: This style works beautifully on second-day hair (hair that’s a day old and has already set into its curl pattern). In fact, side sweeps often look better on day-two curls than on freshly washed curls, because the curls have more definition and hold.
6. Woven Basket Weave Braid
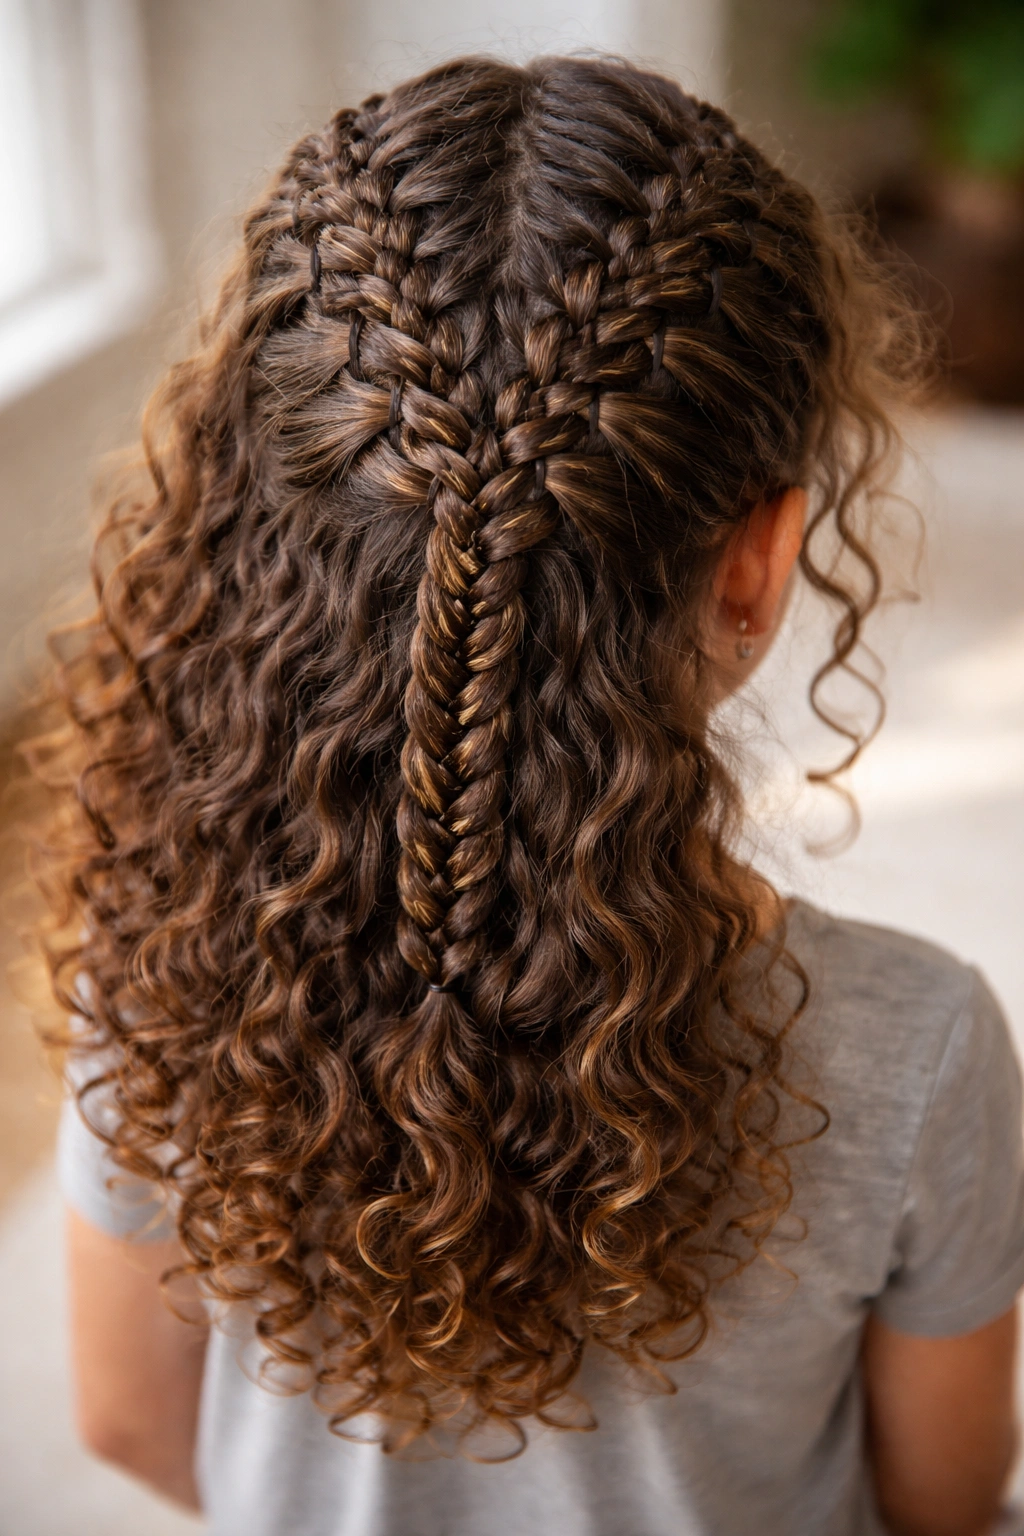
A basket weave braid—where you create one main braid down the center of the head while weaving in additional sections of hair to create a textured, interwoven pattern—looks absolutely stunning and surprisingly professional. On curly hair, the texture makes the weave look fuller and more intricate than it actually is, which means you can create a genuinely impressive-looking style without needing professional braiding skills.
Understanding the Technique
A basket weave braid starts with a basic braid down the center of the head (a straight braid from crown to nape), then you weave additional sections of hair through this center braid from both sides, creating a woven appearance. The curly texture of your child’s hair fills in the weaving and makes the whole thing look intentionally textured and beautiful. Because you’re working with curls, imperfect weaving actually looks more charming—it looks purposefully organic rather than sloppy.
Creating the Style Step by Step
Start with hair that’s been gently detangled. Create a center part from the forehead to the nape, dividing the hair into two equal halves. Begin with a three-strand braid down the center of the head, starting from the crown and working straight down the back. Secure the end with a small elastic.
Now, take a thin section of hair from the left side of the head, weave it over the left outer strand of the center braid, then under the right outer strand, creating an interwoven pattern. Secure this section with a bobby pin. Repeat on the right side, weaving hair over the right outer strand and under the left outer strand. Continue alternating sides as you work your way down the braid, adding woven sections about an inch apart.
Gently pull on the braid and the woven sections to make everything look fuller and more textured.
Simplified Version for Busy Mornings
If the full basket weave feels too complicated for a regular school morning, you can simplify by just creating the basic center braid and weaving in 3-4 sections on each side (rather than the full length). This still creates the basket weave effect and looks beautiful, but takes significantly less time. You can also ask your child’s school if they have a hairstylist on staff or a parent volunteer who’s comfortable doing this style—many schools love having kids come in with special, intricate braids for photos or events.
Quick fact: Basket weave braids actually look better on day-two or day-three curls because the curls have more definition and hold the weaving pattern more securely throughout the day.
7. Space Buns

Space buns—two small buns positioned on either side of the crown—are a playful, fun style that kids absolutely love, and they’re particularly striking on curly hair because the buns are puffier and more voluminous than on straight hair. This style is perfect for younger kids or for any day when you want something fun and a little bit whimsical. The technique is incredibly simple, and you can create the buns using braids, twists, or just plain gathered curls.
Why Kids Love This Style
Space buns are fun, distinctive, and make kids feel special—they’re a style that stands out and looks intentionally playful rather than like something a parent just threw together to get through the day. For curly hair, space buns are particularly effective because the natural fullness of the curls makes them look bigger and more impressive. Kids often want to style their own hair once they’re old enough, and space buns are one of the first styles they can actually create themselves with minimal help, which builds confidence.
Creating the Look
Part the hair down the center from the forehead to the nape, dividing it into two equal sections. Take one section and gather all of the hair up toward one side of the crown, securing it with a scrunchie or elastic to create a high ponytail on that side. Repeat with the other section, creating a matching ponytail on the other side.
Now, take the first ponytail and twist it loosely around itself, coiling it at the base of the elastic to create a bun, and secure with bobby pins. Repeat with the other ponytail. Gently fluff both buns to make them look full and voluminous.
Variations for Different Looks
Braided space buns: Braid each ponytail from base to tip, then coil the braid on itself and pin it into a bun. This creates more texture and a more intricate look. Twisted space buns: Twist each ponytail instead of braiding it, then coil and pin. Messy space buns: Pull the buns slightly loose and mess them up intentionally for a more relaxed, bedhead-style look that’s incredibly charming on curly hair. Space buns with ribbons: Thread a ribbon through each bun or wrap ribbons around the buns before securing them.
Real talk: Space buns on curly hair naturally look “messy” and textured in the best possible way. Trying to make them perfectly neat actually makes them look worse. Embrace the texture and let the curls do the work.
8. Flexi Rod Curls for Extra Definition
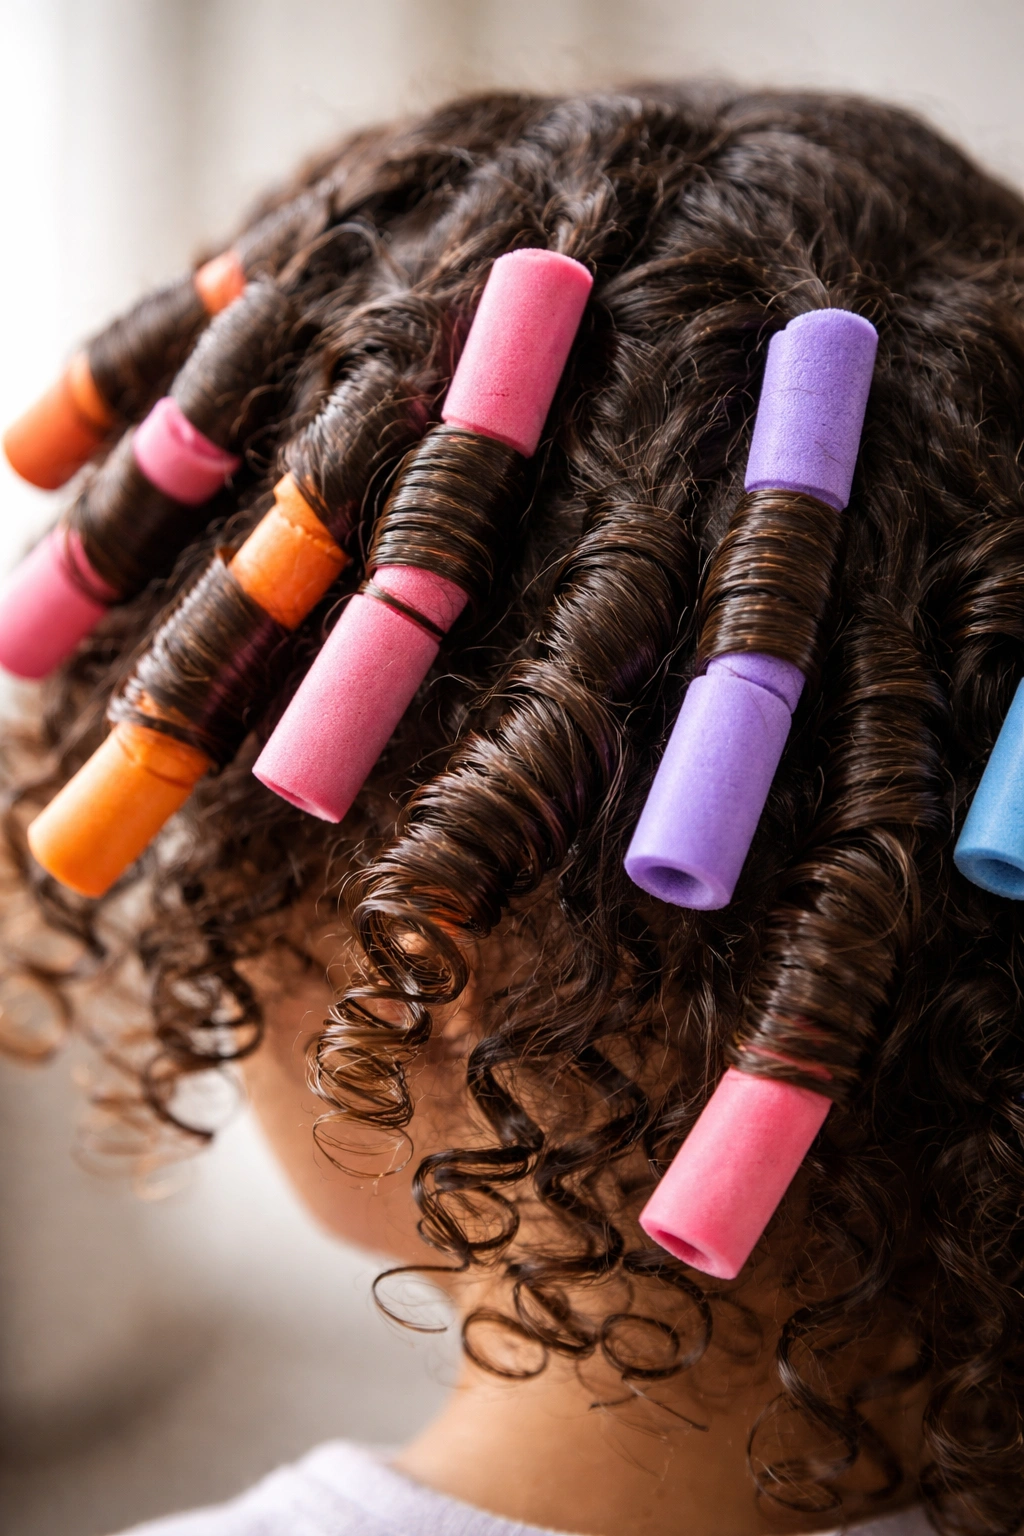
Flexi rods—soft, bendable rollers that you wrap hair around—are a gentle way to add extra curl definition and create bouncier ringlets without using heat tools. For kids with curly hair, flexi rods enhance the natural curl pattern, creating more defined, springy curls that look polished and intentional. This isn’t really a “style” per se, but a styling technique that you can apply to any of the other styles on this list, or just wear on their own for extra definition.
How Flexi Rods Work on Curly Hair
You wrap damp hair around the flexi rod and either let it air-dry or sleep on it overnight, and as the hair dries, it sets into a more defined curl pattern. For kids with naturally curly hair, this amplifies their existing curls rather than creating something artificial. The rods are soft and gentle, which means they don’t cause breakage or damage the way hard rollers or heat tools can. Because the curls are setting overnight or during air-drying, there’s no heat damage at all.
The Basic Technique
Start with freshly washed, damp hair. Section the hair into 6-10 sections, depending on how much definition you want and how long your child’s hair is. Take one section and mist it with a leave-in conditioner or curl cream for hold. Brush or comb the section smooth, then place a flexi rod perpendicular to the section and wrap the hair around the rod from the ends up toward the scalp. Once the entire section is wrapped, bend the flexi rod to secure the wrapped hair in place.
Repeat with each section until the entire head is covered with flexi rods. If you’re doing this in the evening, your child can sleep in the rods and remove them in the morning (this takes about 30 seconds per rod). If you’re doing this earlier in the day, air-dry the rods for 2-3 hours or use a low-heat hair dryer on the cool setting.
Making It Practical for Kids
Very young children might find sleeping in flexi rods uncomfortable, so flexi rods work better as an evening styling technique for kids age 6 and up. Smaller rods create tighter, more defined curls; larger rods create looser, bouncier waves. You can leave the rods in for anywhere from 30 minutes to overnight, depending on how much definition you want and how much time you have. Some parents do this technique just once a week on a weekend to give their child extra curl definition for the week ahead.
Pro tip: If you want even more definition, mist the wrapped sections with a lightweight hairspray before the rods dry completely. This sets the curl pattern and makes the results last longer.
9. Bubble Braid Style
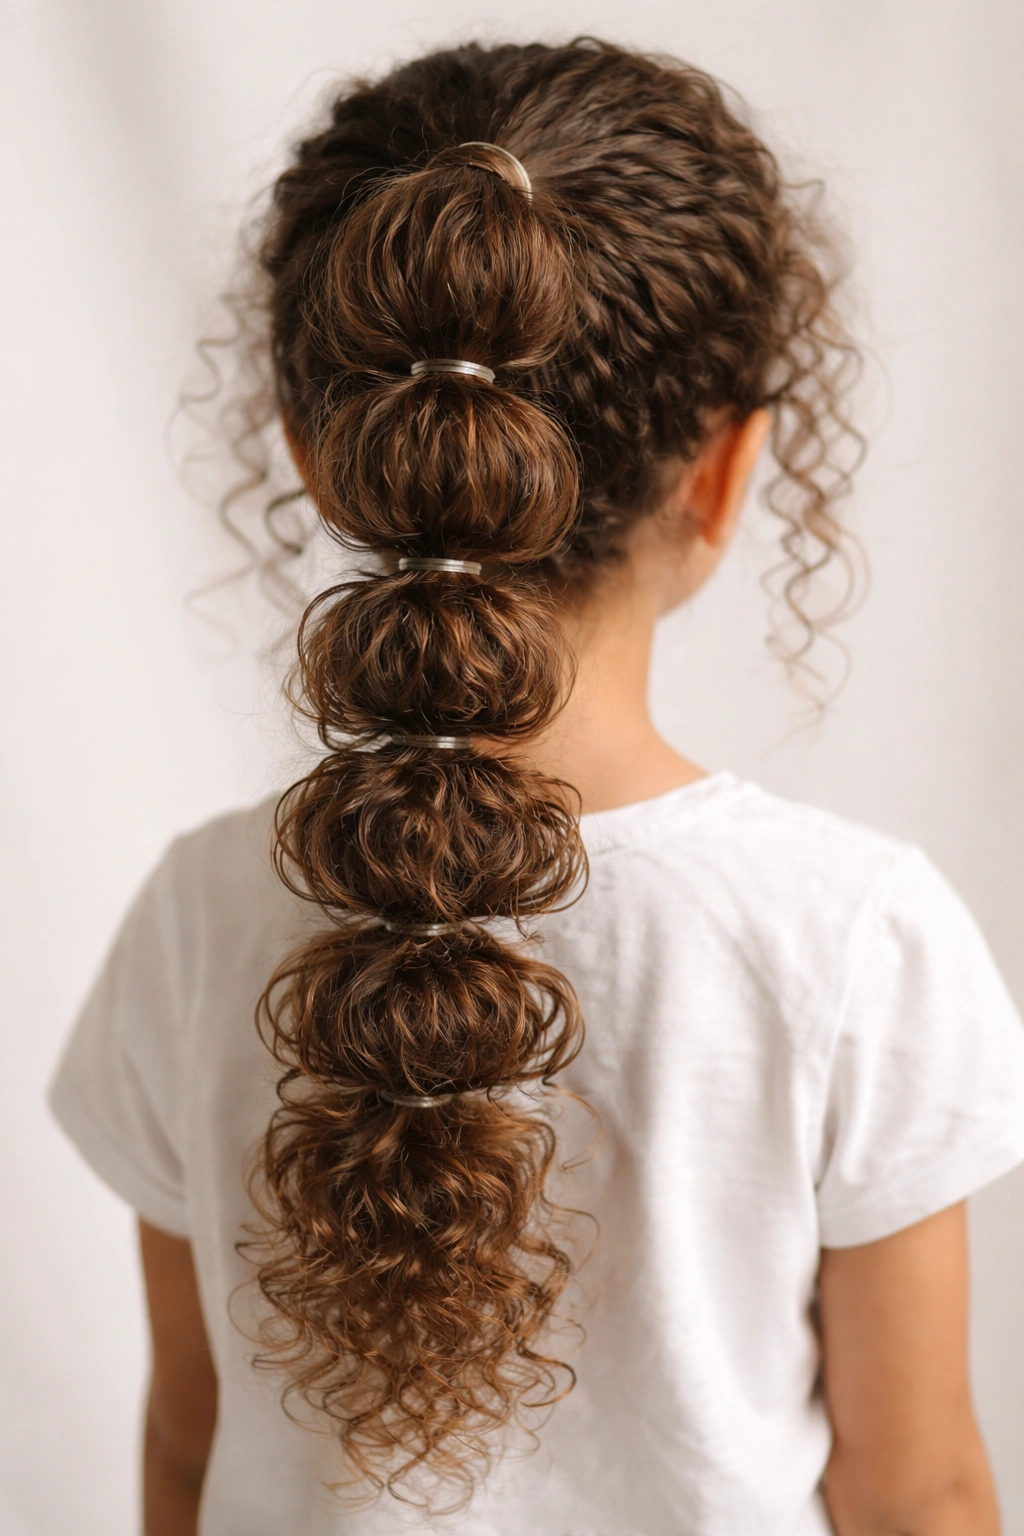
A bubble braid—a style where you create multiple small sections down a ponytail or twisted section, separating each with an elastic and gently pulling out the hair between elastics to create bubble-like puffs—is playful, unique, and genuinely easy to create. On curly hair, bubble braids look particularly cute because the curls fill in the bubbles and create a textured, voluminous appearance.
Why Bubble Braids Work on Curly Hair
The texture of curly hair makes bubble braids look fuller and more impressive than they actually are. Loose strands that would look messy in a bubble braid on straight hair look intentionally textured on curly hair. Because you’re working with the hair’s natural curl pattern, the bubbles hold their shape better and look more defined throughout the day. This style is also forgiving—if a bubble isn’t perfectly shaped or a section is slightly uneven, the curls fill it in and make it look intentionally organic.
Creating the Bubble Braid
Start by gathering the hair into a high ponytail at the crown and securing it with an elastic. This is your base. Now, measure about two inches down from the first elastic and place another elastic around the ponytail at that point, going horizontally around the hair. Gently pull the section of hair between the two elastics upward and outward, fluffing it to create a bubble shape.
Continue down the length of the ponytail, placing elastics about two inches apart and pulling out the hair between each elastic to create bubbles. As you work your way down, you’ll have a series of fluffy, textured bubbles running down the length of the ponytail.
Making It More Interesting
Create a side bubble braid by starting with a side ponytail instead of a high ponytail. Make a half-up bubble braid by gathering just the top section of hair into a ponytail and creating bubbles down that section while leaving the bottom half of the hair down. Twist the base ponytail before adding the elastics and bubbles for a more intricate look. Add small ribbons, bows, or clips to each bubble for extra visual interest.
Worth knowing: Bubble braids hold beautifully overnight, which means you can create them in the evening, your child can sleep in them, and they’ll still look great the next morning. This is a serious time-saver for the school week.
10. Loose Curly Wave Ponytail
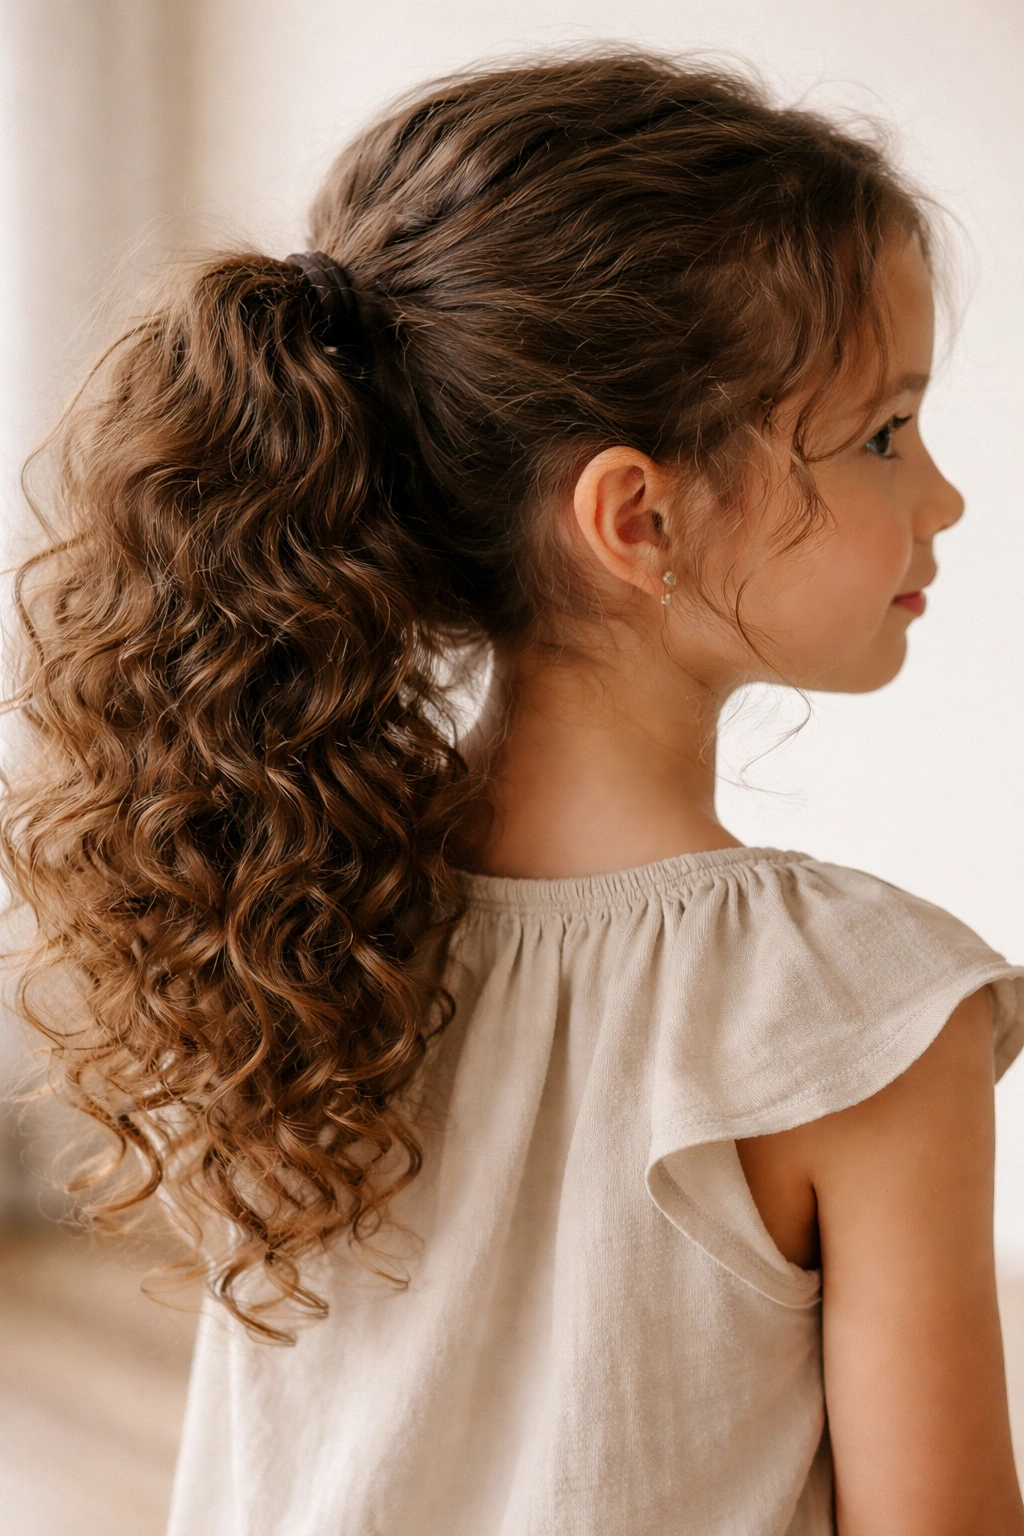
A loose, voluminous ponytail—where you gather the hair at the nape or side of the neck but pull it slightly loose to create a soft, textured look rather than a sleek, tight ponytail—is literally the easiest style on this list. This style celebrates curly hair exactly as it is, without trying to flatten, smooth, or refine anything. It takes about 30 seconds to create and looks polished enough for school, sports, or any activity where you need hair out of the way.
Why This Works So Well
On curly hair, a loose ponytail looks intentionally textured and beautiful rather than sloppy or undone. You’re not fighting the curl pattern or trying to create artificial smoothness; you’re just gathering the curls together and letting them do their thing. The loose, voluminous style is actually more comfortable for kids than tight ponytails because there’s no tension on the scalp, which means your child can wear it all day without getting a headache or hair pulling.
Creating the Look
Gather the hair loosely at the nape of the neck (for a classic low ponytail) or to one side (for a side ponytail). Secure it with a scrunchie, elastic, or clip. That’s genuinely it. You can make it slightly more polished by tucking a few loose pieces behind the ear or smoothing the front sections slightly, but you’re not trying to create a sleek or refined look—you’re celebrating the curls.
Once the ponytail is secured, gently pull on sections of the gathered hair to fluff it up and make it look fuller and more voluminous.
Personalize It
Add a clip, barrette, or bow to the base of the ponytail. Use a silk or satin scrunchie to reduce friction and frizz. Create a low side ponytail for a more relaxed, casual look or a higher ponytail at the crown for something more intentional. Loosely twist or braid the ponytail before securing it for added texture. Wrap a small section of hair around the base of the elastic to hide it and create a more finished appearance.
Real talk: This is the style you’ll end up using most often because it’s genuinely that fast and easy. On mornings when you’re running late, a loose curly ponytail gets the job done without stress, and it looks cute enough that it doesn’t feel like you’re just throwing together whatever works.
Final Thoughts
Every single one of these styles works because they honor your child’s curls instead of fighting them. You’re not blow-drying, straightening, flat-ironing, or applying heat of any kind. You’re not using harsh products that dry out or damage the hair. You’re not spending 30 minutes trying to make naturally curly hair look straight or sleek. Instead, you’re using simple techniques—gathering, twisting, braiding, and securing—that enhance the curl pattern and create beautiful, polished looks in minutes.
The real secret to easy hairstyling for curly-haired kids is this: stop treating curly hair like it’s a problem that needs fixing. Those curls are a feature, not a bug. When you pick styles that showcase them instead of cover them up, styling becomes infinitely easier and the results are genuinely stunning. Your kid gets to feel confident and beautiful in their natural hair, and you get to spend less time on hair and more time on everything else your mornings demand.
Start with whichever style appeals to you most—maybe it’s the five-second loose ponytail because that’s what fits your life right now, or maybe it’s the basket weave braid because your kid thinks it’s magic. Try a different style each week or rotate between two or three favorites. As you get comfortable with the basic techniques, you’ll start combining them naturally: a half-up situation with a twist, a ponytail with braids, a puff with a bow. Once you understand the foundation, you can create endless variations.
Your child’s curly hair is genuinely gorgeous exactly as it is. These styles just help you show it off.