There’s something undeniably romantic about a half-up hairstyle—it’s graceful without being overly formal, allows your face and shoulders to shine, and keeps hair beautifully secured without the severity of a full updo. When you combine that timeless appeal with soft, flowing waves, you get the kind of hairstyle that photographs beautifully, holds up through a full reception, and makes you feel like the best version of yourself on your wedding day.
The magic of a wavy half-up lies in its versatility. Whether you’re envisioning a bohemian garden wedding, an elegant black-tie reception, or something in between, there’s a wavy half-up variation that fits perfectly with your vision and personality. These styles work with nearly every hair type and texture—fine hair benefits from the volume-building properties of waves, thick hair showcases gorgeous movement and dimension, and textured hair already has the grip needed for intricate securing techniques.
What makes a half-up truly special for weddings is the way it bridges casual and formal, romantic and sophisticated. You get to showcase your favorite hair accessories, whether that’s delicate pearl pins, fresh flowers, or an ornate comb. You have the freedom to add texture and personality while maintaining the polished, intentional look that makes a bride feel confident. And perhaps best of all, your hair movements naturally complement your features and your dress in ways that fully down or fully up styles sometimes can’t quite achieve.
Let’s explore twenty stunning wavy half-up styles that each bring something different to a wedding day—some emphasizing texture and bohemian romance, others leaning into glamorous elegance, and many striking that perfect balance between both.
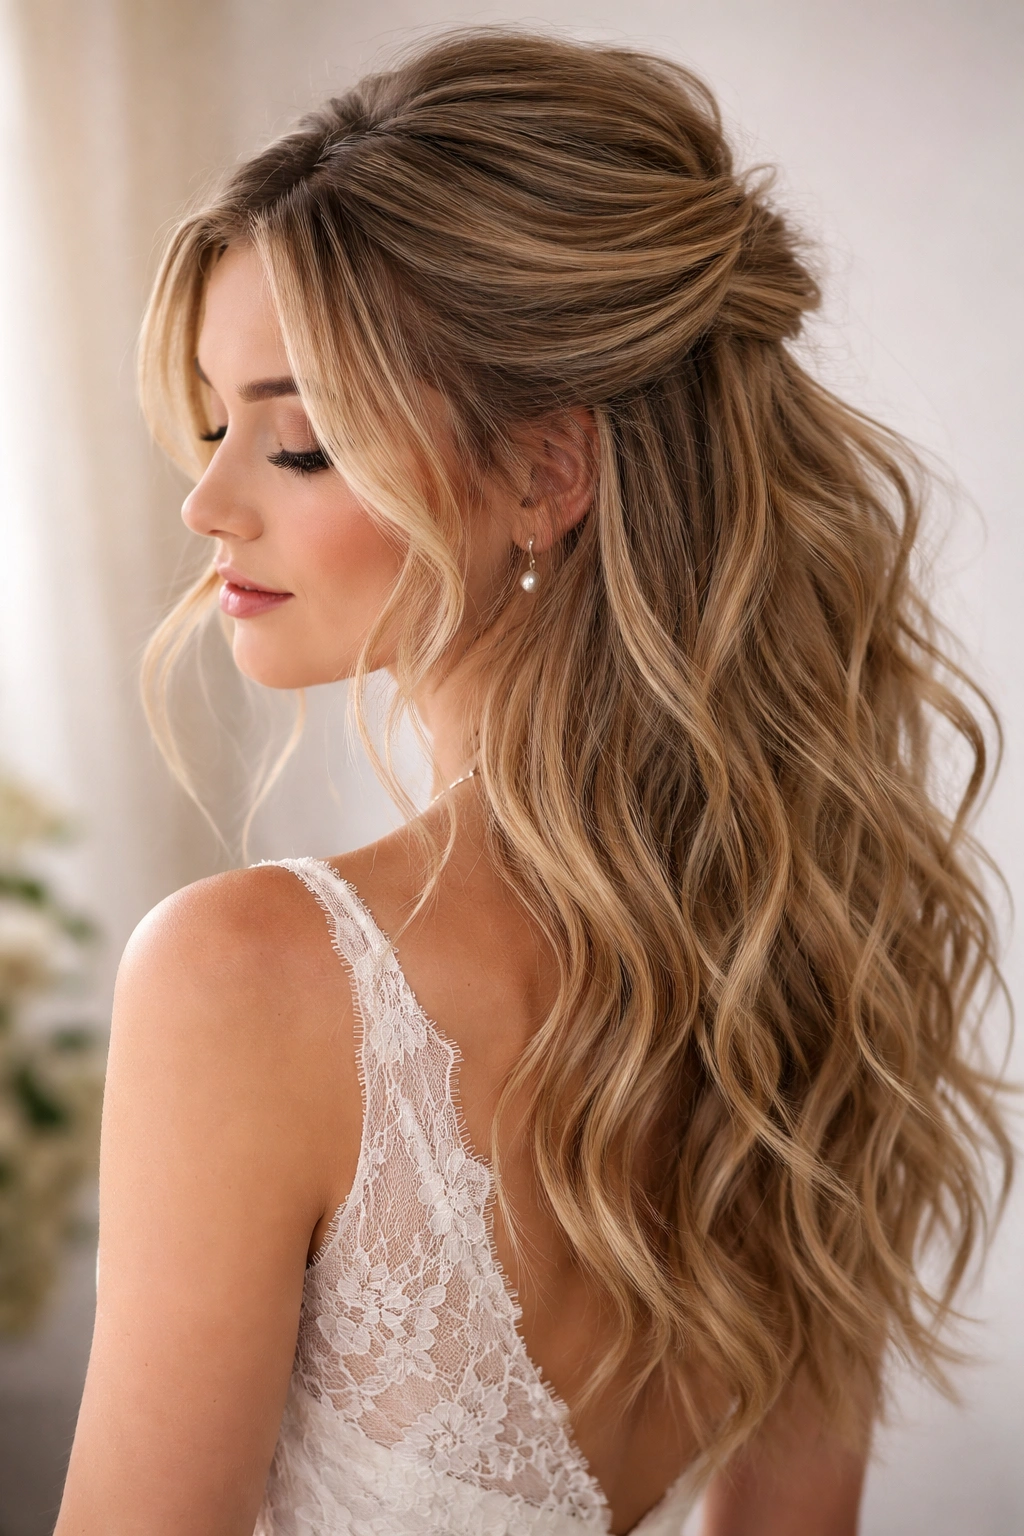
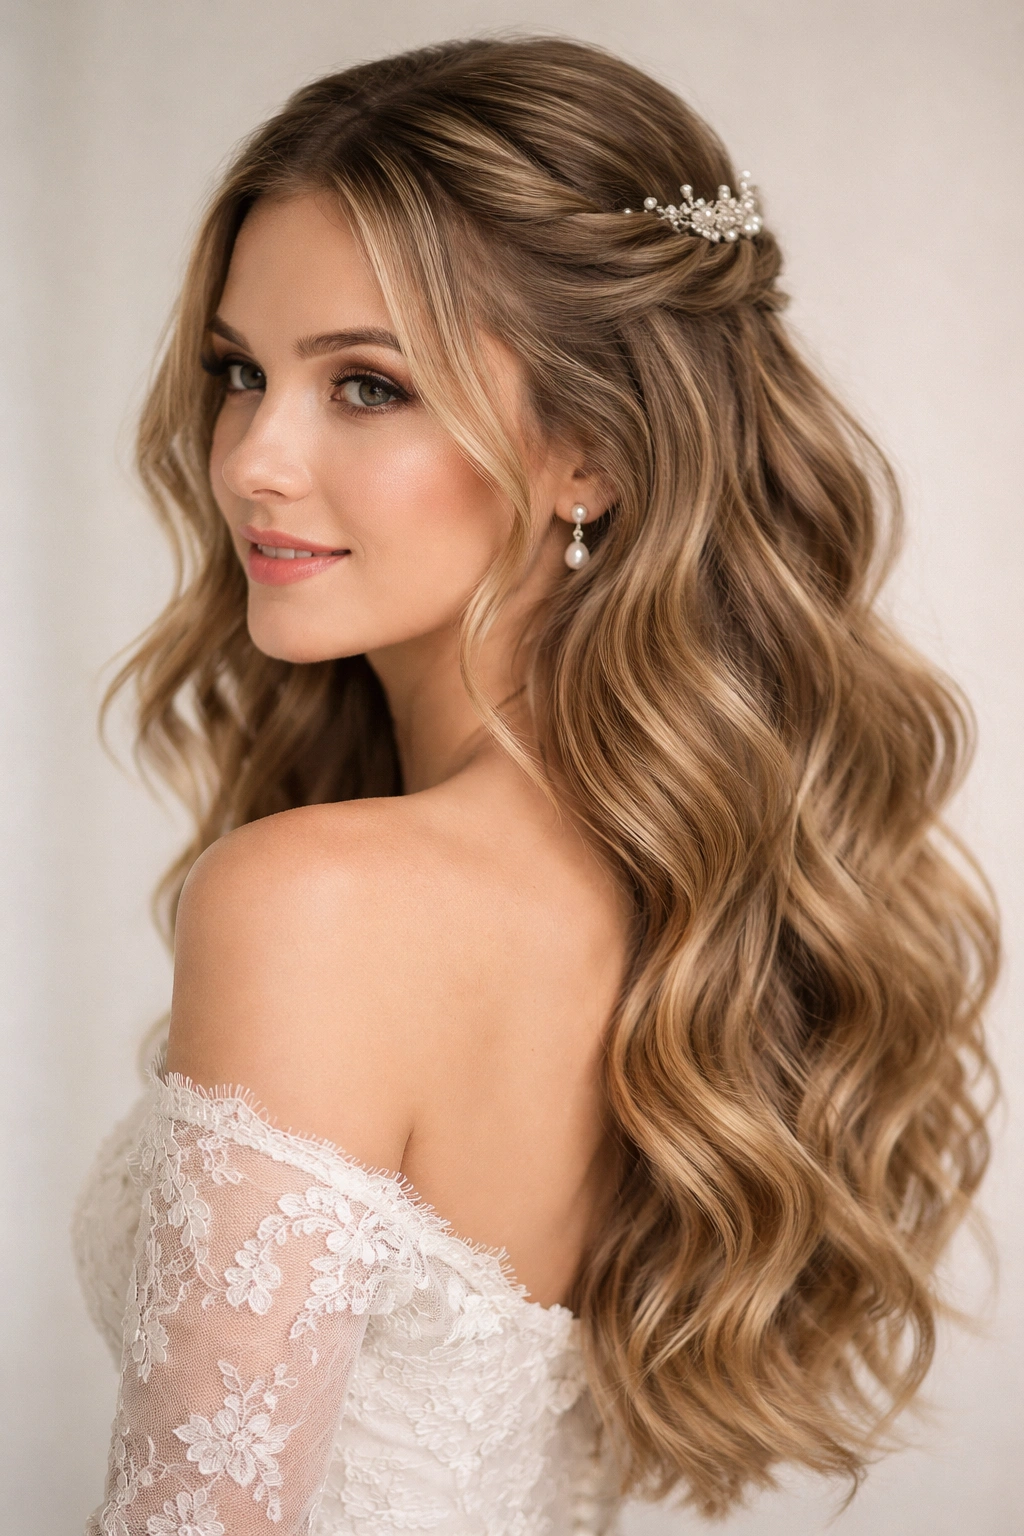
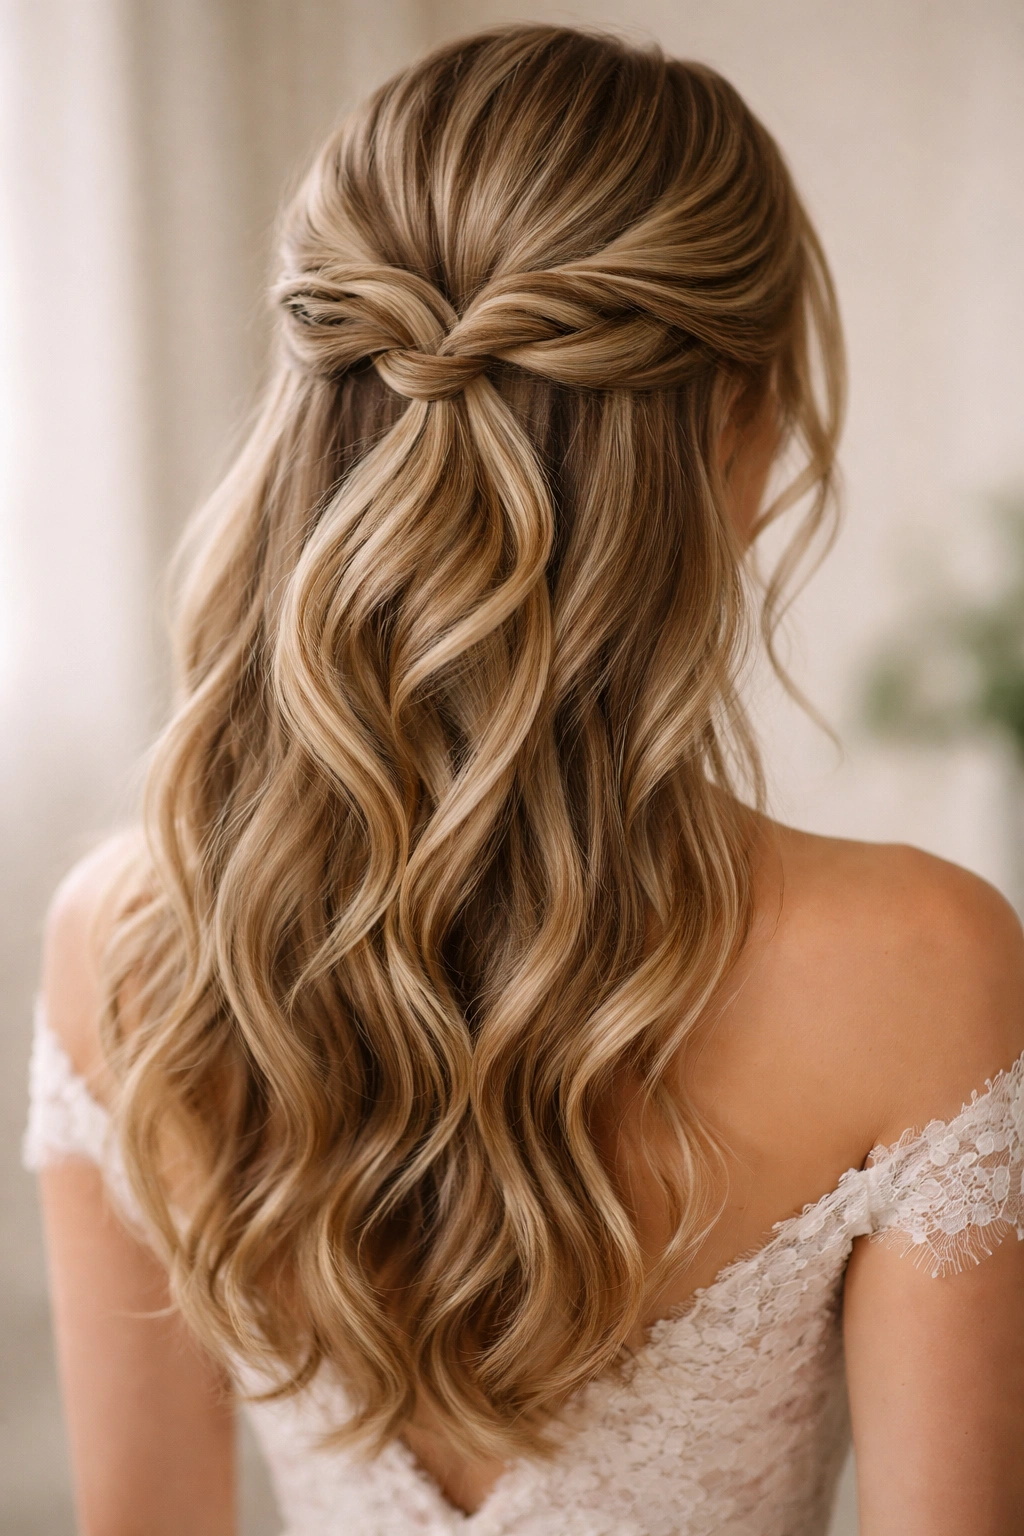
1. The Twisted Rope Half-Up With Pearl Pins
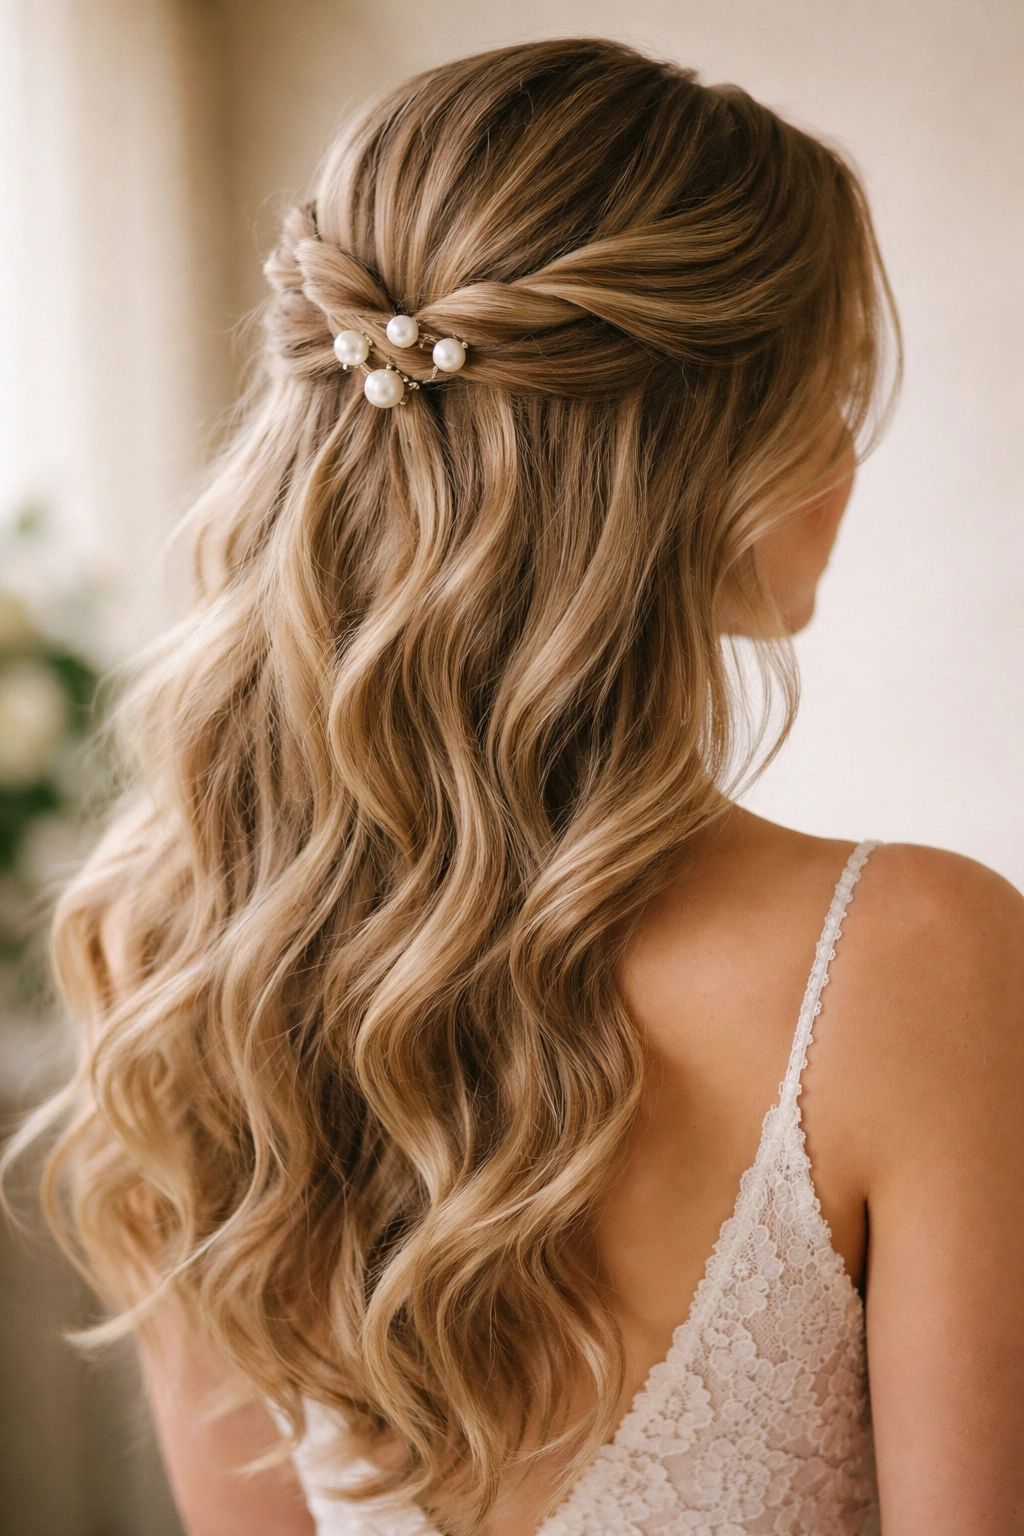
This style showcases the timeless appeal of twisted sections pulled back from the face and secured at the crown. You start with full waves throughout your hair, then take a generous section from each side of your face and twist them as you bring them toward the back. The twisted pieces interlock at the crown, where you secure them with delicate pearl or jeweled pins that catch the light beautifully.
What Makes This Style Sing
The twisted rope technique creates an intricate, intentional look that photographs gorgeously in profile while still showing off the waves cascading down your back. The pearl pins add a subtle sparkle that feels refined rather than over-decorated, making it perfect for both morning and evening celebrations.
Styling Tips for Success
- Curl your hair into loose waves using a curling iron or wand, letting them cool completely before styling so they hold through the day
- Use a texturizing spray on damp hair before curling to give waves more grip and longevity
- Keep the twisted sections slightly loose and imperfect—over-tight twists look modern rather than romantic
- Secure the twists first with bobby pins at the crown, then add pearl pins on top for a layered, dimensional look
Best For
Fine to medium hair that holds waves well; ceremonies with classic or vintage-inspired aesthetics; brides who want an accessible style that doesn’t require elaborate styling.
2. The Curved Velvet Ribbon Half-Up
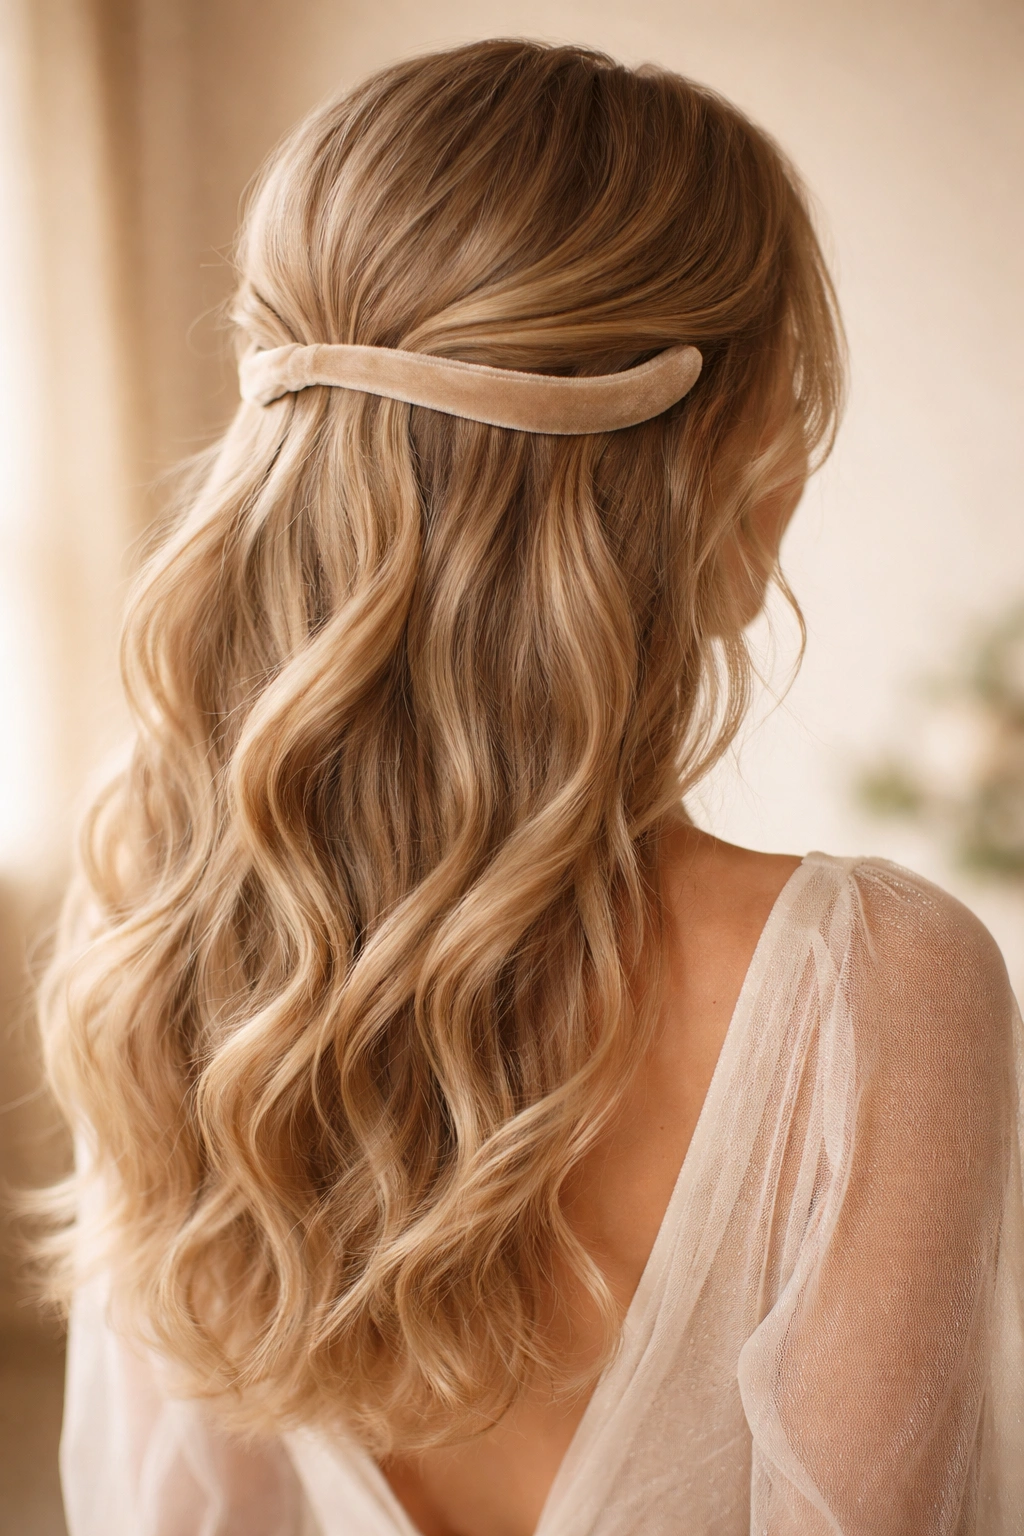
Imagine soft waves swept back and anchored with a luxurious velvet ribbon that curves gracefully across the back of your head. This style brings a decidedly romantic, feminine energy. The waves flow freely down your back while the ribbon does the heavy lifting of securing the half-up section, adding texture and luxury through the ribbon itself rather than intricate pinning.
Why Velvet Works Wedding Magic
Velvet ribbon feels tactile, photographs beautifully in still images and video, and adds an intentional design element that makes the style feel less accidental and more thought-through. A dusty rose, sage green, or blush velvet ribbon pairs naturally with nearly every wedding aesthetic from rustic to romantic to modern.
How to Execute It Flawlessly
- Create loose waves using a large-barrel curling iron or by braiding damp hair overnight and finger-combing out the braids in the morning
- Section the hair for your half-up from ear to ear across the crown, making sure you have enough volume at the base to anchor the ribbon securely
- Use clear bobby pins to secure the half-up section, then wrap the velvet ribbon around the base and tie it in a bow at the back
- Let a few face-framing waves escape naturally around your cheeks and temple—this softens the overall look and creates movement
Best For
Romantic, bohemian, and vintage-inspired weddings; any hair texture that holds waves; couples planning outdoor celebrations where ribbon movement adds visual interest.
3. The Low Half-Up With Interlaced Braid

This variation places the half-up significantly lower—at the nape of the neck rather than at the crown—and incorporates a delicate braid that interlaces through the gathered section. It’s sophisticated without reading as overly formal, and it suits brides who want their hair to feel a bit more relaxed and less structured than traditional half-ups.
The Technique Breakdown
Start with soft, tousled waves. Create two small Dutch or French braids on either side of your head, beginning near your temples and braiding downward. Gather the hair at the nape where the braids meet, interlacing the braid tails through the gathered section before securing everything with bobby pins. The result is a design that looks intricate from the back but feels effortless and organic.
Pro Tips for This Style
- Use a dry shampoo or texturizing spray before braiding to give your hair more grip and prevent slipping
- Make your braids slightly loose and irregular—tight, perfect braids read as too formal for a romantic aesthetic
- Don’t pull your half-up section too tight; it should feel gathered but not strained
- Secure with several bobby pins placed horizontally to distribute the weight and prevent tugging on your scalp throughout the day
Best For
Medium to thick hair; weddings with relaxed elegance or bohemian themes; brides who plan to move around a lot during their ceremony and reception.
4. The Cascading Waves With Delicate Clips
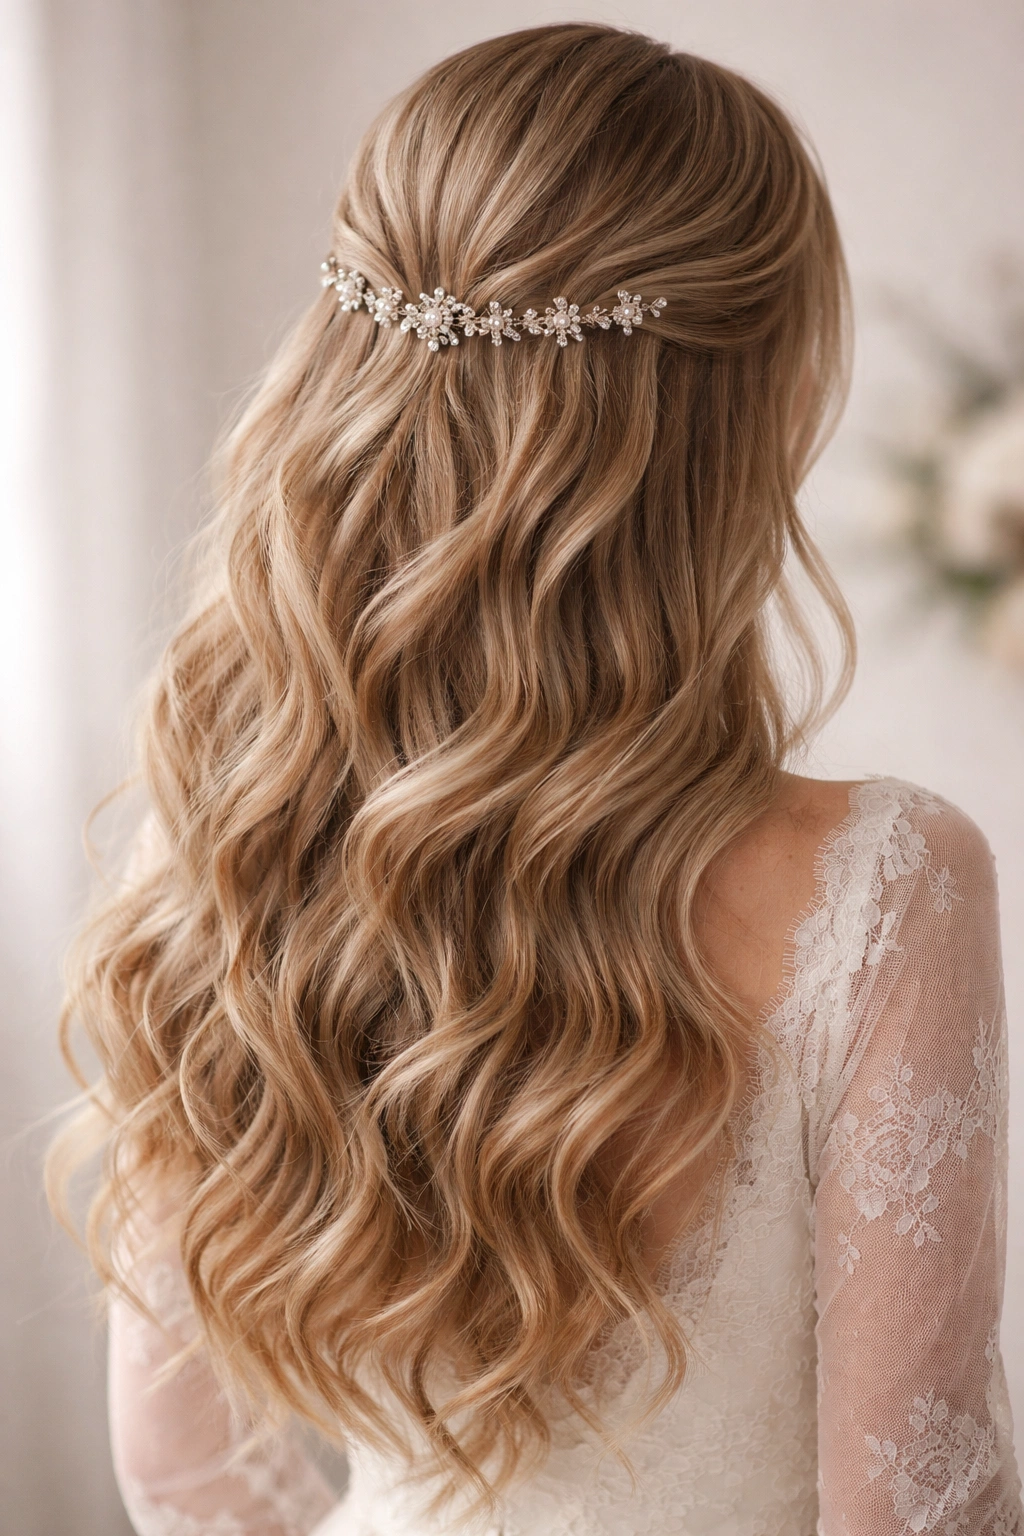
Sometimes the most impactful half-ups are the subtlest ones. This style features waves that flow freely down your back with small, elegant clips positioned strategically to create the illusion of a gathered half-up section without actually pulling hair back tightly. The clips sit just above where a traditional half-up would gather, creating a visual anchor point.
Why This Approach Wins
If you have fine or delicate hair that doesn’t hold traditional pinning well, or if you want maximum movement and volume, clips offer a brilliant solution. They create the aesthetic of a half-up without the tension, and they’re incredibly easy to adjust or remove if you want to transition to fully down hair for the reception’s dance portion.
Selection and Placement
Choose clips in finishes that match your overall aesthetic—pearl, silver, gold, or even tortoiseshell work beautifully. Position them in a slightly staggered line across the back of your head where your half-up would naturally gather, rather than in a perfectly symmetrical row. This asymmetry looks more intentional and less costume-like.
Best For
Fine, delicate, or textured hair; any wedding aesthetic; brides who want flexibility to change their style during the celebration without pulling out bobby pins.
5. The Double-Twisted Crown With Loose Waves
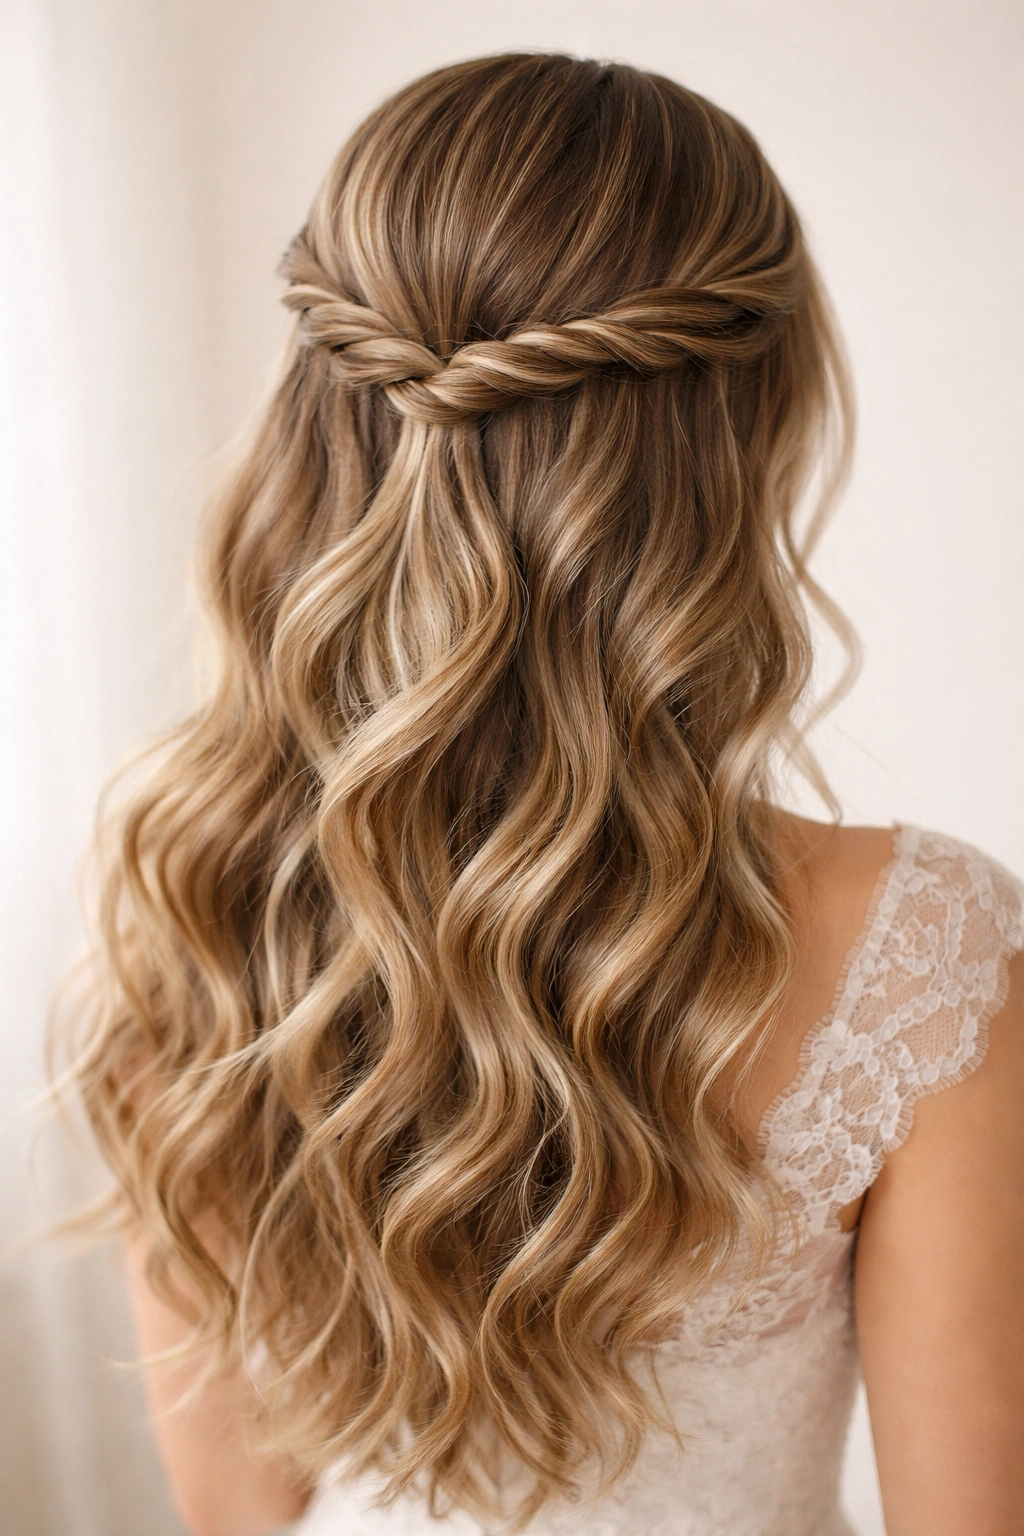
This regal variation incorporates two twisted sections that spiral around your head like a crown before meeting at the back. Each twist begins at a different side temple and curves around the back of your head before the two twists interlock at the nape. The rest of your hair cascades in lush waves below.
Building the Twisted Crown
Start with soft, voluminous waves created with a curling iron or overnight braiding method. Create your first twist beginning near your right temple, twisting as you move back and around your head toward the nape. Repeat from the left side, twisting in the opposite direction so the two twists create a balanced frame. Secure the interlocking point with bobby pins, then add a jeweled comb or clip for polish.
What Makes It Photography Gold
The interlocking twists create an architectural element that’s visually interesting from multiple angles—front, back, and sides all photograph beautifully. It reads as romantic without being overly fussy, and the crown effect feels celebratory and special without being costume-y.
Best For
Medium to thick hair with good body; classic or romantic wedding aesthetics; brides comfortable with a slightly more elaborate styling process.
6. The Textured Half-Up With Volumizing Spray
Focus on creating seriously textured, slightly undone waves throughout your hair, then gather the top section back into a relatively loose, casual half-up secured with a simple elastic or clear clip. This style celebrates imperfection and movement, making it ideal for couples planning outdoor or relaxed wedding celebrations.
The Texture Is Everything
The magic of this style lives in the preparation. Use a sea salt spray before you wave your hair to add grit and hold. Blow-dry your waves with your head tilted to one side, then the other, creating volume from the roots. When you gather the half-up section, make sure there’s texture and slight messiness to it—overly smooth half-ups look dated and stiff.
Securing Without Losing Texture
Use a textured elastic (velvet or cloth rather than shiny) or a decorative clip rather than tight bobby pins that might flatten your waves. Leave some softer wisps around your face and temple to frame your features and add movement.
Best For
Any hair type, particularly thick or naturally wavy hair; outdoor, garden, or bohemian-themed weddings; brides who prefer an effortless, undone aesthetic.
7. The Braided Halo With Wavy Layers Below
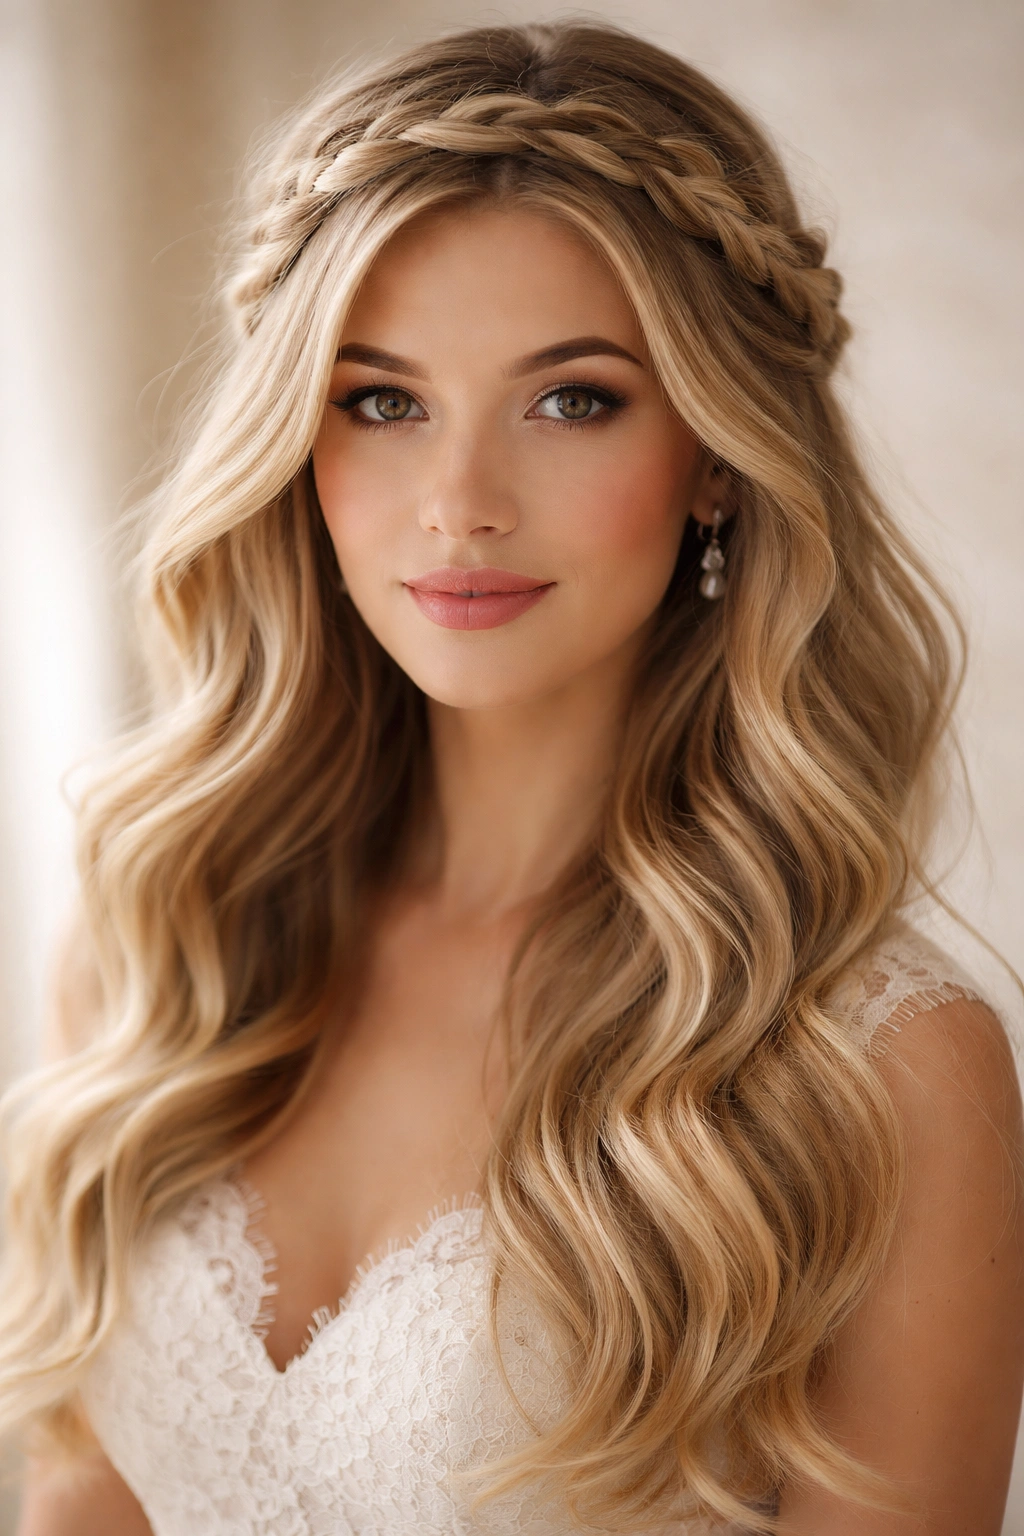
Create a Dutch braid that begins at one temple and wraps around the back of your head like a halo crown, ending at the opposite temple. The braid itself creates the gathered effect of a half-up while your hair below flows in soft waves. This combines the security and design detail of a braid with the movement and romance of a half-up.
The Halo Braid Technique
Part your hair down the center or slightly off-center. Beginning at one temple, create a Dutch braid (braiding underneath rather than over) that curves around the back of your head. As you braid, incorporate small sections of hair as you move backward, creating a halo effect. End the braid at the opposite temple and secure it with bobby pins that are hidden beneath the braid.
Pro Styling Moves
- Make your braid slightly loose and chunky rather than tight and small—it’s more romantic and photographs better
- Gently pull the sides of your braid outward to create additional width and texture after you’ve secured it
- Create waves below the braid using a curling iron, wand, or overnight braiding method
- Leave small wisps of face-framing hair down for softness
Best For
Any hair length and type; romantic, bohemian, or garden-party weddings; brides who want the security of a braid with the romance of movement.
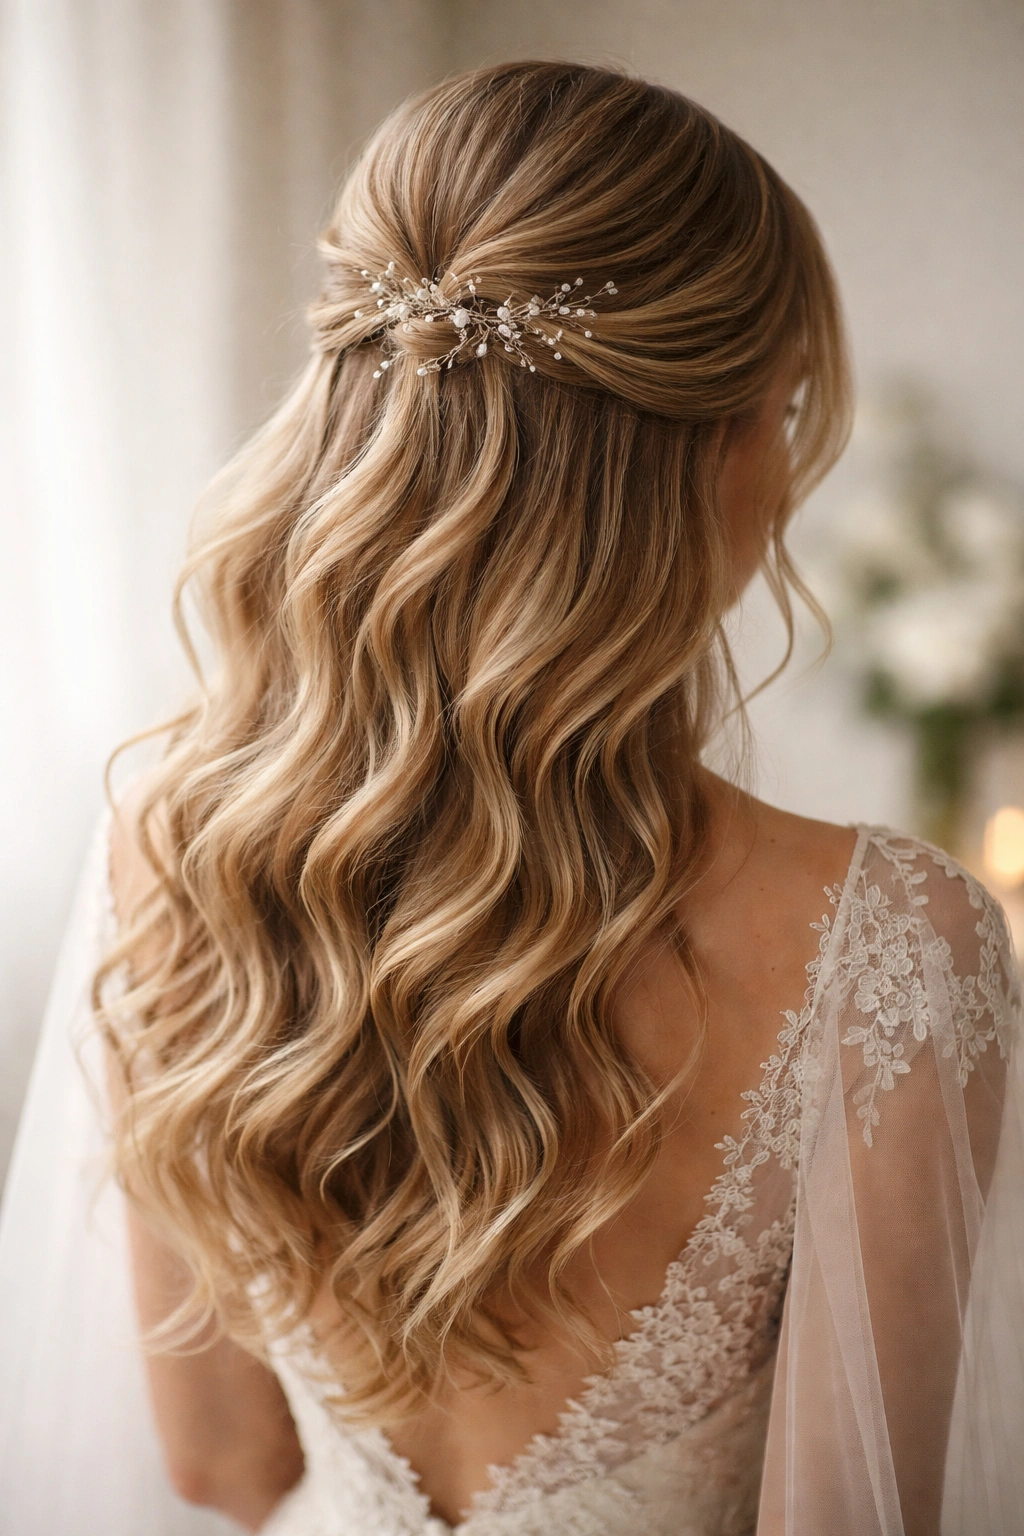
8. The Half-Up With Floating Flowers
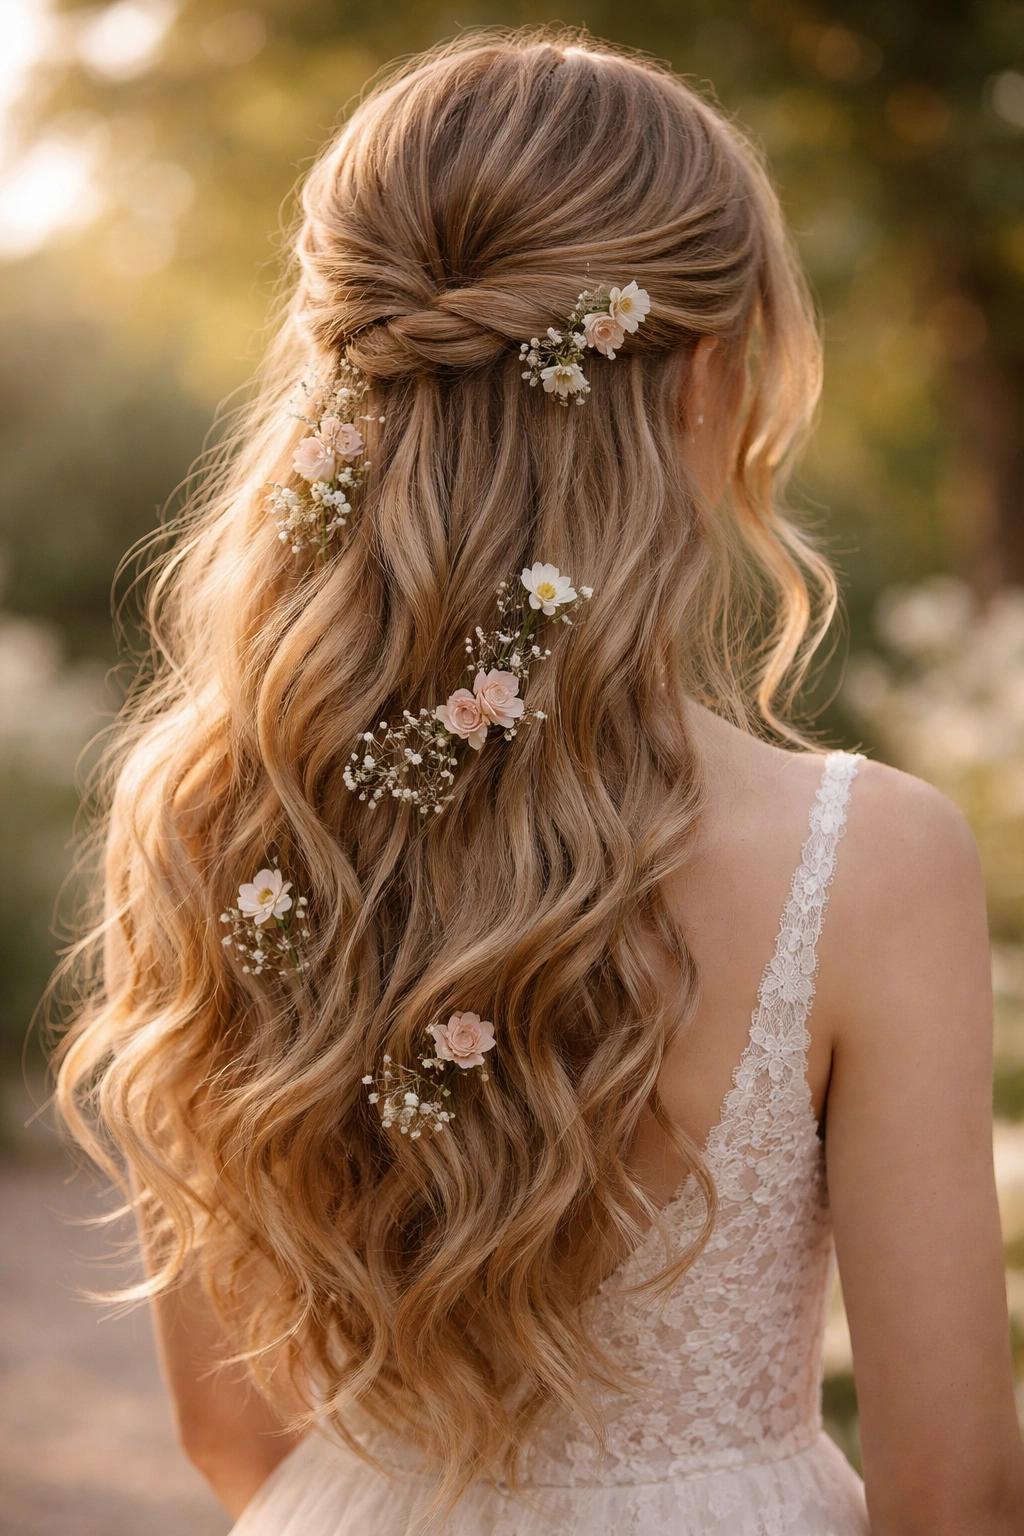
Gather the top section of your hair into a half-up secured at the crown with bobby pins, then weave fresh or faux flowers throughout the back section of your hair—not arranged in a tight bouquet, but scattered loosely as if floating among the waves.
Flower Selection and Placement
Choose flowers that complement your bouquet or your wedding’s color palette. Ranunculus, peonies, baby’s breath, and eucalyptus all work beautifully and photograph wonderfully against wavy hair. Secure each small cluster with a bobby pin hidden at the base, spacing them throughout the back section of your hair so they appear organic and floating rather than arranged.
Making Flowers Last Through the Day
If using fresh flowers, ask your florist which varieties hold up best in hair—some wilt quickly, while others stay fresh for hours. Consider faux options for absolute longevity, particularly if you’re planning a long ceremony or have a lengthy photo session. Wire individual stems so you can position them exactly where you want them.
Best For
Garden or floral-themed weddings; spring or summer celebrations; any hair type; brides who want a romantic, ethereal aesthetic.
9. The Side-Swept Half-Up Wave
Rather than gathering hair at the back or crown, sweep the top section of your hair to one side and secure it with bobby pins or a clip. The gathered section sits more at your temple than at the back of your head. Your waves cascade across your opposite shoulder, creating an asymmetrical, dynamic look.
Asymmetry as a Design Element
This style suits brides who want movement, drama, and a slightly more modern interpretation of the half-up. The one-sided gathering means your hair has room to move and flow rather than being divided equally. It photographs beautifully from certain angles and feels distinctly bridal without being predictable.
Styling for Maximum Impact
- Create loose, beautiful waves throughout your hair before gathering
- When you sweep your half-up section, gather it slightly loosely so wisps can escape and softness is preserved
- Use bobby pins in your hair color to secure so they’re invisible
- Leave your face completely clear on the swept side so your features and makeup show beautifully
Best For
Any hair length and type; modern or fashion-forward weddings; brides comfortable with asymmetrical, dramatic styling; occasions with lots of movement and dancing.
10. The Twisted Half-Up With Piecey Waves
Create prominent, defined waves throughout your hair using a curling iron or wand, keeping them slightly more structured than soft and blended. Then twist a section from each side of your face and gather them at the crown, securing with bobby pins. The “piecey” quality of the waves—each wave visible and individual rather than soft and blended—creates a style that’s polished and intentional.
Creating Piecey Waves
Use a one-inch barrel curling iron and curl sections around the iron, letting each section cool completely before releasing. This creates waves with defined dimension. Don’t brush or finger-comb them out—let them maintain their structured form. The result is waves that feel vintage-inspired and intentional rather than effortlessly tousled.
The Twist Technique
Twist loosely from your temples toward the back, gathering both twists at the crown. Secure with bobby pins, then add a decorative comb, clip, or small headpiece. The piecey waves mean your style reads as updo-adjacent rather than purely down-and-wavy, making it appropriate for formal or evening celebrations.
Best For
Medium to thick hair; formal, elegant, or classic weddings; brides who love a polished, vintage-inspired aesthetic.
11. The Dutch Braid Half-Up With Contrast Color Ribbon
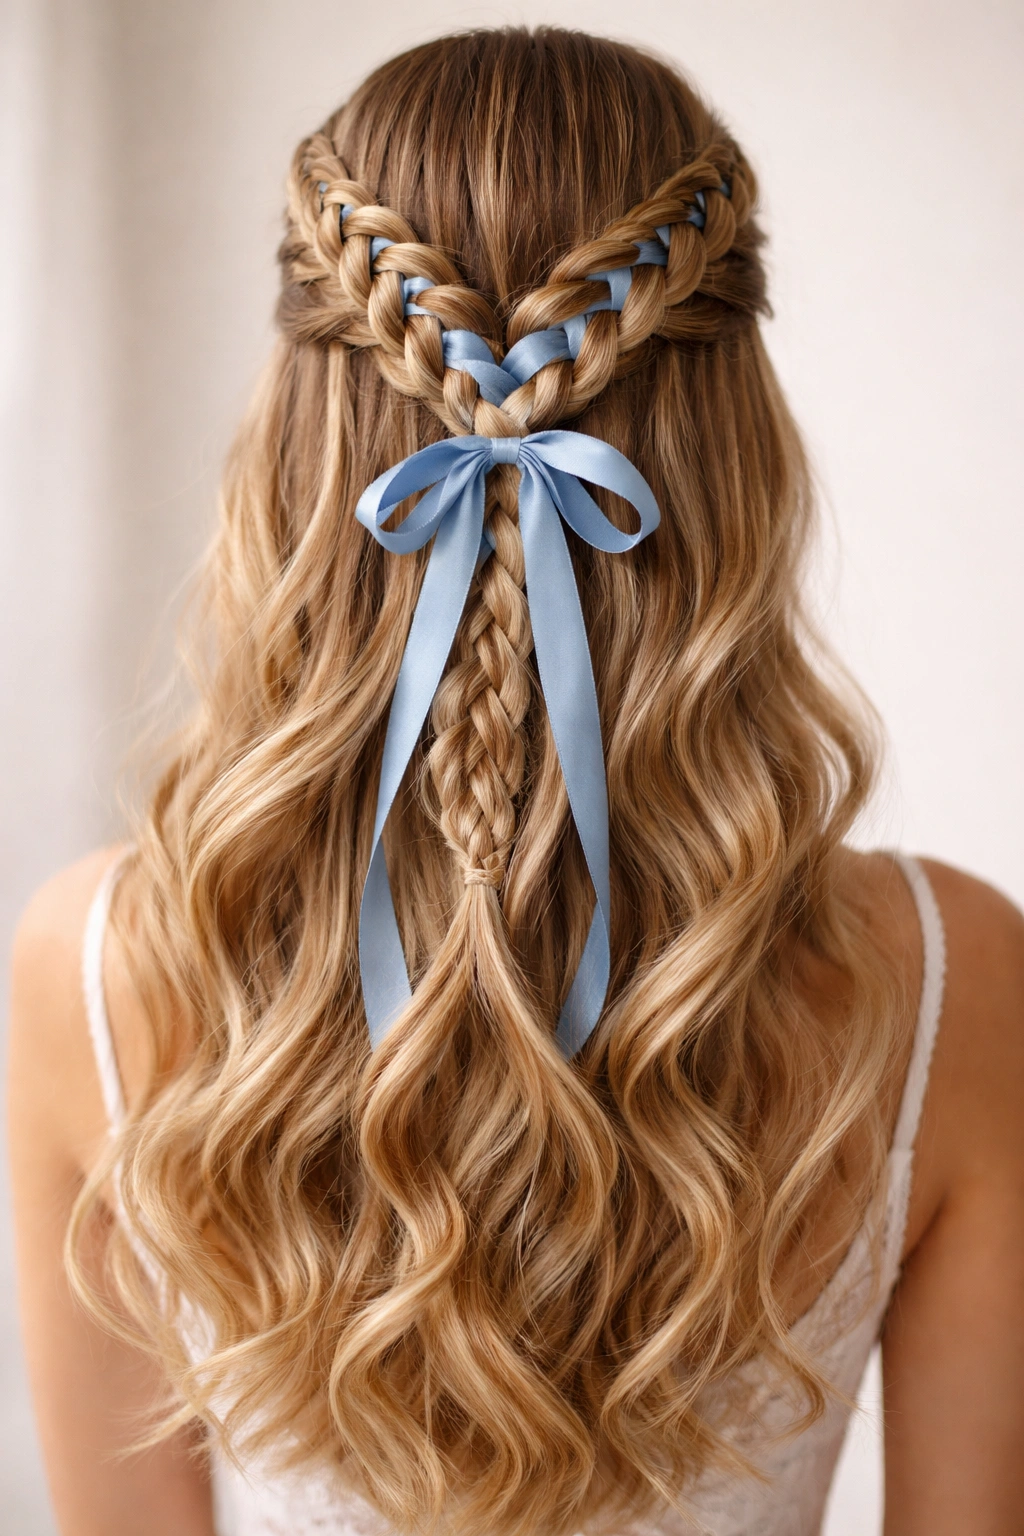
Create two Dutch braids beginning at your temples and trailing down toward your nape, where they interlock and are secured together. Thread a contrasting color ribbon through both braids before securing them—the ribbon weaves in and out, creating visual interest and a pop of color.
Ribbon Selection and Weaving
Choose a ribbon color that contrasts with your hair and complements your wedding palette. Satin, grosgrain, or velvet ribbons work beautifully. After you’ve created and secured your braids, carefully weave the ribbon through the braid sections, creating an over-under pattern that’s visible and intentional. The ribbon becomes part of the design rather than an afterthought.
Why Contrasting Color Works
A metallic gold or silver ribbon through dark hair, or a jewel-tone ribbon through lighter hair, creates a focal point at the back of your head. It photographs beautifully and adds a custom, designed element that makes your style feel uniquely yours.
Best For
Any hair type with enough body to hold braids; weddings with bold color palettes; brides who want a distinctive style that stands out in photographs.
12. The Voluminous Crown Half-Up
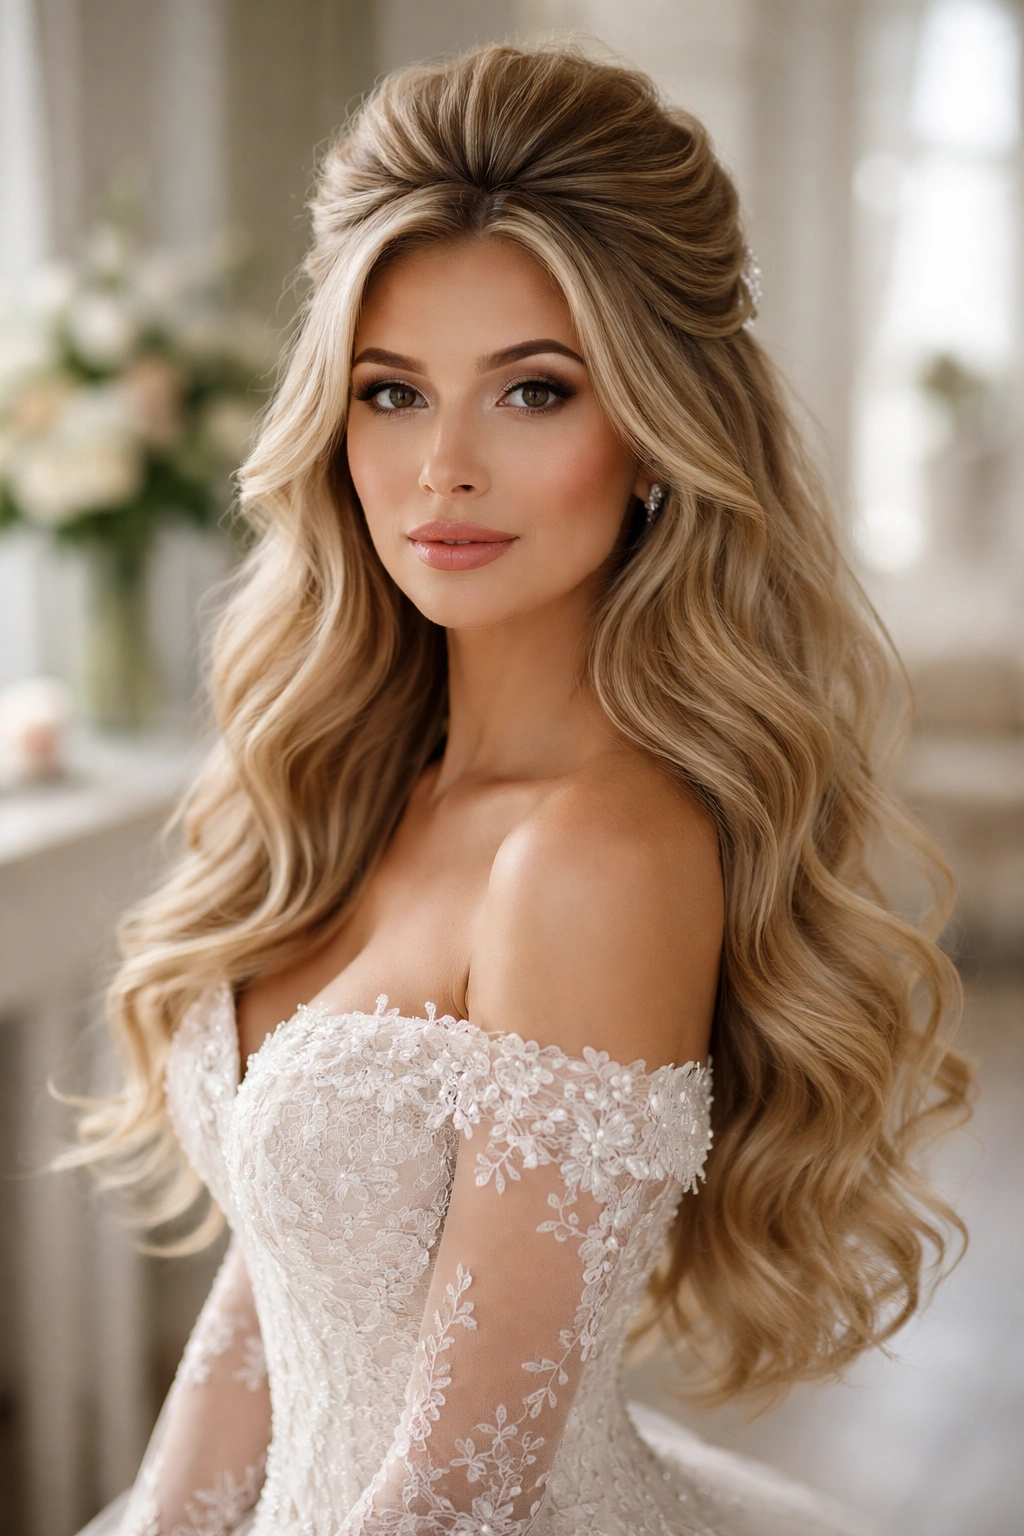
Prioritize volume above all else with this style. Tease and backcomb the crown section of your hair to create significant height, then gather the top section into a half-up at the crown, securing it with bobby pins. The gathered section sits on top of all that volume, creating a style that feels regal and dramatic.
Building the Volume
Use a teasing brush or fine-tooth comb to backcomb the crown section, starting close to your scalp and working upward. Be gentle so you don’t damage your hair, but be generous with the teasing. Smooth the top layer gently with your brush to blend while keeping the volume underneath. This creates a thick, full base for your half-up section.
The Gathered Effect on Volume
When you gather your half-up, it sits on top of all that teased volume, creating a pronounced crown effect. Your waves cascade below, and the overall effect is luxe, full, and highly photogenic. This style suits brides with medium to thick hair particularly well.
Best For
Medium to thick hair; formal, romantic, or glam-inspired weddings; brides who want maximum hair volume and presence.
13. The Half-Up With Looped Twists
Instead of pulling twists straight back, create two twists from each temple and loop them at the back of your head before securing them. The loops create architectural interest and texture while keeping the style romantic and loose.
Creating the Looped Twist
Twist gently from your temple toward the back of your head, then instead of securing the twist straight, create a loop with the twist and secure the loop at the base with bobby pins. You’ll have two loops of twisted hair meeting at the back of your head. Below them, your waves flow freely.
Why Loops Add Dimension
Looped twists create visual depth and interest that straight twists don’t quite achieve. They photograph beautifully from behind and add an element of playfulness without looking juvenile or overly casual. The loops showcase the movement of your hair while maintaining the security of twists.
Best For
Medium to thick hair; romantic or playful weddings; ceremonies with substantial photo time from behind (outdoor celebrations, garden venues).
14. The Half-Up With Scattered Baby’s Breath
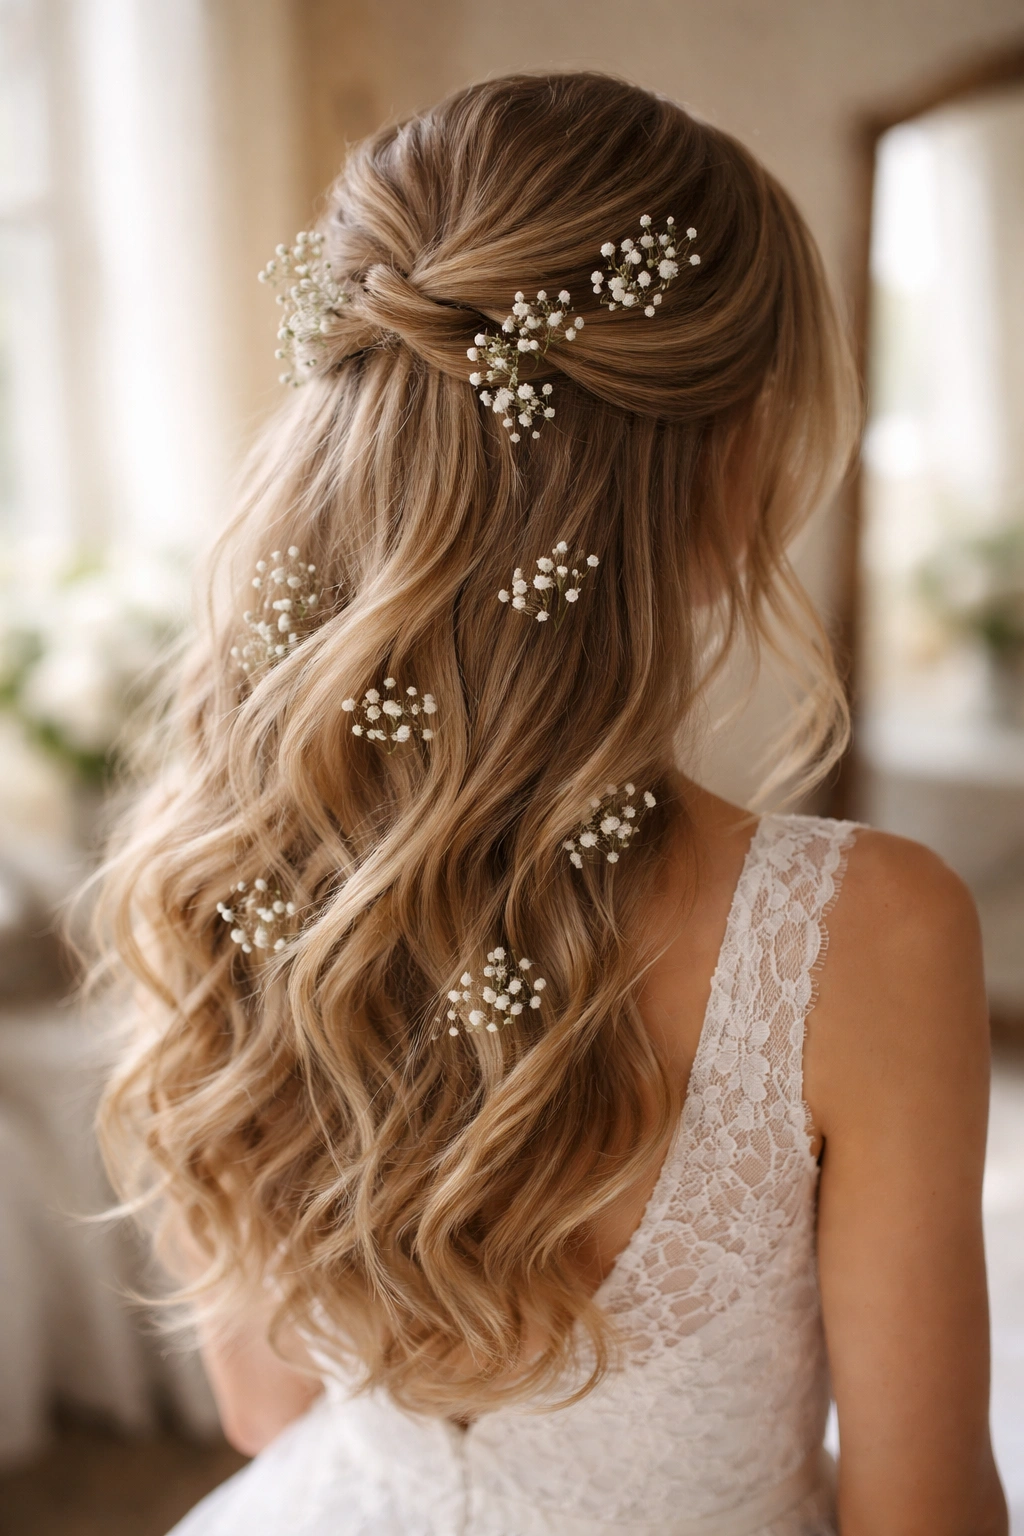
Gather the top section of your hair into a half-up secured at the crown, then weave individual sprigs of baby’s breath throughout your waves—scattered, organic, and light. Baby’s breath is delicate, romantic, and incredibly photogenic, and it’s available year-round, making it a reliable choice.
Working With Baby’s Breath
Use faux baby’s breath if you’re concerned about longevity, or consult with your florist about fresh options. Secure individual sprigs with tiny bobby pins hidden at the base of each sprig. The idea is that the flowers appear to be floating among your waves rather than obviously attached.
Why Baby’s Breath Works Every Time
There’s something timeless about baby’s breath in wedding hair. It adds delicate femininity, photographs beautifully against any hair color, and doesn’t compete with other design elements in your overall look. It reads as classic rather than trendy, making it a safe choice for any wedding aesthetic.
Best For
Any hair length and type; brides planning any wedding aesthetic; ceremonies with significant photo sessions.
15. The Half-Up With Pearl-Studded Elastic
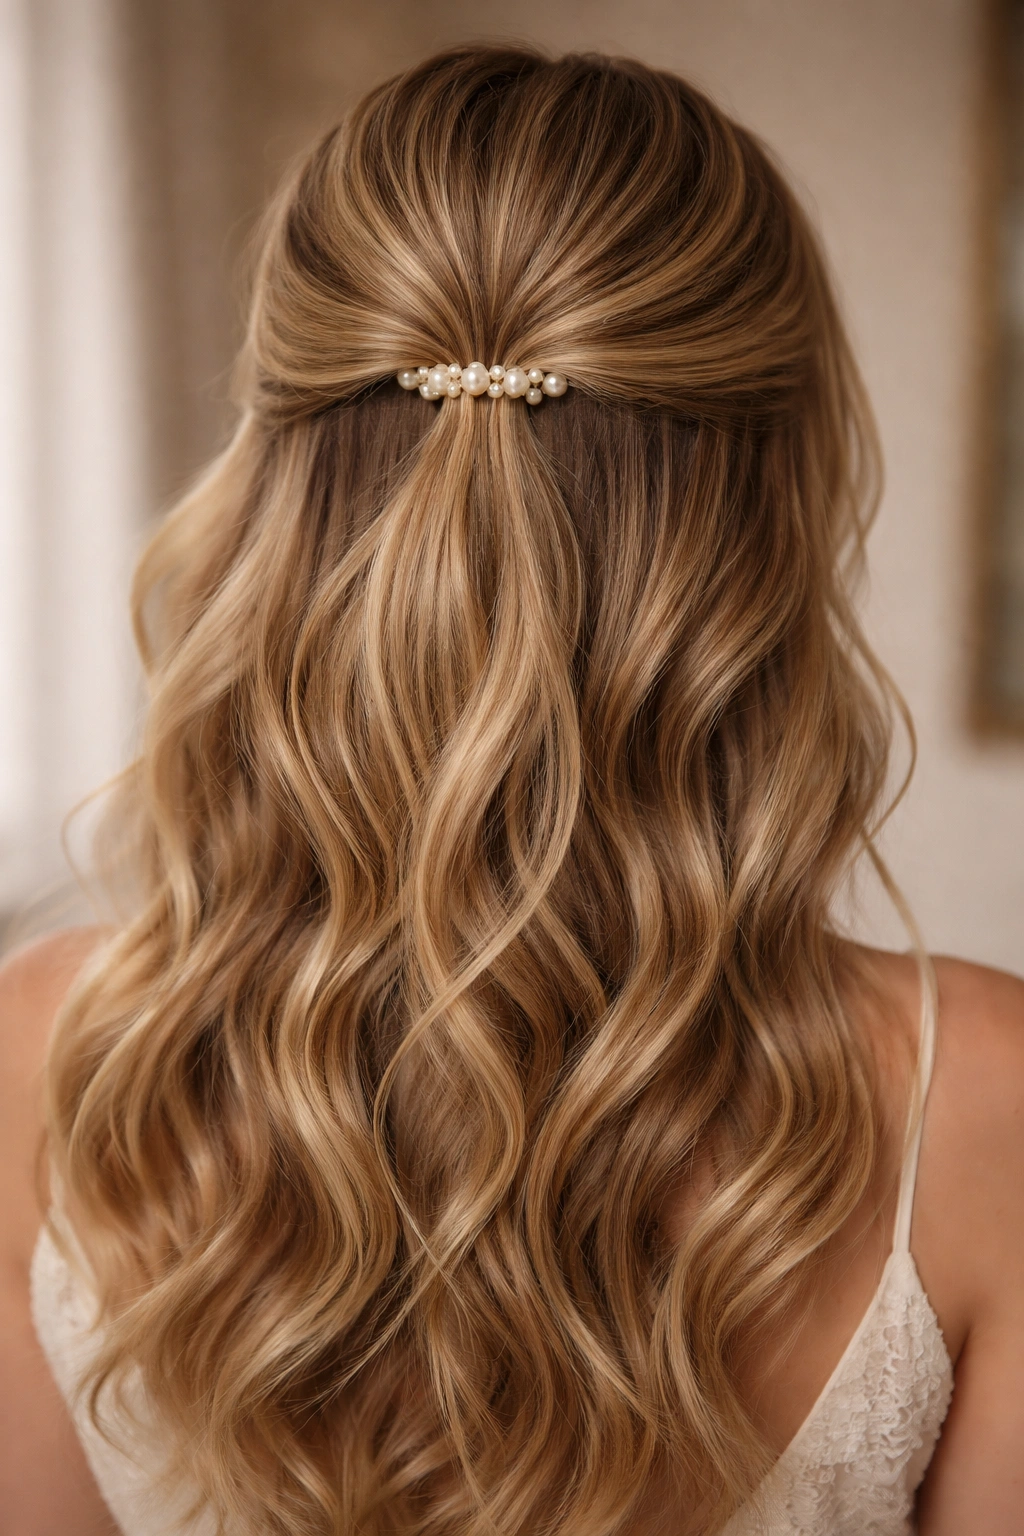
Create soft waves throughout your hair, gather the top section into a half-up at the crown, and secure it with a pearl-studded elastic—an elastic wrapped with small faux pearls or beads that adds subtle glamour without overwhelming the style.
Choosing Your Pearl Elastic
Look for elastics with small, delicate pearls or beads that match your hair color and skin tone. A champagne pearl elastic works on nearly every hair color, adding warmth and subtle sparkle. The pearls should be small enough that they don’t overwhelm your hair, and placed closely enough together that they create a continuous shimmer rather than scattered pieces.
The Elegance of Subtle Embellishment
Rather than obvious, chunky hair jewelry, a pearl elastic adds refinement through subtlety. Your hair remains the star, but the elastic adds just enough shimmer to catch light and photographs beautifully. This style reads as elegant and intentional without being over-decorated.
Best For
Any hair type; formal, elegant, or glam weddings; brides who prefer subtle rather than obvious embellishment.
16. The Curved Half-Up With Side Tendrils
Gather your half-up section not in a straight line across your head, but in a curved, slightly off-center configuration. Release some smaller sections from the gathered area to frame your face as soft tendrils on both sides. This creates a style that’s gathered but not contained, with movement around your face.
The Curved Gathering Technique
Rather than creating a straight line across your head and gathering at the back, curve your half-up line slightly toward one side, then gather at a point slightly off-center at the back of your head. This asymmetry creates visual interest. The tendrils around your face add softness and movement that straight half-ups sometimes lack.
Why Tendrils Matter
Face-framing tendrils soften any hairstyle, draw attention to your features and makeup, and add a romantic element that feels less structured and more effortless. They work beautifully for both casual and formal weddings.
Best For
Any hair type; brides who want to emphasize their face and features; romantic or soft wedding aesthetics.
17. The Half-Up With Metallic Hairpins
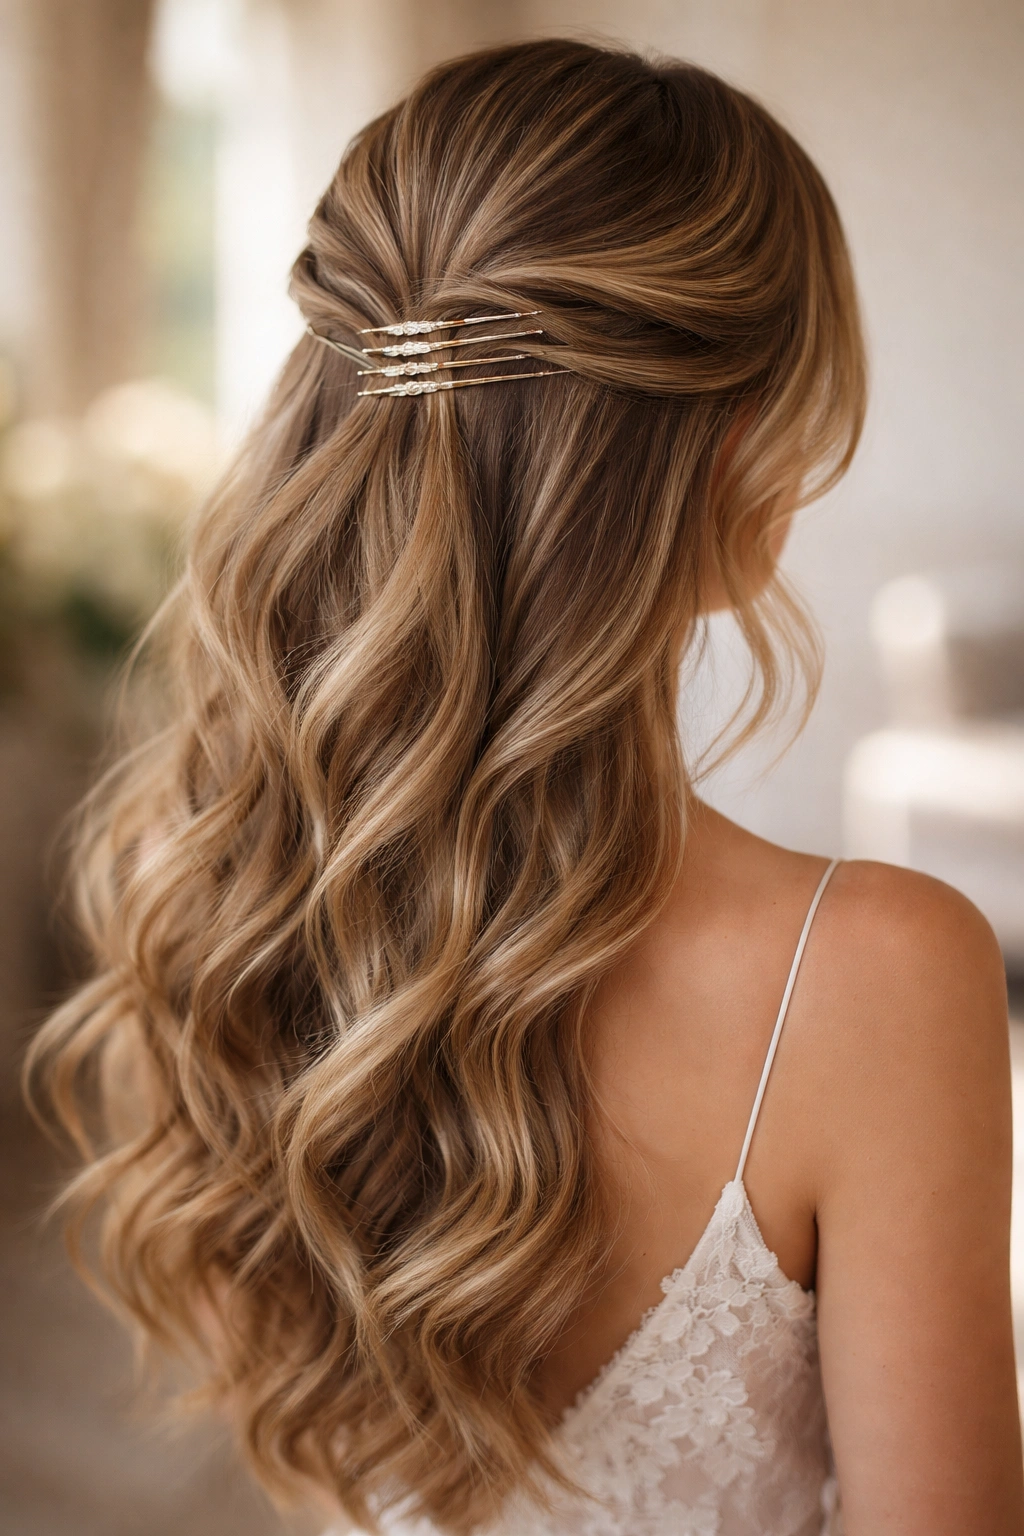
Gather the top section of your hair into a half-up at the crown and secure it using several metallic hairpins (gold, silver, or rose gold) placed visibly and intentionally rather than hidden. The pins become a design element rather than just functional.
Hairpin Selection and Placement
Choose hairpins that suit your aesthetic—delicate and minimal, or ornate and bold. Place them in a slightly staggered line or scattered pattern where your half-up gathers, creating a subtle design at the back of your head. The metallic finish catches light beautifully in photographs and adds a modern, fashion-forward touch.
Modern Meets Romantic
Visible hairpins feel contemporary and editorial rather than traditional, making this style perfect for brides who want a half-up with modern polish. It combines the romance of waves with updated styling sensibility.
Best For
Any hair length and type; modern, fashion-forward, or contemporary weddings; brides who want a style that photographs interestingly from multiple angles.
18. The Half-Up Bubble Braid With Waves
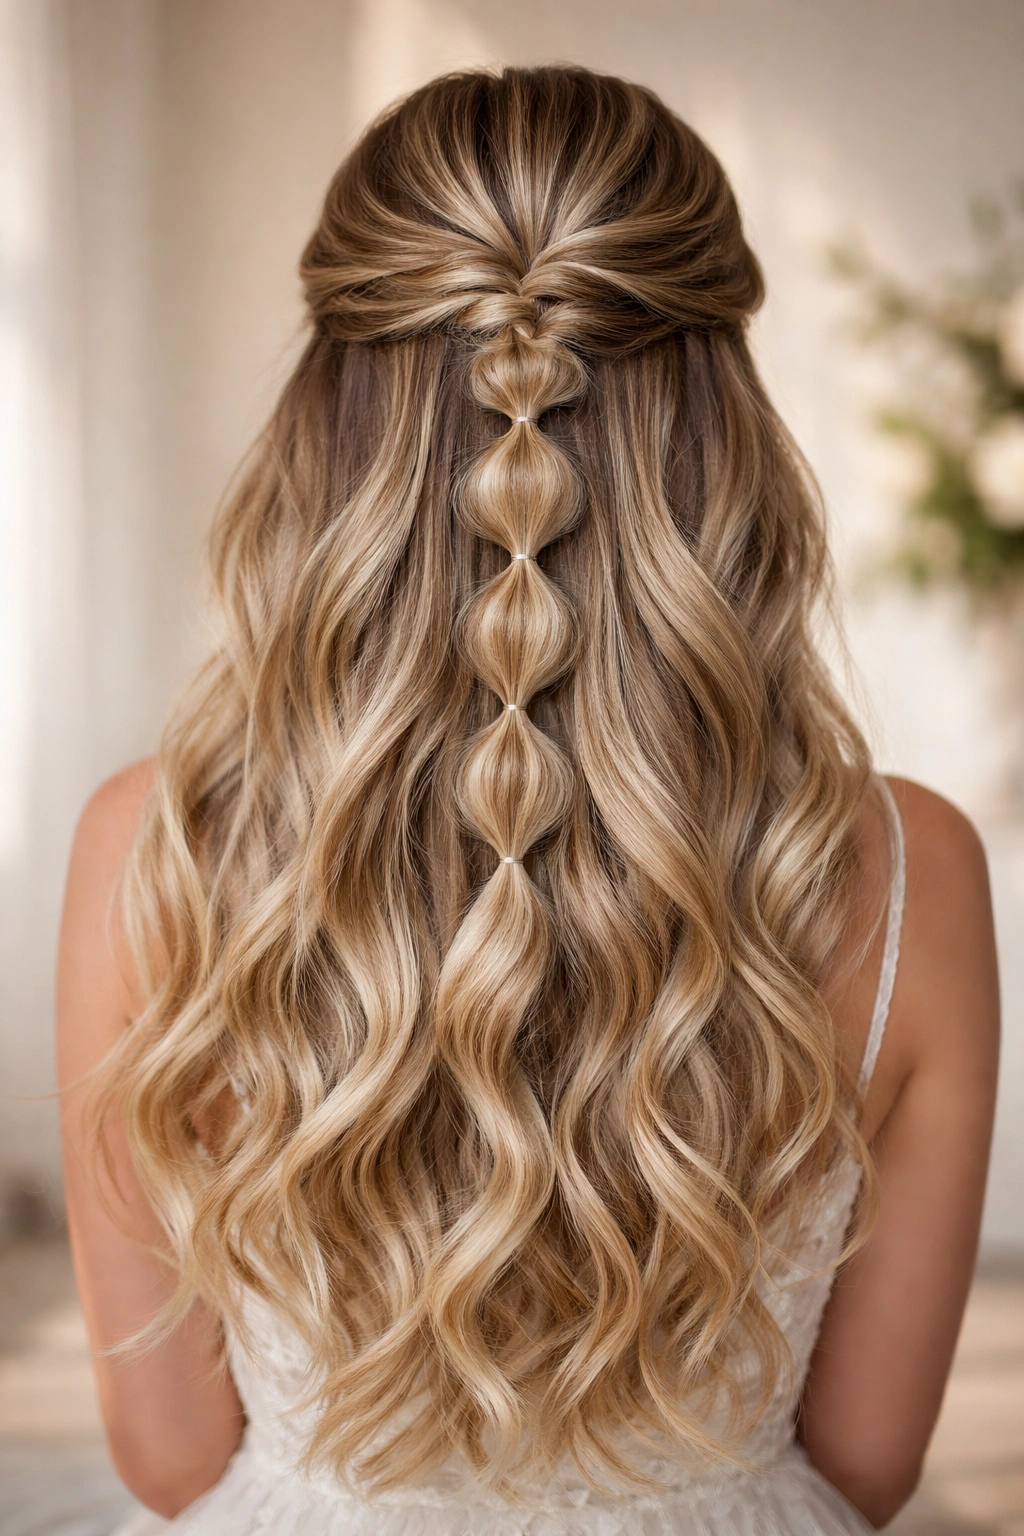
Create a Dutch or French braid beginning at your crown and extending about three-quarters of the way down your head. Then create “bubbles” in the braid by gently pulling out sections and fluffing them, making the braid wider and more textured. Secure the end of the braid with a bobby pin, and let your hair cascade in waves below.
Building Your Bubble Braid
Create your braid loosely to begin with, then once it’s fully braided and secured, gently pull the outer edges of each braid section outward, creating wider, bubblier segments. This technique adds volume and texture to a braid without requiring additional hair or styling steps.
Why Bubble Braids Feel Special
The texture and dimension of a bubble braid create visual interest that a standard braid doesn’t achieve. It reads as special-occasion appropriate while still feeling romantic and soft. The waves cascading below balance the textured braid above beautifully.
Best For
Medium to thick hair; romantic, bohemian, or garden-party weddings; brides who want a braided element without a completely braided style.
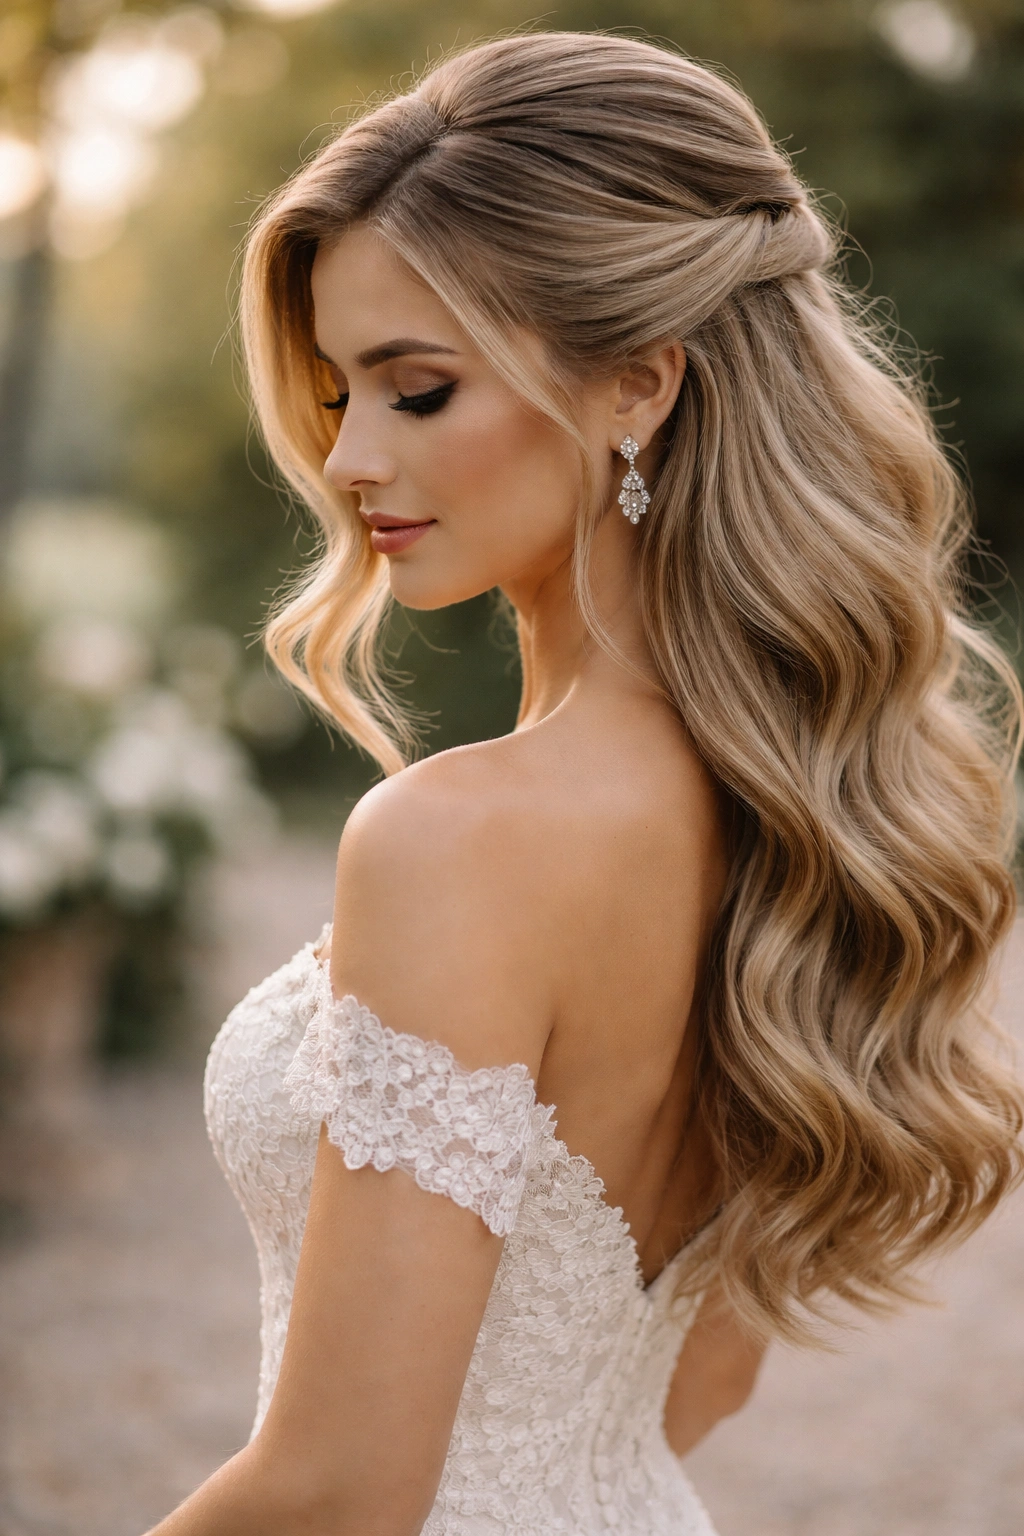
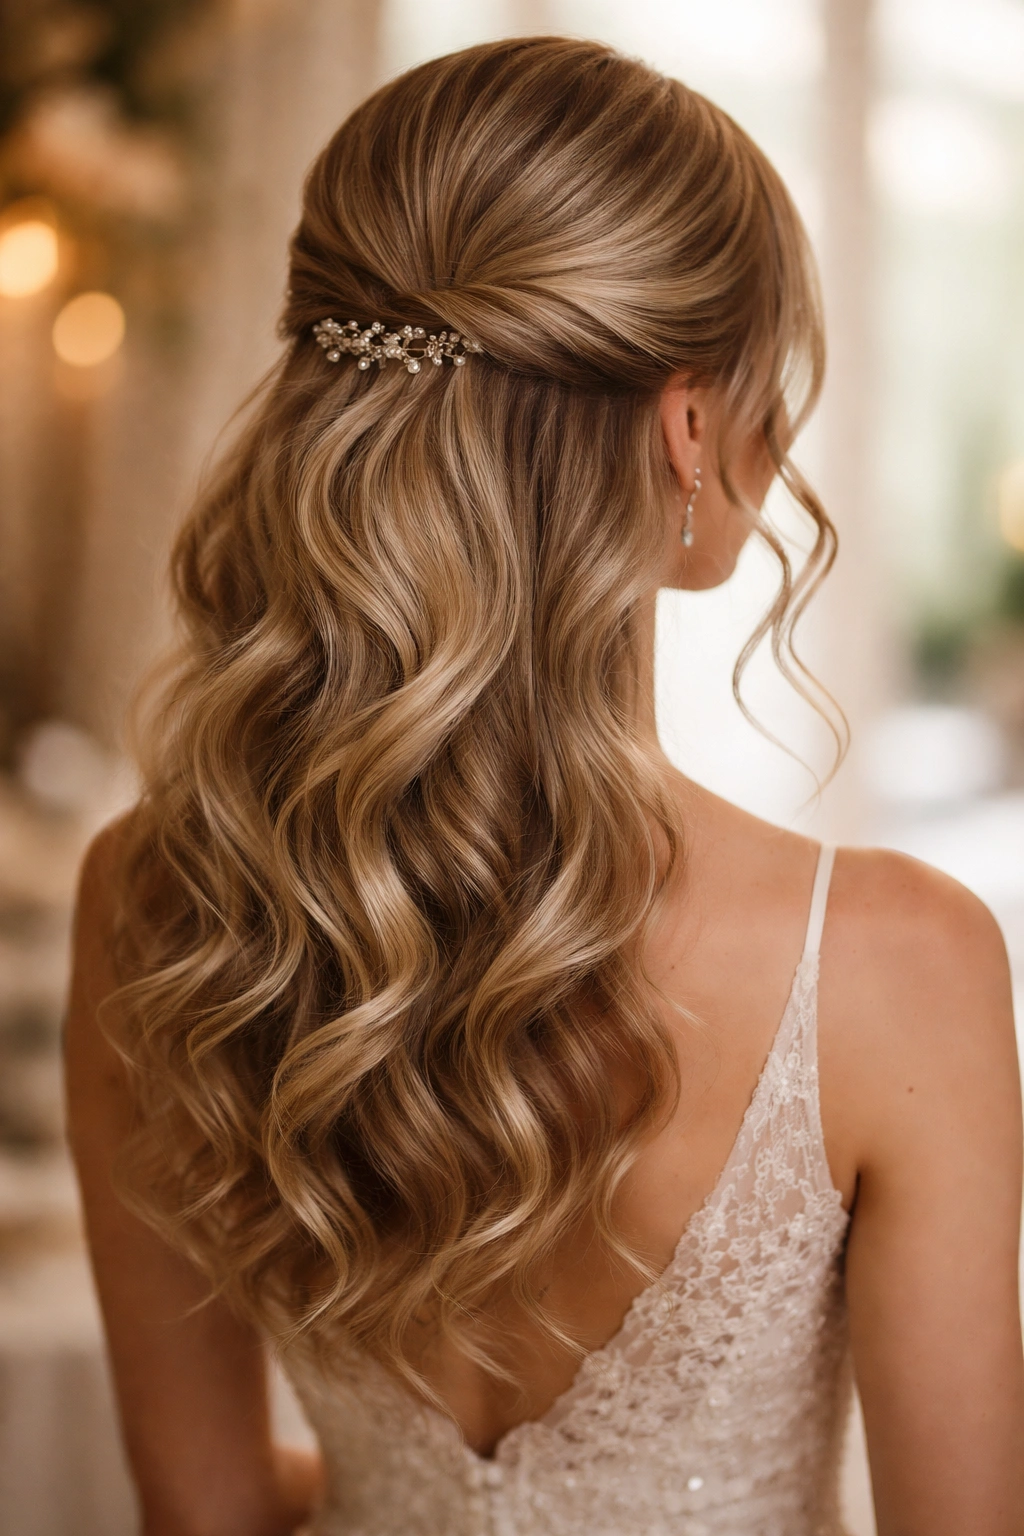
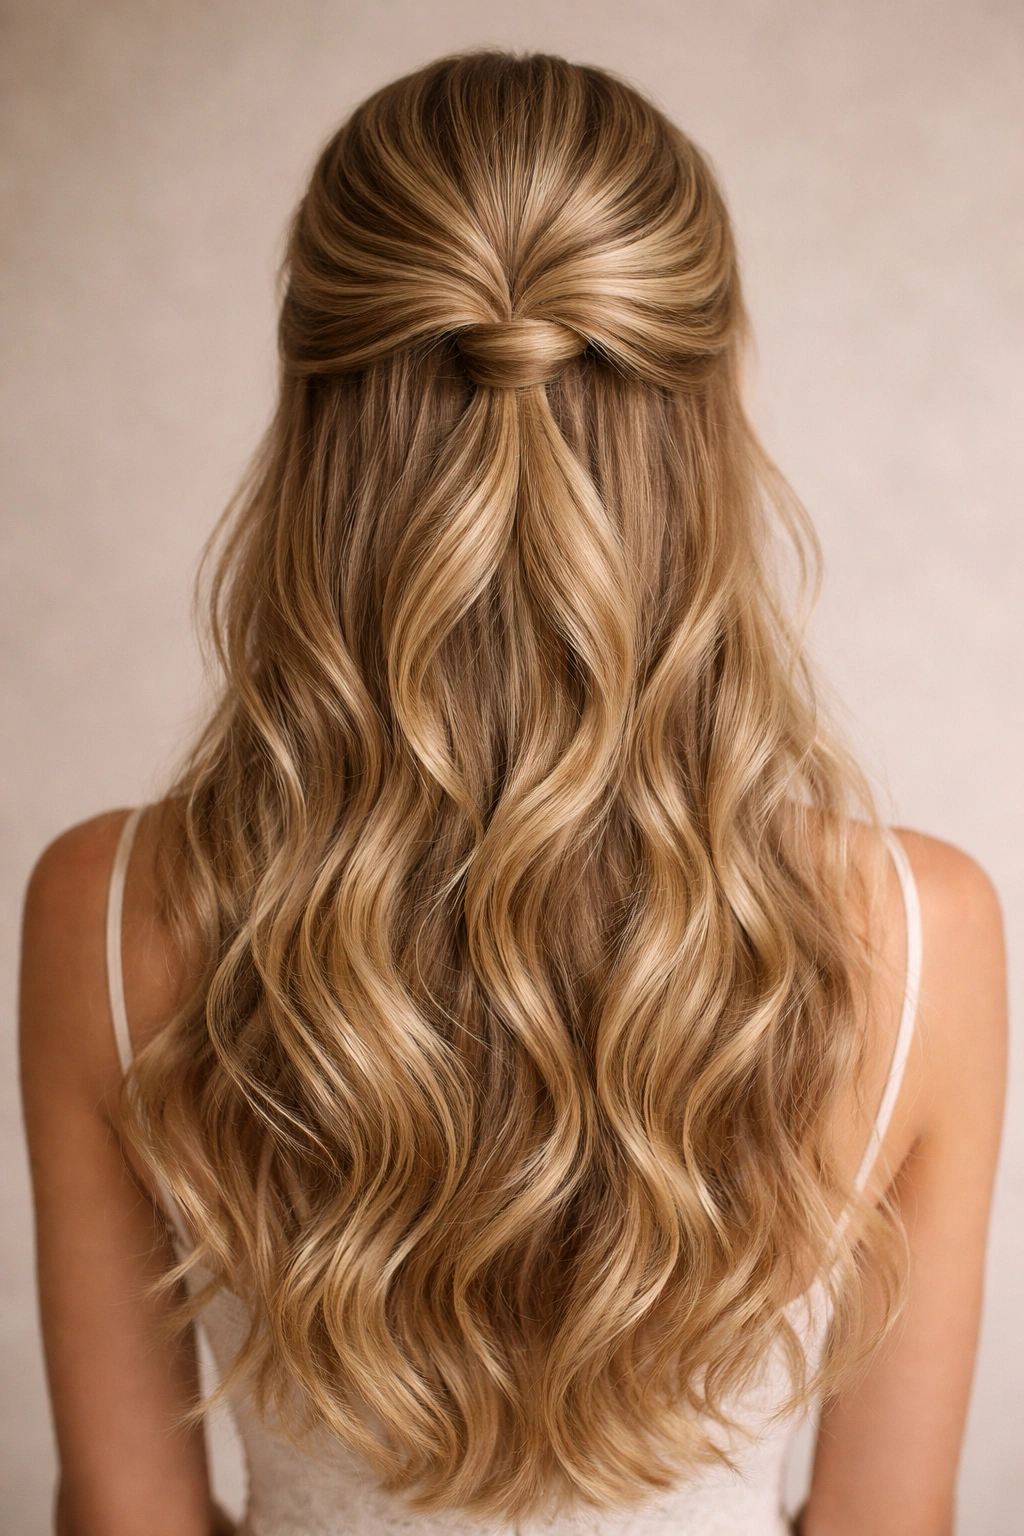
19. The Half-Up With Cascading Back Section

Create soft waves throughout your entire head, then gather the top section into a half-up at the crown secured with bobby pins. Leave the gathered section intentionally slightly loose so pieces can escape and create a cascading effect rather than a tight, controlled line.
The Organized-But-Undone Approach
The key to this style is the tension between structure and softness. Your half-up section is clearly intentional and gathered, but it’s not so tight that it looks controlled or severe. Several strands escape from the gathered section and flow down with the rest of your waves, creating a style that feels romantic and effortless rather than formally arranged.
Why This Works for Photography
The combination of a visible gathered section with cascading, moving hair photographs beautifully. It shows intentionality while maintaining softness, and it suits every wedding aesthetic from bohemian to formal.
Best For
Any hair length and type; weddings of any aesthetic; brides who want a gathered-but-romantic style.
20. The Two-Tier Half-Up With Waves
Create two separate gathering points: one at your crown and one at your nape. Gather a section of hair at your crown and secure it with bobby pins or a clip, then take an additional section of hair and gather it lower, at your nape, securing it separately. This creates a two-tiered effect—two gathered sections rather than one—with waves flowing below.
Building the Two-Tier Effect
Start by gathering your top section at the crown, securing it loosely so you have something to build on. Then, taking fresh hair from the sides and back, create a second gathered section lower on your head. Each should be visible and intentional, creating a cascading effect as you move down your head.
Why Two Tiers Feel Special
This style looks more elaborate and special-occasion appropriate than a simple half-up, but it’s not as tight or formal as a full updo. The two gathering points create visual interest and movement, and it suits longer hair beautifully, allowing for plenty of wave-flow below both tiers.
Best For
Longer hair (shoulder-length and beyond); romantic, formal, or elaborate wedding aesthetics; brides who want their style to feel clearly bridal and special without being an unstructured half-up.
Final Thoughts
A wavy half-up has the remarkable ability to feel both effortless and intentional—romantic without being overdone, styled without looking stiff. Whether you choose something simple and classic or more elaborate and detailed, the key to making any of these styles work beautifully is starting with gorgeous waves and treating them like the foundation they are. Invest in quality curl products, take time to create waves that actually suit your hair type and thickness, and then let the gathering and securing be the finishing touch rather than the foundation.
The beauty of these twenty styles is that each one can be adapted to suit your hair length, texture, and personal aesthetic. A style that feels bohemian with baby’s breath can feel elegant with pearl pins. A style that reads casual with a textured elastic can feel glam with metallic pins. You’re not locked into one approach—these are frameworks for creating something that feels genuinely yours on your wedding day.