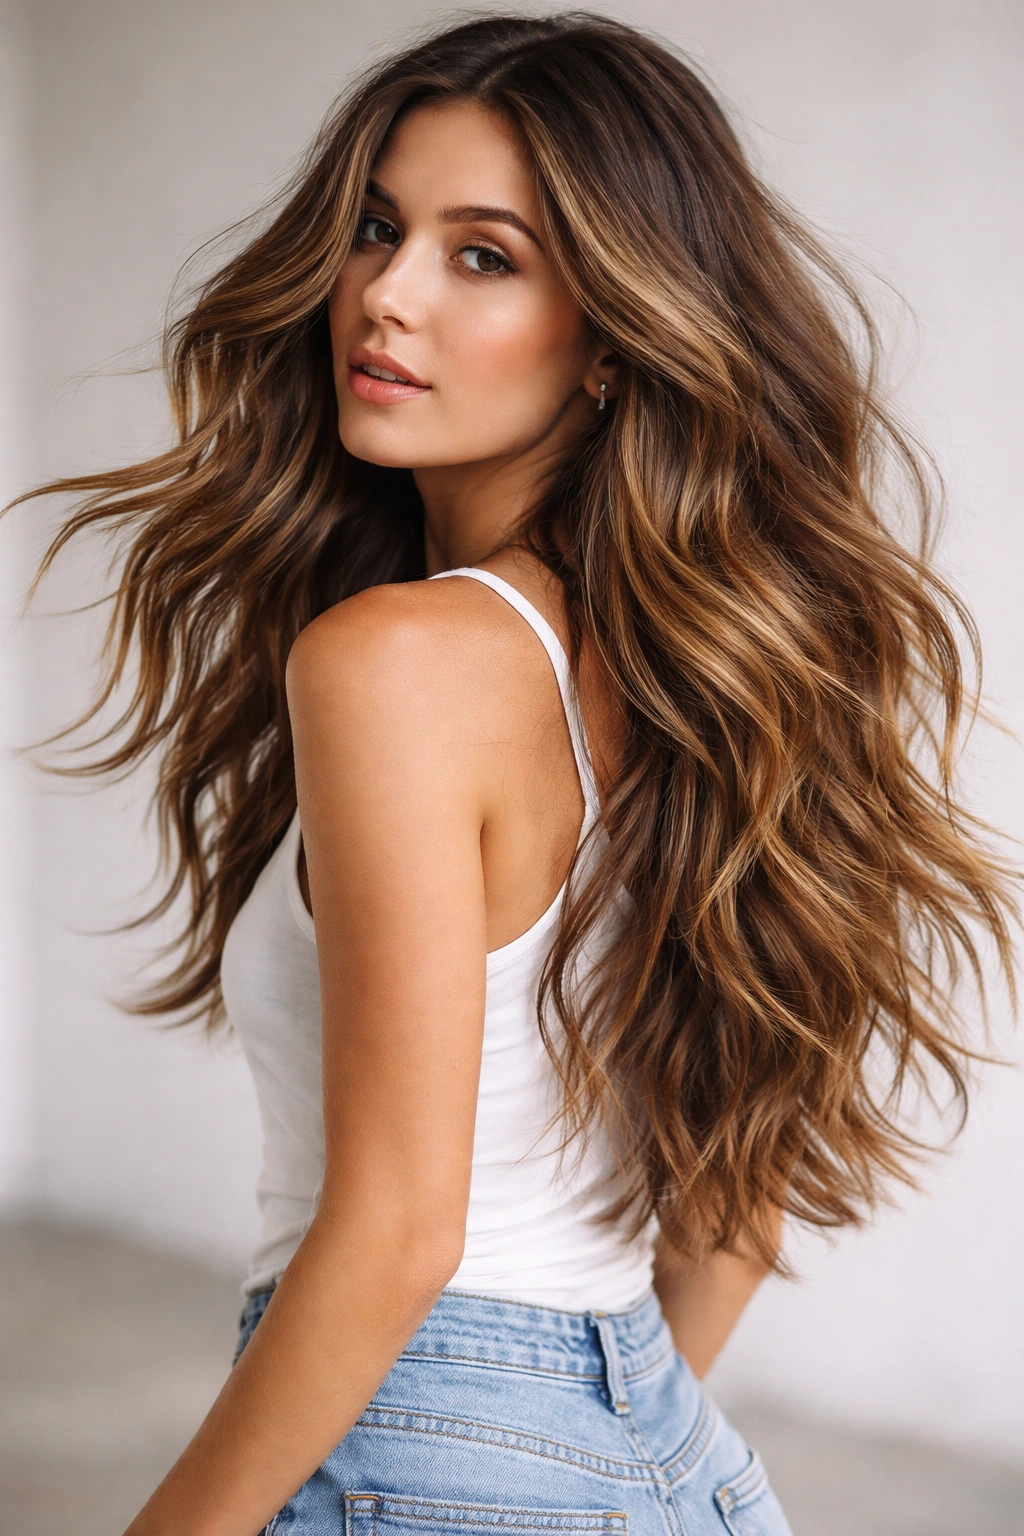
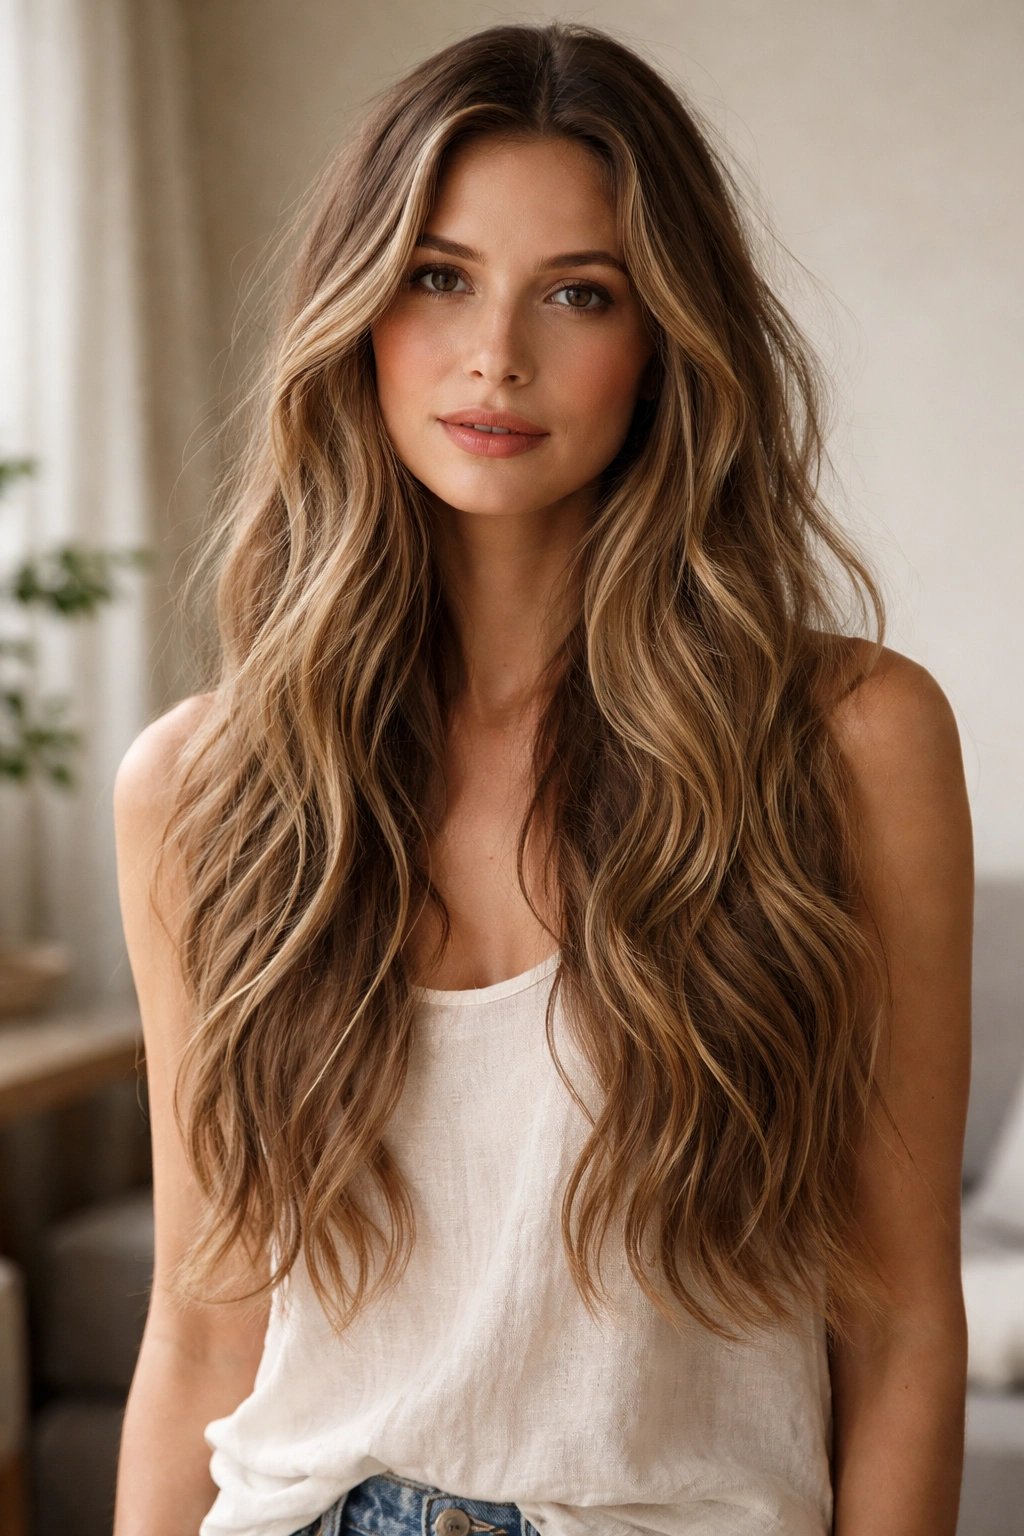
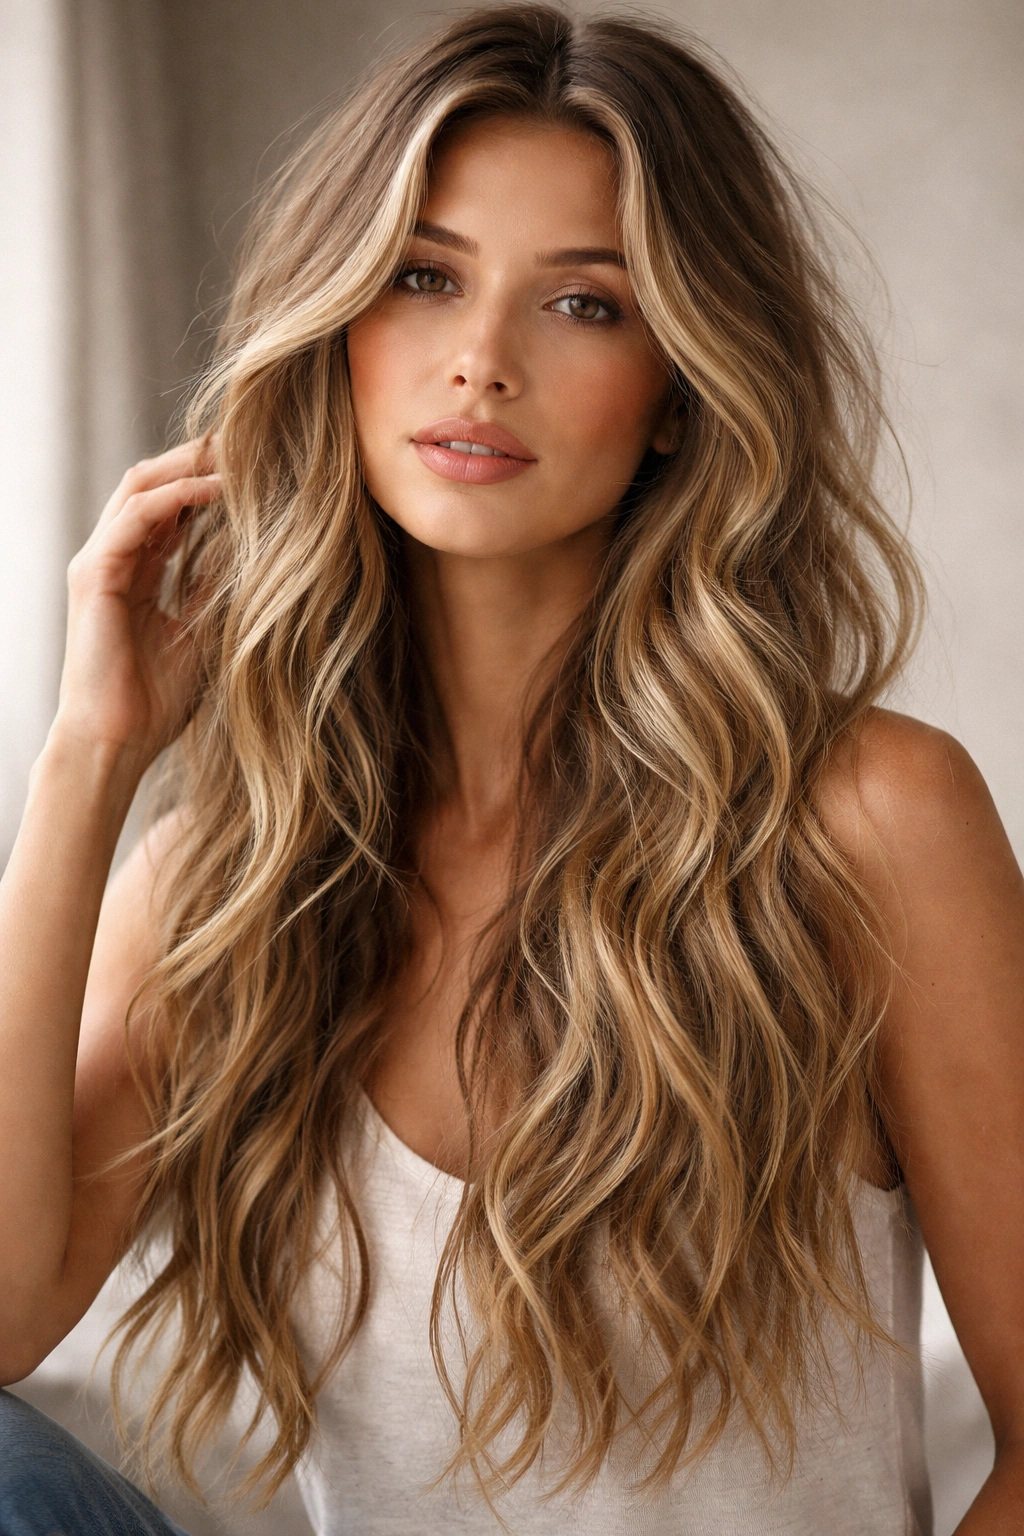
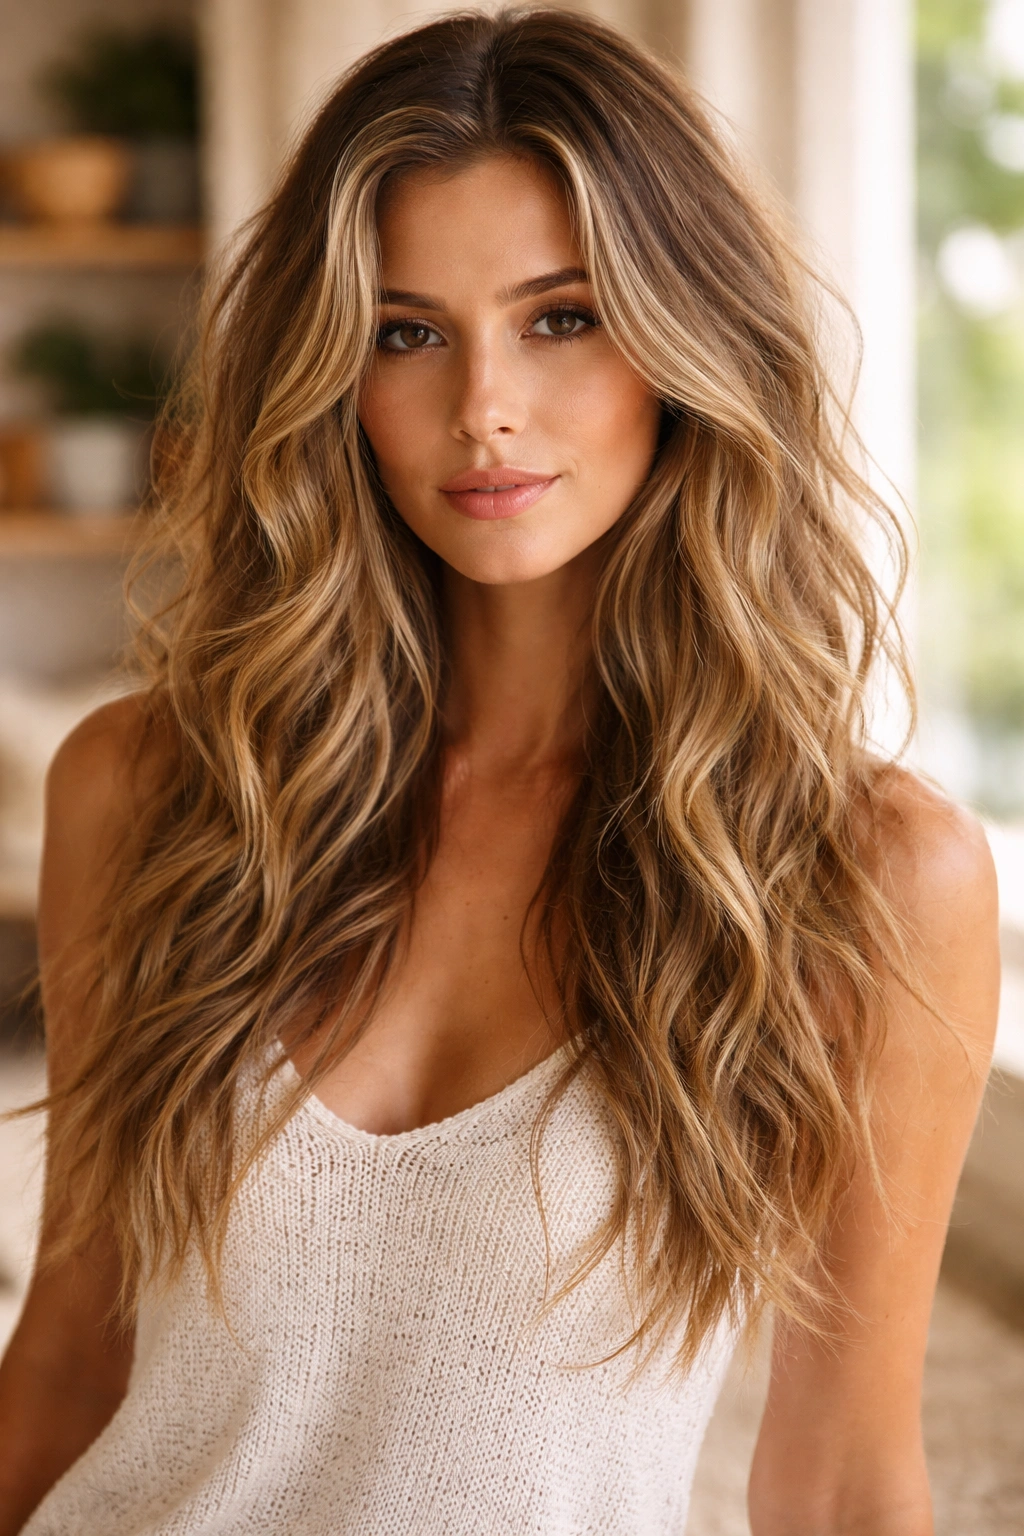
Messy long wavy hair has become the gold standard of effortless elegance. There’s something undeniably appealing about waves that look like they happened naturally—slightly undone, textured, and full of movement—yet still polished enough for any occasion. Whether you’re chasing that beachy, sun-kissed vibe or building texture into your everyday look, messy long wavy hairstyles offer incredible versatility without requiring salon-level precision.
The beauty of this aesthetic is that “messy” doesn’t mean neglected. It means intentional texture, movement that catches light, and a relaxed confidence. These styles work whether you have naturally wavy hair that needs shaping or straight hair that benefits from added dimension. What makes them so popular is their adaptability—the same basic wave can be dressed up for formal events or styled down for casual days, layered with clips or left completely loose, worn with bangs or without, and customized to fit your face shape and lifestyle.
This guide covers twenty distinct takes on messy long wavy styling—from tousled classics to modern variations with shags, curtains, and dimensional coloring. Each style includes the specifics you need: what makes it distinctive, who it suits best, how to achieve it without constant salon visits, and the styling secrets that keep it looking intentional rather than unkempt. You’ll find options for different hair textures, face shapes, and styling commitment levels, so there’s something here whether you love spending time with a curling iron or prefer wash-and-go waves.
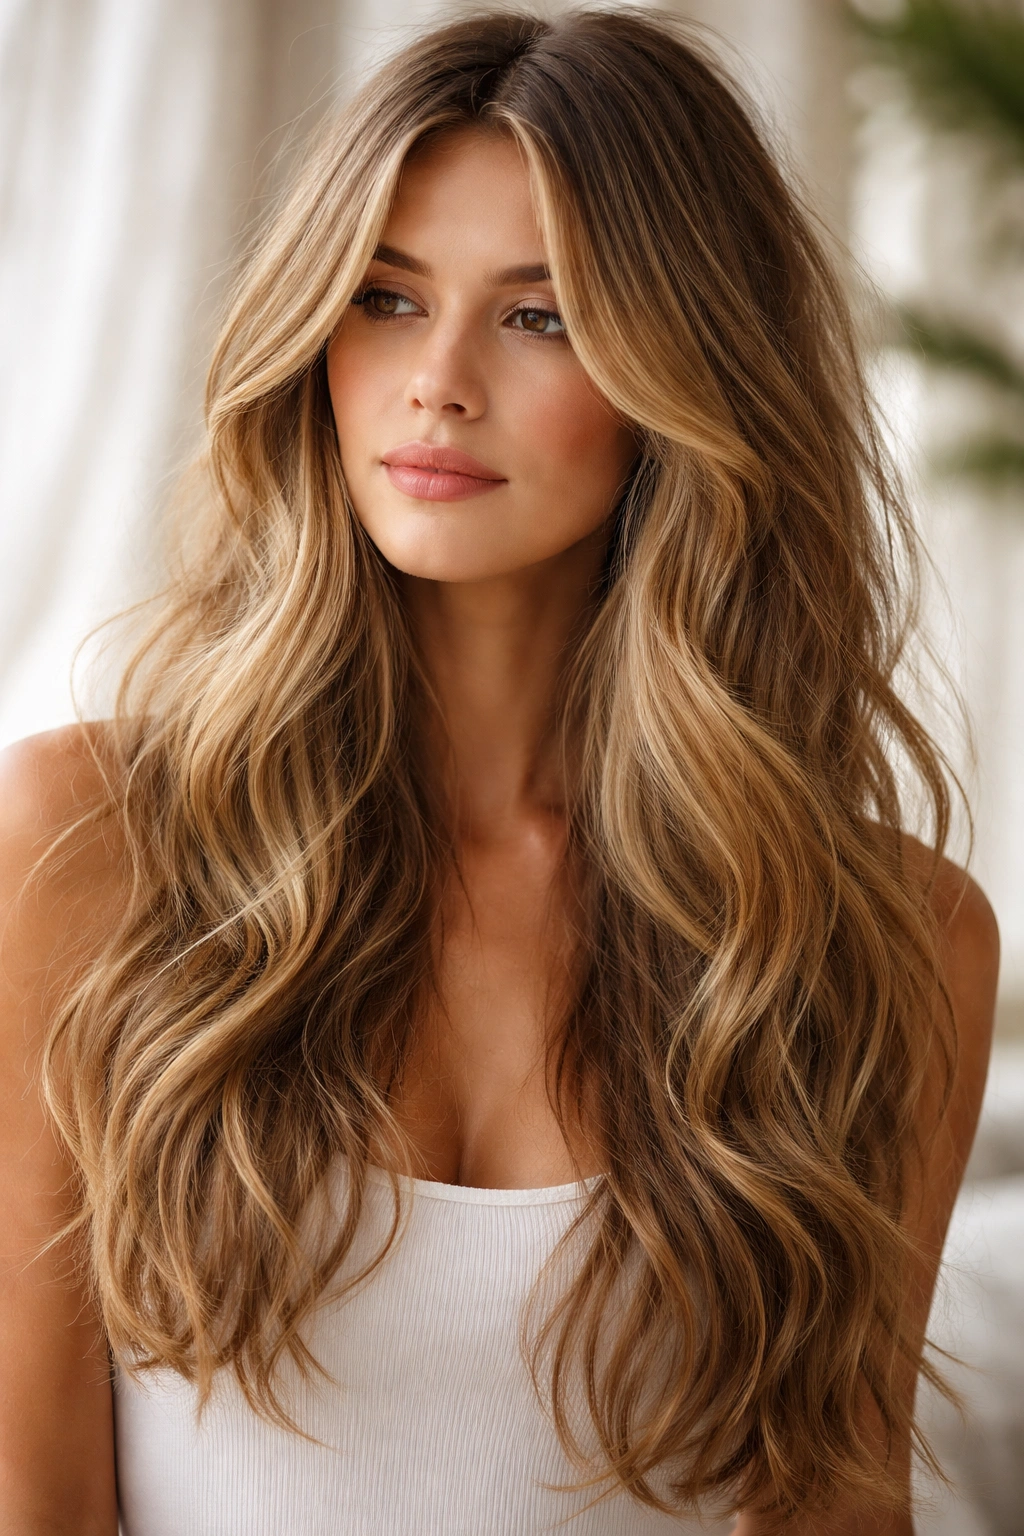
1. The Tousled Beachy Wave
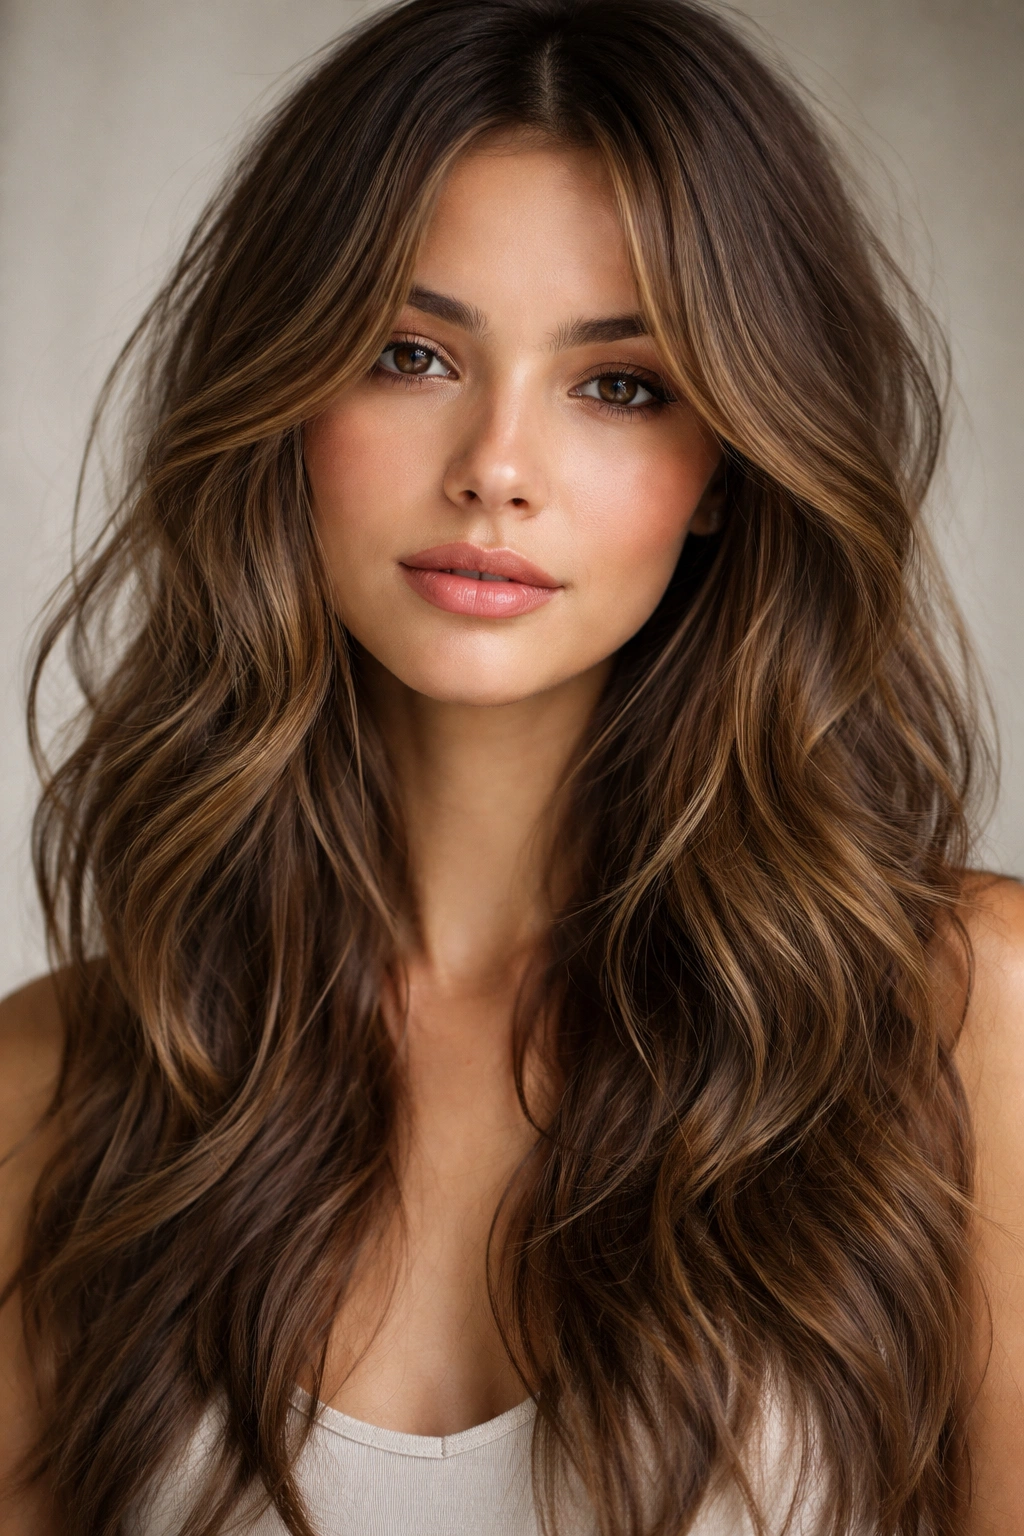
This is the foundation of casual elegance—waves that look sun-kissed and effortlessly textured, as though you’ve just returned from the ocean. The style features soft, loose waves throughout the entire length, with slightly messier texture at the ends and fuller volume at the crown. What distinguishes it from other waves is the deliberate lack of structure; these aren’t uniform ringlets but rather organic-looking bends and curves.
How to Create and Maintain It
The tousled beachy wave starts with preparation. Begin with damp hair and apply a volumizing mousse to your roots, then blow-dry your hair straight or with a slight bend using a round brush. Once dry, use a 1.5-inch curling iron to wrap sections away from your face, curling from mid-length to ends and leaving the last inch uncurled for a softer finish. Don’t curl every section uniformly—vary the direction and looseness to avoid a structured look.
Styling Essentials for This Look
- Apply a texturizing salt spray before curling for grip and definition
- Curl some sections loosely and others more tightly to create varied wave sizes
- Use your fingers to separate and break apart the waves rather than using a brush
- Finish with a light hairspray that holds without stiffening
- Refresh waves between wash days with a curling wand and dry shampoo for texture
The tousled beachy wave requires minimal daily maintenance once you’ve mastered the initial styling. It looks better slightly lived-in, so second or third-day hair actually works in your favor. This style suits most face shapes, though it particularly flatters oval and heart-shaped faces because the soft texture adds width rather than height.
2. The Layered Shag with Long Wavy Texture

A modern shag isn’t the feathered style of decades past—it’s a strategic layering technique that creates movement and texture at every length. When combined with long waves, a shag becomes a powerhouse of dimension. Shorter layers around your face and throughout the mid-lengths create lift and movement, while the longer layers at the back and ends provide weight and flow.
Why Layering Changes Everything
Layers work differently with waves than with straight hair. Each layer catches light independently, making the entire style appear fuller and more dynamic. The shorter pieces around your face create a face-framing effect that draws attention to your features, while graduated layers throughout encourage natural wave formation and reduce bulk.
Key Features of a Successful Layered Shag
- Shorter layers throughout the crown and sides for movement and lift
- Face-framing pieces that angle slightly inward for softness
- Longer layers at the back to maintain length and weight
- Textured, choppy ends rather than blunt lines
- Built-in movement that works with your natural wave pattern
A layered shag with long waves requires regular trims—every 6 to 8 weeks—to maintain the intentional layering and prevent the style from looking overgrown or formless. This investment in maintenance pays off because the layers do much of the styling work for you. Even on days when you simply air-dry your hair with some product, the layers create inherent texture and movement. This style works exceptionally well for those with fine hair that needs structural help to appear fuller.
3. The Beachy Curtain Layers with Wavy Texture
Curtain layers bring back a beloved ’90s element but with a modern twist when paired with long waves. This style features longer pieces that fall on either side of your face—reminiscent of curtains framing a window—combined with softer waves throughout. The curtain section is typically longer than the rest of the hair, creating a face-framing element that’s both flattering and on-trend.
The Anatomy of Perfect Curtain Layers
The curtain layer technique involves cutting slightly shorter pieces throughout the crown and sides, then leaving the front sections (the “curtains”) considerably longer so they create a distinctive frame. When you add waves, these longer pieces create elegant curves that soften your face while the shorter pieces behind them add volume and movement to the crown.
Achieving the Curtain Wave Effect
- Blow-dry your curtain pieces straight or with a gentle bend to maintain length emphasis
- Curl the shorter pieces around your face first, using a 1.25-inch curling iron
- Add waves to the rest of your hair, varying the direction and tightness
- Let the curtain pieces fall naturally; they’ll curve beautifully from their own weight
- Use a smoothing serum on the front pieces to enhance shine and definition
The beachy curtain layer style flatters most face shapes, particularly those with longer faces or higher foreheads, because the longer side pieces provide horizontal balance. This style requires styling tools most days unless you have naturally wavy hair, but it responds beautifully to even minimal effort. Even if you simply blow-dry your curtain pieces and add waves to the rest, the style reads as intentional and put-together.
4. The Undone Waves with Textured Choppy Ends
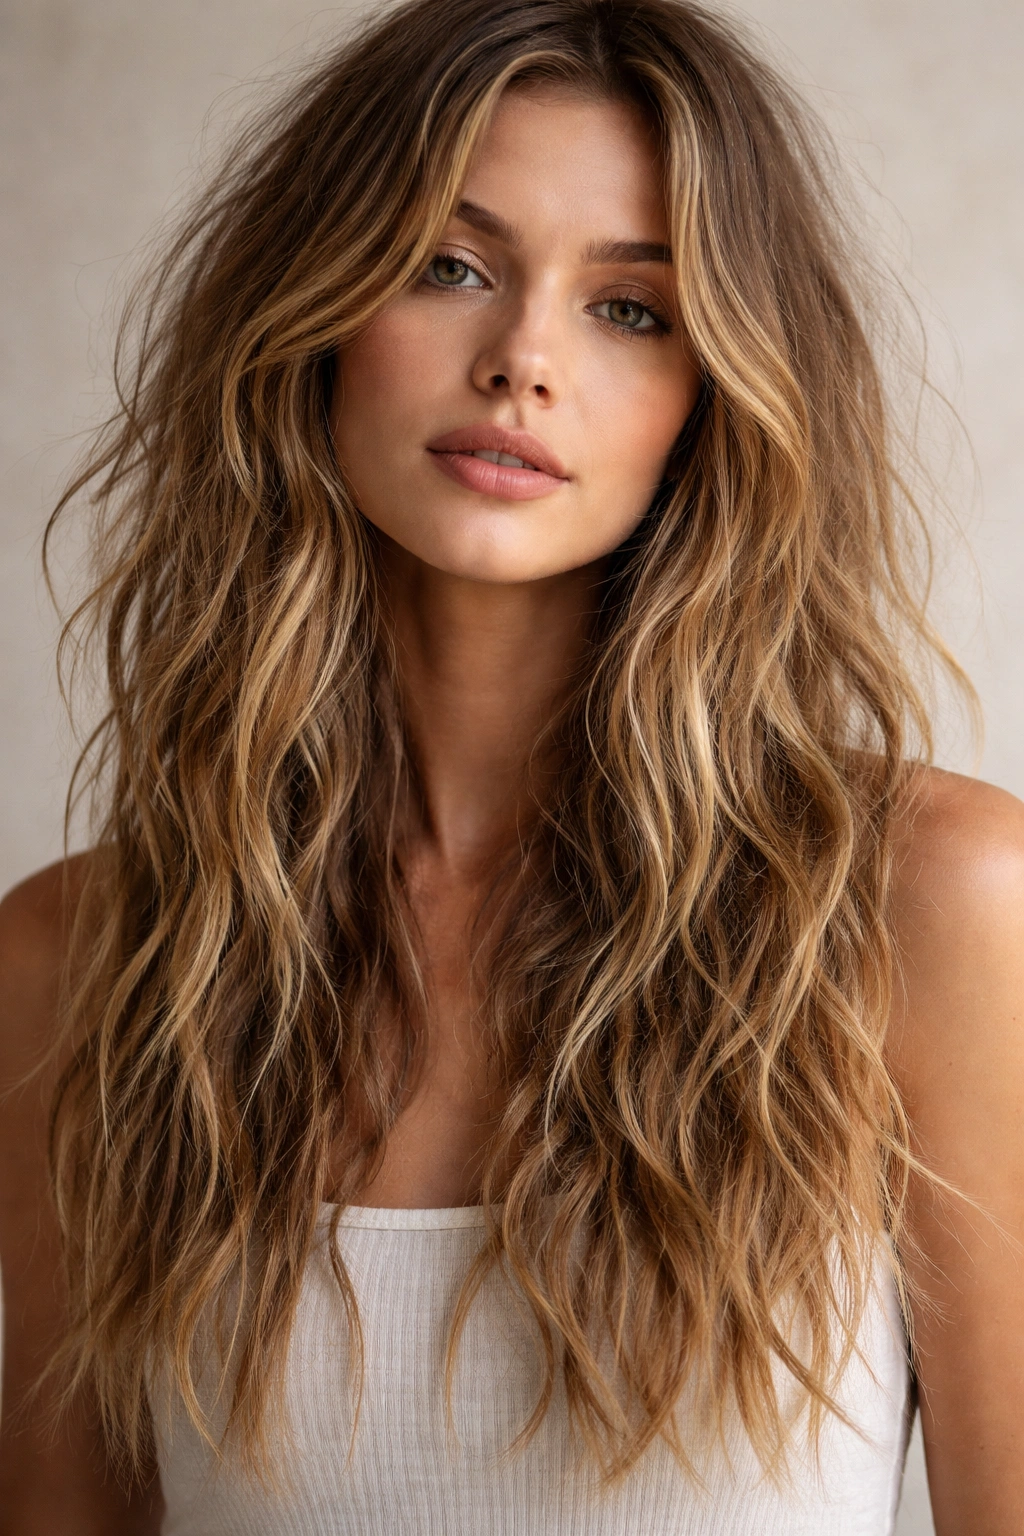
This style prioritizes texture over uniformity. Rather than smooth waves that taper to a point, this look features deliberately choppy, uneven ends that add movement and prevent the style from looking heavy. The waves throughout are loose and organic-looking, created with varying curl sizes and directions to mimic how sun, salt water, and time naturally create texture.
Creating Intentionally Choppy Ends
Choppy ends aren’t accidental—they’re a deliberate styling choice that requires a stylist who understands modern texture. Rather than cutting blunt lines, a skilled stylist uses point-cutting or razor techniques to create irregular, piece-y ends that catch light and add visual interest. This technique works especially well with wavy hair because each piece moves independently.
The Styling Approach for Choppy Wave Texture
- Use a texturizing spray before curling to give the iron better grip
- Curl random sections and leave others uncurled for organic variation
- Spend extra time on the ends, creating tighter, more deliberate texture
- Use a dry texturizing spray or sea salt spray after curling to enhance separation
- Tousle everything with your fingers rather than smoothing with a brush
The undone waves with choppy ends style works beautifully on most hair types and face shapes because the irregularity is flattering—it creates movement without requiring perfect symmetry. This is an excellent choice if you love the idea of long wavy hair but want it to feel more editorial and fashion-forward than traditionally romantic.
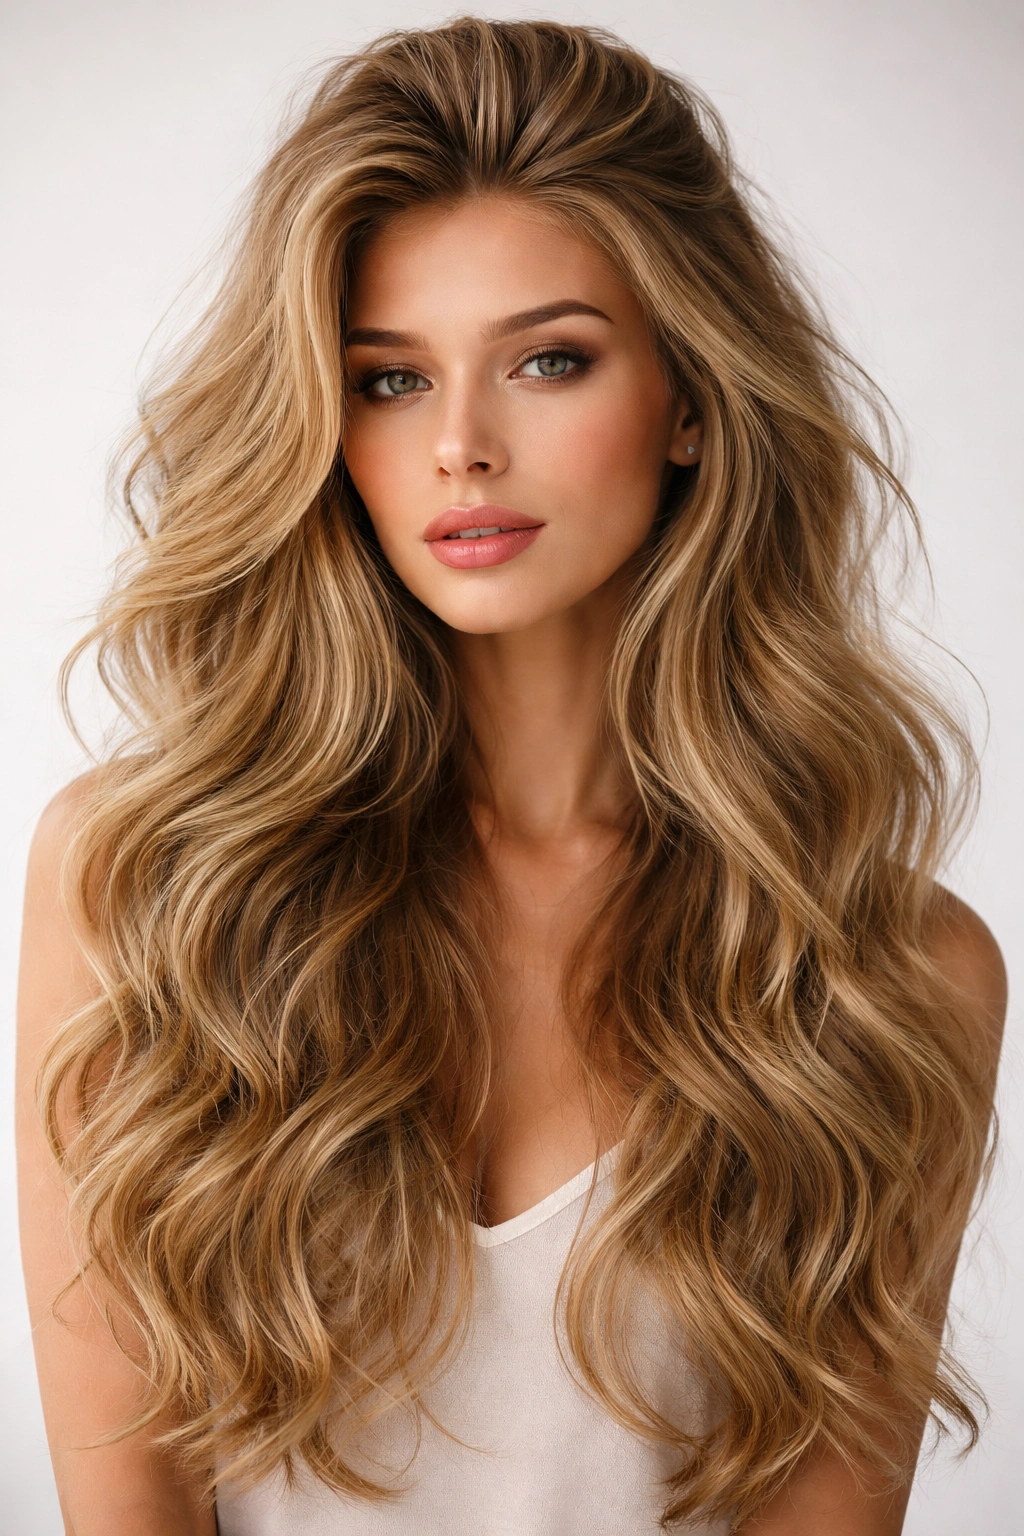
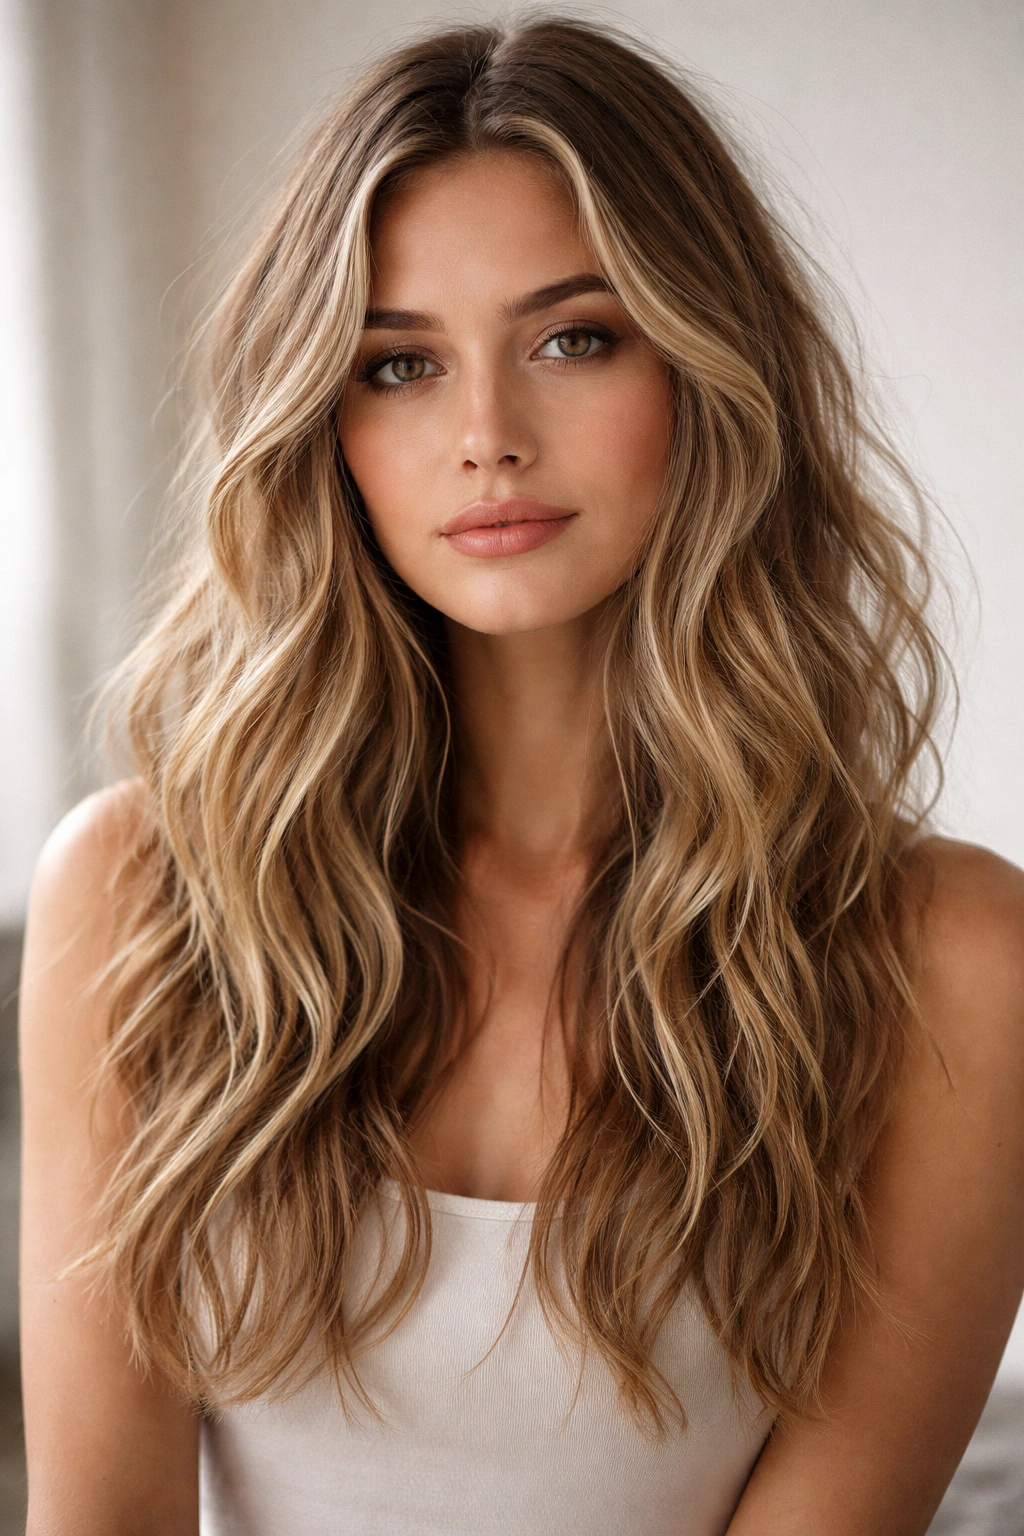
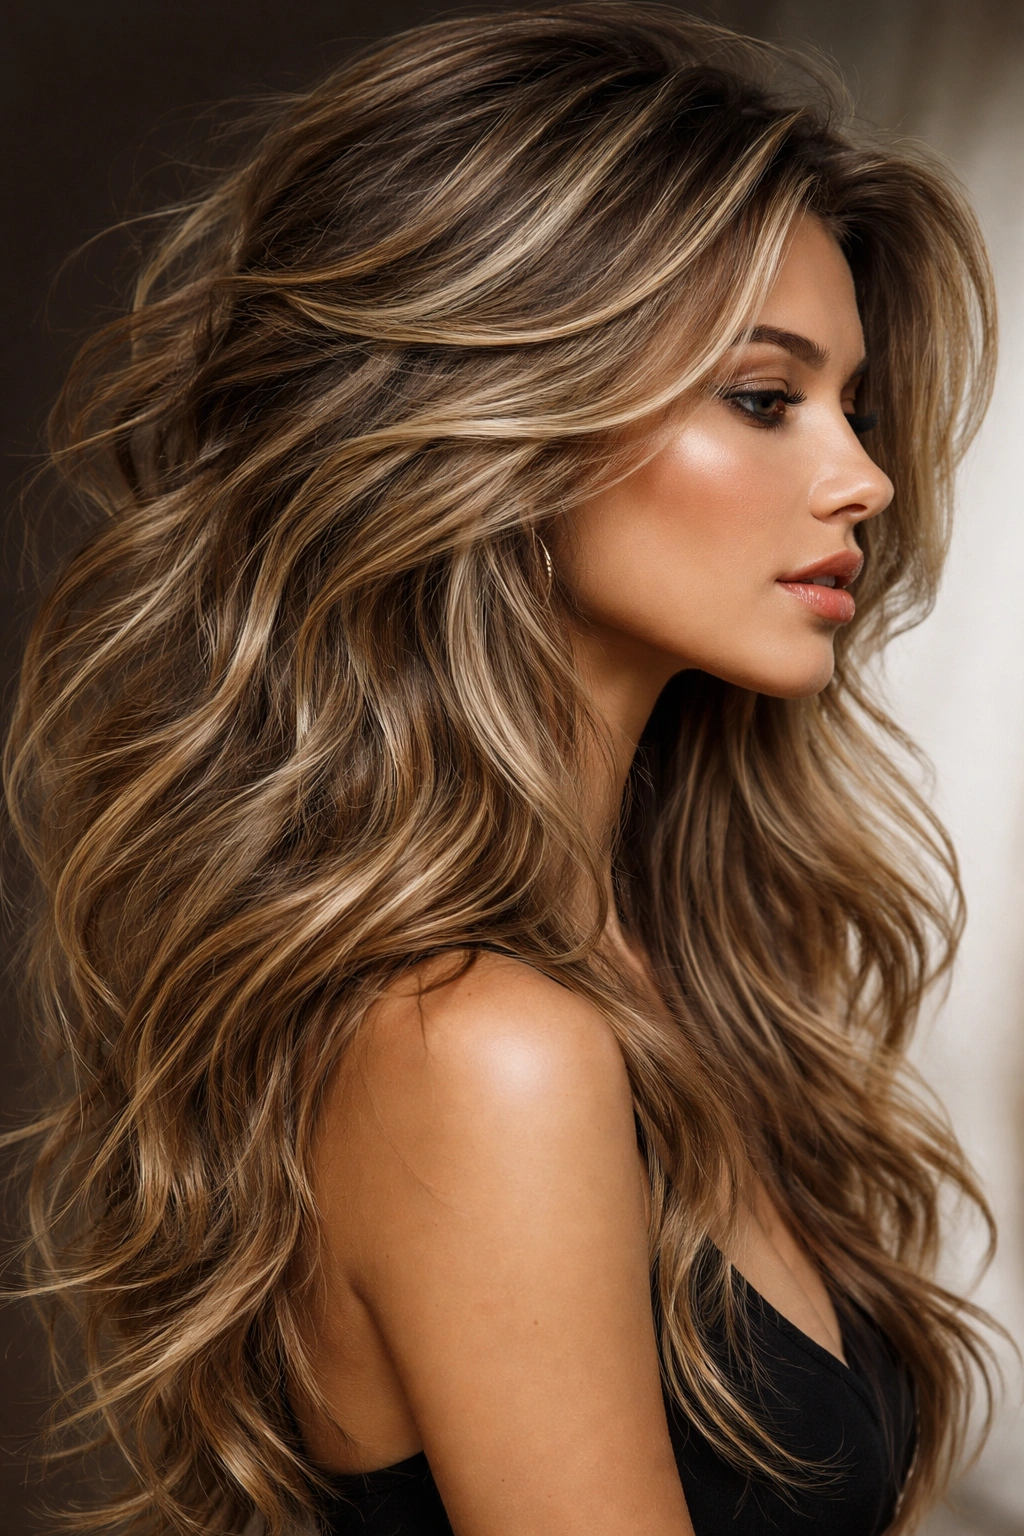
5. The Effortless Waves with Dimensional Color
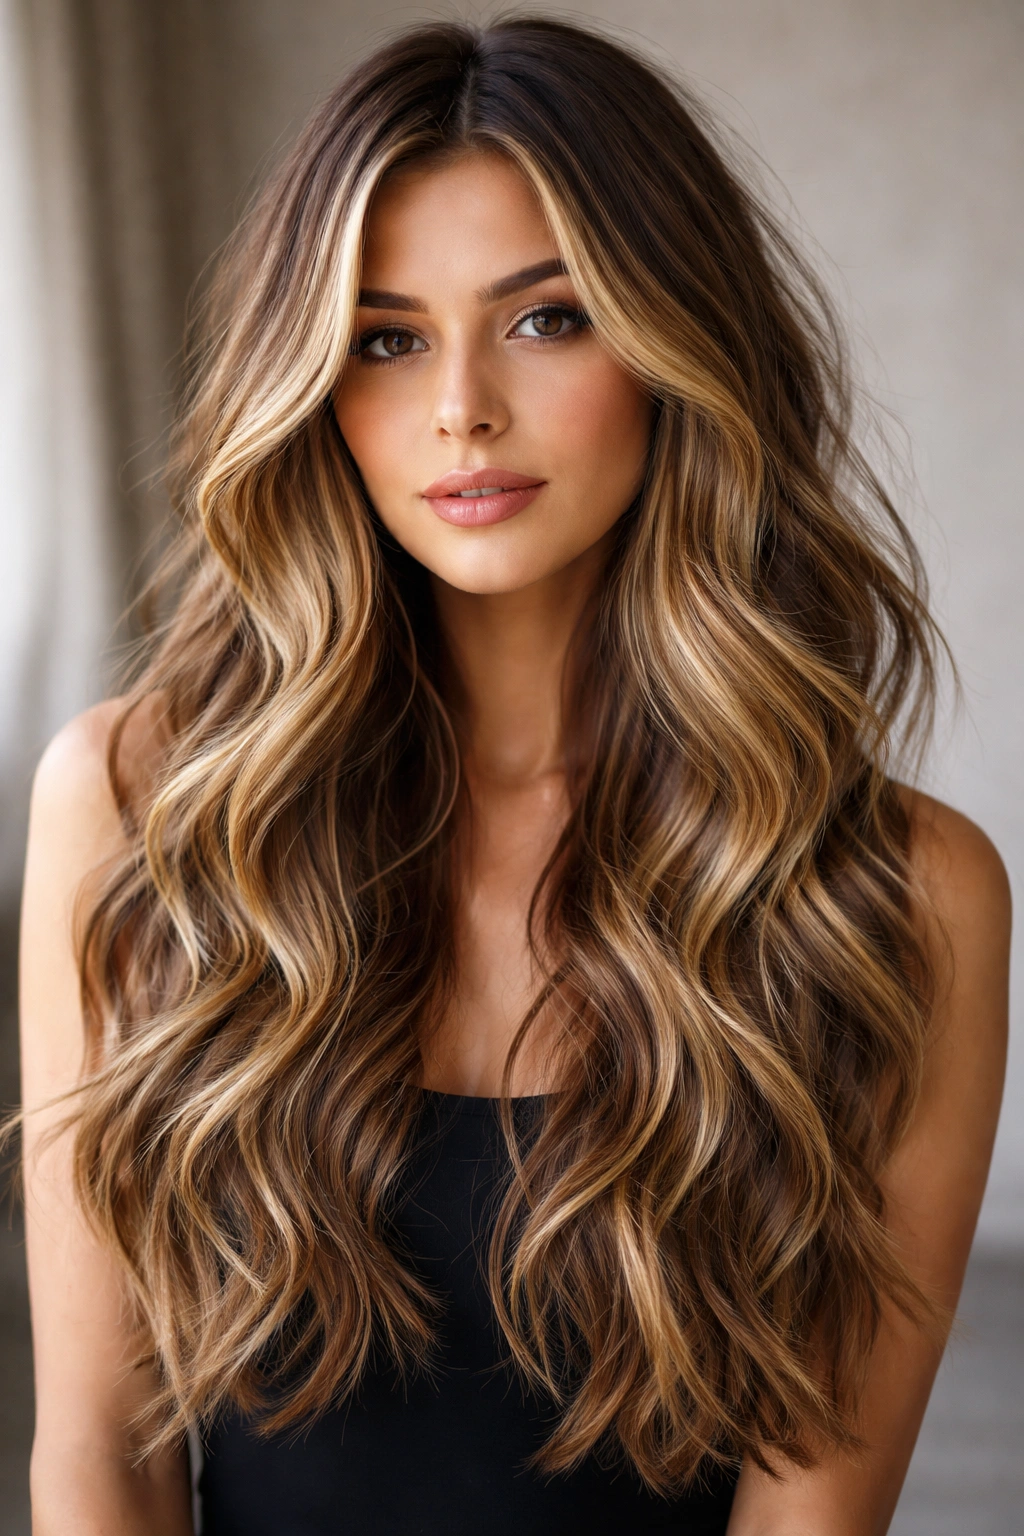
Adding dimensional color transforms simple waves into a multi-layered visual experience. Balayage, highlights, or multi-tonal coloring creates the illusion of more texture and movement by catching light at different angles. When you combine this with long wavy hair, the color literally moves as the waves move, creating a dynamic, expensive-looking effect.
How Color Enhances Wave Texture
Dimension in hair color works with light and shadow to create depth. Lighter pieces placed throughout reflect light, making your hair appear fuller and more textured, while darker pieces create shadow and definition. When these colors move with your waves, they create an almost shimmering effect that single-tone color can’t achieve.
Color Placement for Maximum Wave Impact
- Place highlights around your face and at the crown to brighten and add lift
- Add darker pieces throughout the mid-lengths and ends for depth and dimension
- Consider a rooted color technique that keeps darker tones at the base for low-maintenance growth
- Choose color placement that follows your natural wave pattern for cohesion
- Opt for colors that vary in warmth for a more natural, sun-kissed appearance
Dimensional color requires maintenance every 6 to 8 weeks to keep the effect fresh, and you’ll need quality color-protecting products to prevent fading. However, the investment pays off because even unstyled, second-day waves with dimensional color look intentional and polished. This approach works for every face shape and skin tone when the colors are chosen to complement your complexion.
6. The Side-Swept Long Waves
This style focuses on creating waves that predominantly fall to one side, creating an asymmetrical silhouette that’s both elegant and modern. The waves are longer and more uniform than “messy” styles, but the one-sided emphasis and slightly undone quality keeps it from feeling overly formal. It’s particularly flattering because it naturally creates a slimming, elongating effect.
Achieving the Side-Swept Wave Pattern
Creating a convincing side-swept style requires intentional styling. Begin by blow-drying your hair to one side, using your blow dryer to encourage your natural part to shift or creating a new part slightly off-center. Then, curl your hair away from the sweep—so if you’re sweeping right, curl most pieces to the left first, then flip them over as you release the curl, allowing gravity to pull them toward your dominant side.
Styling Tips for Staying Side-Swept
- Use a volumizing mousse on your roots before blow-drying to maintain lift
- Create your off-center part while your hair is still damp for it to set properly
- Curl sections at the crown with more tension to prevent them from falling flat
- Use a light hairspray to hold the side-sweep without making it feel stiff
- Refresh the style daily with a flat iron or curling wand; don’t rely on it lasting multiple days
The side-swept long wave style is particularly flattering for those with oval or oblong face shapes because it adds width and softness. It’s also an excellent choice if you have a cowlick or natural part line that’s difficult to style, as the asymmetrical nature of side-swept waves works with your hair’s natural tendencies rather than against them.
7. The Tousled Waves with Face-Framing Pieces
This variation on the classic messy wave emphasizes the pieces closest to your face, making them slightly shorter, slightly wavier, and slightly more defined than the rest of your hair. The effect is a halo of texture that draws attention to your features while the longer pieces flow from there. It’s romantic without being overly done, and it works across multiple styling scenarios.
The Face-Framing Technique
Face-framing pieces are typically 1 to 2 inches shorter than the rest of your hair, creating a visible distinction when you’re looking straight ahead. These pieces should wave gently and tousle naturally, framing your cheekbones and jawline. The rest of your hair waves more loosely, creating a cohesive but not uniform appearance.
Creating Face-Framing Definition
- Ask your stylist for face-framing pieces when getting a cut or trim
- Curl these pieces more tightly and with more precision than the rest of your hair
- Use a smaller curling iron (1-inch or smaller) for the face-framing pieces
- Style the rest of your hair with a larger barrel for looser, more relaxed waves
- Apply texturizing spray directly to the face-framing pieces for extra definition
Face-framing pieces work beautifully for most face shapes, but they’re particularly flattering if you have a round or square face because they add angles and definition. This style requires daily styling, but the process is relatively quick—you’re essentially styling only the pieces near your face tightly and then waving the rest more loosely.
8. The Voluminous Waves with Lifted Crown
Some days, you want your long waves to make a statement about volume and presence. This style prioritizes height and fullness at the crown, with progressively looser waves as you move down the length. The effect is glamorous and confident without being over-the-top—it’s the style you’d wear when you want to feel like your best self.
Building Volume at the Crown
Volume at the crown starts with blow-drying technique. Use a blow dryer with a concentrator nozzle, directing air against your hair’s lay to create lift. While blow-drying, use your fingers or a round brush to lift sections away from your scalp. Once your hair is dry, apply a volumizing mousse or texture spray to your roots, then tease gently with a fine-tooth comb.
Styling for Maximum Crown Volume
- Blow-dry your roots upside-down for extra lift
- Apply volumizing product to your roots before styling, not after
- Curl the pieces closest to your crown first, and don’t release these curls as quickly as others
- Use a teasing brush or fine-tooth comb to gently backcomb your roots
- Smooth the outer layer of hair gently so it looks polished, not messy, on top
- Set the volume with hairspray before moving on to the rest of your waves
The voluminous wave style requires time and product but delivers confidence. It’s particularly flattering for those with fine or thin hair because the styling techniques actually create the illusion of density and fullness. This style also works well if you have a longer face or high forehead, as the crown volume adds horizontal balance.
9. The Lived-In Waves with Undone Texture
This style embraces the second or third-day wave aesthetic intentionally. Rather than trying to make your waves look freshly styled, this approach accepts and enhances the natural relaxation and softening that happens over time. The result looks effortlessly beautiful, like you woke up with perfect waves rather than spending thirty minutes styling them.
Styling for the Lived-In Effect
Creating a convincing “lived-in” look actually requires planning. On day one, style your waves tightly. On day two, use dry shampoo at your roots and a texturizing spray throughout to refresh texture and add grip. By day three, your waves have relaxed into soft, romantic curves that look completely natural. The key is maintaining cleanliness and intentionality throughout, so it reads as “chic” rather than “hasn’t washed hair in days.”
Maintaining Lived-In Waves Between Washes
- Use dry shampoo to absorb oil and add texture to second-day hair
- Sleep on a silk pillowcase to prevent tangles and disruption
- Gently finger-comb through your waves in the morning rather than brushing
- Apply dry texturizing spray to reactivate movement and separation
- Braid your hair loosely before bed to enhance wave pattern for the next day
The lived-in wave style is perfect for anyone who wants the look of long wavy hair without daily styling commitment. It works for every face shape and hair texture, though it does require that you have decent natural or previously-styled waves to work with. This approach is also gentler on your hair than daily heat styling.
10. The Mermaid Waves with Pearlescent Shine
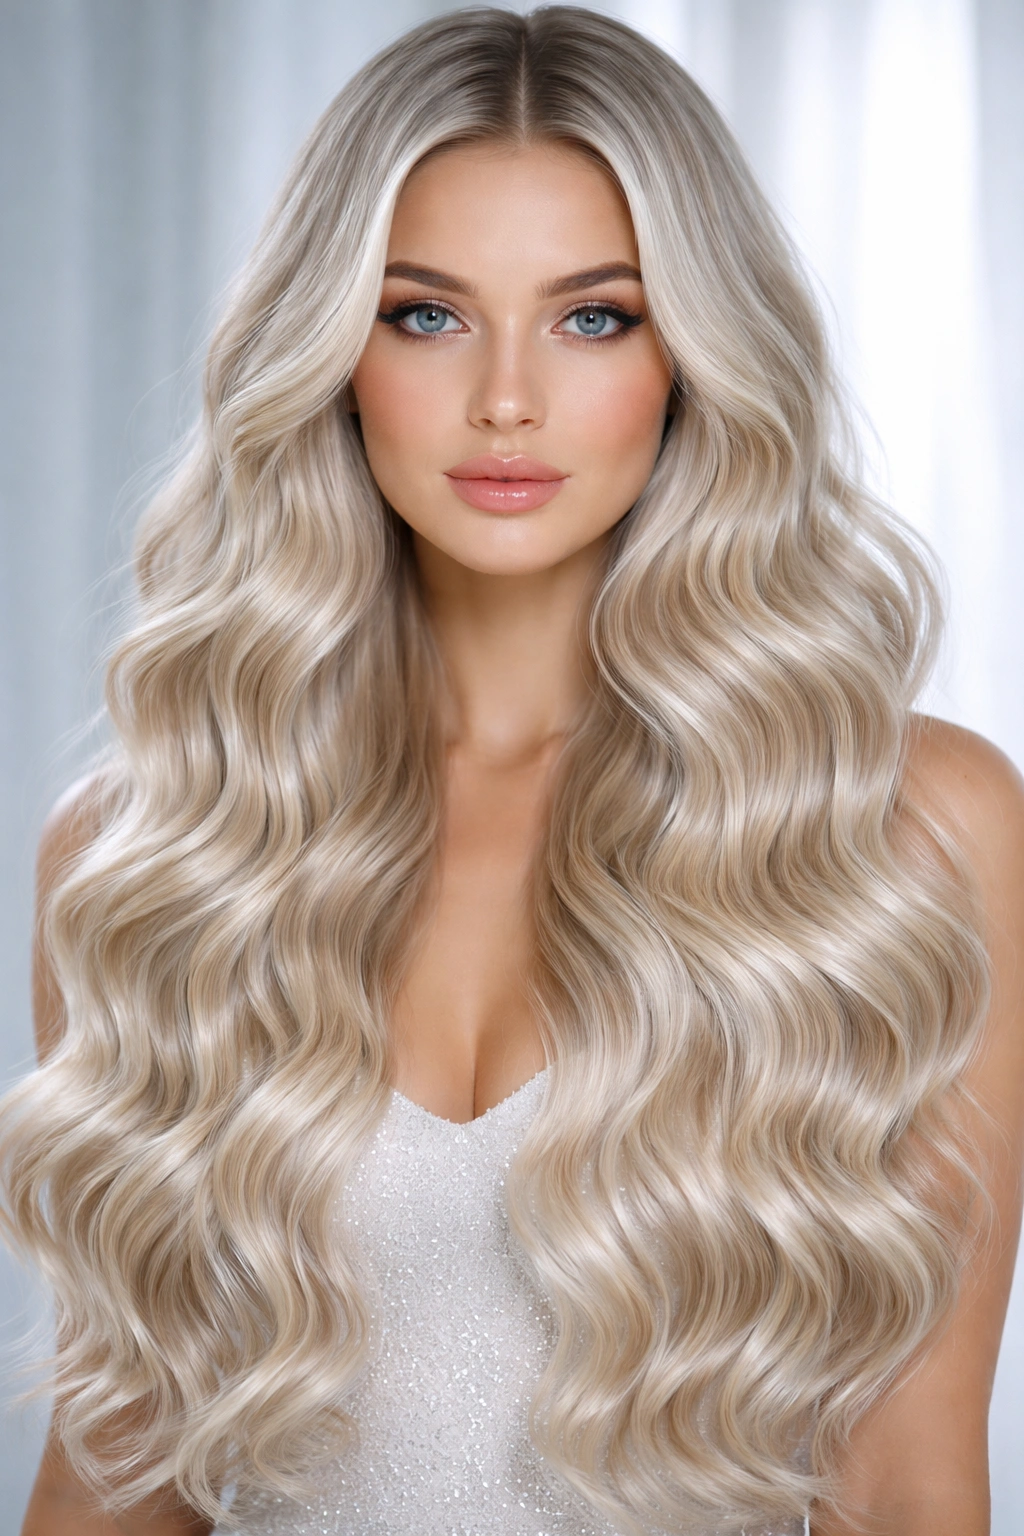
Mermaid waves are tighter, more uniform, and more intentional than beachy waves, but still maintain that messy, undone quality. The difference is in the curl tightness and the shine. This style pairs waves with a glossy, luminous finish that catches light beautifully. The effect is polished and intentional—perfect for events or when you want your hair to be part of your styling statement.
Creating True Mermaid Wave Pattern
Mermaid waves are achieved by curling hair very methodically in the same direction using a 1.5-inch curling iron, but then lightly separating and tousling them so they don’t look overly uniform or structured. Each curl is deliberate, but the overall effect is soft. The key is the finishing step where you break apart the curls slightly and add movement.
Achieving the Pearlescent Shine
- Use a shine-enhancing shampoo and conditioner to build luminosity
- Apply a small amount of hair oil to the mid-lengths and ends before styling
- Use a smoothing serum after curling to enhance shine without weighing waves down
- Consider a gloss treatment to add light-reflecting shine and dimension
- Use a cool shot on your blow dryer after curling to seal the hair cuticle and boost shine
The mermaid wave style requires daily styling but delivers a polished, intentional look that works beautifully for special events or when you want to feel glamorous. This style suits most face shapes but is particularly flattering for those with oval or heart-shaped faces. The uniform-but-messy nature of mermaid waves is forgiving, so even if your styling isn’t perfect, the overall effect reads as intentional.
11. The Textured Waves with Braided Crown Detail
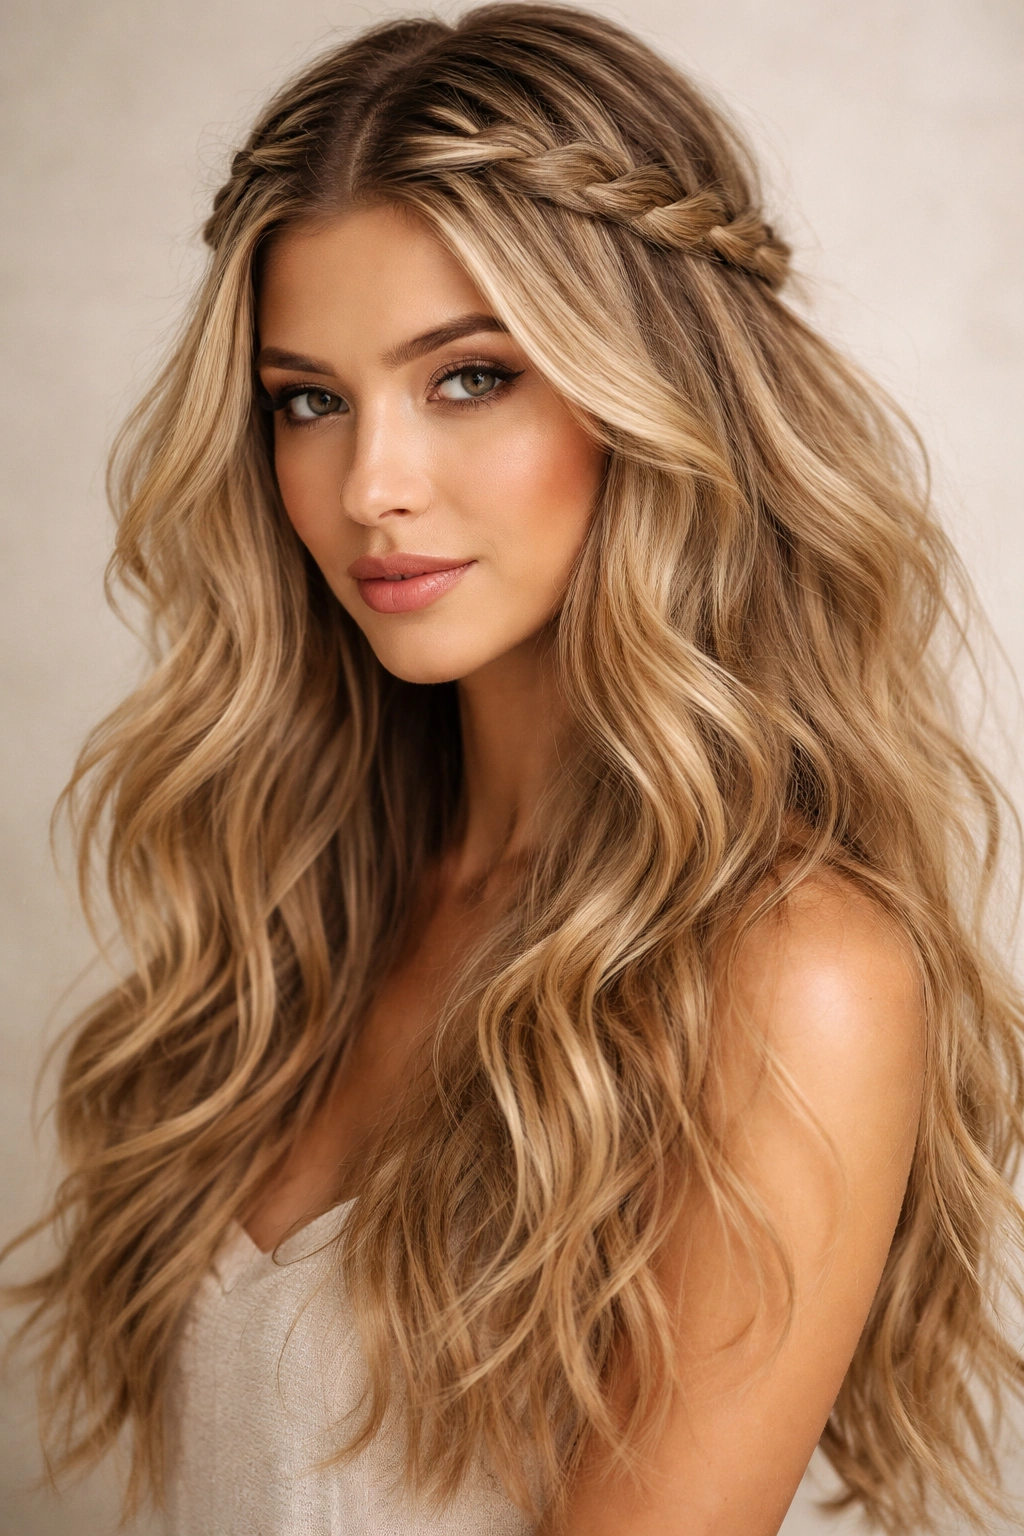
Adding a subtle braid element to your long waves elevates them without requiring complicated styling skills. A simple braid across the crown—either subtle and understated or slightly thicker and more visible—anchors your waves and adds dimension. This style works for casual days and special occasions, depending on how you style and finish it.
Incorporating Braids with Waves
The braid placement is key to this style working. Most flattering is a Dutch braid or French braid that runs along the crown from one side to the other, starting at one ear and ending at the opposite ear. The braid should be slightly loose and textured, not tight and neat. Once you’ve created the braid, style your waves as usual, allowing them to flow from beneath and around the braided crown.
Styling the Braid-and-Wave Combination
- Create your braid while your hair is slightly damp for better grip
- Make the braid slightly loose—tight braids fight with wavy texture
- Gently pull the braid to loosen it slightly once it’s complete
- Style your waves after the braid is in place
- Use bobby pins that match your hair color to secure the braid ends
- Finish with texturizing spray on both the braid and the waves
This style works for nearly every face shape and hair type. It’s particularly effective if you have fine or thin hair because the braid adds visual structure and the waves provide the softness and movement. The braided-crown-with-waves style is also practical for active days when you want your hair partially secured without looking overly done.
12. The Loose Waves with Textured Layers and Movement
This variation emphasizes layering combined with loose, flowing waves. The layers are more subtle than a shag but more noticeable than traditional long hair, creating movement and preventing the style from looking flat or heavy. When you add loose waves to strategic layering, the overall effect is dynamic and flattering.
How Subtle Layering Creates Movement
Layering throughout your length—rather than only at the crown—means that every section has a slightly different starting point. When you add waves, each of these sections waves independently, creating a ripple effect of movement rather than uniform, monolithic waves. The style moves when you move, creating a living, breathing quality.
Styling Loose Waves with Subtle Layers
- Ask your stylist for long, subtle layers rather than choppy ones
- Use a large-barrel curling iron (2 inches or larger) for loose waves
- Curl each section loosely, not with tension, allowing the wave to be gentle
- Release curls immediately after creating them rather than letting them cool
- Use minimal product so the waves feel light and bouncy rather than heavy
- Finish with a light texturizing spray rather than a hold-focused hairspray
Loose waves with subtle layering work beautifully on most hair types and face shapes. This is an excellent choice if you want long wavy hair that reads as intentional but doesn’t require the styling precision of tighter waves. Even imperfectly styled waves look good with this approach because the looseness and movement are forgiving.
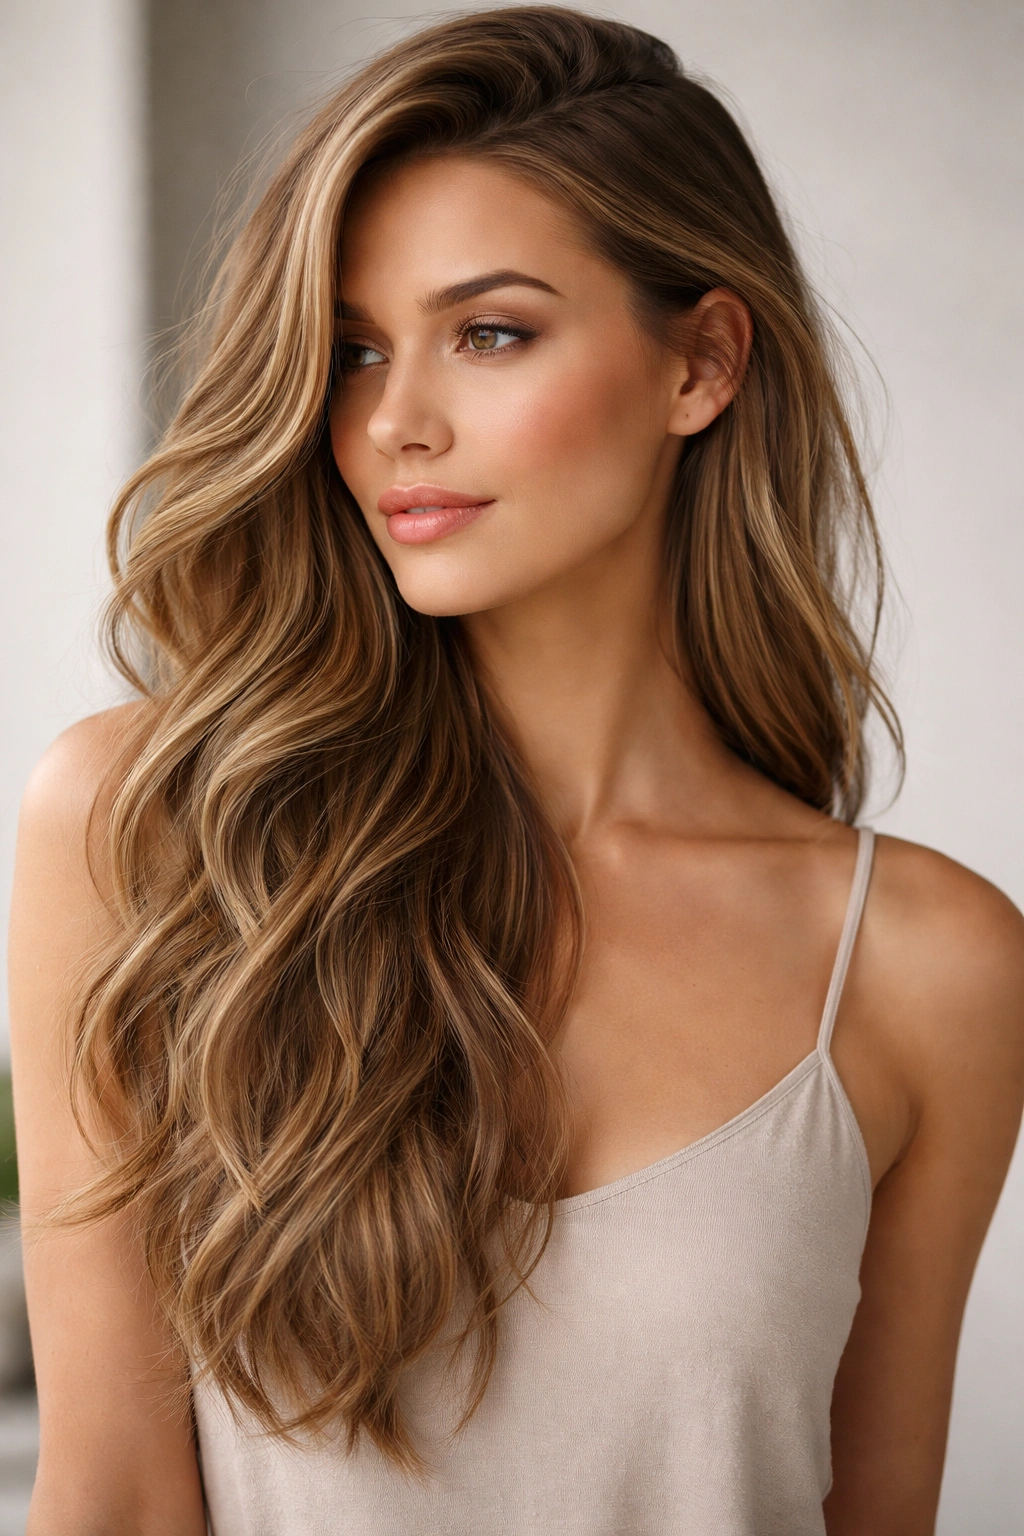
13. The Romantic Waves with Soft, Flowing Movement
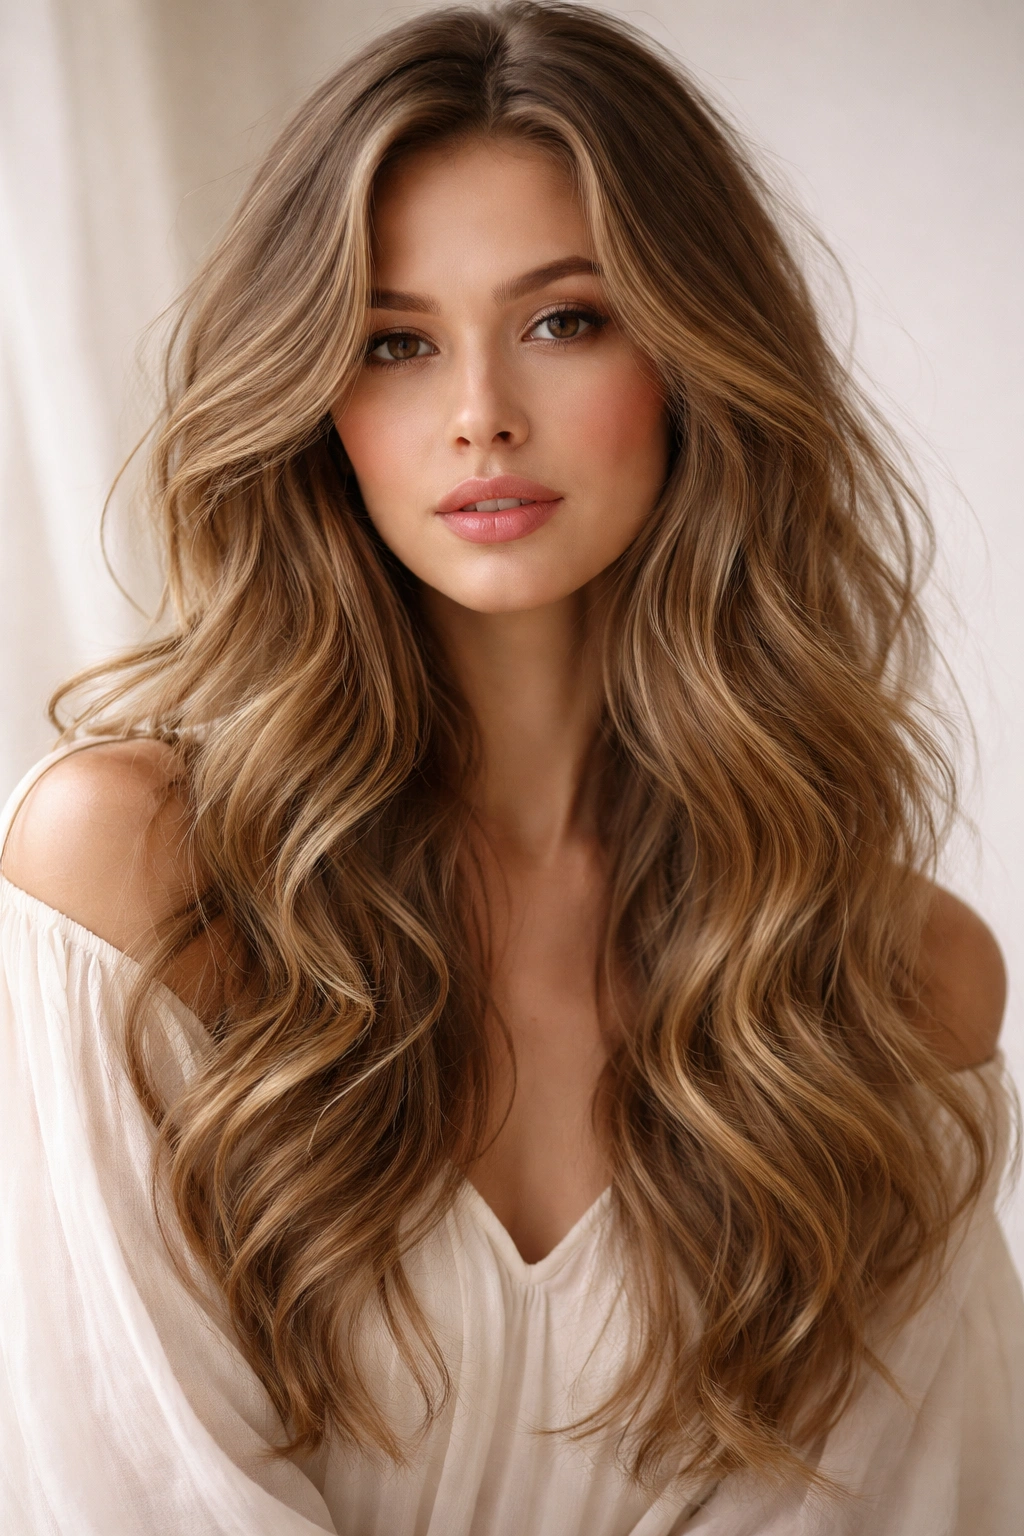
Romantic waves prioritize softness and flow above all else. These aren’t tight waves or choppy layers—they’re gentle curves that create movement without drama. This style pairs beautifully with soft makeup, delicate jewelry, and flowing clothing; it’s the hair equivalent of a whisper rather than a shout.
Achieving Genuinely Soft, Romantic Waves
Soft waves start with heat styling that prioritizes large barrel sizes and loose technique. Use a 2-inch or larger curling iron, or better yet, a waver tool that creates waves without tight curls. The key is never pulling the iron through your hair with tension—instead, close the barrel gently and let the heat do the work.
Styling for Maximum Softness
- Use a curling wand rather than a curling iron; the open barrel allows softer waves
- Don’t wrap hair tightly around the barrel; simply clamp and glide
- Release curls immediately rather than letting them cool and set tightly
- Use a soft-hold hairspray rather than a strong-hold formula
- Apply a smoothing serum to the outer layer of your hair for shine and softness
- Gently comb through your waves with a wide-tooth comb after styling to soften further
The romantic wave style requires daily styling because soft waves don’t hold as well as tighter waves, but the process is relatively quick since you’re not creating defined curls. This style works beautifully for most face shapes and is particularly flattering for those with delicate features or softer bone structure. It’s also an excellent choice if you prefer understated elegance to dramatic styling.
14. The Tousled Waves with Intentional Imperfection
This style fully embraces asymmetry and variation. Rather than trying to create uniform waves, you’re deliberately making each section slightly different—some tighter, some looser, some wavier, some straighter. The effect should look like your waves happened naturally, with no two sections exactly alike. It’s the opposite of precision styling; it’s controlled chaos.
Mastering Intentional Imperfection
Creating convincing imperfection requires ironically, very deliberate planning. Decide before you start that you’re going to curl some sections tightly, some very loosely, and leave some sections waved but not curled. Vary the direction—some curls away from your face, some toward it, some haphazardly. The inconsistency is the point.
Styling for Intentional Variation
- Don’t curl every section; leave some areas waved with just texture
- Change the direction of your curls randomly rather than consistently
- Vary your curling iron size—use 1.5 inches for some sections and 1 inch for others
- Tousle aggressively after curling; this style improves with roughing up
- Use a texturizing spray freely to break apart waves and add separation
- Avoid using a brush after styling; fingers only for final tousling
The tousled waves with intentional imperfection style works for creative, fashion-forward individuals who want their hair to reflect a modern, slightly editorial aesthetic. It’s forgiving because imperfection is literally the goal, and it works beautifully on most face shapes. This style is also excellent if you’re bored with overly perfect styling and want something more authentic-feeling.
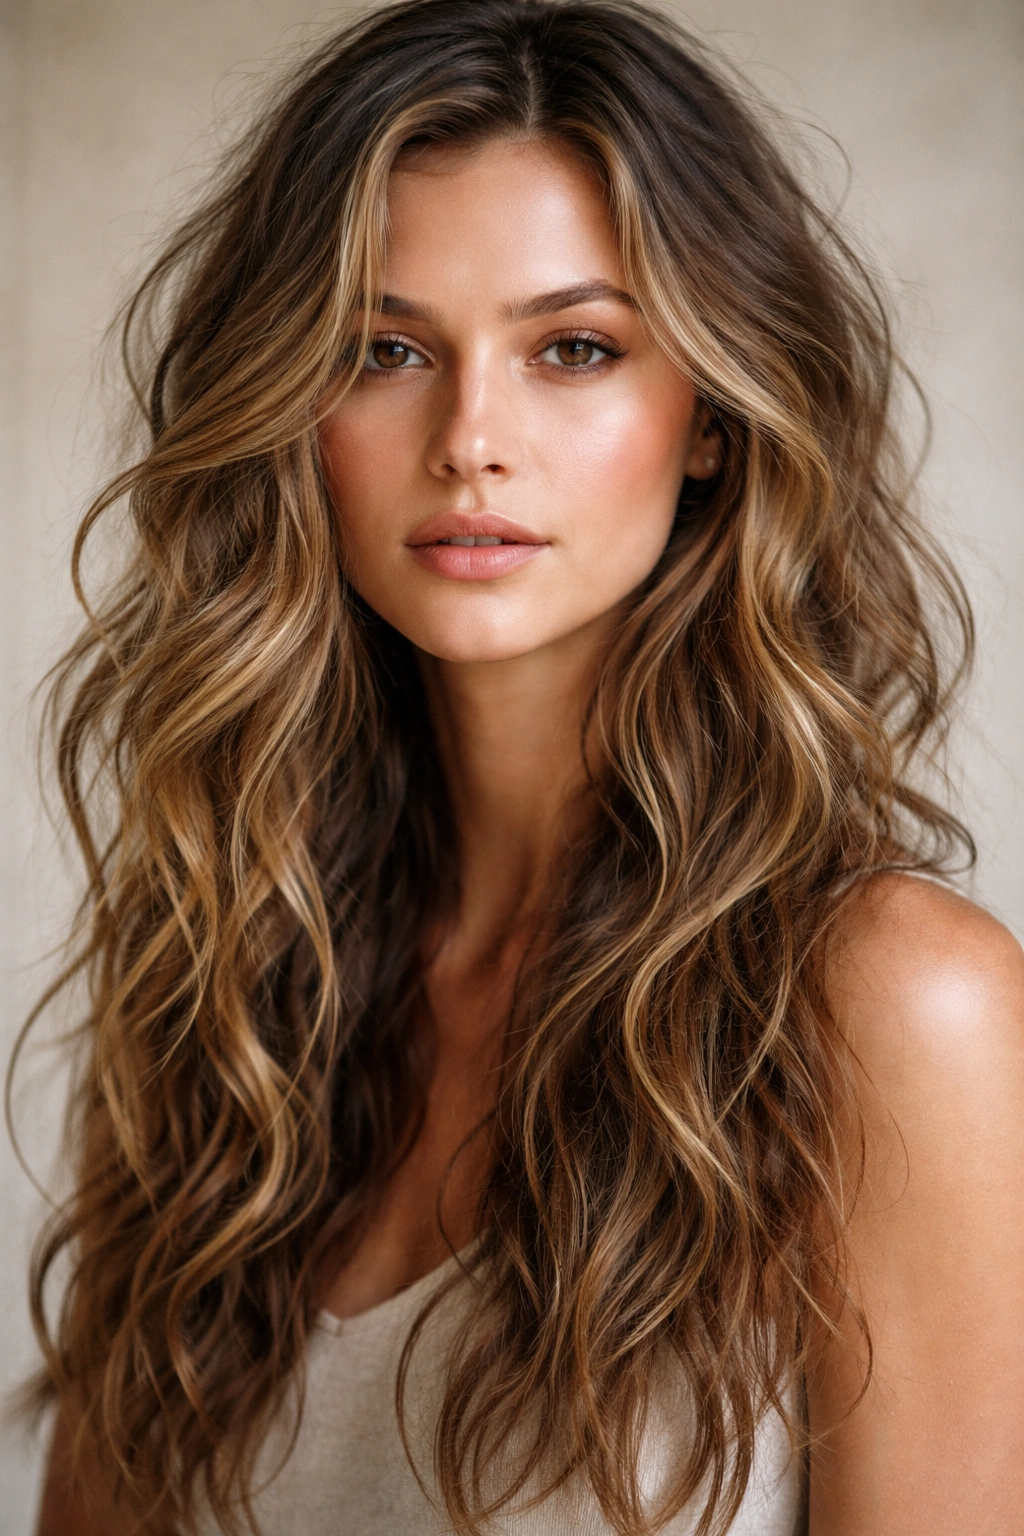
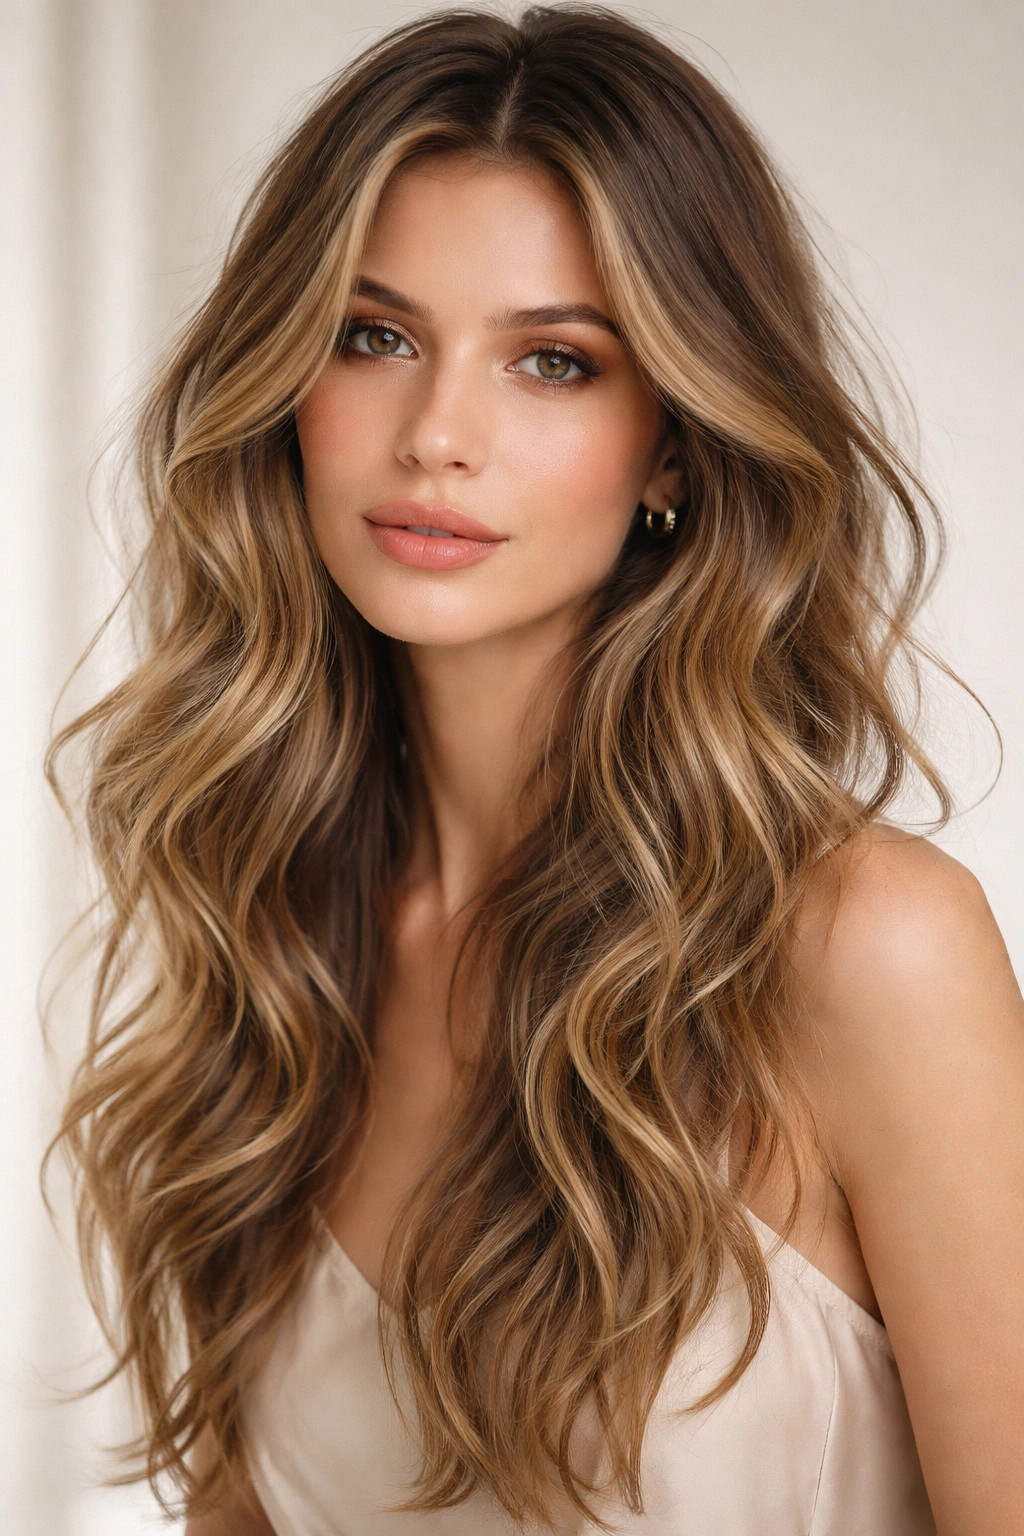
15. The Beachy Waves with Dimensional Highlights and Movement

Combining sun-washed dimensional color with textured, movement-oriented waves creates a style that looks like you’ve been on vacation. This approach prioritizes light, brightness, and the illusion of sun-kissed texture throughout. The waves themselves are loose and informal, but the color creates dimension that makes the style read as intentional.
Color Placement for Wave Enhancement
For this style, ask your colorist for dimensional placement specifically designed to enhance the wave pattern and movement. Lighter pieces should land on your mid-lengths and ends where they’ll catch light as your waves move. Darker rooted pieces at the base make the style low-maintenance and natural-looking.
Styling Beachy Waves with Color Impact
- Use a texturizing salt spray before and after curling
- Create waves with a curling iron or waver tool in loose, casual patterns
- Don’t overthink the styling; the color does much of the visual work
- Finish with a flexible hold hairspray that allows movement
- Refresh curls between washes with your curling iron and dry shampoo
- Use color-protecting shampoo and conditioner to maintain dimension
This style is an excellent choice if you love the beachy aesthetic but want your hair to look intentional and styled. The dimensional color does much of the heavy lifting visually, so even imperfectly styled waves look good. This approach works beautifully on most hair types and face shapes, particularly those with medium to longer faces.
16. The Voluminous Textured Waves with Choppy Layers
This style combines the movement benefits of choppy layers with the glamour of voluminous waves. The layers create natural lift and texture, while the voluminous styling adds presence. The overall effect is bold, confident, and impossible to ignore—this is the hairstyle you wear when you want to make an entrance.
Building Volume with Choppy Layers
Choppy layers inherently create volume because each piece moves independently, but you can amplify this through styling. Use techniques like blow-drying your roots upside down, teasing gently at the crown, and curling sections at the base of each layer to maximize lift.
Styling for Maximum Volume and Texture
- Blow-dry your hair upside-down, focusing on your roots
- Apply volumizing mousse to your roots before blow-drying
- Tease gently at the crown using a fine-tooth comb
- Curl sections at the base of each layer, where they connect to your scalp
- Use a larger barrel iron (1.5 to 2 inches) for the rest of your hair
- Finish with volumizing or texturizing spray rather than heavy, hold-focused products
The voluminous textured wave style requires daily styling and product use, but it delivers maximum impact. This style is particularly flattering for those with fine hair or thin density because the styling techniques and choppy layers create the illusion of fullness. It’s also excellent if you have a longer face or high forehead, as the crown volume adds balancing width.
17. The Effortless Long Waves with Minimal Styling
For those who love the look of long wavy hair but don’t want to spend significant time styling, this approach prioritizes working with your natural texture rather than against it. Whether you have naturally wavy hair or you’re willing to invest in a perm or relaxed texturizing treatment, this style is designed to look good with minimal daily effort.
Maximizing Your Natural Texture
If you have naturally wavy or curly hair, this style is about embracing and enhancing what you already have. Use products designed to define and enhance your natural waves, cutting layers that work with your wave pattern rather than against it, and styling techniques that bring out rather than fight your natural texture.
Low-Effort Styling Approach
- Use a curl-defining cream or mousse on damp hair
- Air-dry your hair whenever possible; let your natural texture do the work
- Use a diffuser attachment on your blow dryer if you need to speed up drying
- Apply texturizing or finishing spray to enhance natural wave pattern
- Trim every 6 to 8 weeks to maintain shape and remove heavy ends
- Sleep on a silk pillowcase to minimize disruption to your waves
This style is perfect if you appreciate the aesthetic of long wavy hair but want a reality-based approach to daily styling. It works beautifully on most hair types, though it’s obviously easiest if you have naturally wavy texture to begin with. Even if your hair isn’t naturally wavy, asking your stylist about perms or relaxed-texture treatments can give you this effortless quality.
18. The Sophisticated Waves with Subtle Styling and Elegance
This style bridges the gap between casual beachy waves and glamorous waves—it’s polished and intentional without being over-the-top or dramatic. The waves are well-defined but soft-looking, creating movement and dimension that reads as sophisticated rather than playful.
Creating Sophistication in Wave Styling
Sophisticated waves often involve tighter curl creation followed by careful separation to soften them. You’re creating defined wave structure, but then you’re tousling and loosening slightly to prevent them from looking rigidly set. The balance between structure and softness is what creates the sophisticated aesthetic.
Styling for Polished Elegance
- Use a 1.25-inch curling iron for well-defined but not-too-tight waves
- Curl with some tension to create visible wave structure
- Allow curls to cool completely before releasing them
- Separate gently with your fingers rather than a brush
- Apply a shine-enhancing serum to the ends after styling
- Use a flexible-hold hairspray that maintains shape without stiffness
The sophisticated wave style requires regular styling but is less time-intensive than very voluminous or heavily textured styles. It works beautifully on most face shapes, particularly those with balanced or oval features. This style is excellent for professional settings or when you want your hair to support a polished overall appearance.
19. The Modern Shag Waves with Feathered Texture
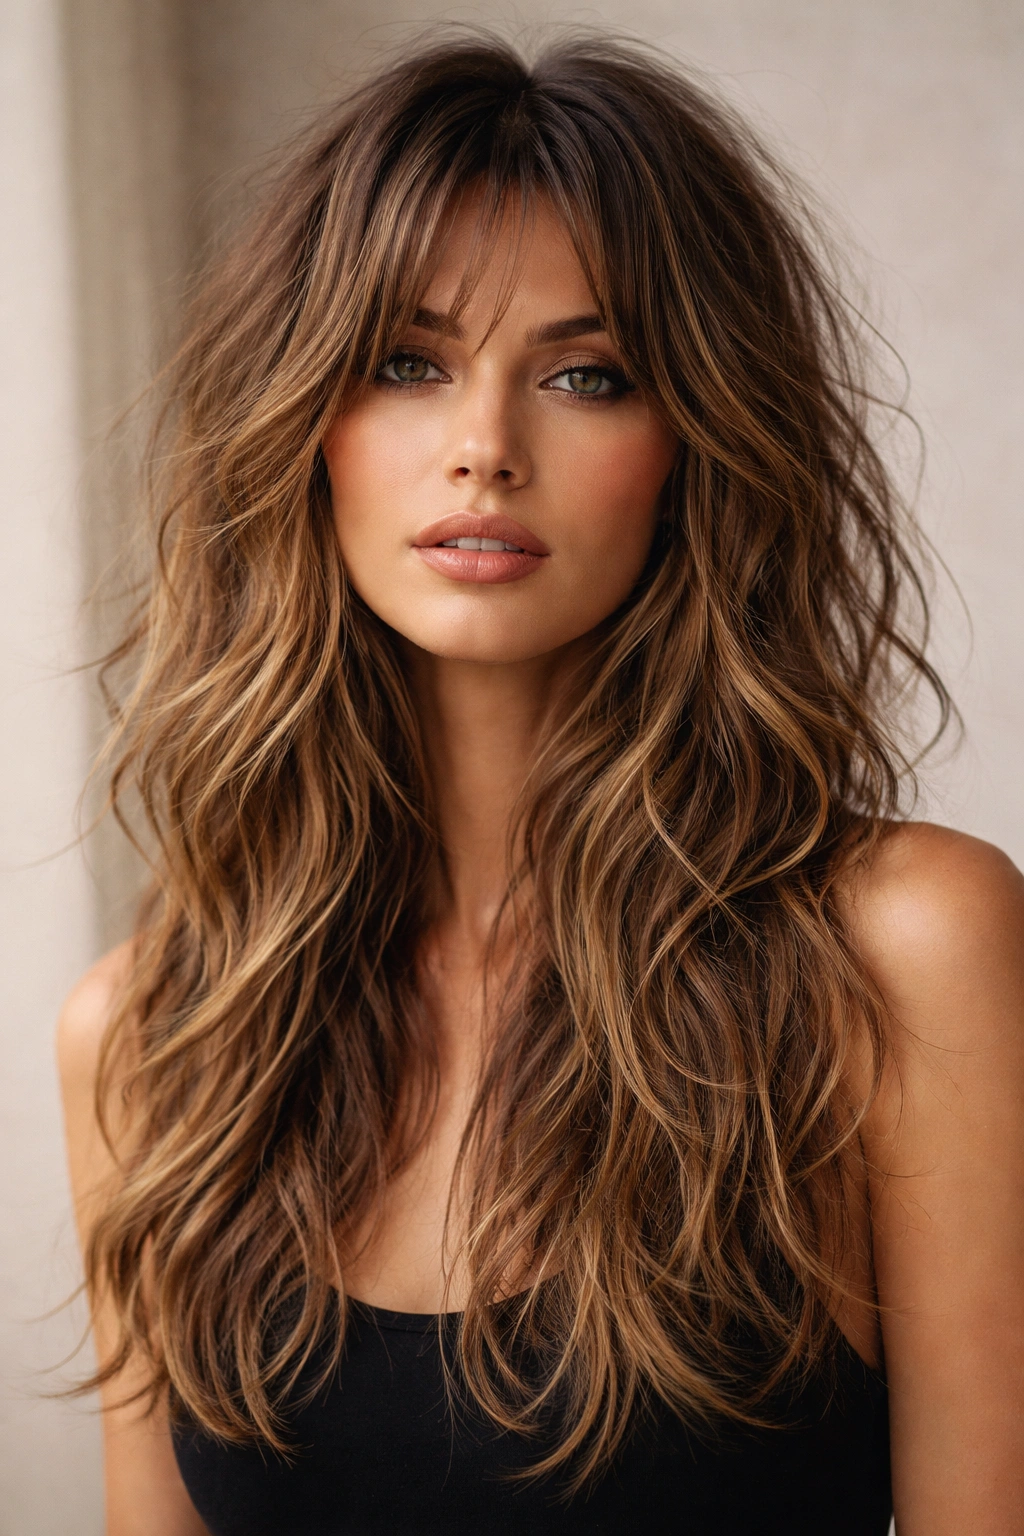
The modern shag is experiencing a well-deserved resurgence, particularly when paired with long waves. This style combines shorter, choppy layers with longer, flowing pieces and emphasizes feathered, piece-y texture throughout. It’s edgy and modern while still maintaining the softness of waves.
Understanding the Modern Shag Structure
The modern shag is different from ’70s shags because it’s more intentional and less voluminous. Layers are strategic rather than aggressive, and the overall effect is textured and modern rather than heavily feathered. When you add waves to this structure, each layer catches and holds the wave independently, creating incredible movement.
Styling Modern Shag Waves
- Use a texturizing spray before curling to enhance grip and separation
- Curl the shorter layers more tightly using a smaller barrel iron
- Use a larger barrel for the longer pieces, creating looser waves
- Finish by finger-tousling everything to break apart the waves and enhance the shag texture
- Apply a piece-defining texturizing spray to emphasize the feathered layers
- Consider a choppy, textured bang style to complete the modern shag aesthetic
The modern shag wave style is perfect for those who want edge and personality in their hair. It requires professional cutting and regular maintenance (every 6 to 8 weeks) to maintain the intentional layering, but the styling is relatively straightforward once you understand the layer structure. This style works beautifully for those with oval, oblong, or heart-shaped faces.
20. The Undone Elegance Waves with Effortless Beauty
This final style encompasses the overall aesthetic of beautiful, well-executed long wavy hair that somehow looks like it required minimal effort. The waves are real and intentional, but they’re styled in a way that suggests natural beauty rather than technical expertise. It’s the hairstyle equivalent of “you look like you just woke up like this” while actually involving significant styling skill.
The Philosophy Behind Undone Elegance
Undone elegance isn’t about being lazy—it’s about creating a perception of ease while actually executing clean technique. The waves should be defined enough to read as intentional, but loose enough that they appear effortless. The overall styling should look naturally beautiful rather than “done.”
Achieving True Undone Elegance
- Master basic wave-creating technique with a curling iron or wand
- Curl your waves, then immediately separate them with your fingers
- Add texture and movement with a texturizing spray
- Avoid looking overly styled by resisting the urge to smooth or perfect every section
- Refresh waves between washes rather than fully restyling daily
- Invest in quality products that enhance rather than control your hair
Undone elegance is the endpoint of developing genuine skill with your hair. It’s not a quick-styling situation—it requires understanding your hair, knowing your tools, and having the confidence to step back and let your hair be itself. This style works beautifully on any face shape and any hair texture, as long as you have the foundational waves in place.
Final Thoughts
The spectrum of messy long wavy hairstyles offers something for every aesthetic, lifestyle, and styling commitment level. Whether you’re drawn to beachy, casual waves or prefer more structured, voluminous styling, the foundation remains the same: intentional texture, movement that catches light, and an overall appearance of effortless beauty.
What makes these styles truly special is their versatility across situations and styling days. The same messy long waves you wear casually on Saturday can be refreshed and elevated for a professional setting on Monday. Second-day waves, often seen as a styling failure with other hairstyles, actually look better with this aesthetic—the natural softening and relaxation that happens over time is exactly what these styles are aiming for.
The most important factor in choosing and executing any of these styles is finding a stylist who understands modern wave aesthetics and can cut your hair with texture and movement in mind. A good cut makes the difference between waves that look flat and one-dimensional and waves that move beautifully and catch light. Invest in quality cutting and the styling becomes exponentially easier.
Remember that these styles aren’t one-size-fits-all—the best version of any messy wave style is the one customized to your face shape, hair texture, lifestyle, and personal aesthetic. Bring inspiration photos to your stylist but be open to their suggestions about what will work best for your specific features. Your stylist’s expertise combined with your own preferences and commitment level will result in waves that feel authentically yours rather than like you’re trying to replicate someone else’s style.