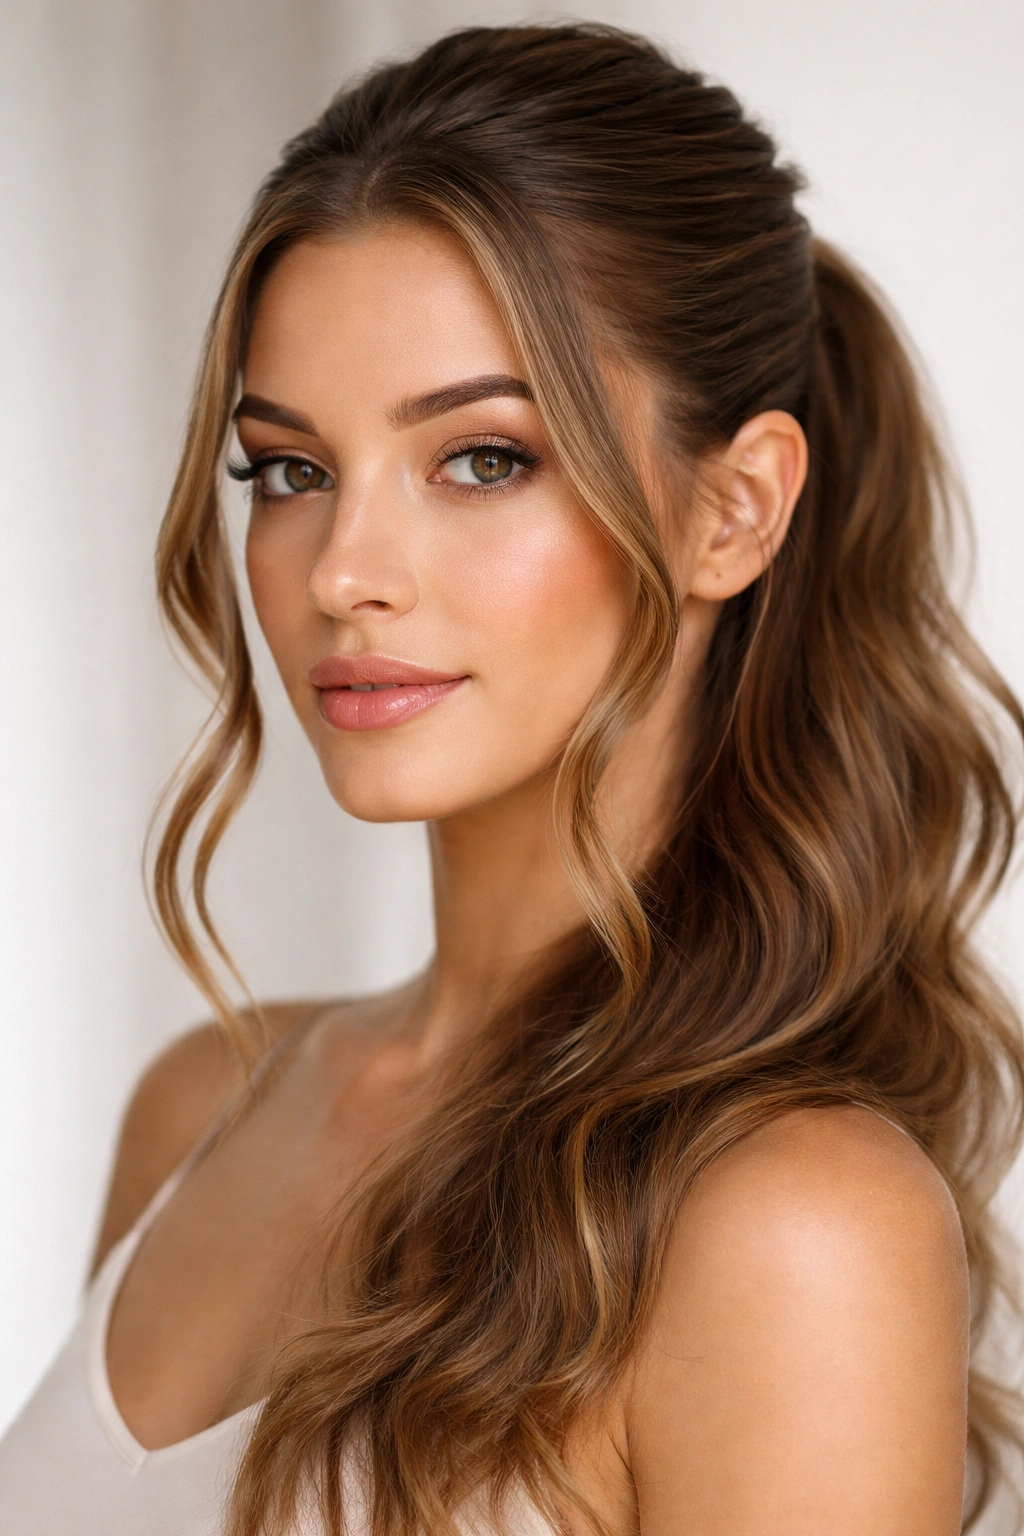
Wavy hair has a reputation for being high-maintenance, but here’s the truth: the problem isn’t your waves, it’s the frizz. Moisture, humidity, friction, and the wrong styling approach turn what could be gorgeous, defined waves into a puffy, undefined mess. The good news? There are hairstyles specifically designed to work with your wave pattern instead of against it — styles that actually contain and control frizz rather than magnifying it.
The key difference between a frizzy wave and a smooth, polished one isn’t complicated. It comes down to minimizing friction on the hair cuticle, sealing moisture in at the right moments, and choosing cuts and techniques that respect your natural texture instead of forcing it into submission. When you choose a hairstyle that complements your waves, the styling work becomes exponentially easier.
What makes these 20 styles so effective at taming frizz is that each one either uses length and weight strategically, incorporates protective styling techniques, or plays to the inherent texture of wavy hair. Some work best with certain wave patterns, and some shine regardless of how loose or tight your waves are. You’ll find options for every occasion, from everyday casual to special-event polish, and each one includes the specific styling tricks that keep frizz at bay.
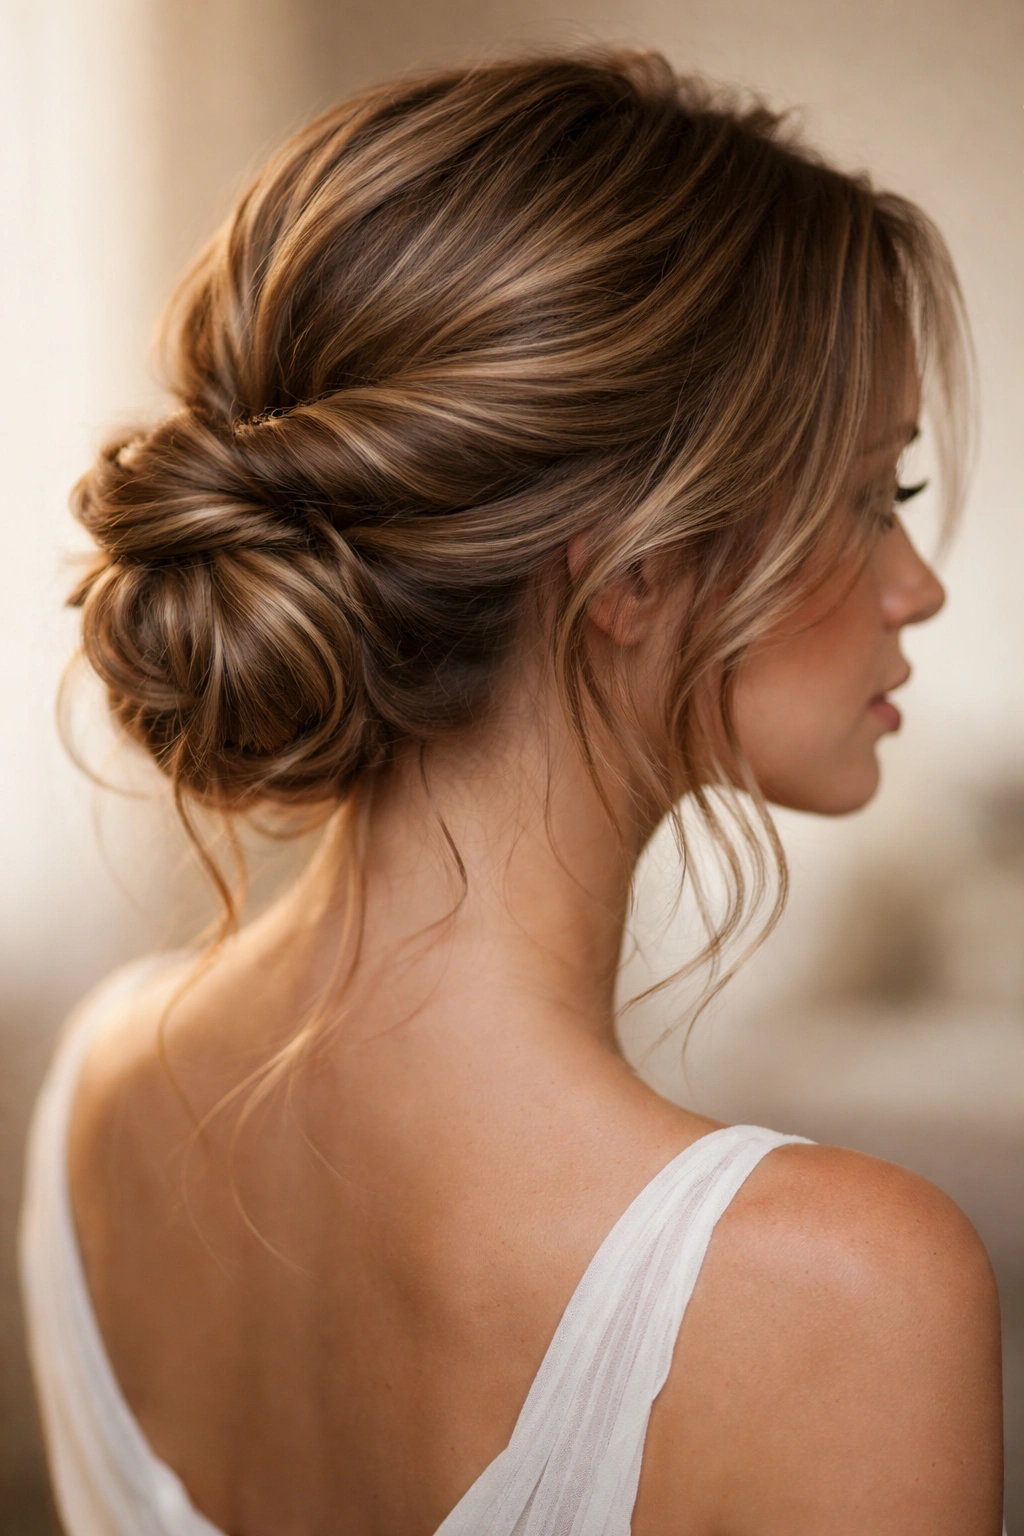
1. The Sleek Low Bun
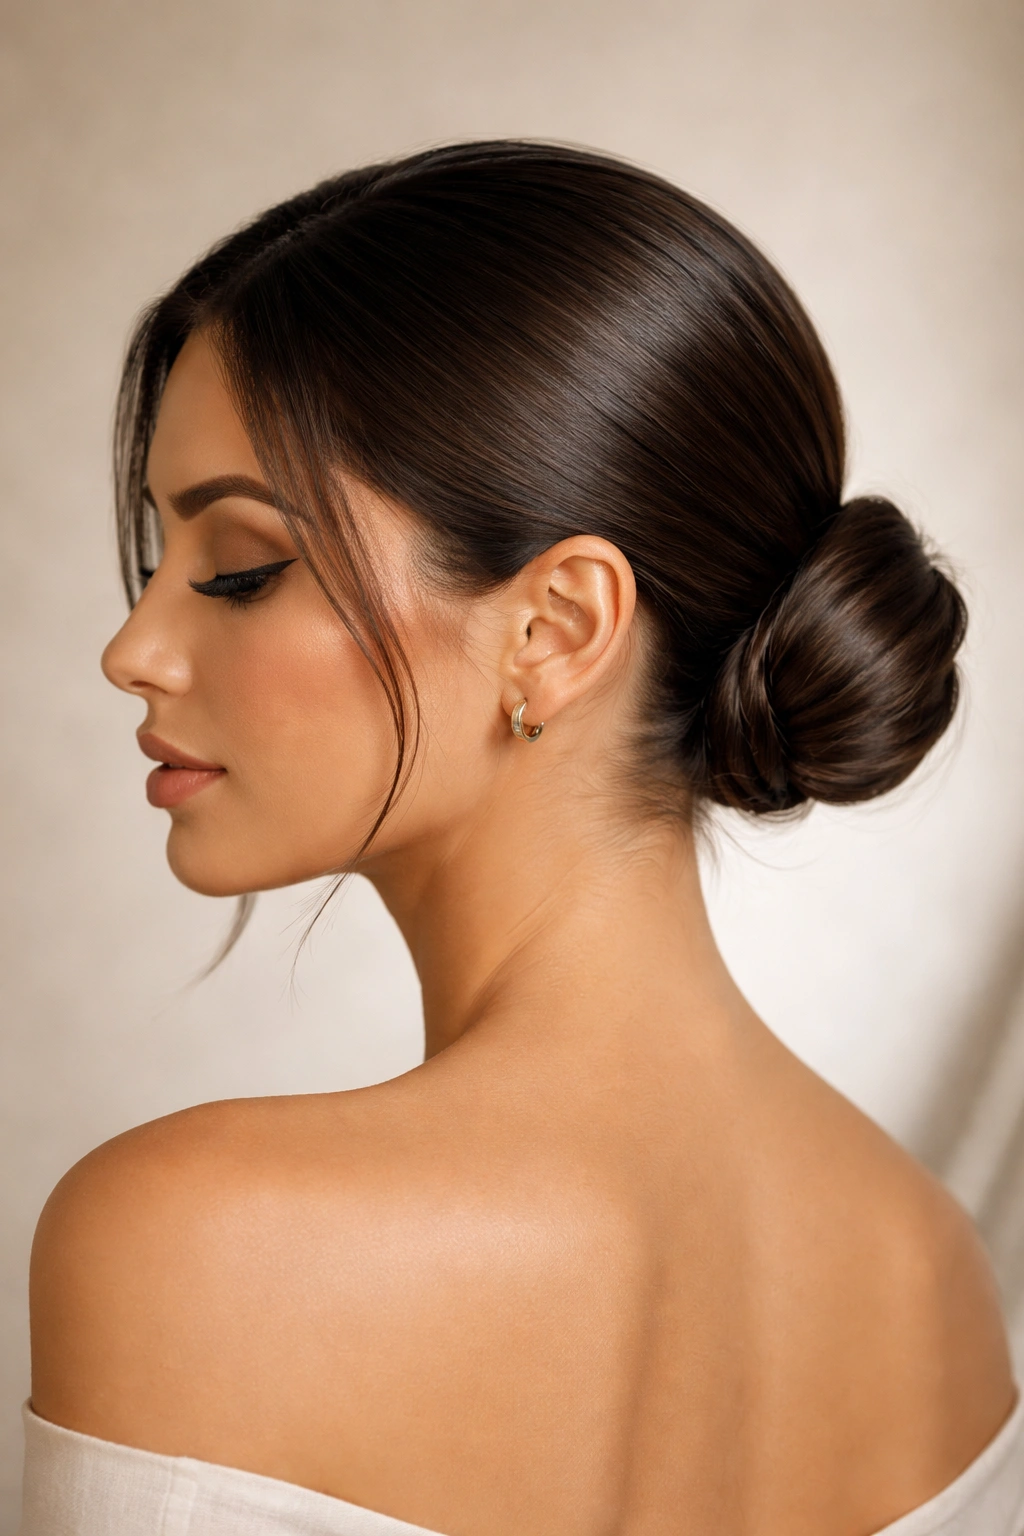
A low bun pulls hair away from your face and neck while keeping everything secured and smooth. This style works because the weight of the hair naturally pulls downward, creating tension that flattens the cuticle layer and prevents frizz from escaping.
Why It Controls Frizz So Effectively
The key is starting with damp hair that’s been smoothed with a lightweight serum or oil. Apply product from root to tip, then brush through gently to distribute it evenly. The gathered-together weight of the bun naturally suppresses flyaways, and the low placement keeps it away from humidity at face level. This is one of the best styles for fighting frizz in humid conditions.
How to Create It Without the Fluff
- Apply a lightweight anti-frizz serum to damp hair before blow-drying
- Blow-dry your hair straight or with a paddle brush to smooth the cuticle
- Create a low ponytail at the nape of your neck, about two inches above where it naturally starts
- Twist the ponytail gently and wrap it around the base to form the bun
- Pin with bobby pins inserted horizontally (not vertically) for better hold
- Smooth down any flyaways with a fine-tooth comb and a tiny dab of gel
This style lasts all day and actually gets smoother as the day goes on because the weight creates continuous downward tension.
2. The Textured Side Braid
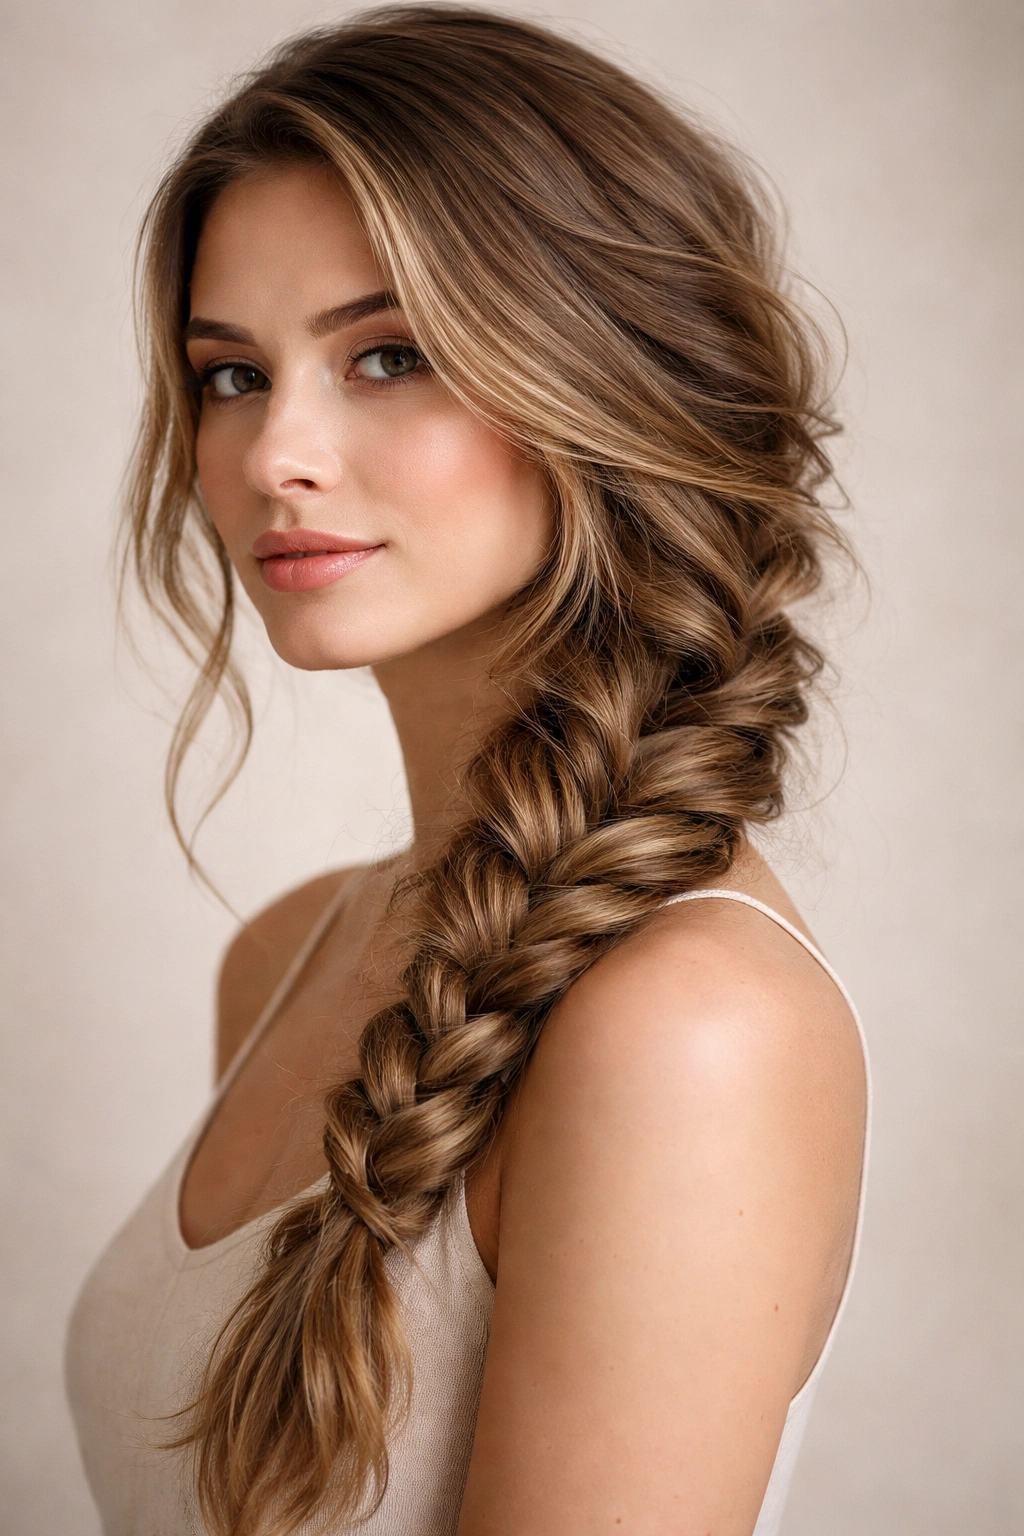
A side braid celebrates your wave texture while keeping it controlled and intentionally undone-looking. The braid structure itself contains the hair, preventing individual strands from frizzing outward.
What Makes This Style Win
The beauty of a side braid is that it works with slightly textured, slightly-not-perfectly-smooth waves. You don’t need your hair poker-straight to pull this off — in fact, a little wave helps the braid look fuller and more dimensional. The braid physically constrains the hair shaft, which keeps moisture locked in and the cuticle lying flat.
The Steps to a Frizz-Free Braid
- Start with damp hair and apply a curl-enhancing cream or mousse to encourage your natural wave
- Rough-dry your hair with a microfiber towel (not regular terry cloth, which causes frizz)
- Once mostly dry, apply a smoothing serum or light oil to the mid-lengths and ends
- Create a side parting and sweep your hair over one shoulder
- Begin the braid about three inches from your ear, gathering from the side rather than the back
- Keep the tension moderate and consistent — tight braids can create creases and look severe
- Leave a few face-framing pieces unbraided for softness
- Secure with a small elastic at the end
The braid’s structure keeps your waves looking defined while the serum prevents frizz from forming at all.
3. The Wet-Look Slicked-Back Style

This trend plays beautifully with waves because it’s intentionally smooth and glossy. A gel or mousse applied to damp hair creates a sleek base that dries down with zero frizz.
Why Wet-Look Works for Wavy Hair
The “wet” appearance comes from shine, not actual wetness. Applying a lightweight gel or mousse to damp hair and smoothing it back with your hands or a brush creates tension on the cuticles while the product sets. As it dries, you get a glass-smooth finish with no frizz because every strand is sealed down by the product.
Achieving the Slicked Look
- Start with damp hair (not soaking wet, but thoroughly damp)
- Apply a lightweight gel, cream mousse, or smoothing lotion throughout your hair
- Brush your hair straight back using a paddle brush, applying firm, consistent pressure
- Use your hands to smooth any flyaways while the product is still wet
- Blow-dry on low heat or air-dry completely for a glossy finish
- For added shine, apply a tiny amount of liquid serum to the surface once dry
- This style pairs beautifully with a sleek ponytail or a side-swept look
The product and tension do all the frizz-fighting work, making this virtually impossible to mess up.
4. The Piecey Shag with Texture
A modern shag cut works with your wave texture instead of against it, especially when you embrace shorter layers. Shorter pieces actually dry faster and with less frizz because there’s less weight pulling on them.
How Layers Reduce Frizz
Conventional wisdom says long hair looks smoother, but that’s only true if your long hair is naturally straight. With waves, the weight of very long hair actually magnifies frizz by pulling down unevenly. A shag with textured layers gives you movement without the frizz-prone length. Each layer dries independently, and the pieces dry faster with less chance for humidity to expand them.
Styling a Shag to Minimize Frizz
- Apply a curl-defining cream to damp hair, section by section
- Rough-dry with a microfiber towel to get about 70% dry
- Use a diffuser attachment on low heat to encourage your natural wave
- Once dry, apply a lightweight serum or oil to seal the cuticles
- Use your fingers to separate and piecey-fy the layers — avoid heavy brushing that creates frizz
- Scrunch gently to encourage texture and spring
- A tiny dab of pomade on just the surface creates shine without weight
This style actually gets easier to manage as your layers settle in over a few weeks.
5. The Half-Up, Half-Down with Twist
This style captures frizz at the crown while leaving waves flowing below. The twist creates a small area of tension that prevents the dreaded “fuzzy halo” effect.
Why the Twist Beats the Regular Half-Up
A traditional half-up clip doesn’t do much for frizz control, but a twisted section does. The twist creates tension along the cuticle layer, which smooths the surface and prevents flyaways from puffing outward. You get the softness of down hair without the frizz that usually comes with it.
Creating a Polished Half-Up Twist
- Start with damp hair and apply a smoothing serum or lightweight cream
- Blow-dry your entire head or air-dry with a diffuser
- Take a small section from one side of your head (about one inch wide)
- Twist this section tightly as you move toward the back of your head, gathering it as you go
- Gather the opposite side and twist it back as well, twisting the two sections together once they meet
- Secure with bobby pins hidden underneath at the crown, or use a decorative clip
- Leave the lower half of your hair down and wavy
- Apply a final coat of anti-frizz serum to the bottom section to seal everything down
The twisted sections naturally create the smoothness while your waves stay free and defined below.
6. The Slick High Ponytail
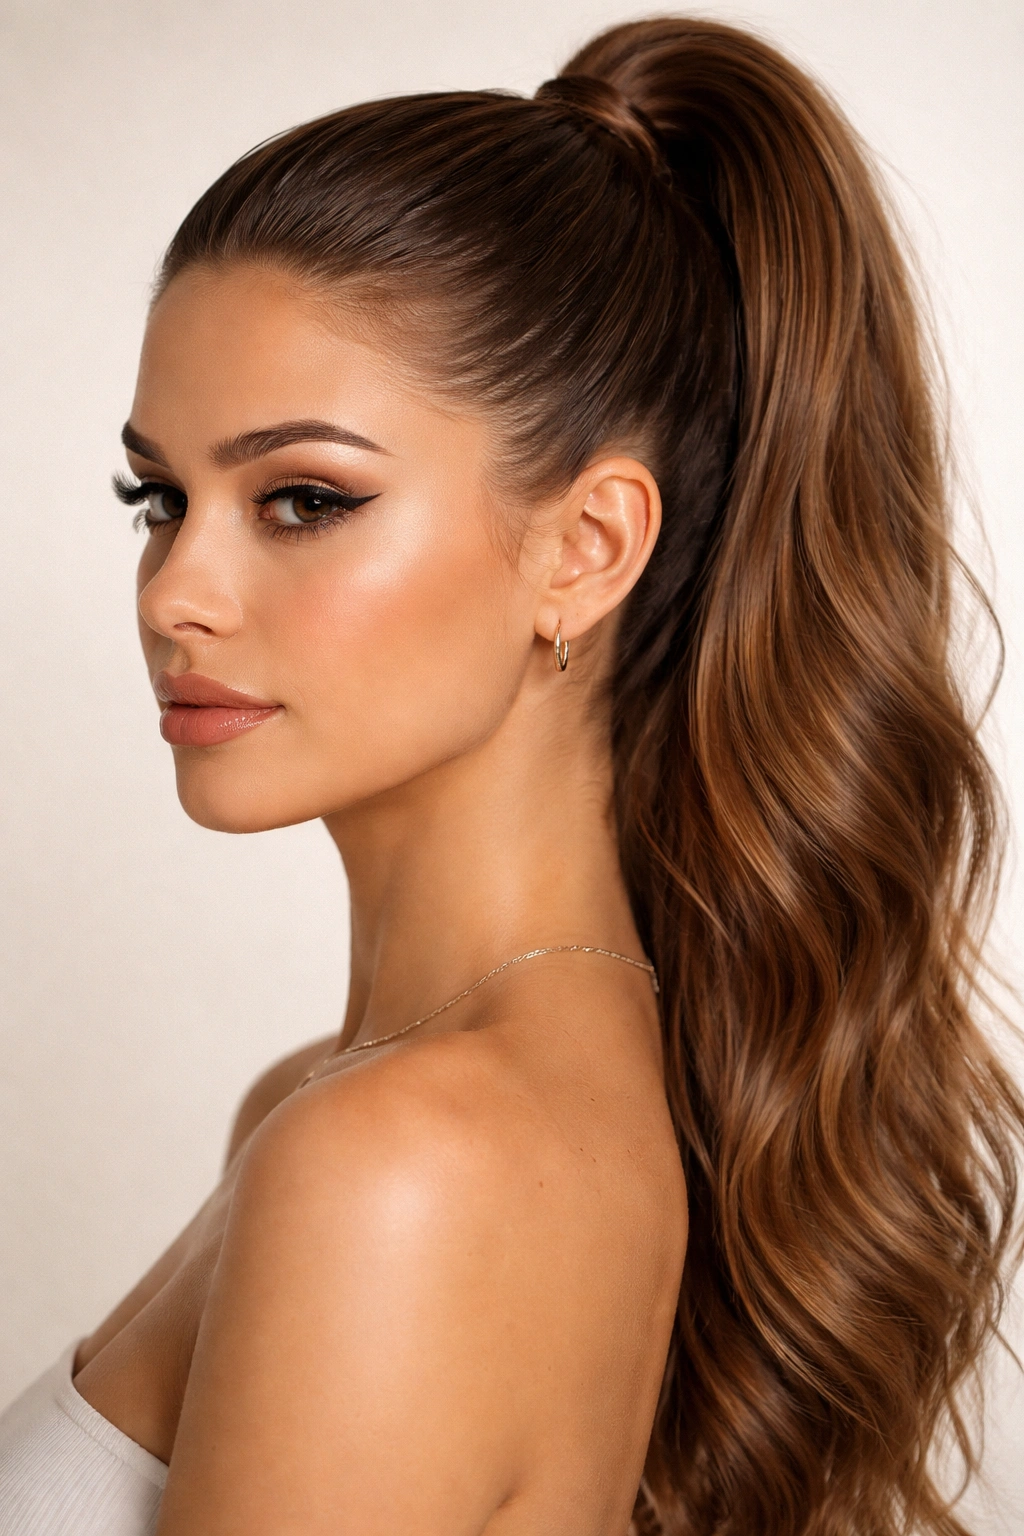
A high ponytail is a classic frizz-fighter, especially when you use the right technique to smooth the base. The key is creating genuine tension that suppresses flyaways.
The Mechanics of a Smooth High Pony
The tighter and higher you pull a ponytail, the more tension you create along the scalp and root area. This tension flattens the cuticle layer and prevents the frizz that normally occurs at the base and crown. The weight of the ponytail itself also helps suppress any stray hairs.
Styling Steps for Maximum Smoothness
- Apply a lightweight gel or mousse to damp hair
- Blow-dry on medium heat using a paddle brush to smooth the surface
- Brush your hair straight up toward the crown
- Create the ponytail at the very top of your head, pulling firmly but not painfully
- Use a small elastic to secure it, and pin it in place with bobby pins for added hold
- Smooth down any baby hairs with a small-tooth comb and a tiny dab of gel
- Wrap a small piece of hair around the elastic base to hide it and add polish
- For extra shine, apply a liquid serum to the surface of the ponytail
A high ponytail can last all day without a single frizz hair escaping, especially in dry climates.
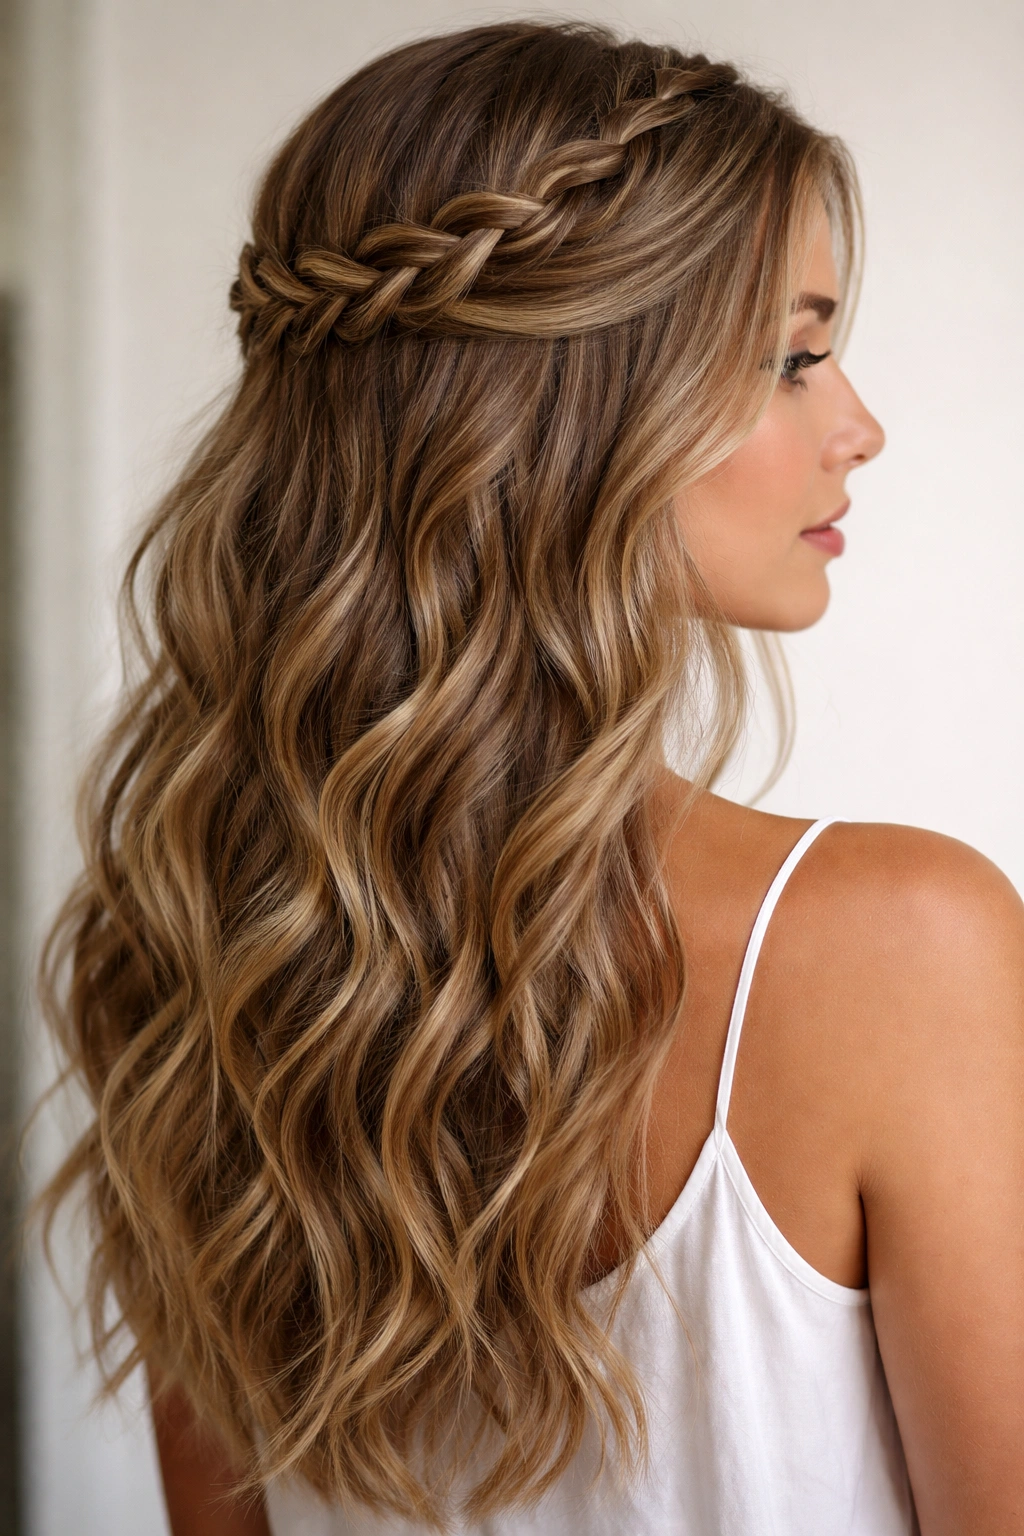
7. The Braided Crown Halo
A crown braid works beautifully with wavy hair because it looks intentional and polished while controlling frizz across the entire head. The braid’s structure contains every strand.
Why a Crown Braid Tames Frizz
Unlike a standard side braid, a crown braid wraps around your head, creating tension points all the way around. This distributes pressure evenly and prevents frizz from escaping anywhere. The style looks romantic and deliberate, not like you’re just trying to manage bad hair.
Creating a Crown Braid
- Start with damp hair and apply a smoothing serum or curl cream
- Blow-dry until about 80% dry, or air-dry with a diffuser
- Create a deep side parting and begin your braid at one temple
- Braid toward the back of your head, incorporating small sections as you go
- When you reach the opposite side, continue the braid and wrap it around the back of your head
- Secure the end with bobby pins hidden underneath, or tuck it into the braid itself
- Leave a few wispy pieces around your face for softness
- Smooth everything down with a tiny amount of gel or serum
This style is surprisingly easy once you understand the path, and it’s virtually impossible for frizz to escape the braid structure.
8. The Sleek Low Ponytail with Shine
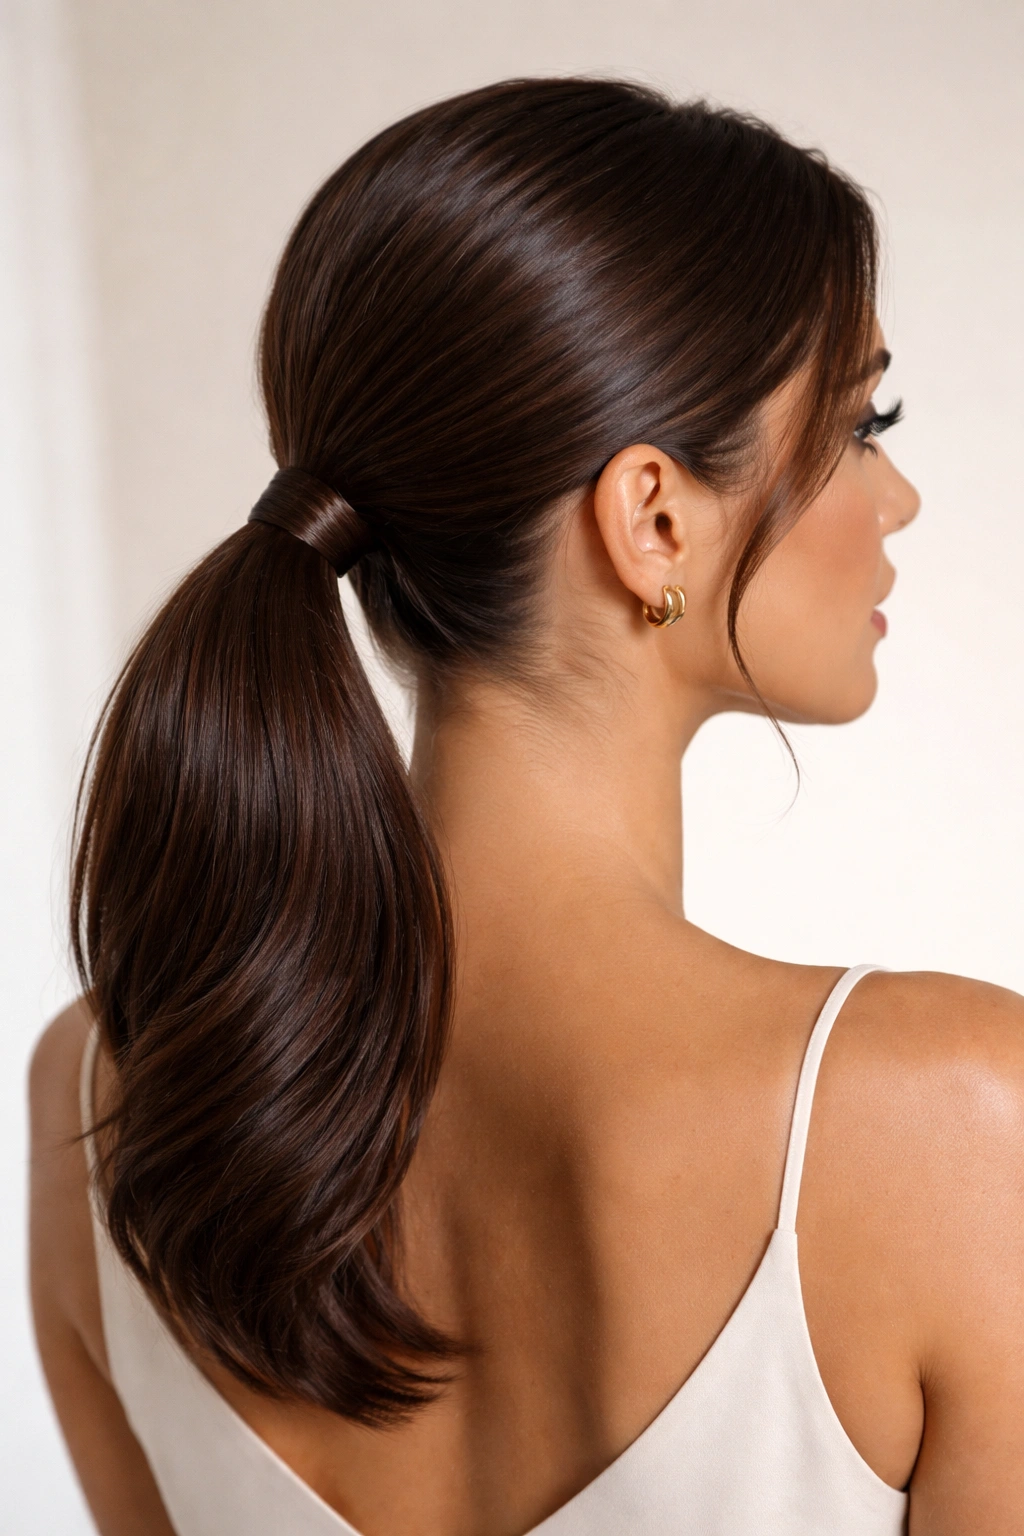
A low ponytail is less obviously tension-based than a high one, but when done with the right products, it’s equally effective at controlling frizz. The key is starting smooth and sealing everything down.
How Low Ponytails Hide Frizz
Lower ponytails work differently than high ones — instead of relying on tension alone, they work by weight and volume management. A low ponytail with carefully controlled texture looks sleek and effortless while keeping every hair contained.
Styling a Polished Low Pony
- Apply an anti-frizz smoothing cream to damp hair
- Blow-dry with a paddle brush, paying extra attention to smoothing the back and sides
- Create a low ponytail at the nape of your neck, about two inches above the hair’s natural start point
- Use a clear elastic or fabric-covered elastic that won’t grip hair too tightly
- Wrap a thin section of hair around the elastic to hide it
- Apply a lightweight serum to the surface of the ponytail for shine
- Smooth down the crown area with a fine-tooth comb and a dab of gel if needed
- Straighten the ends with a flat iron for extra polish, or leave them wavy for texture
A low ponytail reads as more casual and sophisticated than a high one, and it’s easier to maintain throughout the day.
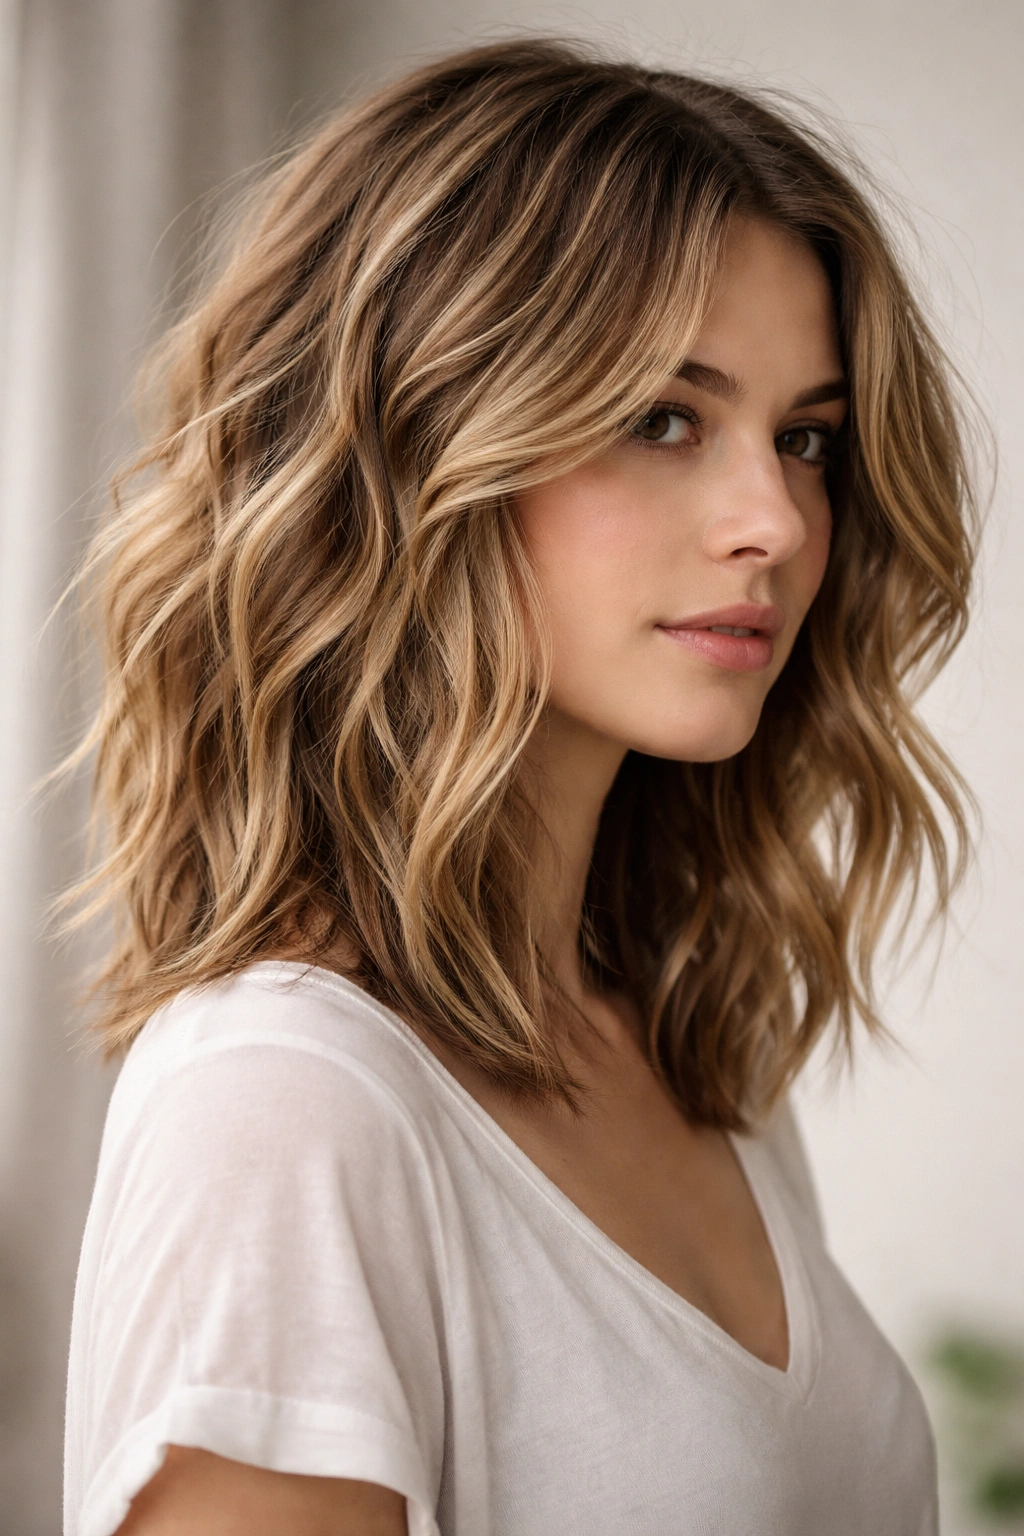
9. The Smooth Wave with Layered Texture
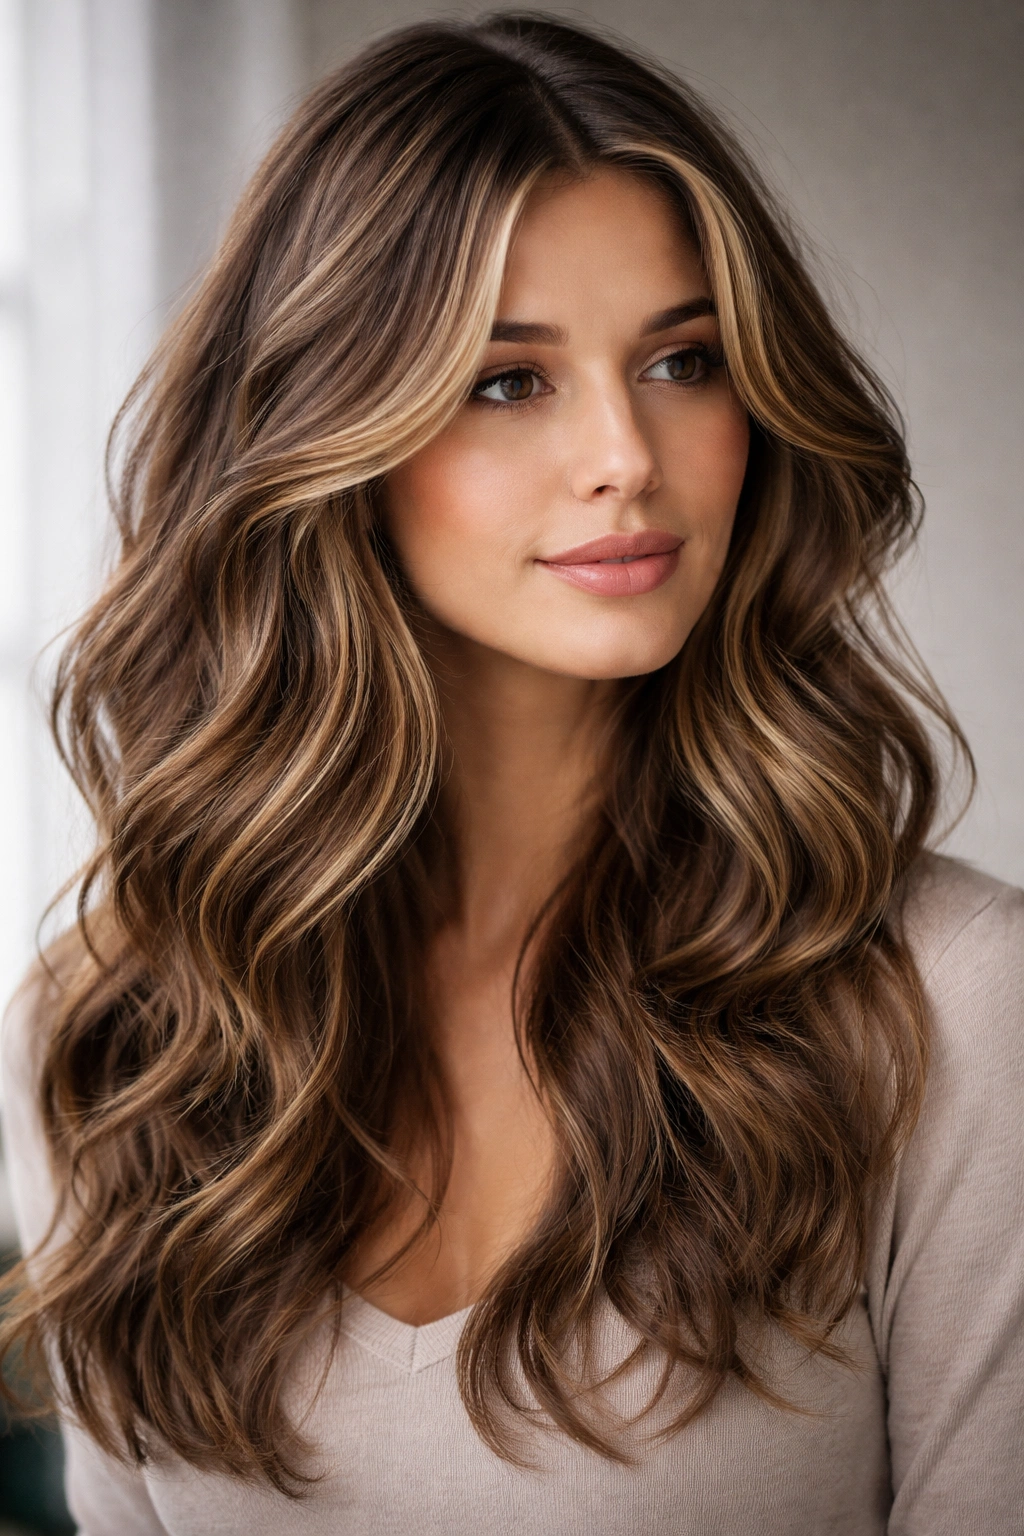
This style keeps waves defined while using layers strategically to reduce bulk and frizz. Shorter, lighter pieces don’t hold moisture or expand as easily as one-length hair.
The Science of Layered Reduction
When you have a lot of thick, heavy hair, waves tend to frizz more because the weight pulls on each strand unevenly. Layers distribute weight more evenly across your head and allow each section to dry independently. Shorter pieces around the face and crown dry fastest, so they frizz less. Lower layers have more weight from above, which actually helps keep them smooth.
Styling Layered Waves for Definition
- Start with damp hair and apply a curl cream or defining mousse
- Rough-dry with a microfiber towel or a diffuser on low heat
- Once mostly dry, apply a lightweight serum or oil from mid-length to ends
- Use your fingers to define and separate the layers — avoid brushing, which disrupts the wave pattern
- If you want more wave definition, use a curling iron on the lower layers only
- Scrunch gently to encourage texture and add volume
- A tiny bit of pomade on the ends prevents them from looking stringy
Layers also give you dimension that makes minor frizz look intentional rather than messy.
10. The Twisted Updo with Softness
An updo that uses twists instead of braids is sophisticated and effective at controlling frizz, especially when you leave a few pieces soft around the face.
Why Twists Work Better Than Braids for Some Hair Types
Twists are tighter and more compact than braids, which means even more control over individual strands. They also look more polished and formal. If your waves are tight or your hair is thick, a twist-based updo might contain frizz even better than a braid would.
Creating a Twisted Updo
- Apply a smoothing serum to damp hair
- Blow-dry on medium heat with a paddle brush for a smooth base
- Create two sections at the crown by parting from ear to ear
- Twist one section tightly and pin it to the back of your head
- Twist the second section and cross it over the first, securing both with bobby pins
- Gather the remaining hair at the nape of your neck and twist it upward, incorporating it into the updo
- Secure everything with pins and smooth down flyaways with gel
- Leave one or two face-framing pieces untwisted for a softer, romantic look
This style is perfect for formal events and lasts all evening without a single frizz hair escaping.
11. The Sleek Wave with Deep Side Part
A deep side part creates asymmetry that makes your style look intentional and controlled. Combined with smooth waves, it’s one of the most polished looks you can achieve.
How a Side Part Enhances Smoothness
A deep side part doesn’t just look chic — it actually changes how light hits your hair, making it appear smoother and shinier. The part line creates a visual anchor that makes any small frizz look intentional. The hair swept over one side is naturally pulled tighter, which helps suppress frizz in that area.
Styling Smooth Waves with a Side Part
- Apply an anti-frizz serum to damp hair from root to tip
- Blow-dry using a round or paddle brush, directing the hair toward the side you want it to fall
- Create a deep side part, starting at one temple and extending back about three inches from the natural part line
- Smooth all the hair over one shoulder
- Use a fine-tooth comb to smooth any flyaways on the smaller side
- Apply a tiny amount of gel to the part line itself to keep it sharp
- Finish with a light hairspray that won’t feel crunchy or stiff
- For extra shine, apply a liquid serum to just the surface of the hair
This look works for professional settings, dates, or whenever you want to look polished without appearing overdone.
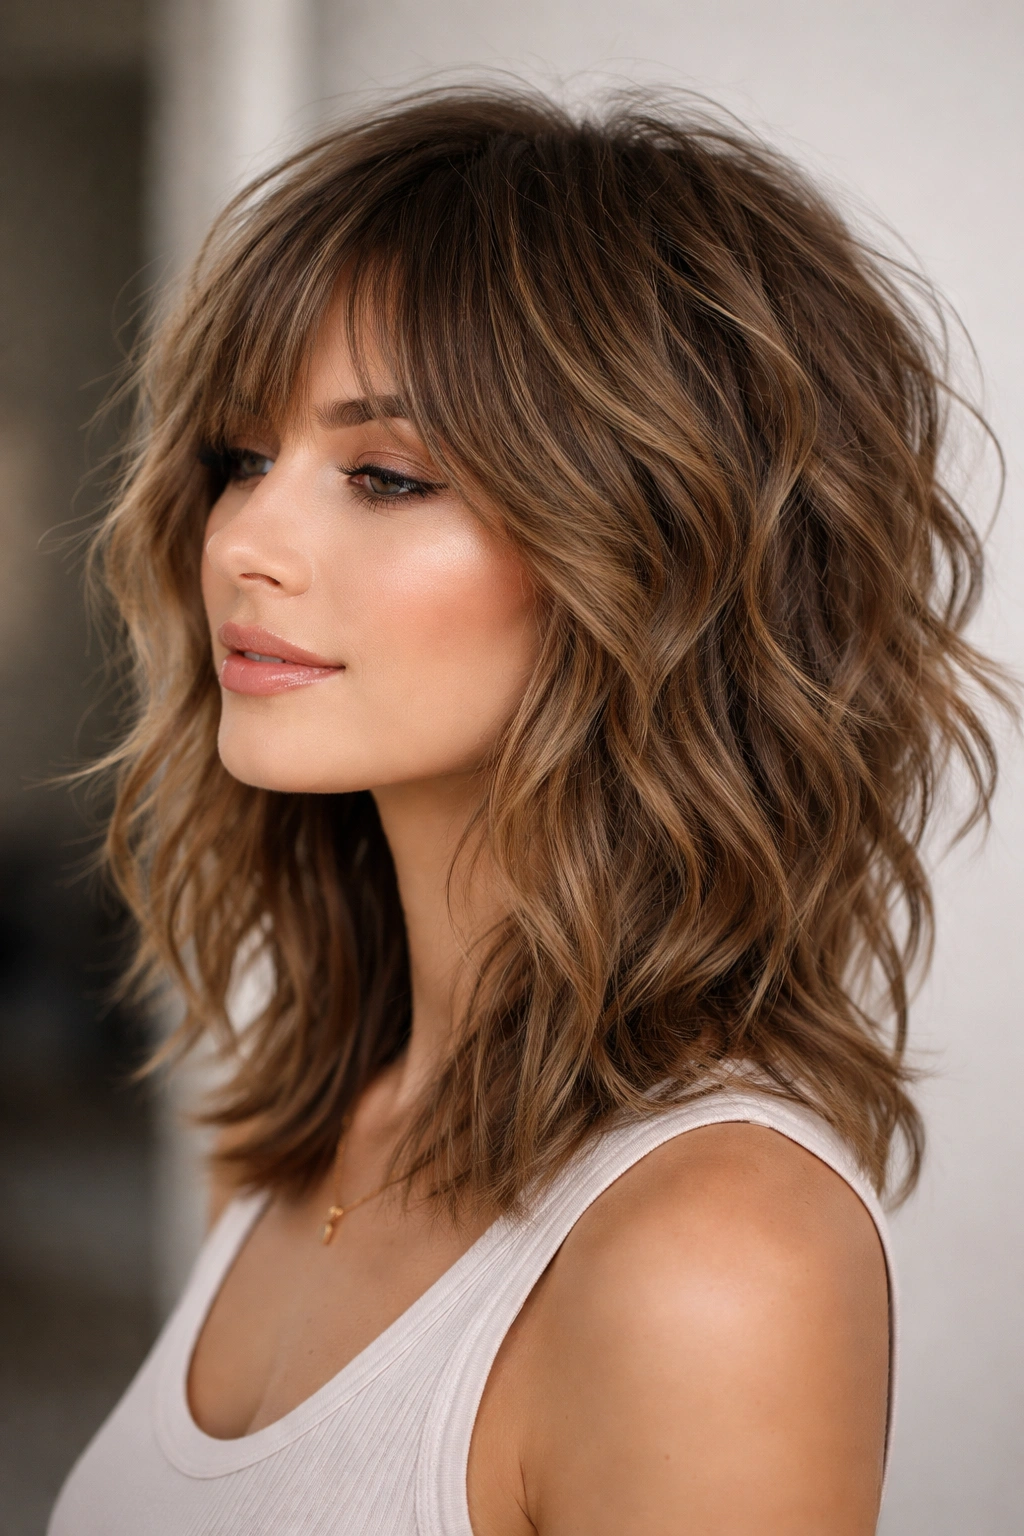
12. The Textured Lob with Choppy Layers
A lob (long bob) with choppy layers is the perfect length for wavy hair to look full without looking frizzy. The length is short enough to dry quickly, but long enough to keep waves defined.
Why a Lob Is Ideal for Wavy Hair
A lob sits right around collarbone length, which is the sweet spot for waves. This length has enough weight to keep waves defined, but not so much that it magnifies frizz. Choppy layers add movement and reduce bulk, which both help with frizz control.
Styling a Textured Lob
- Apply a curl cream or wave-enhancing mousse to damp hair
- Rough-dry with a microfiber towel or diffuser, scrunching as you go
- Once about 70% dry, apply an anti-frizz serum to the mid-lengths and ends
- Use your fingers to separate and define the layers
- If you want more definition, use a large-barrel curling iron on individual sections
- Scrunch and tousle to encourage texture
- Finish with a lightweight hairspray that holds without crunching
A textured lob is easy to style and maintains its shape for days, making it one of the lowest-maintenance frizz-fighting cuts.
13. The Secured Messy Bun with Control

A messy bun isn’t messy when done right — it’s intentionally textured while being firmly secured. The key is using enough pins and product to prevent strays from becoming frizz.
How to Achieve “Controlled Messy”
The difference between a frizzy bun and a controlled messy one is preparation. You need to smooth the base, gather the hair firmly, and use enough pins to prevent any movement. Once everything is secure, a little texture looks artfully undone rather than unkempt.
Creating a Contained Messy Bun
- Apply a smoothing serum to damp hair and blow-dry on medium heat
- Create a high or mid-height ponytail with a clear elastic
- Twist the ponytail loosely and wrap it around the base
- Secure with at least three bobby pins, positioned at different angles
- Leave a few small sections out around the face, twisting them slightly for control
- Gently pull a few pieces from the bun to create texture, being careful not to pull so hard that you create frizz
- Smooth down the base with a small-tooth comb and a dab of gel
- Apply a fine hairspray to set everything in place
This style looks effortlessly chic while actually being very structured and frizz-controlled.
14. The Protective Silk Wrap with Waves
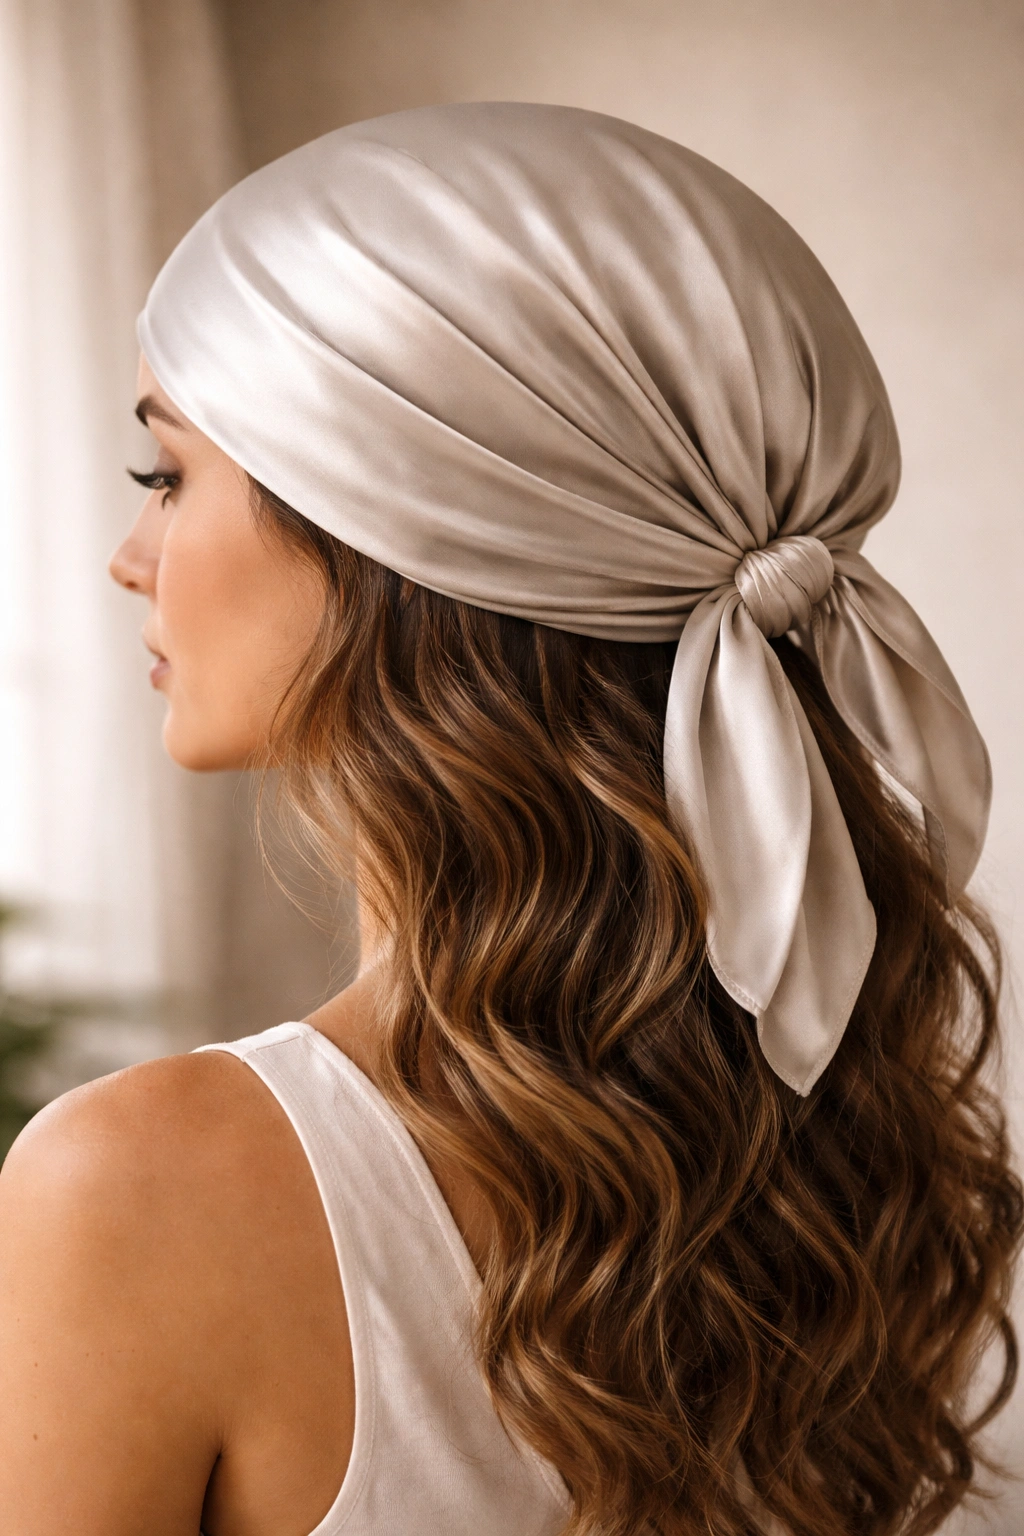
A silk wrap isn’t technically a hairstyle you’d wear out, but it’s one of the most effective overnight frizz prevention techniques. Sleeping in a silk wrap keeps your waves smooth and defined for the next day.
Why Silk Prevents Overnight Frizz
Cotton pillowcases create friction that roughens your hair’s cuticle layer and causes frizz. Silk is smooth and creates almost no friction, which means your waves stay smooth and defined overnight. A wrap also keeps your waves in the exact pattern you created, so you wake up with perfect waves already in place.
How to Create a Protective Silk Wrap
- Style your waves during the day as you normally would
- Before bed, use a wide-tooth comb to gently brush through your hair or smooth it with your hands
- Take a large silk scarf and position it at the back of your head
- Gather your hair up into the scarf, tucking in all the edges so your entire head is wrapped
- Tie the scarf gently at the front — not so tight that it creates a headache, but snug enough that it won’t slip
- In the morning, unwrap carefully and finger-comb your waves gently
- You may only need to touch up with a tiny bit of serum and you’re ready to go
A silk wrap adds no time to your nighttime routine but makes a massive difference in how your waves look the next day.
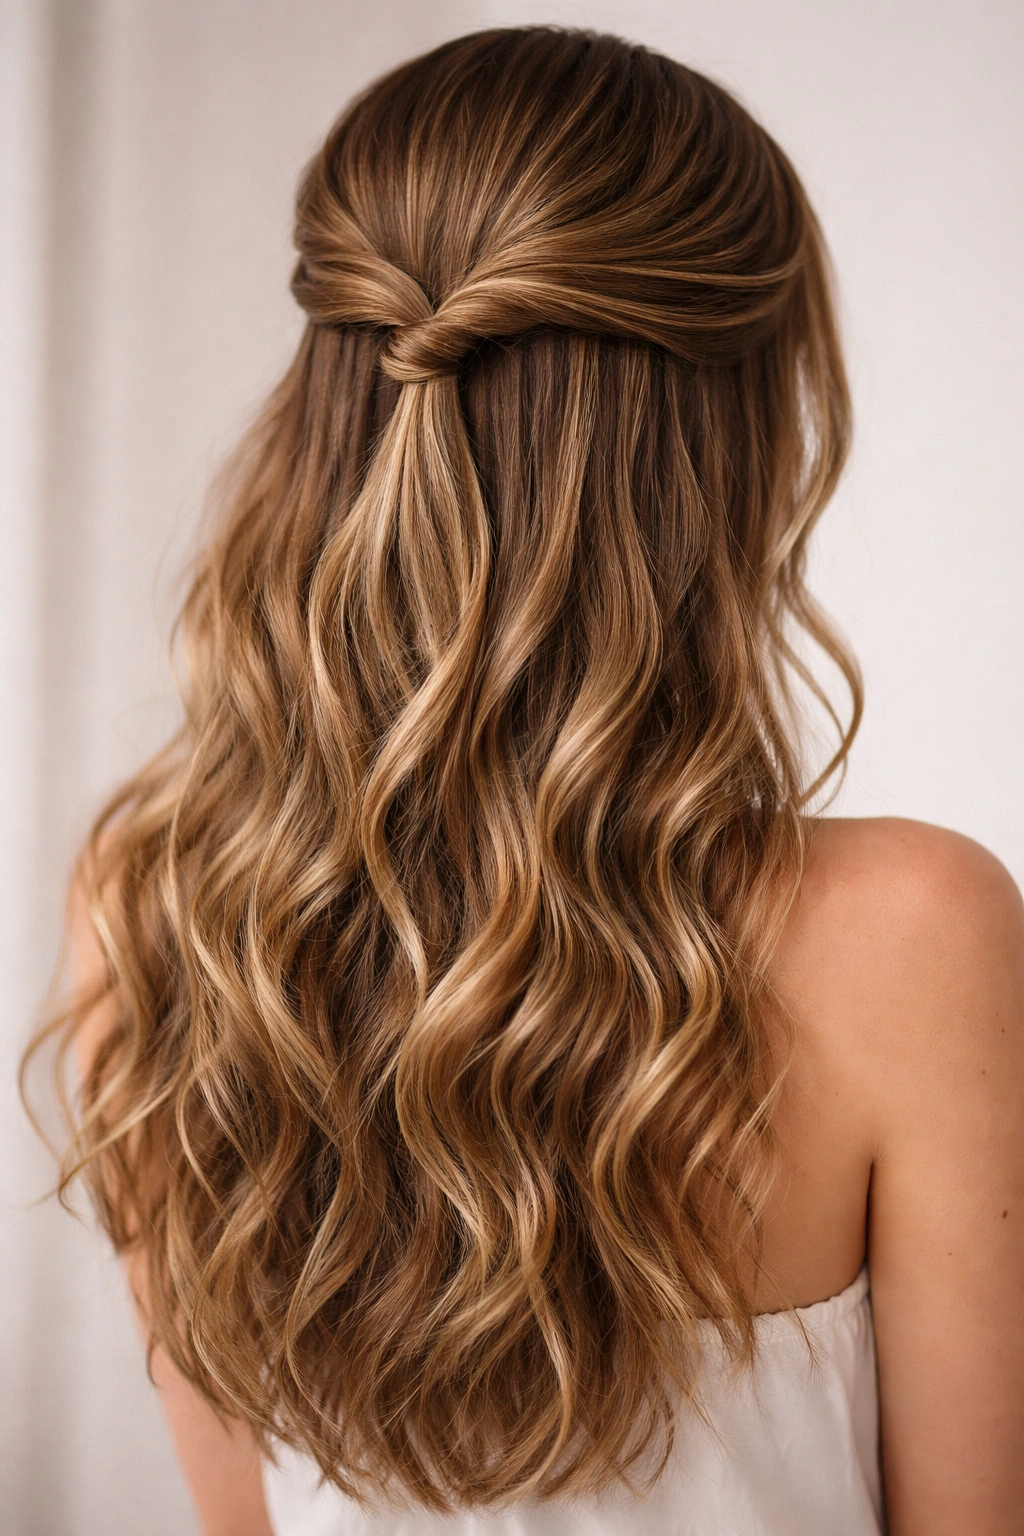
15. The Sleek Pulled-Back Style with Face-Framing Pieces
This hybrid style pulls hair back smoothly while leaving a few pieces down to frame your face softly. It gives you the frizz control of a pulled-back style with the softness of down hair.
The Balance of Structure and Softness
The secret to this style is that the pulled-back section handles frizz control, while the face-framing pieces add femininity and softness. The face-framing pieces are applied with serum, so they don’t frizz even though they’re down.
Styling the Pulled-Back Look
- Apply a smoothing serum to damp hair
- Blow-dry on medium heat using a paddle brush for overall smoothness
- Take a small section from each temple (about one inch wide from each side)
- Pull these sections back and secure them at the crown with a bobby pin or small clip
- Leave the rest of your hair down, creating a frame around your face
- Apply a lightweight serum to the face-framing pieces to keep them smooth
- Smooth down any flyaways on the crown with a fine-tooth comb and gel
- Finish with a light hairspray
This style works for work, casual outings, or dates when you want something more polished than completely down hair but softer than a full pulled-back style.
16. The Smooth Waves with a Silk or Satin Pillowcase
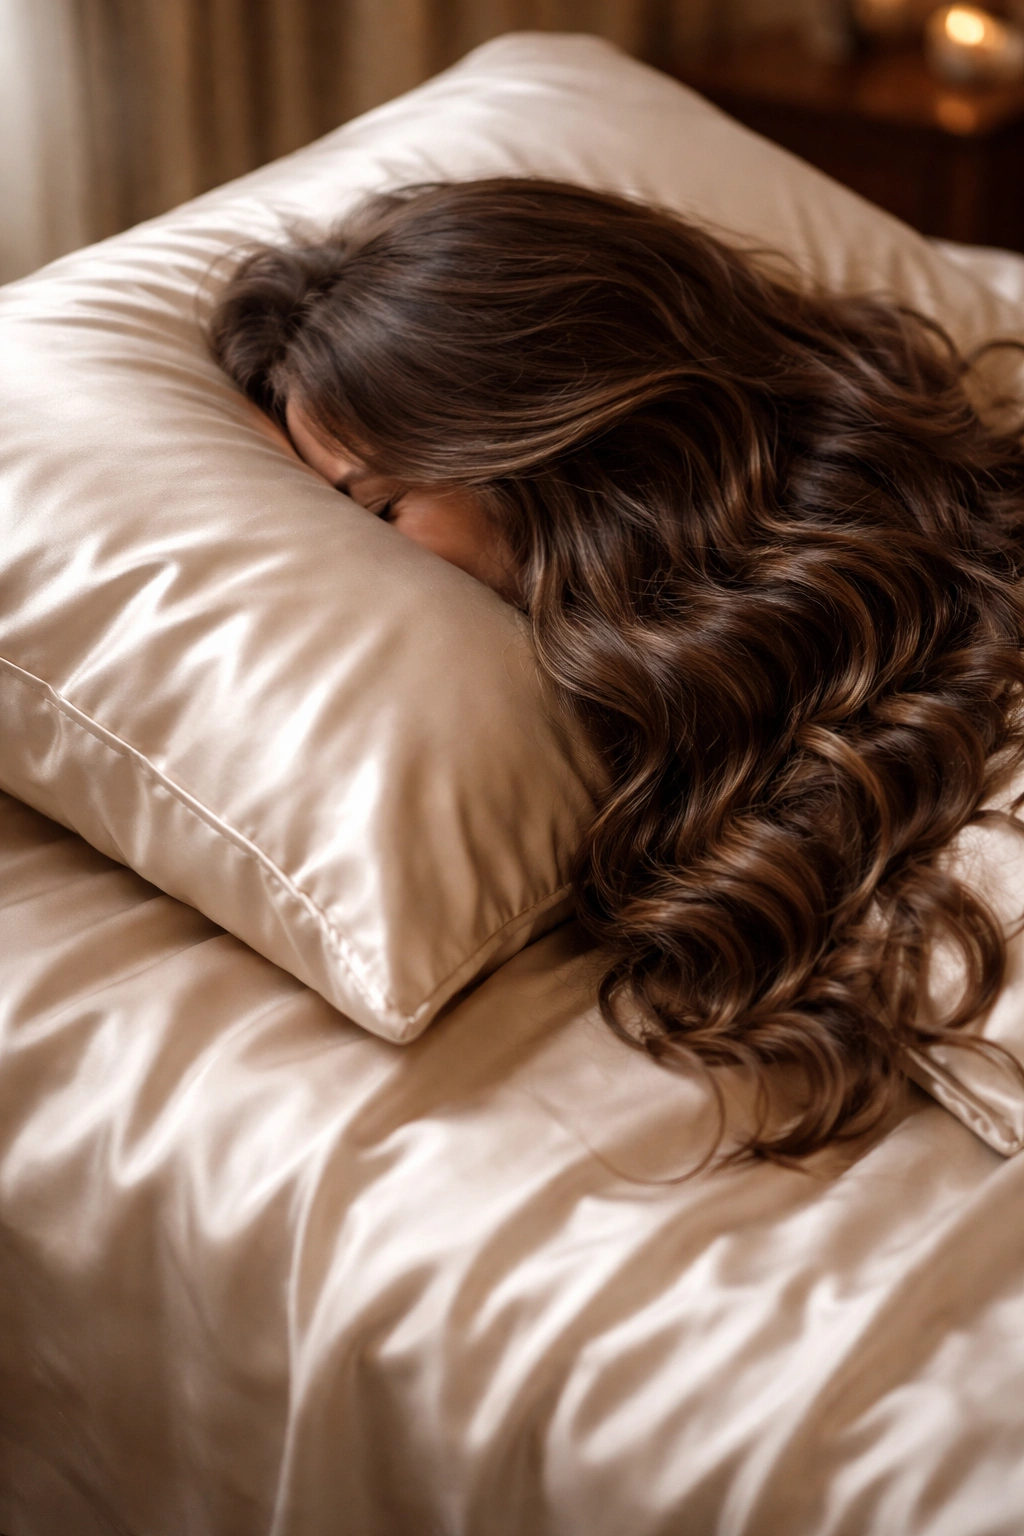
Like the silk wrap, this isn’t a hairstyle itself but an essential tool for maintaining smooth waves. Sleeping on a silk or satin pillowcase is one of the simplest ways to prevent overnight frizz.
The Ongoing Benefits of Silk Pillowcases
Every night you sleep on cotton, your hair experiences thousands of tiny friction points that roughen the cuticle and cause frizz. A silk or satin pillowcase reduces this friction dramatically. Over time, regular silk pillowcase use results in noticeably smoother hair that’s less prone to frizz even during styling.
Making the Switch to Silk
- Invest in a silk or satin pillowcase (they’re affordable and available everywhere)
- Wash your pillowcase every few days to keep it clean, but use gentle detergent so you don’t damage the silk
- When you place your head on the pillow, your waves will glide across it instead of catching and creating friction
- Expect your waves to last longer and look smoother when you wake up
- You may find you need less styling product in the morning because there’s less overnight frizz to tame
- Silk pillowcases also help your skin and are a worthwhile investment for your entire sleep setup
Switching to silk is one of the most cost-effective upgrades you can make for frizz prevention.
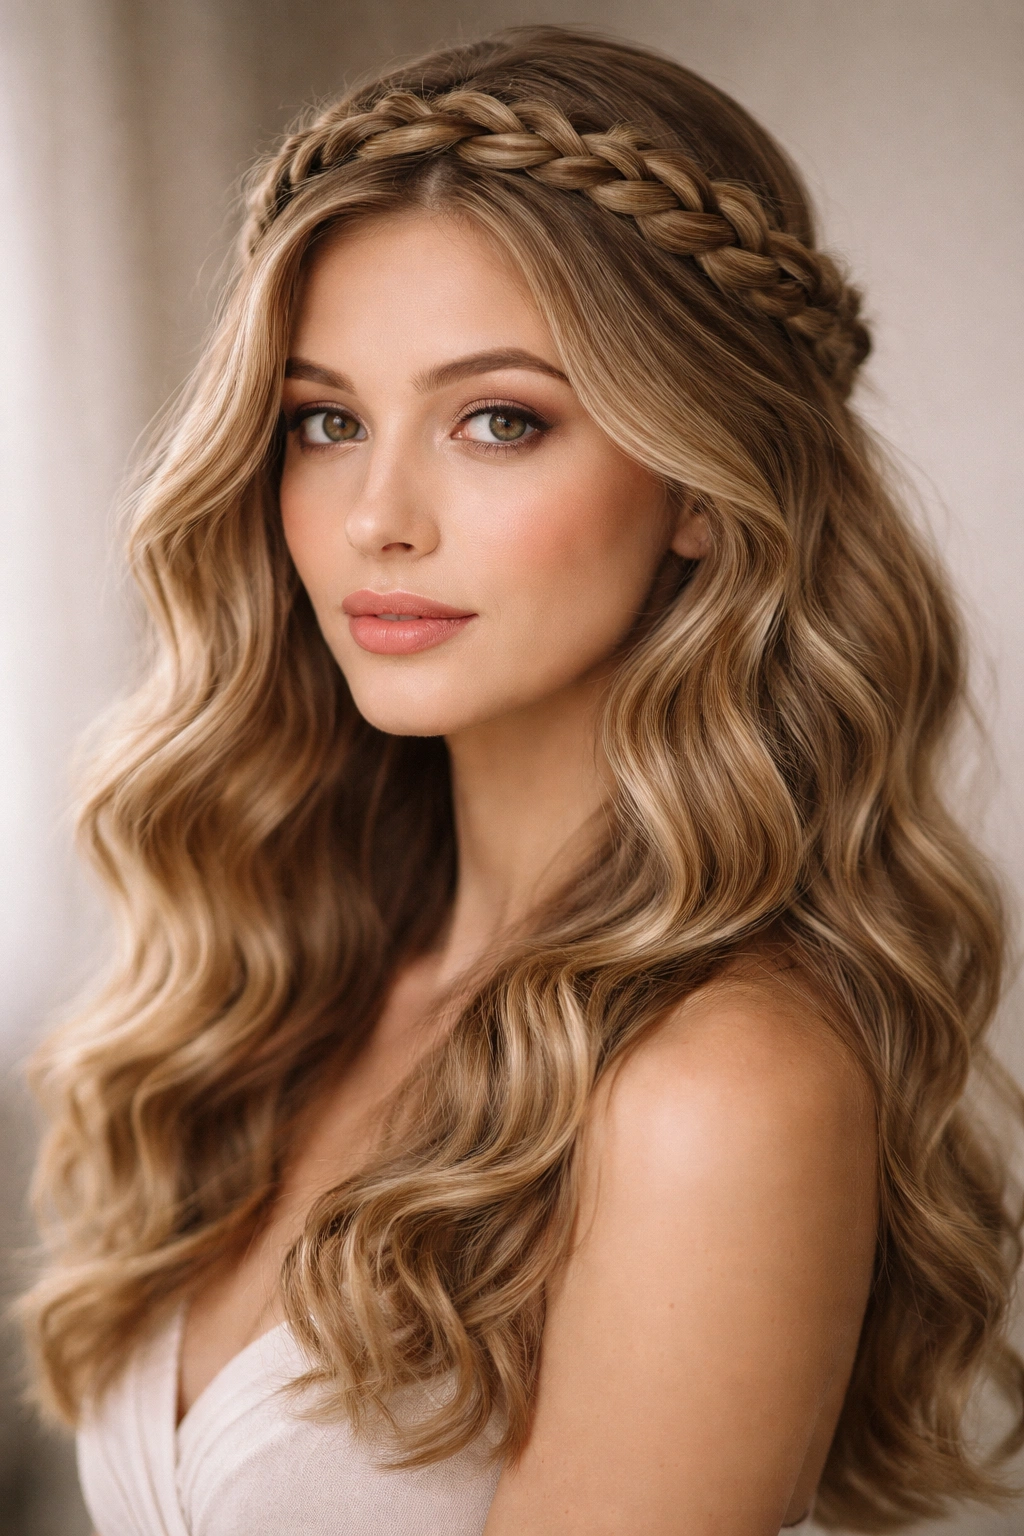
17. The Half-Up Braid Crown with Loose Waves Below
This style combines a braided crown section with loose waves below, giving you frizz control at the top while maintaining wave definition on the bottom.
How Split Structure Controls Frizz Strategically
You don’t need to braid or pin back your entire head to prevent frizz. By braiding just the crown and crown-to-ear sections, you eliminate the frizz-prone area (the top) while letting your waves flow freely below. This is a great compromise style.
Creating a Half-Up Braid Crown
- Apply a curl-defining cream to damp hair
- Rough-dry with a diffuser or microfiber towel to about 70% dry
- Apply an anti-frizz serum from mid-length to ends
- Take a section of hair from your temple and begin a braid
- Continue the braid diagonally across the back of your head to the opposite ear
- Secure the braid with bobby pins and a small elastic at that ear
- Leave all the hair below the braid down and wave-textured
- Smooth down the top section with a tiny bit of gel if needed
- The bottom waves should be enhanced with your fingers or a curling iron for definition
This style is perfect for casual days when you want some polish without looking overdone.
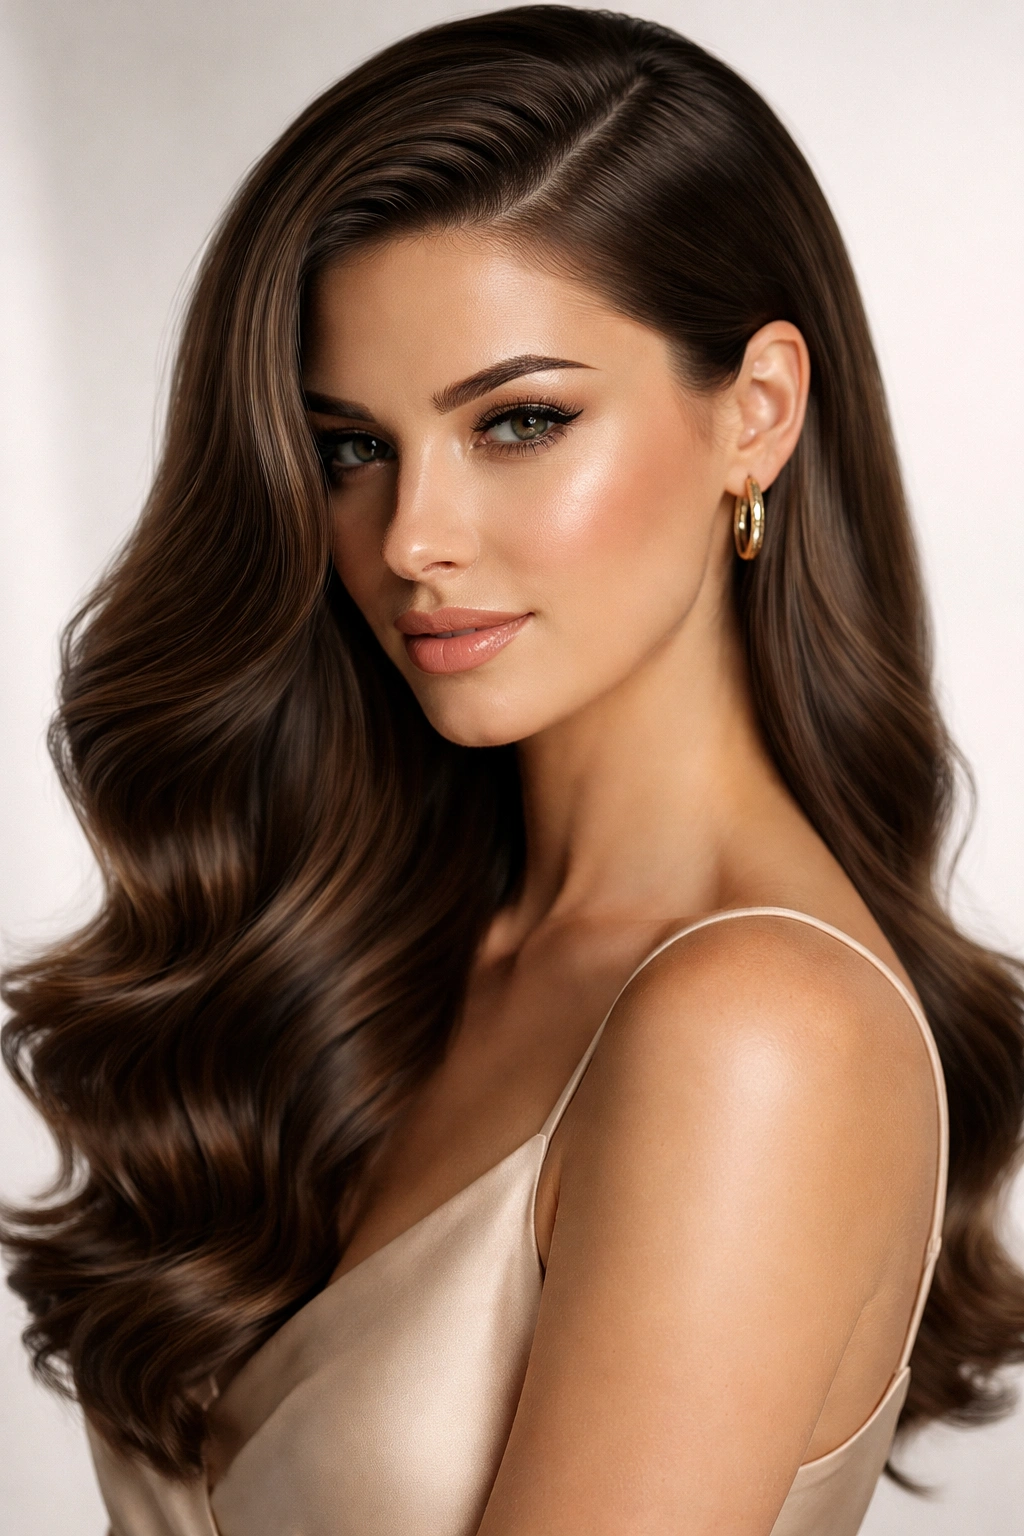
18. The Sleek Straight Waves with a High Shine
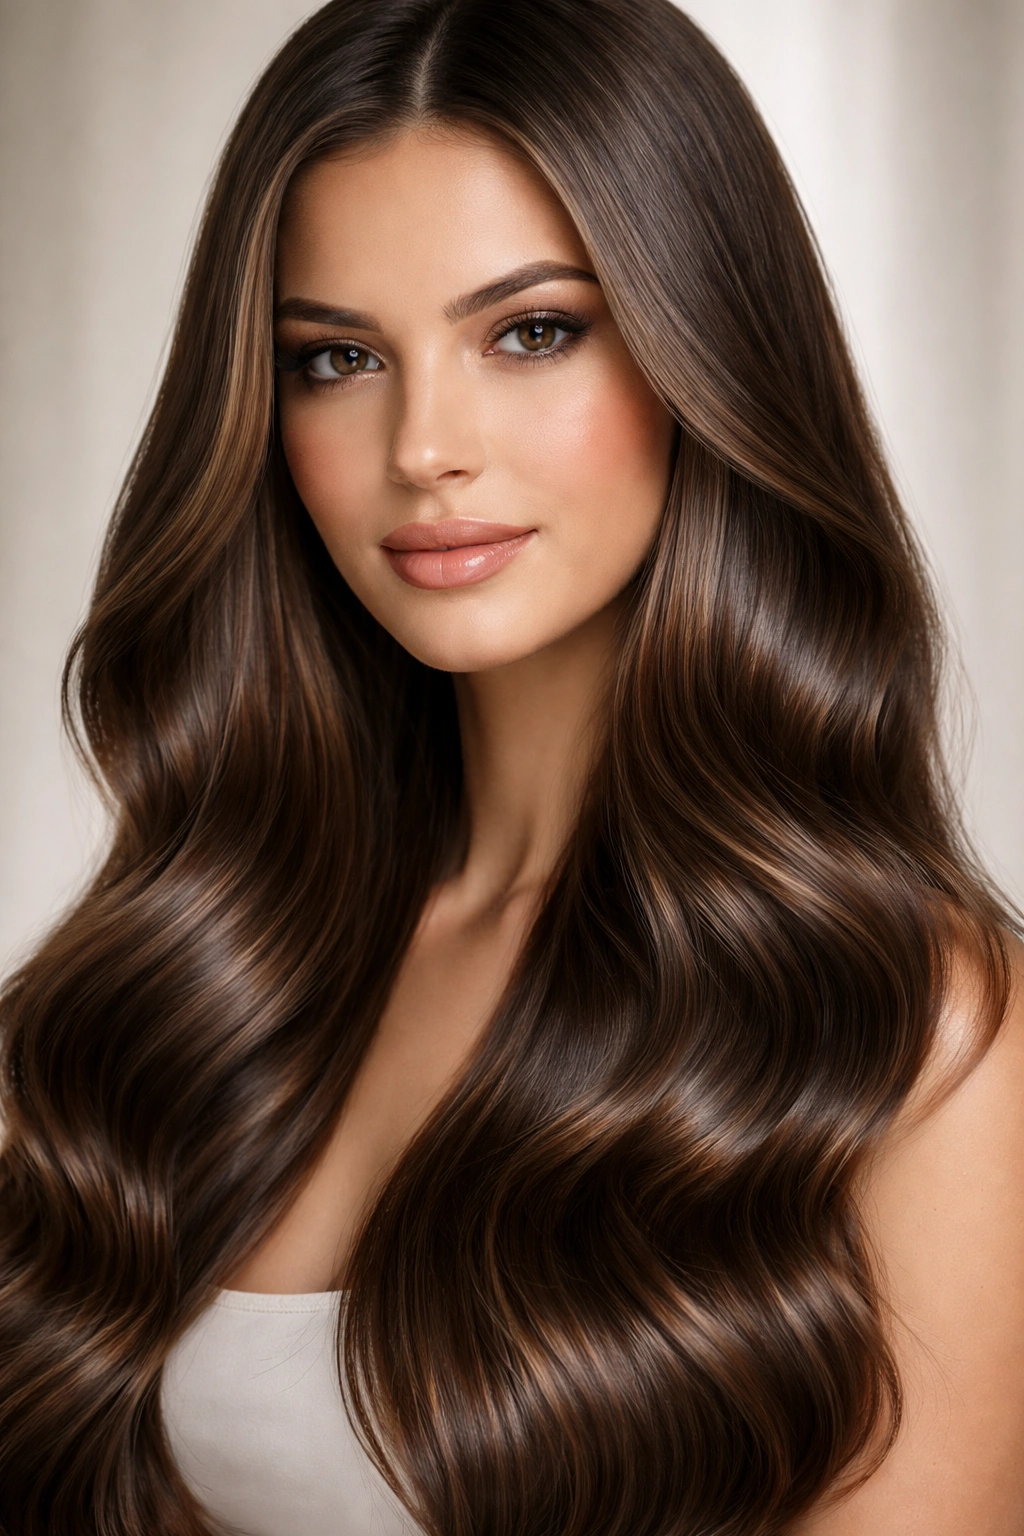
This style uses heat-styling tools to create extremely smooth waves while a shine product keeps everything sealed and glossy. It’s one of the most polished looks possible.
How Heat Styling Creates Frizz Control
Using a flat iron or large-barrel curling iron on damp hair creates a smooth, sealed cuticle layer. When you then apply a shine serum, the combination is virtually frizz-proof. The cuticle layer is closed so tightly that humidity can’t expand individual strands.
Creating Sleek Shiny Waves
- Apply a heat protectant product to damp hair
- Blow-dry completely on medium-high heat, using a paddle brush for smoothness
- Use a flat iron set to 350°F (175°C) to straighten your hair in sections
- Once straightened, use a large-barrel curling iron set to 350°F (175°C) to create loose waves
- Hold each wave for about three seconds, then release and move to the next section
- Apply a lightweight shine serum to the surface once completely cool
- Use a fine-tooth comb to smooth down any flyaways
- Finish with a light hairspray designed for shine, not hold
This style lasts 2-3 days and only gets smoother as the product settles.
19. The Dutch Braids to Low Ponytail
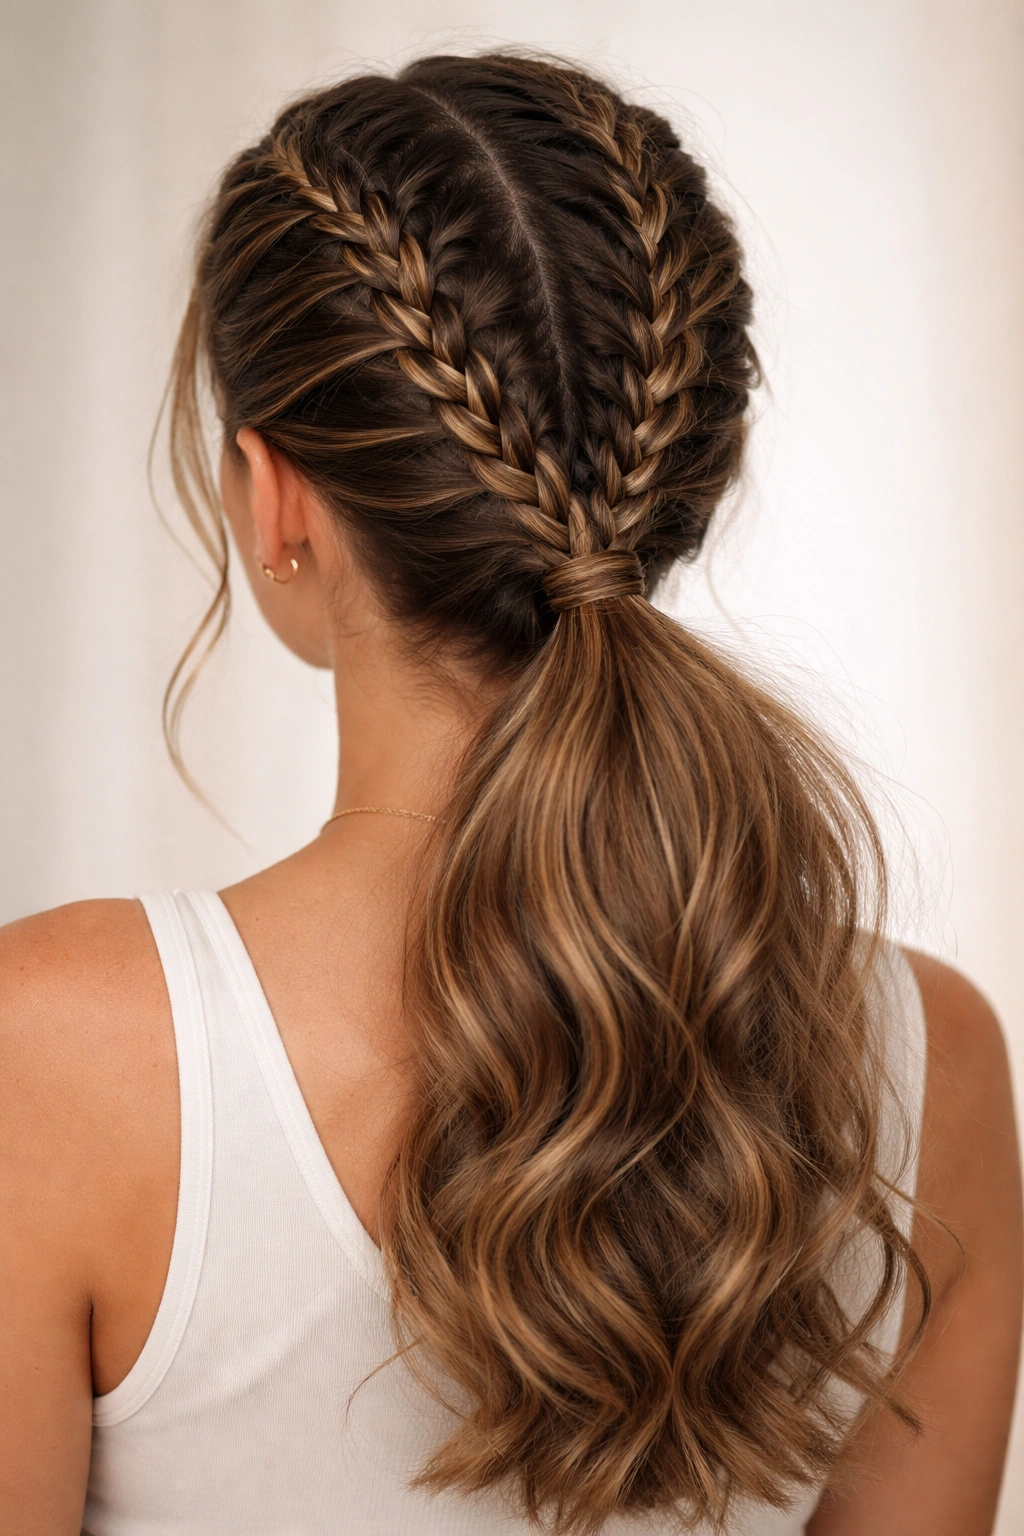
Dual Dutch braids that meet into a low ponytail is both stylish and incredibly effective at frizz control. The braids contain every strand, and the ponytail tail grounds everything.
Why Dual Braids Work So Well
Two braids create twice the tension points, which means twice the frizz control. When they meet into a single ponytail, you get a compound effect — the braids ensure no flyaways escape from the top, and the ponytail ensures the bottom section is contained too.
Styling Dutch Braids to a Low Pony
- Apply a smoothing serum to damp hair
- Blow-dry on medium heat with a paddle brush
- Create a center part and take a section from your left temple
- Braid this section in a Dutch pattern (under-over instead of over-under) toward the back of your head
- Repeat on the right side, mirroring the left braid
- When both braids meet at the nape of your neck, gather them along with the remaining hair into a low ponytail
- Secure with a small elastic and wrap a thin section around it to hide the elastic
- Apply a serum to the ends of the ponytail for shine
- Smooth down any flyaways with a fine-tooth comb and gel
This style is perfect for active days, workouts, or anytime you need your hair completely contained and polished.
20. The Soft Waves with Lightweight Texturizing Spray
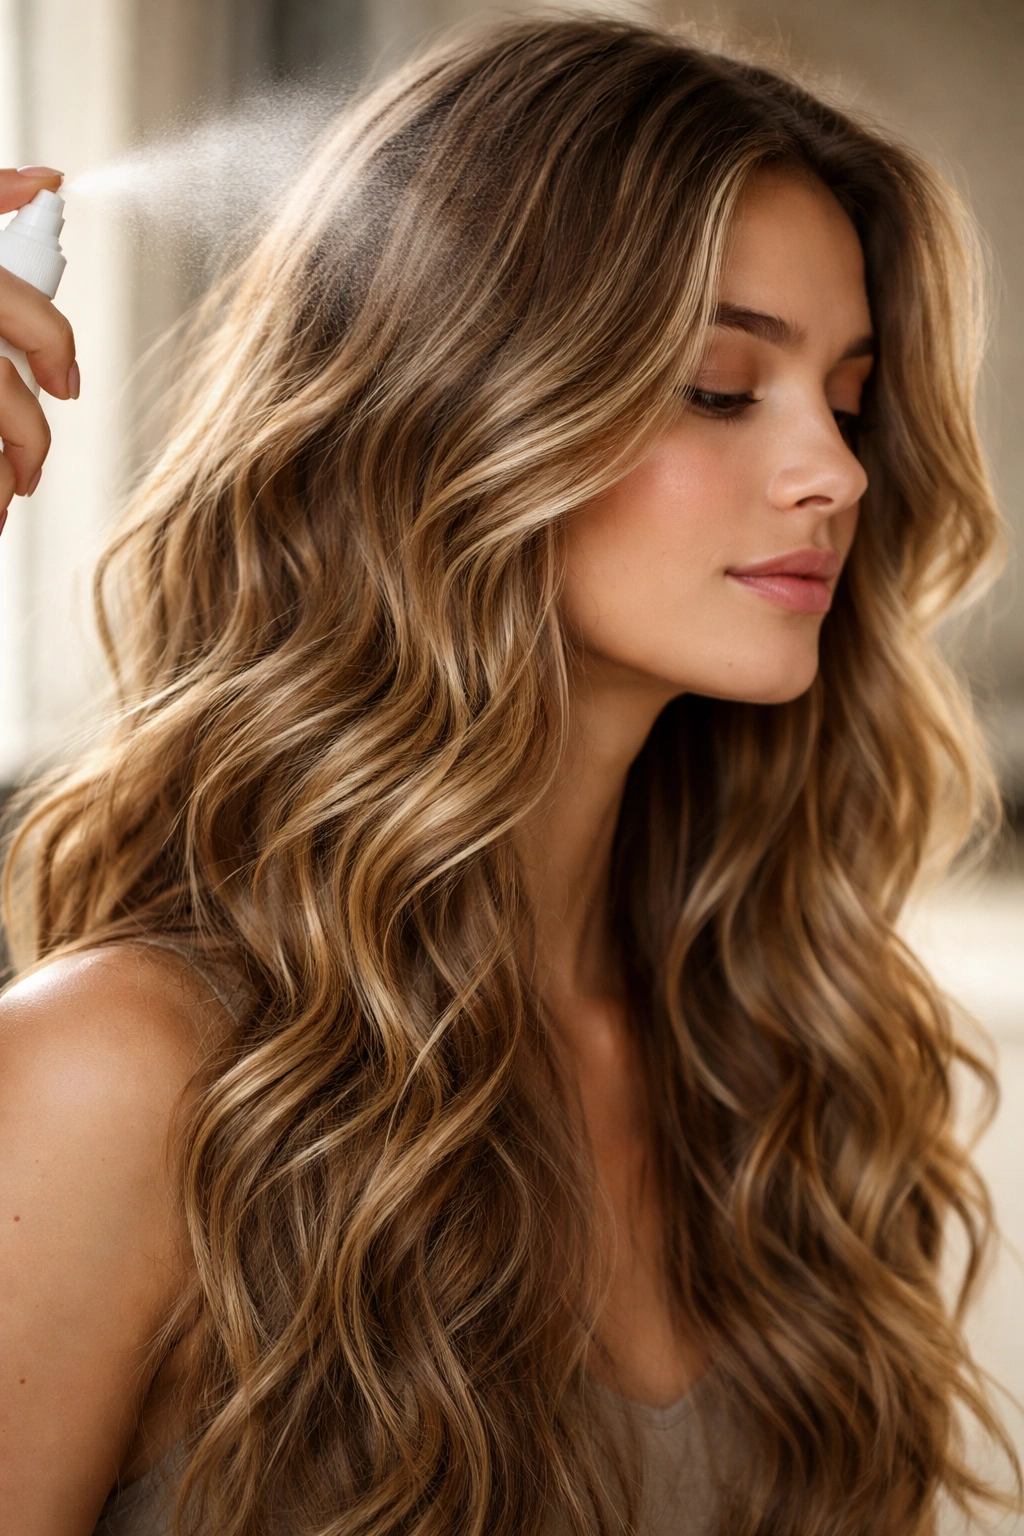
This final style isn’t about structure or braiding — it’s about using the right product approach to enhance waves while preventing frizz. A lightweight texturizing spray adds grip without weight or stiffness.
How Product Choice Changes Everything
The products you use matter as much as the technique. Heavy pomades and creams can weigh down waves and make frizz more obvious. Lightweight texturizing sprays add grip and definition without creating that “product-heavy” look that often looks frizzy.
Styling with Texturizing Spray
- Start with damp hair and apply a curl cream or mousse to encourage your wave pattern
- Rough-dry with a microfiber towel, scrunching to encourage texture
- Once about 70% dry, use a diffuser on low heat to finish drying while the mousse sets
- Once completely dry, apply a lightweight texturizing spray throughout your hair, misting from root to tip
- Use your fingers to scrunch and encourage texture
- The spray adds grip and prevents individual strands from frizzing outward
- Apply a tiny amount of serum to just the surface for shine without weight
- Finish with a light hairspray for hold
This approach is perfect for days when you want your natural waves to shine without looking overdone or heavily styled.
Final Thoughts
The best frizz-fighting hairstyle is the one that works with your specific wave pattern, hair thickness, and lifestyle. Some of these styles require daily styling (like the sleek high ponytail), while others, like the textured lob, work beautifully with minimal effort. The common thread among all twenty is that they either use tension and structure to suppress frizz, they employ products strategically to seal the cuticle layer, or they choose cuts and lengths that naturally dry with less frizz.
Start by experimenting with two or three styles that appeal to you. Pay attention not just to how they look, but to how long they last and how much maintenance they require throughout the day. The perfect frizz-fighting style is one you’ll actually wear, not one you have to style so precisely that it becomes frustrating.
Remember that the most important frizz-prevention happens before you ever start styling — use a microfiber towel instead of terry cloth, apply the right products to damp hair, and consider switching to a silk pillowcase. These foundational steps make every single hairstyle easier to maintain and significantly more frizz-proof. With the right cut, the right technique, and the right products, you can have beautiful, defined waves that actually stay smooth all day long.