Wavy hair has a natural texture that works beautifully for updos—sometimes even better than straight hair, honestly. The waves create instant volume and dimension without you having to tease or backcomb, which means updos can look effortlessly textured and romantic rather than slicked-back tight. But finding updo styles that actually work with your waves instead of fighting against them can feel like a puzzle if you’ve been following straight-hair tutorials or dealing with updos that fall flat by midday.
The challenge with wavy hair isn’t that updos don’t work—it’s that traditional updo styling advice often treats waves as something to smooth down or hide. What you really want is styles that celebrate those waves, use them for grip and hold, and let some dimension show around your face and neck. Whether you’re heading to a wedding, managing a humid day, or just want your waves off your neck without looking overly formal, the right updo can anchor your waves in place while keeping that soft, textured look you’ve worked to develop.
Here’s what makes updos for wavy hair different: you’re working with natural texture that actually holds, you get built-in volume at the crown without extra effort, and the waves themselves become a design feature rather than an obstacle. This means you can skip the heavy pomades that weigh waves down, lean into the texture, and create updos that look intentional and polished without feeling stiff or overdone. The styles below work across all wave patterns—loose waves, tighter waves, or that mixed-texture situation many people have—and most can be done in under 15 minutes once you know the technique.
1. Twisted Crown Updo
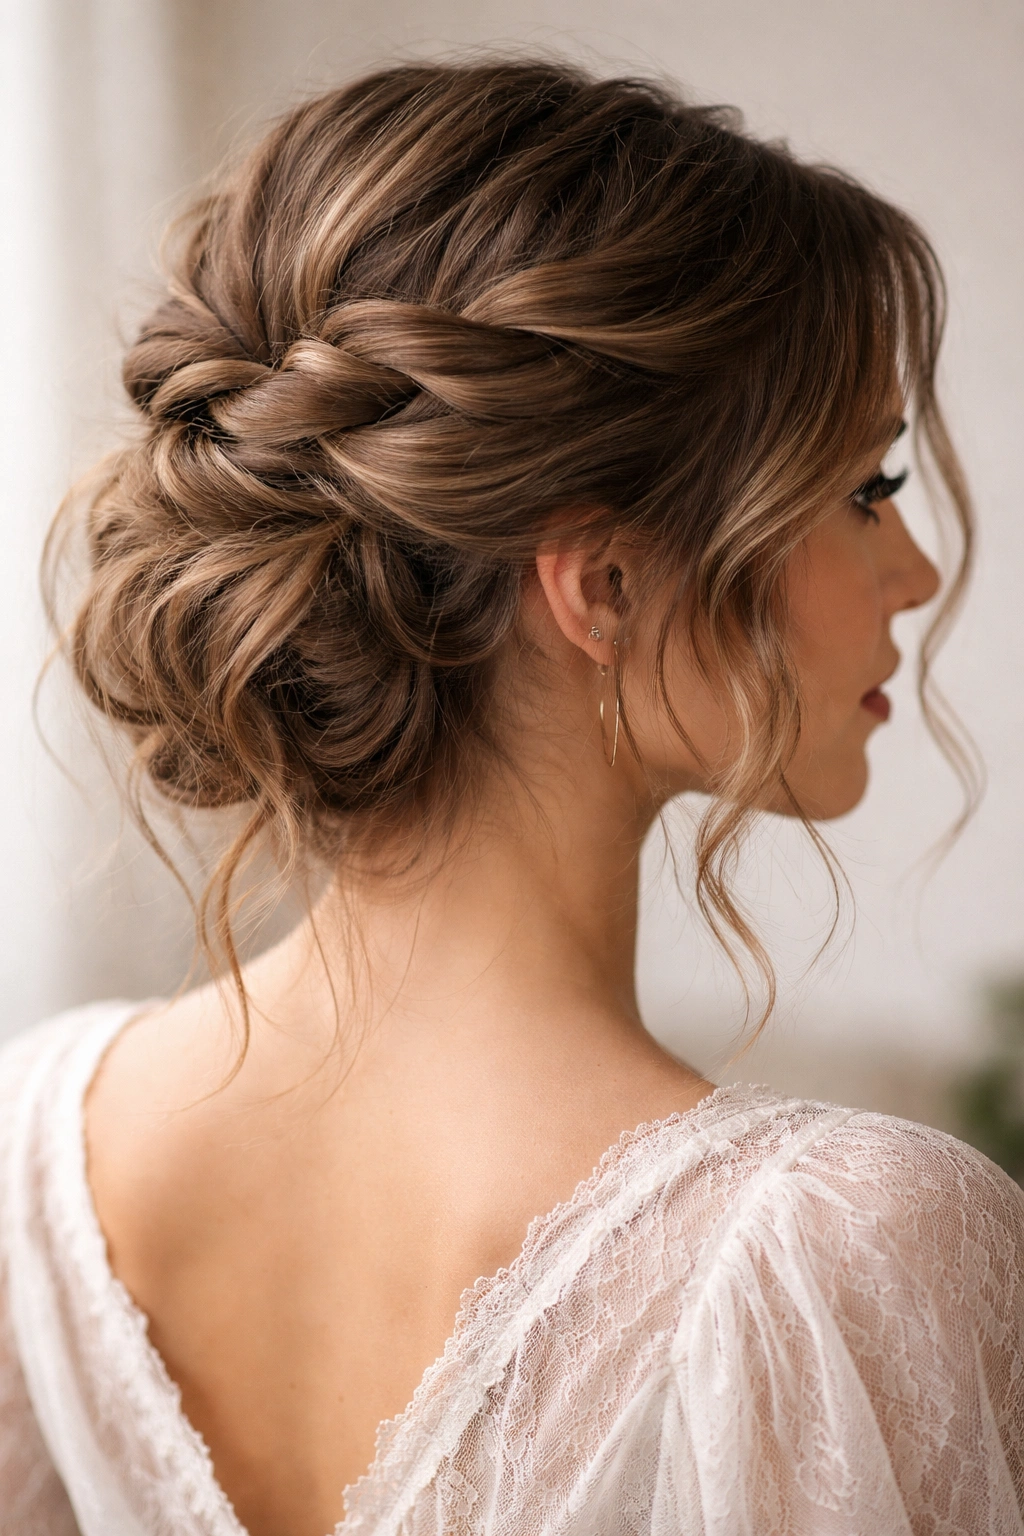
This updo works beautifully because it keeps your face-framing texture visible while anchoring everything else. Start with waves that have some natural body—even second-day waves are perfect for this. Section a portion of hair from one temple to the opposite ear, roughly creating a crown line across the top of your head.
How to Build the Twisted Crown
Take the right section first and gently twist it toward the back of your head, not too tightly so the waves stay visible within the twist. Pin it behind the crown area with bobby pins matched to your hair color. Repeat on the left side, twisting toward the back and crisscrossing the two twisted sections so they interlock slightly. The beauty of this style is that the waves naturally grip the pins and each other, so you need minimal product.
Why This Works for Waves
- The twist sits close enough to feel secure, but loose enough to showcase texture
- Creates a romantic, undone-on-purpose vibe that suits wavy texture perfectly
- Works with second-day hair, which often has better grip and hold than freshly washed waves
- Takes about 8 minutes and requires only bobby pins and maybe one light hairspray
Pin the rest of your hair into a low bun at the nape of your neck, leaving face-framing pieces down if you like. The result is an updo that looks intentional but not rigid—exactly what wavy hair does best.
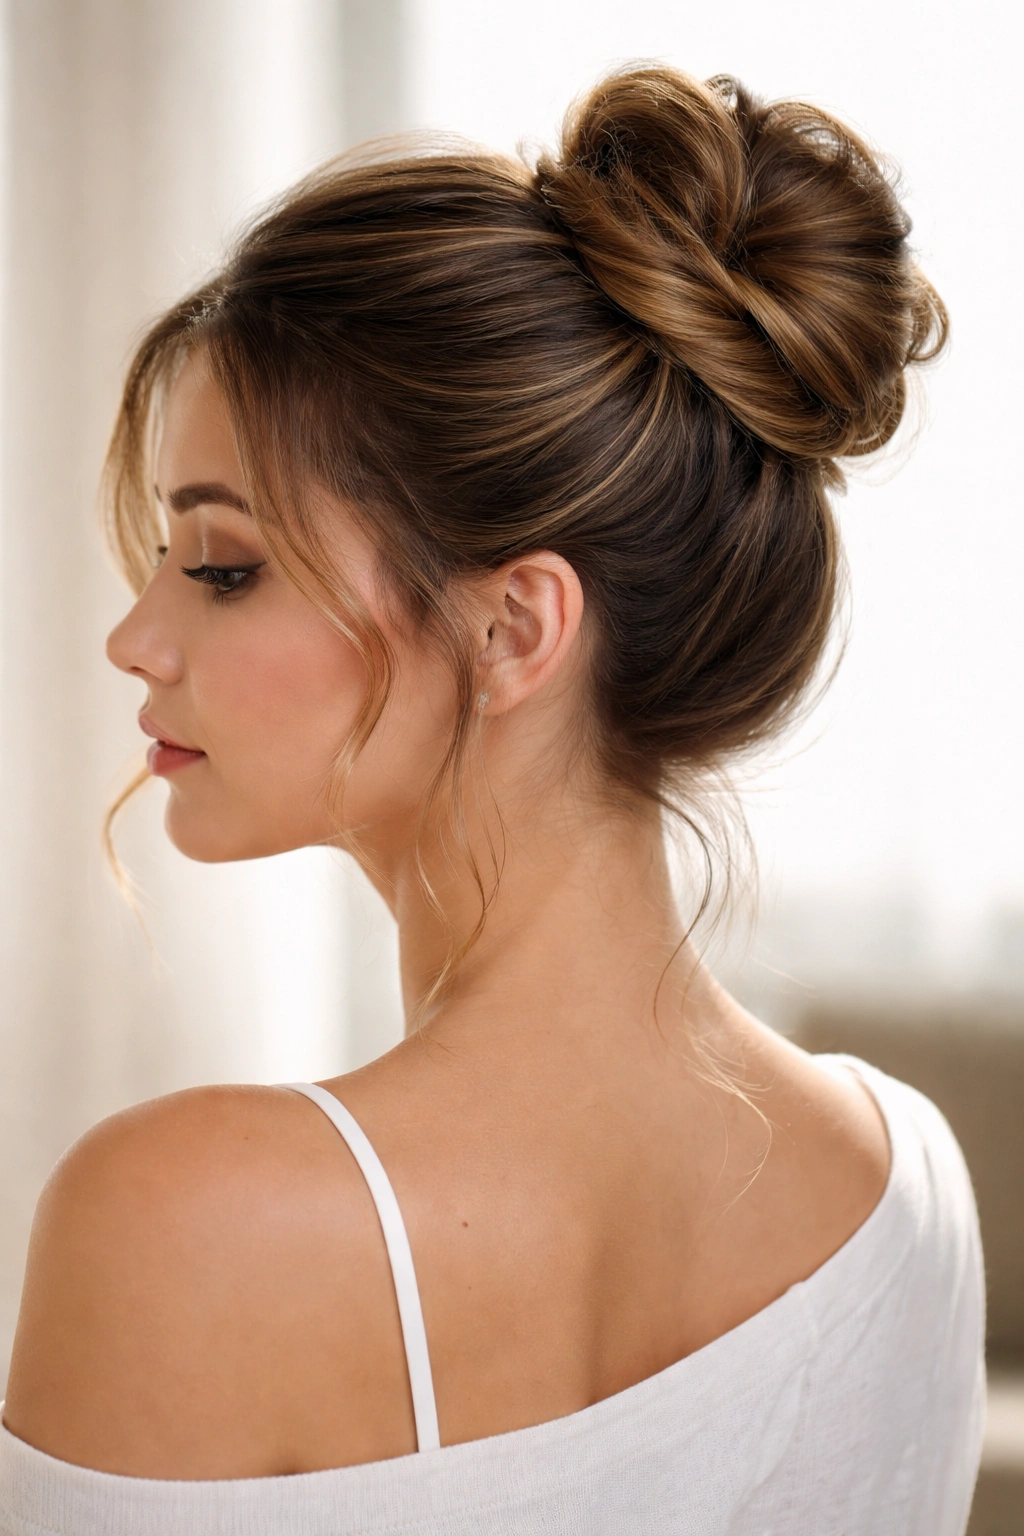
2. Textured High Bun
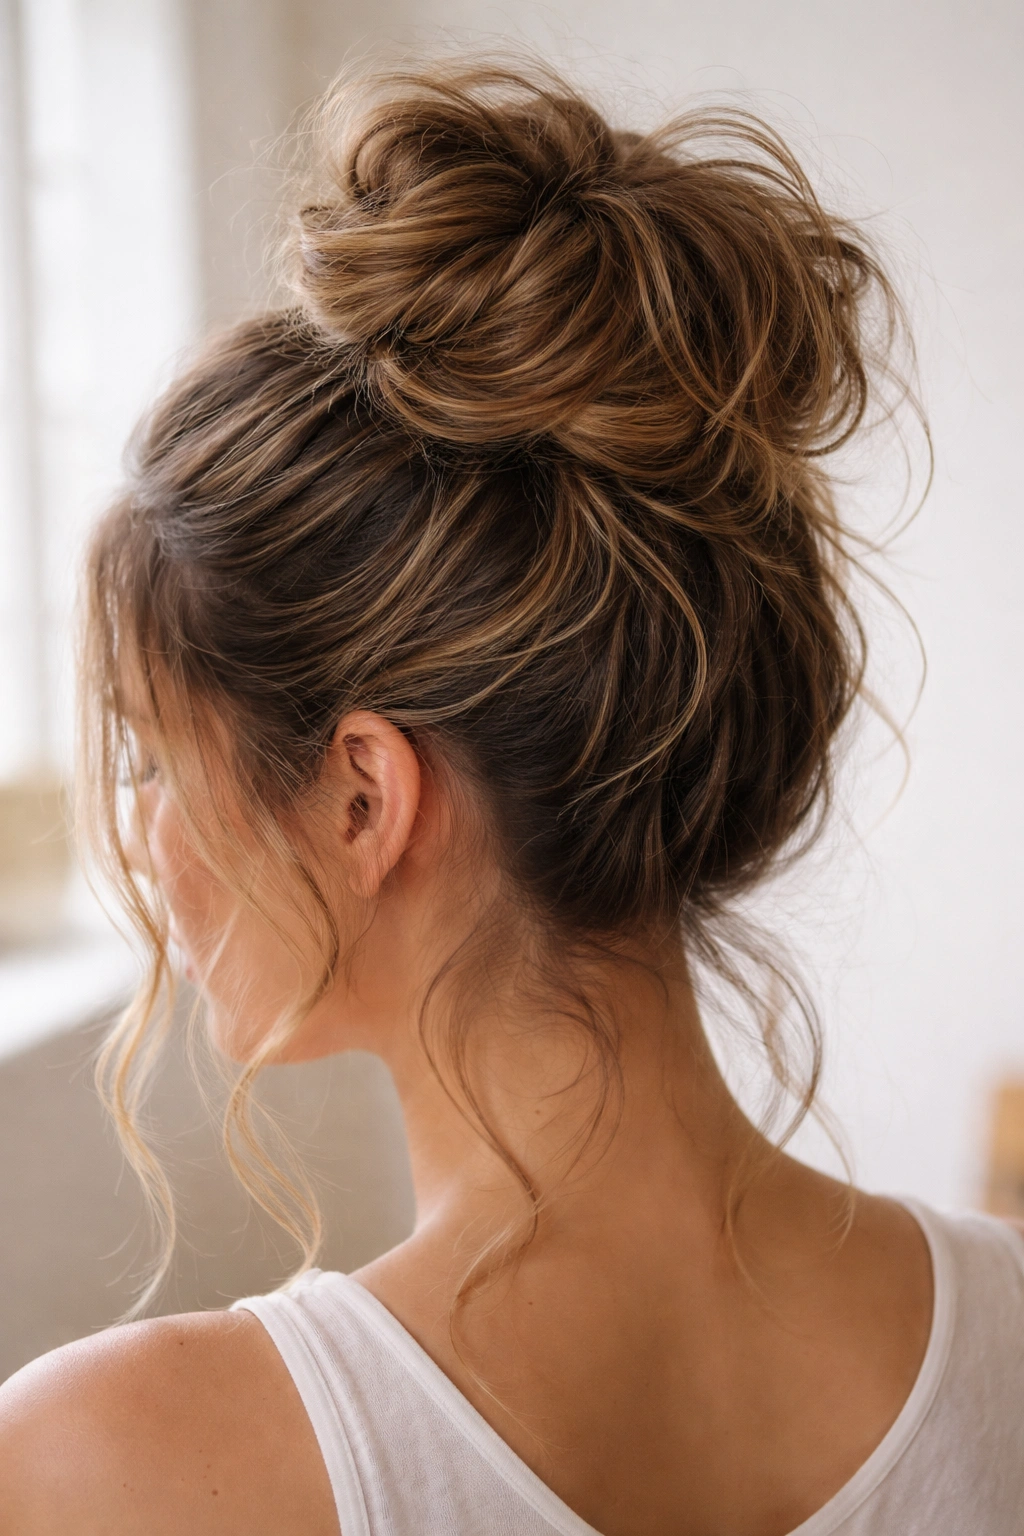
A high bun can look severe on some hair types, but with waves it becomes soft and dimensional almost automatically. The key is not smoothing your waves out—instead, you’re piling them on top of each other to create volume and show off the texture.
Building Volume Without Damage
Start by flipping your head upside down and gathering your hair into a high ponytail at the crown area. Don’t brush it smooth; instead, use your fingers to loosely gather the waves. The messier you are with this step, the better the final look. Once your ponytail is secured with a elastic, twist the ponytail loosely and wrap it around the base, securing the bun with bobby pins.
The Texture-Focused Details
- Don’t smooth flyaways—they add to the intentional, textured look
- Use a light texture spray or sea salt spray if you need grip, but skip heavy gel or pomade
- Leave a few pieces down around your face to frame; the waves look best when they’re not pulled completely tight
- This style holds beautifully for 8+ hours and actually looks better by evening as waves settle and relax
The beauty of this bun is that every wave visible in your ponytail stays visible in the bun, creating a naturally full, dimensional updo without teasing or backcombing.
3. Braided Side Sweep
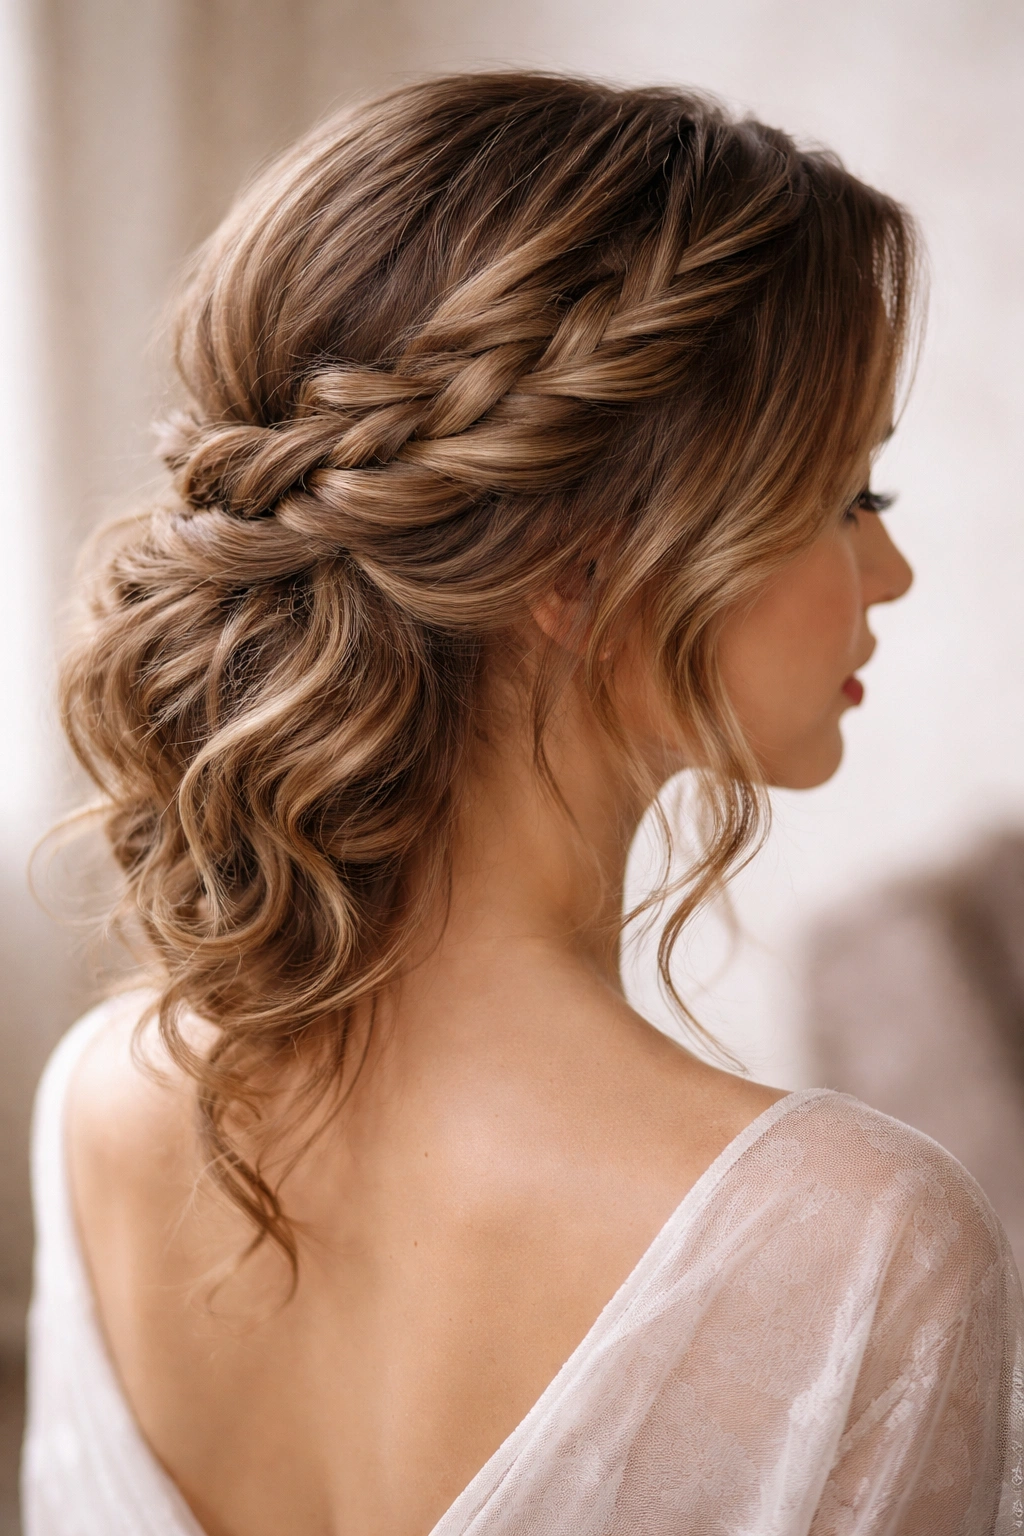
A side braid can transform wavy hair into an elegant updo that feels formal enough for events but relaxed enough for everyday wear. The waves create natural texture within the braid itself, so you don’t need to do anything special to make it look interesting.
Creating the Braid
Start by creating a deep side part on one side—the deeper, the more dramatic the sweep. Take a section of hair from your temple on the fuller side and begin a loose three-strand braid. The key with wavy hair is loose—tight braids look harsh against waves and fight the natural texture. As you braid, use the waves themselves as guides; they’ll naturally suggest where each section should go.
Securing the Swept Style
- Braid all the way down to the ends, then wrap the braid around the back of your head toward the opposite side
- Pin the braid in place at the nape, letting some pieces fall loose if you want a softer look
- Leave the braid loose enough that waves puff out slightly between the braid strands
- Finish with a light hairspray that doesn’t create crunch
This style takes about 10 minutes and works especially well if you have longer wavy hair (shoulder length or past). The braid becomes a design element, not just a functional way to move hair off your face.
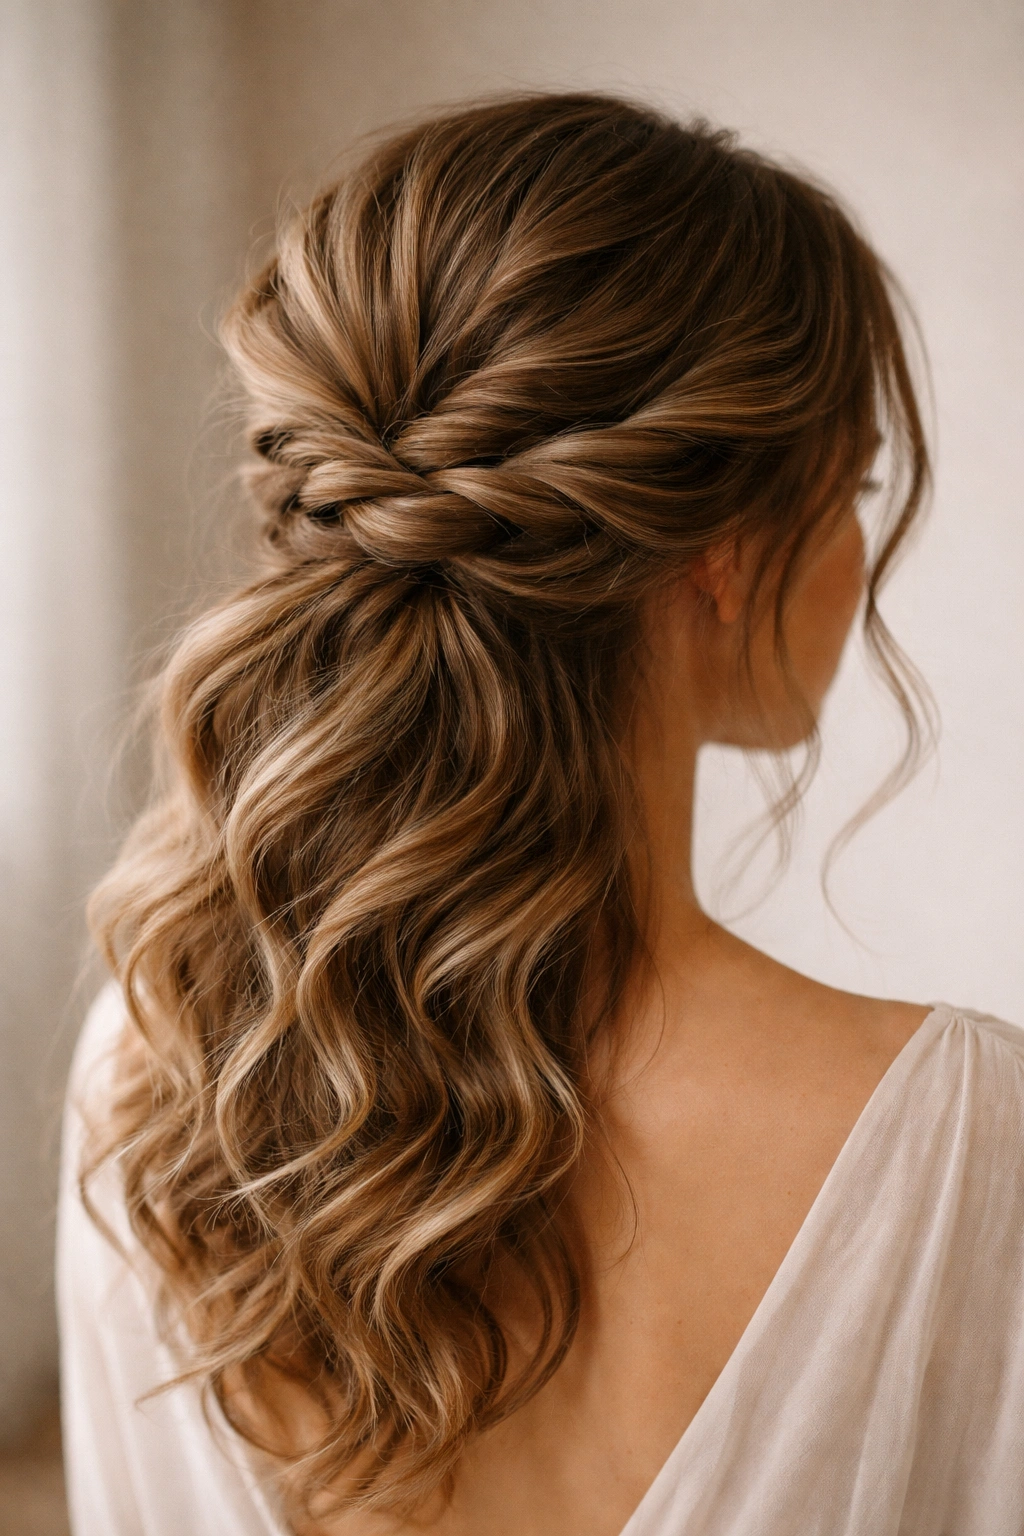
4. Half-Up Twisted Knot
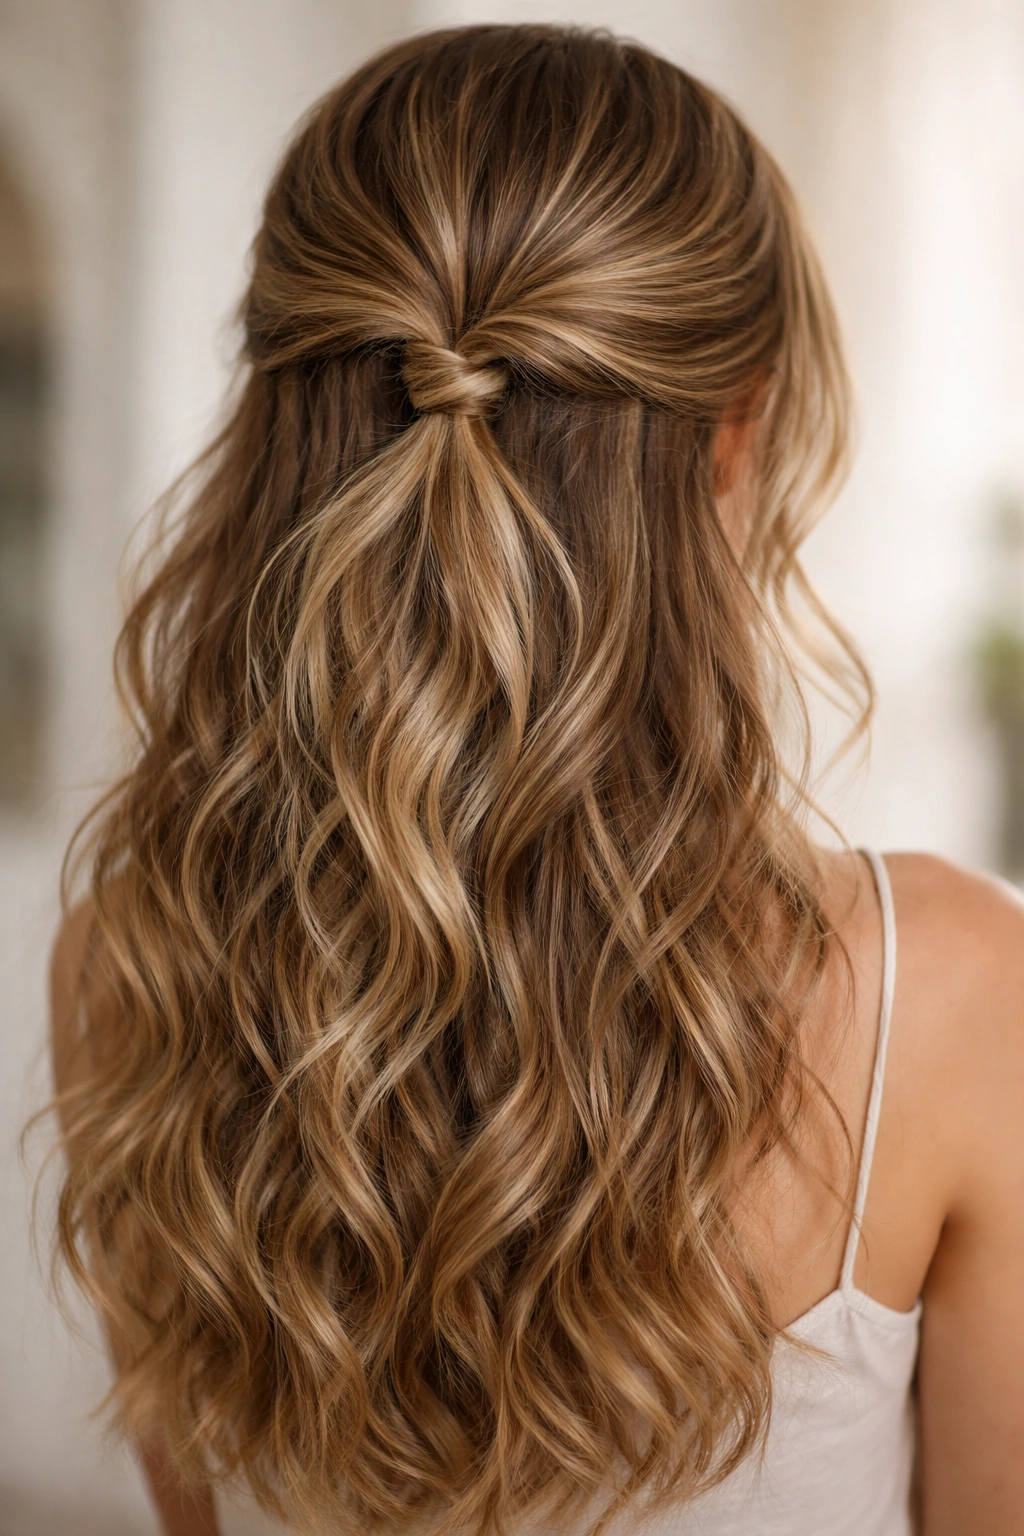
This is the perfect “I have wavy hair and I know what I’m doing with it” style. It’s polished enough for work or dates but relaxed enough that it doesn’t scream “I spent 30 minutes on this.” The twisted knot at the back of your crown becomes an anchor for waves while leaving the length down.
The Two-Section Technique
Separate a section of hair from temple to temple across the top of your head, like you’re creating a half-up style. Divide this section into two equal parts on either side of the crown. Twist each section loosely toward the center back, maintaining the wave texture throughout. When the two twisted sections meet at the back, tie them together into a knot—not a bun, just a knot.
Securing with Texture
- Use bobby pins to secure the knot at its center point, hiding them under the twisted sections
- The waves in the upper section and all the length below stay loose and moveable
- Leave a few strands framing your face for softness
- Light hairspray keeps it in place for 6-8 hours without stiffening the waves
The knot sits just where your crown is fullest, which actually looks good rather than creating an awkward bump. Your wavy length flows freely below, and the whole look takes about 7 minutes.
5. Layered Wave Ponytail
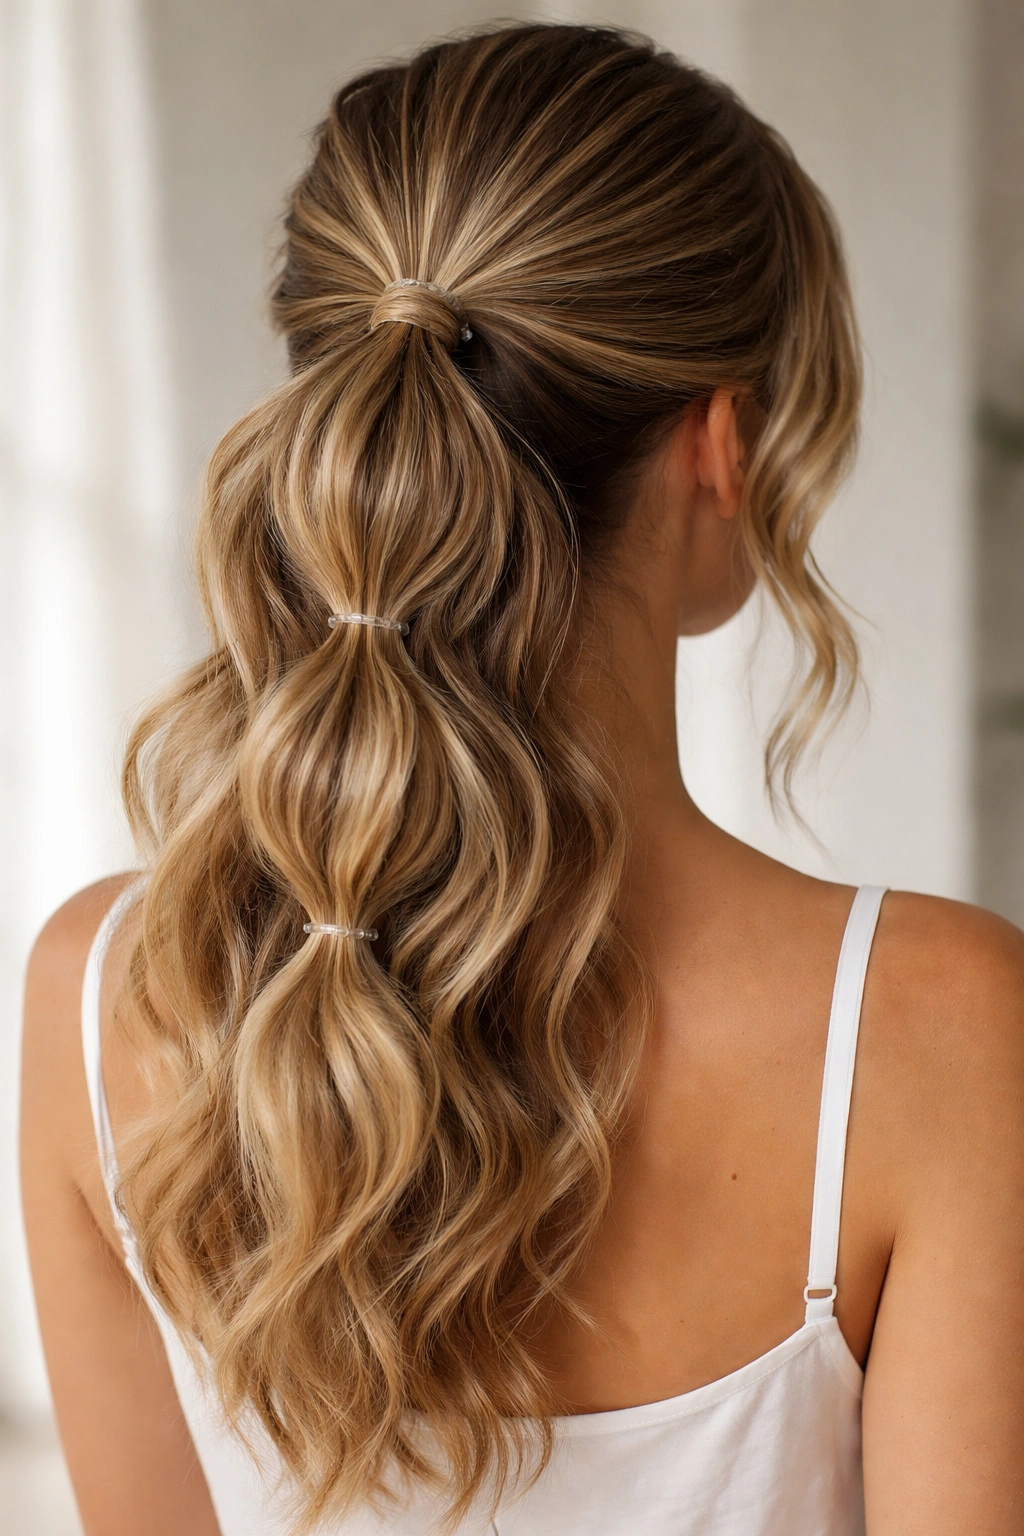
This isn’t your standard sleek ponytail. Instead, you’re creating a ponytail that actually celebrates the layering and dimension in wavy hair by letting different lengths interact naturally. It’s perfect if you have textured, layered hair or waves of varying lengths throughout your head.
Building the Layered Effect
Gather your hair into a mid-height ponytail, but don’t use a standard elastic. Instead, section your ponytail into three or four horizontal layers and secure each with its own small elastic about an inch apart. Leave the layers loose so waves between the elastics can expand outward. This creates a bubble or layered effect that’s way more interesting than a standard ponytail.
Why Layers Work with Waves
- The horizontal elastics break the length up, which highlights dimension and texture
- Shorter pieces that naturally fall out of your ponytail (because of layers and waves) become intentional rather than messy
- You can leave some face-framing pieces down to soften the front
- The whole thing looks modern and deliberately styled, not like you grabbed your hair quickly
Each layer between elastics should be about 1.5 to 2 inches apart. You can adjust the tightness of the elastics to control how much the waves puff out between them. Tighter elastics create more distinct layers; looser elastics look softer and more relaxed.
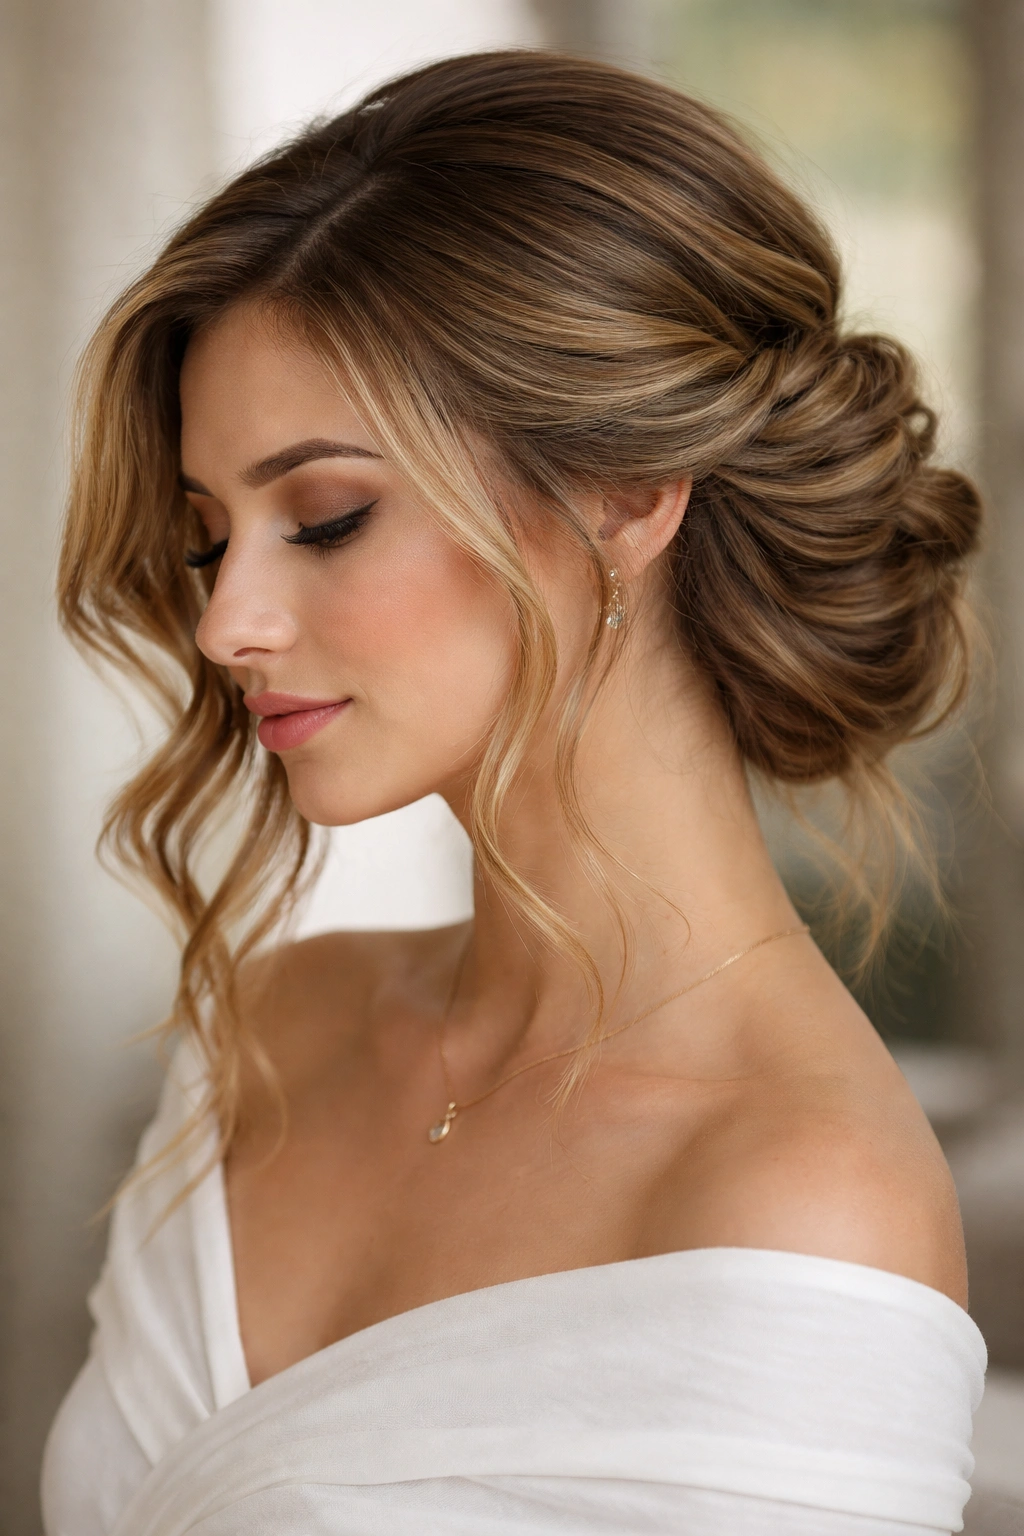
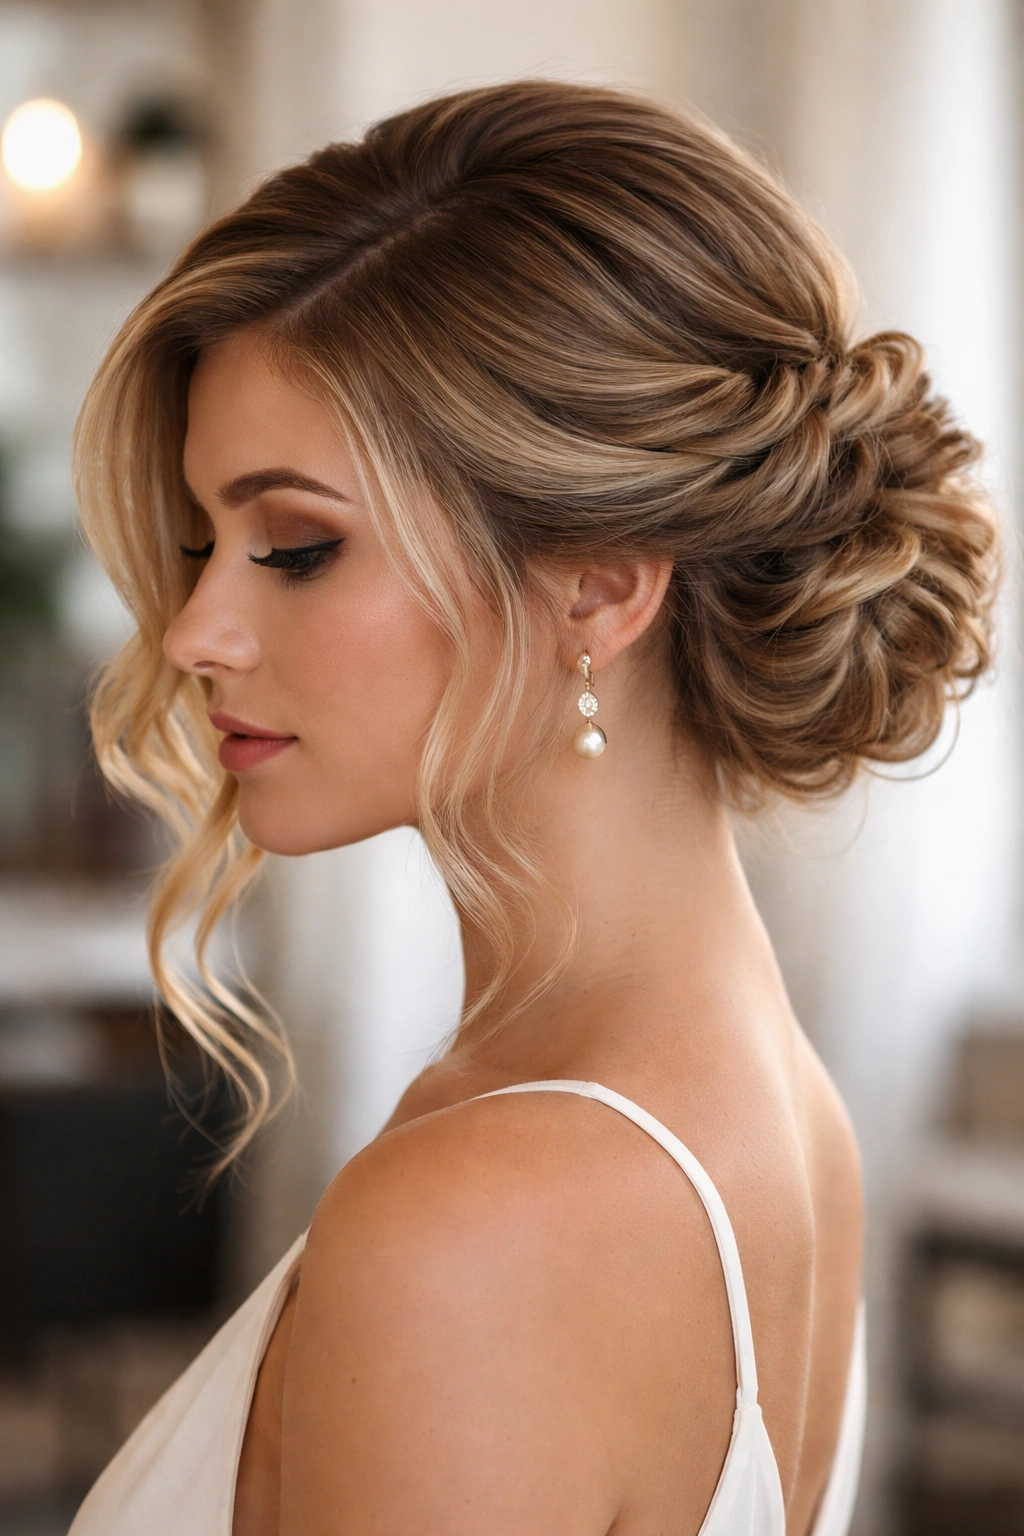
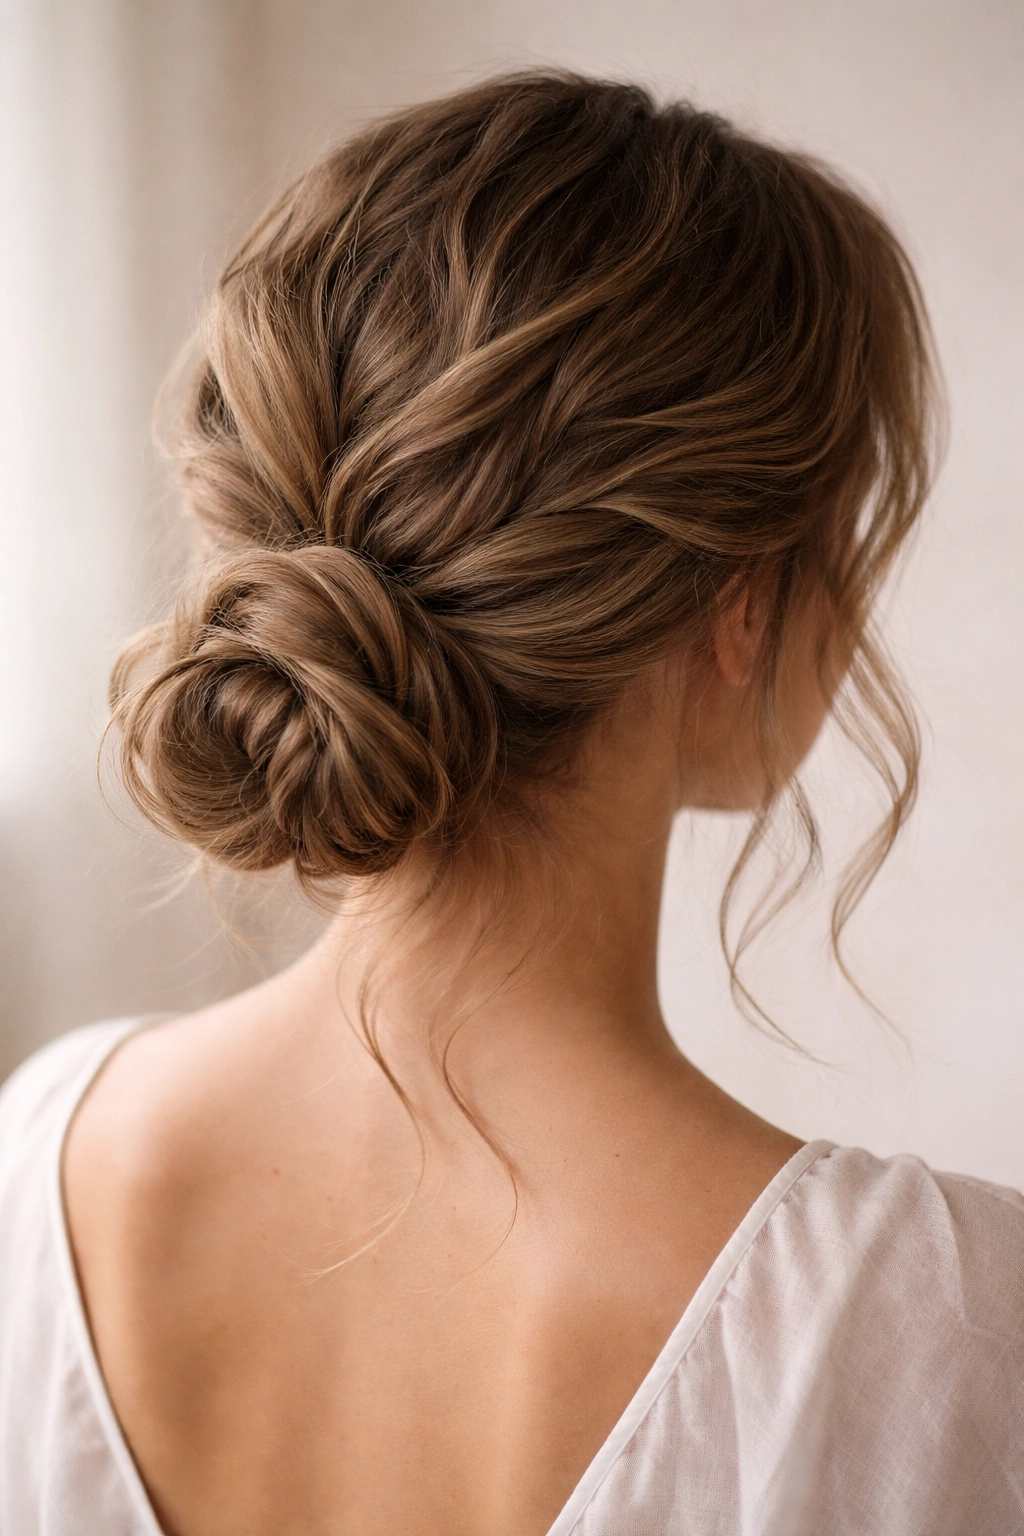
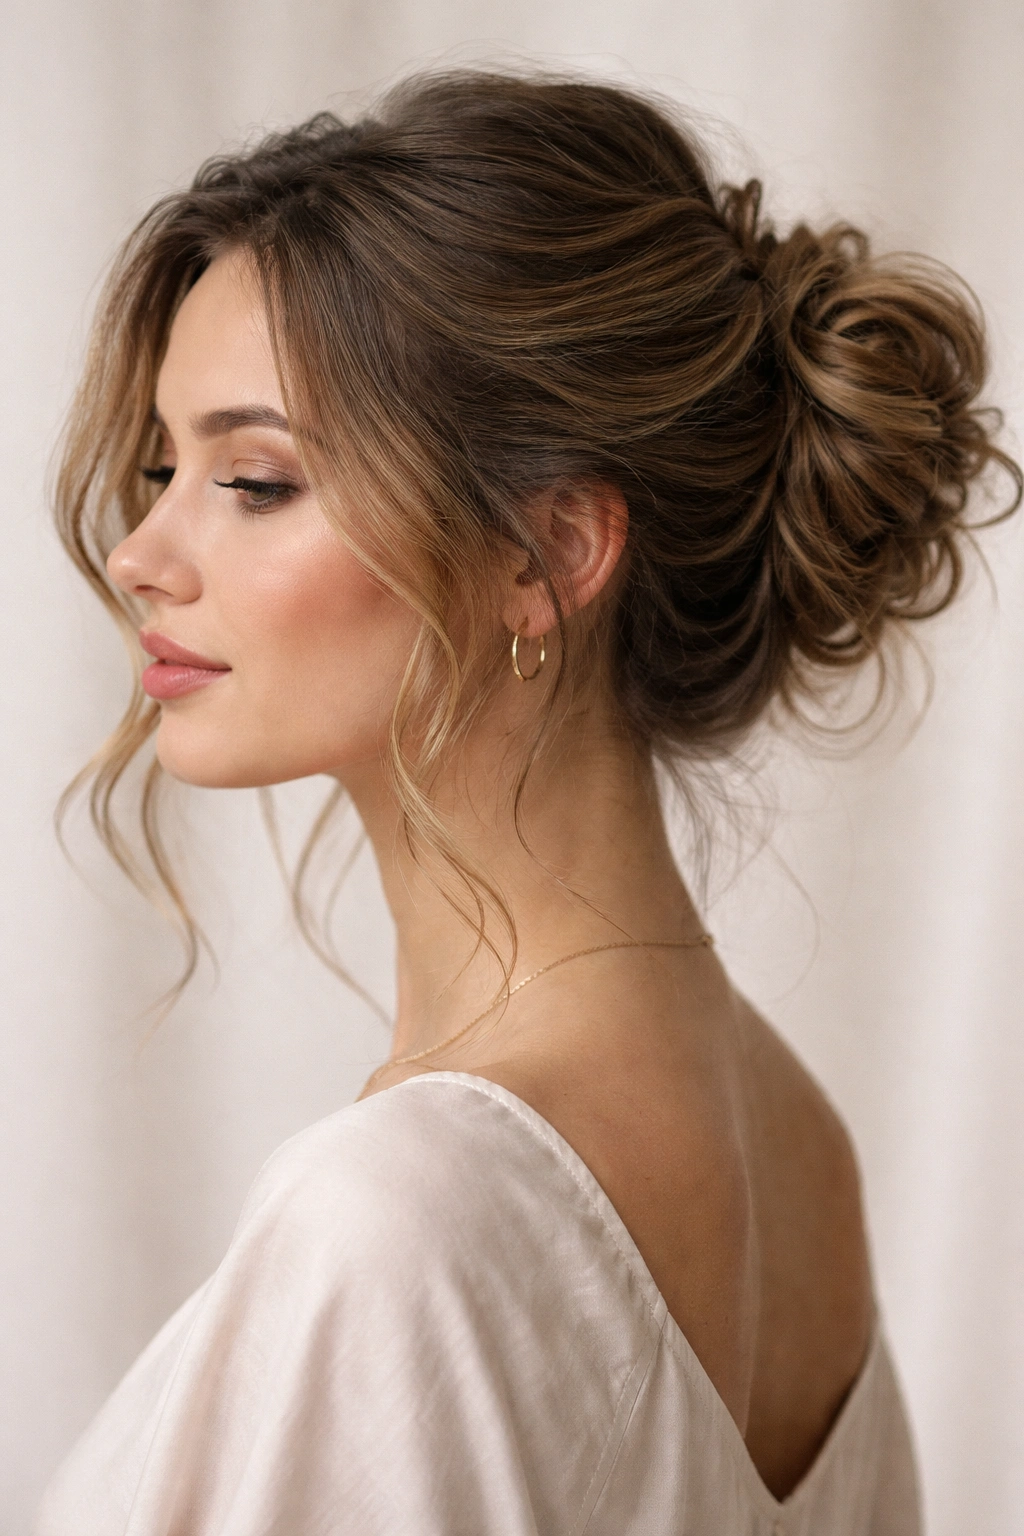
6. Romantic Low Bun with Face-Framing Waves
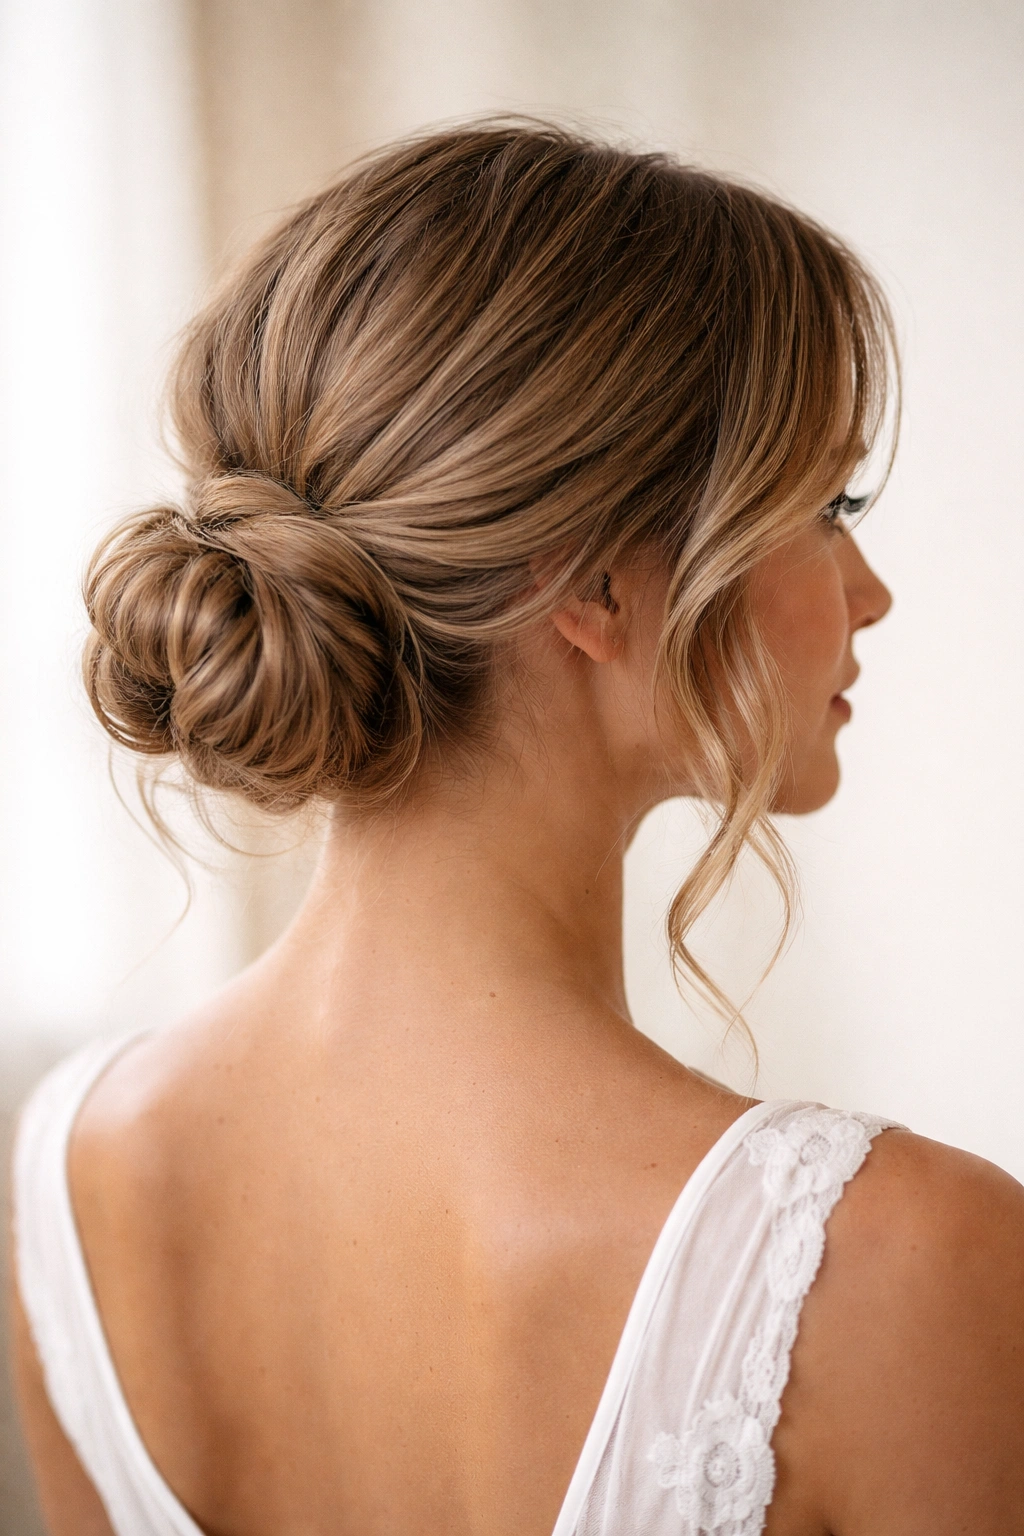
This is the updo for when you want to feel truly polished but not overly styled. It suits wavy hair because you’re intentionally leaving soft pieces around your face while still getting hair off your neck and shoulders. The result looks effortlessly romantic—like you woke up with this hairstyle already in place.
Creating the Soft Frame
Gather your hair into a low ponytail at the nape of your neck, but before securing it, release two small sections from your temples. These should frame your face and fall in front of your shoulders. Now secure the remaining hair into the ponytail with an elastic. Twist the ponytail loosely and wrap it around itself to form a bun at the nape, pinning as you go.
The Details That Matter
- The face-framing sections should be loose enough that they fall in natural waves, not pulled taut
- Curl the face-framing pieces with a curling iron or wand if they’re not naturally wavy enough
- The bun itself doesn’t need to be perfectly smooth; waves showing through actually enhance the romantic vibe
- Use bobby pins that match your hair color and tuck them into the wave texture rather than clamping them down
This style works beautifully for weddings, formal dinners, or any time you want to look polished without feeling stiff. It typically holds for 8+ hours and actually looks better as the day goes on and your waves relax slightly.
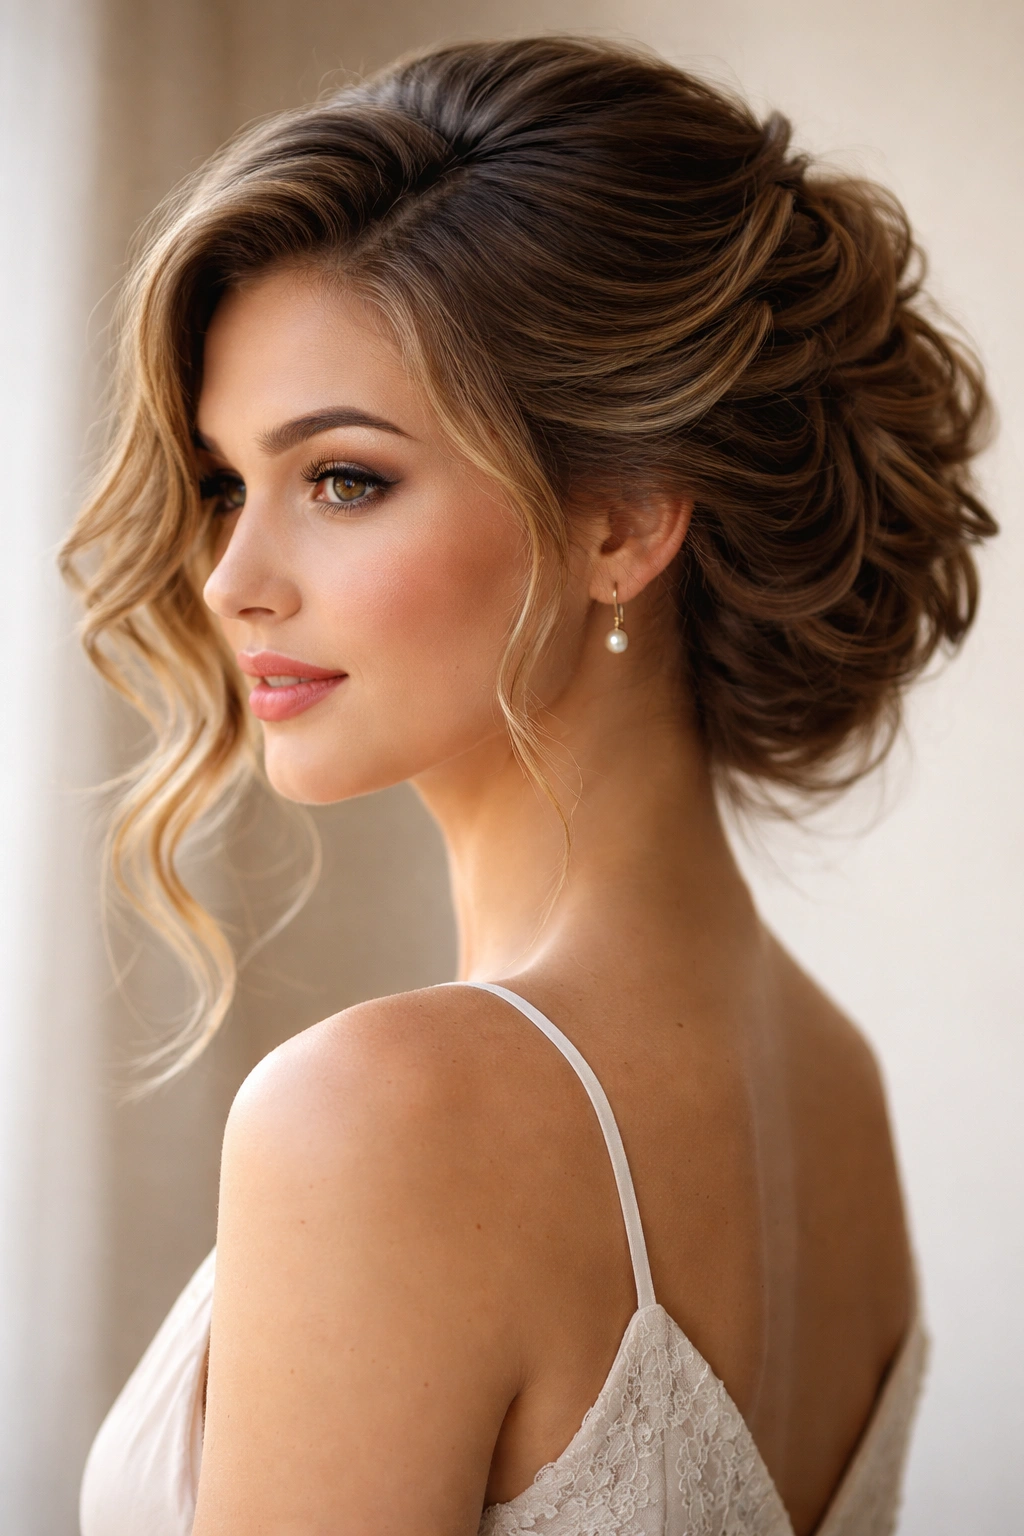
7. Twisted Double Bun
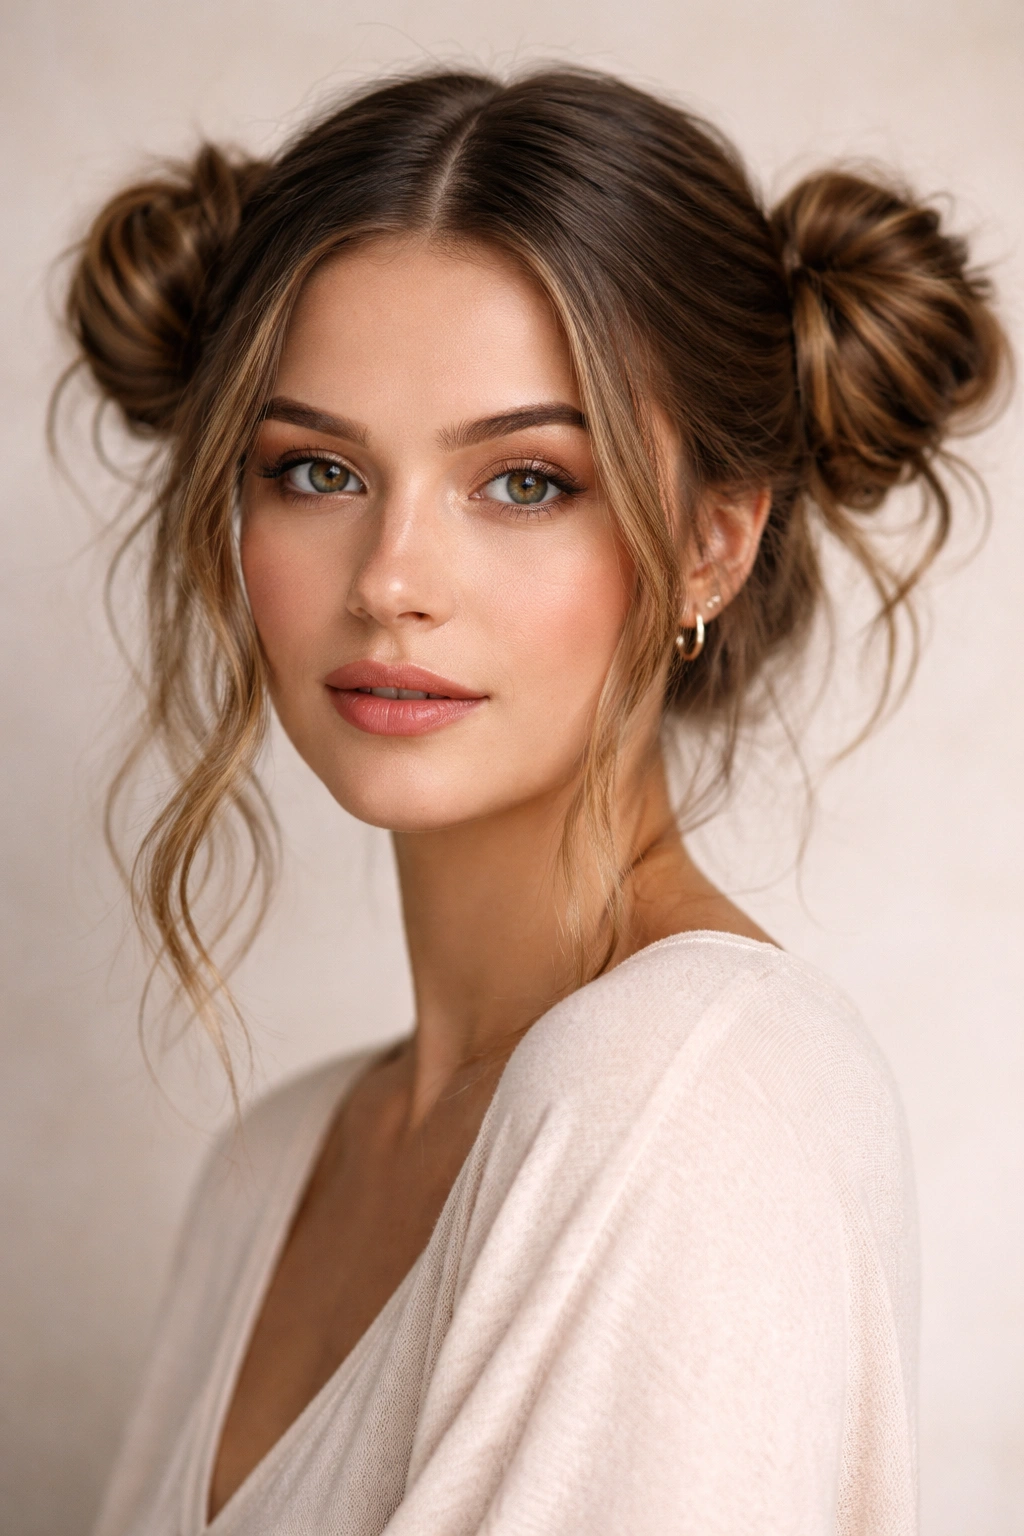
Double buns can look playful or sophisticated depending on how you execute them, and with wavy hair, they lean naturally toward the sophisticated end. Instead of tight, symmetrical buns, your waves make them look intentionally textured and modern.
Creating Two-Bun Balance
Create a center part from your forehead to the nape of your neck. Separate your hair into two equal sections on either side. On the right side, gather the hair into a ponytail at about ear-height level on that side—not at the very crown, but higher than the actual ear. Repeat on the left. Now you have two side-positioned ponytails instead of two top-of-head buns, which changes the whole look.
Making It Look Intentional
- Twist each ponytail loosely, then wrap it around its base to form a bun
- Leave the buns slightly loose and textured rather than sleek; waves should be visible
- The buns should be roughly the same size but don’t need to be perfectly matched—slight asymmetry actually looks more modern
- Use bobby pins in your hair color and let some waves escape from the bun shape
- A light texture spray adds grip but keep it from creating crunch
This style takes about 10 minutes and works especially well for casual events, daytime activities, or creative work environments where you want professional but not formal. It shows serious styling intent without being overdone.
8. Messy Knot with Cascading Waves

This is the updo for people who say “I don’t have time for updos.” It’s actually quite intentional, but it looks completely undone—which is exactly what makes it work so well with wavy hair. The waves cascading down one side are the focal point, not the knot itself.
The Strategic Undone Look
Gather your hair into a ponytail that’s positioned slightly to one side—not dead center, but offset. Rather than making this ponytail at the very crown, position it about an inch lower and slightly off to one side. Twist the ponytail loosely once or twice, then tie the twist into a knot at its center. Let everything escape from this knot—don’t tuck anything in.
The Cascade Element
- Some sections will fall out of the knot naturally; this is the point, not a failure
- Don’t pin the knot tightly; use just enough pins to keep it from tumbling down
- Leave plenty of length to cascade, either all the way down your back or flowing over one shoulder
- The waves in the cascading section should be visible and full
This updo works best with hair that’s at least mid-back length and waves that are natural enough to hold shape. It looks modern, deliberately relaxed, and takes about 5 minutes. It’s perfect for when you want hair off your neck but don’t want to look like you got ready for anything special.
9. Rope Braided Updo
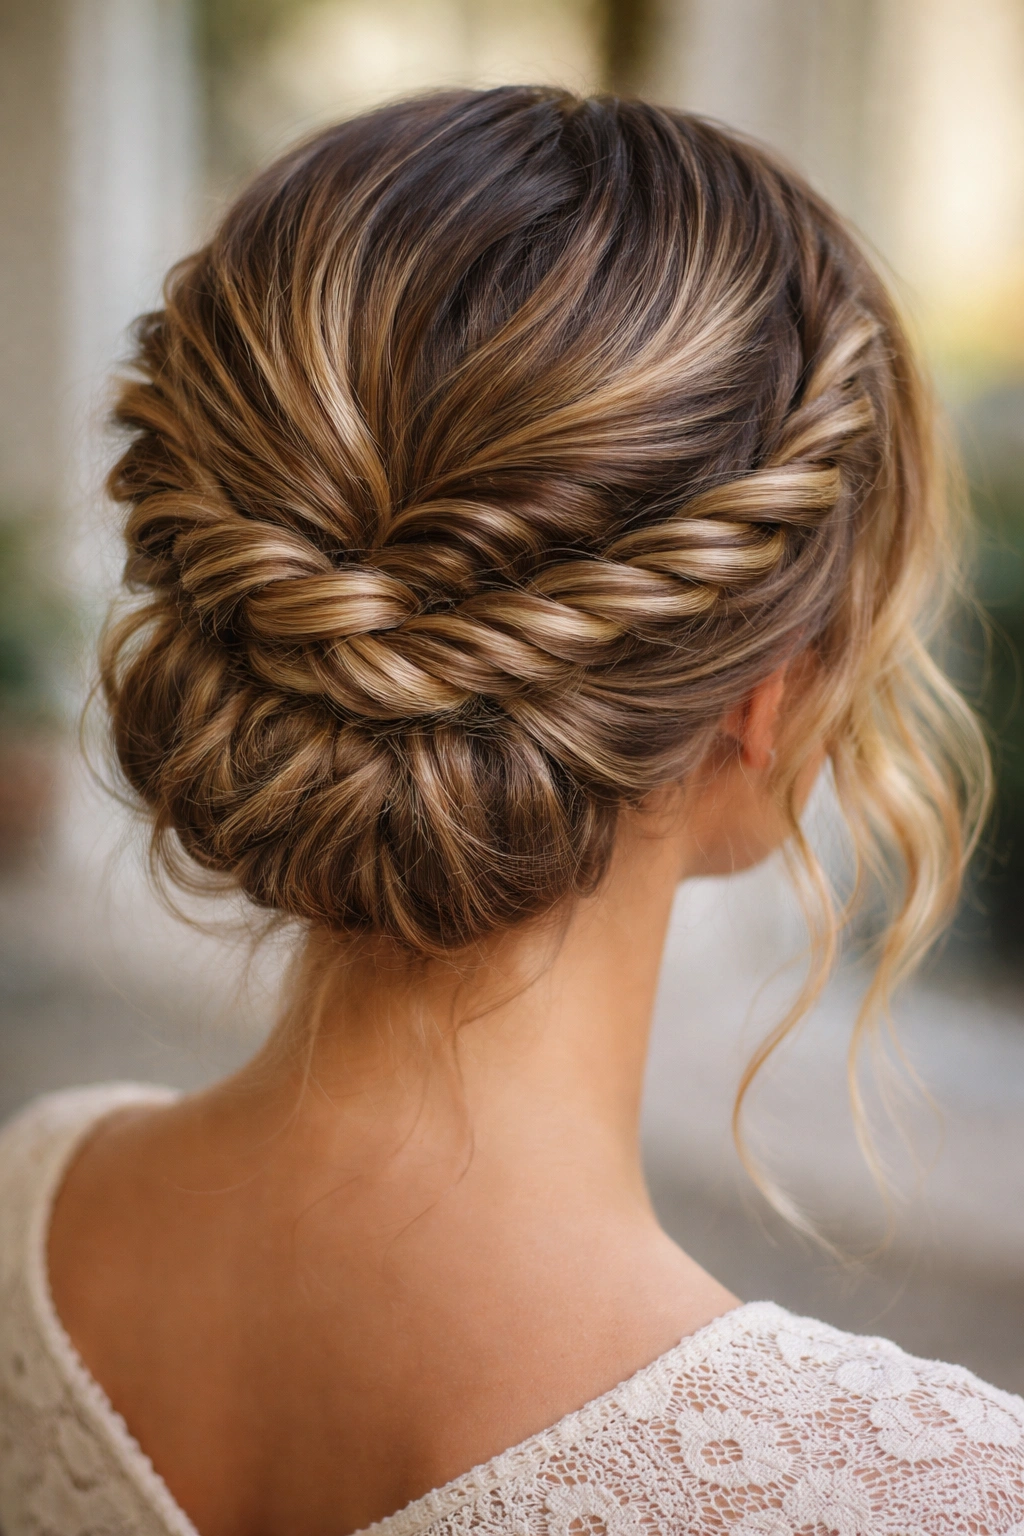
A rope braid is actually easier than a regular braid once you understand the technique, and it creates a more interesting texture within the braid itself—especially with wavy hair. Instead of three strands, you’re twisting two sections around each other, which creates a flat, dimensional braid.
The Rope Braid Technique
Take a section of hair from one side of your head, split it into two equal sections, and twist one section over the other in a spiral motion. As you move down, you’ll add small sections of hair to each twist, similar to how you’d do a regular braid. The result is a flat braid with visible texture. With wavy hair, the rope braid naturally looks more interesting because the waves add dimension within the braid structure itself.
Building the Updo
- Once you’ve created a rope braid on one side, wrap it around the back of your head
- Create a second rope braid on the other side
- Pin both braids in place at the nape, where they meet, creating a wraparound updo
- Leave face-framing pieces down if you prefer softness around your face
A rope braided updo takes about 12-15 minutes once you’re comfortable with the rope braid technique, and it’s more forgiving than a three-strand braid with wavy hair. The flat structure holds beautifully, and the texture shows off your waves rather than fighting them.
10. Wave-Wrapped Ballerina Bun
A ballerina bun sits high and tight on the crown, but instead of smoothing your waves into submission, you’re wrapping waves around the base to create a fuller, more dimensional look. It’s polished without being severe, and it works beautifully with wavy hair because the waves add to the bun rather than detracting from it.
Creating the High Crown Bun
Flip your head upside down and gather all your hair into a very high ponytail at the crown. Don’t smooth it—use your fingers to gather it somewhat messily. Secure with a small elastic close to your scalp. Now, create a second ponytail from that first ponytail about 2 inches down. You’ll have a section of hair between the two elastics that’s loose.
The Wrapped Texture
- From the second ponytail, twist the hair loosely and wrap it around the base of the first ponytail to create the bun
- Secure with bobby pins, leaving waves slightly loose within the wrapped section
- The waves should be visible in the wrapping—this is what makes it different from a typical ballerina bun
- This style holds for 8+ hours and looks best with some texture or wave to your hair
The result is a bun that sits high and secure but looks intentional and textured rather than severe. This is perfect for activities where you need hair completely off your face and neck—sports, dance, yoga, or formal events. It typically takes about 8 minutes.
11. Side-Swept Twisted Updo
This combines the elegance of a swept style with the security of twists, creating an updo that’s both fancy and practical. It works on wavy hair because you’re not fighting the texture; you’re using it to add grip and hold. The twisted sections sit close enough to your head to stay secure all day.
The Swept and Twisted Combination
Create a deep side part on one side of your head. From the fuller side of the part, begin a loose twist at your temple, spiraling it around the back of your head toward the opposite side. This twisted section becomes the base. Now take a second section of hair from near your ear on the same side and create a second twist that follows the same path, slightly below the first.
Securing and Styling
- Pin both twisted sections in place at the back of your head where they meet
- Leave the remaining hair down to cascade in waves, or pin it into a bun at the nape if you prefer more hold
- The twisted sections create an elegant swept effect while keeping hair secure against your head
- Face-framing pieces around the swept side look intentional and soft
This style takes about 10-12 minutes and works beautifully for events, dates, or professional settings. The side sweep creates an elegant, asymmetrical look that’s instantly more interesting than a centered updo.
12. Pinned Wave Arrangement
This is really more of a styling technique than a traditional updo, and it’s perfect for when you want your waves visible and celebrated rather than bundled away. You’re using bobby pins strategically to move your waves into an upswept arrangement without actually putting them into a bun or ponytail.
The Pin-and-Arrange Method
Create a deep side part and sweep your hair to one side. Beginning at your temple on the sweeping side, use bobby pins (in your hair color) to pin sections of waves up and back toward your crown and the opposite side. You’re not creating a sleek line; instead, you’re pinning individual waves and sections so they flow upward and across. The waves stay visible—you’re just moving them off your neck and face.
Creating the Design
- Use 6-10 bobby pins strategically placed along the sweep to hold the arrangement
- Leave the length visible; this isn’t about creating a tight knot or bun
- The pinned waves should look intentional but not perfectly matched
- Pieces framing your face should remain loose and wavy
This technique works especially well if you have longer, very wavy hair and want an updo that still shows off the length and texture. It takes about 8 minutes and holds for 6-8 hours depending on your hair’s natural grip. It’s perfect for work, casual events, or any time you want an updo that still feels like you.
13. Twisted Halo Style
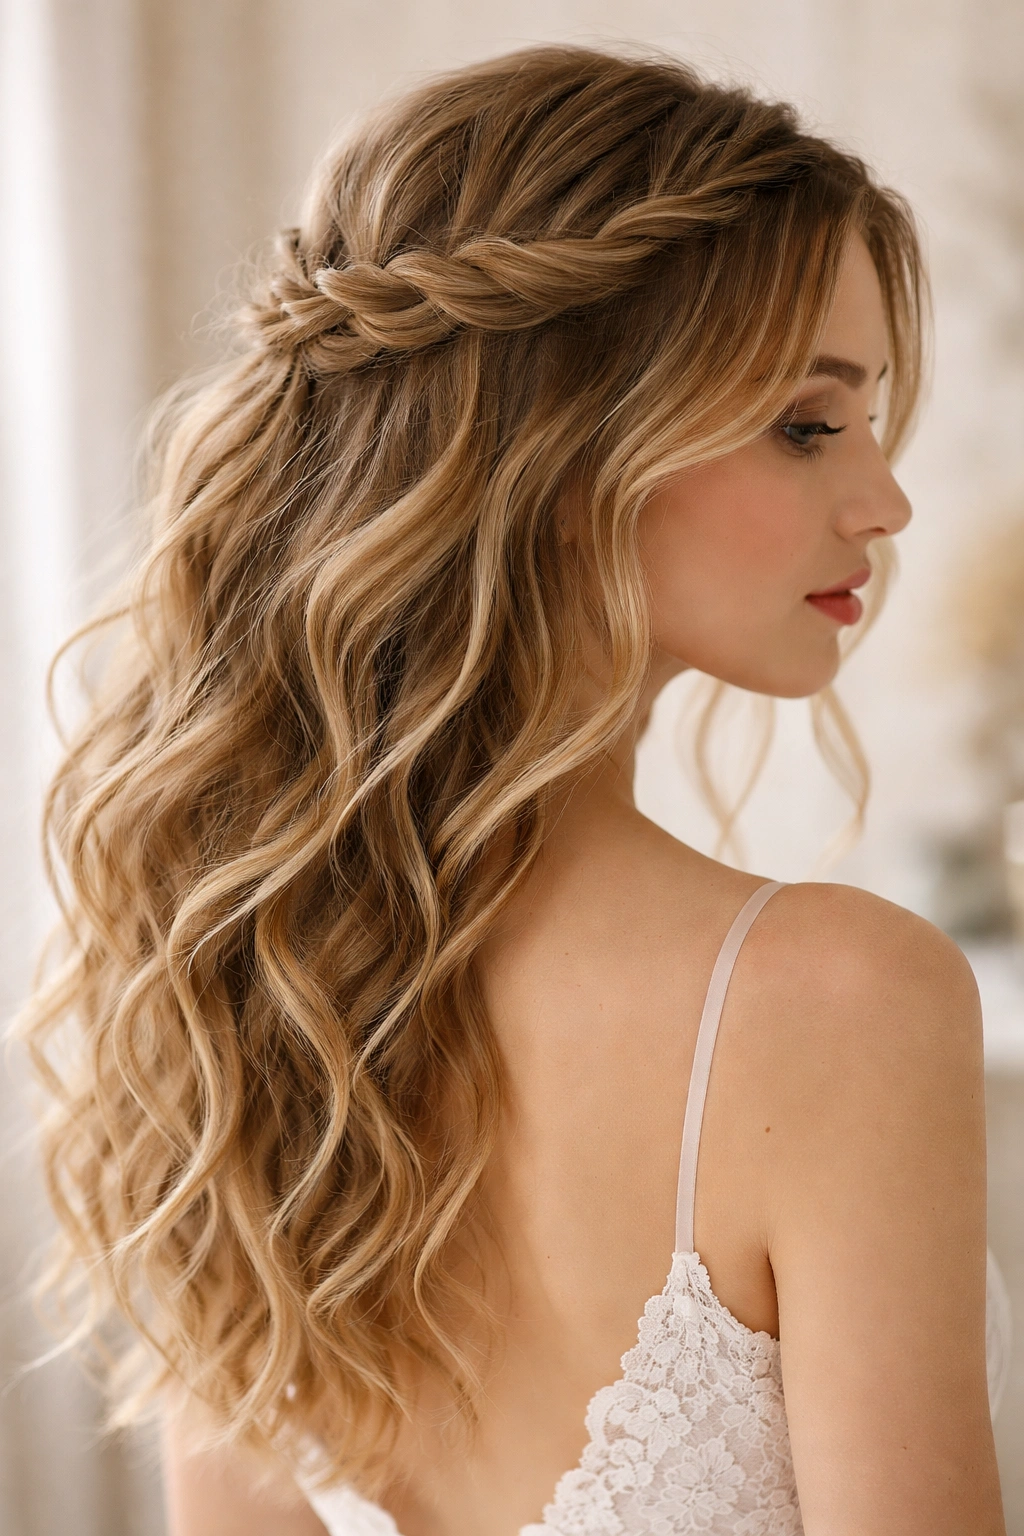
A halo braid typically uses a braid woven around the crown, but with wavy hair and twists instead of braids, you get a softer, more romantic effect. This updo works beautifully for special events because it looks intentional and elegant, but it’s actually much easier than a traditional halo braid.
Creating the Halo
Start on one side of your head at about ear-height. Create a loose twist that spirals around the back of your head toward the opposite ear at the same height. Think of it as creating a twisted band around your head. Use bobby pins to secure the twist against your head as you go, tucking them into the twist so they’re hidden.
The Romantic Crown Effect
- The twist should sit about an inch back from your hairline, creating a crown-like effect
- Leave face-framing pieces down in front of the halo for softness
- The remaining hair can be left down in waves or gathered into a bun at the nape
- The halo twist itself should show wave texture; don’t smooth it
This style takes about 12 minutes and works beautifully for weddings, formal events, or any time you want to look extra polished. The halo creates an elegant frame for your face while keeping some hair off your neck. It’s sophisticated but not stiff, which is exactly what wavy hair does best.
14. Deep Side Part Updo
Sometimes the simplest updos are the most effective, especially with wavy hair. A deep side part changes your entire face shape and creates an asymmetrical line that’s instantly more interesting than a centered part. From there, you can build almost any updo style.
Working with the Deep Part
Create a very deep side part—as deep as you want, but typically from your temple area. The fuller side becomes your styling focus. You can sweep all your hair to the shallower side and pin it there, creating a dramatic side-sweep updo. Or you can create twists or braids from the fuller side, wrap them around the back, and pin everything on the opposite side.
Why Depth Matters
- A deeper side part instantly makes any updo look more intentional and styled
- With wavy hair, the deep part creates natural texture and movement at your hairline
- You get the security of an updo while maintaining the relaxed vibe wavy hair should have
- This works with almost any updo technique—braids, twists, buns, or combinations
The deep side part itself is the style choice; from there, you can build variations in about 8-10 minutes depending on the updo technique you choose. The asymmetry created by the depth automatically makes even simple updos look more interesting and modern.
15. Bubble Ponytail with Waves
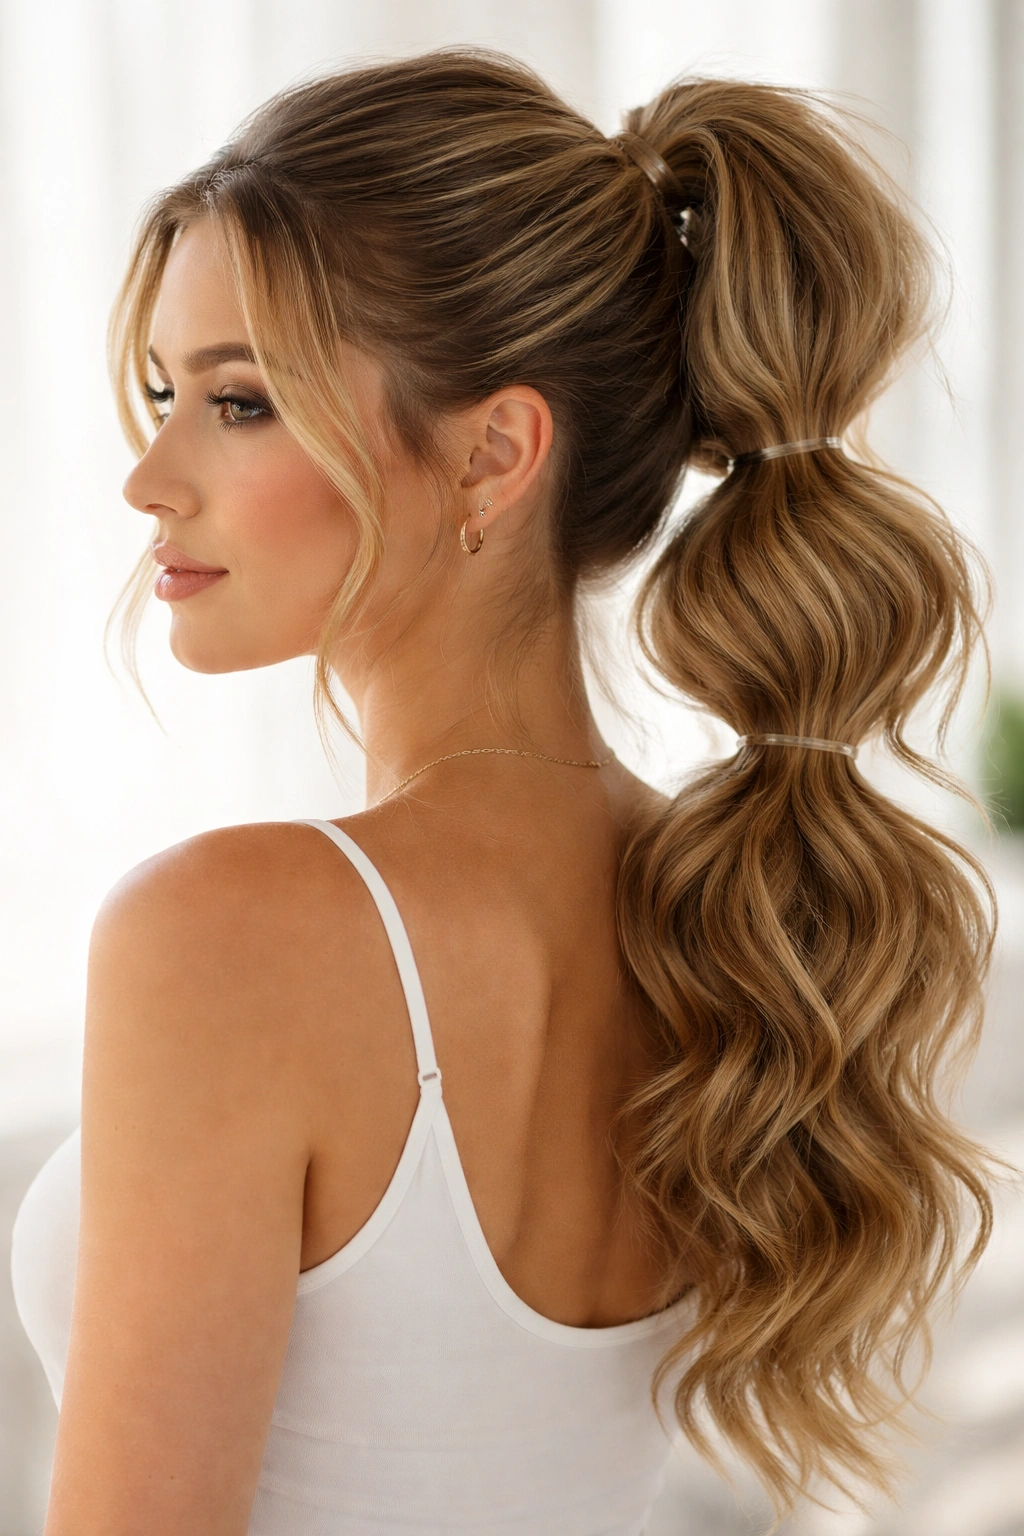
A bubble ponytail uses multiple elastics to create distinct sections, and with wavy hair, the waves puff out between each elastic naturally. This creates a voluminous, playful updo that’s also secure and practical. It looks more complex than it actually is.
The Bubble Building
Create a high ponytail and secure it with an elastic. About 2 inches down from that elastic, create a second elastic around the same ponytail. Now, take the section between the two elastics and gently tease or pull it out slightly to create a “bubble.” Repeat this process down the length of your ponytail, creating as many bubbles as you want (typically 3-5 depending on your hair length).
Making Waves Stand Out
- The bubbles should expand outward; don’t leave them flat against your head
- The waves naturally help each bubble hold its shape and look fuller
- You can leave the tail of your ponytail down below the last bubble, or curl it for extra texture
- This style holds for 6-8 hours and actually looks better as waves relax and bubbles soften
This updo takes about 10 minutes and works beautifully for casual events, active days, or any time you want a fun, definitely-intentional updo that still shows off your wave texture. It’s playful without being childish if you keep the bubbles relatively neat and use a neutral hair elastic color.
16. Textured Low Knot
A low knot differs from a low bun because it sits at the very nape of your neck and uses less hair, creating a smaller, tighter focal point. With wavy hair, the knot becomes a design element rather than a way to hide texture. The remaining hair above can be styled in various ways—left down, half-up, or with face-framing waves.
Tying the Low Knot
Gather the bottom section of your hair (roughly the bottom third or quarter) into a low ponytail at the very nape of your neck. Divide this ponytail into two equal sections and tie them into a knot—literally, like tying a shoe, but with hair. Secure the knot with bobby pins tucked into the wave texture.
Styling Around the Knot
- The knot sits low, so you have creative freedom with the upper portion of your hair
- You can leave it completely down in waves, create twists on the sides, or style it as half-up
- Face-framing pieces look intentional and soft against waves
- A light texture spray keeps everything in place without stiffening
This technique takes about 8 minutes and works for almost any occasion. The low knot is secure enough for active days but relaxed enough for casual settings. It’s perfect if you want an updo that doesn’t require you to gather all your hair—some wave texture remains visible and loose around your shoulders.
17. Woven Twisted Updo
This combines twists and weaving for a more intricate updo that looks complex but is actually quite manageable. You’re creating twisted sections on each side and literally weaving them together at the back, which creates both security and visual interest.
Creating Two Twisted Sections
Start on one side at about your temple and create a loose twist spiraling toward the back of your head. Create a matching twist on the other side, spiraling toward the same meeting point at the back. Both twists should reach the nape of your neck around the same area.
The Weaving Technique
- Once both twists reach the back, weave them together by threading one twisted section through and around the other
- This interlocking creates a secure hold that doesn’t require many bobby pins
- The weaving looks intentional and more intricate than simple twists
- Pin the woven section in place at the base, tucking pins into wave texture
The remaining hair below the twisted and woven sections can be gathered into a bun or left down in cascading waves. This updo takes about 12-15 minutes and works beautifully for special events or any time you want to show that you put real effort into your styling. The woven element is what transforms simple twists into something that looks truly crafted.
18. Tousled Top Knot
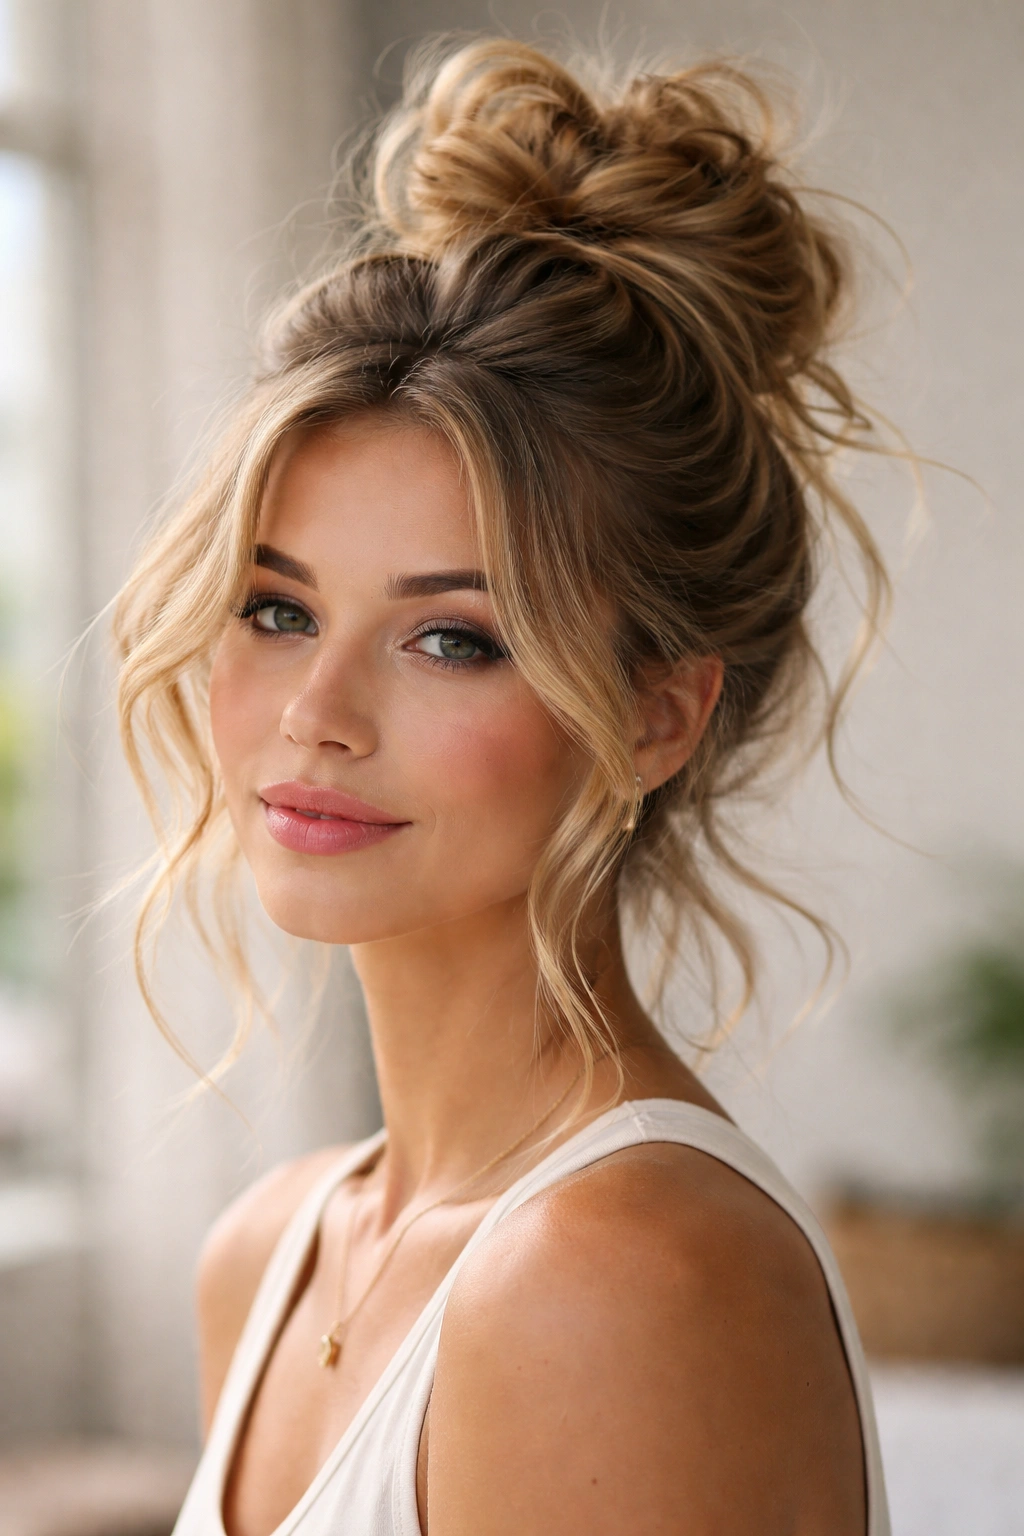
A top knot sits high on your crown and uses all your hair, but instead of making it tight and sleek, you’re deliberately keeping it loose and tousled. With wavy hair, this is actually easier to achieve because waves naturally create volume and texture. The result looks effortlessly cool rather than gym-ready.
Building the Loose Top Knot
Flip your head upside down and gather all your hair into a high ponytail at the crown. Secure loosely with an elastic—not too tight. Twist the ponytail loosely once or twice, then wrap it around the base to form a knot. Rather than tucking everything in neatly, leave sections loose and textured. Some pieces should escape; they’re part of the design.
Perfecting the Tousled Effect
- Use bobby pins only where necessary to keep the knot from tumbling down
- Leave flyaways and loose pieces visible; they add to the intentional, tousled vibe
- The knot should look full and dimensional, not smooth and sleek
- A light texture spray adds hold without creating crunch or stiffness
This updo takes about 7-8 minutes and works for casual days, working from home, or any situation where you need hair off your face but want to maintain a relaxed, undone aesthetic. It’s the updo for people who genuinely don’t have time but still want to look put-together. The beauty is that imperfection is the point with a tousled top knot.
Final Thoughts
Wavy hair actually has some serious advantages when it comes to updos—your natural texture creates grip that holds styles better, you get built-in volume without teasing or backcombing, and waves turn simple techniques into styles that look intentional and polished. The key is choosing techniques that work with your texture rather than against it: loose twists over tight ones, textured buns over sleek ones, and styles that let some wave remain visible rather than hiding everything away.
Most of these updos take between 7 and 15 minutes once you’ve practiced them a few times, and they hold through most of an active day. The best part? Wavy updos often look better by evening as your waves relax slightly and the updo softens—the opposite of what happens with straight-hair styles that can look droopy and tired by dinner time.
Pick a few of these styles and practice them while your hair is still damp or on second-day hair (when waves grip best). You’ll quickly find which techniques work best with your specific wave pattern, and then you’ll have several go-to updos that actually work for you instead of against you.