Round faces benefit from hairstyles that create the illusion of length and definition, and shoulder-length wavy cuts are genuinely one of the most flattering options available. The key is that soft waves add dimension and movement while the shoulder length strategically breaks up the roundness of the face without requiring a dramatic change. Unlike blunt cuts that can emphasize width, waves introduce texture and angles that naturally draw the eye downward and make facial features appear more sculpted.
The beauty of wavy hair on a round face is that you’re not fighting your hair texture — you’re working with it. Waves create vertical lines and visual interest that instantly balance a fuller face shape. Combined with the right placement of layers, curtain bangs, or side-parting techniques, shoulder-length wavy styles can transform how you perceive your own face. These aren’t cookie-cutter styles either; there’s real variation in how you can customize the wave pattern, the layer placement, and the styling approach to suit your specific features and hair type.
What makes these styles genuinely work is that they avoid the two extremes that can backfire on round faces: hair that sits too close to the face with no texture (which emphasizes width), and hair that’s so short it makes the face appear even rounder. Shoulder length hits the sweet spot where you get enough length to create vertical proportion, but the waves add enough movement to prevent the hair from looking flat or heavy.
1. Tousled Waves With Side Part
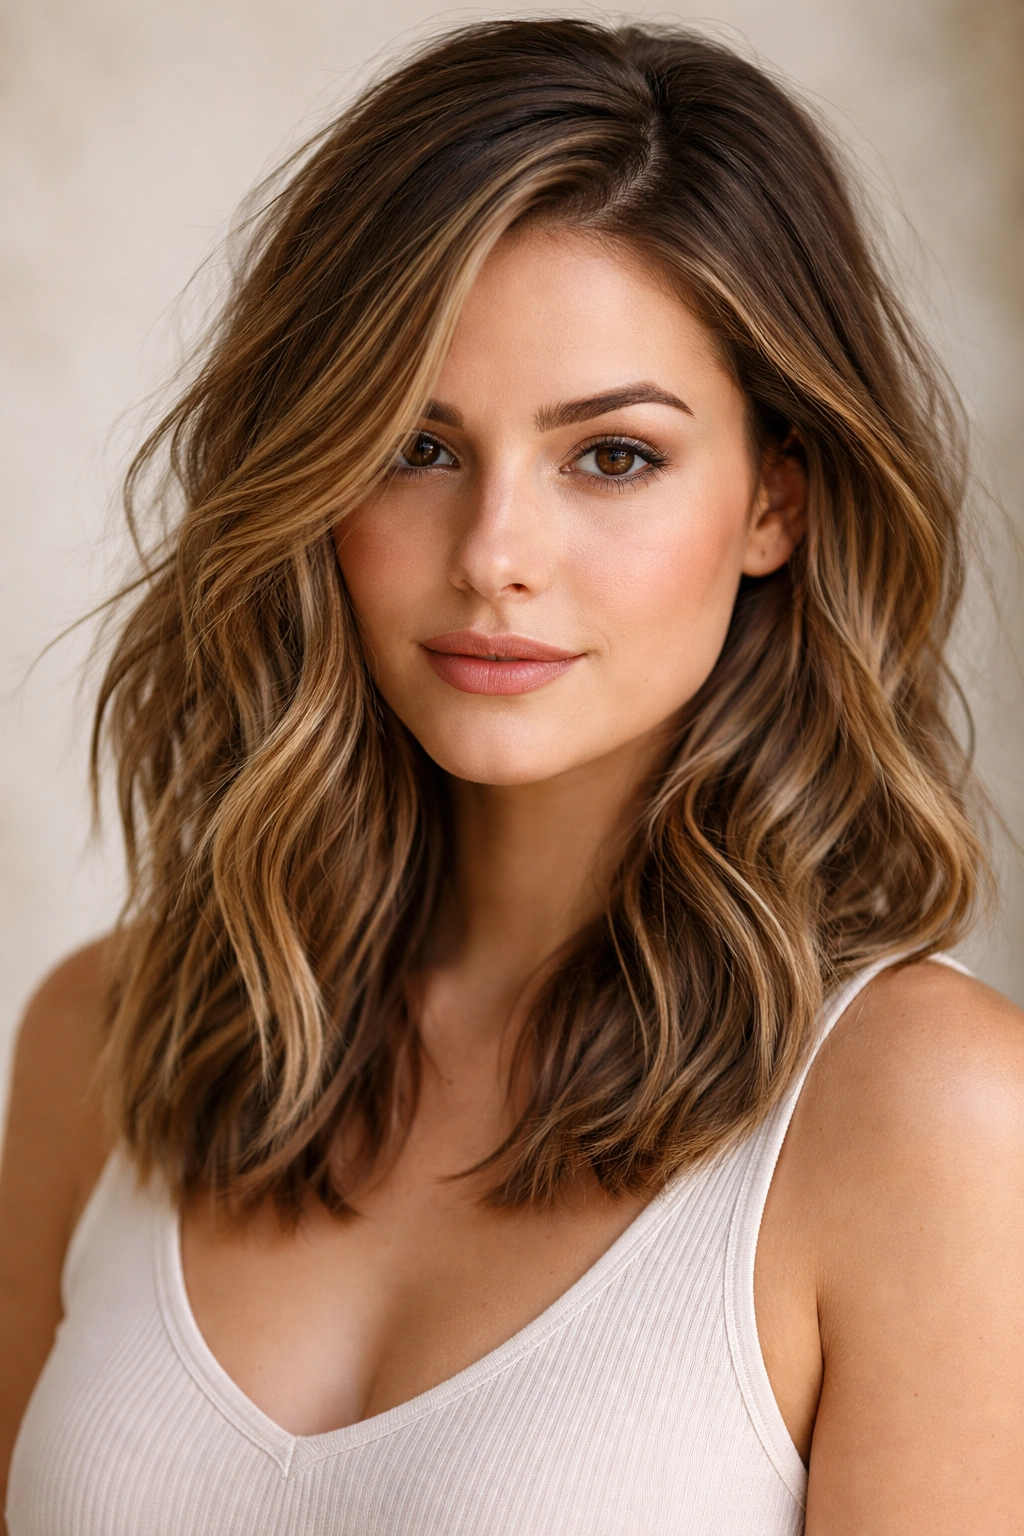
This is the effortless, lived-in style that works on almost every hair type and face shape, but especially on round faces because of the strategic side-parting. The waves fall loosely with deliberately textured ends, creating an undone, beachy quality that somehow makes hair look thicker and the face look longer. The side part is doing the heavy lifting here — it creates an asymmetrical line that breaks up facial roundness.
Why Side Parts Flatter Round Faces
A deep side part automatically creates angle and direction that pulls the eye toward one side, instantly making the face appear less symmetrically round. When your hair falls heavier on one side, it creates shadow and contour that sharpens facial features. The asymmetry is key; it’s the visual opposite of the balanced fullness of a round face, so the contrast naturally creates flattering proportion. The waves themselves add texture and movement, so the hair doesn’t sit flat against the cheeks where it would emphasize width.
How to Style and Maintain This Look
- Keep waves loose and irregular rather than uniform curls — this prevents a “too done” appearance that can make hair look shorter
- Use a sea salt spray or texturizing spray after blow-drying waves to enhance definition and prevent hair from falling flat by day two
- The side part should start at least 2-3 inches from the natural center of your part for maximum flattering effect
- Sleep on waves in a loose braid to refresh them the next morning without restyling
Pro tip: This style ages brilliantly when you add lighter face-framing pieces through balayage or highlights — the dimension makes the entire face appear more sculpted.
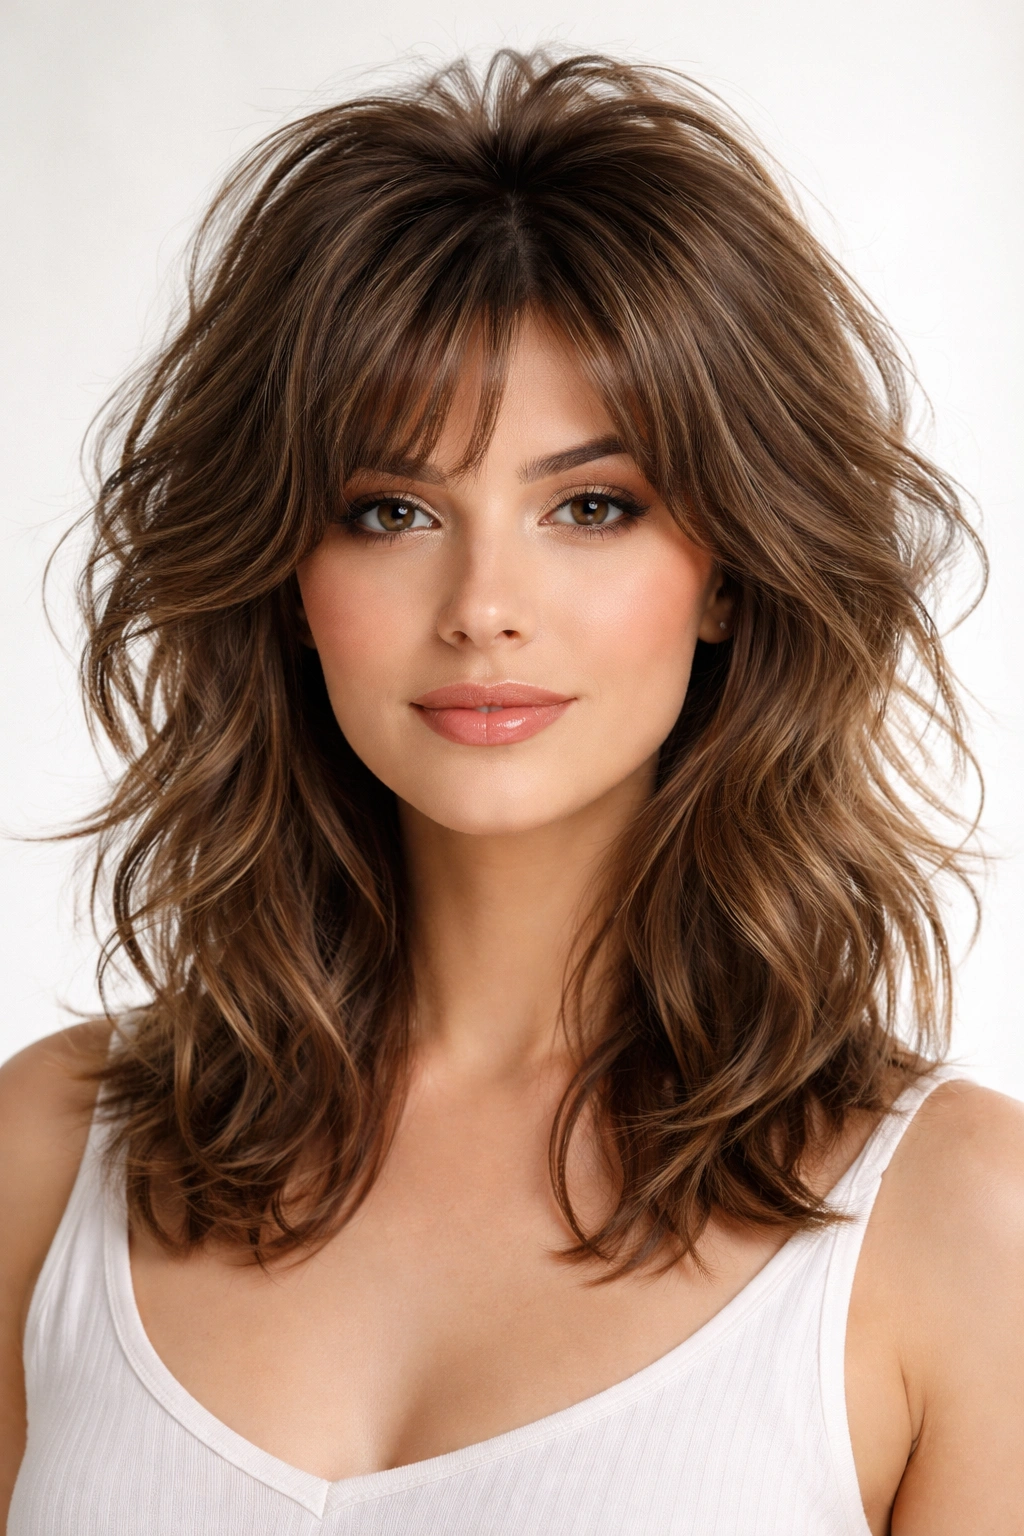
2. Layered Waves With Curtain Bangs
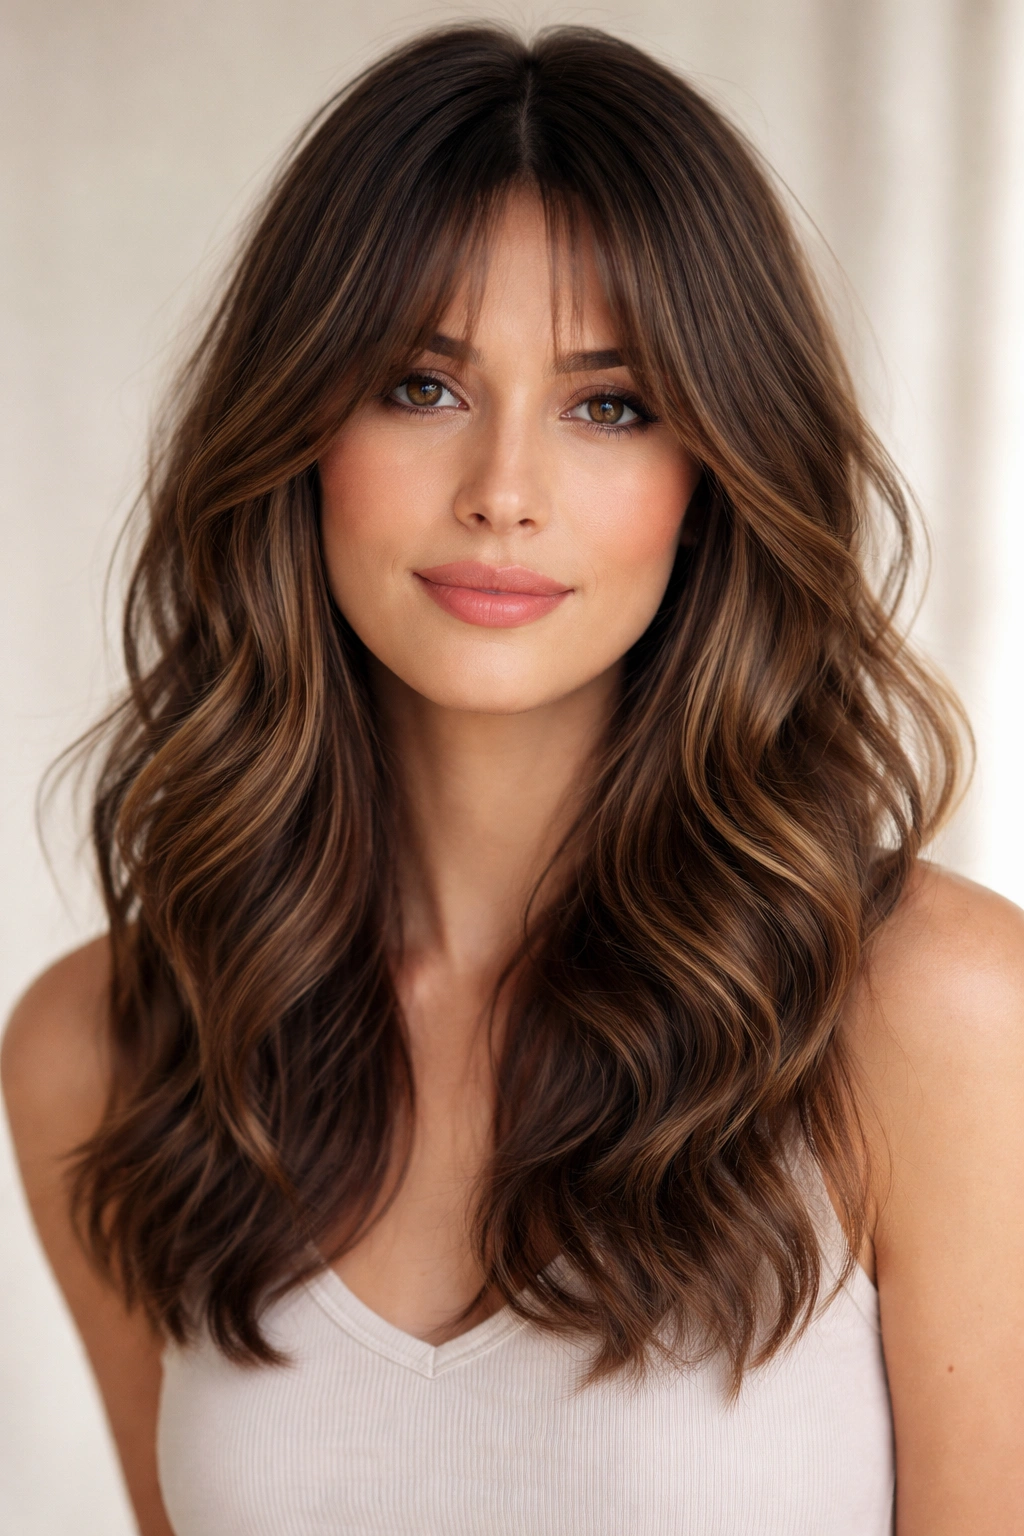
Curtain bangs are experiencing a significant resurgence, and for round faces, they’re a game-changer. The way the bangs frame the face and create a natural vertical line down the center completely changes facial proportions. Pair curtain bangs with heavily layered waves throughout the length, and you’ve got a style that adds serious movement while avoiding any heaviness at the cheeks.
How Curtain Bangs Reshape Round Faces
Curtain bangs naturally fall away from the face and create two soft vertical lines that draw the eye inward and downward. Unlike blunt bangs that sit flat across the forehead and emphasize width, curtain bangs literally point toward the center of the face and elongate the appearance. The side-swept quality means they’re never sitting so close to the face that they emphasize roundness. When combined with waves, the bangs merge into the wave pattern rather than creating a separate, harsh line.
Styling This Multi-Layered Style
- Ask your stylist for choppy, shorter layers throughout the mid-length and ends to maximize movement and prevent that heavy, one-length appearance
- Curtain bangs should graze just below the cheekbone and curve away from the face naturally
- Use a round brush when blow-drying to encourage the bangs to curve outward, not stick to your forehead
- This style benefits from regular trims every 6-8 weeks to keep layers looking intentional rather than grown-out
Worth knowing: The success of this style depends on your hair texture. Fine, straight hair will need help holding waves (a light texturizing spray is essential), while naturally wavy or curly hair will thrive with minimal styling effort.
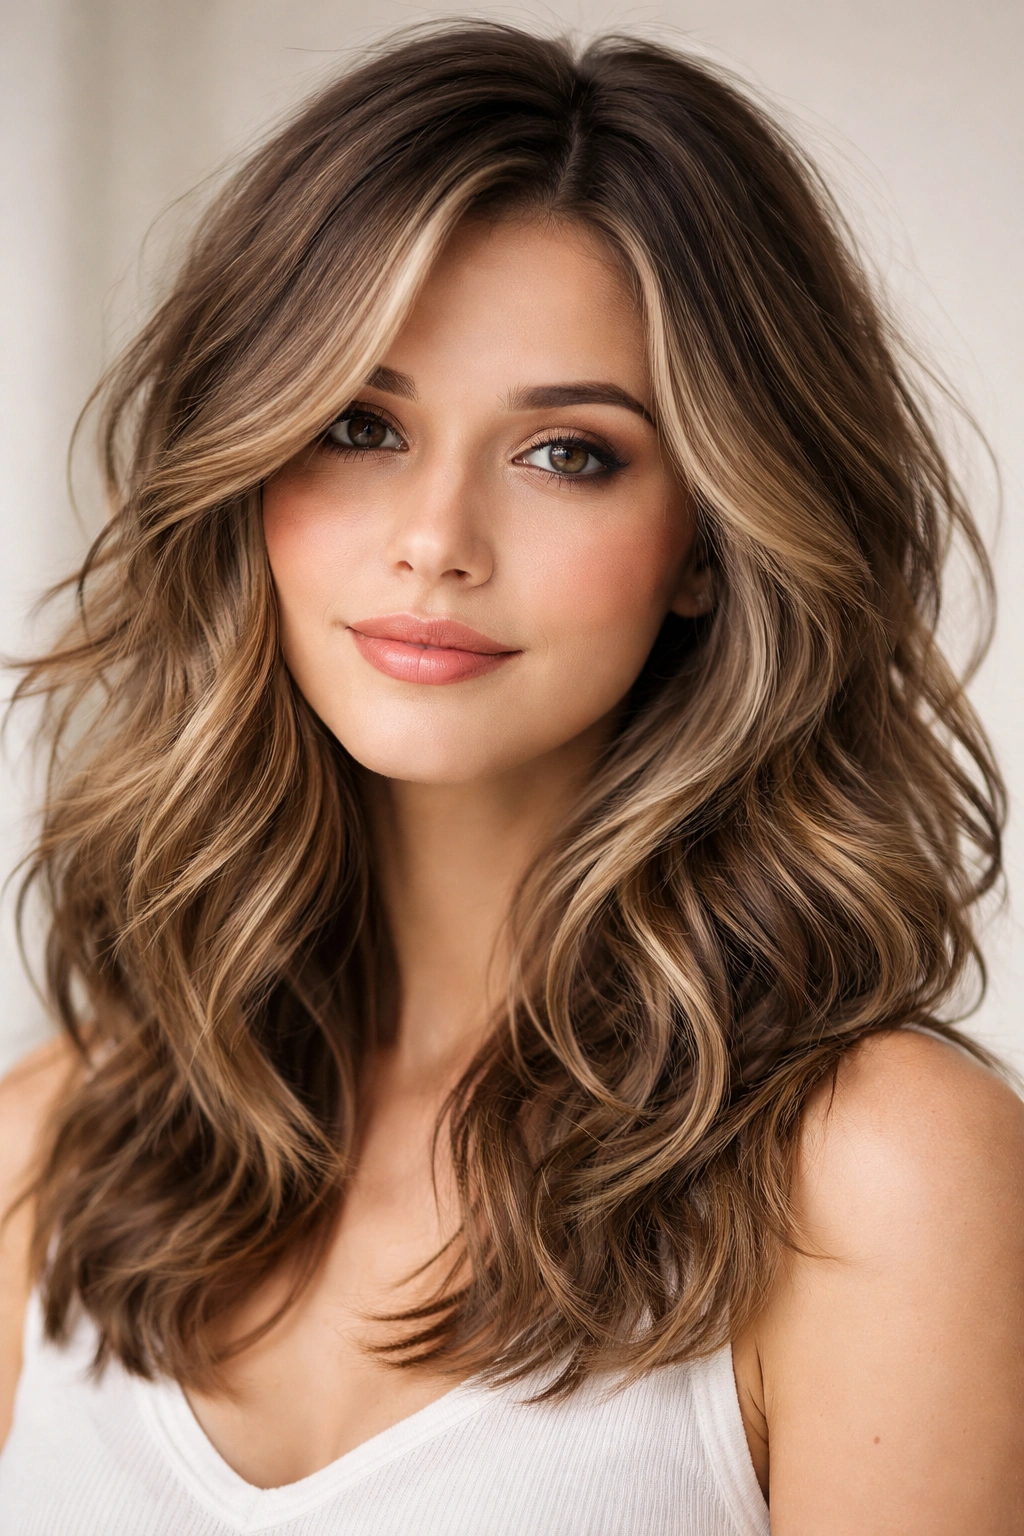
3. Face-Framing Waves With Longer Layers
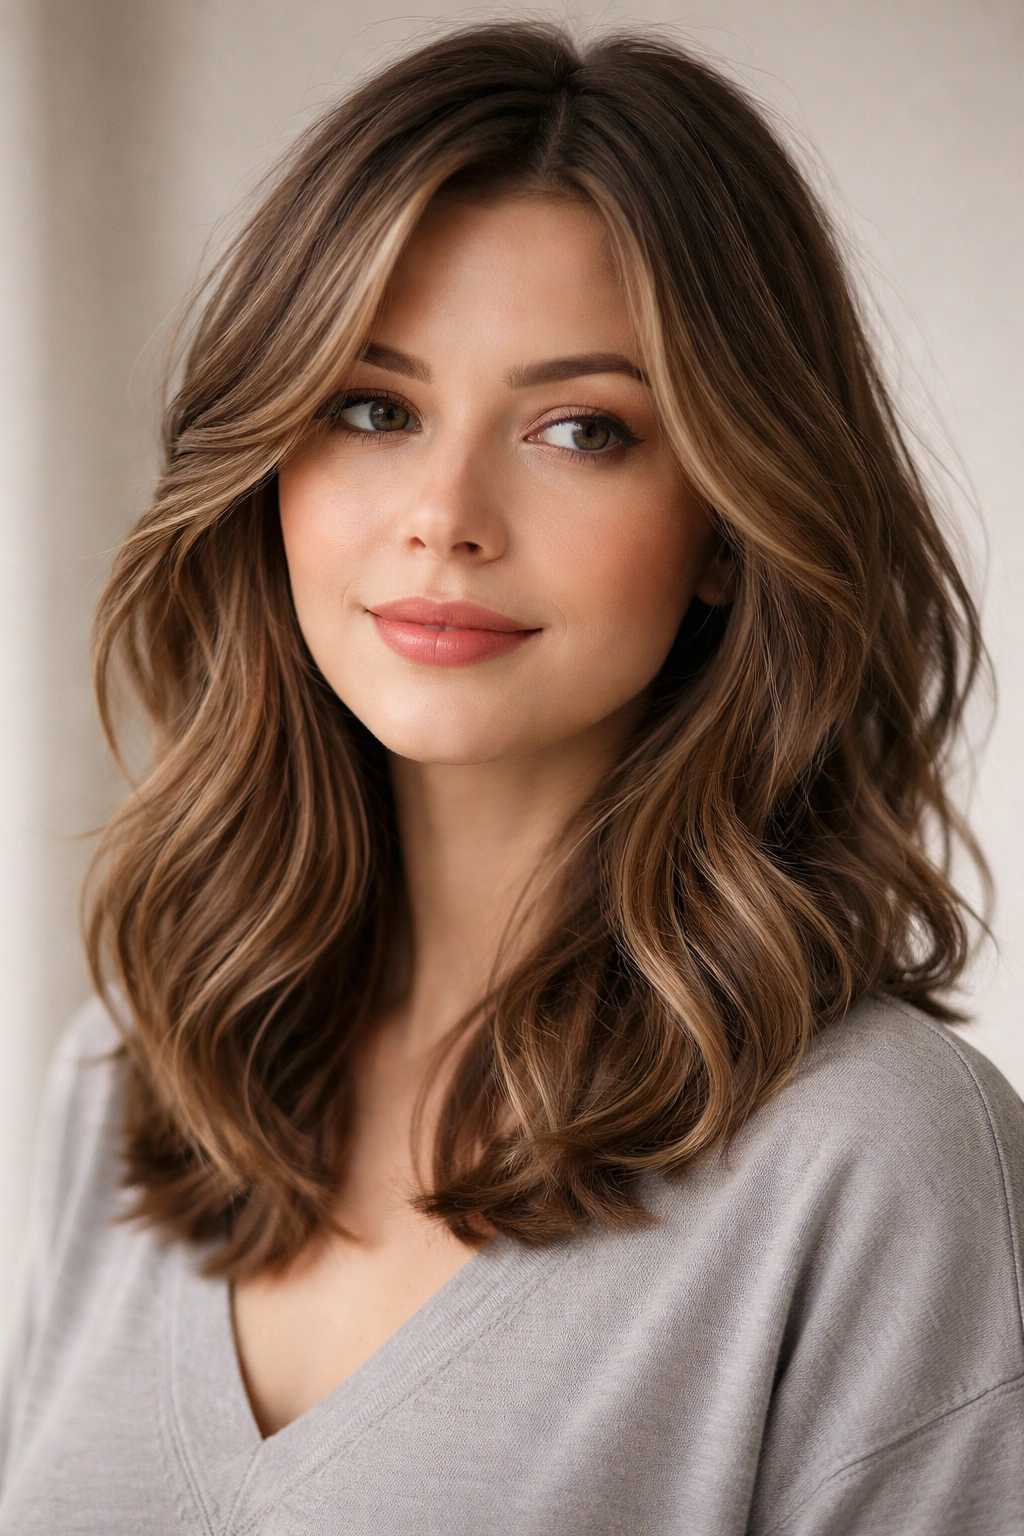
This style keeps most of the hair at shoulder length but adds much shorter, choppy layers around the face that create a soft frame. The shorter face-framing pieces are the visual anchors that prevent the style from looking heavy, while the longer pieces add needed length for balance. When waves are applied to this layered structure, the shorter pieces wave more dramatically while the longer pieces create smoother, broader waves.
Why Shorter Face-Framing Layers Work
Short, choppy layers around the face instantly reduce the visual weight on the cheeks and jawline. These pieces move and swing independently from the longer lengths, creating constant motion that breaks up the perception of a round face. They also catch light differently than the longer hair, creating subtle dimension and shadow that a one-length style simply can’t provide. The shorter pieces also frame features like cheekbones and eyes, drawing attention upward to the face itself rather than just the overall shape.
Building Dimension Into This Style
- Layers should be 2-3 inches shorter than the longest pieces for noticeable impact
- Request side-swept layers rather than layers that sit directly under the chin — this prevents them from adding width
- Wavy texture looks best when layers have some texture built in from the cut itself, not just from styling
- Use a volumizing mousse on damp hair before blow-drying to encourage the shorter layers to separate and move
Insider note: This style works particularly well if you have slightly thinner hair, because the layers create the illusion of fullness without requiring you to blow out thick, heavy hair.
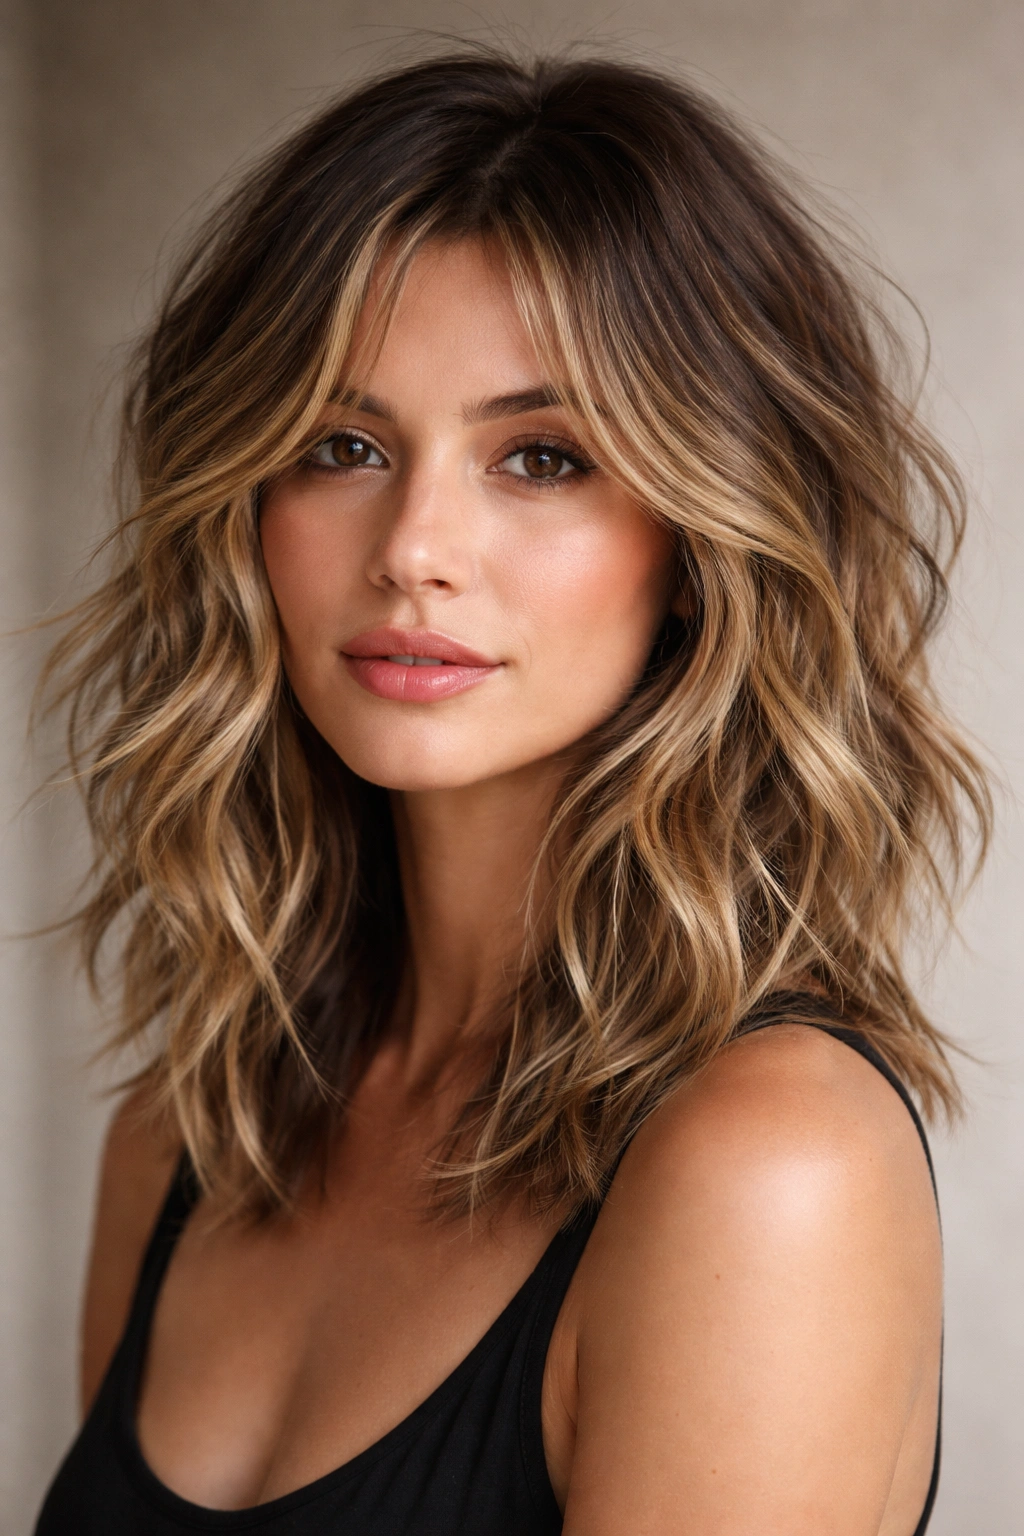
4. Beach Waves With Textured Ends
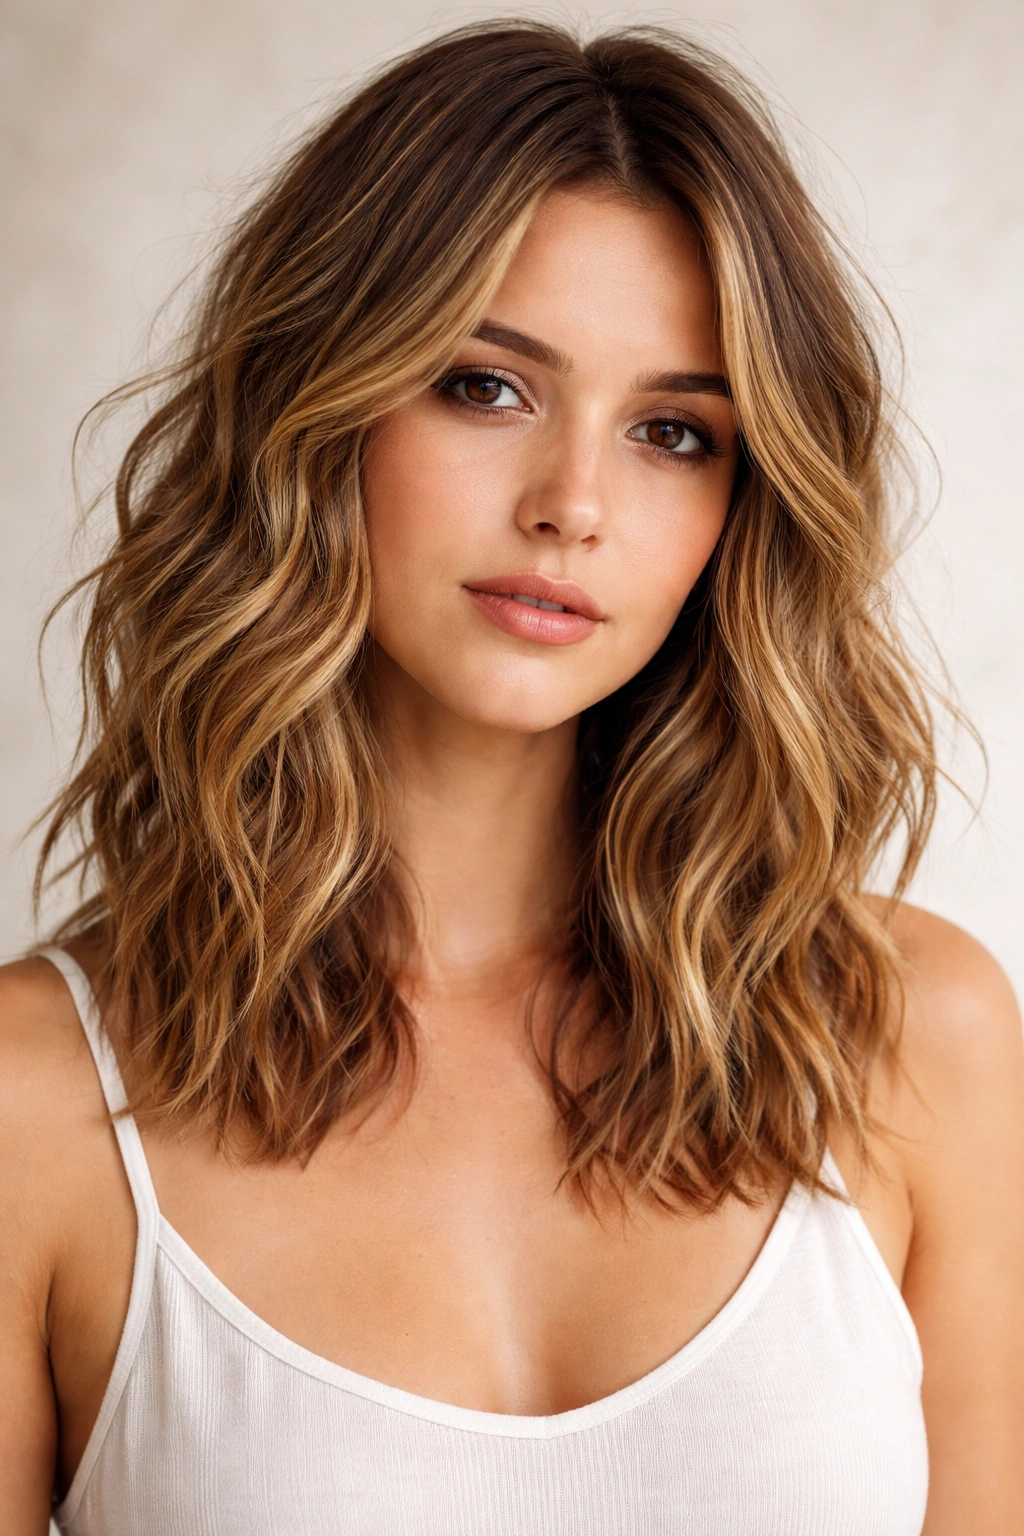
Beach waves are a timeless choice for shoulder-length hair because the loose, undone quality flatters almost every face shape, but they’re especially good for round faces when the waves have intentional texture at the ends. This isn’t a perfectly uniform wave pattern — the best beach waves look a bit chaotic and piece-y, with deliberate fraying and texture that breaks up the overall silhouette.
The Science Behind Textured Waves on Round Faces
Perfectly smooth waves that sit close to the face actually emphasize roundness because they create a solid perimeter around your head. Textured, piecey waves, on the other hand, break that solid line into irregular segments. The eye doesn’t read the face as a unified round shape when the hair surrounding it is constantly shifting and breaking apart. The texture also creates shadow and depth, so the hair appears to have more dimension and less weight.
Creating Intentional Wave Texture
- Textured ends require regular trims every 6-8 weeks to maintain the piece-y quality — ends that grow out smooth will weigh down the texture
- Apply texturizing spray to damp hair before blow-drying, not after, for better wave hold and more intentional texture
- Use a curling iron on the largest barrel (1.5 inches) and curl away from the face on both sides
- Don’t smooth the waves with a flat iron; instead, use your fingers to separate the curls while they’re still slightly warm
Real talk: Beach waves require a bit more styling than some other options. If you need a style that looks good without daily effort, this might require a monthly trip to get waves professionally refreshed.
5. Shaggy Layers With Volume on Top
Shaggy layering is having a genuine moment in modern hair, and it’s particularly flattering on round faces because the extra volume on top creates height that elongates the face. This style uses graduated layers throughout, with the shortest layers at the crown and progressively longer layers down to the shoulders. Waves applied to this structure create movement in multiple directions, preventing any sense of flatness or heaviness.
Why Shag Layers Elongate Round Faces
A shaggy cut distributes volume throughout the entire style, but especially at the crown and sides. This means the widest part of your hairstyle sits at your ears and above, rather than hugging your cheeks. The multiple layers at different lengths create what stylists call “texture separation,” where you can see individual sections of hair rather than one solid shape. For round faces, this separation is crucial — it breaks the face shape into smaller visual sections rather than reading as one round outline.
Styling Shaggy Layers for Maximum Impact
- Use a volumizing mousse on damp roots before blow-drying — shag layers need volume to look intentional, not just choppy
- A round brush at the crown while blow-drying helps direct volume upward rather than outward
- Finger-comb through waves while they’re slightly damp to separate layers and prevent them from looking clumped
- This style pairs exceptionally well with a side part, which adds asymmetry to an already textured cut
Pro tip: Ask your stylist to point-cut (rather than blunt-cut) the ends of the layers, which prevents them from looking too severe or blunt and creates softer, more natural-looking texture.
6. Asymmetrical Waves With Extended Undercut

An asymmetrical cut takes one side shorter than the other, creating dramatic visual imbalance that completely reshapes how a round face appears. When combined with waves, this approach feels modern and intentional. The shorter side can sit anywhere from chin-length to ear-length, while the longer side reaches the shoulder. This isn’t a subtle difference — the asymmetry is the point.
How Asymmetry Reshapes Facial Proportions
A round face is, by definition, symmetrical in width — the face is roughly as wide as it is long. An asymmetrical cut deliberately breaks that symmetry by making one side visibly shorter and therefore requiring the eye to work harder to understand the overall shape. The longer side creates a vertical line, while the shorter side adds height and dimension. The combination essentially forces the eye to follow the longer side downward, which creates the illusion of length and narrowness.
Styling and Maintaining Asymmetrical Waves
- This cut requires styling intention — you’ll typically wear the longer side forward or draped across the chest to emphasize the asymmetry
- The shorter side can be tucked behind the ear or styled to sweep back, depending on your mood
- Waves should be consistent throughout both sides for balance, even though the lengths differ
- This style needs a trim every 5-6 weeks to maintain the length differential
Worth knowing: Asymmetrical cuts can feel high-maintenance if you’re someone who likes a low-effort hair routine. However, they can also be styled multiple ways depending on how you position the longer side, so one cut actually gives you multiple styling options.
7. Wispy Waves With A Center Part

A center part can be risky on round faces because it emphasizes the symmetry you’re trying to minimize — unless you pair it with wispy, delicate waves that create enough movement to break up the center line. The key here is that the waves need to be loose and piece-y so they’re not sitting flat against the cheeks. The center part works because the waves move away from the face on both sides, creating two subtle vertical lines rather than emphasizing the center.
Why Wispy Movement Matters With Center Parts
A center part on its own can emphasize a round face’s natural symmetry, but wispy waves offset this problem by creating constant directional movement. The waves naturally fall away from the face on both sides, so even though the part is centered, the hair itself isn’t sitting flat in a way that emphasizes width. The lighter, piece-y quality of wispy waves means the hair has visual texture rather than visual weight, so the eye sees dimension rather than a solid shape framing the face.
Creating Wispy Waves That Actually Last
- Wispy waves require very fine hair or professionally thinned-out longer layers — thick, dense hair will look blunt rather than wispy
- Use a small-barrel curling iron (1.25 inches) for tighter, more delicate waves that read as wispy
- Apply waves to damp hair rather than dry for better hold and more natural-looking texture
- Use a lightweight hairspray that won’t weigh down fine waves — a heavy-hold formula will make wispy waves flatten by day two
Insider note: This style works best if you have naturally straight or minimally wavy hair. If your hair is naturally very curly or thick, this particular approach will require daily styling.
8. Choppy Layers With Piecey Waves
Choppy layering is more extreme than subtle layering — it uses very sharp length variations and more dramatic cuts throughout the entire style. When paired with piece-y waves, choppy layers create the maximum amount of movement and texture, which works beautifully on round faces that need to break up their solid shape. This style reads as intentional and modern rather than just “messy,” because the choppiness is built into the cut itself.
The Impact of Choppy Texture on Face Shape
Choppy layers create what stylists call “visual interruption.” Instead of the eye following a smooth outline around your face, it gets interrupted by the irregular lengths throughout the style. Piecey waves amplify this interruption by adding color variation and shadow from the way light hits the textured ends. For a round face, these interruptions are beneficial — they prevent the eye from settling on the rounded outline and instead create a more chaotic, interesting silhouette.
Getting Choppy Layers Right
- Choppy layers should feel intentional, not just like your stylist made mistakes — ask specifically for a choppy, textured cut rather than layered
- The shortest layers should be around 2-3 inches shorter than the longest, creating genuine contrast
- This style requires a more skilled stylist because choppy cutting is a specific technique, not just random layers
- Piecey waves are essential for this style to work — without them, choppy layers can just look unfinished
Pro tip: This style looks exceptional when you add a subtle undercut or shaved portion on the lower back of the head, hidden when the hair is down but visible when you put it up. It adds another dimension to the style.
9. Cascading Waves With Sideswept Styling
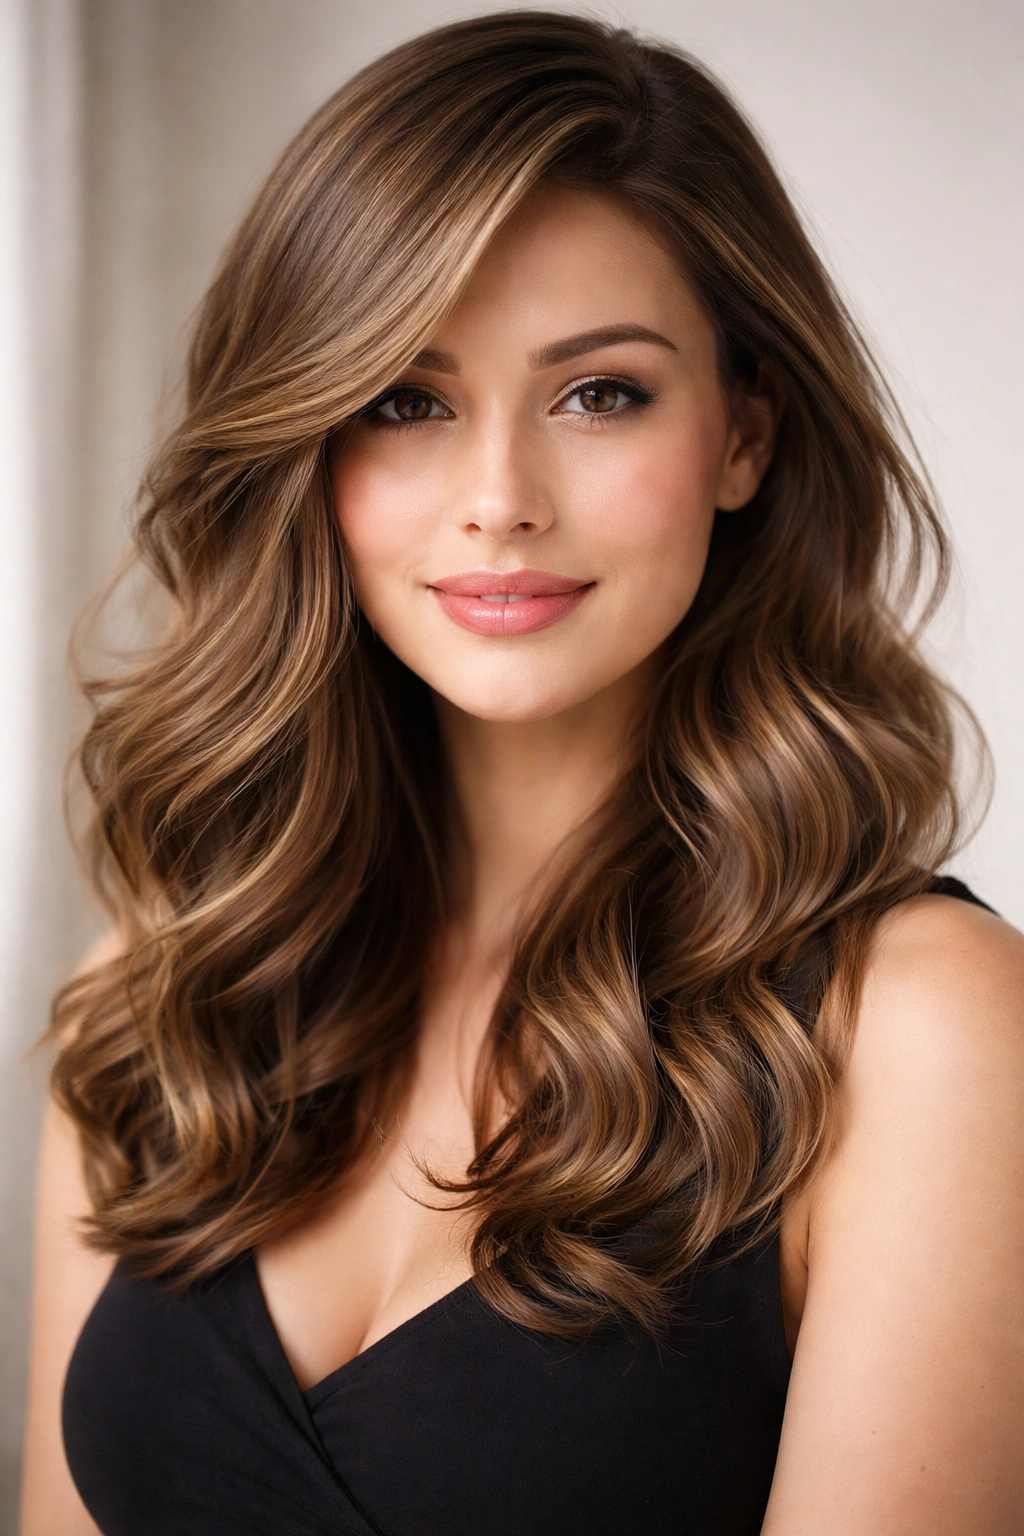
Cascading waves create a literal waterfall effect, with each wave flowing into the next in a continuous, smooth pattern. When styled with a deep side sweep, this creates the most feminine, romantic version of shoulder-length waves. The cascade itself creates a natural elongating line, while the side sweep adds asymmetry that flatters round faces. This style feels more polished and intentional than beach waves, but equally flattering.
How Cascading Patterns Complement Round Faces
A cascade creates visual movement that flows downward and slightly to one side, which naturally elongates the perception of face length. The pattern also creates subtle highlight and shadow contrasts as light hits each wave at different angles. Unlike random waves that might read as chaos on a round face, cascading waves create intentional directional flow that the eye can follow. The sideswept quality means the hair isn’t distributed equally on both sides, which breaks the symmetrical roundness you’re trying to minimize.
Creating Picture-Perfect Cascading Waves
- Use a 1.5-inch curling iron and curl sections consistently away from the face on one side and toward the face on the other
- Curl from the mid-length down rather than from the roots, which prevents the waves from looking kinked
- Brush through the curls very gently with a paddle brush while they’re still warm to blend them into a cascade rather than keeping them as separate ringlets
- This is a style that typically requires blow-drying and styling — it’s not a wash-and-go option for most hair types
Worth knowing: Cascading waves often look most beautiful on hair with some natural wave to it. Straight hair can hold the style but may require more product and refreshing throughout the day.
10. Wavy Bob With Subtle Layers
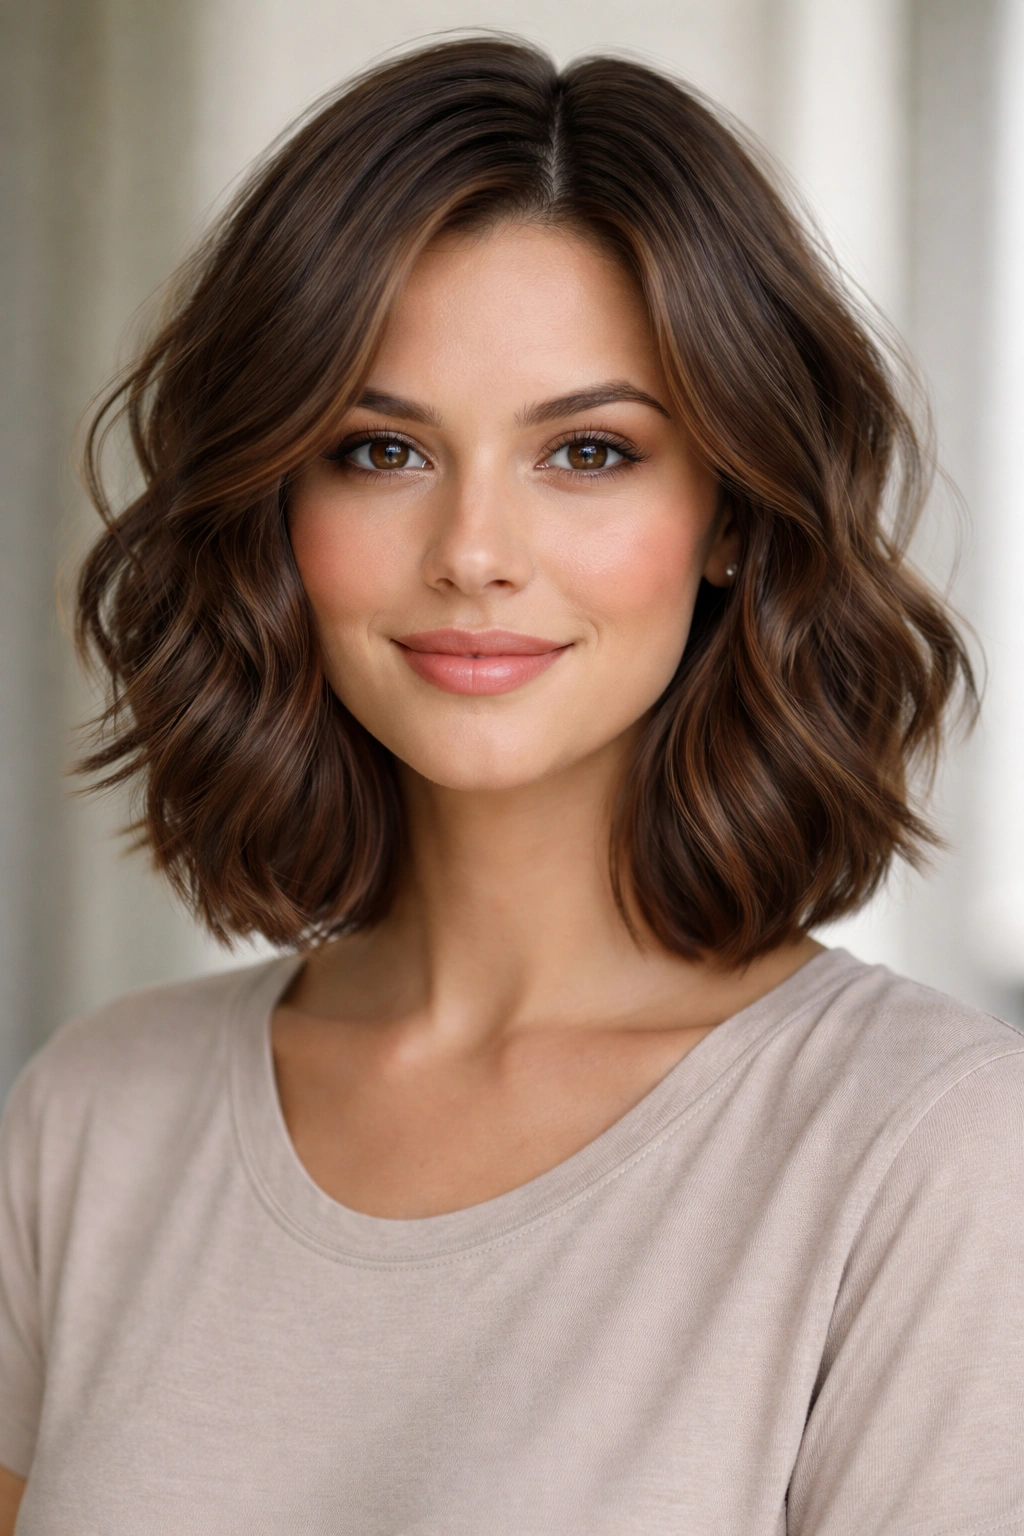
This is technically slightly shorter than true shoulder-length, but because it has subtle layering and waves, it reads as much longer than a standard bob. The waves create volume and movement that prevents the shorter length from emphasizing roundness. The layering is minimal — just enough to create texture without creating the choppy, extreme look of a shag. This is a sophisticated, wearable style that works in professional and casual settings.
Why Short + Waves = Longer Proportions
A traditional bob can be unflattering on round faces because the blunt ends sit right at the width of the face. However, when you add waves and subtle layers, those blunt ends become textured and move away from the cheeks rather than sitting flat against them. The waves essentially add inches of perceived length because they extend the visual line of the hair outward and downward. The subtlety of the layers means the style reads as intentional rather than just wavy, but not so choppy that it becomes high-maintenance.
Styling a Layered Wavy Bob
- Keep layers very subtle — ask your stylist for 1-2 inches of variation in length rather than dramatic choppy layers
- A side or deep side part is essential with this length to avoid emphasizing the roundness of the face
- Blow-dry waves in the direction of your part for maximum flattering effect
- Use a medium-barrel curling iron (1.5 inches) and curl all sections consistently for uniform waves
Real talk: This length might feel shorter than you expect when it’s first cut, but the waves add the equivalent of an inch or two in perceived length. Trust the style for at least a week before deciding if you want more length.
11. Tousled Waves With Hidden Undercut Texture
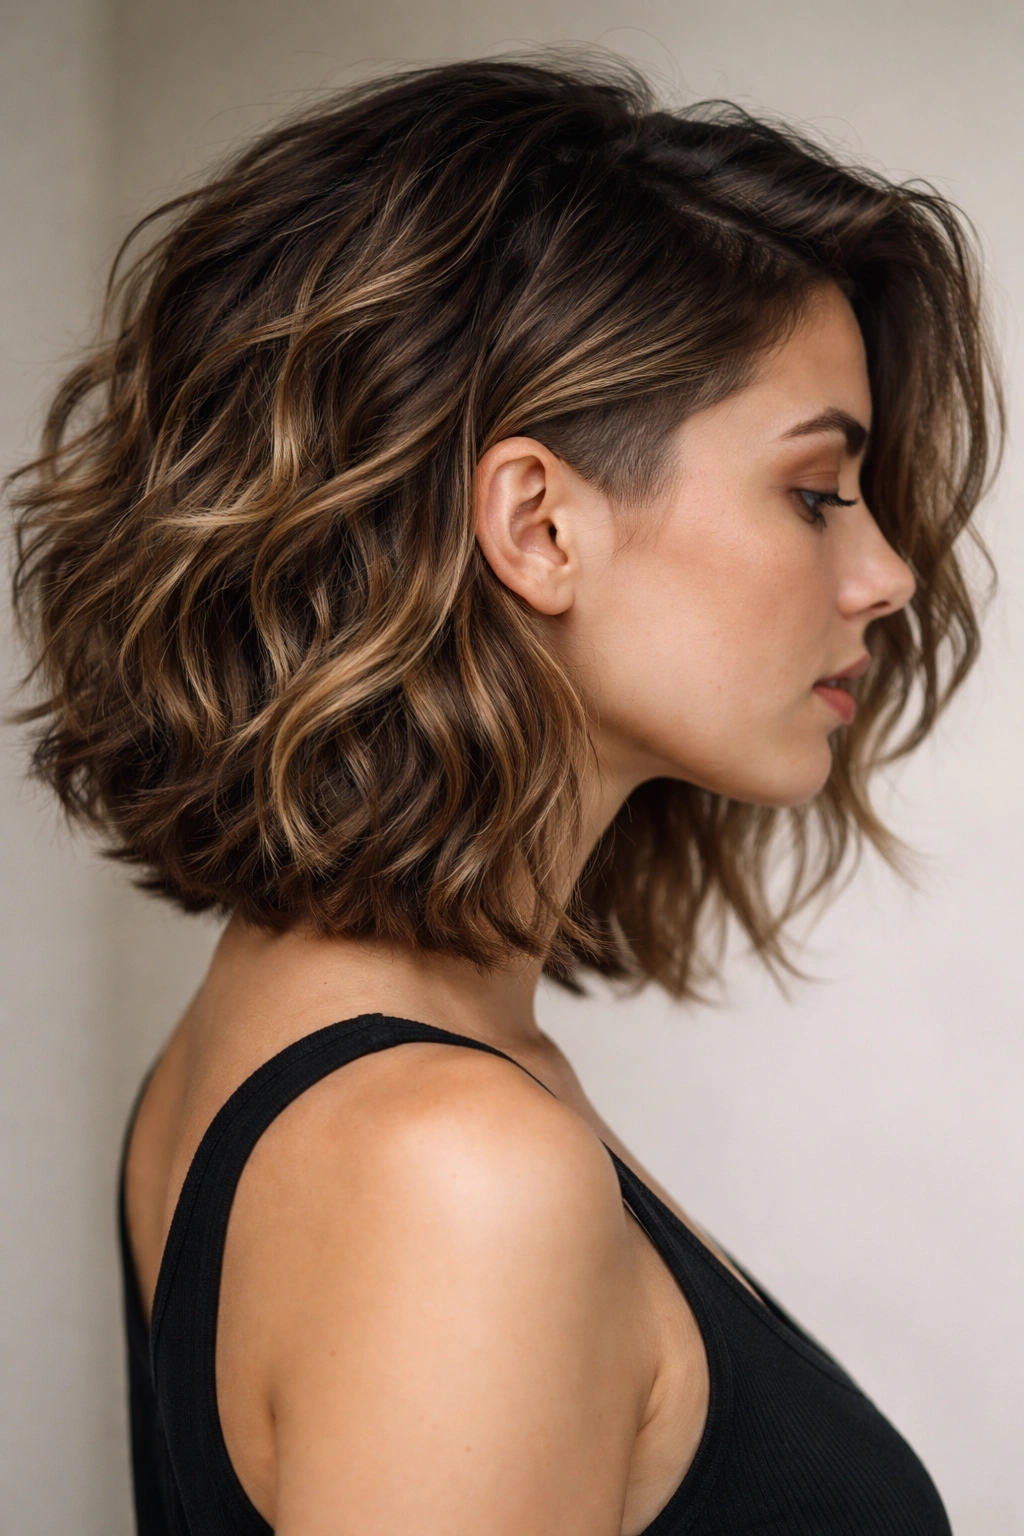
An undercut means shorter hair is clippered underneath while the top layer remains longer, creating surprise texture and volume when you move or style your hair differently. Hidden undercuts work on round faces because you get all the volume and movement benefits of shorter, layered hair while maintaining the length to balance facial proportions. When the top layer is wavy, the undercut creates incredible texture and movement.
Why Undercuts Add Flattering Dimension
An undercut does two things simultaneously: it removes weight from the internal layers (so hair moves more easily and looks fuller) and it creates visual texture separation when the longer top layer moves. For round faces, the removal of interior weight is beneficial because it means the longer hair around your face has actual movement rather than sitting flat with gravity pulling it toward your cheeks. The undercut also allows you to style the top layer in different ways without the weight of the full thickness.
Maintaining an Undercut Style
- An undercut requires trims every 4-6 weeks to maintain the clippered texture underneath — as soon as the undercut grows out, you lose the benefits
- Style the top layer with waves; the undercut will show through and add automatic dimension
- Use a lightweight styling product so you’re not weighing down the top layer with the same density that would flatten shorter styles
- You can wear this style with the undercut hidden (top layer down) or with it slightly visible, depending on your mood
Pro tip: Ask your stylist to undercut only the back and lower sides, leaving the front fuller. This way you get movement and dimension without sacrificing face-framing length.
12. Soft Waves With Lots of Layers and Depth
This is the “every layer is visible and intentional” approach, where the stylist creates enough layers that each one reads as a distinct section. When waves are applied to this structure, the waves in each layer move at slightly different speeds and directions because of the length variations, creating incredible dimension and movement. It’s not as extreme as a shag, but it’s much more layered than subtle layering.
How Visible Layers Create Flattering Movement
When you have enough layers that each one is distinct, the overall shape of your hair becomes much less “round” and much more “textured and interesting.” Each layer can move independently, creating multiple directional lines rather than one solid shape. For round faces, this multiplication of visual lines is beneficial — the eye tracks the movement of each layer instead of settling on the overall face shape. The waves amplify this effect by ensuring that no two layers sit the same way, even if they’re the same length.
Styling Many Layers Successfully
- Use a volumizing mousse on damp roots before blow-drying to ensure each layer has bounce and doesn’t flatten under the weight of the layers above it
- Blow-dry with a round brush, lifting each section at the roots and releasing while still warm
- Apply waves with a medium or small-barrel curling iron and don’t brush them out completely — let them blend together slightly
- This style actually looks better with a bit of texture and “imperfection” — the more intentional it looks, the less interesting it becomes
Worth knowing: This level of layering requires a skilled stylist and regular trims every 5-6 weeks to maintain the shape. As layers grow out, the style starts to look shapeless rather than intentionally layered.
13. Romantic Waves With Decorative Side Clip
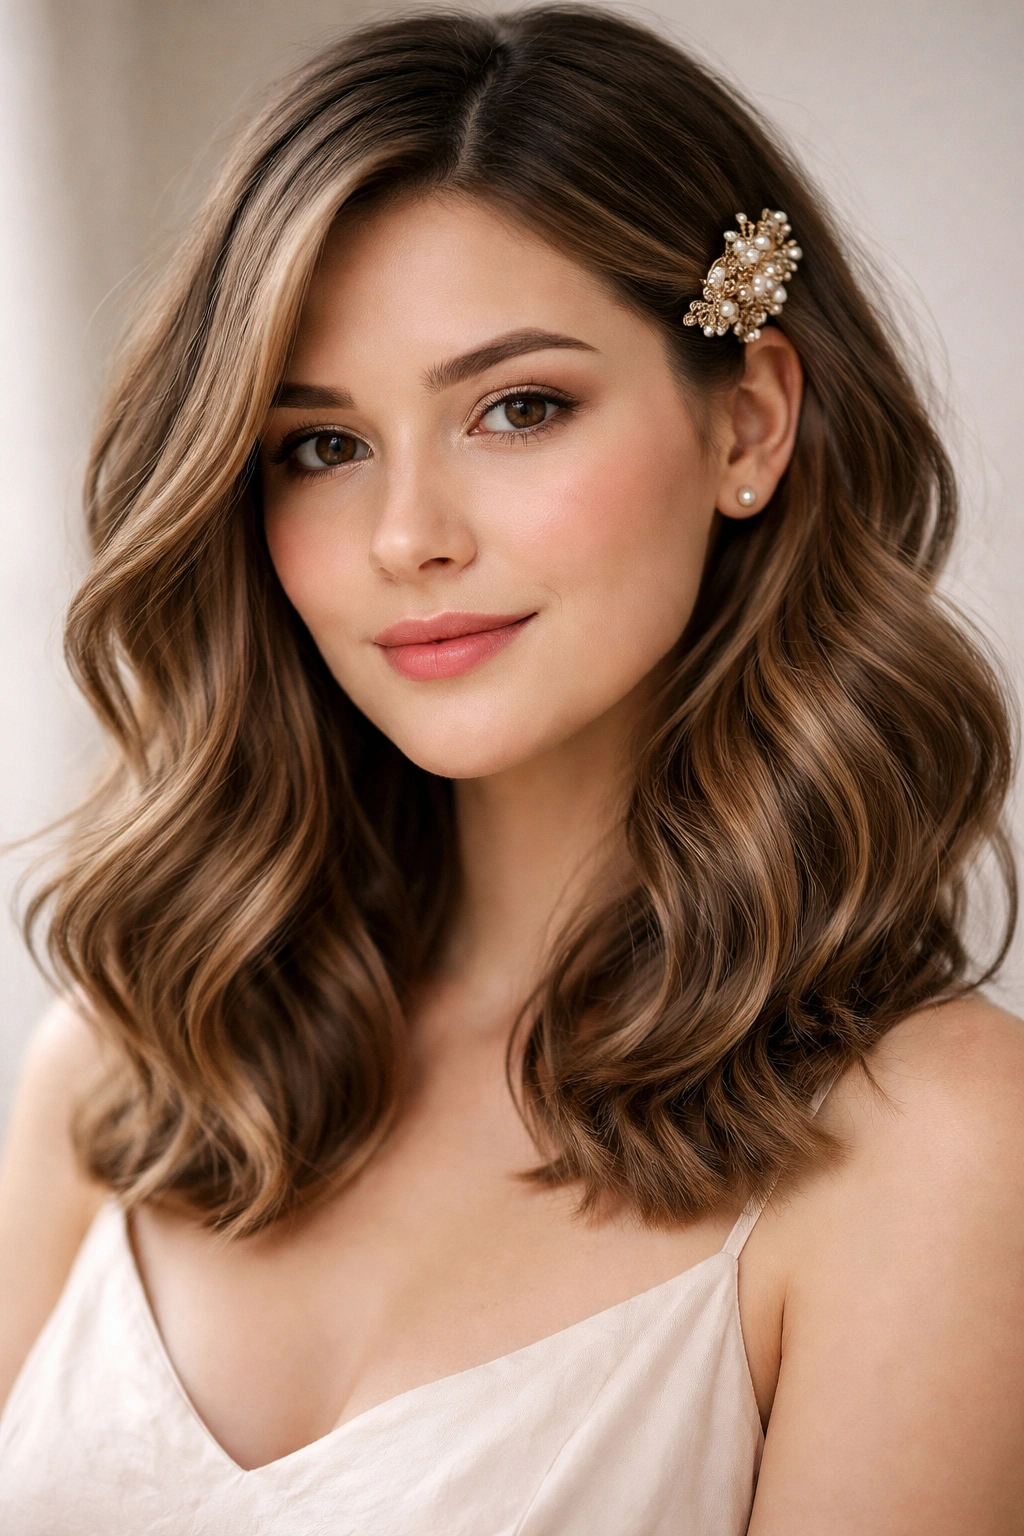
Sometimes the styling and accessories matter as much as the cut itself. Romantic waves are soft, loose waves that are almost swoon-worthy in their femininity, and when styled with the longer side clipped or pinned back, they create flattering asymmetry on round faces. The clip itself becomes an accessory that draws the eye to one side, breaking up facial symmetry.
How Styling Choices Reshape the Face
A decorative clip or pin, especially when placed strategically on one side, literally creates visual weight on that side and draws the eye away from facial roundness. The romantic waves themselves are loose and soft, so they don’t look severe — they maintain the style’s softness while the asymmetrical clip creates balance. This is particularly effective if your round face is combined with a strong jawline or prominent cheekbones on one side, because the clip can emphasize those features instead of the overall roundness.
Creating Romantic Waves and Placement
- Romantic waves should be loose and soft, not tight or kinky — use a large-barrel curling iron (2 inches) and only curl to the mid-shaft, not down to the ends
- Style with a deep side part, then clip or pin the longer side back, leaving face-framing pieces down
- The clip should sit roughly at ear height or slightly higher, not at the very crown (which can make you look like you have a top knot)
- Use a tortoiseshell or vintage-style clip that coordinates with your overall look rather than a basic bobby pin
Insider note: This style works beautifully if you have fine or medium-thick hair that holds waves without looking weighed down. Very thick hair might need texture spray to help waves cooperate.
14. Lived-In Waves With Barely-There Layers
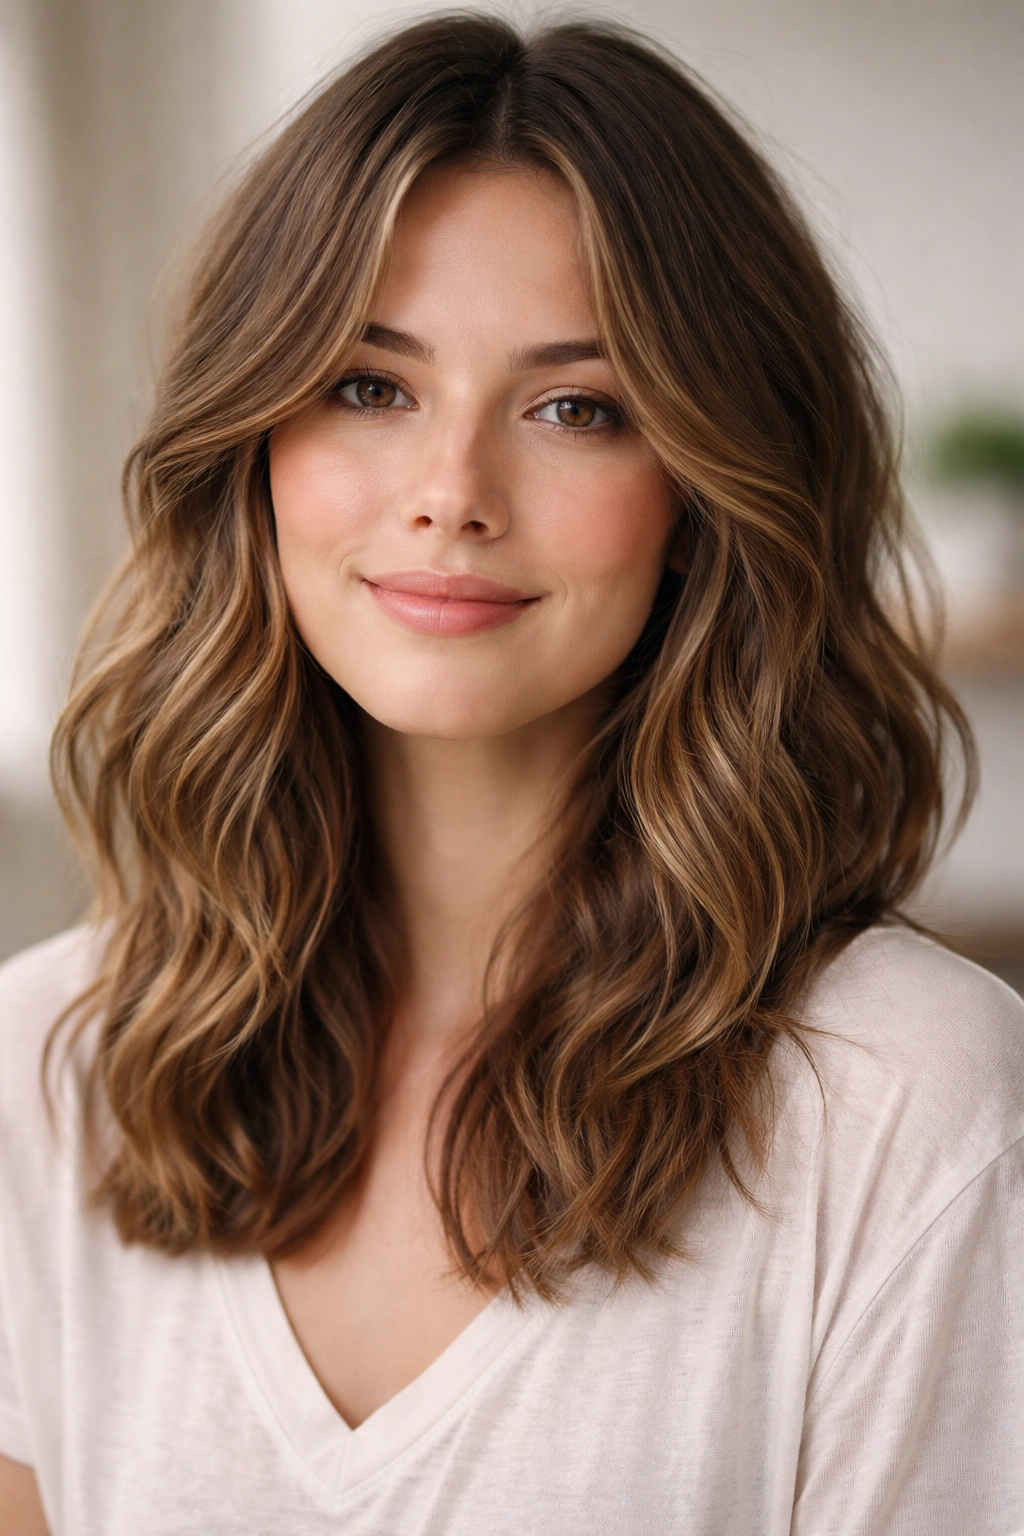
This is the most effortless version of shoulder-length wavy hair — minimal layers, soft waves, and the kind of texture that looks good from day one through day three without needing a full restyle. The “barely-there” layers mean that the professional’s eye created subtle movement, but the overall length is maintained so there’s still plenty of length to balance a round face. It’s a style that works with your natural hair texture rather than fighting it.
Why Minimal Layers Work With Waves
When you keep layers very subtle, you’re essentially creating a style that’s close to one-length but with just enough texture to prevent it from sitting flat against the face. The waves are the main texture element rather than the layers, which means the style depends on your hair’s natural or styled wave pattern. For round faces, this works because the waves create the movement and dimension without relying on choppy layers that might look too severe or high-maintenance.
Maintaining Lived-In Waves
- This style works best if you have naturally wavy or curly hair, or if you’re willing to do minimal styling on wash days
- Sleep waves by putting damp hair in a loose braid overnight and finger-combing them out in the morning
- Use a wave-enhancing or curl-defining product that works with your hair type rather than fighting it
- Refresh waves on day two or three with a texturizing spray rather than rewashing and restyling
Pro tip: Ask your stylist for “invisible layers” — this term specifically means layers that can’t be seen when the hair is down but create movement and prevent flatness. This gives you the benefits of layers without the visible choppiness.
Final Thoughts
The most flattering shoulder-length wavy hairstyle for a round face isn’t determined by a single element — it’s the combination of length, wave pattern, layering strategy, and how you style and part the hair that creates the magic. The common thread running through all these options is that they all use strategic movement, asymmetry, or textural variation to break up facial roundness and create the visual illusion of length and definition.
Your best choice depends on your specific hair type, your styling commitment level, and your personal style. If you have fine hair and limited styling time, a lived-in waves approach with barely-there layers might be perfect. If you love the feeling of getting ready and enjoy daily styling, choppy layers with piecey waves or cascading waves could be your ideal option. If you want something versatile that can shift between polished and casual, shaggy layers or face-framing waves give you the most flexibility.
Start a consultation with a skilled stylist by bringing multiple photos of styles that resonate with you, and be specific about your lifestyle. Let them assess your hair texture and face shape in person — they can identify which of these approaches will require the least maintenance while still giving you the flattering benefits you’re after. The most beautiful hairstyle is one that works with your hair and fits into your actual life, not against it.