Wavy hair has a superpower in the school setting—it looks effortlessly put-together while actually requiring minimal effort to maintain throughout a busy day. Whether you’re heading to class, sitting through long lectures, or navigating crowded hallways, the right wavy style keeps you looking polished without demanding constant touch-ups or time-intensive styling. The beauty of waves for school is that they work across every hair texture, blend seamlessly with different face shapes, and sit perfectly at that sweet spot between “I care about how I look” and “I didn’t spend two hours getting ready.”
The challenge is finding styles that actually survive your actual school day—styles that don’t flatten during fourth-period math, hold up through physical education without becoming a tangled mess, and look legitimately good in photos rather than just acceptable. You need hairstyles that give you confidence when you catch your reflection in classroom windows, styles that stay in place when you’re taking notes or concentrating hard on an exam.
What makes these 13 styles standout is that they’re rooted in real-world school demands. They work with natural wave patterns rather than fighting against them, they hold up under the conditions students actually face, and they deliver that polished, intentional look that makes you feel genuinely good about how you’re presenting yourself. Most importantly, you can actually replicate them at home without needing to master advanced salon techniques.
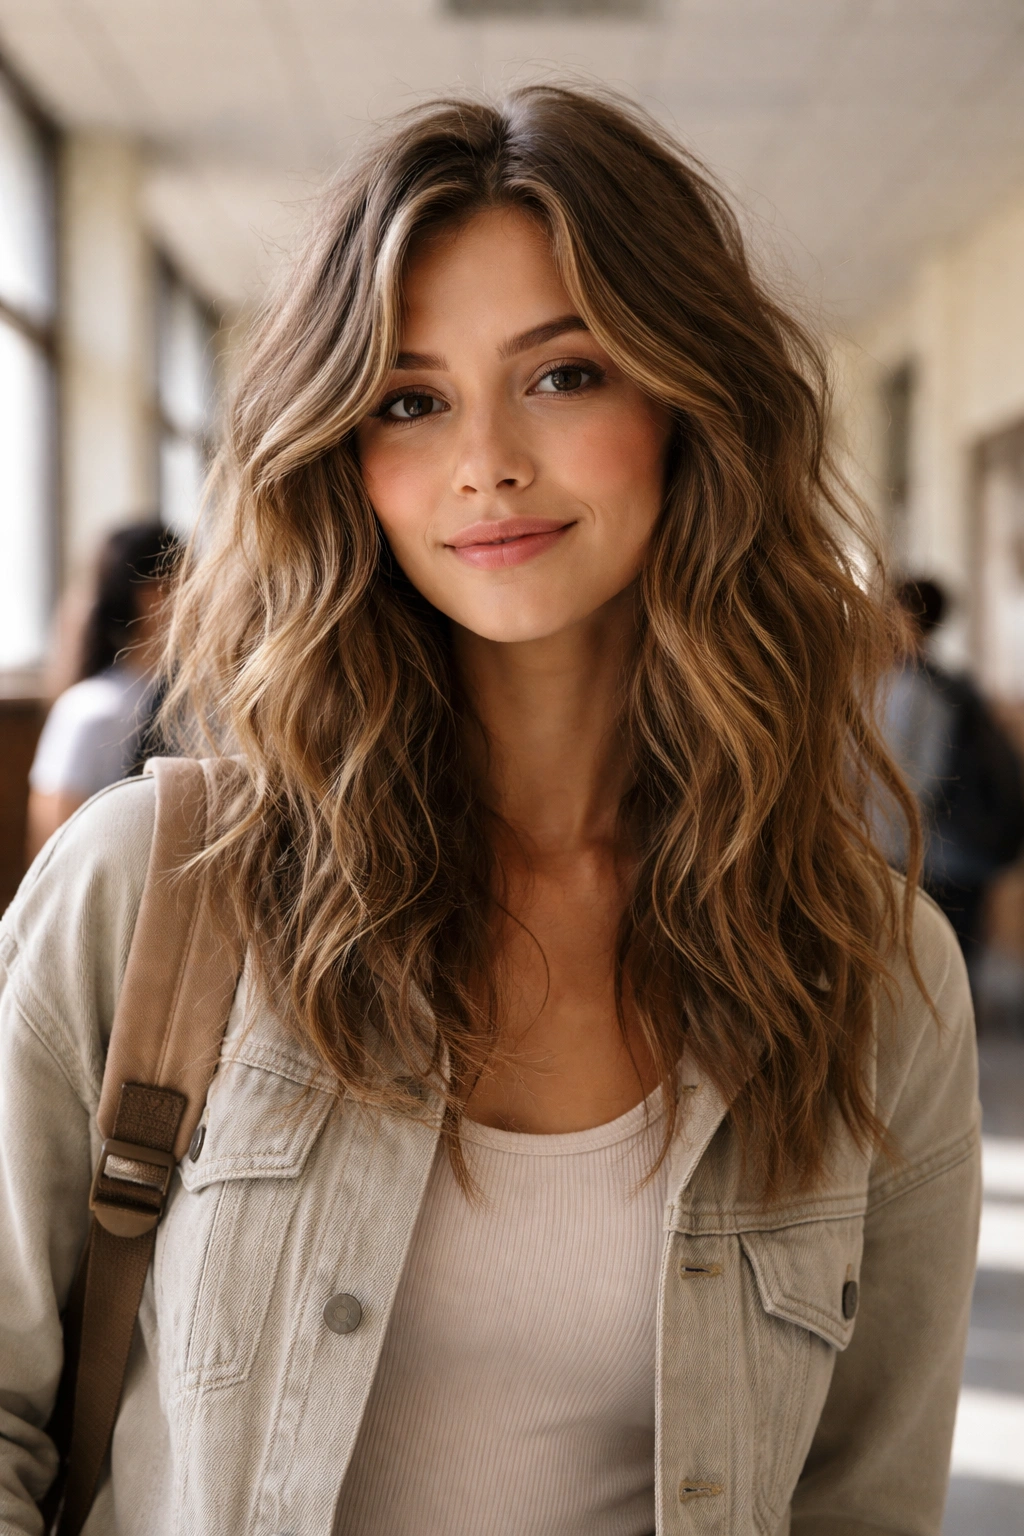
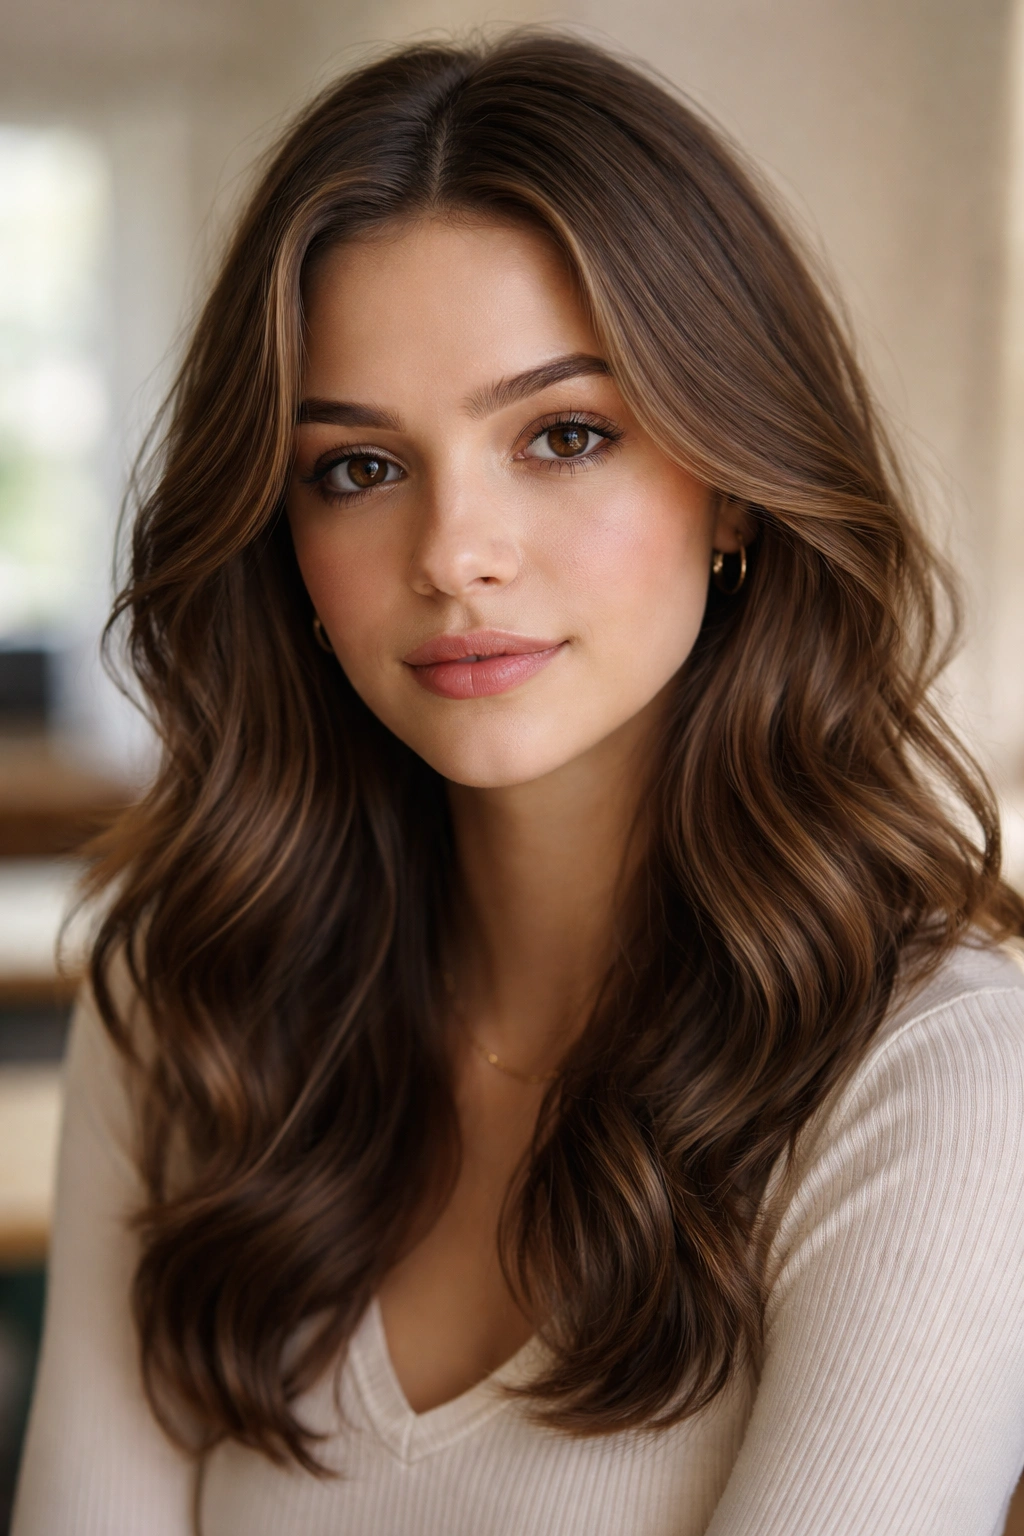
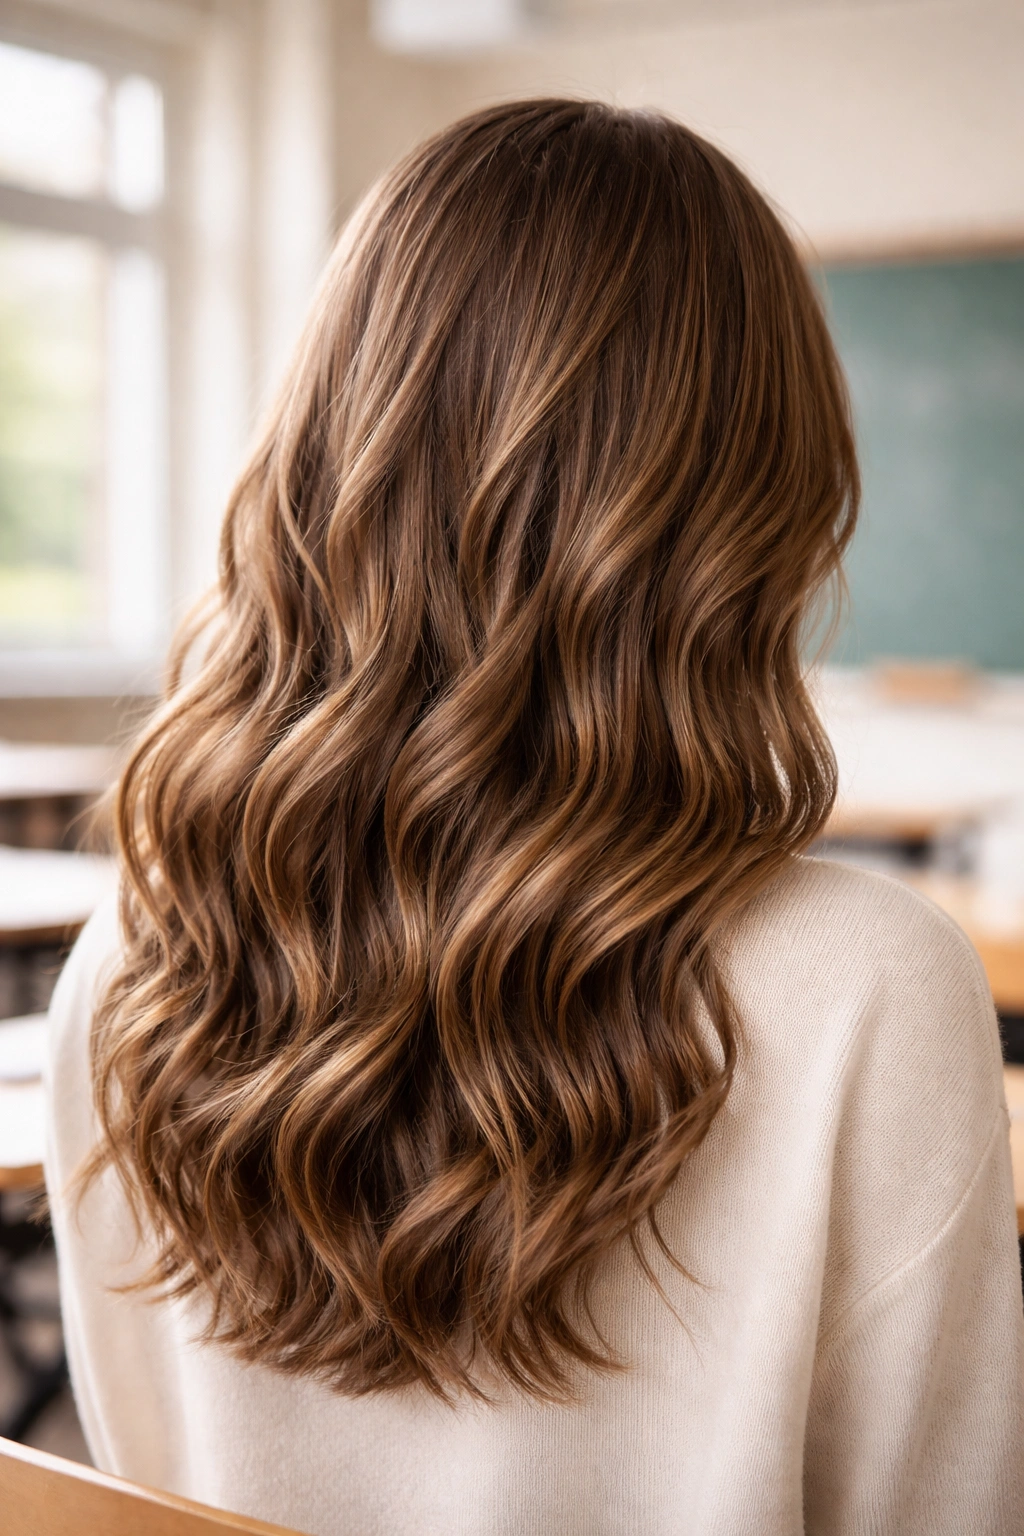
1. Loose Beach Waves
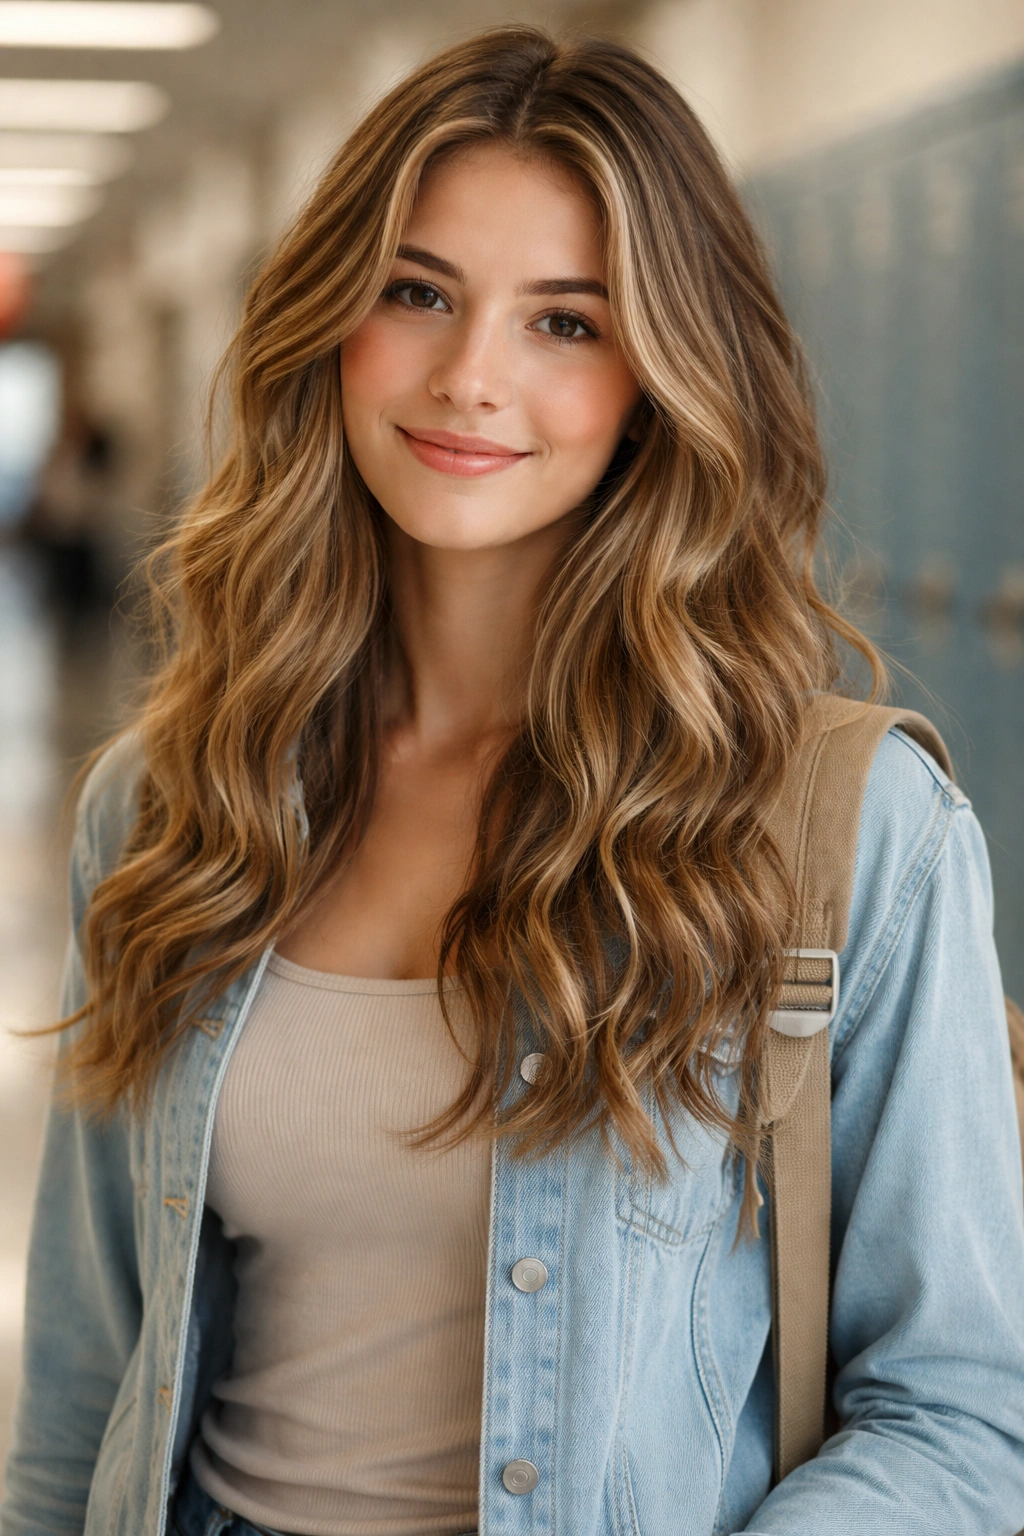
Loose beach waves hit that perfect balance between casual and intentional—they look completely effortless, which is exactly what you want when you’re navigating the school hallways. This style works because it enhances your natural wave pattern without looking overly styled or like you spent an hour with a curling iron. The waves move and shift throughout the day, which means minor imperfections actually work in your favor, making it almost impossible to get wrong.
Why This Works for School Days
Beach waves stay put because they’re anchored in your hair’s natural texture rather than dependent on a specific curl formation. Even if waves loosen slightly during the day, they still look intentional and pretty rather than just messy. You can throw this style together in 20 minutes, and it genuinely improves with a little movement and time—perfect for a style that needs to last through seven class periods.
How to Achieve Loose Beach Waves
- Use a 1.25-inch or 1.5-inch curling iron, curling sections of hair away from your face, holding each section for 8-10 seconds
- Work in horizontal layers from bottom to top, focusing on mid-lengths to ends rather than roots
- Let curls cool slightly before gently pulling them apart with your fingers to create that loose, separated texture
- Use a sea salt spray or texturizing product while hair is still damp before curling for better hold and more authentic texture
- Rough dry your hair with a blow dryer first—don’t start with perfectly straight, damp hair, as waves hold better in textured foundation
- For lasting waves, apply a light hairspray after curling but before the finger-tousling step
Pro tip: Curl larger sections and hold the curling iron vertically (barrel pointing up) rather than wrapping your entire section around—this creates separated waves instead of ringlets, which reads as more modern and less overly styled for a school setting.
2. Braided Half-Up Waves
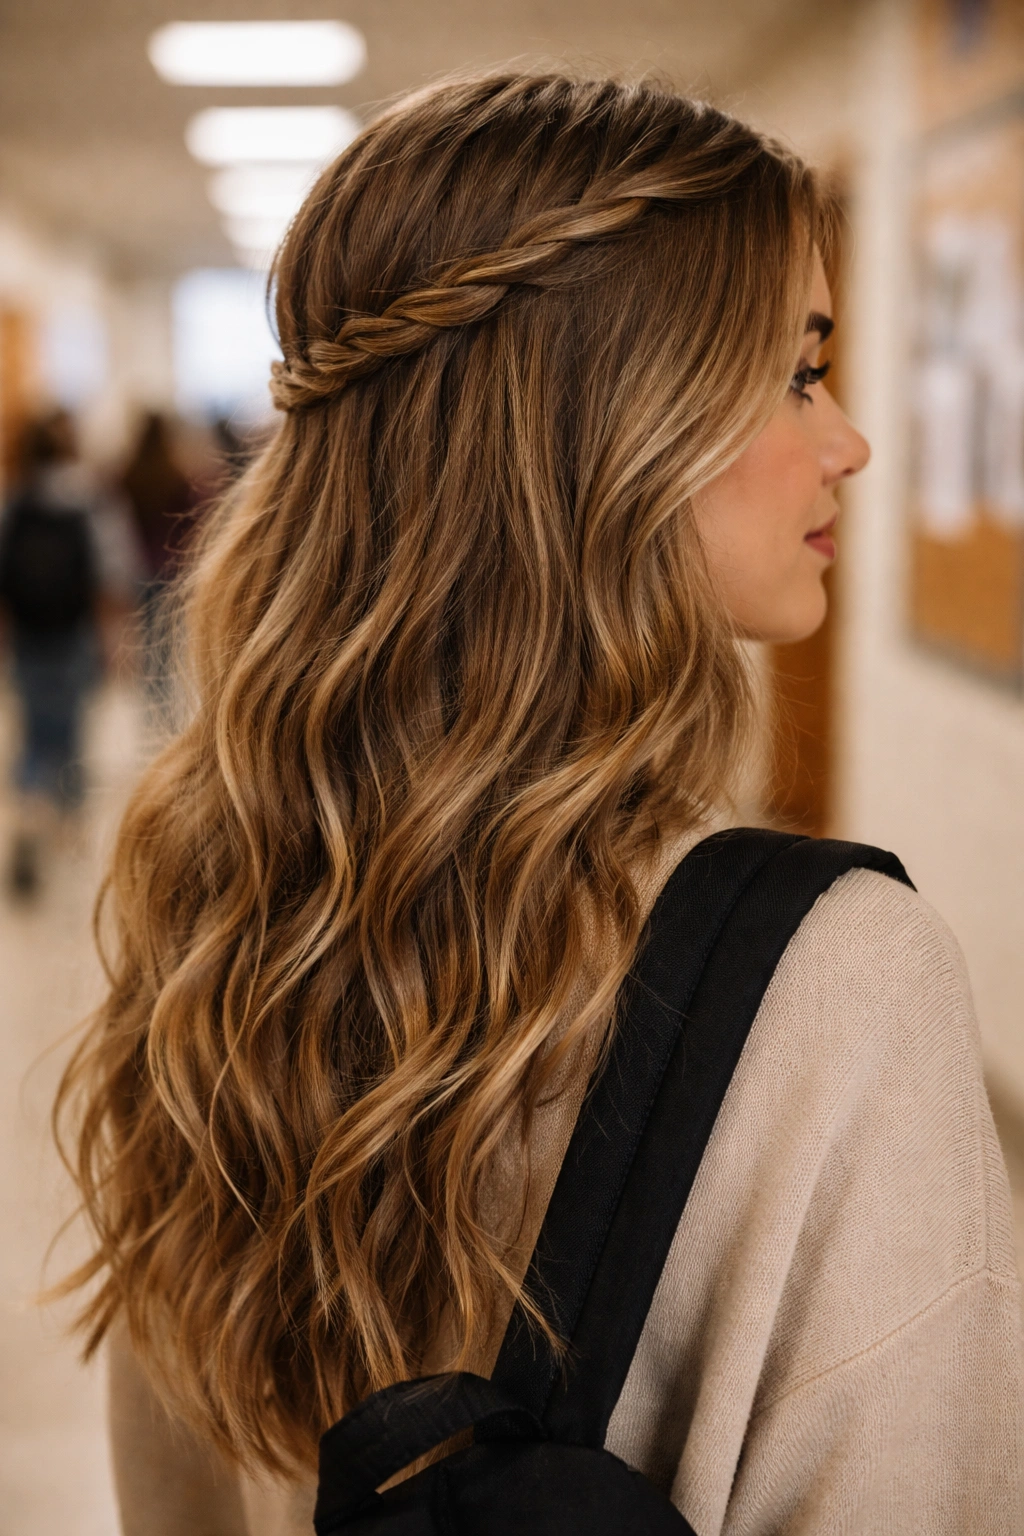
This style combines the polish of intentional styling with the low-maintenance benefits of having some hair secured away from your face. A braid running from one temple to the opposite side pulls back just enough volume to look deliberate while leaving the majority of your hair down and wavy, creating visual depth and interest. It’s the kind of hairstyle that looks like you put genuine thought into your appearance without actually consuming much time.
Why Half-Up Braids Work for School
Keeping some hair pulled back keeps it from falling into your face during lectures or tests, which is a genuine practical advantage beyond aesthetics. The braid anchors your waves, preventing them from flattening on one side where you might rest your head against a desk. Half-up styles also read as slightly more “pulled together” than fully down hair, which can matter in school environments where you want to project attentiveness and care about your appearance.
How to Create Braided Half-Up Waves
- Curl your entire head with a curling iron first, following the loose beach wave method described above
- Allow curls to cool and loosen slightly into waves
- Create a deep side part on whichever side feels natural for your face shape
- Take a section from your temple area (about 1.5 inches wide) and braid it loosely across the back of your head toward the opposite ear
- Use a small clear elastic to secure the braid end—clear elastics are nearly invisible and won’t disrupt the visual flow
- Gently tug the braid edges outward to add texture and make it feel less structured and more romantic
- Pin the braid end with a bobby pin that matches your hair color, tucking it slightly under the loose waves so the pin disappears
Worth knowing: A three-strand braid is cleaner and more classic for school settings, whereas a French braid can look slightly more formal or costume-like if that’s not the vibe you’re going for.
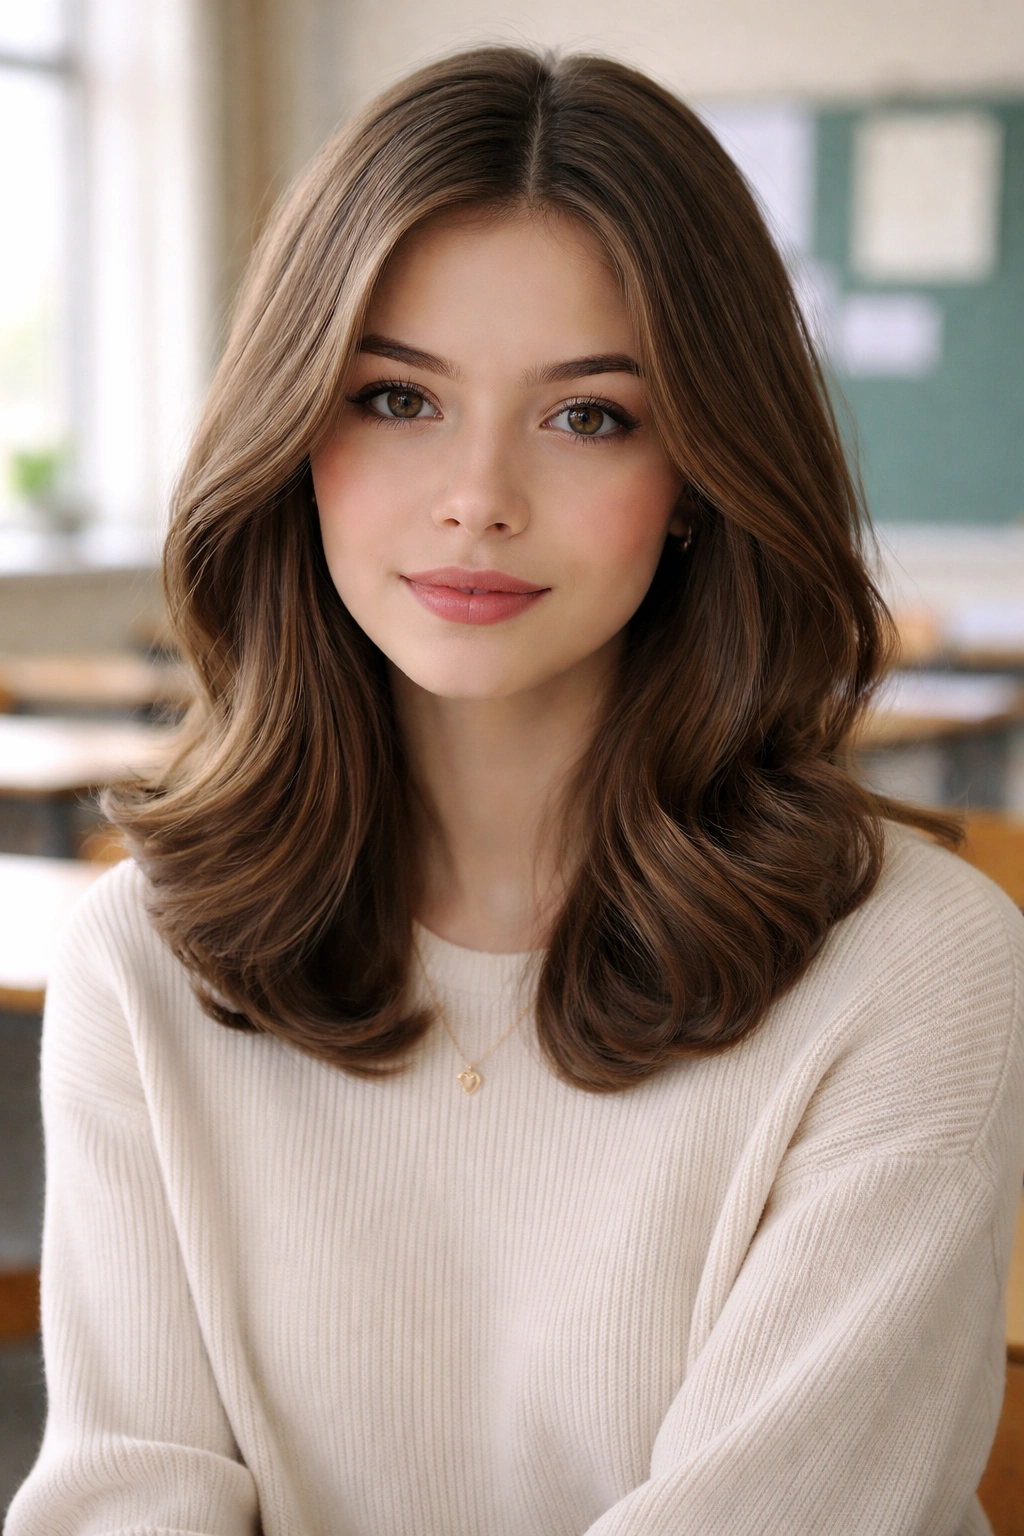
3. Textured Lob Waves
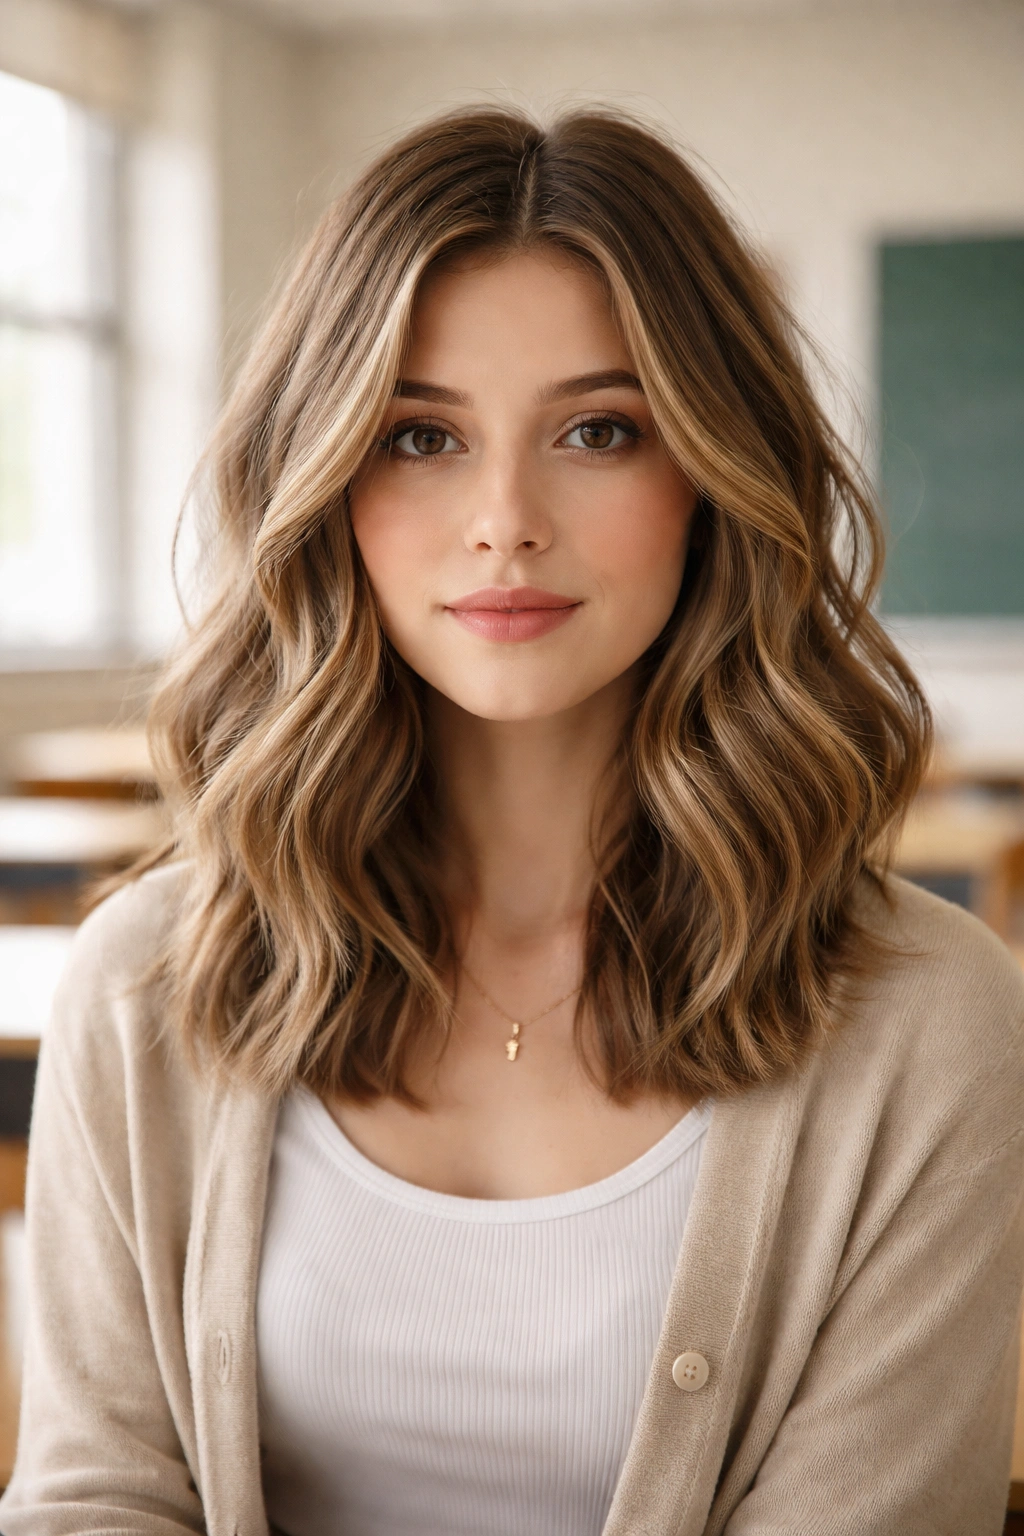
A lob (long bob) works beautifully with waves because the shorter length makes texture appear fuller and more dramatic, while the actual style remains easy to manage and style. Wavy texture on a lob creates visual movement that shorter, straighter styles don’t achieve—the waves catch light differently and create dimension that makes even a simple style feel intentional. A lob with waves is also forgiving because slight imperfections in wave placement read as texture rather than mistakes.
Why Textured Lobs Excel in School Environments
A lob sits right around collarbone length, making it short enough that it won’t brush across your desk or fall across your notebook while you’re writing, but long enough to still feel like you have real hair to work with styling-wise. Waves on a lob dry faster than longer hair, which matters if you’re styling in the morning before school when time is tight. The shorter length also means less weight pulling waves down throughout the day, so waves actually hold better than they would on longer hair.
How to Style Your Lob with Waves
- Start with damp hair and apply a curl-enhancing mousse or wave cream to mid-lengths and ends
- Use a 1.25-inch curling iron and curl sections away from your face, holding for 8-10 seconds
- Curl underneath layers slightly tighter than top layers to create lift at the roots without frizz at the surface
- Use a medium-hold hairspray that won’t weigh down or stiffen your waves
- Once waves are set, gently run your fingers through them to separate and texture them
- For extra dimension, consider asking your stylist for long, subtle layers that work with your wave pattern—layers enhance texture without creating choppy, disjointed styling
Quick facts about lobs with waves:
- The style works best with medium to thick hair that has natural body
- Waves appear fuller and more dramatic on lobs than on longer hair
- You’ll need a trim every 6-8 weeks to maintain the shape and prevent waves from looking droopy
- Textured lobs require less daily styling than longer wavy hair
4. Side-Parted Soft Waves
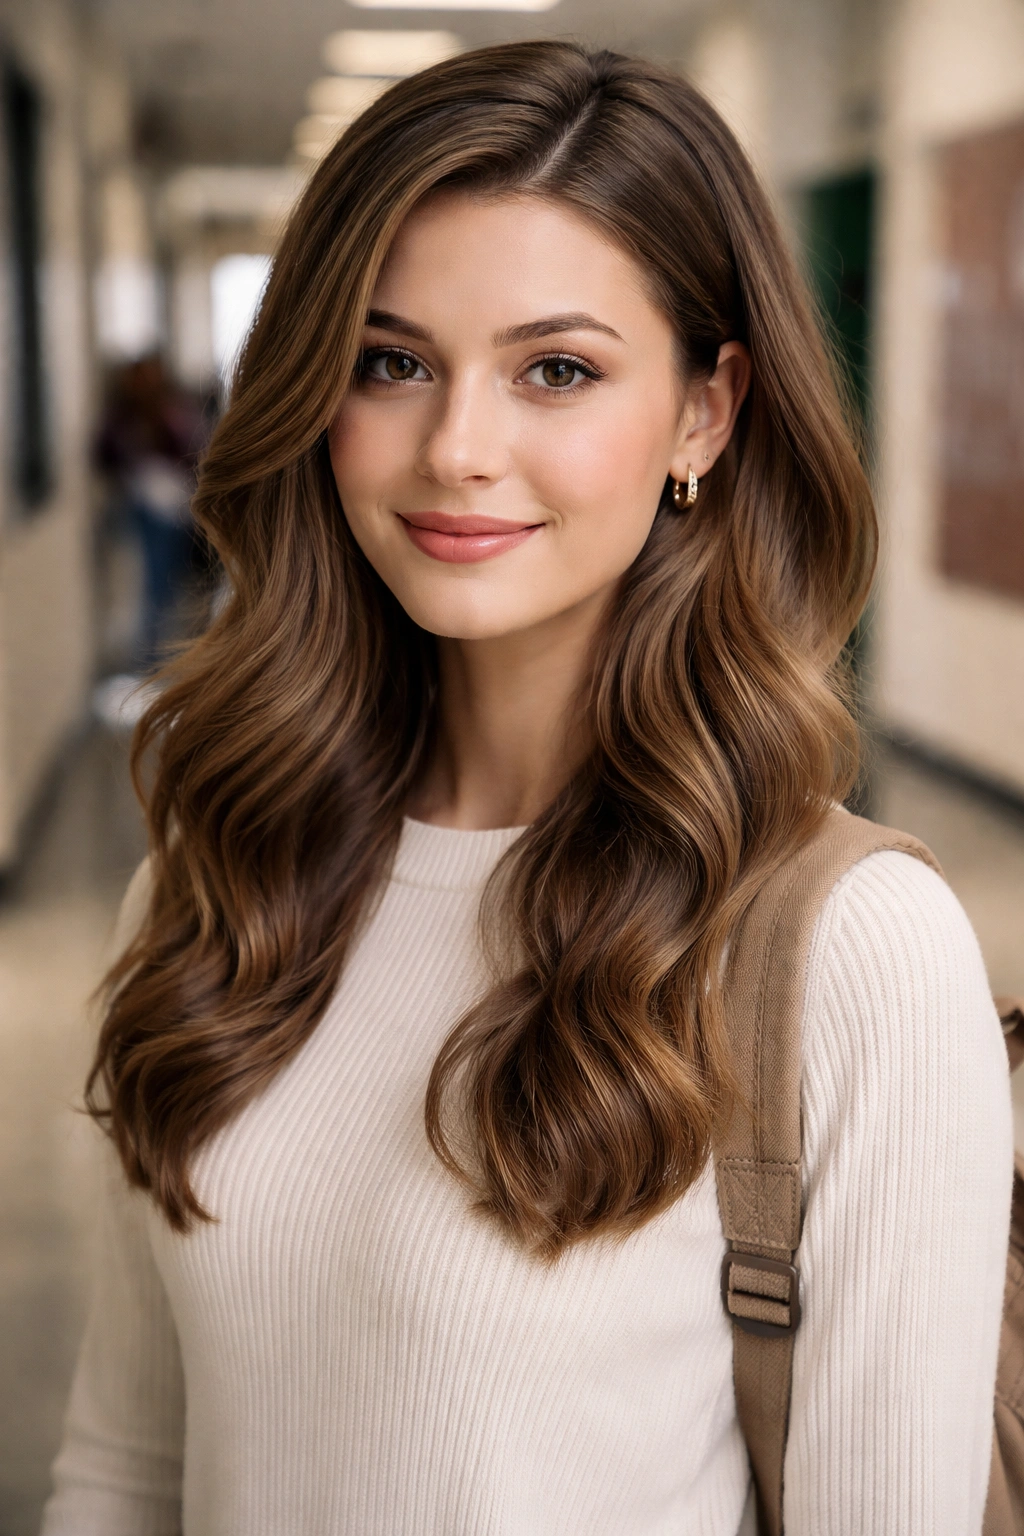
A deep side part combined with soft, loose waves creates an asymmetrical look that feels sophisticated and intentional without reading as overly formal or styled. Side-parted waves have an elegant quality that works equally well for a regular school day or a special event like a school dance or presentation. The asymmetry flatters most face shapes and creates a slimming visual effect that many people find flattering.
The Visual Impact of Side Parting
A side part naturally draws attention to one side of your face, which means you can use this strategically based on your face shape and features. Side parts also create a visual line that makes waves appear more intentional and carefully styled rather than just wavy by default. The part itself becomes a design element that enhances the overall silhouette of your hairstyle.
Steps for Side-Parted Soft Waves
- Create a deep side part by combing hair to one side, using a fine-tooth comb to make the part line clean and defined
- Use heat protectant spray on damp hair before any heat styling
- Curl your entire head using a 1.5-inch curling iron, curling away from your face on the fuller side of the part and away from the face on the smaller side as well
- This creates a face-framing effect where waves curve outward, opening up your face
- Gently finger-comb through curls to create loose, separated waves
- Use a light hairspray to set the part and the wave structure
- You can add a subtle textured headband or hair clip on the smaller side of the part if you want to dress up the look for a special school event
Pro tip: The deeper your part, the more dramatic the asymmetry—for a more subtle, everyday look, part slightly off-center rather than extremely far to one side.
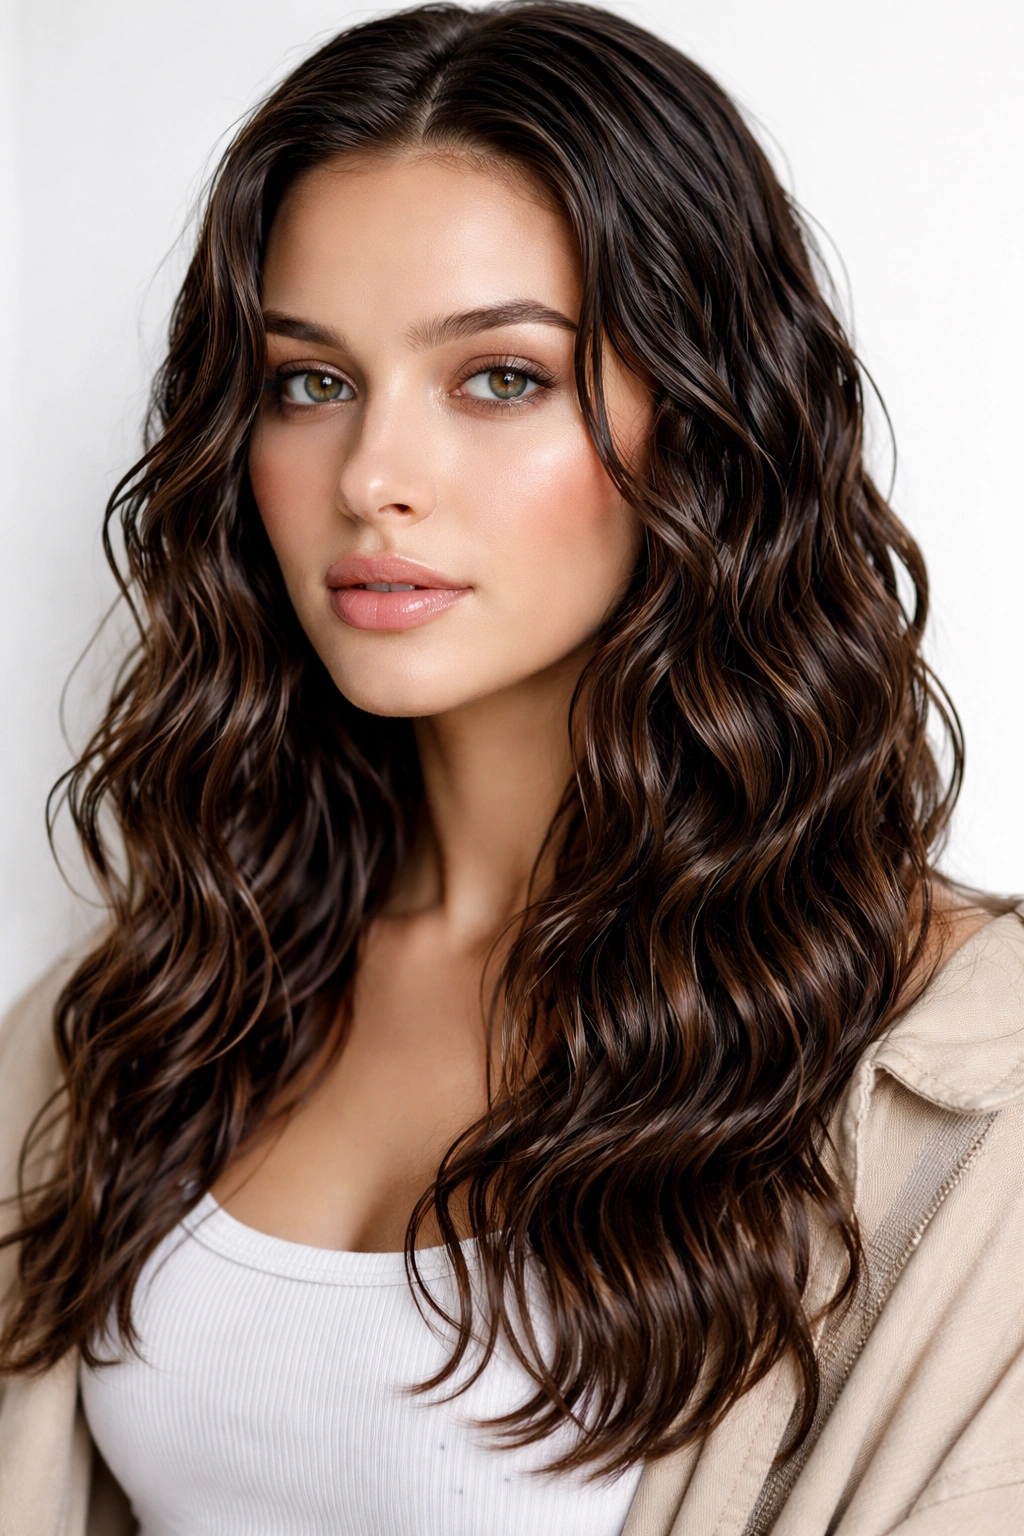
5. Tousled Messy Waves
Messy waves seem contradictory for school—after all, you want to look put-together—but tousled waves actually read as intentional and effortfully casual rather than sloppy. This style embraces texture and movement rather than trying to perfect every wave, which paradoxically makes it appear more sophisticated. The key is understanding that “messy” in this context means textured and loosely organized, not actually disheveled or neglected-looking.
Why Messy Waves Feel School-Appropriate
Messy waves work in school because they read as confident and comfortable in your own skin rather than anxious about appearance. They also have supreme longevity throughout the day—as waves loosen and shift, they still look intentional rather than undone. This style is perfect if you have naturally textured or wavy hair that you’re trying to enhance rather than tame into perfection.
Creating Intentionally Messy Waves
- Start with slightly damp hair and apply a texturizing spray or sea salt spray generously
- Use a 1.25-inch curling iron or even a waving iron (which creates texture rather than ringlets) to add movement
- Curl different sections at different angles—some upward, some downward, some neutral—rather than curling everything in one direction
- Don’t worry about perfect placement; the goal is texture and movement, not uniformity
- Once curled, use your fingers (not a brush or comb) to break apart and tousle the waves
- Apply a light, flexible-hold hairspray that won’t feel crunchy or stiff
- If desired, add a small hair clip or barrette on one side to suggest intentionality without full styling
- Sleeping on braids or doing a loose braid overnight before school creates natural-looking messy waves without heat styling
Worth knowing: Messy waves work better with medium-length to longer hair—on very short hair, they can read as simply undone rather than intentionally tousled.
6. Elegant Pinned Waves
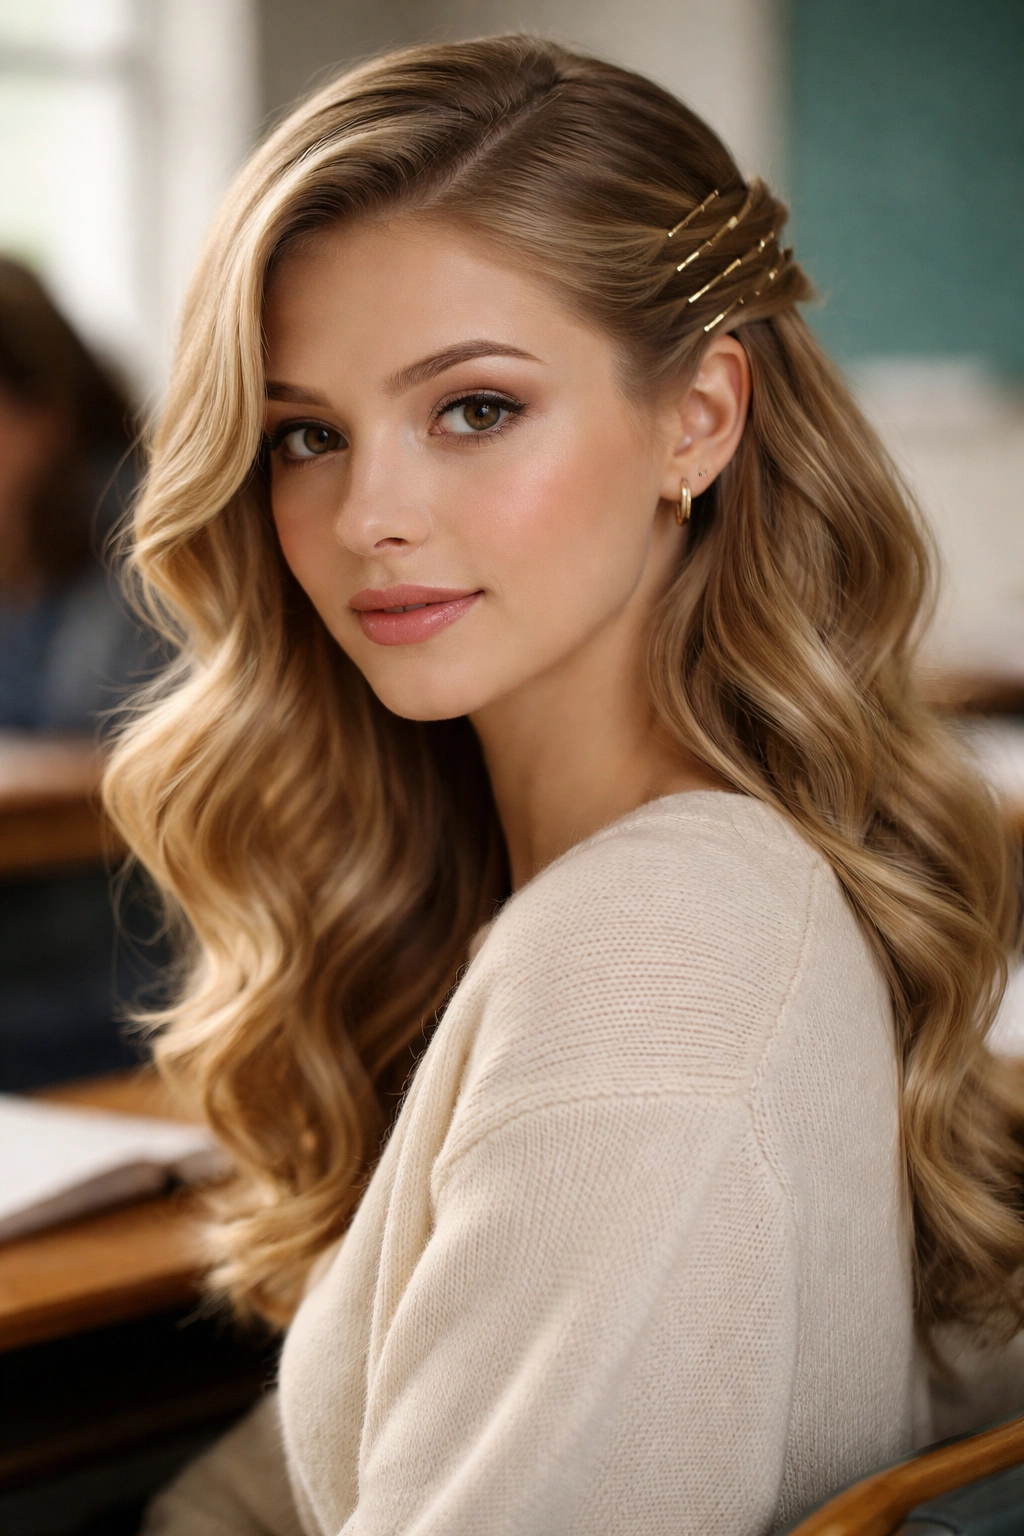
This style takes your waves and elevates them with strategic pinning that creates shape, movement, and intentional structure. Pinning waves—using bobby pins to direct them in specific ways—creates dimension and visual interest while keeping hair away from your face. It’s a technique that looks more complex than it actually is, making it perfect for looking polished without spending excessive time on styling.
Why Pinning Transforms Simple Waves
Pinned waves stay in place better than unpinned waves because the pins hold curl structure even as hair moves and shifts throughout the day. Pinning also creates asymmetrical balance and visual structure that reads as more deliberately styled. You can pin waves in countless ways—some pins visible as design elements, some completely hidden—giving you flexibility in how formal or casual you want the final look.
Technique for Pinning Your Waves
- Start with curled, slightly loose waves as your foundation
- Identify a section of wave you want to pin (perhaps the wave closest to your temple or the wave at the back of your head)
- Use a bobby pin that matches your hair color and pin that wave to the side, securing the pin into the hair underneath
- The pin should be positioned horizontally, against the direction of hair growth, for maximum holding power
- Pin 2-3 waves on each side for balanced, intentional structure
- Some pins can be left visible as design elements (maybe using decorative clips instead), or all pins can be hidden for a more seamless look
- For a special occasion version, you can pin waves into a low side bun while leaving face-framing pieces down and wavy
Quick facts about wave pinning:
- Use matte bobby pins that match your hair color—shiny or metallic pins are more visible
- Pin in the direction that the wave naturally wants to go for secure, long-lasting hold
- Pinning works best on waves that are already set (after curling and cooling, not immediately after)
- Experiment with different pinning patterns—you can create geometric shapes, asymmetrical designs, or subtle structure depending on your preference
7. Curled-Under Waves
Curled-under waves (sometimes called “flipped” waves) create a polished, finished look that instantly reads as intentional and carefully styled. Rather than waves that curl away from your face or in random directions, curled-under waves all turn inward, creating a cohesive, elegant silhouette. This style has a timeless quality that feels appropriate for school while still looking modern and intentional.
The Sophistication of Curled-Under Waves
Curled-under waves create a visual frame around your face because the ends of your hair curve inward rather than flipping out. This creates a slimming effect and draws focus upward to your face and eyes. The unified direction of the waves makes the style feel more controlled and intentional than waves that curve in multiple directions.
How to Create Curled-Under Waves
- Blow dry your hair with a round brush, curling the brush under at the ends to create an inward direction**
- Alternatively, use a curling iron and curl all sections of hair under your head, rotating the iron so the barrel points down and slightly under rather than away from your face
- Work in horizontal layers, starting at the bottom and working up
- Make sure to curl the front face-framing sections under as well—this is crucial for the polished look
- Hold each section in the curl for 8-12 seconds to set the direction
- Allow curls to cool before releasing
- Use a light hairspray to hold the inward direction
- For extra polish, you can use a flat iron to gently smooth the surface of each wave while maintaining the inward curl
Pro tip: Curled-under waves work best on hair that’s at least shoulder-length—shorter hair can look too rounded and costume-like with this technique.
8. Sleek Low Bun with Face-Framing Waves
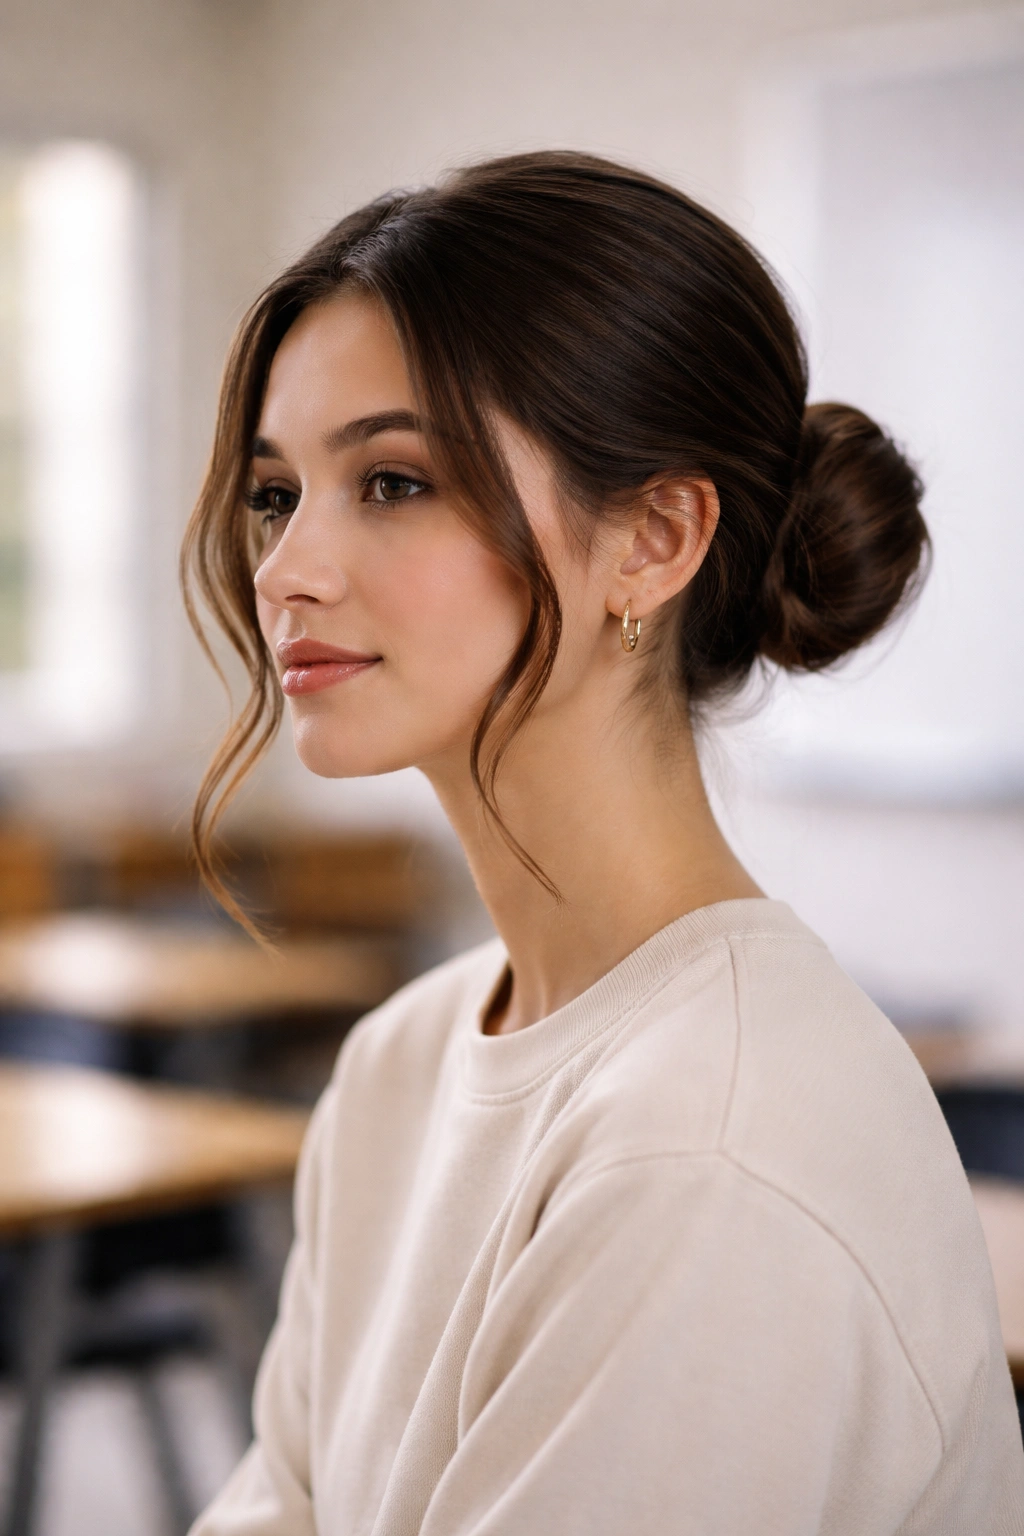
This hybrid style keeps most of your hair secured in a low bun while leaving strategically chosen pieces down and wavy to frame your face. It combines the practical benefits of having hair pulled back with the aesthetic appeal of waves, making it perfect for days when you need hair out of your face but still want to look polished. This style works across all hair types and reads as both practical and intentional.
Why This Hybrid Works for School
A low bun keeps the bulk of your hair contained, which is practical for a school day where you’re focused on classes and don’t want hair falling across your notebook or face. The wavy face-framing pieces keep the style from looking too severe or pulled-back, adding softness and movement. You can actually study effectively and take notes without constantly pushing hair back, while still maintaining an intentional, styled appearance.
Steps for Sleek Low Bun with Waves
- Curl your entire head with a 1.25-inch curling iron, creating soft waves throughout
- Gather most of your hair at the base of your neck, leaving 1.5 to 2-inch sections around your face (temples, cheekbones) unincorporated
- Create a low ponytail with the gathered hair using a smooth elastic
- Twist the ponytail loosely and wrap it around the base to form a bun, securing with bobby pins
- The bun should look soft and slightly textured, not slicked and tight
- Let the face-framing pieces stay wavy and loose, using a light hairspray to maintain their wave structure
- You can tuck the wavy pieces behind your ears for a more pulled-back look, or leave them forward for more framing
- Add a hair stick, decorative pin, or minimalist clip to the bun for a finished touch if desired
Worth knowing: This style works best with medium-length to longer hair (at least shoulder-length) so you have enough hair to create a full, pretty bun while keeping generous face-framing pieces.
9. Face-Framing Waves
This technique focuses specifically on creating waves that sit closest to your face—subtle, intentional waves that draw focus to your features and create dimension right where it matters most. Face-framing waves can be minimal (just a few waves near your temples and cheekbones) or more extensive (wavy layers throughout), depending on how much styling effort you want to invest. Even subtle face-framing waves make any hairstyle look more intentional and polished.
The Strategic Purpose of Face-Framing Waves
Face-framing waves open up your face and draw the eye upward toward your eyes and cheekbones rather than letting hair sit flat against your face. Waves placed strategically near your face create movement and shadow that adds dimension and makes your features appear more defined. This technique works even if the rest of your hair is straight—face-framing waves alone can transform your entire appearance.
How to Create Strategic Face-Framing Waves
- Start by identifying which pieces naturally frame your face—these are typically 1 to 2-inch sections at your temples and along your cheekbones
- Use a 1-inch curling iron (smaller than you’d use for full-head waves) to curl just these face-framing sections
- Curl them away from your face, holding the curl for 10-12 seconds
- Allow these curls to cool completely, which helps them hold longer
- Gently separate the curls into waves using your fingers
- If you want additional texture elsewhere, you can curl longer sections in the back, but the face-framing pieces are the priority
- Use a flexible-hold hairspray that won’t feel stiff or crunchy around your face
- You can leave the rest of your hair straight, wavy, or however you prefer—the face-framing waves are the styling star
Quick facts about face-framing waves:
- This technique works on all hair lengths, including short hair and pixie cuts
- Smaller curls (1-inch or smaller) work better for face-framing than larger, looser waves
- Face-framing waves require more frequent touch-ups than full-head waves because they’re more visible and any looseness is immediately apparent
- This is an excellent technique for school days when you want to look styled without investing significant time in complete styling
10. Double Dutch Braid Waves
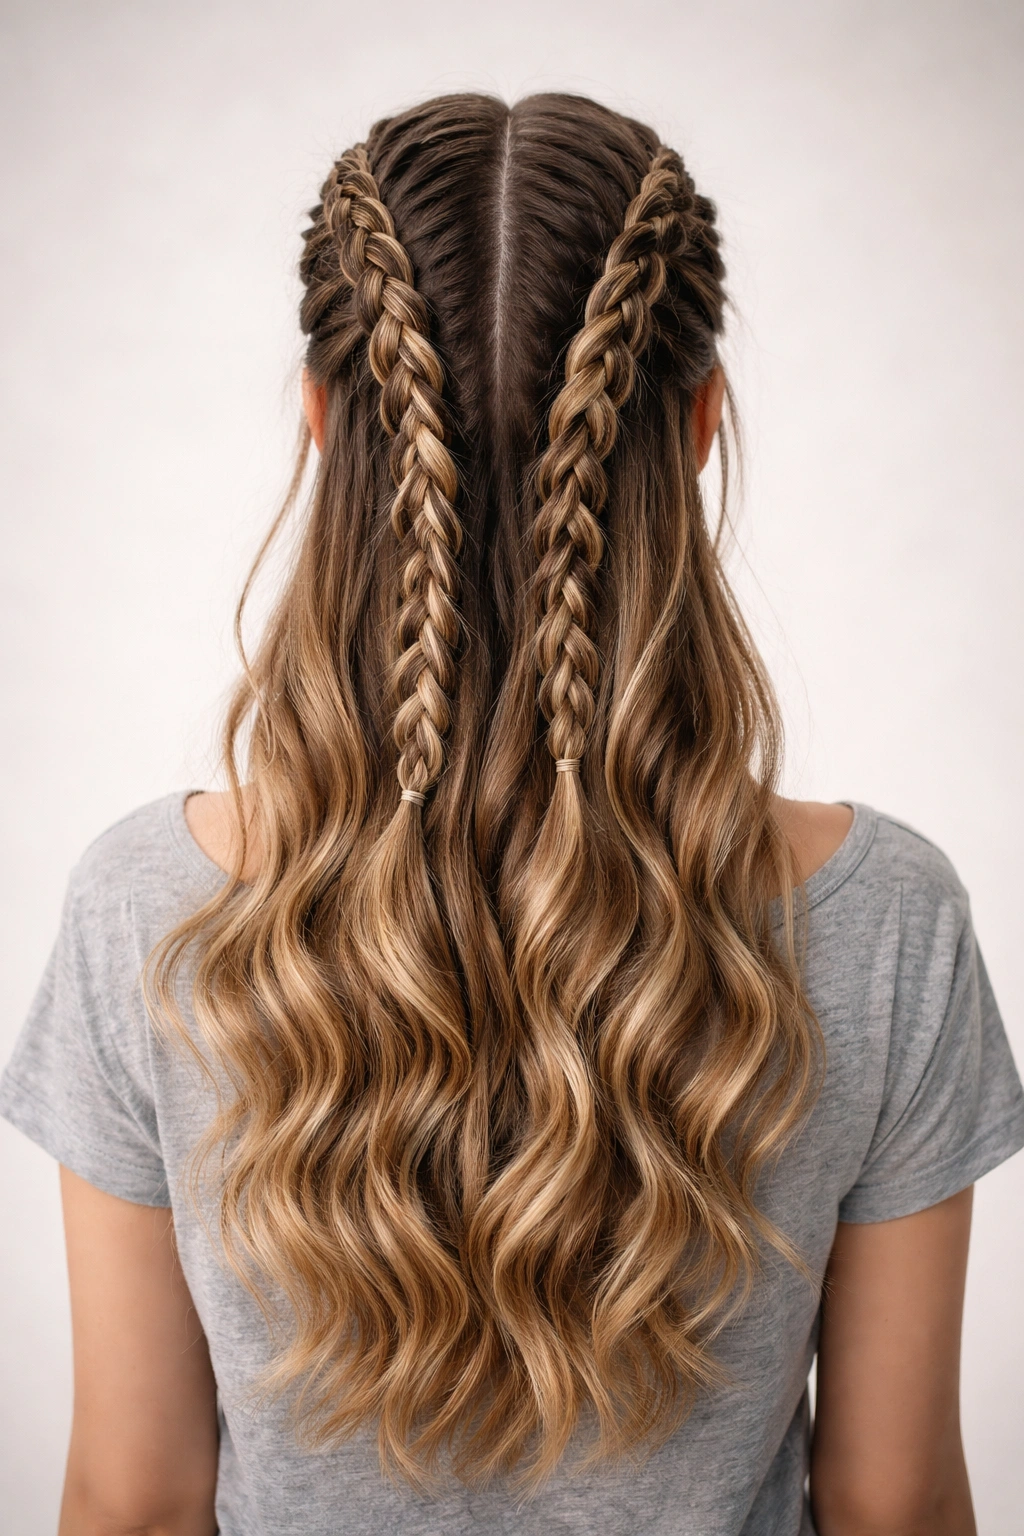
This style combines the structure of two Dutch braids running down the back of your head with wavy texture throughout, creating a sporty-meets-elegant aesthetic. Dutch braids pull hair back neatly while the overall hairstyle still features prominent waves, giving you the practical benefits of contained hair with the aesthetic appeal of waves. This style works particularly well for active school days or for looking put-together during athletic events or physical activity.
Why Double Braids with Waves Work
Dutch braids keep hair completely away from your face and neck while distributing the hair evenly, which is practical for school. The braids create structure that helps anchor waves, preventing them from falling flat on the back of your head where you might rest against a chair. The combination of braids and waves reads as intentional and sporty without looking overly precious—it’s the kind of style that works equally well for a regular school day or an athletic competition.
Creating Double Dutch Braids with Waves
- Start with textured, wavy hair created by curling or with naturally wavy texture—this works better than completely straight hair
- Create a center part running from your forehead to the nape of your neck
- On one side of the part, create a Dutch braid by dividing a section into three strands and braiding, adding hair as you move down
- A Dutch braid sits on top of the head rather than weaving under (unlike a regular three-strand braid), creating more visibility and dimension
- Repeat the Dutch braid on the opposite side of the part
- Secure each braid end with a small elastic in a color matching your hair
- Gently tug the braid edges outward to create loose, textured braids that feel less structured
- The wavy texture throughout means the braids won’t look too tight or rigid
- You can leave the braids as-is, or you can bring the braid ends together at the nape and secure them into a low pony for a more complete look
Pro tip: Dutch braids are more visible and textured than French braids—if you prefer a subtler braided element, use French braids instead, which sit closer to the scalp.
11. Wet-Look Glossy Waves
This modern style combines waves with a glossy, polished finish that creates an intentional, editorial appearance. The “wet look” is achieved through strategic use of serum or oil products that add shine and create definition between waves, making them appear more sculptural and intentional. This style reads as current and polished without looking overly done or costume-like.
Why Wet-Look Waves Read as Intentional
Wet-look waves have a sophisticated, modern quality that instantly elevates your appearance. The glossy finish makes waves appear more defined and structured, which helps them hold their shape throughout the day. The shine catches light and creates visual interest that makes even simple waves appear more intentional and carefully styled than matte waves.
How to Create Wet-Look Glossy Waves
- Create soft waves using a 1.5-inch curling iron, following the loose beach wave method from earlier in this guide
- Allow waves to cool and loosen slightly
- Use a lightweight serum, shine spray, or luminous hair oil applied sparingly to mid-lengths and ends—don’t saturate, or hair will look greasy rather than polished
- Work the product through your waves using your fingers, scrunching slightly to distribute evenly
- Use a flexible, light-hold hairspray that won’t interfere with the glossy finish
- For extra drama, you can apply slightly more serum to the ends of your hair, creating emphasis on the wave tips
- The wet look works best on darker hair colors where shine creates more visual contrast, but it works on all hair colors
- If you have naturally matte or dry hair, this technique adds shine and polish that transforms your overall appearance
Worth knowing: The wet-look works best when your waves are already well-defined—start with strong curls that you then relax into loose waves, rather than trying to create the wet-look with subtle, barely-there waves.
12. Half-Ponytail with Waves
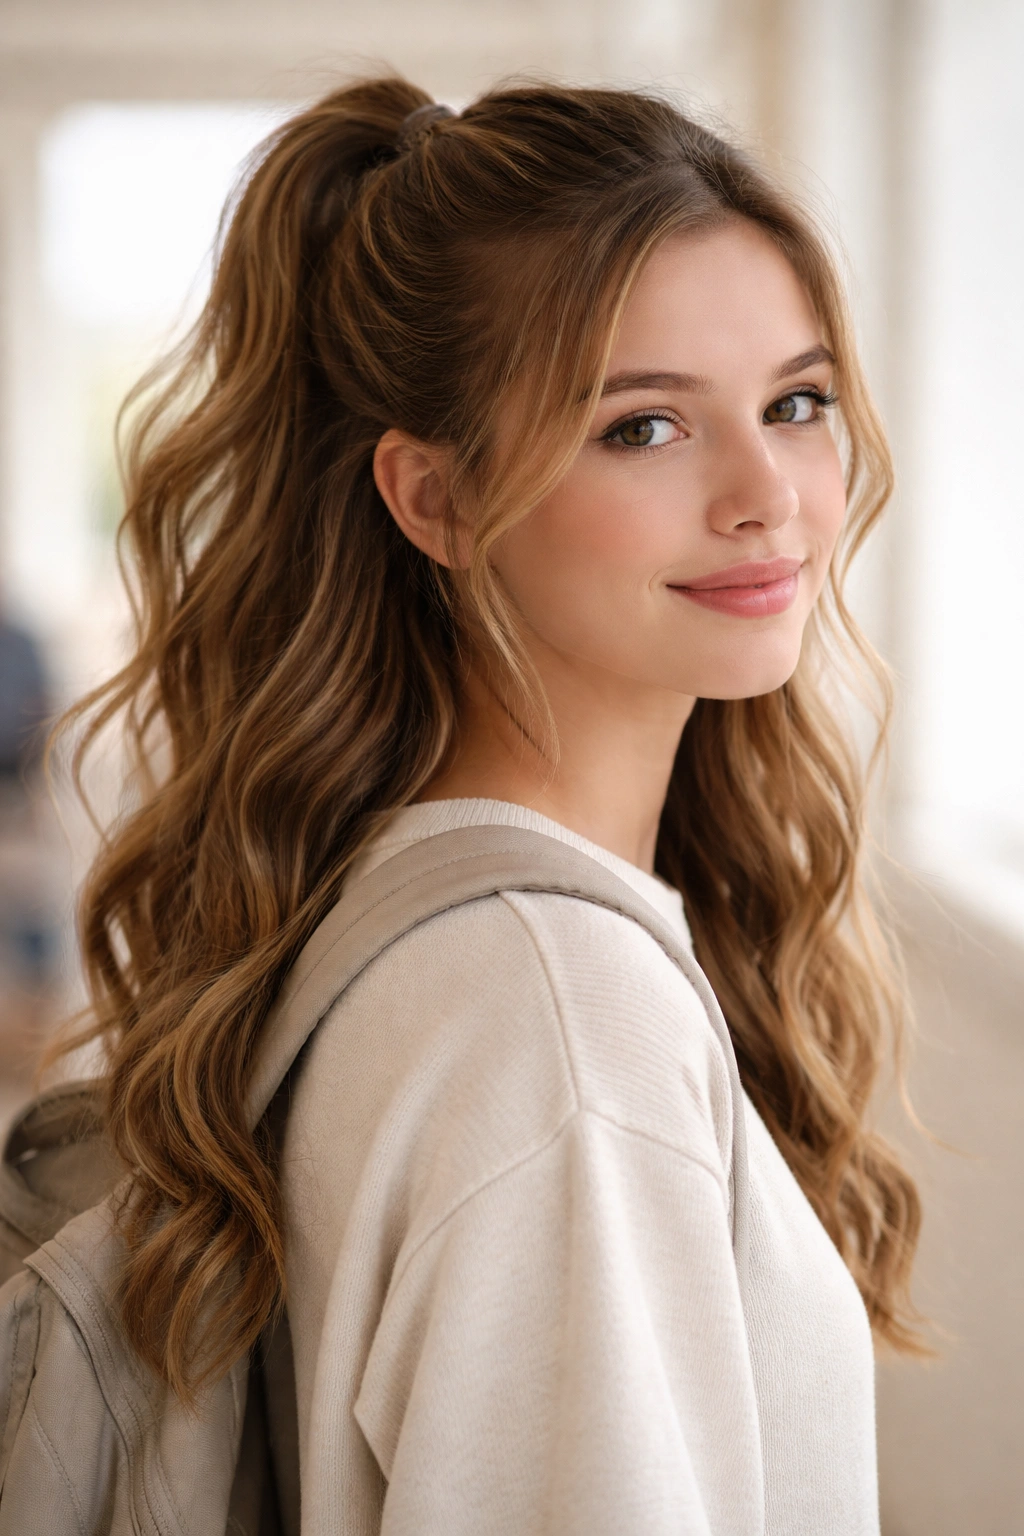
Similar to the braided half-up style but simpler in execution, a half-ponytail keeps some hair pulled back while leaving the bulk down and wavy. This creates visual interest and a pulled-together appearance while keeping hair away from your face without the commitment of full braiding. A half-ponytail is quick to style and incredibly versatile—you can dress it up or down depending on your needs.
The Simplicity and Versatility of Half-Ponytails
A half-ponytail takes less than two minutes to create once your waves are done, making it perfect for mornings when you’re rushed. It reads as more intentional than completely down hair while being less formal than a full ponytail or bun. The style works with any wave pattern, from tight curls to loose, subtle waves, making it genuinely universal.
How to Style a Half-Ponytail with Waves
- Create soft waves throughout your hair using a curling iron or wave method of your choice
- Allow waves to cool and loosen
- Take a section from each temple (about 2 inches wide) and gather these two sections at the crown of your head
- Secure with a small elastic in a color matching your hair or a clear elastic
- Gently pull the ponytail slightly higher on your head so it sits at the crown rather than drooping down
- Leave the remaining hair down and wavy
- You can leave the elasticated section smooth, or you can gently tug the sides outward to create a softer, less structured appearance
- For a dressier version, you can wrap a small section of hair around the elastic to hide it, securing the wrapped section with a bobby pin
- Add a decorative clip, hair stick, or small barrette at the ponytail base if you want an extra styling element
Quick facts about half-ponytails:
- This style works best with medium-length to longer hair that has enough length to be pulled back but still frame your face
- The higher the ponytail sits, the more youthful and intentional the style appears
- This style is particularly good for school days when you want the practical benefit of some hair pulled back without looking overly styled
13. Structured Wave Set
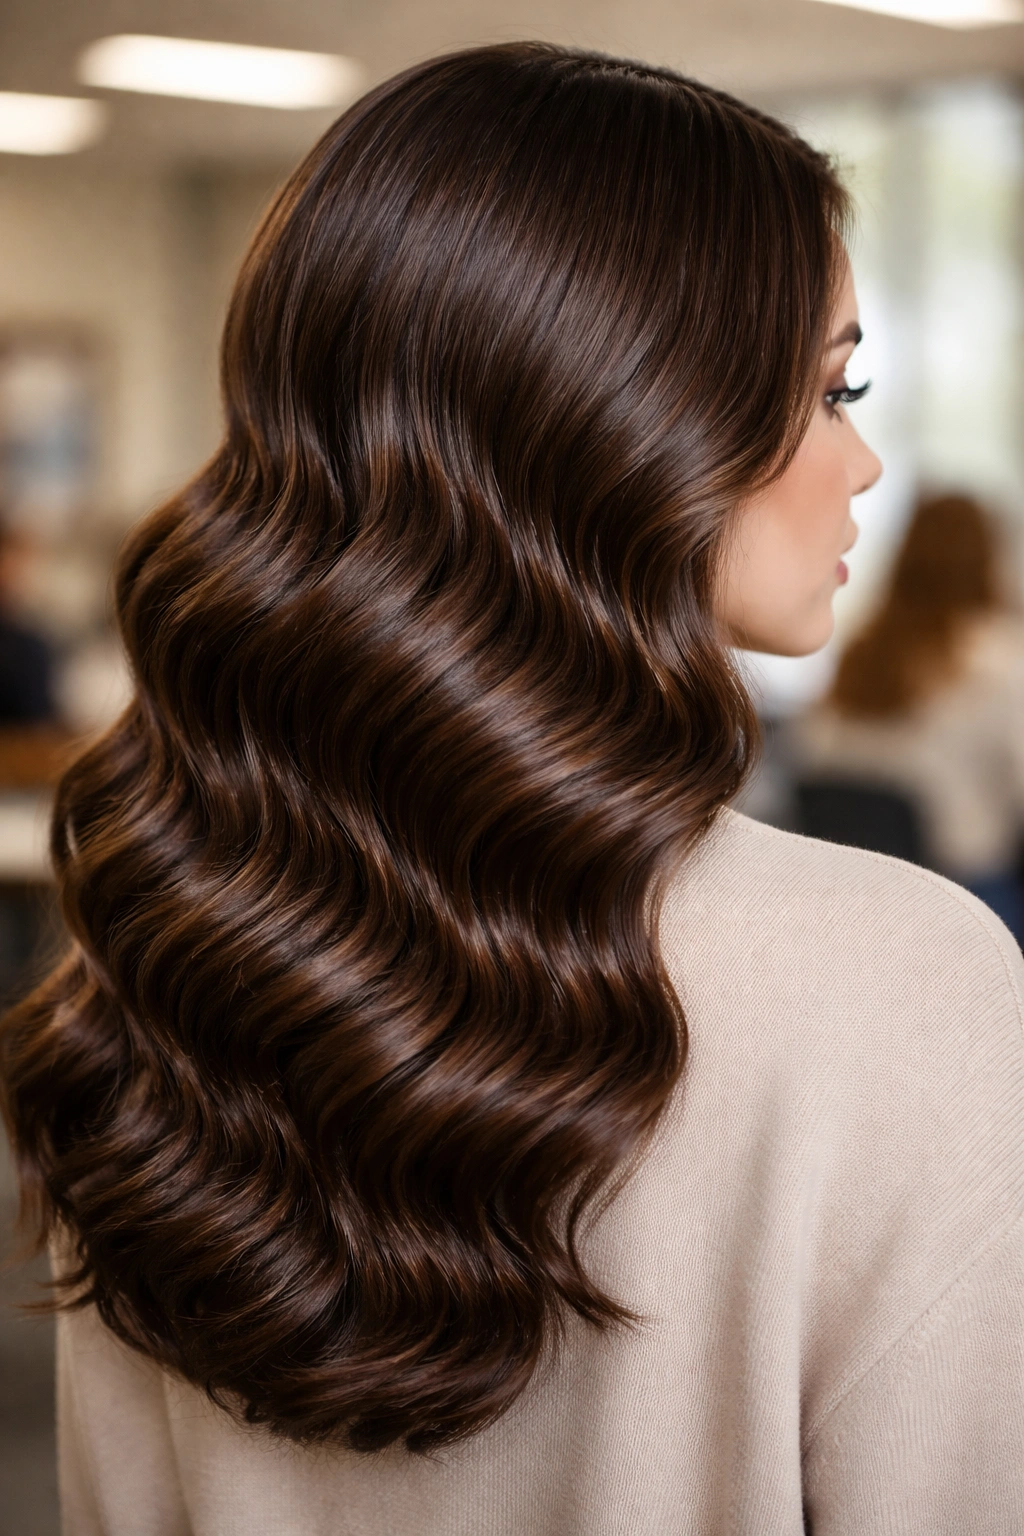
This style emphasizes creating perfectly defined, intentional waves with strong hold and structure—every wave is distinct, controlled, and clearly placed. Rather than loose, relaxed waves, structured waves have a more formal, polished quality that reads as deliberately styled. This technique creates waves with impressive longevity that hold their shape throughout a full school day.
Why Structured Waves Stand Out
Structured waves create visual drama and definition that loose waves don’t achieve. Each wave is distinct and sculptural, which creates strong visual interest and reads as more intentionally styled. Structured waves also hold significantly better throughout the day because they start from a strong foundation rather than loose, separated curls.
How to Create Structured Waves
- Start with clean, completely dry hair (or at least completely blow-dried)
- Apply a lightweight mousse or volumizing product to damp hair before blow-drying, focusing on mid-lengths and ends
- Blow dry with a round brush, creating smooth, organized sections
- Use a 1-inch or 1.25-inch curling iron for tighter wave definition than you’d use for loose waves
- Curl each section firmly, holding for 12-15 seconds (longer than loose waves) to set the curl structure
- Work in horizontal layers, keeping your sections consistent in size and angle so your waves appear uniform
- Allow all curls to cool completely—this is essential for structured hold, so clip cooled curls up and don’t disturb them
- Use a medium to firm-hold hairspray that will maintain the wave structure throughout the day
- Once all curls are cooled and sprayed, gently run your fingers through them just enough to create slight separation, but don’t over-tousle—you want structure maintained
- For maximum longevity, consider using a wave-setting lotion or gel before curling, which adds hold without making hair feel stiff
Pro tip: The key to structured waves that actually last is allowing curls to cool completely before touching them—this sets the curl structure so waves hold even as you move and your hair experiences moisture and friction throughout the day.
Final Thoughts
The real beauty of wavy hairstyles for school is that they work across different hair types, face shapes, and styling skill levels. Whether you’re naturally wavy and enhancing what you’ve got, or you’re using heat tools to create waves from scratch, these 13 styles give you genuine options for looking polished and intentional without sacrificing time or practicality. The styles that work best for you depend on your hair length, your natural hair texture, and how much time you realistically want to spend styling in the morning—but within these 13 options, there’s genuinely something for every student.
The confidence that comes from knowing you look put-together matters more in a school environment than most people acknowledge. When your hairstyle is intentional and polished, you walk into class feeling ready and composed rather than self-conscious. You’re able to focus on what actually matters—classes, friendships, learning—rather than worrying about how your hair looks. These wavy styles deliver that confidence while being entirely manageable within the constraints of a school schedule.
Start with whichever style appeals to you most, practice it once or twice to get the technique down, and then make it a rotation with one or two other options. Having two or three wavy styles you can execute confidently means you always have something that works, even on mornings when you’re rushing or when your hair isn’t cooperating perfectly. The more you practice, the faster these styles become—eventually, you’ll be able to execute several of these in the time it takes most people to do basic straightening.