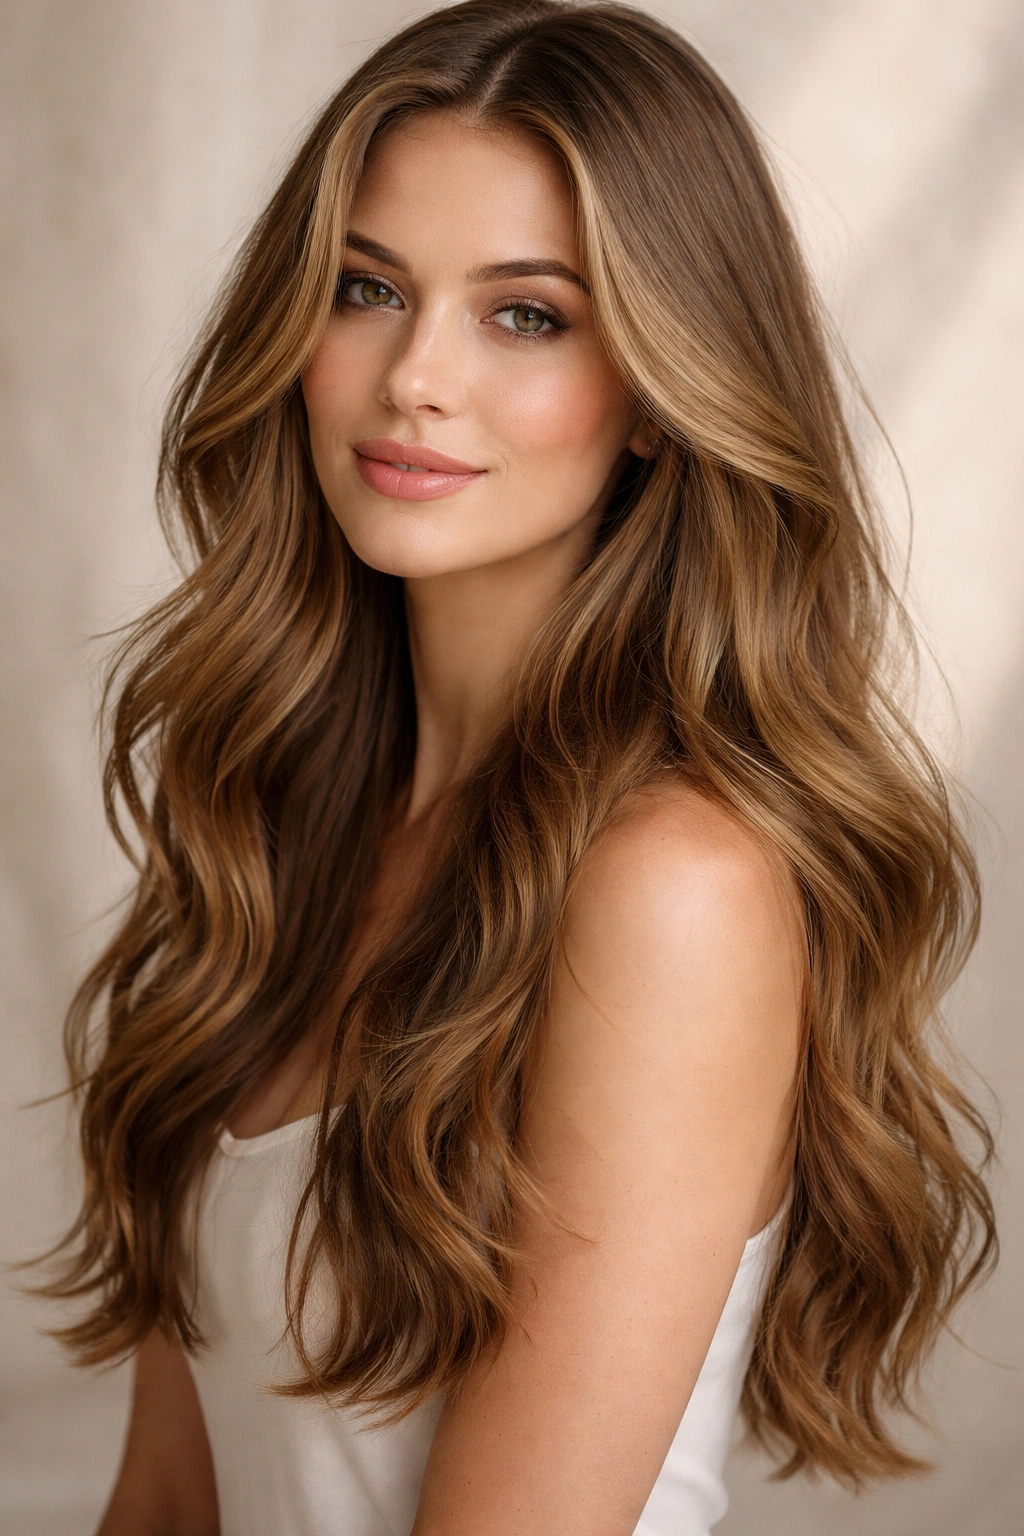
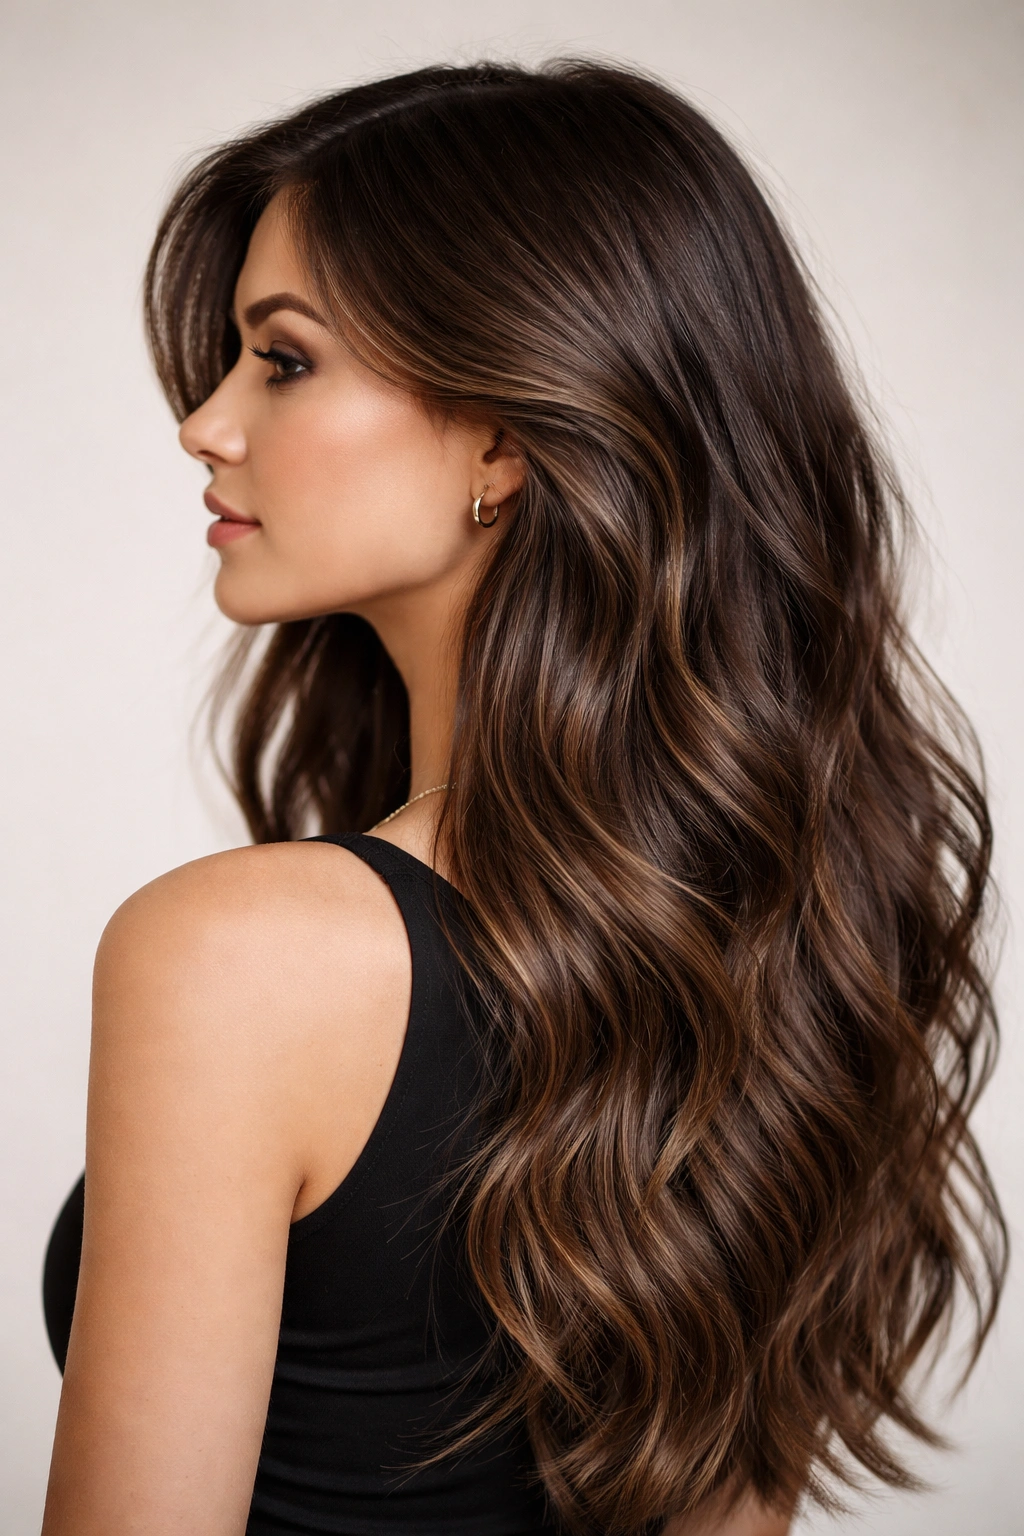
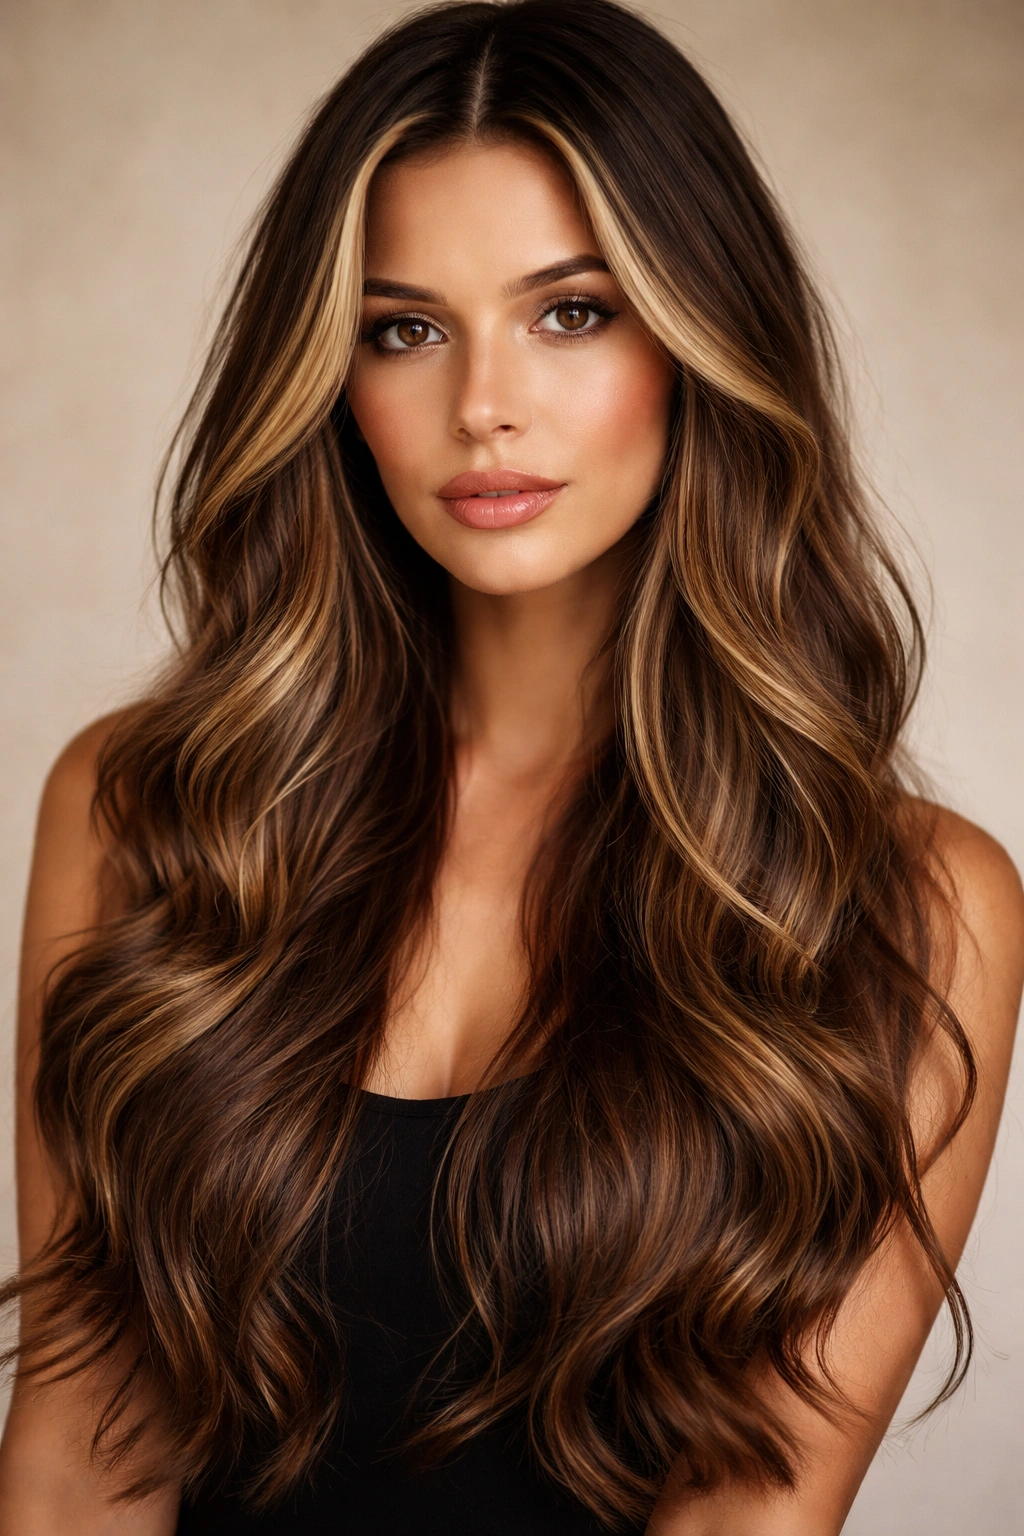
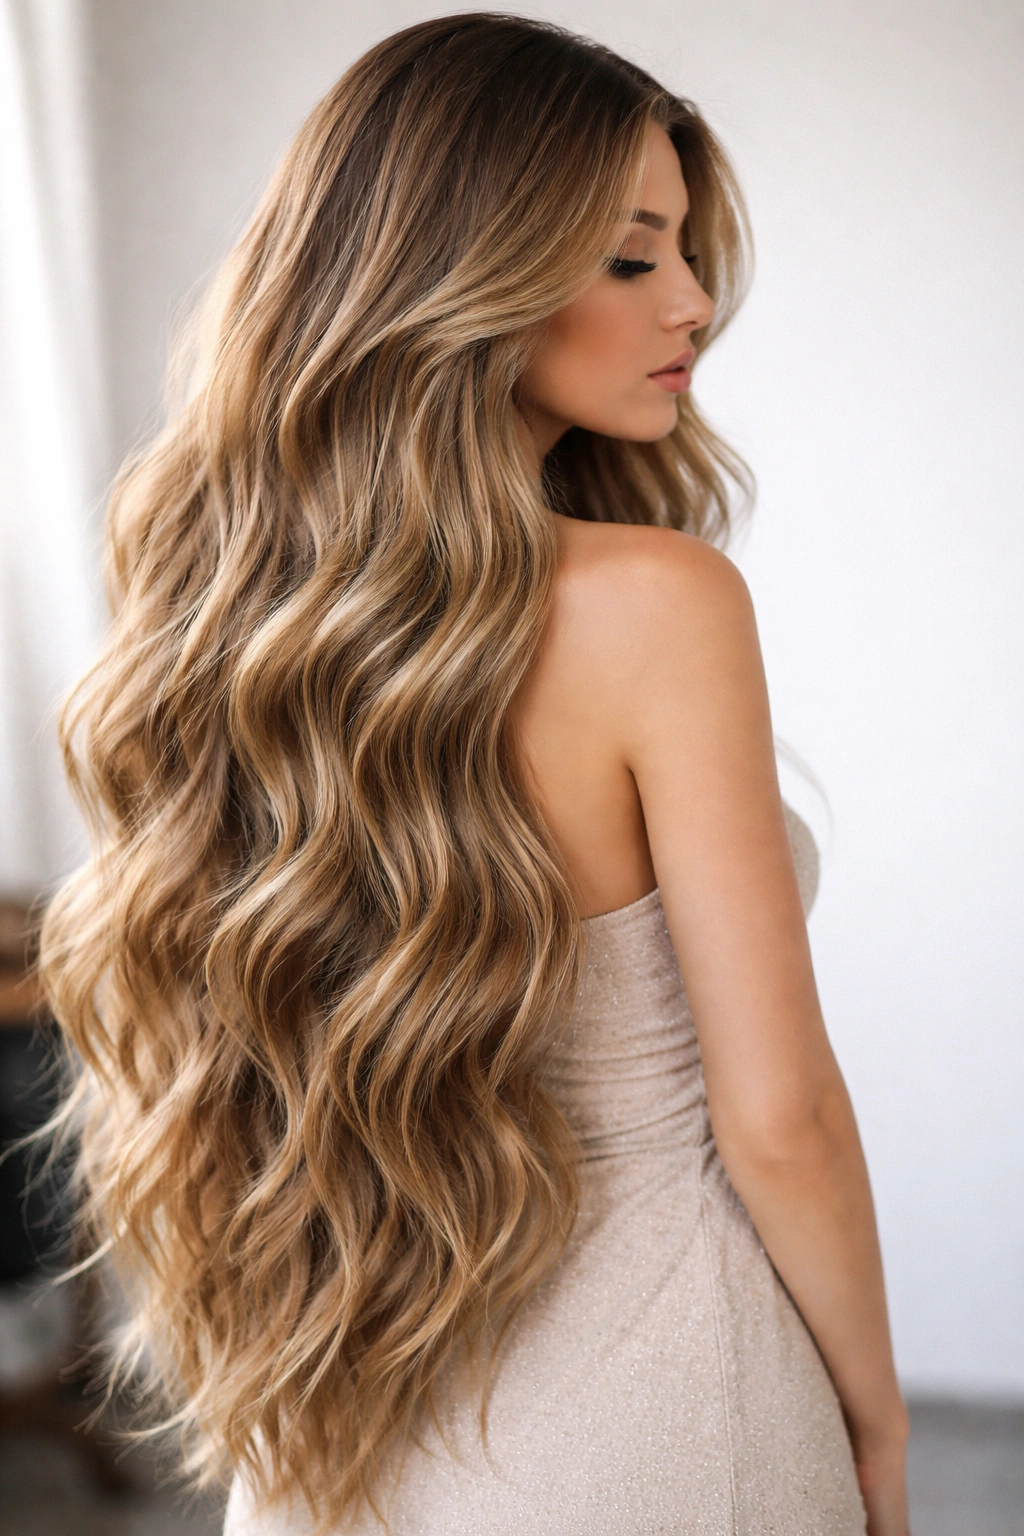
Wavy hair has a magnetic quality that’s hard to ignore. There’s something effortlessly sophisticated about waves that cascade past the shoulders—they catch light, frame the face with movement, and create dimension without the commitment of tight curls or the flatness of perfectly straight strands. Long wavy hairstyles have remained popular across generations because they work for so many face shapes, hair textures, and personal styles. Whether your waves are natural, created with heat tools, or achieved through styling techniques, the right long wavy cut and styling approach can completely transform how you present yourself.
The beauty of embracing long wavy hair is that it sits in this sweet spot between effort and effortlessness. You get the visual impact of texture and movement without needing to blow-dry your hair straight or spend hours curling it into ringlets. Waves are genuinely forgiving—a little humidity, a quick tousle with your fingers, and you’ve got dimension that works. Plus, long wavy styles offer incredible versatility. You can wear your hair down and loose for a romantic vibe, pull it into a half-up style for something more polished, or braid sections for texture that compounds your wave pattern.
This guide walks through 20 distinct long wavy hairstyles, each bringing its own personality and suited to different occasions, hair types, and styling preferences. Some are more structured, others more undone. Some work best with thick hair, while others shine on finer textures. The common thread is movement, length, and the kind of effortless beauty that makes people ask what products you’re using—even when the answer is mostly luck and the right cut.
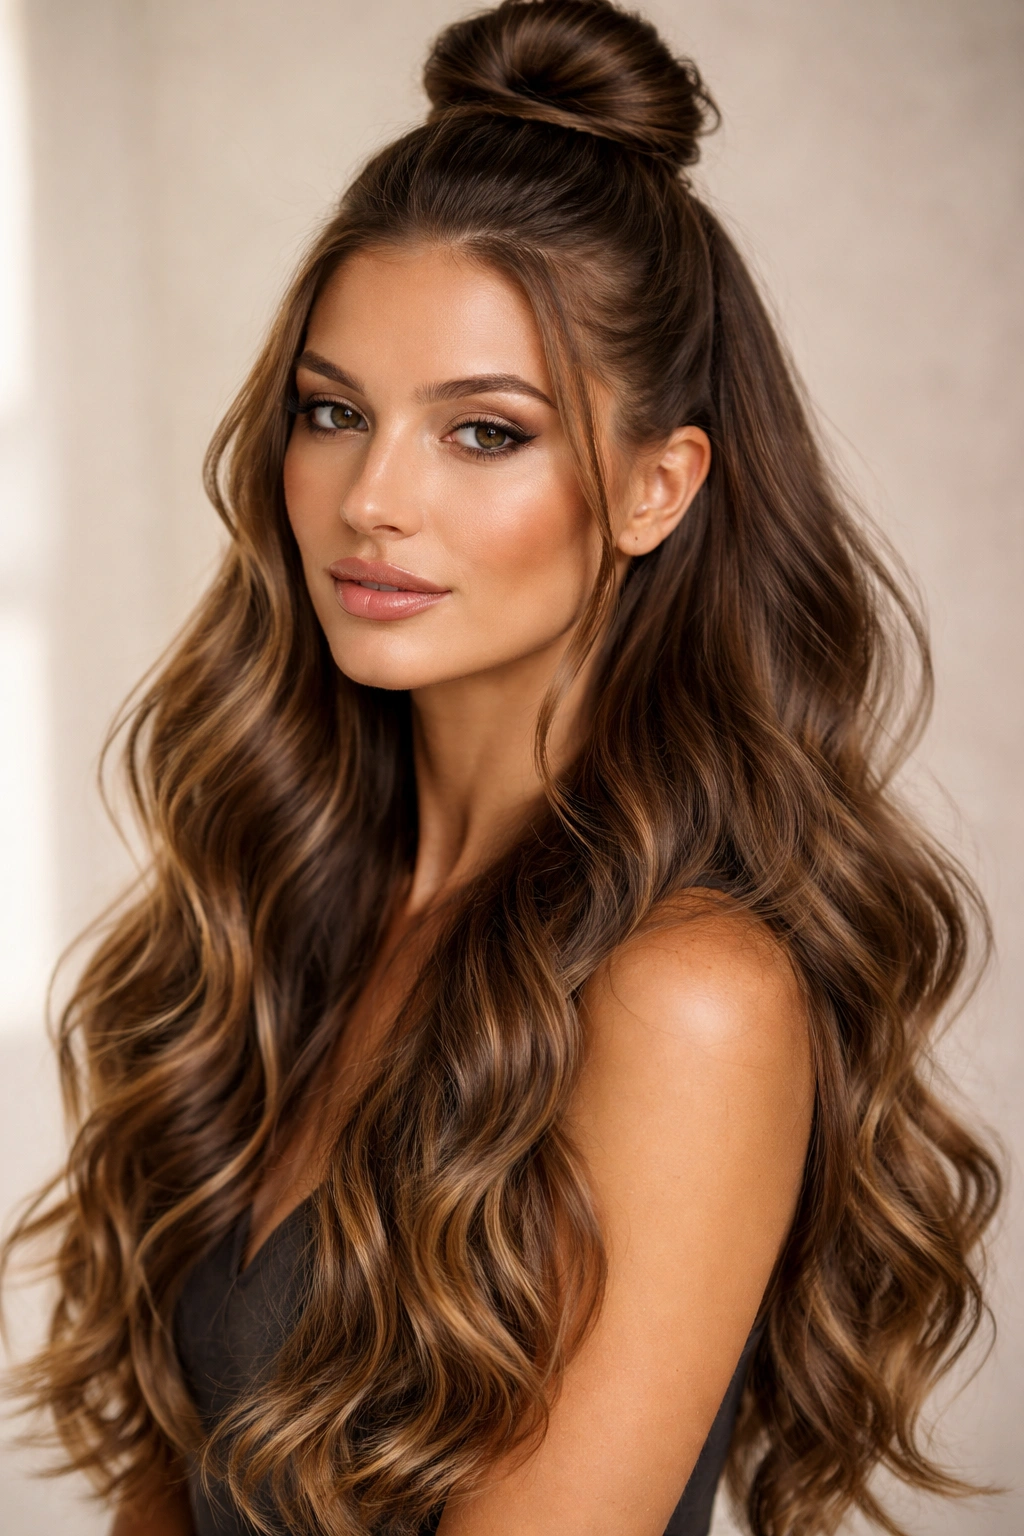
1. Classic Loose Waves
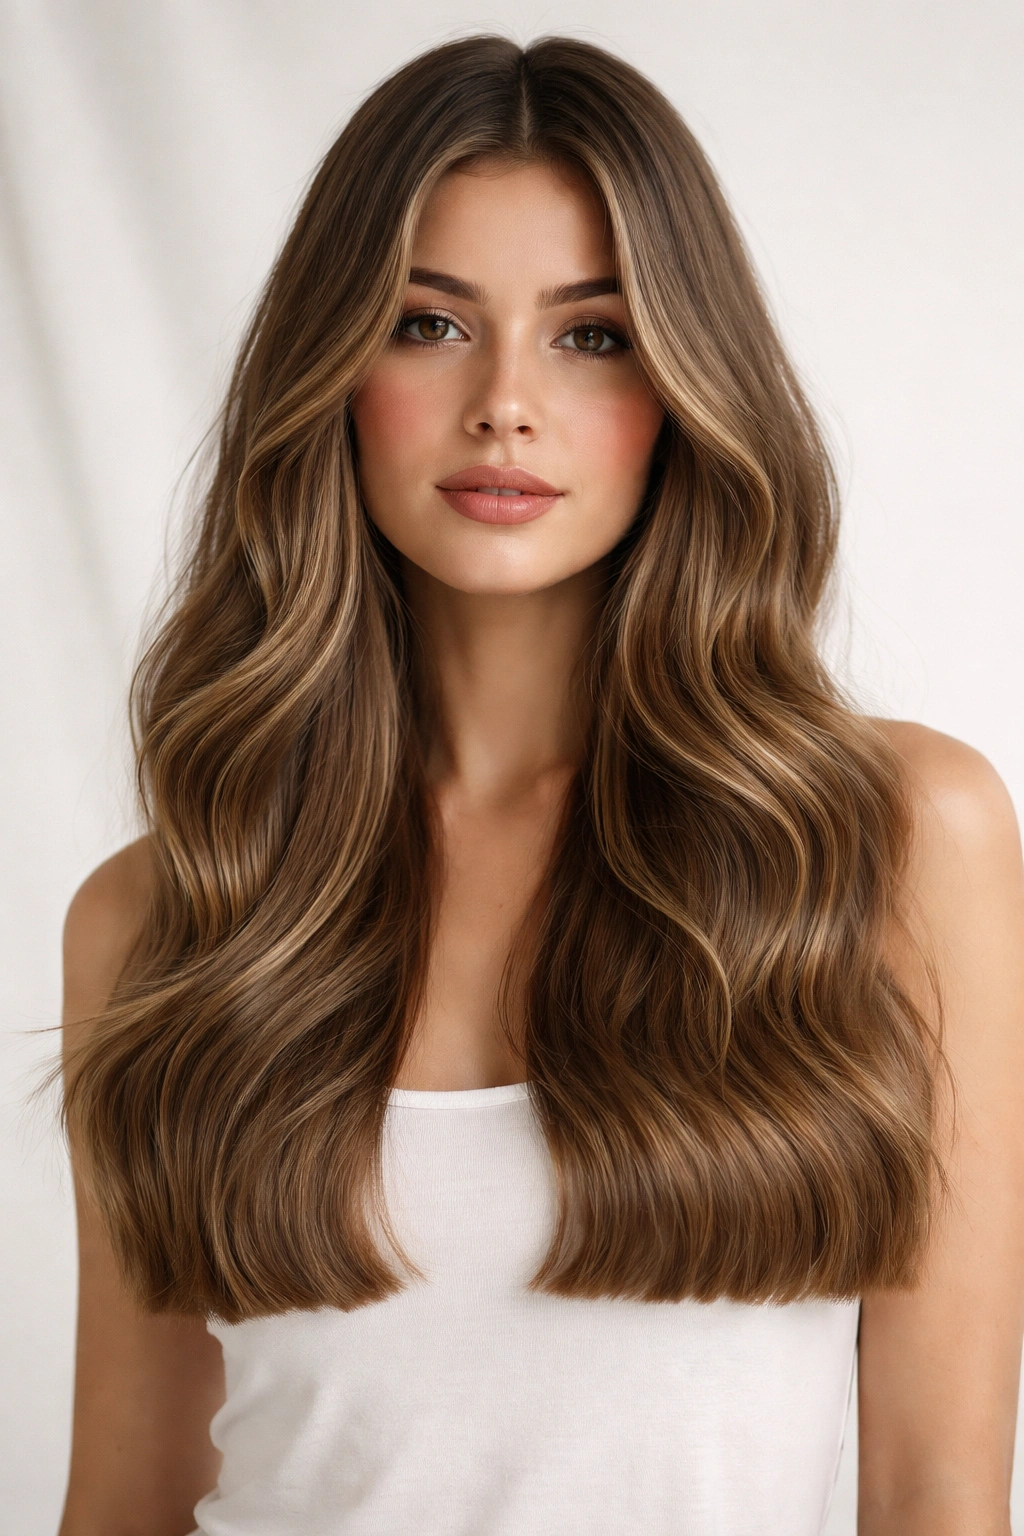
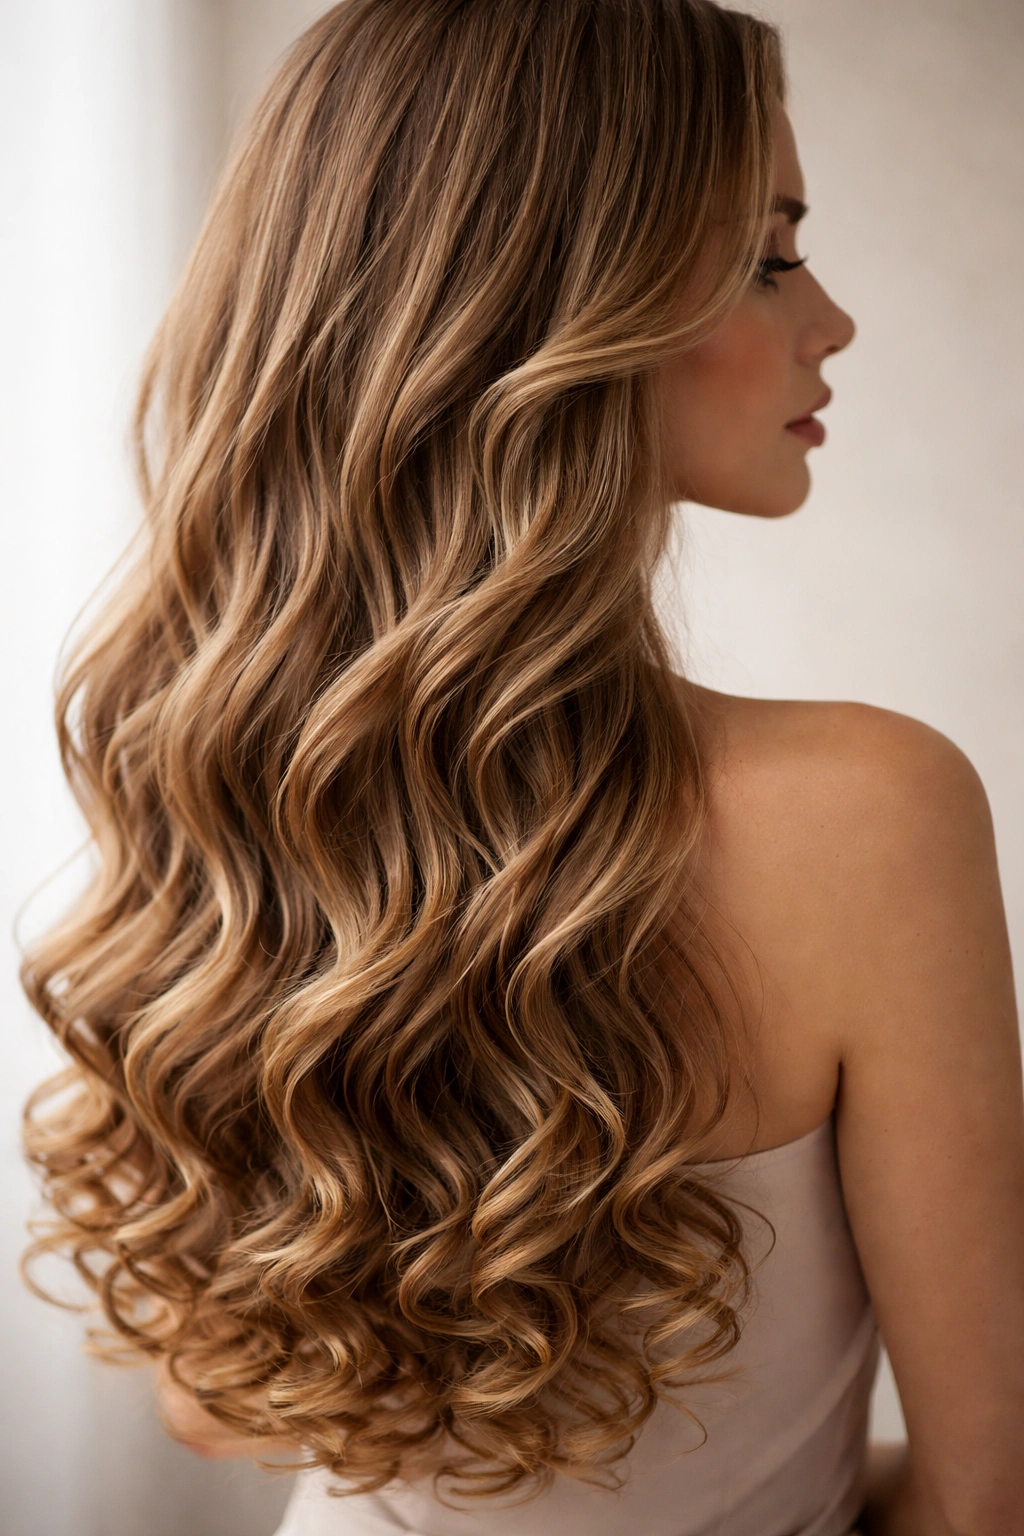
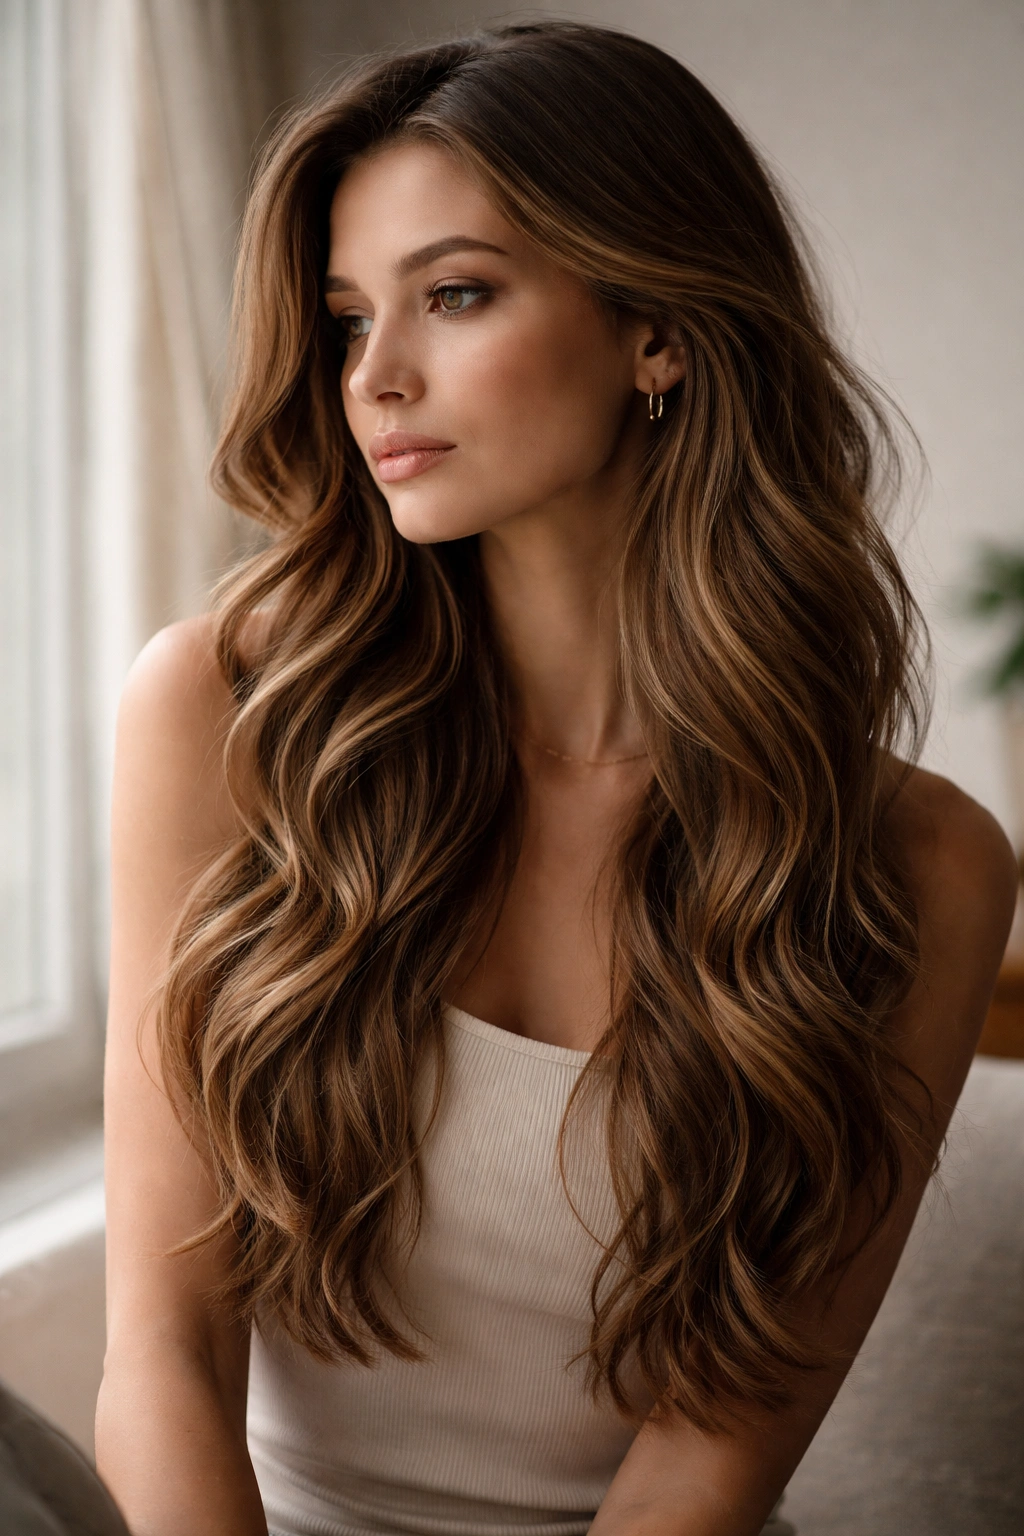
Classic loose waves are the foundation for so many other styles—they’re the hairstyle that works in almost every context and suits nearly every person. This style features waves that start roughly at the middle of the shaft and flow all the way to the ends, creating soft, romantic movement without being tight or defined. The waves should feel relaxed, like your hair naturally wants to move this way, rather than tightly coiled or heavily structured.
Why This Style Works for Nearly Everyone
Loose waves have an inherent softness that flatters most face shapes. They create a gentle frame around the face without the severity of straight hair, and they’re forgiving enough that slight imperfections in the wave pattern actually add to the natural appearance. The key is that these waves feel intentional but not overdone—you’re aiming for the aesthetic of “I woke up with this,” even if you spent 20 minutes with a curling iron.
How to Create and Maintain Loose Waves
- Use a 1.25-inch curling iron or wand, wrapping sections away from the face and holding for 10-15 seconds
- Let curls cool completely before running your fingers through them to break up the pattern
- Apply a light wave spray or texturizing spray to add hold and definition without crunchiness
- Sleep on waves by braiding damp hair loosely before bed, then unbraiding in the morning
- Use a root-lifting spray at the crown to keep waves bouncy throughout the day
Pro tip: Alternate which direction you curl each section—away from the face on one side, toward the face on the other—to create a more natural, multidimensional wave pattern that doesn’t look uniform or overdone.
2. Beachy Waves with Layers
Beachy waves are the deliberate cousin of loose waves—they’re intentionally textured, tousled, and slightly undone, as though you just came from the ocean. This style benefits enormously from layering throughout the hair, which gives shorter pieces the chance to move independently and creates that distinctive feathered, piece-y texture. Long hair with beach waves feels modern and effortlessly cool, like you’re not trying hard but clearly understand style.
The Science Behind Beachy Waves
Beachy waves work because of the combination of movement and texture. Layers of varying lengths break up the density of long hair, so the whole head doesn’t feel heavy or flat. The wave pattern is typically less uniform than classic waves—some pieces curve tightly, others loosely, creating visual interest. This imperfection is the whole point. You’re aiming for the look of textured, sun-kissed hair that’s moved by wind and water, not a perfectly executed salon blow-dry.
Creating Beachy Waves at Home
- Apply sea salt spray to damp or dry hair, scrunching upward to distribute evenly
- Use a curling iron or wand loosely—don’t wrap the entire section, just create texture at the mid-lengths and ends
- Blow-dry with your head tilted to one side, then the other, to avoid a center-parted flatness
- Finish with a texturizing spray and tousle with your fingers to break apart the waves
- Try braiding damp hair overnight and spraying with sea salt spray in the morning for a more effortless look
Worth knowing: Beachy waves photograph beautifully and actually improve over the first day or two as the texture settles. You don’t need perfect waves to pull this off—messiness is part of the aesthetic.
3. Mermaid Waves
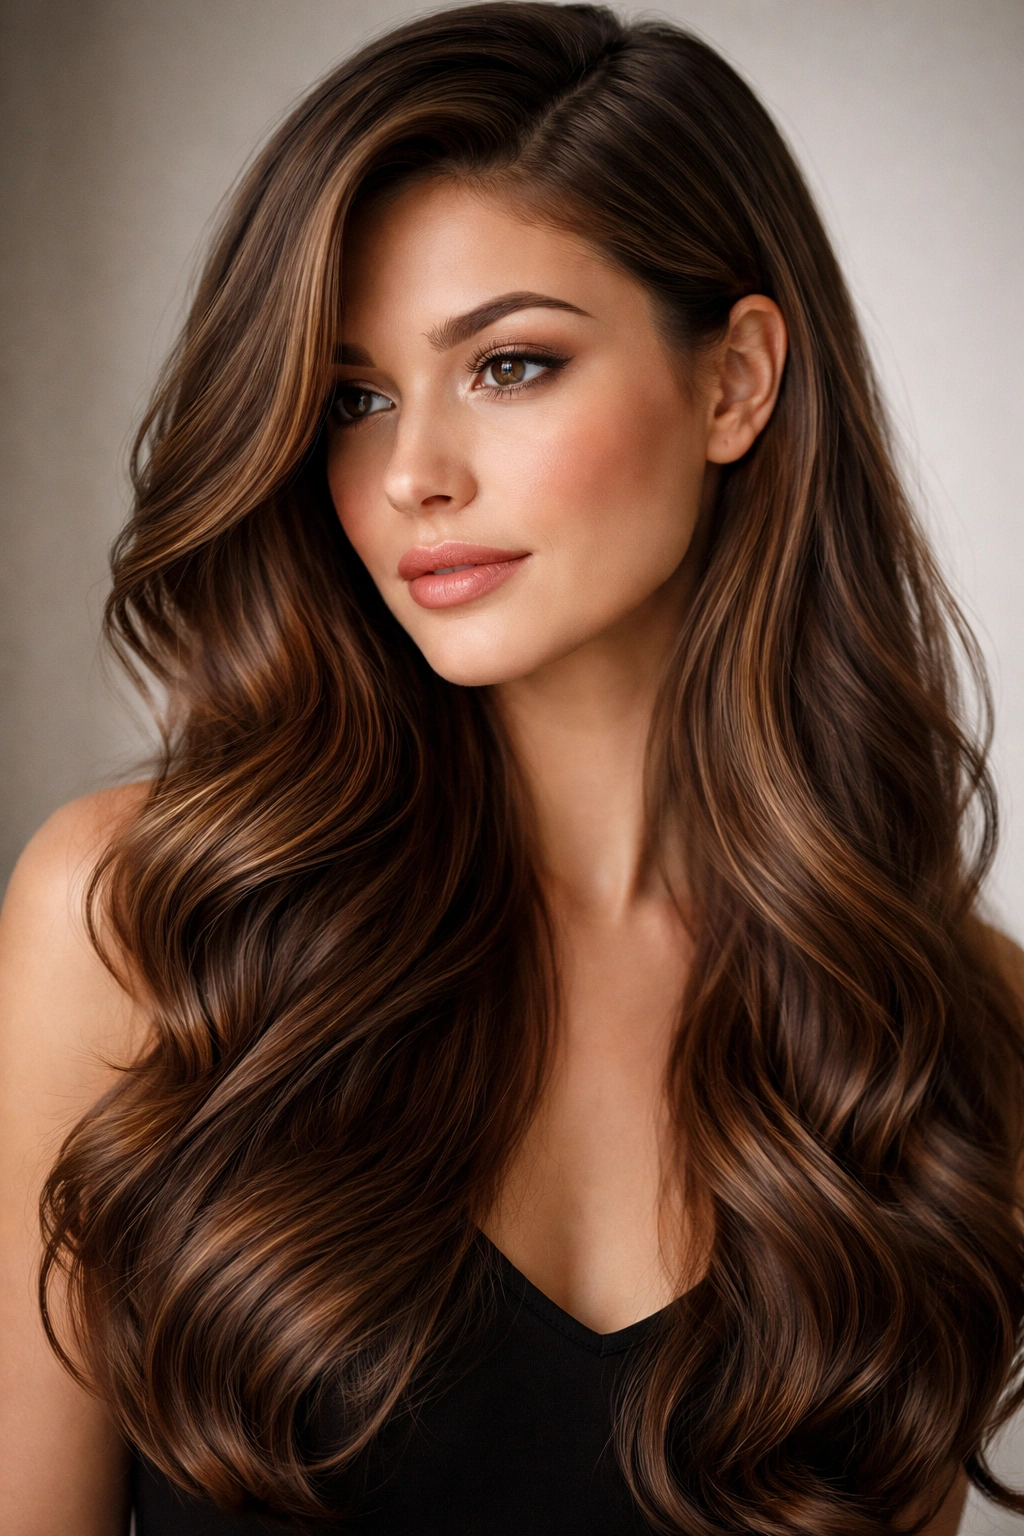
Mermaid waves are tighter, more deliberate waves that look like they’ve been meticulously created—because they have. Unlike beachy waves, mermaid waves have a clear, defined S-curve pattern that runs continuously through the hair. Long mermaid waves evoke elegance and fantasy, often seen in bridal styles or special occasion looks. The waves are consistent in depth and spacing, creating a glamorous, polished appearance that still reads as romantic rather than structured.
What Makes Mermaid Waves Different
Mermaid waves are all about precision and repetition. Each wave should be clearly defined, with consistent spacing and size throughout the length of the hair. This requires more time to create than casual waves, but the payoff is a hairstyle that genuinely stops people in their tracks. Mermaid waves work especially well on straight or wavy hair that can hold the shape without too much frizz—they’re less forgiving on very curly hair types unless that curl is being redefined into waves.
The Technique for Perfect Mermaid Waves
- Section hair into 1.5-inch vertical sections from root to tip
- Use a 1-inch curling iron, creating a C-curve by wrapping the section around the barrel and rotating it as you move down
- Hold each curl while it cools to lock in the wave shape—don’t let it go while still warm
- Once completely cool, gently unwind the curl and leave it intact rather than finger-combing it apart
- Use a flexible hold hairspray to keep the waves defined throughout the day
- Sleep on waves wrapped loosely in a silk scarf to preserve their shape
Insider note: Mermaid waves actually look better when your hair is slightly textured going in—use a heat protectant that adds grip, not one that leaves hair slippery.
4. Textured Waves with Face-Framing Layers
This style combines shorter, choppy face-framing layers with longer wavy lengths beneath. The shorter pieces around the face create dimension and draw attention to your features, while the longer underlayer provides length and movement. This is an especially effective cut for fine or thin hair, as the layers create the illusion of fullness without actually requiring a lot of density.
Why Face-Framing Layers Transform Long Hair
Face-framing layers do something that straight hair can’t do alone—they create instant movement around the features you want to highlight. Combined with waves, they multiply that effect. The shorter pieces catch light independently, they move separately from the longer hair, and they create visual interest at eye level. For anyone whose long hair otherwise falls in a flat sheet around the face, layers are genuinely transformative.
Styling Textured Waves with Layers
- Apply mousse to damp roots and blow-dry with a round brush, lifting at the crown for volume
- Use a 1.25-inch curling iron on the face-framing pieces specifically, curling toward the face to open up your features
- Create waves through the longer underneath section, alternating direction for dimension
- Apply a light texturizing spray and scrunch sections with your fingers to blend the layers
- Consider a side part that showcases the asymmetry of the shorter pieces
- Pin one shorter side back gently if you want to show off a lighter piece or undercut
Pro tip: Ask your stylist to cut the face-framing pieces slightly shorter than you think you want—they’ll sit perfectly after waves are created, while longer pieces would feel in-between and neither frame nor flow.
5. Soft Waves with Blunt Ends
A contrast between soft movement and precise line creates visual impact. Soft waves throughout the hair with a blunt, one-length hemline is a surprisingly modern combination—the waves feel romantic, but the blunt edge feels intentional and fashion-forward. This style works particularly well on thick, healthy hair that can support the weight of the length while still moving with freedom.
The Power of Contrast in Styling
Blunt ends emphasize that whatever waves you create are deliberate and styled, not just the natural texture falling however it wants. The geometric precision of the cut contrasts beautifully with the organic curves of the waves. This style reads as polished without being boring, put-together without being overdone. It’s especially flattering if you have a square or angular face shape, as the soft waves soften your features while the blunt line balances them.
Creating Soft Waves with Blunt-Cut Ends
- Get a precise blunt trim with a straight edge to frame your length intentionally
- Protect ends with a heat protectant serum before creating waves—blunt hair ends are more prone to splitting
- Use a wand rather than a curling iron to create softer, less uniform waves that aren’t perfectly coiled
- Apply waves mostly through the mid-lengths and ends, keeping the crown relatively straight for dimension
- Use a liquid texturizing spray rather than a heavy-hold product to keep the blunt line visible
- Consider a middle part with this style to emphasize symmetry and the blunt line
Worth knowing: Blunt ends require more frequent trims—every 6-8 weeks—to maintain the sharp line. As your hair grows, the blunt ends can look choppy if not maintained.
6. Waves with a Deep Side Part
A deep side part is a strategic styling choice that can make long wavy hair look longer, slimmer, and more intentional. Instead of parting hair down the middle, you move the parting significantly to one side, creating asymmetry and drawing the eye across the face. When combined with waves, a deep side part adds movement in multiple directions—the waves flow downward while the parting creates horizontal movement.
How a Side Part Changes the Game
A center part distributes the face evenly, which is fine but can sometimes feel flat or make a round face appear rounder. A deep side part creates movement and drawing attention to one side of the face, which is flattering for most people. The longer side of the parting flows over the shoulder, creating a visual line that can make you appear more elongated. For anyone with a round or square face, a deep side part is genuinely transformative.
Styling Waves with a Deep Side Part
- Create your parting by running a comb from your temple diagonally back toward the crown, moving the parting several inches to one side
- Create waves throughout, but focus slightly more wave definition on the larger side to give it movement
- Use a round brush to blow-dry the side with the parting, directing hair back and away from the face
- Tease gently at the crown on the side where you’re parting from, to add height and dimension
- Consider pinning back the larger side loosely with a bobby pin at the back of the head if you want a softer half-up look
- Apply texturizing spray to add grip and help the parting stay in place throughout the day
Insider note: The deeper your side part, the more dramatic the effect. Start with a subtle side part and gradually move it farther over several styling sessions if you’re not sure what feels right for your face.
7. Wavy Shag Cut
A shag is a layered cut with choppy, disconnected layers throughout that create incredible movement and texture—and it’s become freshly cool in recent years. A wavy shag is essentially a shag haircut created specifically to work with waves rather than fight them. This style is all about embracing dimension, movement, and a bit of intentional scrappiness. The shorter layers throughout catch the waves, multiplying the texture and creating a head-turning style.
Why Shags Work with Long Wavy Hair
A shag is actually the opposite of a blunt cut—instead of one line, you have dozens of different lengths working together. This maximizes movement because shorter pieces move independently from longer ones. The waves created in a shag are never uniform, which is exactly what makes them interesting. This style reads as edgy and cool rather than romantic or soft, making it a good choice if you want long wavy hair with attitude.
Creating and Maintaining a Wavy Shag
- Ask your stylist for disconnected layers throughout with shorter, choppier pieces at the crown for volume
- The shortest pieces should hit around chin-length, graduating to your longest length at the front or back
- Blow-dry using a round brush on the top layers only, leaving underneath texture to fall naturally
- Create soft waves with a wand, focusing on mid-lengths and ends where the shorter layers can catch the movement
- Tousle with your fingers and apply texturizing spray to enhance the piece-y, undone texture
- Refresh the cut every 6-8 weeks to maintain the disconnected layer effect as hair grows
Pro tip: A shag looks best when you actively embrace the texture—don’t try to make it look neat or polished. The messier you style it, the better it looks.
8. Waves with Hidden Undercut
An undercut adds an unexpected element to long wavy hair—the hidden length and thickness is removed from underneath, creating a secret surprise of shaved or very short hair underneath. When your hair is down and wavy, no one knows the undercut is there. When you flip your hair, pull it into a ponytail, or pin it up, the undercut reveals itself. This style is for people who want the polish and length of long waves but also want an edgy, rebellious detail underneath.
The Appeal of a Hidden Undercut
Hidden undercuts have become increasingly popular because they satisfy two desires at once: you get the romantic length and movement of long waves on the surface, but you’ve also got a bold, fashion-forward surprise hidden underneath. This is especially practical for people with very thick hair—removing density from underneath actually makes the hair easier to manage and style while still providing length. The undercut also means your hair dries faster and sits lighter on your head.
Creating Waves Over an Undercut
- Discuss the undercut design with your stylist beforehand—some people do full shaved sides, others just remove density from underneath
- Create waves primarily on the top and sides where they’ll be visible when hair is down
- When styling, focus the most defined waves on the upper sections to draw attention upward
- Use a round brush to add volume at the crown, which emphasizes the longer top layers against the shorter underneath
- Texturizing spray helps blend the top layers with the undercut so it doesn’t look like two separate hairstyles
- Play with updos to showcase the undercut when you want to show it off
Worth knowing: Undercuts require regular maintenance—every 3-4 weeks—to keep them looking sharp and prevent an awkward grow-out phase. This is a commitment, not a “let it grow out” situation.
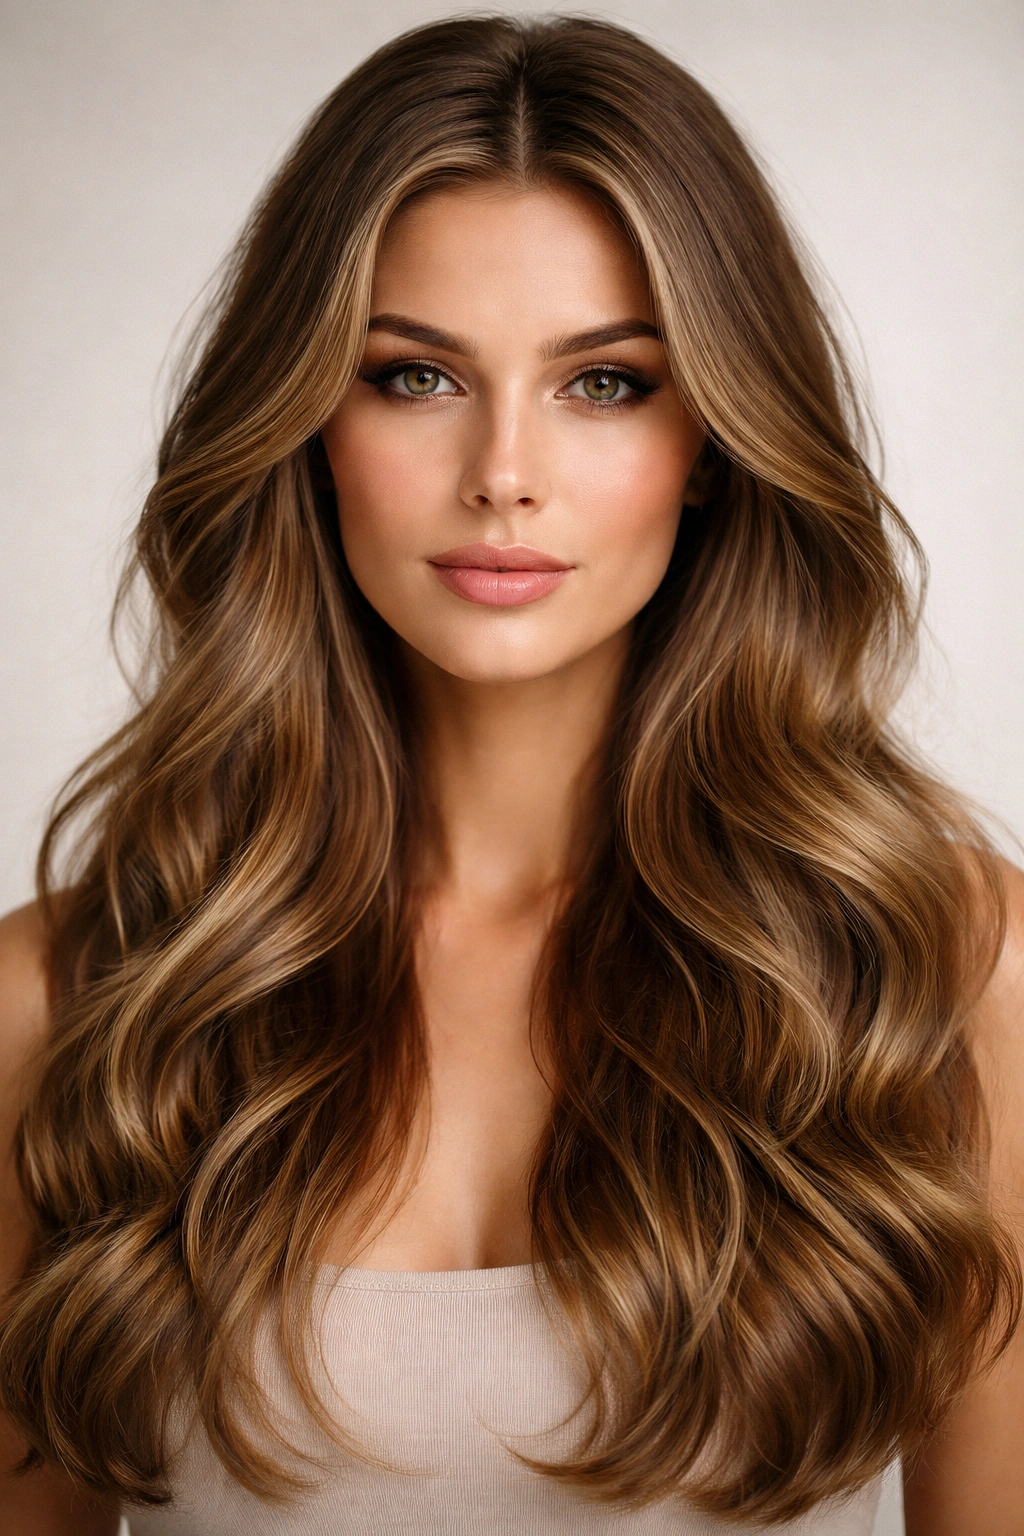
9. Long Waves with Face-Framing Highlights
This isn’t technically a haircut difference, but the coloring strategy makes a huge difference in how waves read. Face-framing highlights—shorter pieces of color around the face, often in a lighter shade than the base color—work with your wave pattern to create depth and draw attention to your features. This technique has been used for decades because it’s genuinely flattering, and it’s especially effective when combined with long waves.
How Highlights Enhance Wave Texture
Waves create movement, but a single-color wave pattern can sometimes blend together. Face-framing highlights in a contrasting shade break up that visual monotony—each wave catches light differently depending on whether it’s in the highlighted or base color. This multiplies the dimension of your waves. Additionally, lighter pieces around the face are universally flattering because they draw attention upward and brighten the complexion.
Making Face-Framing Highlights Work with Waves
- Consult with your colorist about placement—the highlights should frame your face, not create a blocky striped effect
- Babylights (very thin, subtle highlights) work especially well with waves because they integrate seamlessly
- Consider a balayage technique where highlights are painted on to look naturally sun-kissed, then waves will enhance that effect
- Waves with highlights need slightly more frequent toning—every 4-6 weeks—to keep the lighter pieces from turning brassy
- Use a color-safe heat protectant when styling waves, since colored hair is more fragile than virgin hair
- Waves with highlights look best when the base color is also maintained—roots showing can look less intentional
Insider note: If you have naturally dark hair, the contrast of face-framing highlights with your waves is more dramatic and more noticeable than it would be on lighter hair. Plan accordingly.
10. Waves with a Center Part and Volume at Crown
A center part is the most classic, symmetrical parting option—and when combined with wavy hair and intentional volume at the crown, it creates a look that’s both balanced and dynamic. This style works beautifully for people with longer face shapes, as the volume at the crown balances length, and the center part provides symmetry. The waves flow equally on both sides, creating visual harmony.
Why Crown Volume Matters with Center Parts
A center part can sometimes look flat if the crown doesn’t have height. With a center part and long wavy hair, you need intentional volume at the crown to avoid looking like your hair is just hanging straight down the center. The volume creates lift and dimension, making the whole style feel more intentional and less like you’re simply parting your hair and letting it fall.
Creating Crown Volume with Centered Waves
- Blow-dry with your head upside down, directing the blow-dryer upward at the roots to create lift
- Use a volumizing mousse on damp roots before blow-drying for extra hold and texture
- Create your center part after blow-drying, then tease gently at the crown to maintain height
- Create waves on both sides evenly, using the same technique on each side to keep them symmetrical
- Pin a small section at the very crown to an interior layer of hair—just a subtle pin that no one will see—to keep the crown from falling flat by evening
- Use a texturizing spray rather than a heavy-hold hairspray to keep volume looking natural rather than shellacked
Pro tip: The key to crown volume lasting all day is creating it with a gel or mousse while hair is damp, then heat-setting it with the blow-dryer before it’s completely dry.
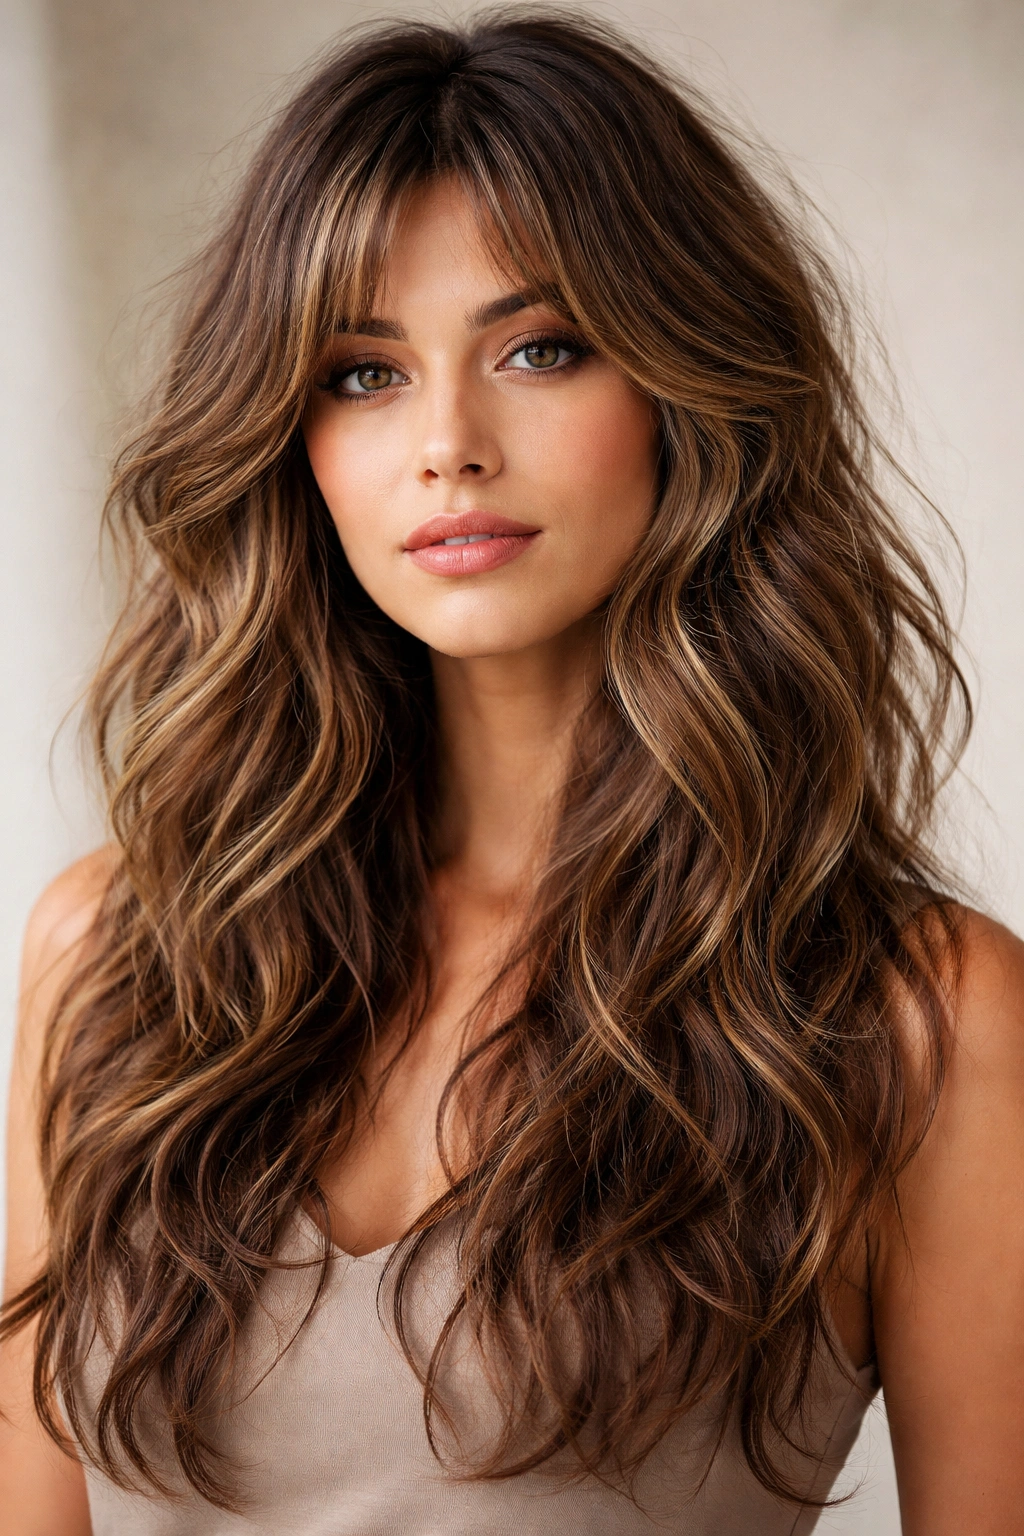
11. Waves with Curtain Bangs
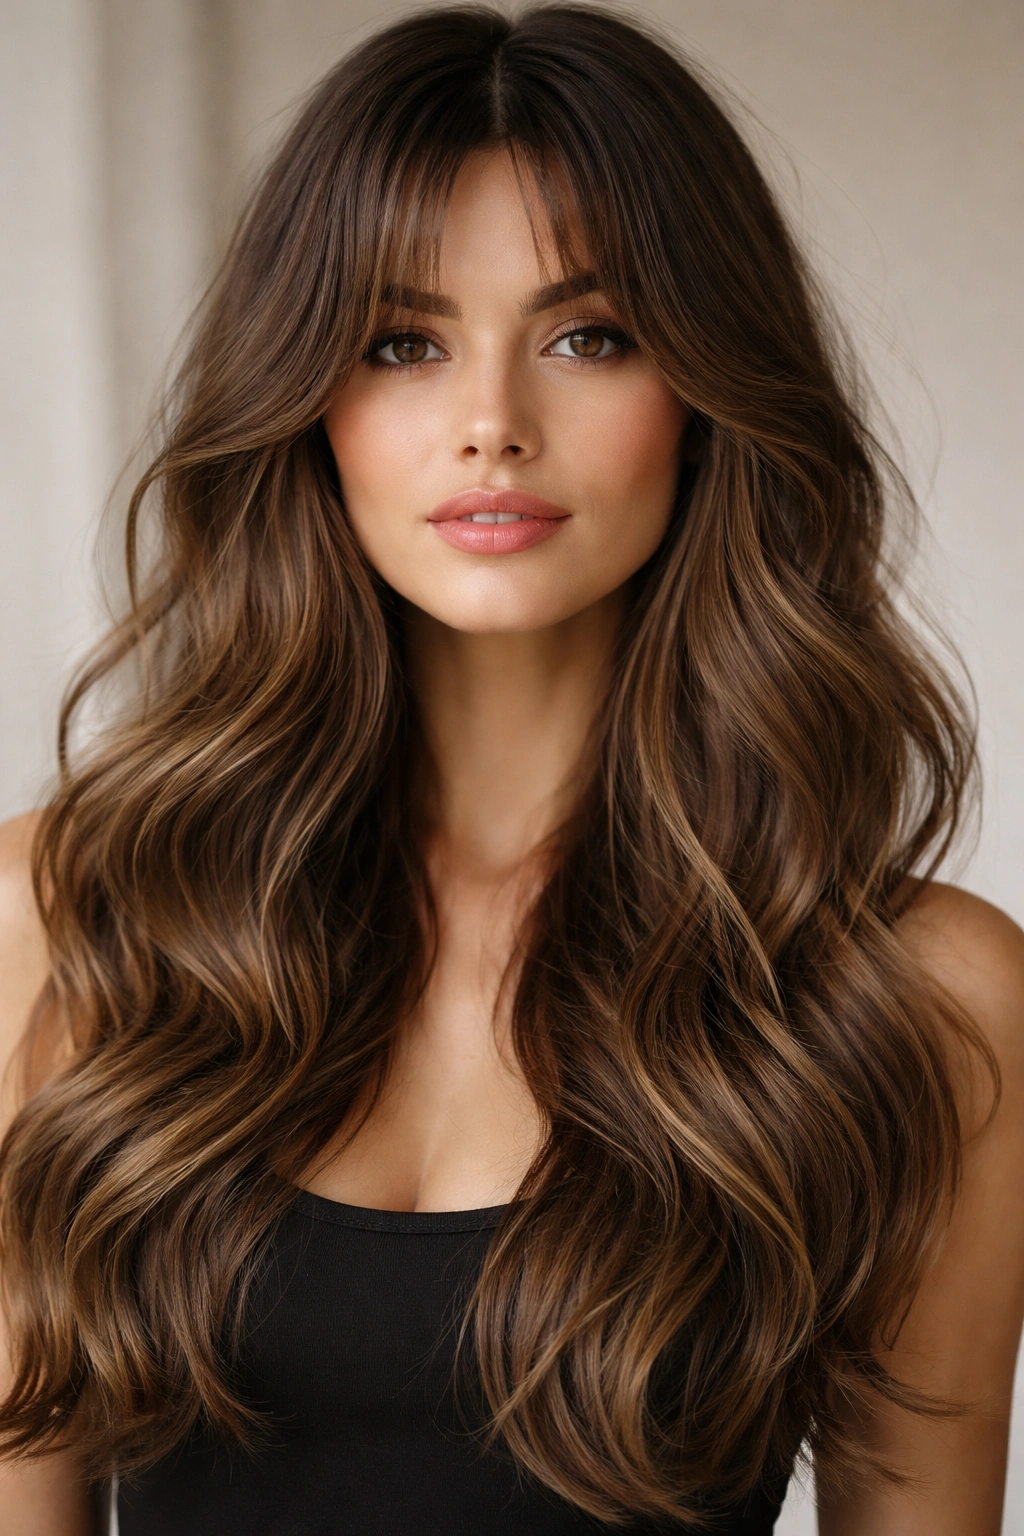
Curtain bangs—longer, face-framing bangs that part in the middle and sweep to the sides—add both movement and a trendy edge to long wavy hair. Combined with waves, curtain bangs create a style that feels effortlessly cool and slightly edgy. The bangs frame the face while the longer waves continue below, creating a cohesive, intentional style. This works especially well if you’re not ready to commit to a full cut but want a change.
Why Curtain Bangs Work with Waves
Curtain bangs are designed to frame the face and move independently from the rest of your hair. When you add waves to the whole head, including the bangs, you multiply the movement and dimension. Curtain bangs also have a casual, undone vibe that pairs perfectly with wavy texture. This is a young-feeling, current style that looks great on almost every face shape.
Styling Waves with Curtain Bangs
- Ask your stylist to cut curtain bangs to hit around cheekbone length, parting down the center
- Create a center part in your main hair, which naturally aligns with the parted center of your bangs
- Wave the bangs using a smaller curling iron (0.75 to 1 inch) since they’re shorter and more delicate
- Curl the bangs slightly away from the face on each side so they sweep away rather than covering your features
- Create waves in the rest of your hair using your standard technique
- Style the bangs to curve away from the face with a round brush and blow-dryer for definition
Worth knowing: Curtain bangs require regular trims every 4-6 weeks to maintain their shape and prevent them from growing too long and covering your eyes. This is a higher-maintenance styling choice than no bangs.
12. Waves with a Low Ponytail
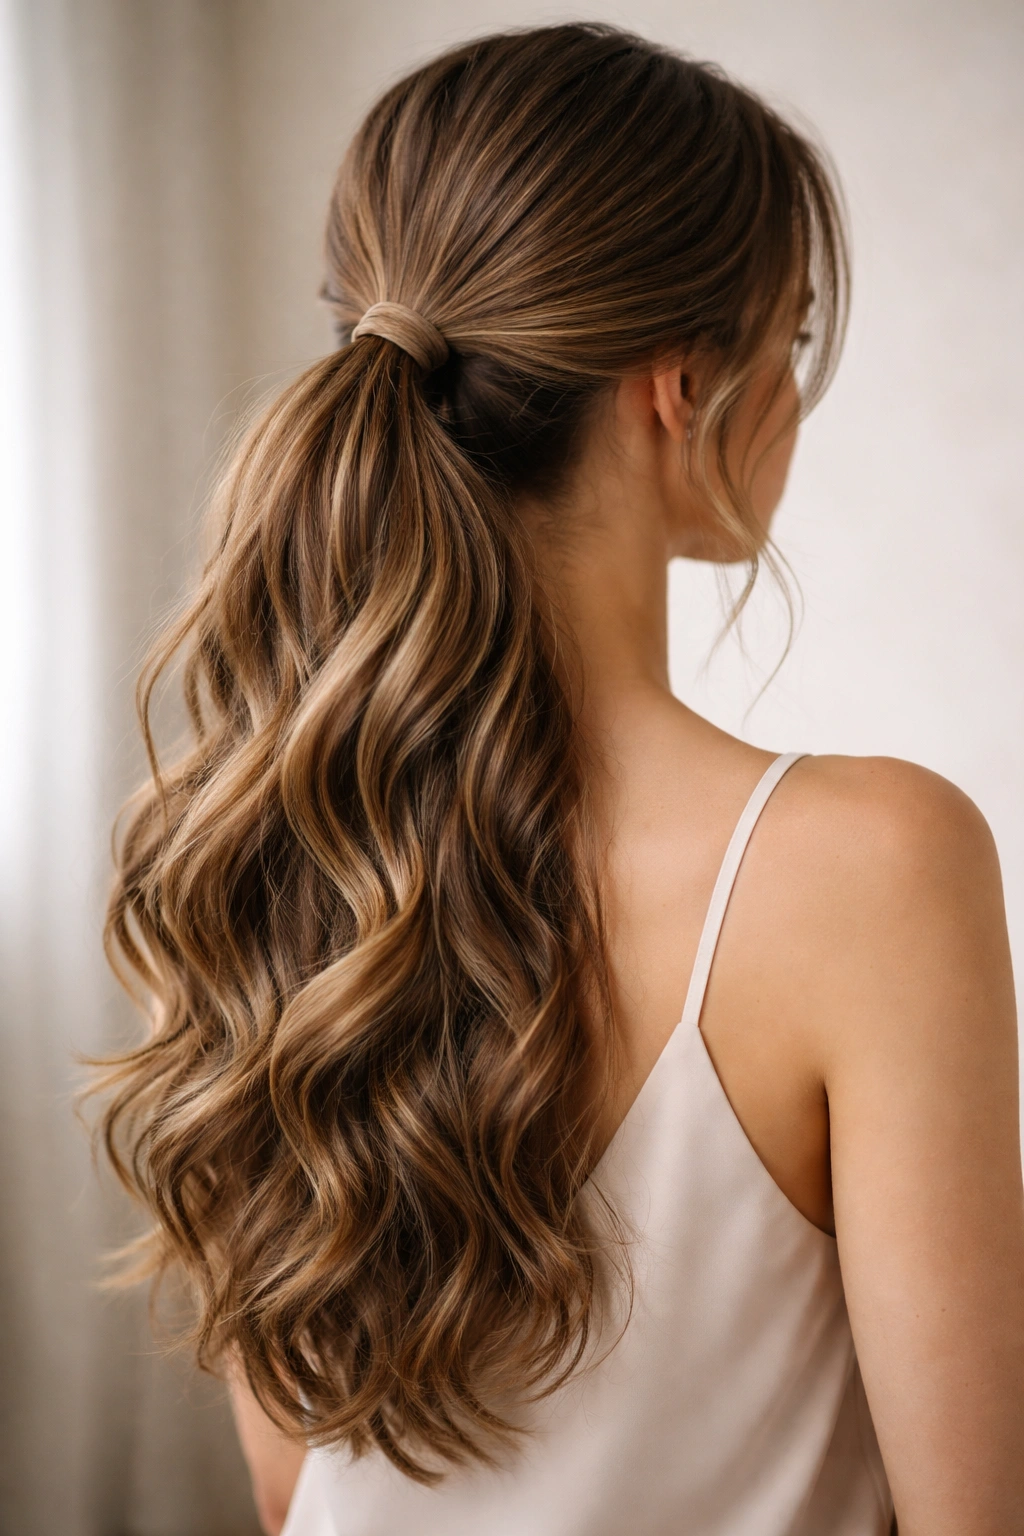
A low ponytail is one of the most elegant ways to style long wavy hair—you’re still showing off your length and waves, but pulling everything back in a way that feels refined and intentional. A low ponytail with wavy hair reads as polished enough for professional or formal settings, but still casual enough for everyday wear. You can leave some face-framing pieces down for softness, or pull everything back for a sleeker look.
The Versatility of Low Ponytails with Waves
A low ponytail essentially creates a second opportunity to style your hair—once in the waves you create beforehand, and again in how you arrange the ponytail itself. You can make it sleek and smooth for a refined look, or leave it loose and wavy for something more casual. You can wrap a section of hair around the base to hide the elastic, or show it off. The ponytail is neutral enough not to interfere with your waves, but intentional enough to look like a deliberate style choice.
Creating a Polished Low Ponytail with Waves
- Create your waves first, while your hair is down and you can create a cohesive wave pattern
- Gather hair into a low ponytail at the base of your skull—not at the very base of your neck, but slightly higher for a more flattering angle
- Use a clear or hair-colored elastic to secure, and consider wrapping a small section of hair around the base to hide the elastic
- Leave 2-3 face-framing pieces down on each side, allowing them to wave naturally
- Gently pull and tousle the ponytail slightly to keep it looking undone rather than severely pulled back
- Use a lightweight hairspray to keep flyaways controlled without making the style look stiff
Insider note: For a low ponytail to feel intentional rather than like you just threw your hair back, make sure it’s positioned at or slightly above the base of your skull. Positioning it too low can make it look accidental.
13. Waves with Spiral Curls at the Ends
This is a hybrid style that combines soft waves through most of the hair with defined spiral curls specifically at the ends. The technique creates a style that has softness and movement through the mid-lengths, but defined texture right at the tips. This style is especially effective for creating the illusion of thicker ends and creating a style that reads as intentionally done without being overly formal.
How Spiral Curls Change the Impact
While waves create movement and softness, spiral curls at the ends add definition and structure. A head of hair that’s all waves can sometimes read as undone or natural in a way that feels like you didn’t try. Adding intentional curls at the ends signals that you styled your hair deliberately. The combination of soft waves above and defined curls below creates visual interest and makes the style more memorable.
Technique for Waves with Spiral Curls at Ends
- Create soft waves through the mid-lengths using a wand or curling iron, not wrapping too tightly
- Once you reach the bottom 3-4 inches, switch to a tighter wrapping technique to create defined spirals
- Hold the curls in place for longer (15-20 seconds) to lock in the tighter shape
- Let curls cool completely before unraveling them so the spiral shapes hold
- Use your fingers to gently separate the spirals from each other rather than fully combing them out
- Apply a medium-hold hairspray to keep the definition without creating crunchiness
Pro tip: Spiral curls look better when the base of your hair is wavy rather than completely straight—they stand out more as an intentional detail.
14. Waves with Textured Braids
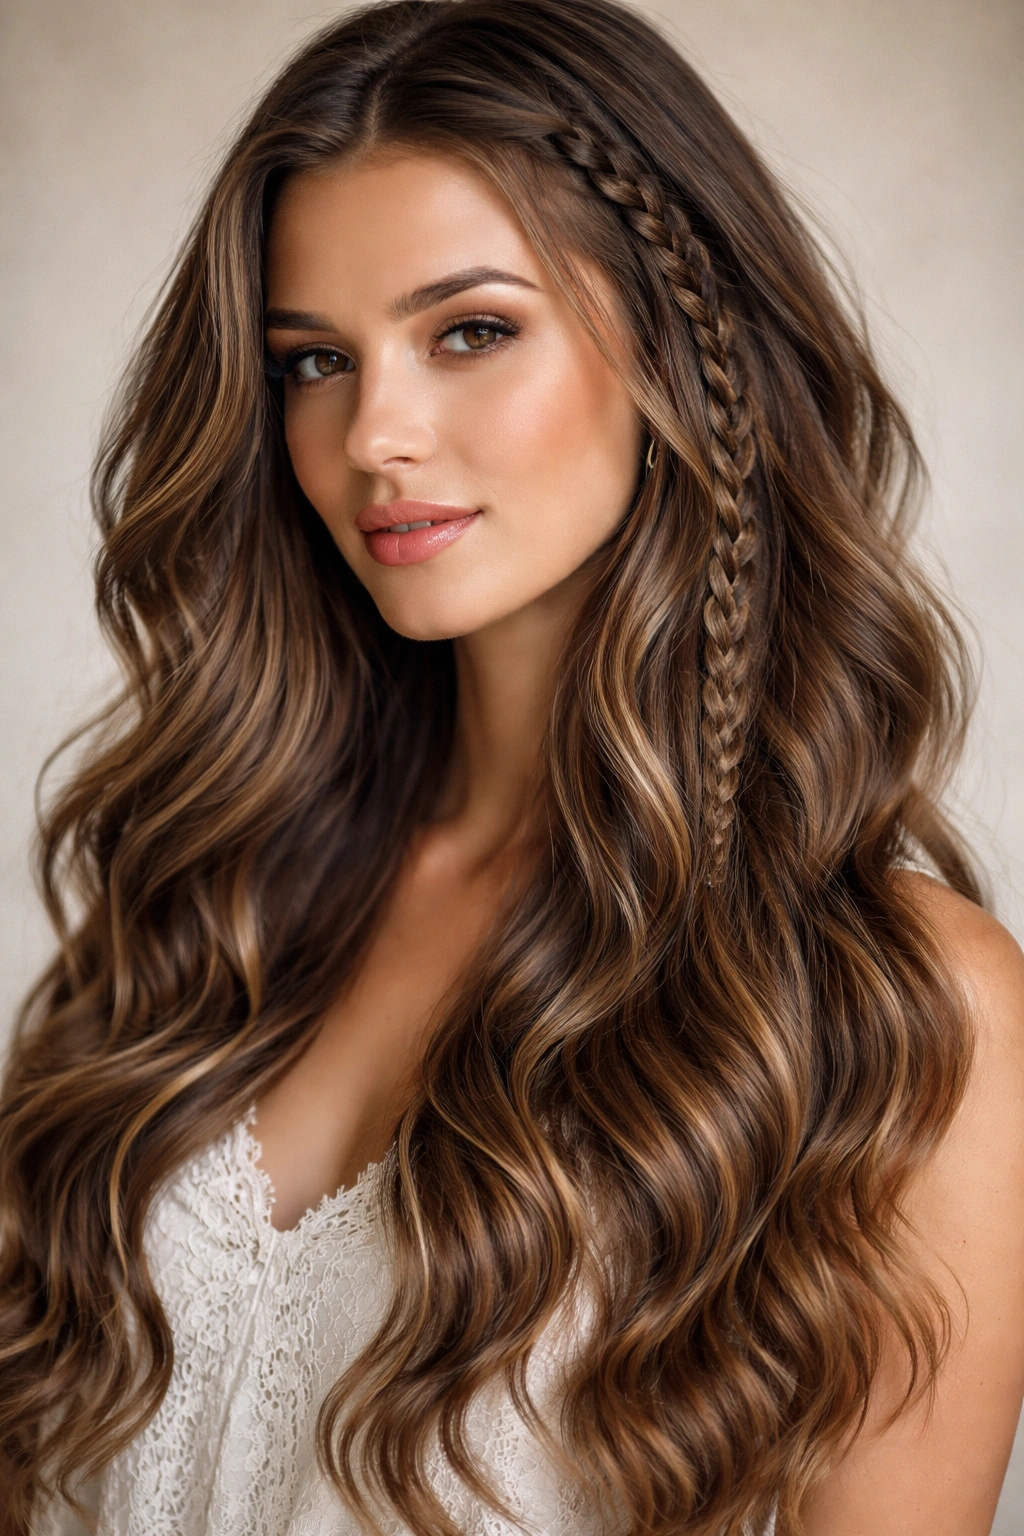
Incorporating braids into long wavy hair is a surprisingly effective way to add dimension and interest. You can braid a small section underneath, braid the underside of a section while leaving the surface wavy, or create a more obvious braid feature. Textured braids work especially well with wavy hair because the waves continue through and around the braided sections, creating an intentionally textured, bohemian vibe.
The Complexity Textured Braids Add
Braids are inherently more structured than waves, so combining them creates visual interest and signals intentionality. A simple style of just waves can sometimes feel like you didn’t try, while adding a braided element shows clear effort. Braids also have a romantic, bohemian quality that pairs perfectly with wavy hair—they’re often associated with wedding styles or special occasions, but they can also work in everyday styling.
Creating Waves with Textured Braids
- Create waves throughout your hair first to establish your base texture
- Once waves are set, select a section or sections where you want to incorporate braiding
- French braids work beautifully through wavy hair—the waves integrate into the braid naturally
- Fishtail braids create a more intricate, textured look that stands out against the waves
- Don’t pull braids too tightly—loose, relaxed braids look better with waves than severe, tight braids
- Leave face-framing pieces down to maintain softness around your features
- Consider braiding one side back while leaving the other side loose and wavy
Worth knowing: Braids in wavy hair look better when you braid slightly loosely than you normally would—tight braids can look dated or overwhelming next to textured waves.
15. Waves with Subtle Ombre
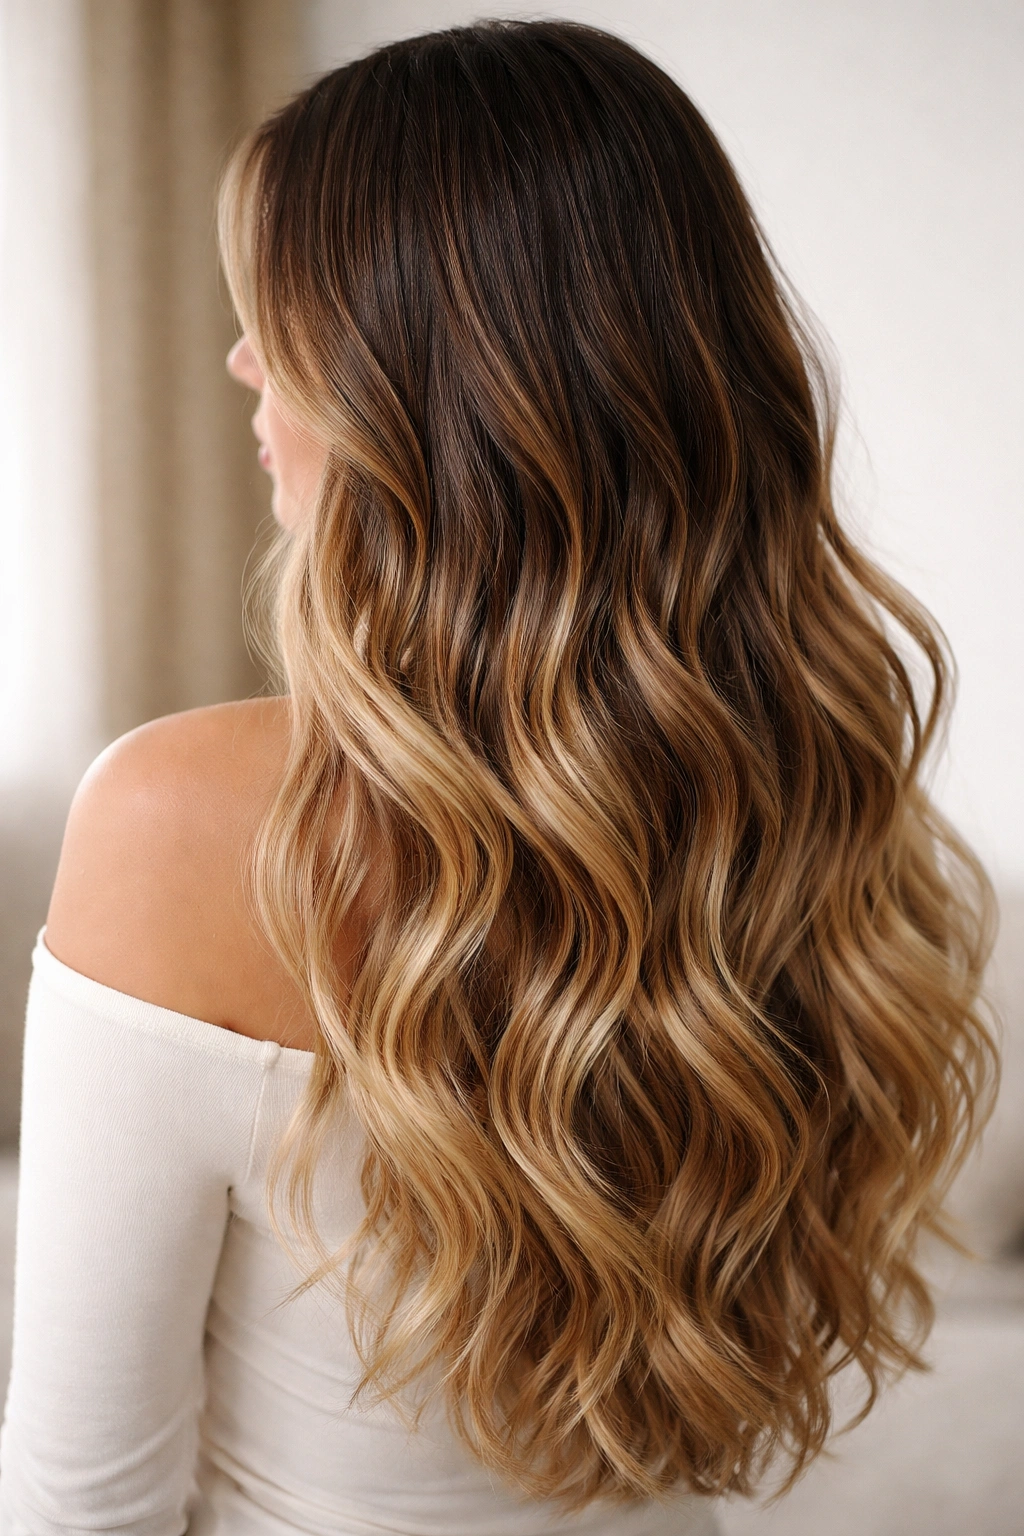
An ombre is a gradual color transition that goes from darker at the roots to lighter at the ends. When subtle and done well, an ombre adds depth to wavy hair without the commitment of regular highlights. The color transition works with the movement of waves to create the impression of even more dimension and texture. A subtle ombre (one to two shades difference) looks modern and intentional without being as high-maintenance as full-coverage color.
Why Ombre Works with Wave Texture
Waves create movement, but a single color through all that movement can sometimes feel flat. An ombre adds another dimension—literally—by introducing color variation. Each time a wave catches the light, it might be hitting the darker root color or the lighter end color, which multiplies the visual texture. An ombre also creates an illusion of lighter, airier ends, which makes long hair feel less heavy.
Maintaining Waves with Ombre Color
- Use a color-safe shampoo and conditioner to keep both the dark roots and light ends vibrant
- Apply waves with a heat protectant designed for color-treated hair, which tends to be more fragile
- Refresh waves more frequently than you might with non-colored hair, as colored hair tends to lose shape faster
- Have your stylist refresh the ombre every 8-12 weeks to keep the transition looking intentional rather than like grown-out color
- Use a purple or blue-toning conditioner on the lighter ends to prevent brassiness
- Consider a glossing treatment every 6 weeks to refresh color and add shine to both dark and light sections
Insider note: The more subtle your ombre, the easier it is to maintain and the more versatile it is for different occasions and styling.
16. Waves with Extensions for Added Length and Volume
Hair extensions—whether tape-in, clip-in, or sew-in—can dramatically change the impact of wavy hair by adding length, volume, or both. Long wavy hair is beautiful on its own, but extensions can maximize the effect and create styles that wouldn’t be possible with your natural hair alone. This is especially useful if your hair is naturally straight, fine, or doesn’t grow as quickly as you’d like.
How Extensions Enhance Long Wavy Styles
Extensions add multiple benefits to wavy hair: they increase overall length for a more dramatic wave pattern, they add volume at the crown and throughout, and they allow you to experiment with styles without committing to growing your hair out. Quality extensions blend seamlessly with your natural hair when done by a professional, and they multiply the impact of your wave styling because you’re working with more hair.
Working with Extensions for Waves
- Choose extensions in a shade that closely matches your natural hair or slightly lighter to blend seamlessly
- Wavy or textured extensions blend better with wavy hair than perfectly straight extensions would
- Avoid putting too much heat near the bonds or attachment points—use heat styling on the extended sections only
- Braiding or putting hair up in a ponytail helps protect extensions and can make them last longer between appointments
- Refresh extensions every 6-8 weeks for sew-in or tape-in types to maintain the look and keep them from slipping
- Clip-in extensions are lower commitment but require taking them out and putting them in daily, which can be tedious
Pro tip: Extensions work best when you already have some natural wave or texture—they’re much easier to style and blend if your hair naturally cooperates with the texture.
17. Waves with a Sleek Topknot
This style is a play on contrast—the top of your head is pulled back into a tight, sleek bun while the rest of your hair remains down and wavy. A sleek topknot creates the illusion of face-framing waves while keeping hair off the face, making it practical for hot weather or when you want an element of your long wavy hair off your neck. This style works beautifully for work settings or occasions where you want hair somewhat contained without it being fully up.
The Strategic Purpose of a Sleek Topknot with Waves
A full-down wavy style sometimes means your hair is constantly touching your face or shoulders. A sleek topknot solves that problem while maintaining the visual impact of waves. The contrast between the sleek, smooth bun and the textured waves below creates an intentional, styled look that reads as very put-together. This style is also practical because it keeps your hair off your face while allowing the length to move freely.
Creating a Sleek Topknot with Waves
- Create waves in the bottom half of your hair while the top is still down and unwaved, or braid the top section before waves to prevent frizz
- Gather the top section into a high ponytail at your crown
- Twist or braid the ponytail and wrap it around the base to form a bun, securing with bobby pins
- Smooth the bun down with a fine-tooth comb and finishing spray to keep it sleek
- Leave a few face-framing pieces down if you want softness around your features, or keep everything up for a sleeker look
- Use a texturizing spray on the wavy bottom section to ensure it doesn’t look flat against the sleek bun above
Worth knowing: The sleeker the bun, the more the contrast with wavy hair below. If you want a softer overall vibe, make the bun slightly messier or looser.
18. Waves with Decorative Accessories
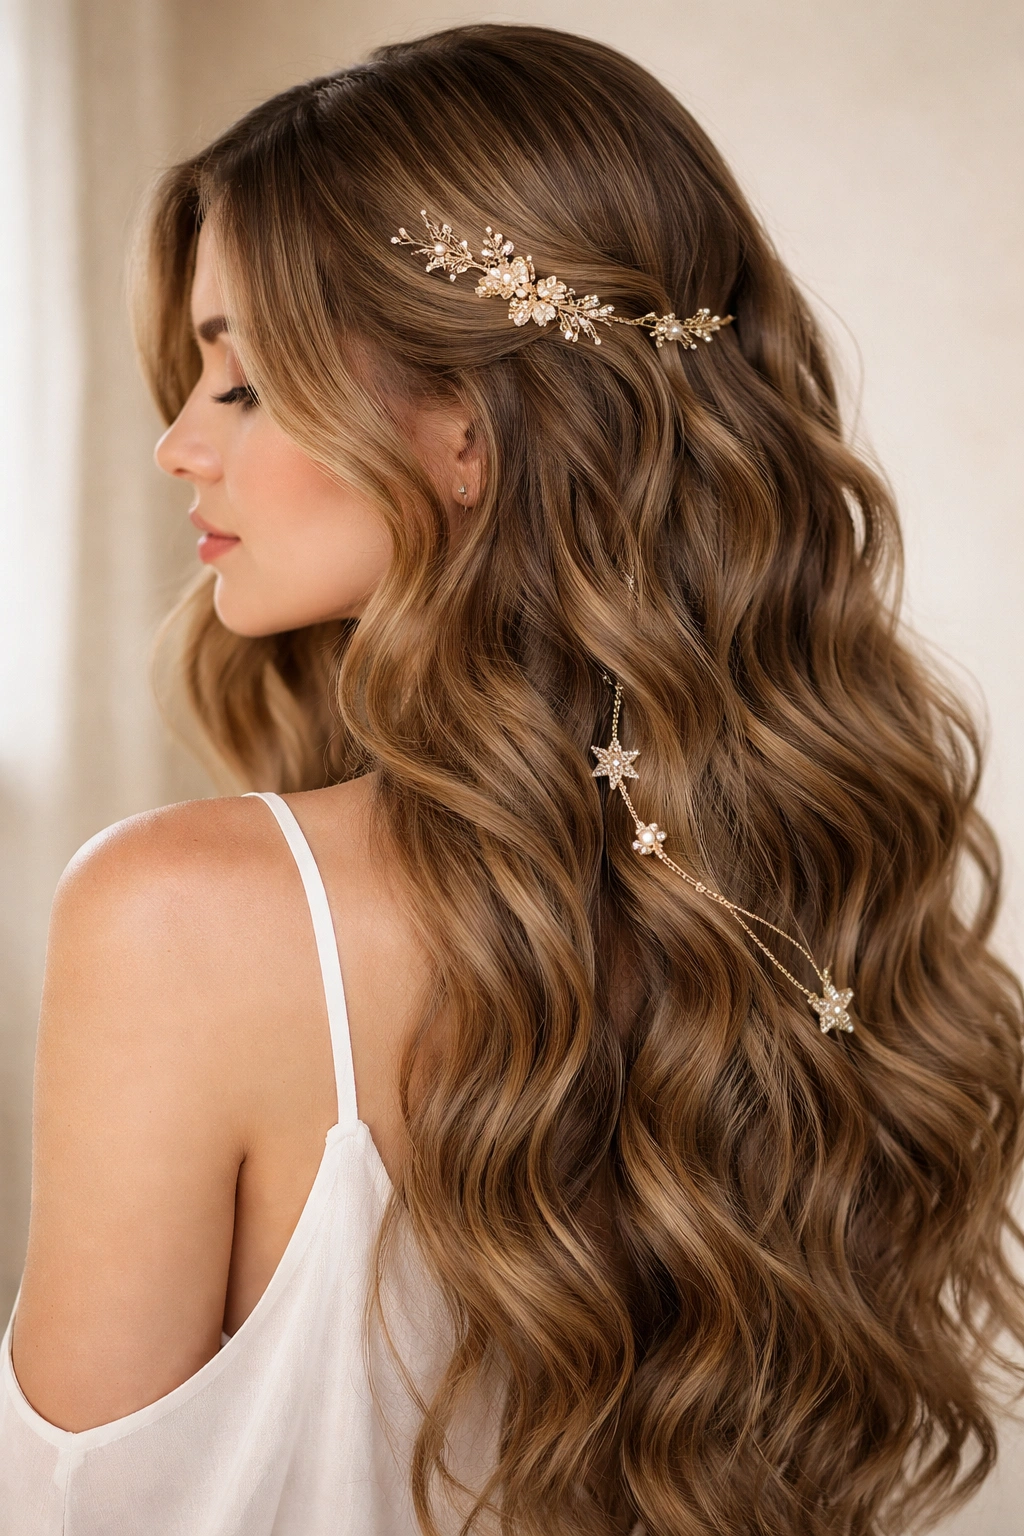
Adding pins, clips, cuffs, or bands to your long wavy hair elevates a simple wave style into something more intentional and fashion-forward. Decorative accessories work especially well with wavy hair because the texture gives them something to grip and integrate into, rather than looking like they’re simply sitting on top of smooth hair. This approach is perfect for when you want to dress up your waves without changing the haircut or style itself.
How Accessories Transform Wavy Styles
A simple wavy style can sometimes read as incomplete or not quite intentional enough—adding a beautiful accessory signals that you’ve put thought into your look. Decorative clips, cuffs, or hair pins catch light and draw attention to your waves, emphasizing the texture you’ve created. Accessories are also practical—they can hold back smaller sections of hair without requiring a full ponytail, which keeps the majority of your waves down and visible.
Using Accessories with Your Waves
- Claw clips work especially well with wavy hair, gripping texture naturally without slipping
- Place a clip at the back of your head to secure a small, loose section of hair without pulling everything back
- Try multiple smaller clips or pins in a line rather than one large clip—it looks more intentional and modern
- Metal hair cuffs can be looped through braided sections for an edgy touch
- Pearl or jeweled clips add elegance and work well for dressier occasions
- Place accessories slightly off-center rather than perfectly centered—it reads as more intentional
Insider note: The placement of your accessory matters as much as the accessory itself. Placing it at the base of your skull creates a different effect than placing it toward the back of your head or to one side.
19. Waves with a Braided Crown
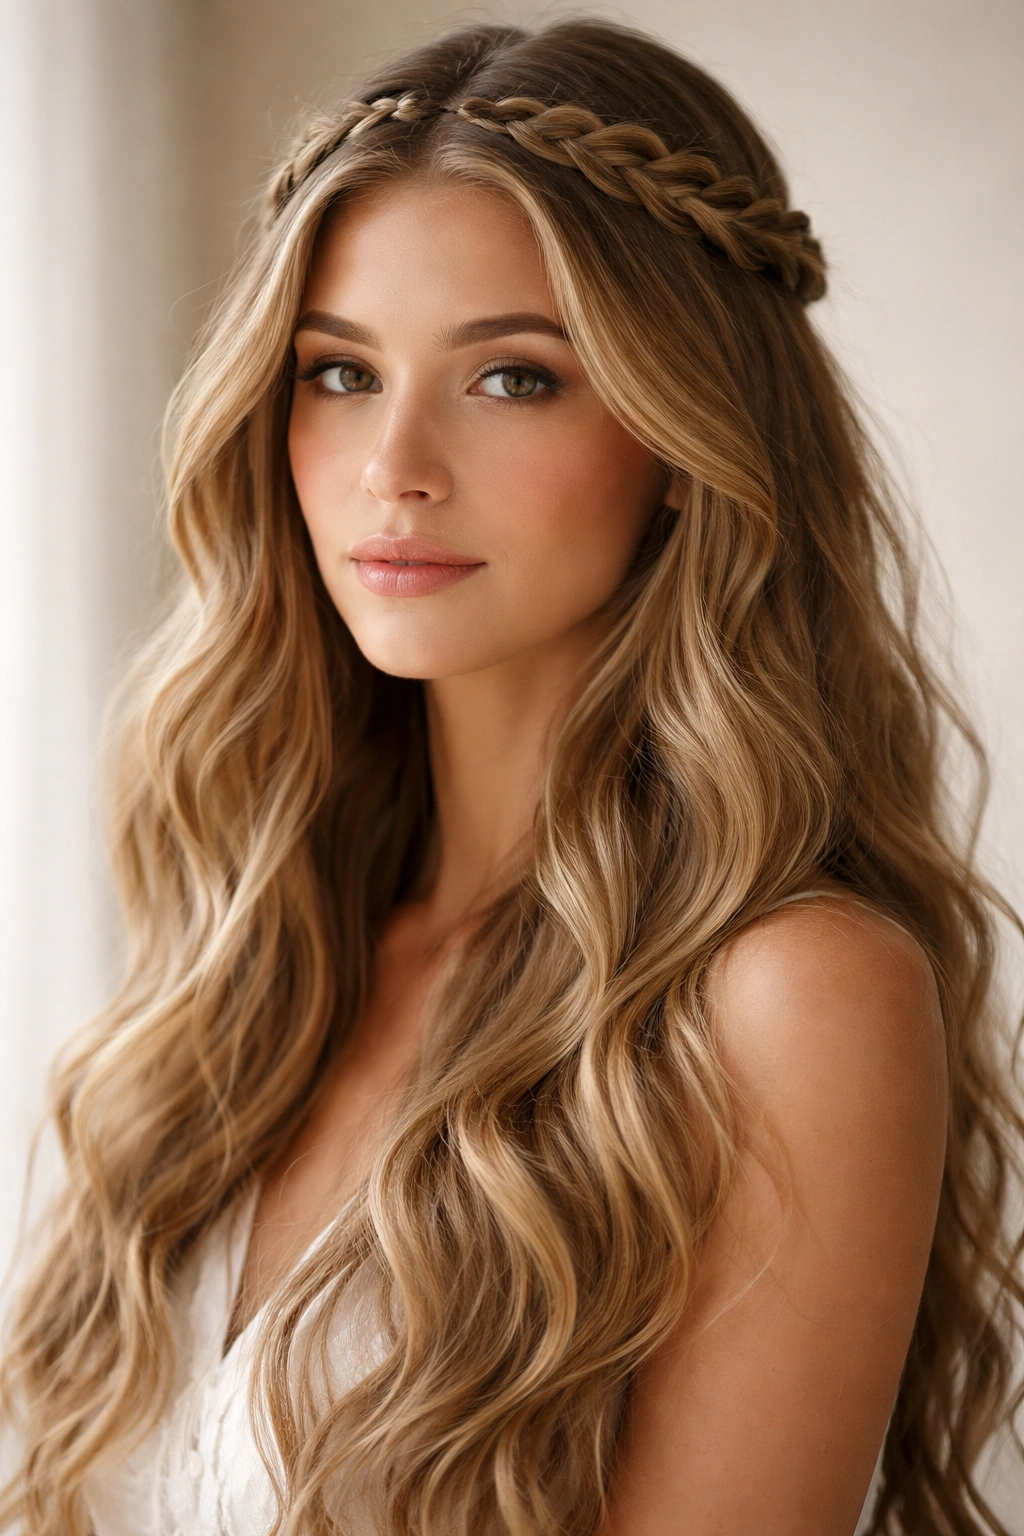
A braided crown—a braid or series of braids that runs across the crown of your head like a halo—is an elegant, romantic style that works beautifully with long wavy hair. The braids frame your face and pull back a small section of hair while leaving the rest down and wavy. This style reads as both bohemian and intentional, and it’s practical for keeping hair out of your face while maintaining the visual impact of your length.
The Romantic Impact of a Braided Crown
A braided crown has been popular across centuries and cultures because it’s genuinely flattering and romantic. Combined with long waves, it creates a style that reads as special and intentionally styled without being formal or overdone. The braid creates a visual line across the crown that balances facial features, and leaving the rest of your hair down in waves maintains the sense of freedom and movement.
Creating a Braided Crown with Waves
- Create waves throughout your hair first, then let them cool completely
- Begin your braid at one temple, taking a small section of hair about an inch wide
- Create a Dutch or French braid (depending on the look you want) from one temple toward the opposite side of your head
- The braid should sit on top of your head, creating a crown-like effect
- End the braid at the opposite temple and secure the end with a small elastic or bobby pins
- Gently tug and loosen the braid slightly for a more relaxed, romantic look—too-tight braids can look harsh
- Let the rest of your hair flow down in waves below the braid
Pro tip: A braided crown looks especially beautiful with a side part rather than a center part. The asymmetry is more interesting and frames the face better.
20. Waves with Soft Scarf Wrap
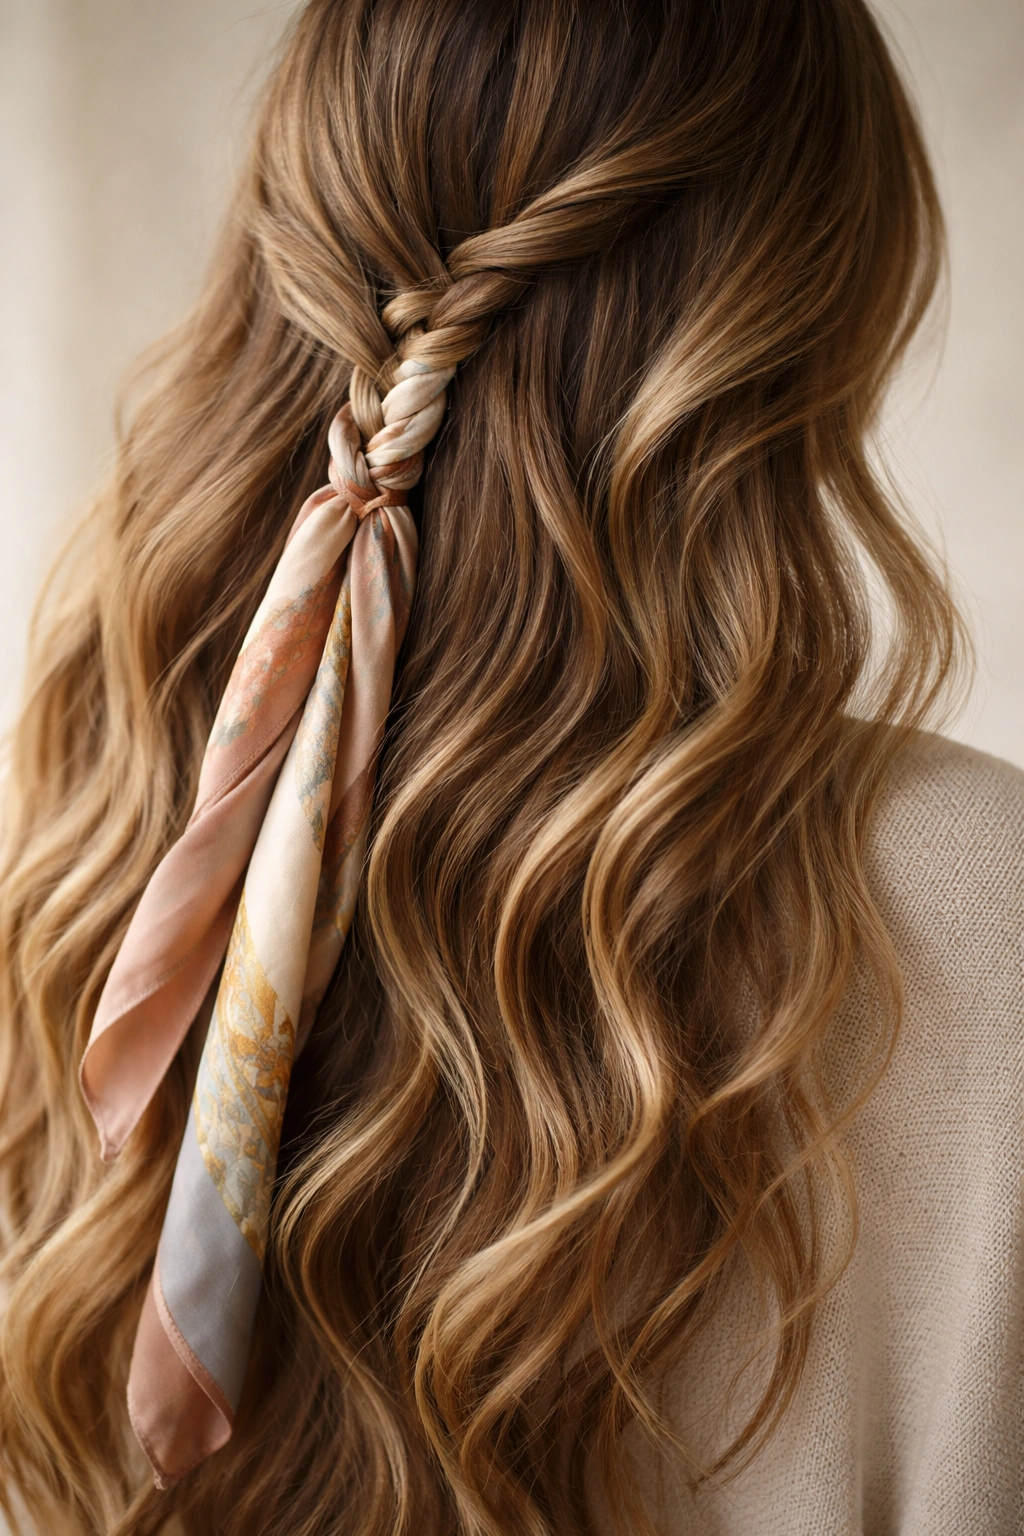
Using a soft scarf or fabric wrap integrated into long wavy hair is a styling technique that adds elegance and texture while also serving a practical purpose—protecting your hair while adding a fashion element. Scarves can be woven through braids, wrapped around the base of a ponytail, or even integrated directly into sections of your waves. This technique has been used for centuries and never really goes out of style.
The Dual Purpose of Scarves in Hair
Scarves serve both a practical and aesthetic purpose in your hair. Practically, they protect your waves from environmental damage and can help keep your style intact longer. Aesthetically, they add color, pattern, and texture that elevate a simple wavy style. Scarves are especially useful for protecting your hair while sleeping—wrapping your waves in a soft scarf keeps them from rubbing against rough pillowcases that create frizz.
Incorporating Scarves into Wavy Hair Styles
- Choose a soft scarf in a silk, satin, or similar fabric that won’t create frizz (avoid cotton)
- Weave the scarf through a braid for an integrated, intentional look
- Wrap the scarf around the base of a ponytail to hide the elastic and add visual interest
- Tie a scarf loosely around your head at night over your waves to protect them while you sleep
- Use a scarf as a hairband by tying it around your head with your waves flowing below
- Choose scarves in colors or patterns that complement your hair color and skin tone
Worth knowing: The way you tie or wrap a scarf makes an enormous difference in how polished the final look is. Spend a minute arranging it rather than just tying it quickly.
Final Thoughts
Long wavy hairstyles offer genuinely impressive versatility because they work in so many contexts and suit so many different people. Whether you’re embracing your natural waves or creating them with heat tools, the fundamental truth remains: waves are forgiving, flattering, and endlessly customizable. The styles in this guide range from effortless and undone to intentional and polished, which means you can adjust your approach depending on the day, the occasion, or your mood.
The practical reality is that long wavy hair doesn’t require the precision of other hairstyles. You don’t need every wave to be perfect, and in fact, the styles that look best often have an element of imperfection. Waves catch light and move independently, which means even if one section doesn’t cooperate, the overall effect is usually still beautiful. This makes waves especially appealing for people who want a style that looks intentional without requiring flawless execution every single time.
Experiment freely with different wave patterns, styling techniques, and accessories. Try waves at different tightness levels to see what flatters your face shape best. Use different tools—a curling iron for tighter waves, a wand for looser ones, a flat iron for an alternative technique. Mix and match the styles in this guide. Add layers to a simple wave, incorporate braids, use accessories, experiment with parting. The beauty of long wavy hair is that your options are nearly endless, and your hair will look beautiful no matter which direction you choose.