Curly hair is one of those things that can feel like both a gift and a puzzle at the same time. The volume, the texture, the way it takes on a completely different personality in humidity versus dry air — it’s unpredictable in the most beautiful way. But that unpredictability is also why so many curly-haired people default to the same ponytail or wash-and-go day after day, unsure which styles will actually work with their curl pattern and length.
Here’s what most curly hair guides miss: the right hairstyle isn’t just about whether you have long, medium, or short hair. It’s about curl density, shrinkage factor, and how your curls behave when freshly washed versus a few days old. A hairstyle that looks stunning on a loose 2C wave can completely fall flat on a tightly coiled 4B. That’s why this collection covers real, wearable styles across every hair length — and explains exactly how and why each one works for specific curl types.
Whether your curls are loose and beachy, tightly coiled, or somewhere in the middle of the curl spectrum, there’s a style here that’ll make your texture the main event. And the best part? Many of these styles actually get better as your hair grows or shrinks — because curly hair is just built differently.
1. The Curly Pixie Cut
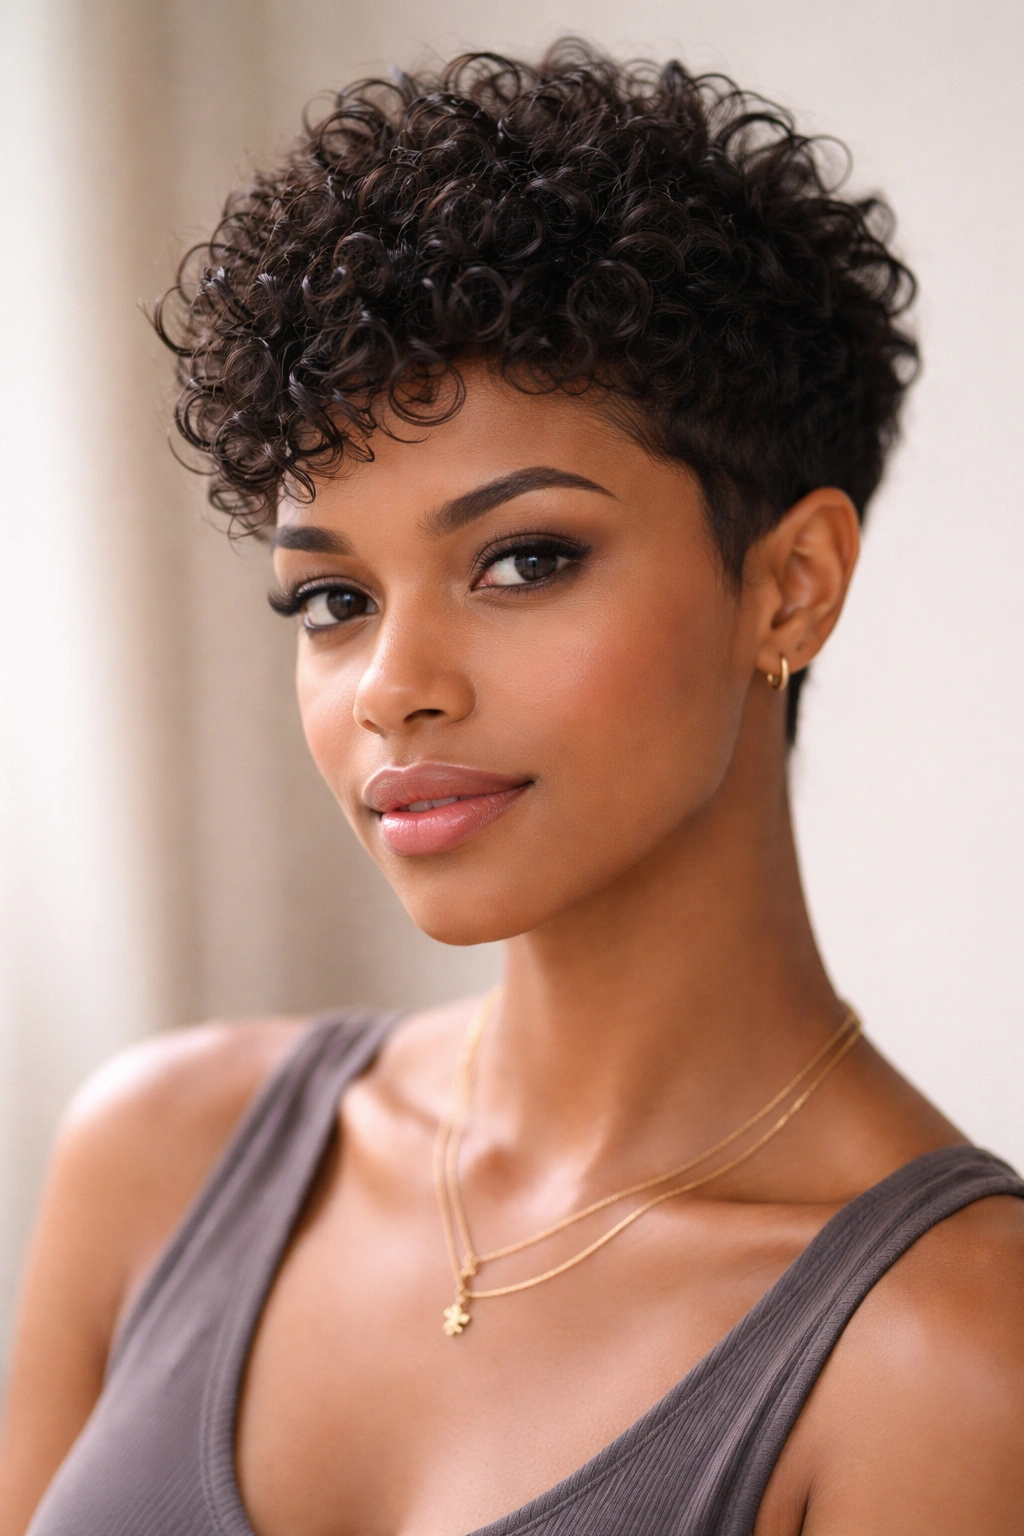
Short curls combined with a pixie cut is one of the boldest, most flattering combinations in the curly hair playbook. The curly pixie works by letting your natural texture do the structural work — no heat styling, no blowouts required. When your natural curl pattern is front and center, even a minimal cut carries maximum impact.
Why This Cut Works for Tight and Loose Curls Alike
The beauty of a curly pixie is that it plays well across curl types, but it’s particularly striking on 3A–4C patterns. Your stylist should cut the hair dry whenever possible — curly hair behaves completely differently when wet, and a wet cut can leave you with unexpected surprises once the shrinkage sets in. Ask for longer length at the crown (at least 2–3 inches) to preserve volume and curl definition, with tapered sides to create a clean, intentional silhouette.
Each curl needs room to spring without overwhelming the face. A skilled curly hair specialist trained in the Ouidad or DevaCut method will cut individual curls in their natural position rather than pulling them straight.
What You Need to Know Before Getting This Cut
- Shrinkage matters: If your curls shrink 50% or more, ask your stylist to leave extra length — what looks like a 2-inch curl wet will dry much shorter
- Face shape consideration: The curly pixie is especially flattering on oval, heart, and round face shapes
- Product choice: A light curl cream or mousse keeps the shape defined without weighing down short curls
- Maintenance: Expect a trim every 6–8 weeks to keep the shape clean and prevent the cut from growing into an undefined form
- Styling time: Once you’ve nailed your product routine, refreshing this style takes 5–10 minutes daily
Worth knowing: Ask your stylist to cut the nape of your neck slightly shorter — this prevents the infamous “mushroom effect” as the cut grows out.
2. The Wash-and-Go for Short Curls
The wash-and-go is less a hairstyle and more a philosophy — and for short curly hair, it might be the most liberating styling approach out there. The premise: cleanse, condition, add product, and let your natural curl pattern take over. No manipulation, no sectioning, no overthinking. It’s the style that proves your texture is the style.
The Right Product Layering Technique
Short curls don’t need as much product as longer hair, but they do need the right layering order. Start with a leave-in conditioner applied on soaking wet hair — this step is non-negotiable. Follow with a curl-defining gel or custard raked through in sections. The gel creates a cast around each curl cluster as it dries, which you “scrunch out” once the hair is fully dry to reveal defined, frizz-free curls without crunch.
One thing most people get wrong: applying product to hair that’s too dry. If your hair feels like it’s soaking up product rather than distributing it, it’s too dry. Re-wet with a spray bottle before continuing.
Best Curl Types for the Short Wash-and-Go
- 3A and 3B curls: These curl types define most cleanly with this method — expect spiral definition and bounce
- 3C curls: Use a stronger hold gel to keep coils elongated and reduce frizz at the roots
- 4A and 4B: The wash-and-go is absolutely doable, but protective styling products with extra slip help prevent tangles
- Fine or low-density curls: Skip the heavy creams and reach for a lightweight curl mousse that won’t flatten your volume
3. The Tapered Natural
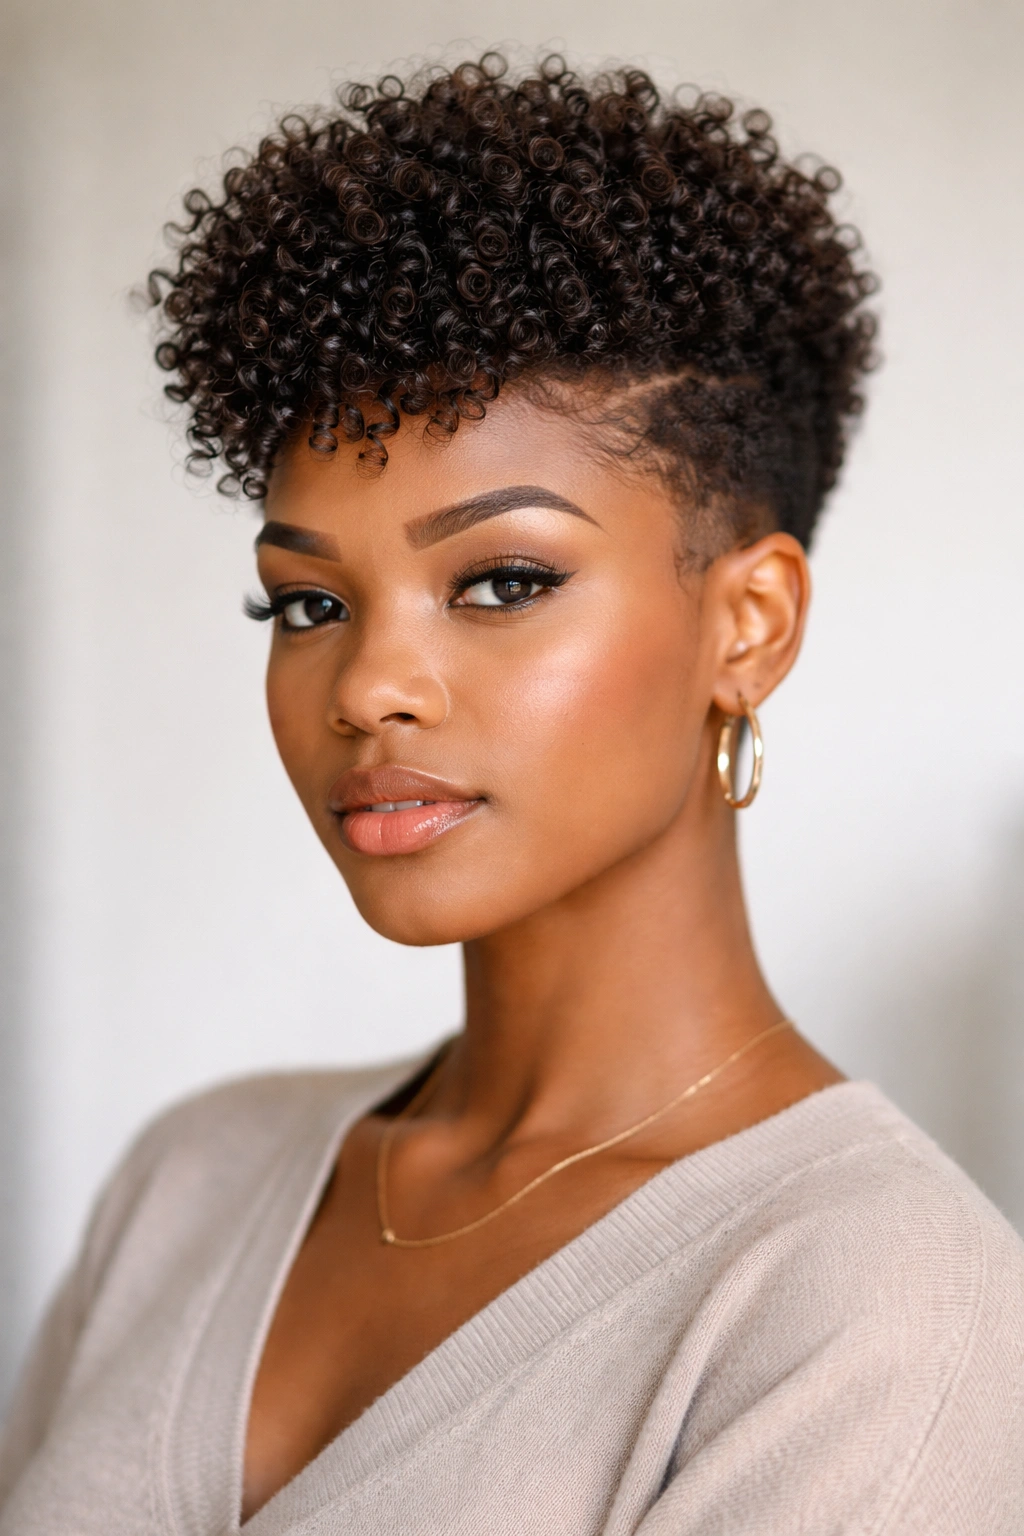
The tapered natural (sometimes called a tapered afro) is one of the most architectural curly hairstyles available for shorter lengths. The sides and back are cut close — sometimes with a fade, sometimes just noticeably shorter than the top — while the crown is left full and free to grow into its natural shape. The contrast between the close-cut sides and the voluminous crown is what gives this style its striking, sculptural quality.
Why the Taper Works So Well with Natural Texture
A taper amplifies curl pattern visibility. Because the sides are shorter, the curl definition at the crown becomes the focal point — and your natural texture gets to shine without competing with length at the sides. This structure also makes the style more weather-resistant than an even all-over length: the tight sides are less affected by humidity, and the styled top can be shaped and refreshed each day.
This is also a genuinely low-shrinkage-problem style. Since the top is intentionally grown out and the sides intentionally kept short, shrinkage affects the appearance far less dramatically than it would with uniform length.
Styling the Tapered Natural Day-to-Day
- Apply a small amount of edge control or curl cream to the sides each morning to keep them smooth and polished
- Use a twist-out or defined wash-and-go on the crown for maximum definition
- A pick or wide-tooth Afro comb lifts the crown into shape without disturbing the curl pattern
- Refresh the style on days 2 and 3 with a water-based leave-in spray followed by a light gel
Pro tip: Ask your barber or stylist to shadow fade the sides rather than creating a hard line — the soft gradient blends more naturally into the curl pattern at the temples.
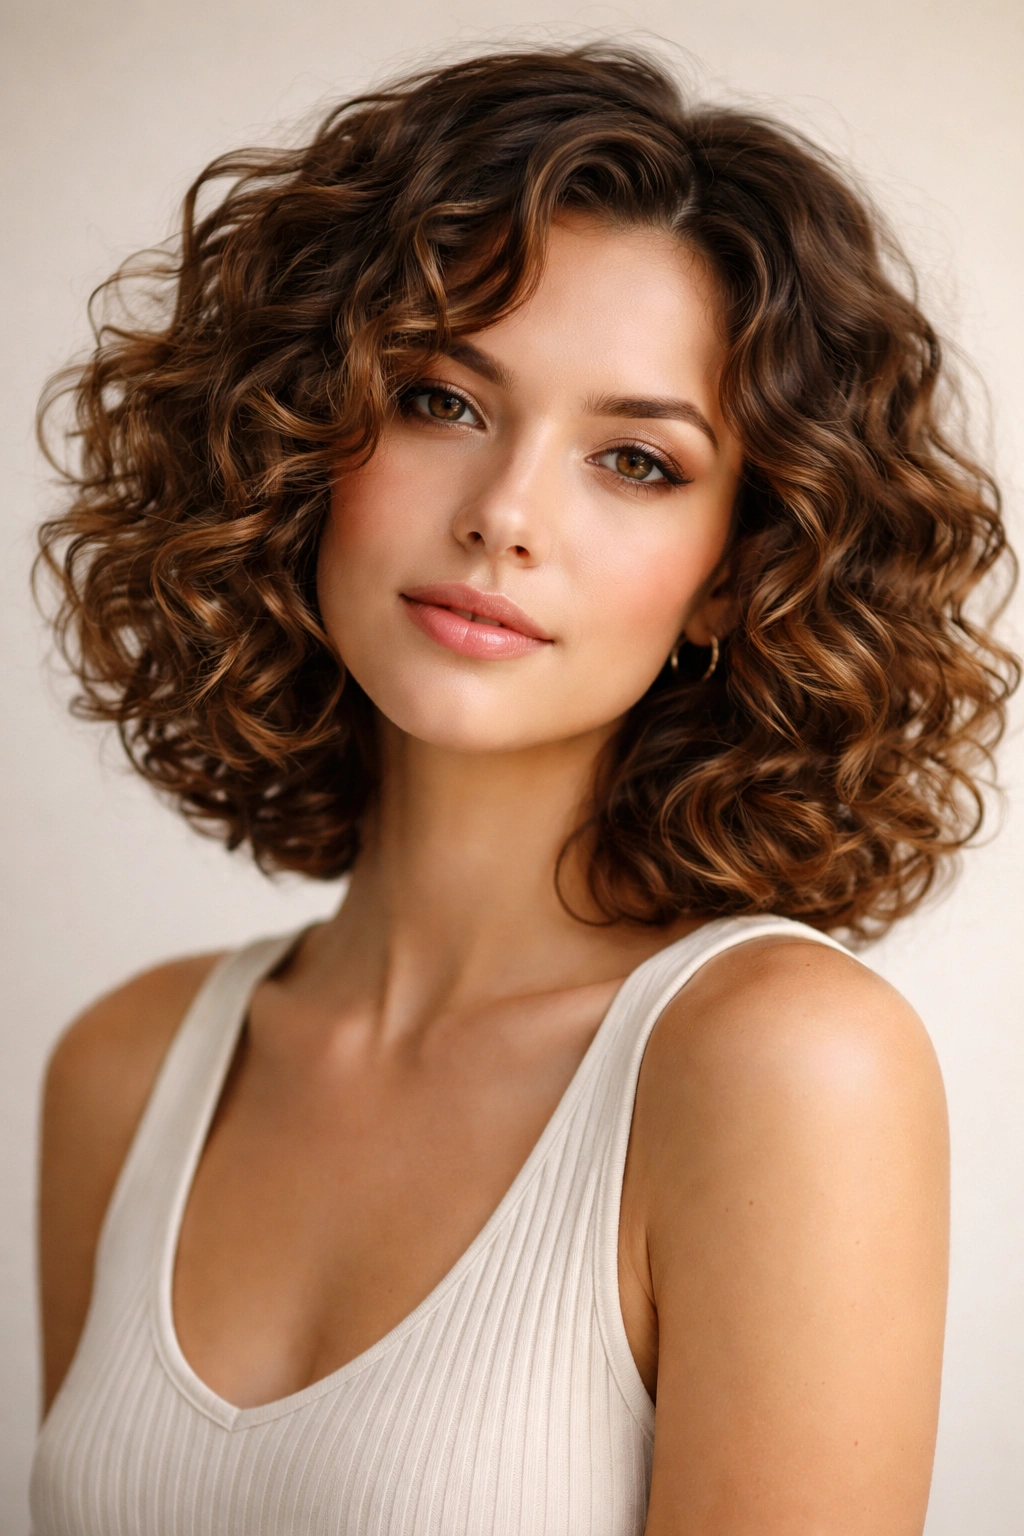
4. The Curly Bob
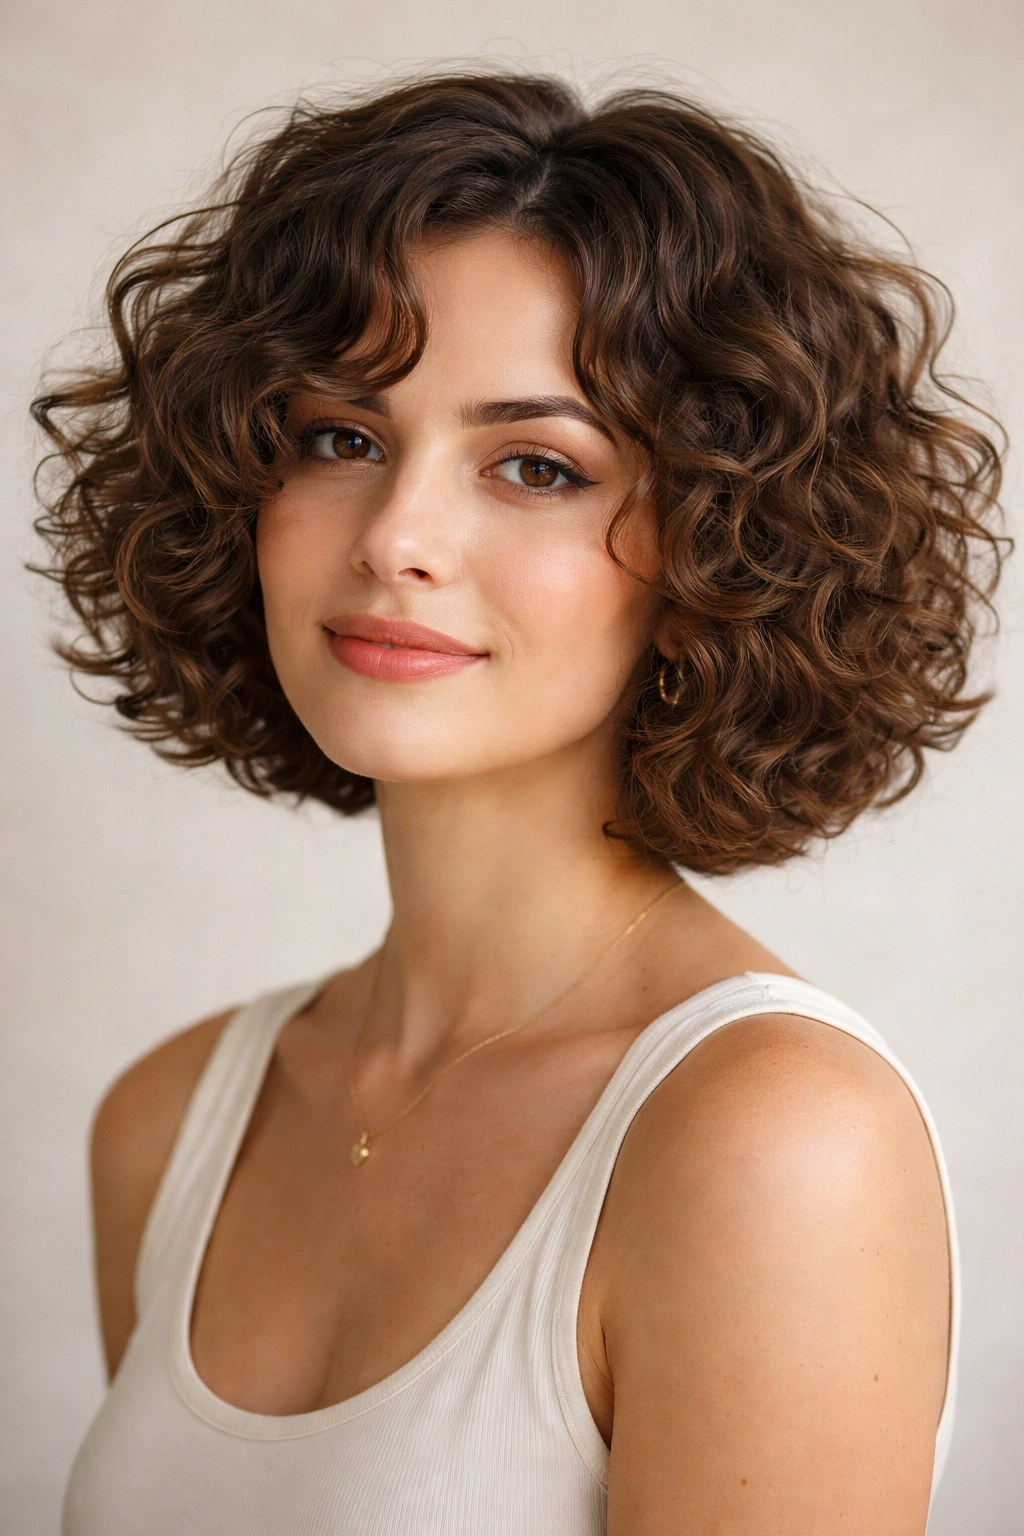
The curly bob deserves more credit than it gets. Cut at jaw length or slightly below, the bob gives curly hair a defined shape that a shorter pixie can’t quite achieve and that longer styles sometimes lack. It frames the face, adds structure without heat, and takes full advantage of the natural volume curly hair produces.
What Makes the Curly Bob Different from a Straight Hair Bob
A curly bob is cut longer in the back and shorter at the front — the opposite of a straight bob. This is called a reverse cut or curly-specific layering. The reason: curly hair at the nape of the neck shrinks significantly more than hair at the front of the face, so cutting it longer compensates for that shrinkage and keeps the overall shape visually even.
If you bring a straight bob cut to a curly hair specialist, a good stylist will immediately start mapping out that reverse cut structure. If they don’t mention it, ask — it’s the difference between a bob that hangs evenly and one that’s inexplicably shorter in the back.
Styling Tips for Maximum Bob Shape
- For 2C–3B curls: Diffuse the hair upside down to build volume at the root before flipping upright to define the ends
- For 3C–4A curls: A defined twist-out gives the bob an even, rounded silhouette
- Avoid heavy creams that pull the curl down — this shortens your bob visually
- A satin-lined headband transforms a refreshed day-2 curly bob into a put-together style in seconds
- Trim every 8 weeks to maintain the shape as the back grows faster than the front
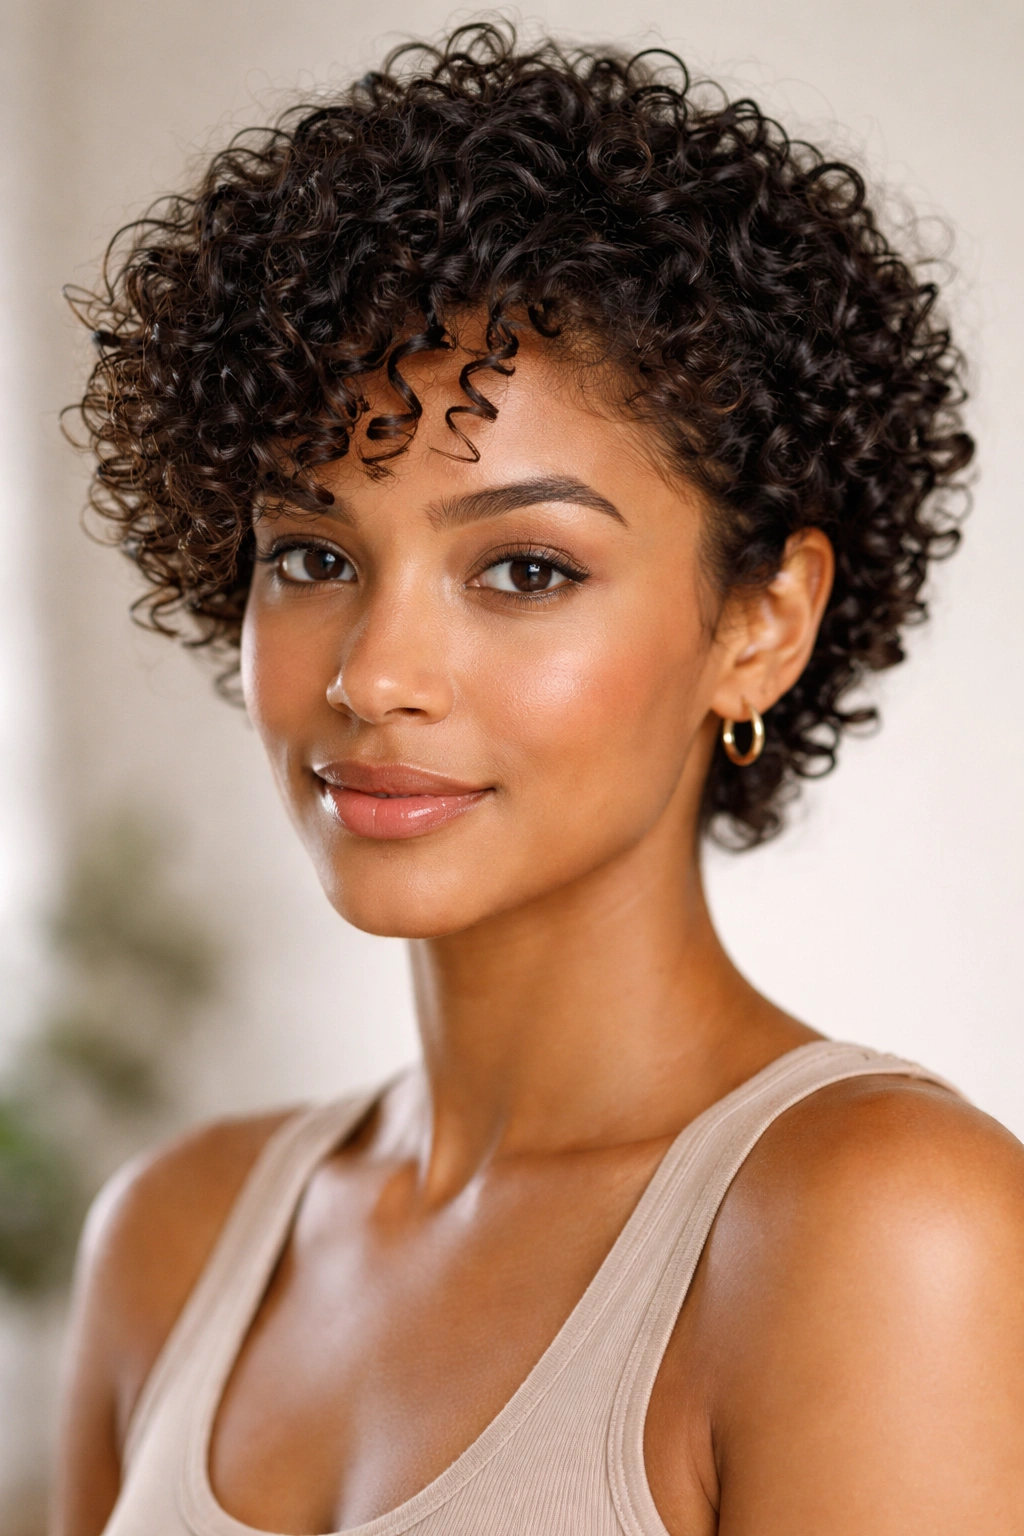
5. The Defined Twist-Out on Short Natural Hair
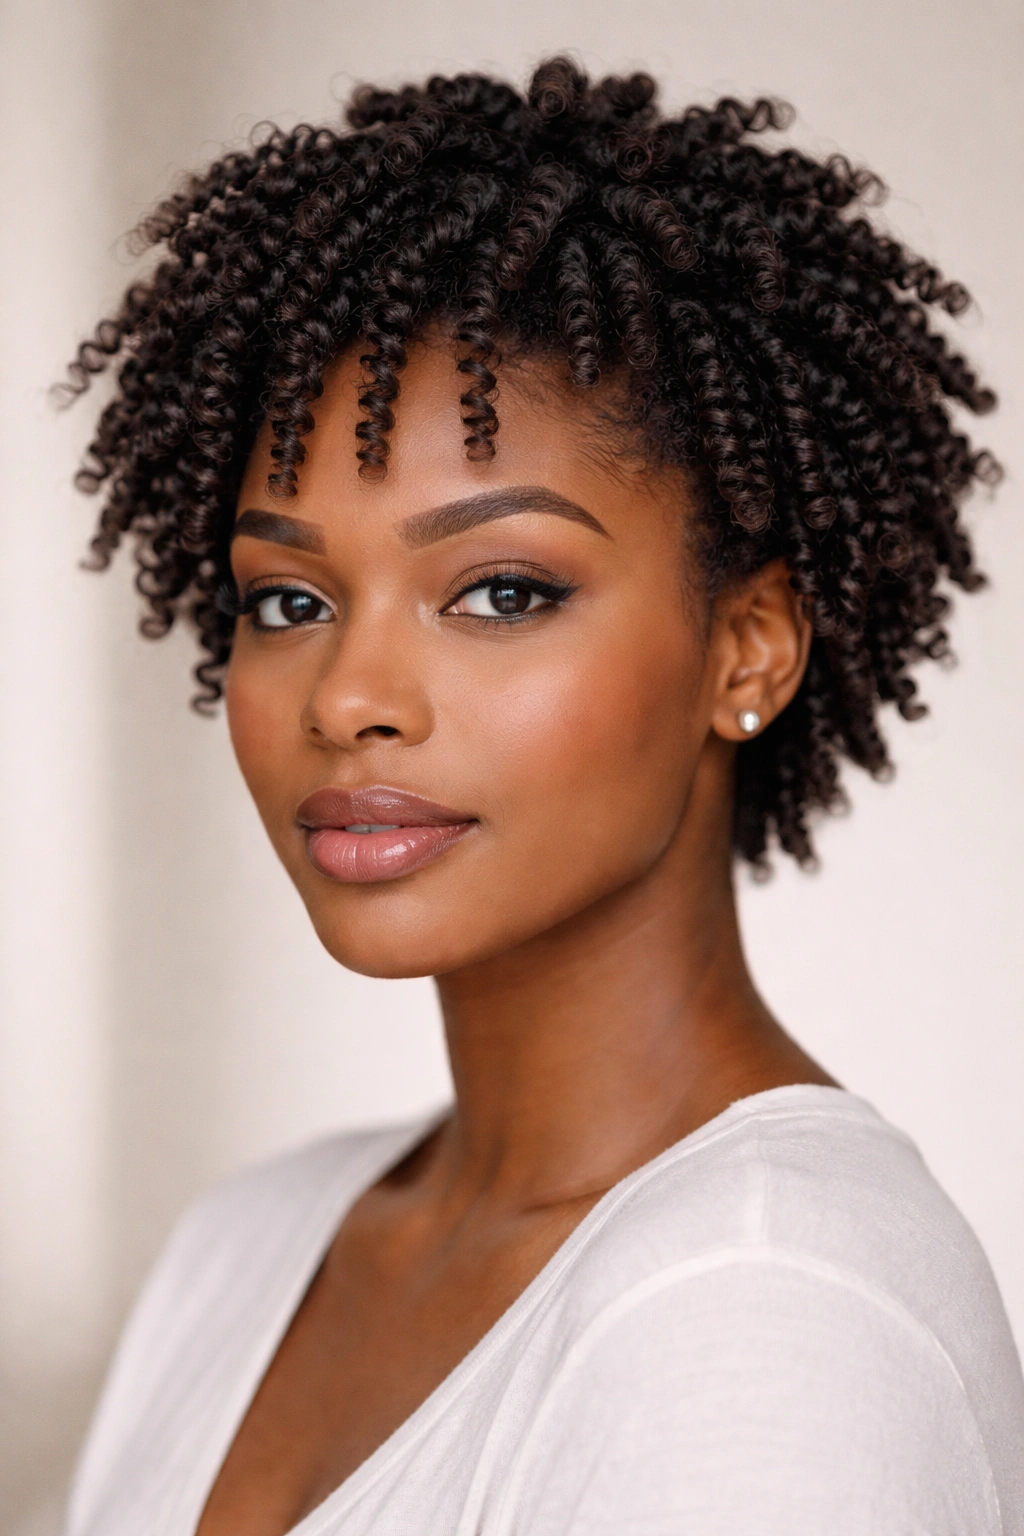
The twist-out is a foundational natural hair technique — and on short hair, it creates defined, stretched coils with significantly less frizz than air-drying alone. The process involves sectioning damp hair into two-strand twists, letting them set overnight or under a dryer, and then carefully unraveling each twist to reveal elongated, defined curl clusters.
How to Get the Cleanest Twist-Out on Short Hair
Shorter hair means less weight pulling the style down, which is both a benefit and a challenge. Benefits: your twist-out will have incredible lift and volume. The challenge: shorter twists are easier to accidentally unravel mid-day.
Use a butter or cream with a medium-hold finish — not too heavy, not too light. Twist each section firmly and in the same direction throughout. If some twists go clockwise and others counterclockwise, your unraveled curls will coil in different directions and the final style will look uneven. Consistency is everything here.
Section Sizes and What They Change
- Smaller twists (pencil-width): Create tighter, more defined ringlets with more volume overall
- Larger twists (finger-width): Produce softer, looser spirals with more elongation and less shrinkage
- Even sections throughout: Ensure the final style looks uniform rather than patchy in spots
- Set time: 8 hours minimum for full definition; overnight always produces a better result than just a few hours
6. The Curly Lob
The curly lob lives in the sweet spot between a traditional bob and shoulder-length hair — typically falling between the chin and collarbone. It’s one of the most universally flattering lengths for curly hair because it’s long enough for versatile styling but short enough that the curls retain bounce and shape without getting weighed down.
Why Lob Length Is the Golden Zone for Curls
Curly hair has a natural weight distribution that changes dramatically as length increases. At lob length, most curl types from 2B to 4A sit in their strongest structural zone — the curls have enough weight to elongate slightly (which reduces frizz) without so much weight that they stretch out and lose definition. Many curly hair specialists consider jaw-to-collarbone length the ideal range for curl performance.
The lob also offers something longer styles don’t: the ability to wear your curls down without the style feeling overwhelming or high-maintenance. The volume is proportional to the face and frame, which creates a natural, balanced look.
Styling Versatility at Lob Length
- Pull the front sections back into two mini twists for a half-up style that showcases the curl texture
- A single large clip at the back creates a sophisticated half-up look in under 60 seconds
- Lob length is ideal for diffusing — it dries faster than long curly hair but retains more shape than short hair when diffused
- Curtain bangs (coming up in item 8) pair particularly well with the curly lob
7. The Half-Up Half-Down Curly Style
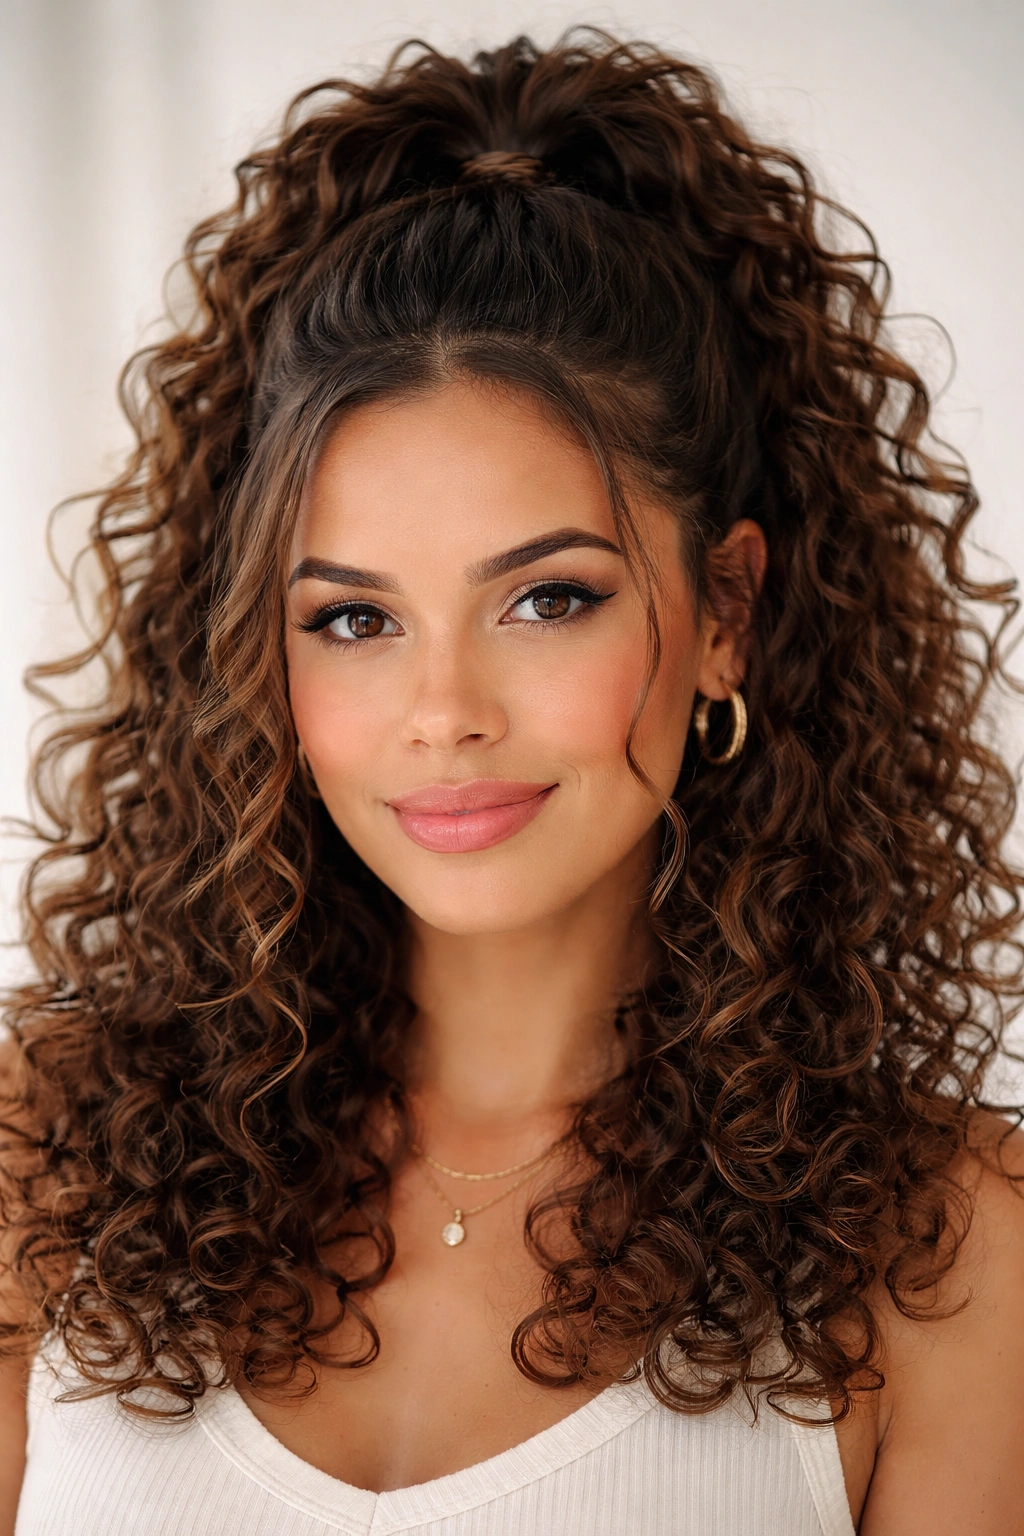
Few styles are as endlessly versatile as the half-up half-down on curly hair. It takes a full wash-and-go and gives it a polished, intentional frame — pulling the top section back while letting the rest of the curls fall freely. It works on every hair length from lob to long, and it can go from casual to dressed-up with one change of clip or hair accessory.
Getting the Proportions Right
The most common mistake with this style is pulling back too much hair. A curly half-up looks best when the parted section runs roughly from temple to temple — not all the way back to the crown. Taking too much removes the volume from the sides of the face and makes the style look more severe than intended.
The front section you pull back should always be secured at the top of the crown, not the middle. This creates an arch of volume rather than a flat, pulled-back appearance. Use a seamless hair tie, a large claw clip, or a silk scrunchie — anything that won’t dent or flatten the curls where they meet the elastic.
Variations That Change the Whole Look
- Twisted half-up: Twist the front two sections before pinning them back for an extra sculptural detail
- Puff half-up: Tease the pulled-back section slightly for a voluminous puff effect at the crown
- Braided crown: Braid the top sections before securing for a bohemian, textured result
- Accessorized: A large pearl barrette or decorative claw clip transforms this into an elevated evening style instantly
Pro tip: Spritz the front sections lightly with water and scrunch in a bit of curl refresher before pulling them back — refreshed curls hold the style much better than dry, day-old ones.
8. Curly Curtain Bangs
Curtain bangs — those face-framing, center-parted, slightly wispy front pieces — have become a beloved choice for curly and wavy hair, and for good reason. On textured hair, curtain bangs don’t need to be cut as precisely as they do on straight hair. The natural curl creates softness and movement that blends beautifully into the rest of the style without looking choppy or blunt.
Choosing the Right Bang Length for Your Curl Type
This is where curl type matters more than almost anywhere else. Looser waves (2A–2C) can handle shorter curtain bangs around cheekbone level because their curl is gentle and won’t cause dramatic shrinkage. Tighter curls (3A–4C) need their curtain bangs left significantly longer — what appears to be eyebrow-length when wet can spring up to forehead height once dry.
Always have curtain bangs cut on dry hair if you have tight curls. Ask your stylist to cut them slightly longer than you think you want — you can always trim more, but you can’t undo over-zealous scissor work.
Daily Maintenance for Curly Curtain Bangs
- Separate them daily: Gently pull the bangs to either side of the part each morning to maintain the curtain shape
- Product choice: A light hold curl cream or mousse defines the bangs without weighing them into your eyes
- Shrinkage management: Stretch the bangs gently with a diffuser on low heat to control how much they spring up
- Refresh method: A small amount of water on your fingertips, scrunched into the bangs, revives curl definition on days 2 and 3
9. The Curly Messy Bun
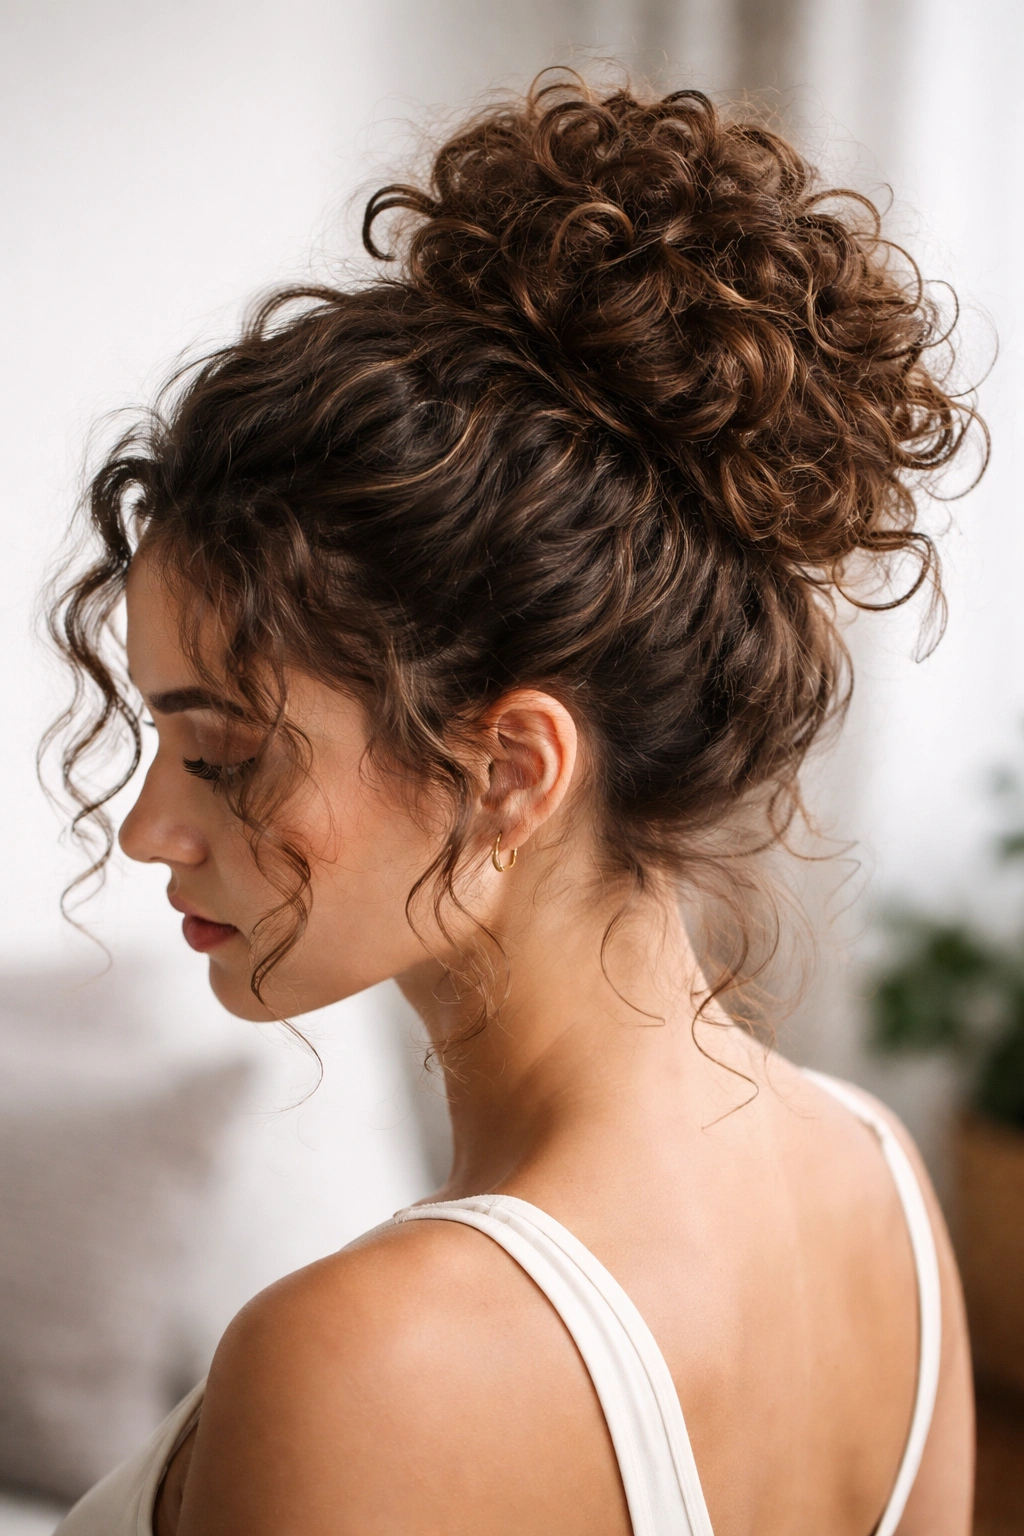
The messy bun on curly hair is a masterclass in effortless style — but there’s actually a method behind the “messy” part. Done right, it preserves curl integrity, creates volume at the crown, and keeps flyaways minimal without relying on heavy products. Done wrong, it’s just… frizzy.
How to Build Volume Without a Flat Bun
The cardinal sin of the curly messy bun is pulling all the hair too tightly. Tight equals flat, and flat equals no volume. Instead, gather the hair loosely — almost like you’re piling it rather than pulling it — at the top of the head. Secure with a thick, seamless elastic or a large claw clip rather than a thin hair tie.
Once secured, pull individual curl clusters gently from the bun itself to create volume around the base. Don’t brush or comb — just separate with your fingers. This is what creates that full, intentional-messy look rather than the accidentally-unkempt version.
When This Style Works Best
- Medium hair: The bun sits lower and tighter, giving a sleek silhouette with curls peeking out at the base
- Long hair: More length means more material to create a dramatically voluminous bun — pull out more pieces for that oversized look
- Day 2 or 3 hair: A curly messy bun is actually better on older hair — the natural oils and slightly looser curl definition give it more texture and grip
Worth knowing: A few strands pulled out at the temples and tousled slightly with your fingertips make this style look intentional rather than rushed.
10. The Pineapple Updo
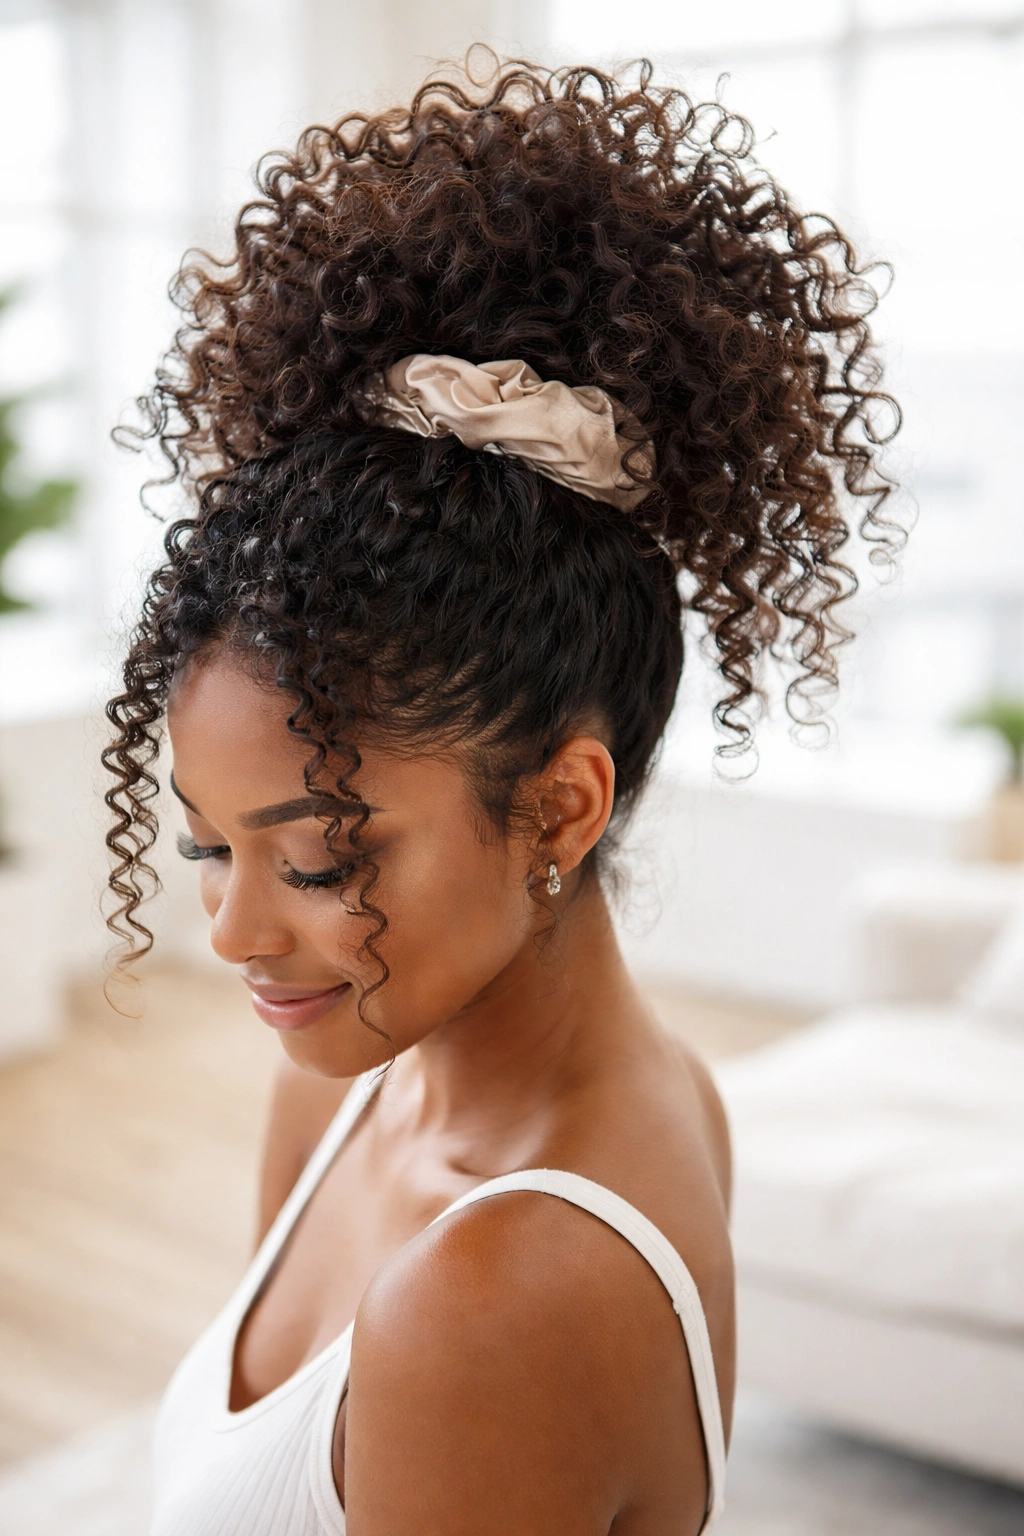
The pineapple isn’t just a nighttime hair-protection technique — though it excels at that too. As a daytime style, the pineapple updo (a high, loose gathering of curls at the very top of the head) is one of the fastest ways to take a wash-and-go and give it a polished, editorial quality.
Why the Height Is the Whole Point
The pineapple works because height equals volume equals apparent length. By gathering your curls at the very highest point of your head, you let them cascade forward and downward in a way that shows off their full stretch — which matters especially for those dealing with significant shrinkage. A pineapple secured at mid-crown instead of the very top will flatten and bunch rather than cascade.
Use a satin scrunchie or a large, loose elastic. The goal is to secure the hair with just enough tension to hold it up — not enough to pull the roots or disturb the curl pattern at the nape and sides.
Pineapple Style Variations Worth Trying
- The half-pineapple: Gather only the top two-thirds of the hair for a look that shows off the nape and sides
- Two-pineapple pigtails: Two high, loose pineapples side by side for a playful, retro-inspired look
- Pineapple with a headband: Slide a thick headband just behind the hairline for a polished, intentional finish
- The low pineapple: Gather curls at the nape for a lower ponytail effect that keeps volume at the back
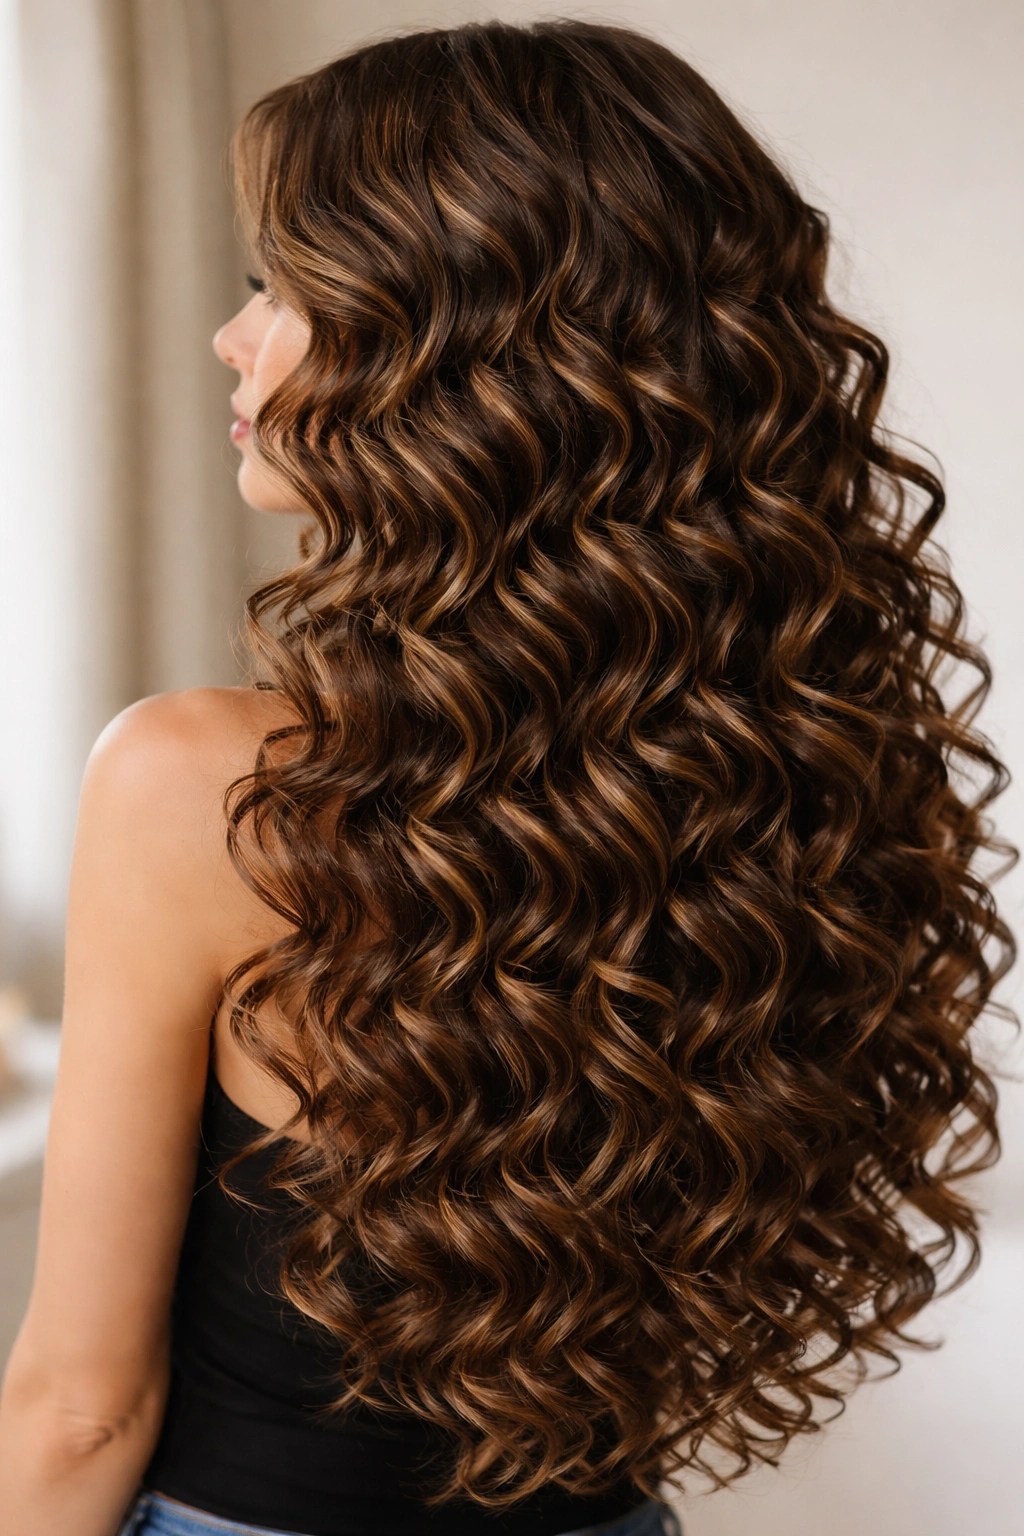
11. Big Bouncy Curls with a Center Part
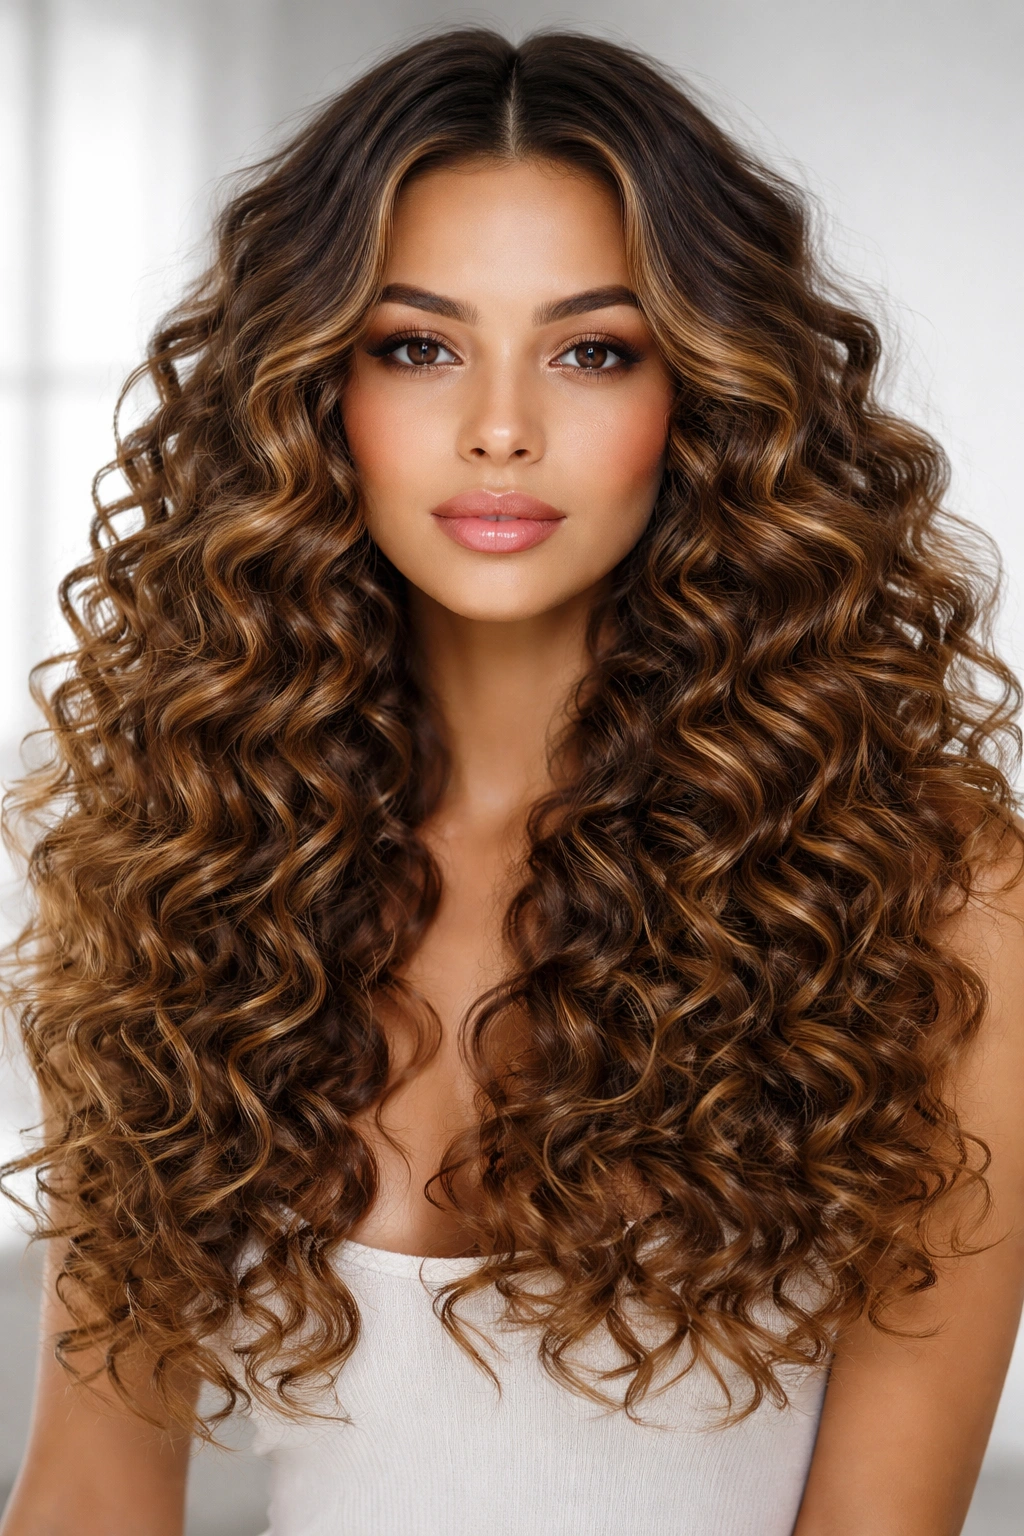
Long curly hair with a clean center part is one of the most iconic curly hairstyles — 70s inspiration meets modern curl care. The center part creates symmetry and gives each side of the curl pattern equal visual weight. Combined with well-moisturized, defined curls, the result is a striking, confident look that works equally well on 2C waves and 3C coils.
How to Get the Most Volume and Bounce
Volume in long curly hair starts at the roots, not the ends. The most effective technique for root volume is diffusing upside down — flip your head forward and scrunch sections upward with the diffuser bowl, lifting the roots away from the scalp. Once most of the moisture is gone, flip upright and finish diffusing gently. This creates volume that holds all day rather than collapsing within an hour.
Product placement matters too. Apply your leave-in and curl gel from mid-length to ends first, then work any excess product upward into the roots. This concentrates definition where it’s most visible while still moisturizing the roots.
Making Long Curls Last Through the Day
- The LOC or LCO method: Layering a liquid, oil, and cream in sequence locks in moisture for longer-lasting definition
- Plop your curls: Wrap freshly washed, product-applied hair in a microfiber towel or cotton t-shirt for 20–30 minutes to reduce frizz before diffusing
- Avoid touching your hair while it dries: Every contact with curling hair before it’s fully dry introduces frizz
- Silk pillowcase: Reduces friction overnight and extends the life of your style into the next day
12. The Curly Shag Haircut
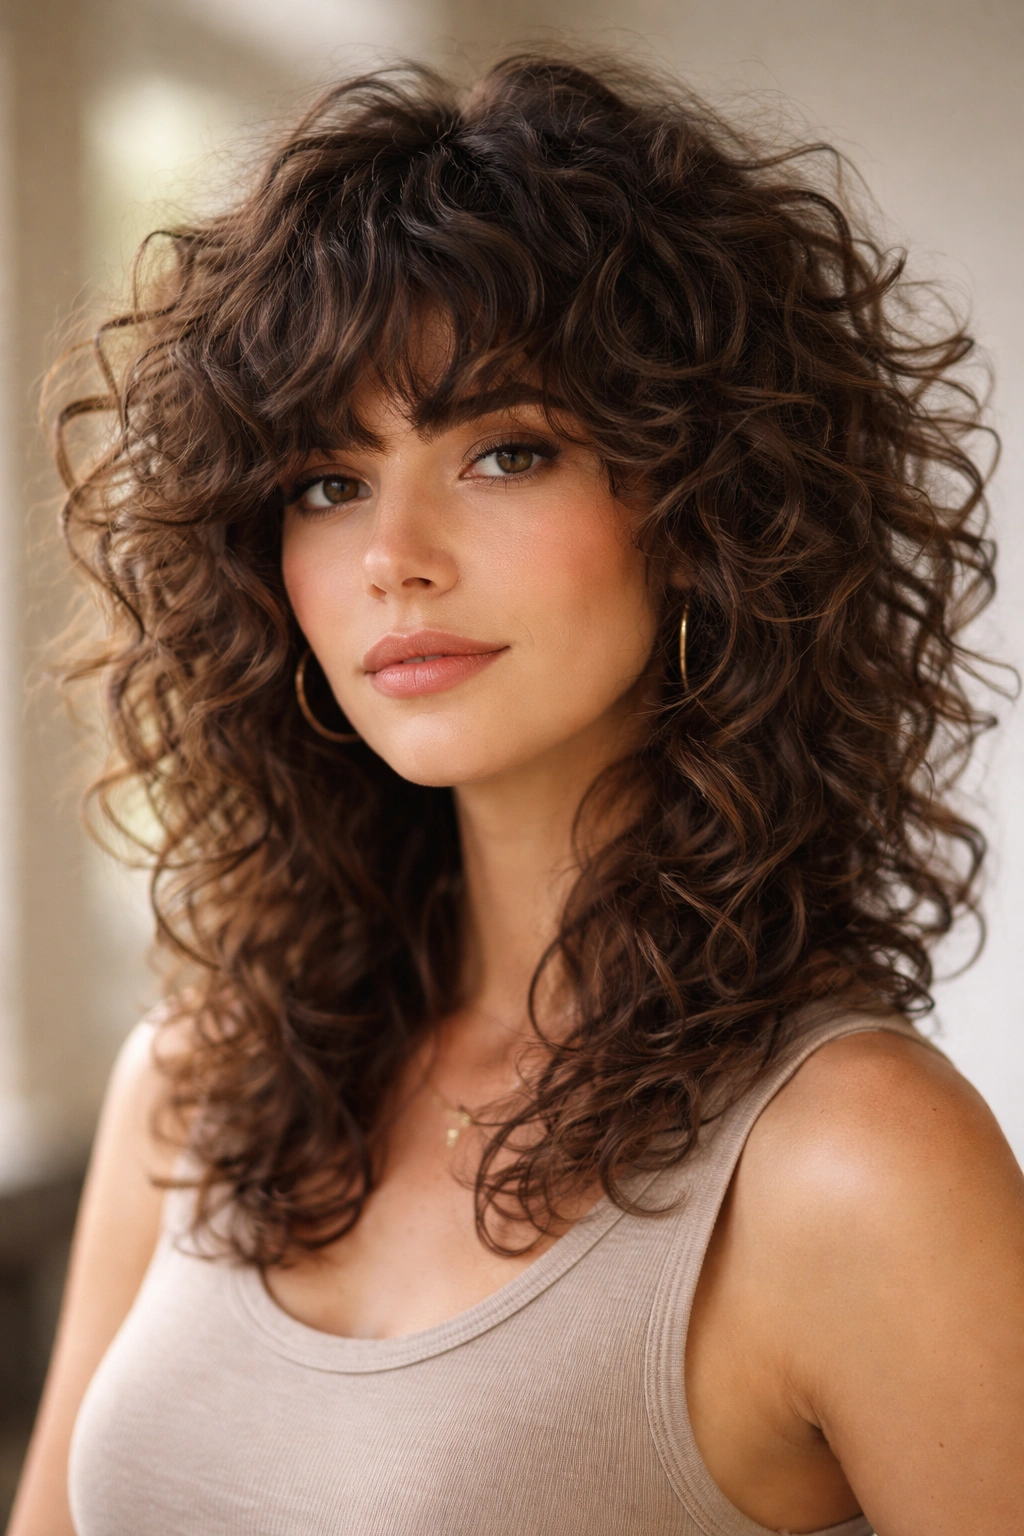
The shag is having a long-running moment in curly hair circles, and the reason is simple: the layered, textured structure of a shag cut was practically designed for curly hair. The heavy layering removes bulk at the ends (which can weigh curls down), adds movement throughout the length, and creates a lived-in aesthetic that takes zero effort to maintain once the cut is right.
What Makes the Curly Shag Different from Regular Layers
A traditional layered cut adds length-based layers that frame the face. A shag is more aggressive — it incorporates deep internal layers throughout the entire head, including the crown, mid-lengths, and ends. The result is a cut with dramatically different lengths throughout that creates texture and bounce rather than a uniform, polished shape.
For curly hair, a shag should always be cut dry or at least evaluated dry before finalizing. The stylist needs to see where the curls naturally fall before making any cuts, because each curl type has a different relationship between wet length and dry length.
Curl Types That Thrive in a Shag Cut
- 2A–2C wavy hair: The shag adds definition and structure to waves that might otherwise fall flat at the roots
- 3A–3B curls: Deep layers create separation and movement without sacrificing the curl’s natural shape
- 3C–4A: A shag reduces the triangular silhouette that can form when tight curls are all one length, creating a more rounded shape
- Fine-to-medium density: The shag works best on medium-to-high-density hair; very fine curls may find heavy layering removes too much weight for definition
Pro tip: Request that your stylist use a razor or point-cut technique rather than blunt scissors at the ends — this creates softer, more natural-looking texture that blends with the curl pattern.
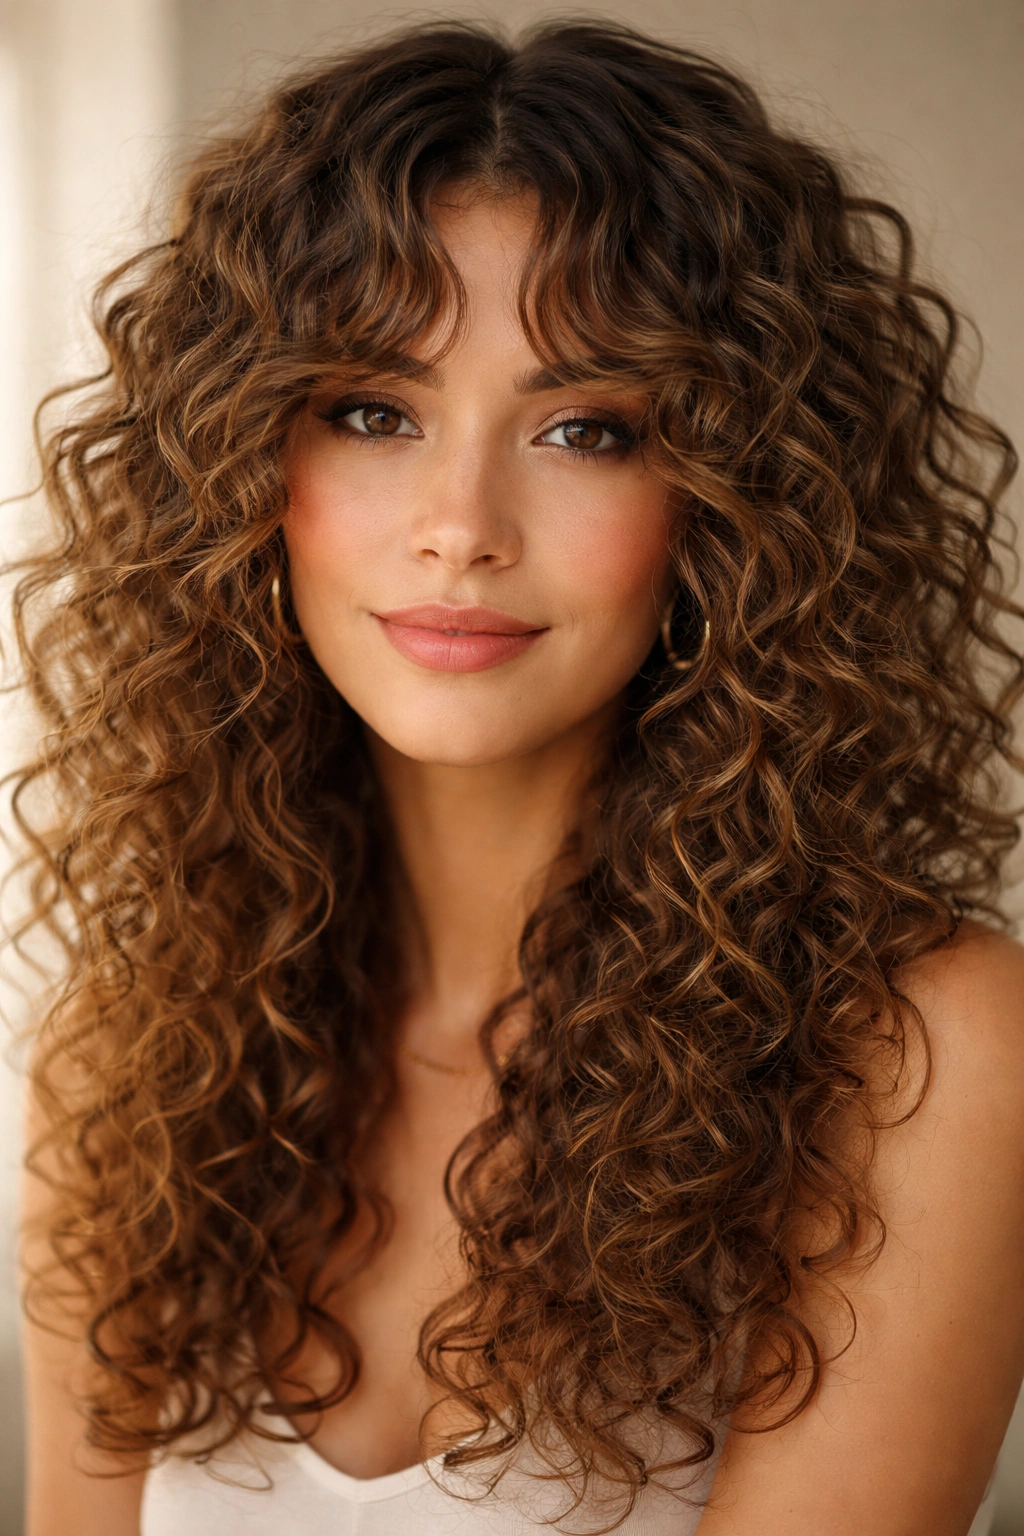
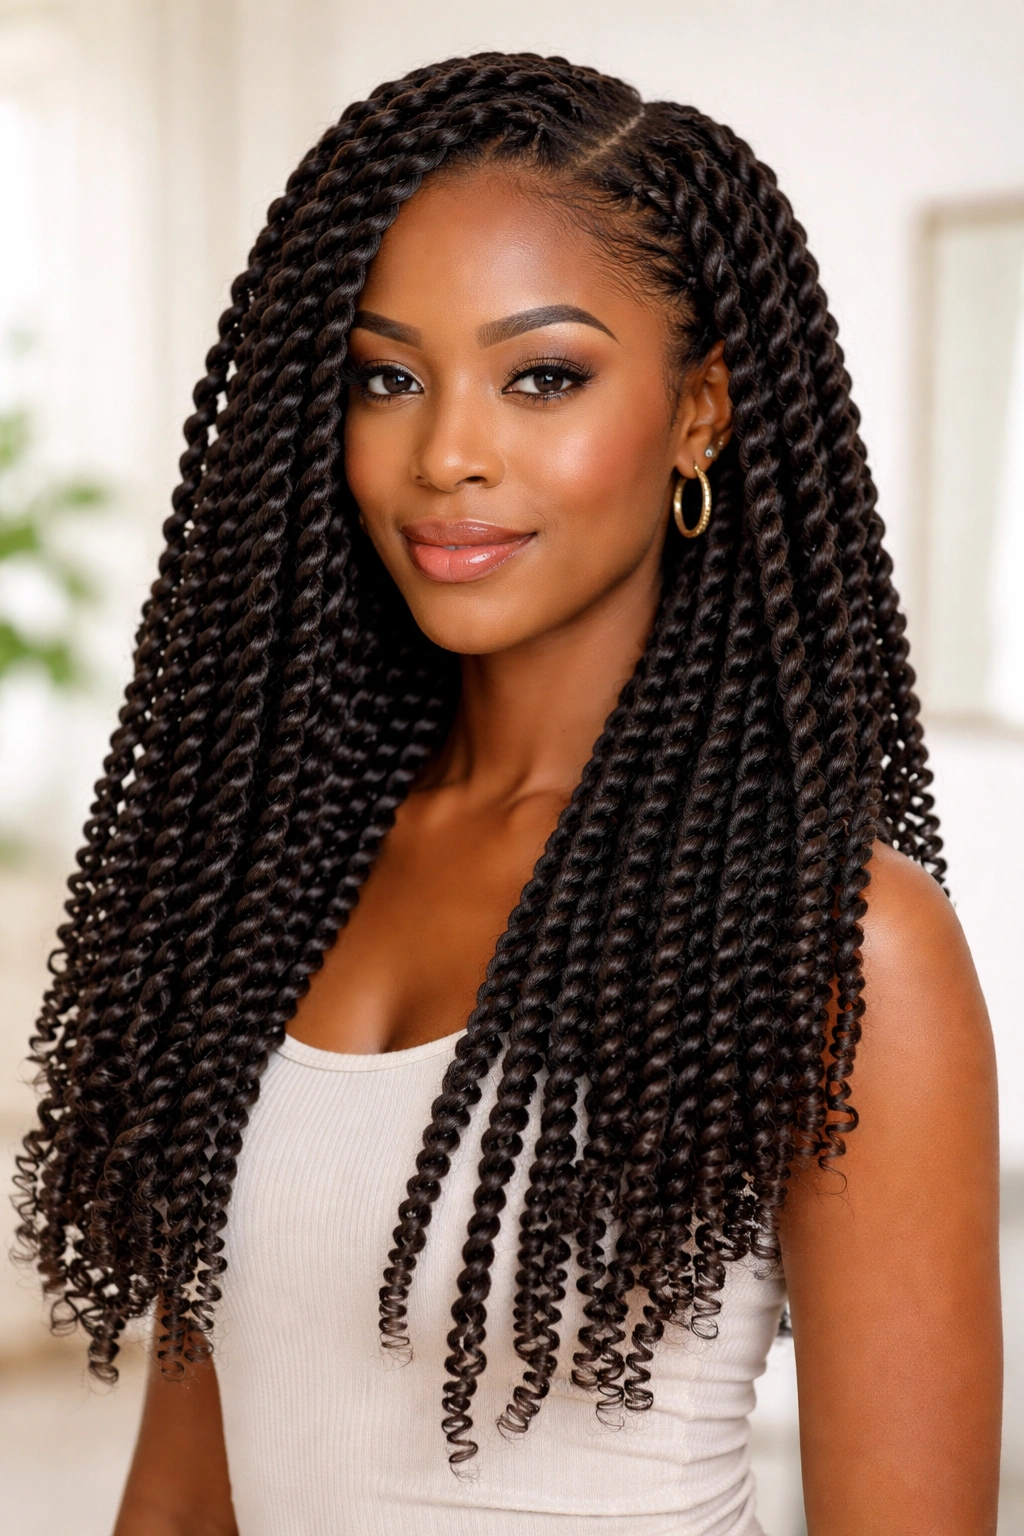
13. Spiral Curl Layers on Long Hair
Spiral curl layers are a technique and a style simultaneously. The cut itself creates layers that encourage individual curl clusters to spiral and separate, while the styling approach uses finger coiling or rod sets to define each curl as a distinct, spring-shaped spiral rather than a mass of texture.
The Technique That Makes Spirals Pop
Finger coiling is the foundation of this style. On freshly washed, product-saturated hair, take a small section and wrap it around your finger from root to tip, coiling in the direction of your natural curl. Hold for a moment, then release. The product in the hair helps the coil maintain its shape as it dries. Repeat throughout the entire head — yes, this takes time, but the result is a defined, frizz-free spiral finish that can last 5–7 days.
Rod sets using flexi rods, perm rods, or curlformers achieve the same result with even more uniformity. The rods set the curl shape, and heat from a hooded dryer or extended air drying creates a lasting spiral pattern.
Best Products for Defined Spirals
- Curl-defining cream: Applied section by section before coiling to provide moisture and initial definition
- Strong-hold gel: Applied over the cream to lock the spiral shape and prevent frizz as it dries
- Sealing oil: A light oil pressed gently over the finished style prevents the gel cast from feeling stiff and adds shine
- Spray bottle with water: Keep within reach during the entire process — rewetting any section that starts to dry mid-style prevents uneven definition
14. Protective Twist-Out on Long Natural Hair
On long natural hair, the twist-out evolves from a simple technique into a full style with genuine staying power. A well-executed twist-out on length gives you stretched, elongated coils with significantly reduced frizz, making it one of the most practical and beautiful styles for 3C–4C hair types.
Protective Benefits Beyond Aesthetics
The twist-out is technically a protective style — the two-strand twists that create the final look keep your ends tucked and minimize the daily manipulation that causes breakage over time. Every day you’re wearing a twist-out rather than manipulating your loose curls is a day you’re retaining length. This is why the twist-out is a cornerstone style for so many natural hair journeys.
The protective quality extends to the nighttime routine as well. You can re-twist any sections that have started to unravel at bedtime, wrapping them back up to refresh the style for another day or two.
How to Make the Twist-Out Last All Week
- Moisturize and seal before twisting: Apply a water-based leave-in first, then seal with a butter or oil to prevent the style from drying out midweek
- Sleep with a satin bonnet or silk pillowcase: This prevents friction that causes frizz and disturbs the twist pattern overnight
- The pineapple method at night: Gather all twists loosely at the top to prevent flattening at the crown
- Unraveling technique: Separate your twists with a small amount of light oil on your fingertips — this adds shine and prevents frizz during the unravel process
- Days 4–7 refresh: Spritz with water, add a tiny amount of curl cream to the ends, and reshape with fingers
15. The High Curly Ponytail
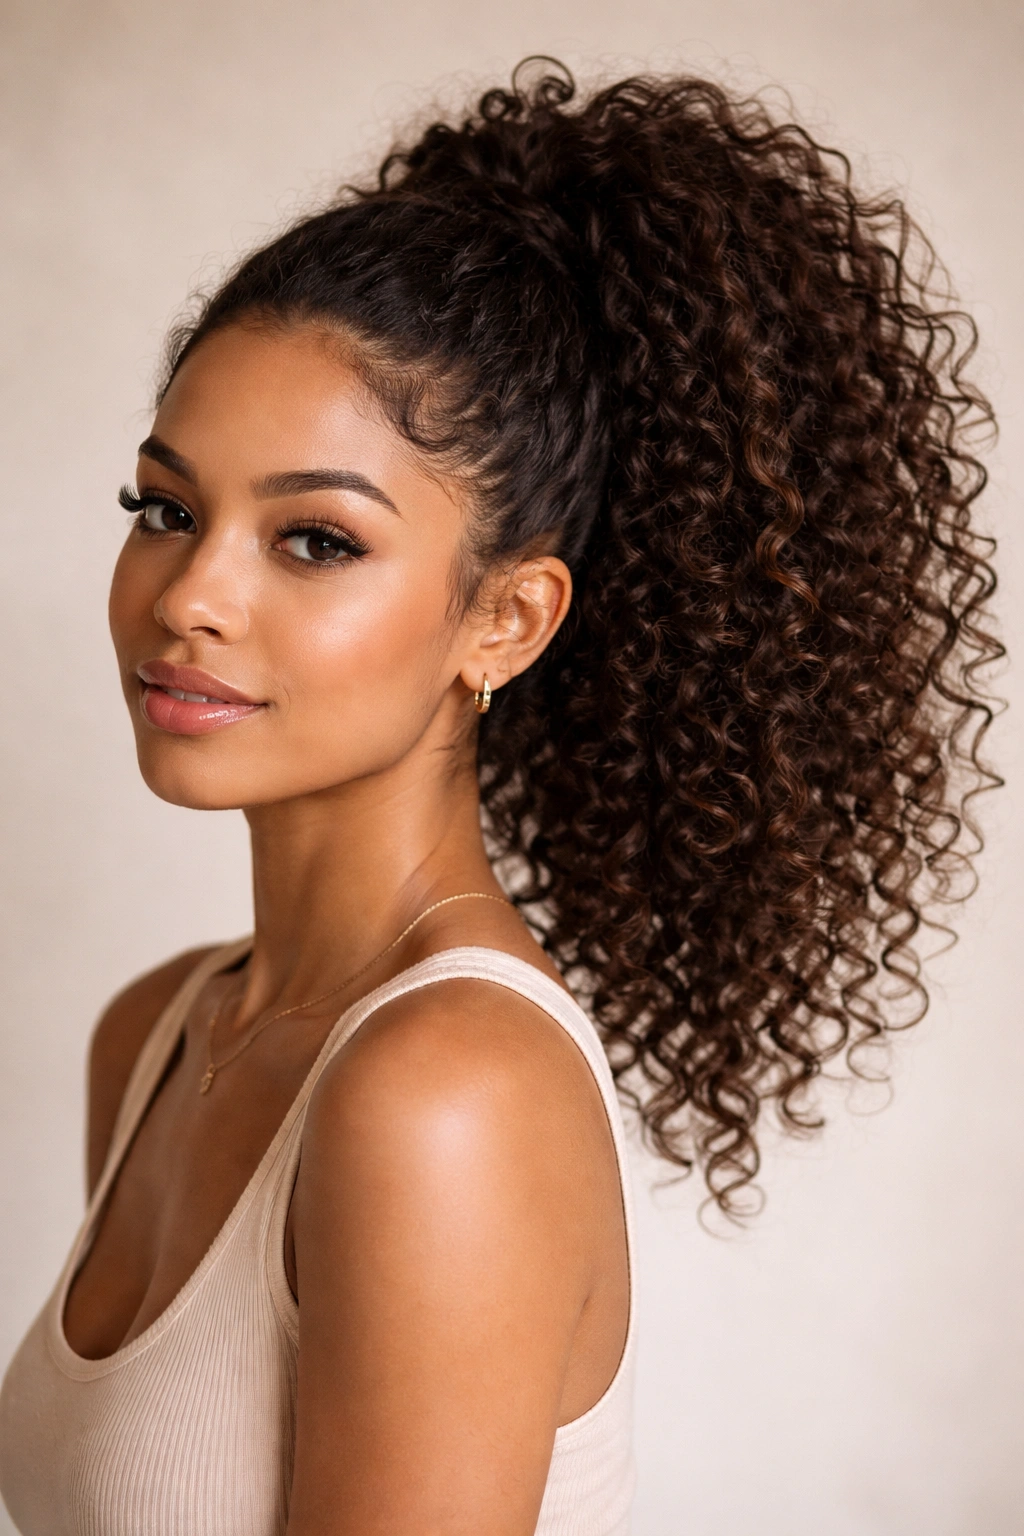
The high ponytail on curly hair is a statement style that requires almost no skill but delivers an elevated result every time. Unlike a straight ponytail that relies on sleekness, a curly high ponytail relies on volume — and curly hair has that in abundance.
How to Get Height Without Causing Breakage
The biggest challenge with any ponytail on curly hair is tension. Tight ponytails pull at the edges and create a form of traction stress that can be gradual and cumulative over time. To protect your edges, wrap a small section of curl or a satin strip around the base of the ponytail before securing — this distributes the tension across more surface area rather than concentrating it at a single point.
Use a large, thick elastic or a scrunchie rather than a thin band. And place the ponytail at the top of the crown rather than the back of the head — this creates the most flattering angle and the most impressive volume cascade.
Ways to Amp Up the High Curly Ponytail
- Wrap a curl around the base: Take one long strand and wrap it around the elastic until hidden — this transforms the ponytail into a polished, elevated look
- Fluff the ponytail: Use a pick or your fingers to pull the curls outward and upward for maximum volume
- Add accessories: A large pearl or tortoiseshell clip at the base creates an instant editorial moment
- Edge control: A small amount of edge control at the hairline gives the ponytail a clean, intentional frame
16. The Curly Frohawk
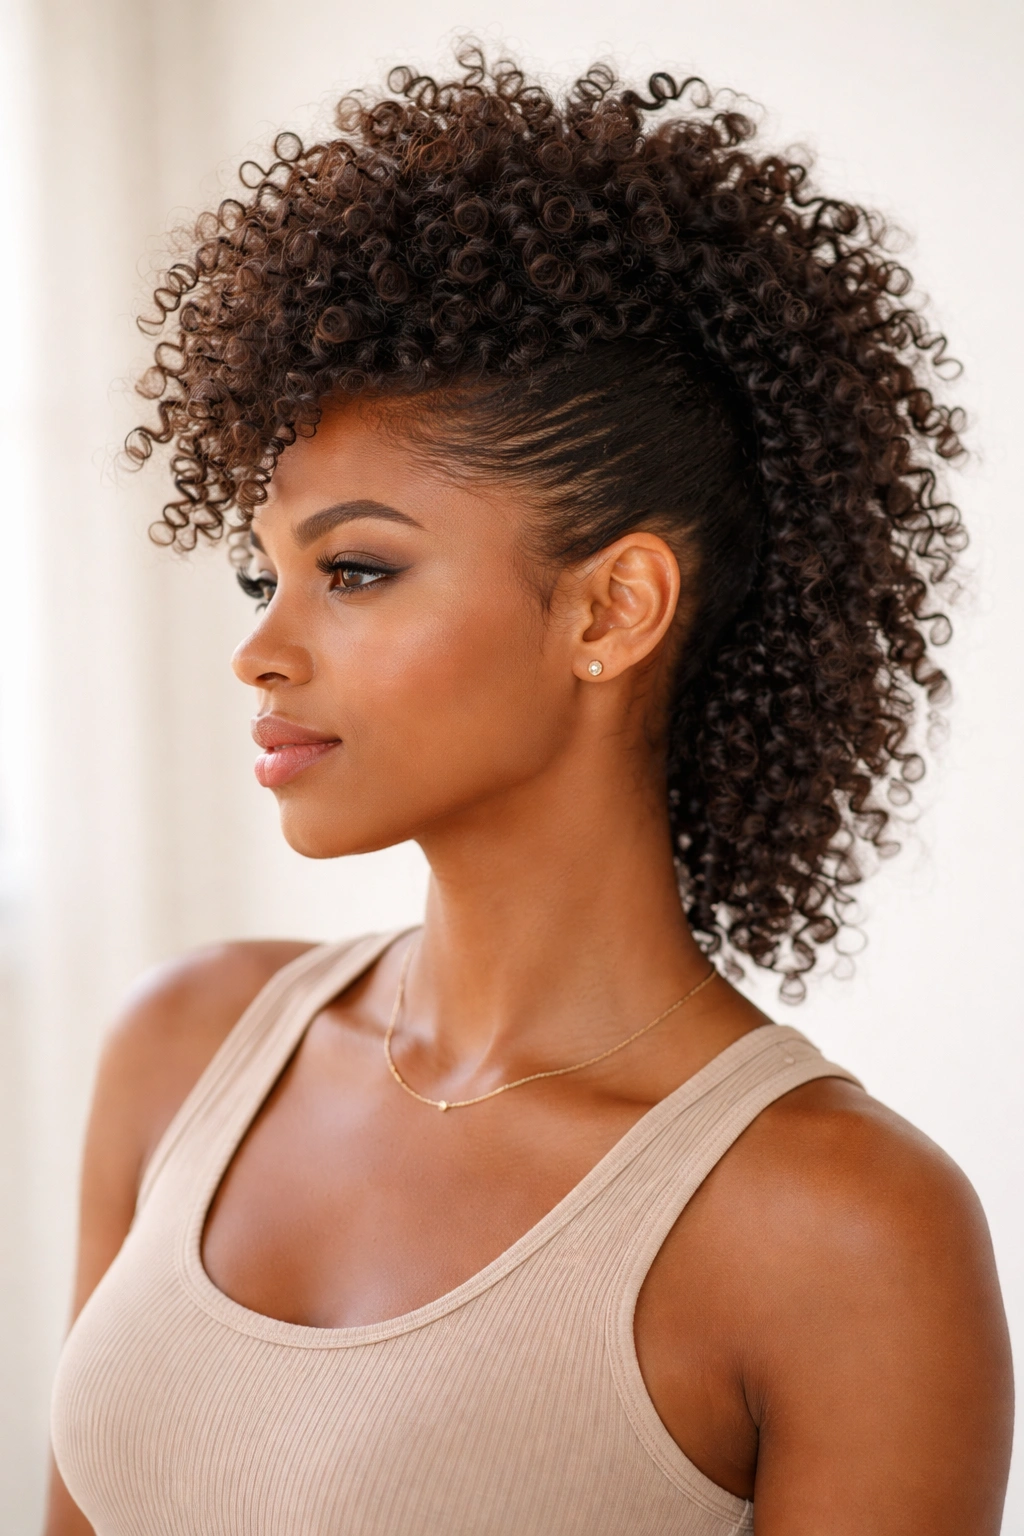
The frohawk is exactly what it sounds like: a style that mimics the silhouette of a mohawk, with volume running down the center of the head and the sides either slicked down, pinned, or cut shorter. It’s one of the most dramatic and expressive curly hairstyles, and it works on everything from short-medium lengths to big, long natural hair.
Creating the Frohawk Without a Clipper
You don’t need an undercut to achieve the frohawk effect. The most accessible version involves sectioning the hair — the sides are either moisturized and smoothed flat with a curl cream, braided flat against the scalp, or pinned back with flat twist pins. The center strip, running from forehead to nape, is left fully natural and fluffed for maximum height and volume.
The key to a frohawk that maintains its shape all day is root hold. Work a medium-hold gel into the center section and diffuse upward with your diffuser to build volume that actually stays through the hours.
Frohawk Variations for Different Lengths and Occasions
- Short frohawk: Works as an everyday style with the sides smoothed and the top finger-coiled for definition
- Long frohawk: The center section can be braided into chunky plaits for a more structured look, or left fully free and wild
- Formal frohawk: Flatten the sides with gel and a boar bristle brush, pin with decorative pins, and style the center with rod-set curls for special occasions
- Color play: The frohawk showcases highlights or bold color in the center strip brilliantly — the contrasting shape draws the eye directly to any color work
17. The Braided Crown with Free Curls
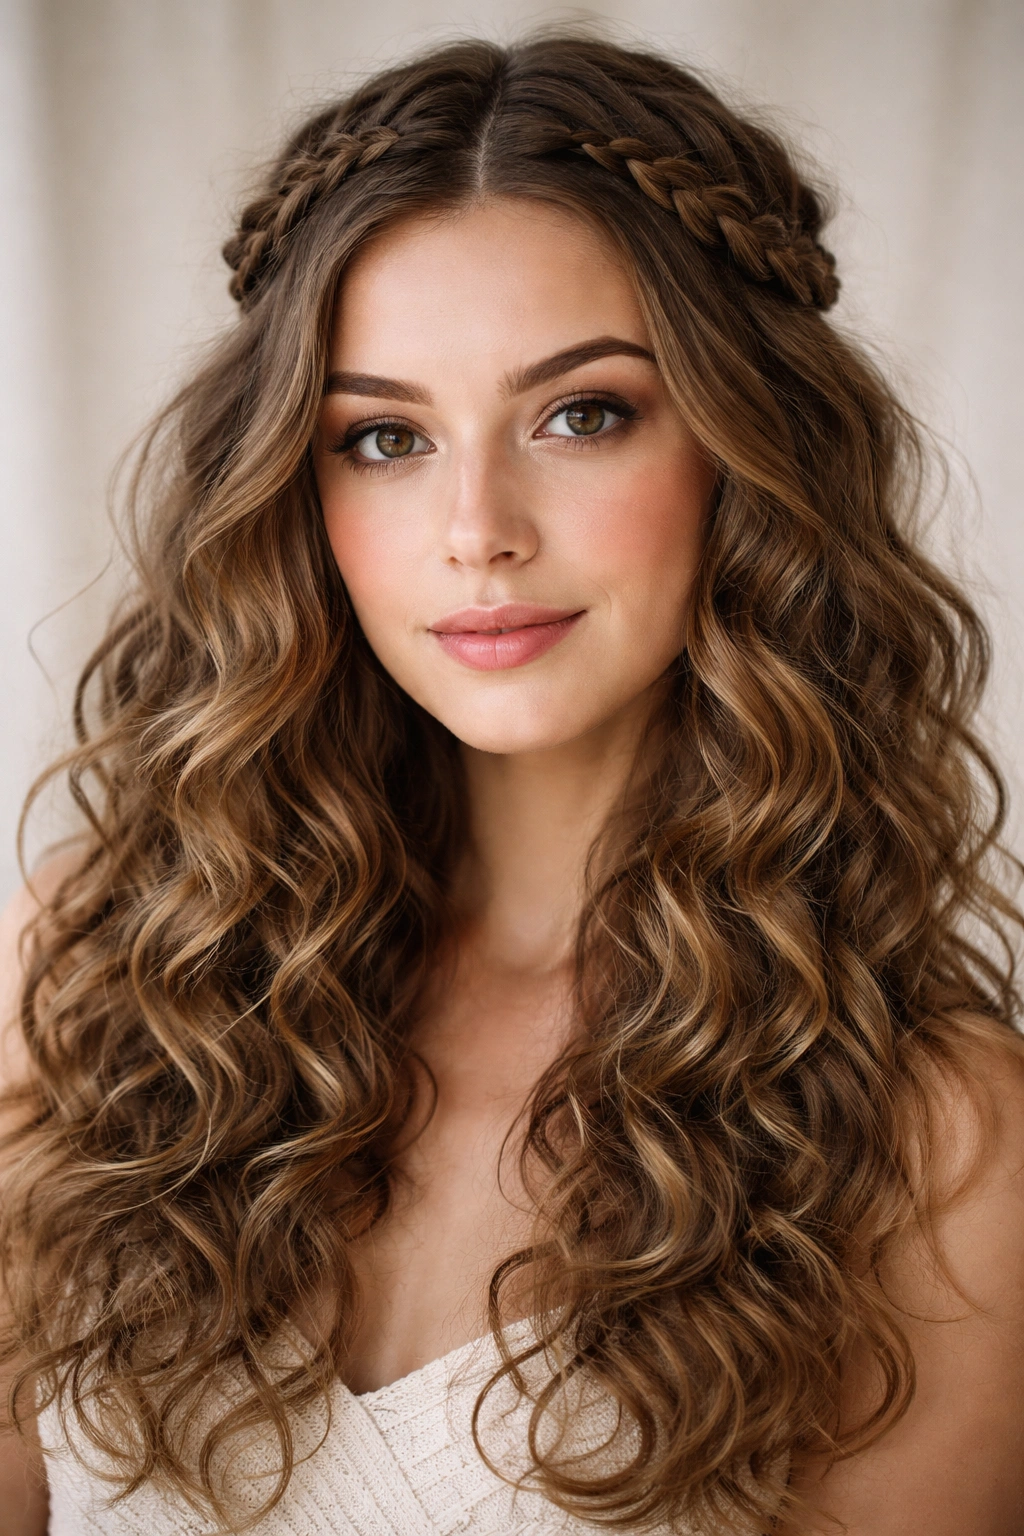
The braided crown — where two braids travel along the hairline from the temples to the back of the head like a headband — creates an instant bohemian-meets-elegant effect on curly hair. The braided sections frame the face while the remaining length falls freely, showing off the full curl pattern beneath.
Getting the Braids to Sit Flat on Curly Hair
Curly hair’s natural texture can make braids at the hairline feel bulky or uneven. To keep the crown braids flat and smooth, work with damp (not wet) hair and apply a smoothing gel or edge control to each section before braiding. The moisture and product allow the hair to braid more smoothly and lie flat against the head.
Braid each side using a Dutch braid (braiding under rather than over) for a braid that stands slightly more prominent on the scalp, or use a French braid for one that sits flatter. Pin the ends where they meet at the back with bobby pins in a color that matches your hair.
Who This Style Works Best For
- Length requirement: Works best on hair that’s at least shoulder length when stretched — the free curls below the crown need enough length to be the focal point
- Curl types 2B–4A: These curl patterns produce the most defined free section below the crown braids
- Occasion range: Casual with a t-shirt, elevated with earrings — this style genuinely spans both ends of the spectrum
- Longevity: The style holds 2–3 days when sleeping with a satin bonnet and re-pinning the braid ends as needed
18. Curly Space Buns
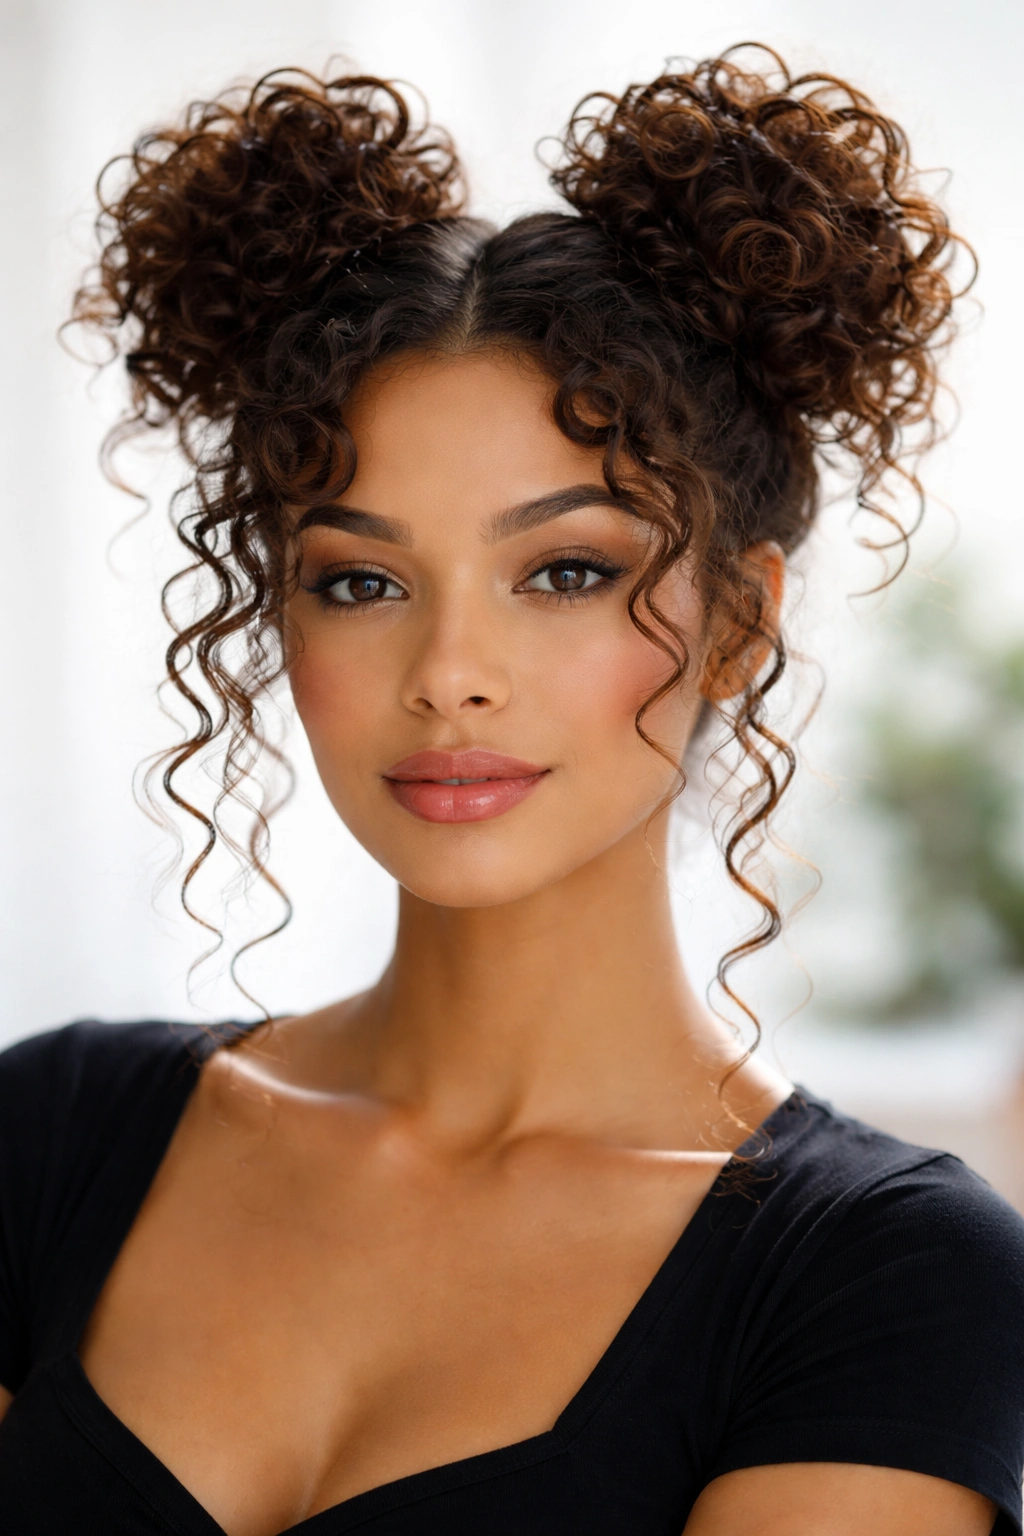
Space buns on curly hair take one of the most beloved playful hairstyles and dial it up with texture and volume that straight hair simply can’t replicate. The style involves splitting the hair into two equal sections and creating a bun on each side of the head — typically high up near the crown. On curly hair, those buns aren’t compact and smooth; they’re full, fluffy, and slightly wild in the best possible way.
Getting the Buns Even and Secure
Symmetry is the main challenge with space buns on curly hair. Because curly hair often has uneven density, the two sides can feel like they have different amounts of hair. Work with freshly defined curls and divide the hair at the center with a rat-tail comb for a precise middle part. Gather each side loosely into a high ponytail first, check that the two ponytails are even in height and volume, then wrap each one into a bun and secure with bobby pins or a large elastic.
Leave some curls trailing out from each bun rather than tucking everything in — this is what gives curly space buns their signature loose, free-spirited quality.
Styling Tips for the Most Voluminous Curly Space Buns
- Keep the bun loose: Don’t twist the gathered section too tightly before pinning — loose creates volume rather than a flat, compact shape
- Pull curls from the bun: Once secured, gently tug individual curl clusters out to create a fuller, more dimensional shape
- Face-framing pieces: Leave a few curls at the temples and nape free to soften the look
- Length requirement: Works best on medium to long hair — at least shoulder length to create buns with visible volume
- Hold: A light mist of flexible-hold hairspray over the finished buns keeps flyaways at bay without flattening the curl
Pro tip: Curly space buns look better on day 2 or 3 hair — the slightly looser, more textured curls create a more organic, voluminous bun than freshly washed, tightly defined curls.
19. The Diffused Blowout for Maximum Volume
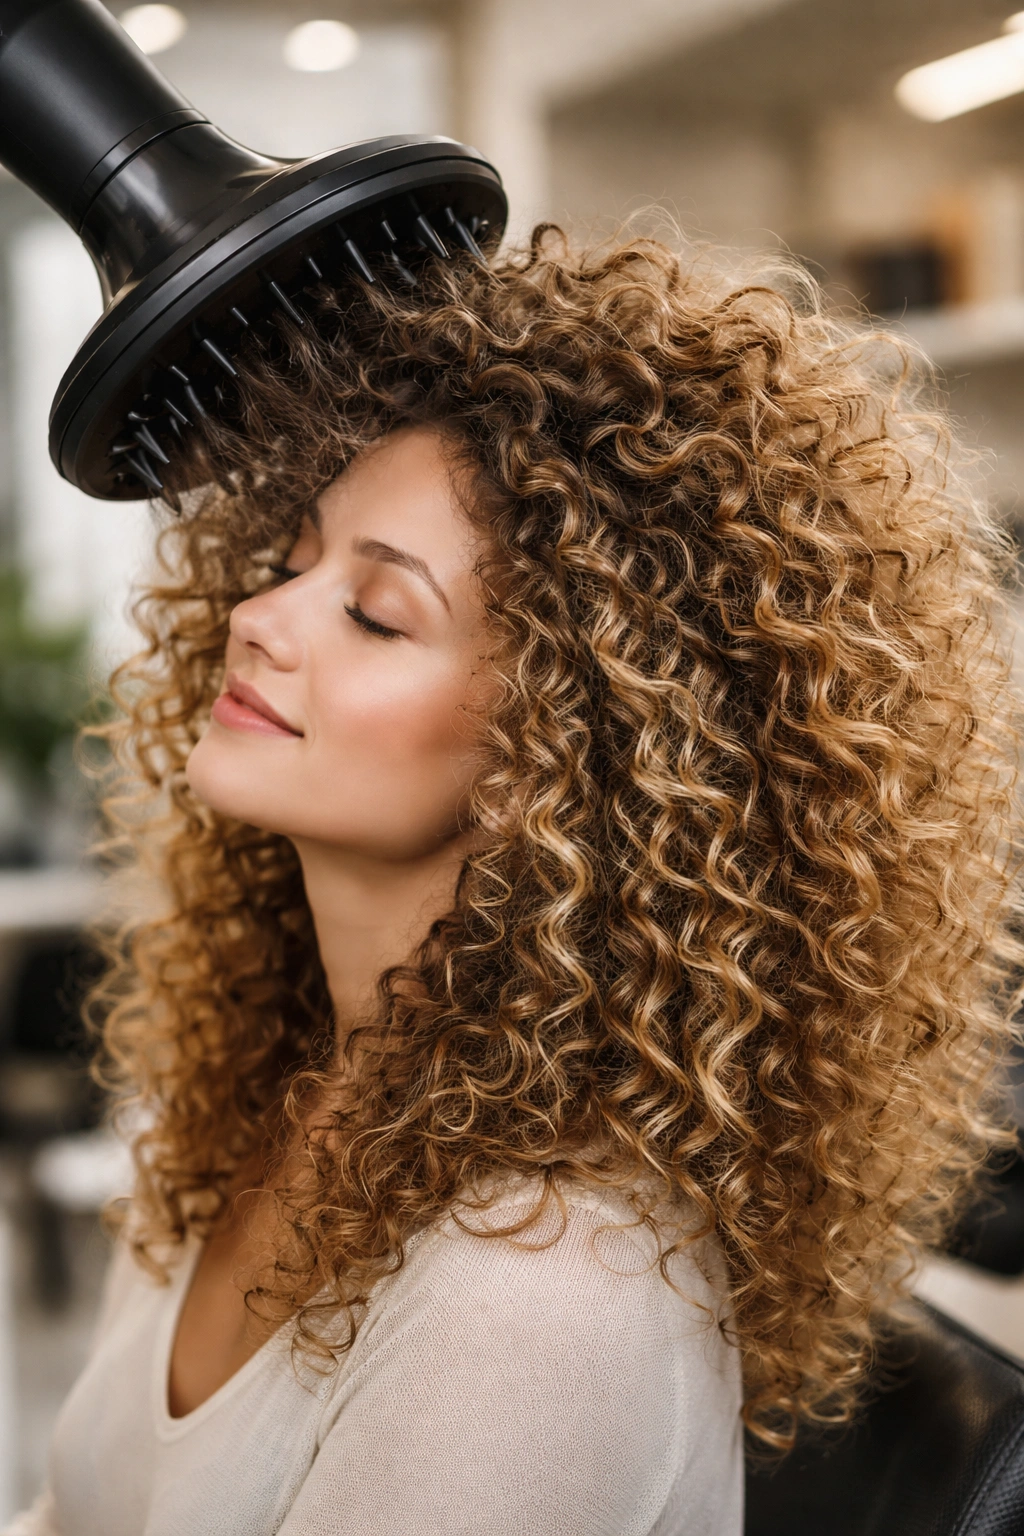
The diffused blowout sits between a traditional blowout and a natural air-dry — and it produces the most volume you can get from curly hair without compromising curl definition. Unlike a straight blowout, a diffused blowout uses a diffuser attachment that disperses airflow to dry curls in their natural shape rather than blowing them straight.
How to Diffuse for Volume vs. Definition
The angle and movement of the diffuser changes the result dramatically. For maximum volume, tilt your head to one side and cup sections of curls into the diffuser bowl without moving it — let the hair sit in the bowl and dry in that lifted position. This creates root lift and a rounded, voluminous shape.
For definition over volume, cup curls into the diffuser and pulse the heat rather than leaving it on continuously. This gentler approach dries the cast around each curl cluster without disturbing the definition that your gel or cream created.
The Diffusing Process: Key Settings and Techniques
- Use medium heat, low airflow: High airflow creates frizz by disrupting the curl pattern during drying; low airflow is the non-negotiable setting
- Scrunch upward while diffusing: Scrunching curls toward your scalp as you diffuse builds volume from the roots outward
- Never touch your hair mid-diffuse: Wait until the hair is at least 80% dry before scrunching — early contact creates frizz that won’t go away
- Finish with cool air: Switching to cool air for the final few minutes sets the style and reduces surface frizz
Worth knowing: Plopping for 15–20 minutes before diffusing removes excess water and dramatically cuts total diffusing time — which means less heat exposure for your curls overall.
20. Finger Coils for Ultimate Definition
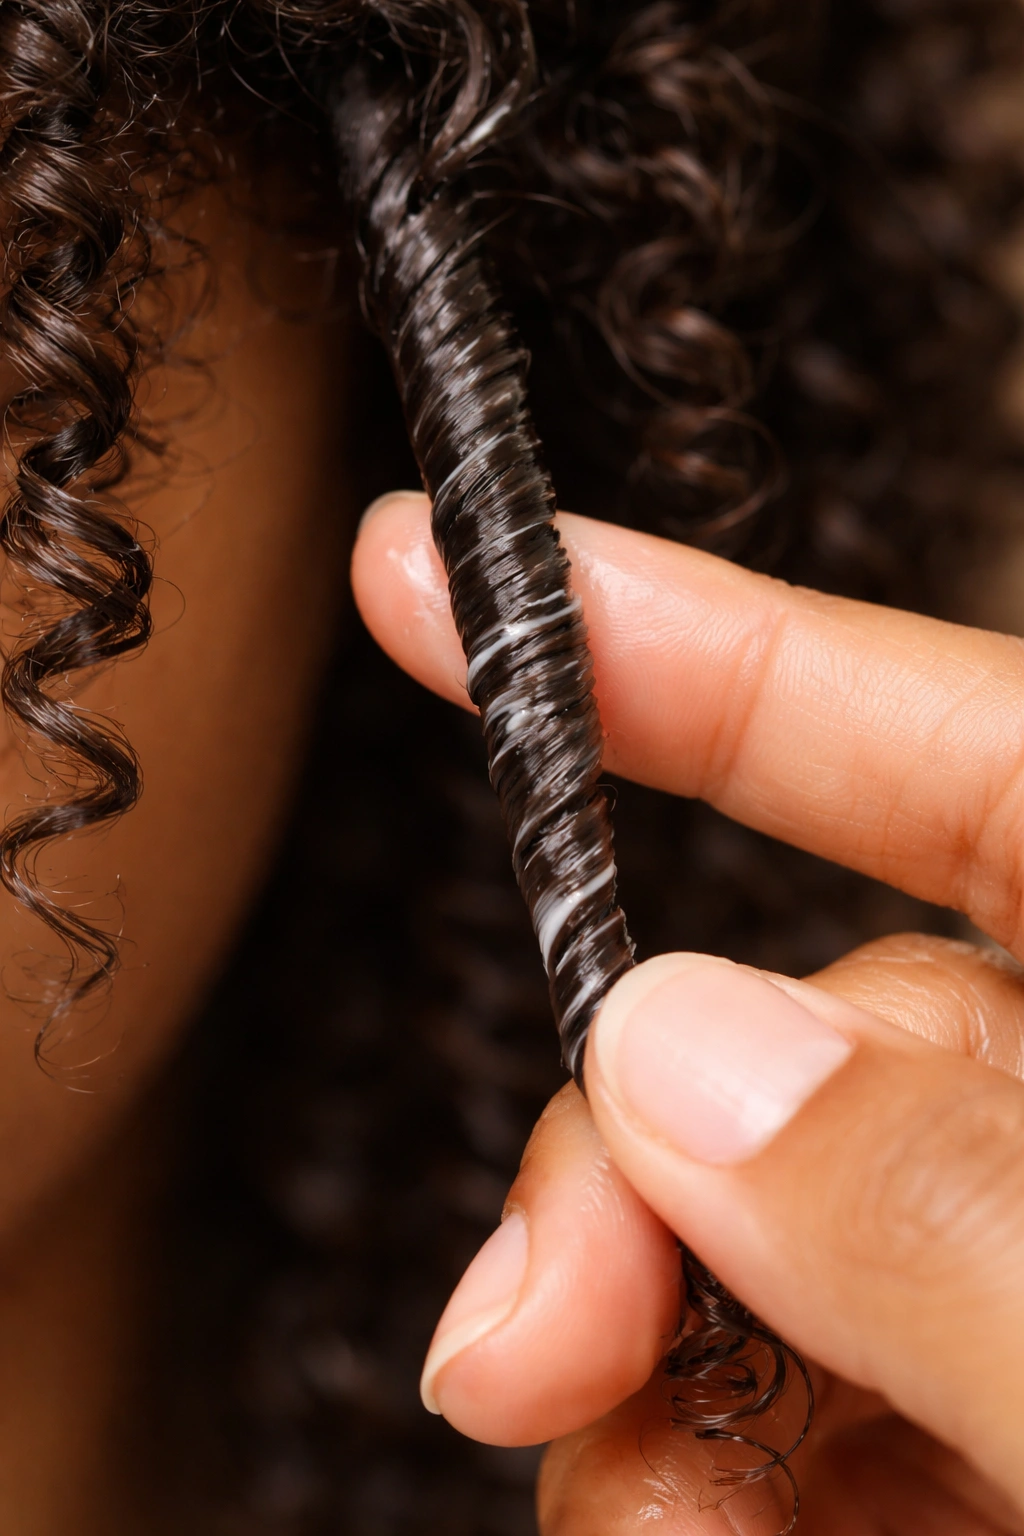
Finger coiling is one of the most intentional and rewarding styling techniques in the curly hair world. Unlike styles that rely on the hair’s natural pattern to do the work, finger coils are manually shaped — wrapping each small section of hair around a finger from root to tip to create a uniform, tightly defined coil. The result is a precise, almost sculptural style with every curl perfectly formed.
Why Finger Coils Work on Any Curl Type
Because you’re manually creating the coil shape, finger coiling isn’t limited to one curl pattern. Loose 2C waves can be finger-coiled into tight spirals. Tight 4C coils can be finger-coiled into elongated, defined shapes that show off length without the frizz of a wash-and-go. The technique adapts to the hair you have rather than requiring a specific natural curl type to succeed.
The critical factor is product saturation. Every section of hair needs to be thoroughly coated in curl cream, gel, or a combination of both before coiling. Dry or under-moisturized hair won’t hold the coil shape through the drying process.
Tips for Coils That Last More Than One Day
- Section size determines coil size: Small sections create tight, fine coils; larger sections produce looser, chunkier spirals
- Keep the coiling direction consistent: Coil every section in the same direction — clockwise or counterclockwise, never a mix
- Don’t touch until fully dry: Finger coils are fragile while wet — a single touch before they’re set creates a permanent frizz spot in that coil
- Sleeping in coils: A satin bonnet and pineapple position at night preserve the shape far better than sleeping flat
- Day 2 and 3 refresh: Mist with water and a small amount of gel, then re-coil any sections that have lost their definition
Pro tip: For the longest-lasting finger coil set, allow your coils to air dry completely rather than diffusing — the extra time produces a more polished, frizz-free finish that a diffuser can sometimes disrupt.
Final Thoughts
Twenty styles, every hair length, and one thread that runs through all of them: curly hair has far more range than most people give it credit for. From precision cuts like the tapered natural to free-form approaches like the pineapple updo, the variety here shows that working with your curl pattern opens up far more options than fighting against it ever will.
The most important thing to take from all of this isn’t a single style to copy exactly — it’s the understanding that the right product routine, smart application technique, and cuts designed specifically for curly hair make every one of these styles more achievable than they might first appear. Finding a stylist who cuts hair dry, understands shrinkage, and knows how curl density affects the finished result is genuinely worth the effort.
Start with one new style that speaks to your length and curl type, master the technique behind it, and build from there. Every style on this list rewards a bit of patience and the willingness to experiment — and once you find your signature approach, curly hair becomes one of the most expressive and effortlessly beautiful hair types to work with.