Curly hair is having a moment — and honestly, it’s about time. For decades, straight hair dominated fashion magazines and runways, leaving curly-haired people with a false choice: conform or stand out. But the beauty industry’s perspective has shifted dramatically, and curly hairstyles have moved from an afterthought to center stage. The truth is, curly hair has inherent texture, movement, and personality that straight hair simply can’t replicate, and when you work with your natural curl pattern instead of against it, you unlock a range of stunning looks that turn heads for all the right reasons.
The challenge, though, is knowing which cuts and styles actually work for curly hair. Not every hairstyle that looks good on straight hair translates smoothly to curls — texture changes everything. A blunt cut that works beautifully on silky strands can look shapeless or frizzy on curls, while a strategically layered cut on curls can add movement, define your curl pattern, and create volume that feels effortless. The key is finding a style that respects your natural texture, frames your face, and makes mornings feel less like a battle and more like a celebration of what you’ve got.
What makes a curly hairstyle “work” also depends on your specific curl pattern. Whether you have loose waves, springy ringlets, or tight coils, there’s a cut and styling approach designed to make your hair look its absolute best. The styles in this guide span multiple curl types and face shapes, so you’ll find options regardless of whether your curls are fine and delicate or thick and robust. Each one has been chosen for its staying power, its ability to maintain definition without constant touch-ups, and its genuine versatility — you can style these looks multiple ways depending on your mood and the occasion.
1. Coily Bangs with Textured Length
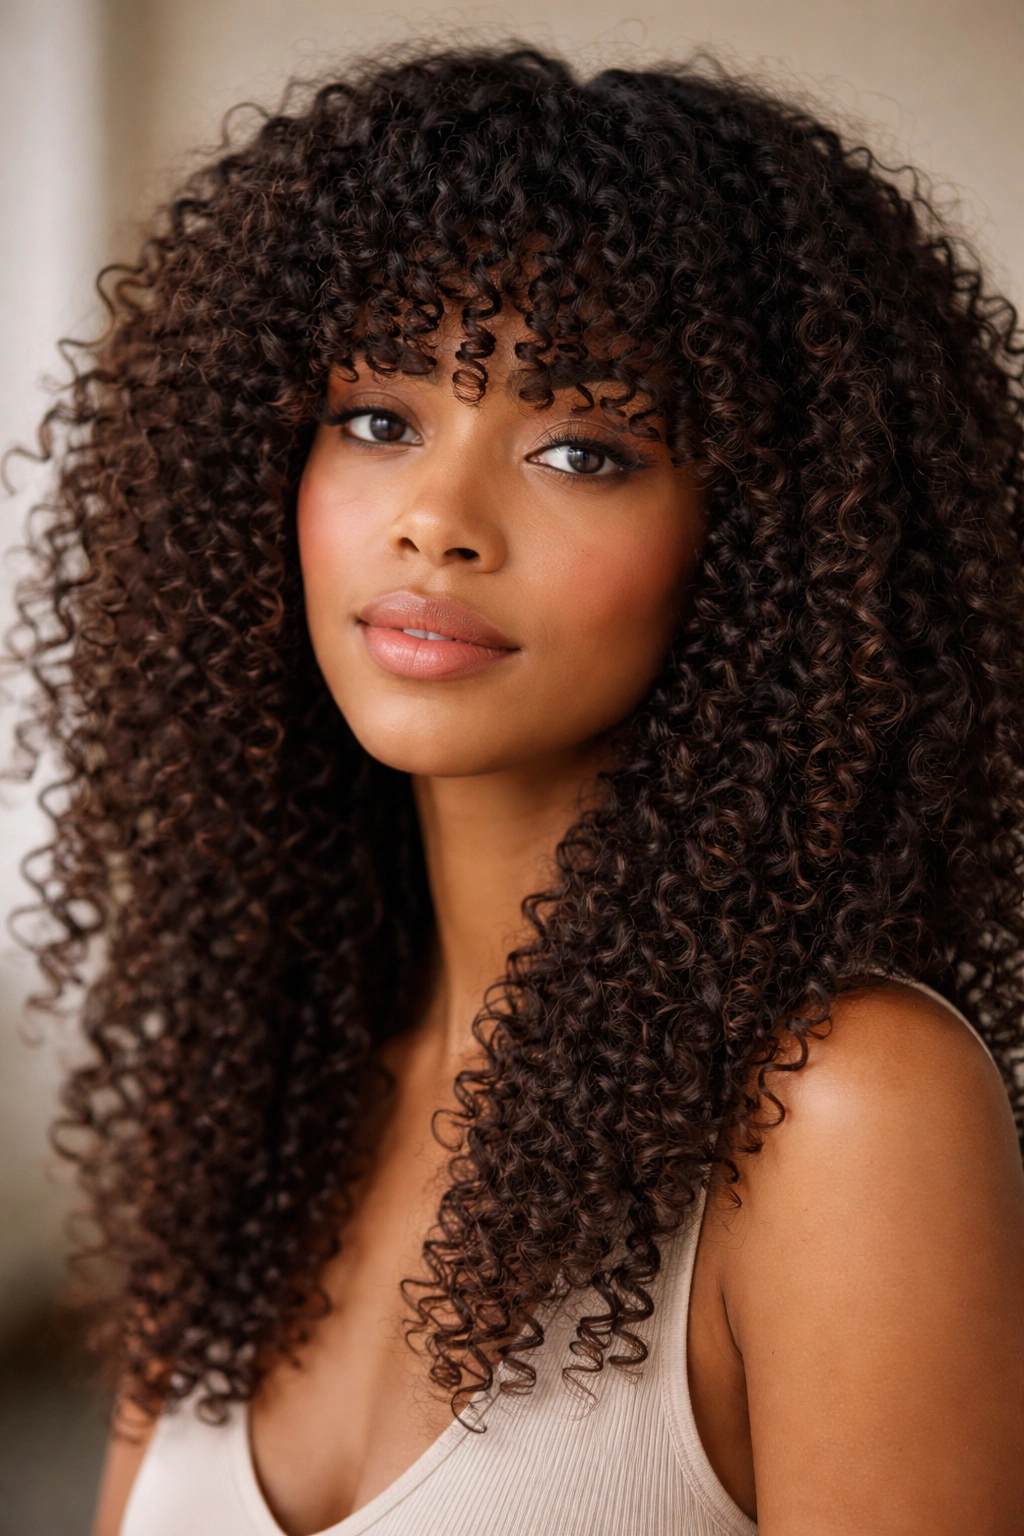
Bangs and curly hair have had a complicated relationship, but coily bangs are breaking that tension in a major way. Instead of fighting your curl pattern with flat, blunt bangs that frizz instantly, coily bangs work with your texture by letting your curls sit naturally across your forehead while the longer length flows down the sides. This style reads as intentional and fashion-forward rather than accidental, and it completely transforms your face without committing to shorter overall length. The bangs add an edgy, younger vibe while the textured length gives you options for styling — wear it down and voluminous, or pull it back for a sleeker look that still shows off your curl definition.
Why This Style Works Across Curl Types
Coily bangs work because they don’t require you to fight your natural texture. Rather than trying to straighten or flatten sections of your hair, you’re letting the curls be curls from root to tip. This style particularly suits people with medium to tight curls (type 3 and up) because the curl pattern itself creates the shape and structure that keeps bangs looking intentional. The key is getting a cut that’s specifically designed for curly bangs — a stylist should be cutting into your curls when they’re wet and in their natural state, not trying to create the look on dry hair.
What to Know Before Committing
- Coily bangs require maintenance every 6-8 weeks to keep them shaped and framing your face properly
- You’ll need to establish a morning routine for your bangs — even if the rest of your hair is air-drying, bangs usually need a quick refresh with water and curl cream
- This style works best if you’re comfortable with some volume at your hairline; if you prefer a completely flat forehead look, traditional bangs might suit you better
- Coily bangs pair beautifully with longer length (shoulder-length minimum) because the contrast between the shorter front and longer back creates visual interest
- The style requires a stylist who specializes in curly cuts; a general salon may not know how to execute this properly
Pro tip: Sleep on your bangs in a pineapple updo (a loose, high ponytail on the crown of your head) to preserve your curl pattern overnight, then refresh them in the morning with a spray bottle of water and a small amount of leave-in conditioner.
2. Shoulder-Length Curls with Face-Framing Layers
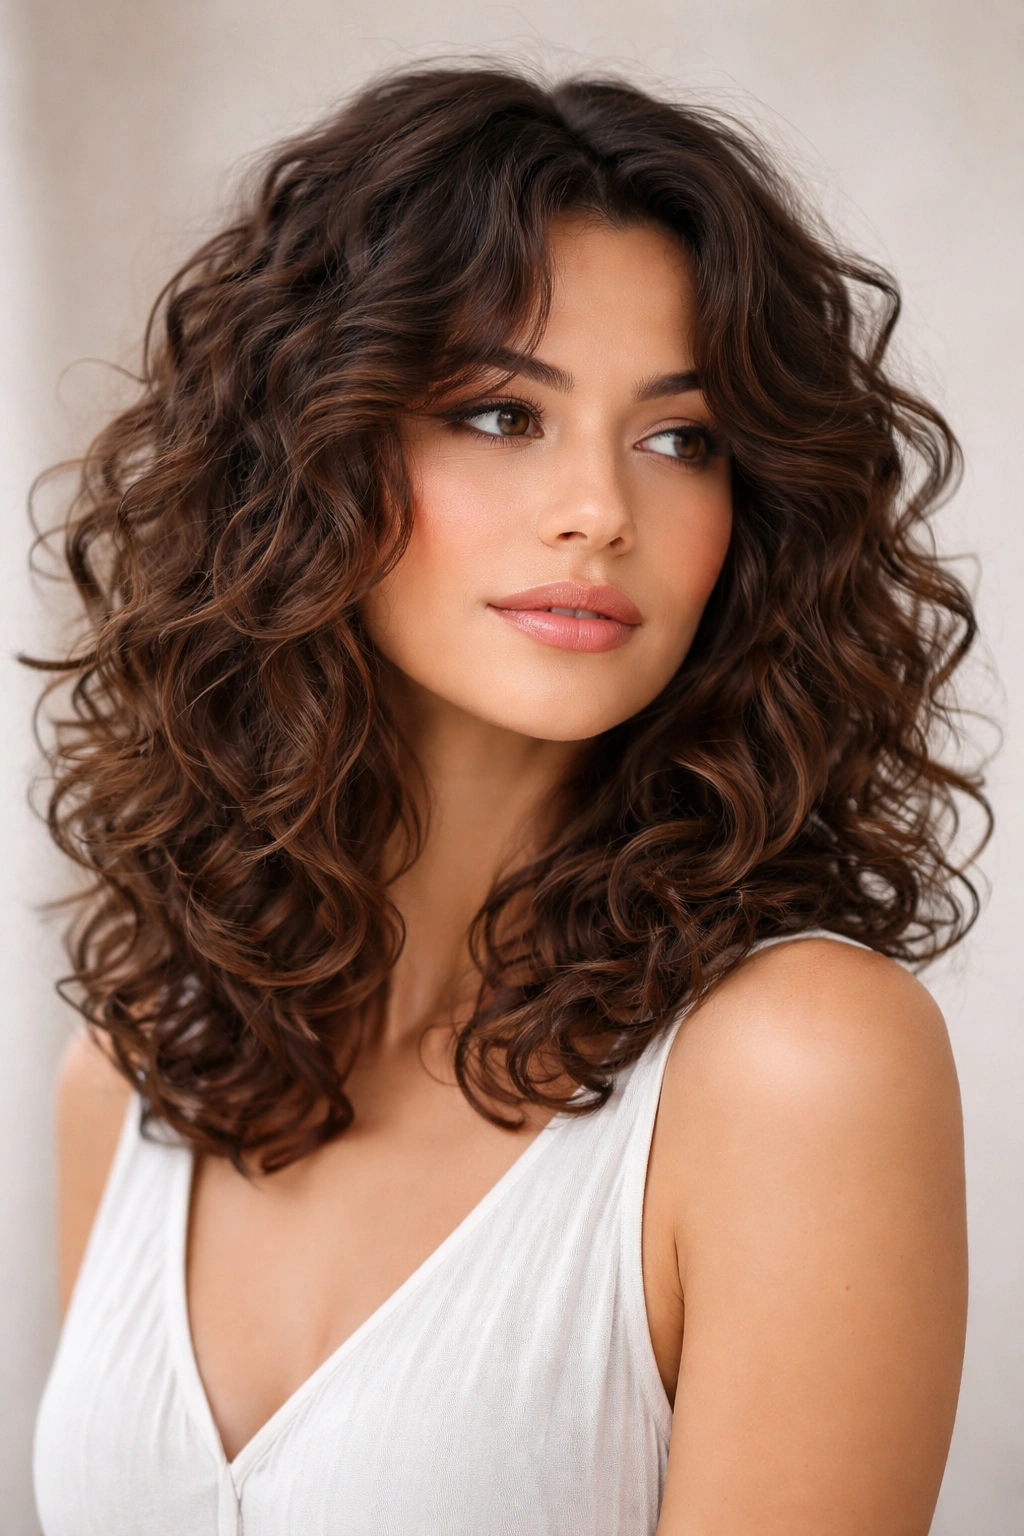
One of the most universally flattering curly hairstyles is shoulder-length curls with strategically placed layers. This cut sits right at your shoulder, giving you a defined endpoint that feels polished without looking overly controlled. The layers are the magic here — they break up bulk, add movement, and create a frame around your face that’s both flattering and modern. The key difference between a good layered cut and a bad one on curly hair is how the layers are cut. Instead of choppy, disconnected layers that create frizz and undefined texture, the best layers are cut with intent: longer pieces frame the face, medium pieces add volume at the crown, and shorter pieces in back create shape and prevent that awkward shelf look that can happen when curly hair is cut bluntly.
The Science Behind Why Layers Work
Layers reduce bulk by removing weight strategically rather than uniformly. When you have thick curly hair and you cut it bluntly at one length, all that weight pulling down actually suppresses your curls and makes them look flatter and tighter. When you add layers, you’re removing some of that weight while keeping length where you want it. The layers also allow your curl pattern to expand naturally — each layer can curl independently, creating more overall volume and dimension. On top of that, face-framing layers draw attention upward toward your eyes and cheekbones, making your face look brighter and more defined.
Key Details for This Style
- The shortest layers should be around chin-length, creating a frame that follows your jawline
- Longer layers underneath add flow and prevent the style from looking too choppy
- Medium layers at the crown add height and volume without requiring teasing or additional styling
- A good length for this cut is 2-4 inches past your shoulders, which gives enough weight for curls to stretch slightly while maintaining definition
- This style works for all curl types, from 2b waves to 4c coils
Worth knowing: This cut works beautifully with minimal styling — you can literally wash, apply curl cream, and go. The layers do most of the work for you, which is why it’s so practical for people who don’t want to spend an hour styling every morning.
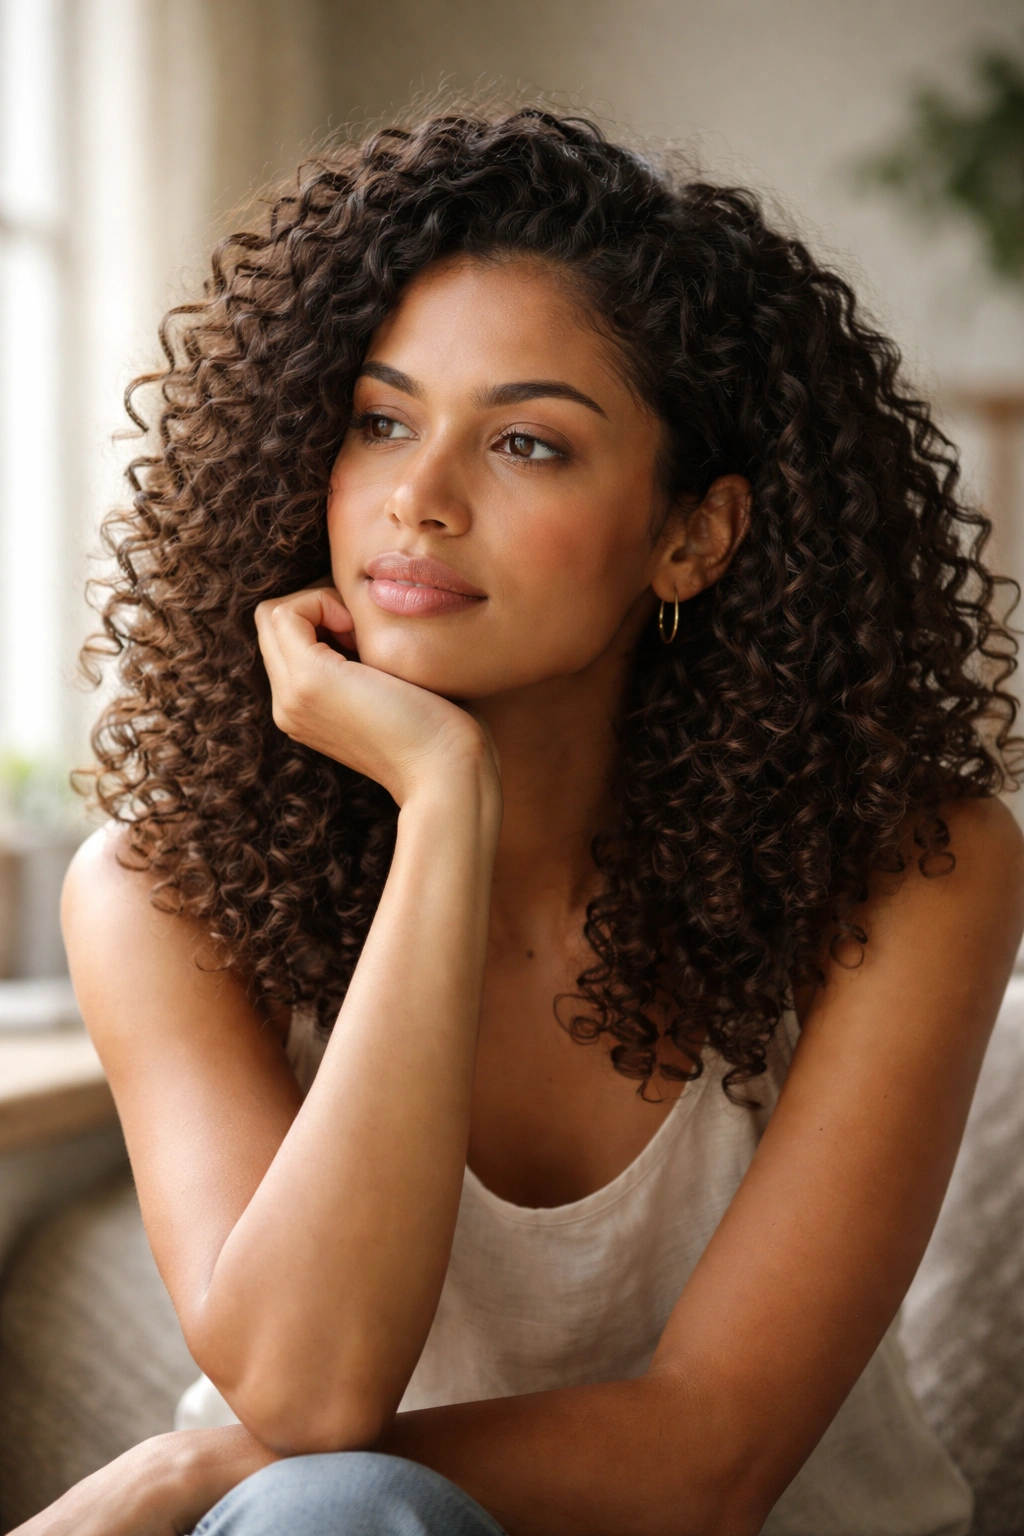
3. Voluminous Spiral Curls
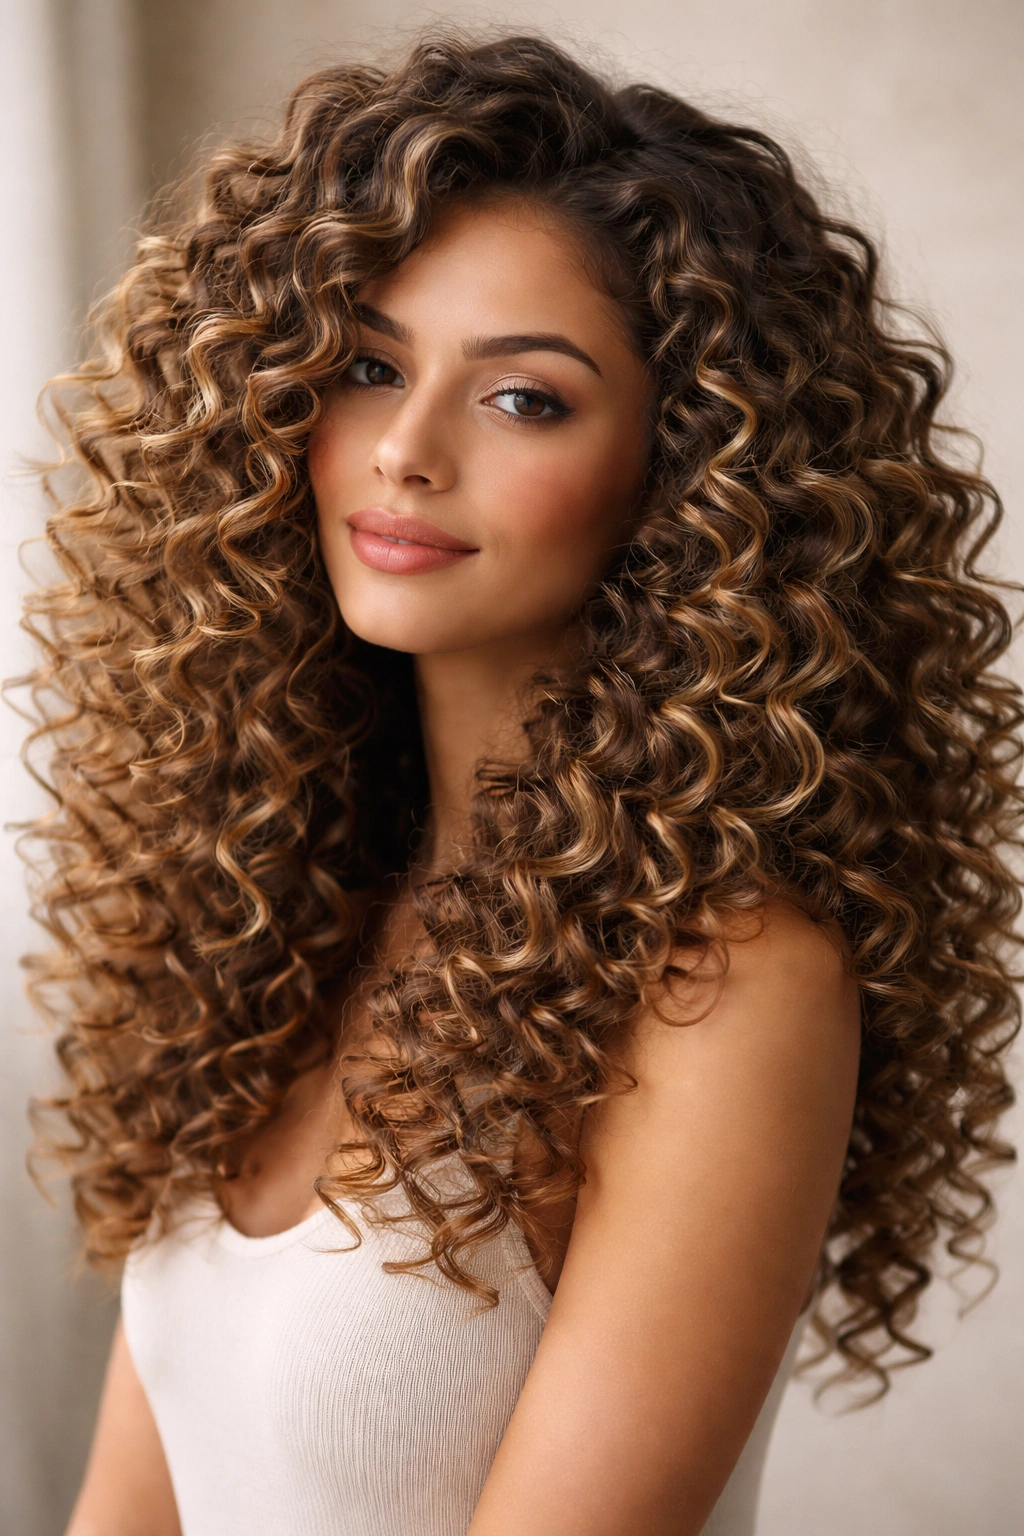
If you’ve ever looked at a picture of spiral curls and wondered how people get them so bouncy and defined, the answer involves both a specific cut and a styling technique. Voluminous spiral curls start with a cut that removes the right amount of bulk while preserving length, but the real magic happens in how you style and care for them. This look is all about defined curls — each ringlet is distinct, bouncy, and separated from its neighbors, creating an almost delicate, intricate appearance. It’s the kind of style that makes people assume you spent hours at the salon when you actually just know the right technique. Spiral curls work best on medium to thick hair with naturally bouncy curl patterns (3b, 3c, and 4a curls particularly), though with the right product and styling method, other curl types can achieve a similar effect.
How Stylists Create Defined Spiral Curls
The cut for spiral curls usually involves what’s called “curl by curl” cutting — where a stylist actually looks at your individual curl pattern and cuts around it rather than making uniform horizontal cuts. This respects each curl’s natural form and prevents the bluntiness that disrupts spiral definition. The styling, though, is where spiral curls truly come alive. This usually involves using a curl-defining cream or gel, then either finger-coiling each curl (manually wrapping sections of hair around your finger to set the spiral) or using a technique like plopping (wrapping damp hair in a t-shirt or microfiber cloth for 20-30 minutes) to encourage spirals to form. Some people use perm rods or curlformers (flexible barrel-shaped tools) while their hair is damp, then remove them once the hair is dry to reveal tight, uniform spirals.
Making Spirals Last Through Your Week
- Spiral curls usually hold their definition for 2-3 days with proper nighttime care
- The best preservation method is a pineapple updo (a loose high ponytail) or a bonnet made of silk or satin, which prevents friction that flattens spirals
- Refreshing spirals mid-week involves spritzing with water and curl cream, then re-twisting or re-coiling sections by hand
- You don’t need to wash your hair every day to maintain spirals; most people refresh 2-3 times per week and do a full wash once weekly
- Gel is your friend for hold — a good curl gel will keep spirals locked in place without the crunchiness of some products
Insider note: Finger-coiling takes practice, so don’t expect perfect results the first time. Most people find their rhythm after 3-4 attempts and then it becomes second nature. Watch tutorial videos specific to your curl type, because the technique varies slightly between curl patterns.
4. Defined Bouncy Curls with Undercut Sides
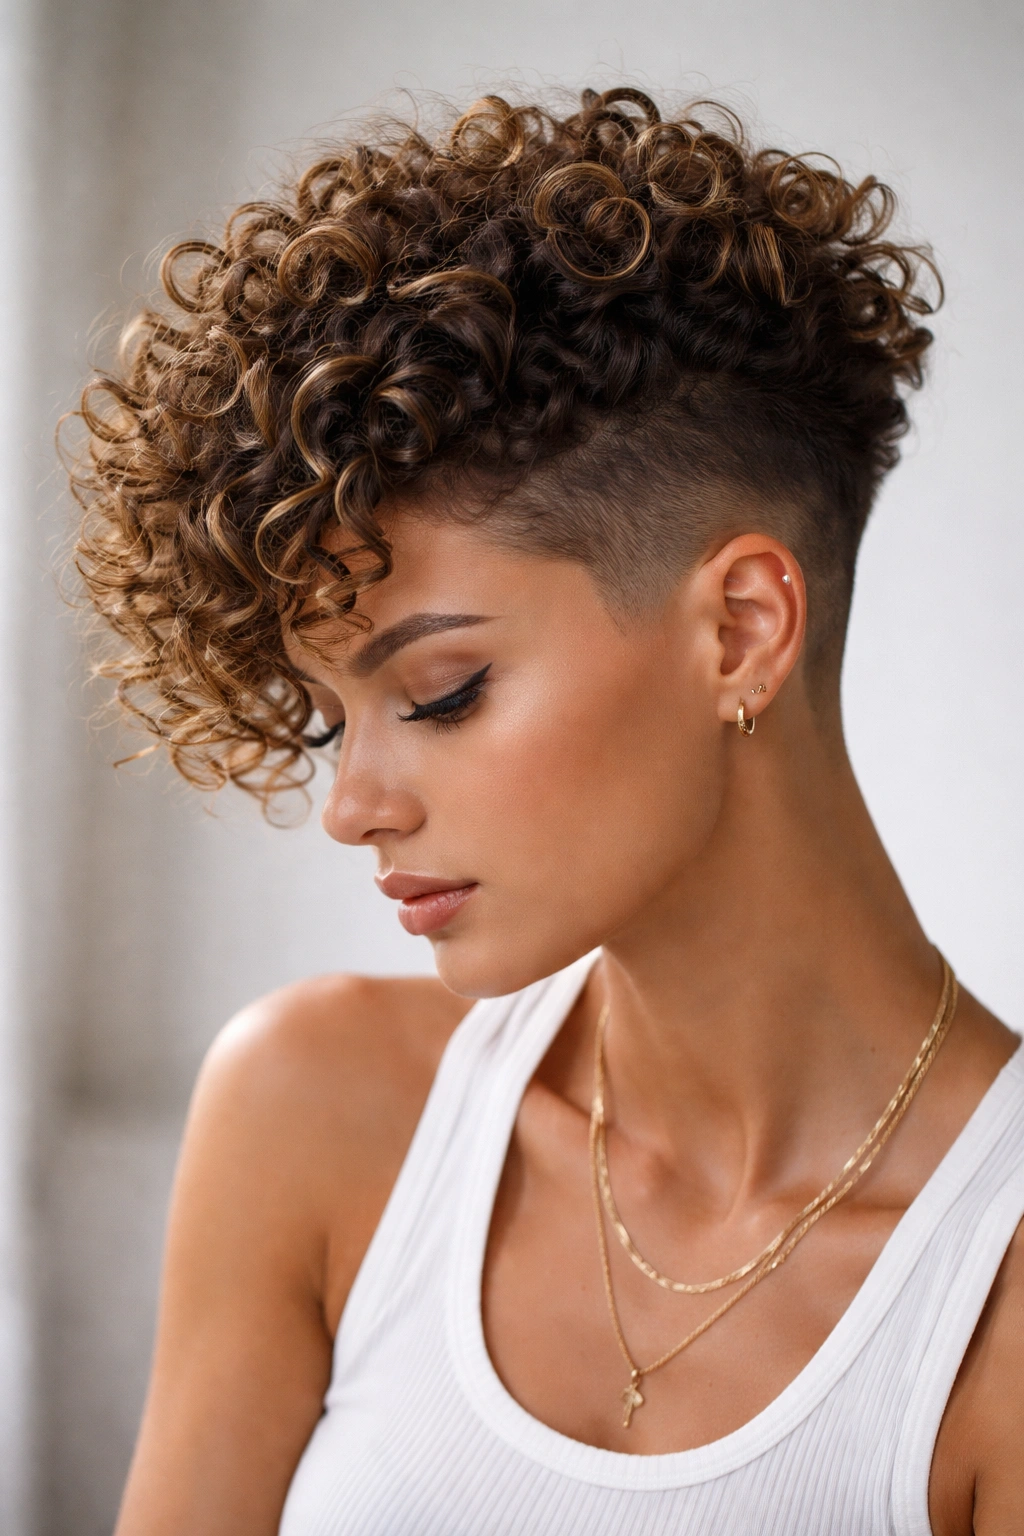
This style combines length on top with clean, sharp undercut sides — usually faded from longer on top to very short (often clipper-cut at a 0.5 or 1 guard) on the sides and back. The contrast is dramatic and modern, and it works particularly well for people with tight or medium curls who want their curl definition to be the focus. With the sides cut short, all the visual attention goes to your crown and the beautiful texture of your curls on top. The undercut also serves a practical purpose: less hair on the sides means less weight pulling your curls down, so the curls on top can spring up with more volume and energy. This is a style that reads as intentional and fashion-forward, and it’s become increasingly popular across all hair types.
Why the Undercut Amplifies Curl Definition
When you have curly hair growing in every direction on your head, some of that curl energy gets distributed around the sides, which actually pulls down the curls on top and suppresses your volume. By removing hair from the sides with an undercut, you’re concentrating all the curl and volume in one area — the crown and top — where you can see and appreciate your natural texture. The undercut also creates a stark architectural contrast: the soft, textured curls on top literally pop against the clean lines of the sides. It’s a style that demands attention in the best way.
Styling and Maintenance Specifics
- The fade on the sides usually takes 3-4 weeks before you need a touch-up, so plan your barber or stylist visits accordingly
- The length on top should be at least 3-4 inches minimum, enough that your curls have room to form and won’t look like a flat puff
- Textured products like sea salt spray, mousse, or curl-defining creams work best here rather than heavy gels, because you want the curls to move and bounce rather than being locked in place
- You can style this look multiple ways: wear it down and wild for volume, brush it back with a light hold product for a sleeker vibe, or even wet it down and let it air-dry for definition
Real talk: This cut works best if you’re comfortable with a weekly or bi-weekly barber routine. If you like going longer between cuts, the undercut will lose its sharpness and start looking grown out rather than intentional.
5. Shag Cut for Curly Hair
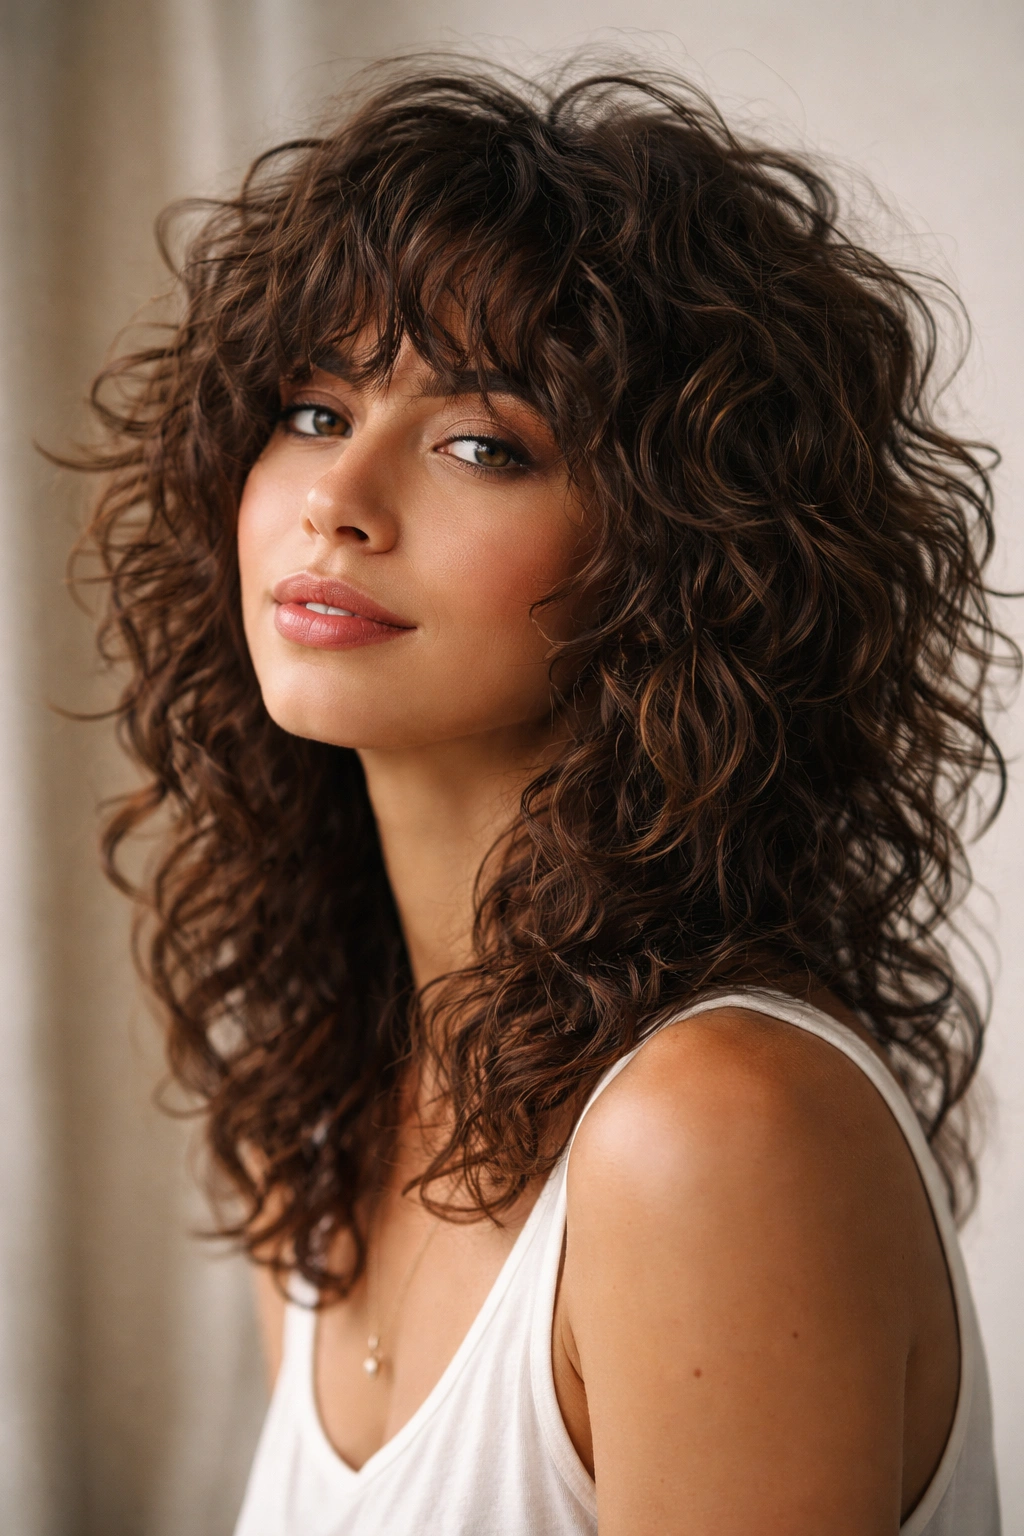
The modern shag cut is having a serious moment, and for good reason — it’s one of the most flattering styles for curly hair. A shag is a layered cut with texture throughout, designed to create movement and break up bulk without looking choppy or disconnected. The difference between a bad shag and a good one is subtle but crucial: a good shag on curly hair has longer pieces throughout (so you don’t lose length), shorter pieces strategically placed to remove weight, and an intentional shape that doesn’t just look like your haircut has grown out. Done well, a shag is edgy and undone-looking without actually being poorly maintained. It’s a style that says “I know what I’m doing” even when you’re literally just air-drying.
What Makes a Shag Different from Layers
Shag cuts and layered cuts are often confused, but there’s a key difference. Layers are usually more symmetrical and precise, with a clear graduation of length. A shag is intentionally messier and more textured — the layers are less uniform, and there’s more texture and movement throughout. A shag also typically has shorter pieces around the face and crown that create a lived-in, tousled look, whereas a traditional layered cut is more structured. On curly hair, this slight messiness of a shag actually works with your natural texture instead of against it. Your curls naturally create that undone look, so a shag cut capitalizes on that.
The Shag for Your Specific Curl Type
- For loose waves (2b-3a), a shag works best with longer overall length (mid-back at least) because shorter shags on looser curls can look stringy
- For medium curls (3b-3c), a shag can be shoulder-length or shorter and still look full and textured
- For tight curls and coils (4a-4c), even a very short shag looks voluminous and textured because of the curl pattern itself
- A shag intentionally breaks your hair into sections with different lengths and textures, so asking your stylist for a “choppy, textured shag” is actually the right approach
- The back should be shortest (adding height), the sides should be medium length, and the front should be longer, framing your face
Pro tip: Shags look better the “messier” they are, so resist the urge to perfectly define your curls. Scrunch your hair while it’s damp, let it air-dry, and embrace the slightly tousled, imperfect texture — that’s the whole point.
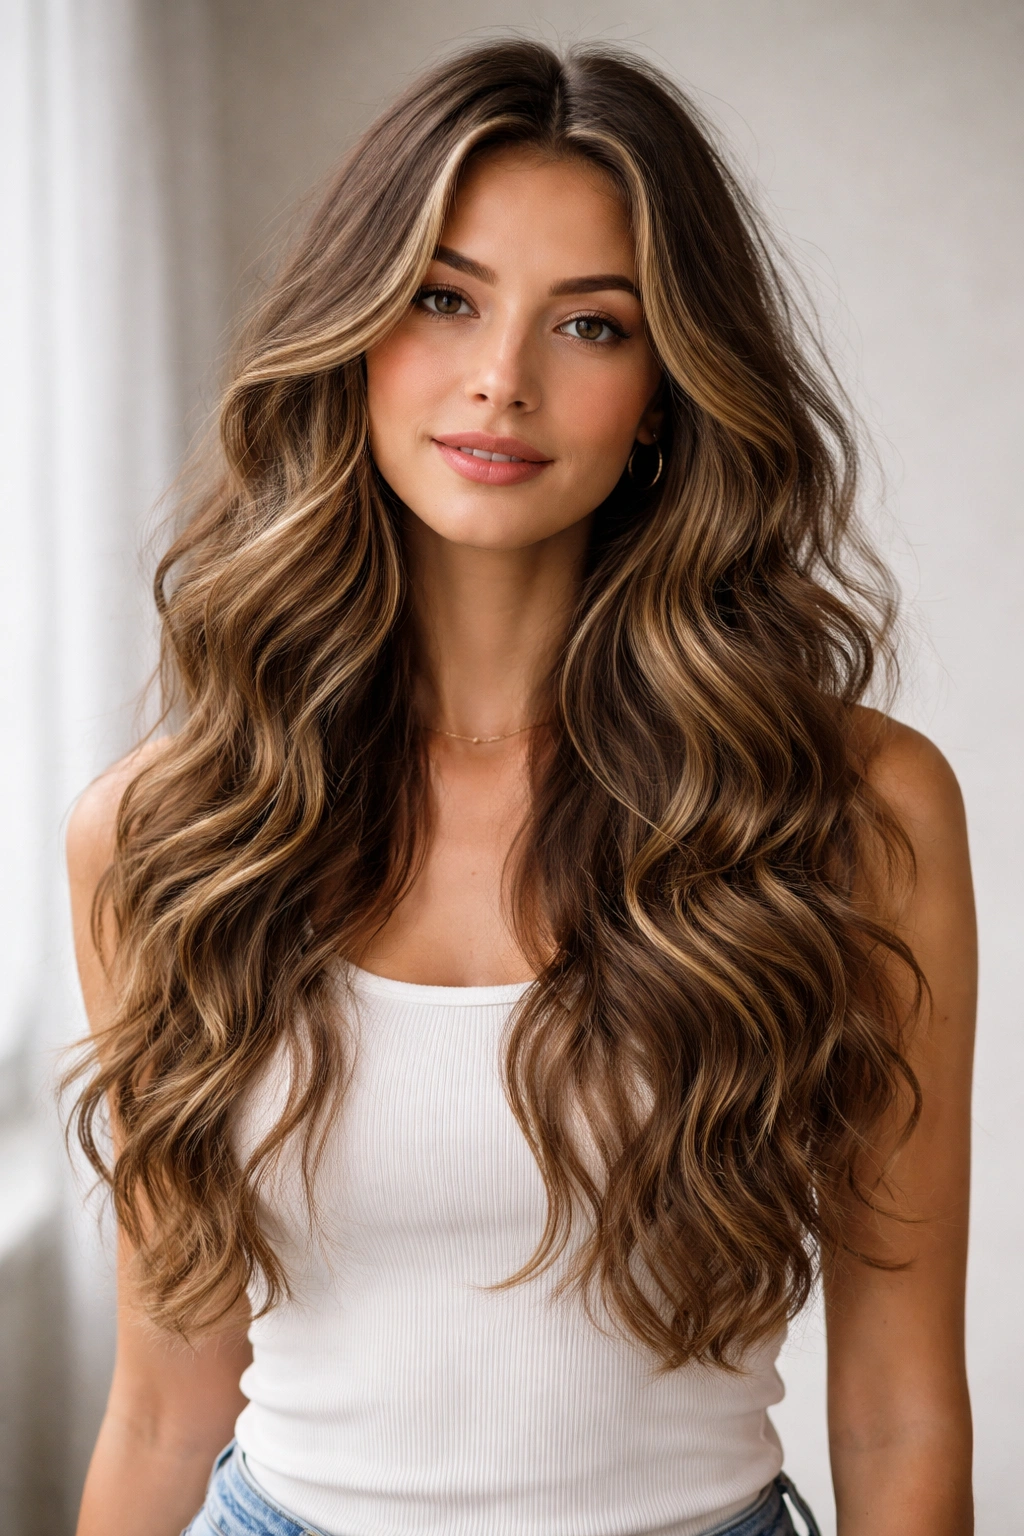
6. Two-Tone Curls with Color Play
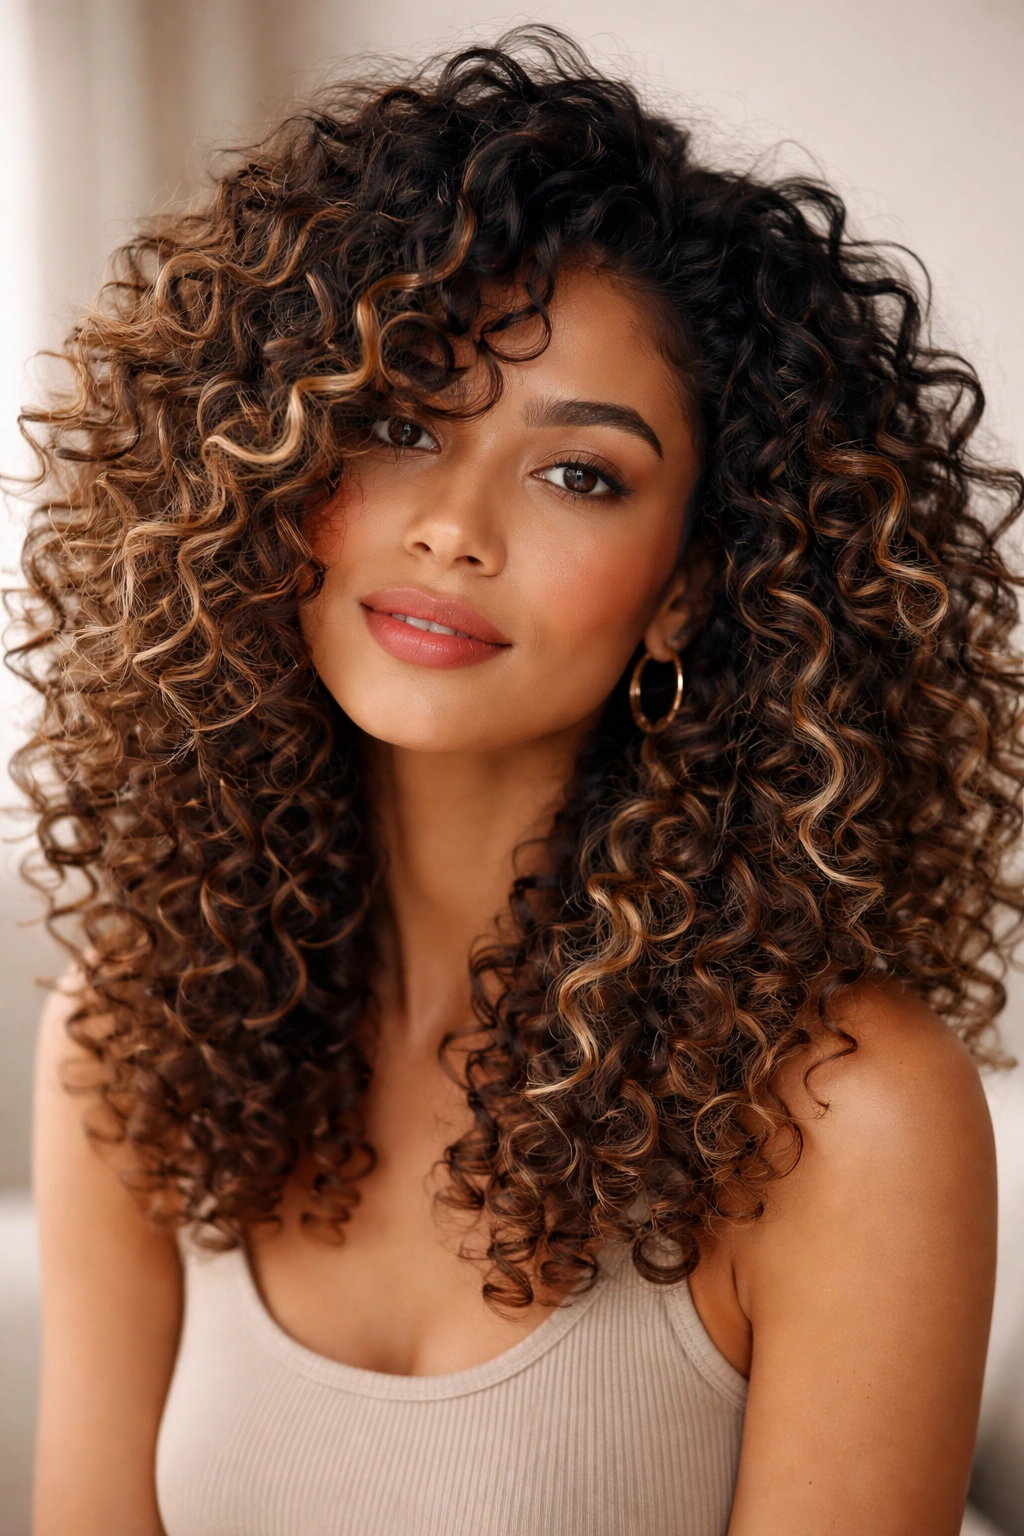
Color can completely transform a curly hairstyle, and two-tone curls (also called dimensional coloring or balayage on curls) add depth and movement to your style even when your hair is in its natural state. Two-tone typically means lighter pieces blended throughout darker hair (or vice versa), creating a multi-dimensional effect that catches light and makes your curls look more defined. The beauty of color on curly hair is that the texture itself creates natural dimension — when you have different tones weaving through your curls, the color play enhances that dimension even more. This style works on any curl type and at any length, and it’s particularly striking when the contrast between the two tones is noticeable.
Why Two-Tone Works Visually with Curls
Curly hair naturally has dimension because of the way the curls sit and catch light. When you add color dimension on top of that, you’re multiplying the visual effect. Lighter pieces in your curls catch light and appear closer or more prominent, while darker pieces recede slightly, creating the illusion of even more texture and depth. This is especially noticeable in photos and in person when you’re moving — the color seems to dance and shift as your curls move. Additionally, color can brighten your face and make your eyes pop, especially if you choose tones that complement your skin tone.
Color Maintenance and Curl Health
- Two-tone color usually involves some level of bleaching for the lighter pieces, which can dry out curls if not done carefully
- You need a stylist who understands both curly hair care and color — someone who can work with your curl pattern while applying color safely
- Colored curls require more intensive moisture care than uncolored curls; you’ll likely need to deep condition weekly rather than bi-weekly
- The best tones for curly hair are usually warm highlights (caramel, honey, rose gold) rather than cool, ashy tones that can read as dull against textured curls
- Your curls will look most dimensional if the lighter pieces are near your face and throughout the crown, rather than just in one section
Worth knowing: You don’t need to go drastic with two-tone color. Even subtle highlights that are just a shade or two lighter than your base color can add significant dimension to curly hair without the maintenance intensity of full color.
7. Tight Coils with High Fade
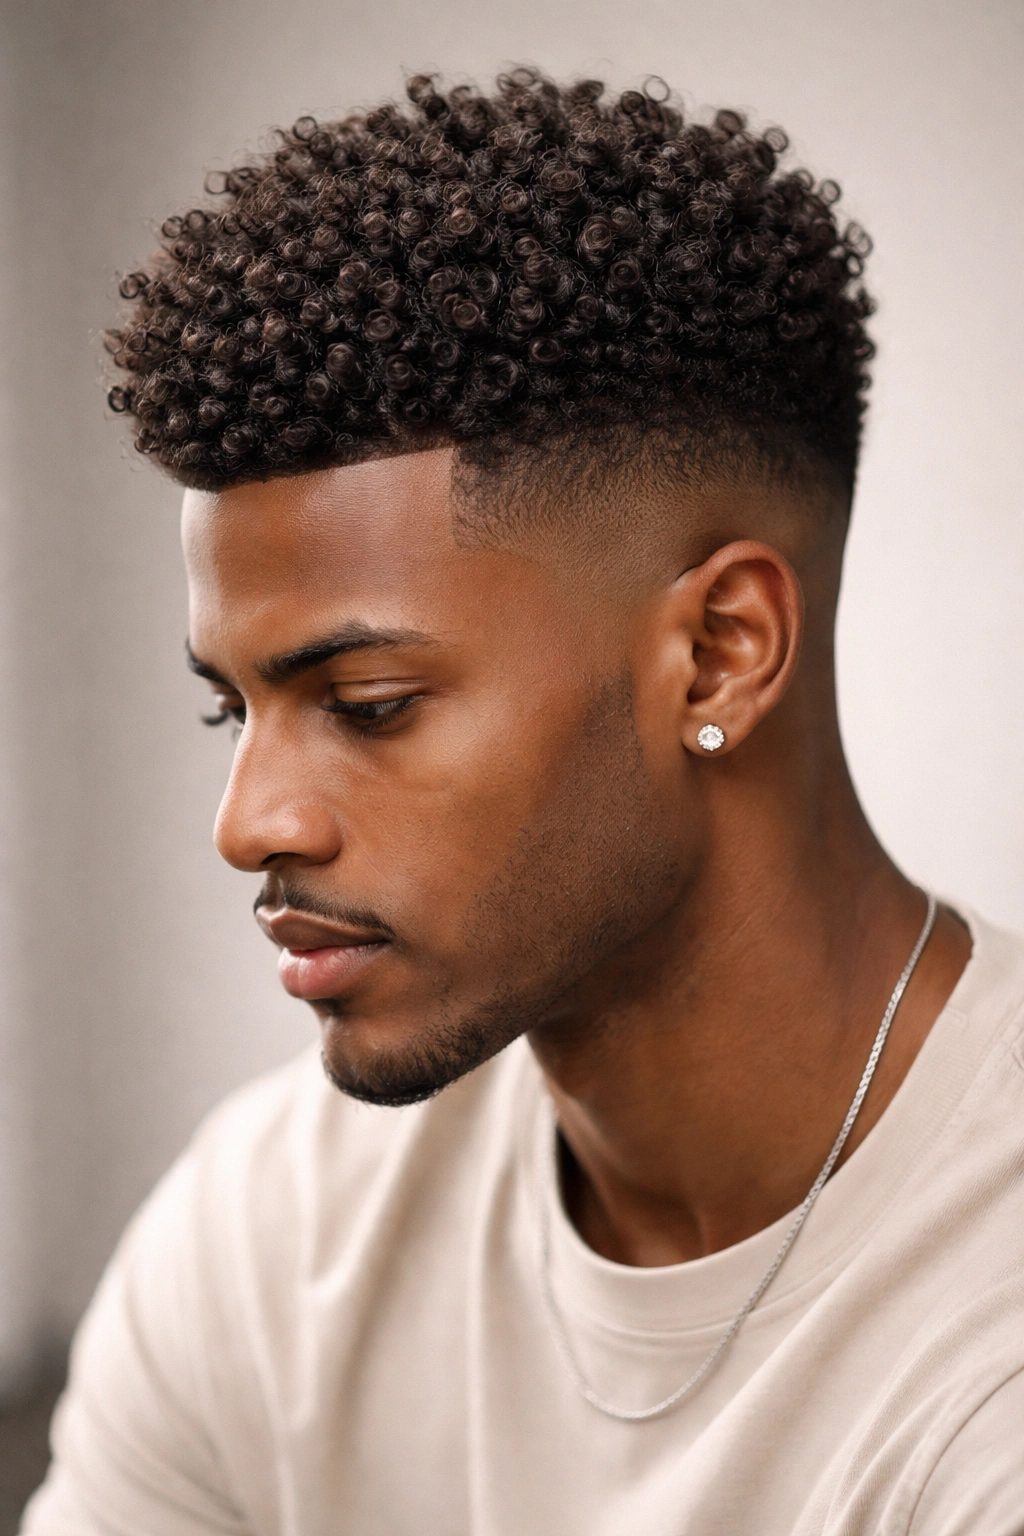
For people with naturally tight coil curl patterns (4b and 4c textures particularly), tight coils with a high fade is a style that celebrates texture and creates clean, architectural lines. A high fade means the sides are very short (clipped much shorter than the undercut) while the top stays long, allowing your tight coils to spring up and expand without the weight and pressure of longer hair on the sides pulling everything down. The coils on top can be styled in multiple ways: worn out and full for maximum volume, brushed back for a sleeker look, or twisted into protective styling like twists or braids. The high fade is particularly practical because it makes styling easier and protects the sides of your hair from breakage caused by friction against shoulders and clothing.
The Science of How Tight Curls Stack
Tight coils naturally stack on top of each other, creating height and volume with virtually no styling. When you remove the weight from the sides with a high fade, you’re allowing that natural stacking to happen freely at the crown. The coils can expand in all directions without being compressed or weighted down. This is why even a very short high fade (leaving maybe 2-3 inches on top) looks full and voluminous — the curl pattern itself creates the shape. Additionally, the high fade shows off the beautiful architectural lines of your hair and your head shape in a way that longer hair covering the sides wouldn’t.
Styling Flexibility Within This Cut
- Wear coils out and natural for a bold, statement look that’s entirely low-maintenance
- Use a twist-out technique (twisting damp hair while it’s wet, then unraveling once dry) for a slightly looser, curlier texture at the top
- Style into protective styles like coil-outs, twists, braids, or puffs that give you styling options throughout the week
- The high fade itself requires touch-ups every 2-3 weeks to maintain the sharpness, but the length on top can go much longer between cuts
- This style is incredibly low-manipulation, which is why it’s popular among people focused on protective styling and hair health
Real talk: A high fade on tight curls is one of the most striking and eye-catching hairstyles you can wear. If you’ve been nervous about going short or experimental, this is a confident choice that reads as intentional and modern.
8. Curly Top Knot and Pineapple Updo
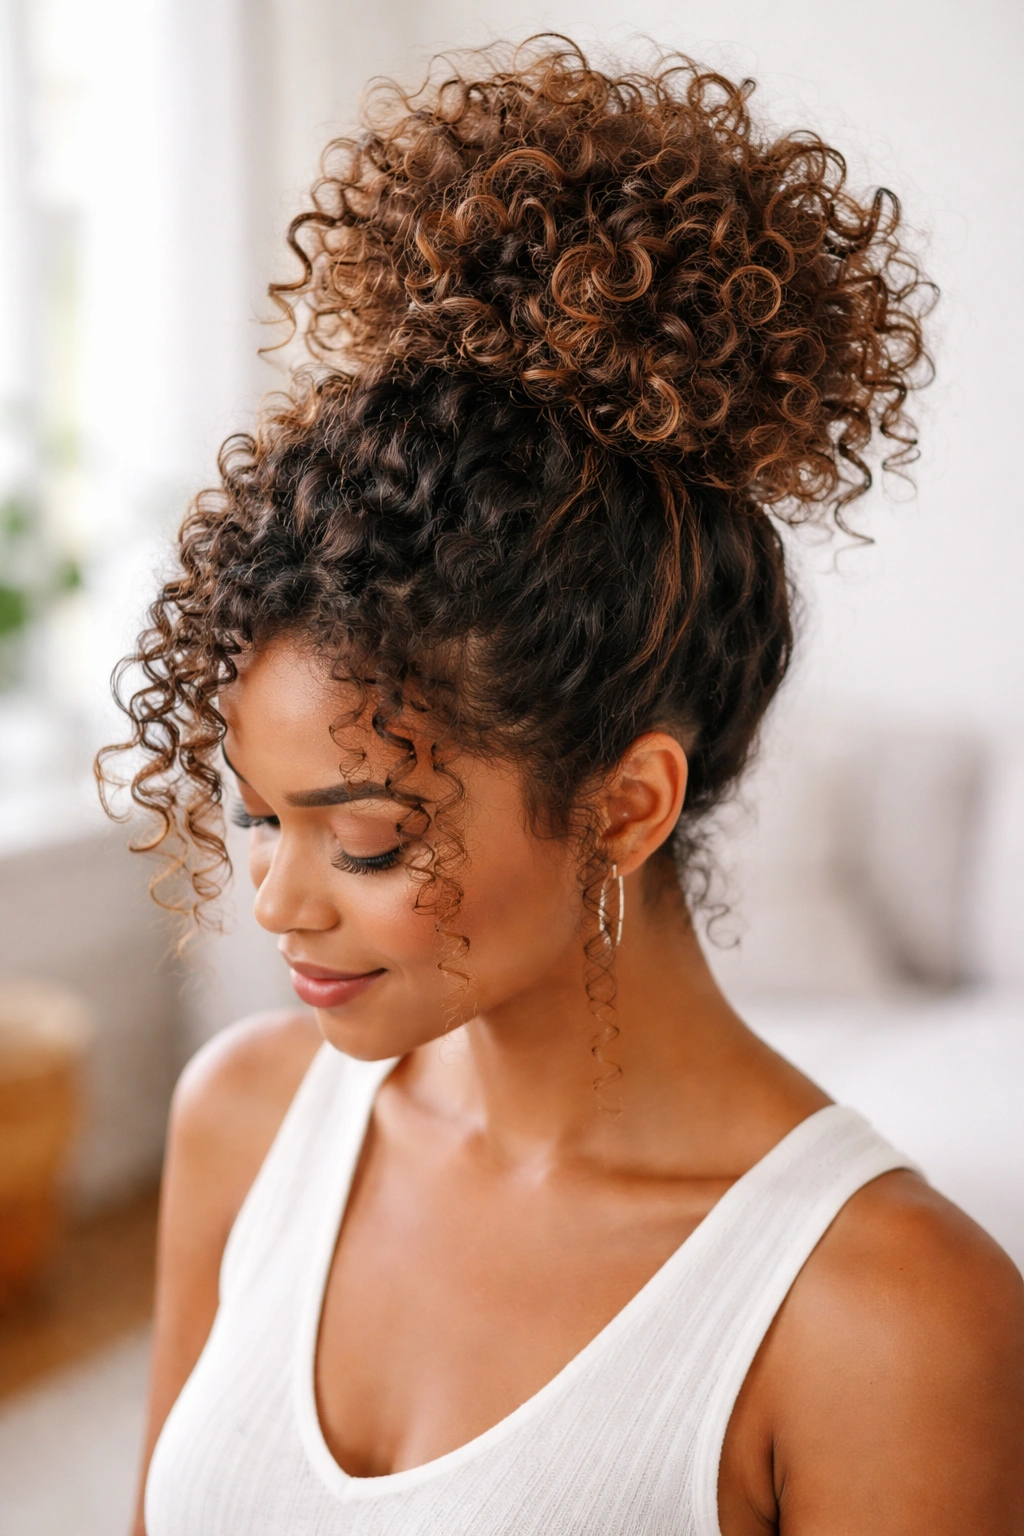
While technically an upstyle rather than a haircut, the curly top knot and pineapple updo deserve their own spot because they’re styling techniques that completely change your look and are essential to curly hair care and maintenance. A top knot is exactly what it sounds like — your curly hair gathered high on your crown and twisted or secured into a knot shape. A pineapple updo is a loose high ponytail (the name comes from the resemblance to a pineapple shape). Both styles serve multiple purposes: they’re cute and put-together enough for actual wearing out in public, they protect your curls while you sleep by preventing friction and flattening, and they give you styling options when your curls are having an off day.
Why These Updos Actually Preserve Curl Quality
When you sleep in updos or wear them during the day, you’re preventing your curls from getting flattened, frizzed, or rubbed raw against pillows and fabric. The friction from sleeping on loose curls causes breakage, frizz, and loss of definition. A loose updo (key word: loose — you don’t want to pull so tight that you’re creating tension on your scalp and edges) keeps your curls in their natural shape overnight, so you wake up with minimal styling needed. Wearing updos throughout the day gives you styling variety without requiring you to restyle your hair, which means less manipulation and healthier curls long-term. These styles are also protective in that they keep the ends of your hair tucked away and protected from environmental damage.
Styling Variations Within the Updo Concept
- High top knots sit directly on your crown and read as young and playful
- Lower top knots (more toward the back) read as sleeker and more adult
- Messy, slightly undone top knots created by leaving some curls loose and slightly framing the face look more intentional and styled
- Pineapple updos work best with your hair slightly damp or refreshed with a water-curl cream mixture so the curls are activated and springy
- You can sleep in these styles if you use a silk or satin elastic (regular elastics create kinks and breakage) and keep the updo loose enough that it’s not pulling on your scalp
- Adding a silk or satin bonnet or scarf over an updo while you sleep gives you extra protection and helps maintain moisture in your curls
Pro tip: If you’re planning to wear an updo multiple days in a row, refresh your curls before putting them back up — spritz with water, add a tiny bit of curl cream or refresher product, and let them air-dry for a few minutes before securing the updo again.
9. Wavy Curls with Long Layers
Long, layered wavy curls are a style that works for nearly everyone and celebrates movement without sacrificing length. This cut is less about removing bulk (though some is removed strategically) and more about creating flow and removing weight in a way that lets your waves stretch and elongate. The layers are longer overall — usually gradual changes in length rather than dramatic differences — which means you keep the length you want while still getting dimension and movement. This is the style that makes people say “your hair looks so healthy” because the ends aren’t blunt, the movement is natural, and there’s an effortless quality to it. It works on loose waves, medium curls, and even tighter curl patterns if styled with a technique like a diffuser blow-dry that encourages stretch.
The Physics of How Layering Creates Movement
Weight suppresses curl and wave formation. When you have long, thick, uncut hair, the sheer weight of it pulls your curl pattern down and makes it look tighter or straighter than it actually is. By removing some weight through layering, you’re allowing your natural curl pattern to express itself more fully. Longer layers specifically create movement because each layer is long enough to maintain weight (so it doesn’t puff out uncontrollably) but graduated enough that air flows through and allows the curl to open up and wave. This is why wavy curls with long layers look so effortless — you’re literally working with the physics of your hair rather than against it.
Length and Layer Placement for Your Face Shape
- For round faces, longer layers that fall past the shoulders elongate your face and make it appear slimmer
- For heart-shaped faces, layers that start around chin-length and get progressively longer work well because they add volume where needed at the bottom
- For square faces, diagonal layers that are longer in front and shorter in back soften angular features
- For oblong faces, layers throughout add horizontal dimension and make your face appear shorter
- Regardless of face shape, asking your stylist for “longer layers with gradual graduation” usually gives better results on wavy-curly hair than asking for specific layer lengths
Worth knowing: This cut looks better the longer it grows out — within reason. A fresh cut might have very subtle layers that you can barely see, but as your hair grows and the shorter layers get longer, the layering becomes more obvious and creates more movement and dimension.
10. Low Fade Curly Fade with Curls on Top
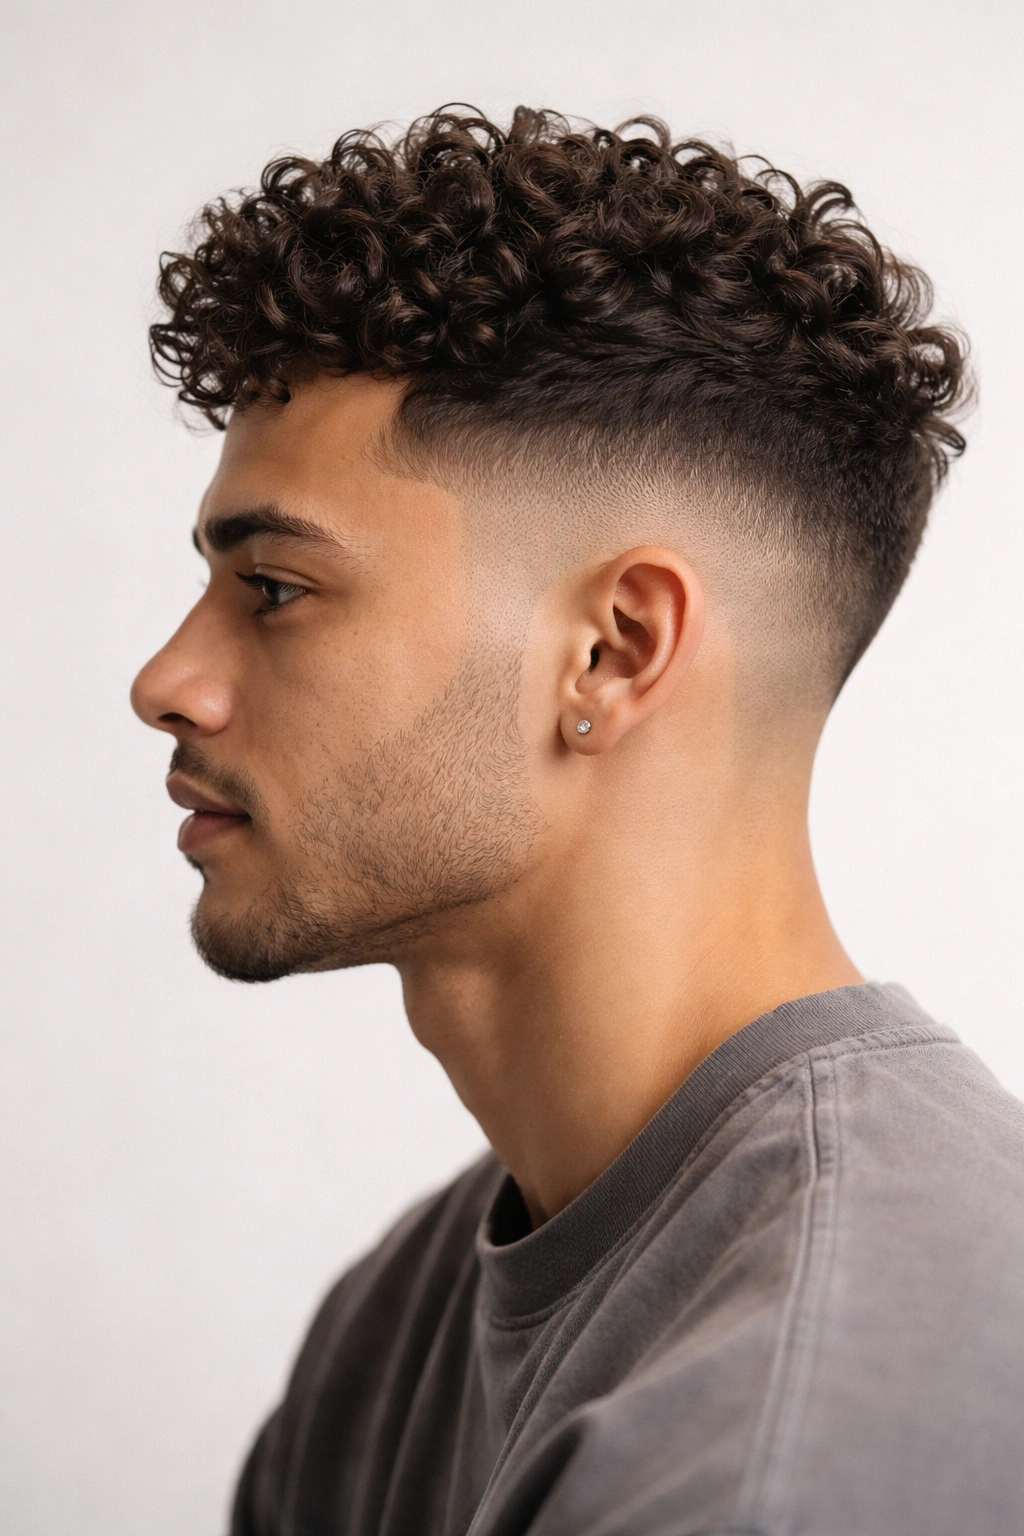
A low fade is similar to an undercut or high fade but with the fade starting lower — usually around ear level or slightly below — so you have more bulk on the sides while still creating that contrast between the short sides and longer top. This style gives you a slightly softer look than a high fade while still providing the benefits of removing weight from the sides. The low fade works particularly well for people who like the clean, sharp aesthetic of a fade but want something slightly less dramatic. With curls on top left to grow out, you have room for texture, movement, and styling flexibility while maintaining clean lines on the sides.
Why a Low Fade Offers More Styling Flexibility
Because you’re keeping more length on the sides than with a high fade, you have more options for how you style and present the cut. You can wear it down with curls flowing everywhere, brush or comb the sides back while letting the top stay full and textured, or even style the whole thing back for a sleeker appearance. The low fade also suits a wider range of face shapes because it’s less dramatic than a high fade. For people with wider faces, the fuller sides created by a low fade (rather than the stark contrast of a high fade) can be more flattering.
Maintenance and Product Choices
- A low fade requires touch-ups every 4-5 weeks to keep the lines clean, less frequently than a high fade
- The longer you keep the length on top, the more styling options you have, but it also means more time spent styling in the morning
- For a low fade, texturizing products work better than heavy gels — try mousse, sea salt spray, or light curl cream that let your curls move
- You can style the top in multiple ways: wild and full for volume, brushed back with a light product for a cleaner look, or twisted for texture
- The low fade pairs well with beard work (if you’re growing one) because the slightly longer sides create better proportion with facial hair
Real talk: A low fade is a great middle ground if you like the idea of a fade but aren’t ready for the commitment of a high fade. It’s modern and sharp but still feels like a more traditional men’s haircut, if that matters to you.
Final Thoughts
Choosing a curly hairstyle that actually works with your hair — rather than against it — is one of the best investments you can make in how you look and feel every single day. A good cut, paired with the right styling technique and products, transforms curly hair from something that feels unmanageable into something that’s genuinely effortless. The styles in this guide all share one thing in common: they’re designed with your curl pattern in mind, not despite it. They work with your natural texture instead of requiring you to fight it.
The truth is that finding the right style often requires a stylist who specializes in curly hair. Not every stylist understands how curls work, how they behave when wet versus dry, or how cutting techniques need to change to respect curl patterns. When you’re ready to commit to a new style, ask for recommendations for curly-hair specialists in your area. Show your stylist pictures of what you want — and pictures of your hair texture in its natural, unmanipulated state, not heavily styled looks that might not be realistic for your everyday routine.
Once you’ve got the cut, the styling and care are the other half of the equation. Even the best haircut won’t look its best if you’re using products that don’t suit your curl type or skipping deep conditioning. Give yourself permission to experiment with different products and techniques until you find what makes your curls look and feel their absolute best. Curly hair is an asset, not a problem to be solved — and the right style makes that crystal clear.