Curly hair in the morning presents a unique challenge: you’ve got gorgeous natural texture that took hours to develop, and you’ve got maybe ten minutes before you’re out the door. The good news is that curly hair actually lends itself beautifully to quick, polished styles — once you know the right techniques that work with your curl pattern instead of against it. Most of the stress around styling curls in a hurry comes from trying to force them into flat, sleek shapes that require heat tools and product wrestling. The moment you embrace what your curls naturally want to do — cluster together, stack upward, twist into defined patterns — getting ready becomes genuinely fast.
The styles that work best for busy mornings are the ones that look intentional while actually being forgiving. A few strategically-placed bobby pins, a spritz of water from a spray bottle, and maybe a quick palm-scrunching with gel can transform bedhead into an effortlessly put-together look. The trick is knowing which styles leverage the volume, shape, and definition your curls already have, rather than fighting against them. Most of these styles take five to ten minutes once you’ve figured out the technique a couple of times. And honestly? Some of your best hair days might be the ones where you’re rushing and just grab whatever works — that genuine, undone quality is often way more flattering than something over-thought.
1. The Pineapple Topknot
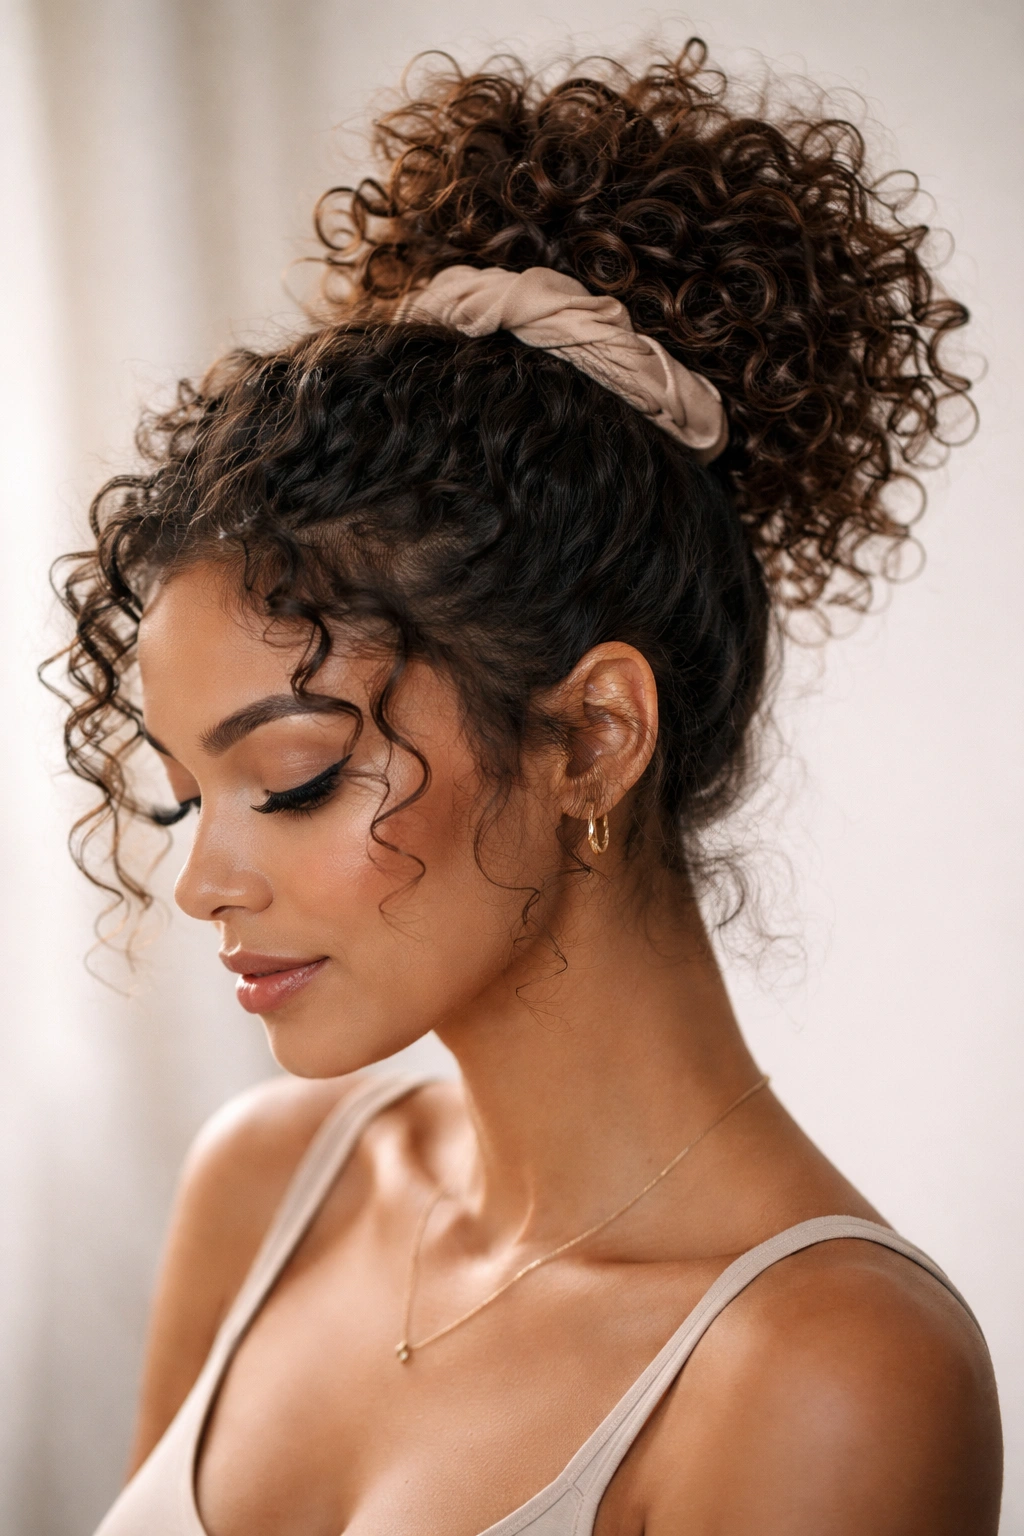
This is the fastest possible way to get curls off your face while keeping them looking deliberately styled rather than like you just rolled out of bed. The pineapple is a loose, high gathering of curls secured at the crown — not a tight bun, but more of a relaxed clump held together by a soft scrunchie or claw clip. The result is height, movement, and an undone elegance that reads as intentional.
Why This Works for Rushed Mornings
The pineapple topknot requires absolutely zero effort with a heat tool or product beyond what you’ve already got in your hair from the day before. You simply flip your head forward, gather your curls loosely at the crown, and secure them with a hair-friendly elastic — the kind that doesn’t snap or create creases. Because you’re not pulling curls flat or forcing them into a tight bun, your curl pattern stays intact and pops right back into shape the moment you take it down. This style works whether your curls are fresh from wash day or a few days in. Even second-day curls that have relaxed and lost a bit of their spring will look intentionally tousled in a pineapple rather than messy.
How to Get It Right Every Time
- Flip your head completely upside down and use both hands to gather curls loosely at your crown
- Use a soft elastic, silk scrunchie, or claw clip — never a regular rubber band that will create a sharp crease
- Secure with just enough tension to hold the curls in place; this isn’t a pulled-tight topknot but a casual gathered style
- Let a few face-framing pieces fall loose for softness; a perfectly smooth pineapple actually looks less polished
- Once clipped, give the whole knot a gentle shake with your fingers to loosen it and create volume
Pro tip: Sleep in your pineapple if you did it the night before — your curls will be completely refreshed and bouncy the moment you take it down in the morning, turning a previous-day style into a completely fresh one with zero effort.
2. Twisted Crown
A twisted crown sits like a halo around the back of your head, framing your face while pulling curls back just enough to show your features clearly. This style works because it uses the natural tendency of curls to coil and cluster — you’re simply guiding a few sections into deliberate twists that wrap around the head and secure with bobby pins. The result looks intricate and put-together, even though it’s genuinely just twisting hair, not braiding.
The Beauty of Using Curl Texture
Twisted crowns work because curls hold a twist shape naturally without requiring much tension or heat. Unlike straight hair that needs to be twisted tightly or waved with heat tools to hold a coil, curly hair naturally wants to spiral and stack. Your twist will stay put from the moment you secure it, even if you don’t use product. The crown also gives you the visual benefit of height and dimension — your face looks more awake, your features more defined, and the overall effect is romantic rather than severe.
Step-by-Step Technique for Maximum Speed
- Take a small section of hair from one side of your head, near your ear
- Twist it gently toward the back of your head; if your hair is damp, give it a quick spritz with water first to activate the curl
- Once you’ve twisted about four to six inches, secure the end with a bobby pin tucked under the curl, not pulling the twist tight
- Repeat on the other side of your head, twisting toward the back
- The two twists should meet or nearly meet at the back center; secure with another bobby pin and gently fluff
Worth knowing: If your curls are on the looser side or droopy by morning, this is the style that will benefit most from a quick water spritz and palm-scrunching with gel. The moisture reactivates the curl pattern, and the twists will hold even tighter than they would on dry hair.
3. Half-Up Clipped Style
The half-up is a reliable middle ground: curls are partially secured so they’re off your face and neck, but the rest hang freely and do their thing. This style works with almost any curl type because you’re not trying to coerce the entire head into one shape — you’re just managing the top half. A claw clip or hair clip at the back of the crown holds the top section, while curls from the bottom half create volume and frame the face.
Why Half-Up Is Deceptively Powerful
This style looks like you have significantly more volume and curl definition than you might actually have at that moment. By gathering only the top portion and letting the bottom half hang, you create visual separation and shape. Your curls at the crown get lift from being clipped up, and your face-framing curls fall naturally without being constrained. Even if your curls have relaxed overnight and lost bounciness, the half-up automatically creates dimension by layering a clipped section over a free-hanging section.
How to Make It Look Intentional, Not Lazy
- Flip your head forward and gather only the top third to one-half of your hair, depending on how much you want back
- Use a claw clip or hair clip to secure at the crown; position it toward the back rather than dead-center for a more modern look
- Take the clip out once, flip your head back upright, and re-clip from the right side up — this prevents visible creases and makes it look less flat
- Leave face-framing pieces completely free and don’t try to control them; the slightly-undone texture is what makes this style work
- If your clipped section looks too smooth or slicked, use your fingers to gently tease the roots for texture and volume
Insider note: Spritz the clipped section lightly with dry shampoo before clipping for instant texture and grip — this keeps the clip from sliding out and adds fullness that might otherwise be missing on a low-volume morning.
4. The Messy Bun
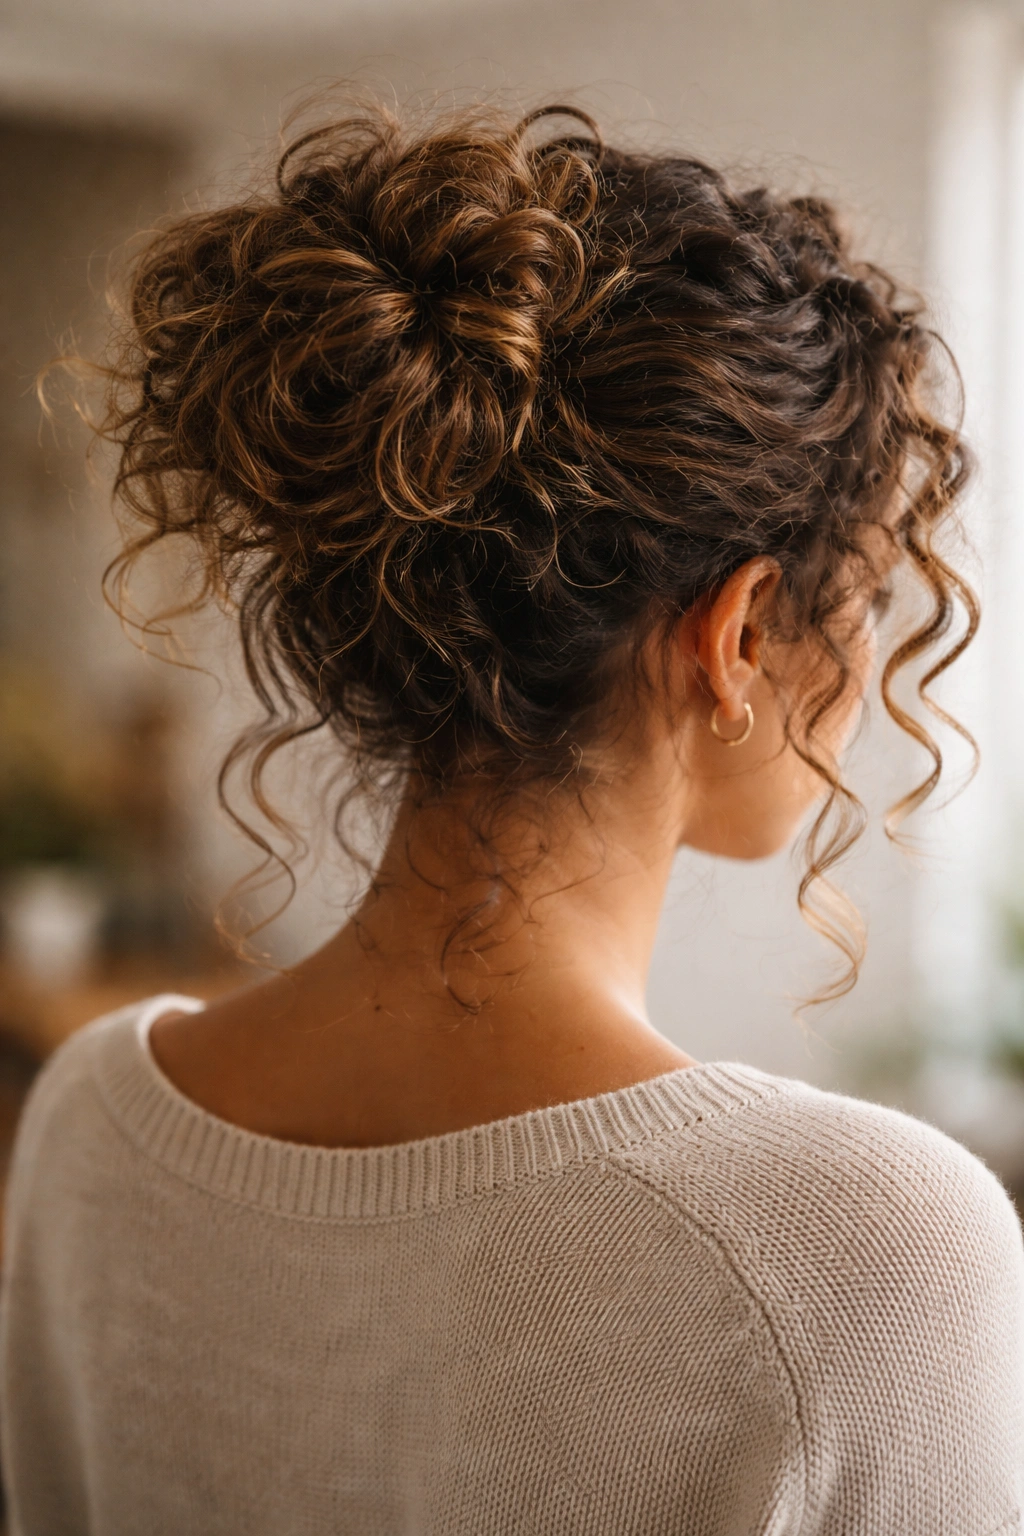
Curly hair makes genuinely the best messy buns because the texture is already there — you’re not trying to tease or manipulate straight hair to look textured. You’re simply gathering your natural curls loosely and securing them, then strategically loosening the bun to create that deliberately-undone effect that somehow reads as both polished and relaxed.
Why Curly Messy Buns Look Better Than Straight-Hair Versions
A messy bun made from straight hair requires teasing, texture spray, and styling effort to look intentional rather than like you just threw your hair in a bun to wash the dishes. A messy bun made from curls? Your curls provide the texture automatically. You twist or coil your hair loosely at the back of your head, secure it with a clip or elastic, then gently pull at individual curl clusters to create a fuller, more dimensional bun. The outcome looks effortlessly textured and romantic, not sloppy.
The Technique That Prevents the “Too Tight, Too Smooth” Problem
- Gather your curls into a loose, high ponytail at the back of your head, holding it loosely in one hand
- Twist the ponytail gently or coil it around the base into a loose spiral
- Secure with a claw clip or elastic, but stop — don’t try to smooth anything or tuck all the ends in
- Now comes the styling: gently pull individual curl clusters out from the bun to create dimension and volume
- Keep pulling and loosening until the bun looks full and textured, with some curls intentionally falling free
- Spritz lightly with a flexible-hold spray to keep everything in place without adding stiffness
Pro tip: If your bun starts to loosen throughout the day (common with curly hair that’s been pinned), keep bobby pins in your bag for a quick re-pin. Twist a small section of loose curls around the bun base and secure with a pin — nobody will be able to tell it’s different from the original style.
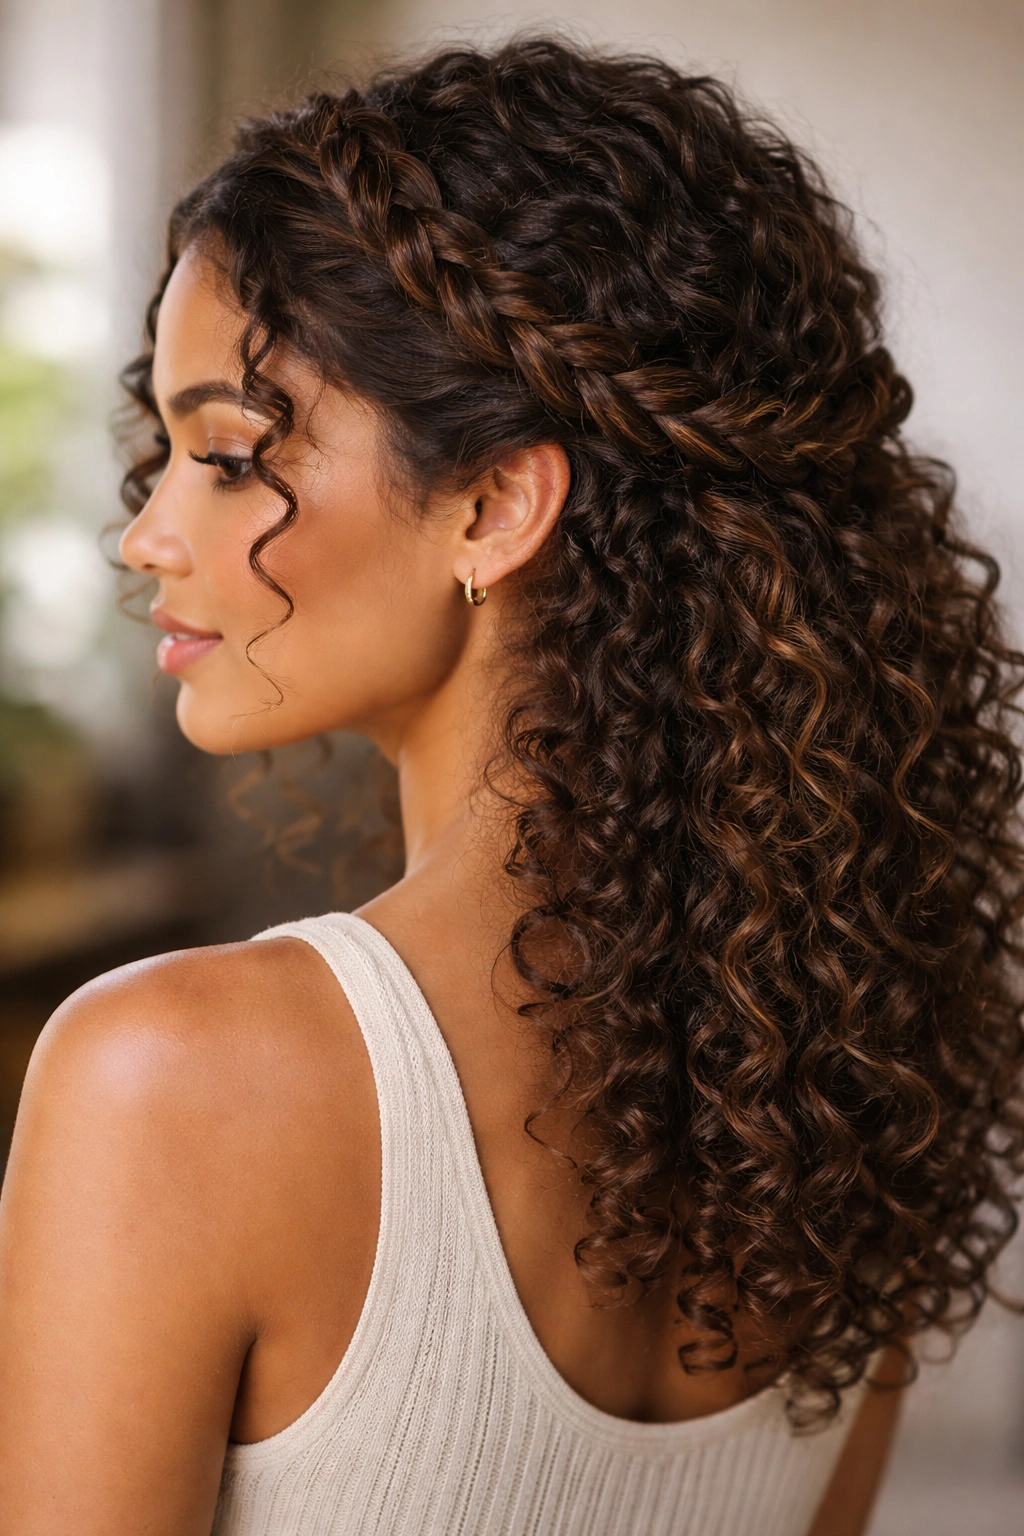
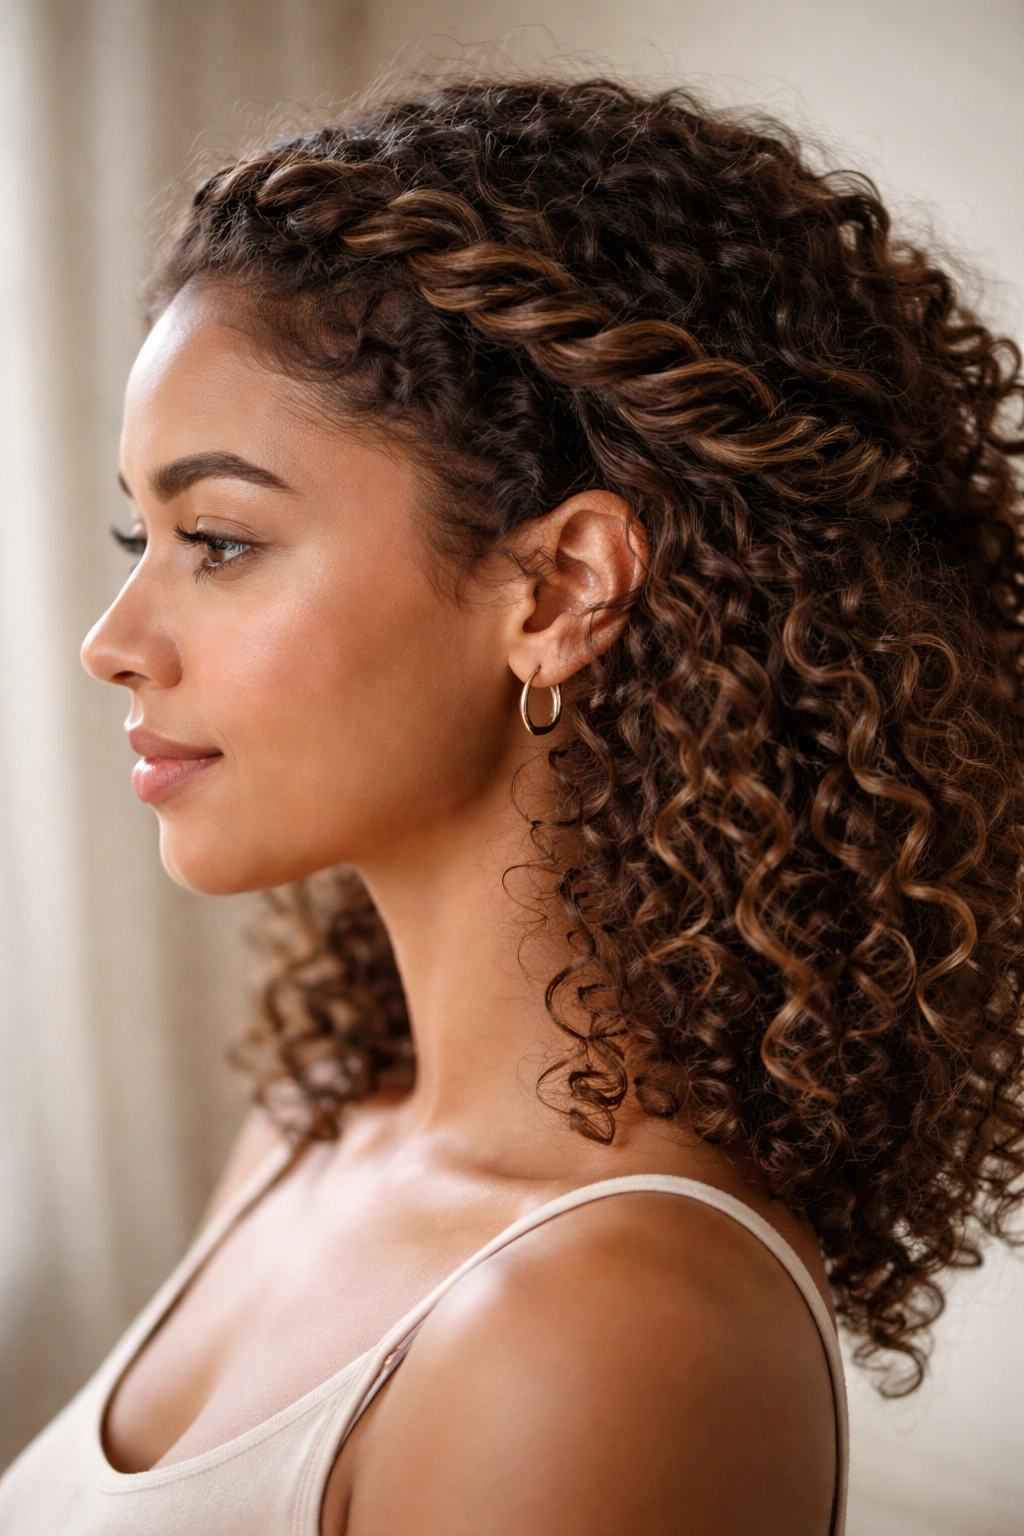
5. Twisted Side Sweep
A side sweep gathers curls to one side and secures them with twists and bobby pins, creating a draped, asymmetrical look that feels romantic and intentional. This works beautifully for curls because the twists naturally cluster and hold — you’re not fighting against the curl pattern but working with it to create defined twists that wrap around the head.
The Asymmetrical Advantage
Side-swept styles are wildly flattering on curly hair because they create facial framing while also showing off curl definition and volume. By sweeping curls to one side and securing them with twists, you’re creating a visual focal point — whether that’s one side of your face, a defined profile, or the way your curls cascade over one shoulder. The asymmetry makes this style feel more thoughtful and fashion-forward than a center-parted look, which is why it works so well as a quick but polished morning style.
How to Create the Effect Quickly
- Create a deep side part, pushing the larger section of curls toward the side you want them to sweep to
- Take a small section from the back of the smaller side and twist it toward the back of your head, where you want curls to gather
- Secure that twist with a bobby pin hidden under the curl
- Repeat with another small section, spiraling twists toward the same gathering point
- Once you have two or three small twists anchoring the sweep, gently comb or finger-comb the larger section of curls toward that same area
- Clip or pin everything together at the gathering point and fluff the secured curls for dimension
Worth knowing: This style works best when your curls have at least a little grip or texture — so wash day or day-one hair is ideal. Day-three or day-four curls will still work, but you might need a light spritz of water and a moment for the curls to reactivate before twisting.
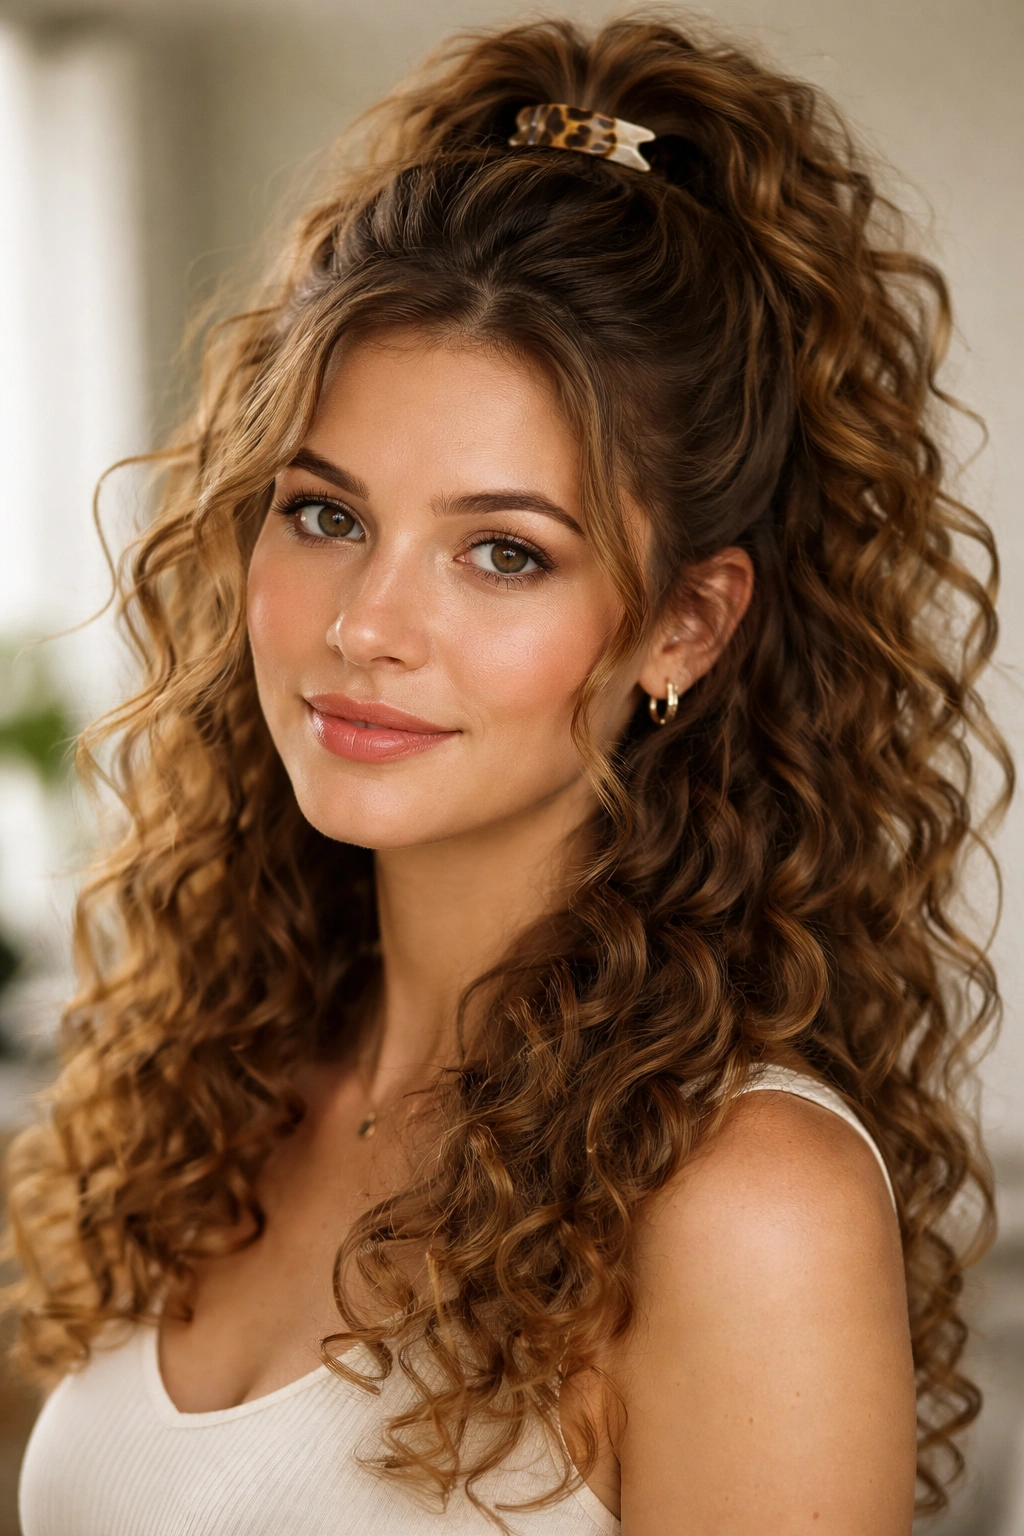
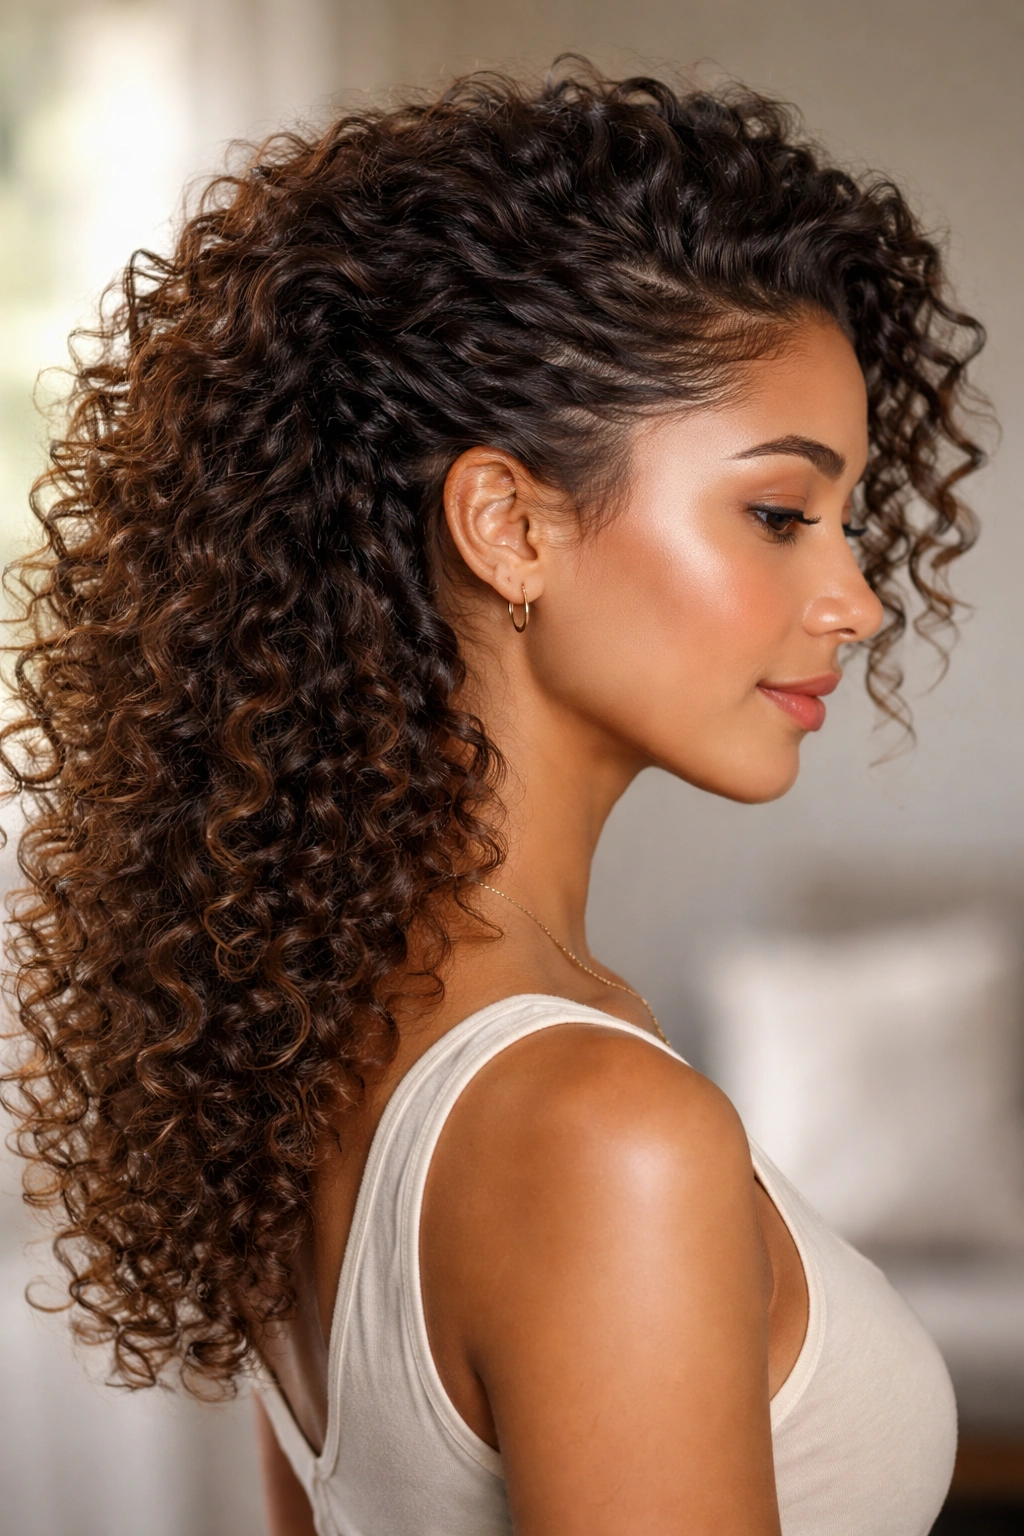
6. High Ponytail with Accent
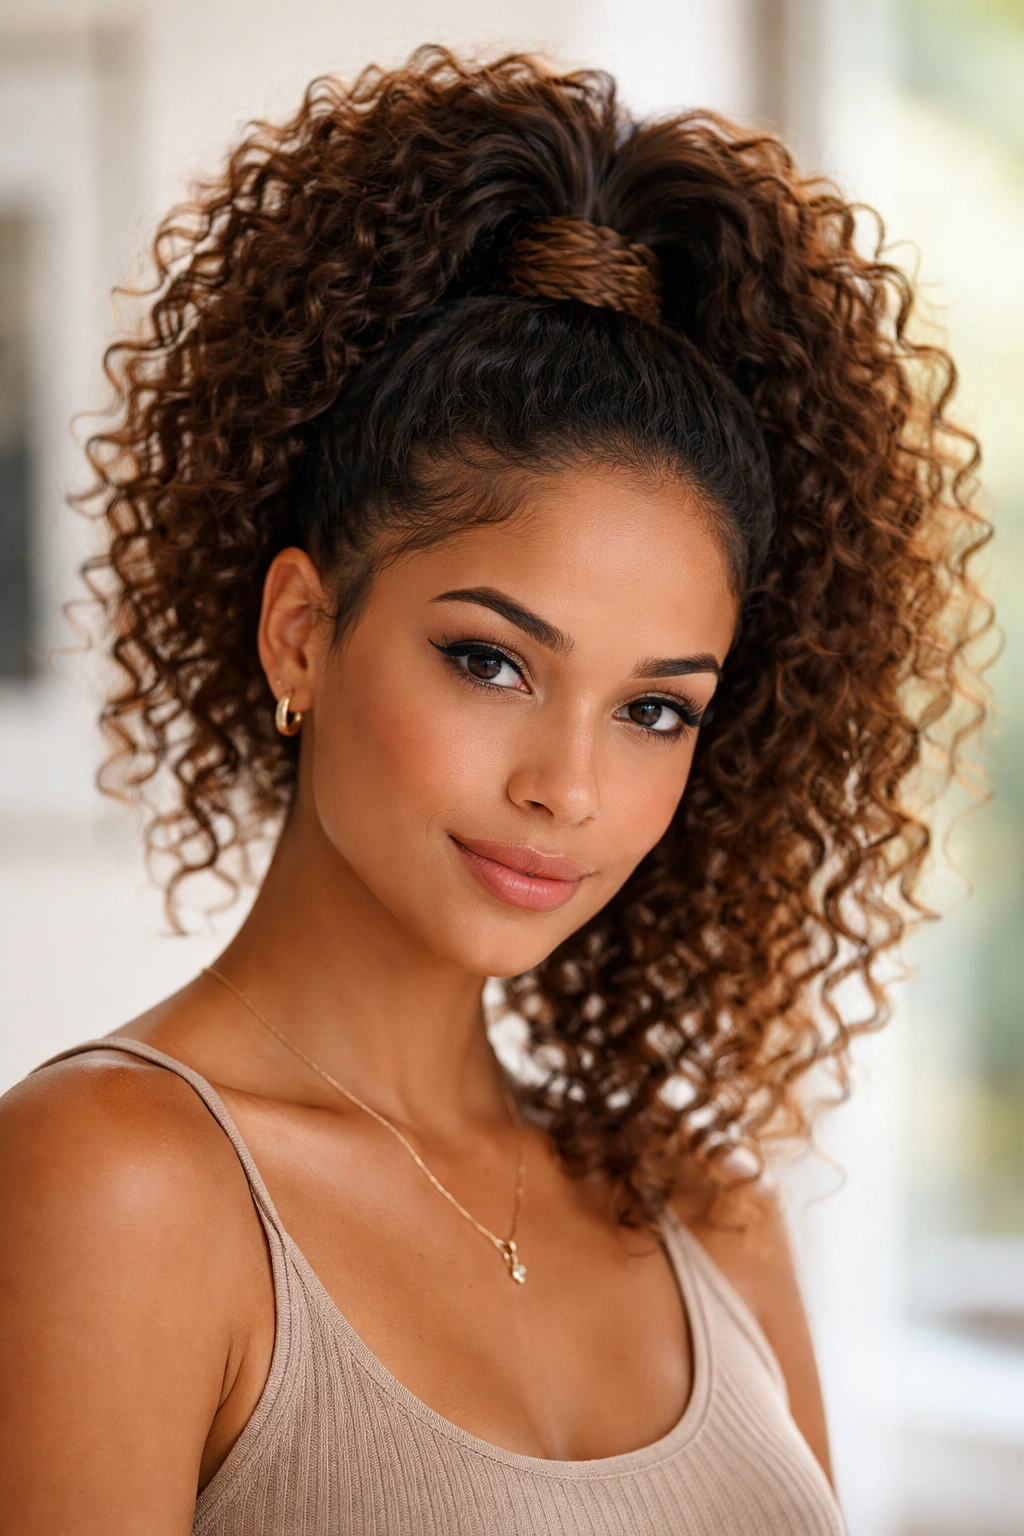
A high ponytail gathered at the crown is a classic, but the secret to making it look special on curly hair is adding an accent — a small twisted or braided section that wraps around the base of the ponytail elastic, instantly elevating the whole look from “quick practical style” to “I put thought into this.” The accent takes maybe thirty extra seconds but makes an enormous visual difference.
Why the Accent Detail Changes Everything
Wrapping a small twisted or braided section around your ponytail base hides the elastic, adds texture and dimension, and creates a focal point that draws the eye. On its own, a basic ponytail can look utilitarian or lazy. With a wrapped accent, the exact same ponytail looks intentional, polished, and style-forward. The accent also creates visual separation between your gathered curls and the rest of your hair, making the whole hairstyle read as more deliberate.
Creating the Accent in Real Time
- Gather your curls into a high ponytail at your crown and secure with an elastic
- Take a thin section of hair from the side of the ponytail (only about an inch thick) and twist it gently
- Wrap that twisted section around the base of the elastic, covering it completely
- Secure the end of your twist with a bobby pin tucked underneath so it’s invisible
- Gently fluff both the ponytail curls and the twisted accent to add volume and texture
Pro tip: If you want the accent to look even more polished, use a small claw clip instead of an elastic for the main ponytail — secure it, create your accent twist, then hide the clip teeth completely under the wrapped twist. The result is an elevated look that takes the same amount of time but reads as significantly more styled.
7. Curly Low Bun

A low bun at the nape of your neck gathers curls away from your face and neck while keeping the style close to your head — practical for hot mornings, working out, or just wanting your hair completely secured without the height of a high bun. The low position also creates an elegant, professional vibe that works for casual settings or more formal situations where a high bun might feel too playful.
Low Buns Photograph Better Than You’d Expect
The curve of a low bun created from curls flatters the back of the head and neck in a way that straight-hair buns often don’t. Because your curls have natural texture and volume, a low bun doesn’t look severe or slicked-back — even if you’ve used minimal product, the curl pattern creates softness and dimension. The result is an elegant, pulled-together look that reads as intentional without requiring heat styling or extensive product application.
Technique for a Bun That Holds All Day
- Gather your curls into a low ponytail at the base of your neck, holding it gently in one hand
- Take the ponytail in both hands and twist it loosely into a rope, starting at the elastic and working toward the ends
- Coil that twisted rope around the base of the elastic, tucking the ends underneath
- Secure with bobby pins inserted horizontally through the coil and into your scalp; three to four pins should hold everything firmly
- Gently pull at curl clusters in the bun to loosen it and add volume
Insider note: A low bun holds best when your curls have at least a little texture or grip. If you’re styling on day-one hair with fresh curl definition, you might not need product. By day two or three, a light application of a flexible-hold gel or cream product on the ponytail before twisting will keep everything secure.
8. The Scarf Wrap
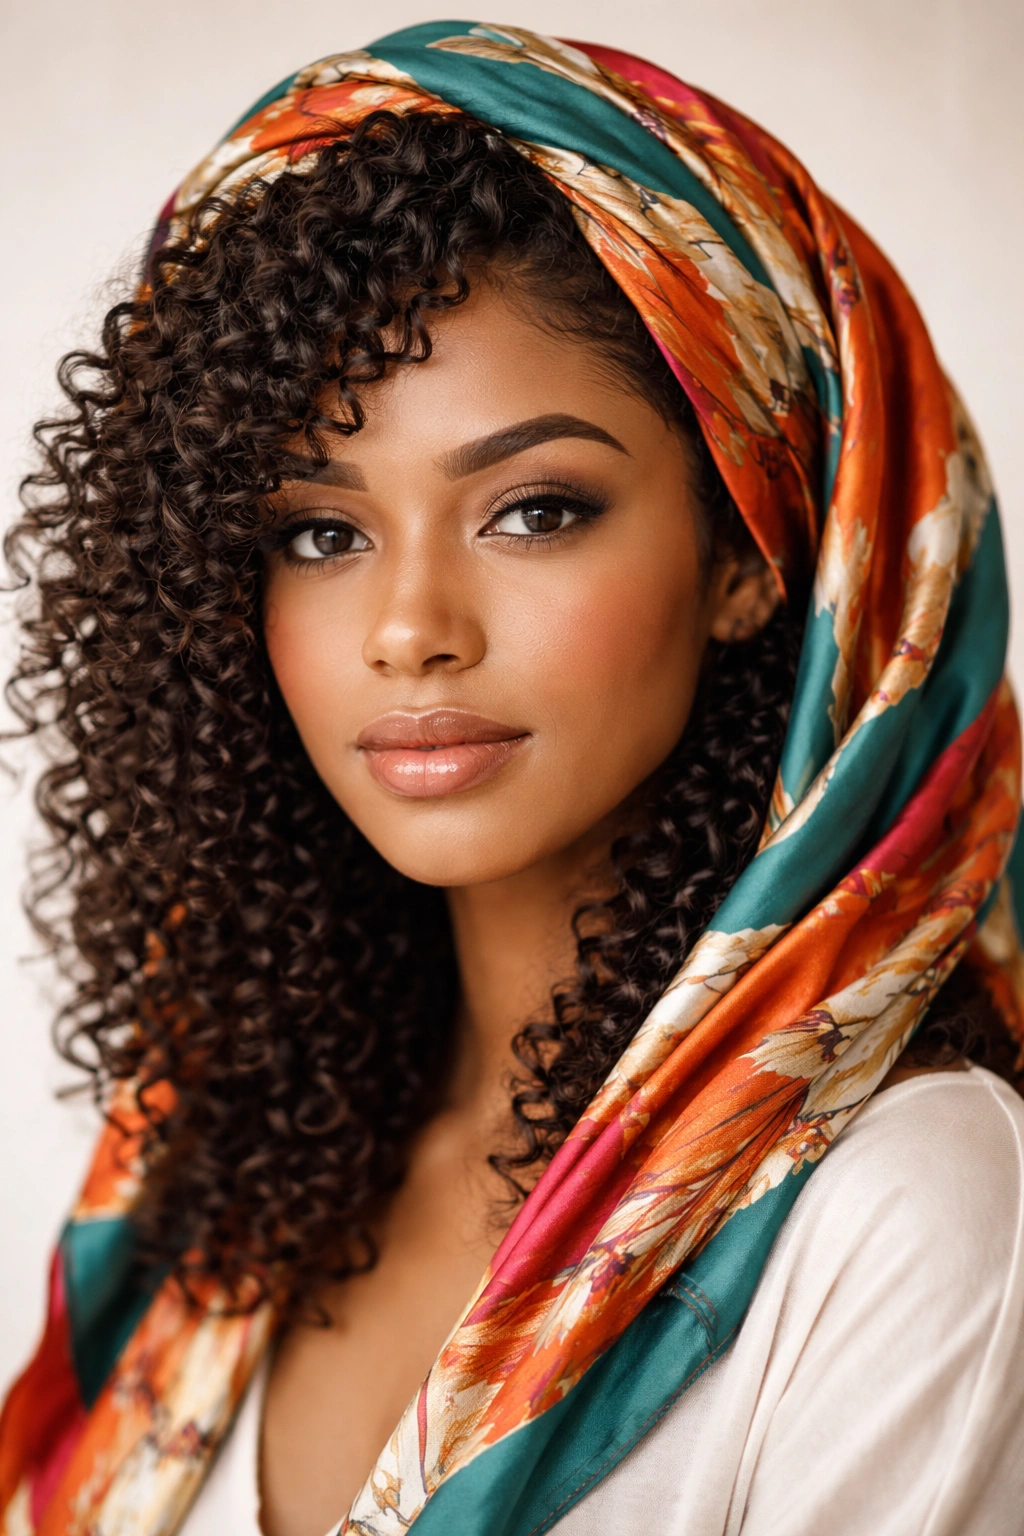
Wrapping a silk or cotton scarf around your head isn’t just a protective styling method — it’s also a genuinely gorgeous, intentional-looking hairstyle that takes about two minutes and works with literally any curl type or pattern. The scarf gathers your curls while also protecting them, and the visual impact is bold and undeniably stylish. You’re not hiding your curls; you’re framing them and accessorizing them.
Why Scarf Wraps Work When You’re Short on Time
A scarf wrap solves the problem of having-to-style without actually requiring any styling. Your curls can be fresh or second-day, tightly coiled or loosely wavy — the scarf works with all of it. You’re gathering your hair and securing it with a scarf, then arranging that scarf so it looks intentional and beautiful. The scarf automatically creates a polished frame for your face, adds color and pattern if you choose a printed scarf, and protects your curls from friction and frizz. It’s low-effort styling that somehow always looks high-effort.
Three Ways to Wrap That Look Different Each Time
- The High Crown Wrap: Gather curls at the crown, drape the scarf over your head like a headband, tie at the back, and let curls spill over and around it. This creates height and shows off your curl definition.
- The Low Wrap: Gather curls at the nape and wrap the scarf low, covering that gathered section but leaving face-framing curls completely free. This is elegant and flattering on almost every face shape.
- The Side Wrap: Gather curls to one side, wrap the scarf around to secure that side sweep, and let the other side of your hair flow free. This is asymmetrical and romantic.
Pro tip: Use a silk or satin scarf rather than cotton — it protects your curl pattern better, prevents frizz, and ties more smoothly without creating creases. If you don’t have a dedicated scarf, even a silk pillowcase folded into a triangle works in a pinch.
9. Twisted Headband
This style uses twists of your own hair as a headband, pulling curls back from your face while leaving the rest of your hair completely free. The twists sit like a crown or headband from one side of your head to the other, creating a focal point and polish without requiring bobby pins, clips, or elastic. It’s purely your hair twisted against itself and held by the natural grip of your curls.
Why Twisted Headbands Hold Without Products or Pins
Curly hair twists naturally want to grip and hold — the curl pattern itself creates enough friction that twists stay put without aggressive securing. Unlike straight hair that might slip out of a twisted headband after an hour, your curls will maintain the twist throughout the day. The more textured or tightly curled your hair is, the easier this style becomes. Even looser waves can manage this style if you take a thicker section and twist gently but firmly.
Creating a Twisted Headband That Stays Secure
- Take a small to medium-sized section of hair from one side of your head, starting near the temple
- Twist that section firmly toward the back of your head, twisting as you work across
- Once you’ve twisted about four to six inches, bring the twisted section across the back of your head toward the opposite side
- Continue twisting the same section (you’re not adding more hair, just twisting one continuous section across the back)
- Tuck the end of the twist behind your ear on the opposite side, or secure it with a single bobby pin hidden under the twist
- Gently fluff any curl clusters that fall forward to frame your face
Worth knowing: This style works better on curly or wave-patterned hair than on straight hair because your curl pattern provides the grip. On very loose waves, you might want to add a light mist of water to the section you’re twisting so the curls activate and hold more firmly.
10. Quick Coil Out
A coil-out is when you unravel curls that you’ve deliberately set into small coils the night before, creating defined, voluminous, bouncy curls without any styling work the morning of. This requires some setup the night before, but the payoff is literally the most polished curl style possible, achieved with zero effort in the morning. You’re not blow-drying, flat-ironing, or manipulating your curls into shape — you’re simply taking out the coils you’ve already set and letting your curls shine.
Why Coil-Outs Are the Ultimate Busy-Morning Hack
If you’re someone who regularly has busy mornings but can spare ten minutes the night before, a coil-out is genuinely the solution. You do the styling prep when you have time, then wake up to gorgeous, defined, bouncy curls that require zero morning manipulation. You can literally wash your face, apply makeup, get dressed, and walk out the door with your hair already finished. The coil-out also tends to last longer throughout the day because your curls are fresh from being set in that shape — they’re not relaxing or losing definition like curls styled in the morning might be.
How to Set Coils the Night Before
- Apply a lightweight curl cream or styling gel to damp hair, scrunching upward to encourage curl pattern
- Section your hair into small subsections (for tighter curls, use smaller sections; for looser waves, use larger ones)
- Take each section and wrap it gently around your index or middle finger to create a coil
- Slide your finger out, leaving the coil in place on your scalp
- Repeat until your entire head is covered in small coils
- Sleep on this (a satin bonnet helps keep coils in place overnight and reduces frizz)
- In the morning, gently unravel each coil with your fingers, starting at the roots
- Once all coils are released, lightly spritz with water or a light finishing spray and gently shake your curls into place
Pro tip: If you’re new to coil-setting, practice on a day when you have time to redo it if needed. After a couple of practice rounds, you’ll be able to set coils in about five to ten minutes, making the morning payoff absolutely worth the night-before investment.
Final Thoughts
The beautiful truth about curly hair is that your texture does most of the work for you — you’re not building curl definition from scratch like someone with straight hair styling into waves. You’re simply guiding, securing, and showcasing curls that already exist. All of these styles work because they leverage what your curls naturally want to do rather than fighting against it.
When you’re rushing in the morning, pick whichever of these styles matches your current curl situation: fresh definition? Try the pineapple topknot or coil-out. Second-day curls? Go for the messy bun or twisted crown. No time at all? Grab a scarf and wrap. Within a few tries of each style, you’ll find one or two that become your go-to, requiring minimal thought and just a couple of minutes. That’s when mornings stop being stressful and your curly hair becomes an actual asset rather than something that feels like it needs managing.
The real shift happens when you stop thinking of curly hair as something that needs to be styled into shape and start seeing it as something that’s already beautiful and just needs to be secured strategically. That mindset change, combined with these quick techniques, transforms your morning routine completely.