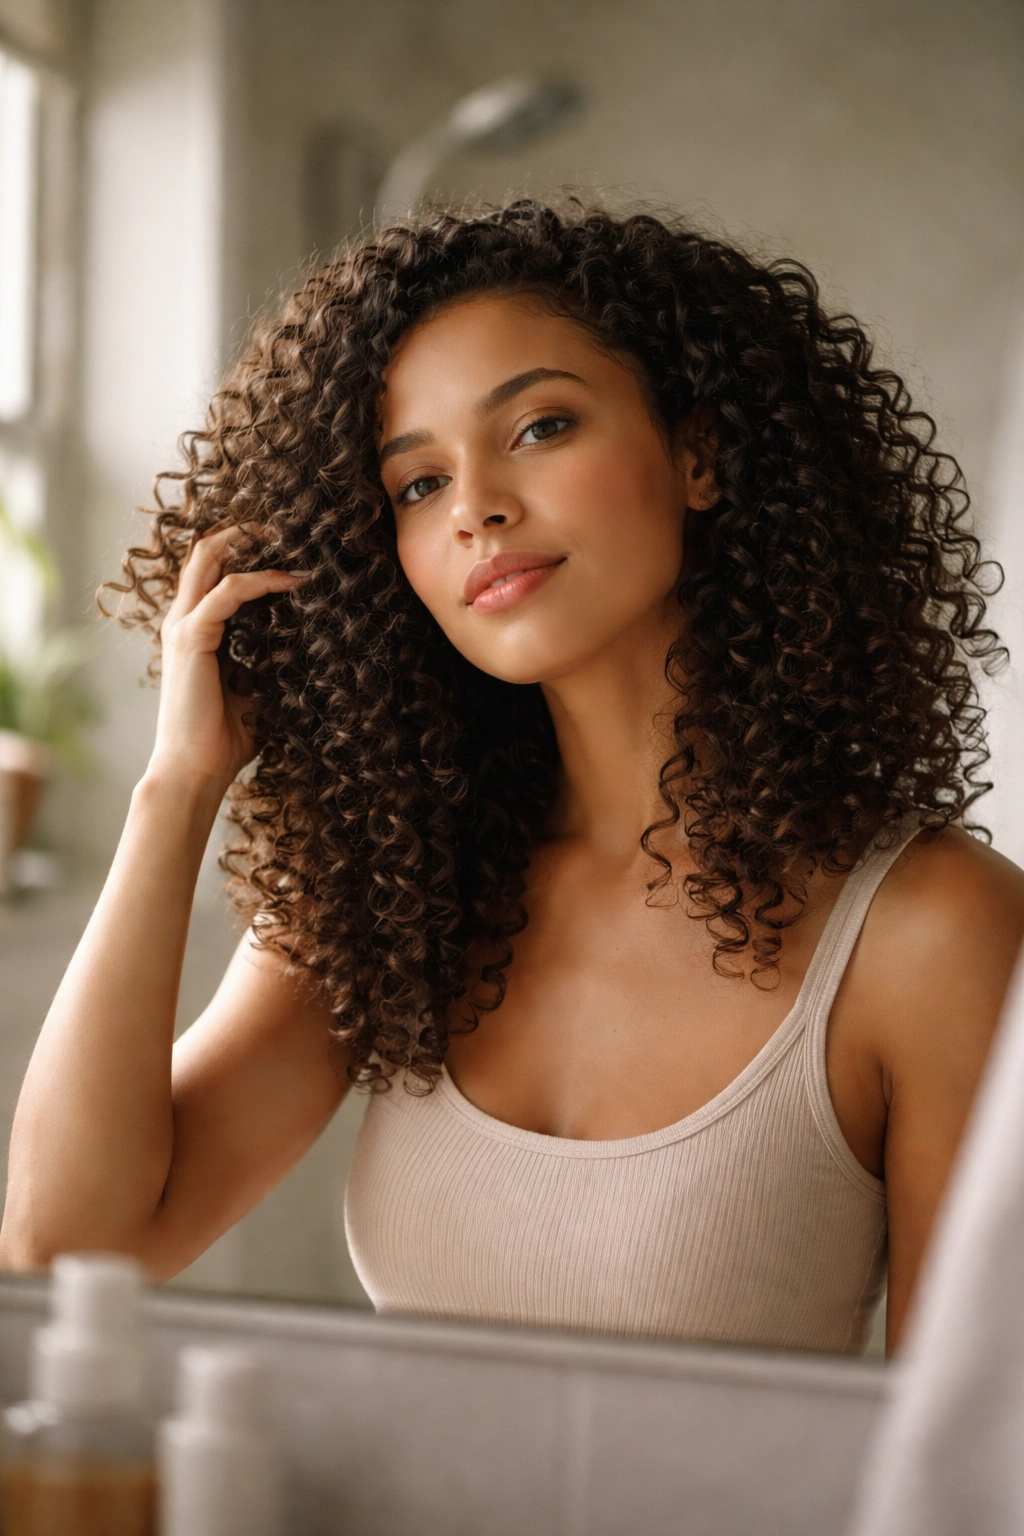
There’s a moment every curly-haired person knows well — standing in the bathroom with soaking-wet hair, a handful of products on the counter, and the quiet pressure of deciding what to do with all that texture. Natural curls carry a personality of their own. They shift with humidity, respond to touch, and change entirely based on how they’re set. That unpredictability is both the challenge and the beauty of working with your natural pattern.
What makes natural curly hairstyles different from other styling categories is the sheer range of what they can become. A head of 3c coils can transform into a sleek updo on Tuesday and a full, voluminous wash-and-go by Thursday — same person, same products, completely different style. Curl typing alone (from loose 2a waves to tight 4c coils) means what works brilliantly for one texture might need a complete rethink for another. That specificity matters when you’re choosing a look that’ll actually hold.
What often gets overlooked is that technique matters just as much as the style itself. A wash-and-go applied to dry hair isn’t a real wash-and-go. Finger coils done without enough product will puff out before noon. Every style on this list has a method behind it — and understanding that method is what separates a genuinely good hair day from a defeated one.
The 15 styles below serve different needs. Some are quick, low-manipulation options for busy mornings. Others are protective styles designed to reduce breakage and retain length. A few are polished enough for events and workplaces. Each one has been chosen because it works across a range of curl types with the right application — and because knowing the technique behind it makes all the difference.
1. The Wash-and-Go
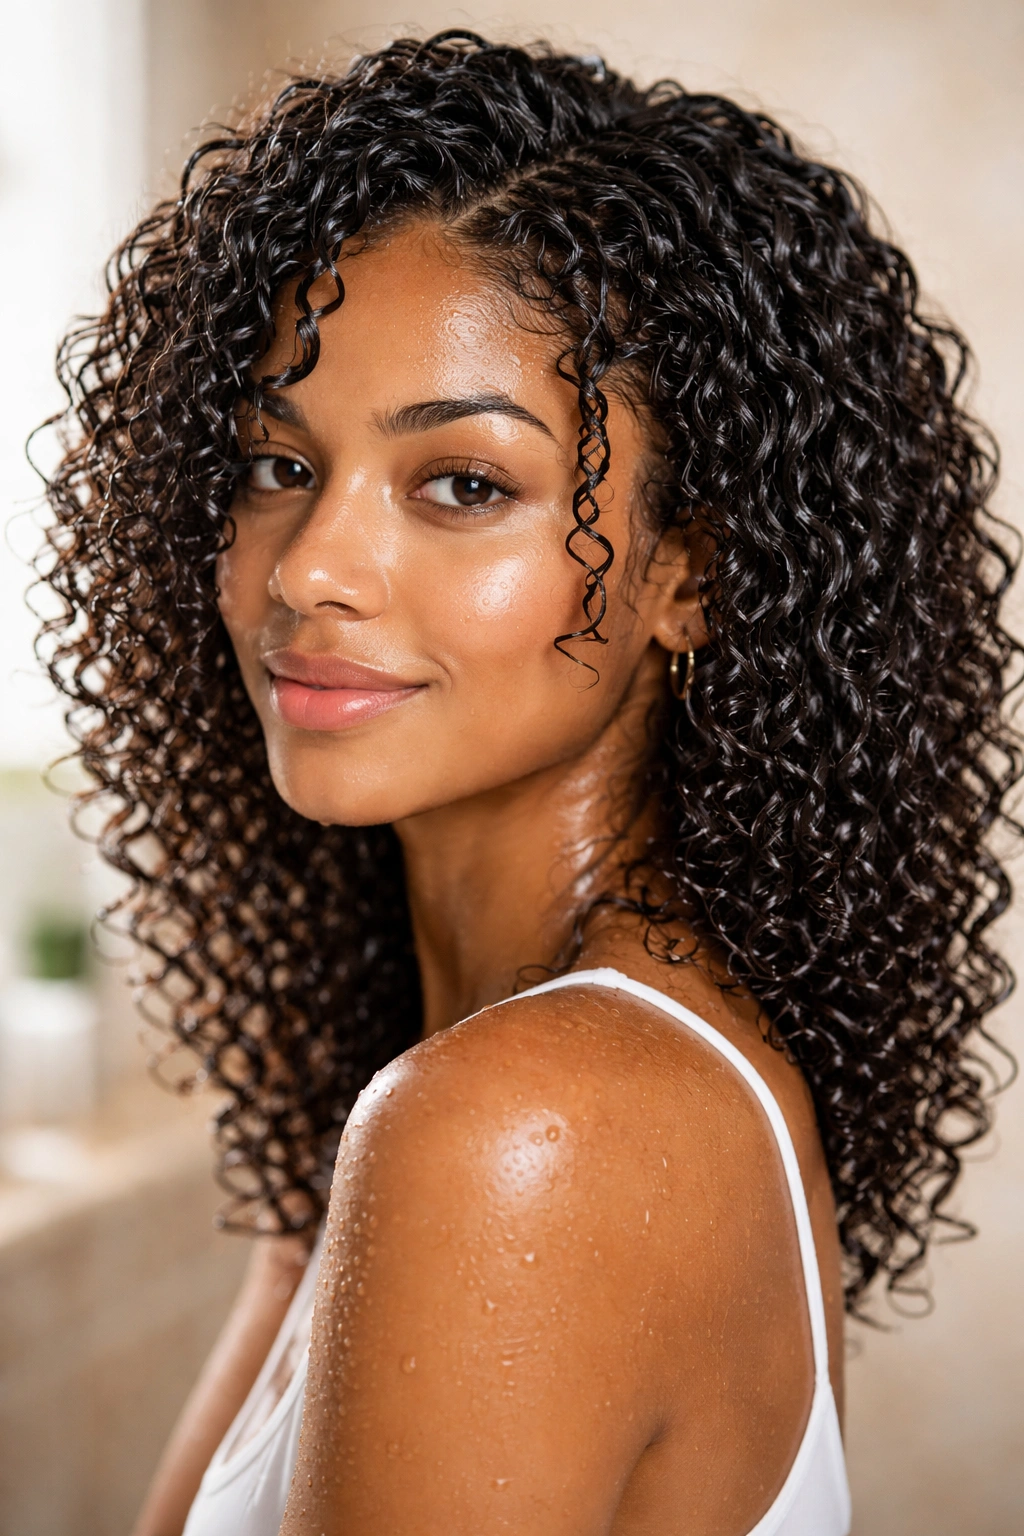
The wash-and-go sounds deceptively simple: wet hair, apply product, leave the house. The truth is that a genuinely good wash-and-go is one of the more technique-dependent styles in the natural curly hair toolkit. The difference between a clumped, defined result and a frizzy cloud comes down to product application, saturation level, and timing.
The method works by defining your natural curl pattern while hair is soaking wet, locking that definition in with a gel, curl cream, or custard before the hair dries. Working in sections while hair is fully saturated — not just damp, fully dripping — ensures even product coating and allows the curls to clump together cleanly without separating into frizz.
How to Get Defined Results Every Time
The product layering order matters more than most tutorials admit. Start with a leave-in conditioner on dripping-wet hair, then seal with a gel or curl custard while the hair is still soaking. The water in the hair activates the hold without creating crunchiness or white cast. Adding gel to slightly dry hair is one of the most common wash-and-go mistakes — it produces stiffness without definition.
Best Curl Types for This Style
- Works across 3a–4c curl patterns, though technique varies by density and porosity
- Fine or low-density curls need lighter products to avoid deflation — a water-based gel works better than heavy cream
- Thick or high-density coils benefit from a cream layer under gel for moisture and hold
- Air drying produces the softest finish; diffusing on low heat minimizes frizz while cutting drying time
Pro tip: Don’t touch your hair until it’s bone dry — even pushing it behind your ear mid-dry breaks the curl clumps and introduces frizz that can’t be undone without starting over.
2. The Pineapple Updo
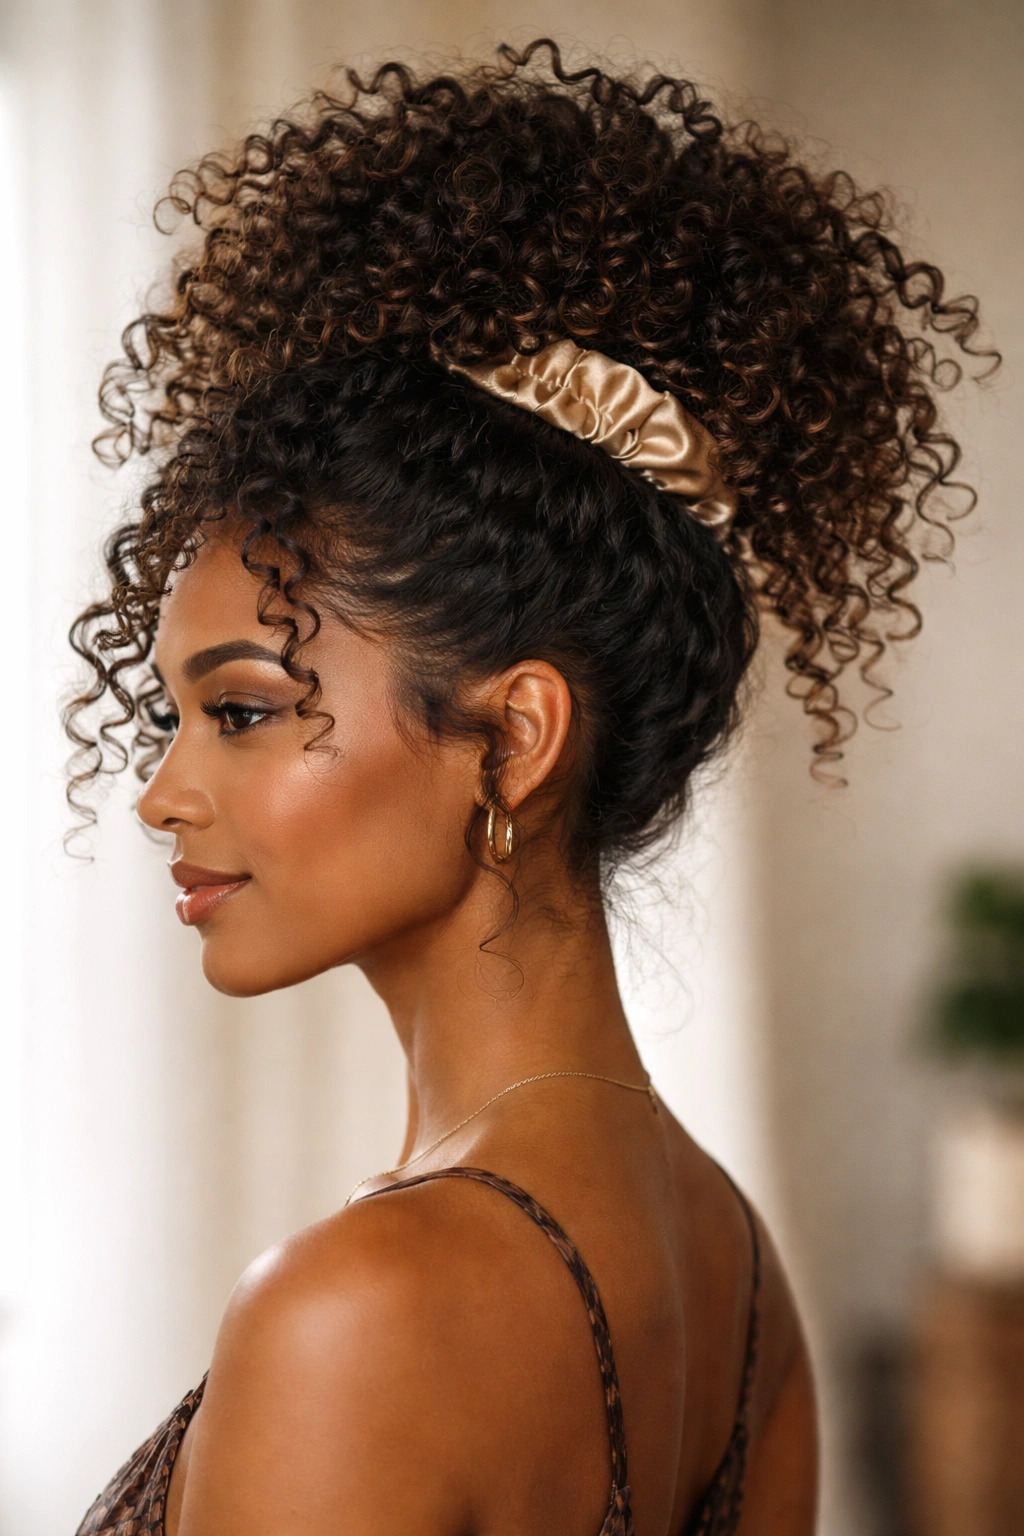
The pineapple genuinely pulls double duty. During the day, it reads as a chic, effortless updo with signature volume at the crown. At night, it’s the technique that protects a wash-and-go or twist-out from being crushed while you sleep. Understanding both uses makes it one of the most practical styles in any natural curly hair rotation.
To build a pineapple, you gather all your hair loosely at the very top of your head — not at the back crown, right at the top — and secure it with a satin scrunchie or a very loose elastic. The goal is to keep curls upright and grouped together without compressing them or leaving a crease.
Why Position and Tension Change Everything
Where you set the pineapple on your head determines how much volume you get when you release it. A pineapple set too far back compresses the front and sides, flattening the roots where you want the most lift. Too tight, and you’ll wake up to a deep elastic crease that takes most of the morning to work out. Loose and high is the consistent rule.
How to Style and Sleep in a Pineapple
- Use a wide satin or silk scrunchie — cotton elastics snag and pull individual curl strands over time
- Secure loosely enough that two fingers slide comfortably under the scrunchie
- For shorter curls, create two or three smaller pineapples across the top of the head instead of one
- Wrap the hairline with a satin bonnet or satin-lined sleep cap over the pineapple for full frizz protection
The pineapple works best on hair that’s already styled — think of it as preservation and extension of a style, not an original one, though it happens to look polished on its own.
3. The Twist-Out

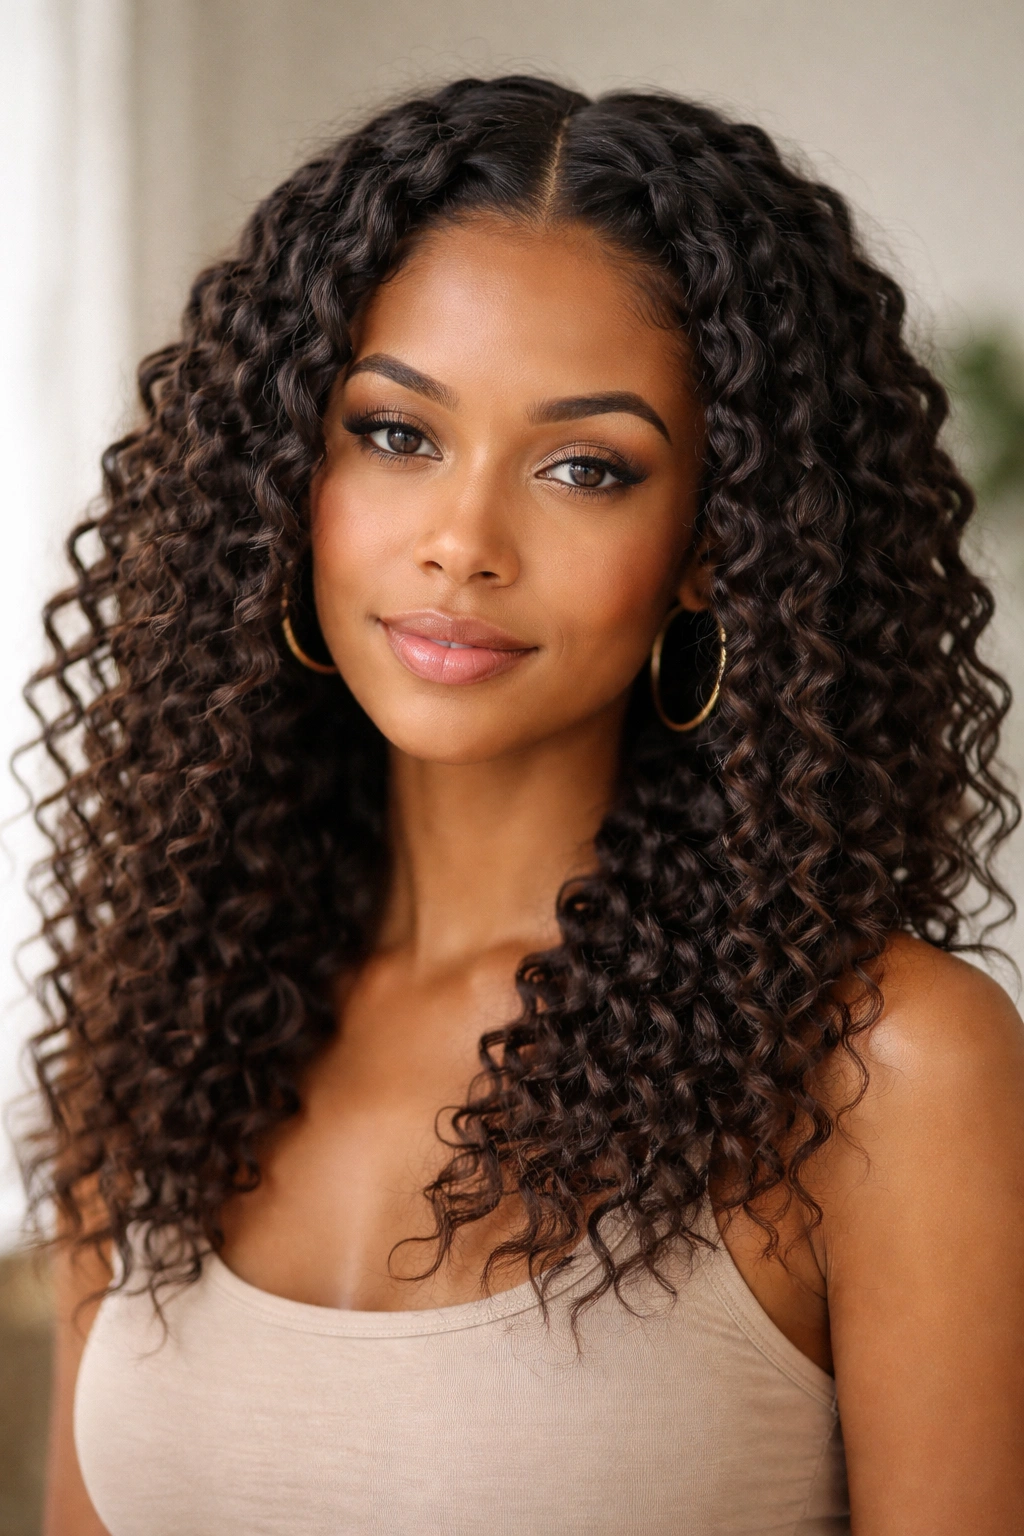
Few natural curly hairstyles match the versatility of the twist-out. It delivers the defined curl pattern of a set style without the potential crunch of a wash-and-go, and it can be worn across multiple days with a smart refresh routine. When it works — and it does, with the right approach — it’s spectacular.
The method involves dividing hair into sections, applying a moisturizing cream or styling butter, then two-strand twisting each section from root to end. After fully drying — overnight air drying or diffusing — you unravel the twists with oiled fingers, starting from the ends and working upward. Starting from the root instead of the tip is where frizz gets introduced.
Getting the Section Size Right
Twist width controls the final look completely. Small pencil-width twists produce a tighter, more defined wave pattern. Larger twists give a looser, more voluminous result with sweeping, open waves. For medium-length hair, pencil-width twists are a reliable middle ground. For shorter TWA-length hair, finer twists are necessary to get visible definition once the style is released.
Products and Techniques for Multi-Day Wear
- Apply a cream-based product on damp hair — not soaking wet — for the best hold and definition
- Use a light shingling motion with each twist, pulling slightly outward to encourage the curl to set around the twist
- Twist ends tightly and tuck them to prevent unraveling during the drying period
- On day two or three, lightly mist with water, work a small amount of gel into the ends, and re-scrunch gently
Pro tip: Sleeping with each section re-twisted and covered with a satin bonnet can extend a twist-out by 3–4 extra days without needing a full restyle.
4. The Braid-Out
The braid-out and the twist-out share the same foundation, but they produce noticeably different results. Where a twist-out gives soft, S-shaped definition, a braid-out creates a more textured, zigzag wave pattern — slightly more structured and, for many curl types, more durable. For people whose twist-outs fall flat by afternoon, the braid-out typically holds better in humidity.
You braid the hair in sections while damp, sleep in the braids or wait for full drying, then release and separate. The crimped pattern left by the braid weave creates texture that grips itself — meaning the style frizzes less and lasts longer than a twist-out on challenging weather days.
Section Size Controls the Final Texture
The size of each braid directly determines the finished wave. Micro braids produce a fine, densely textured wave that closely mimics a natural coil pattern. Larger braids create bold, graphic waves with significant volume and movement. Flat braids at the root with individual braids from midshaft down give you stretched roots with defined ends — a technique that reduces shrinkage without relying on heat.
Products That Work Best for a Braid-Out
- Use a medium-hold cream or butter applied to damp hair in clean sections before braiding
- Avoid heavy oils on the surface of the braid — they cause slippage and soften the crimp
- Seal each braid end with a small amount of gel for sharper definition at the tips
- Separate with dry, oiled hands (coconut or argan oil) to prevent frizz on release
For 4a and 4b curl types specifically, the braid-out is particularly effective because it stretches the coil slightly, making length more visible and the texture more manageable day to day.
5. The Bantu Knot-Out
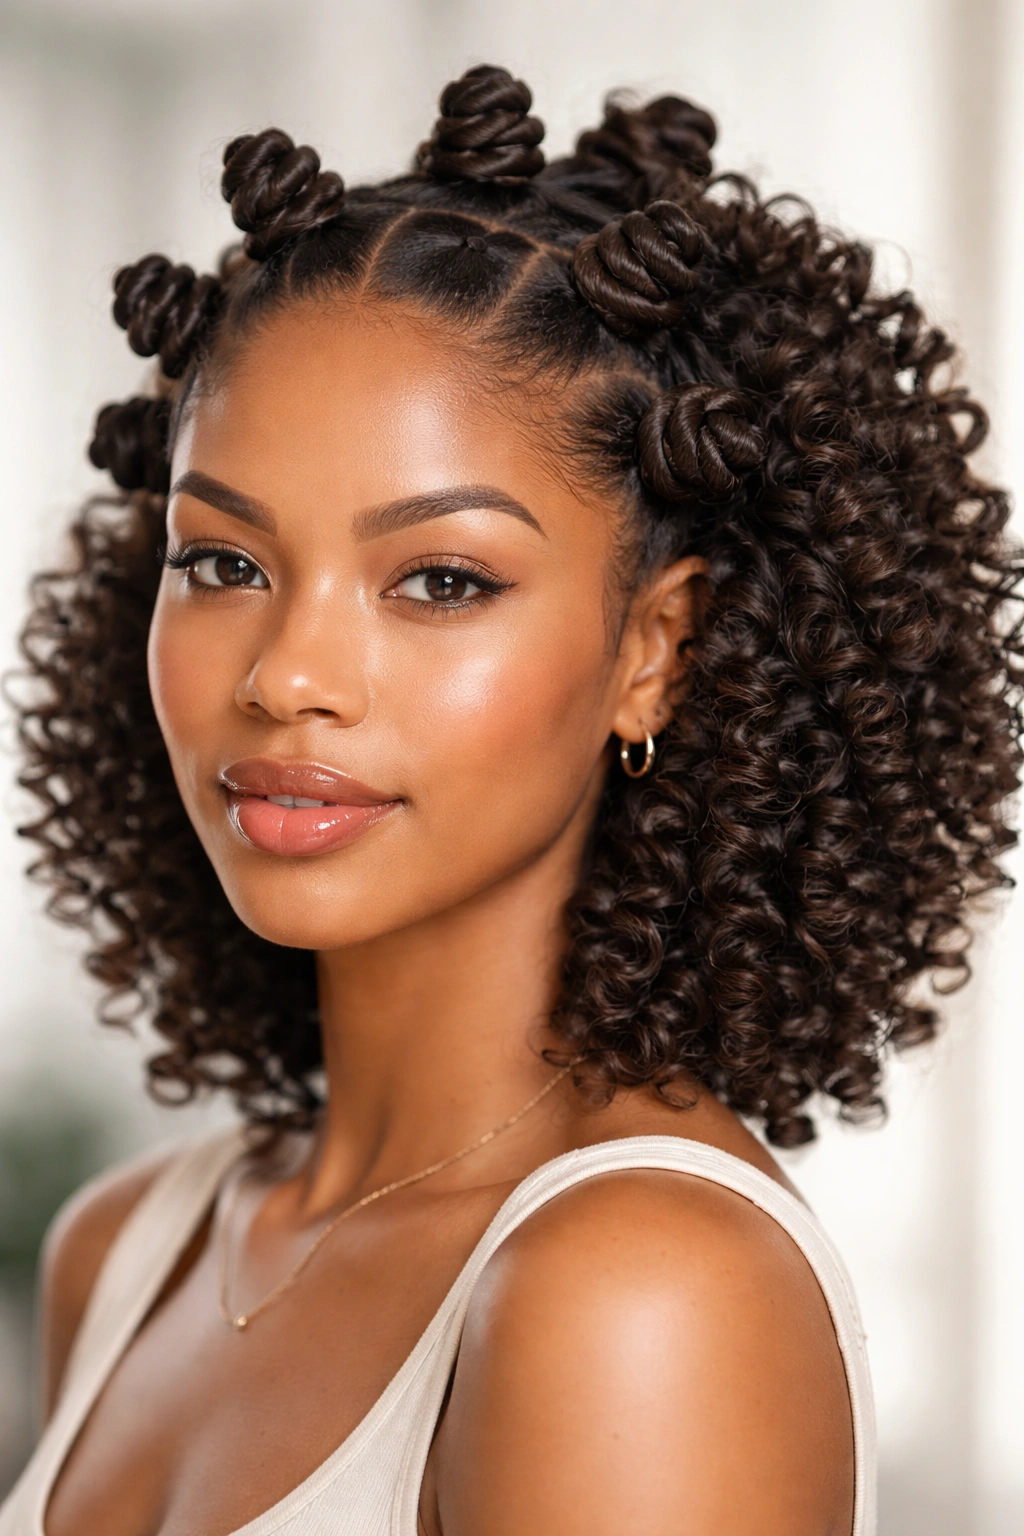
The Bantu knot-out is among the oldest documented African hair styling techniques, and it produces one of the most distinctive curl patterns achievable without heat. The method involves sectioning hair and coiling each section tightly into a small, flat knot at the scalp. When released after full drying, those knots spring out into precisely formed spiral curls — often sharper and more uniform than anything a wash-and-go produces.
Getting the knots right is where the technique lives. Each section needs to be twisted tightly enough to hold its coil while drying, but wrapped flat and snugly against the scalp without digging in or creating unnecessary tension at the root.
Building Knots That Actually Hold
Section size is everything here. Larger sections create fewer, bigger curls with more volume and a more open spiral. Smaller, tighter sections produce denser ringlet-style definition. A pointed rat-tail comb creates precise parts, which matters if you plan to wear the knots themselves as a style — Bantu knots look polished when the parts are clean.
Releasing for Maximum Curl Definition
- Unravel knots starting from the bottom, coiling the curl gently around your finger as it releases
- Use a light oil on your fingers, not the hair, to reduce friction
- Do NOT pull sections apart — let the curls fall naturally; aggressive separation breaks the spiral
- The look reaches its best point 24 hours after releasing, as the curls relax slightly into a more natural shape
Pro tip: Wear the knots themselves as a protective style for 1–2 days before releasing — you get two complete looks from a single styling session.
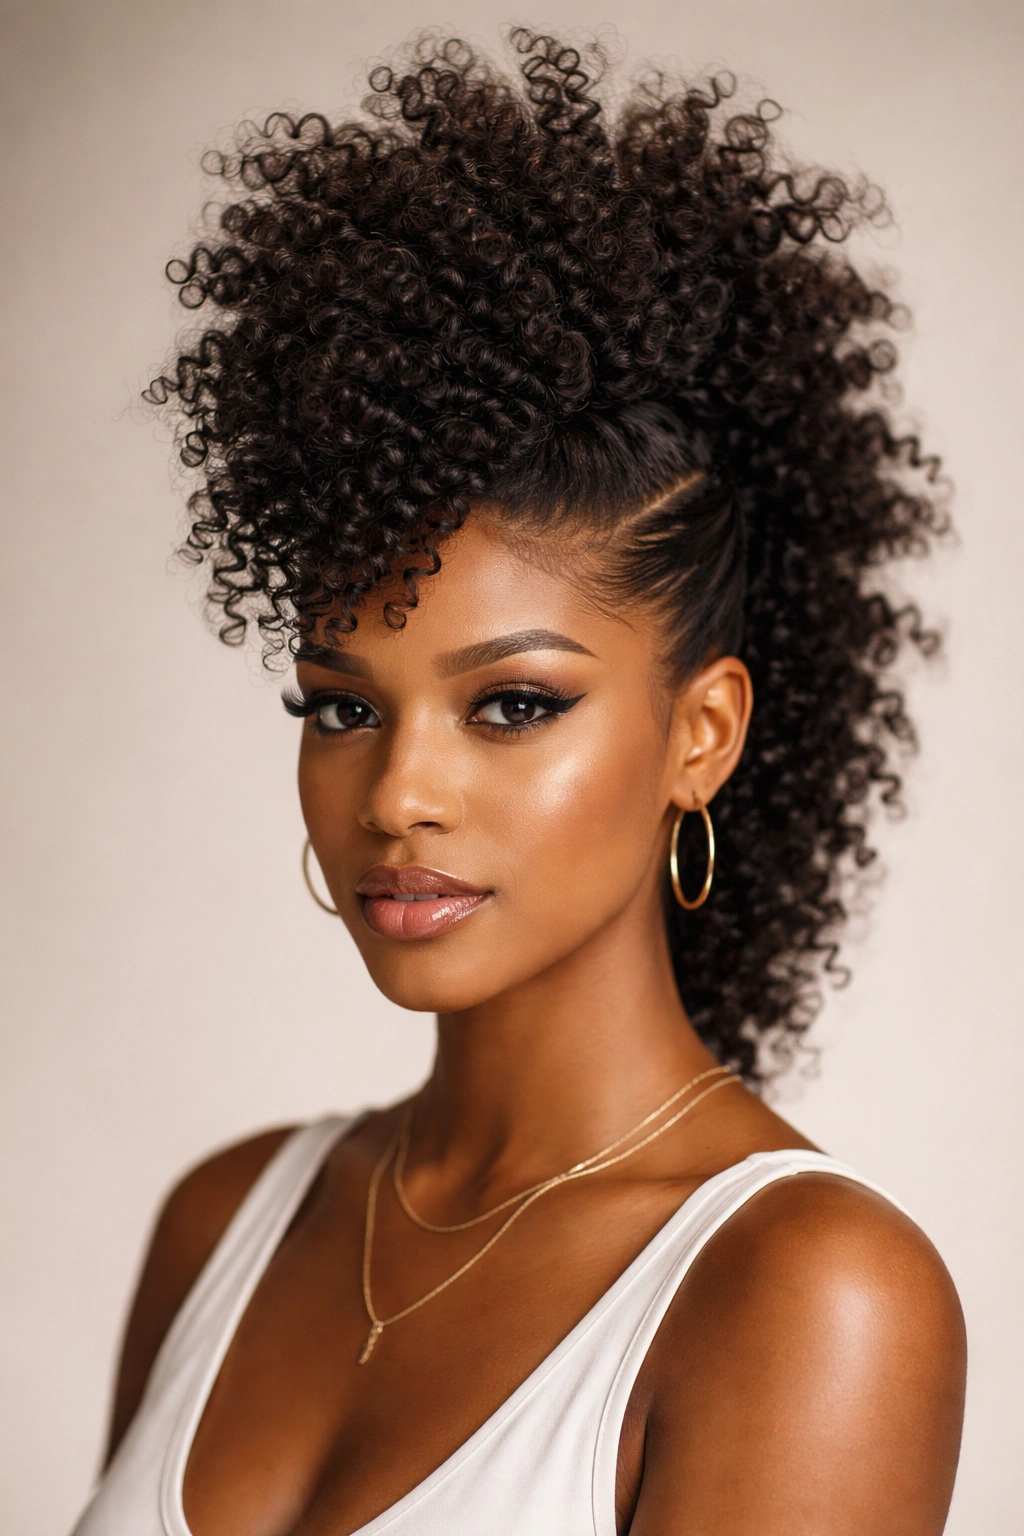
6. The High Puff
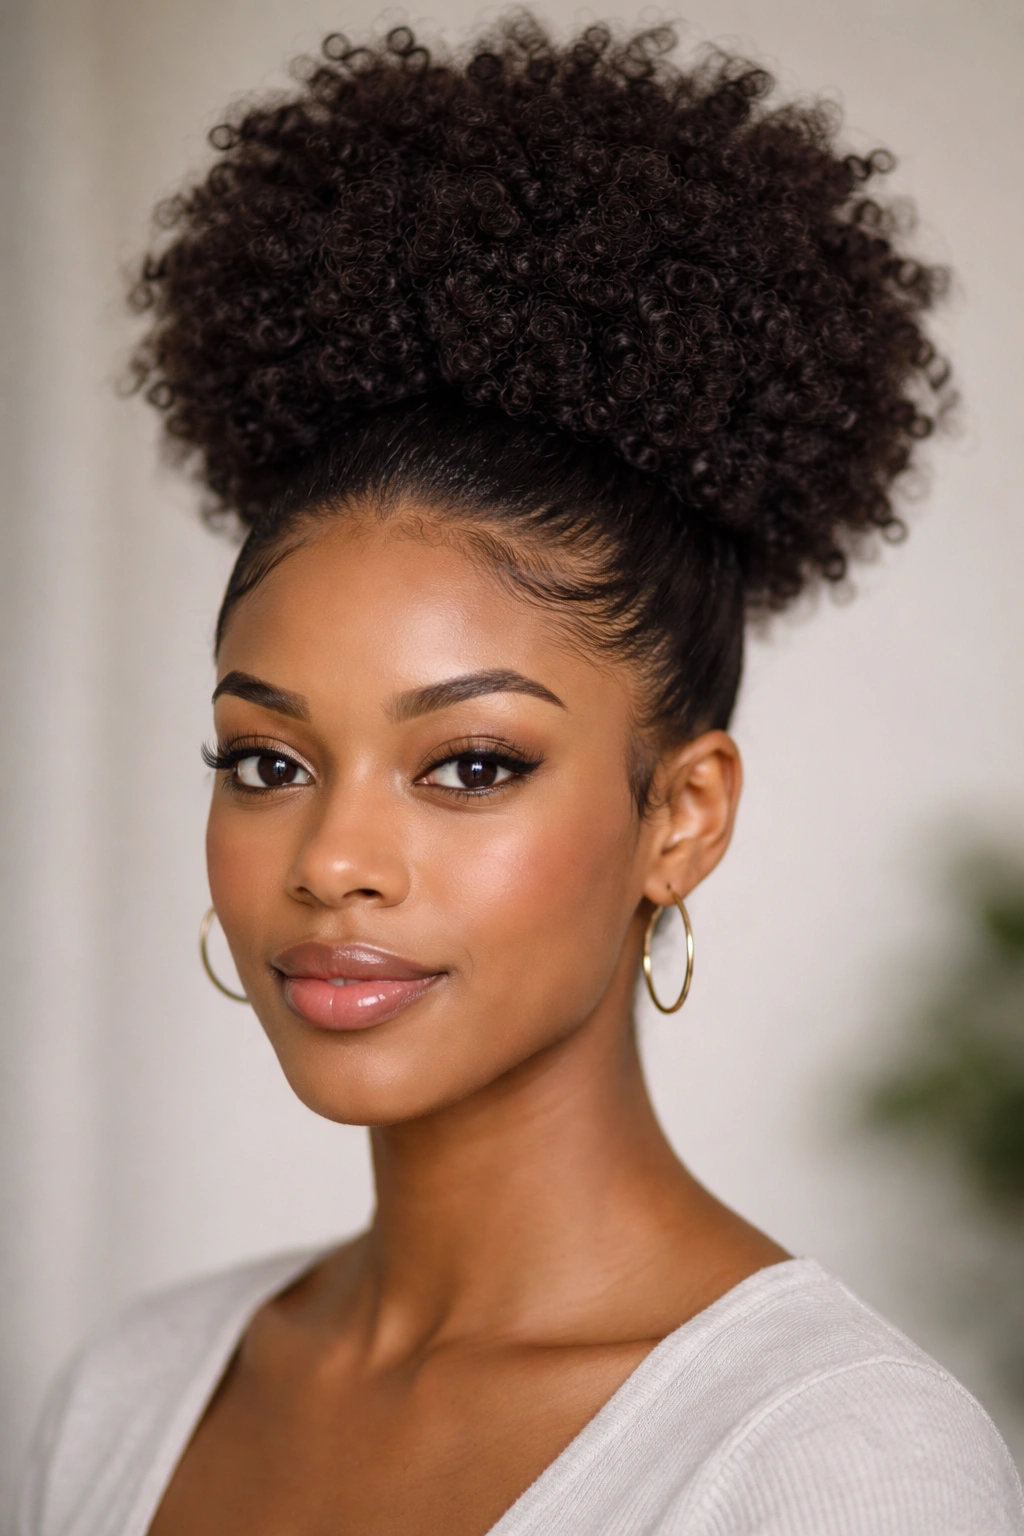
The high puff is the natural curly hair equivalent of a quick, polished ponytail. When your wash-and-go or twist-out needs a rest day but you still want to look intentional, the high puff delivers in under 10 minutes. It works across 3b through 4c curl types, and when it’s done well, it looks deliberate rather than rushed.
The line between a high puff that looks styled and one that looks haphazard comes down to two things: the treatment of the edges and the shape of the crown. Laid edges paired with a dome-shaped puff at the crown transforms a simple gathered style into something visually structured.
Shaping the Puff to Your Face Shape
Oval and round faces benefit from maximum height at the crown — a tall, rounded puff elongates the face. Square jawlines look best with a puff that extends wider than it is tall, softening the angles below. Heart-shaped faces do well with a medium puff sitting slightly forward, adding fullness at the crown without drawing attention to the forehead.
Tools and Techniques for a Clean Result
- Use a satin-lined elastic or a wide soft band — thin rubber bands cause breakage at the perimeter
- Gently stretch the front hairline forward before securing to preserve curl definition around the face
- Apply edge control with a boar-bristle brush or a soft toothbrush, following the direction the edges naturally lie
- Add a few bobby pins underneath the base of the puff if it tends to droop forward throughout the day
Don’t overwork the edges — edge control should enhance what’s naturally there, not flatten baby hairs into an immovable sheet of product.
7. The Flat Twist Updo
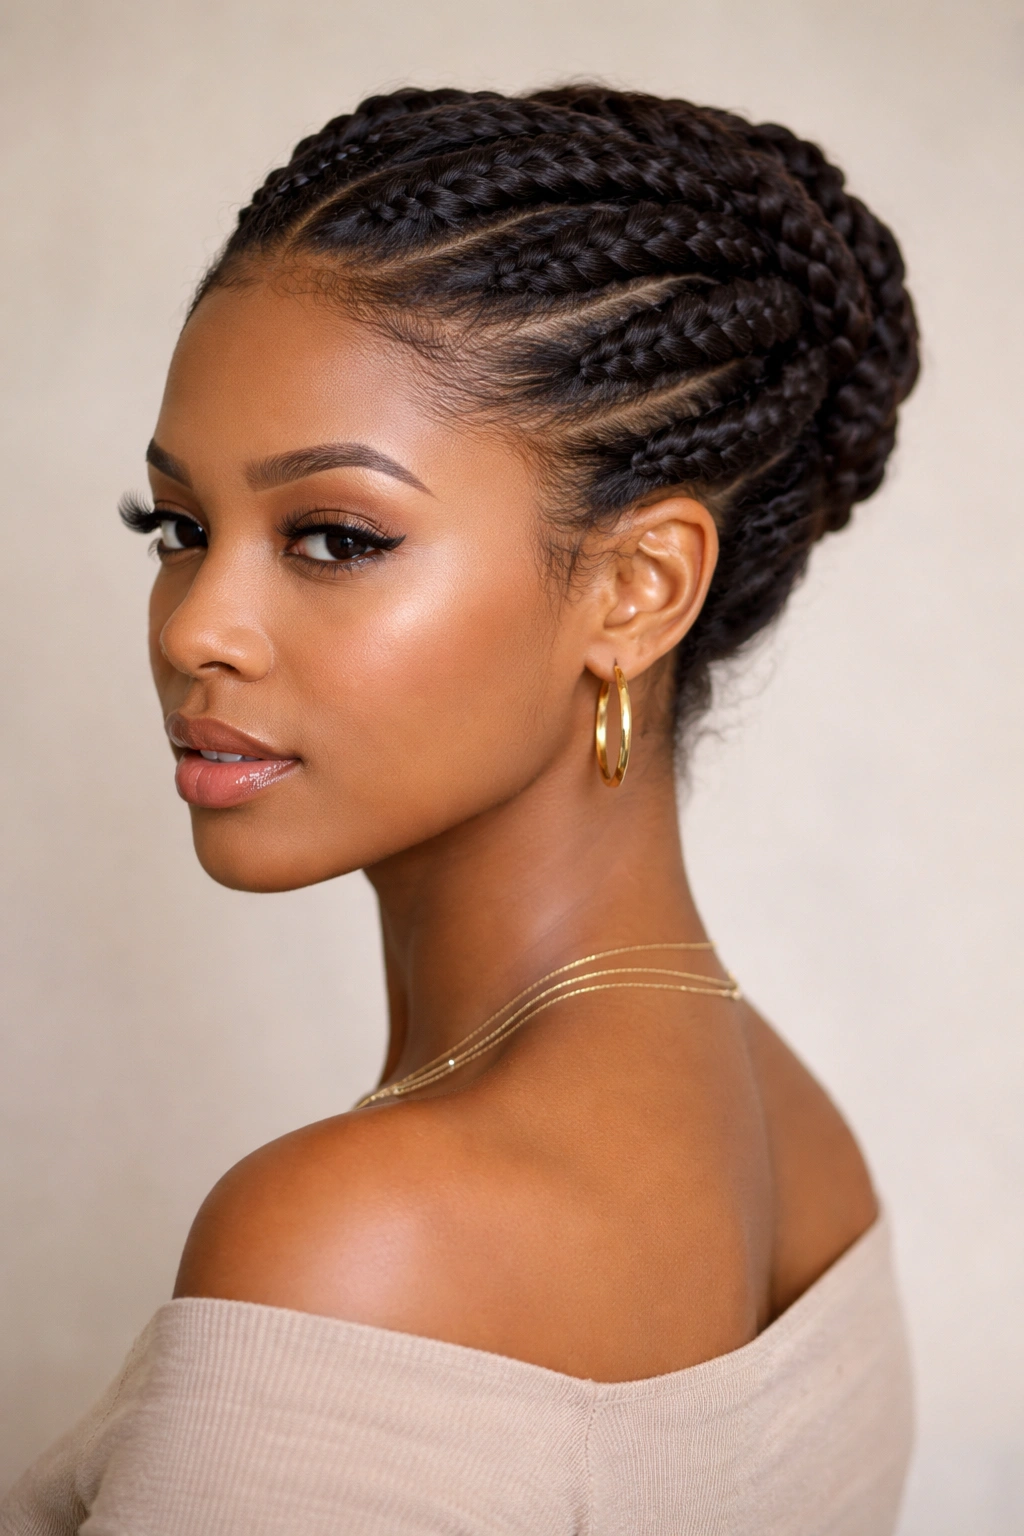
The flat twist updo lives between everyday wear and special occasion styling — elevated enough for events, low-maintenance enough for a regular workday. Flat twists follow the scalp in a two-strand rope twist, similar to how cornrows lie flat, but without the weaving underneath. The result is smooth, directional sections that can be pinned and arranged into an updo in several different configurations.
One of its strongest qualities is genuine protectiveness. The ends are tucked and secured, the scalp is covered, and daily manipulation drops to almost nothing. For length retention, a flat twist updo worn for several days is a strong option without relying on extensions or braiding services.
How Twist Direction Shapes the Final Look
The direction and pattern of the flat twists determines the updo’s structure. Twists flowing toward the center of the head create a natural gathering effect that pins easily into a bun or chignon. Twists directed from the nape forward create a swept-back look with lift at the crown. For asymmetrical updos, start the front twists from one side and direct them across the crown to the opposite ear.
Finishing and Accessorizing the Updo
- Use bobby pins matching your hair color, inserted at the base of each twist so the pin disappears completely
- Mist with a light curl refresher to smooth any flyaways along the twist line
- Leave ends loose for a more relaxed, bohemian finish, or tuck them under for a cleaner, formal look
- A gold pin, a decorative comb, or small flowers at the gathering point transforms this from everyday to dressed-up
8. The Frohawk
The frohawk is one of the boldest and most visually immediate natural curly hairstyles. Its shape comes from the mohawk concept but replaces shaved sides with compressed or pinned sections that create a dramatic ridge of height down the center of the head. The result is striking — graphic, full of personality, and structurally impressive without requiring any cutting or permanent change.
You don’t need to shave anything. The sides of the hair are pinned or tucked under, and the center section rises upward and outward. On highly textured 4a–4c hair, the natural density of the coil works in your favor — the center section stands up on its own once the sides are removed from the equation.
How Curl Type Changes the Approach
For wavy 2c–3a hair, a frohawk requires more structural support — a light-to-medium gel or mousse on the center section builds height that won’t collapse by midday. For tighter coil patterns (3c and above), the volume is already there; the main work is defining the center section and compressing the sides cleanly and symmetrically.
Pinning and Shaping the Sides
- Part each side section clearly using a rat-tail comb, starting just behind the ear on both sides
- Twist or coil each side section and pin it flat against the head using bobby pins or small clips
- For smoother sides, apply a light gel and lay each side section down with a soft brush before pinning
- The center ridge can be extended with a wide-tooth pick for extra height and width
Pro tip: Mist the center section with water and work in a small amount of curl cream before picking it out — this refreshes the curl definition and builds volume simultaneously.
9. Two-Strand Twists
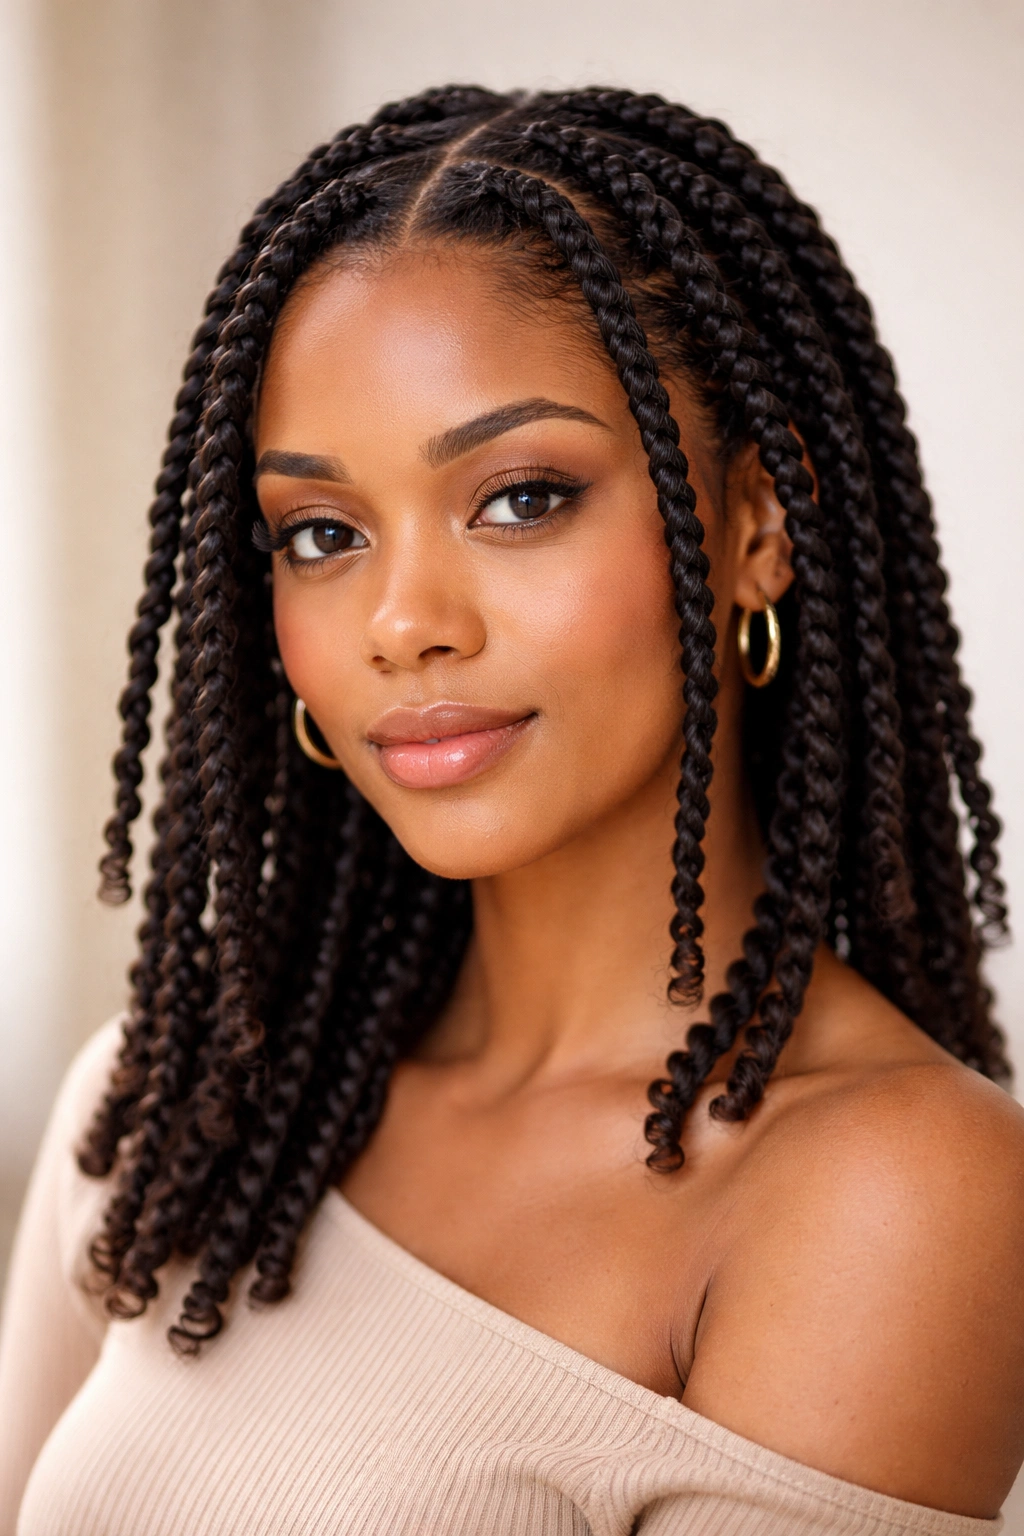
Two-strand twists occupy a genuinely interesting middle ground: they can be a finished look in themselves, a step toward a twist-out, or the beginning of a protective style that lasts for weeks. The technique is among the most accessible for beginners — no braiding skill required, no special tools — but the results range from polished everyday wear to a neat protective set depending on how they’re finished.
To execute a two-strand twist, divide a section of hair into two equal pieces and wrap each piece over the other repeatedly from root to end. The wrapping tension keeps the twist from unraveling and encourages the natural curl to coil around the twist as it forms.
Wearing Twists as a Protective Style
When worn without releasing into a twist-out, two-strand twists protect the ends, reduce daily manipulation, and help retain moisture between wash days. For this purpose, they should be uniform in size, sealed at the ends (either by coiling the tip tightly or finishing with a small roller), and re-moisturized every 3–4 days with a light spray or oil.
Size, Tension, and How Long They Last
- Small pencil-width twists last longer and hold definition better, but take more time to install
- Large thumb-width twists install faster and create bold, graphic texture with visible movement
- Medium, consistent tension throughout prevents frizzing while avoiding stress at the roots
- Covering nightly with a satin bonnet significantly extends the lifespan of the style
At medium length, a full set of two-strand twists typically lasts 1–3 weeks as a protective style before needing refresh and re-moisturizing.
10. Finger Coils
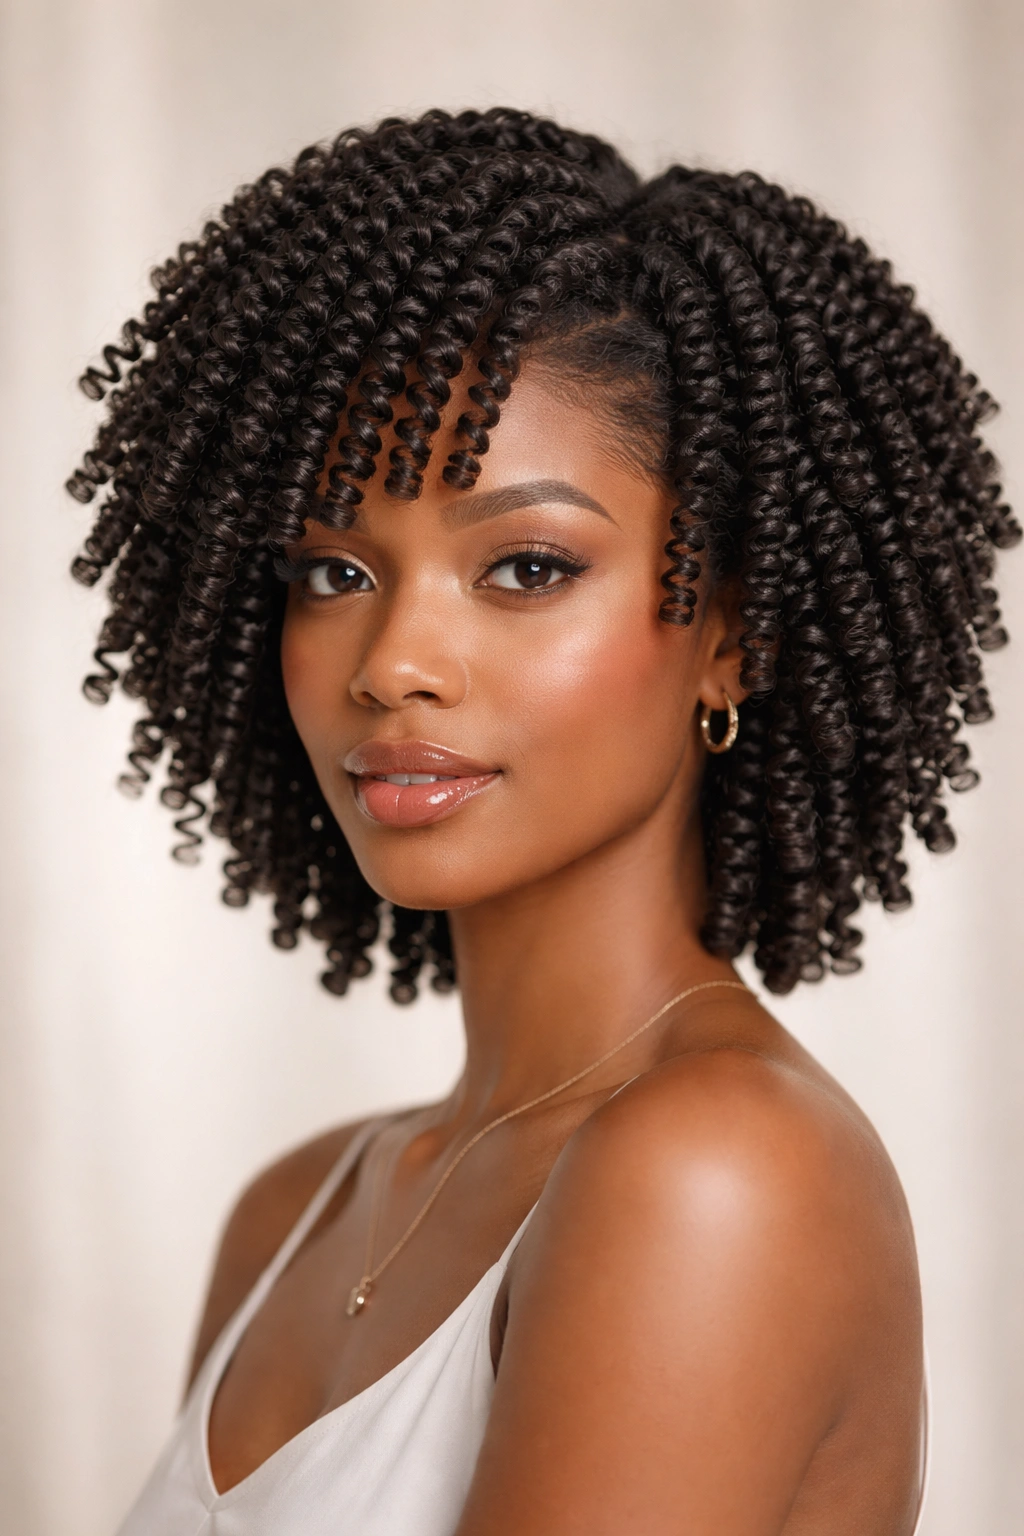
Finger coils might be the most satisfying style to watch come together. You wrap individual small sections of hair around a single finger in a tight spiral from root to end — and when done right, the result is a head of perfectly formed, uniform spirals that look like they came from a professional curl wand, with no heat at all.
The technique takes time — a full head of finger coils can run 2–3 hours for medium-length hair — but the payoff is a defined, long-lasting set that works exceptionally well on 3c through 4b curl types. The coil shape formed by wrapping around a finger gives the hair a structural memory, and that memory persists through multiple days and simple refreshes.
The Product Application That Makes or Breaks It
Finger coils require a medium-to-firm hold product — a flaxseed gel, curl custard, or strong-hold cream — applied section by section on soaking-wet hair. Too little product means the coils will separate and puff before drying finishes. Too much creates white cast and stiffness. The right amount is enough to feel the product between your fingers as you coil each section.
Drying, Refreshing, and Maintaining the Coils
- Air dry completely before touching — any movement of wet coils breaks the spiral before it sets
- Diffuse on low speed and low heat if air drying isn’t practical, holding the diffuser cup upward under sections
- Refresh on day two by misting with water and a small amount of gel, re-coiling just the sections that have loosened
- Sleep on a satin pillowcase with hair loose, or do a loose pineapple to protect the coil shape overnight
11. The Half-Up Half-Down Curly Style
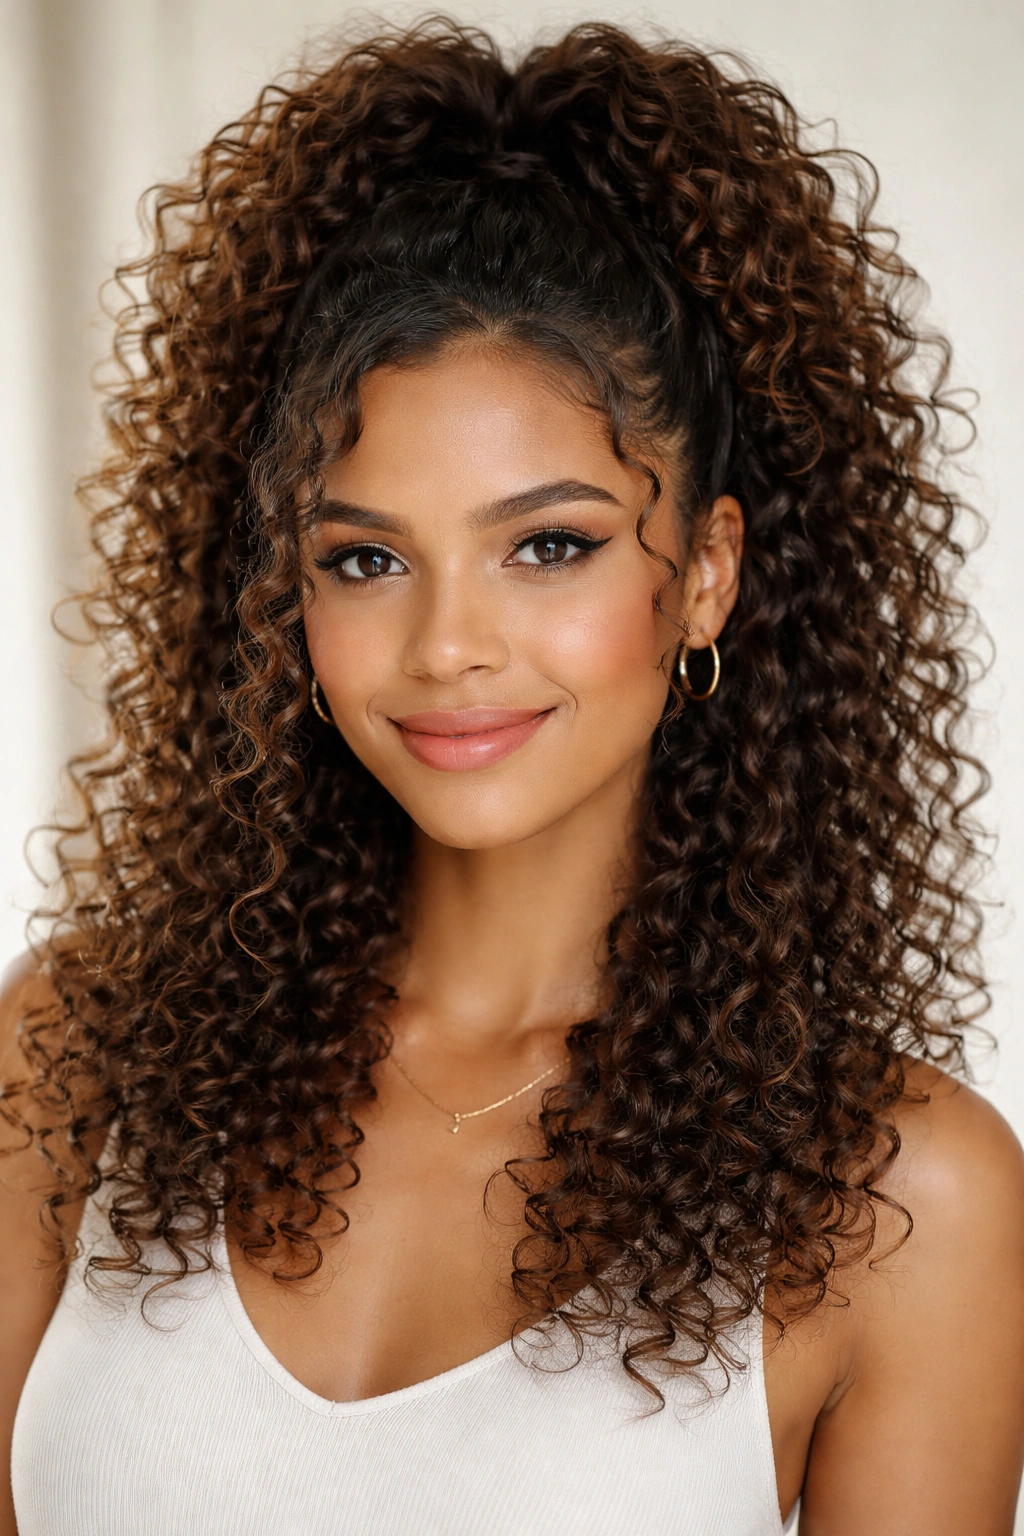
The half-up half-down style might be the most consistently underused arrangement for natural curly hair. Leaving the bottom half loose frames the face, showcases your length, and the gathered top section adds enough structure to elevate the look beyond simply wearing hair down. It reads effortless but intentional — which is a difficult combination to achieve.
What makes it work so well on curly hair is the contrast between sections. The slightly lifted, gathered top creates visual balance against the loose, voluminous bottom. The height at the crown elongates the face; the loose curls at the sides and back soften it.
Variations That Completely Change the Feel
The gathered top section can be styled multiple ways that shift the tone of the look entirely. A simple gathered puff reads casual and easy. Two flat twists meeting at the center crown reads slightly more deliberate. Braids or cornrows sweeping back from the temples to a gathered knot reads editorial and polished. Same structure, three distinct personalities.
Getting Clean Separation Between the Two Sections
- Use a rat-tail comb to draw a clean horizontal part from ear to ear, or a curved part that follows the natural arch
- Secure the top section with a satin scrunchie or small elastic, pulling gently to avoid creasing the curl
- Leave a few face-framing tendrils loose on either side for a softer, more relaxed finish
- Add a decorative clip, cuff, or scarf at the gathering point to make the style feel more considered
Pro tip: On day-two or three hair, the half-up half-down is perfect for disguising any flatness on the top layer — the gathered section hides the compression while the loose bottom curls carry the look.
12. The Flexi-Rod Set
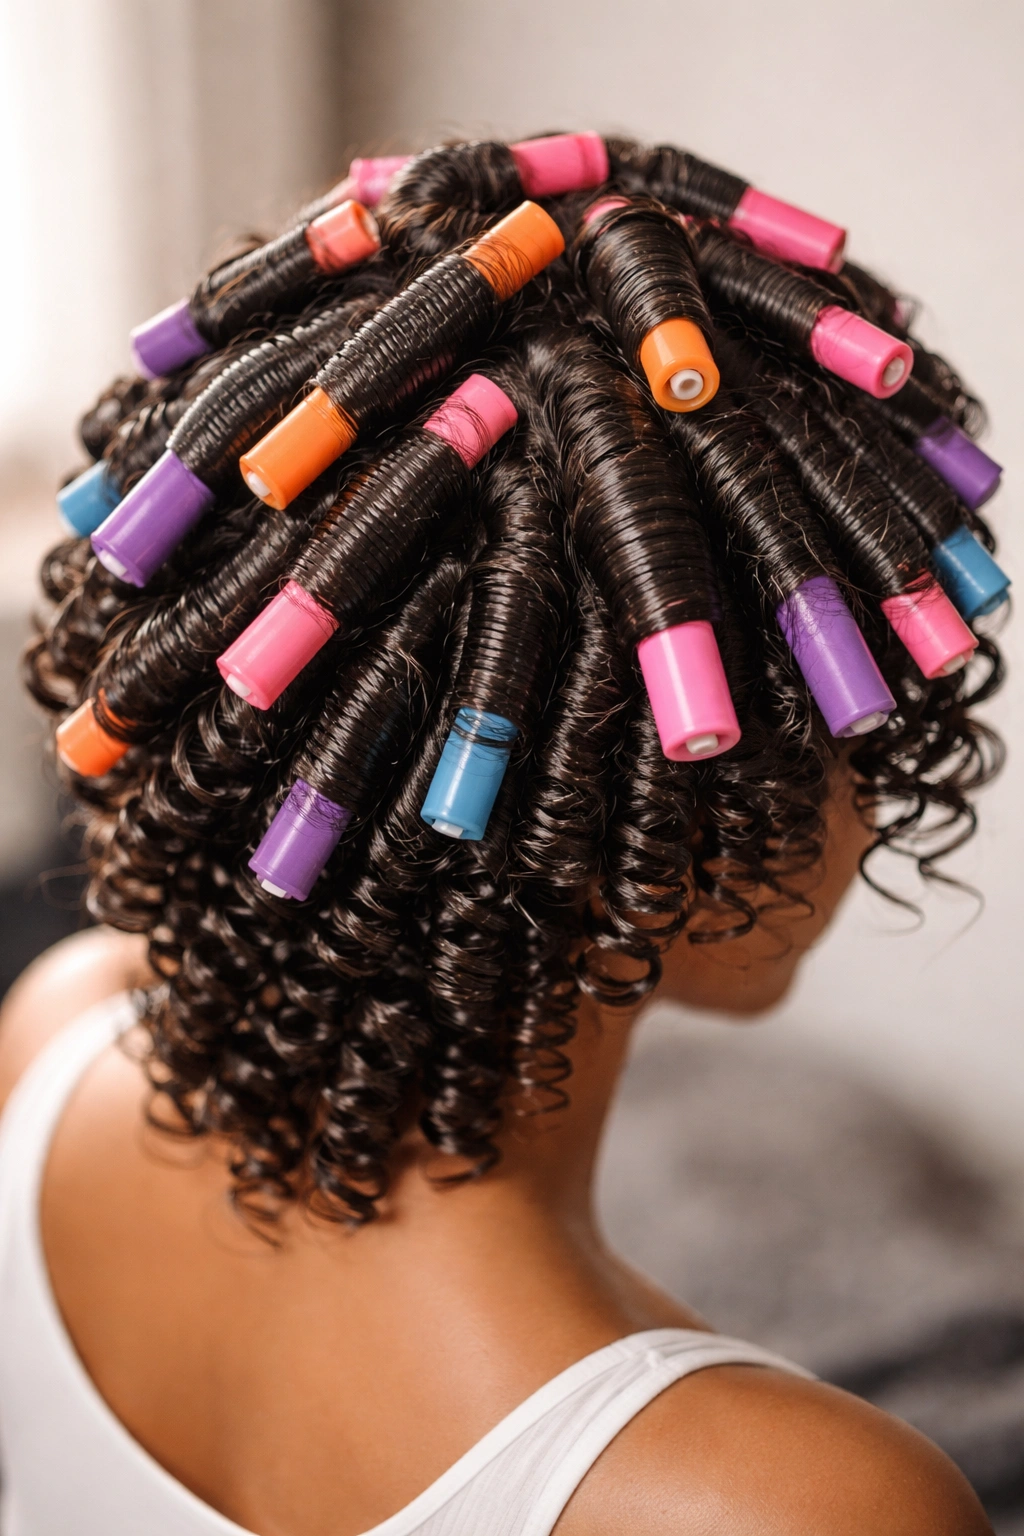
The flexi-rod set is the closest you can get to a professional roller set on natural hair without heat, and the curl it produces — round, bouncy, and uniform — is difficult to replicate with any other heatless technique. Flexi rods come in various diameters, from thin rods that create tight ringlets to large rods that produce loose, romantic waves, giving you genuine control over the finished result.
The technique involves wrapping sections of moisturized, product-coated hair around the flexi rod in a spiral from end to root, bending the rod to secure it, then allowing the hair to dry completely before removing. Done right, the result is a full, flowing curl set that holds for days.
Choosing the Right Rod Diameter
Rod size is the single most important decision in a flexi-rod set. A 3/8-inch rod on 4a hair creates tight, defined ringlets. A 3/4-inch rod on 3b hair creates loose, bouncy curls. Going up a rod size produces more wave than curl. Going down creates more definition. A reliable starting point: a rod roughly the diameter of a highlighter marker, then adjust based on how the first section releases.
Setting, Drying, and Releasing the Curls
- Wrap hair around the rod from the tip upward, keeping sections smooth and flat against the rod surface
- Bend the rod snugly at the midpoint to secure — it should hold without pinching the scalp
- Sit under a hooded dryer for 45–60 minutes, or air dry overnight — hair must be completely dry before releasing
- Release each rod by gently uncurling from the rod, then separate curls from the end upward with oiled fingers
Avoid silicone-heavy products when setting flexi rods — silicone creates slippage on the rod surface and produces looser, less uniform results.
13. Space Buns on Natural Hair
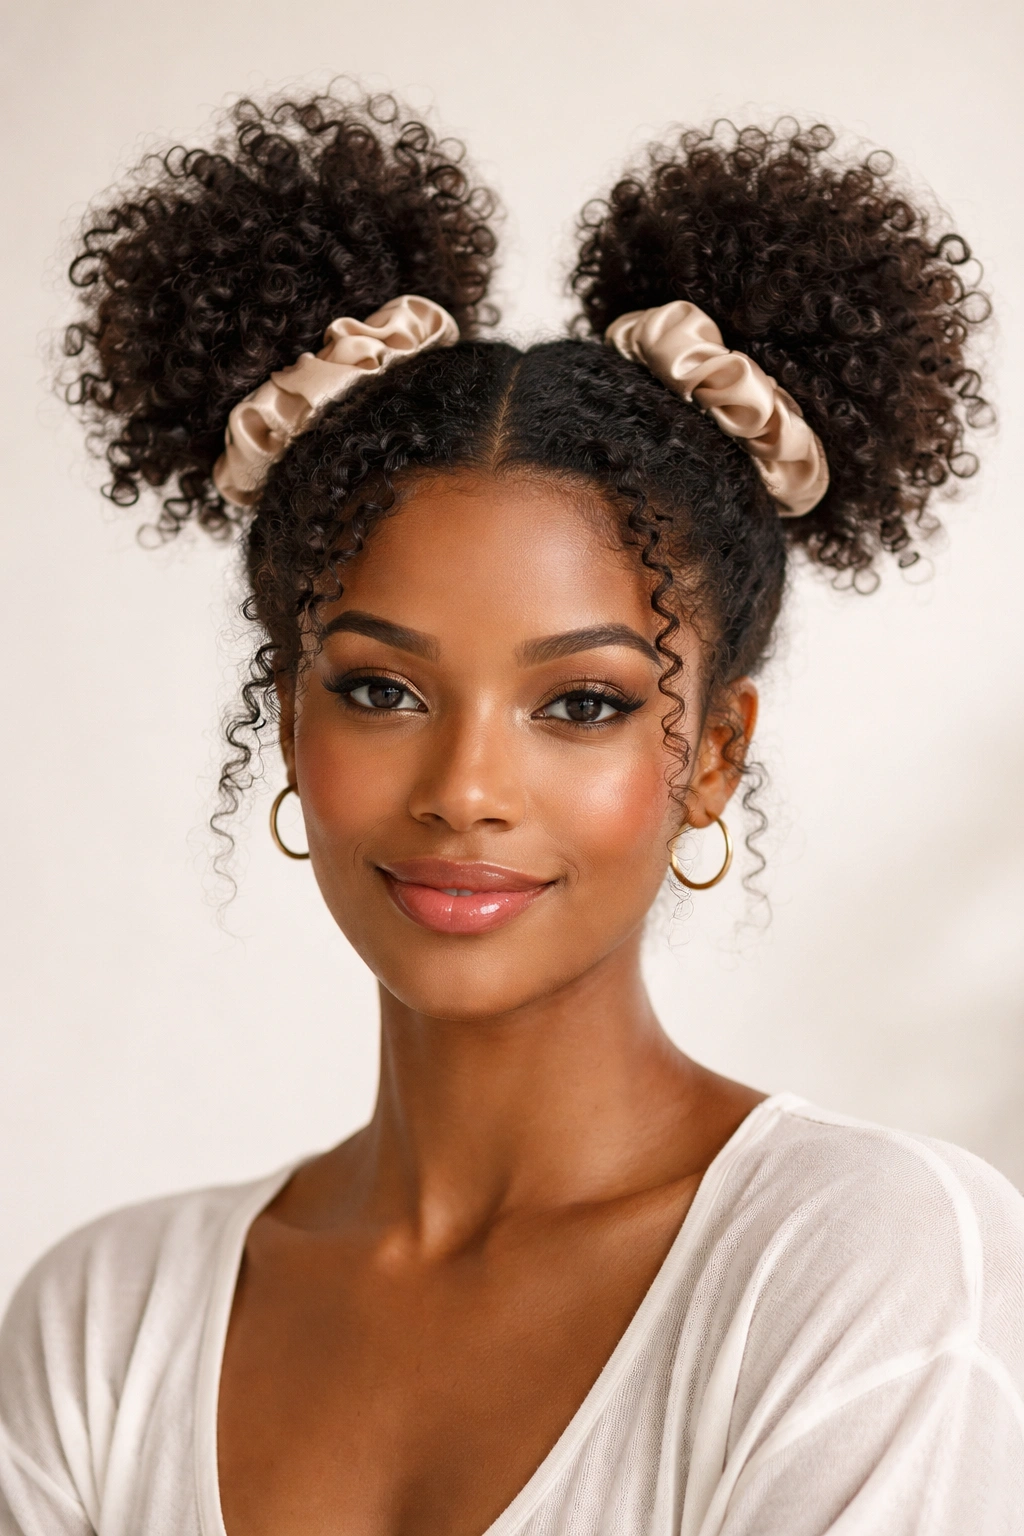
Space buns have earned a permanent place in the natural curly hair lineup. On natural hair specifically, the buns become full, round, dimensional globes of texture — completely different from the smooth, sleek version they take on with straight hair. The effect is playful, voluminous, and visually interesting in a way that’s hard to achieve with any other updo.
Placement and volume are everything here. Space buns set too low and close to the sides of the head read dated. High on the crown, positioned toward the front rather than the back, with each bun puffed out to full potential — that’s where the style comes alive.
Building Volume Into Each Bun
Don’t gather your curls tightly before forming the bun. Compressing the curls before gathering reduces the volume you’re trying to preserve. Instead, gather loosely, twist the gathered section into a soft spiral, and wrap it into a bun while deliberately pulling sections outward to give each bun its characteristic rounded shape. Large bobby pins hold the weight without showing when inserted at the base.
Styling Details and Accessory Options
- Matching satin scrunchies at the base of each bun do double duty — securing and adding a style element
- Add beads, gold rings, or ribbon threaded through the base for a more dressed-up finish
- Leave a few curls loose around the hairline or at the nape for a relaxed, lived-in quality
- For an intentionally asymmetrical version, set one bun slightly higher than the other — it reads deliberate rather than crooked
14. The Defined Afro
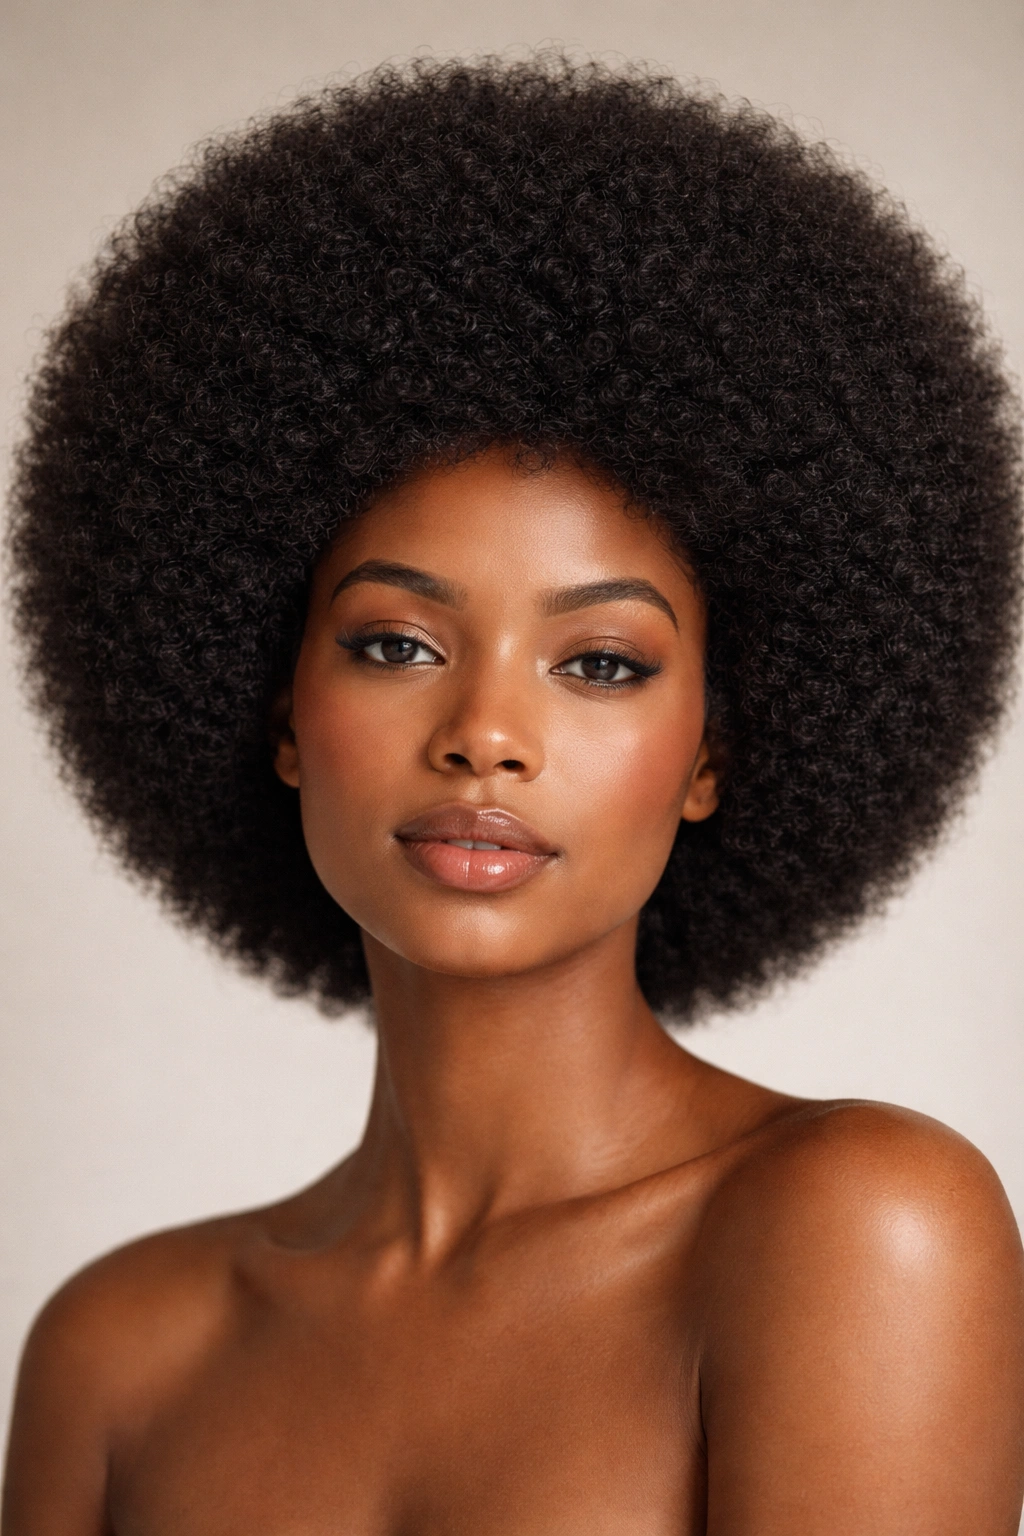
A defined afro is not simply leaving natural hair loose. It’s a shaped, intentional style where the size, symmetry, and perimeter are sculpted to create a round, full silhouette that frames the face with purpose. The difference between a picked-out, shaped afro and unmanaged loose hair is the same gap between a styled updo and hair hastily gathered with a found elastic.
For the afro to reach its full potential, it benefits from freshly moisturized, detangled hair, a wide-tooth pick for shaping, and close attention to the perimeter. The edges and outer silhouette define the shape — and a sharp, clean perimeter is what makes an afro look styled versus unstyled.
Picking and Shaping for a Round Silhouette
Use a wide-tooth afro pick starting from the ends and lifting upward and outward, working toward the roots. Don’t stab the pick directly at the roots — work from underneath and outside inward. Over-picking at the roots causes hairline breakage over time. Shape the perimeter by picking outward along the sides at a slight angle, building width without sacrificing density at the center.
Keeping the Afro Moisturized and Extended
- Apply a light, water-based moisturizer or curl cream before picking to prevent frizz and reduce breakage
- Use a light finishing sheen spray to add luminosity without weighing the hair down
- Cover with a satin bonnet nightly and reshape with the pick each morning — this approach extends the style 4–5 days
- Define the hairline with edge control and a soft brush if a cleaner perimeter is the goal
Pro tip: The afro’s apparent size adjusts daily — more picking builds height and width; gentle finger-combing maintains a slightly more compact, defined look when you want something subtler.
15. The Curly Bob Shape-Up
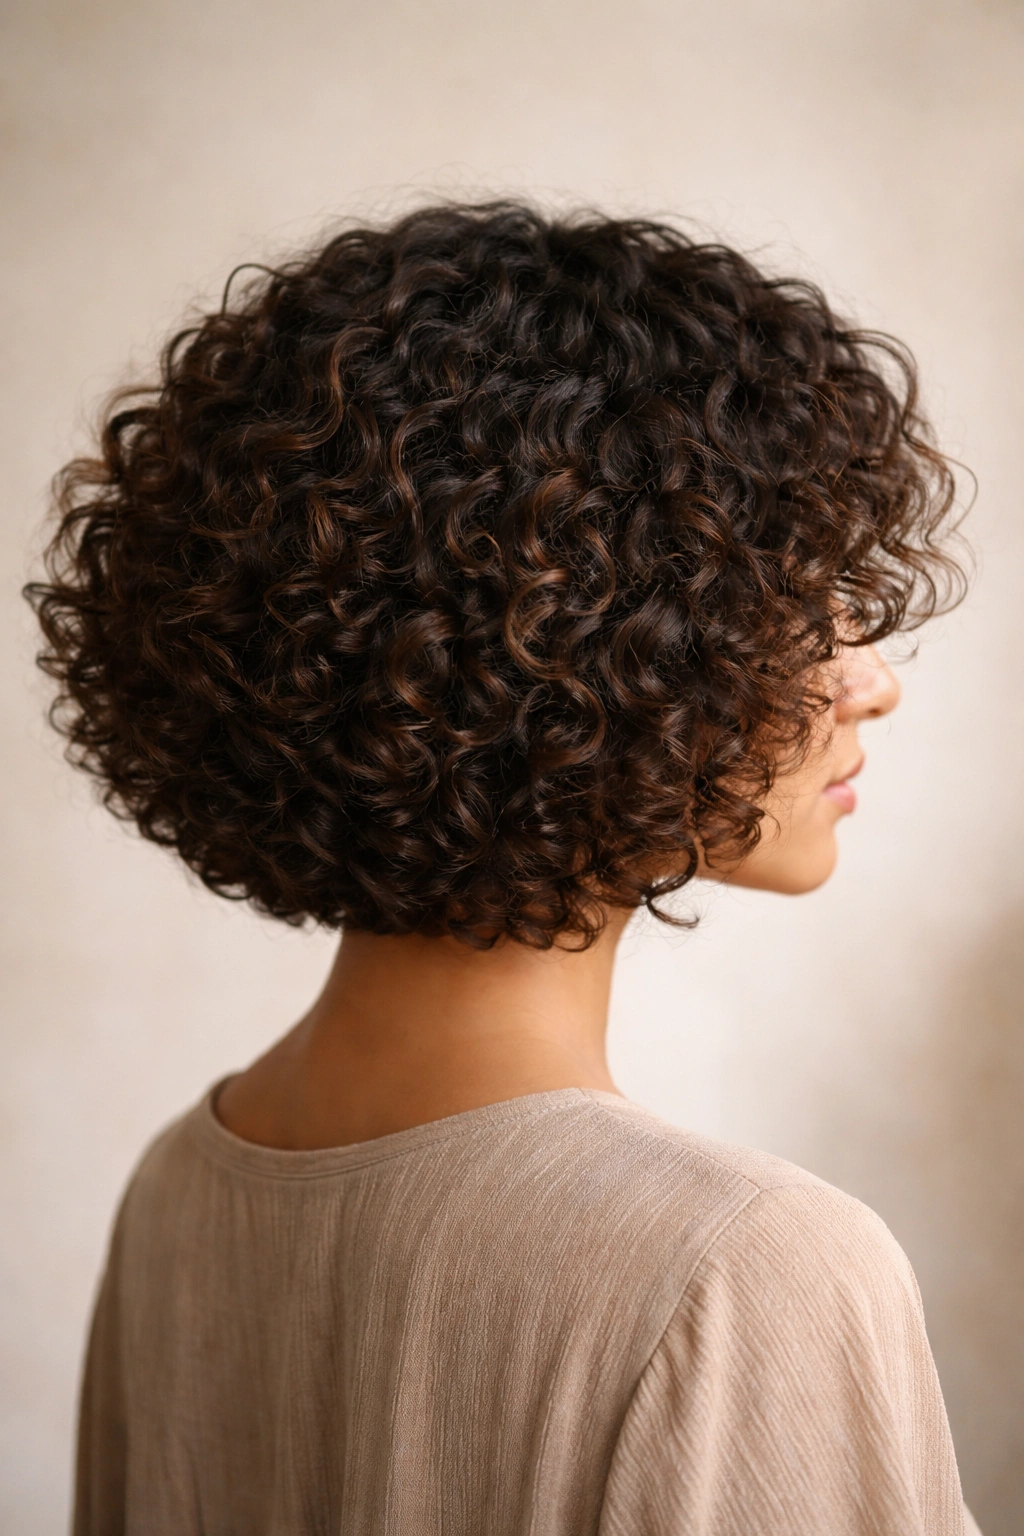
The curly bob — not a haircut, but a styling technique — uses the natural spring and shrinkage of curly hair to create a rounded, chin-to-shoulder-length silhouette that reads like a precision cut without scissors. On hair that carries significant shrinkage (where 4-inch lengths can appear as 1–2 inches when dry), the curly bob leverages that behavior intentionally.
This style works best when hair is layered slightly longer in the back than the sides, letting shrinkage create a natural rounding effect. The result on 3c through 4b curl types is a bouncy, full, bob-shaped silhouette that looks polished and considered.
How Shrinkage Does the Styling Work for You
The physics of shrinkage mean that tighter curls near the crown compress more than looser curls near the nape. Understanding this lets you predict exactly how a fresh wash-and-go or twist-out will dry: the crown appears shorter and rounder; the nape carries more visible length. Styling into a bob shape means embracing this rather than fighting it — letting the crown compress to form the bob’s rounded top, letting the nape curls provide the jaw-framing length.
Defining and Finishing the Bob Shape
- Apply a medium-hold defining cream in sections from root to end, distributing product downward to encourage curl clumping
- Diffuse on low heat from underneath the hair, lifting sections upward into the diffuser to build round, upward-facing curl structure
- Use a microfiber towel or an old cotton T-shirt to blot (never rub) excess water before diffusing
- Finish with a light-hold gel scrunched into the ends for frizz control that doesn’t deflate the shape
The curly bob shape-up often gets better on day two — the curls relax slightly, the shape softens just enough, and the volume hits its peak.
Final Thoughts
Natural curly hairstyles cover a range wide enough that no two mornings in front of the mirror need to look the same. From the effortless stretch of a well-executed twist-out to the sculptural boldness of a defined afro, each style here offers a different trade-off between time, hold, definition, protection, and personality.
What connects all 15 is that technique matters more than the style name. Knowing what products to apply and when, how saturated the hair should be, and how to handle curls during drying — these details separate genuinely great hair days from frustrating ones. And every one of these techniques is completely learnable with practice and the right information.
Pick two or three styles and master them thoroughly before rotating through the rest. A deep working knowledge of a small handful of looks will serve you far better than a surface-level familiarity with all 15. Once you understand how your specific curl pattern, density, and porosity respond to certain products and methods, you can carry that knowledge into any of these styles with confidence.
Healthy, well-moisturized hair is what makes every single one of these styles perform at its best. No styling technique compensates for chronically dry or damaged hair — consistent moisture, periodic protein balance, and low manipulation between wash days are the foundation that makes every style on this list look the way it’s supposed to.