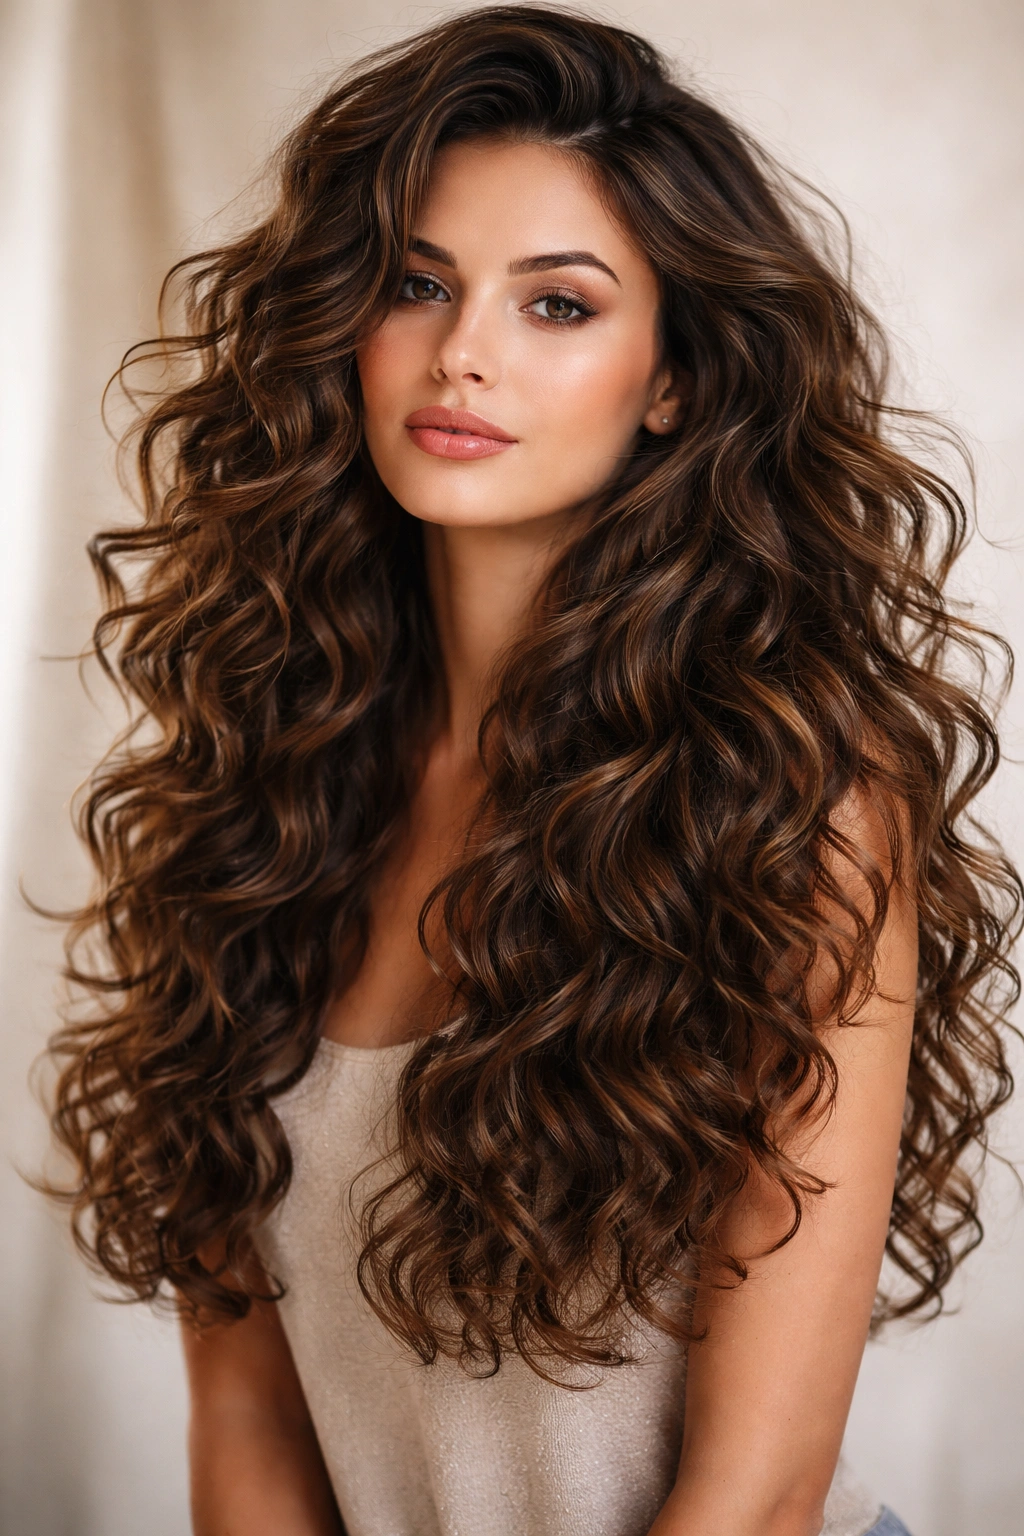
There’s something magnetic about long curly hair — it moves, breathes, and carries a kind of effortless drama that other textures simply can’t replicate. But if you have curls that fall past your shoulders, you also know the flip side: the frizz that arrives uninvited, the curl pattern that behaves differently on each side of your head, the styles that look breathtaking on someone else’s curl type and completely lose their shape on yours within an hour.
Long curly hair requires different thinking than straight or wavy styles. Curl pattern matters — Type 2 waves, Type 3 spirals, and Type 4 coils each respond differently to the same technique, the same product, the same updo. Hair density, porosity, and even the direction of your natural part all shape whether a style flourishes or falls flat on your specific hair. That specificity sounds like a limitation, but it’s actually a strength once you know which styles align with your texture.
The styles here span everything from wash-and-go ease to occasion-ready polish. Some ask nothing more of you than a satin scrunchie and five focused minutes. Others are worth the extra deliberate preparation. What they all share is a common premise: curly hair has movement, volume, and structure that straighter textures have to manufacture artificially — the most flattering thing you can do is direct that energy rather than fight it.
1. Long Layered Curls with Movement and Volume
Layers and curly hair have a relationship that most curl-textured people eventually discover is non-negotiable. When long curly hair carries too much weight — especially with dense, thick, or coarse curl patterns — the curls at the bottom get stretched out and lose their spring. Strategic layers remove that weight and let each curl bounce back into its natural shape, creating a silhouette that feels alive rather than heavy and dragged down.
Why Layers Are a Curl’s Best Friend
The critical distinction for curly hair is curl-specific layers, not the same layering technique applied to straight hair. A dry cut — where the stylist cuts hair while it’s already dry and in its natural curl state — gives a far more accurate picture of where the weight sits and how each section naturally falls. Cutting wet, straightened hair completely masks how the curl behaves once it dries, which is why so many curly-haired people walk out of a layered cut disappointed.
Good layers on long curly hair remove bulk from the mid-lengths and ends without creating a triangular, wide-at-the-bottom shape. The result is a silhouette that’s fuller at the top, defined through the middle, and light at the ends — allowing curls to spiral properly rather than hanging limp.
The amount of layering depends on your curl type. Looser Type 2 waves benefit from subtle, soft layers that add movement without removing too much weight, while tighter Type 3 and Type 4 curls can handle more dramatic layering because natural shrinkage compacts the overall shape regardless.
What to Tell Your Stylist
- Request a dry cut if your stylist works with curly textures — this reveals the true shape before a single snip
- Ask for face-framing layers to highlight your features without the sides overwhelming your face
- Specify bulk removal at the mid-length, not short choppy layers that cause the perimeter to pyramid outward
- Avoid razor cuts — the frayed edges they create in curly hair translate directly into frizz at the ends
- Bring reference photos of curly layered hair specifically, not straight cuts, so your stylist has a texture-accurate visual to work from
Pro tip: If your stylist doesn’t mention doing a dry cut, ask specifically — many trained in traditional techniques won’t offer it unless prompted.
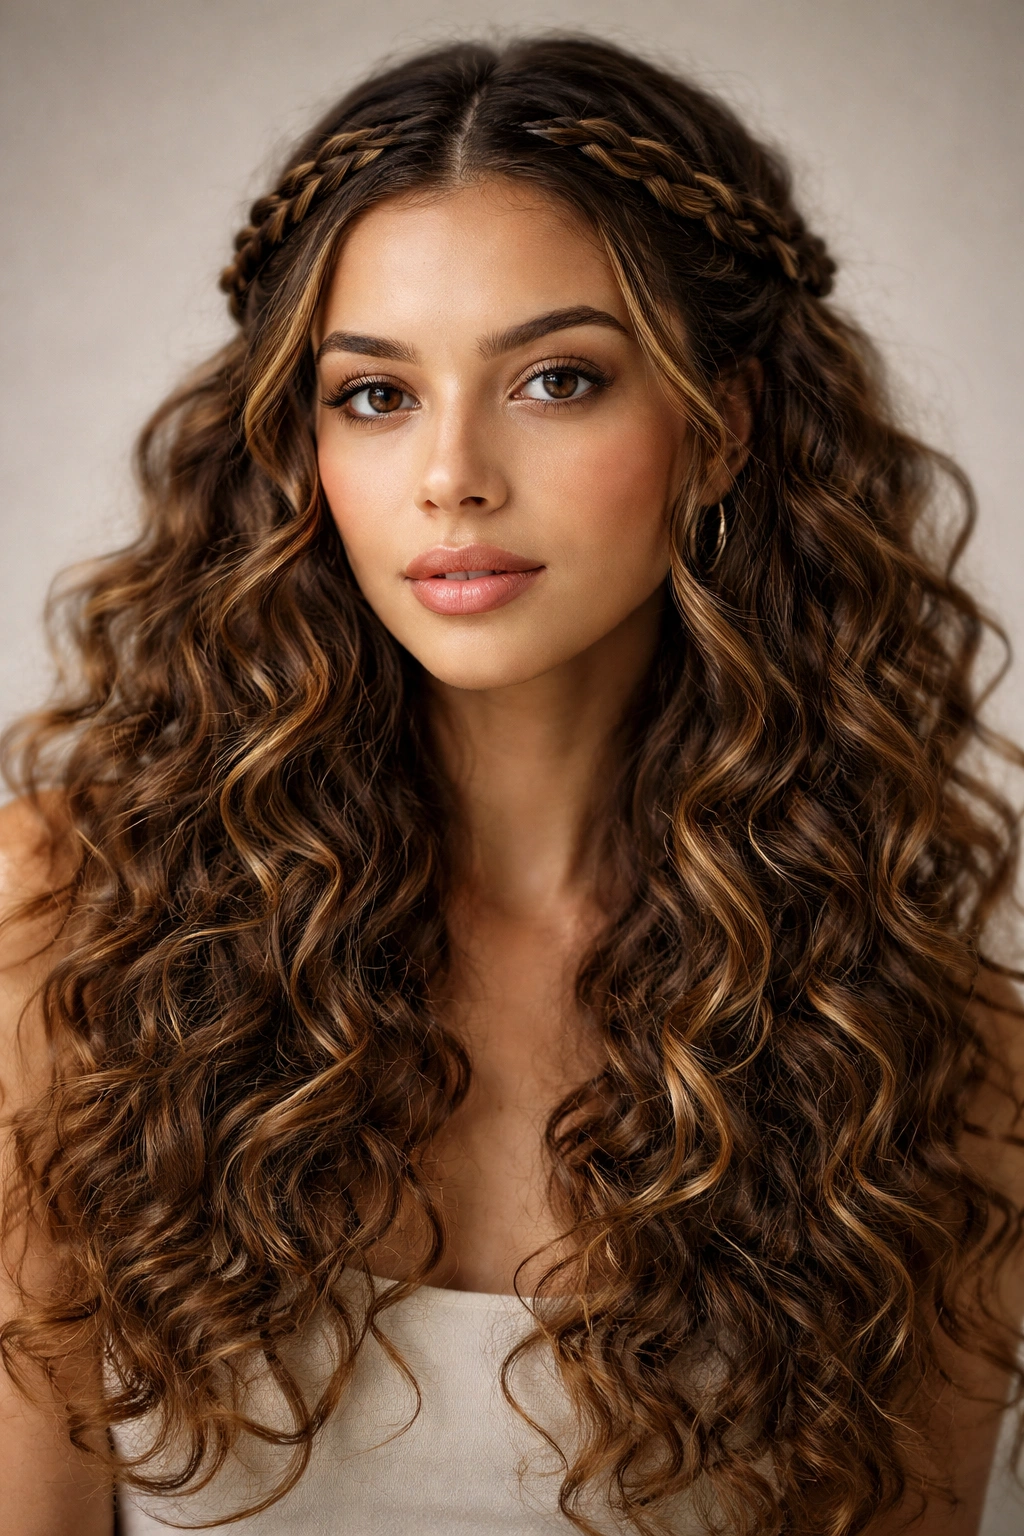
2. Half-Up Half-Down Curly Crown
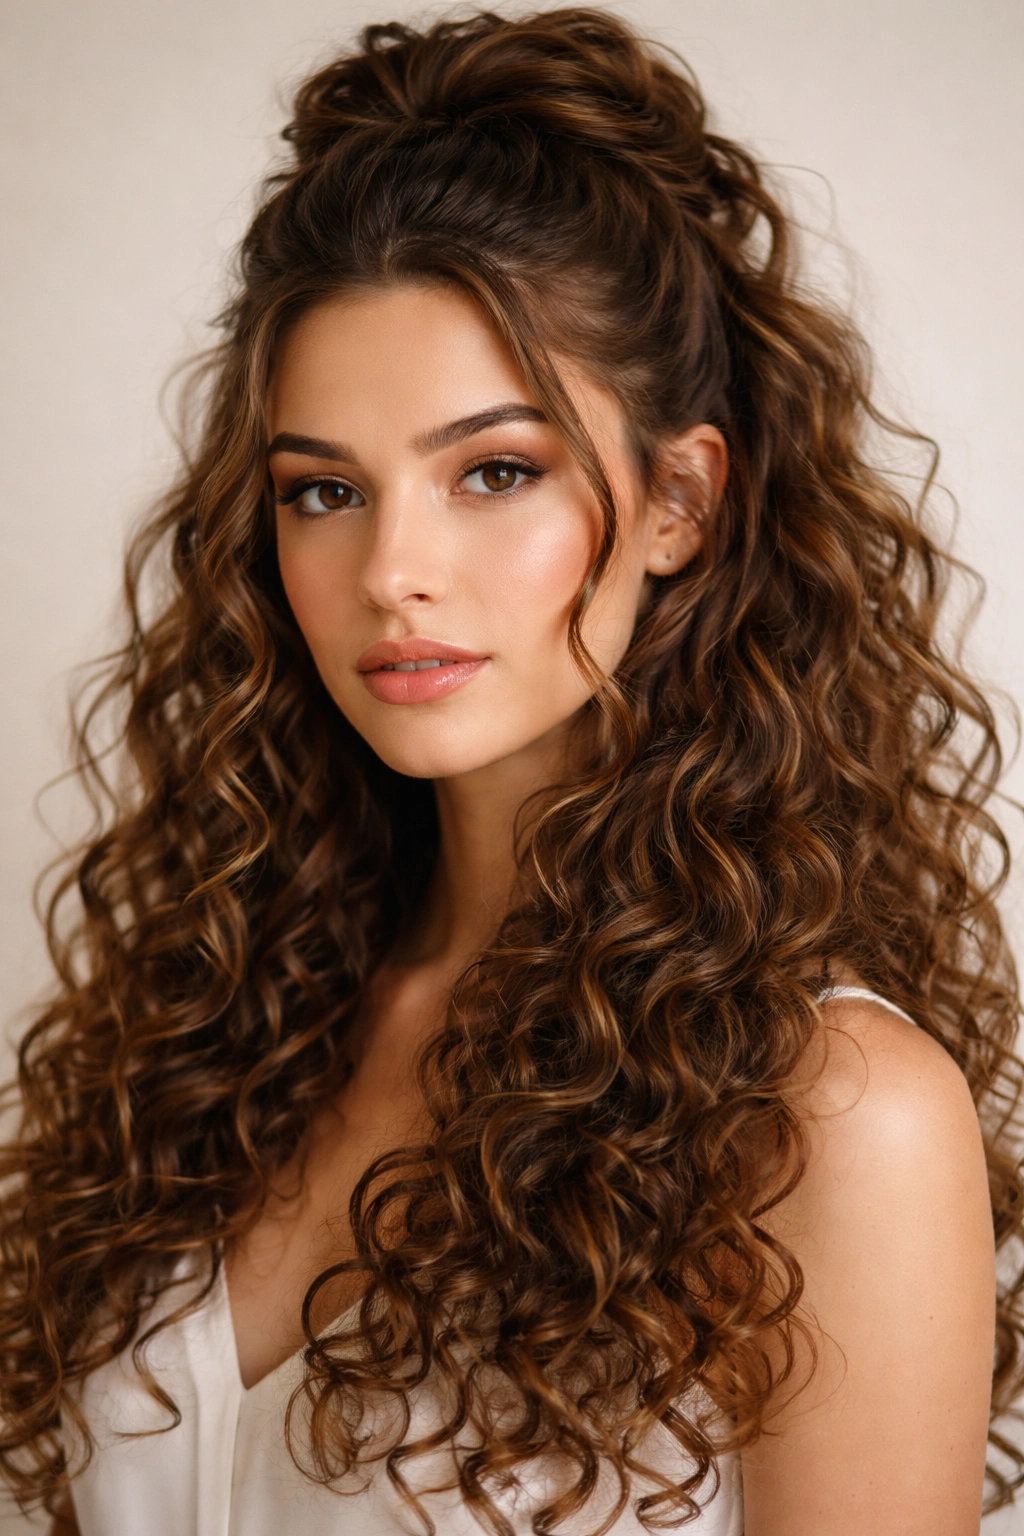
The half-up, half-down style manages to look polished and relaxed simultaneously — which, on long curly hair, is genuinely difficult to achieve with either a full updo or completely loose curls. The top section gets lifted and secured at the crown while the remaining length flows freely, and the combination creates exactly the kind of “I tried, but not obviously” aesthetic that makes it work for brunches, presentations, and weddings with equal ease.
Why This Balance Works on Long Hair
The crown section — the top half of the hair gathered just above the temples and back toward the nape — creates structure and framing that a full wash-and-go rarely delivers. It lifts hair away from your face, reveals your bone structure, and adds a clean top line to what would otherwise be an amorphous cloud of curls.
Where you section the hair makes all the difference. Take too much up top and you lose the waterfall effect below; take too little and the gathered section looks underfed and thin. The sweet spot is a horizontal line just above the temples on each side, following the natural curve of the crown.
The loose lower curls carry the visual weight of the entire style, so they should be at their best — refreshed with a light curl cream if they’re second-day, properly diffused if freshly washed.
Getting the Top Section Right
- Use a satin scrunchie or a large claw clip rather than a thin elastic — these hold without crimping thick or curly hair at the gather point
- Don’t brush the top section before gathering — finger-detangle only, or you’ll turn spirals into frizz before you’ve even started
- Leave two face-framing pieces out on each side to soften the look and prevent it from pulling tightly across the temples
- A light curl cream or mousse on the loose lower section before styling keeps curls defined throughout the day
- For extra crown volume, lift and slightly forward-push the gathered section before securing — this creates natural puff at the top without requiring product
3. Long Curly Shag with Curtain Bangs
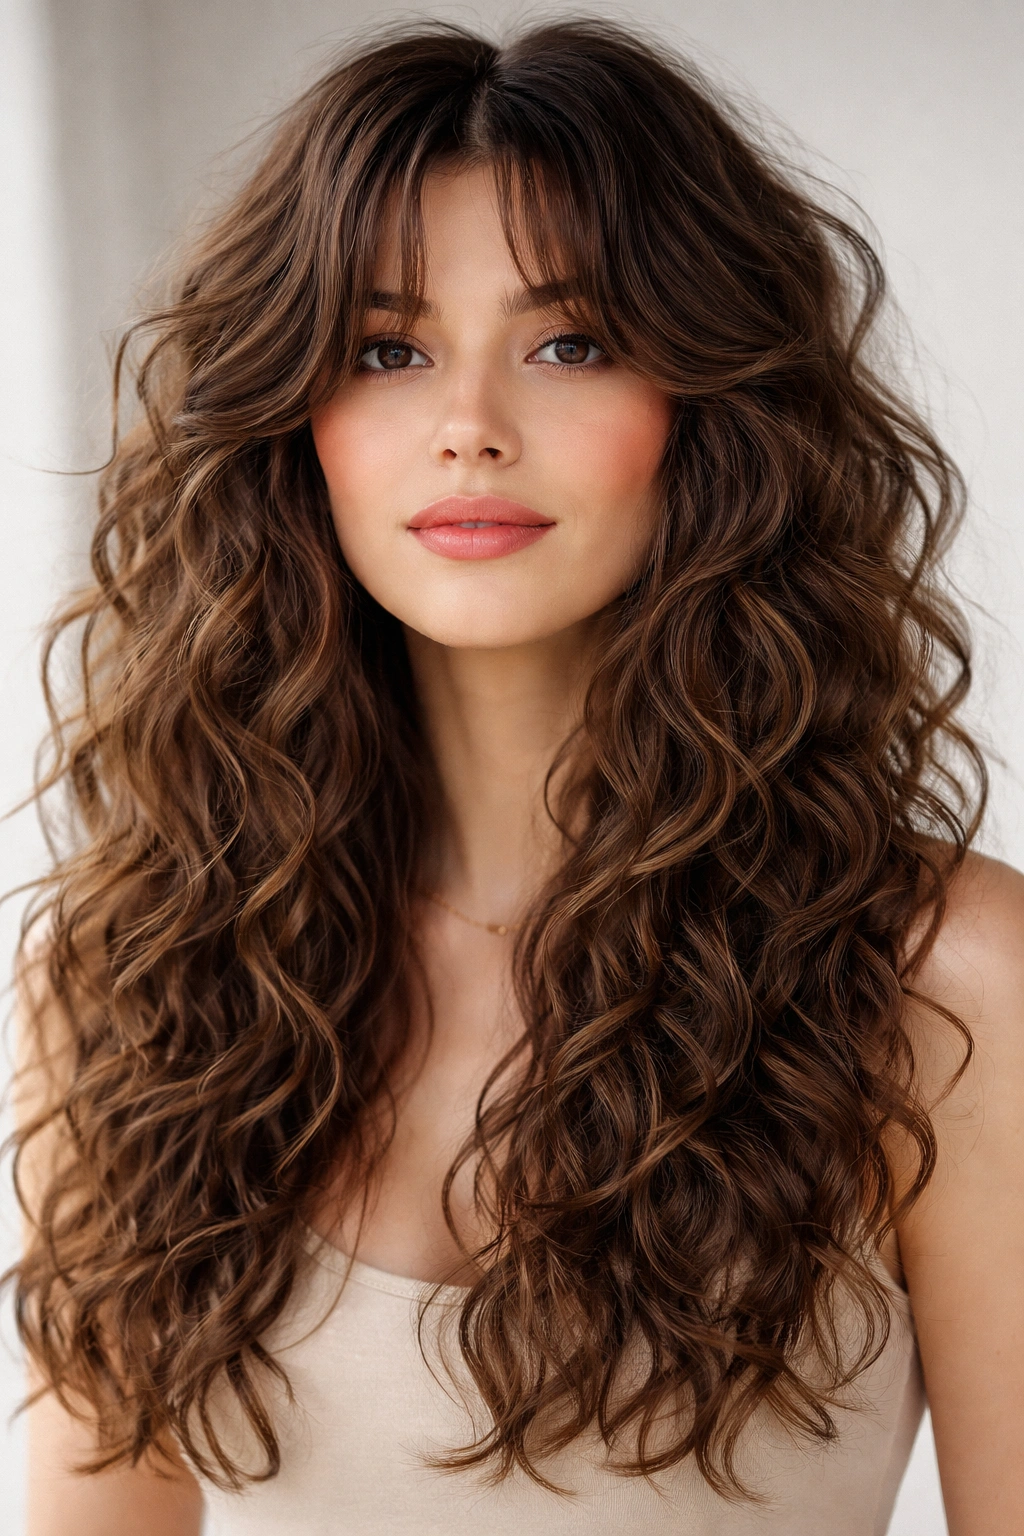
The curly shag — a textured take on the wolf cut that leans fully into natural movement — is one of the most consistently flattering cuts for long curly hair. It’s built around layers at multiple lengths: shorter at the crown for volume, mid-length through the body for definition, and longer at the ends to preserve length while reducing bulk. The result is a graduated, textured shape with movement at every level rather than the dragged-down weight of an unstrategic long cut.
Understanding the Shag’s Structure
What distinguishes a shag from a standard layered cut is the short crown layers. These layers at the top of the head create a volume foundation — shorter curls at the crown spring up and create height, which then cascades down through progressively longer layers beneath.
On long curly hair, this builds a silhouette that’s full at the top without being wide at the bottom, giving the whole shape an upward energy rather than the inverted triangle that plagues many layered curly cuts. The curtain bangs component adds face-framing without the full commitment of a blunt fringe — parted at the center and swept to each side, they frame the face like panels of soft, coiling texture.
Working with Curtain Bangs on Curly Hair
- Tighter curl patterns (Type 3b and above) will shrink significantly in the bang area — ask your stylist to cut them longer than feels right, as they’ll spring up considerably once dry
- Apply a small amount of curl cream to the bang area while damp, then diffuse on low heat to encourage definition without frizz
- On uncooperative days, two small bobby pins angled inward toward the center part hold the bangs discreetly in place
- Avoid over-touching the bang area — handling them throughout the day introduces frizz faster than any other factor
- The ideal dry length for curly curtain bangs lands at or just past the cheekbone — factor in shrinkage when discussing this with your stylist
4. Defined Spiral Ringlets at Full Length
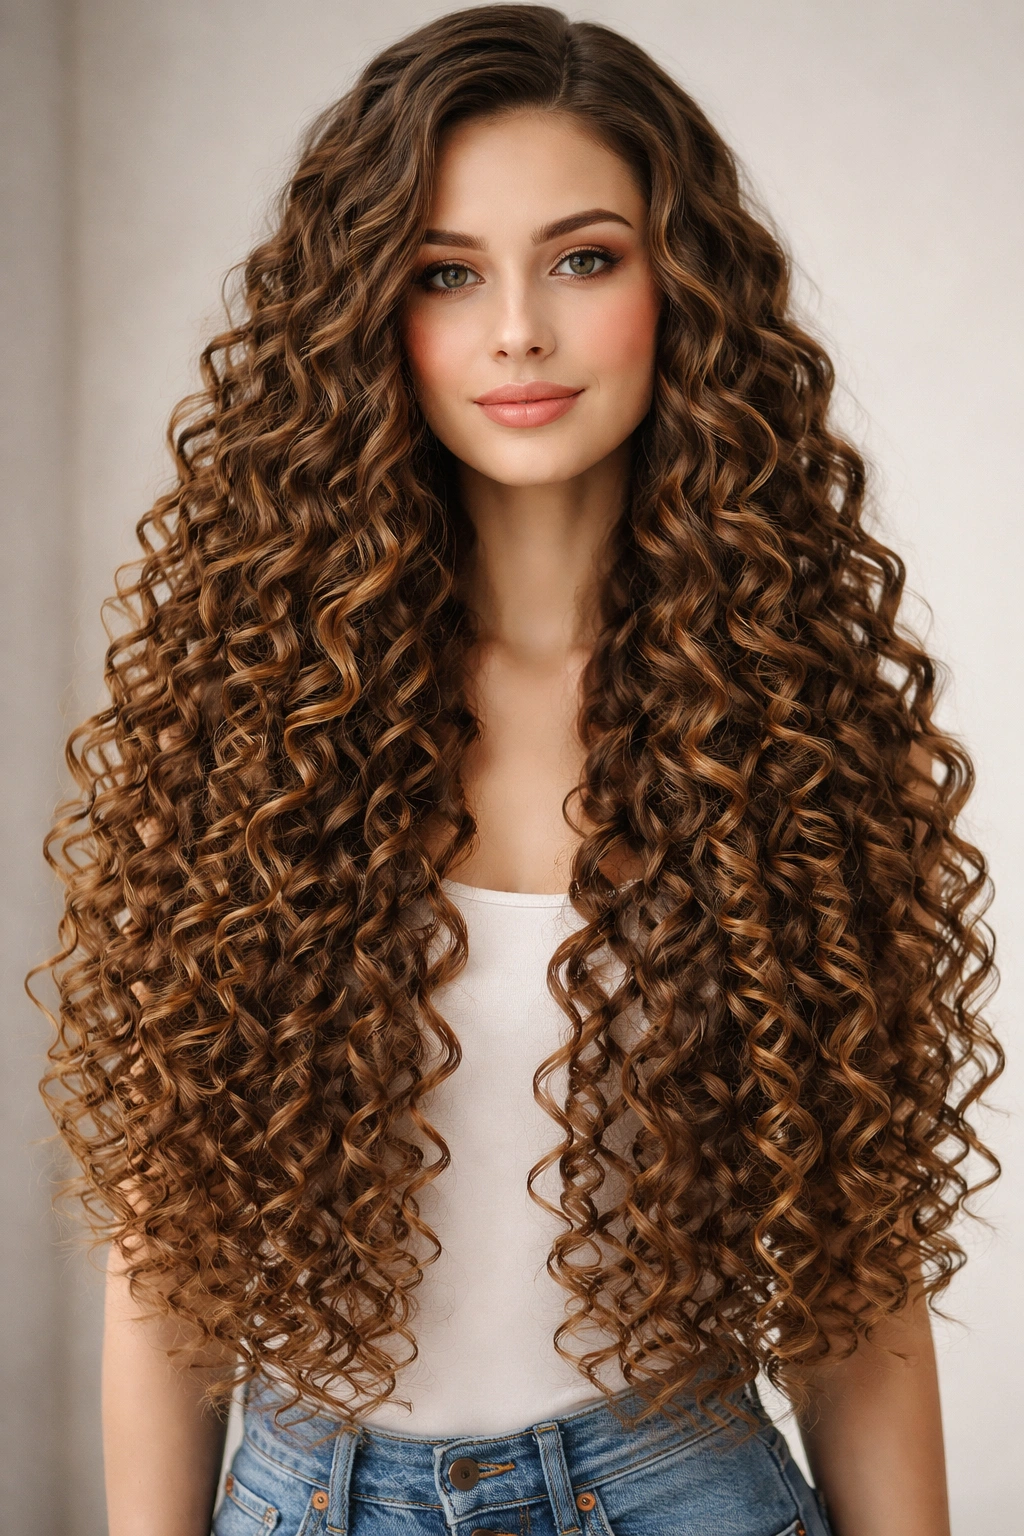
Fully defined spiral ringlets on long hair is the style that turns heads. Each curl distinct, coiled, and gleaming — the kind of hair that appears to move in slow motion. Achieving it requires a combination of the right product layering, a hands-off drying approach, and enough patience to let the hair set without disruption. The payoff for that patience is considerable.
The Technique That Makes Ringlets Work
The foundation of defined ringlets is the rake-and-scrunch method on soaking-wet hair with enough gel or curl cream to give each strand structure. Soaking is the operative word — barely damp hair won’t absorb product evenly, which leads to inconsistent definition and patchy crisp spots. Work in sections from the nape upward, raking product through with your fingers to ensure even coverage, then scrunch upward to encourage each curl to coil tightly.
Letting the hair dry completely undisturbed — through a diffuser on low heat, or air-drying with the hair pinned up at the roots — preserves the coil formation. Touching, scrunching, or flipping while wet breaks the curl structure and introduces frizz.
Once fully dry, scrunch out the crunch (known in the curly hair community as SOTC — “scrunch out the crunch”) by working a few drops of lightweight oil through the dried, firm gel cast. This breaks the stiff exterior and reveals soft, defined ringlets underneath.
Products and Tools You’ll Actually Need
- A medium to strong-hold gel (not hairspray — gel provides structure without sticky residue)
- A curl cream or leave-in conditioner applied before the gel for moisture and to prevent the gel from over-drying the hair
- A diffuser attachment on your dryer — this distributes heat evenly without disturbing the curl formation in progress
- A microfiber towel or a cotton T-shirt for post-wash blotting (terry cloth creates friction, which is the fastest route to frizz)
- A few drops of lightweight oil — jojoba, argan, or squalane — for the scrunch-out phase once the cast has fully set
Worth knowing: The stiff, crunchy cast that forms when the gel dries is not a mistake — it’s the gel doing its job correctly. Break it early and you sacrifice the definition underneath.
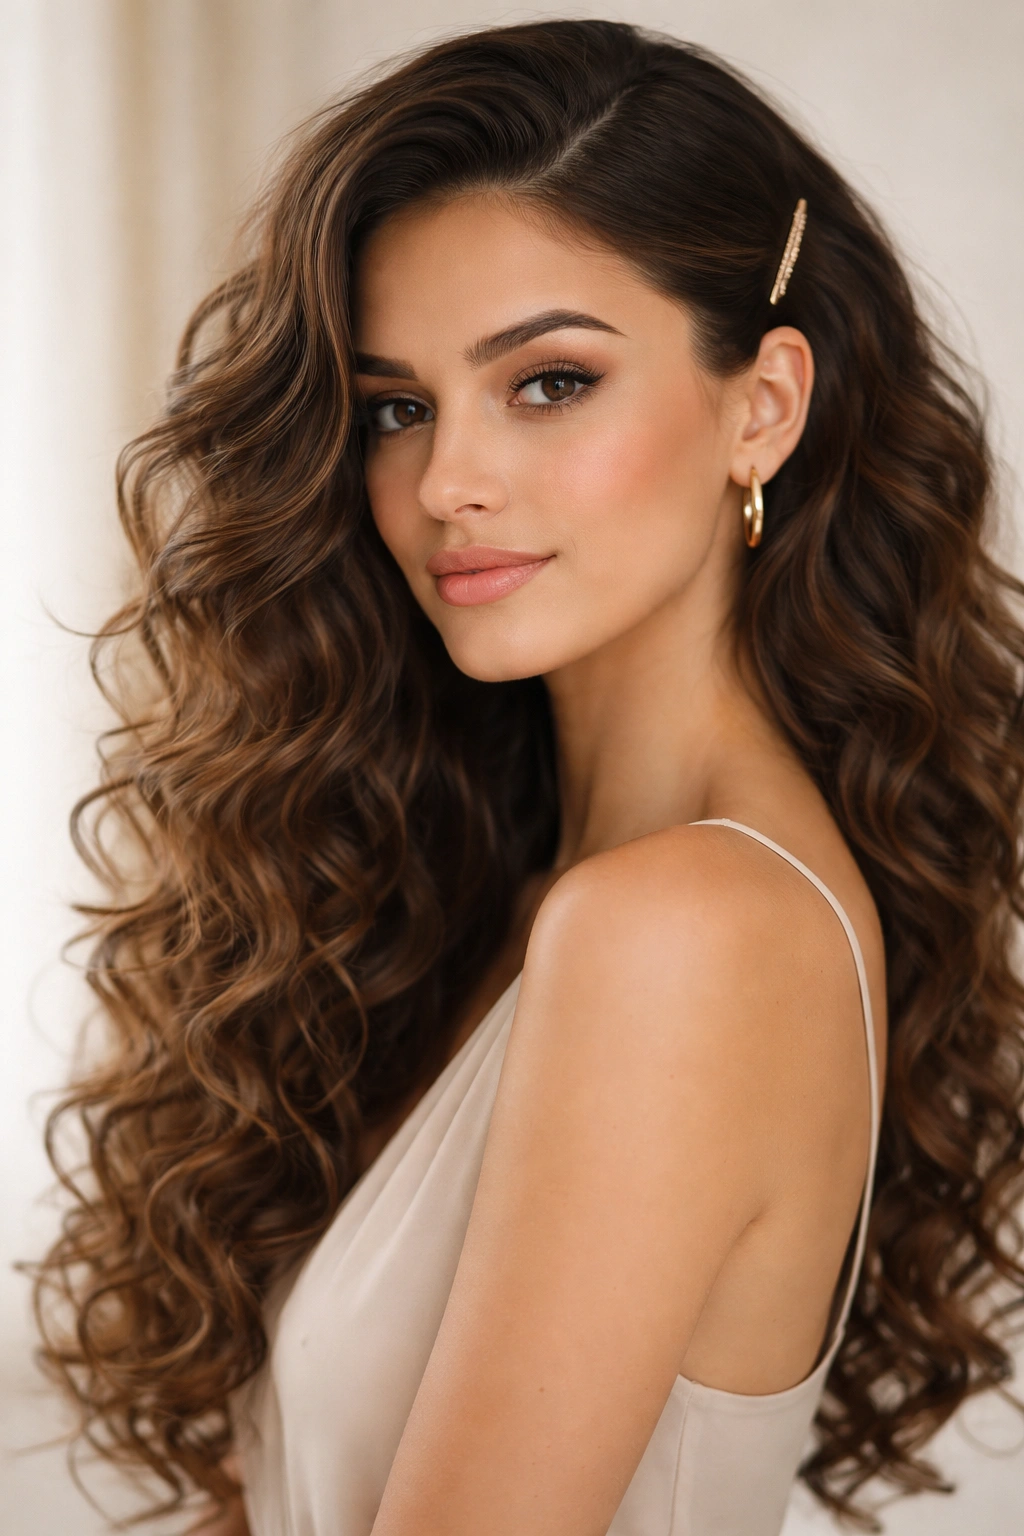
5. Romantic Loose Curly Waves
Loose curly waves occupy the middle ground between structured ringlets and completely free curls — softer in definition, with more movement and less coil structure. Think beachy, romantic, and slightly undone. This style works especially well on Type 2 and looser Type 3 curls, where the natural pattern already tends toward waves rather than tight spirals, but it can also be created intentionally on tighter curl types with the right product adjustments.
Why Less Product Gets Better Results Here
The counterintuitive truth about loose curly waves is that less product generally wins. Heavy gels and thick creams weigh down the looser curl patterns that create natural waves, leading to hair that looks lank and weighed-down rather than soft and romantic. A lightweight mousse, a curl-enhancing spray, or a thin cream applied to soaking-wet hair and then left completely alone to dry gives this look its characteristic ease.
Diffusing on low speed and medium heat — or air-drying entirely — preserves the gentle movement of the wave without creating frizz. The goal is maximum softness, not maximum definition, so techniques that encourage tight coiling (like raking through with a wide-tooth comb while wet) work against the whole aesthetic here.
For a warmer, more polished version, a curling wand on 1.5 to 2-inch sections enhances and smooths the natural wave pattern, then gets finger-combed through for that signature effortless finish.
Styling for Softness, Not Definition
- Swap heavy curl creams for a lightweight mousse or curl spray — these enhance without weighing the wave down
- Diffuse on low speed to avoid disturbing wave grouping; aggressive high-speed diffusing disrupts the natural clusters
- Flip the hair upside down while applying product to encourage root volume, which keeps the look lifted rather than flat
- Resist detangling with tools while the hair dries — let natural wave grouping form on its own
- A few drops of lightweight oil once fully dry adds shine and the glossy finish that makes this look feel intentionally romantic
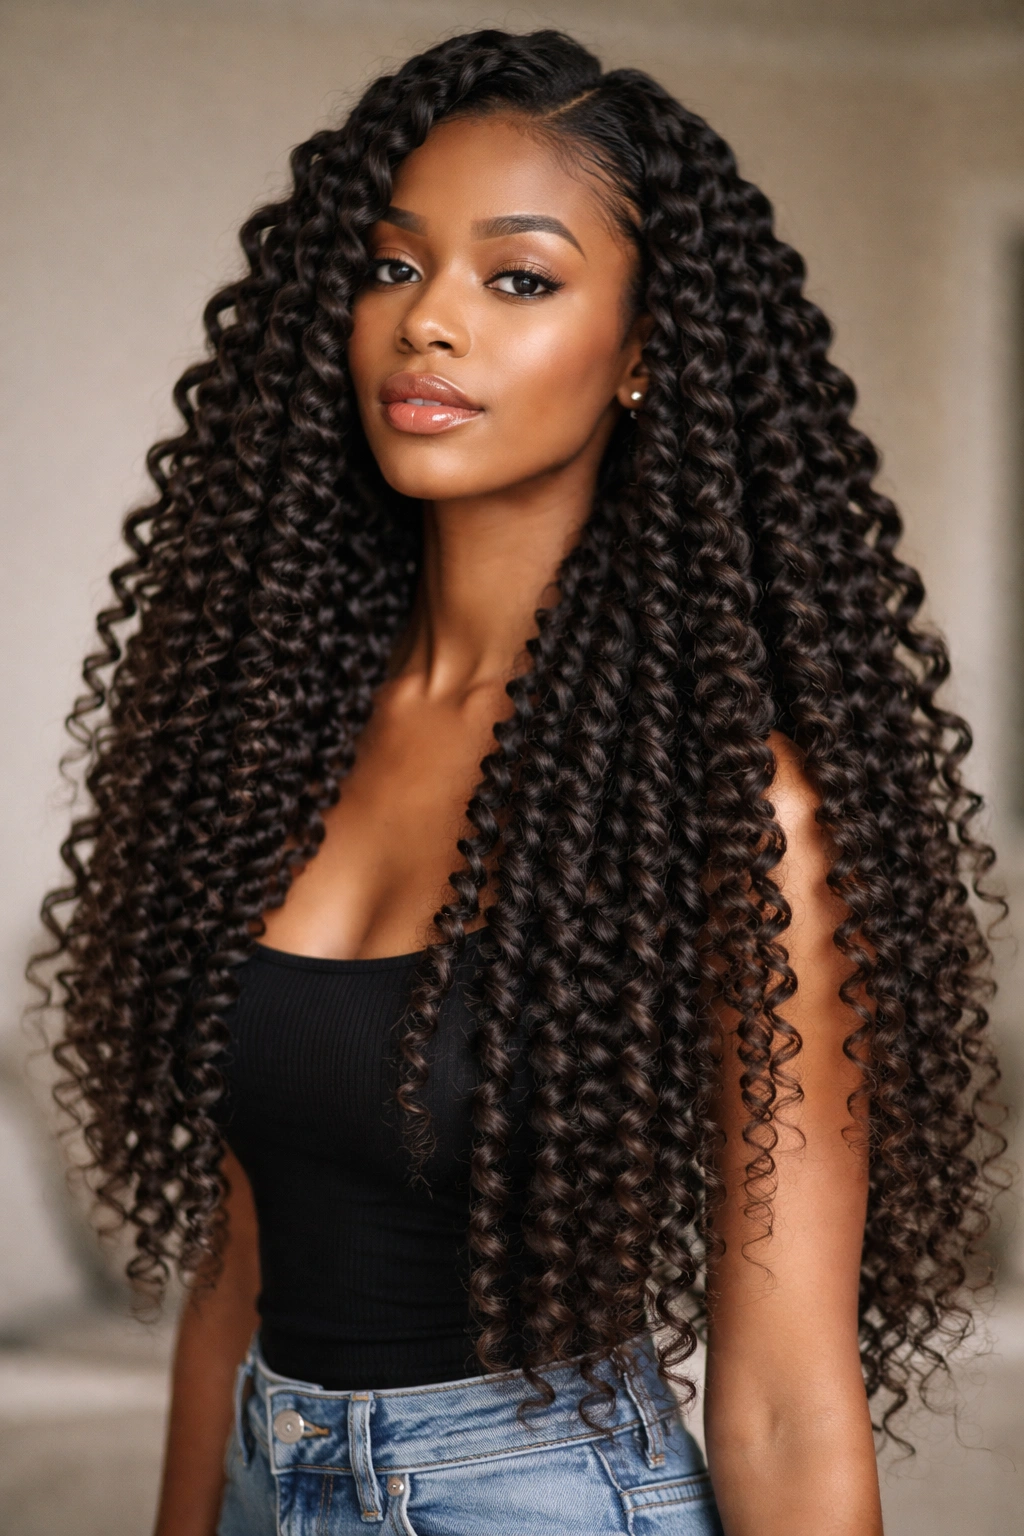
6. Long Natural Coily Style
Type 4 coils — tight, densely packed spirals or zigzag patterns — at long lengths are genuinely stunning, and they’re also significantly underrepresented in most hairstyle roundups. Natural coily hair at full length carries an incredible amount of volume and presence, and styling it to showcase that natural texture (rather than altering or stretching it) is both the most expressive choice and, in many ways, the most freeing.
Understanding Shrinkage as a Feature, Not a Flaw
Shrinkage is one of the defining characteristics of tight coily hair. Type 4 hair can shrink anywhere from 50% to 75% of its stretched length — waist-length coils might appear shoulder-length or shorter in their natural state. Most people experience this as frustrating. But shrinkage is a sign of healthy elasticity, and a shrunken coily style at long lengths has a density and volume that no product can manufacture artificially.
Wearing natural coily hair down at full length comes down to moisture retention and layer protection. The LOC method (liquid, oil, cream — applied in that order) or the LCO variant (liquid, cream, oil) forms the foundation of a moisturized, defined coily style that holds throughout the day. A water-based leave-in handles the initial moisture, oil seals it in, and cream provides the protective outer layer that locks everything in place.
Daily Maintenance for Long Coily Hair
- Use the LOC or LCO method on wash days — the order you apply each layer matters as much as the products themselves
- Seal each section as you work through the hair rather than applying product to everything at once; this keeps each area damp and workable
- A satin-lined bonnet or satin pillowcase overnight prevents friction-related frizz and preserves the day’s definition
- On refresh days, a small spray bottle with water and a touch of leave-in reactivates product and revives the coil pattern without a full rewash
- Resist touching the hair once it’s set — every pass with your fingers disrupts the curl clumping that creates visible definition
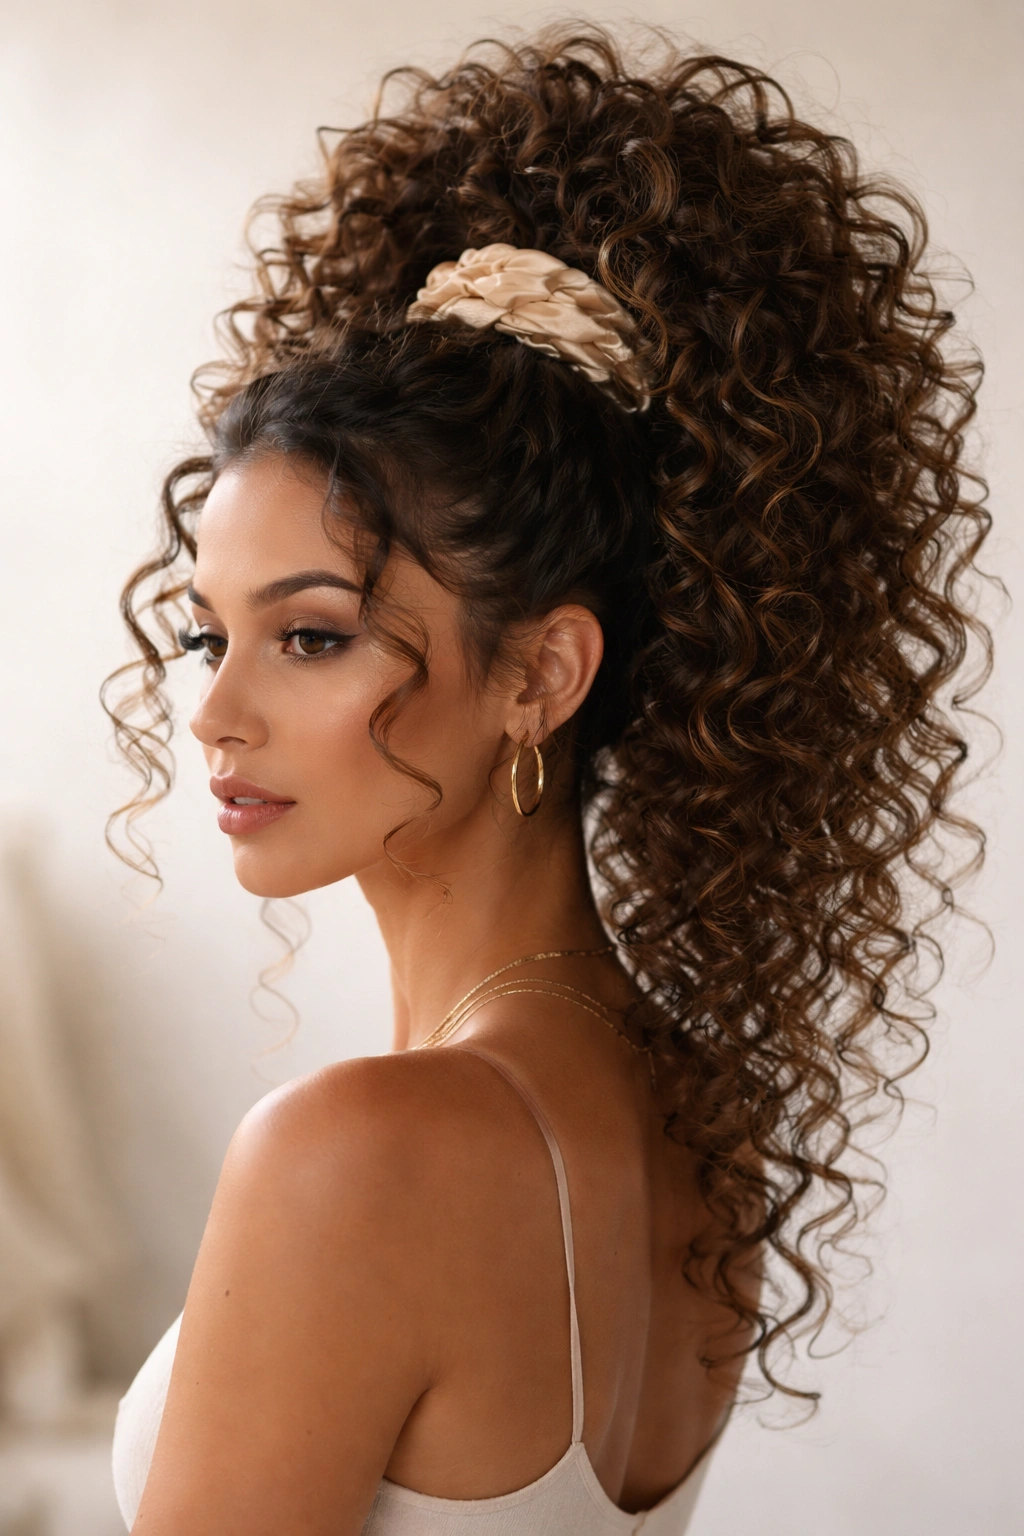
7. High Curly Ponytail with Cascading Volume
A high curly ponytail on long hair hits differently than the same style on straight hair. Where straight ponytails hang flat and sleek, a high curly ponytail explodes outward from the base — a full, cascading fall of curls with far more visual energy than the sum of its parts. When done right, it reads as bold, celebratory, and effortlessly confident all at once.
Building from the Root
The foundation of a great high curly ponytail is root volume. If the crown sits flat when you gather the hair, the ponytail will droop regardless of how voluminous the curls themselves are. Spritz the root area with water before gathering, then finger-massage the scalp to lift the roots. When gathering, hold the hair loosely and keep the crown puffed as you bring it upward — don’t smooth the top flat in the process of gathering.
A small section of hair wrapped around the elastic and secured with a bobby pin at the ponytail base polishes the look considerably, creating the appearance of a fuller, more intentional foundation. It takes ten seconds and elevates the style noticeably.
Keeping It in Place All Day
- Use a thick fabric-covered elastic — thin elastics crease and slip in curly hair; wider ones distribute the weight more evenly
- Apply a light-hold gel around the crown before gathering to control flyaways at the root
- Double-layer the elastic for long or thick hair — two elastics at the base distribute weight and prevent slippage through a full day
- After securing, gently separate each curl in the ponytail with your fingers to maximize volume in the cascading section
- A flexible-hold spray from about 12 inches away finishes the style without stiffening the curls or making them feel coated
8. Side-Swept Long Curls
A deep side part transforms long curly hair in a way that few other zero-effort changes can match. Where a center part creates symmetry and balance, a deep side part creates drama — one side of the hair falls across the face and frames the cheek, while the other is swept back, producing an asymmetrical silhouette with an inherently more glamorous, editorial quality.
What a Deep Side Part Actually Does
The side sweep works for a structural reason: it interrupts the expected symmetrical fall of curly hair and creates visual interest through contrast. One side — the heavier, fuller side — drapes across and past the shoulder in a cascade that has a deliberately cinematic quality. The other side recedes, and that negative space makes the draped side more dramatic by comparison.
Timing matters here. Forcing a deep side part into already-dry, set curls creates frizz and awkward sections that fight the intended direction. The right moment is on damp hair, before the curl fully sets — part the hair well off-center while wet, apply product over the part, and let the natural curl form on top of that directional structure.
Styling for Longevity
- Part well off-center on damp hair — trying to redirect dry curls creates more frizz than style
- Apply a medium-hold gel or curl cream over the part structure, then diffuse or air-dry without disturbing the direction
- On the heavier forward-falling side, extra leave-in conditioner helps curls fall smooth and defined rather than frizzy
- A small amount of edge control or lightweight pomade along the part line smooths root frizz without weighing down the rest of the hair
- A decorative clip on the lighter side adds a finished, deliberate touch that elevates the style without overcomplicating it
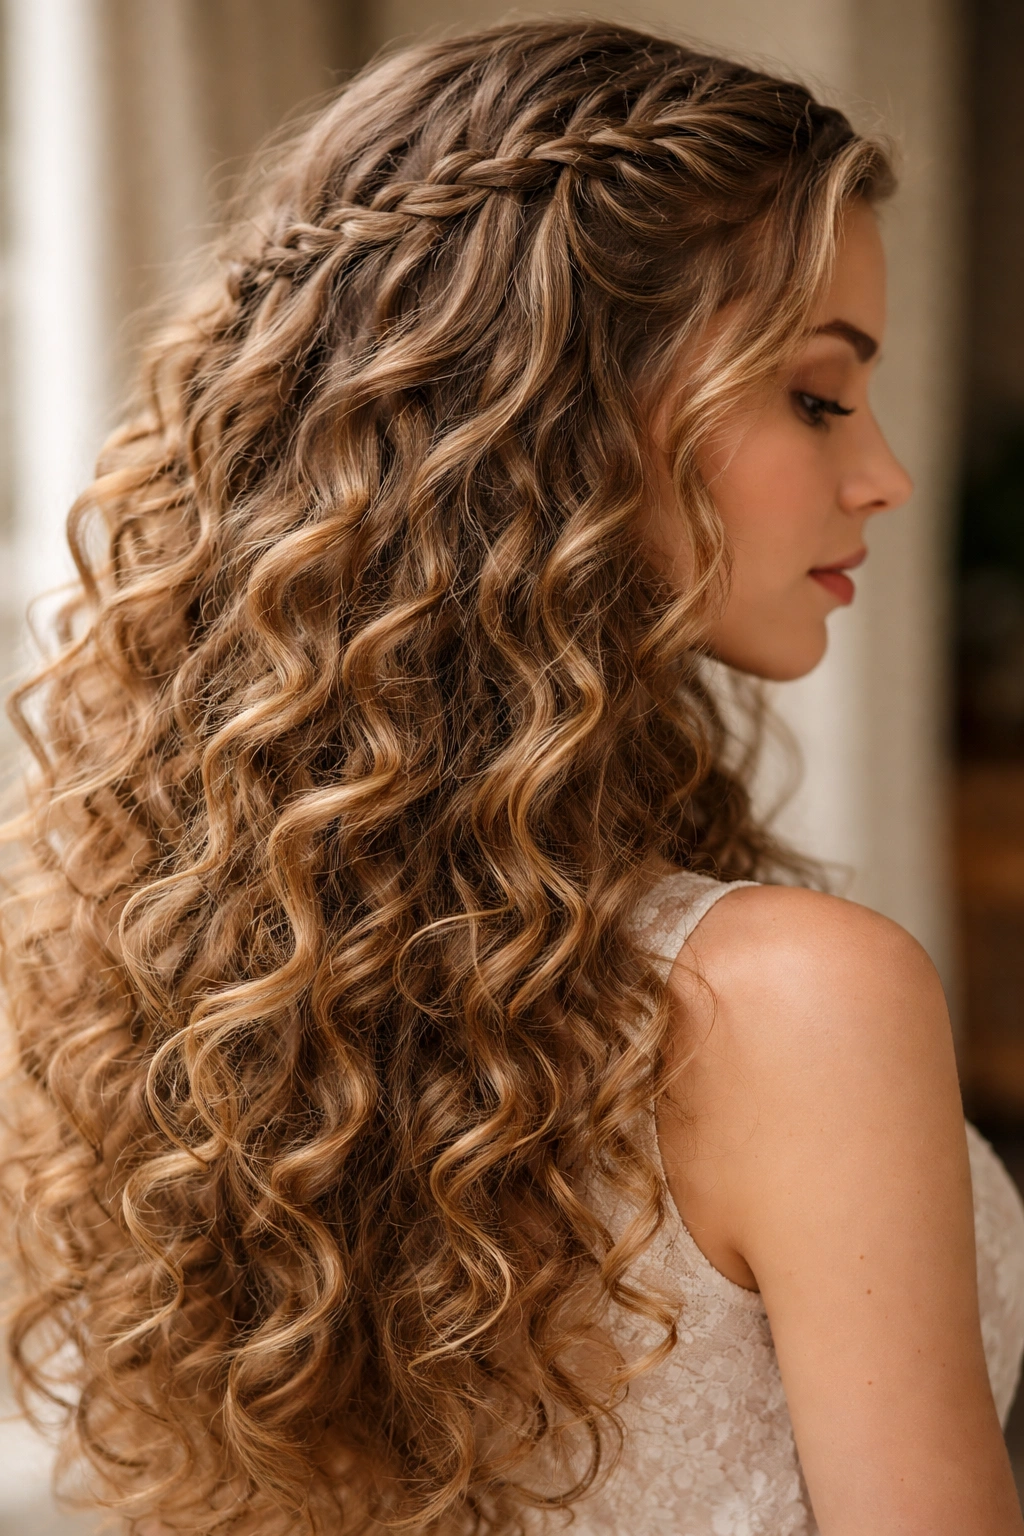
9. Braided Crown with Long Curly Ends
The braided crown is one of the most striking ways to frame long curly hair. Two braids — or two-strand twists, depending on your texture — are created at the front hairline on each side, then pinned across the crown like a headband, while the remaining length hangs freely in curls. Half structured, half completely free, and the contrast between the two is exactly what gives this style its power.
The Balance Between Structure and Flow
The braids provide clean, precise lines that frame the face and draw the eye upward. The loose curls provide movement and softness that prevents the style from reading as rigid or overly formal. Getting the balance right means the braids shouldn’t be too tight or uniformly smooth (which reads as overly ceremonial) or too loose and approximate (which just looks unintentional). A middle ground — neatly executed but slightly textured — threads the needle.
For looser curl patterns, a standard three-strand braid works beautifully. For tighter or coilier textures, two-strand twists hold more naturally without needing to be stretched smooth, and the texture of the twist adds visual interest rather than working against the style. The pinning technique matters: crisscrossing two to four bobby pins under each braid (not through it) creates a flat, secure hold that keeps the braid close to the head without gapping or lifting.
Practical Setup Guide
- Part the hair into a front section (what gets braided) and a back section (the free-hanging curls), keeping the division clean
- Braid or twist each front section from near the temple backward toward the ear, staying close to the hairline
- Pin each braid across the crown using crisscrossed bobby pins, securing firmly at the back
- Refresh the free back section with a curl cream or water-and-leave-in spray so the hanging curls are at their best
- Pull a few small face-framing curls forward from just behind the braid to soften the hairline and prevent the style from appearing too structured
10. Low Curly Updo with Face-Framing Tendrils
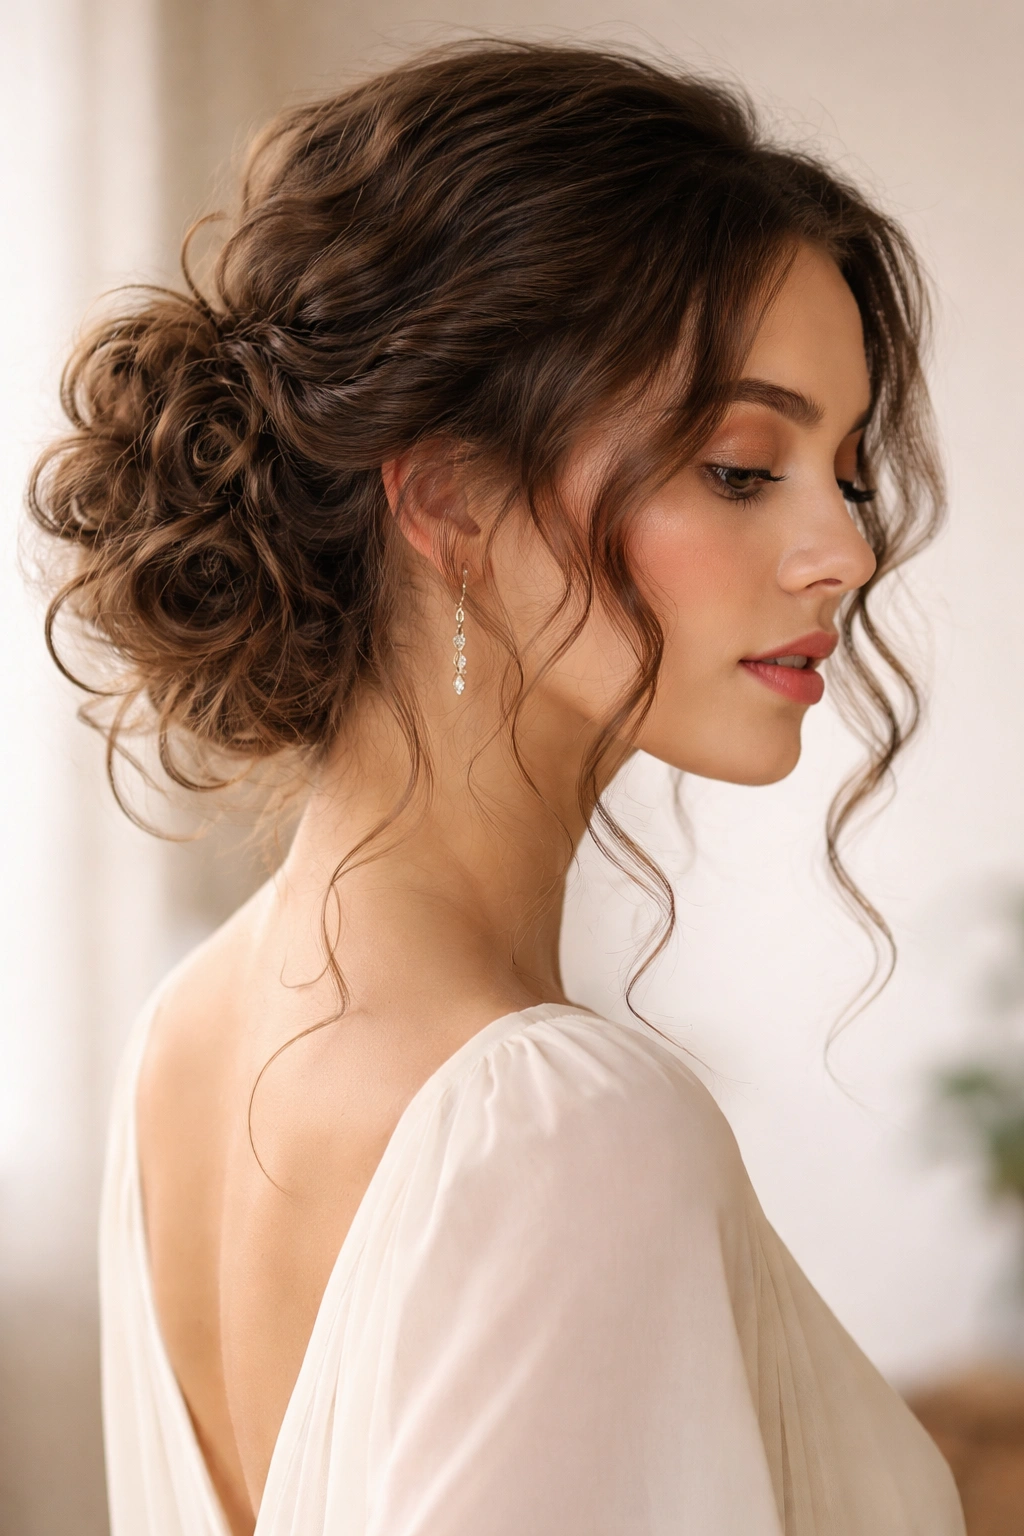
The low curly updo is the evening upgrade — it takes long curly hair from casual to polished without any heat tools or advanced technique required. Gather the curls loosely at the nape or low on the back of the head, secure them in a way that allows some movement, and deliberately pull out a few tendrils to frame the face. The result is undone-but-intentional, romantic without being fussy, and adaptable from date nights to formal occasions.
The Role of Intentional Imperfection
A sloppy updo and an elegantly undone updo can look nearly identical at a glance, but the difference lies in where the loose pieces fall and whether they were placed deliberately. Tendrils should frame the face — at the temples, along the jaw, and at the nape of the neck. They shouldn’t just be the pieces that escaped the elastic in the process of gathering.
To get this right, pull the tendrils out before fully securing the updo, positioning each one with intention. A small amount of curl cream worked through each tendril helps it coil neatly rather than frizzing outward into a halo of fluff.
Placing the Tendrils Correctly
- Pull tendrils before securing the main updo — post-pull pieces tend to look accidental rather than positioned
- Apply a small amount of curl cream to each tendril and coil it around your fingertip to define the curl before releasing
- Place tendrils at the temples, just in front of each ear, and at the nape for the most flattering framing around the face and neck
- Don’t over-pin the main updo — a slightly loose, slightly lived-in gather looks more elegant on curly hair than one pulled tight and plastered flat
- Small decorative or pearl-tipped pins placed into the updo add a polished finish without adding bulk or unwanted weight
11. Twist-Out on Long Natural Hair
The twist-out is one of the most celebrated styles in the natural hair community, and the reason is clear once you understand what it actually does. It creates a defined, elongated curl pattern that stretches the hair beyond its natural state, reduces frizz, and lasts multiple days when properly maintained. On long natural hair, a well-executed twist-out has a fullness and movement that’s distinctly different from a wash-and-go, and for many people, it’s the style that shows off length most impressively.
How the Twist-Out Creates Its Signature Look
A twist-out works by sectioning damp, product-loaded hair into two-strand twists and allowing them to dry completely before unraveling. The twisting action trains the hair into a stretched, elongated S-pattern that’s distinct from the natural coil or zigzag — it’s a created definition rather than a natural one, which gives the result a consistency that wash-and-go coils often don’t have across the full head.
The longer the twists are left in (overnight is standard; 24 hours is better), the more defined and durable the result. Unraveling before the hair is fully dry leads to immediate frizz and collapsed definition. Dryness is the fixative here — it’s non-negotiable.
When it’s time to unravel, separate each twist from the tip upward, not from the root downward. Starting at the root immediately creates frizz; working from the tip up and gently fluffing upward preserves definition while building volume gradually from beneath.
Step-by-Step for the Best Result
- Twist on damp hair — not soaking, not dry — so the twist holds its shape cleanly as it dries
- Layer leave-in conditioner under a curl butter or styling cream for the right balance of moisture and hold
- Keep section sizes consistent — inconsistent sections create uneven definition when unraveled
- Allow twists to dry fully before unraveling — overnight minimum; 24 hours for maximum definition and longevity
- Unravel from tip to root, with a small amount of lightweight oil on your fingertips to prevent frizz during separation
- Separate one twist at a time — pulling multiple twists apart simultaneously collapses the definition you worked to build
12. Curly Waterfall Braid
The waterfall braid is a partial braid that runs along the side of the head while “dropping” sections through the structure as it progresses — creating the effect of hair cascading through the braid like water through a grate. On long curly hair, the dropped sections spiral into their natural pattern as they fall, producing layered curtains of coiling curls that give this style its name and its undeniable visual appeal.
How Curly Hair Makes This Braid Better
The waterfall braid is a French braid variation where, instead of adding new sections upward, you drop a section every few stitches and pick up a replacement from above. The dropped sections become the waterfall — and on curly hair, they immediately coil into their natural pattern, creating those cascading spirals that give the style its signature effect.
Curly hair actually makes this braid easier than straight hair. Straight, slippery hair often needs hairspray and a careful hand just to keep a waterfall braid in position, but curly hair grips and holds naturally through texture. The braid essentially locks itself once enough curly sections are woven through it.
Working on second-day curls rather than freshly washed hair gives the best result — day-two curls have enough natural grip that the braid constructs more easily and stays better through the day.
Executing It Cleanly
- Start the braid at the temple and work horizontally toward the ear, continuing toward the back of the head
- Keep the dropped sections clean and separated as they fall — if they merge into each other, the waterfall visual effect disappears
- Secure the braid end behind the ear with a small elastic or bobby pin, leaving the remaining length to cascade freely
- Work on second-day curls for the best grip and longevity — fresh hair is often too slippery to hold the structure
- Finish with a light-hold spray from a distance to manage any flyaways along the braid without flattening the surrounding texture
13. Long Curly Pineapple Updo
The pineapple started as a curl-preservation sleep technique and grew into a fully-fledged hairstyle in its own right. Gathering all the hair loosely at the very top of the head — higher than a regular ponytail — and securing it with a satin scrunchie creates a high, cascading fountain of curls: the crown sits smooth and gathered, and the curls spill outward and downward from the top in the shape that gives the style its name.
Why Long Hair Changes the Pineapple Game
On long hair, the pineapple has substantially more visual drama than on shorter lengths because the cascading curls have further to fall. The contrast between the smooth, gathered crown and the full spiraling curls spilling outward and downward creates a silhouette that’s simultaneously polished and exuberant — a rare combination in any hairstyle.
Placement of the elastic is the key variable. Aim for the highest point of the head, slightly forward of the true crown. Too low, and it becomes just a high ponytail; the further up the elastic sits, the more pronounced the pineapple effect. On long hair, a correctly placed pineapple lets the curls cascade outward first and then downward, forming a full dome of volume before they fall.
Face-framing matters: a few free tendrils at the front hairline prevent the style from appearing too severe and soften the transition between the gathered top and the loose curls falling around the face.
Making It Intentional
- Secure with a large satin or silk scrunchie — a regular elastic will crease the hair and cause frizz at the gather point
- Don’t tighten the scrunchie fully — a loose, relaxed gathering produces the right volume and visual looseness at the crown
- Leave two to four face-framing curls free at the front hairline to soften the look
- Refresh the cascading curls with a water-and-leave-in spray before pineappling if they need definition
- A decorative headband or a few bold pins at the pineapple base elevates it from everyday casual to occasion-appropriate quickly
14. Long Curls with One Side Pinned Back
Pinning back one side of long curly hair is one of the most elegant, minimum-effort styling choices available — and it works across curl types and face shapes without requiring much adjustment. A few bobby pins, a decorative barrette, or a single statement clip positioned above one ear, gathering a section of curls back and away from the face, creates an asymmetrical, polished effect that’s distinctly different from sweeping all the hair directionally to one side.
The Visual Logic of Asymmetry
The principle at work here is simple: asymmetry draws the eye and creates a focal point. When one side of the hair is pulled back to expose the cheekbone, jaw, and neck, those features become prominent, and the cascading curls on the opposite side provide visual contrast. The style reads as effortless and considered simultaneously — a combination that comes naturally to curly textures.
Unlike a full side-swept style (which repositions all the hair directionally), pinning back one side keeps the curls completely intact. You’re editing the look rather than restructuring it — one clean section is gathered and secured, and everything else continues doing what curly hair naturally does. This makes it a strong option for refreshing second-day curls: one decorative pin placement and suddenly rested hair looks styled and deliberate.
Choosing and Placing the Right Pin
- The pin or clip itself matters — a gold barrette, a pearl-studded pin, or a vintage-style clip turns a basic technique into a complete style
- Position the clip behind the ear or just above it for a classic look; higher placement at the temple creates a more dramatic result
- Coil any flyaways at the pinned section around your finger before securing so they integrate cleanly rather than frizzing at the clip’s edge
- Apply a small amount of edge control or lightweight pomade along the pinned hairline to smooth that section without affecting the rest of the hair
- The unpinned side carries most of the visual load — refresh those curls with a water-and-leave-in spray before making the final pin placement
15. Voluminous High Curly Bun
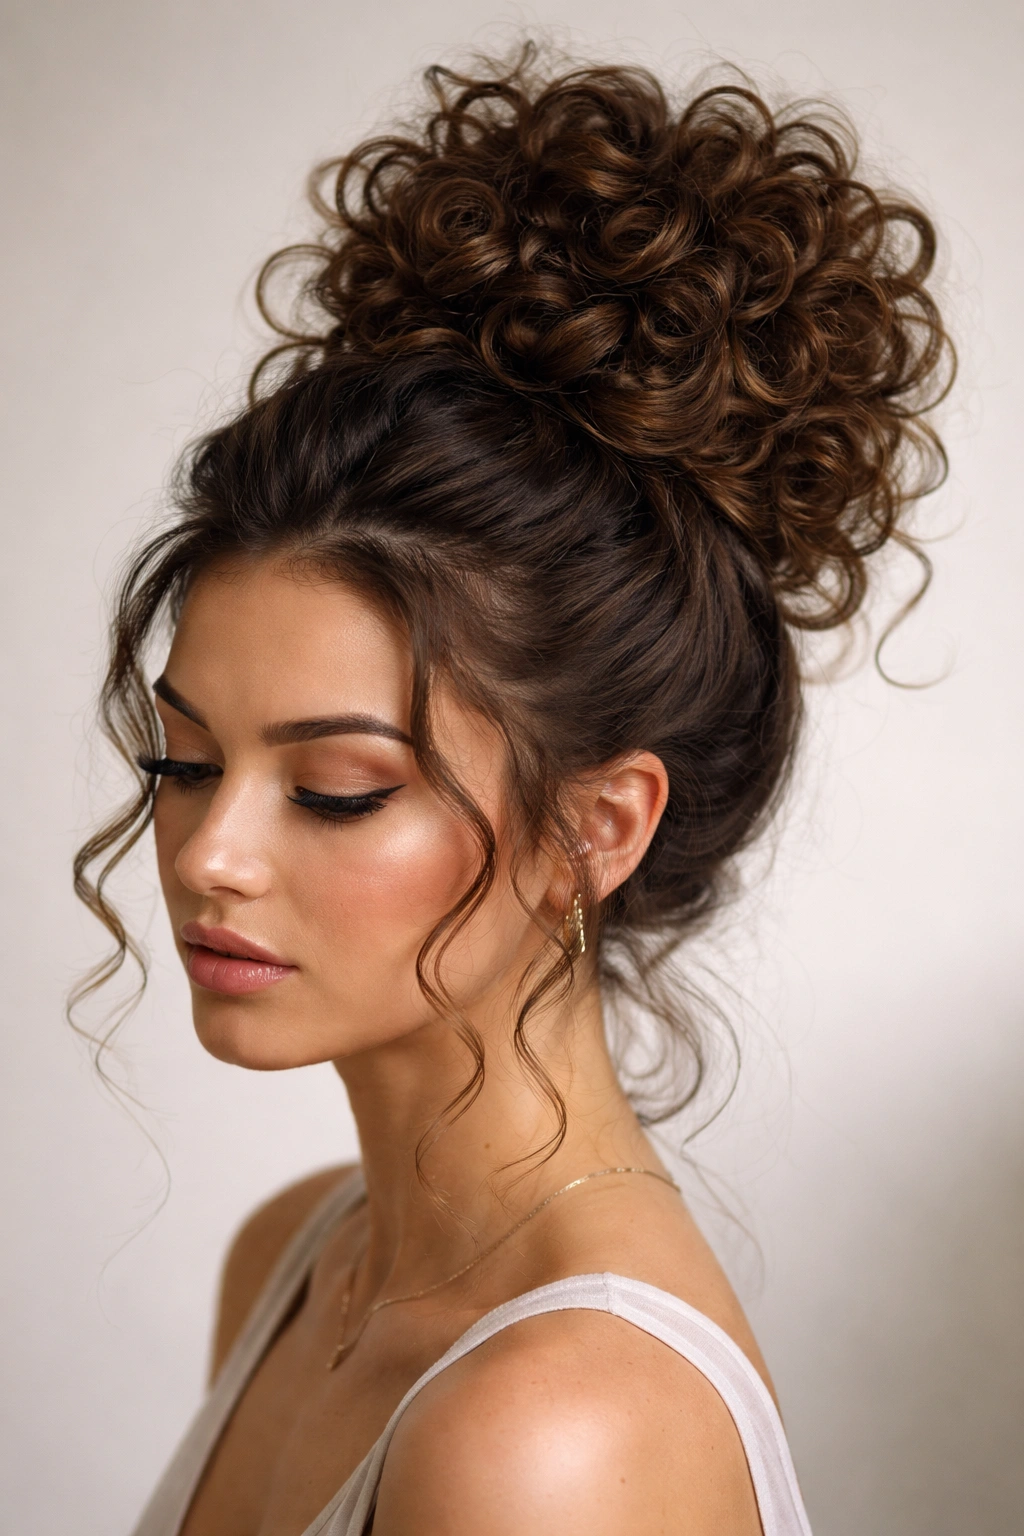
If the low updo is the whisper, the high curly bun is the shout. Built at the top of the head with the specific intention of creating maximum volume and presence, this style celebrates the full dimension of long curly hair rather than containing it. The curls aren’t tamed so much as stacked — gathered high and then encouraged to expand, loosen, and fill the space around the bun’s base in a way that creates an impressive, full-dome silhouette.
Building Volume Before You Gather
The key difference between a sloppy messy bun and an intentionally voluminous high curly bun is root volume created before gathering. Flip your head upside down and finger-fluff the roots with purpose — work your fingertips in circular motions at the scalp to lift as much as possible. Then maintain that volume as you gather: hold the hair loosely, keep the crown section puffed, and wrap it into a bun without pulling tightly or smoothing it flat in the process.
A loose, imprecise wrap creates the characteristic escaped curls and spirals at the bun’s perimeter — which is the visual you’re after, not a flaw to correct. Securing with a large satin scrunchie rather than a tight thin elastic gives the right balance of hold and looseness while being far kinder to the curl texture.
After securing, gently pull the bun upward and outward from the scrunchie. This fans the curls outward from the base and creates the dome-shaped, full appearance that separates a voluminous high bun from a standard topknot.
Finishing for Maximum Impact
- Root-fluff upside down before gathering — this single step contributes more to final volume than any product
- Wrap loosely — tight wrapping collapses the volume you just created; a generous, casual gather is what you’re after
- Pull the bun upward after securing to fan the curls outward and increase the overall dome effect
- Leave a few face-framing curls at the temples and nape — a bun with every single strand tucked away can look severe on curly textures
- For occasions that call for more formality, a wide headband or a set of decorative pins at the bun base adds polish without changing the fundamental style
Final Thoughts
Long curly hair rewards a particular kind of attention — the observant, curious kind that figures out why a style works on your specific texture rather than just copying an image and hoping for the same result. Curl pattern, density, and porosity all influence which styles flourish and which fall flat, and recognizing that specificity is the first step toward building a hairstyle repertoire that actually fits your hair.
The 15 styles here share a common foundation: each one works with the natural behavior of curly hair rather than trying to override it. Layers that remove weight rather than add it. Product quantities matched to the desired result, not applied out of habit. Gathering and pinning techniques that preserve curl texture rather than flatten it. The specific details change across each style, but the underlying principle stays the same.
Not every style here will suit every curl type — and that’s worth saying plainly. A defined ringlet technique that works beautifully on Type 3a spirals might need real adaptation for Type 4 coils, and a pineapple that looks full and cascading on thick, long hair might sit flat on fine curls. The goal isn’t to master all 15; it’s to find 3 or 4 that feel native to your texture and your daily life, and to wear those with genuine confidence.
Your hair has character and direction. The best styles don’t fight that — they use it.