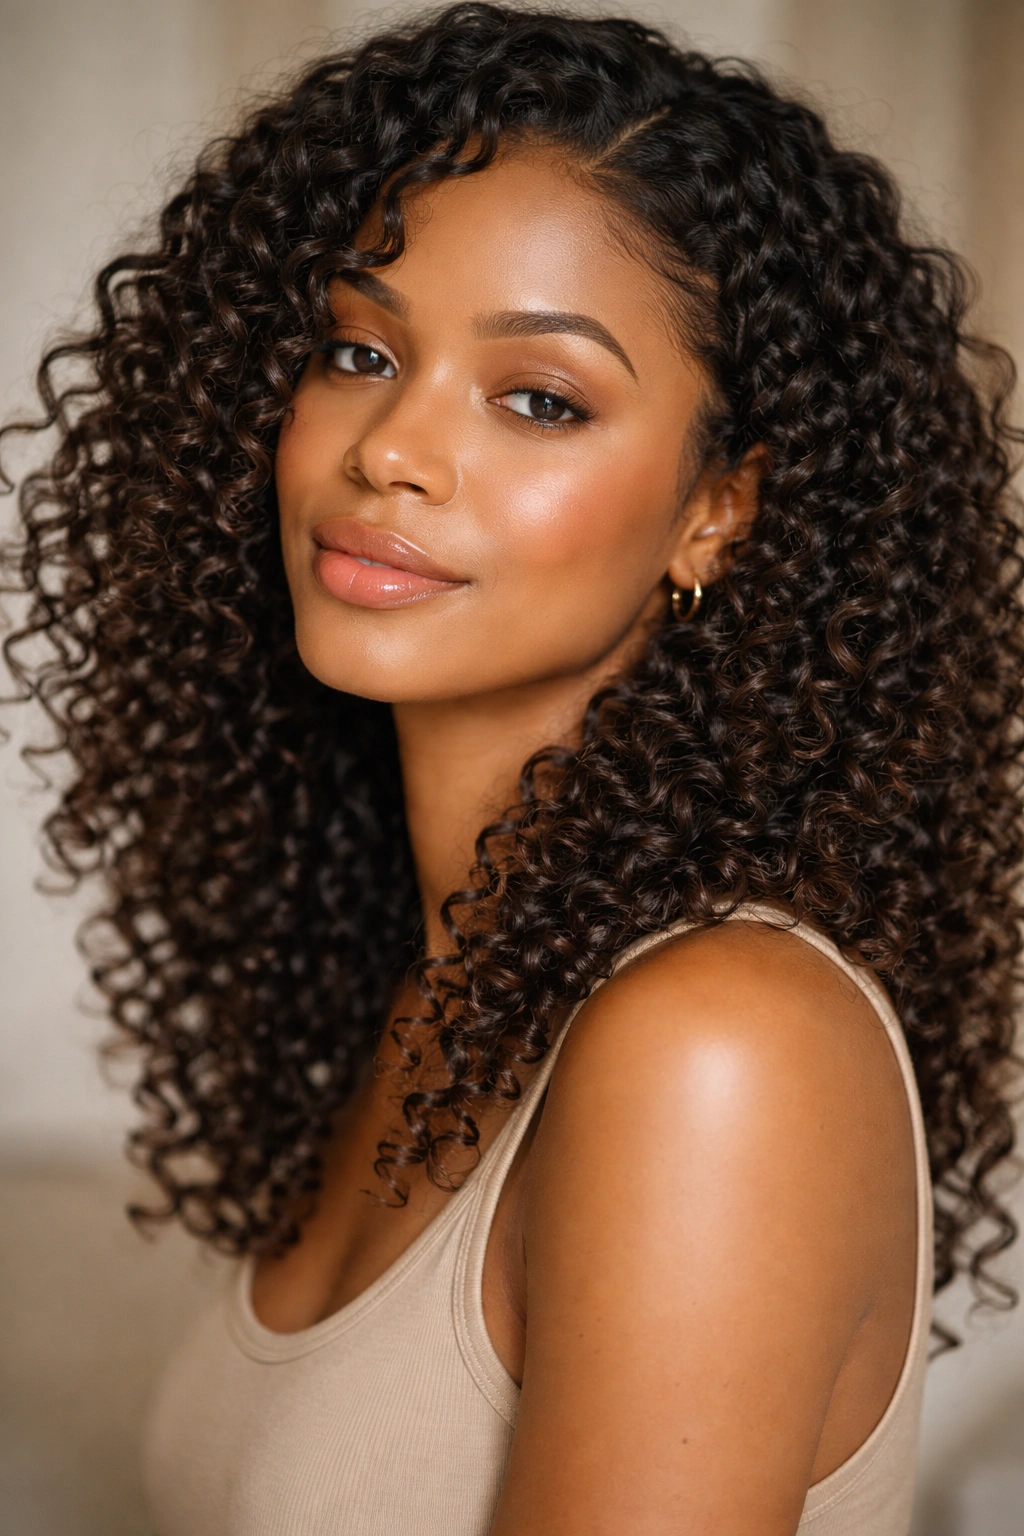
Dry curly hair presents a unique challenge: your curls need moisture and protection, but many traditional hairstyles actually strip hydration or leave curls exposed to environmental damage. The right style can work with your curls’ natural moisture needs rather than against them—maintaining curl definition while sealing in hydration and minimizing frizz and breakage.
The truth about styling dry curly hair is that it’s not really about fighting your texture or forcing it into shapes it doesn’t naturally want to hold. Instead, it’s about choosing styles that reduce manipulation, allow your curls to rest, and actively help retain moisture. Some of the most stunning curly hairstyles are actually the ones that demand the least from your hair—they work because they respect your curl pattern and give your strands time to recover between wash days.
If you’ve been struggling with styles that leave your curls looking limp, frizzy, or feeling even drier than they started, you’re likely using techniques that don’t complement your curl structure. The hairstyles in this guide are chosen specifically because they either seal your curl cuticle, minimize the need for heat or tension, or create protective environments where your curls can thrive. Each style can be customized for different curl patterns, from loose waves to tight coils, and can be achieved with products and techniques you probably already have at home.
1. Protective Low Bun
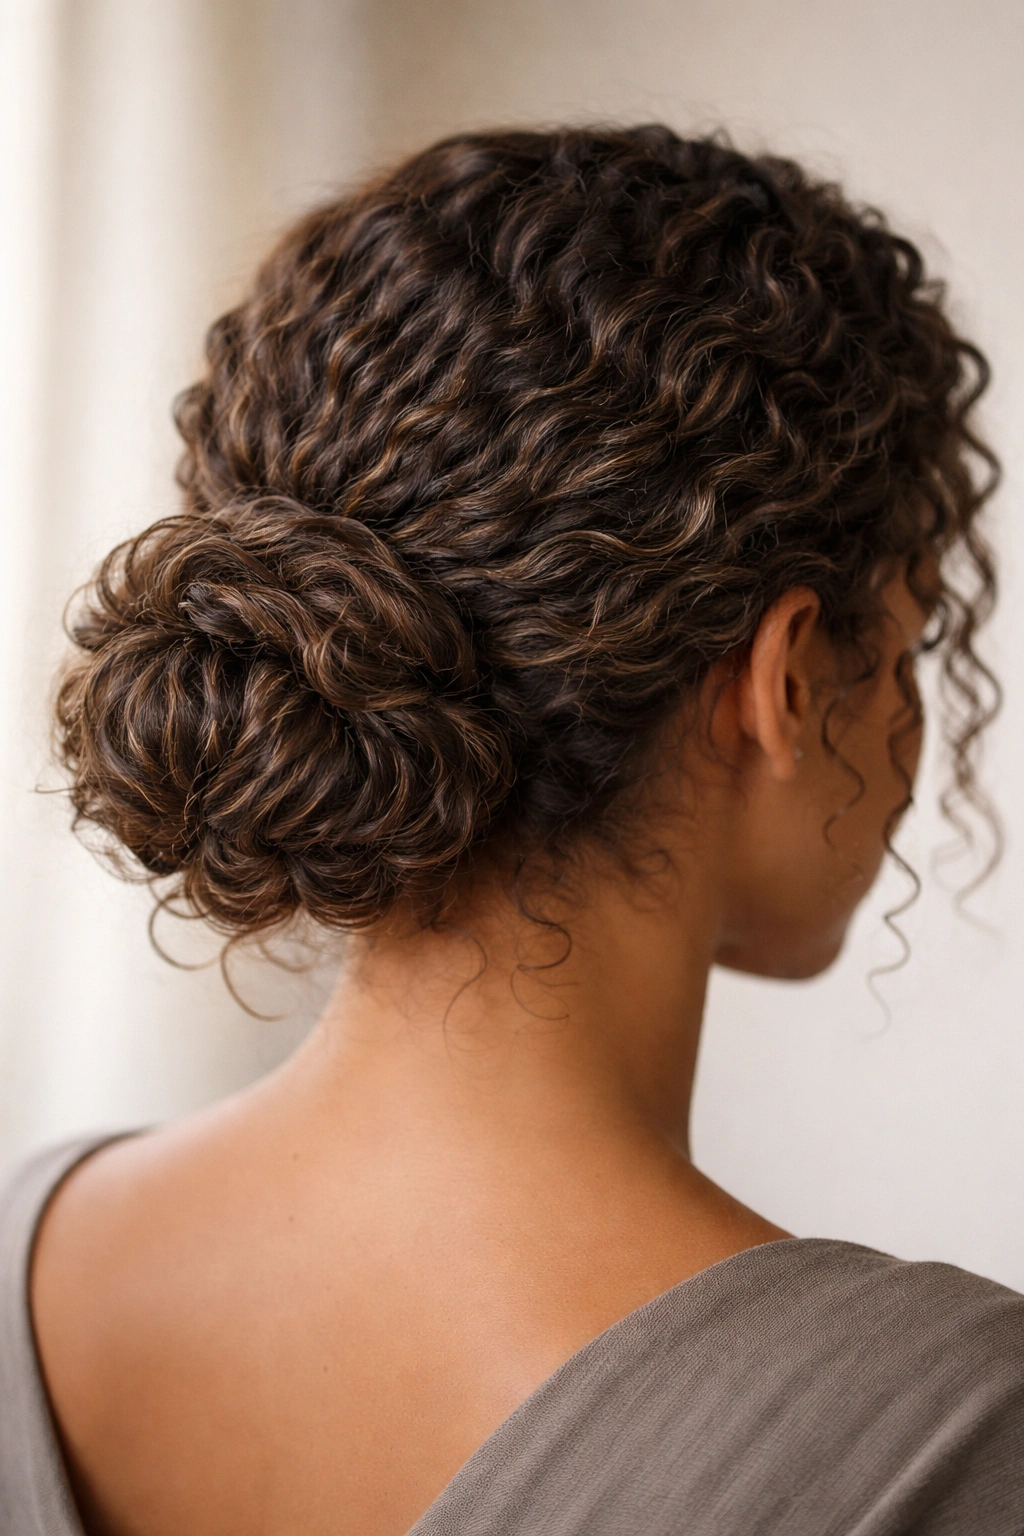
A low bun is deceptively powerful for dry curly hair because it tucks your most fragile curl ends away from environmental stressors while keeping the style understated and elegant. This isn’t a sleek, pulled-tight bun—it’s a soft, textured one that keeps your curl pattern visible and doesn’t put tension on your hairline or cause breakage at the nape of your neck.
Why It Works for Dry Curls
A low bun minimizes daily manipulation, which is one of the biggest culprits behind moisture loss and breakage in curly hair. Your curls aren’t being stretched, twisted, or combed repeatedly throughout the day; they’re held gently in place while your curl pattern sets. The enclosed style also means less surface area is exposed to friction from pillows, shoulders, or environmental humidity. If you apply a leave-in conditioner or curl cream before securing the bun, you’re actively sealing moisture into each curl while it rests in the bun for hours.
How to Create a Textured Low Bun
- Start with curls that are at least partially dry or use a curl-defining cream on damp hair to establish your pattern before the bun
- Flip your head forward and gather curls loosely at the nape of your neck—don’t comb or brush aggressively, just use your fingers to gather
- Twist the gathered section loosely 2-3 times, creating a rope-like texture
- Wrap the twisted section around itself to form the bun base, securing with 2-3 bobby pins positioned to support the bun without creating tension
- Leave some pieces loose around your face and neck for a softer look that shows off your curl definition
- Mist lightly with a hydrating spray to set the style and add extra moisture
Pro tip: Secure your low bun with a silk or satin hair tie instead of elastic—metal-free options reduce friction and minimize the hair breakage that comes from elastic pulling at your curl edges.
2. Defined Twist-Out
A twist-out is a classic protective style that creates beautifully defined curls while keeping your hair off your neck and face. The style works because you’re creating tension in a controlled way that encourages curl definition, then releasing that tension to let the curls bounce and expand—all without heat or damaging tools.
Why Twist-Outs Enhance Moisture Retention
When you twist damp hair with a curl-defining product, you’re essentially setting your curl pattern into that twisted structure. Once you unravel the twists, your curls hold that definition for days, which means less re-styling and less manipulation of your hair throughout the week. Each twist acts like a moisture seal, keeping your product locked into the curl. The fewer times you have to restyle, reapply products, or comb through your curls, the more moisture stays locked in your strands.
Step-by-Step Twist-Out Process
- Apply a leave-in conditioner and curl cream to soaking-wet hair, working through one section at a time with your fingers
- Divide your head into 4-6 large sections using clips, depending on your hair density
- Take a subsection from one quadrant about the width of your thumb
- Twist the subsection tightly from root to tip, allowing the twist to coil around itself naturally at the end—secure with a small clip or bobby pin
- Repeat until all hair is twisted, then allow to air-dry fully (at least 4-6 hours, ideally overnight)
- Once completely dry, gently unravel each twist by releasing the clip and slowly unwinding the twisted section
- Separate the unraveled curls with your fingers to add volume and definition
Worth knowing: Twist-outs last 4-7 days depending on your sleep position and how much you manipulate the style—meaning you get multiple days of defined, moisturized curls from a single styling session.
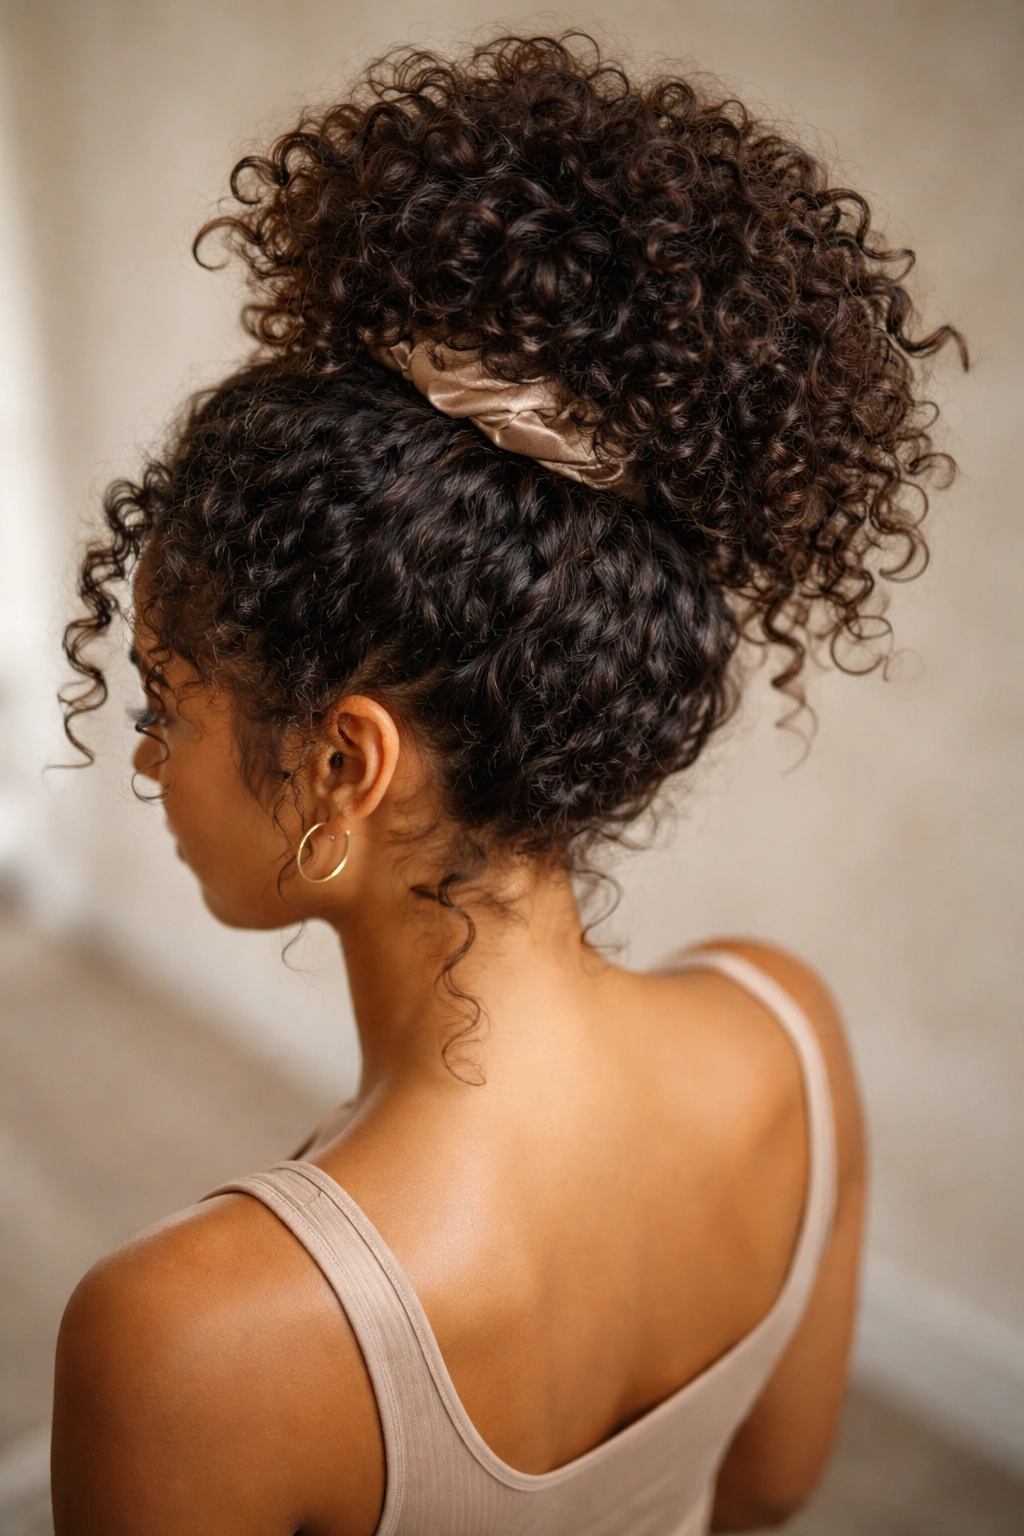
3. Soft Pineapple Topknot
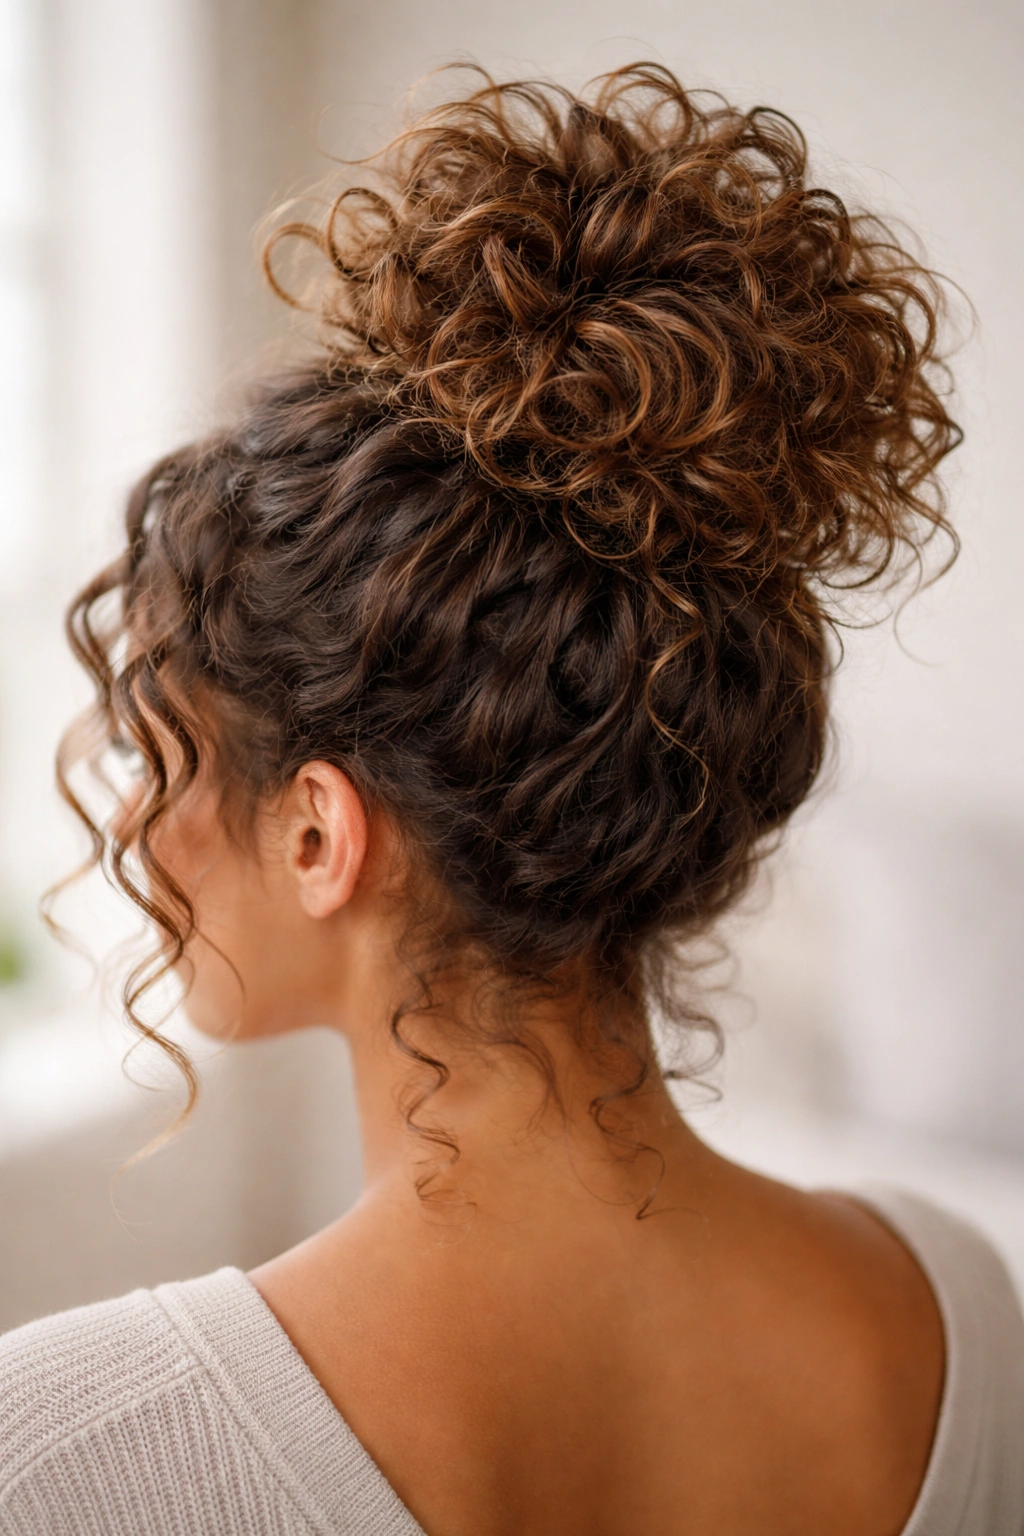
The pineapple is a beloved protective style among curly-haired people, and for good reason: it protects your curls while you sleep, maintains definition overnight, and takes literally 30 seconds to create. A topknot version keeps the style secure enough that it won’t fall out, while the soft gathering keeps tension minimal and your curl pattern visible.
How It Reduces Nighttime Damage
When you sleep with dry curly hair loose, friction between your curls and your pillow causes frizz, breakage, and moisture loss—by morning, your curls often look flat on one side and matted. A pineapple gathers your curls up and away from the pillow, preserving the curl definition you created during styling. Because the gathering is gentle and positioned at the crown, there’s no tension on your hairline, and your curls can actually continue to set and dry in an optimal position while you sleep.
Creating a Protective Pineapple Topknot
- Flip your head forward and gather all your curls loosely at the crown (the highest point of your head), using your fingers rather than a comb
- Secure with a silk or satin scrunchie or a soft hair tie, positioning it loosely enough that you could fit a finger between the tie and your scalp—tight is the enemy here
- Let your curls fan out from the topknot, creating a shape that vaguely resembles a pineapple sitting on your head
- If you’re concerned about curls slipping free during sleep, add a silk or satin bonnet over the pineapple for extra protection
- In the morning, gently remove the tie and fluff your curls with your fingers—most of your style will be intact, needing only minor touch-ups
Insider note: A pineapple works best when you do it with curls that are already fully dry from styling; attempting to pineapple soaking-wet hair can cause curls to lose their shape by morning.
4. Hydrating Braid-Out
A braid-out creates gorgeous, elongated curls with a softer, more stretched definition than a twist-out—and because braids are a structured, low-manipulation style, they actively protect your curls while helping them retain moisture. The braid-out is particularly effective for dry hair because the braid structure holds your product-coated strands in place while they dry, sealing moisture throughout the curl length.
Why Braids Lock in Moisture Effectively
When you braid damp hair that’s coated with a hydrating cream or oil, every strand is protected within the braid structure—your curls aren’t exposed to air that might evaporate moisture, and they’re not being manipulated or combed repeatedly. The braid acts like a moisture seal. Once you unravel the braid, you’re left with a curl pattern that’s been hydrated for hours and set into that stretched, defined shape. The result is curls that stay moisturized and defined for days without requiring additional products or styling.
Creating a Lasting Braid-Out
- Apply a rich leave-in conditioner and curl cream or curl butter to soaking-wet hair, detangling gently with your fingers as you apply
- Divide hair into 4-8 sections depending on desired curl size and hair density
- Take one section and braid from root to tip, braiding loosely enough that you can still see some of your curl pattern within the braid—this ensures definition isn’t lost
- Secure the braid tip with a small elastic or bobby pin
- Allow to air-dry completely (overnight is ideal)
- Once dry, unravel each braid slowly, working from the bottom up, and fluff gently with your fingers
- Separate curls slightly to add volume and movement
Worth knowing: Braid-outs from loose braids create softer, more elongated curls, while tight braids create tighter, more defined curl patterns—choose your braid tension based on the look you want to achieve.
5. Textured Half-Up Crown

A half-up style lets you show off the upper half of your curl pattern while creating a protective style for the lower half. This approach is perfect for dry curly hair because it gives you defined curls on display while keeping the rest of your hair secure and protected from manipulation and friction.
The Protective Balance of Half-Up Styles
Half-up styles reduce the total amount of hair that’s exposed to styling stress while still allowing you to show off your curl definition where it matters most—around your face. The gathered bottom half stays secure and protected, while the top half can dry and set naturally. If you’ve added product and curl pattern-setting to the lower half, it’s now tucked away, meaning your curls will maintain their moisture and definition throughout the day without additional manipulation.
Styling a Half-Up Crown
- Apply leave-in conditioner and curl cream to damp hair, working through one section at a time to fully coat each curl
- Allow curls to air-dry to about 50-60% dry (still slightly damp) for the best hold and definition
- Take a section of hair from one side of your head at about ear level and twist it gently toward the back
- Do the same on the opposite side, twisting the section back toward the center
- Gather both twisted sections at the back of your head and secure with bobby pins, allowing the pins to sit within the twists where they’re hidden
- Leave the bottom section of curls loose, and gently separate the half-up section with your fingers to add texture and volume
- If desired, mist lightly with a hydrating setting spray
Pro tip: For extra grip that doesn’t damage your curls, twist your gathered sections around a thin silk scarf or ribbon before securing with bobby pins—the fabric provides hold without the metal pins directly gripping your hair.
6. Sleek High Ponytail with Curly Ends
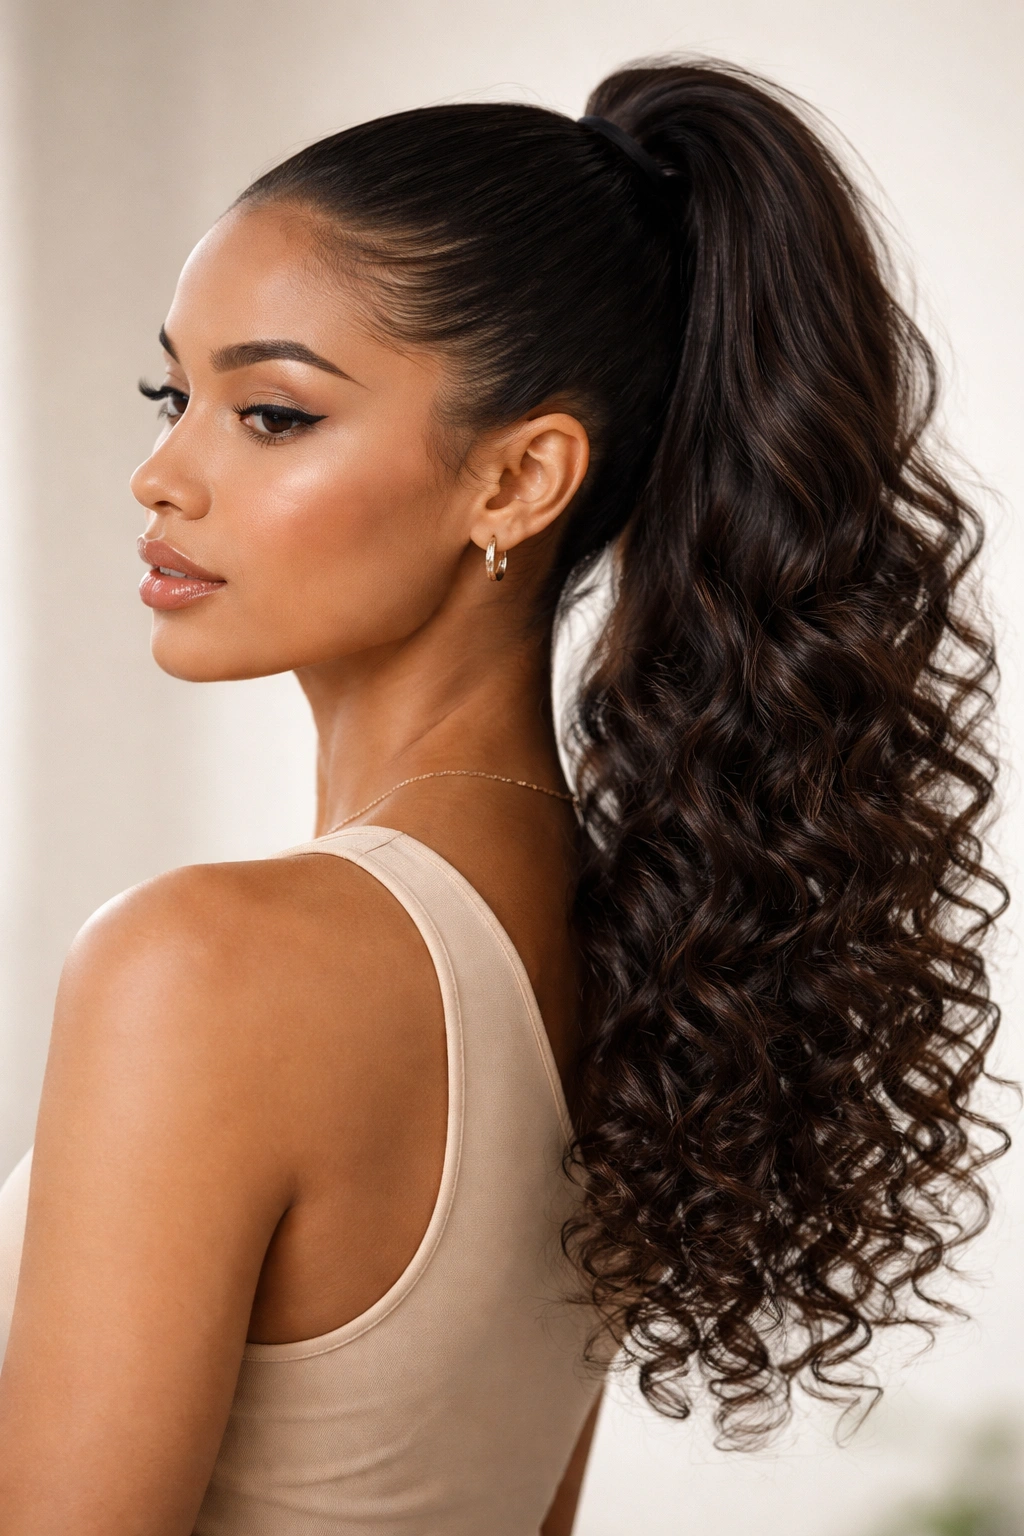
This style offers the best of both worlds: a neat, polished look with the versatility of defined curls still visible. The key to making this work for dry curly hair is gathering gently at the crown and allowing your natural curl pattern to shine in the ponytail portion—no smoothing, no flattening, just your curls in their most beautiful form.
Protecting Curls While Styling Sleekly
A common mistake with ponytails on curly hair is pulling hair too tightly at the base, which causes breakage and stress on your hairline. A high ponytail that gathers curls gently, paired with a soft hair tie, actually protects your curls by containing them in one place while leaving them free to maintain their texture. The gathered base keeps the lower half of your hair secure and protected from friction, while the curly tail shows off your best curl definition.
Creating a Sleek-Into-Curly Ponytail
- Work with curls that are at least 70% dry and have been styled with your favorite curl-defining product
- At your crown, gather a section of hair loosely—not tightly—using your fingers to position it
- Secure with a silk scrunchie positioned in a way that feels secure but not constraining
- Take a small subsection from the front of your head and wrap it around the base of the ponytail where the elastic is, tucking the end under and securing with a bobby pin—this creates a polished finish that hides the elastic
- Allow your curly ends to fall naturally, fanning them out slightly with your fingers to show off your best curl definition
- If any flyaways emerge, smooth them lightly with a tiny bit of edge cream or gel applied with a toothbrush
Worth knowing: This style works beautifully for both casual and professional settings because the sleek gathered base looks polished while your natural curls communicate texture and movement.
7. Layered Twist and Curl Combination
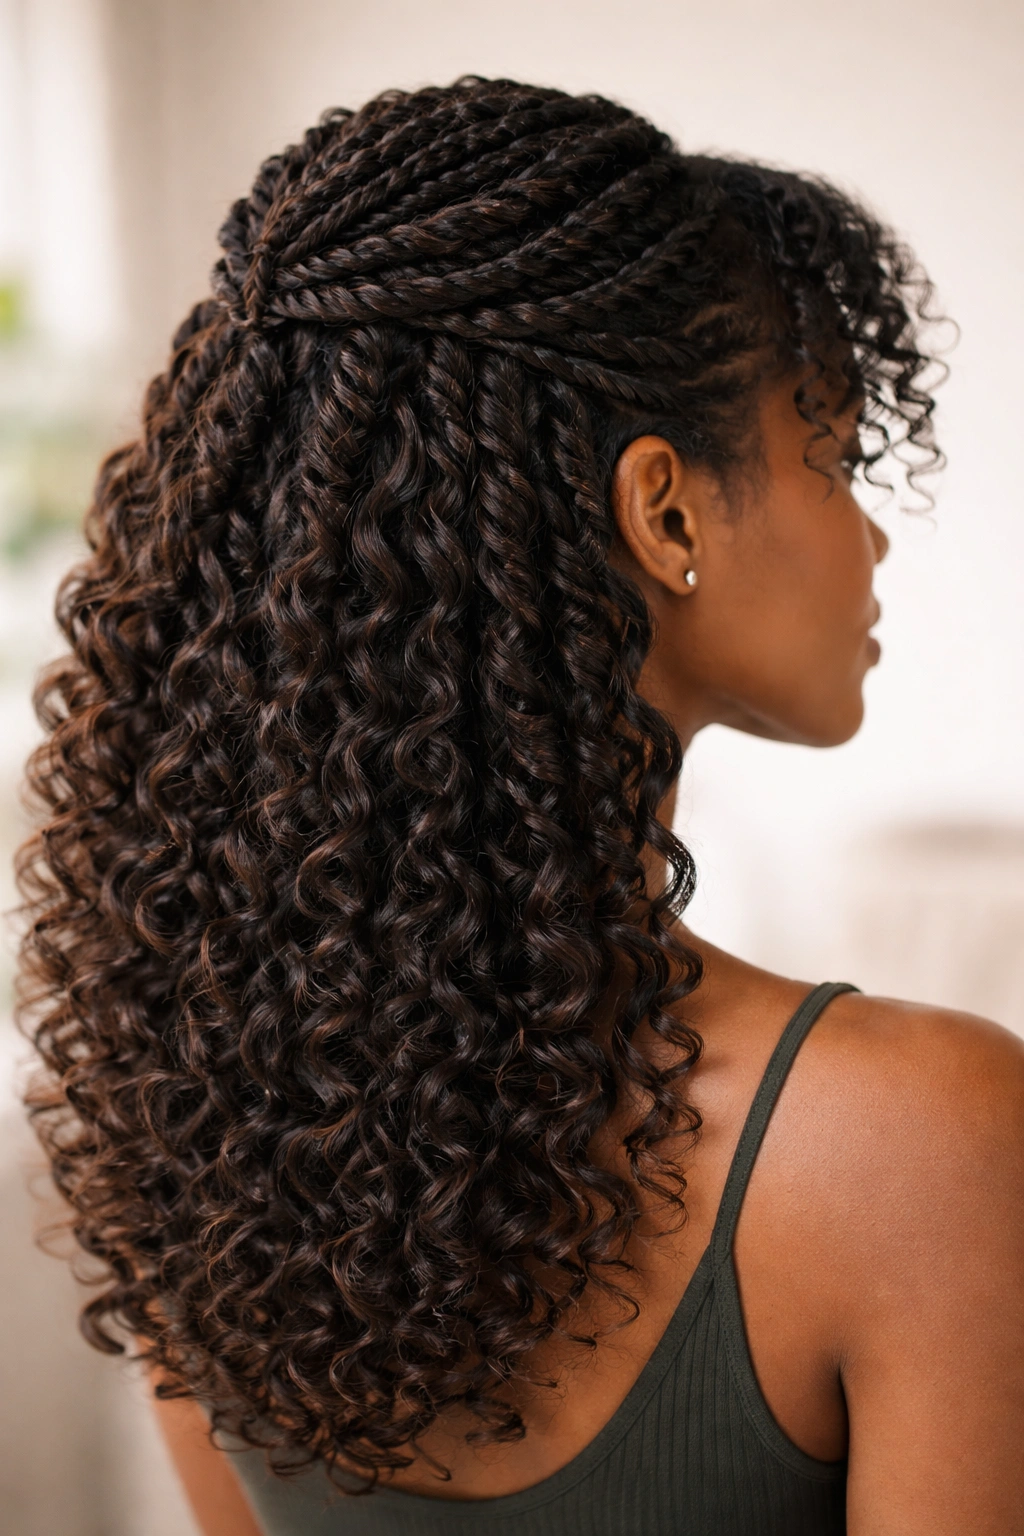
This intermediate style layers twists with loose curls to create a visually interesting, textured look that’s protective and stays defined for several days. The combination approach gives you the best of protective styling (the twisted sections) while still allowing your natural curl pattern to show off in the loose sections.
Multi-Textured Styling for Maximum Moisture Protection
By combining twists with loose curls, you’re creating a style where different sections of your hair get different levels of protection. The twisted sections are fully enclosed, locking in moisture and product completely. The loose curl sections show off your curl definition while still being protected by the overall style structure—they’re not being manipulated or styled daily. This layered approach means you get 5-7 days of definition and moisture retention from a single styling session.
Building a Twist and Curl Combination
- Start with freshly washed, conditioned hair that’s about 50% dry
- Apply a hydrating curl cream or butter throughout your hair, working section by section
- Divide the back half of your head into 4-6 sections and twist each one from root to tip, securing the ends with small clips
- Leave the front sections and sides loose, allowing them to air-dry in their natural curl pattern
- Once completely dry (overnight works well), release the clips and gently unravel the twists
- Separate the unraveled curls with your fingers, then lightly rake your fingers through the loose curl sections to add texture
- Apply a light hydrating mist to refresh the style and add shine
Insider note: This style is particularly effective for curly hair that tends toward dryness in certain areas—you can choose which sections to twist (protecting and hydrating them more) and which to leave loose based on where your hair needs the most moisture.
8. Moisturizing Wash-and-Go
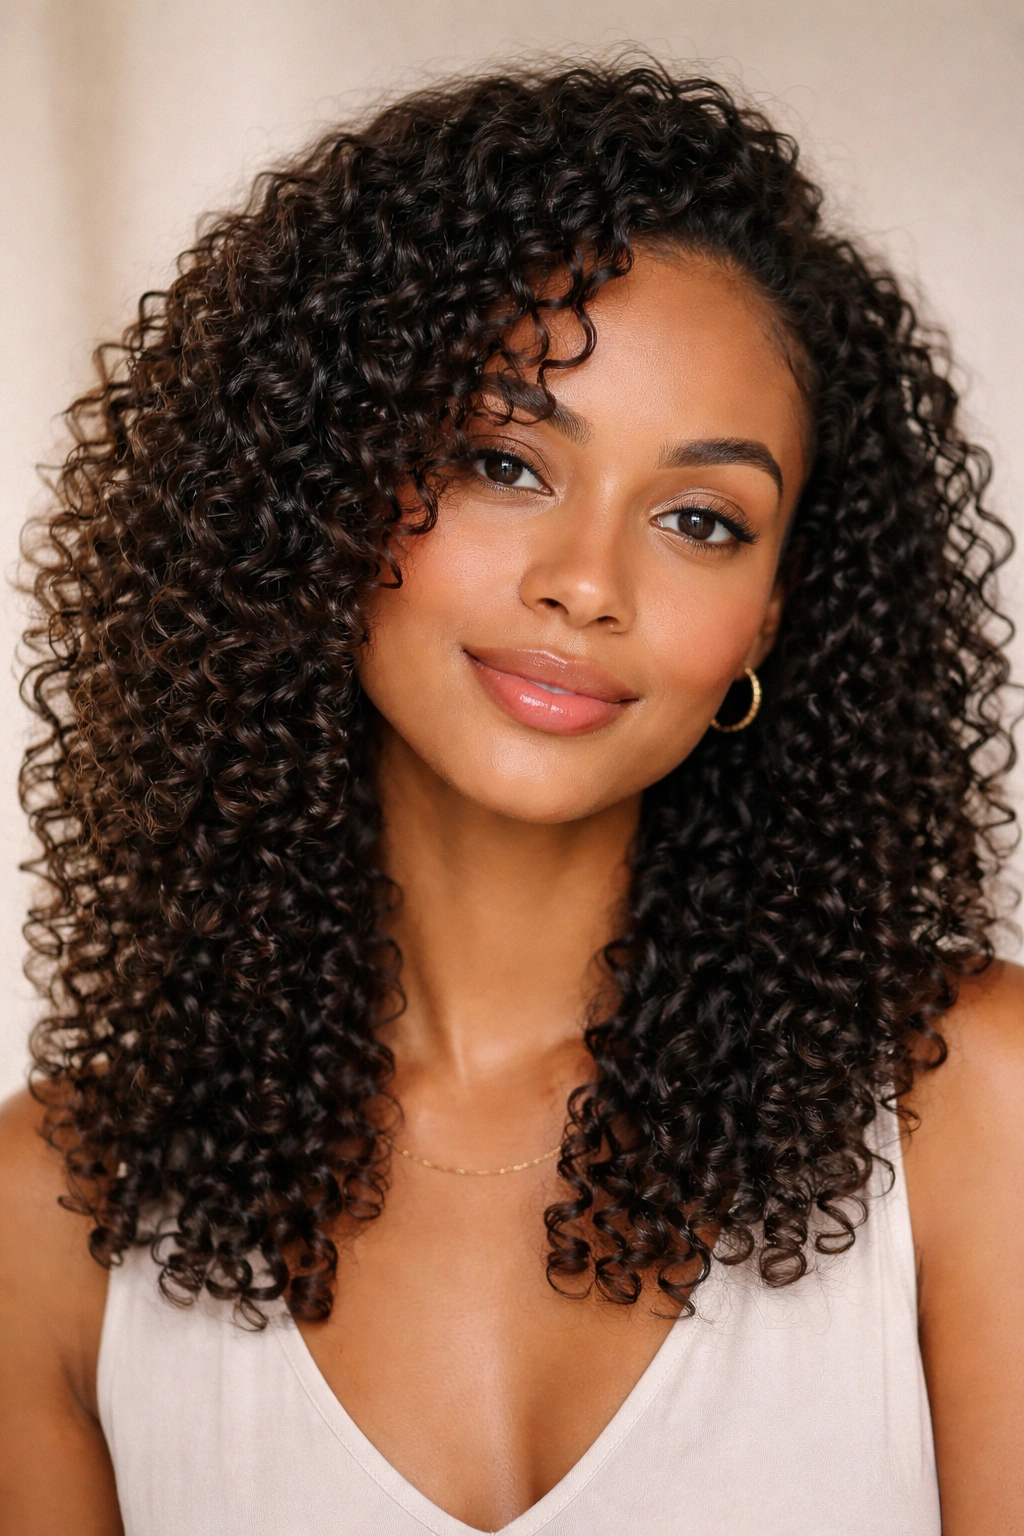
A wash-and-go sounds simple, but for dry curly hair, it’s actually an art form. The key is starting with deeply moisturized curls, applying the right products in the right order, and allowing your curls to dry in a way that maximizes definition and minimizes frizz. A true wash-and-go requires virtually no styling beyond product application and gentle finger-raking.
Why Wash-and-Gos Are Actually Protective
A common misconception is that wash-and-gos are high-manipulation styles—they’re not, if done correctly. You’re washing your curls, applying product, and allowing them to air-dry in their natural pattern. There’s no heat, no pulling, no re-styling throughout the week. The minimal manipulation actually protects your curls and allows your natural moisture and oil to distribute throughout your hair. Over time, consistent wash-and-gos improve your curl’s natural moisture retention and definition because you’re not regularly manipulating or damaging your strands.
Building a Successful Wash-and-Go
- Shampoo your curls gently using a sulfate-free, moisturizing formula, focusing on your scalp rather than your ends
- Apply a rich, moisturizing conditioner from mid-length to ends and leave it on for at least 3-5 minutes—more time allows deeper hydration
- Rinse the conditioner with cool water (cooler water seals your curl cuticle, trapping moisture inside)
- While your hair is still soaking wet, apply a leave-in conditioner, working through each section with your fingers
- Apply a curl-defining product (cream, gel, or mousse) using the praying hands method: sandwich a curl section between your hands and apply product, or rake product through with your fingers
- Cup your curls with your hands to encourage them to coil tightly, then allow to air-dry—don’t touch or disturb them while they dry
- Once fully dry, gently rake your fingers through your curls to separate and add volume
Pro tip: A successful wash-and-go depends entirely on generous product application—dry curly hair typically needs more product than you think, so apply more generously than feels comfortable and adjust downward in future washes only if you end up with buildup.
Pre-Styling Hydration Prep
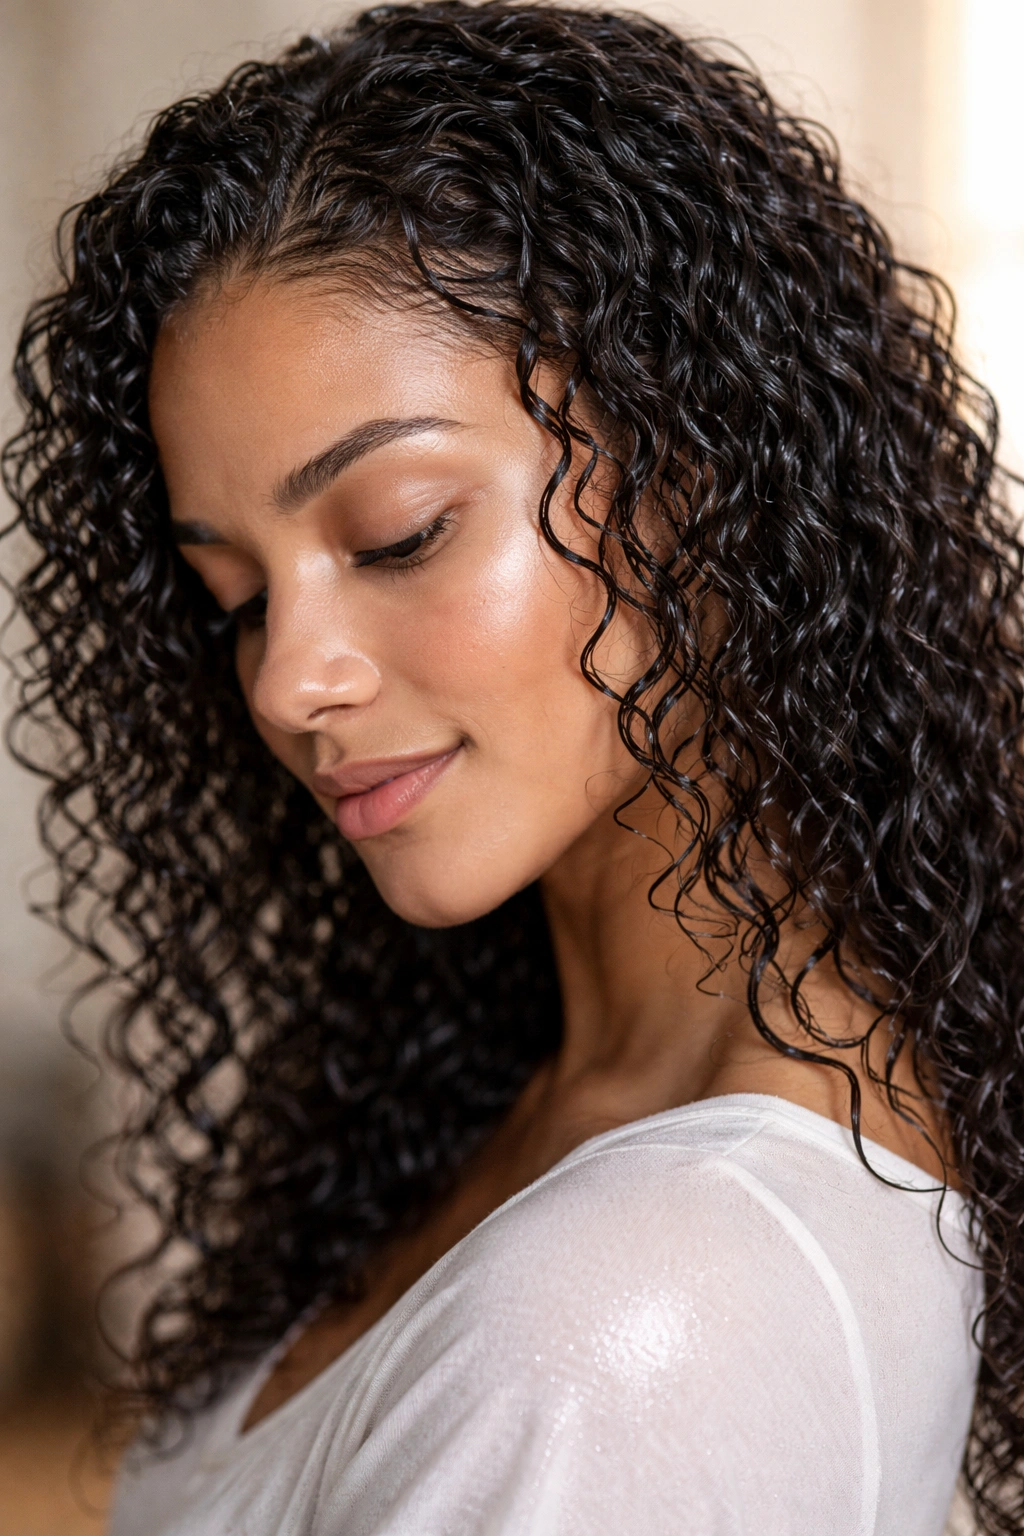
Before you style your curls into any of these hairstyles, your foundation matters. If your curls aren’t adequately hydrated at the starting point, no style will solve the dryness problem. A solid pre-styling prep routine means your curls will hold definition longer, feel softer, and look healthier throughout the days you wear each style.
Start with a clarifying shampoo once every 4-6 weeks to remove buildup that prevents moisture absorption. Between clarifying sessions, use a sulfate-free, moisturizing shampoo that won’t strip your curls. A deep conditioning treatment is non-negotiable for dry curly hair—use one at least once weekly, leaving it on your curls for 15-30 minutes. Heat-free methods work best: wrap your head in a warm towel or apply the conditioner before bed and let it sit overnight.
Your leave-in conditioner is your secret weapon. Apply it to soaking-wet hair immediately after rinsing out your rinse-out conditioner, while your hair is still in its most receptive state for hydration. A good leave-in should feel lightweight but moisturizing—if it leaves your curls feeling sticky or heavy, try a different formula or reduce the amount you’re using.
Consider adding a hydrating oil to your routine, but use it strategically. Apply oil to your curl lengths and ends, not your roots—this adds shine and seals moisture without creating buildup or making your scalp feel greasy. Argan oil, jojoba oil, or lightweight coconut oil work well for most curl types; apply sparingly, using only a few drops per hand.
Maintenance Tips Throughout the Week
Styling your dry curly hair beautifully is half the battle—keeping those styles fresh and moisturized throughout the week is what separates good hair days from great ones. The right maintenance approach means you can extend your styles for longer periods, requiring fewer restyles and giving your curls more time to recover and retain moisture.
Sleep is where most curl damage happens. Every night you should protect your curls either by using a silk or satin pillowcase (regular cotton pillows create friction that causes frizz and breakage) or by using a protective style like a pineapple or bonnet. A silk or satin bonnet is particularly effective because it fully encloses your curls, protecting them from all friction and environmental moisture fluctuation.
Refresh your curls midweek without a full wash using a curl refresher spray or a light mixture of water and leave-in conditioner in a spray bottle. Spray your curls lightly, working the moisture in with your fingers using an upward scrunching motion. This resets your curl definition and rehydrates your strands without the stripping effect of shampooing.
Avoid touching your curls excessively throughout the day. Every time you rake your fingers through, touch up your edges, or adjust your style, you’re potentially disrupting curl definition and causing frizz. If you need to adjust your style during the day, use the scrunching method—cup your curls gently in your hands and squeeze upward to reset their shape rather than smoothing or combing through them.
Don’t shampoo more frequently than necessary. Dry curly hair loses moisture with every wash, so shampooing less frequently (once weekly or less) allows your natural scalp oils to distribute throughout your hair, keeping it naturally moisturized. If your scalp feels oily between washes, use a dry shampoo or a light co-wash (conditioning wash) instead of a full shampoo.
Final Thoughts
Your dry curly hair doesn’t need to be a constant source of frustration—it’s actually a sign that your curls need a particular kind of care and styling approach. The hairstyles in this guide work because they either protect your moisture by reducing manipulation, seal your curl cuticle with product and structure, or allow your natural curl pattern to set without interference.
The real secret to beautiful, moisturized curly hair is consistency. Choose one or two of these styles that feel most natural and achievable for you, and commit to that style for at least two weeks. This gives your curls time to recover from any previous damage, allows your moisture-retention habits to establish, and lets you see the true potential of your curl pattern. You’ll probably find that your curls become shinier, hold definition longer, and feel softer as you spend more time protecting them rather than fighting them.
Remember that your curls are unique to you—what creates gorgeous definition and moisture for someone else might not feel perfect for your hair. Use these styles as starting points, but adjust them based on what you observe with your own curls. If a low bun keeps your curls too compressed, try the half-up style instead. If wash-and-gos leave your curls feeling undefined, commit to twist-outs for a few weeks. Your curls will tell you what they need; you just have to listen and adjust accordingly.