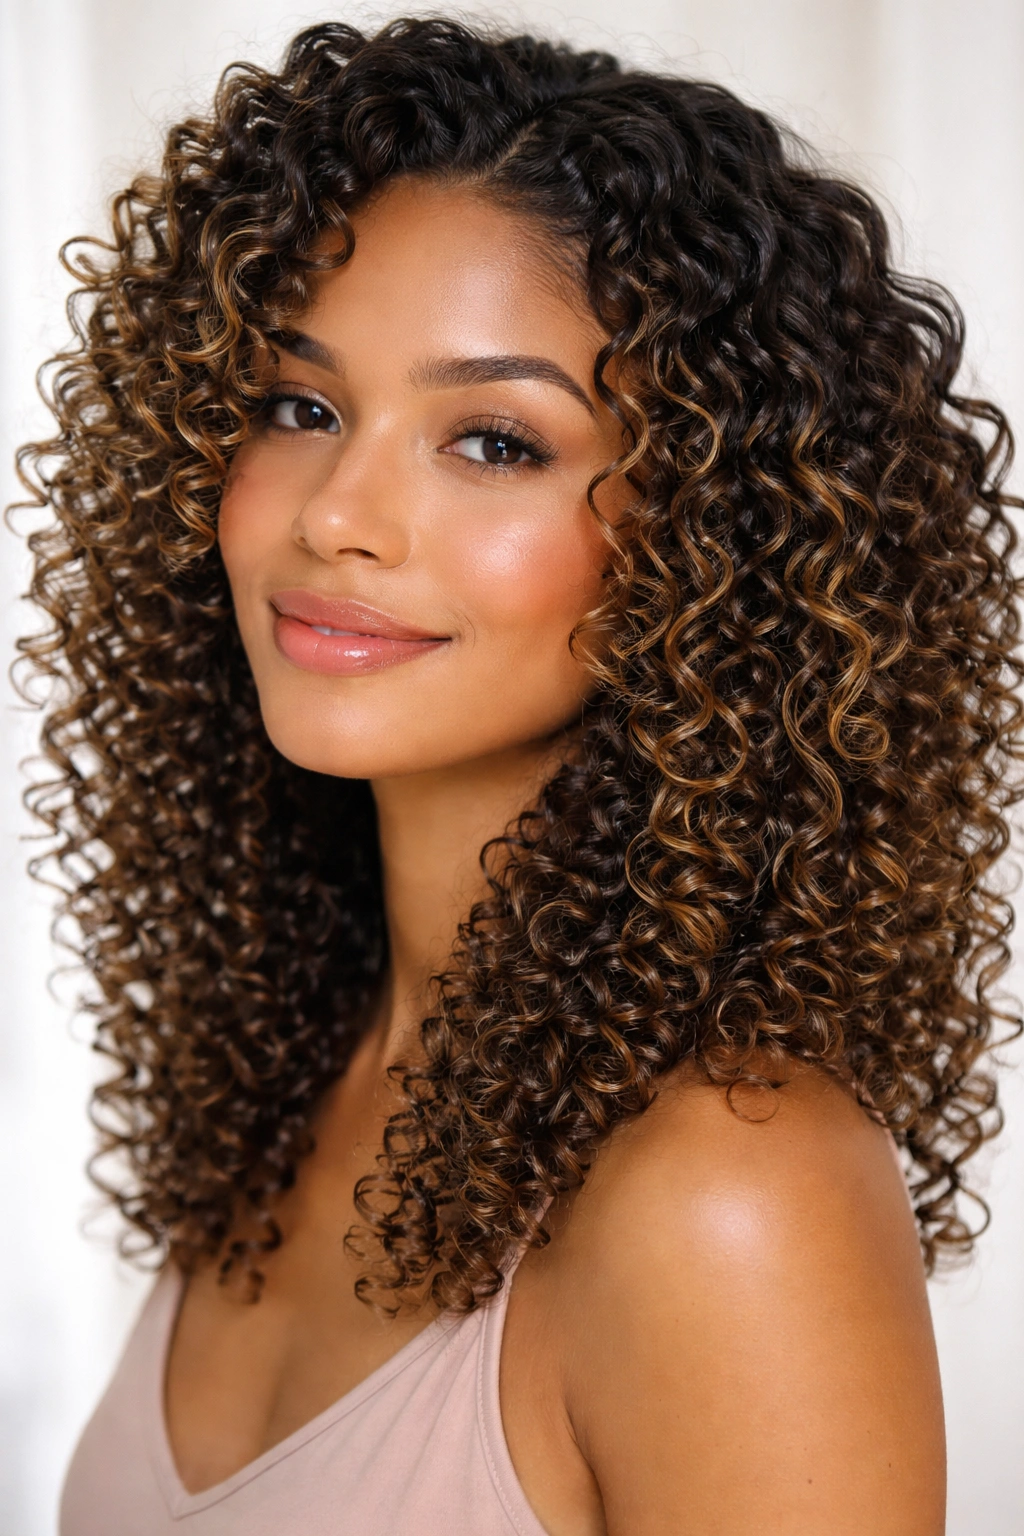
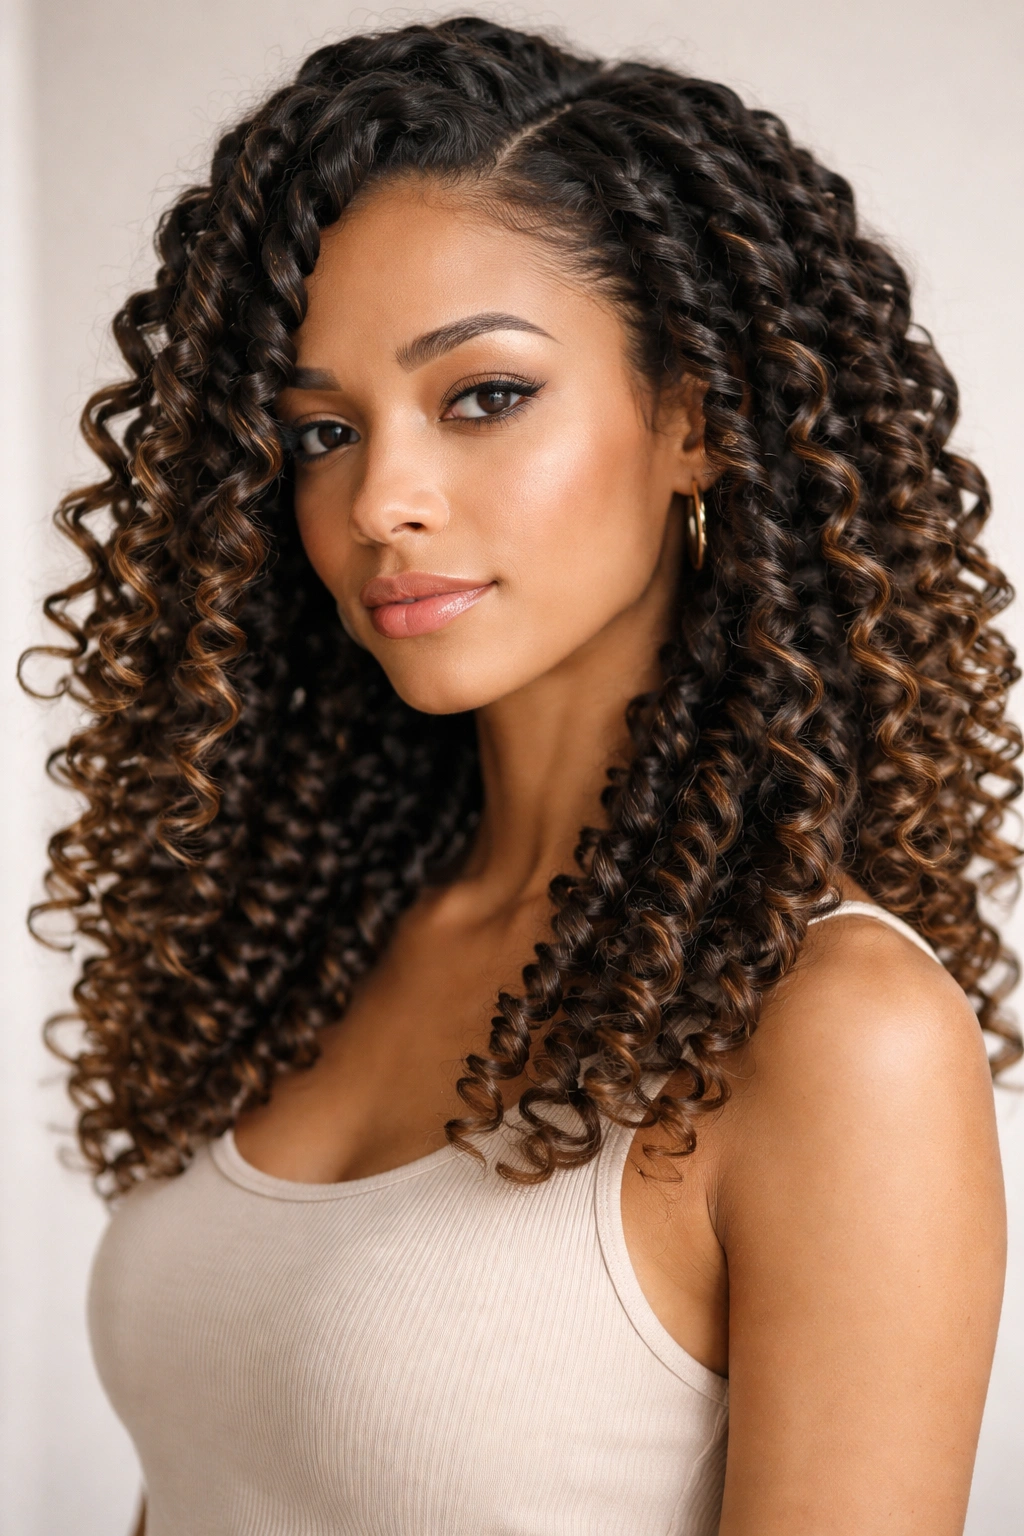
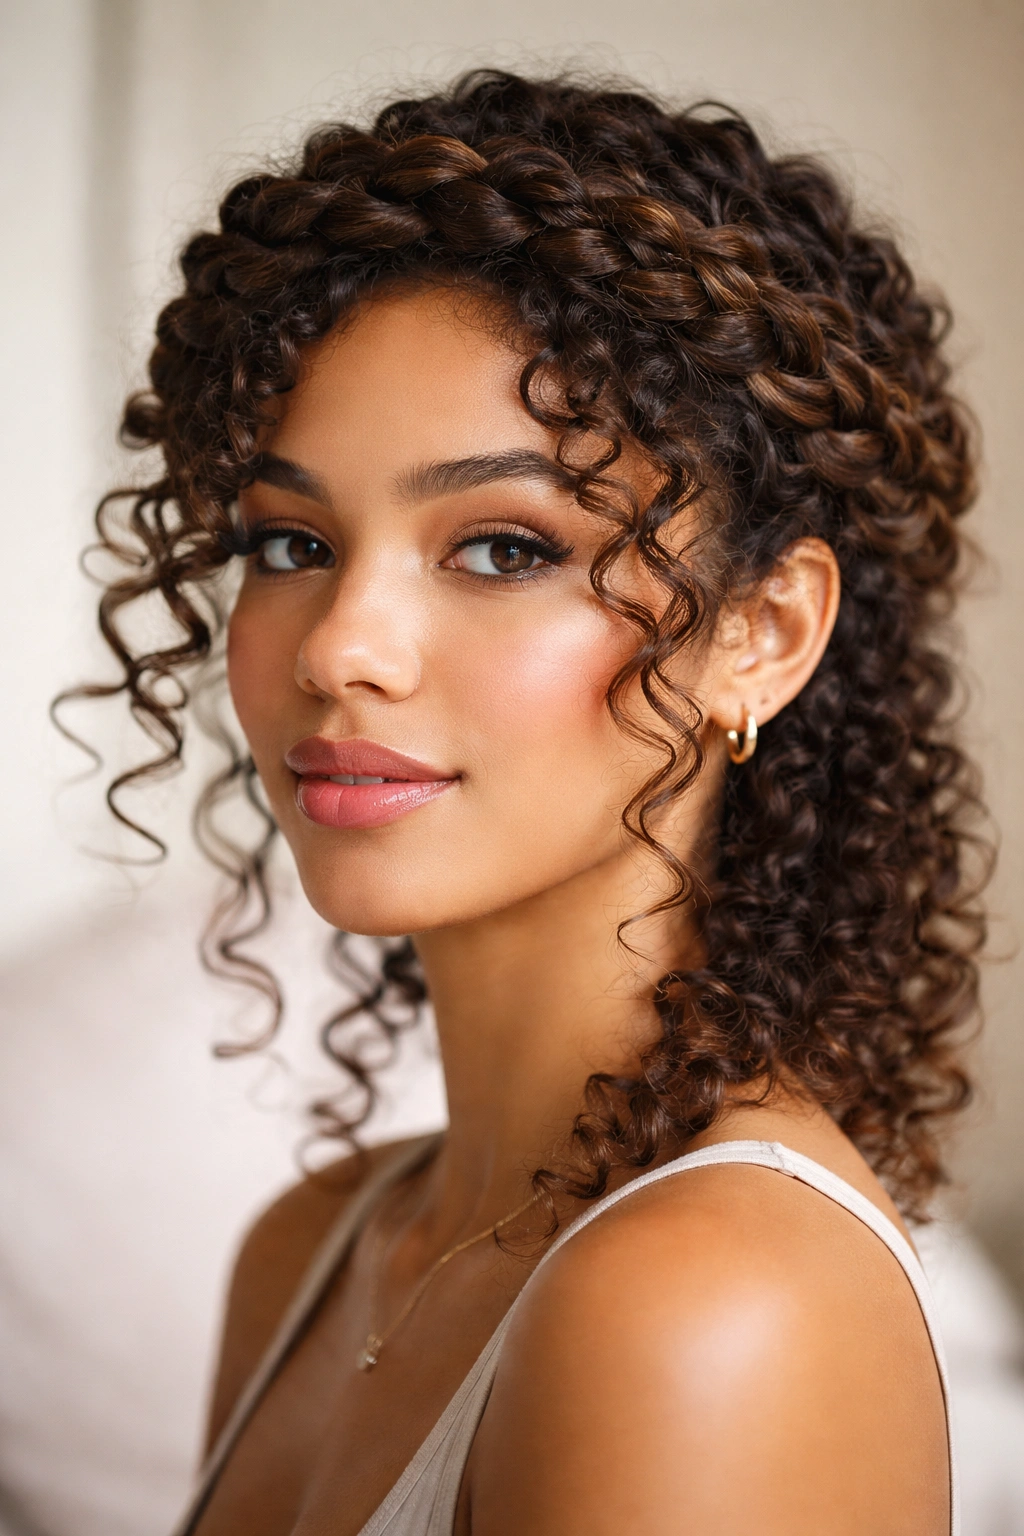
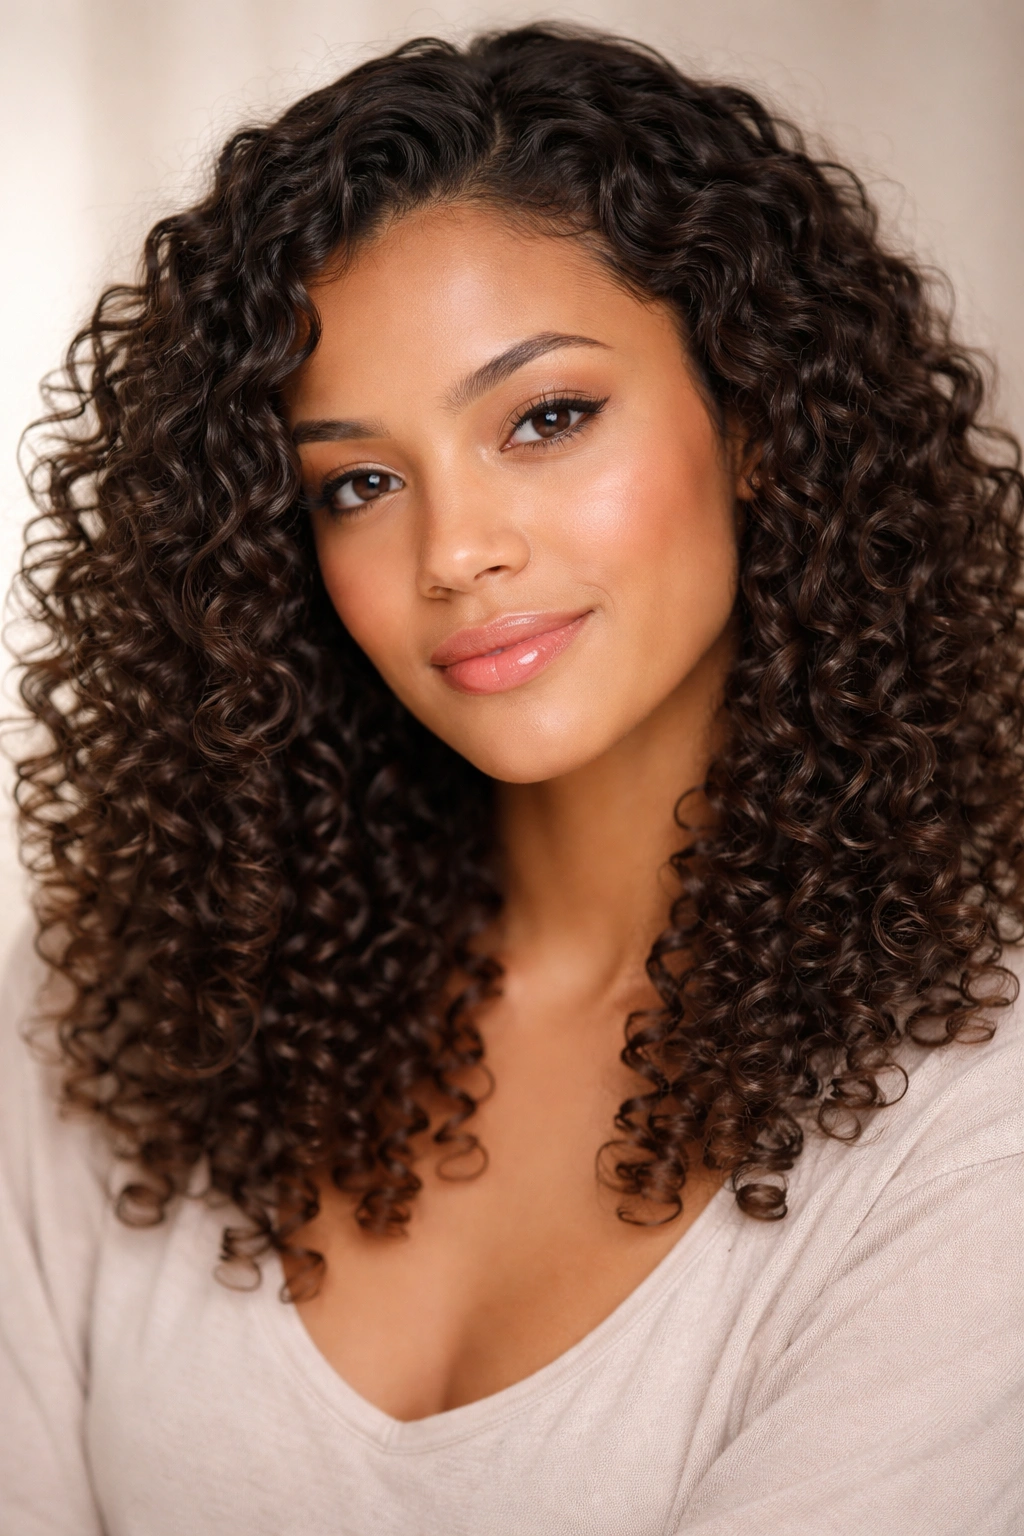
3a curls have a mind of their own — they’re tighter than wavy hair but less densely coiled than 3b or 3c textures, which means they’re capable of beautiful definition and volume when you know how to style them properly. The challenge (and the opportunity) is that 3a curls sit right in that sweet spot where they can either fall flat and frizz, or bounce with gorgeous springy definition. The right hairstyle doesn’t just look good — it actually works with your hair’s natural structure instead of fighting it.
Most people with 3a curls fall into a styling trap: they either stick with the same few go-to styles because they’re afraid to experiment, or they try techniques designed for curlier textures and end up frustrated when the results don’t match the tutorials. The reality is that 3a curls have their own specific needs and opportunities. They respond beautifully to certain cutting techniques, layering strategies, and styling methods that actually enhance your curl pattern rather than trying to force it into something it’s not.
What makes this texture so versatile is that 3a curls can be styled in ways that look completely different depending on moisture levels, product choice, and drying method — the same head of hair can look elegantly refined one day and wild and voluminous the next. This flexibility means you’re not locked into one look. Whether you want something polished for professional settings, playful and textured for everyday wear, or bold and statement-making for a night out, your 3a curls can deliver.
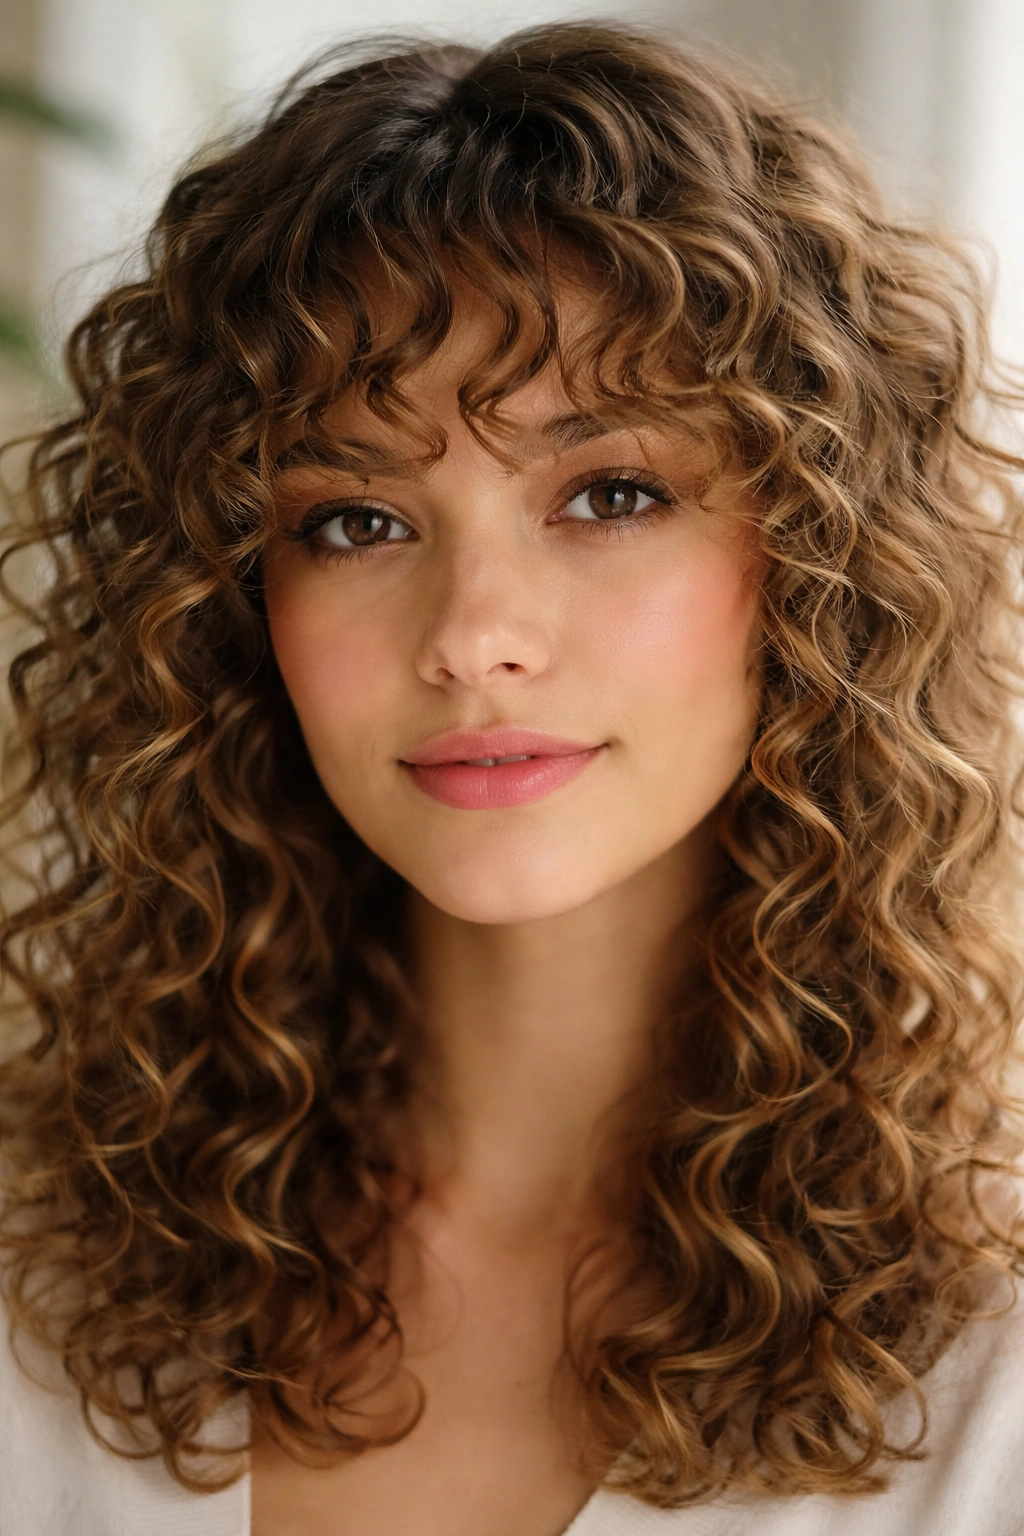
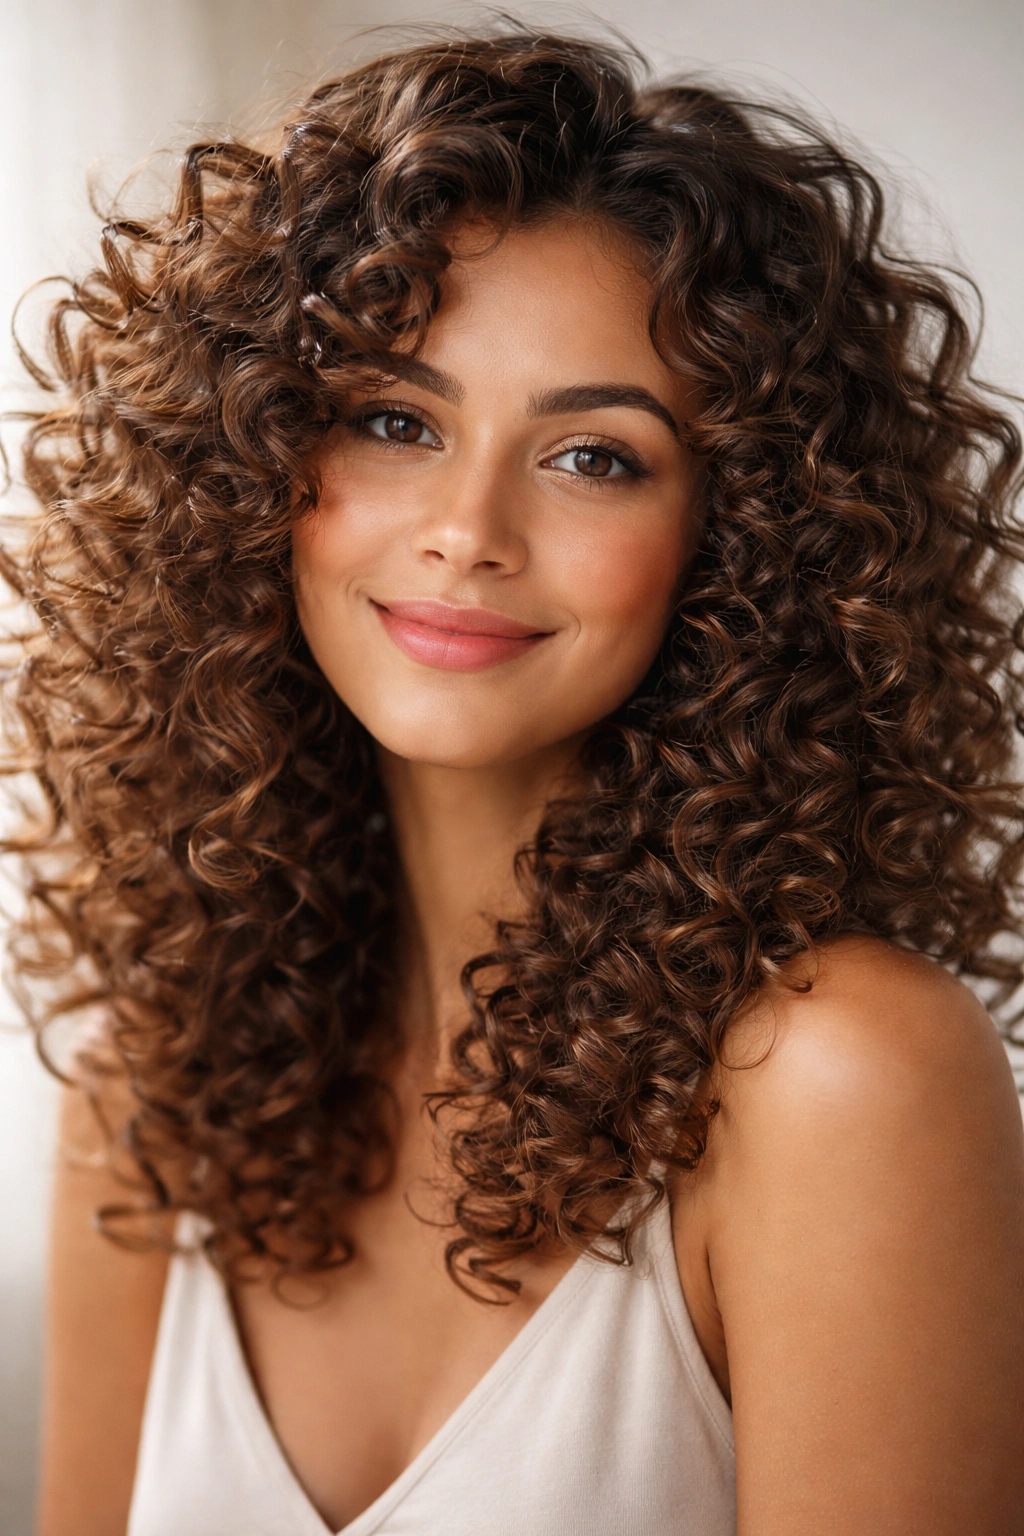
1. The Defined Wash-and-Go
The wash-and-go is the holy grail for many people with 3a curls, and when done correctly, it delivers salon-quality results without the salon time. This style relies on proper hydration, the right product layering, and a reliable drying method to create bouncy, defined ringlets that last from wash day through the week. The key is that this isn’t actually a hands-off style — it’s a technical style that requires intention during the wash and drying phases.
What Makes It Work for 3a Curls
3a curls have enough natural texture to hold definition with the right moisture and product support, but not so much curl density that they look overwhelmed by heavy products. A good wash-and-go for 3a hair typically involves a hydrating shampoo (or co-wash), a rich conditioner applied to soaking wet hair, and a lightweight gel or curl cream that defines without weighing the curls down. The magic happens during styling: you’re applying products to saturated hair and then using a specific drying method — either air drying, diffusing, or a combination — to set the curl pattern.
How to Achieve the Look
Start with very wet hair and apply your leave-in conditioner generously, working it through from mid-length to ends. While your hair is still dripping wet, add your styling product — a curl-defining gel, cream, or mousse — and distribute it evenly by scrunching or praying hands method (clapping your wet curls between your palms). If you’re using a diffuser attachment on your blow dryer, work section by section on medium heat, gently cupping curls into the diffuser and holding for 10-15 seconds per section. The goal is to dry your hair to about 60-70% dry with the diffuser, then let it air dry completely for the final set. If you’re air drying entirely, apply your products and then do nothing — no touching, no rearranging — for at least 4-6 hours while your curls dry completely.
Pro Tips and Variations
The cast (that crunchy layer that forms on top of your curls as they dry) is your friend, not your enemy. Once your hair is completely dry, scrunch the cast out with your hands or a microfiber cloth — this breaks up the product shell and reveals soft, defined curls underneath. If your curls look frizzy or separated during styling, add more conditioner — dryness at the wash stage always leads to frizz. For a more voluminous wash-and-go, flip your head upside down while diffusing the roots. For a sleeker version, smooth the products downward rather than scrunching, and use a gel with stronger hold.
When to Wear It
This style is perfect for lazy weekends, everyday wear, or any day when you have 4-6 hours to let your curls dry properly. It’s low-manipulation, which means it causes less breakage and frizz than styles where you’re constantly touching or styling your hair. Many people with 3a curls find that their wash-and-go gets better over the course of the week as the curls continue to settle and define.
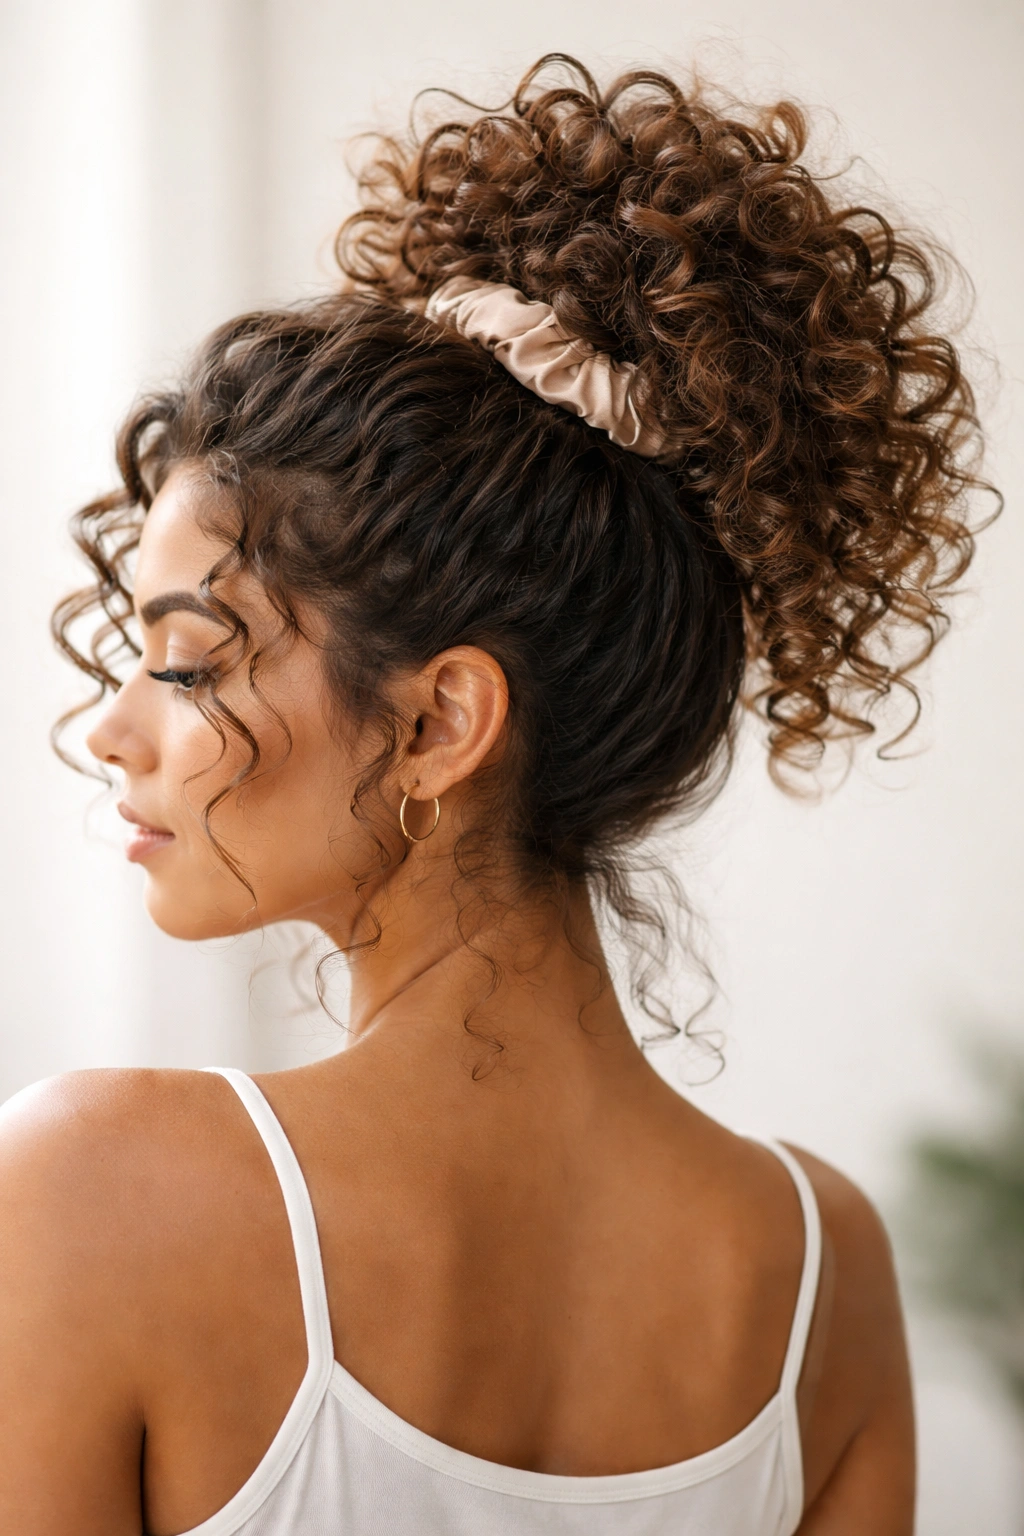
2. High Ponytail with Defined Curls

A high ponytail works beautifully for 3a curls because your curl pattern is visible from every angle, and the height of the placement actually showcases the bounce and dimension of your texture. This isn’t just a casual ponytail — it’s a style where your curls remain defined and individual, not scrunched into a compressed blob at the base.
What Makes It Work for 3a Curls
Unlike tighter curl types that can look quite sleek even in a ponytail, 3a curls maintain their springy character when gathered up, which gives a high ponytail real personality and movement. The curls frame your face slightly as they fall from the ponytail base, and the individual ringlets catch light in a way that reads as intentional and styled, not just “hair pulled back.”
How to Achieve the Look
Apply your curl cream or gel to damp hair and dry as you would for a standard curl style, then gather your curls into a high ponytail at the crown while your hair is still slightly damp or has just finished drying. Use a silk or satin elastic (never a tight elastic with metal) to secure it gently — you want to avoid creasing or breaking your curls at the base. Smooth the hair at the hairline if desired with a light gel, but leave your curls loose and bouncy everywhere else. You can wrap a small section of hair around the elastic base to hide it, pinning it with a bobby pin, for a more finished look.
Pro Tips and Variations
If your ponytail feels droopy after an hour or two, it’s likely because you secured it while your hair was still damp and it finished drying in a softer, less structured state. Secure it once your hair is completely dry for more hold. For an extra-voluminous high ponytail, tease gently at the crown before gathering the ponytail — this creates height at the base. For a sleeker version, smooth your edges with edge control, and even out the tension of the ponytail by gently pulling the hair slightly at the elastic base to create a gentle poof above it.
When to Wear It
This works for casual everyday wear, professional settings, workouts, or anytime you want your curls visible but off your face. The style reads as effortlessly styled rather than overdone, which makes it versatile across contexts.
3. Spiral Curls with Plopping Method
Spiral curls are the tightest, most defined expression of 3a curl texture, and the plopping method is the technique that creates them most reliably. When spirals are done well on 3a hair, they look like individual springy coils that have real bounce and movement — not tight ringlets, but actual spirals of defined curl.
What Makes It Work for 3a Curls
The plopping method works by allowing each curl to form and set without any interference or disruption during the drying process. For 3a curls specifically, the medium hold and structure they naturally have means they’ll hold a spiral shape beautifully if you’re patient and don’t disturb them while they’re drying. 3a curls are also forgiving enough that if your spirals don’t form perfectly, the overall look is still textured and intentional.
How to Achieve the Look
After applying your conditioner and styler to soaking wet hair (apply the product by scrunching and praying hands to encourage curl formation), place a microfiber cloth or t-shirt on a flat surface. Lean your head down and wrap your curls into the fabric, then tie the ends of the fabric at the top of your head, securing your curls in a bundle. This is the “plop” — your curls are now suspended in fabric, free from gravity’s downward pull. Leave the plop in place for 10-20 minutes. After plopping, you can either air dry completely (4-8 hours depending on density and length) or diffuse on low heat for 30-45 minutes, then air dry the rest. The key is that your curls should dry without any scrunching, touching, or rearranging after the initial plop.
Pro Tips and Variations
The longer you can leave your curls plopped and undisturbed, the more defined your spirals will be. If you’re in a hurry and need to diffuse, use the lowest heat setting and the lowest speed — high heat and high speed will create frizz and disrupt the spiral formation. For extra-defined spirals, apply a stronger-hold gel before plopping, and consider doing a second light application of gel after the initial plop to keep everything in place during air drying.
When to Wear It
Spiral curls are a statement style — they’re beautiful for special occasions, photoshoots, or any time you want your curl pattern to be the focal point. They also look great for nights out where you want texture and dimension to be noticeable.
4. Layered Cut with Face-Framing Pieces
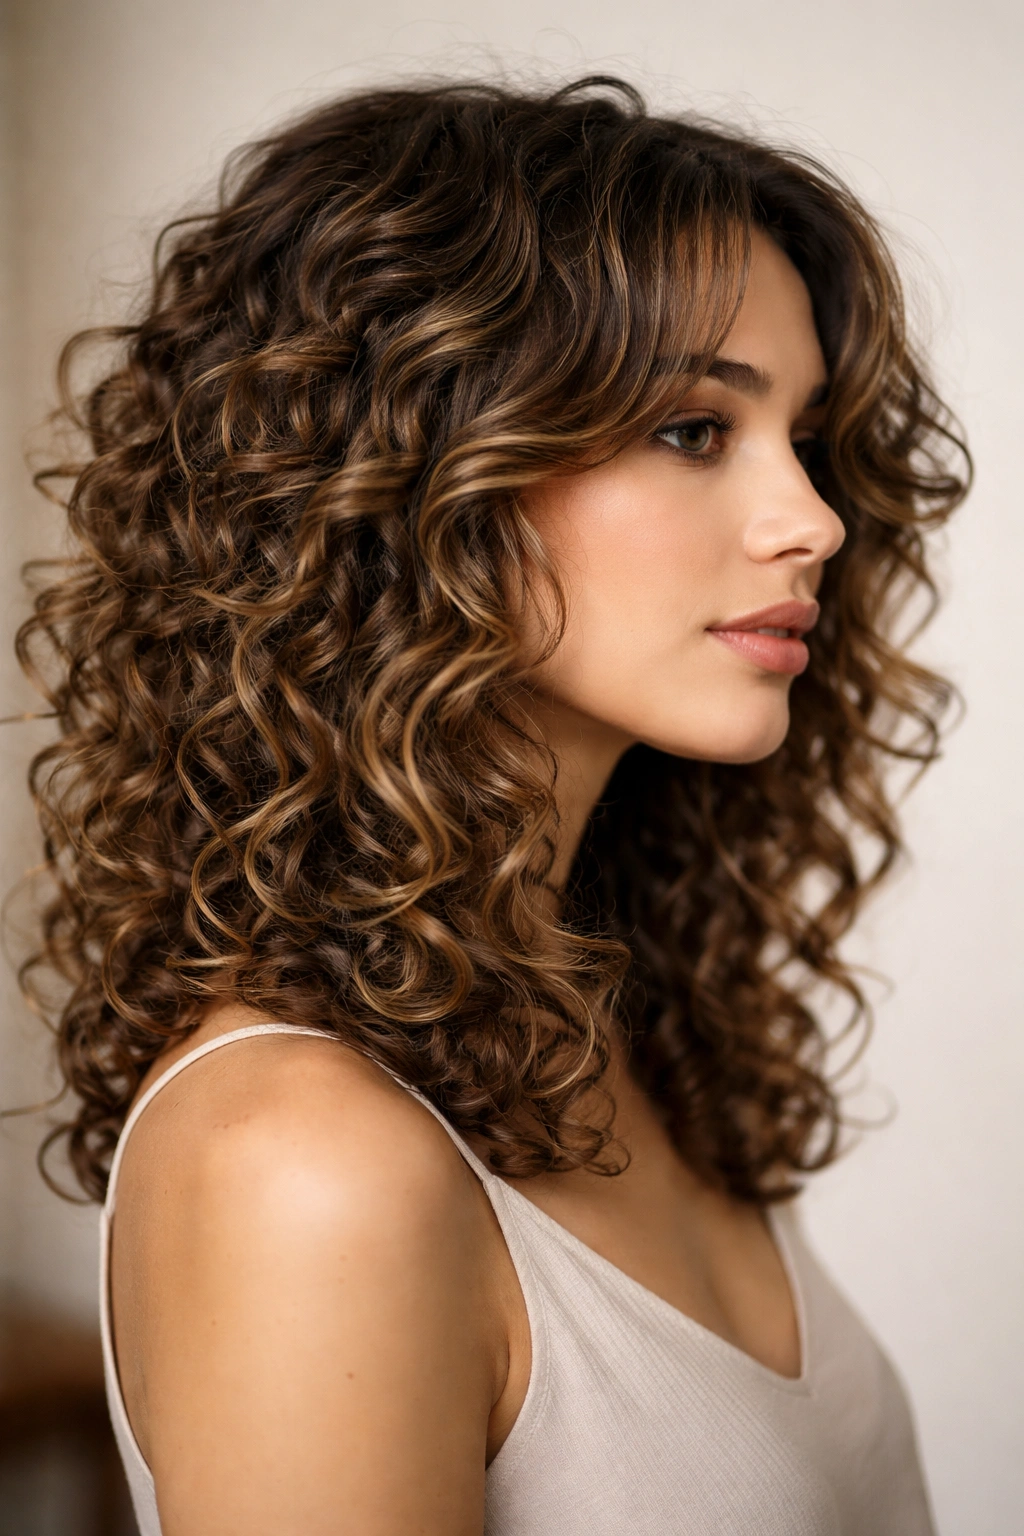
A well-executed layered cut is transformative for 3a curls because layers create the appearance of more curl, better movement, and genuine bounce. Unlike a blunt, one-length cut that can look heavy and linear on 3a curls, layers break up the mass of hair and allow each individual curl to express itself fully. Face-framing layers specifically draw attention to your face and create softness around the features.
What Makes It Work for 3a Curls
Layers are effective on 3a curls because they reduce bulk without creating frizz or disrupting the curl pattern. When you cut into wet 3a curls, the layers are actually shorter than they appear — once your curls dry and spring up, the layers create dimension and volume that a blunt cut simply can’t deliver. Face-framing layers add an intentional, styled quality to your overall appearance without requiring any more styling effort than your usual routine.
How to Achieve the Look
Find a curl-specialist stylist who understands 3a texture specifically — this matters more than you might think. A stylist who regularly works with curls will cut your hair while it’s wet to see your true curl pattern, and they’ll use techniques like the “deva cut” or other curl-specific methods that honor the way your curls naturally fall. Ask for layers throughout that remove bulk while maintaining length, and specifically request face-framing layers that hit around your cheekbone or jawline. These shorter pieces will curl up and frame your face beautifully once dry.
Pro Tips and Variations
Layers work best when they’re cut at different lengths rather than all one short length — this creates movement and prevents the “perm” look. Ask your stylist to cut fewer, more intentional layers rather than many thin layers, which can look stringy. For a bolder version, ask for more dramatic face-framing layers that are significantly shorter than your overall length. For a subtle version, ask for just two or three layers that remove weight without drastically changing your length.
When to Wear It
A layered cut is the foundation of almost every other style in this list — it’s not a style itself so much as a cut that makes all your other styling choices look better. The beauty of layers is that you’ll see the benefits whether you’re doing a wash-and-go, a style with products, or even an updo.
5. Slicked-Back High Bun with Curls
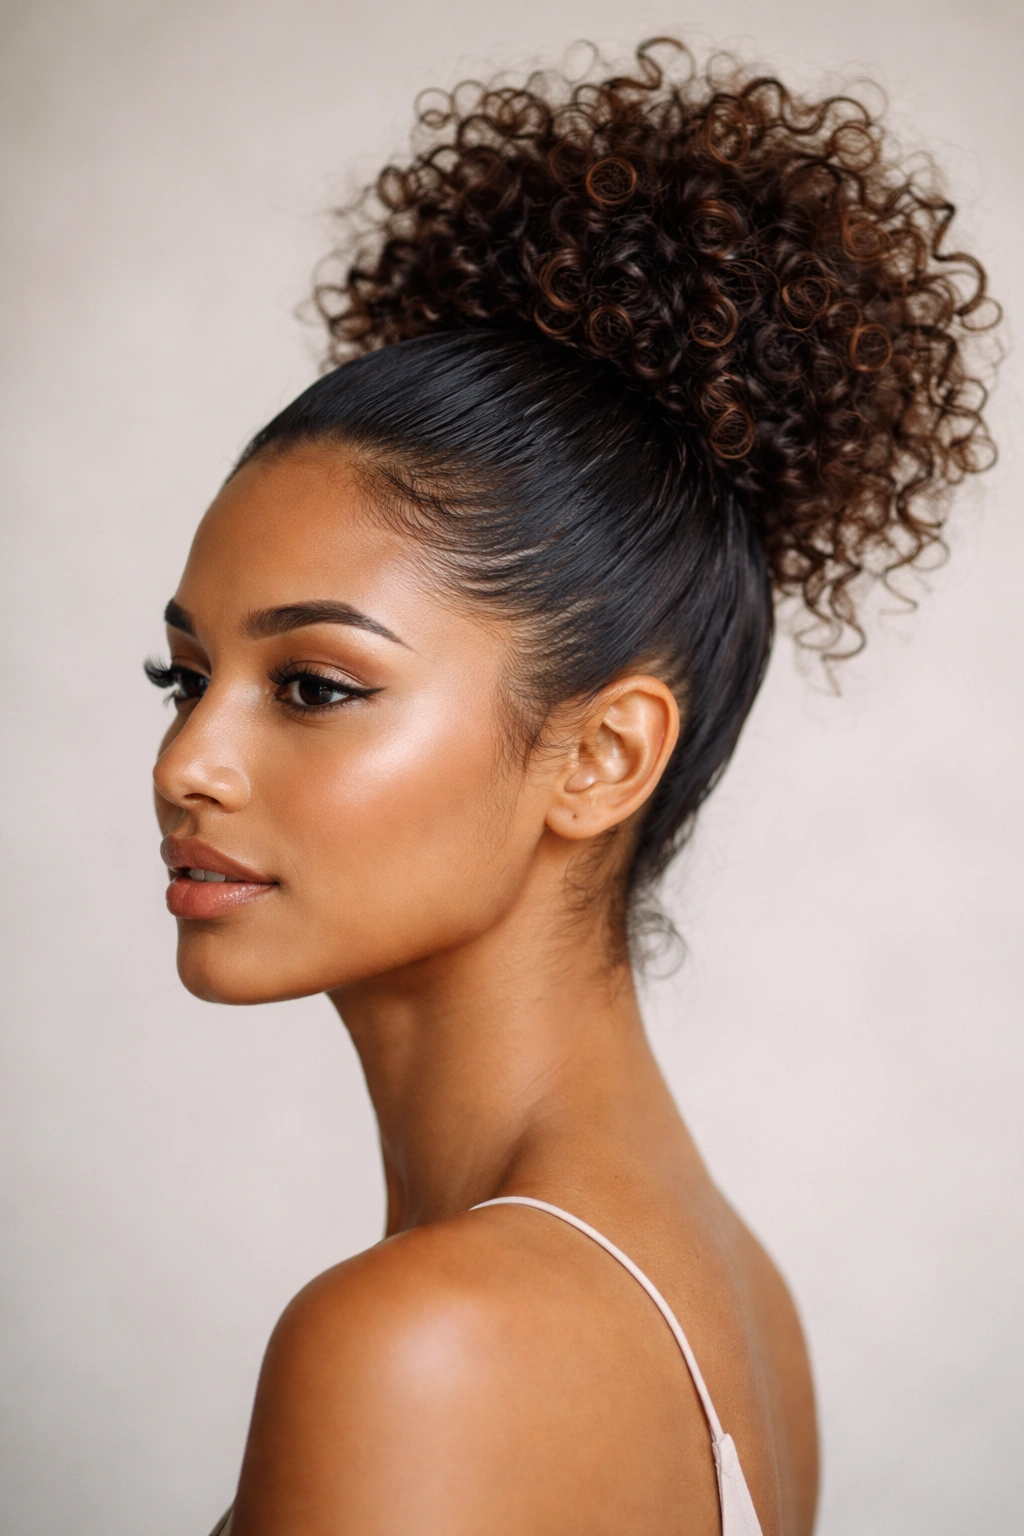
A slicked-back bun works for 3a curls when you embrace the contrast between the smooth, controlled base and the natural curls that explode out of the bun at the top and sides. This is a style that’s both practical (hair completely off your face and neck) and stylish (the loose curls have serious visual impact).
What Makes It Work for 3a Curls
3a curls are bouncy enough that when gathered into a bun, they create real volume and texture at the top of your head, rather than a flat, compressed blob. The curls that escape the bun or are intentionally left loose around the sides have movement and dimension that reads as intentionally styled. This is very different from 4a or 4c curls, which would need much more product and technique to achieve this effect.
How to Achieve the Look
Start with hair that’s been styled or dried with your usual method — whether that’s a wash-and-go with gel, a diffused dry, or curls that have been set overnight. Gather your curls into a high ponytail and secure with a silk elastic. Take the ponytail and twist it gently, then wrap it around the base to form a bun shape, pinning it in place with bobby pins. Apply a strong-hold gel to the hairline and around the bun base to smooth flyaways, but leave your bun curls loose and textured. Pull a few face-framing pieces gently around your face for softness.
Pro Tips and Variations
The “slicked-back” effect comes from gel at the hairline and a smooth part, not from pulling your curls tight — keep your bun actually quite loose and fluffy for the most flattering look. If your bun feels droopy, you’ve likely twisted too loosely or your hair is still too damp. Let it dry completely before styling into a bun. For a more casual version, make the bun lower and messier with more curls coming out of it. For a polished version, create a higher bun with tighter curls and minimal loose pieces.
When to Wear It
This works beautifully for workouts, professional settings, hot weather, or any day when you want your curls off your face and neck but still visible. It reads as intentional and styled, not like you’re just pulling your hair back because it’s not cooperating.
6. Bangs with 3a Curls
Bangs on 3a curls are a technique style choice rather than just a cut choice, because the way you style your bangs dramatically affects how they look day to day. Bangs can range from full and thick to wispy and piece-y, and they interact with your curl pattern in beautiful ways.
What Makes It Work for 3a Curls
3a curls actually work well with bangs because your curl pattern has enough structure to create shape around your face, but not so much density that bangs look overwhelmingly thick or heavy. Curly bangs also tend to photograph beautifully — they have texture and movement that catches light, rather than the severe line that straight bangs create.
How to Achieve the Look
The cut is the first step: work with a curl-specialist stylist who can cut your bangs while wet to account for how they’ll shrink when they curl. Ask for bangs that hit somewhere between your eyebrow and lash line — remember that curly bangs will curl upward and slightly backward, so they’ll appear shorter once dry than they seem right after the cut. Ask for slightly textured, piecey bangs rather than blunt, heavy ones, which will look more natural and work better with your curl pattern.
Styling your bangs daily means applying the same products you use on the rest of your curls — leave-in conditioner, curl cream or gel — and either air drying them or diffusing them. Many people with curly bangs find that they need to refresh their bangs more often than the rest of their hair, since bangs are closer to your face and scalp, they pick up oil and become less defined throughout the week. A quick spritz with a curl refresher spray and a few minutes under the diffuser will revive them.
Pro Tips and Variations
Curly bangs look best when they’re slightly longer rather than too short — too-short bangs can look poofy and uncontrolled. If you’re nervous about bangs, start with longer, wispy ones that blend more seamlessly into your face-framing layers. For a bolder look, go for fuller, shorter bangs that are more of a statement. The biggest trick with curly bangs is accepting that they’ll move and shift throughout the day — that’s part of their charm, not a flaw.
When to Wear It
Bangs are a year-round commitment in the sense that you’ll be styling them regularly, but they’re particularly impactful in warm months when they’re fully defined and bouncy. Bangs work for casual everyday wear, but they also look great for more formal occasions because they add softness and movement to your face.
7. Twist-Out for Definition and Length
A twist-out is a protective style that actually delivers beautiful definition and elongation for 3a curls. Unlike braids or box braids, which can be hard on 3a hair because of the constant tension, twists are gentler while still providing gorgeous results once they’re released.
What Makes It Work for 3a Curls
When you twist sections of 3a curls and let them set overnight or for several days, you’re essentially training your curls into a elongated spiral pattern. Once you release the twists, you’re left with beautifully defined curls that look like a combination between your natural curl pattern and loose waves. The twists also protect your curls from external friction and moisture loss, so your curls will be healthier and more defined than if you’d left them unprotected.
How to Achieve the Look
Detangle your hair thoroughly while damp, applying conditioner to help with the process. Section your hair into 4-8 sections depending on your density and desired twist size. In each section, divide the hair into two strands and twist them around each other from root to tip, keeping tension consistent. Secure the end of each twist with a small elastic or bobby pin. You can let the twists air dry completely (overnight or 8+ hours), or you can diffuse them for 15-20 minutes to speed up the process, then let them air dry the rest. Once completely dry, gently unravel each twist by carefully separating the two strands, starting from the bottom and working toward the root. Use your fingers to separate the twists into individual curls.
Pro Tips and Variations
The smaller your twists, the tighter and more defined your curls will be when released. Larger twists create looser waves. For maximum definition, twist while your hair is wet and let the twists dry completely before releasing them. For looser waves, twist while damp and release the twists while they’re still slightly damp. Apply a light curl cream or gel before twisting for better hold and definition.
When to Wear It
Twist-outs work beautifully as an everyday style — you wear the twists in for a day or two, then release them for 3-4 days of gorgeous definition. This is a great style when you want something different from your usual routine and don’t have time for your standard wash-and-go.
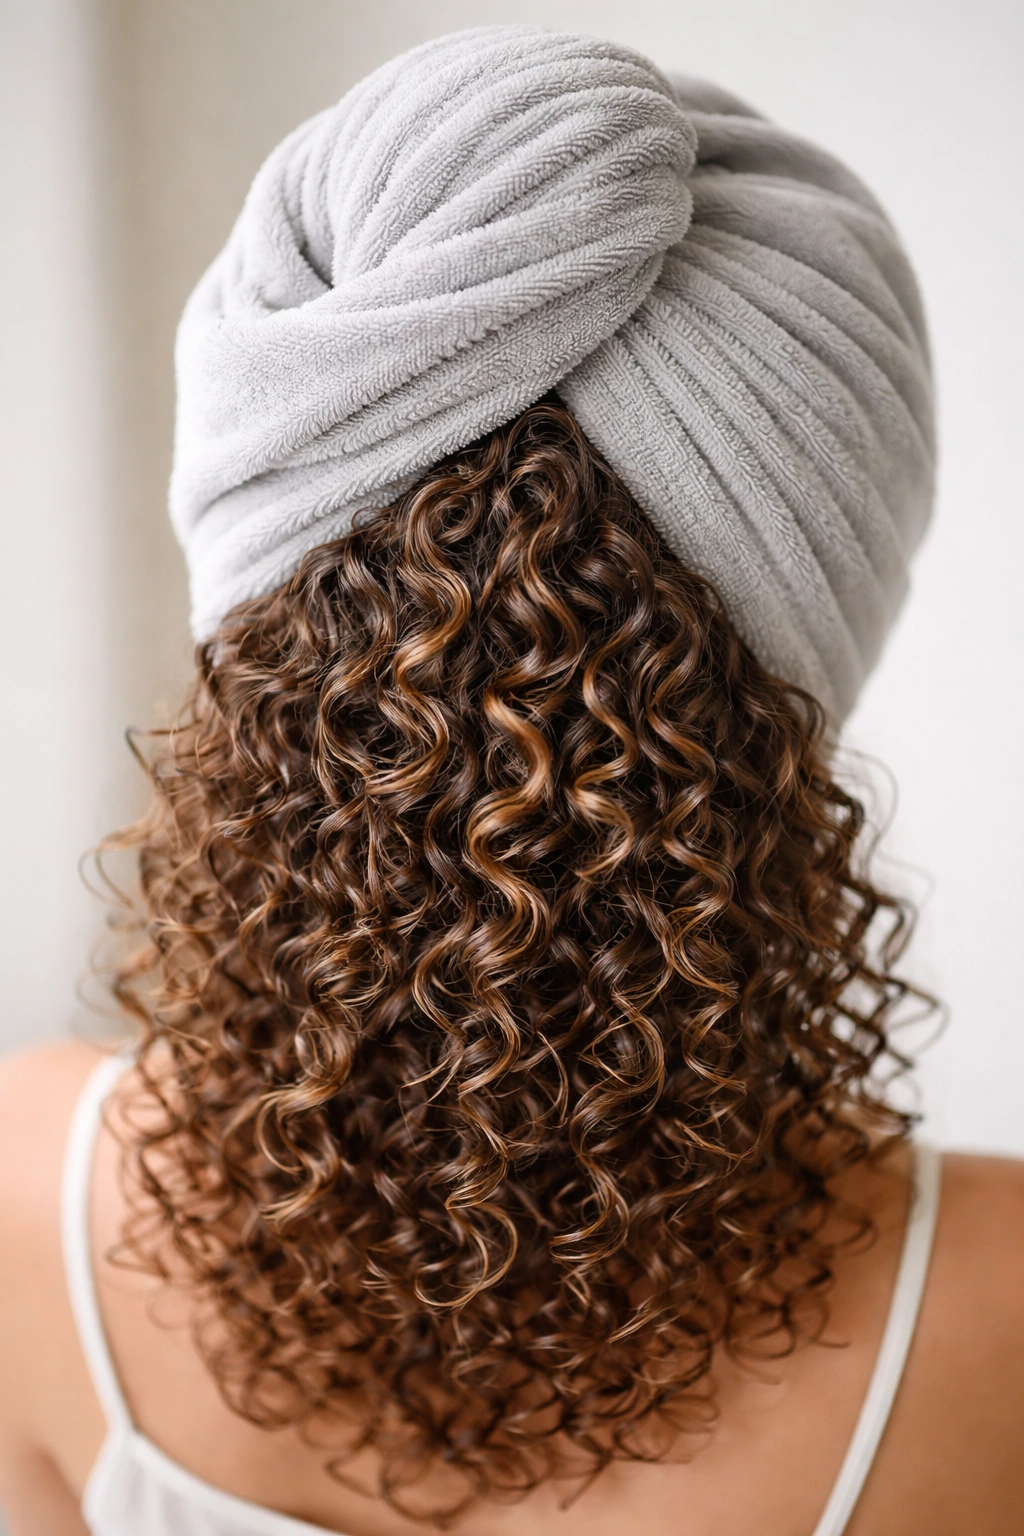
8. Pineapple Method for Overnight Curl Preservation
The pineapple method isn’t technically a style you wear out — it’s a sleeping/preservation technique that keeps your curls defined and bouncy for multiple days after wash day. However, it’s worth including here because it’s so transformative for 3a curls, and mastering it means your styles last longer and look better.
What Makes It Work for 3a Curls
3a curls are vulnerable to flattening when you sleep, especially if you’re sleeping on a regular cotton pillowcase that creates friction and absorbs moisture from your curls. The pineapple method works by gathering your curls loosely at the crown in a way that preserves their structure while you sleep, rather than having them compressed against the pillow.
How to Achieve the Look
Before bed, gather your curls into a loose, high ponytail at the very top of your head using a silk or satin elastic. This should be genuinely loose — not tight — because you’re not trying to prevent breakage, you’re trying to suspend your curls away from the pillow while keeping them in their general curl structure. You can also use a silk or satin sleep bonnet, which covers your entire head and prevents friction, though this doesn’t work as well for every curl pattern. Some people prefer a combination: the pineapple ponytail plus sleeping on a silk or satin pillowcase for maximum protection.
Pro Tips and Variations
In the morning, gently release the ponytail and allow your curls to fall. They should spring back into their original shape, though you might have some slightly flattened areas that respond to a light spritz of water and a few seconds under the diffuser. For extra curl preservation, sleep on a silk or satin pillowcase every night in addition to the pineapple, which protects curls even more effectively than the pineapple alone. If you find your curls are still flattening despite the pineapple, you might be tightening the elastic too much — try loosening it slightly.
When to Use It
Use the pineapple method every single night after styling, regardless of what style you’re wearing. It’s the single most important technique for extending the life of your curls between wash days.
9. Half-Up, Half-Down with Twisted Sides
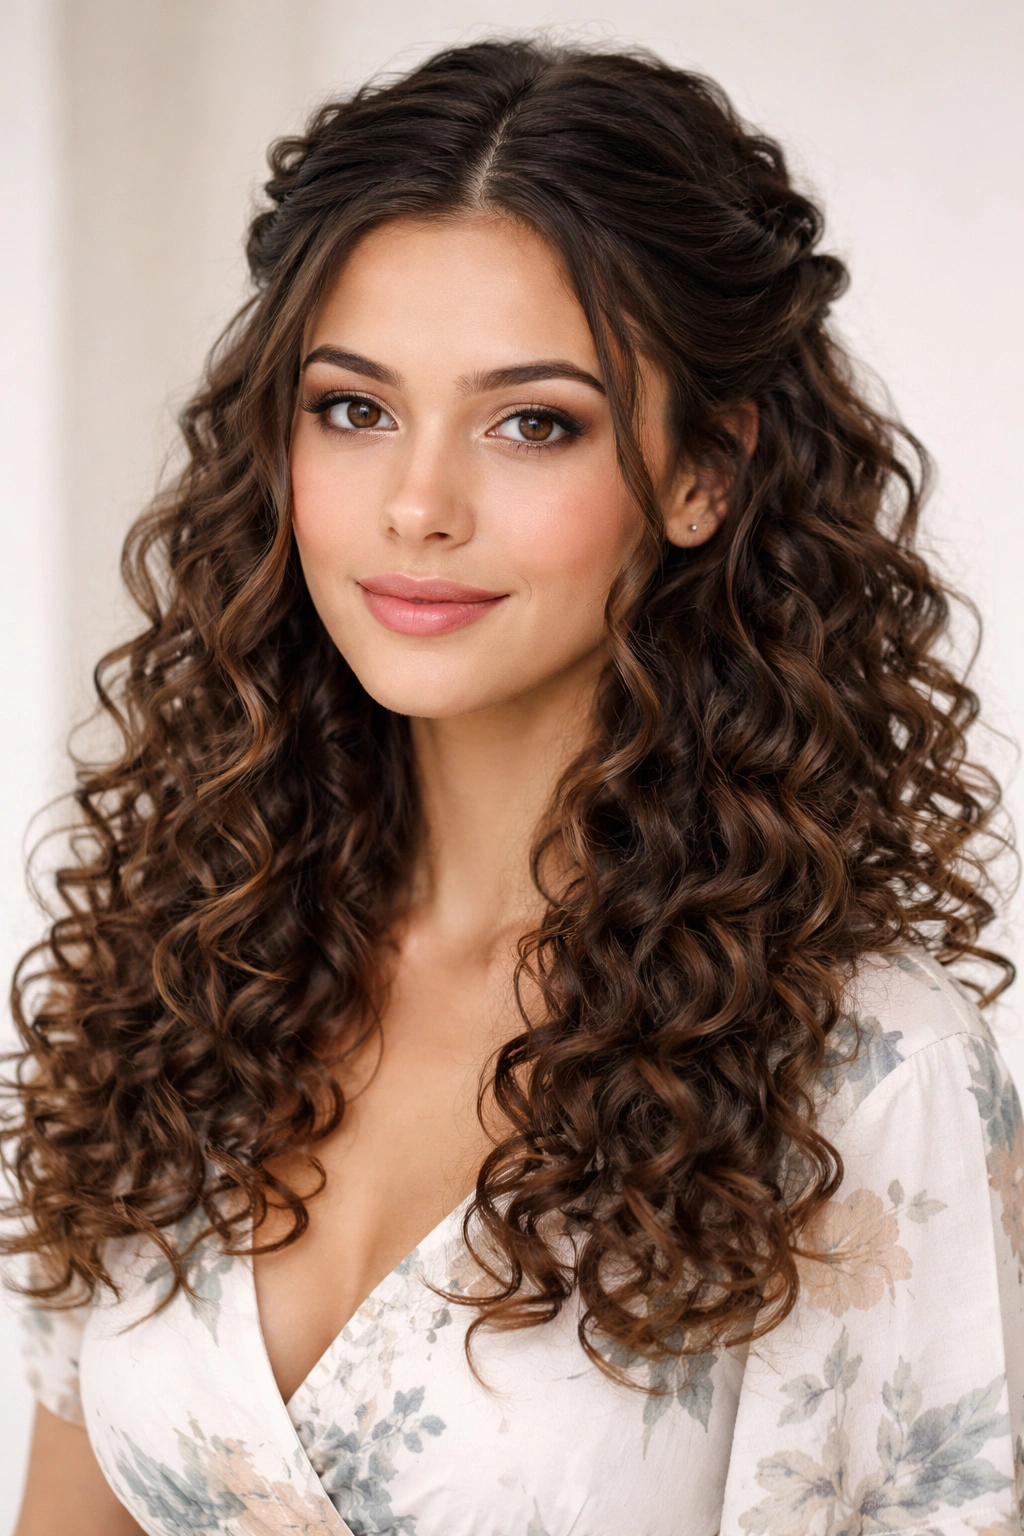
This style splits the difference between wearing your curls fully down and pulling them back completely, creating a romantic, versatile look that works for nearly any occasion. The twisted sides add intentional styling detail that makes the overall look feel polished.
What Makes It Work for 3a Curls
3a curls have enough visual interest that when you pull back the sides, you’re creating definition and movement without over-styling. The twists at the sides actually enhance the curl definition in the front, because they’re creating contrasting texture and directing attention toward your face.
How to Achieve the Look
Start with curls that have been styled and dried — a wash-and-go or any of your standard curl methods work perfectly. Take a section of hair from each temple area and twist it gently, working the twist back toward the crown. Secure both twists at the center back of your head using bobby pins, or secure them by crossing them over each other and pinning them in place. Leave the rest of your curls down and loose. You can tuck loose curls from the back behind your ears if you want a cleaner look, or leave them fully down and loose for a more romantic vibe.
Pro Tips and Variations
The tightness of your twists determines how styled the overall look feels — tighter twists read as more intentional and polished, while looser twists feel more relaxed and romantic. For a sleeker version, smooth the twists with a light gel. For a messier version, let the twists be slightly undone with pieces falling out. You can also try this style with braids instead of twists, or with a mix of braids and twists.
When to Wear It
This style works for casual everyday wear, dates, professional settings, or any occasion where you want something that feels intentionally styled but not overdone. It’s especially flattering because it shows your curls while also framing your face.
10. Braid Crown or Halo Braid
A braid crown or halo braid is an elegant, romantic style where you braid sections of hair and wrap them around your head to create a crown effect. The style frames your face beautifully and works particularly well with 3a curls because your curl texture adds dimension to the braids.
What Makes It Work for 3a Curls
Braids on 3a curls look beautiful because the curls peeking out from between the braid strands create texture and visual interest. The braids don’t compress your curls the way they might on curlier textures — instead, they create a lovely contrast between the smooth line of the braid and the bouncy curls around it.
How to Achieve the Look
Start with dry or nearly-dry curls. Take a section of hair from one side of your head near the temple and create a three-strand braid, working toward the back of your head. Once you reach the back, secure the braid and then create a second braid on the opposite side. Pin both braids in place so they form a crown or halo around your head, wrapping each braid across the back. You can also create a single braid that starts at one temple, travels across the back of your head, and ends at the opposite temple.
Pro Tips and Variations
Looser, slightly messy braids photograph better and feel more romantic than tight, neat braids — try not to pull your braids too tight, and gently pull the edges of the braid strands to create a softer, fuller look. Leaving face-framing pieces out of the braids creates softness and frames your features nicely. For a more intricate look, try French braids that start at the crown and work down, or Dutch braids for a different texture.
When to Wear It
This style is beautiful for special occasions, photoshoots, outdoor events, or any time you want something romantic and intentionally styled. It also works as a protective style if you’re trying to give your curls a break from daily styling.
11. Bouncy Curls with Curl-Activating Mousse
This style focuses specifically on using a lightweight curl-activating mousse to create the bounciest, most voluminous version of your 3a curls. Unlike gel, which creates more definition and hold, mousse creates airiness and movement.
What Makes It Work for 3a Curls
3a curls respond beautifully to mousse because they need lift and bounce more than they need intense definition and hold. Mousse is lighter than gel, so it won’t weigh down your curls or make them look stiff — instead, it enhances the springiness and creates volume.
How to Achieve the Look
Apply your leave-in conditioner to soaking wet hair, then flip your head upside down and apply your curl mousse, working it through from roots to ends. Use a diffuser attachment on your blow dryer on medium heat, working in sections and gently cupping the curls into the diffuser. Work upside-down for the first 10-15 minutes to create volume at the roots. Flip right-side-up and continue diffusing until your hair is about 60-70% dry, then let it air dry completely. Once dry, gently scrunch your curls to break up any slight crunchiness and reveal soft, bouncy ringlets.
Pro Tips and Variations
Mousse works best when applied to very wet hair — if your hair dries out during application, spray it lightly with water. For maximum bounce, apply mousse while flipped upside-down so gravity works with you rather than against you. If your curls fall flat after a few hours, it’s usually because the mousse hasn’t fully set — give your curls more time to dry completely before expecting them to hold.
When to Wear It
This style is great for days when you want lightweight, bouncy curls that feel and look effortless. It’s perfect for casual everyday wear, and it works beautifully for athletic activities or warm weather when you don’t want heavy product in your hair.
12. Sleek Low Bun with Smooth Edges
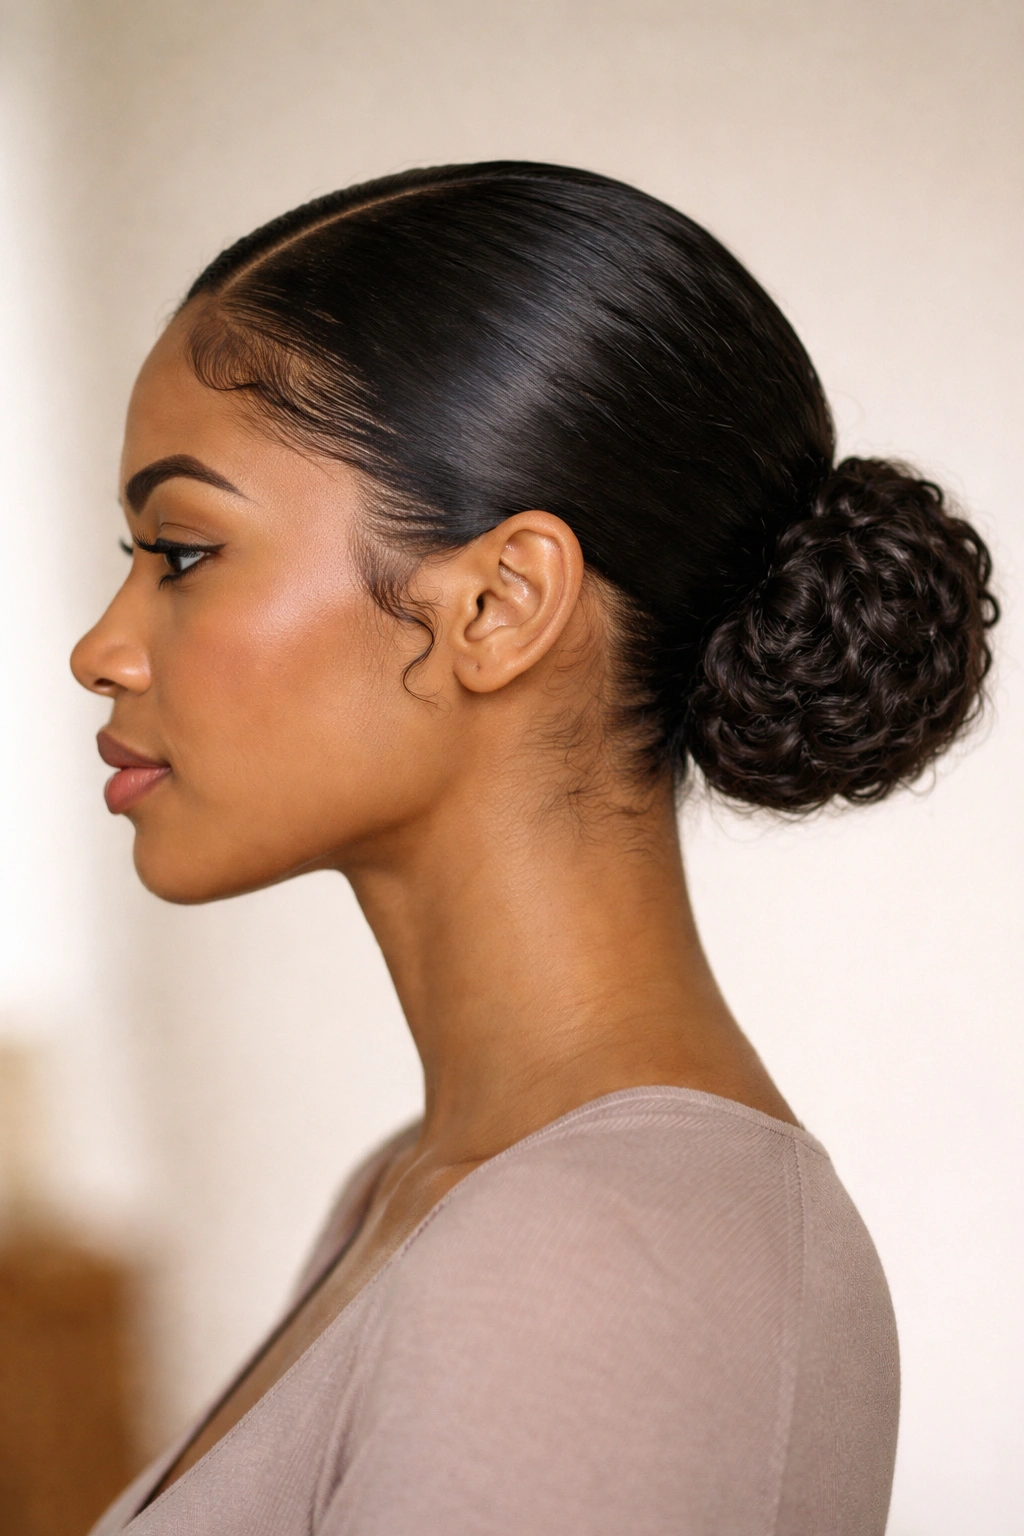
A sleek low bun creates a completely different aesthetic from the other styles in this list — it’s polished, professional, and elegant while still showing off the texture of your curls within the bun itself.
What Makes It Work for 3a Curls
A low bun on 3a curls works because your curls still have visible definition and texture even when gathered up, so the bun doesn’t look flat or blah — it looks intentionally styled and sophisticated. The contrast between the smooth, controlled edges and the textured curls in the bun is striking.
How to Achieve the Look
Apply a smoothing gel or cream to your hairline and work sections of your hair smooth, creating a sharp part if desired. Gather your curls into a low ponytail at the nape of your neck and secure with a silk elastic. Gently twist or braid the ponytail and wrap it around the base to create a bun, pinning it securely. Apply edge control to your hairline and around the bun to tame any flyaways, creating clean, sharp lines. You can also wrap a small piece of hair around the elastic base to hide it and create a more finished appearance.
Pro Tips and Variations
The key to a truly sleek bun is smoothing your edges with a strong-hold gel and taking time to make clean lines around your face and hairline. Use a fine-tooth comb to smooth sections of hair, and don’t be shy with the edge control. For an extra-polished look, create a deep side part before gathering your ponytail. For a more casual version, leave some curl texture around your face instead of smoothing everything back.
When to Wear It
This style is perfect for professional settings, formal events, job interviews, or any situation where you want to look polished and put-together. It reads as intentional and sophisticated while still being relatively simple to execute.
Final Thoughts
3a curls are remarkably versatile, capable of everything from effortless wash-and-go texture to sleek, refined styles. The key to making any of these styles work for your specific hair is understanding that 3a curls respond best to moisture, gentle handling, and techniques that honor your natural curl pattern rather than fighting it. The right cut — one that’s specifically designed for your texture — makes every single one of these styles easier to achieve and more flattering overall.
The styles you choose will depend on your lifestyle, the time you have available, and what you’re trying to accomplish on any given day. Some days you’ll want the effortless bounce of mousse and a diffuser. Other days, you’ll want the intentional romance of a braid crown or the polished sophistication of a sleek bun. The beauty of 3a curls is that you don’t have to choose just one — you have the flexibility to rotate through these styles based on your mood, your schedule, and what your curls need. Once you’ve mastered a few of these techniques, the others become intuitive, and you’ll find yourself experimenting and adapting in ways that feel natural for your specific hair and personal style.