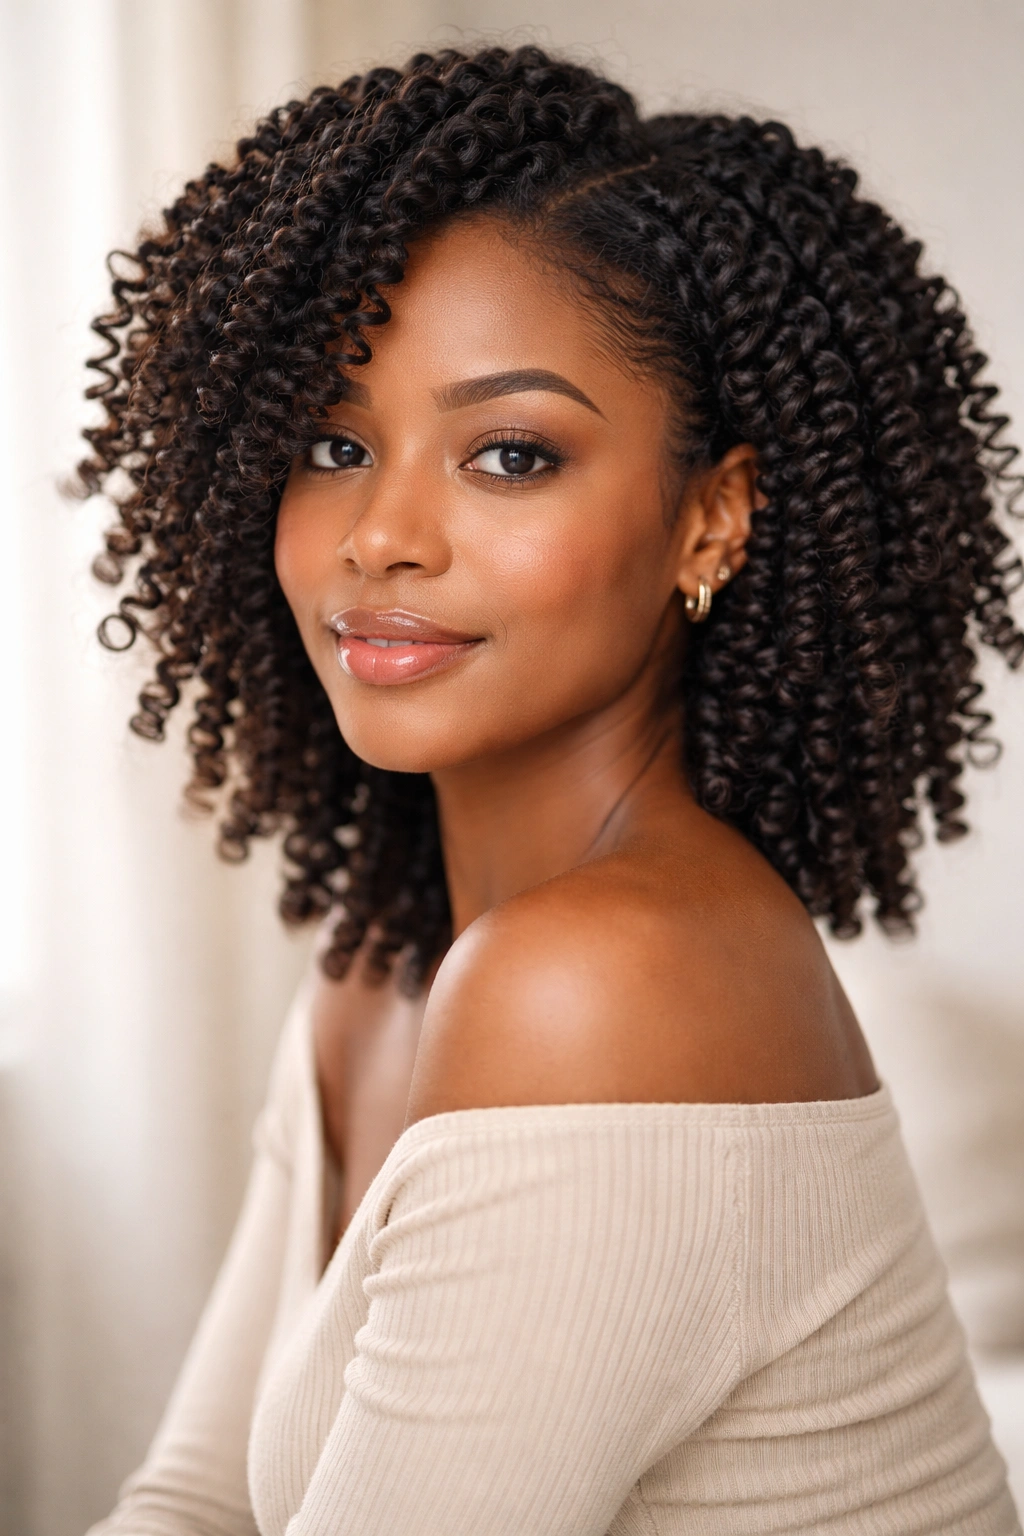
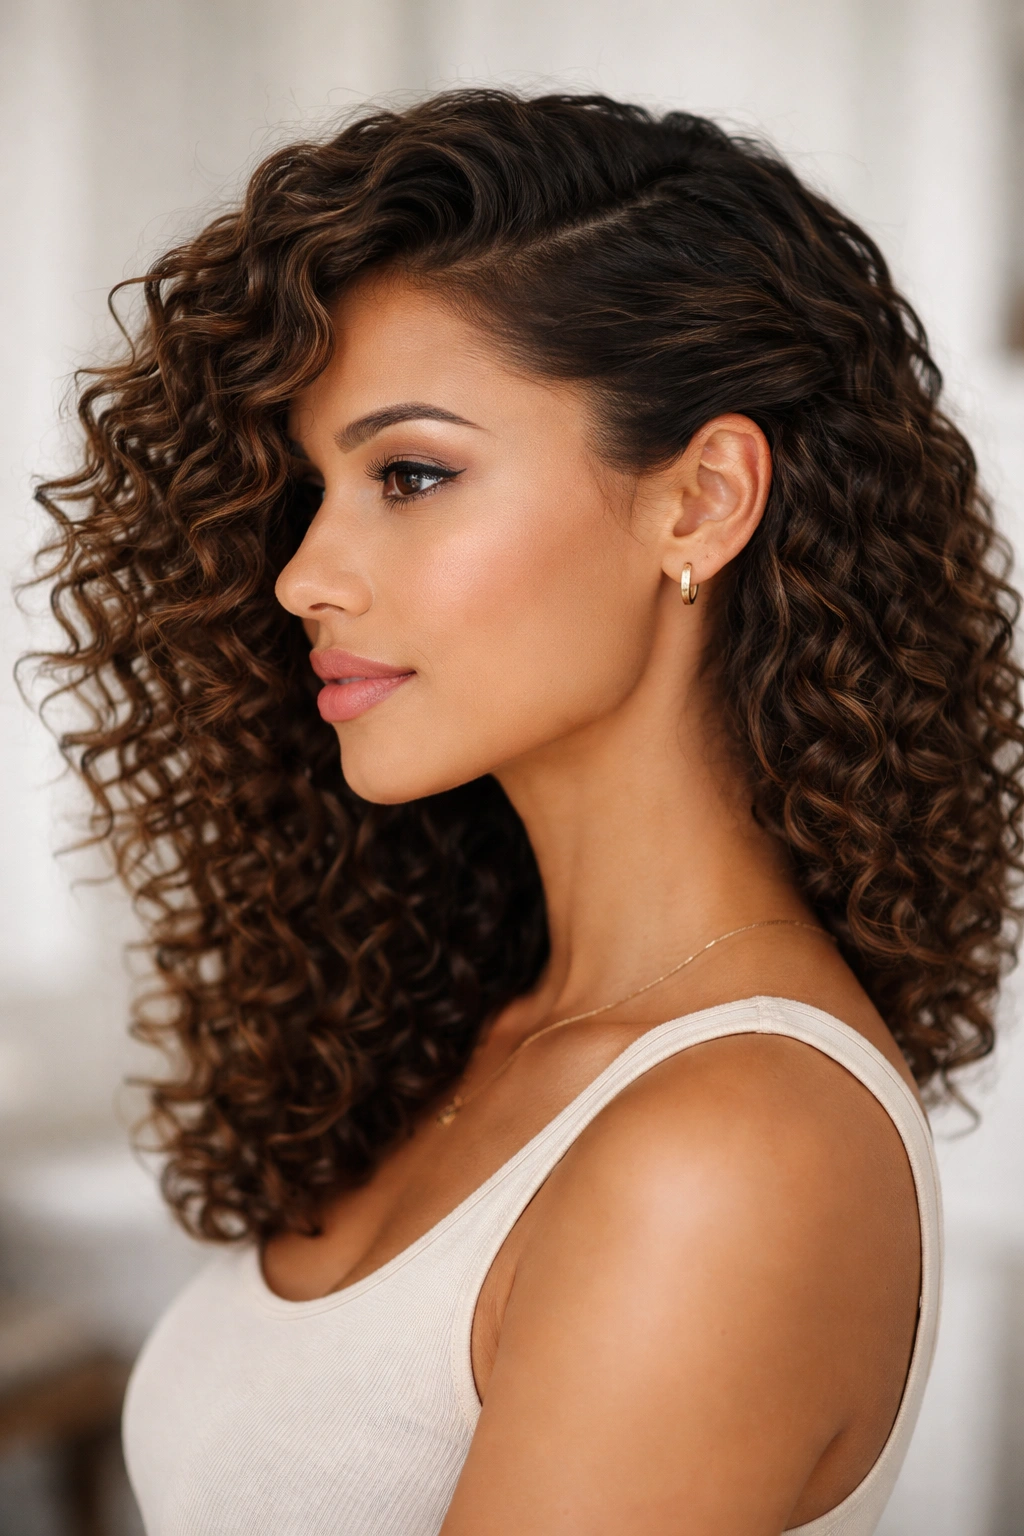
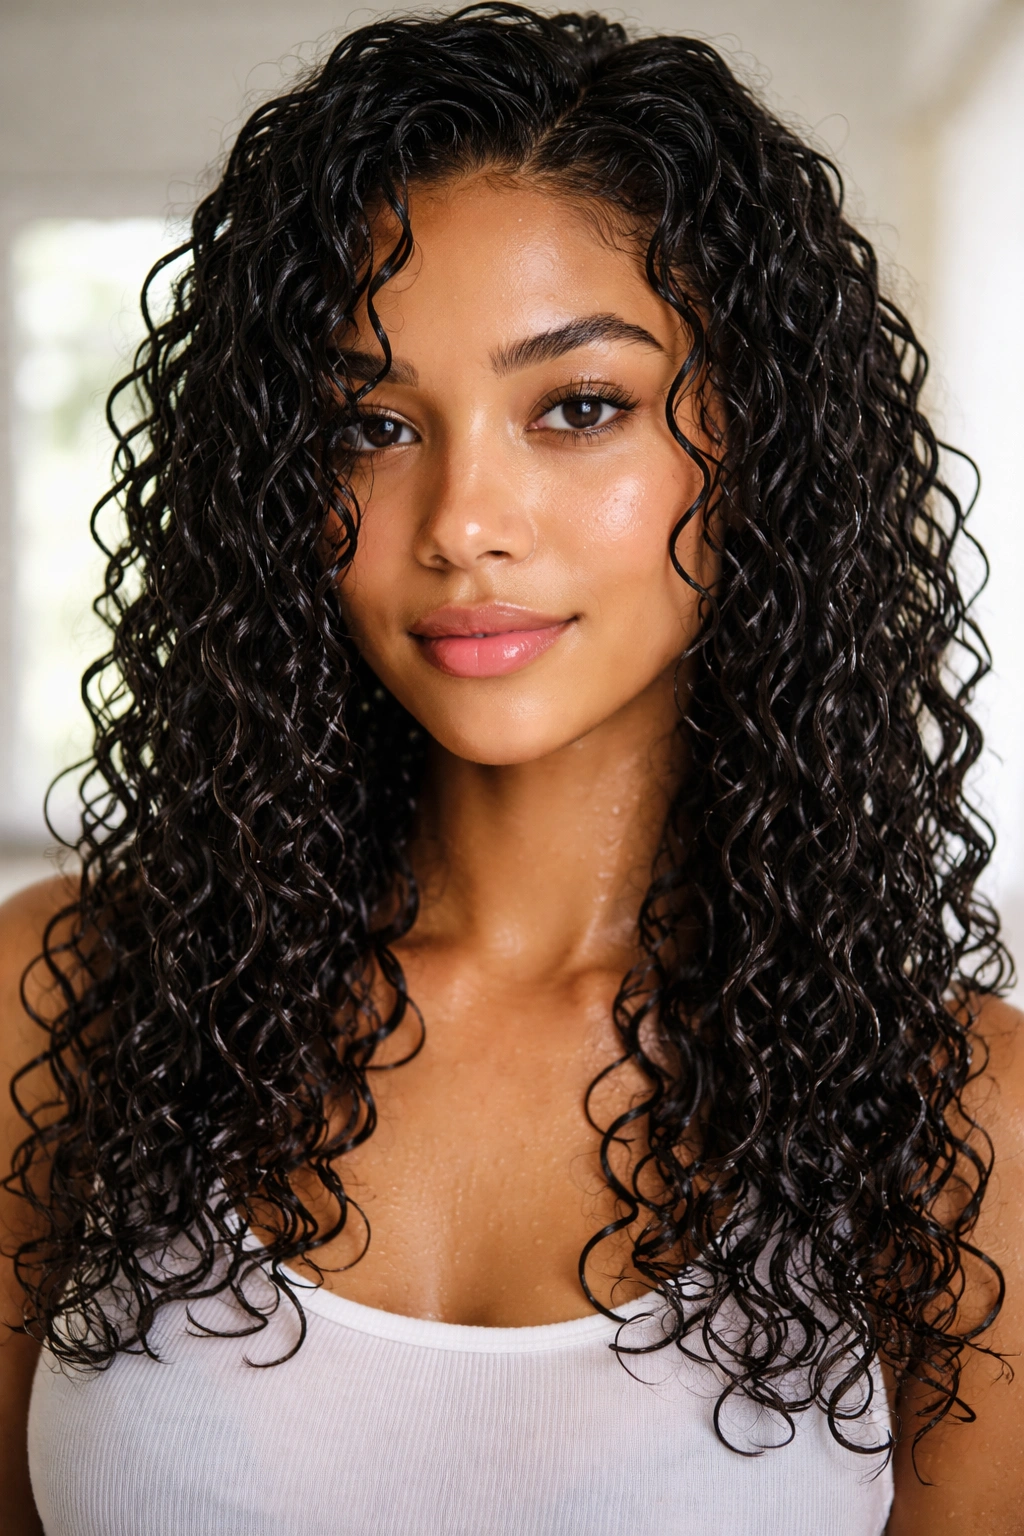
Curly hair has its own personality — and on a busy morning, that personality can feel like a full-on argument. You want your curls to cooperate. Your curls have other plans. If you’ve spent any time navigating a curly hair routine, you know that simply “throwing your hair up” doesn’t always go the way it does for your straight-haired friends. A rushed updo can stretch your curl pattern, create awkward frizz halos, or fall apart within an hour because curly hair doesn’t behave like straight hair.
The good news is that curly hair actually has a structural advantage when it comes to styling. That natural texture, volume, and grip means styles hold better, look fuller, and often improve through the day as the curls settle. The trick is working with those qualities rather than against them.
What follows are 15 genuine go-to styles for curly hair — ranging from under-two-minute options to slightly more involved techniques that reward a small investment of time with multiple days of wear. All of them require minimal equipment, no heat tools, and work across a wide range of curl types, from loose 2b waves to tight 4c coils.
The Right Tools Make Every Curly Style Easier
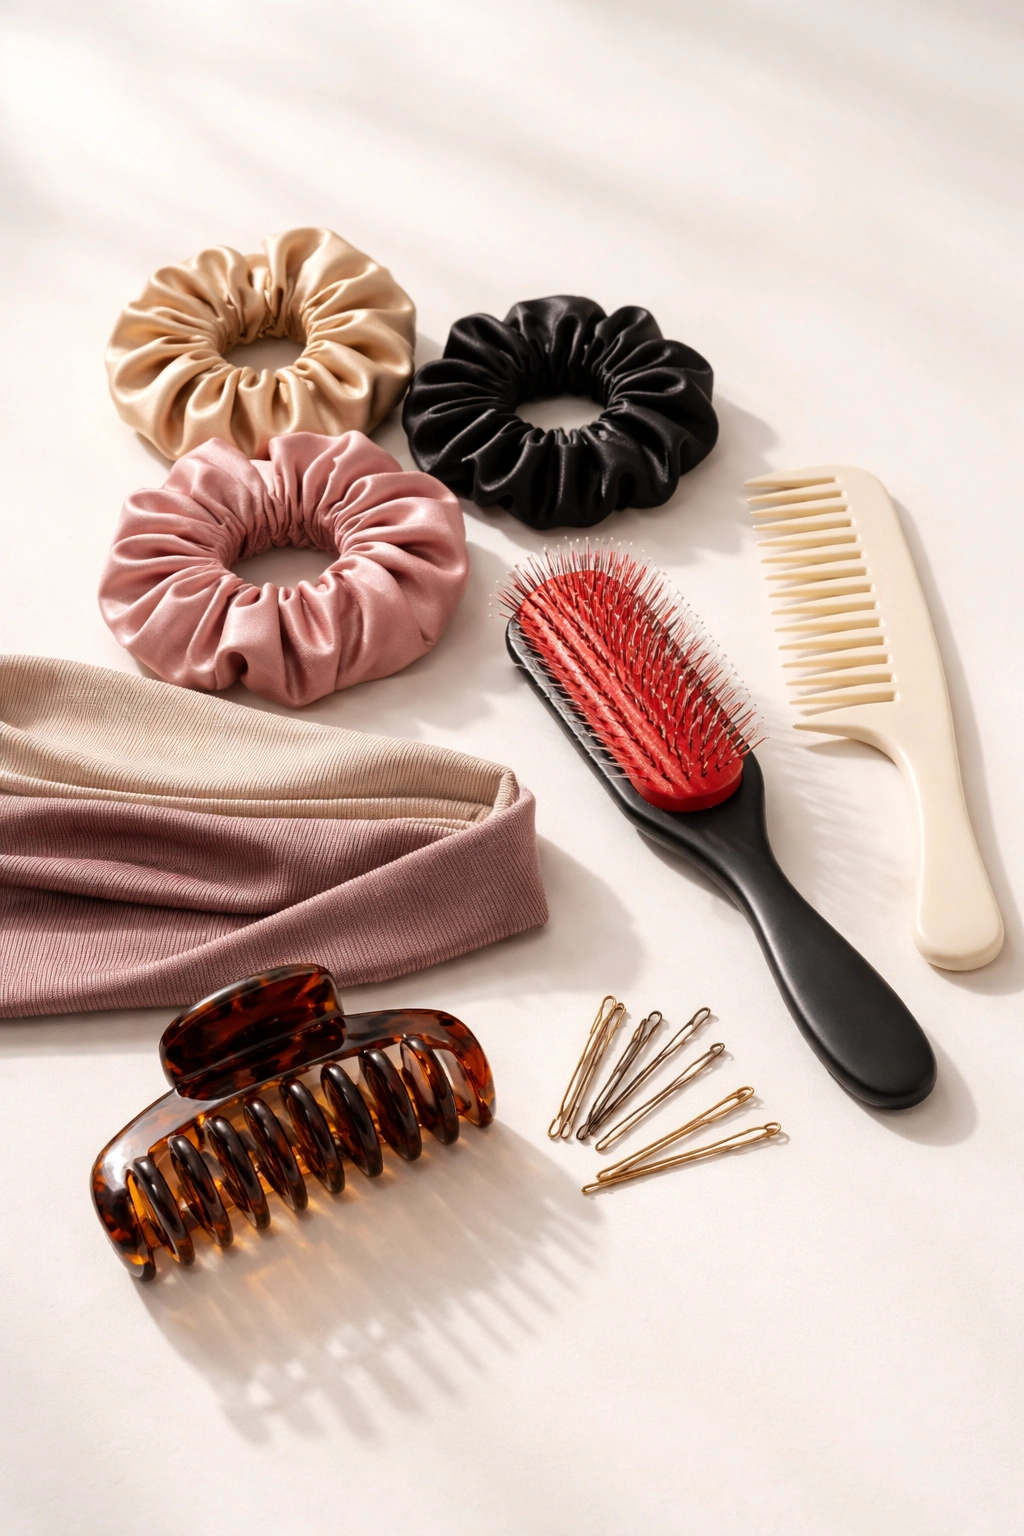
Before getting into the styles themselves, it’s worth spending a moment on the tools that make all of them work. The difference between a curly hairstyle that holds beautifully and one that collapses by noon is often the quality of the tools used — not the technique itself.
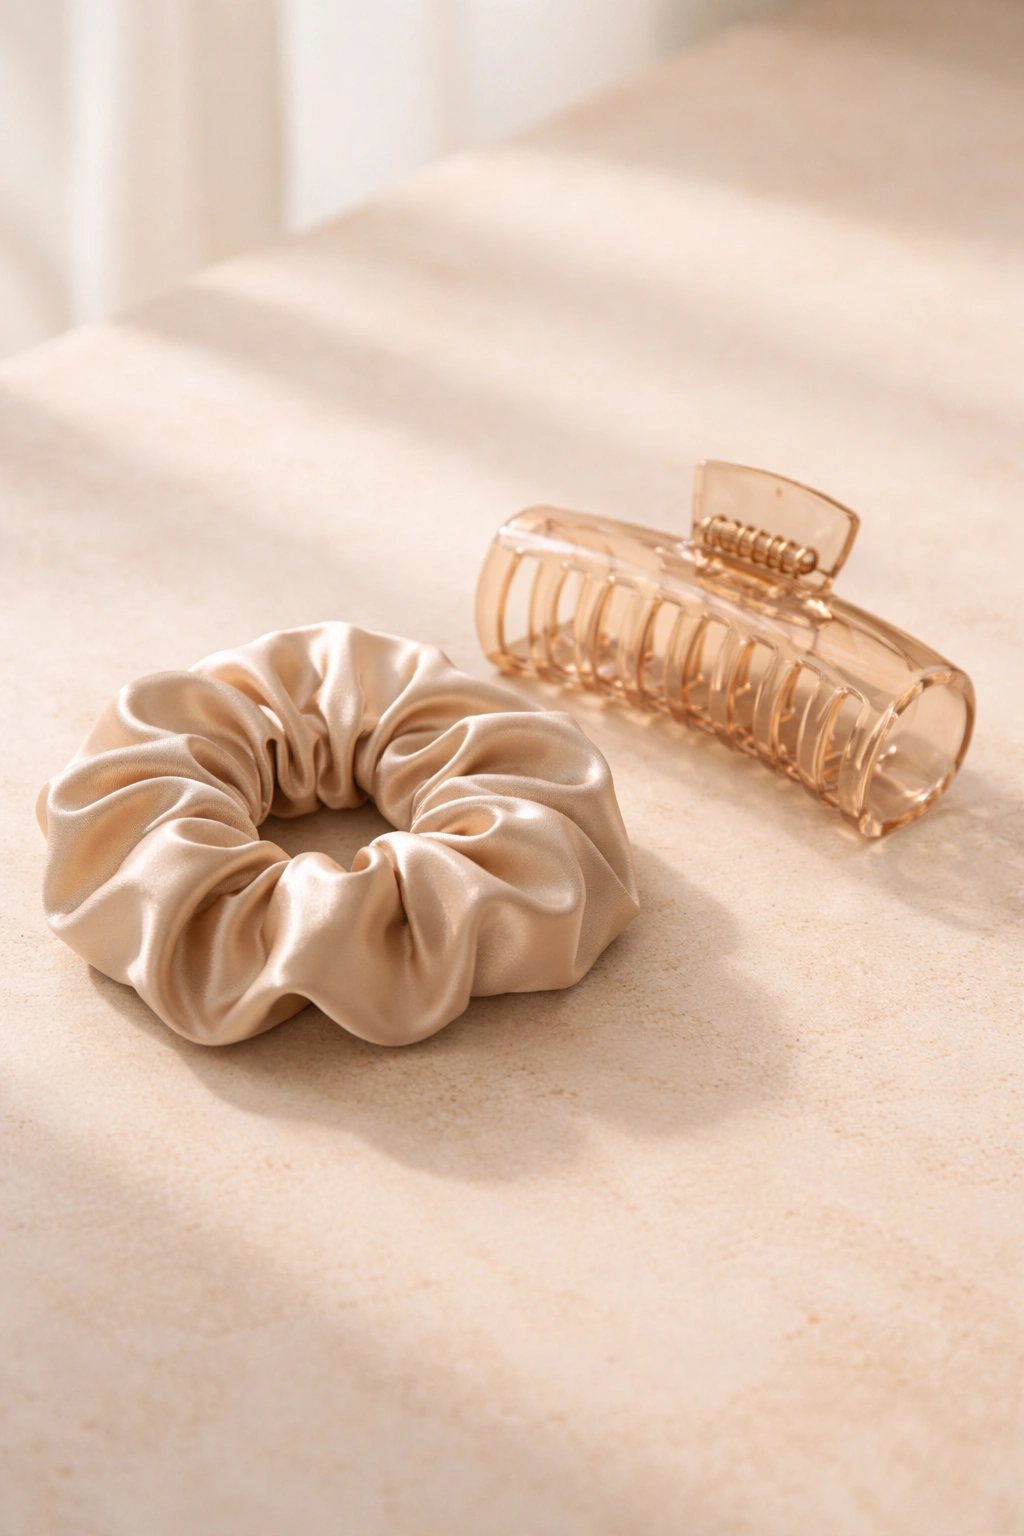
Satin or silk scrunchies are non-negotiable. Cotton and rubber elastics create friction against the hair shaft, leading to frizz, breakage, and the dreaded dent in your curl pattern. A satin scrunchie glides on smoothly and releases without pulling. Keep a few in different sizes — a thinner one for sectioned styles and a large, chunky one for full updos.
A wide-tooth comb or a Denman-style brush should be your detangling tool of choice. Fine-tooth combs and paddle brushes designed for straight hair create breakage and disrupt curl clumps in textured hair. Wide-tooth combs work through knots with minimal damage.
One large quality claw clip, a handful of wide fabric headbands, and bobby pins that match your hair color complete the basics. With just these on hand, every style in this guide becomes achievable in minutes.
A simple product lineup helps too: a lightweight leave-in conditioner, a curl-defining cream, and a flexible-hold gel cover the majority of what you’ll need. Three well-chosen staples do more than fifteen mediocre ones crowding your bathroom shelf.
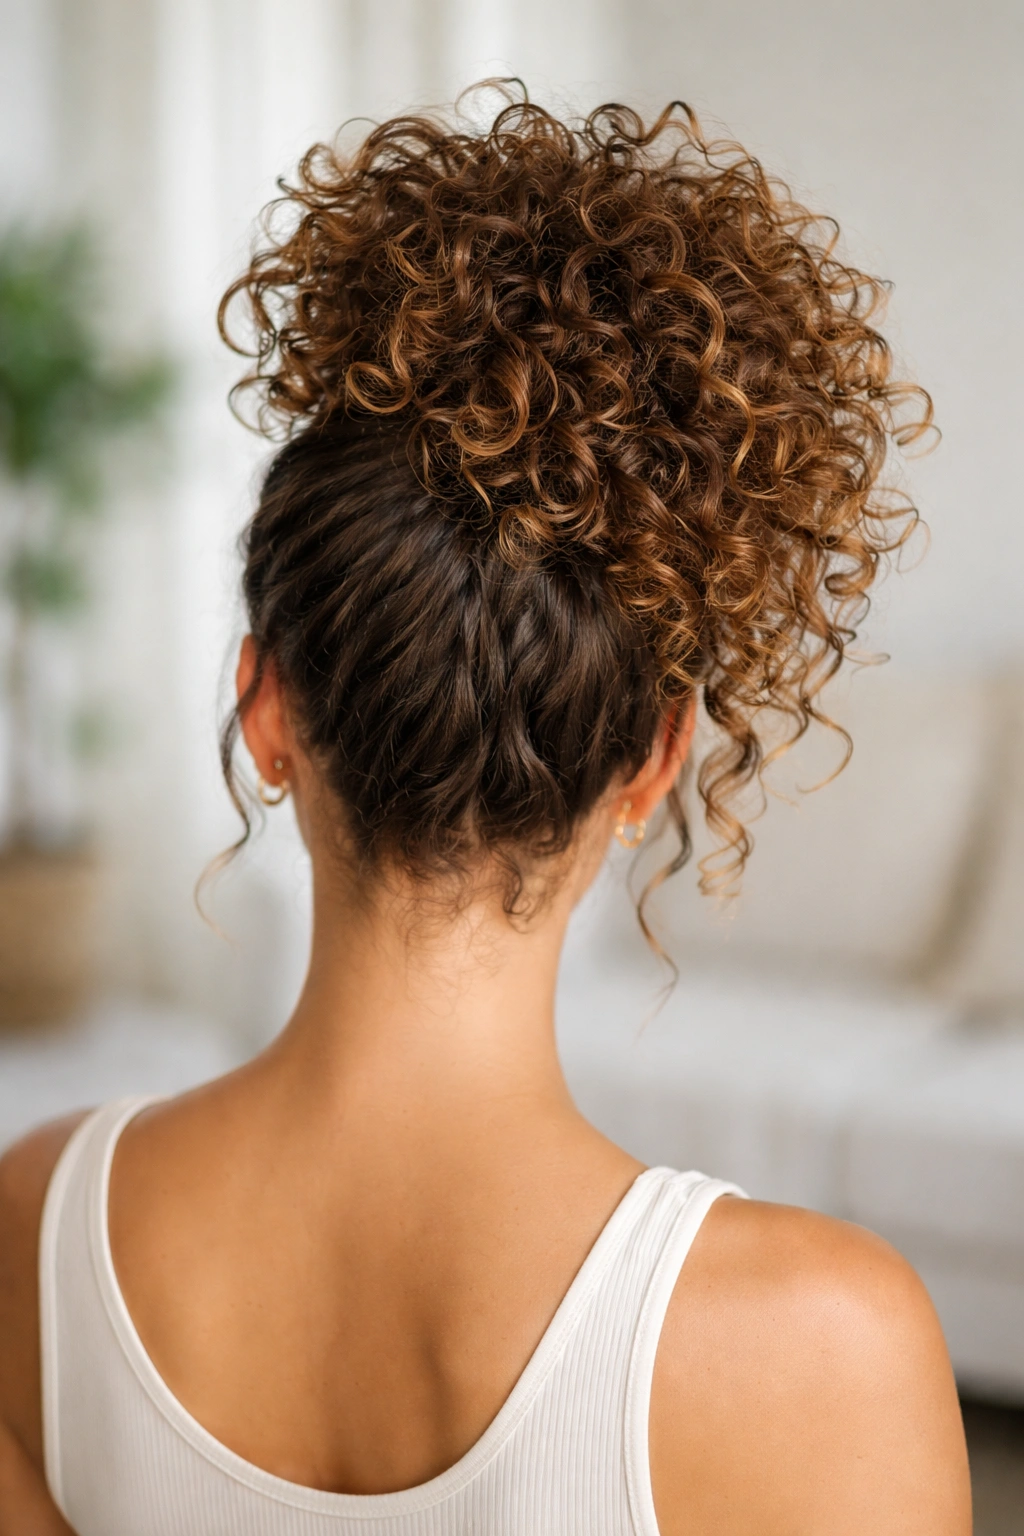
1. The High Curly Bun
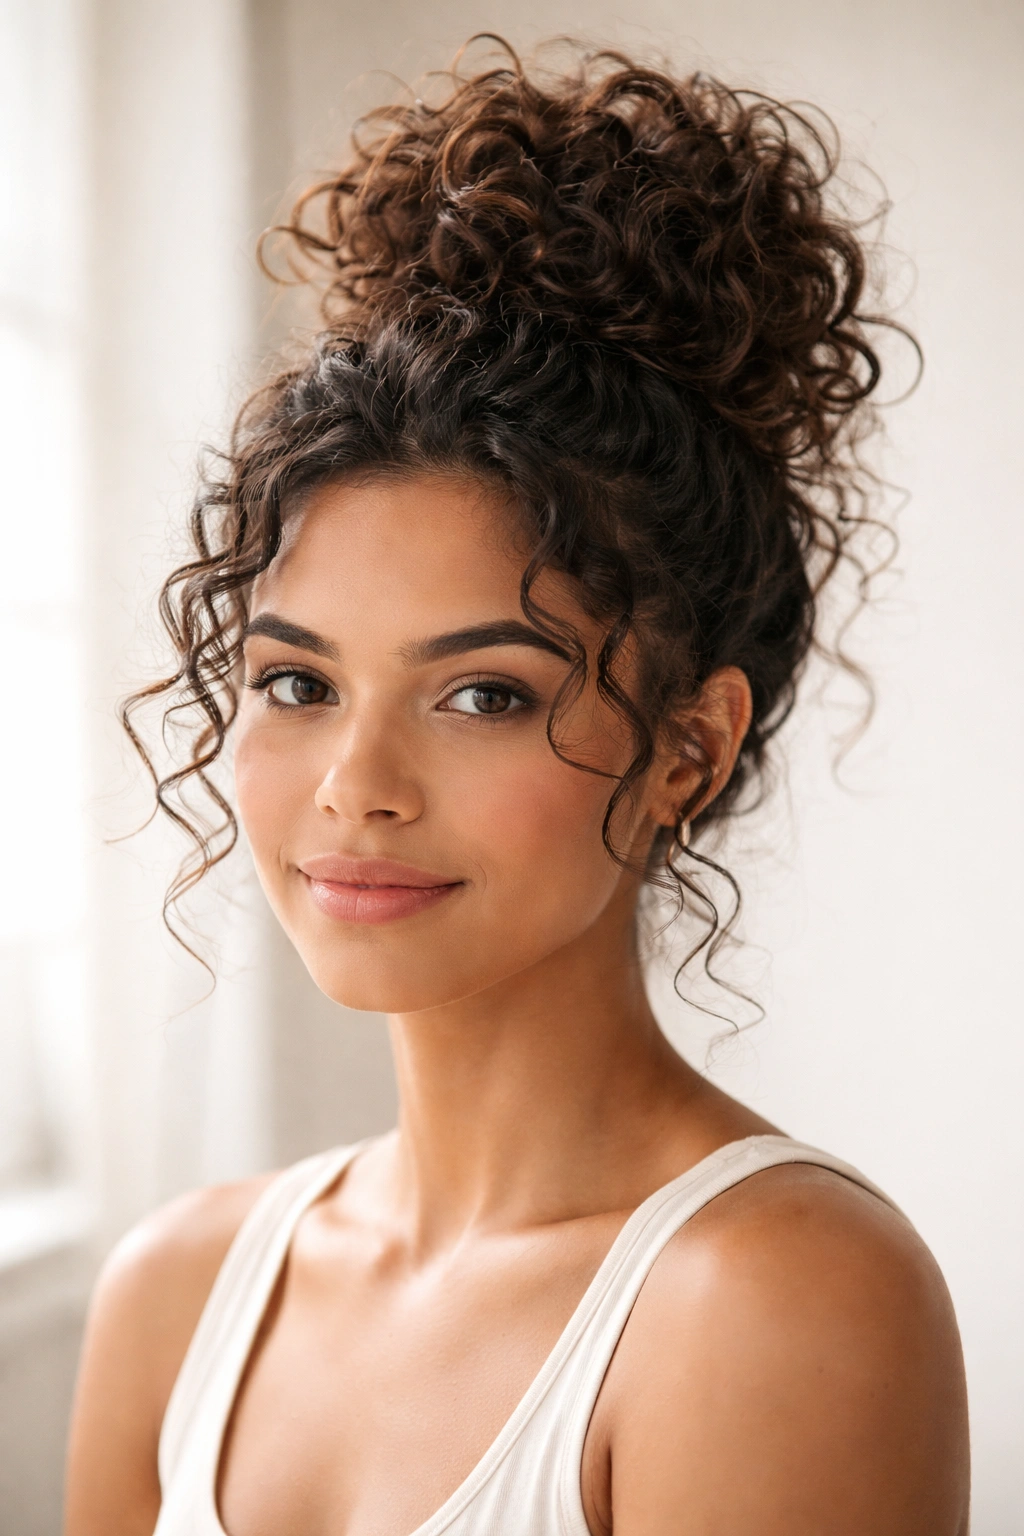
The high curly bun is the fastest, most versatile style in the curly hair toolkit. Done correctly, it looks polished and intentional — not like you gave up and wrapped your hair in a knot. The elevation at the crown adds visual length to the face and keeps hair completely off the neck and shoulders.
Why It Looks Better When It’s Slightly Imperfect
The temptation with a curly bun is to chase a smooth, sleek shape — which fights your hair’s natural texture and takes three times as long. The loose pieces, the escaped spirals, the slightly asymmetrical shape? Those are features, not flaws. They give the bun its softness and signal that your hair is healthy and full of life.
This style works best on second or third-day curls when there’s already some natural definition built in and the volume is slightly more controlled. Fresh-wash-day curls can sometimes be too fluffy for a tidy bun, so if you’re styling on wash day, a light misting of water and a small amount of curl cream gives you more workable control without deflating your curl pattern.
How to Build the Perfect High Bun
- Flip your head forward and gather all your hair toward the crown using your fingers — guide it upward, don’t drag it tightly against the scalp
- Secure with a satin scrunchie, keeping the hold loose enough that you’re not pulling at the edges or temple hairline
- Loop or twist the gathered hair once or twice and tuck the ends under to form a round shape, then secure with a second scrunchie or a few large bobby pins
- Pull 3-4 small curl sections loose at the temples and nape to frame the face — this is what separates a great curly bun from a severe one
- Spritz with a light flexible-hold spray if you need extra security through a long day
Pro tip: A second scrunchie layered over the first adds both hold and visual interest. Try a contrasting color or different fabric texture to make the scrunchie part of the look.
2. The Pineapple Updo
Originally popularized as a nighttime protective style, the pineapple has crossed over into daytime styling territory in a big way — and with good reason. It’s one of the most effortless curly styles you can wear and requires nothing but one scrunchie and about 45 seconds.
What Makes the Pineapple Stand Out
The pineapple sits at the very top of the head — further forward than a typical ponytail — and the curls cascade downward from the gathered section like the leaves of the fruit it’s named after. On longer curls, the effect is dramatic and voluminous. On tighter curl patterns, the pineapple creates a stunning high knot with individual coils hanging free at the front.
The beauty of this style is that it preserves your existing curl pattern completely. Because the gathering point is at the crown and the hold is intentionally loose, the curls retain their shape and bounce throughout the day. It’s the style equivalent of respecting your hair’s work — you’re not disrupting the pattern you already created.
How to Create the Pineapple
- Tilt your head forward and let your curls fall toward your face
- Gather all your hair at the very top of your head — the gathering point should sit closer to your forehead than the back of your head
- Secure loosely with a satin scrunchie, wrapping only once or twice — never tight
- Stand upright and let the curls fall forward naturally; don’t fight the direction they want to go
- Fluff the root area gently with fingertips for extra lift at the base
- Smooth any frizz at the sides with a small amount of edge control worked in with your fingertips
3. The Half-Up Twisted Crown
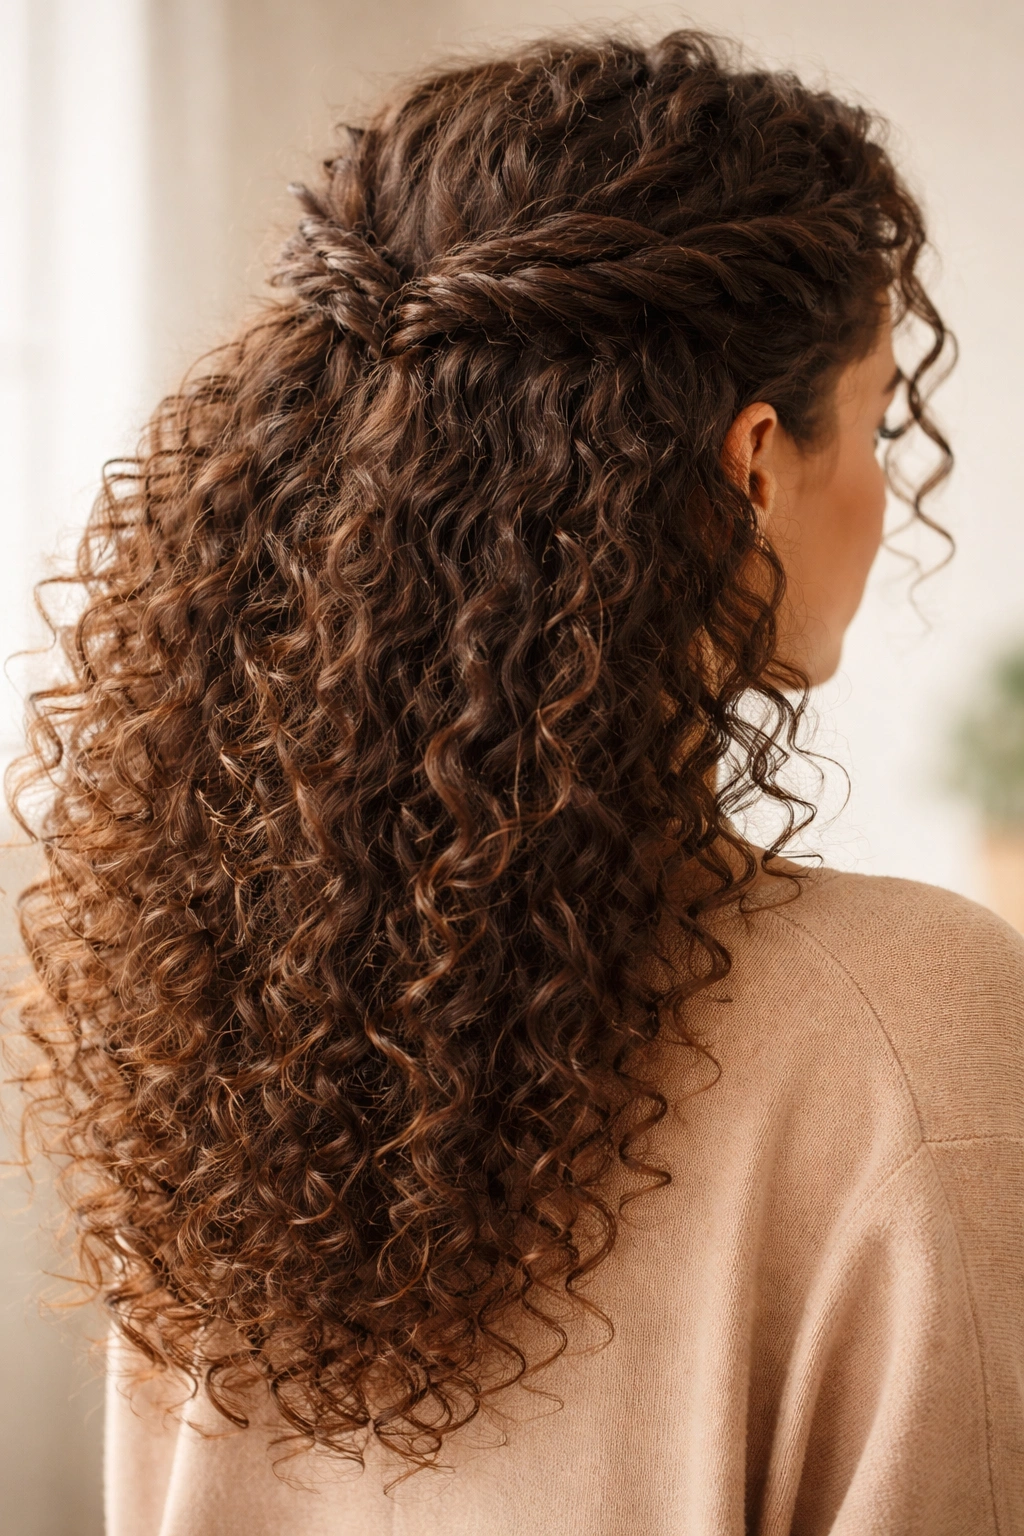
Two small front twists, pinned at the back of the crown, transform your curls from “down and loose” into a deliberate, styled look in under three minutes. The half-up twisted crown is one of those styles that earns more compliments than the effort it takes — people genuinely think you put real time into it.
How Two Small Twists Change the Whole Look
Taking a section from each temple and twisting it toward the back of the head creates a delicate detail at the crown that reads as thoughtfully styled. The rest of your curls hang free, so you’re not sacrificing your length or volume — you’re just adding a focal point that elevates the entire silhouette.
This style suits medium to longer curls particularly well because the pinned section frames the face without hiding the curl length below. It also works as a practical way to keep hair off your face during active mornings without committing to a full updo.
How to Create the Twisted Crown
- Take a 1.5-inch section from just behind your right temple
- Twist it loosely toward the back of your head, keeping the tension gentle so you don’t pull the curl pattern out of shape
- Repeat on the left side, using the same loose tension
- Cross the two twists at the center back of your crown and pin with 2-3 bobby pins, tucking the ends under
- Release your remaining curls and finger-detangle gently to encourage volume and separation
Pro tip: Twist in the same direction as your natural curl pattern. Twisting against it lifts the cuticle and creates frizz at the twist that’s difficult to smooth out without product.
4. The Low Curly Ponytail
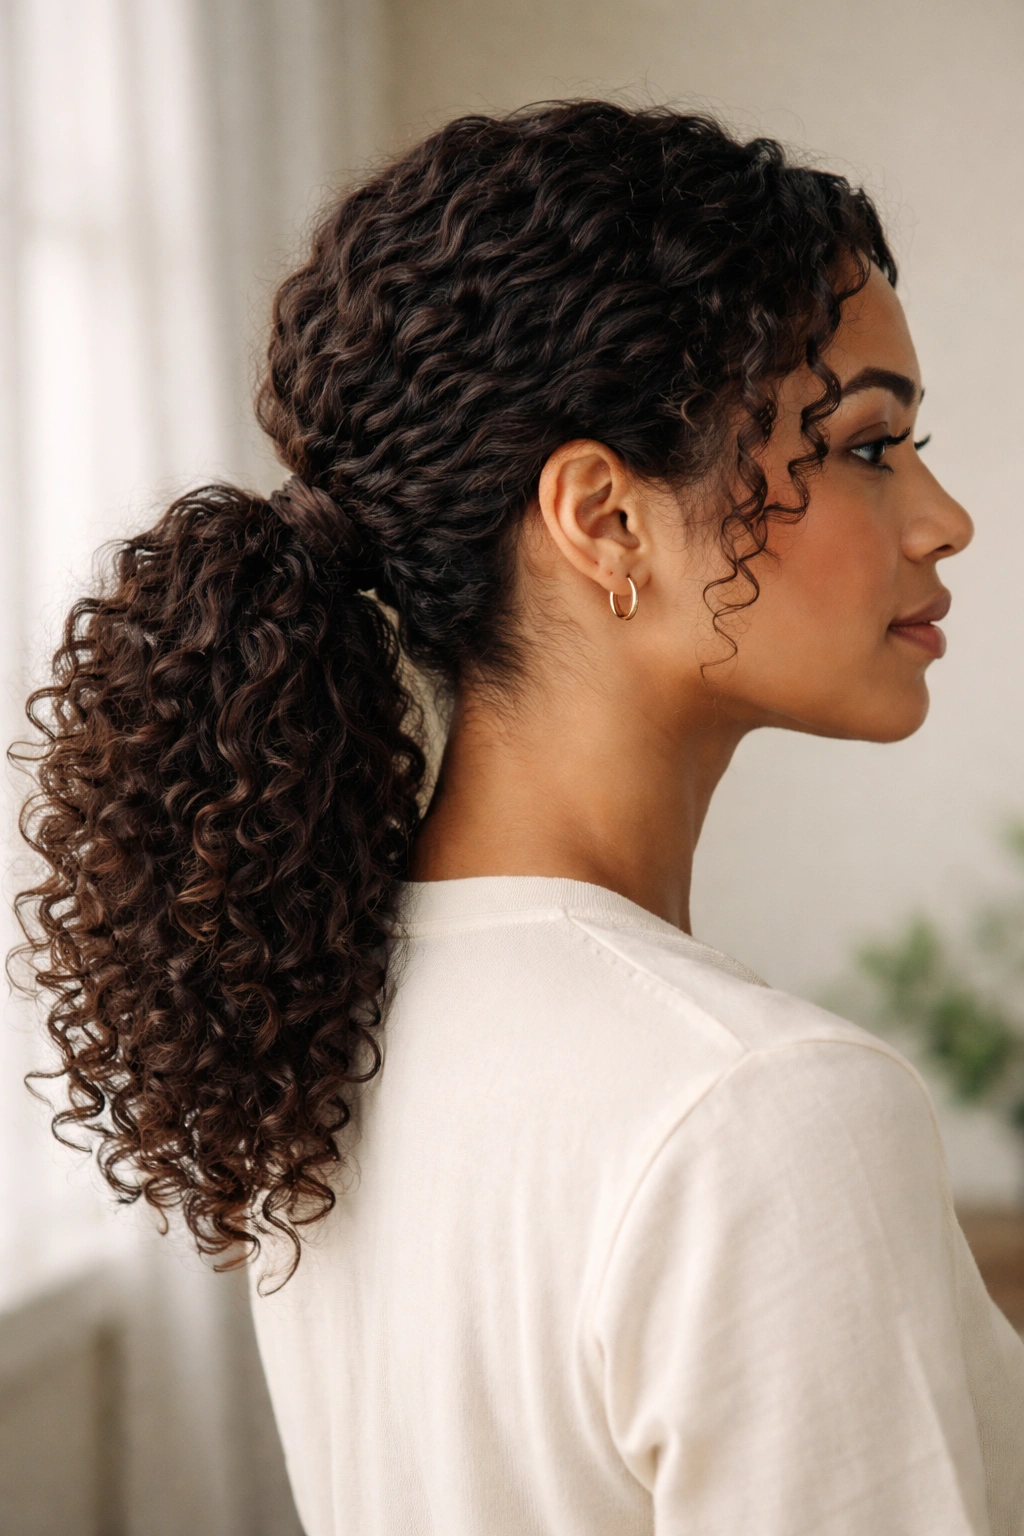
The low ponytail has an understated elegance on curly hair that no other style quite matches. Where a low pony can look flat and plain on straight hair, curly hair’s natural volume and body fill it out into something polished and full-looking — especially at the nape where the curls have the most density.
Why Lower Is Often Better for Curly Hair Health
High ponytails place consistent tension on the hairline, particularly on the edges, which are the most fragile part of curly and coily hair textures. A low ponytail placed at the nape distributes the weight more evenly and reduces the chronic pull that leads to thinning and breakage at the temples over time.
Beyond the health benefits, the low ponytail also works better in professional and formal settings where a high puff or messy bun might feel too casual. It’s a quietly impressive style that communicates effort without looking overdone or attention-seeking.
How to Create a Polished Low Ponytail
- Gather your curls loosely at the nape — resist the urge to pull them tightly from the front hairline
- Secure with a covered elastic or satin scrunchie
- Wrap a small strand of curl around the base of the ponytail to conceal the elastic, then pin the end underneath with a bobby pin
- Let any short pieces at the temples fall freely as natural face-framers rather than trying to smooth them back
- Apply a small amount of curl cream to the ponytail and scrunch gently to revive any curls that flattened during gathering
5. The Messy Curly Bun With a Chunky Scrunchie

The messy curly bun fully leans into the inherent looseness and personality of curly hair — and when done correctly, it looks like something that belongs on a fashion editorial, not just a rushed Tuesday morning. The curls that escape, the pieces that won’t lie flat, the slight asymmetry of the shape? All of that is the style.
The Art of Intentional Imperfection
The secret to a great messy curly bun is doing less, not more. Every time you try to fix a loose piece or smooth out a bump, you make the style look more labored and less natural. The goal is a bun that looks like it came together effortlessly — because at its best, it genuinely should.
Choosing the right scrunchie makes a significant difference here. A large velvet or ribbed fabric scrunchie becomes a visual element of the look rather than just a utility item. It adds color, texture, and personality to a style that might otherwise look unfinished. Coordinate your scrunchie color with your outfit and the messy bun immediately reads as styled, not sloppy.
How to Build the Messy Bun
- Gather hair at a low or mid-height position — not quite a topknot, not all the way down at the nape
- Wrap the scrunchie around the gathered hair, but on the last loop, don’t pull the ends all the way through — leave a loose loop of hair partially out
- Pull the bun shape apart slightly with your fingertips to widen and relax it
- Tug 4-5 individual curls loose around the face and at the nape
- Resist fixing it — the undone quality is the point, and the more you fuss, the less effortless it looks
6. The Twist-Out Style
The twist-out is a pre-styled technique that takes a bit of investment upfront but rewards you with days of defined, beautiful curls that require almost no morning effort. Once you’ve dialed in your personal recipe — the products, the section sizes, the dry time — it becomes one of the most reliable styles in your entire rotation.
Why One Night of Work Buys You Three to Five Days of Style
The setup happens on wash night: apply products to clean damp hair, divide into sections, twist each section from root to tip, sleep on it protected by a satin bonnet or pillowcase, and wake up to fully formed curls. On day one, the unraveled twists show tight, defined, elongated spirals with serious shine. By day two, the curls loosen into a fuller, more voluminous shape. By day three, the volume is at its peak.
Each day of a twist-out is genuinely a different style — from precise and defined, to big and bouncy, to soft and free. Refresh between days with a light mist of water and a small amount of curl cream, scrunching gently to re-activate the pattern.
How to Create a Twist-Out
- Apply leave-in conditioner and a curl-defining cream to damp, freshly washed hair, working in sections so every strand is coated
- Divide hair into 8-16 sections depending on thickness and desired tightness
- Take each section, split into two equal strands, and twist them firmly around each other from root to tip
- Allow to dry completely — air dry or use a hooded dryer, but do not unravel until the hair is 100% dry or the curl shape won’t set
- Apply a small amount of oil to fingertips, then gently unravel each twist in the direction it was wound
- Separate curls with fingers only — a comb breaks up the defined pattern and causes frizz
7. The Side-Swept Curl Tuck
Not every curly hairstyle needs to go up. Sometimes the most flattering thing you can do is sweep everything to one side, tuck a section behind an ear, and let your texture do the work. The side-swept tuck takes about 60 seconds but creates an asymmetrical shape that’s both striking and practical.
How Asymmetry Works in Your Favor
Side-swept styles create a diagonal line across the head that naturally draws the eye upward toward the face, elongating the neck and highlighting the jawline. On curly hair, that sweep also showcases the full depth and texture of your curl pattern in a way that centered styles don’t always achieve.
This works particularly well for medium to longer curls, and it’s a reliable option when your curls are well-defined from a recent wash or twist-out but you want to keep everything off one side of your face during a busy day.
How to Create the Side Tuck
- Part your hair on one side, deeper than your natural part if possible
- Sweep the larger section entirely behind one ear and pin with a large decorative clip or 2-3 bobby pins at the temple
- Allow the smaller section to fall naturally near the face
- Tuck individual curls further behind the ear on the secured side for a clean, intentional line
- Optional: use a single oversized tortoiseshell barrette at the temple instead of bobby pins — it makes the look immediately feel editorial
Worth knowing: The larger your clip or barrette, the more deliberate the style reads. A tiny pin looks incidental; a large statement piece looks intentional.
8. The Braided Crown Headband
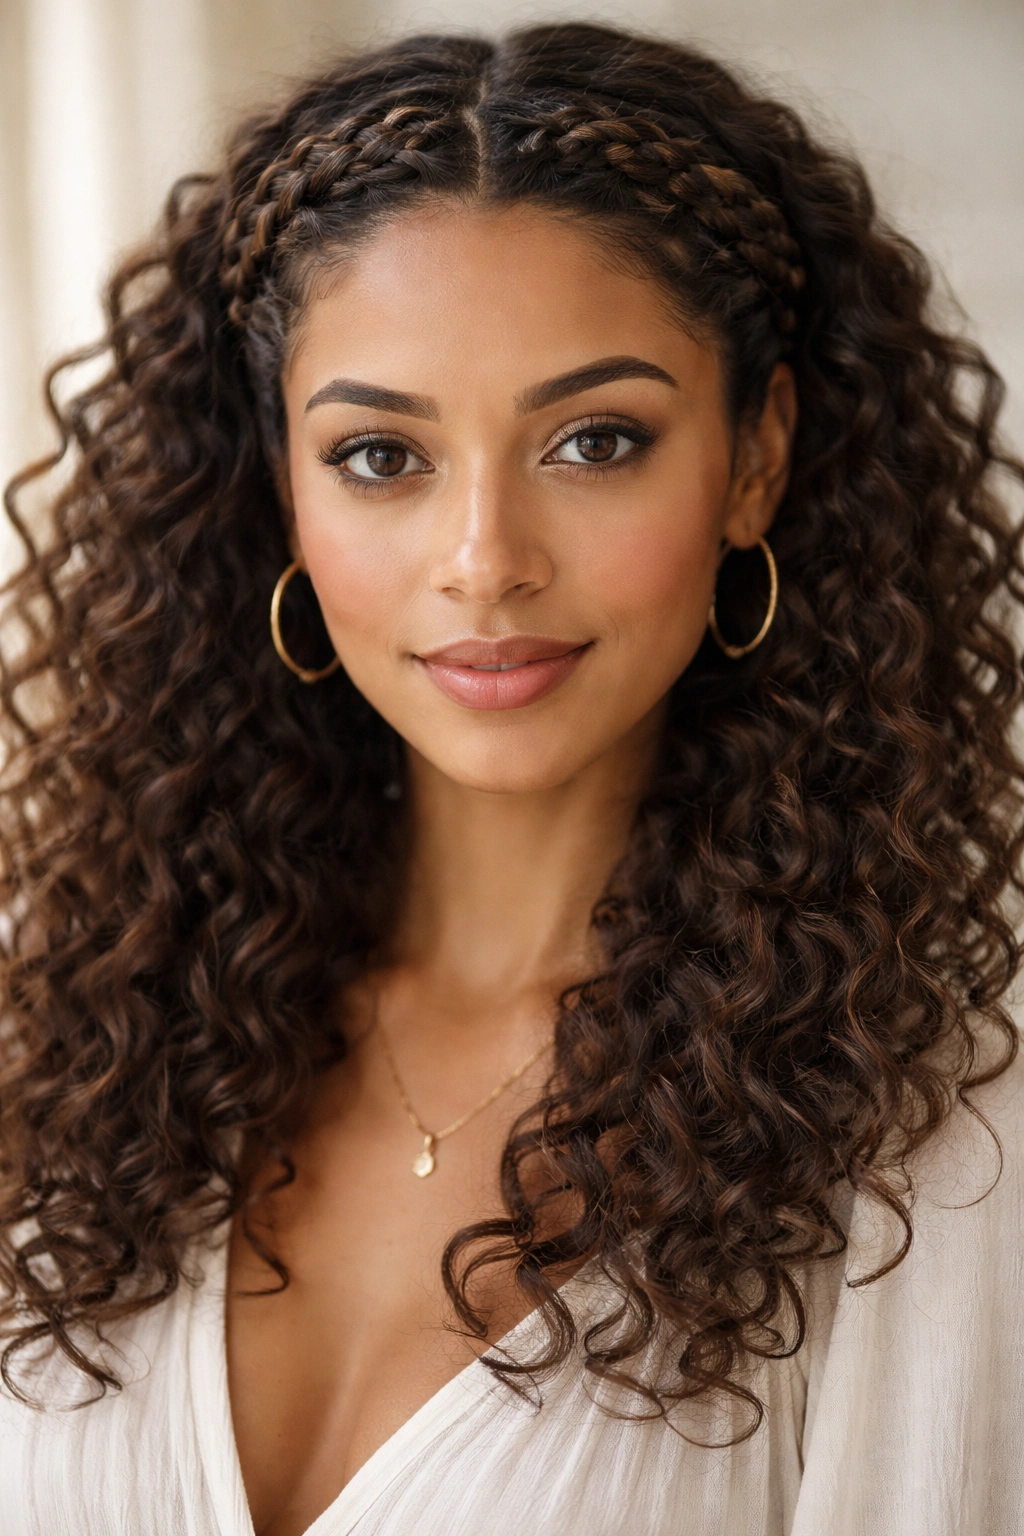
A small braid running along the hairline from one temple to the other creates a crown effect that frames the face beautifully while the rest of your curls hang completely free. It looks intricate. It’s actually straightforward. And it becomes genuinely fast once you’ve done it two or three times and the motion becomes automatic.
How Curly Hair Actually Makes Braiding Easier
Hair with texture and natural grip holds itself together during braiding better than slippery straight hair does. The curl texture creates friction between strands that keeps the braid cohesive without requiring tight tension — which means a more relaxed, organic-looking braid that suits this style perfectly.
The crown braid works particularly well on oval, round, and heart-shaped faces because it creates a horizontal line across the upper third of the face that balances and softens facial proportions. It also keeps hair off the face through a full active day without the pulling sensation of a tight updo.
How to Create the Crown Braid
- Starting at one temple, take a 1-inch section of hair from along the hairline
- French or Dutch braid this section across the front of the head toward the opposite temple, adding small amounts of new hair from the hairline with each stitch
- Keep the tension loose and relaxed — a tight crown braid looks severe; a loose one looks intentionally romantic
- Secure the end behind the opposite ear with a small clear elastic
- Tuck the tail under the remaining curls and pin with a bobby pin so the end disappears into the style
9. The Wash-and-Go With Defined Curl Clusters
A properly executed wash-and-go is one of the most stunning things curly hair can achieve — and it requires no manipulation beyond applying the right products to wet hair and stepping away. The challenge is understanding that this style only looks effortless when the product application is deliberate and precise.
The Technique That Actually Makes It Work
The single most common mistake is applying products to damp or partially dried hair. Products need to be applied to hair that is literally dripping wet — every curl saturated, every section coated — so that as the hair dries, the product encapsulates each curl clump and holds the shape from wet to dry. Applying to damp hair leads to uneven product distribution, inconsistent definition, and frizz in the sections that were missed.
The second non-negotiable: leave the hair completely alone while it dries. Every time you touch it — to check a section, separate a clump, smooth a frizzy piece — you break the forming product cast and create a frizz point that won’t recover.
Product Layering for Full-Day Definition
- Start with hair that is literally soaking wet from the shower — do not towel dry before applying product
- Apply a generous amount of leave-in conditioner using smooth “prayer hands” rather than scrunching, to coat each curl without disrupting the clump structure
- Apply curl-defining gel over the leave-in, working through 4-8 sections for even coverage
- Scrunch gently from ends to roots to encourage curl formation and help the product penetrate
- Keep your hands out of your hair while it dries — no exceptions
- Once completely dry, break the gel cast by scrunching firmly with a microfiber towel or a soft cotton T-shirt to release any crunch and reveal soft, shiny, defined curls underneath
10. The High Puff Ponytail
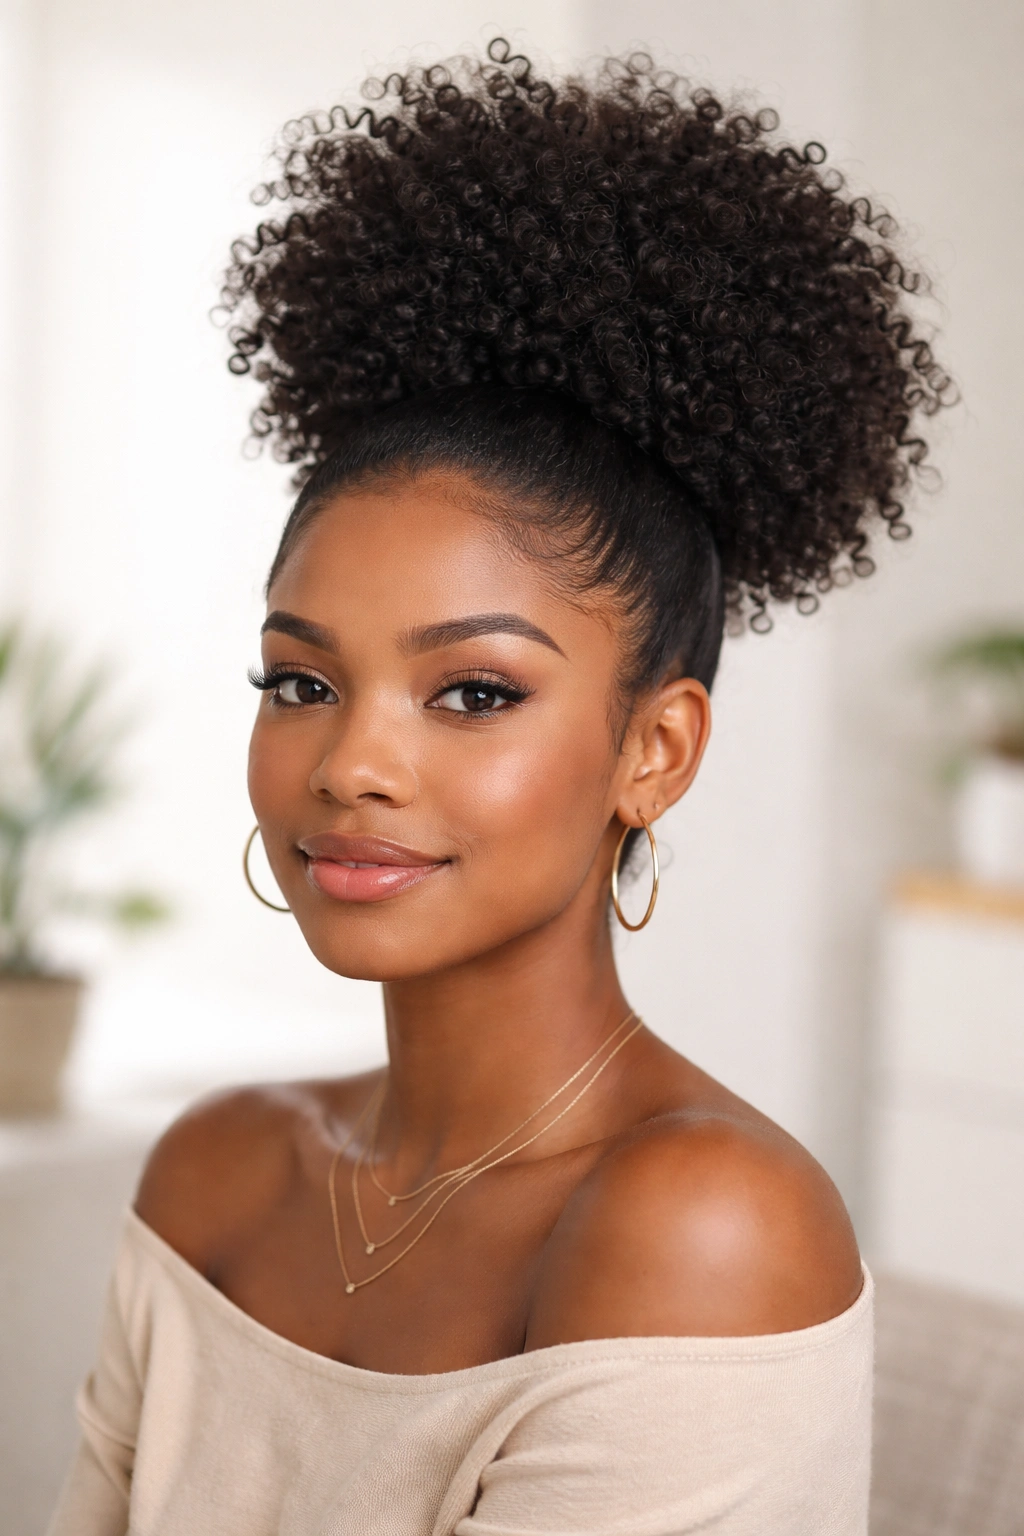
For tighter curl patterns — 3c through 4c — the high puff ponytail is an icon. It celebrates exactly what makes tight coils unique: the incredible natural volume, the sculptural shape, the way shrinkage concentrates curl density at the crown into something that looks effortlessly magnificent.
When Shrinkage Is the Whole Point
Tight curls shrink dramatically when dry, which concentrates a large amount of hair into a dense, rounded shape above the elastic. The high puff is one of the few styles where shrinkage works entirely in your favor — the more compact your coils, the more impressive the puff shape becomes.
Adjusting the tightness of your gathering changes the silhouette: a loose gathering creates a rounded globe shape; a slightly firmer gathering creates a more defined, lifted dome. Both are beautiful — it comes down to the occasion and personal preference.
How to Build the High Puff
- Flip your head forward and gather all hair toward the crown using a wide-tooth pick comb or your fingers — a fine-tooth comb will cause breakage in tight textures
- For a sleeker base, apply edge control along the hairline and smooth with a soft-bristle brush before securing
- Secure with a thick satin scrunchie, keeping the tie positioned at the very top of the head
- Fluff the puff by pulling individual curl sections outward and upward with your fingers
- Use a wide-tooth afro pick at the base of the puff to lift the roots for maximum volume and height
11. The Twisted Half Bun
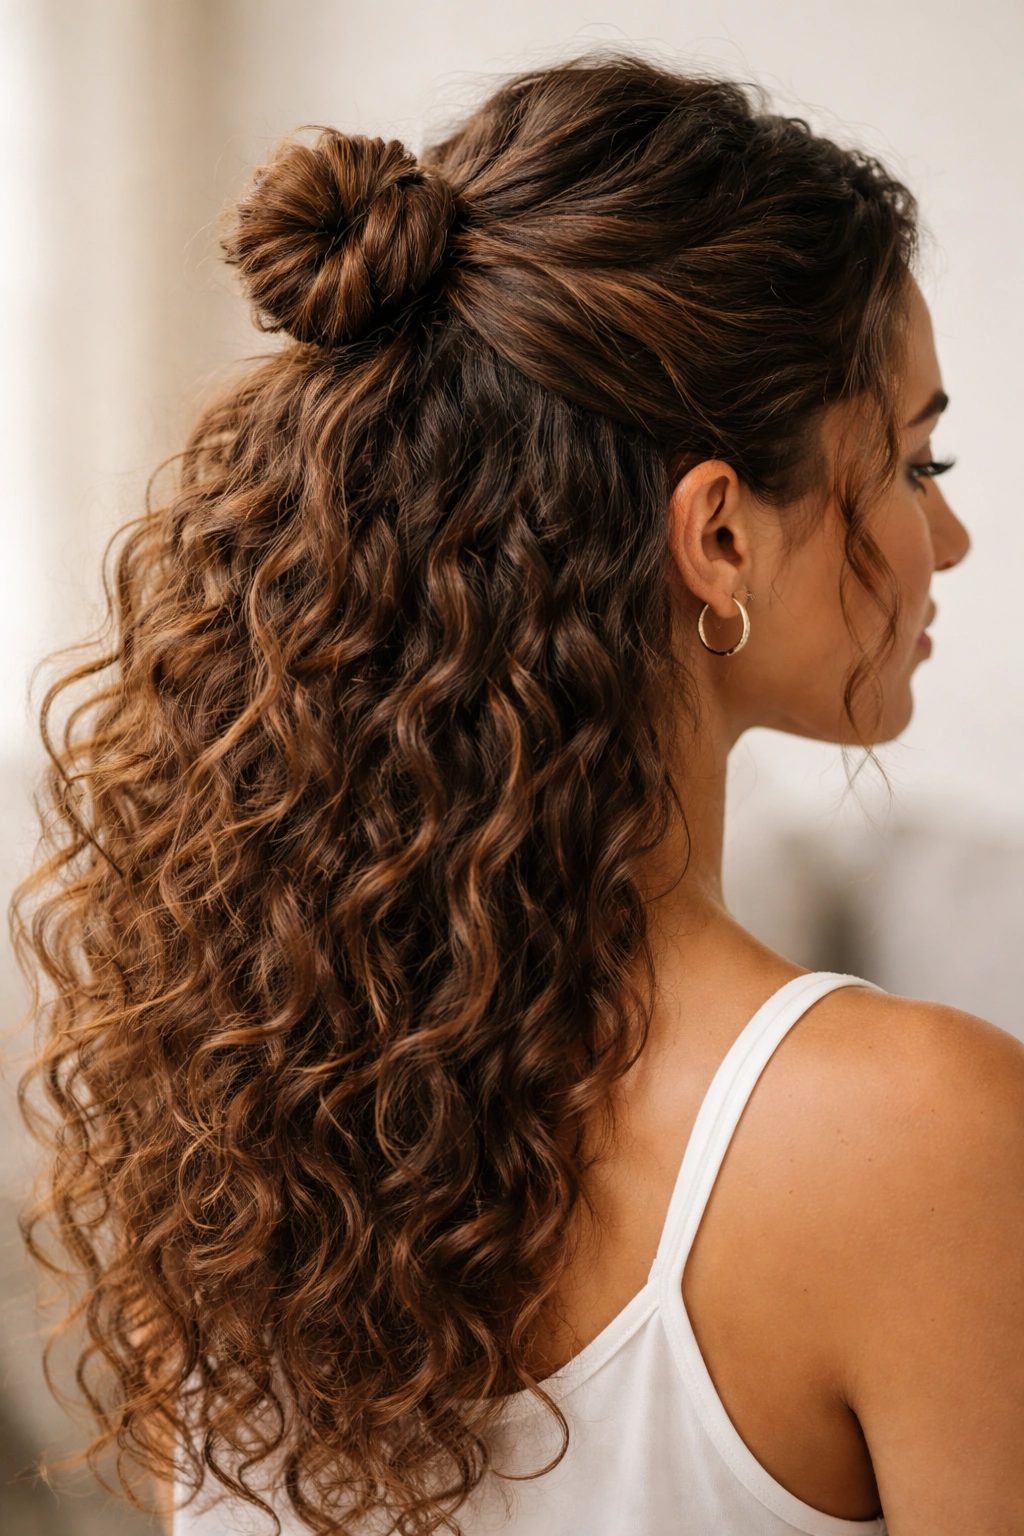
The twisted half bun takes the standard half-up ponytail and improves it with a single added detail: a two-strand twist in the gathered section before securing. That spiral adds texture, dimension, and movement to what is otherwise a flat, uneventful crown section.
Why the Twist Changes Everything
Without the twist, the top section of a half-up style can look deflated, especially on second or third-day curls that have lost some of their original definition. Adding a twist reintroduces texture and movement at the crown and creates a deliberate focal point that makes the style read as fresh regardless of which day of the week your hair is on.
A tight twist looks neater and shows its spiral shape clearly. A loose, casual twist reads as more relaxed and suits low-key settings. Either version takes approximately 90 seconds from start to finish.
How to Create the Twisted Half Bun
- Separate the top third of your hair from the rest and clip the bottom section out of the way temporarily
- Divide the top section into two equal halves
- Twist the two halves around each other in the same direction as your natural curl
- Fold the twisted length back on itself into a loose knot and secure with bobby pins or a small claw clip
- Release the bottom section and finger-separate the curls gently to encourage volume and separation below the bun
12. The Wide Headband Tuck
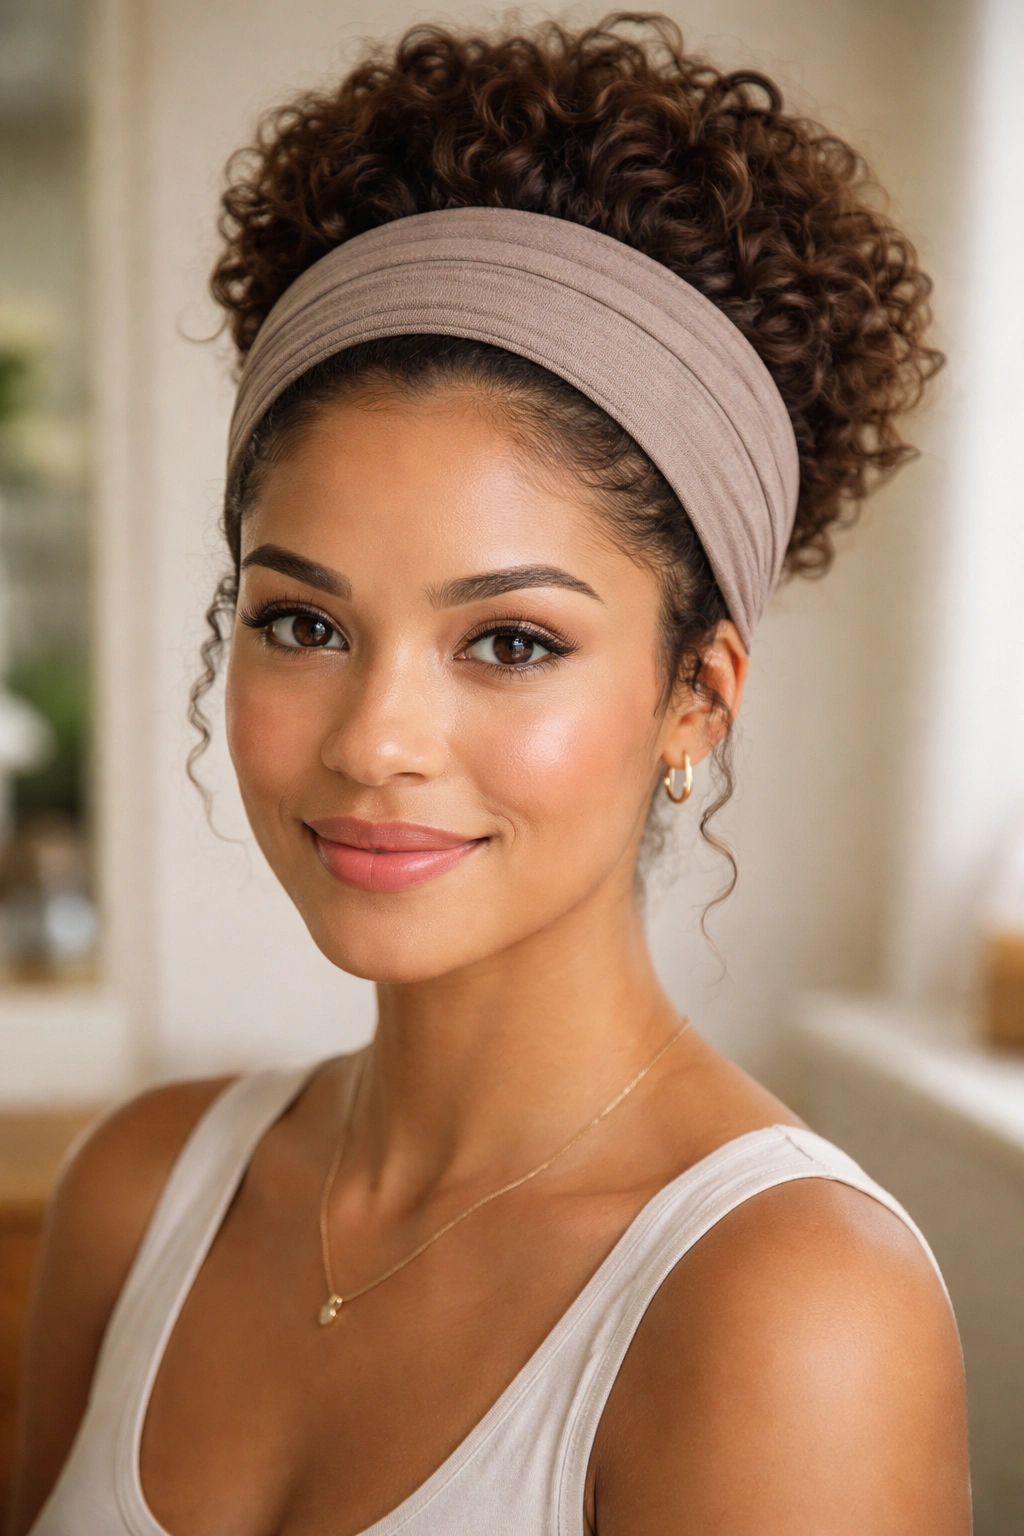
A wide stretchy or rigid headband does double duty for curly hair: it smoothes the edges and frames the face at the front while also acting as a structural support for tucking and rolling the rest of your hair up and back. The headband tuck looks like a vintage rolled updo but comes together in about three minutes.
Why Headbands Are Underrated Styling Tools
Wide headbands distribute pressure across a broad section of the hairline rather than concentrating tension at a single point the way a ponytail elastic does. This makes them a gentler option for edges and fine hairline hair — replacing daily elastic use with headband-based styling can make a noticeable difference in edge health over time.
Wide fabric headbands also work beautifully on day-old curls that might not be defined enough to wear down freely. The headband contains the silhouette at the edges while the tucked sections create a structured shape that doesn’t require any product or effort to look intentional.
How to Create the Headband Tuck
- Place a wide stretchy headband like a crown, sitting a few inches back from the hairline
- Take 1-inch sections from the front and sides and tuck them up, over, and under the headband, rolling them away from the face
- Continue tucking sections all the way around the head, or leave the back loose for a different silhouette and more curl length on display
- Fluff the tucked sections gently with fingertips for volume and adjust the headband forward or back to find your most flattering placement
- Mist lightly with a flexible-hold spray to keep everything in position through a long day
13. The Bantu Knot-Out
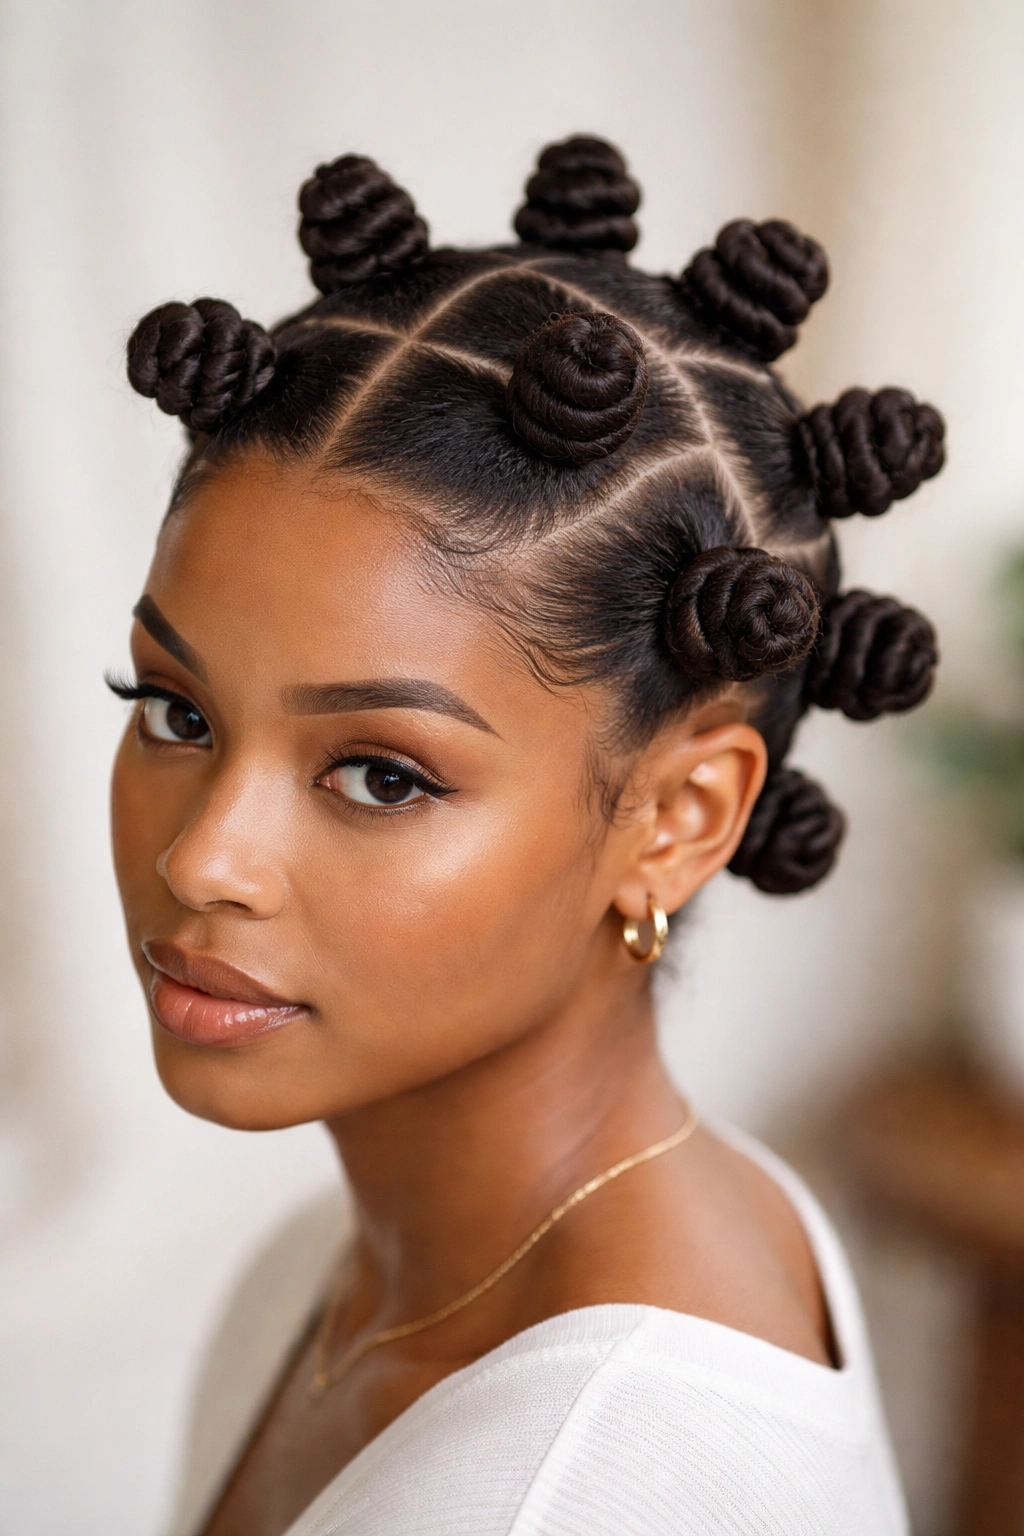
Bantu knots are a traditional African protective hairstyle with deep roots in Zulu culture, and they genuinely serve two purposes simultaneously: the knots themselves are a striking finished style, and when unraveled after drying, they release beautifully defined, springy coils that hold their shape for multiple days of wear.
Two Styles, One Technique
This is the true value of the Bantu knot approach — you’re setting up the next several days of style, not just today’s look. Worn as knots, the style is sculptural, bold, and celebration-worthy in its own right. Worn unraveled, the released coils tend to be tighter and more defined than a standard twist-out, with a rounded, spring-like bounce and serious shine.
Smaller sections create tighter, more compact coils when unraveled; larger sections create looser, more romantic curls. Once you know your preferred result, you can adjust your section sizes to produce the same outcome consistently every time.
How to Create Bantu Knots
- Start with freshly washed, damp hair with leave-in conditioner and curl cream already worked in thoroughly
- Divide hair into 8-16 sections depending on desired tightness, clipping each out of the way as you work
- Take one section and two-strand twist it from root to tip, then coil the twisted length tightly around its own base in a clockwise spiral
- Tuck the end firmly under the coiled knot to hold it in place — no elastic needed when the knot is wound tightly enough
- Allow to dry completely before unraveling — this step cannot be rushed; unraveling partially dry knots produces frizzy, undefined results
- To unravel: apply a single drop of oil to your fingertips and gently unwrap each knot in the opposite direction it was coiled
14. The Bobby Pin Fan Detail
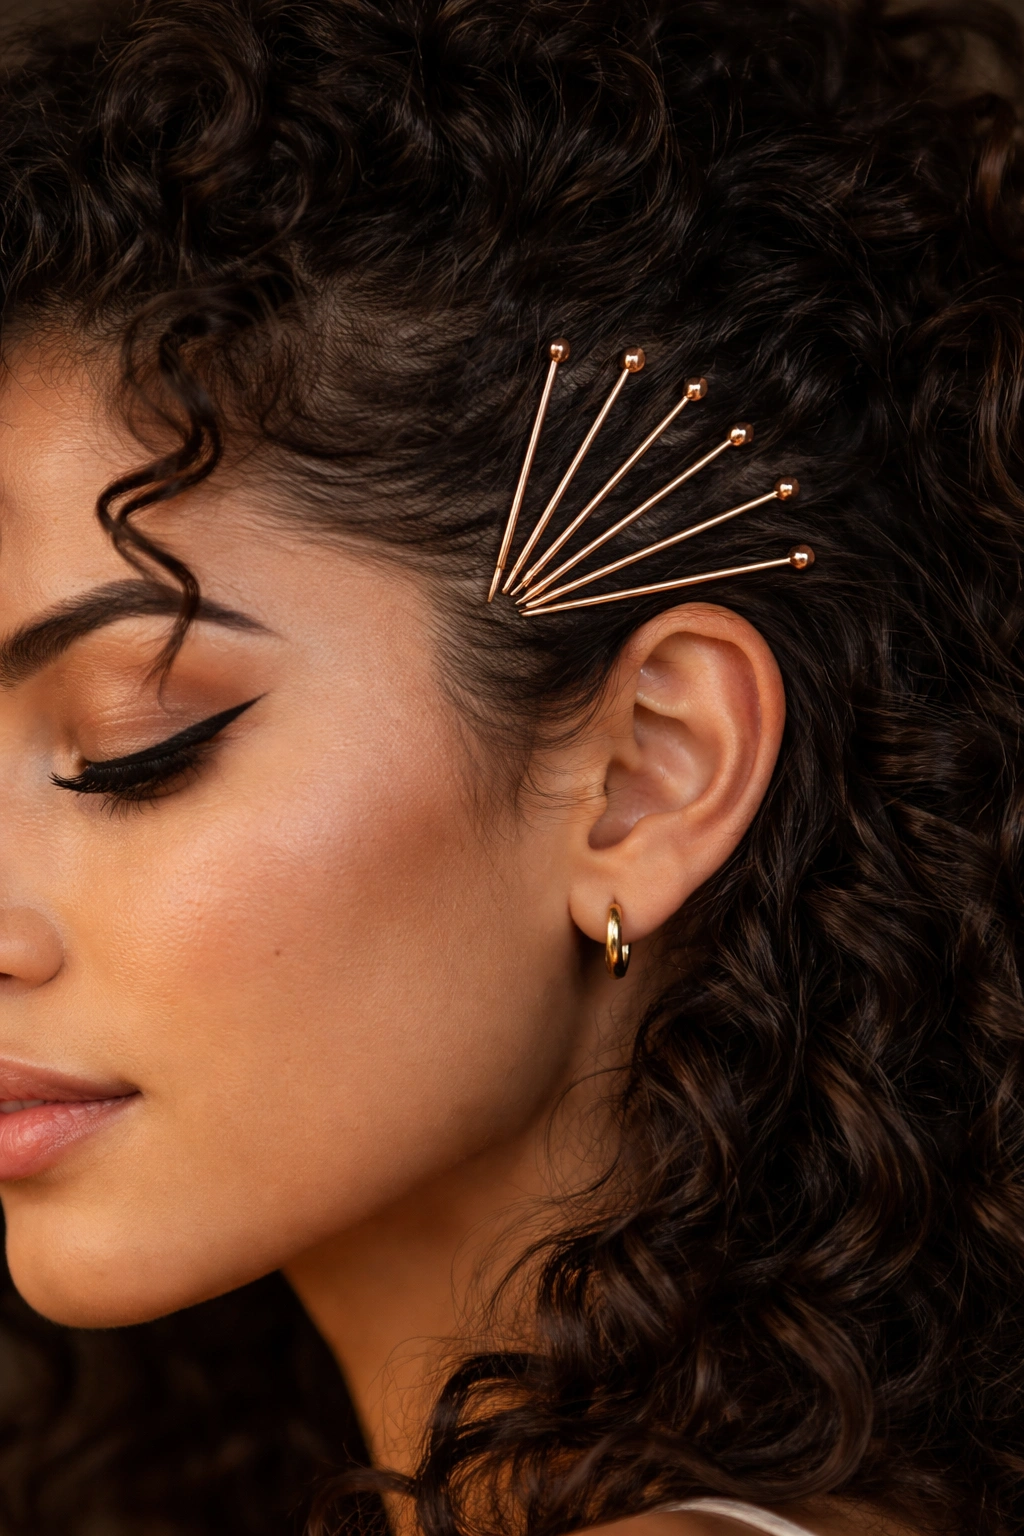
Bobby pins aren’t just for keeping flyaways in place — in the right arrangement, they’re a genuine hair accessory that transforms a basic wash-and-go or low bun into something fashion-forward. A deliberate fan, line, or geometric arrangement of metallic or jeweled pins at the temple, crown, or above the ear does more for a finished look than any amount of additional product or effort.
How to Make Pins Look Intentional Rather Than Functional
The difference between decorative bobby pins looking purposeful versus scattered comes down to arrangement. A fan of 3-4 pins radiating outward from one temple, a horizontal line of 5 pins above one ear, or a clean cross-pattern at the back of the crown all read as intentional styling choices. Randomly placed single pins look like you forgot to remove them.
Gold and rose gold pins photograph beautifully against darker hair tones. Silver and pearl-tipped options suit lighter natural colors and silver-toned gray hair beautifully. Matte pins blend into the hair for subtle edge control; metallic pins catch light and become the focal point of the entire look.
How to Create the Pin Fan Look
- Choose your placement: one temple, above the ear, or at the back crown all work well
- Arrange 3-5 pins in your chosen pattern before inserting them — fan shape, parallel horizontal lines, or a cross pattern all look polished
- Slide each pin in at a slight outward angle so the decorative side faces the viewer
- Tuck any flyaways or loose curl sections under the pins as you insert them for a clean, controlled result
- Mist lightly with a flexible hairspray to set the area and prevent the pins from sliding through the day
Pro tip: Matte finish bobby pins grip curly hair better because the surface texture catches the hair shaft. Smooth metallic pins tend to slide on fine or slippery curl textures — drag the pin tip through a small amount of wax or pomade before inserting for extra hold.
15. The Claw Clip Statement Style
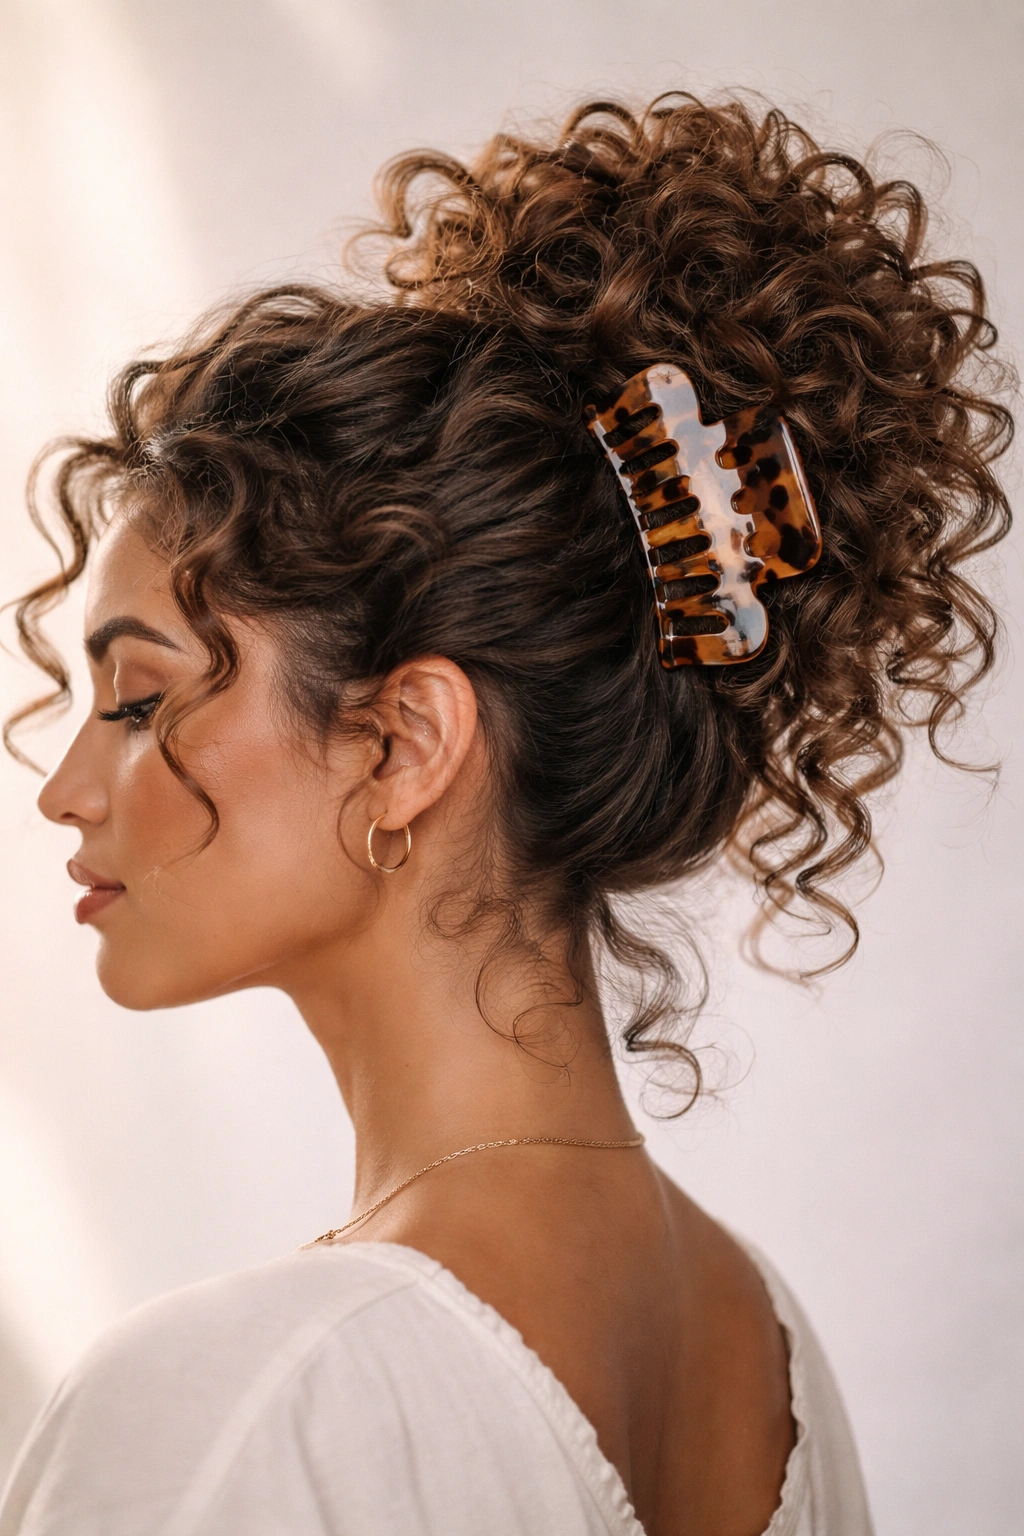
One quality claw clip and 30 seconds. That’s the formula. On curly hair, the results are genuinely better than any amount of effort would suggest — curly hair fills out a claw clip in a way that straight hair simply can’t, creating a full, cascading effect above the clip with a waterfall of defined curls below that looks editorial rather than accidental.
Why Curly Hair and Claw Clips Are a Natural Match
Curly hair’s natural volume and texture makes a claw clip look intentionally full, rather than flat and limp the way it can appear on thinner hair types. The curls that escape above the clip create organic volume and dimension without any product. The curls that hang below frame the neck beautifully. It’s a style where your hair’s natural behavior is the entire aesthetic — no manipulation required.
Clip size matters more than most people realize. A clip that’s too small for your hair volume will pop open under tension, which is frustrating and can cause breakage at the hairline. For thick or high-volume curly hair, look for clips labeled jumbo or extra-large. Acetate or resin claw clips are the most durable option and provide the strongest grip over time — cheap plastic clips frequently break with thick textured hair.
How to Create the Claw Clip Look
- Gather your curls at the back of the head at whatever height suits the occasion — nape level for an elegant, lower silhouette, or crown height for more volume and drama
- Optionally twist the gathered section once before clipping for more structure and a slightly elevated, more deliberate look
- Open the claw clip, place it underneath the gathered hair, and snap it closed through the hair in one smooth motion
- Allow curls to cascade naturally from the top of the clip — don’t try to contain them all inside, the overflow is part of the appeal
- Pull 2-3 individual curl sections loose at the temples and sides for face-framing softness
Insider note: Rotating between 2-3 different clip positions across the week — low, mid, and high — prevents repeated tension on the same hairline section and creates natural variety in your daily looks with zero additional effort.
Final Thoughts
Curly hair’s reputation for being high-maintenance mostly comes from trying to force it into styles designed for straight hair. These 15 styles all share the same logic: curly texture is an asset, not an obstacle. Volume holds styles up. Natural grip keeps braids and twists in place. Coil patterns create interest and dimension without any extra styling.
The two easiest changes you can make starting now: replace every rubber elastic and cotton hair tie with satin scrunchies, and invest in one quality jumbo claw clip. Those two swaps alone affect every style on this list and make a real difference in how your curls behave and hold from morning to evening.
Pick two or three styles that match your curl type and your most common occasions. Practice them on low-stakes mornings until they feel automatic — and then they’ll be there for you on the rushed ones. Four or five reliable go-to looks that you can execute quickly and confidently will serve you far better than 15 styles you’ve only tried once.
Your natural texture is already doing the heavy lifting. These styles just give it a clear direction to go.