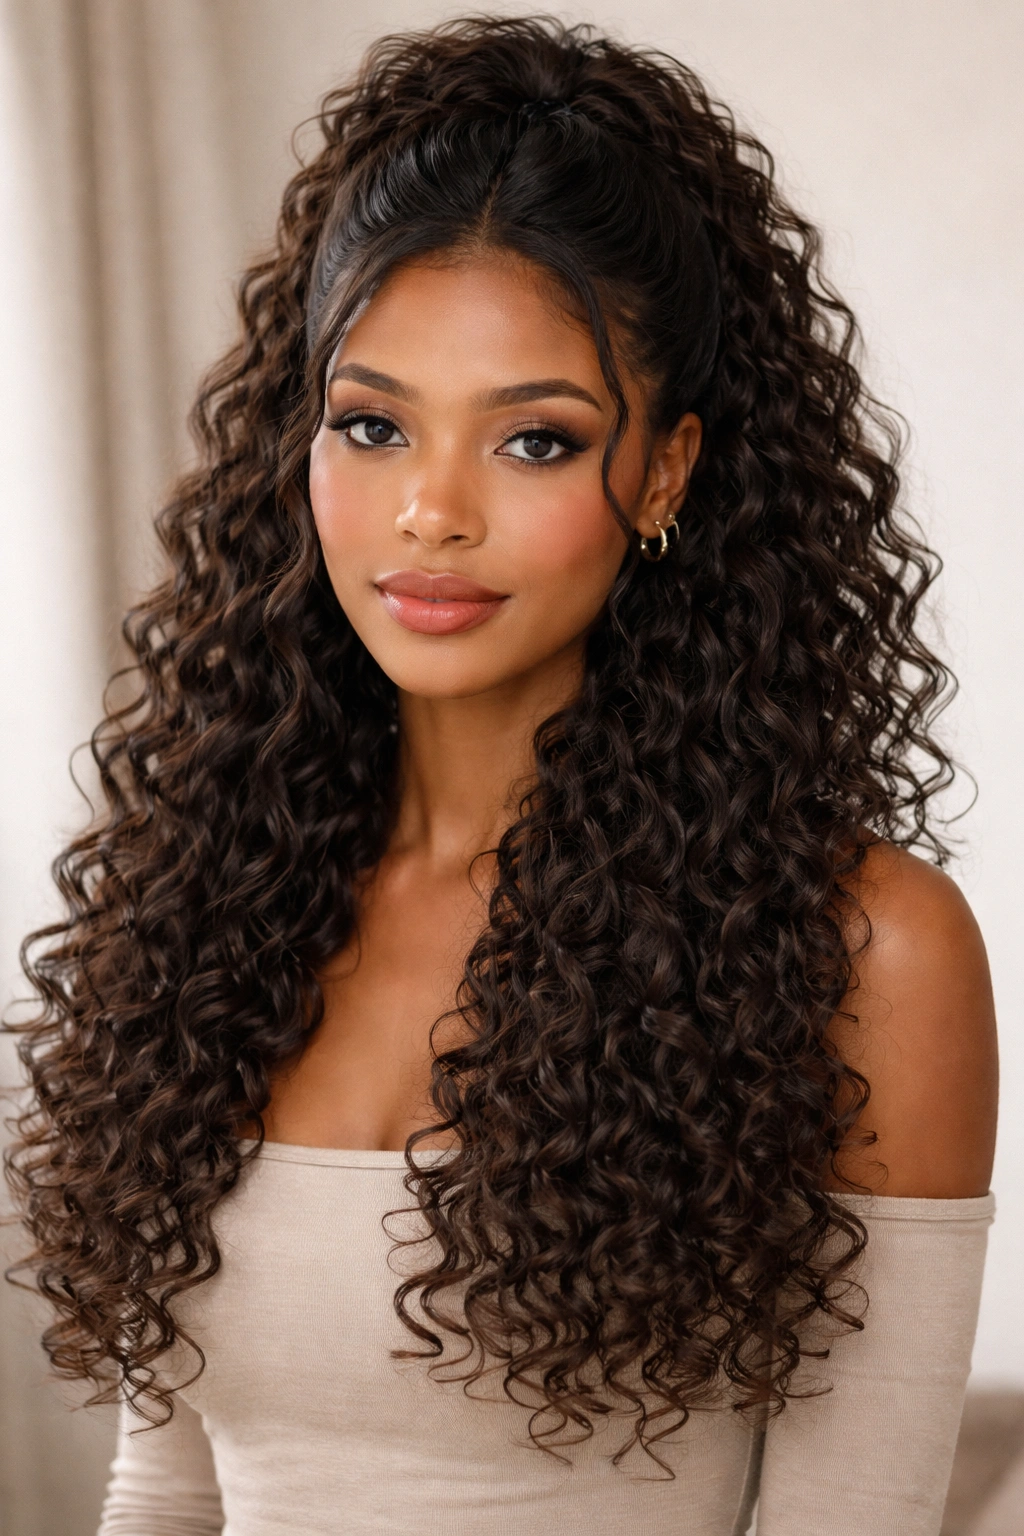
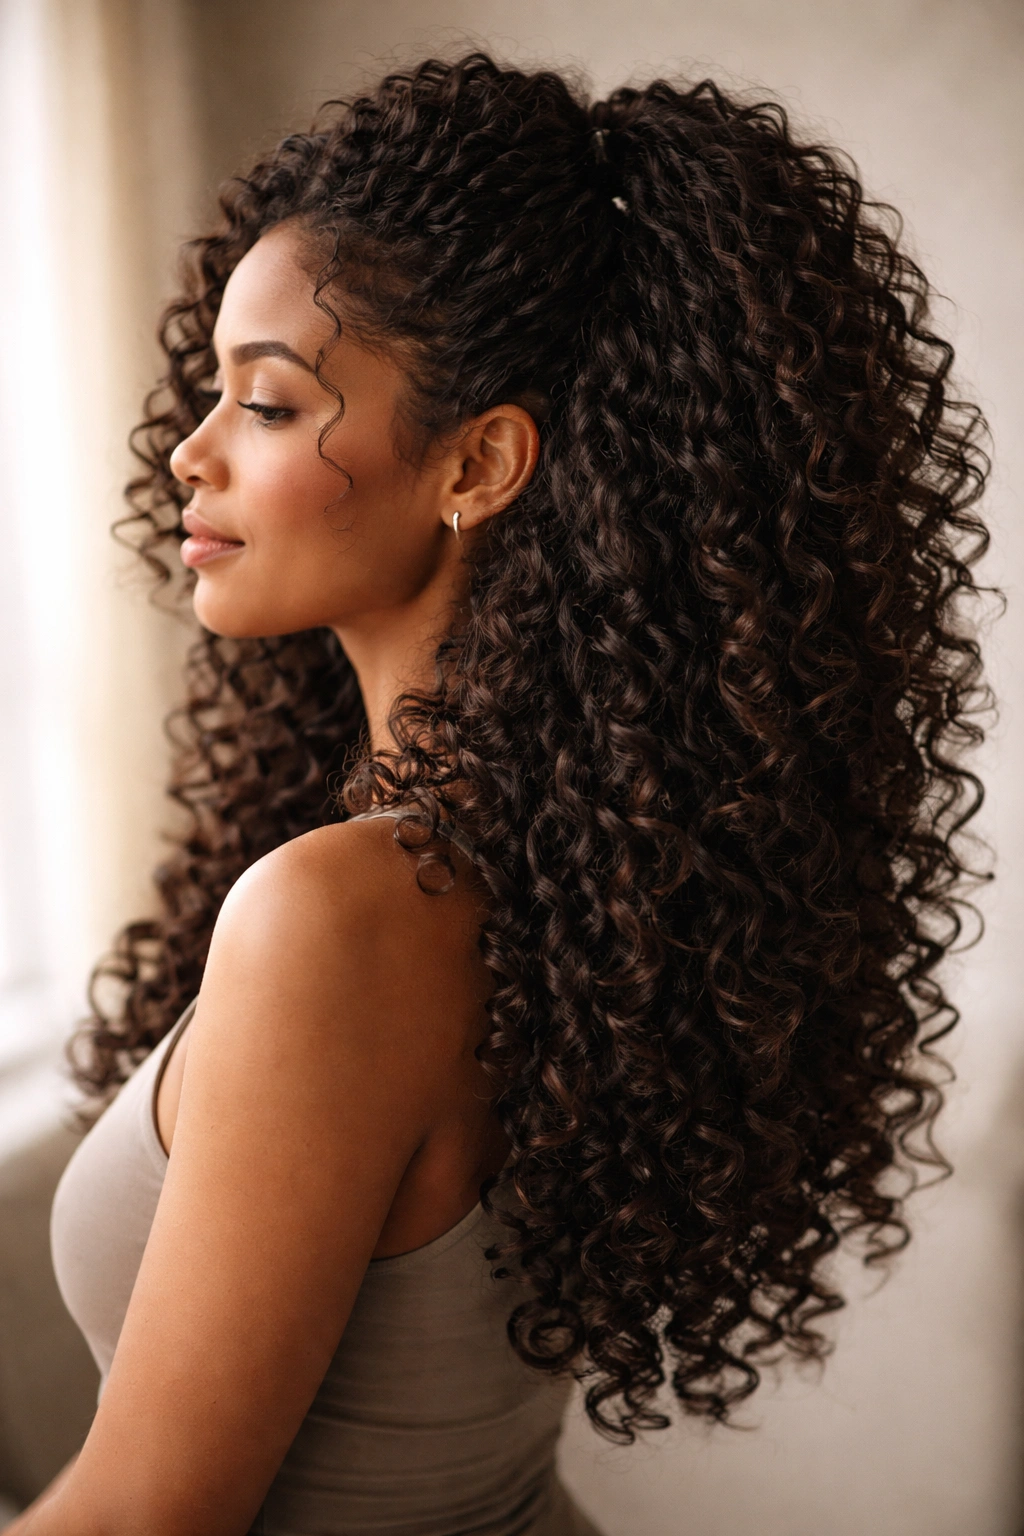
Clip-in extensions offer a game-changing solution for anyone with curly hair looking to add instant volume, length, or coverage without the commitment of permanent extensions. The beauty of clip-ins for curls is that they let you experiment with different looks without chemical treatments or daily heat styling—your natural texture stays protected while you get all the drama and fullness you want. Whether you’re dealing with thinning spots, patchy areas from heat damage, or simply want to amp up your curl definition and bounce, there’s a clip-in strategy that works perfectly for your curl pattern.
The versatility here is what makes curly-haired people genuinely excited about clip-ins. Unlike straight-haired extensions that can look suspiciously obvious against fine or limp hair, extensions blend seamlessly into curly texture because curls naturally disguise seams and blend multiple hair densities together. You can wear your curls down with extensions adding volume throughout, clip them in the back for instant length while keeping your natural curl definition at the front, or use small accent pieces to target problem areas. The key is understanding which placement and technique works best for your specific curl pattern and what you’re actually trying to achieve.
1. Back-of-Head Volume Boost
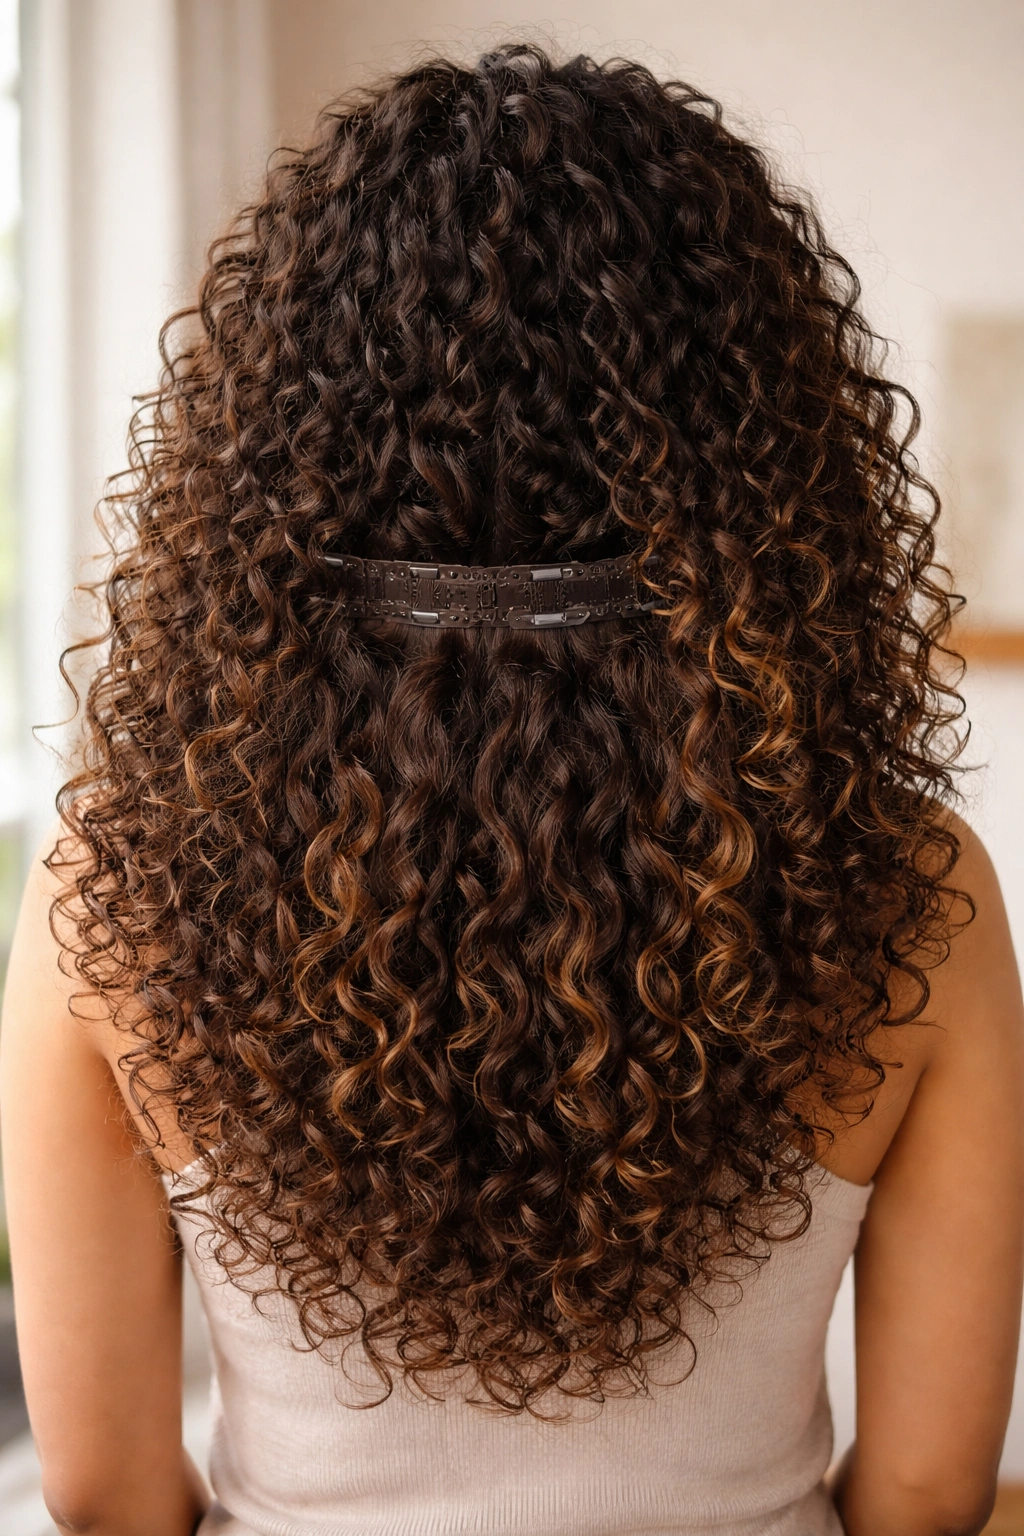
This is the classic clip-in placement that works for almost every curl type and is probably the most forgiving style for first-timers. You’re clipping one or two dense weft pieces at the back of your head, usually in the lower-mid section, anchoring them into your natural curls using sectioning clips. The extension hair blends into your own curl pattern and adds serious depth and fullness without changing your overall look dramatically.
Why This Works for Curls
The back-of-head placement is brilliant for curly hair because your own curls naturally camouflage the clips and wefts. Unlike straight hair where clip placement is incredibly obvious, your curl texture wraps around and conceals everything. The extensions add weight and volume where curls tend to get a little flat—usually around the crown and mid-lengths—without altering your hairline or face-framing curl definition. It’s the most “invisible” clip-in approach, which is why it’s perfect if you’re nervous about your extensions being obvious.
How to Place Them for Maximum Blend
Section off a small horizontal line of hair about two inches below where you want the clip to sit. Tease this section gently with a teasing brush to create grip for the clip. Attach the clip parallel to the sectioned line, making sure the weft sits flush against your scalp. Layer your natural curls back over the weft—the clips should literally disappear under your curls. If you see a dark line or the clip backing is visible, your natural hair isn’t covering it properly, which means you need to tease a bit more or adjust the clip placement slightly deeper into the curl mass.
Quick Tips for This Style
- Prep your back section with lightweight mousse or texturizing spray beforehand—this gives the clip something grippy to hold onto
- Use at least 18 inches of hair length at the back for seamless blending
- Wear your curls down and loose for this style; slicked-back styles will expose the clips
- Check the blend from multiple angles before leaving the house—mirrors lie sometimes
Pro tip: This style is perfect for date night or events where you want noticeable fullness without looking obviously styled.
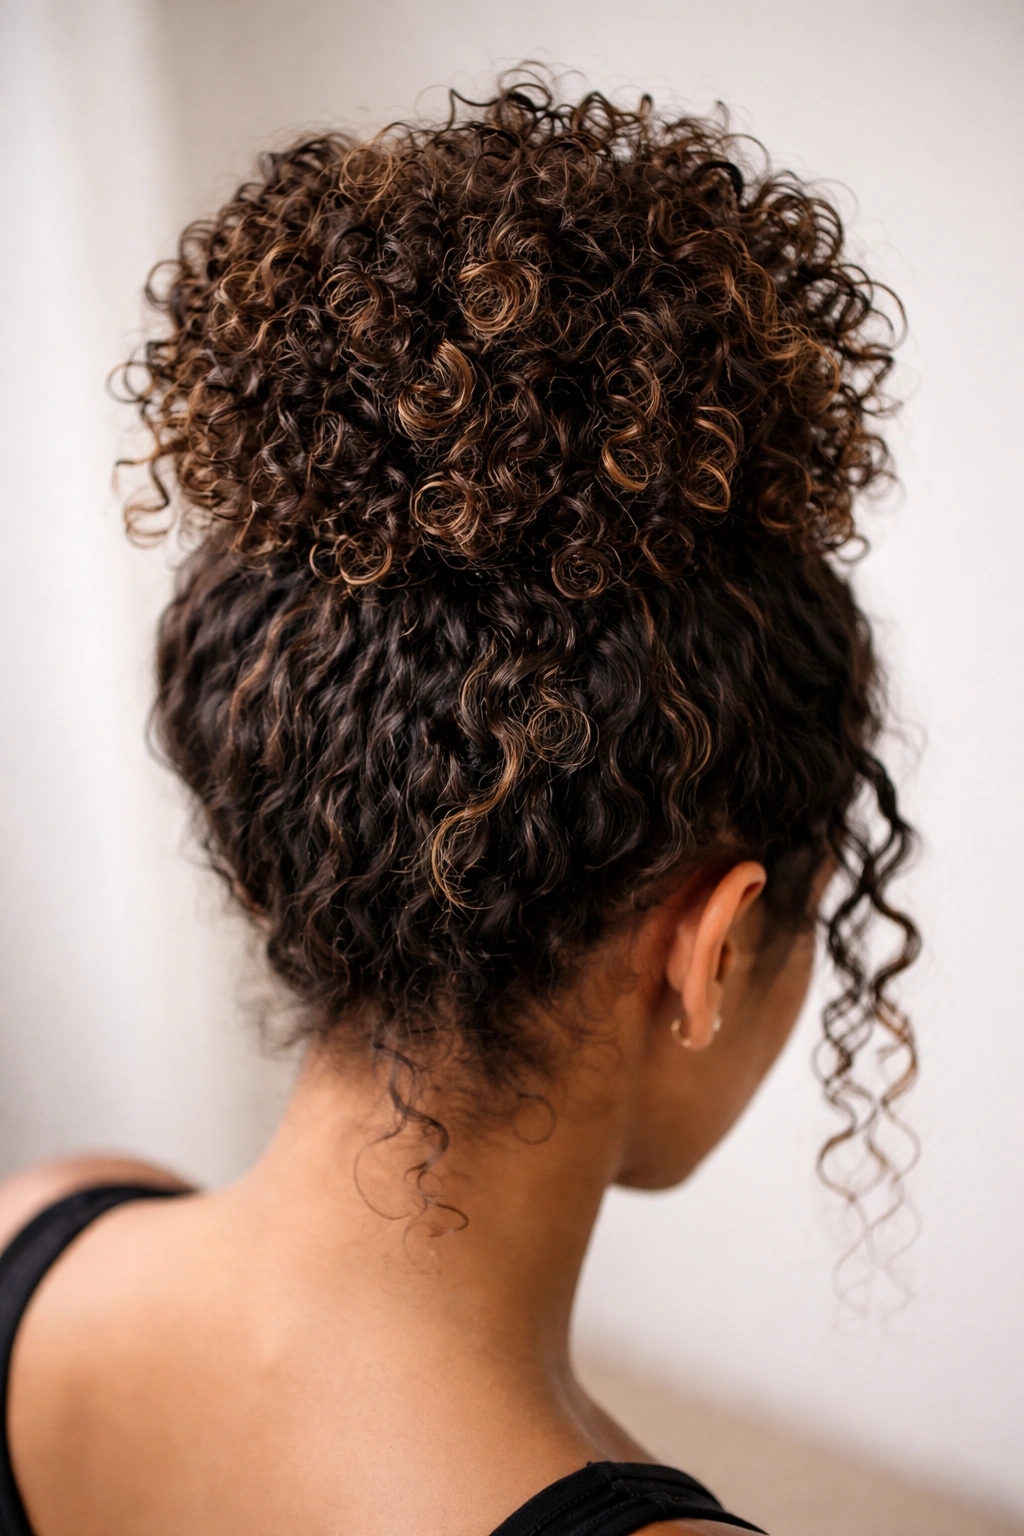
2. Crown and Volume at the Roots
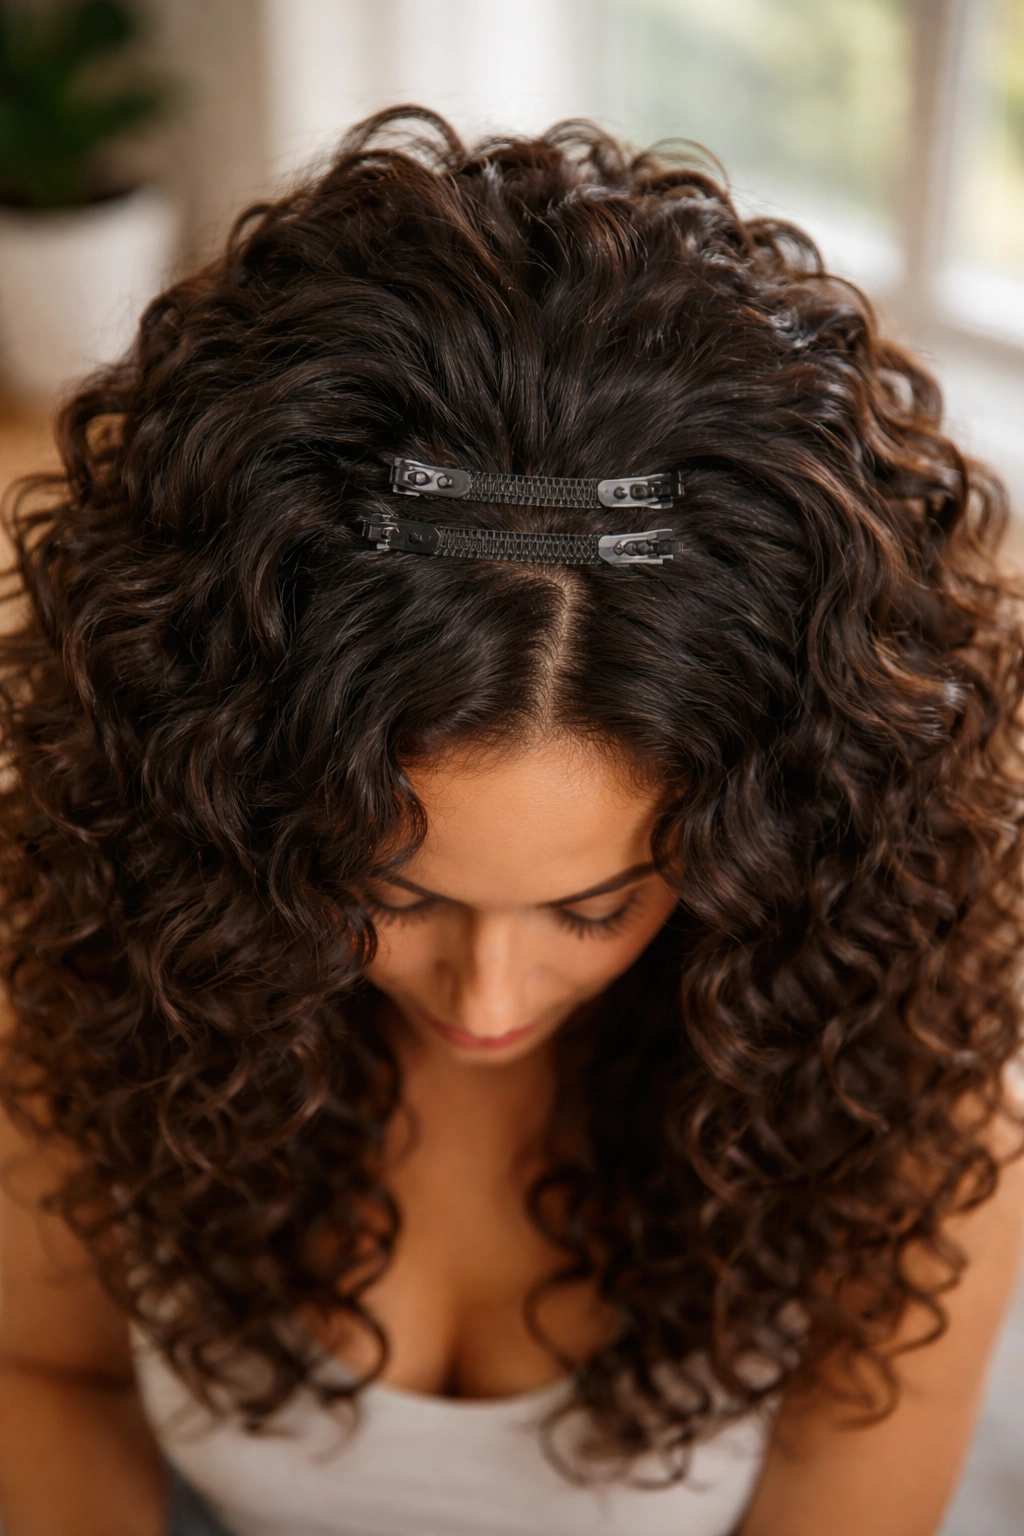
Crown extensions specifically target the area around your crown and temple region, adding lift right at the roots where many people struggle to keep curls bouncy. This is different from the back-of-head boost because you’re focusing on height and lift rather than overall length, making it ideal if your curls flatten down during the day or if you have naturally fine curl density up top.
What Crown Extensions Actually Do
Unlike wefts that add length all the way down, crown extensions are usually smaller pieces positioned specifically at the root level where your hair naturally wants to flatten. They lift your entire curl formation upward, giving you that fresh, voluminous look that lasts all day instead of deflating by afternoon. This is especially helpful for people with looser curl patterns (waves and ringlets) that lose their shape as the day goes on, since the extension weight acts as an anchor that holds your curl pattern taut and defined.
Placement That Doesn’t Show
The tricky part with crown extensions is making them invisible, especially if you wear your hair in any kind of upstyle. The absolute best placement is right at the natural crown section where your own hair is already thickest, clipping horizontally so the weft runs parallel to your scalp. Your natural curls should cover the entire clip backing and weft. If you can see any dark line or clip hardware at all, you need to section off more hair or move the placement slightly.
Styling Approaches
- Wear your curls down in a loose, voluminous style where the extensions blend seamlessly
- Pair crown extensions with pulled-back styles only if you’re comfortable showing the clips as a deliberate, intentional styling choice
- Work with smaller, lighter wefts if you have fine curls; heavier extensions can weigh down delicate curl patterns
- Use crown extensions for special occasions where you want maximum impact
Worth knowing: Crown extensions work best on people with at least shoulder-length curls where the length of your natural hair can properly mask the clip placement.
3. Face-Framing Curls for Texture and Density
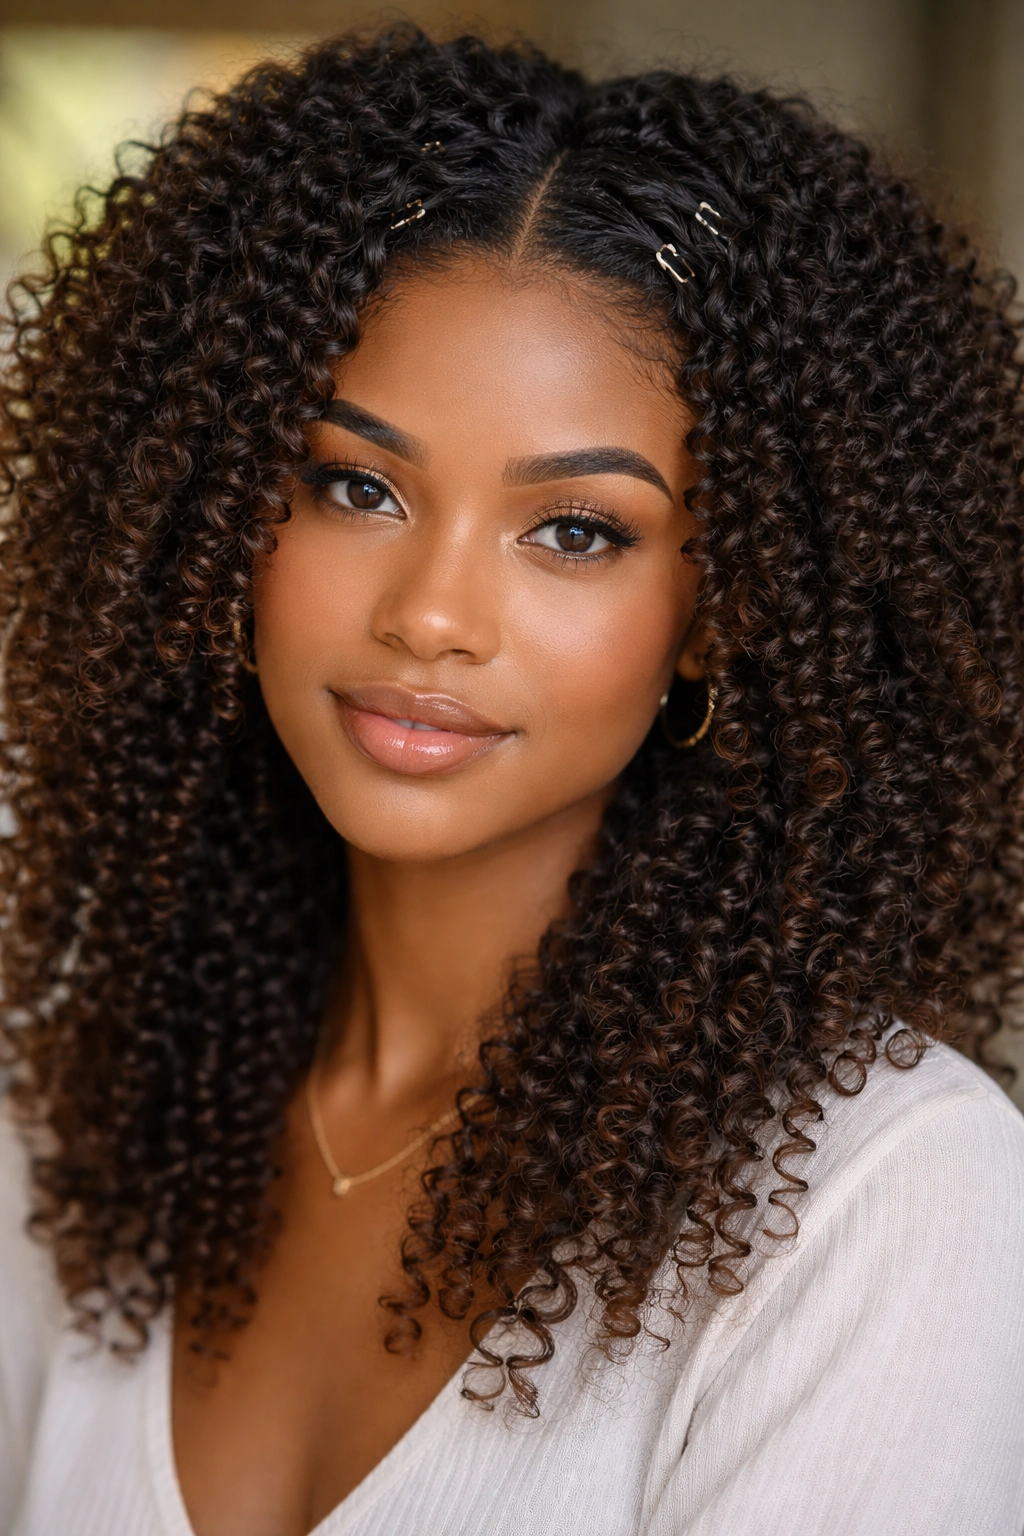
Face-framing clip-ins are smaller pieces positioned around your hairline and sides, adding texture and density to the curls that literally frame your face. Instead of adding length (though they do), face-framing extensions are primarily about adding visual fullness and making your curl pattern look thicker and more defined right at the front where people see you first.
Why Face-Framing Changes Your Look
These extensions work by making your face-framing curl layers denser and more prominent, which subtly reshapes how your face appears and creates an instantly styled look. Thicker, more defined curls around your face make you look polished and intentional, even if you just rolled out of bed. The curls catch light differently, creating more movement and dimension than your natural hair alone might have. This is the style that makes people ask if you got a fresh cut or if something about your hair just looks different.
Securing Them Without Looking Staged
The key to natural-looking face-framing extensions is using smaller pieces and placing them high enough that they clip into dense sections of your natural hair, not just single strands at your hairline. Section off small pieces around each side of your face, roughly ear-width, and clip the extension pieces horizontally into these sections. Your goal is for the extensions to feel like they’re part of your natural curl formation, not separate pieces stuck on. When you style your curls, these extensions should move and fall exactly like your own hair does.
Styling Combinations That Work
- Wear your curls down and soft for maximum blending
- Pair face-framing extensions with a loose half-up style to showcase the textured curls around your face
- Combine face-framing pieces with a back-of-head volume boost for dramatic fullness all over
- These work beautifully with curly updos because the loose, wispy curls around your face hide clip placement perfectly
Insider note: Look for face-framing pieces that already have some wave or curl pattern that matches your natural curl texture, rather than trying to curl straight extensions to match.
4. Full-Head Coverage with Distributed Placement

This is the approach where you’re using multiple smaller clip-in pieces distributed throughout your entire head—crown, sides, and back—for comprehensive volume and density all over. Instead of one or two dramatic pieces, you’re using maybe four to six smaller sections to add fullness wherever your curls are thinner or flatter. This style requires more clips but creates the most seamless, professional-looking result because the extensions are so well-distributed that they truly disappear into your natural curl pattern.
Why Distributed Placement Works Best for Curls
Curly hair naturally has varying density throughout—some areas might be thick and bouncy while others are thinner or have less defined curl. Distributed placement lets you target those specific thin areas without overloading any one section with too much weight. The extensions blend more invisibly because they’re integrated throughout your hair rather than clipped in obvious rows. You also get better movement and more natural-looking bounce because the weight is balanced across your entire head rather than concentrated in one place.
How Many Clips to Use and Where
For full-head coverage, you’re typically using four to six clip-in sections: one or two at the crown, one or two at the sides for face-framing, and two at the back. Each individual piece should be smaller and lighter than if you were doing one large weft. The placement should follow the natural contours of where your curls already sit—you’re not forcing the extensions into unnatural positions, just strategically filling in gaps. Most people use 16- to 20-inch clips spaced throughout rather than one 24-inch piece across the back.
Maintenance and Daily Management
- Check your clip placement before you go out because distributed clips are easier to accidentally dislodge
- Use a paddle brush or wide-tooth comb gently, working through hair section by section rather than aggressively brushing
- Sleep carefully with distributed placements—you might want to do a loose braid or pineapple style to prevent clips from rotating overnight
- Remove and reposition any clips that feel loose or uncomfortable as soon as you notice movement
Pro tip: This approach requires slightly more effort than single-placement styles, but it looks absolutely flawless and is worth the extra five minutes of setup.
5. Side-Swept Volume for Romantic Styling

Side-swept clip-ins are positioned strategically to add volume and fullness specifically to one side of your head, creating an asymmetrical look that’s inherently romantic and more deliberate than everyday styles. You’re typically using one substantial piece (or sometimes two smaller pieces on one side) clipped into that side, which adds swoop and movement when you sweep your curls to that side.
Creating the Romantic Movement
The whole idea behind side-swept extensions is creating that gorgeous, off-center cascade of curls that looks effortlessly romantic. You clip the extensions into your dominant side—whichever direction you naturally sweep your hair—and use a larger piece than you might for face-framing. When you style your curls with movement going to that side, the extensions amplify the volume and create dramatic, flowing lines. It’s the kind of style that photographs beautifully and feels special without being over-the-top.
Placement That Looks Intentional
For side-swept styling, clip your extension into the side of your head roughly mid-ear height or slightly behind, using a horizontal sectioning technique. The weft should run parallel to your scalp and be completely hidden under your natural curls when swept to that side. Your own hair should fully cover the clip backing—if you can see any hardware or dark lines, the placement isn’t hidden enough. The beauty of curly hair is that when you sweep it, the curl pattern naturally camouflages everything.
Styling Techniques for This Look
- Sweep all your curls to one side using your fingers or a wide-tooth comb
- Use a lightweight mousse or curl cream on damp hair before styling to encourage the sweep direction
- Secure the sweep with a bobby pin or clip at the back if you want it to hold all day
- Accessorize on the opposite side with an earring or hair clip to balance the asymmetry
- Pair with makeup that’s slightly heavier on the swept-to side for a cohesive, intentional look
Worth knowing: This style works best for events, dates, or special occasions rather than everyday wear because the asymmetry requires an intentional styling decision.
6. Two-Toned or Dimension-Adding Placement
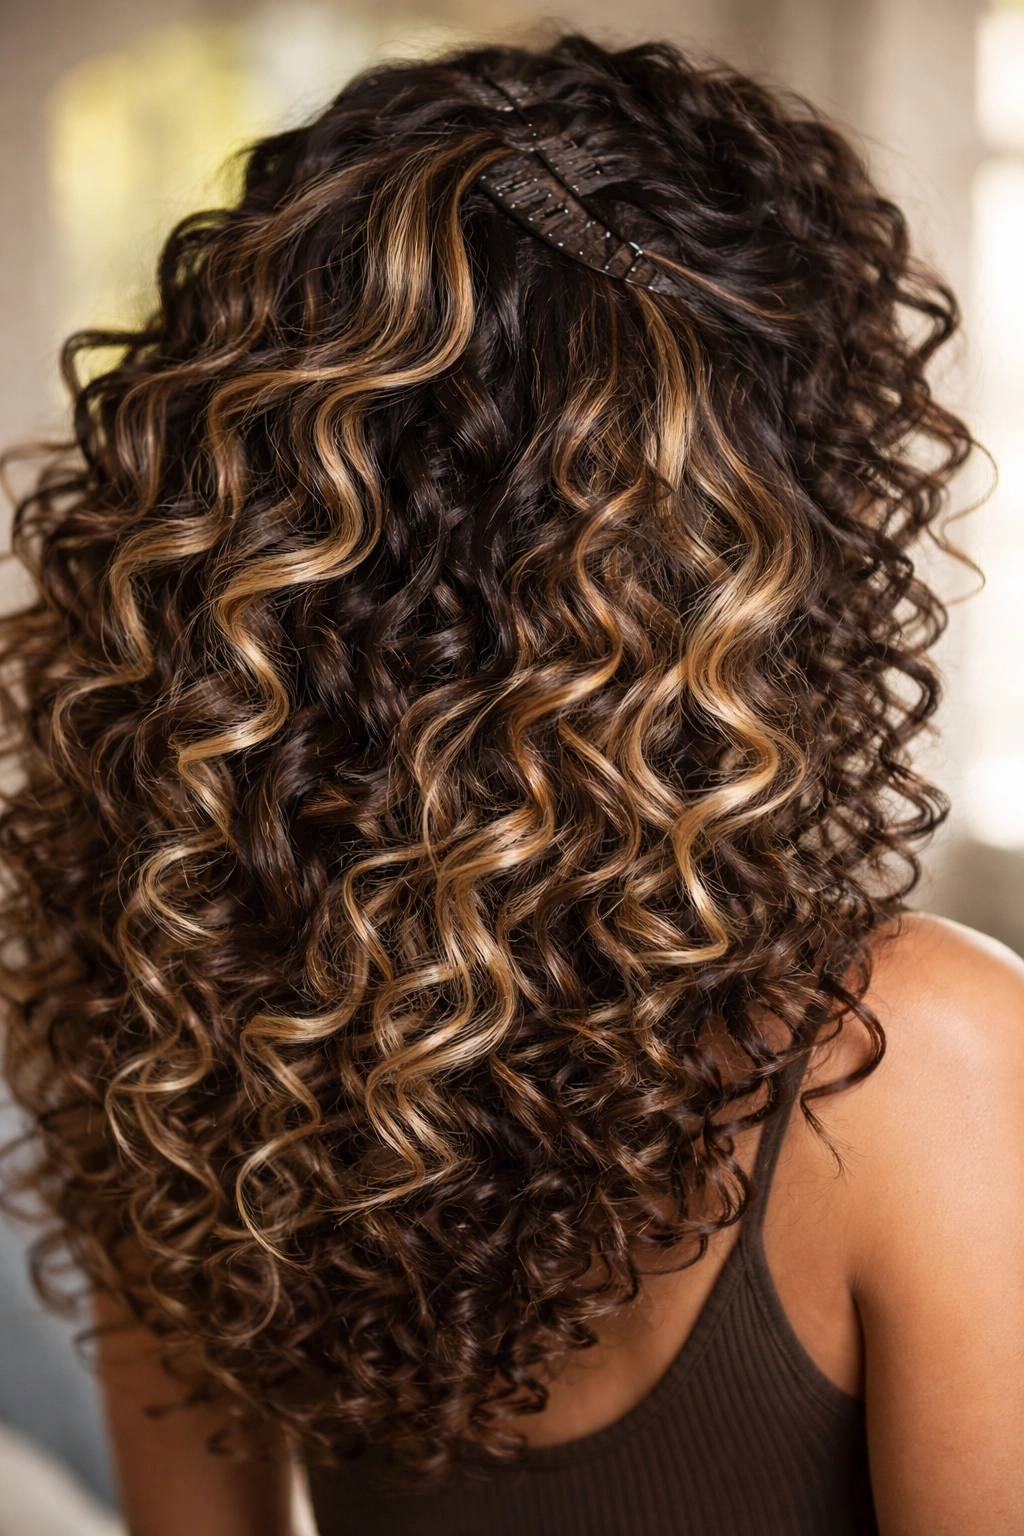
This is where you use clip-in extensions that are a slightly different shade than your natural curls—maybe lighter, darker, or a subtle color accent—to add visual dimension and depth to your curl pattern. Instead of matching your hair exactly, you’re strategically placing extensions in a contrasting shade to create highlights or lowlights that make your curls look more dynamic and interesting.
How Color Contrasts Work with Curly Hair
Curly hair naturally catches light differently throughout the day because of the way light plays across the curves and texture of each curl. Adding extensions in a slightly different shade amplifies this natural light-catching quality. A shade lighter than your base creates a highlighted, sun-kissed effect; a shade darker creates subtle shadowing and depth. The curly texture means these color variations blend beautifully instead of looking like harsh lines, which is why dimension-adding placement works so well for curls compared to straighter hair types.
Strategic Placement for Maximum Dimension
You don’t need to cover your entire head with a contrasting shade—in fact, that usually looks overdone. Instead, place lighter extensions at the crown and face-framing areas where light naturally hits (and where you want the most visual lift), and place any darker shades at the back or underneath. This creates a natural-looking dimensional effect that gives the illusion that your curls are thicker, shinier, and more carefully styled than they might be with just one solid shade.
Color Choices That Look Natural
- Choose extensions that are maximum one to two shades different from your base color
- Warm, honey-toned highlights look dimensional against almost any base color
- Cooler, ash-toned shades create a subtle shadowing effect that adds depth
- If your natural curls have any color variation or highlights already, match the extension shade to the lighter parts of your hair for seamless blending
- Avoid stark color contrasts (like adding silver to dark brown) unless you’re going for a deliberately bold, statement look
Pro tip: This styling approach is especially effective if your natural curl color is very flat and one-dimensional—adding just a touch of a contrasting shade makes you look instantly shinier and more polished.
7. Half-Up Curls with Extension Fullness
Half-up styling with extensions means clipping the extensions into the lower section of your hair while wearing the top half pulled back, creating a style that shows off your curl definition at the top while amplifying fullness and length in the bottom half. This is brilliant for people who want the polish of a partially styled look while still maximizing the visual impact of clip-in extensions.
Why Half-Up Works So Well for Extensions
Half-up styles naturally hide clip placements because the top half of your hair covers everything underneath. You get all the fullness and length benefits of extensions without any worry about clips being visible. The contrast between the structured top half and the voluminous, textured bottom half creates visual interest and sophistication. It’s polished enough for work or events but still shows off your natural curl texture at the front where it matters most.
Creating the Half-Up Base
Start with damp, freshly defined curls. Section off the top portion of your hair from temple to temple across the crown, and clip the extensions into the lower section before you style the half-up. Use a larger, thicker weft in the back section since the top half will cover everything. Clip horizontally into well-prepped sections to ensure solid grip. Then smooth the top section back and secure with a clip, claw, or elastic (depending on how polished you want the look). Your natural curls should frame the half-up and blend seamlessly into the extension hair below.
Styling Variations on This Theme
- Keep the top section smooth and controlled for a sleek, professional half-up
- Let the top section be loose and textured for a more relaxed, romantic version
- Secure the half-up with a decorative clip that doubles as an accessory statement
- Use a small braided section in the top half for extra visual interest
- Wear the back extensions down and voluminous, or style them in loose waves for a different texture contrast
Worth knowing: This style photographs beautifully and works for everything from casual date nights to formal events depending on how you style the top section.
8. Curly Bun or Updo with Extension Support
Curly updos with clip-in extensions work by using the extensions as volume support underneath or around your updo formation, adding fullness and substance to a curl-based bun, twist, or higher style. Instead of trying to create an updo with just your natural curls (which can be thin or take forever to arrange), extensions give you the volume and length you need to make a statement updo in minutes.
How Extensions Change Updo Possibilities
Natural curly hair can sometimes feel wimpy or sparse when you try to do updos because you’re working with individual curls rather than a dense mass of straight hair. Extensions solve this by adding volume and substance so your updo looks full, intentional, and professionally arranged. You can create higher, bouncier buns; fuller twists; and more dramatic rope details because you have more hair to work with. The extensions essentially give you permission to try updo styles that might not have worked with your natural curl volume alone.
Strategic Clipping for Updo Support
For updo styling, you want to clip extensions into the lower sections of your hair—basically anywhere that will get enclosed in the updo formation where clip placement is completely hidden. Clip into your lower crown, the back section, and sides if you want maximum fullness. Use larger, substantial wefts since all the hardware is hidden by the updo itself. Position clips horizontally into well-teased sections so they sit securely and don’t shift as you’re arranging the updo.
Updo Styles That Shine with Extensions
- High, voluminous curly buns (think elegant wedding guest looks)
- Twisted or braided updos where the extensions add thickness to the braided sections
- Loose, romantic updos where extensions create fullness around the face
- Sleek topknots with curly detail and texture (extensions provide the texture)
- Half-up buns paired with loose curls down the back (extensions make the bottom-half curls fuller and more impressive)
Pro tip: When doing updos with extensions, secure your base bun or formation first with your natural hair, then clip the extensions into place to add volume and fullness around and under the structure. This prevents the extensions from pulling on your scalp and keeps your natural hair safe.
Final Thoughts
The right clip-in style depends entirely on your hair goals, how much time you want to spend on styling, and what kind of look you’re going for. Some people love the simplicity of a single back-of-head boost that takes two minutes to clip in, while others enjoy the precision and fuller result of distributed multi-clip placement. Your curl pattern matters too—finer curls might work better with smaller, lighter clips spread throughout, while denser curls can handle larger, heavier pieces without looking unbalanced.
The beauty of experimenting with clip-ins is that there’s zero commitment and zero damage to your curls. You can try every single style in this list, figure out which approach makes you feel most confident and comfortable, and stick with that. Most people end up with two or three go-to placements—maybe a simple back boost for work and casual days, face-framing clips for date nights, and a full-head distributed placement for special occasions. Start with one style, master the clipping technique, and then branch out from there once you understand how they work with your specific curl pattern and lifestyle.