Short curly hair doesn’t whisper — it announces. There’s a boldness to wearing your curls at a length where they can’t hide, where your texture, your volume, and your natural pattern are front and center the moment you walk into a room. But choosing the right short curly hairstyle isn’t as simple as picking the one that looks good on your Pinterest board.
The real challenge is finding a style that actually works with your specific curl pattern, your face shape, your lifestyle, and your willingness to maintain it week after week. A cut that looks sculptural and intentional on tightly coiled 4C hair might fall completely flat on loose 3A waves. A wash-and-go that takes someone 10 minutes might take someone else 45, depending on density and porosity.
Here’s the thing most curly hair guides gloss over: shrinkage is a non-negotiable variable. Your hair at chin length when wet could be ear-length or jaw-length when fully dry, depending on how tightly your curls coil. That’s not a problem — it’s information. Understanding how much your particular curl pattern shrinks is the single most useful thing you can know before you choose a cut or schedule an appointment with your stylist.
The 15 short curly hairstyles below span the full range — from the most beginner-friendly, low-maintenance options to sculptural, detailed styles that reward the extra effort. Whether your curls are loose and spiraling or tight and densely packed, there’s a look here that fits the real version of your hair, not just an idealized one.
1. The Wash-and-Go
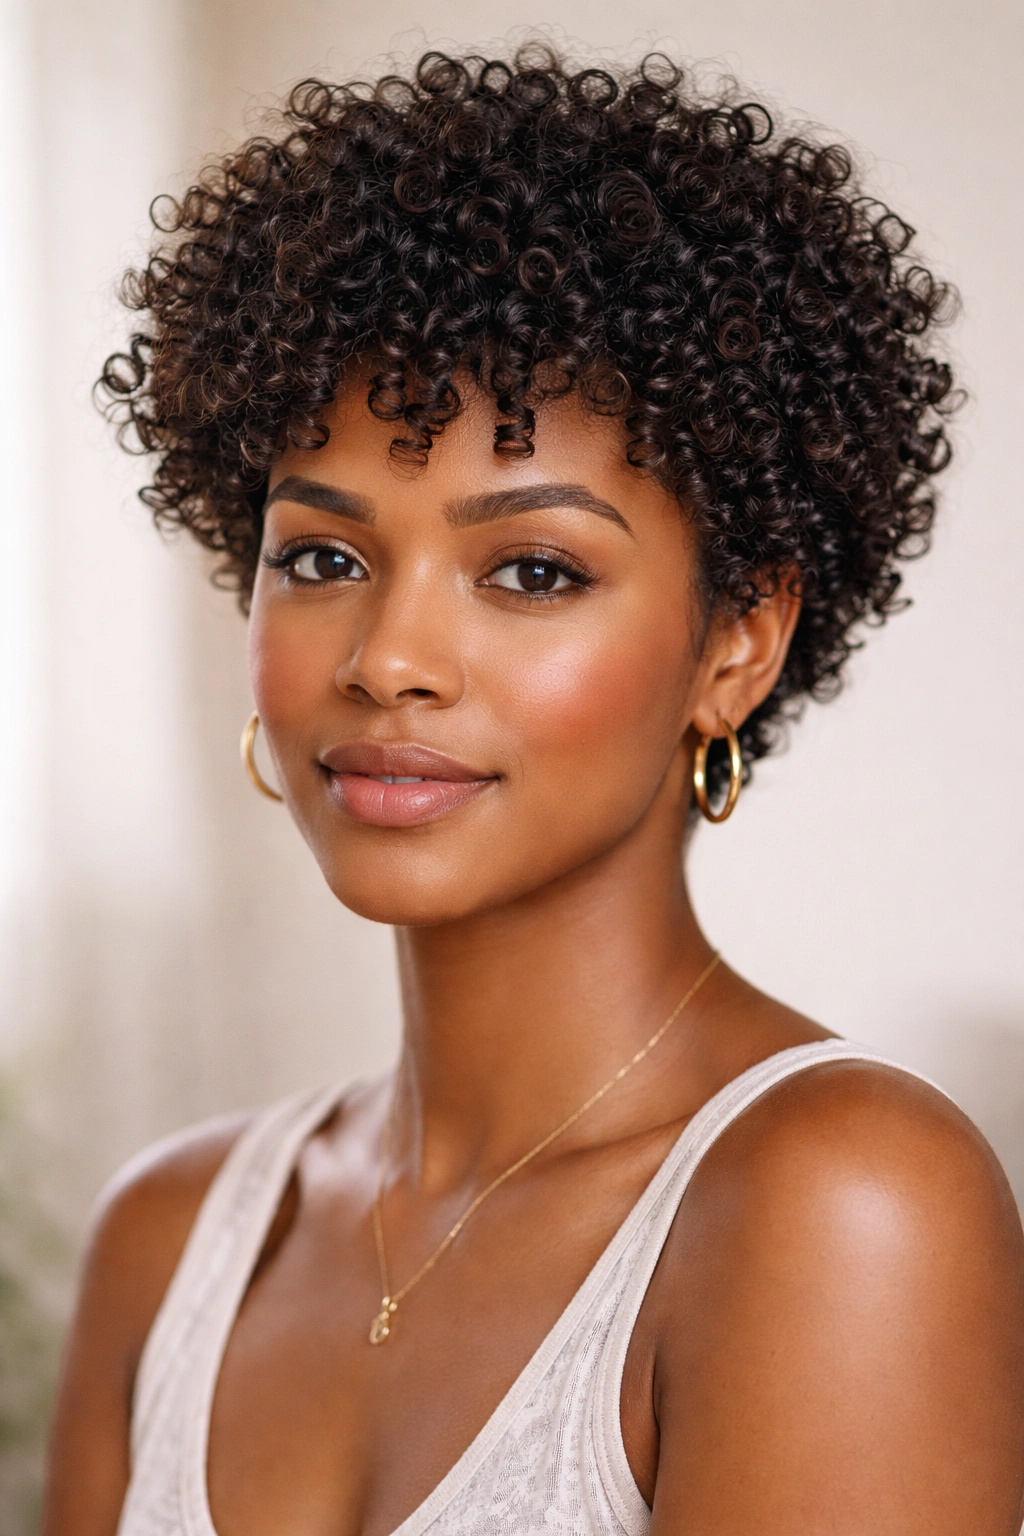
The wash-and-go is the most celebrated short curly hairstyle in the natural hair community, and for good reason — it works with your curl pattern instead of reshaping it. The philosophy is simple: wash, apply product to wet hair, and let your curls do what they naturally do. The result, on short hair especially, is a full, rounded crown of defined curls that looks intentional and effortless at the same time.
Why It Lands Differently on Short Hair
On longer curly hair, gravity often pulls the curl pattern down, making the roots flat and the ends weighty. Short hair eliminates that problem entirely. Without the length dragging your coils downward, you get more lift at the roots and a rounder, more dimensional shape overall. This style works across curl types from 3A all the way through 4C, though the finished look varies significantly by texture.
Getting the Best Results Every Time
The key variables are application method and product layering. Start with a generous leave-in conditioner worked through soaking wet hair in sections, then follow with a curl cream or gel while the hair is still dripping. Don’t touch the hair while it dries — disturbing the curl clumps while they form is the main cause of frizz.
- Apply products in small sections (4-6 for short hair) to ensure even coverage
- Use the praying hands method to smooth products down each section without separating the curl clumps
- Once dry, scrunch out the cast if you used gel — your curls should feel soft, not crunchy
- Refresh on day two with a water spritz and a drop of curl cream worked into the palm first
Pro tip: On hair under 3 inches long, finger-detangling in the shower — rather than using a comb or brush — keeps curl clumps intact from the very start, which sets you up for the best possible definition.
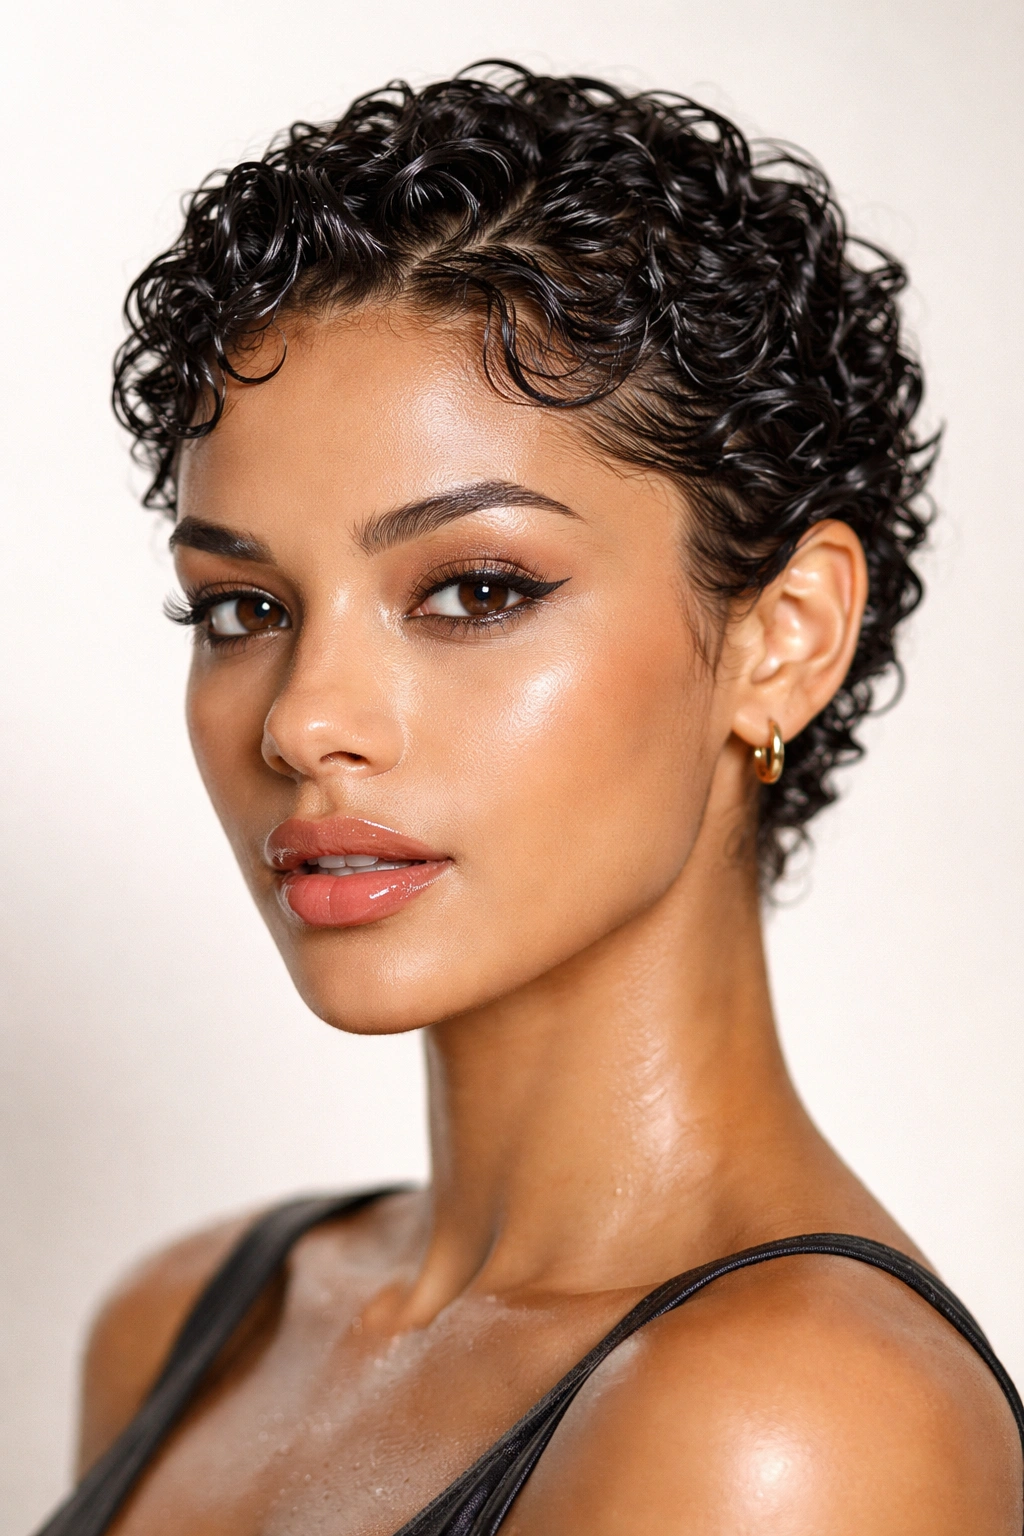
2. The Curly Pixie Cut
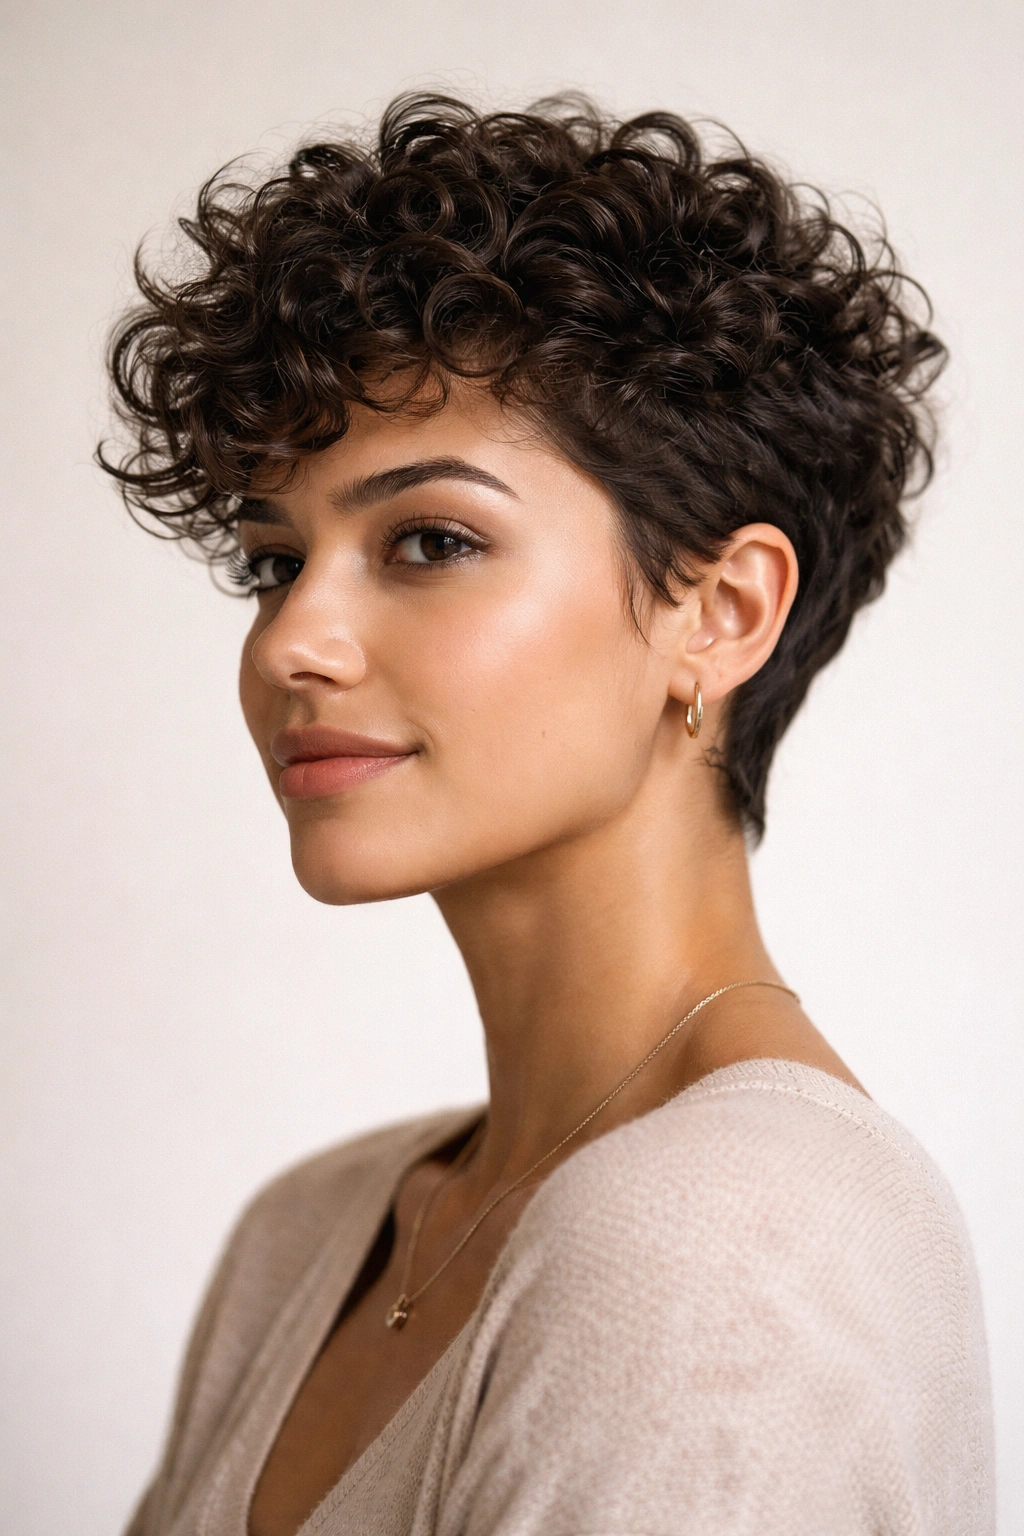
The curly pixie is, in many ways, the purest form of short curly styling. By stripping away length, you expose the actual shape of each curl, the way it springs at the root, and the natural volume your hair creates when it has no length weighing it down. It’s a cut that demands confidence — and then quietly rewards it.
How a Curly Pixie Differs from Its Straight-Hair Counterpart
On straight hair, a pixie is primarily a length decision. On curly hair, it’s a texture-revealing event. The cut needs to honor the curl pattern, which means a skilled stylist should ideally cut the hair dry — or at least assess the dry curl pattern before making any decisions wet. A pixie cut on curly hair that was cut entirely wet often loses its intended shape once the hair springs back to its natural coil.
Styling and Keeping the Shape
The curly pixie is genuinely low-maintenance on a day-to-day basis. It air-dries fast, responds beautifully to a diffuser, and rarely needs more than a small amount of curl cream and a quick scrunch to look put-together.
- Request a DevaCut or dry cut whenever possible for the most curl-accurate result
- Diffuse using the hover method (hold the dryer 3-4 inches from the hair) to maximize root lift without disturbing the curl pattern
- Refresh with a water bottle and minimal product — at this length, less is genuinely more
- Schedule trims every 6-8 weeks to maintain the shape; pixie cuts on curly hair grow out quickly and unevenly
Curly pixies look especially striking on 3B and 3C textures, where the tight ringlets create a sculptural, almost jewel-like arrangement around the face.
3. The Teenie Weenie Afro (TWA)
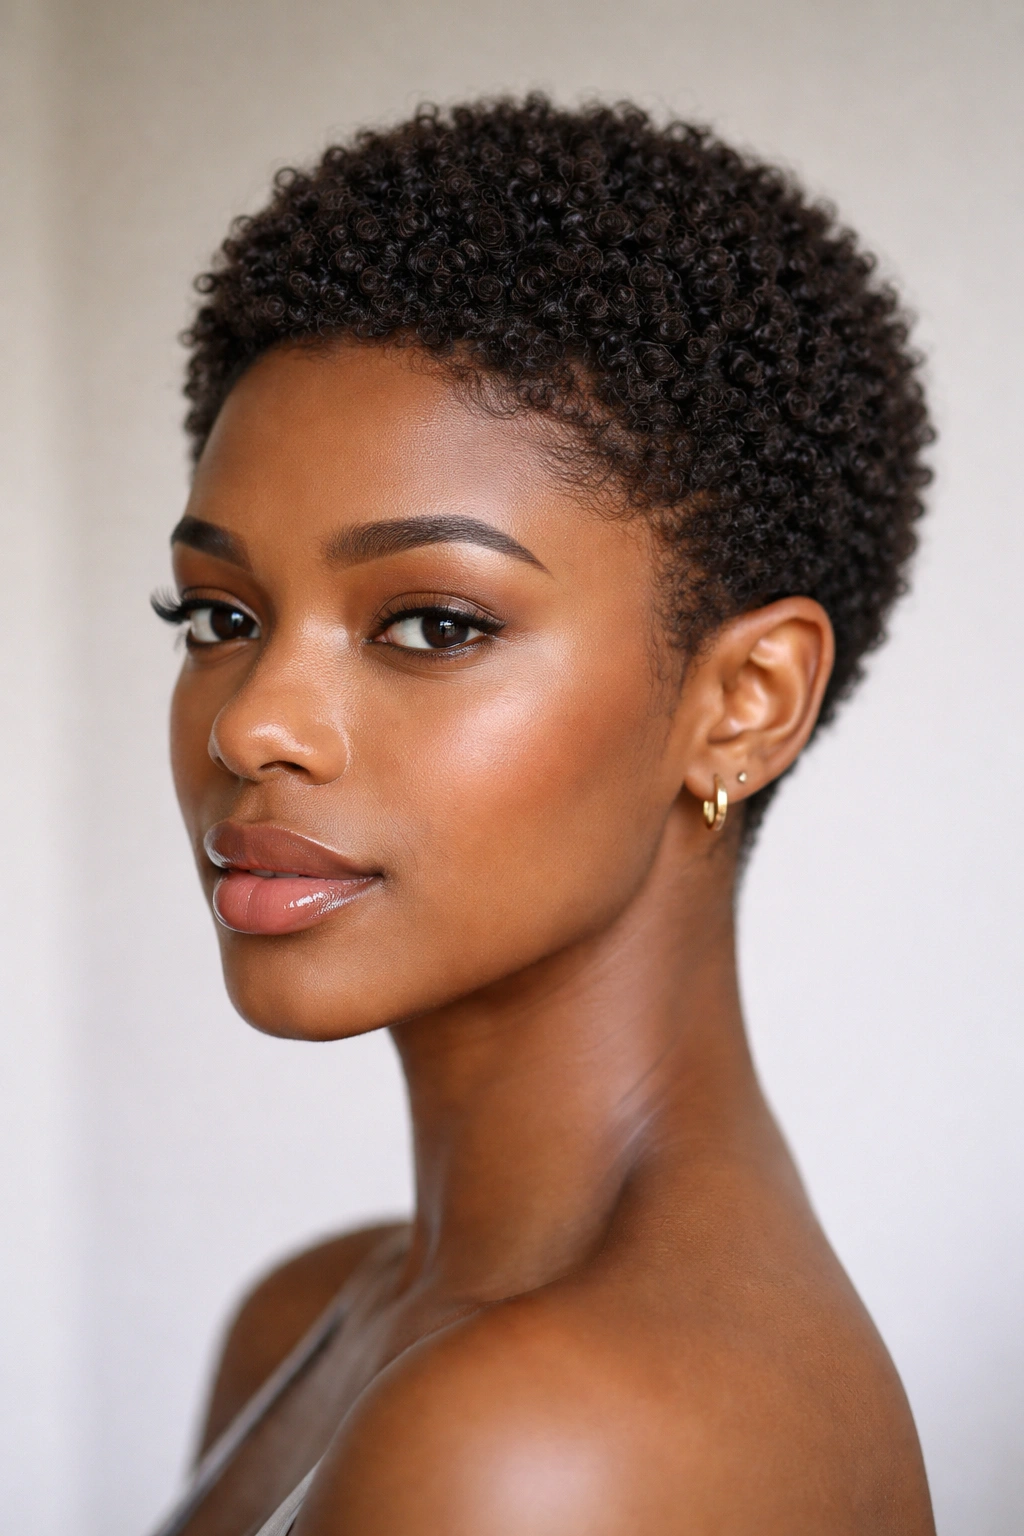
The TWA has a story that goes beyond styling. For many people, it’s the first time they’ve seen their natural curl pattern unaltered, unprocessed, and fully themselves. It’s also, viewed purely on aesthetic terms, one of the most striking short curly hairstyles available — a close-cropped shape that puts the focus entirely on facial features and personality.
What Makes the TWA a Statement Style
At its shortest — typically a half-inch to about an inch of length — the TWA creates a silhouette that highlights the jawline, cheekbones, and eye shape with a clarity that longer styles simply can’t match. There’s no hiding behind layers or length. What you get is a clean, rounded shape defined entirely by your natural curl or coil pattern at its most compact.
Care and Styling at This Length
Hair this short actually dries out faster than longer natural styles because there’s very little length to retain moisture. A consistent moisturizing routine — at minimum a daily water-based moisturizer and sealant — keeps the TWA looking healthy and defined rather than dry and dull.
- Apply a small amount of shea butter cream or a light oil daily to seal moisture in
- Pat and shape the hair with your palm rather than using a brush or comb at this length
- Accessorize intentionally — statement earrings and bold necklines elevate the TWA with zero additional effort
- Give your scalp attention with weekly oil massages to support healthy growth
Worth knowing: The TWA is the stage where many people first discover their true curl pattern, before the weight of longer hair alters how the coils form. What you see at this length is as close to your natural texture as you’ll ever get.
4. The Tapered Natural Cut
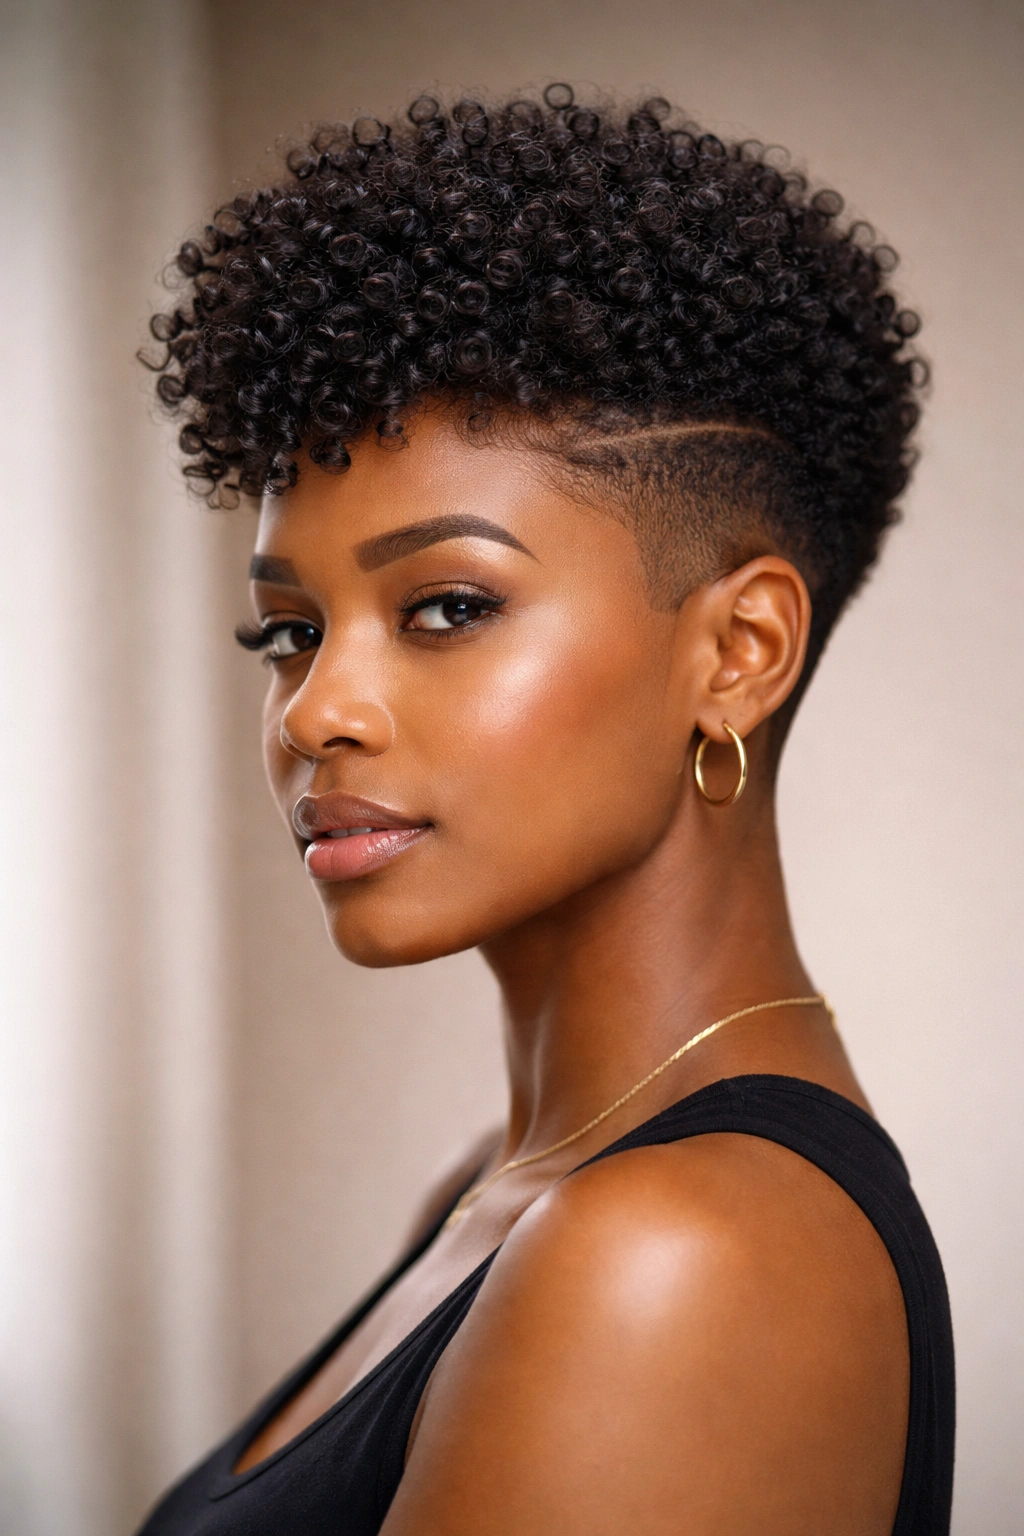
The tapered cut brings something most short curly styles don’t: contrast. The top stays full, natural, and voluminous — whatever your curl pattern creates, it’s celebrated up there — while the sides and back gradually decrease in length down to a close trim at the temples and nape. The result is sharp, polished, and distinctly intentional.
The Visual Power of a Taper on Curly Hair
Most short curly cuts are round by default, which is beautiful. A tapered cut introduces a directional element — fullness where it reads as confident (the crown), and clean precision where it shows craft (the taper). On 4A and 4B curl types especially, the coils at the top create a voluminous contrast against the shorter sides that looks genuinely architectural.
How to Request the Right Taper for Your Texture
- Find a barber or stylist with specific experience in coily and kinky textures — taper cuts on these hair types require a different approach than on finer, looser curls
- Communicate your shrinkage level clearly: your stylist needs to know how much the top will pull up when dry to gauge where the taper should begin
- A low taper starting near the ear is versatile and wearable; a high taper above the ear is bolder and more structured
- Touch up the tapered sides every 3-4 weeks to keep the contrast between top and sides looking intentional
The full top of a tapered cut can be styled as a wash-and-go, a twist-out, a braid-out, or a finger coil set — and the clean tapered sides make every one of those options look more deliberate and refined.
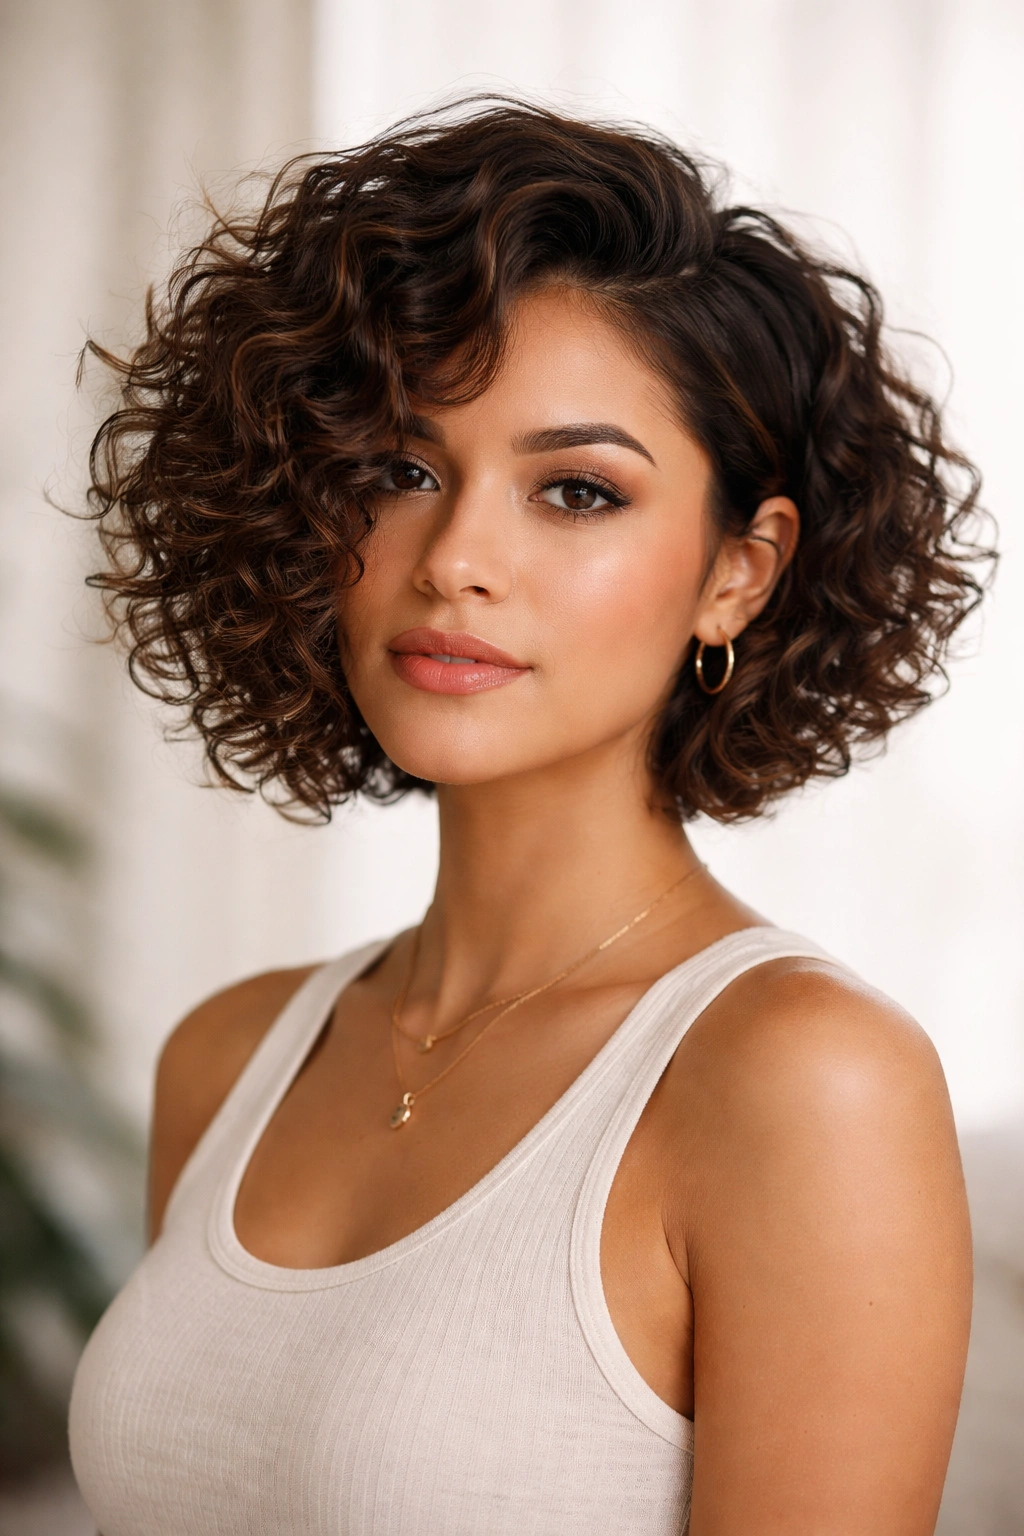
5. The Short Curly Bob
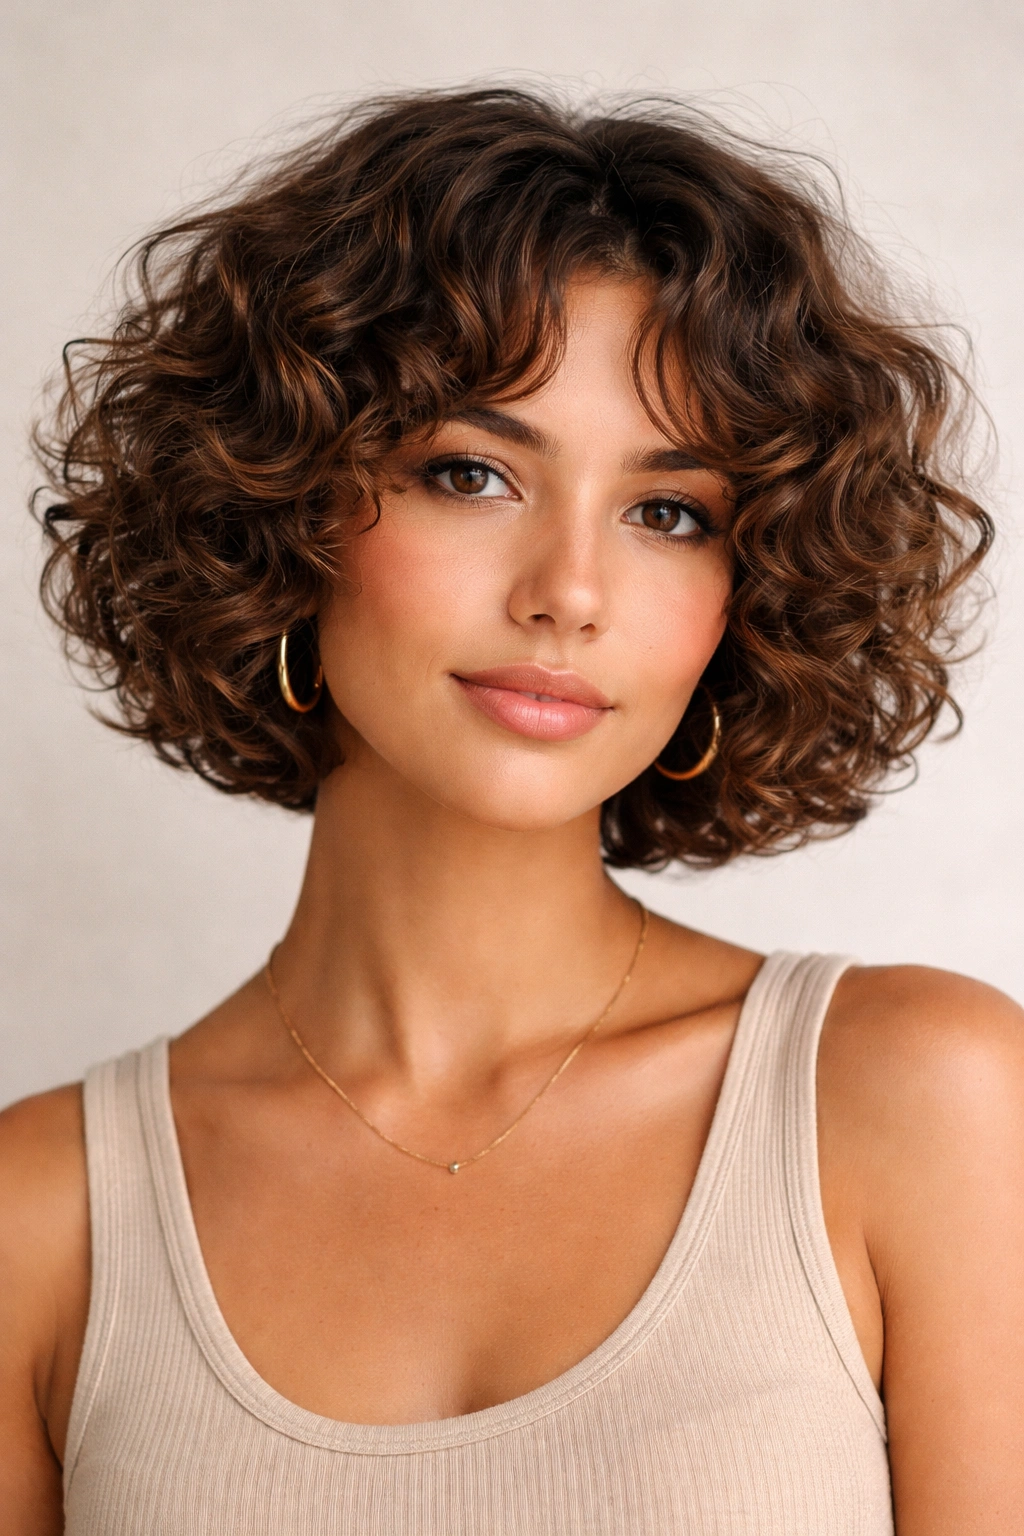
The curly bob is a completely different cut from its straight-haired counterpart — and understanding that difference is the key to loving it. Forget the flat, blunt hemline of a straight bob. The curly bob has a soft, curved, bouncy perimeter that moves differently every single day, sitting roughly between the chin and the ear.
Why Layers Are Non-Negotiable in a Curly Bob
A one-length bob on curly hair creates a triangle shape: flat at the top, wide and heavy at the bottom. That’s almost never the goal. Internal layers encourage each curl to spring upward and outward, creating the rounded, voluminous shape that makes a curly bob so appealing. The layers also reduce bulk without sacrificing overall fullness.
Styling Tips to Maximize the Shape
- Diffuse rather than air-dry to lift the roots and prevent the bob from falling flat against the head
- A center part creates a rounder, symmetrical silhouette; a side part gives the bob a more directional, asymmetrical look
- Use a lightweight curl cream rather than a heavy butter — at bob length, heavy products can drag the ends down and create that triangular shape
- Trim every 8-10 weeks, because once the bob grows past the jaw it starts losing its defining shape quickly
Shrinkage actually works in your favor with this cut. A bob cut to the chin when wet will often sit right at the jaw when dry — which tends to be the most flattering position for most face shapes.
6. The Frohawk
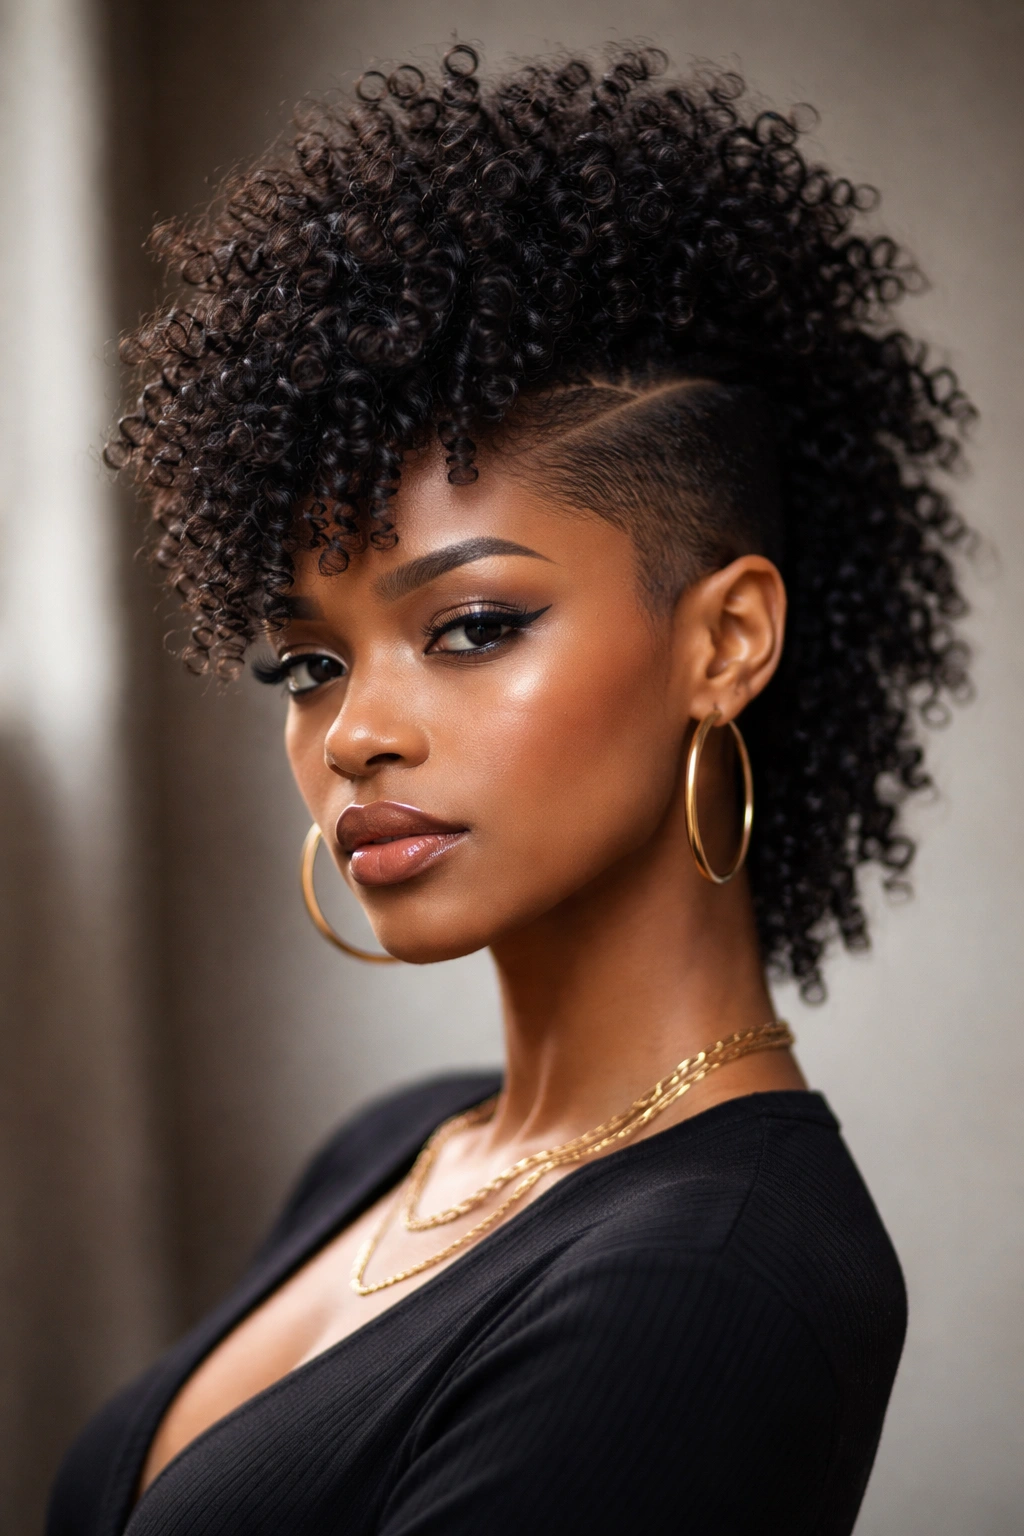
The frohawk channels the structural energy of a mohawk but executes it entirely through natural curl volume and shaping — no shaving, no commitment to a drastic cut unless you want one. The sides of the hair are smoothed down or tapered while the center strip is encouraged to stand as tall and full as possible, creating a bold ridge of curls from the forehead to the nape.
Why the Frohawk Has Such Lasting Appeal
It’s the contrast that does it. The compressed sides against the raised center create a visual line that frames the face powerfully. That central ridge of coils — whether it’s a half-inch of height or two inches — gives the face a defined, sculpted quality. It works particularly well for oval, heart, and diamond face shapes, where the height at the crown adds a flattering proportion.
Creating the No-Shave Version
- Apply a strong-hold gel to each side section while hair is wet, smooth flat, and pin with bobby pins tucked underneath; leave to dry flat
- Apply a volumizing mousse or foam to the center strip and diffuse upward from the roots to encourage height
- Finger-comb the center section upward from root to tip, working in the direction you want the curl to fall
- Seal the shape with a light oil sheen once dry
The frohawk is remarkably versatile — wear the sides pinned for a polished, evening look, or release them for a softer, everyday version of the same basic shape.
7. The Defined Ringlet Style
For curls that fall between 3A and 3C, the defined ringlet style is one of the most visually striking options at short length. Individual spirals are encouraged to form distinct, separated coils that catch light from multiple angles and create a level of dimension that looser, undifferentiated curl clumps simply can’t match.
The Shingling Technique That Creates True Ringlets
Ringlet definition is almost entirely about application method, not product quantity. The technique called shingling involves smoothing a curl cream or defining product through a small section of wet hair — pressing the curl flat against itself and then releasing it — to coax each strand into forming a tight, even spiral rather than fusing with neighboring strands.
How to Maintain and Protect Defined Ringlets
- Shingle in very small sections: the smaller the section, the more distinct and defined each ringlet becomes
- Layer a medium-hold gel over the defining cream to seal the shape and extend how long the ringlets stay intact
- Sleep in a pineapple (a loose, high gathering at the crown secured with a scrunchie) to preserve the ringlets overnight
- Refresh on day two with a water spritz and a single drop of curl cream; avoid re-saturating the entire head
Pro tip: Shingling on short hair takes considerably less time than on long hair — 15 minutes at most — and the payoff is 3-4 days of glossy, defined ringlets that draw exactly the kind of attention they deserve.
8. The Curly Undercut

The curly undercut takes the contrast principle of the tapered cut and makes it more dramatic. Instead of a gradual fade, the undercut creates a sharp, visible line where a closely cropped or shaved section meets the full, natural curly top. The result is bolder, more fashion-forward, and immediately recognizable as an intentional style choice.
What Separates the Undercut from a Standard Taper
A taper changes length incrementally — the gradual fade creates a continuous line from top to sides. An undercut creates a distinct break: you can see exactly where the close-cut section ends and the curly top begins. That sharp demarcation is the whole point. It reads as more structured, more editorial, and harder to achieve casually — which is why it photographs so well.
Maintaining the Shape and Impact
- The undercut requires touch-ups every 2-3 weeks to keep that sharp line visible — as the close-cut sections grow, the contrast diminishes quickly
- Use a small amount of edge control or pomade to clean up the line where the shaved or close-cut section meets the curly top
- On the curly top, you can wear the curls freely for volume, or slick them toward one side for a more directional, deliberate look
- Pair with statement earrings — the cut naturally draws attention toward the face and ears
The curly undercut tends to suit oval and long face shapes particularly well, as the added width from the curly top creates visual balance against a longer face structure.
9. The Braid-Out on Short Natural Hair
The braid-out is a styling technique that temporarily transforms your natural curl pattern into something looser, more elongated, and with a beautiful crimped wave pattern throughout. On short hair, it creates an unexpected result: the appearance of added length, a reduction in shrinkage, and a style that looks polished without requiring any heat whatsoever.
How the Braid-Out Changes the Curl Pattern
When you braid damp hair and let it dry completely before taking the braids down, the curl’s memory gets stretched into the shape of the braid. The result is a defined wave or crimped pattern — softer and more open than your natural coil, with a slight zig-zag texture that adds movement and visual interest. On short hair, this can make your hair look half an inch to a full inch longer.
Step-by-Step for a Clean Braid-Out
- Start on freshly washed, damp hair with a leave-in conditioner worked through thoroughly
- Braid the hair in 6-10 sections: more sections create tighter, more defined waves; fewer sections create looser, more relaxed waves
- Let the braids dry completely before taking them down — removing them while even slightly damp leads to frizz and an undefined result
- Unravel each braid gently, starting from the tip upward, then pull at the roots slightly to create volume
- Seal the finished style with a light oil or shine spray
Patience is the actual technique here. If air-drying overnight, plan for 6-8 hours. A hooded dryer cuts this to 30-45 minutes and locks in moisture simultaneously.
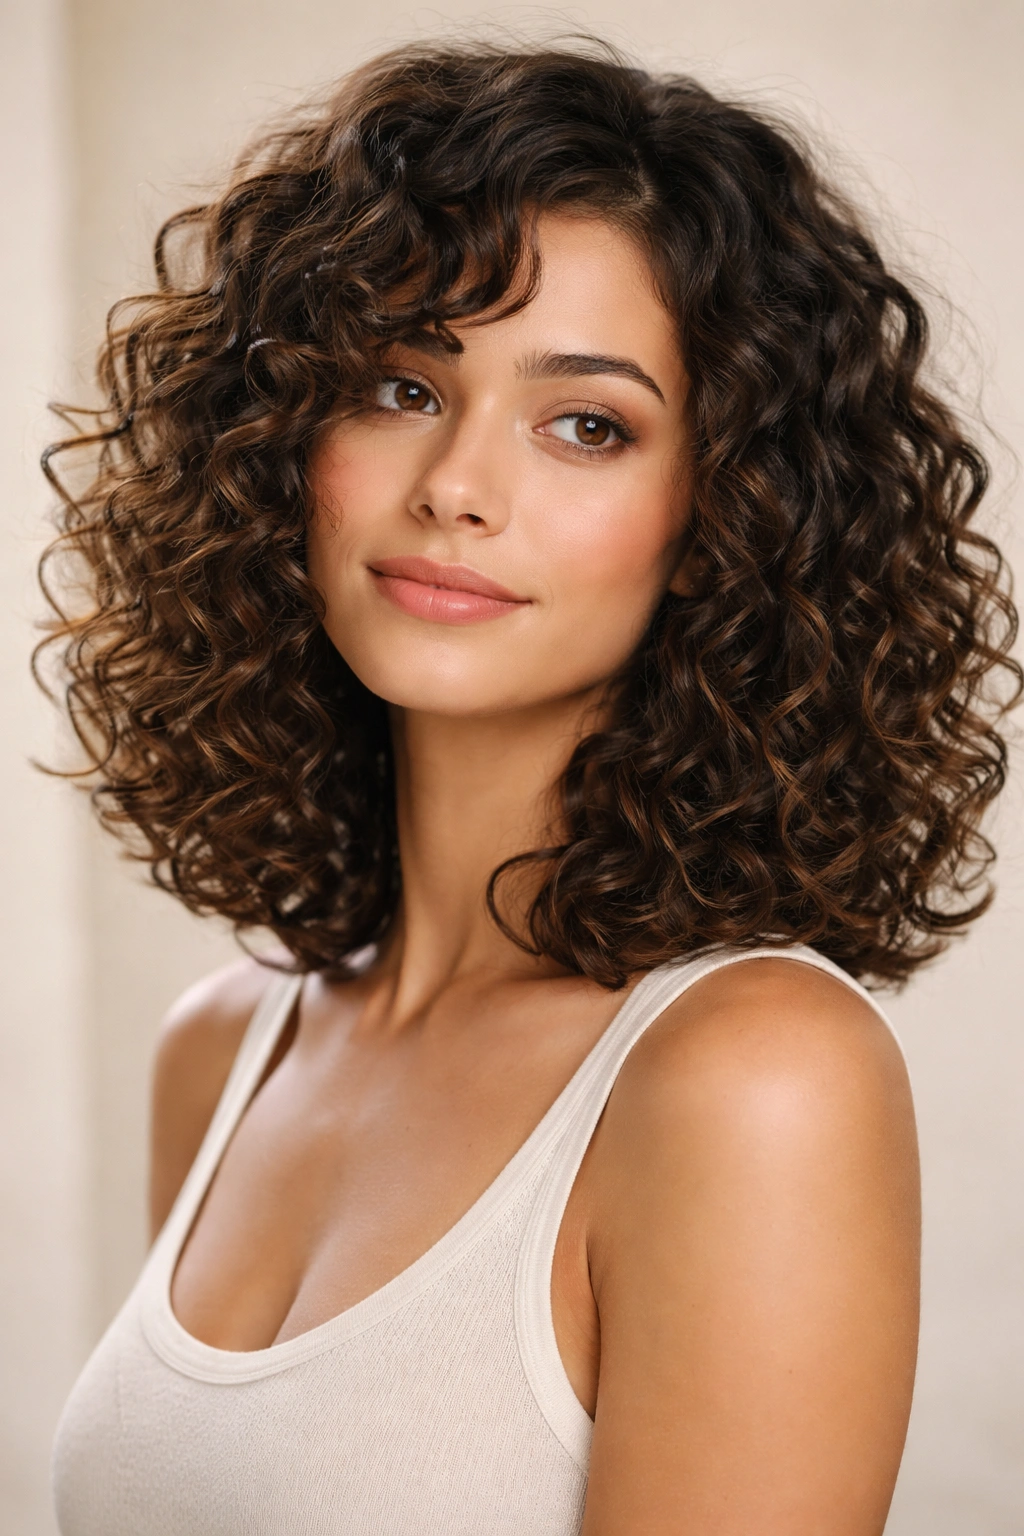
10. The Curly Shag with Layers
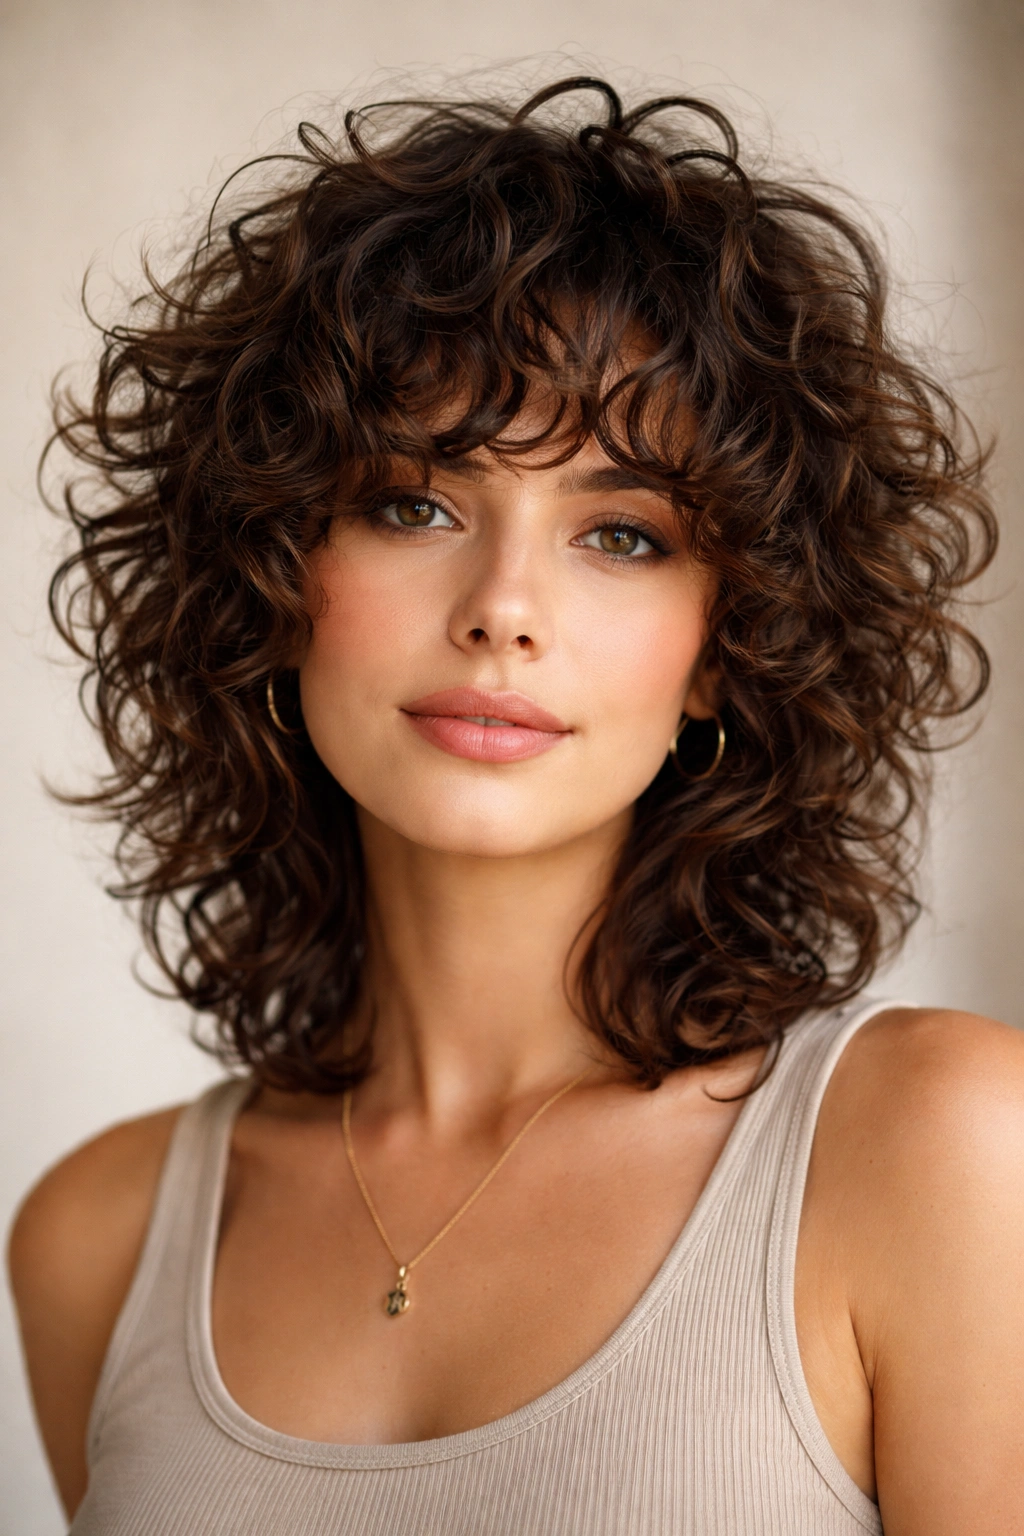
The curly shag borrows its DNA from one of the most enduring haircuts in modern styling history — the layered shag that’s been popular since the early 1970s — and adapts it for curly textures. Lots of internal layers, a feathered perimeter, and a deliberately undone, lived-in quality that manages to look both relaxed and deliberate.
Why Curly Hair and Heavy Layering Work So Well Together
Straight hair can look stringy when layered too aggressively, because the layers hang and separate. Curly hair behaves entirely differently — each shorter layer springs back and creates lift, body, and bounce throughout the entire style. The internal layers reduce weight at the mid-lengths (which prevents the dreaded triangular shape) while the perimeter layers keep the ends light and mobile.
Requesting This Cut from Your Stylist
- Ask specifically for internal layers, not just perimeter layers — the layers need to be throughout the body of the hair, not just trimmed along the bottom edge
- Consider a soft, curly fringe or curtain bang for face-framing effect; on curly hair, a soft fringe creates a romantic, retro-inspired look with almost no extra styling required
- Remind your stylist about shrinkage — the layers should be assessed and cut based on your dry curl length, not wet length
- Finish with a diffuser dry to see the layers at their fullest and most dimensional
The curly shag suits 2C through 3B curl patterns especially well, where the waves and loose ringlets can display the layered movement most visibly.
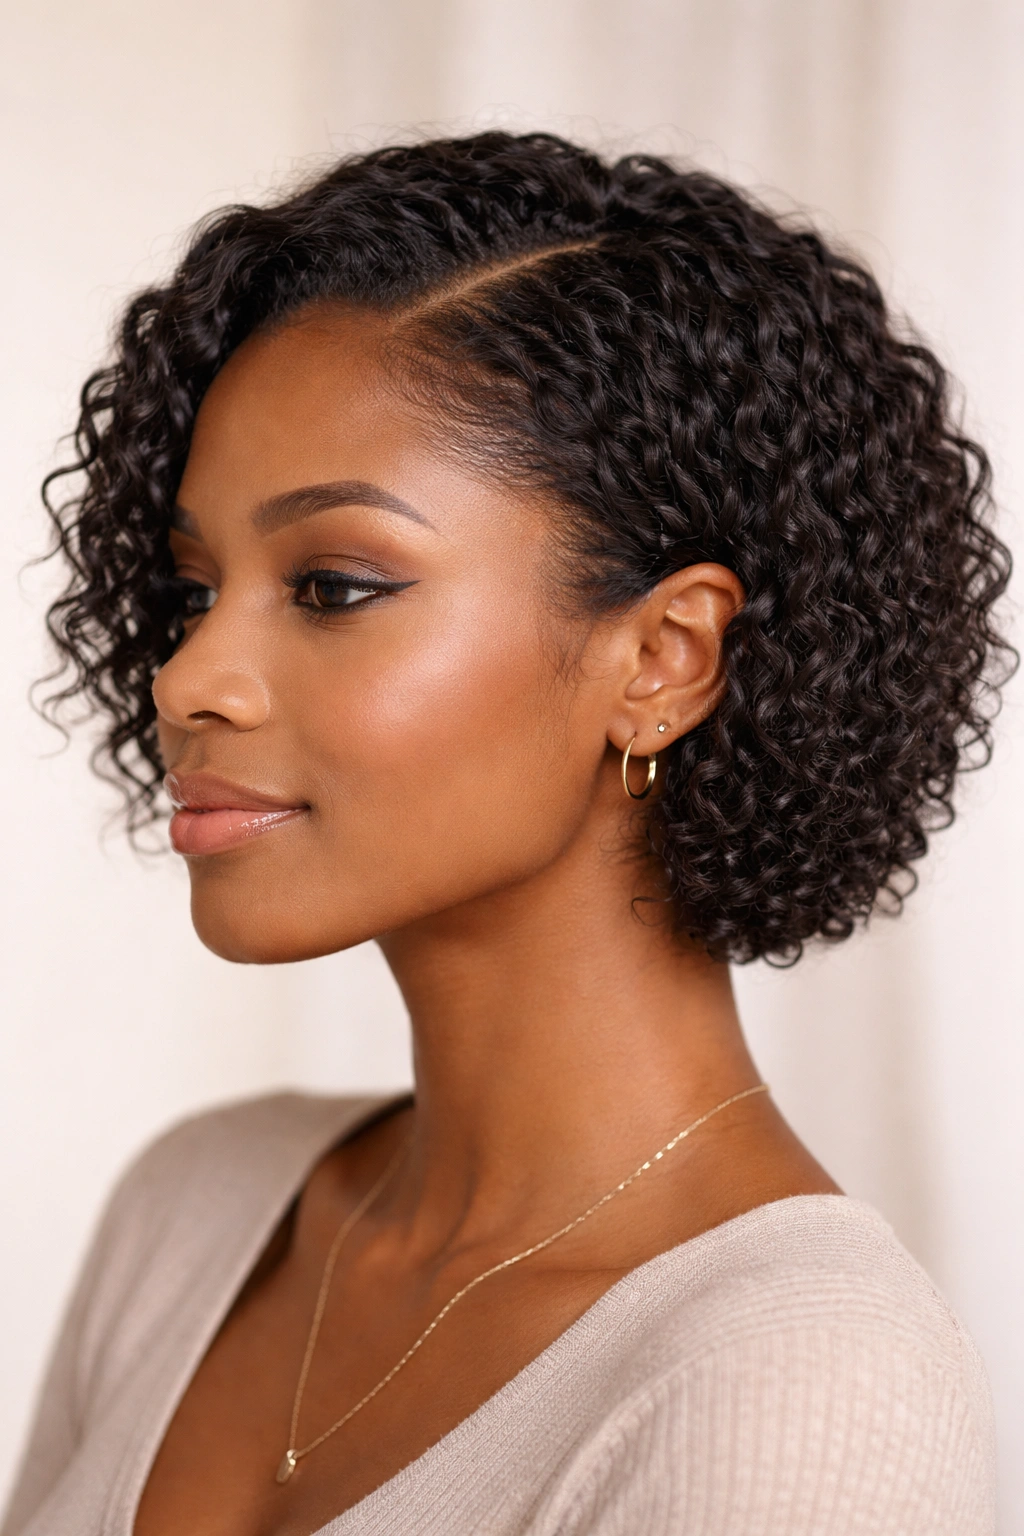
11. The Asymmetrical Curly Bob
One side lands longer than the other. It sounds like a simple variation on the standard bob, but the asymmetrical curly bob introduces a visual energy and forward movement that the symmetrical version doesn’t have. On curly hair, the asymmetry is even more pronounced because the two sides have different lengths, different weights, and different behavior — which is exactly what makes it interesting.
The Geometric Drama an Asymmetrical Cut Creates
There’s a reason this cut has stayed relevant across decades of changing style preferences: the uneven hemline creates a diagonal line that adds inherent movement and visual direction to the silhouette. On curly hair, that diagonal becomes a soft, curved line as the curls spring upward at the shorter end. The result looks dynamic rather than static, bold rather than safe.
Getting the Asymmetry to Land Right
- The length difference between sides should be deliberately noticeable — a half-inch variation reads as uneven; a 2-3 inch difference reads as styled and intentional
- On the longer side, use slightly more product to manage the extra weight without losing definition
- On the shorter side, use less product so the curls can spring freely for bounce
- A subtle highlight or color treatment on the longer side can emphasize the asymmetry and make the diagonal line even more visible
One honest heads-up: Because curly hair shrinks at different rates at different lengths, the degree of asymmetry can shift significantly once the hair dries. Talk through your shrinkage pattern with your stylist before the cut starts, not while looking at the result in the mirror.
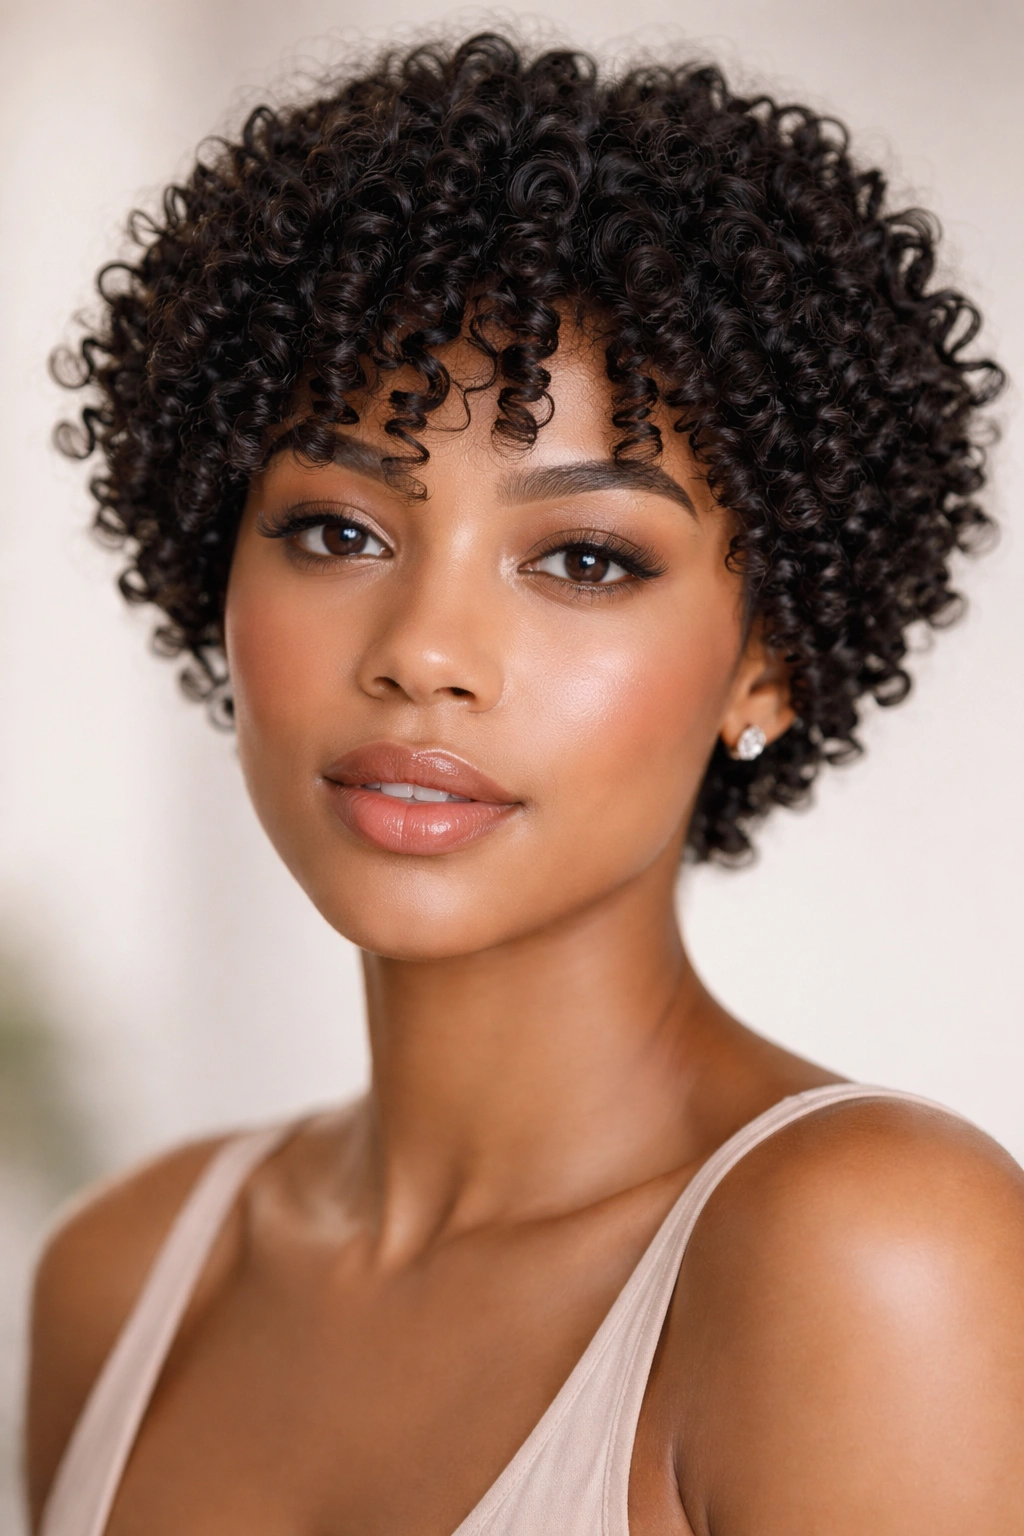
12. The Finger Coil Style
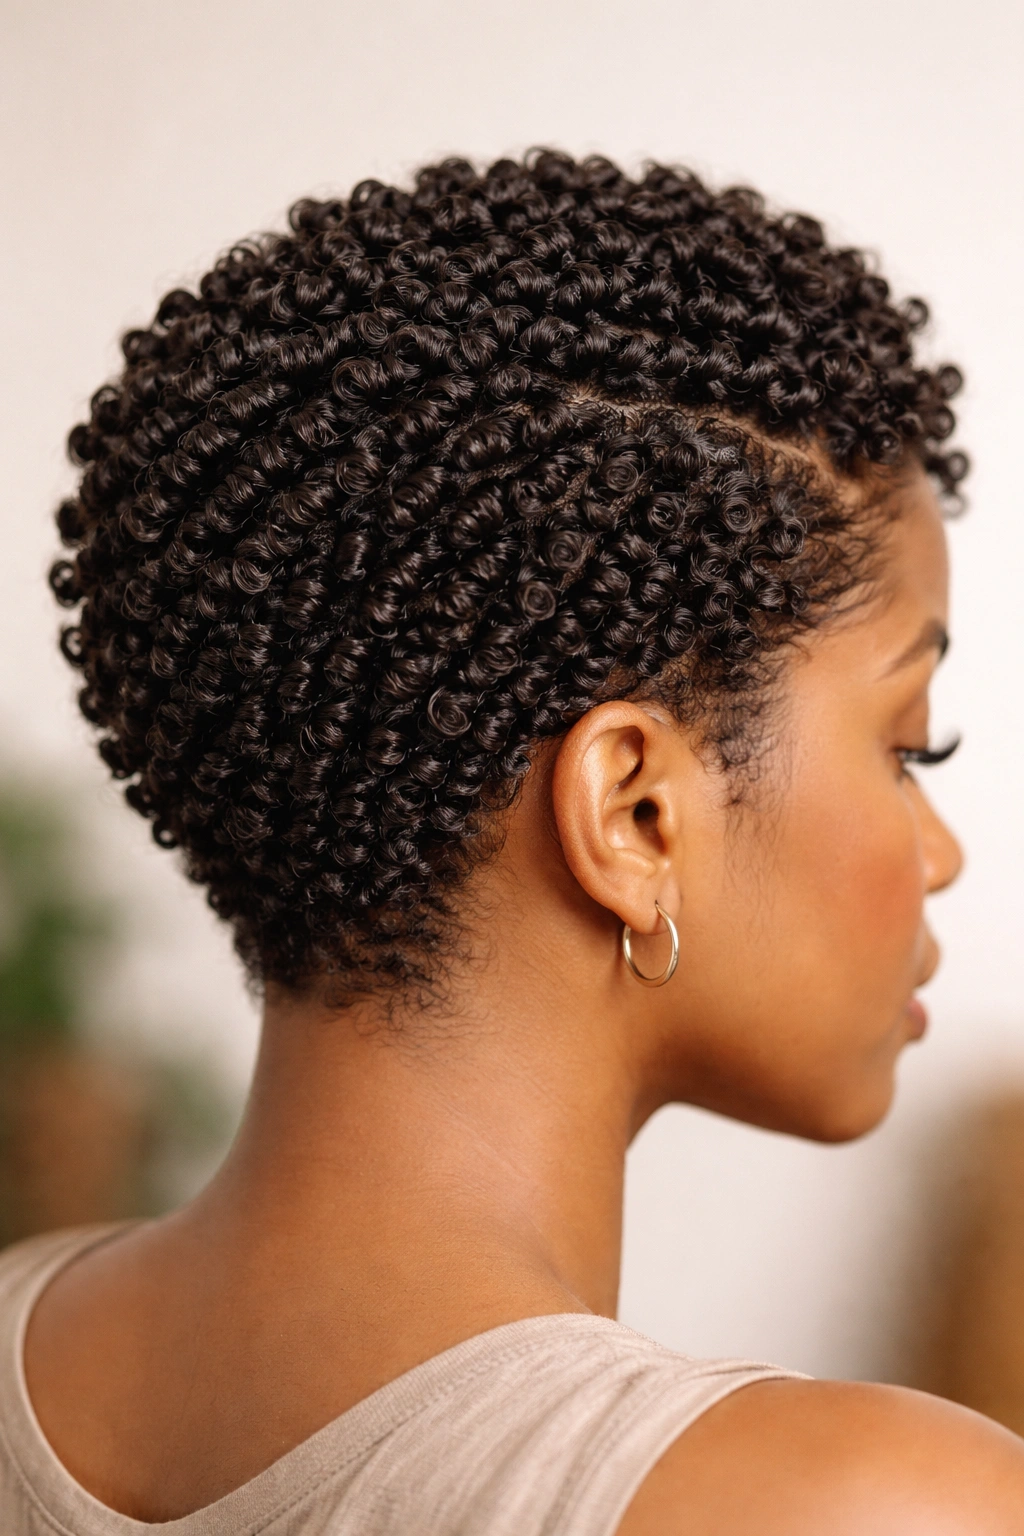
Finger coils are a technique that looks complex in photographs and turns out to be deceptively simple in practice. The motion is straightforward: take a small section of damp, product-coated hair, wrap it around your finger from root to tip, and release. Repeat this across your entire head. The result — a compact arrangement of defined, uniform coils — is one of the most visually striking natural hair styles at short length.
Why Finger Coils Shine on Short Hair
On longer hair, finger coils create cascading, elongated spirals. On short hair, they create a dense, jewel-like field of tiny coils that sits close to the scalp and catches light from every angle. The shorter the hair, the tighter and more precise each coil appears. It works across all coily and kinky textures — 3C through 4C — and looks especially polished on 4A and 4B hair, where the tight coil pattern complements the technique naturally.
The Technique, Step by Step
- Work on freshly washed hair with a curl-defining cream or medium-hold gel applied generously section by section
- Take sections no wider than a pencil for maximum definition — wider sections create looser, less distinct coils
- Wrap each section tightly around your index finger, pressing toward the scalp, then slide your finger out slowly to release without disturbing the coil
- Dry under a hooded dryer or diffuse on low to set the coils with minimal frizz
- Do not separate or touch the coils while they’re drying
Pro tip: Adding a drop of glycerin-based gel to each section before coiling keeps the finished coils soft and defined for days — glycerin draws moisture from the air and prevents the coils from drying rigid or losing their shape.
13. The Bantu Knot-Out Style
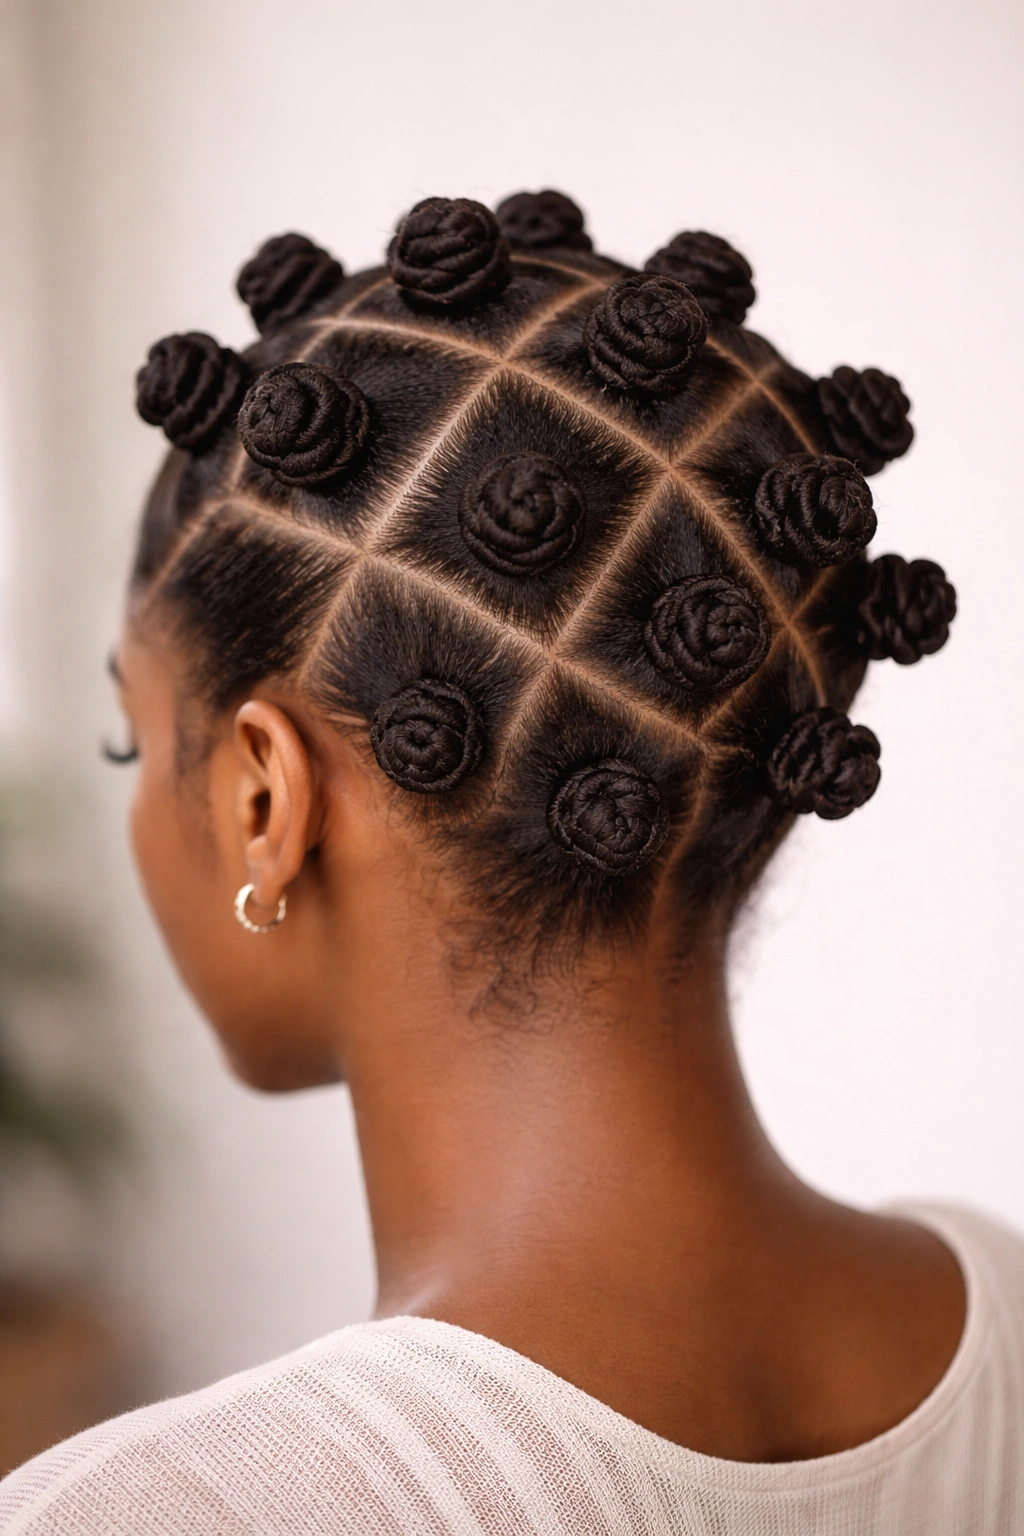
The Bantu knot-out is genuinely a two-for-one: the knots themselves — tight, geometric mini-buns pinned flat against the scalp — are a bold, wearable style with deep cultural roots in traditional African styling. And when you release them after drying, you get something completely different: soft, full, stretched spiral waves that look nothing like your natural curl pattern.
The Two Distinct Looks of the Bantu Knot
Wearing the knots themselves creates a graphic, sculptural look that frames the face with geometric precision. Small, evenly sized knots placed across the head create a mosaic effect that’s striking from every angle. The knot-out, by contrast, is loose and romantic — softly defined waves that move freely and retain the volume of the original curl without the shrinkage.
How to Get a Clean Bantu Knot-Out on Short Hair
- Section damp hair into 8-12 parts (more sections = more defined, tighter waves when released)
- Apply a medium-hold styling cream or setting lotion to each section before knotting
- Twist each section firmly from root to tip, then wrap it around itself in the same direction and pin flat at the scalp
- Dry completely — overnight air-drying or 45 minutes under a hooded dryer both work well
- Release by unwinding each knot from the outside in; pulling the knot straight off causes frizz
- Separate the waves using fingertips lightly coated with oil, pulling gently for volume
A well-executed Bantu knot-out on short natural hair lasts 4-5 days with an overnight pineapple and a satin pillowcase.
14. The Wet Curl Look
The wet curl look — sometimes called the soufflé set or the slicked wet finish — leans fully into what curly hair looks like when it’s soaking wet and product-loaded, and makes that the style rather than a stage to dry through. It’s intentionally glossy, defined, and close-to-the-scalp in a way that reads as polished and fashion-forward rather than unstyled.
Why This Look Works Best on Short Curly Hair
On longer curly hair, the wet look can create drag and heaviness that pulls the curl flat. On short hair, the effect is entirely different — controlled, sculptural, and deliberately sleek. The curls stay defined and compact, with a glossy finish that suits formal settings, editorial styling, or simply a day when you want your hair to look like you put thought into it without the volume of a wash-and-go.
Products and Method for the Wet Curl Finish
- Start with soaking wet, freshly washed hair — this style only works from the completely wet stage; damp or partially dry hair won’t give the same result
- Apply a high-hold gel generously throughout (flaxseed gel works particularly well for a non-sticky hold with serious shine)
- Use a wide-tooth comb or a Denman brush to define the curls and smooth the hair surface; the goal is uniform definition, not maximum volume
- Air-dry or use the absolute lowest heat and speed setting on a diffuser to preserve the glossy appearance — aggressive heat diffusing disrupts the wet finish
- Seal with a light oil or shine serum once fully dry
Worth knowing: The wet look style uses significantly more product than most other techniques, so your next wash needs to include a clarifying shampoo or low-poo to remove buildup before it starts affecting your scalp health.
15. The Short Curly Lob (The Curly Clob)
The curly lob — nicknamed the “clob” in natural hair circles — occupies the space between a bob and a medium-length style, sitting somewhere between the chin and the collarbone. It’s the longest style on this list, and the most forgiving in terms of face shapes, curl patterns, and styling versatility. If you love the idea of short curly hair but aren’t ready to commit to ear-length cuts, this is your entry point.
What Makes the Curly Lob So Wearable
At this length, curls have enough weight to stretch slightly and show their full pattern rather than pulling up into maximum shrinkage. You get real definition, real movement, and real variety in how you style it. Wear it down for fullness, half-up for balance, or tucked behind the ears for a cleaner look — each option creates a completely different visual result from the same cut.
How to Style and Maintain the Curly Lob
- Request long, sweeping internal layers — without them, the lob develops a triangular shape where the sides widen dramatically at the ends, which is the most common mistake at this length
- Use a lightweight curl cream rather than a heavy butter or dense curl pudding; at clob length, heavier products drag the curl down and flatten the mid-length where you want the most body
- Diffuse on medium heat with the bowl diffuser technique (flip your head forward, place the curl clumps into the bowl, and hold without moving) to preserve curl clumps and build root lift simultaneously
- Trim every 10-12 weeks to remove splits before they travel up the shaft and cause the ends to frizz and look thin
One honest note about the clob: It grows out into an in-between length quickly — not quite short, not quite medium — and that stage can feel uncomfortable for people who like clean, defined cuts. Commit to regular trims to maintain the lob’s shape, or have a clear plan for what comes next as it grows.
Final Thoughts

The best short curly hairstyle isn’t the one with the most Instagram saves — it’s the one that fits how you actually live: your product budget, your morning time, your curl type, and what you genuinely find beautiful when you look in the mirror. These 15 styles cover an enormous range of commitments and aesthetics, which means the hard part isn’t finding something that looks good. It’s being honest about which one you’ll actually enjoy maintaining.
Start by understanding your curl type at its most hydrated and unmanipulated. Everything else — the cut, the technique, the product selection — builds on that foundation. A style that works against your natural texture is a daily battle. A style that works with it is, more days than not, genuinely easy.
And when you sit down with your stylist? Bring photos, bring curiosity, and bring your shrinkage data. Tell them how much your hair pulls up when it dries. That single piece of information shapes every decision a skilled curly hair stylist makes — from where the taper starts to how long the layers land to whether a bob should be cut at the chin or two inches below it.
Short curly hair asks you to trust your texture. Every style on this list is ultimately just a different way of doing exactly that.