Curly hair has a complicated relationship with headbands — they can either transform your look completely or slide right off your curls, leaving you frustrated. The truth is, with the right technique and the right headband style, you can create stunning looks that actually work with your natural texture rather than against it. Headbands offer a practical solution for days when your curls need some wrangling, while simultaneously adding an intentional, polished element to your style.
The key difference between headband styles that work and ones that don’t comes down to understanding your specific curl pattern and how to anchor a band so it stays put. Whether you’re working with loose waves, spring-like coils, or thick, defined curls, there’s a headband technique designed for you. Many people assume they have to abandon headbands because traditional approaches don’t account for volume and texture — but that’s where intentional styling and the right accessories come in. You’re about to discover how to make headbands work as a genuine part of your curly-hair toolkit.
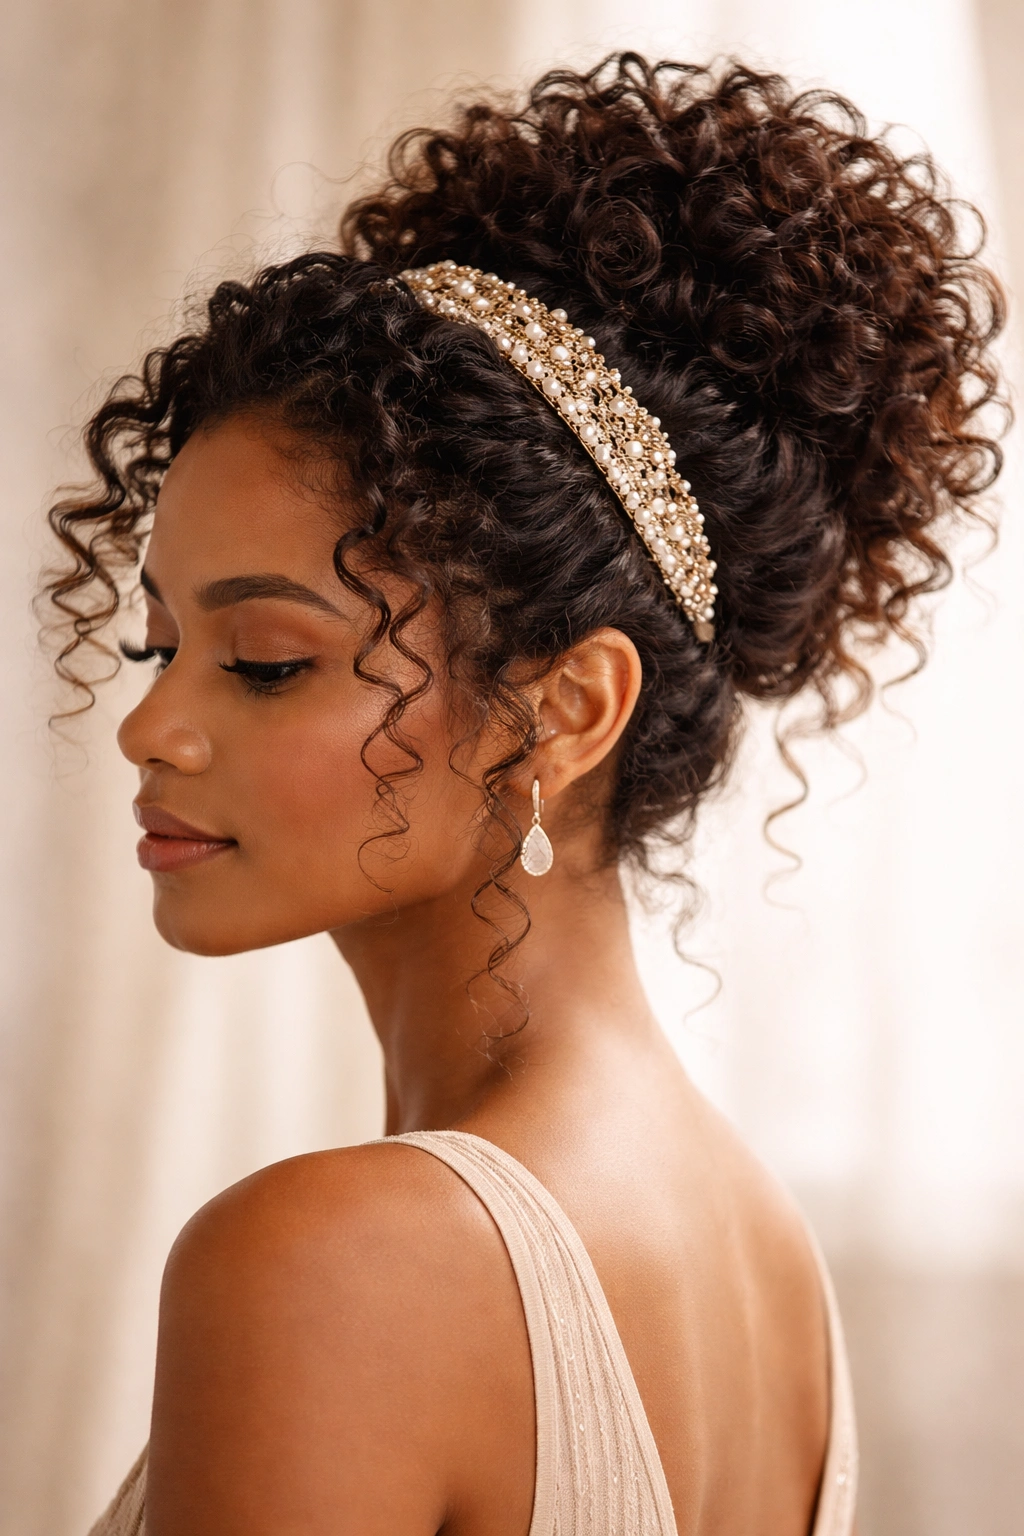
1. The Sleek High Pony with Decorative Headband
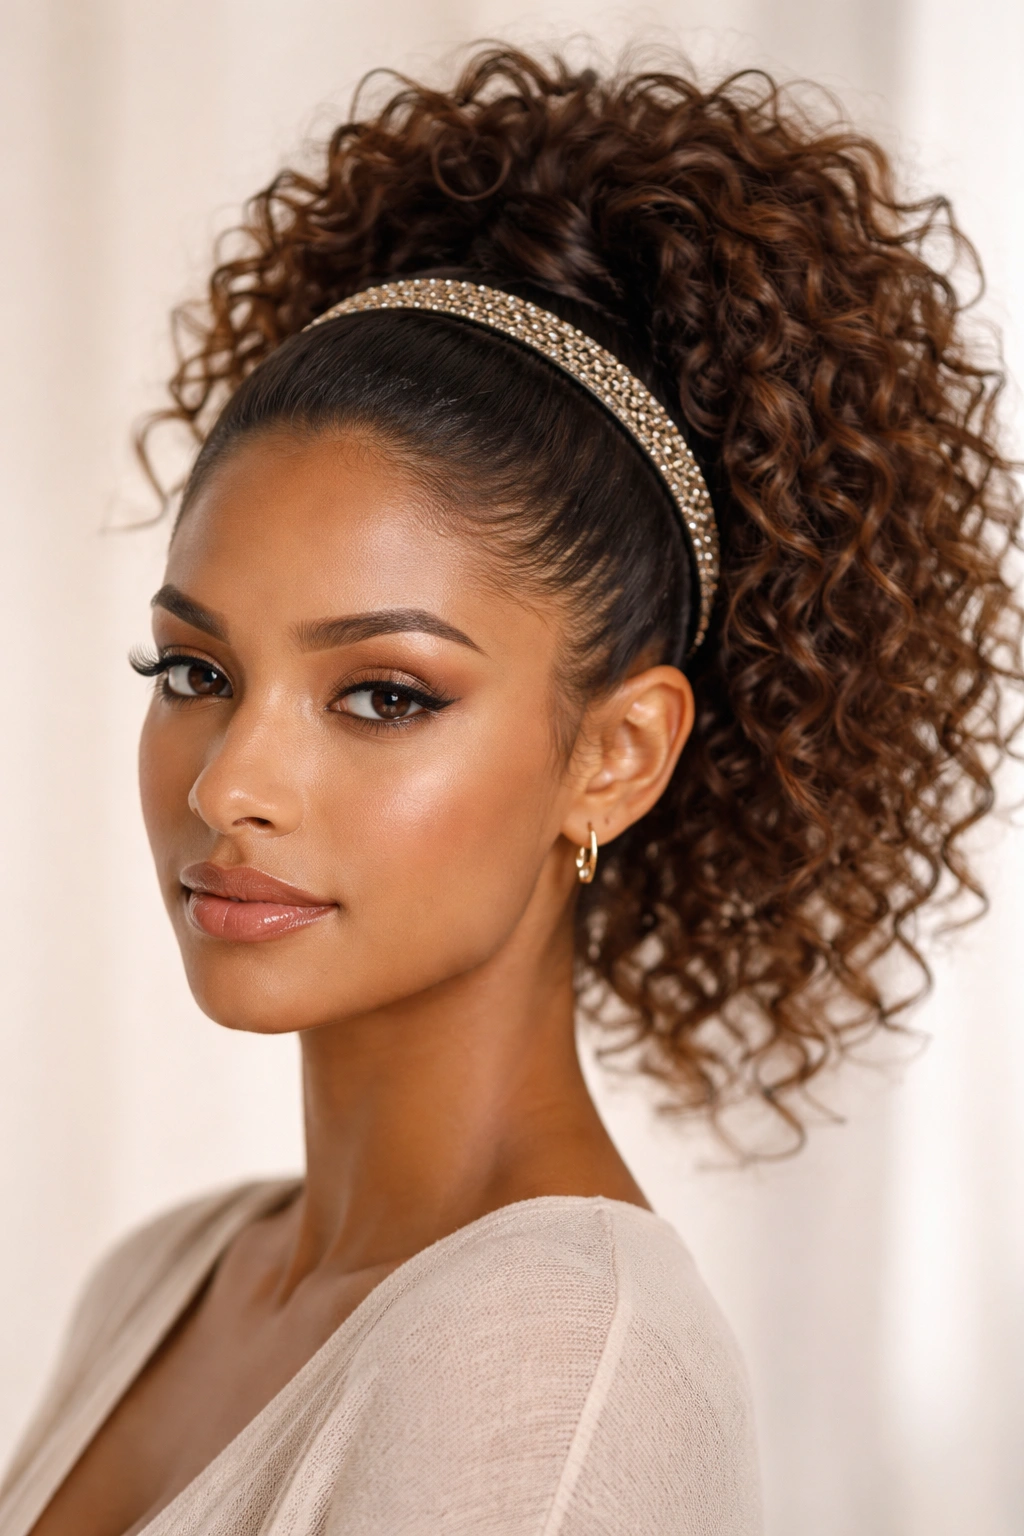
This style works beautifully when you want maximum lift and visual drama. The high pony concentrates curl volume at the crown and back of your head, creating height that a sleek headband can anchor against. Start by brushing your curls back gently into a high ponytail at the crown — you’re not flattening them, just directing them upward. Secure with an elastic, then slide a metallic or beaded headband over the elastic so it sits snugly.
Why This Works for Curly Hair
The high position of the ponytail means your curls have natural height and body, which provides the anchor point a headband needs to stay in place. Your curls hold the band up rather than it sliding down. This is particularly effective for people with medium to thick density curls that create natural volume.
How to Make It Last All Day
- Use a flexible metallic band or padded headband rather than a rigid plastic one — flexibility means it won’t dig into your scalp or slip as you move
- Apply a light hairspray before placing the band so the surface of your ponytail has slight grip
- Create small texture with your fingers before the band goes on — smooth, flat ponytails are more slippery
- Secure the elastic tightly but not painfully; the band should sit directly over it
Pro tip: If your headband tends to slip backward throughout the day, use a bobby pin to anchor the back edge of the band to a section of your ponytail hair underneath.
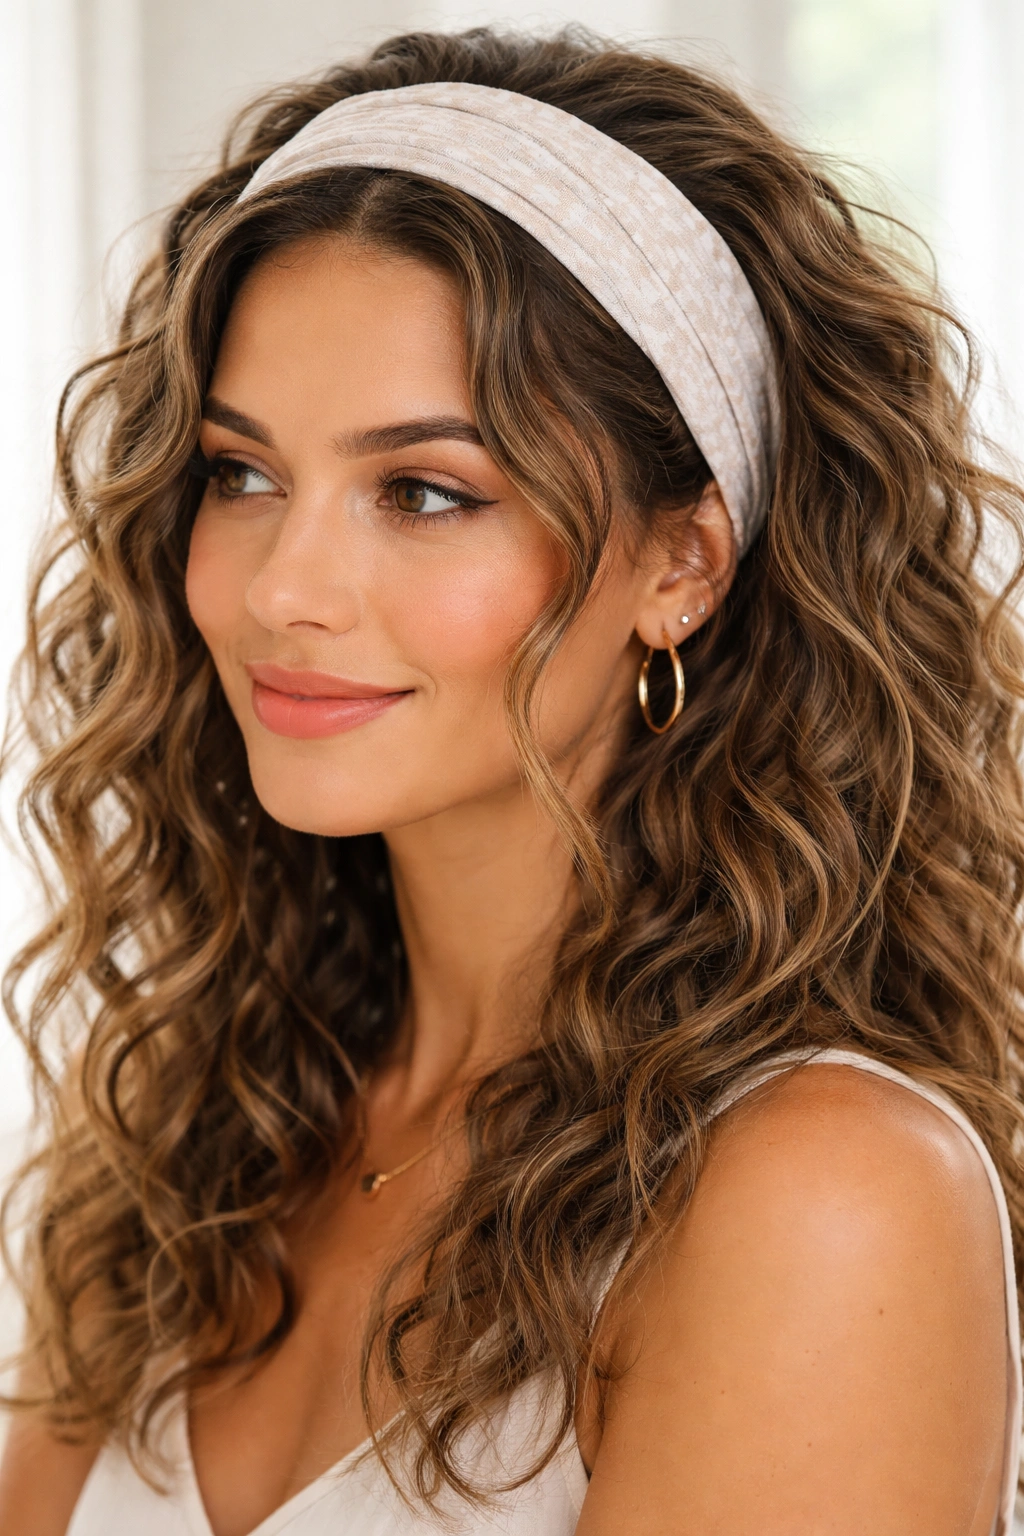
2. The Boho Twisted Crown with Patterned Headband
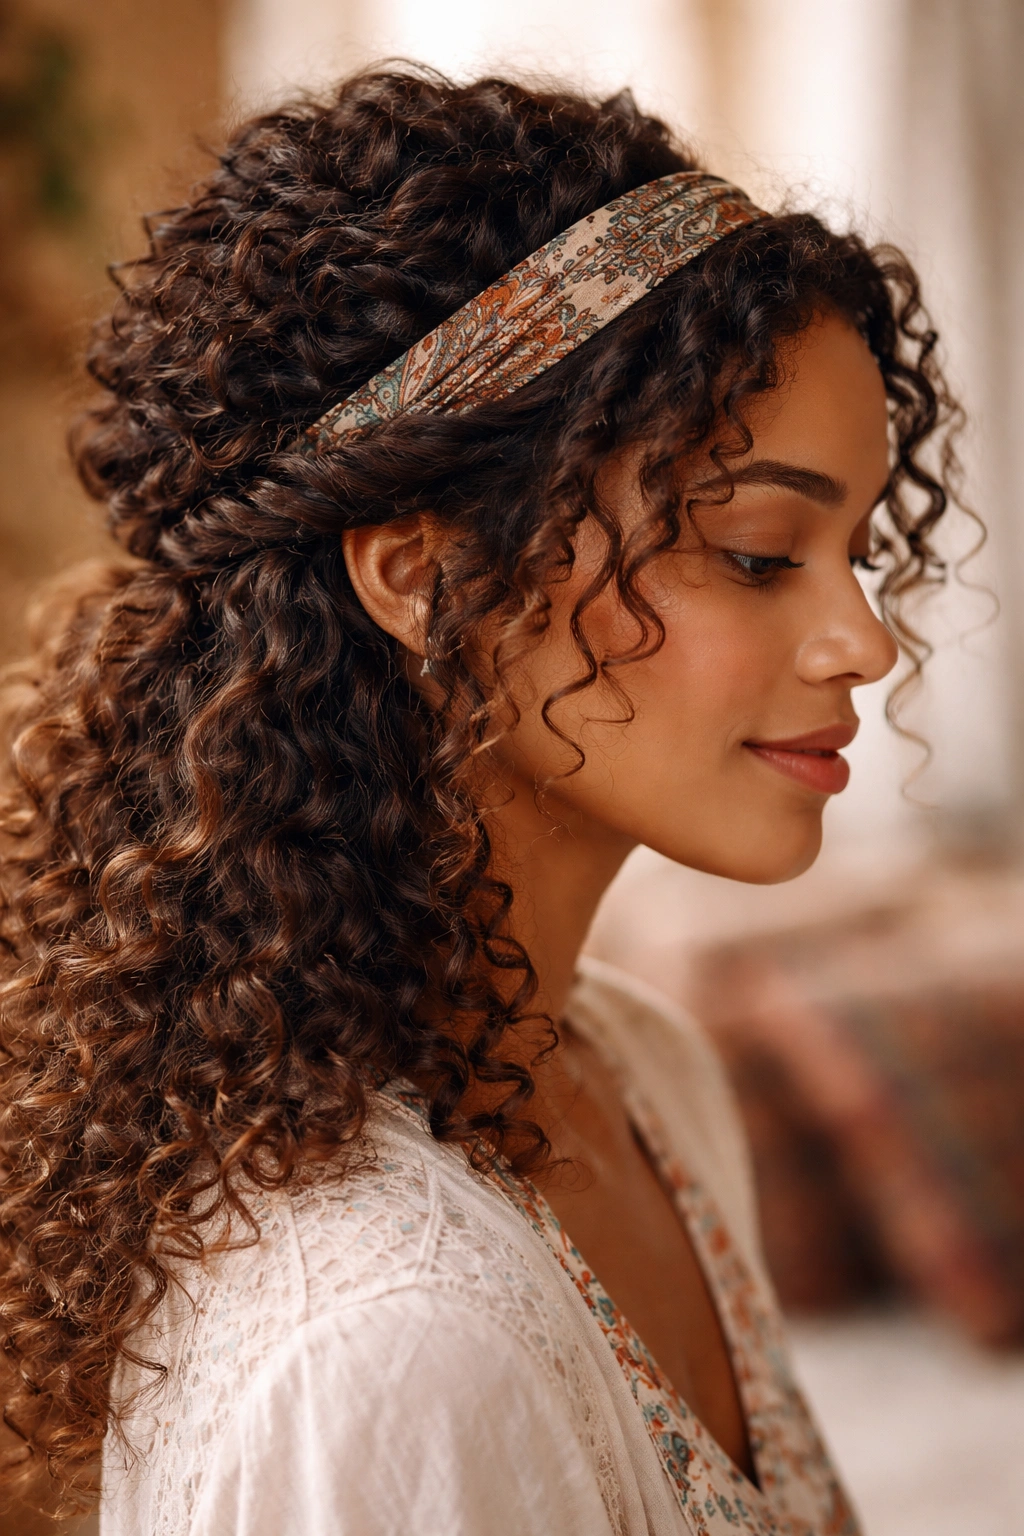
This romantic, texture-forward look plays into curly hair’s natural bohemian vibe. Instead of a traditional parting, you’ll create soft, subtle twists at the sides of your head that lead toward the back. Each twist happens in the way that feels most natural to your hair — you’re not aiming for perfection, just gentle spirals that add visual interest. A patterned fabric headband or a woven leather band anchors everything, creating a “crown” effect that frames your face.
The Styling Mechanics
Separate a section from one temple area, twist loosely toward the back of your head, and let natural curls peek through the twist. Do the same on the opposite side. These twists should be loose enough that your curls are visible within them — tight twists look formal, not boho. The headband then sits horizontally across the back of your head, catching both twisted sections and securing them into place.
What Makes This Look Appear More Voluminous
- The twists draw eye upward and inward, making your face appear more defined
- Loose twists allow curl volume to show, which amplifies the romantic aesthetic
- A patterned headband adds visual weight and interest that balances facial features
- This style actually showcases your texture rather than flattening it
Insider note: This works best when you have at least two days of texture in your curls — freshly washed curls can be too soft to hold a twist. Dry shampoo or a texturizing spray the day before helps enormously.
3. The Half-Up Half-Down with Wire Headband
This modern approach gives you the best of both worlds: you get to show off your full curl pattern while keeping hair off your face. A wire headband (the kind with flexible metal inside fabric) is essential here because you can actually shape it to your head and adjust how much hair it holds. Start by sectioning the top half of your curls back, as if you’re doing a partial updo, then secure that section loosely with a clip.
Placement and Anchor Technique
Instead of placing the headband on top of your head, wear it underneath the top section. Take the wired headband and position it so the top edge sits just above your ears, curving across the back of your head. Now release your top section and let it drape over the headband — this creates the visual effect of a half-up style while the band actually holds everything. You can even tuck small curl sections under the band for extra security.
Real-World Advantage
This positioning means the headband is actually holding hair up from underneath, so it won’t slip no matter how much your curls relax or move throughout the day. You get style security without the “pinched” feeling of a traditional headband against your scalp. Wire headbands also allow you to customize the pressure — tighter in the back where it needs grip, looser at the sides for comfort.
Worth knowing: If your headband is too rigid, it’ll feel uncomfortable under a full section of hair. Look for headbands with truly flexible wire that can shape to your head’s contours without creating pressure points.
4. The Top Knot with Fabric Wrap Headband
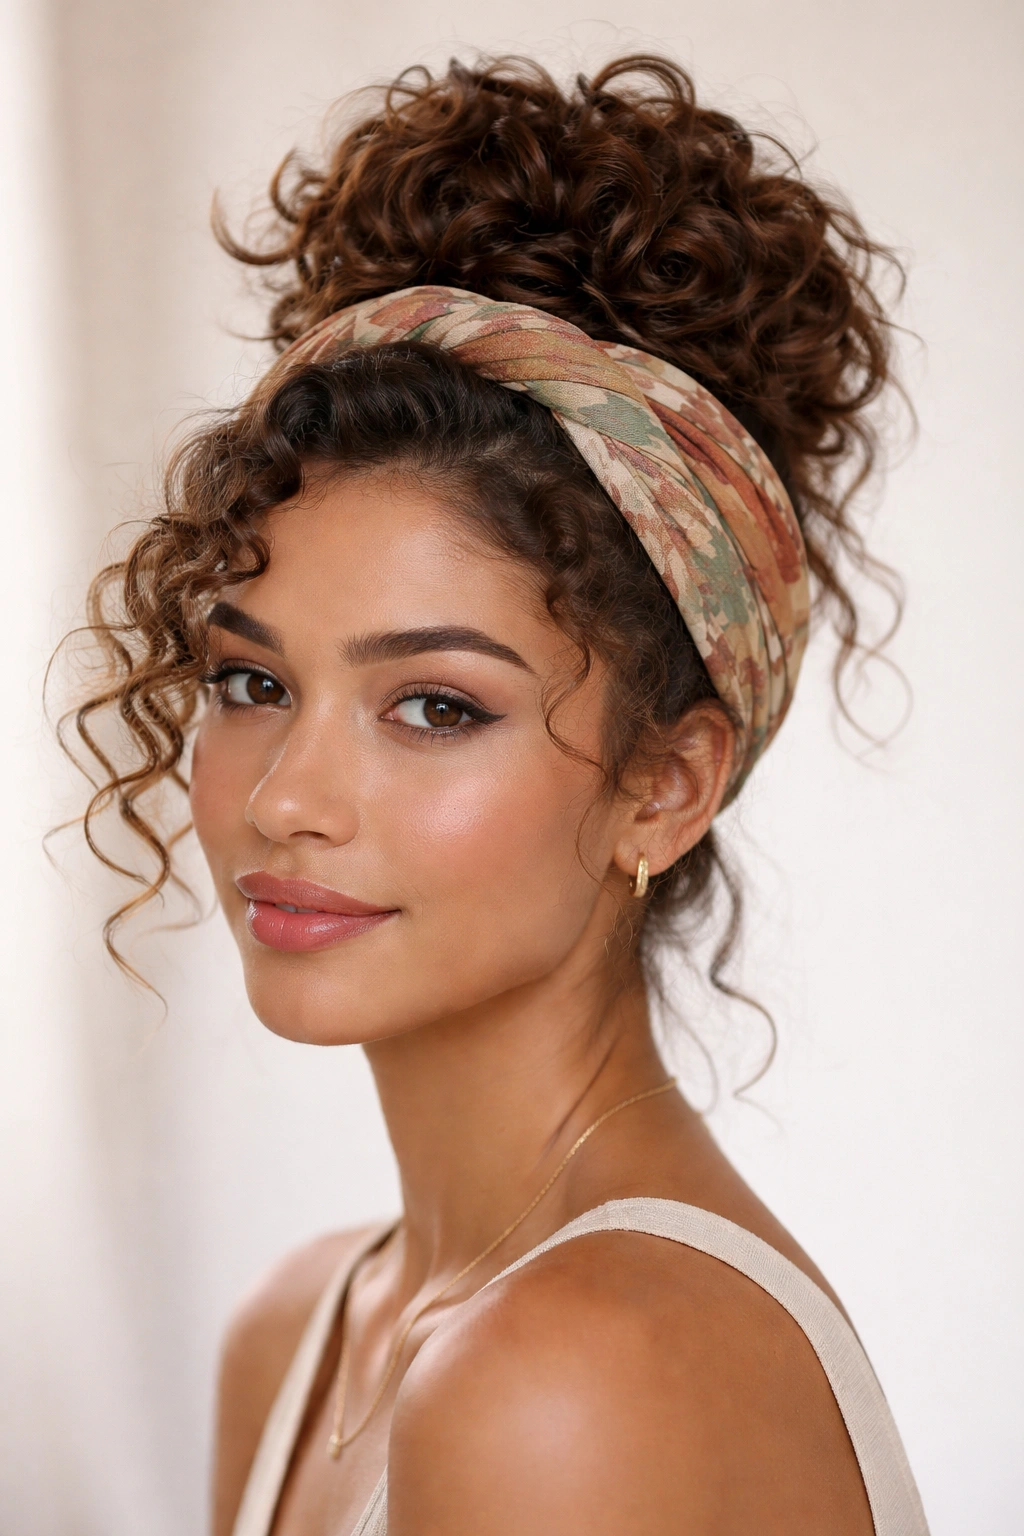
The top knot is practical and polished simultaneously, and adding a fabric wrap headband transforms it from casual to intentional. This works across all curl types because the knot itself doesn’t require hair to be smooth or flat — your curls can remain textured within the knot. Gather all your hair to the crown of your head and twist it into a loose knot shape, securing it with bobby pins and an elastic.
How Fabric Bands Make This Style Pop
A fabric wrap headband or a scarf-style band wrapped around the base of your knot adds an instant finishing touch. You can wrap the fabric through the knot structure itself, weaving it in and out of the curl formations, or simply wrap it around the elastic that secures your knot. The fabric anchors any stray curls while adding visual interest and preventing that “I just threw my hair up” appearance.
Construction Tips for Maximum Hold
- Use at least two elastics stacked together to hold the knot — one heavy elastic tends to slip through textured curls
- Don’t pull your hair too tightly when gathering it; there should be slight looseness so the knot feels soft and intentional
- Wrap your fabric band starting at one side, going around the back of the knot, and finishing at the opposite side — this creates balanced visual weight
- Tuck the fabric ends under or secure them with bobby pins so they don’t flap
Real talk: Top knots work better when your curls have a bit of age to them (a day or two since washing). Fresh curls are too heavy and slip more easily, while slightly textured curls grip better and hold knots more securely.
5. The Space Buns with Delicate Headband Accent
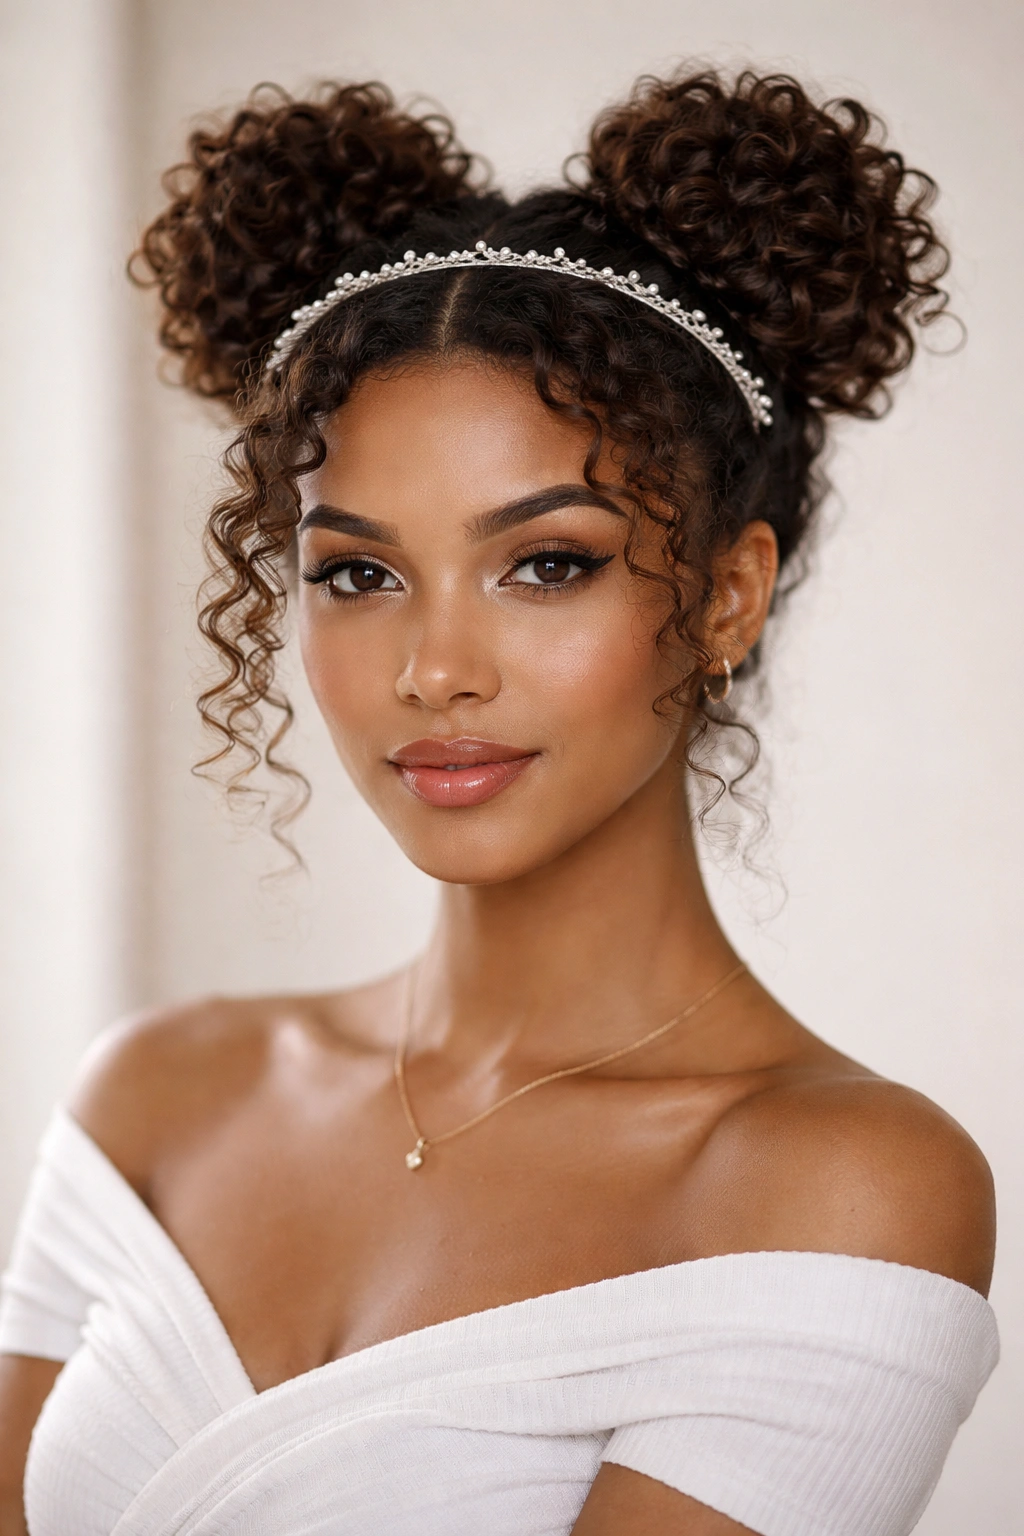
Space buns are playful and cool, and they actually work really well with curly hair because the natural texture fills out the buns beautifully without any need for smoothing or teasing. Create two sections on either side of your head, twist each one loosely (not braiding, just twisting), and wrap each twist around itself to form a bun. Secure each bun with bobby pins and small elastics.
Headband Placement for Cohesion
Rather than wearing a traditional headband across your forehead, position a delicate wire or fabric headband across the crown area where your two buns sit. The headband should sit slightly in front of the buns, creating visual separation between your forehead and your crown. This placement prevents the whole look from feeling too childish — it adds elegance through careful positioning.
Why This Works Visually
Two buns plus a headband create a balanced, triangular composition that’s visually striking. The headband acts as a visual connector between the buns, making the overall look feel more intentional and styled rather than assembled. A delicate metallic band, pearl-studded band, or thin fabric band all work beautifully here without overwhelming the style.
Pro tip: Use colored or metallized bobby pins that match your headband — this creates visual continuity and makes the whole look feel more cohesive, even if some of your bobby pins are visible.
6. The Curly Braid Wrapped with Headband
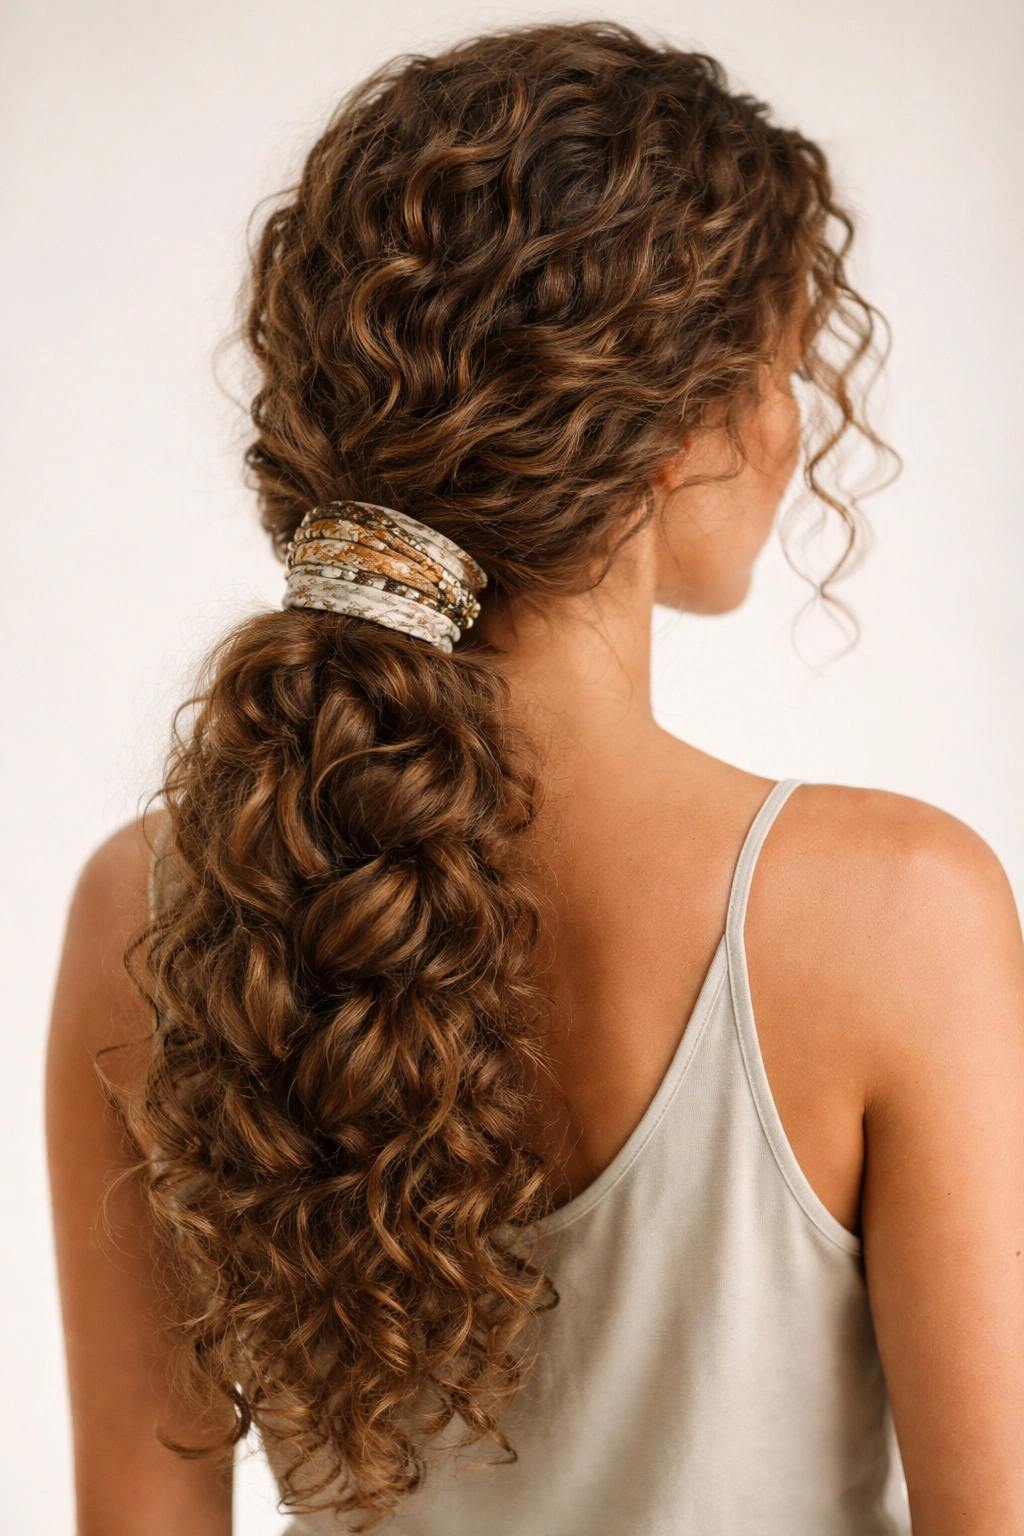
This style showcases your curl pattern while creating a contained look that’s perfect for active days or when you want structure without heat styling. Create a braid by sectioning three strands and braiding loosely — the key with curly hair is braiding generously and loosely so your curls don’t get flattened into the braid. A loose, chunky braid with visible curl texture is infinitely more interesting than a tight, flat one.
Incorporating the Headband
You can create a single braid down the back of your head and wrap a headband around the base, or create two side braids and connect them at the back with a headband that bridges across. The headband doesn’t need to hold anything in this case — it’s purely decorative, adding visual interest and helping blend the braids into the rest of your curl pattern. A metallic band or beaded band works particularly well because it creates a focal point that draws attention to your braiding work.
Braid Techniques That Work Best for Curls
- Dutch braids (braiding underneath rather than over) create more texture and visual interest with curly hair than standard braids
- Loose, chunky three-strand braids that allow curls to puff out the sides look more intentional than tight braids
- Fishtail braids, while fiddly, create a gorgeous textured look when you have curly hair because the thin strands highlight your natural texture
- French braids starting from the crown and braiding down create elegant containment while showing off your curl pattern
Insider note: Braiding curly hair is easier when it’s not freshly washed. Wait at least one day after washing so your curls have slight texture and grip, which makes braiding dramatically easier.
7. The Frizz-Controlling Turban-Style Wrap
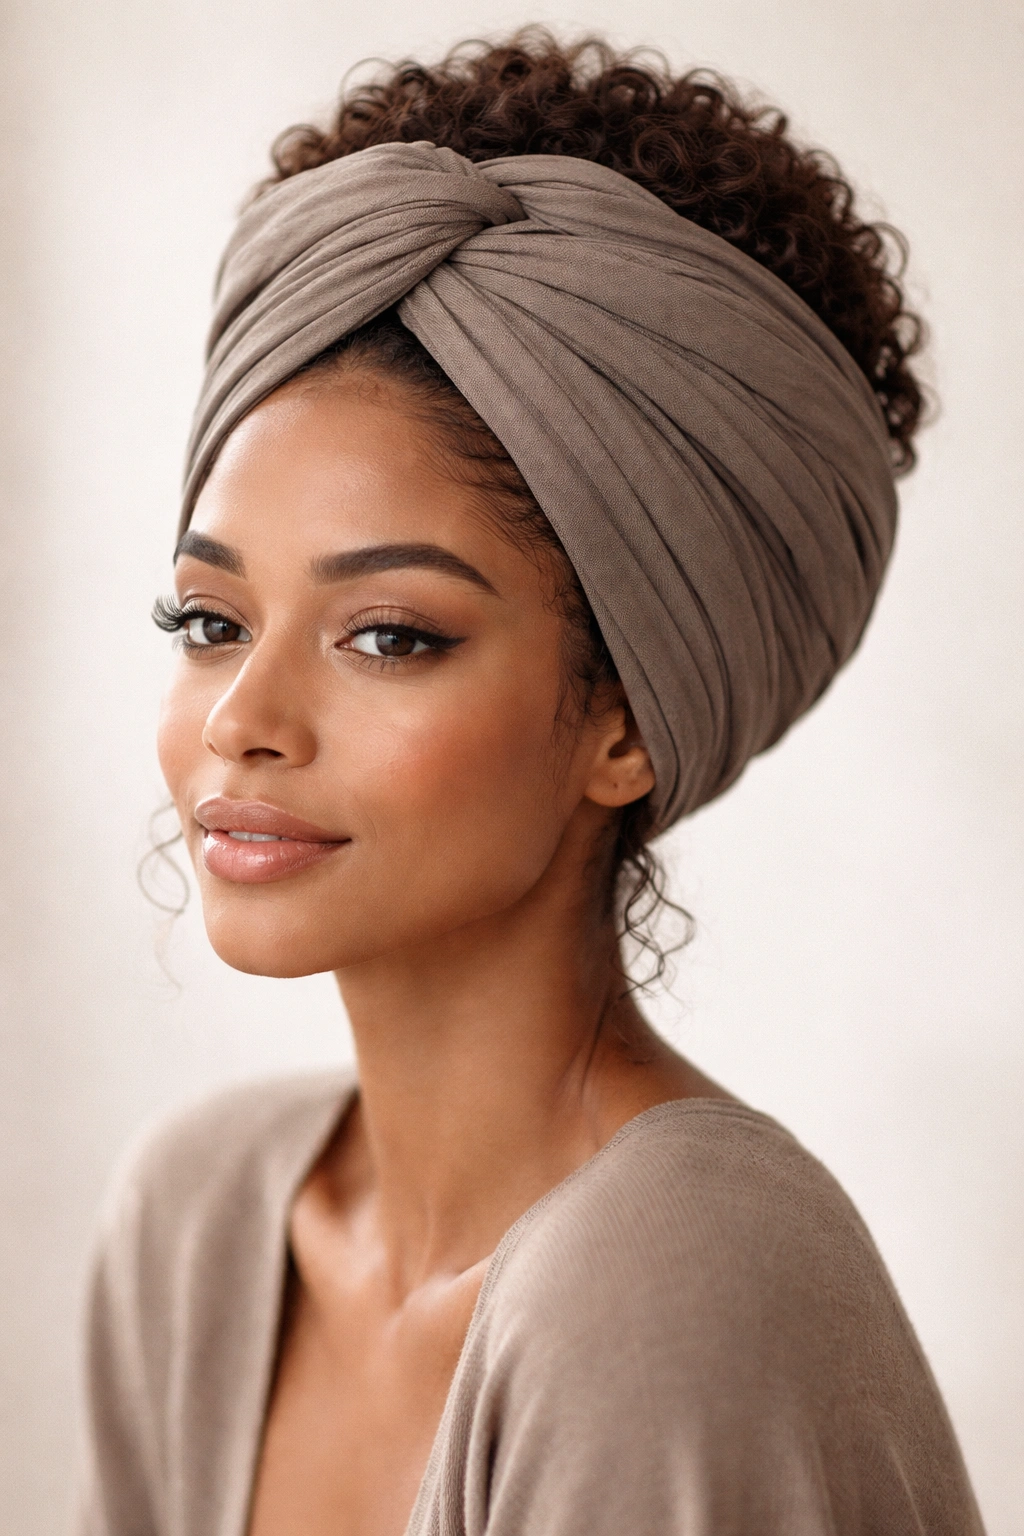
This is the style you wear when you want maximum practicality and the appearance is secondary — though it can actually look quite chic depending on your headband choice. A turban-style wrap containsall your curls and holds them in place while minimizing frizz and protecting your curl formation. You’ll use a longer fabric band or a scarf-style headband for this one.
Construction Steps for Actual Hold
Flip your head upside down and gather all your curls up toward your crown as if you’re doing an inverted topknot. This repositions all your curl weight toward the top of your head. Then flip upright while maintaining that gathered position, and wrap your fabric band around the gathered curls, securing the fabric by tucking the ends through themselves or using bobby pins. The goal is an enveloped turban shape where no loose curls escape.
When This Style Is Actually Stylish
Don’t think of this purely as a protective style — it’s also a legitimate fashion choice. Silk turbans, patterned fabric wraps, and luxe metallic bands can make this look intentional rather than purely practical. Wear it with a well-fitted outfit and minimal jewelry, and it reads as high-fashion. Wear it with gym clothes and it reads as practical. The styling is entirely in your confidence and context.
Worth knowing: If you’re wearing a turban-style wrap for several hours, check under the band occasionally to make sure it’s not creating flat spots in your curls. Slightly loosening the band periodically helps maintain your curl pattern.
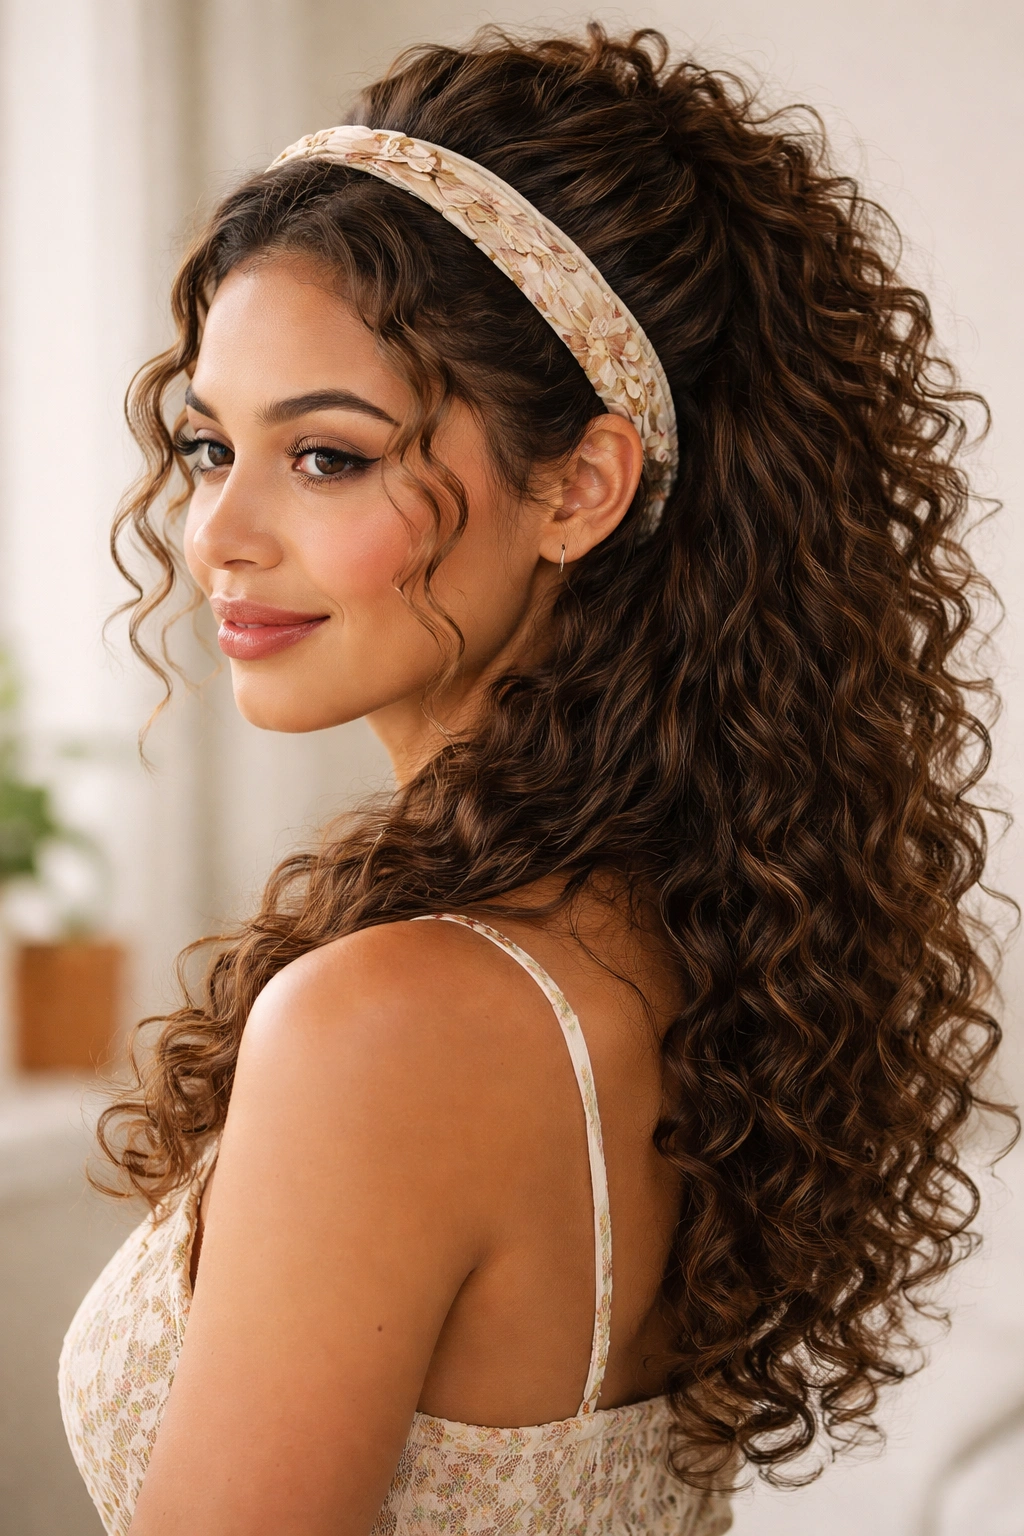
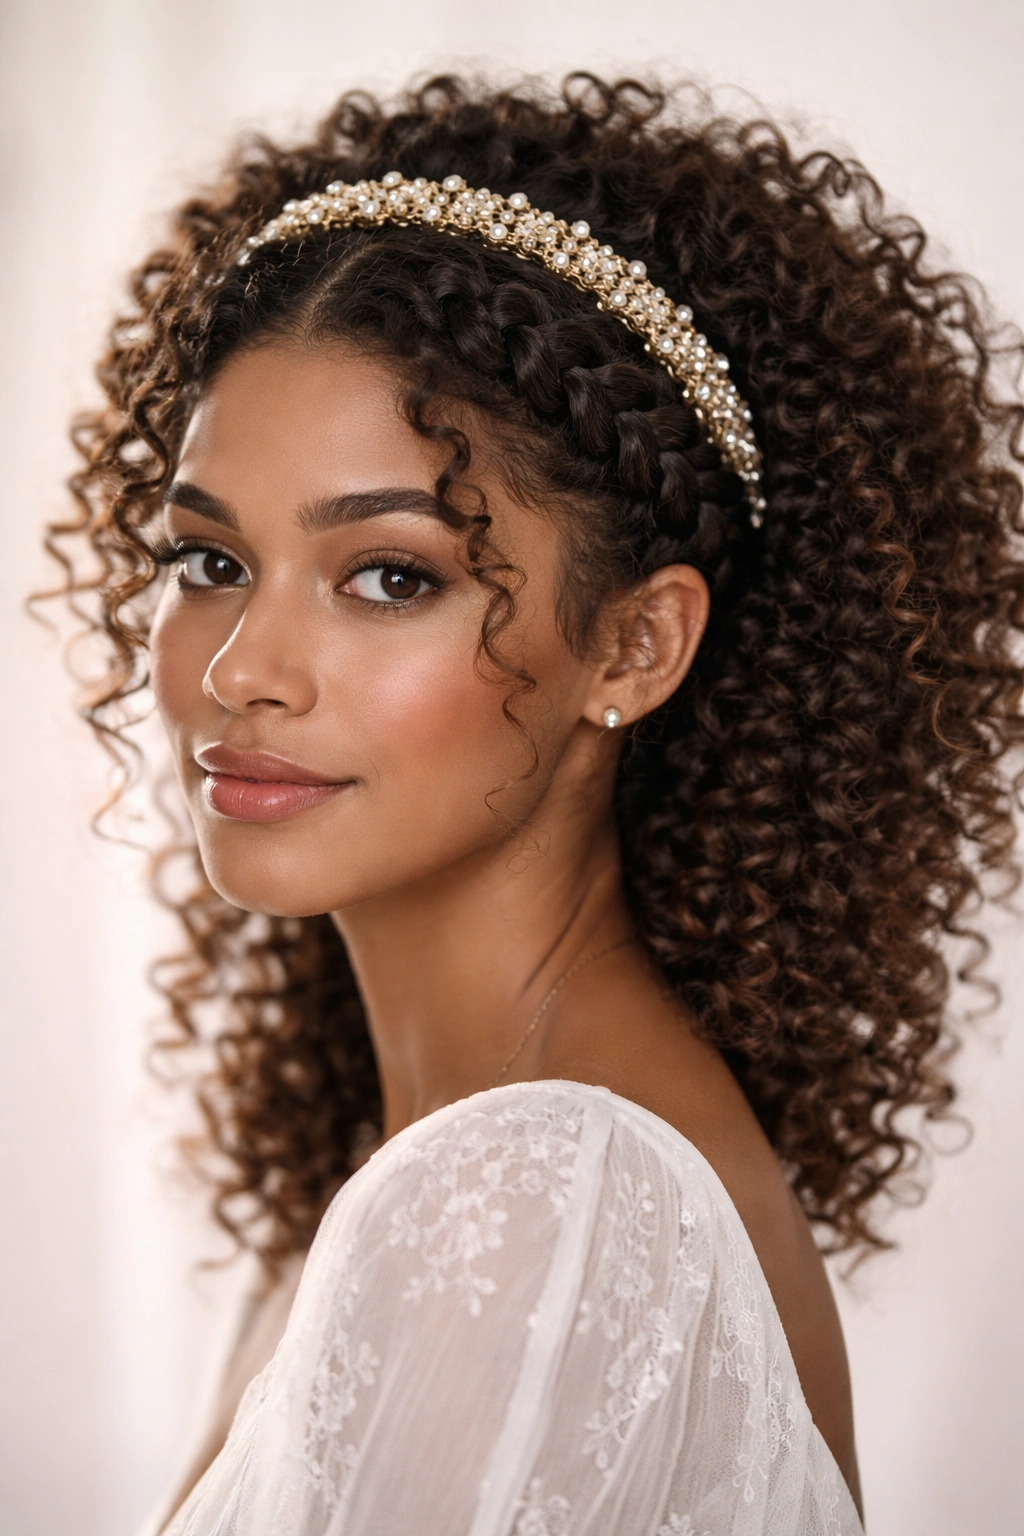
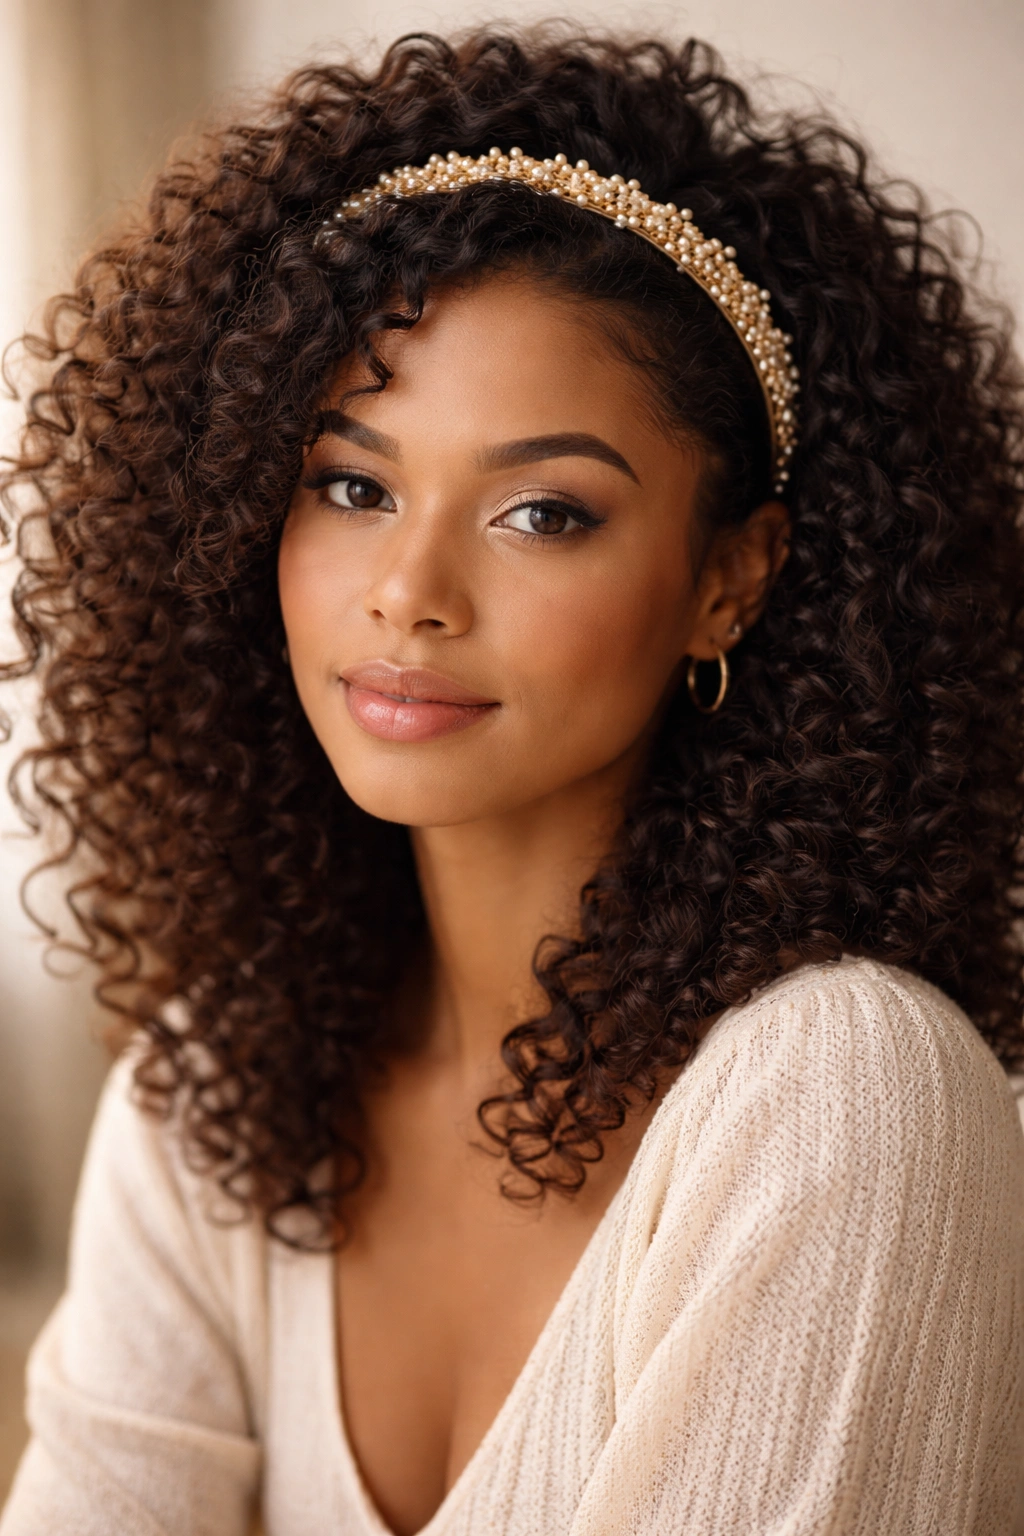
8. The Face-Framing Curls with Pearl Headband
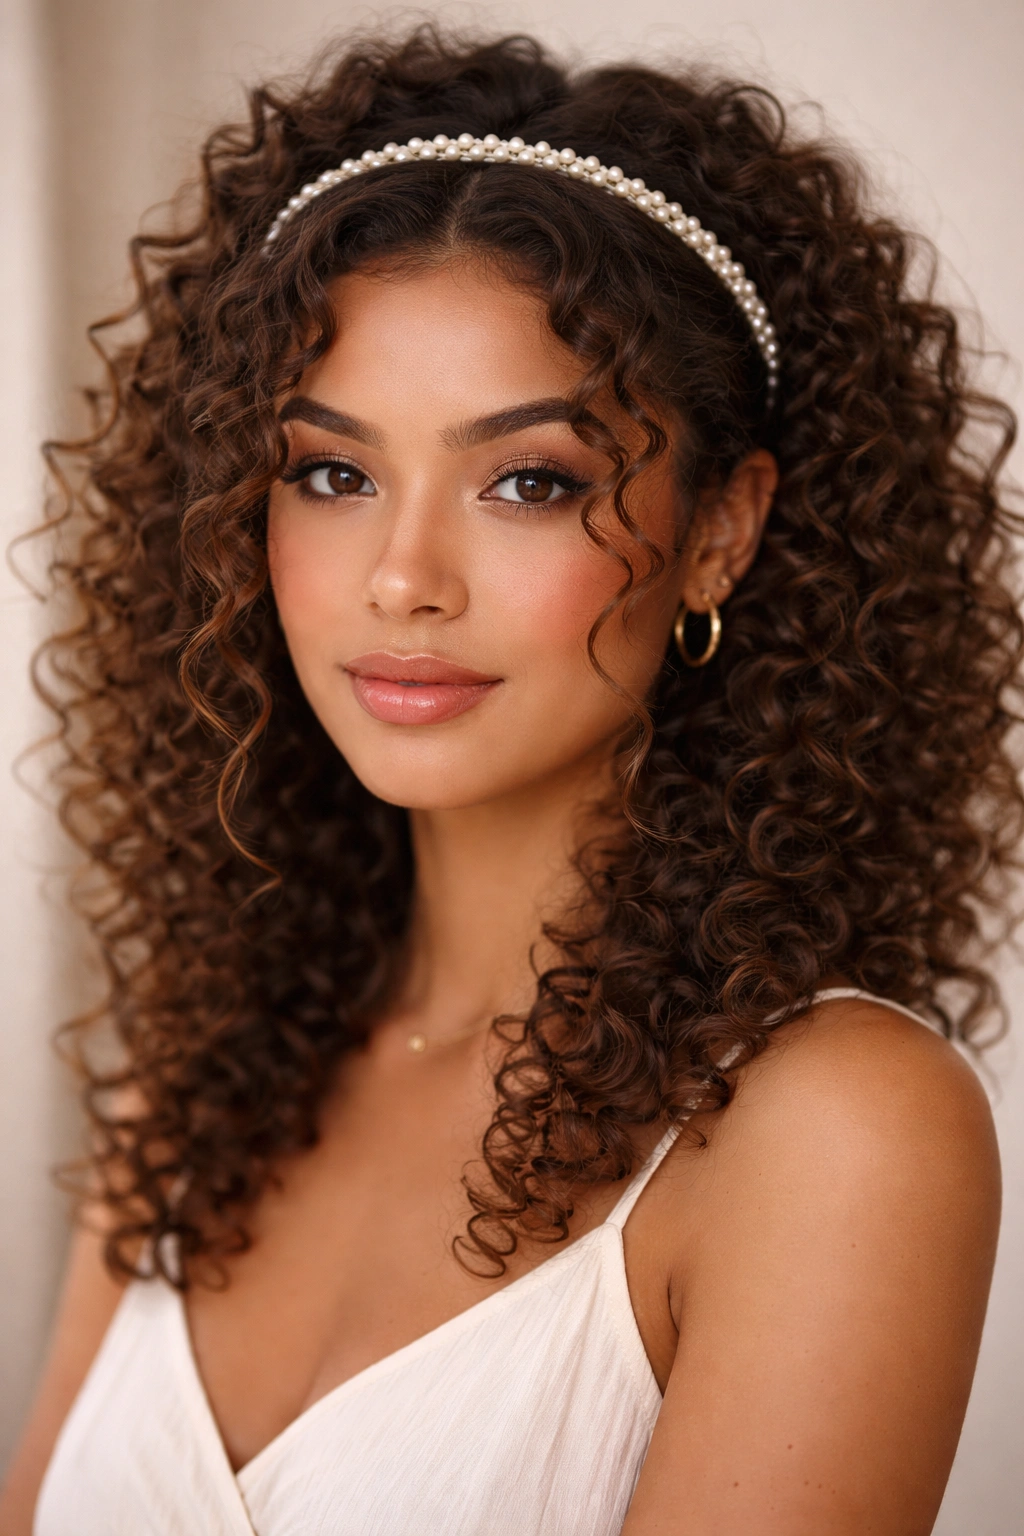
This sophisticated style keeps most of your hair pulled back while allowing a few carefully selected curls to frame your face. It’s elegant and works for everything from professional settings to special occasions. The key is intentionality — these aren’t accidental face-framing pieces, they’re placed curls that you’ve arranged deliberately.
Selecting and Placing Your Framing Pieces
Start by gathering the bulk of your hair back into a low or mid-height ponytail or bun. Then, take one curl from each temple area and allow it to fall forward, framing your face. You can also pull one curl from each side of the bun and let those frame your face. The goal is two to four curl pieces creating a flattering frame, not a bunch of escaping flyaways.
Headband Selection and Positioning
A pearl headband, a thin metallic band, or a delicate beaded band works best here because you want something refined and minimal. Position the headband just above your natural hairline, creating a tiara-like effect. The headband should sit far enough back that your face-framing curls can fall in front of it — this creates the visual hierarchy you’re after, where curls are in the foreground and the headband is secondary.
Creating Definition in Your Face-Framing Curls
- Use a light curl cream or smoothing serum on your framing pieces so they look intentional rather than frizzy
- Avoid gel or heavy products that weigh curls down or make them look wet
- Consider finger-coiling your framing pieces to enhance their curl pattern and make them extra defined
- These pieces should be noticeably shinier and more defined than the rest of your pulled-back hair — that contrast is what makes the style read as intentional
Pro tip: This style works beautifully for photos because the face-framing curls add dimension to your face, while the pearl headband adds a touch of elegance that photographs beautifully.
9. The Braided Halo Headband Look
A halo braid is a classic updo technique that works surprisingly well with curly hair, especially when you skip traditional smoothness and embrace the texture. A halo braid is created by braiding from one side of your head, around the back, to the other side, creating a crown-like effect. When you add a decorative headband that runs parallel to this braid or sits on top of it, you create a stunning, layered effect.
Executing the Halo Braid on Curly Hair
Start by creating a deep side part and braiding from that point, going horizontally around the back of your head and finishing at the opposite temple. Keep your braid loose and chunky — tight braids look strange on curly hair because the flattening creates contrast with your natural texture. Once your braid is complete, position a decorative headband on top of it or just below it, creating two parallel lines that frame the crown of your head.
Why the Texture Works Here
The beauty of this style is that your braid doesn’t need to be perfect. Lumpy sections, visible curls escaping the braid, and slight irregularity actually add to the charm rather than detracting from it. This style celebrates texture rather than fighting it, making it perfect for people who have struggled with updos on curly hair. The headband adds structure and intentionality, making the inevitable texture look styled rather than accidental.
Creating Visual Balance
- If your braid is chunky and very textured, pair it with a minimal, thin headband so you don’t feel top-heavy
- If your braid is relatively neat, a bolder, beaded, or thicker headband can hold its own visually
- Consider the color contrast between your hair, your braid texture, and your headband — too much contrast looks busy, too little looks flat
Real talk: This is one of the few updos that genuinely looks better when executed on curly hair with some texture. Perfectly smooth, flat braids look over-processed and dated on curly hair. The bumpy, textured braid is what makes this style interesting.
10. The Textured Updo with Decorative Band
This is the go-to style when you want an elegant updo that actually accommodates your curls rather than trying to minimize them. You’re creating an updo that showcases texture intentionally rather than hiding it. Start by gathering your curls into a loose, romantic updo shape — you can twist sections, pin curls into the structure, or gather everything into a textured bunch at the crown or back of your head.
Building Structure Without Flattening
Use bobby pins to secure individual curl sections into your updo rather than trying to smooth everything flat. This creates structure while maintaining the integrity of your curl pattern. You should see curl texture throughout your updo, not a smooth, sleek surface. The goal is height, shape, and intentional structure, not a travel-smooth finish.
Headband as the Finishing Touch
Once your textured updo is in place, add a decorative headband across the crown or at the base. The headband should enhance your updo rather than feel like it’s holding something that’s about to fall down. A beaded band, a metallic band, or a fabric band all work depending on the occasion and your personal style. The headband is the jewelry piece that elevates your updo from casual to intentional.
Making This Look Polished Rather Than Haphazard
- Choose a color and finish for your headband that coordinates with your outfit, not just your hair color
- Use bobby pins that match your hair color so they disappear into your texture
- Leave a few curls or curl sections slightly loose around your face and neck — this softens the look and prevents it from feeling too severe
- Apply a light hairspray to the finished updo so stray curls don’t develop throughout the day
Worth knowing: This style actually improves as the day goes on because your curls relax slightly and fill in gaps in your updo, creating a fuller, more intentional-looking shape. Updos on curly hair are actually more forgiving than updos on straight hair.
Choosing the Right Headband for Your Specific Curl Pattern
Not all headbands work equally well for all curl types, so understanding your curl pattern helps you choose smartly. Fine, loose waves need different headband support than thick, tightly coiled curls. A delicate wire headband might slip right off loose waves but work perfectly for tight curls with more natural grip. Conversely, a heavy beaded headband might feel uncomfortable against fine waves but provide perfect balance for thick curls.
For loose waves and bouncy curls, fabric or padded headbands tend to grip better than smooth plastic or metal. The friction between fabric and your curl surface helps prevent slipping. For tight coils and curly patterns, even smooth headbands grip well because your curl structure naturally catches and holds. Wire headbands are universally adaptable because you can adjust the tension to match your curl pattern and hair density.
Consider the weight of your headband relative to your hair density. Fine or medium-density curls need lightweight headbands that won’t create pressure points or headaches. Thick, dense curls can handle heavier decorative headbands because the mass of your hair naturally distributes weight better. Test any headband by wearing it for at least 30 minutes before committing to wearing it all day.
Styling Your Curls Before Adding a Headband
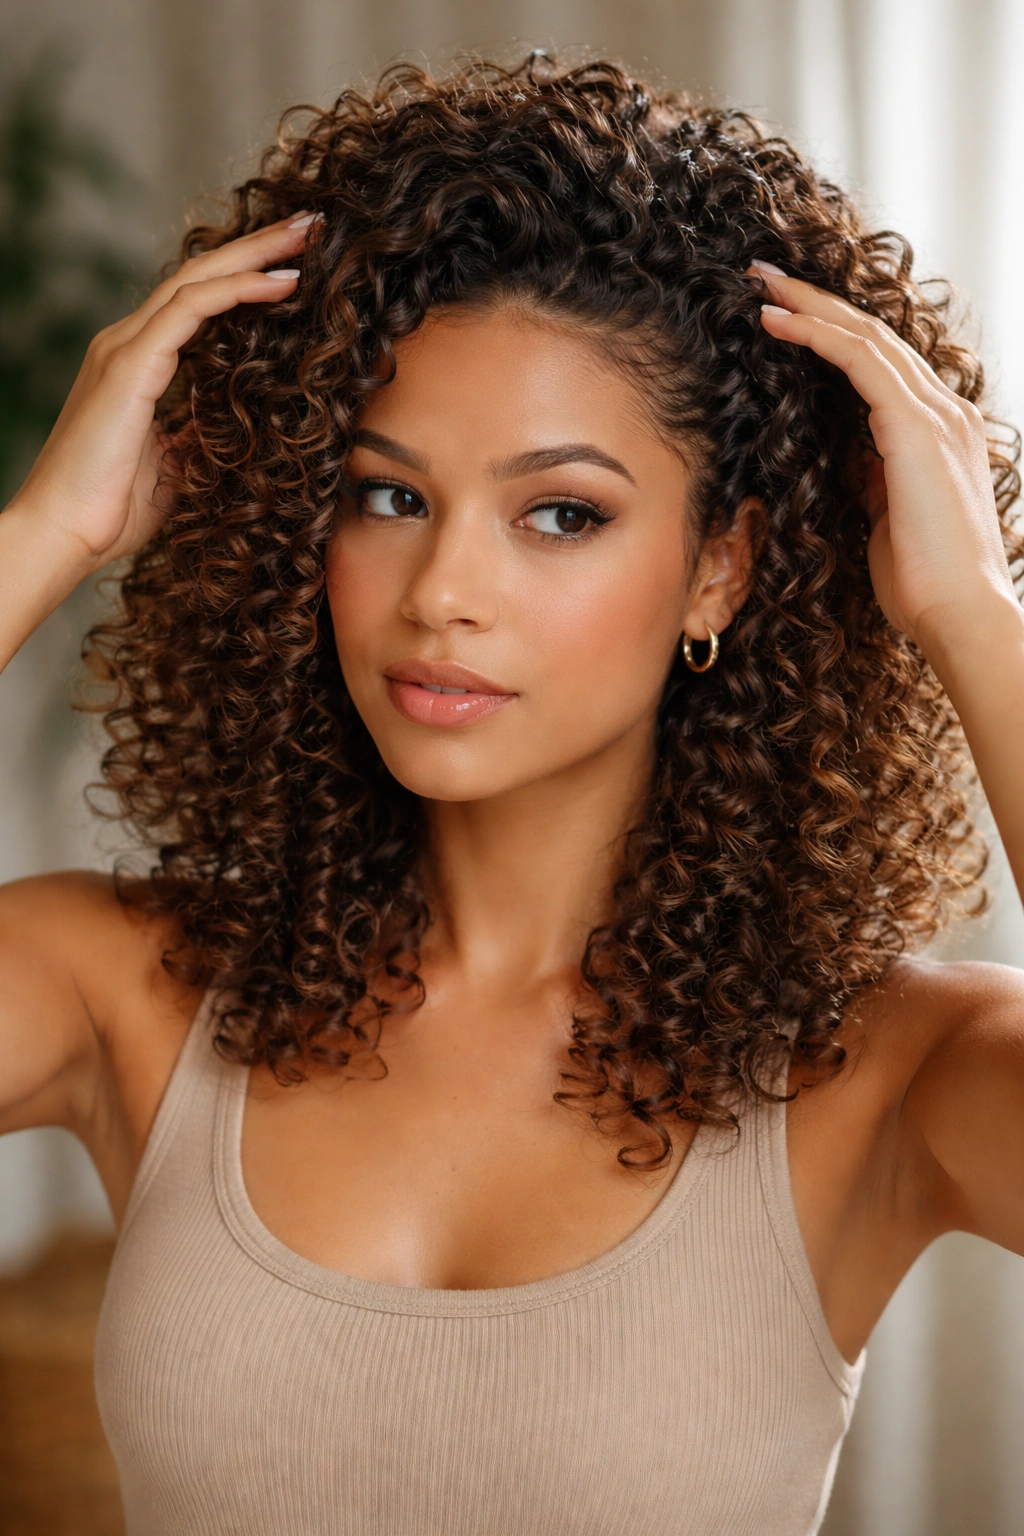
Preparation makes an enormous difference in whether your headband stays put throughout the day. Freshly washed curls are your enemy when it comes to headband stability because they’re at their softest and heaviest. Wait at least one day after washing before wearing a headband — your curls will have naturally relaxed slightly and developed texture that provides grip. If you absolutely must style curls on wash day, apply a lightweight volumizing spray or texturizing product before adding your headband.
Product choice matters significantly. A lightweight curl cream or defining lotion helps your curls hold shape while maintaining their structure. Avoid heavy pomades or thick gels that weigh curls down and make them slippery. Similarly, avoid silicone-based smoothing products that create a slick surface — headbands will slide right off. A light hairspray applied to the areas where your headband will sit provides subtle grip without creating visible stickiness or crunchiness.
How you dry your curls affects headband compatibility. Fully air-dried curls are more stable than plopped and partially dried curls. If you’re in a hurry, use a diffuser on low heat to set your curls more firmly, then apply your headband. Avoid blow-drying with regular heat on your full curl pattern, which flattens texture — use a diffuser attachment to maintain curl structure while drying thoroughly enough for stability.
Final Thoughts
Headbands for curly hair work best when you stop thinking of them as something that needs to tame or contain your curls, and instead view them as styling tools that work with your natural texture. The styles that look most intentional and polished are the ones that showcase your curls rather than hide them. Whether you’re wearing a delicate pearl band with face-framing curls or a bold metallic band with a textured updo, your headband becomes a legitimate accessory that adds intentionality to your look.
The real game-changer is understanding your specific curl pattern and choosing headband styles that match your hair’s natural tendencies rather than fighting them. A style that works beautifully for thick, coiled curls might slide off fine waves, and that’s completely okay — you’re not doing anything wrong, you’re just matching your styling technique to your hair’s actual behavior. Give yourself grace while experimenting with different styles, and pay attention to which headbands feel comfortable and stay put throughout your day.
Your curls have natural beauty and structure that straight hair simply can’t replicate. Headbands aren’t about minimizing that texture — they’re about framing it, elevating it, and adding intentional styling that makes you feel confident. Once you find the headband styles and techniques that work for your specific curls, you’ll have an entirely new set of styling options that feel easy, comfortable, and genuinely beautiful.