Medium curly hair is a canvas for beautiful, texture-rich styles that look effortlessly put-together without requiring hours in front of the mirror or professional-grade techniques. The challenge isn’t finding what works with curls — it’s finding styles that don’t fight against your natural texture, that actually look better on day two or three when your curls have settled, and that you can realistically create yourself on a Tuesday morning before work.
The best hairstyles for medium curly hair are the ones that work with your curl pattern instead of against it. They embrace the volume, the movement, and the natural structure your curls already provide. The styles in this guide aren’t complicated blow-out treatments or intricate salon techniques — they’re real-world hairstyles that medium curly-haired people actually wear, that hold up throughout a full day, and that you can genuinely master once you understand the fundamentals.
What makes these styles so wearable is that they accommodate the reality of curly hair: it shrinks when it dries, it needs moisture to stay defined, and it actually looks better when you let it do what it naturally wants to do. These ten hairstyles follow that principle. Whether you’re styling freshly washed curls, working with day-old texture, or dealing with humidity, each of these looks offers a practical way to put your hair together and feel confident about it.
1. The Sleek High Ponytail
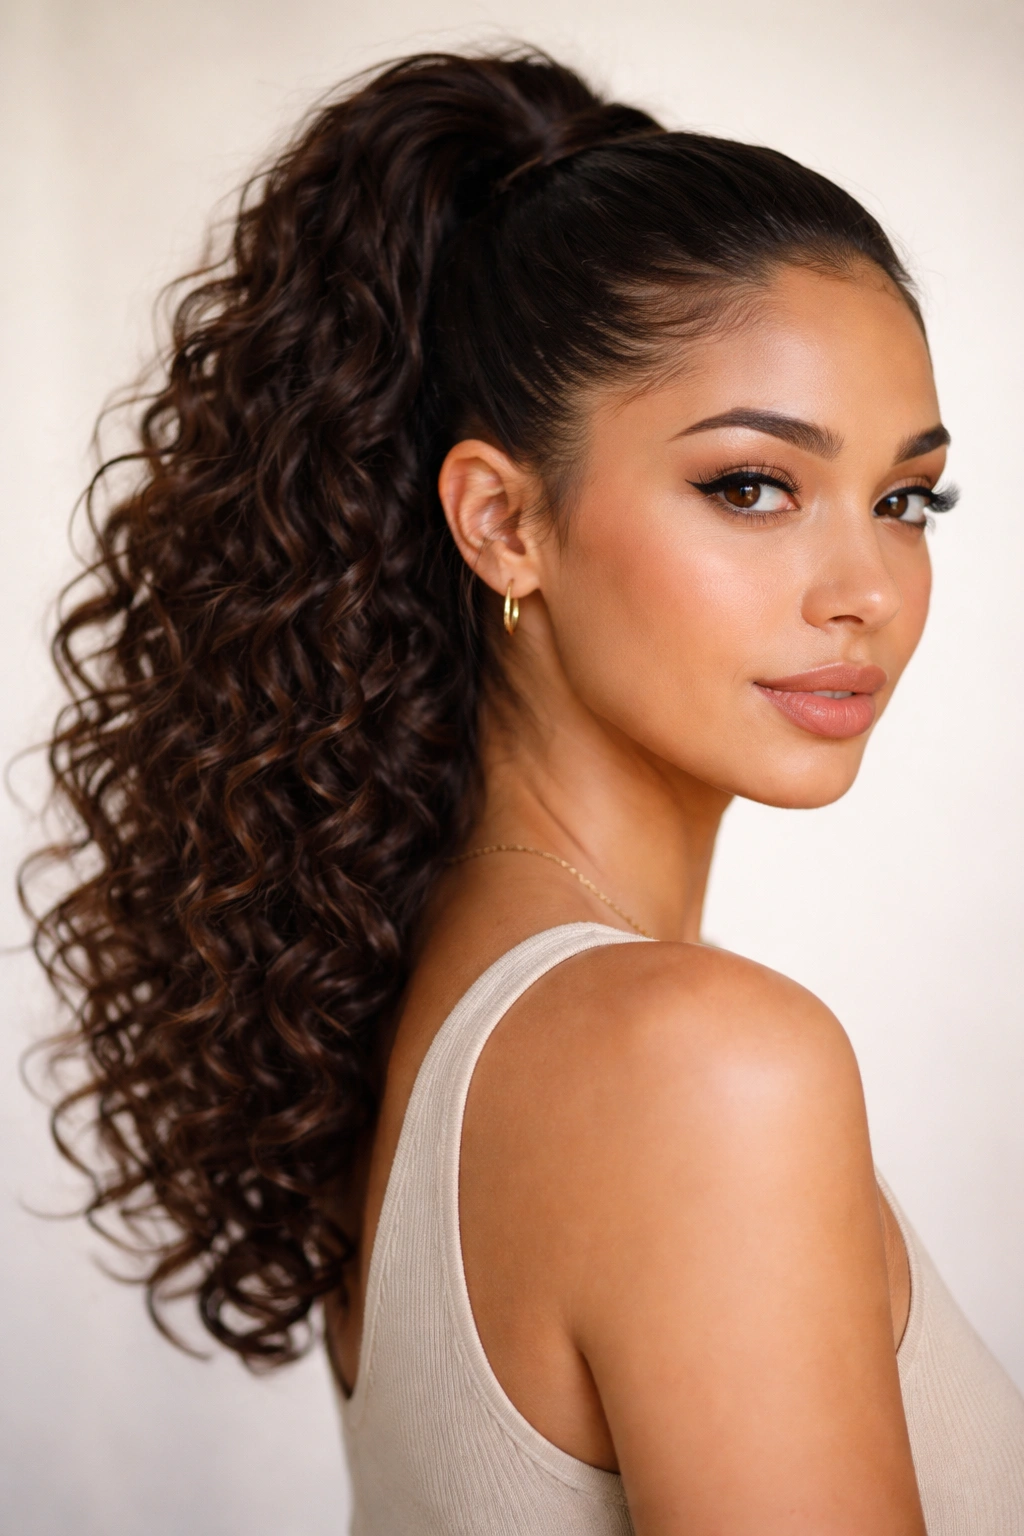
A high ponytail on curly hair reads completely different than it does on straight hair — instead of a severe, pulled-back look, you get volume, movement, and softness all collected at the crown. The curls fall from the tie in a way that looks intentional and polished without looking overly formal or restrictive. This works particularly well with medium curly hair because your curls have enough weight to create shape around the face while the ponytail itself stays compact and secure.
Why This Works on Medium Curls
The key is that you’re not fighting your curl texture — you’re collecting it at the base while letting it spring freely from the ponytail tie. Your natural curl pattern creates volume and dimension that a straight-haired version simply can’t achieve. The height and lift from medium-density curls make this style look fuller and more intentional without any teasing or backcombing. Curly hair naturally has grip, which means your ponytail will stay exactly where you put it without sliding down throughout the day.
How to Create It
Start with hair that’s at least partially dry — fully soaking wet curls are too heavy and slippery to work with for a ponytail. Use your fingers or a wide-tooth comb to gently gather your hair at the crown, smoothing the sides just enough to define your face but not so much that you’re flattening your natural curl texture. Secure with a strong elastic that won’t slip (silk or silk-lined elastics are gentler on curls than basic rubber ones). The curls will fall naturally from the tie — you don’t need to separate or arrange them further. If any shorter layers or baby hairs are escaping, smooth them down with a small amount of edge gel or serum.
Pro Tips
Gather your ponytail from slightly off-center rather than dead center for a modern, relaxed vibe. Wrap a small section of hair around the elastic base to hide the tie itself — this turns a casual ponytail into something that looks more deliberately styled. Avoid ultra-tight gathering, which can damage curls and actually make the ponytail look thinner rather than fuller. If you’re doing this on second-day hair, refresh your curls first with a spray bottle of water mixed with a tiny bit of conditioner, then scrunch and let them set before gathering.
2. The Tousled Half-Up Bun
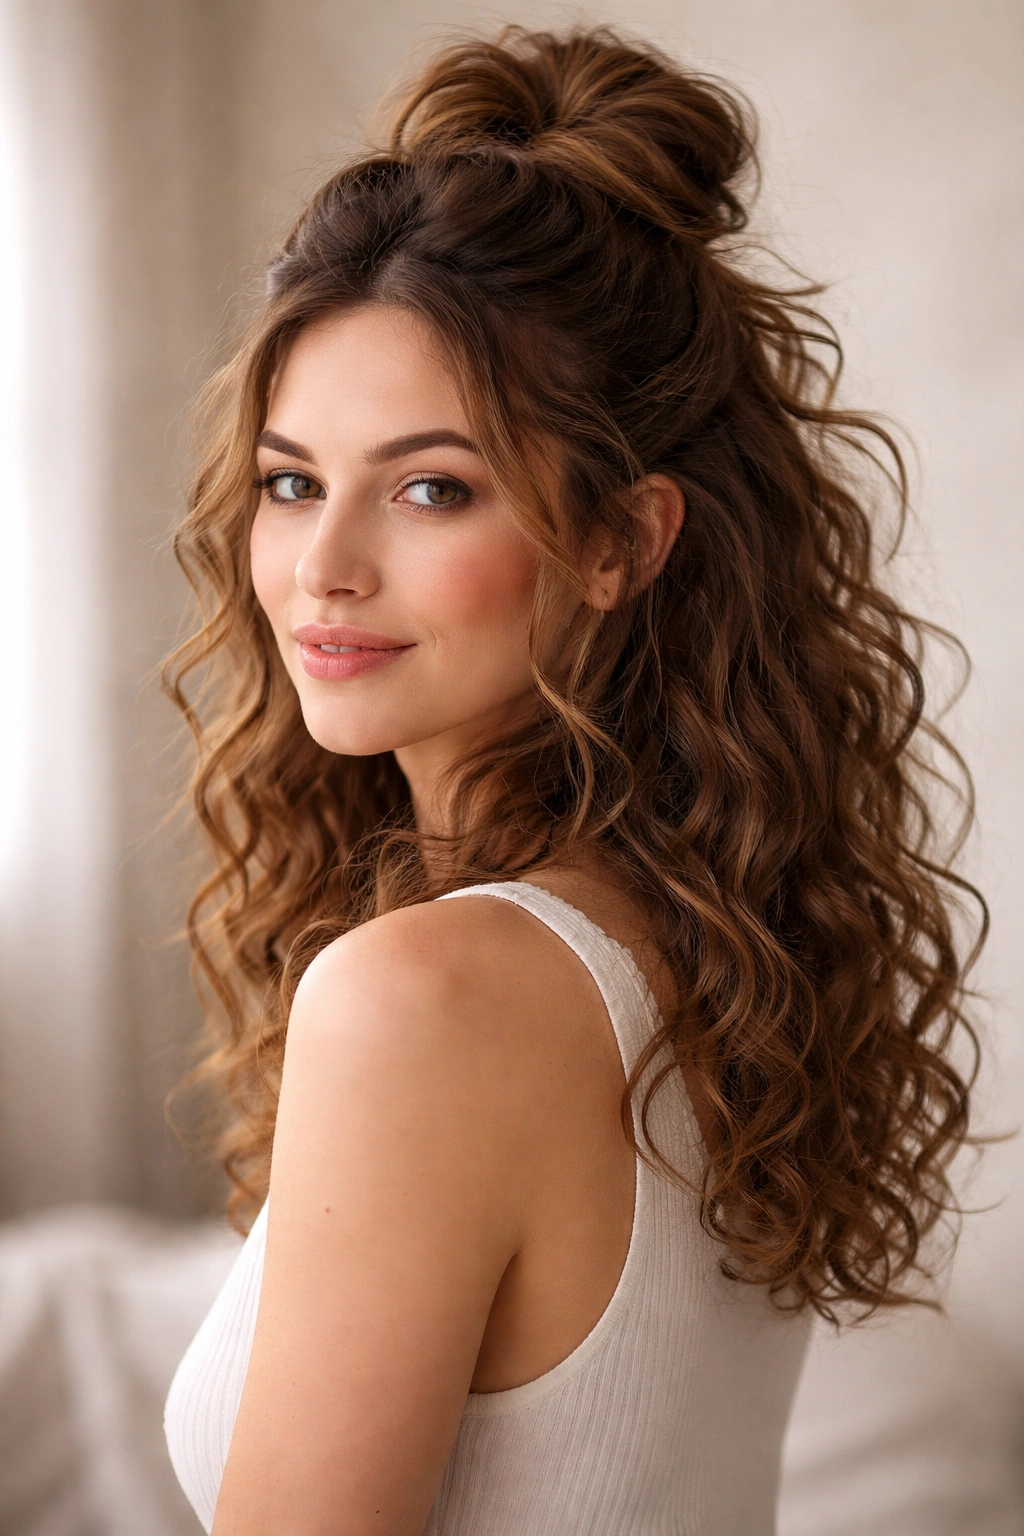
A half-up style on medium curly hair is the ultimate “I woke up like this” aesthetic without actually requiring you to wake up like that. You’re leaving the bottom half of your curls loose and full while gathering just enough from the crown to keep hair out of your face and create a casually romantic silhouette. The bun doesn’t need to be tight or perfectly round — in fact, looser is better. Slightly undone actually reads as intentional on curly hair.
Why Half-Up Works Better Than Full Styles
Half-up styles let you showcase the length and curl pattern of your hair while still controlling the top section for comfort and visibility. Medium curly hair has just enough volume to make a half-up bun look substantial without needing extra texturizing or teasing. The style naturally photographs well, looks good from every angle, and works for everything from casual weekends to more polished occasions — it’s just a matter of how finished you make the details.
How to Create It
Flip your head upside down and mist your roots with water or a light volumizing spray, then flip back and let curls settle for 30 seconds. This creates lift at the crown that makes your half-up section look naturally full. Gather the top section — roughly from your temples back to the crown — and secure loosely with an elastic. Twist the gathered section slightly, then wrap it into a loose coil and secure with bobby pins tucked underneath. Don’t pull it tight. Your curls will hold the bun together naturally; you’re just directing them, not controlling them rigidly.
Pro Tips
Leave a few face-framing pieces loose if you want a softer, more romantic look. Use a claw clip instead of an elastic for an ultra-casual vibe — clip the bun loosely at the crown and let pieces escape naturally. Finish with a flexible hold hairspray that won’t stiffen your curls into separate, crunchy pieces. If your bun starts to slip by midday, simply re-tuck the bobby pins rather than recreating the whole thing.
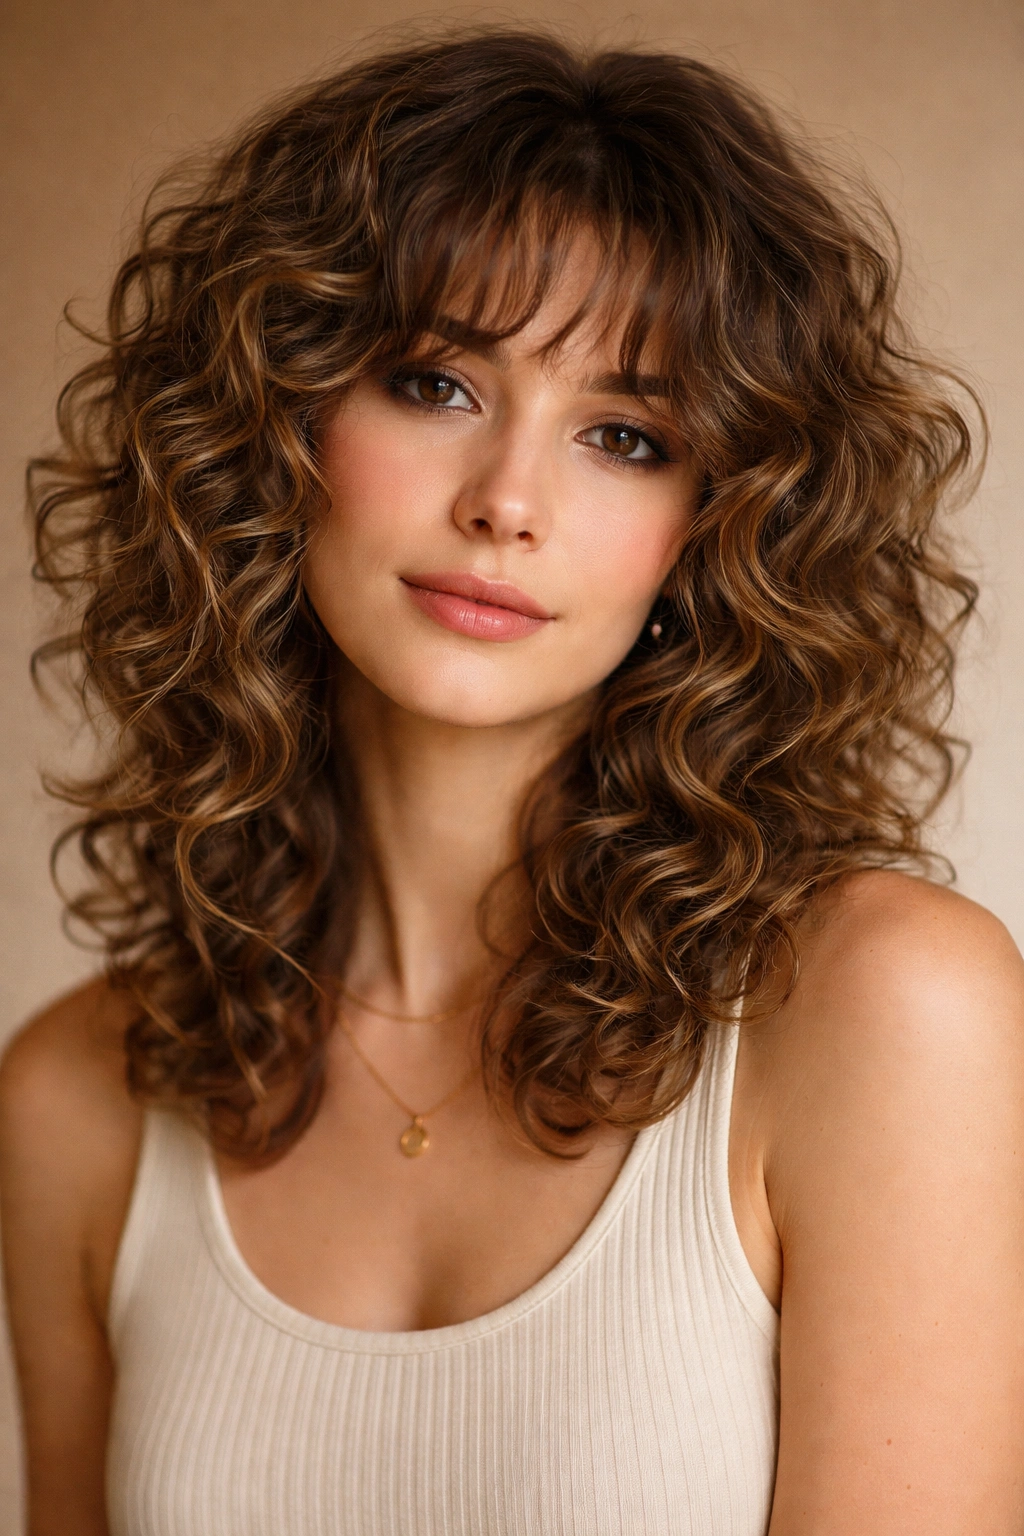
3. Loose Spiral Waves for Maximum Definition
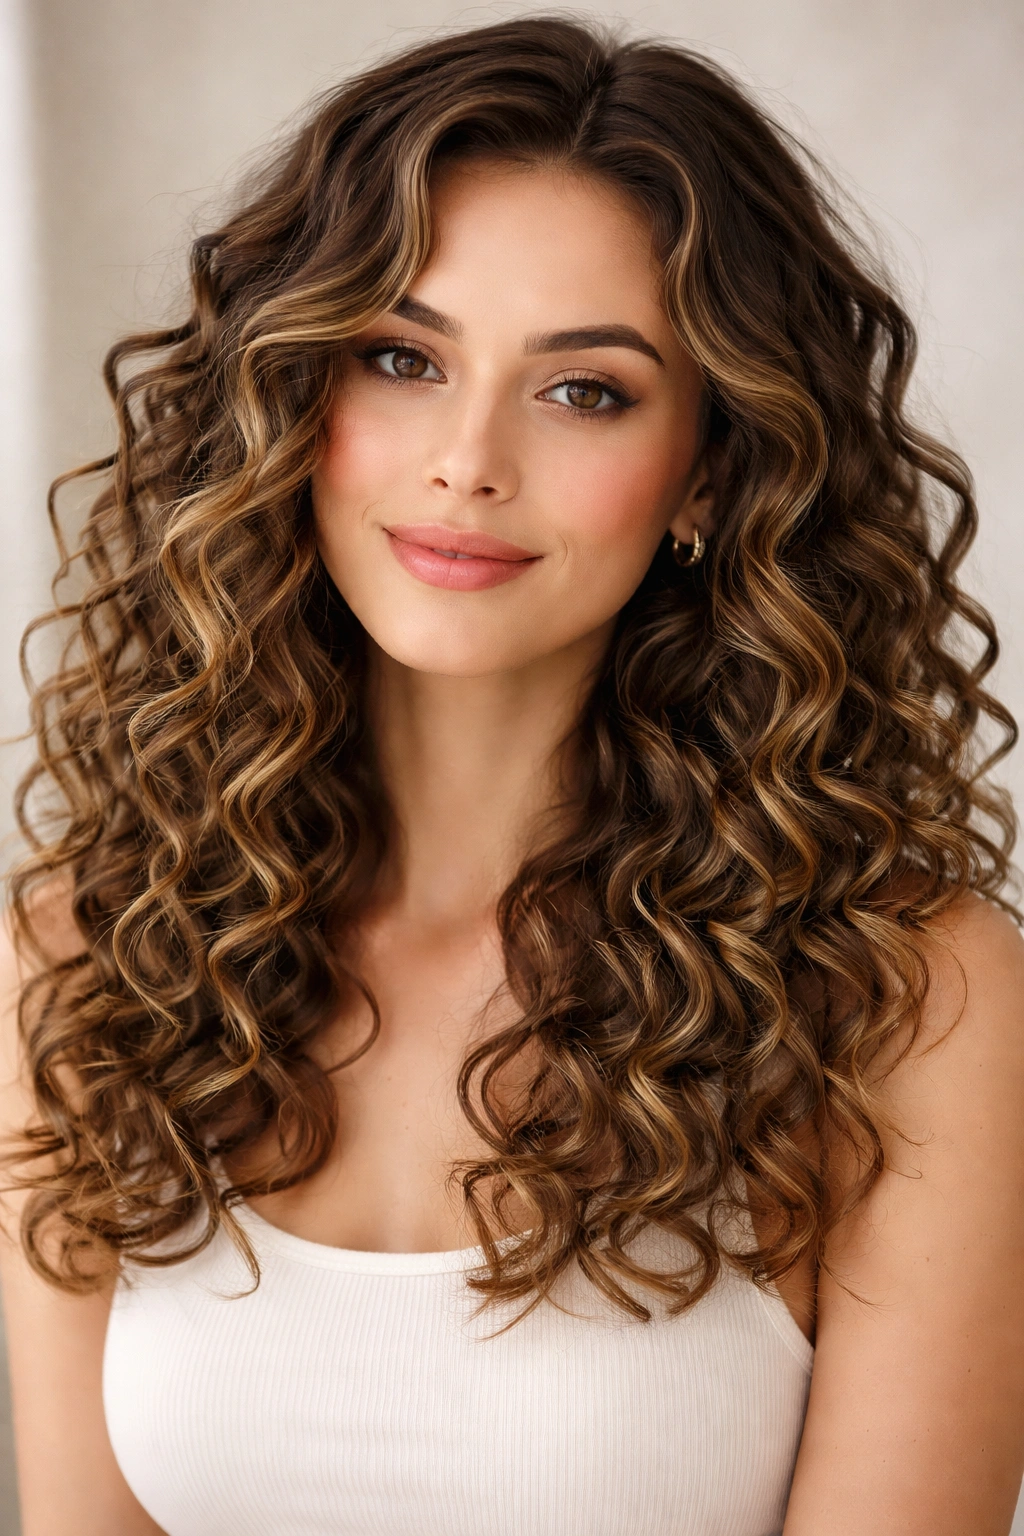
This style celebrates everything medium curly hair does naturally — you’re not fighting the texture, you’re enhancing and defining it. The goal is to create soft, separated, individually beautiful curls that look like they have intentional shape and movement. This works especially well if your natural curls are slightly looser or if you have a mix of curl patterns throughout your head.
Why Definition Matters With Medium Curls
Medium curls sometimes sit in a space where they look frizzy or undefined without help, or they can look flat if they’re not properly hydrated and set. By deliberately defining each curl, you’re telling your hair to show its best self. Separated curls look shinier, bouncier, and more intentional than clumpy, undefined texture. The effort here is minimal — you’re not creating curls that don’t exist, just making the curls you have look their absolute best.
How to Create It
Start with freshly washed, conditioner-rich hair that’s still damp but not dripping wet. Apply a curl-defining cream or gel to small sections, working from roots to ends. Use your fingers or a curl-defining brush to gently separate each curl at the base and smooth it upward, encouraging it to form a defined spiral. Don’t comb through your curls or you’ll break up the pattern — work in sections and be intentional about which curls you’re touching. Let air dry or use a diffuser on your blow dryer. The key is patience — don’t disturb the curls while they’re drying.
Pro Tips
Apply your styling product to soaking wet hair, not just damp hair — your curls need moisture to set properly. Work on one small section at a time rather than trying to do your whole head at once. If you’re short on time, focus on defining just the face-framing layers and the front section — these are the most visible parts. Refresh defined curls the next day with a light misting of water and a tiny amount of product, then scrunch gently and let them reset.
4. The Curly Top Knot
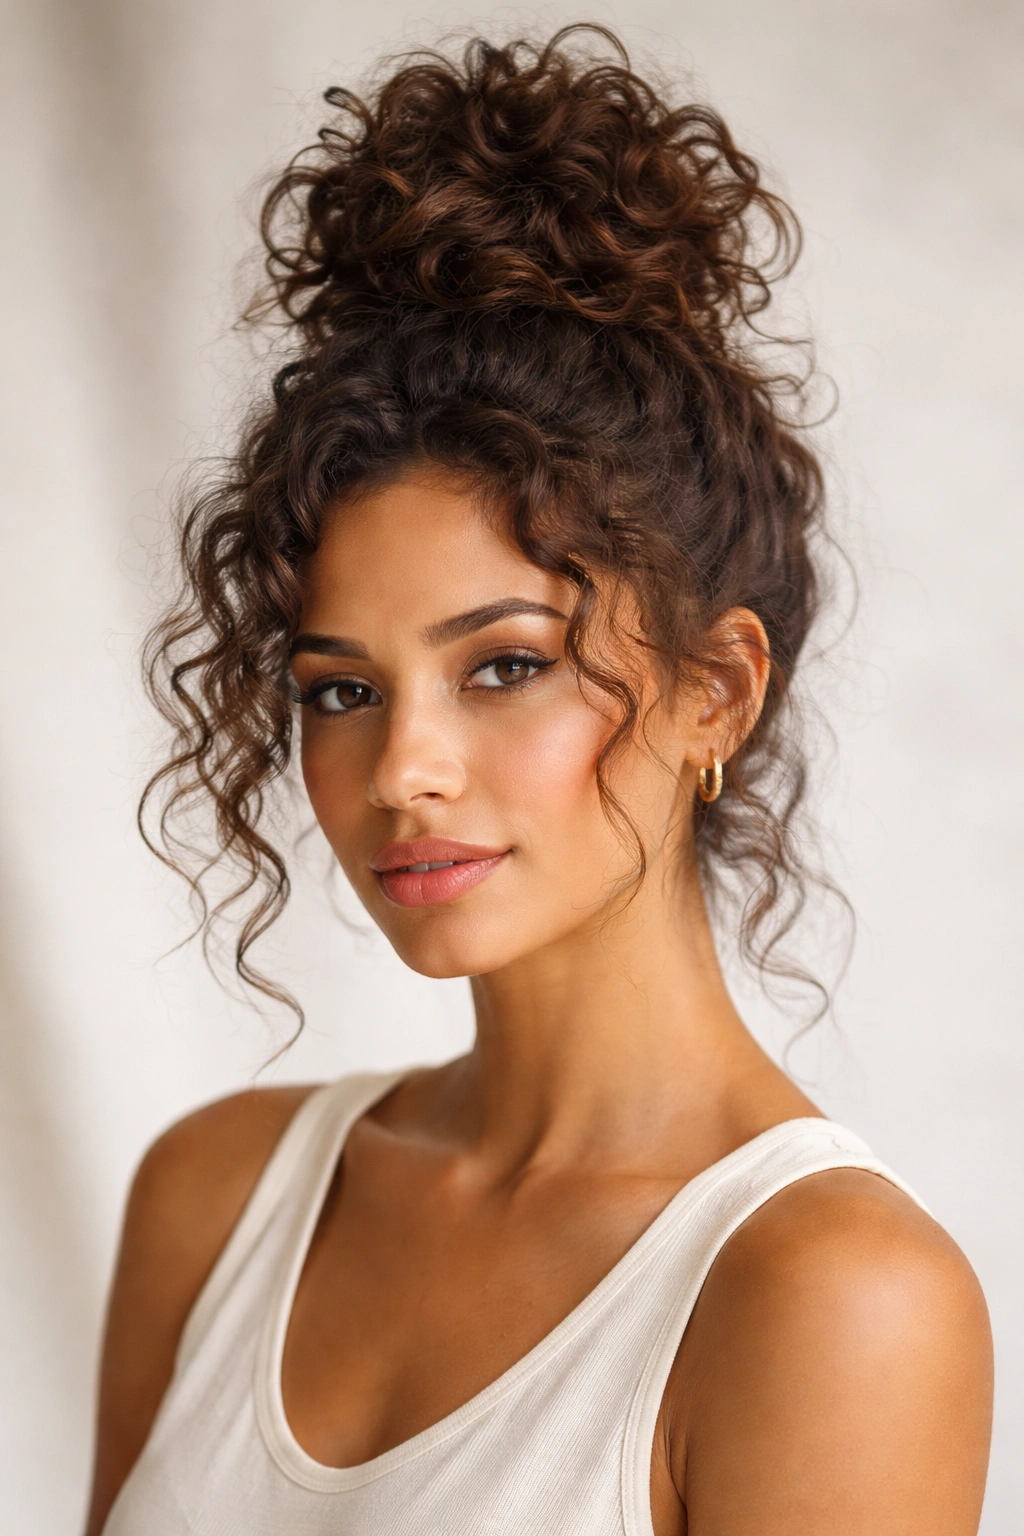
A top knot on curly hair is inherently high-volume and interesting because your curls create natural texture and movement around the knot itself. This isn’t a ballet-tight bun — it’s a relaxed collection of curls twisted into a loose coil at the crown. The style works for casual days at home, gym days, or lazy weekend moments, but it reads polished enough that you can wear it to run errands or meet friends.
Why Top Knots Suit Curly Hair
Your curls do the visual work of making a top knot look substantial and intentional without requiring you to tease, backcomb, or artificially volumize. Medium curly hair has enough weight and texture that a loosely twisted top knot looks full and dimensional rather than thin and wispy. The curls that escape around the face and nape create a soft frame that makes the whole style more flattering.
How to Create It
Gather your hair into a high ponytail at the crown — the higher the better, as this creates the most flattering proportion. Twist the ponytail loosely, then wind it into a coil and secure with bobby pins tucked underneath the coil so they’re hidden. Don’t aim for tightness — let the curls maintain their natural shape. A few pieces escaping around the face and neck actually look intentional rather than messy. Use a bobby pin or small clip to secure any flyaways that bother you, or leave them entirely if you like a softer aesthetic.
Pro Tips
Do this on second or third-day curls if possible — freshly washed curls are bouncier and slightly slippery, making it harder to secure a top knot that stays put. If your top knot keeps slipping, use a stronger elastic and wrap a small section of hair around the base to lock everything in place. This style gets better as the day goes on; curls settle and the knot becomes more compact and polished. Spray with flexible hold hairspray if you’re going somewhere that needs a more finished look.
5. The Textured Braided Crown
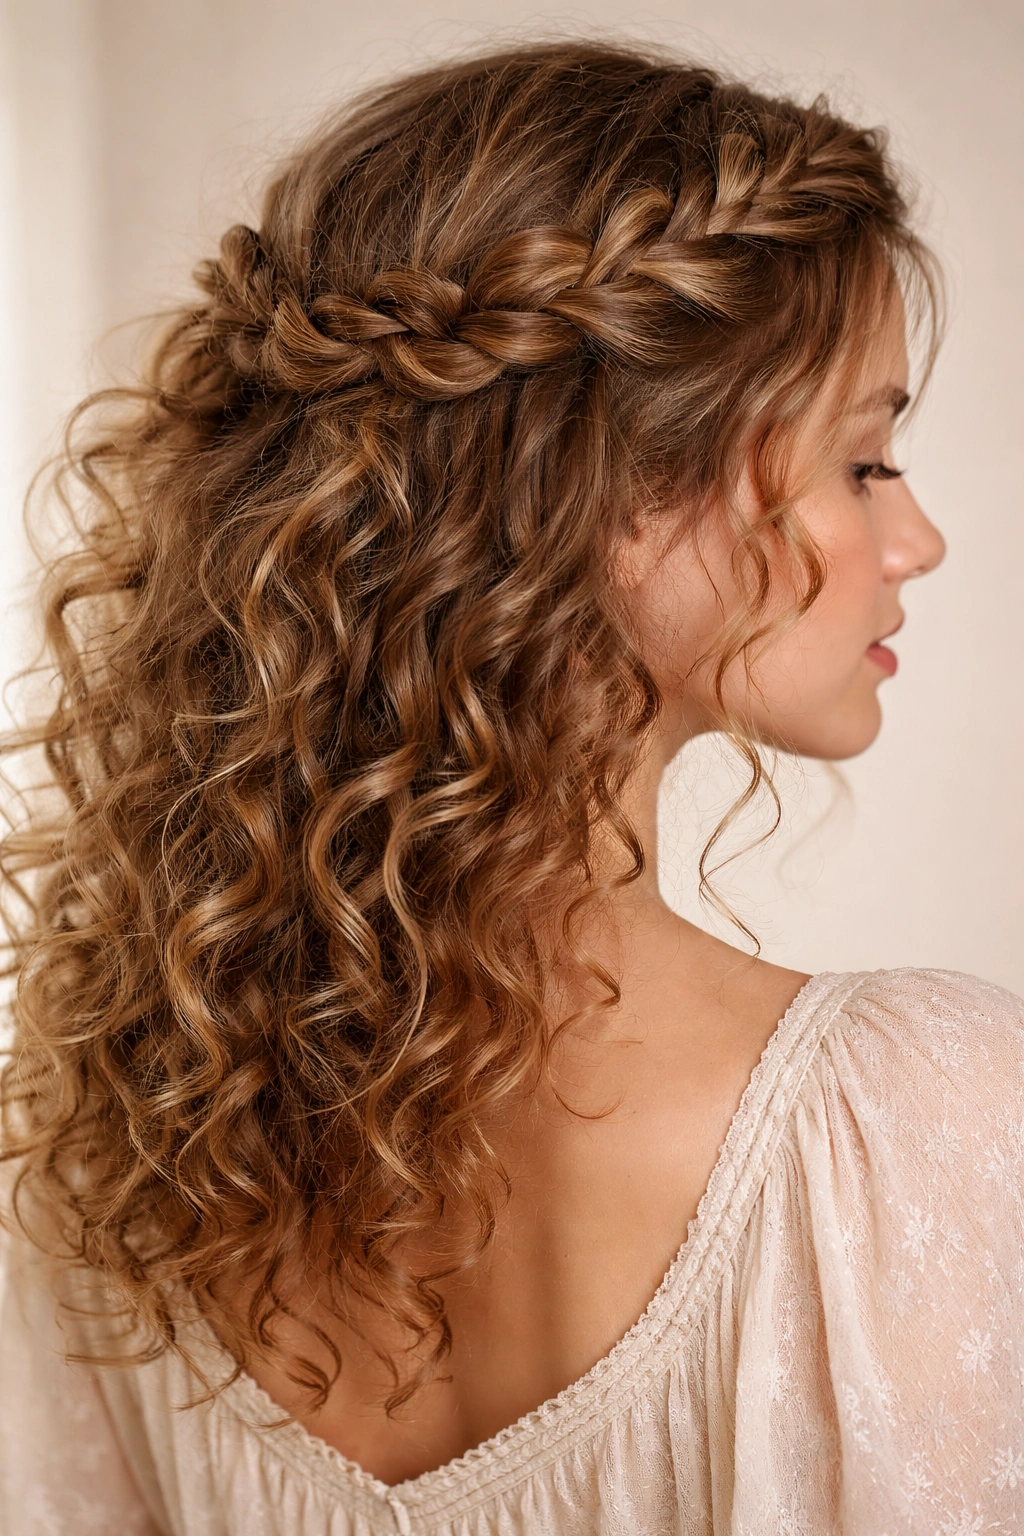
A crown braid — where you braid from one side of your head around to the other, creating a circlet across the crown — becomes something entirely different on curly hair. Your curls poof and expand around and out of the braid, creating tons of visual interest and texture. This is a genuinely special-occasion style that looks intricate but only requires basic braiding skills.
Why Braids Work With Curly Texture
Braids on curly hair have automatic texture and dimension because your curls don’t stay contained within the braid the way straight hair does. This is actually the point — the escape creates fullness. A crown braid on straight hair might look sleek and precise, but on curly hair it looks romantic, bohemian, and intentionally relaxed. The curls that escape create an halo effect that’s naturally flattering.
How to Create It
Start with your hair brushed gently into smooth sections — you want it smooth enough to braid but textured enough that curls still show. Begin braiding on one side of your head at ear level, creating a loose three-strand braid (loose is essential; tight braids look severe on curly hair and damage curls). As you move toward the back of your head, gently pull the braid loops slightly to make the braid look fuller and more textured. Braid all the way around to the opposite ear, then secure the end with bobby pins tucked underneath.
Pro Tips
Finger-comb your hair rather than using a brush, which can stretch and damage curls. Let your braid be imperfect — slightly loose, with curls escaping freely, is the whole point. Use a small amount of edge gel or serum to tidy any wild flyaways without making your curls crunchy. This style is easiest on second-day hair because fresh curls are bouncier and harder to braid cleanly. Set with flexible hairspray rather than rigid hold spray, which will stiffen your curls.
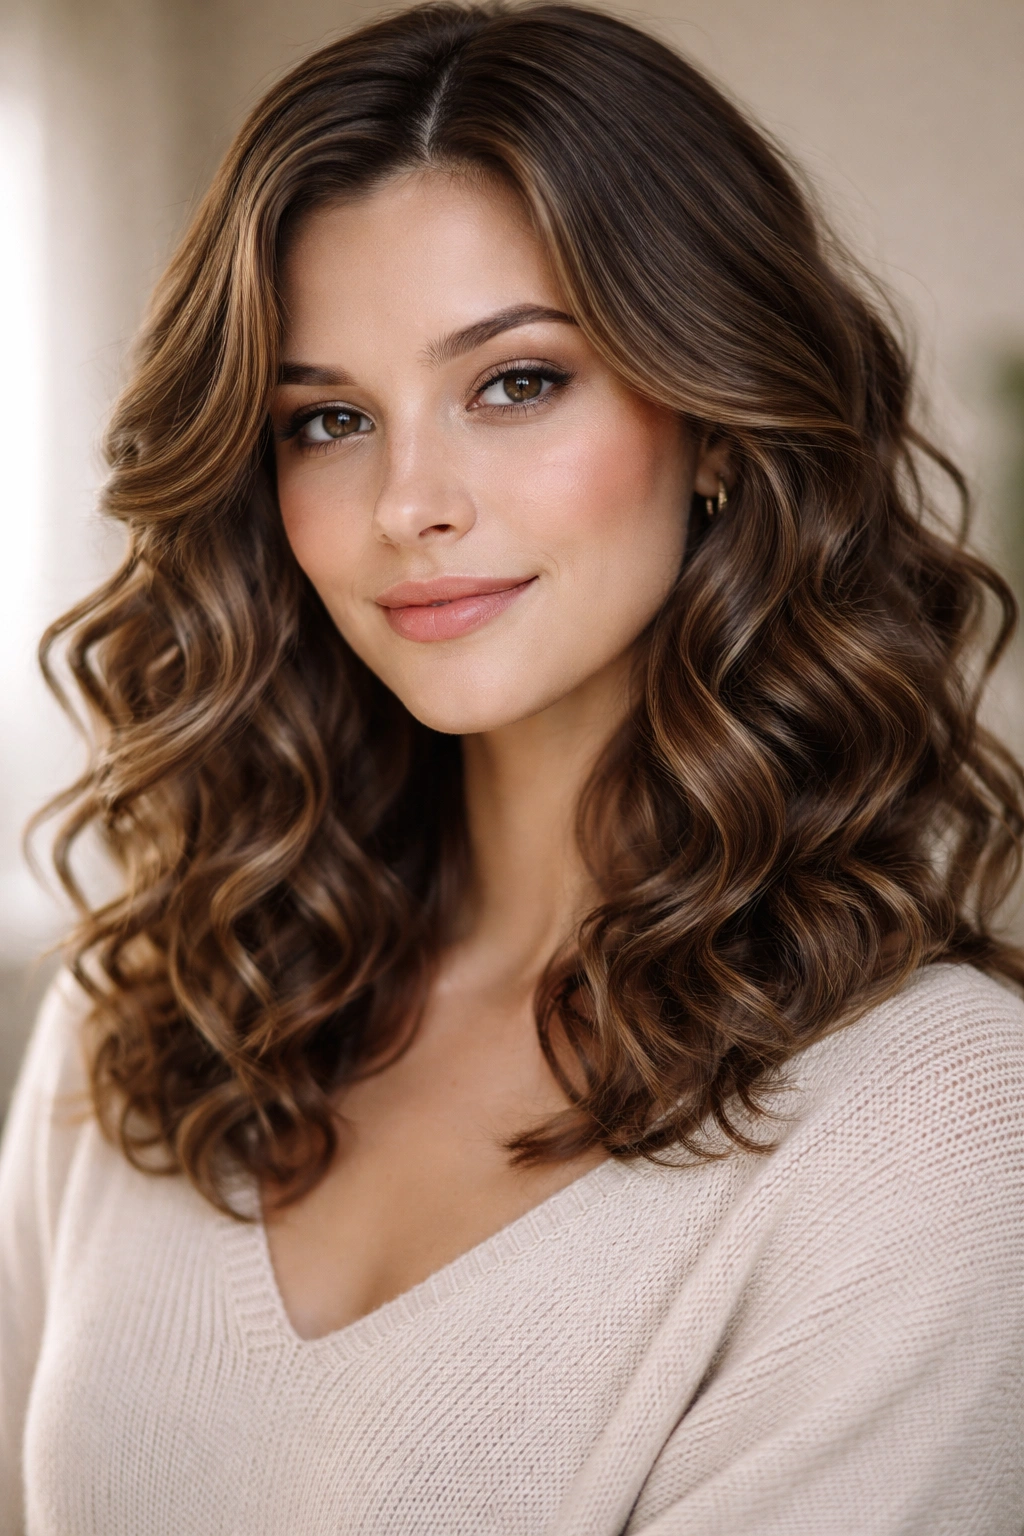
6. Bouncy Blow-Out Waves
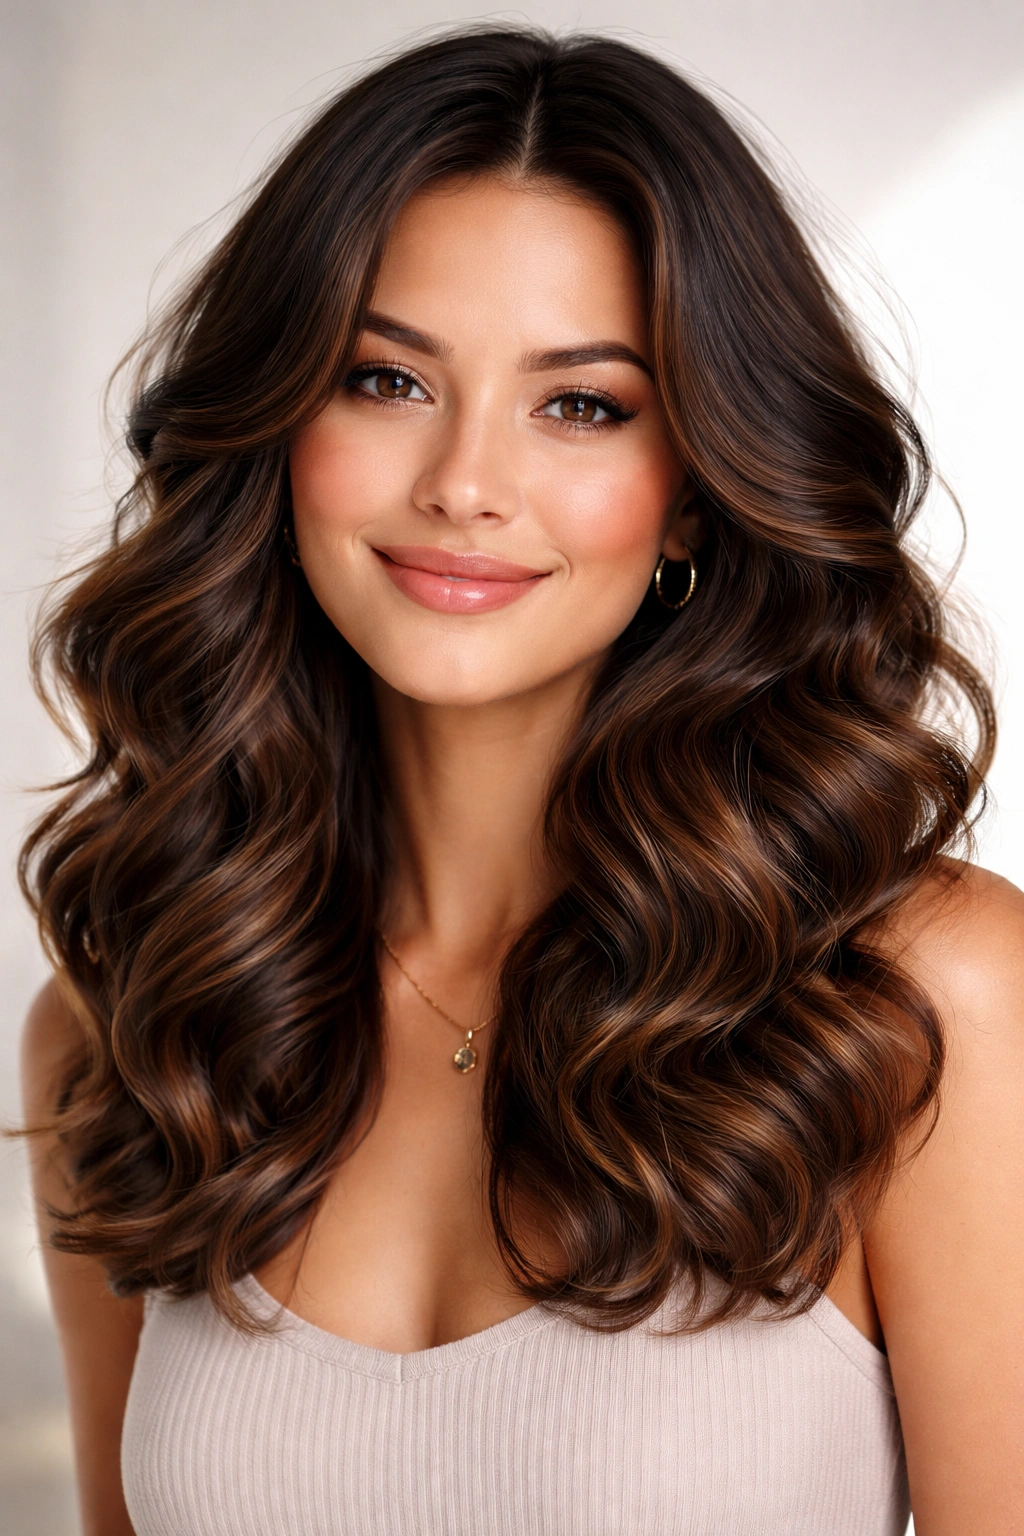
A blow-out on curly hair is a specific technique that creates fuller, bouncier waves while still honoring your curl pattern instead of trying to erase it. You’re drying your curls in a way that encourages them to form larger, more separated waves rather than tight coils. This style reads polished and put-together while still being genuinely easy to maintain.
Why This Look Works
A blow-out on medium curly hair creates a middle ground between your natural curl pattern and smoother waves. You get the volume and movement of your curls plus the shine and polish of blow-dried hair. The style is bouncy, wearable for full days, and actually looks better the next day as curls settle into the wave pattern you’ve created.
How to Create It
Start with damp (not wet) curls and apply a lightweight mousse or curl-enhancing foam. Using a diffuser attachment on your blow dryer, dry your curls on medium heat while scrunching upward to encourage curl formation. Once curls are about 70% dry, switch to a round brush or paddle brush and use sections of hair around the brush while continuing to dry. Work in 2-3 inch sections from roots to ends, creating smooth tension without pulling too tightly. Let each section cool before releasing it — this sets the wave pattern. Finish with cool air shot over your whole head to seal the cuticle and create shine.
Pro Tips
A round brush creates tighter, bouncier waves; a paddle brush creates larger, looser waves. Choose based on how tight or loose you want your final texture. Don’t rush the drying process — this style takes 20-30 minutes but lasts for 2-3 days. Use a lightweight, anti-frizz serum rather than heavy oils, which can flatten your curls. Refresh the next day by misting with water and scrunching, then allowing curls to air dry or using a quick diffuser pass.
7. The Effortless Pineapple Updo
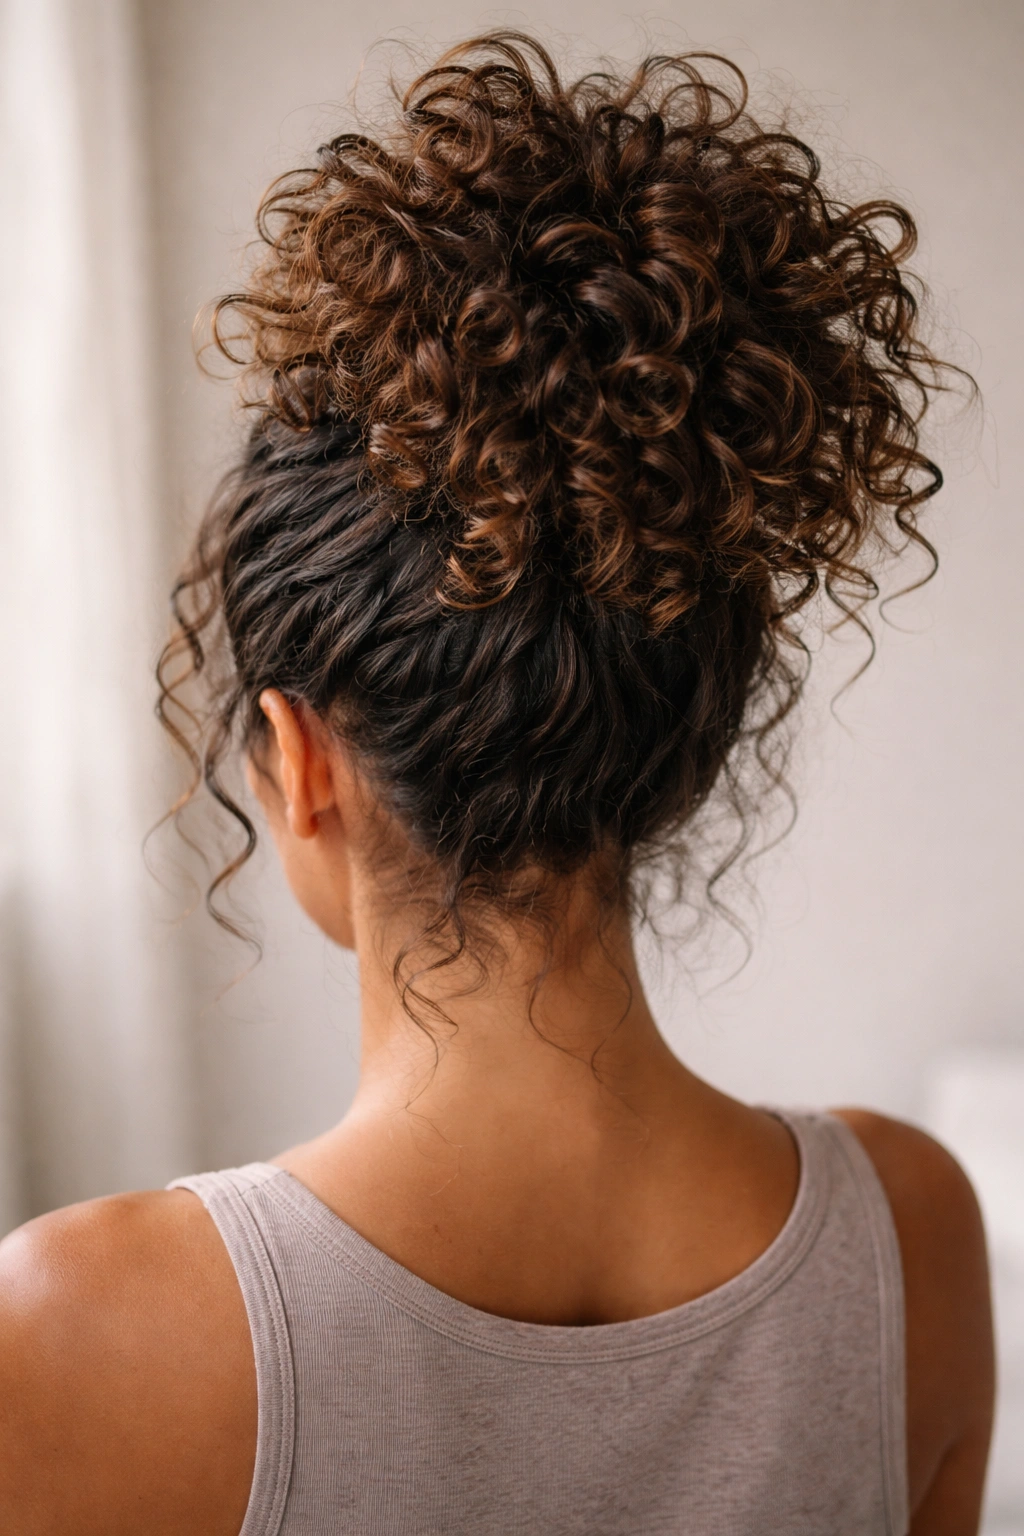
A pineapple updo isn’t actually meant to be an all-day style — it’s a protective way to sleep on curls while keeping them relatively secure and undamaged. But here’s the thing: if you do it right, you can wear it as an actual daytime style too. It looks casual and intentional rather than like you just woke up. A loose, high ponytail with curls spilling out is inherently flattering on medium curly hair.
Why This Saves Your Curls
The pineapple technique gathers curls on top of your head rather than letting them compress against your pillow while you sleep, which protects the curl pattern and prevents frizz. Done loosely, it becomes a legitimate hairstyle rather than just a protective sleep method. Your curls stay bouncy and defined, and you can actually wear this look to run errands or meet friends.
How to Create It
Gather your curls into a very loose, high ponytail at the crown using a soft elastic or silk scrunchie. Don’t make it tight — the point is to loosely bundle your curls together, not compress them. Let curls fall freely from the elastic, creating a fountain of texture and movement. If you’re doing this before bed, secure loosely and sleep on a silk pillowcase to further reduce friction and frizz. In the morning, you can wear it as-is or release the ponytail and refresh your curls.
Pro Tips
Use a silk or satin scrunchie rather than a regular elastic, which grabs and damages curls. A loose pineapple actually holds curls better than a tight one because the curls maintain their natural shape and bounce. If you’re wearing this during the day, add a small claw clip at the base of the ponytail to secure it more firmly without tightening the elastic. This look is inherently casual — don’t overthink it or try to make it too perfect.
8. The Twisted Side Ponytail
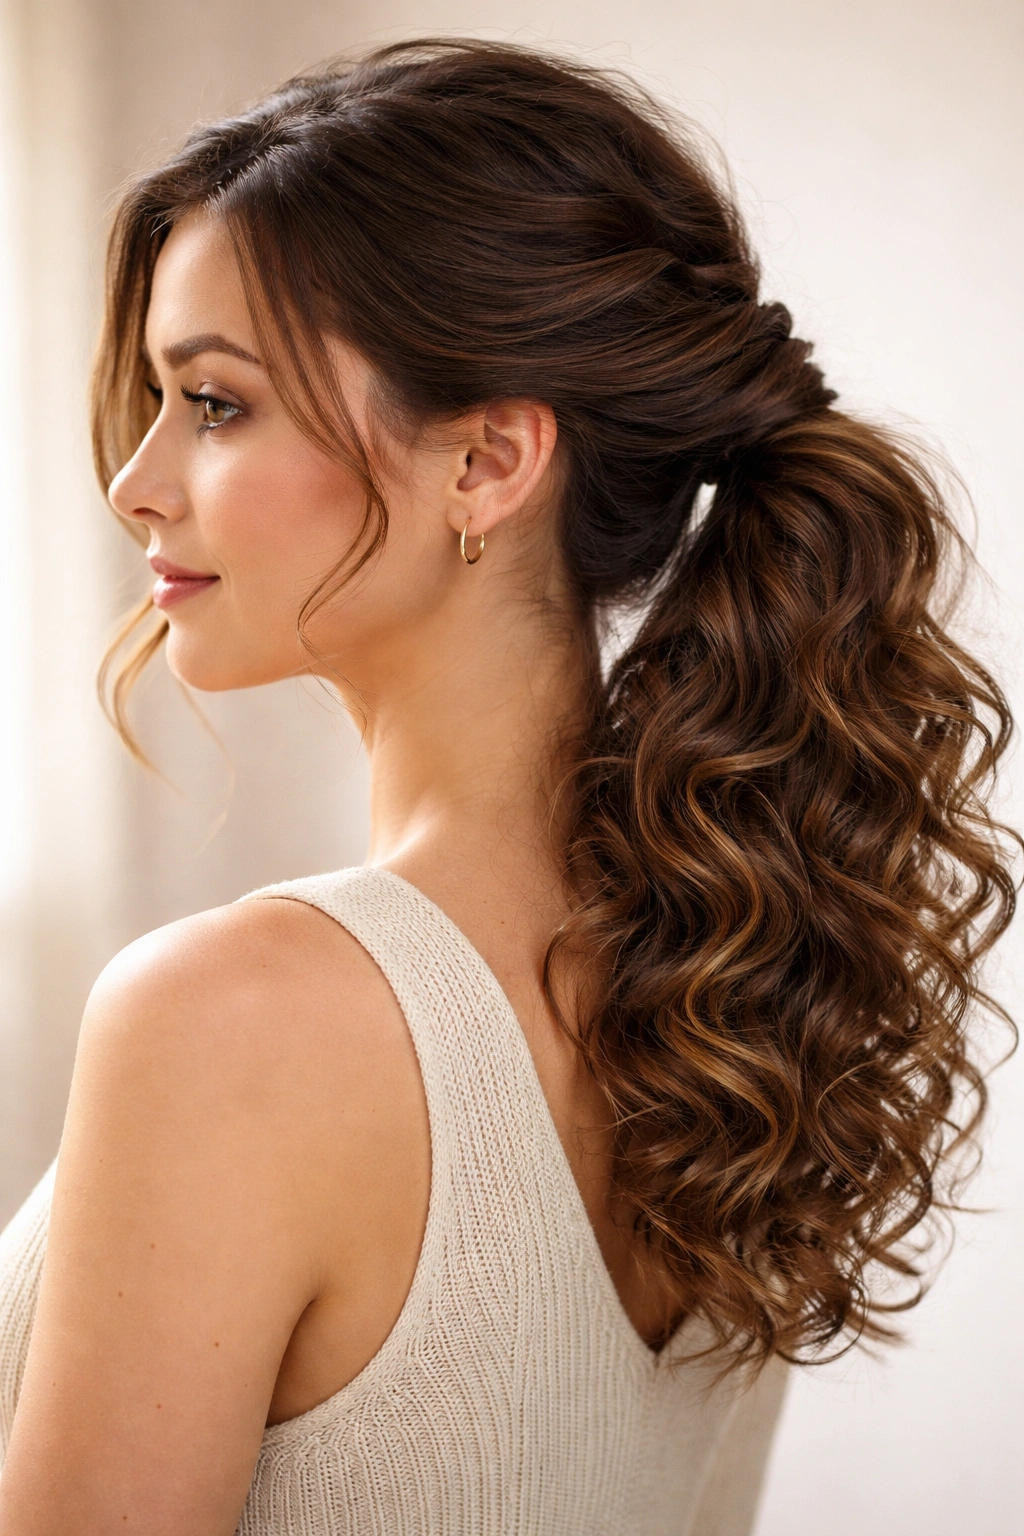
A side ponytail gathers your curls to one side of your head, creating asymmetrical balance and a softer, more romantic silhouette than a center ponytail. When you twist the hair before gathering it, you add another layer of texture and interest. This style is easy to create, works for casual and slightly dressier occasions, and feels more intentional than a regular ponytail.
Why Side Ponytails Flatter Curly Hair
A side placement naturally creates asymmetry that makes your face look fuller and framer, which most people find more flattering than center styling. Your curls fall from one side, creating movement and softness. The twisting before gathering creates texture variation and makes the style look less severe and more romantic.
How to Create It
Part your hair slightly off-center, creating a deeper side part. Gather the hair from the deeper side back toward the opposite ear — so if you’re parting deeper on the left, you’re gathering hair from the left side and pulling it toward the right side of your head. Before securing with an elastic, gently twist the section of gathered hair to create a subtle spiral texture. Secure with an elastic at the level where you want your ponytail to sit — mid-back looks casual, lower back or at the base of your neck looks more polished.
Pro Tips
A side ponytail looks best with face-framing pieces loose, which happens naturally with this style. If shorter layers are too wild, smooth them with a tiny bit of serum or edge control. Leave the twist subtle rather than making it a tight spiral — you want the twist to be visible but not overly structured. This style actually improves throughout the day as curls settle and the twist becomes more defined.
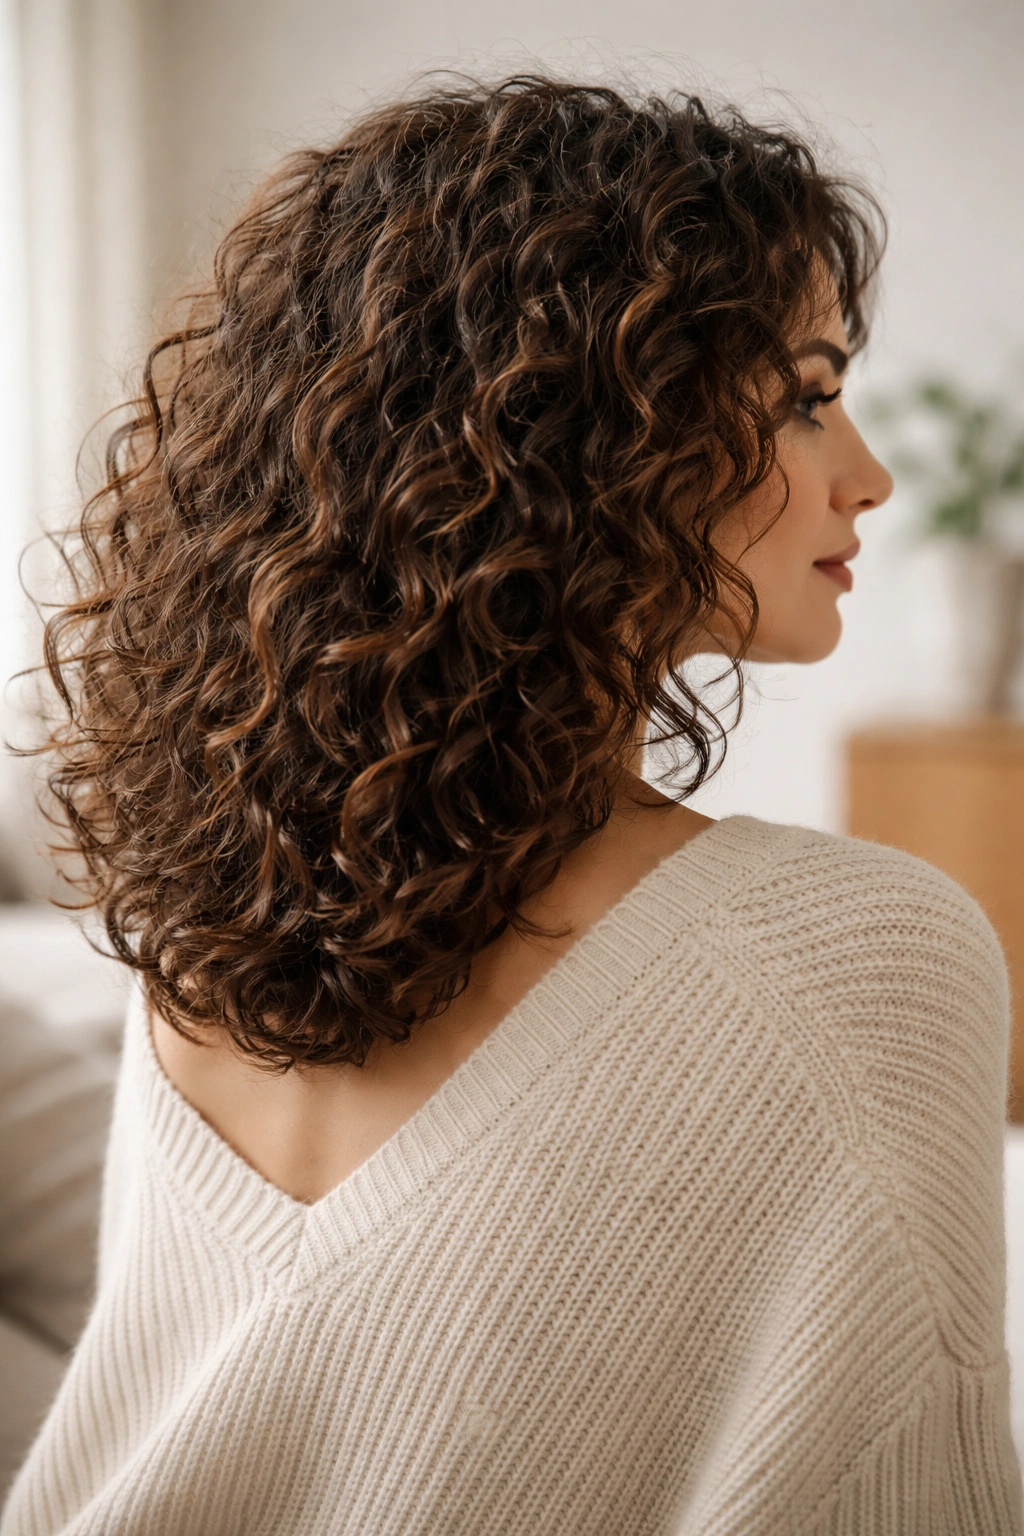
9. The Layered Curly Shag
This isn’t a hairstyle you create daily — it’s a haircut that translates to multiple easy styles. A layered shag cut on medium curly hair creates natural dimension and texture without requiring much styling effort. The layers encourage your curls to separate naturally, reducing frizz and creating intentional-looking texture. With a good shag cut, your hair looks amazing with minimal effort on days you don’t want to style.
Why Layers Transform Curly Hair
Layers prevent your curls from becoming a heavy, dense blob at the bottom and instead create movement from roots to ends. Each layer encourages curls to separate and show individual texture. Shorter layers at the crown create natural volume without backcombing or teasing. A properly layered cut means your curls have a built-in shape rather than relying entirely on your styling efforts.
How to Create the Best Version
Wash your hair with a sulfate-free shampoo and rich conditioner, applying more conditioner to ends than roots. Apply a curl-defining cream or gel to damp hair, section by section, encouraging each curl to form and spiral. Use a diffuser to dry, scrunching upward as you dry to encourage curl formation and separation. The layers will naturally enhance the texture your curls create. Once dry, gently separate any curls that are clumped together using just your fingers.
Pro Tips
Ask your stylist for choppy, piece-y layers rather than blunt layers, which can look heavy on curly hair. Layers grow out and get longer fairly quickly, so schedule trims every 6-8 weeks to maintain shape. Avoid brushing or combing through a shag cut (use only your fingers to separate) or you’ll destroy the layer structure. This is the ideal haircut for people who want beautiful hair with minimal daily styling.
10. Romantic Curled Waves With Soft Styling
This final style takes your natural curls and enhances them with soft, romantic styling that adds shine and definition without looking overly done. You’re creating waves that are intentionally separated, gently curved, and full of movement. This works for dates, special events, or any day when you want your curls to look their absolute best.
Why Soft Styling Enhances Curls
Gentle styling that respects your curl pattern creates hair that looks healthy, shiny, and intentionally beautiful. Rather than fighting your texture or trying to create something your hair doesn’t naturally do, you’re enhancing what you already have. Medium curly hair responds beautifully to products and techniques that add moisture and definition without stiffness.
How to Create It
Start with freshly washed curls and apply a lightweight leave-in conditioner throughout, focusing on mid-lengths and ends. Apply a curl cream or curl gel to damp hair, working in small sections and encouraging each curl to form. Use your fingers to gently separate clumped curls, creating individual spirals. Dry with a diffuser, or allow to air dry for softer, looser waves. Once completely dry, you can gently separate waves further with your fingers if desired, creating a relaxed, romantic texture.
Pro Tips
Use a microfiber towel or t-shirt to dry your hair rather than a regular terry cloth towel, which disrupts curl formation. Apply curl cream to soaking wet hair, not just damp hair — your curls need moisture to set properly. Don’t touch your curls while they’re drying or you’ll disrupt the pattern. Once completely dry, add a tiny bit of anti-frizz serum to your hands and gently run them over your curls to add shine and smooth any flyaways. This style looks better the next day, so don’t judge it fresh from the shower.
Final Thoughts
Medium curly hair is genuinely easy to style once you understand that the goal isn’t fighting your texture or creating something your hair doesn’t naturally want to do. Every hairstyle here works with your curl pattern — enhancing it, organizing it, and letting it do what it does best, which is create volume, movement, and beauty with minimal effort on your part.
The styles that will become your go-to favorites are the ones that make you feel most like yourself. Try each of these when you have a moment, notice which ones make you feel confident and comfortable, and lean into those. The real secret to easy hairstyling with curly hair isn’t finding the perfect technique — it’s understanding your own curl pattern, using products that work for your porosity and density, and choosing styles that celebrate what you already have rather than constantly fighting against it.
Your medium curls are genuinely your best asset, and these ten styles show you exactly how to make them work every single day.