Braids and curly hair seem like they should be natural partners, but anyone with texture knows the reality is more complicated than that. Curls want to express themselves, shrink when wet, and sometimes rebel against tight tension—so braiding curly hair requires a completely different approach than braiding straight or wavy strands. The good news? Some of the most stunning, dimensional hairstyles happen when you work with your curl pattern rather than against it, letting your natural texture frame and enhance the braid structure instead of trying to sleek everything into submission.
The magic of braiding curly hair is that you don’t have to choose between healthy texture and beautiful, polished styles. The right braided hairstyle showcases your curls’ dimension and bounce while keeping hair protected, manageable, and undeniably gorgeous. Whether you’re looking for something you can style in 15 minutes before work, a protective style that lasts a week, or an intricate updo that turns heads at an event, there’s a braided hairstyle that works for your specific curl pattern and lifestyle.
Here’s what makes curly braids different: texture actually helps them hold structure. Your curls grip the braid naturally, so you can loosen styles intentionally for a soft, romantic vibe without them falling apart. You can prep curls with moisture (unlike straight hair, where products sometimes make braids slip), and you can refresh them mid-week with a little water and curl cream. Plus, the dimension of curly hair means braids photograph with incredible depth and visual interest that straight-hair braids simply can’t match.
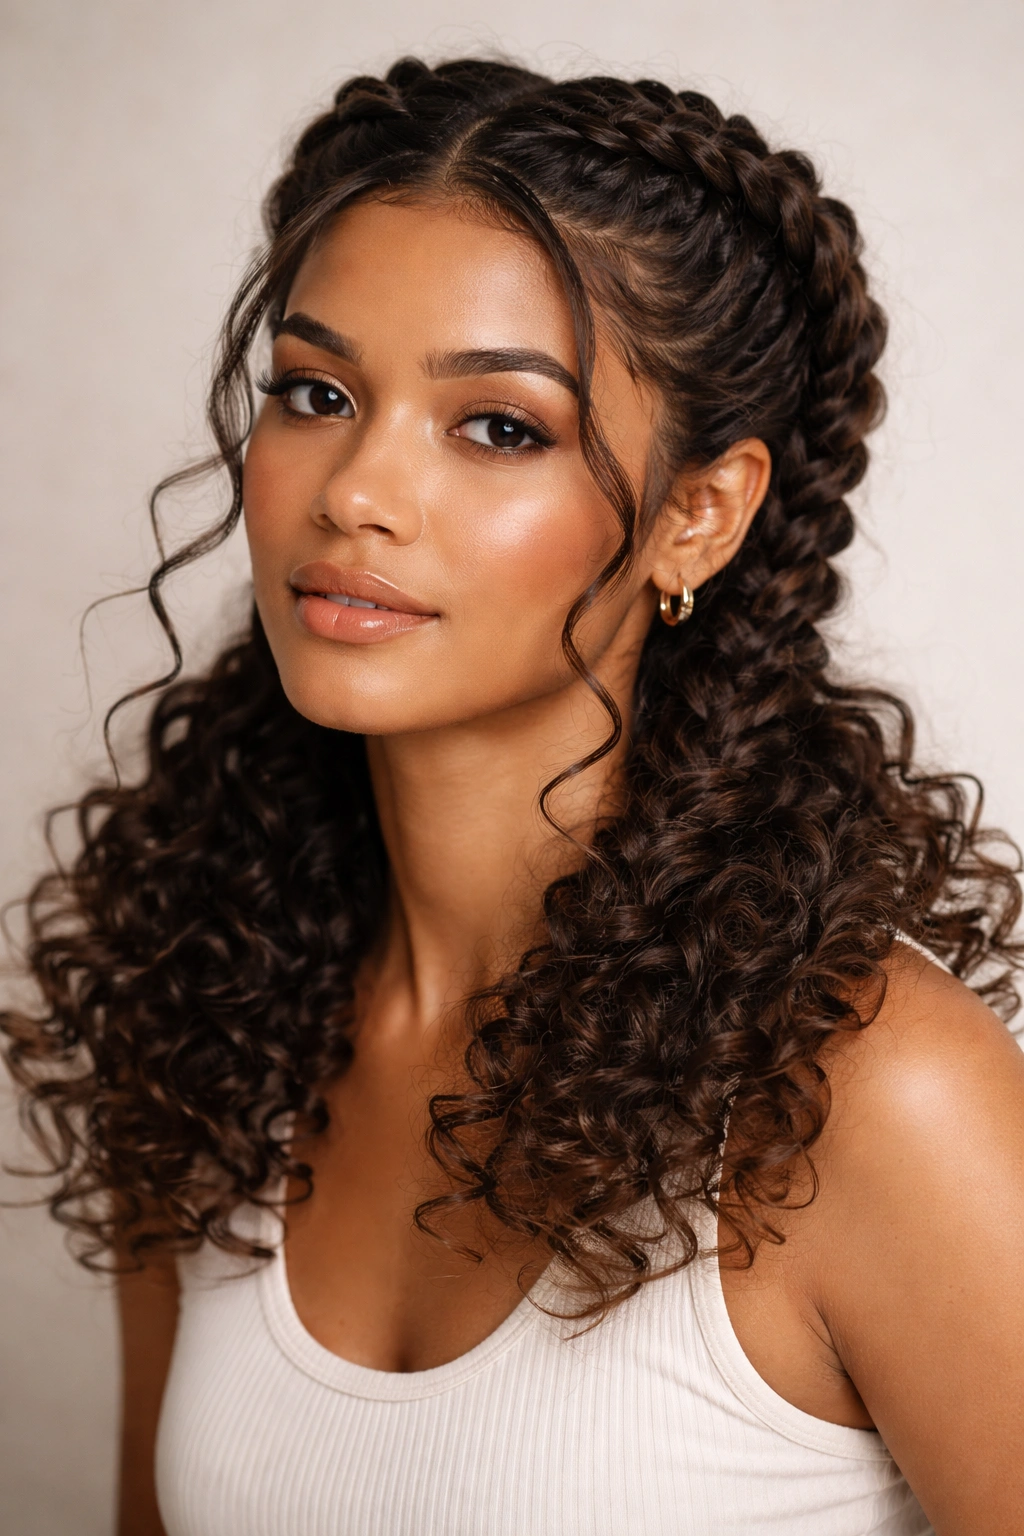
1. Twisted Braids with Loose Curl Ends
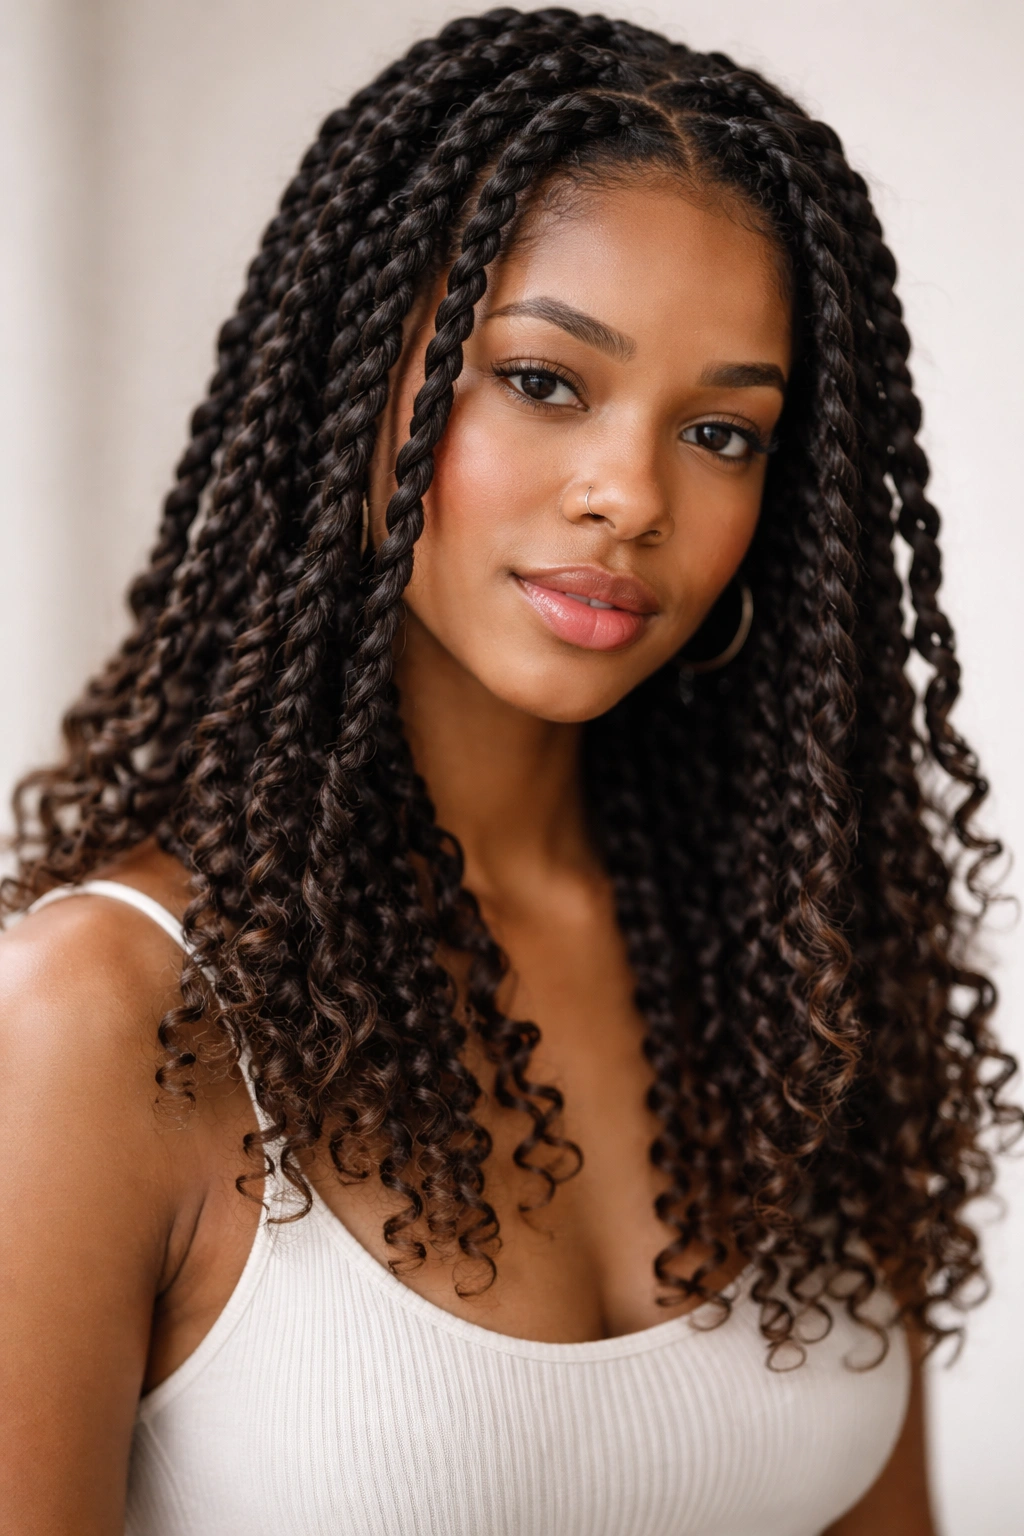
Twisted braids are where you start if you want something protective but still show off your natural curl pattern. Instead of tight three-strand braids, you’re creating two-strand twists by wrapping sections around each other, which reduces tension on the roots and allows curls to pop at the ends. This style works beautifully for medium to tightly coiled curls and gives you the polished look of braids without the commitment of full braiding.
How to Create the Dimensional Effect
The key is in the prep and execution. Start with damp, moisturized curls and apply a leave-in conditioner or curl cream to each section before twisting—this keeps hair hydrated and helps curls stay defined. Divide your hair into 4-8 sections depending on thickness, then take two strands within each section and twist them around each other from root to end. Don’t twist too tightly; if you pull, you’re defeating the purpose of protecting your curls. The twist should feel gentle and secure, not tense.
Why This Works for Textured Hair
- Two-strand twists require significantly less manipulation than traditional braids, meaning less breakage and less stress on your curl pattern
- Curls escape at the end of each twist, creating a soft, romantic look that’s actually easier on hair than slicked braids
- Twists loosen naturally over days, transforming into a textured, undone look that’s even more beautiful than day one
- No edges are fully exposed, so the style offers protection without being overly severe
- Twists work on all curl types, from loose waves to tight coils
Pro tip: Refresh twists mid-week by spraying with a water-and-conditioner mix and gently re-curling the ends with your fingers. They’ll look nearly as fresh as day one.
2. Box Braids with Textured Edges
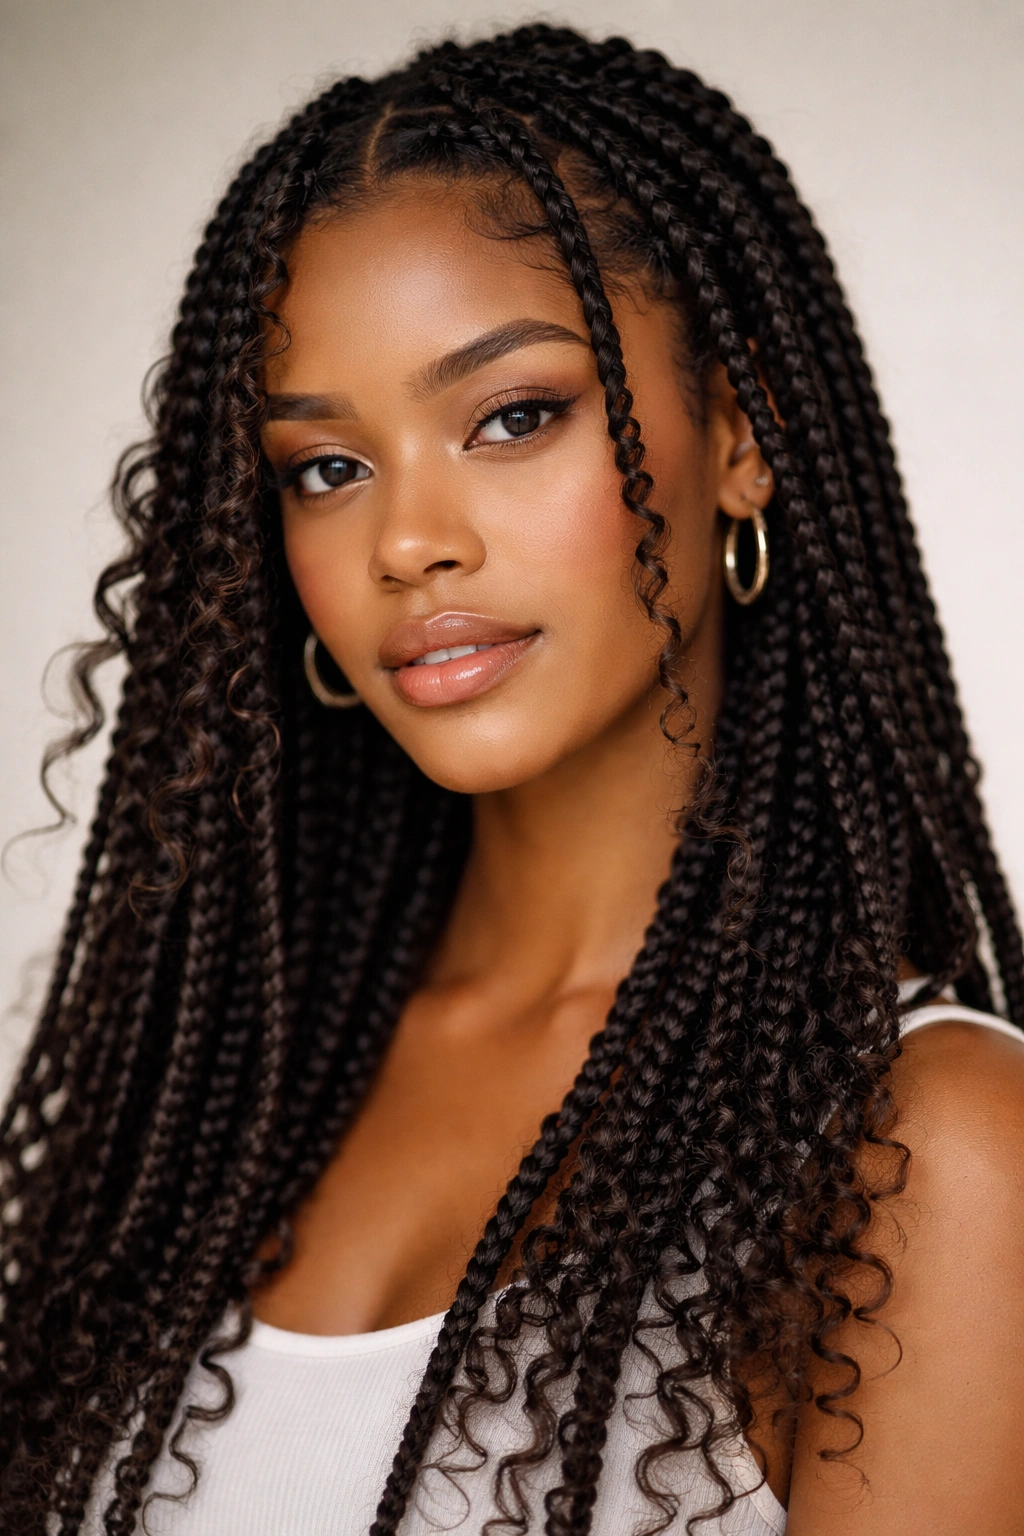
Box braids deserve a mention in the curly-hair conversation because they’ve evolved beyond the heavy protective styles your mom wore. Modern box braids for naturally curly hair incorporate your actual curl pattern into the style, especially at the edges and the ends, creating braids that look intentionally undone rather than super-sleek. This hybrid approach gives you the protection of braids with the aesthetic dimension of textured hair.
Building Braids That Showcase Curl Pattern
The technique here is about leaving sections of your natural curl undone, especially the front hairline and the ends of each braid. Braid sections starting about an inch back from the part line, not right at the root—this prevents tension alopecia and lets your curl pattern frame your face beautifully. At the ends of each braid, don’t braid all the way to the tip; stop about 2-3 inches from the end and let curls flow free. You can even unravel the last inch slightly once the braid is complete, so curls escape and soften the look.
The Long-Term Wear Benefits
- Box braids naturally soften as you wear them and curls begin to escape, which makes them more forgiving if you can’t braid perfectly tight
- The combination of braided and curly sections reduces overall tension compared to fully braided styles
- You can refresh the curly ends every few days with water and product, extending the lifespan of the braids dramatically
- This style reads as intentionally textured and modern, not dated or overly “neat”
- If you’re using extensions, textured extensions blend far better with natural curly hair than super-sleek extensions do
Worth knowing: If you have very tight coils (4C texture), braid more loosely and use thicker sections—thin, tight braids are harder on tightly coiled hair than thicker, gentler ones.
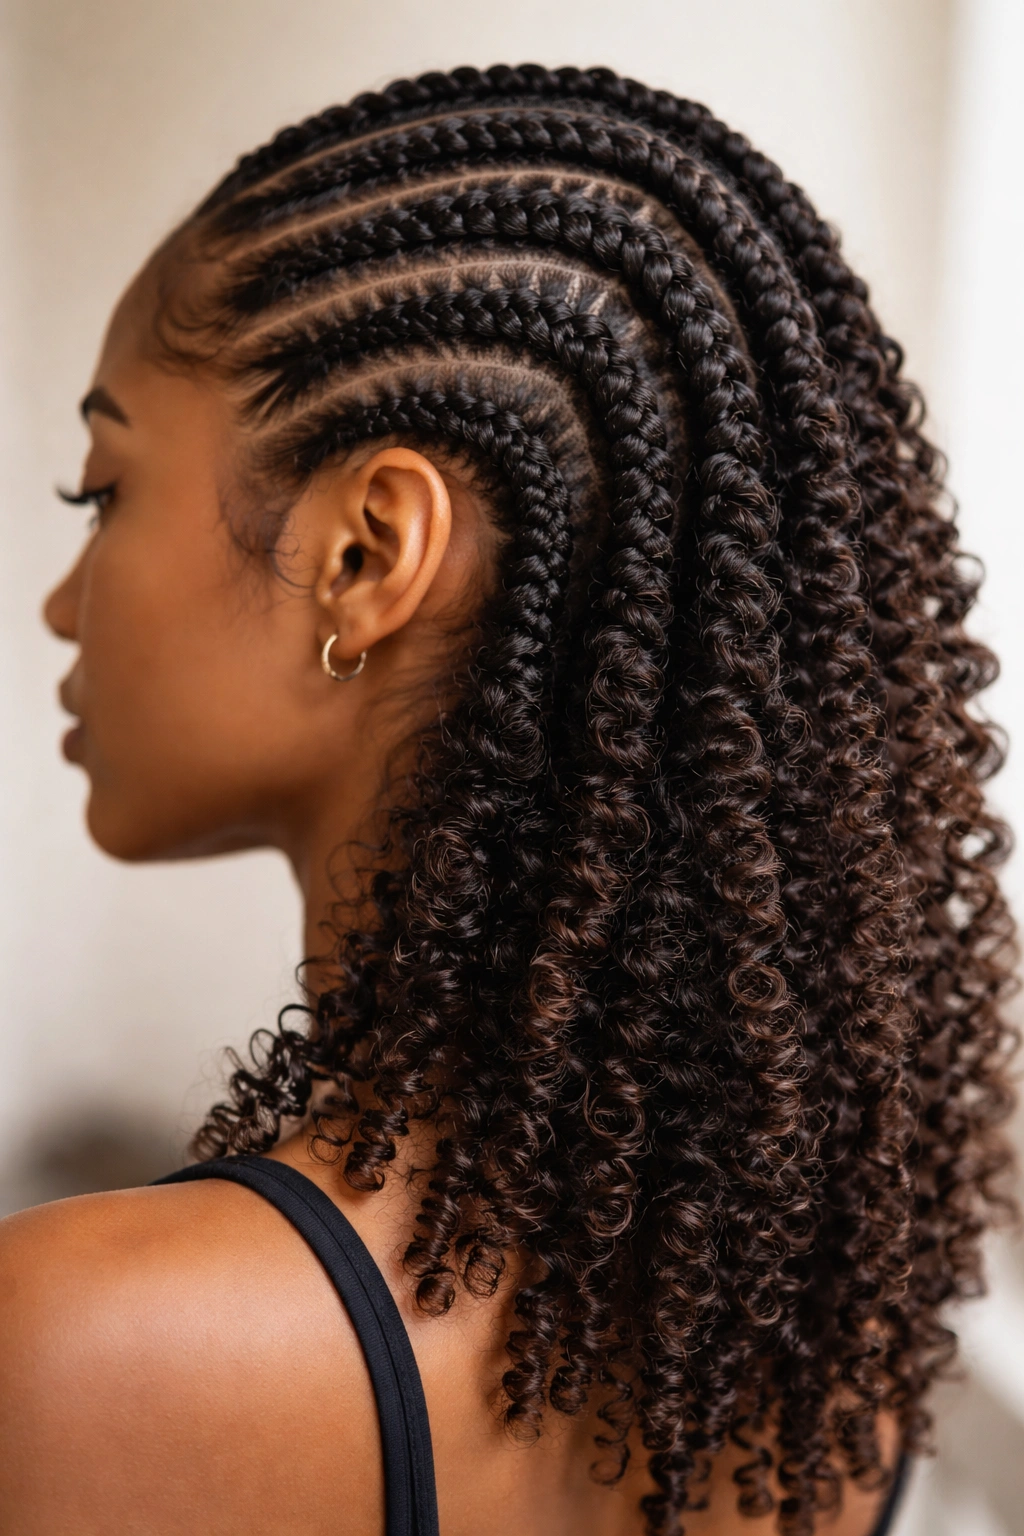
3. Ghana Braids with Curly Definition
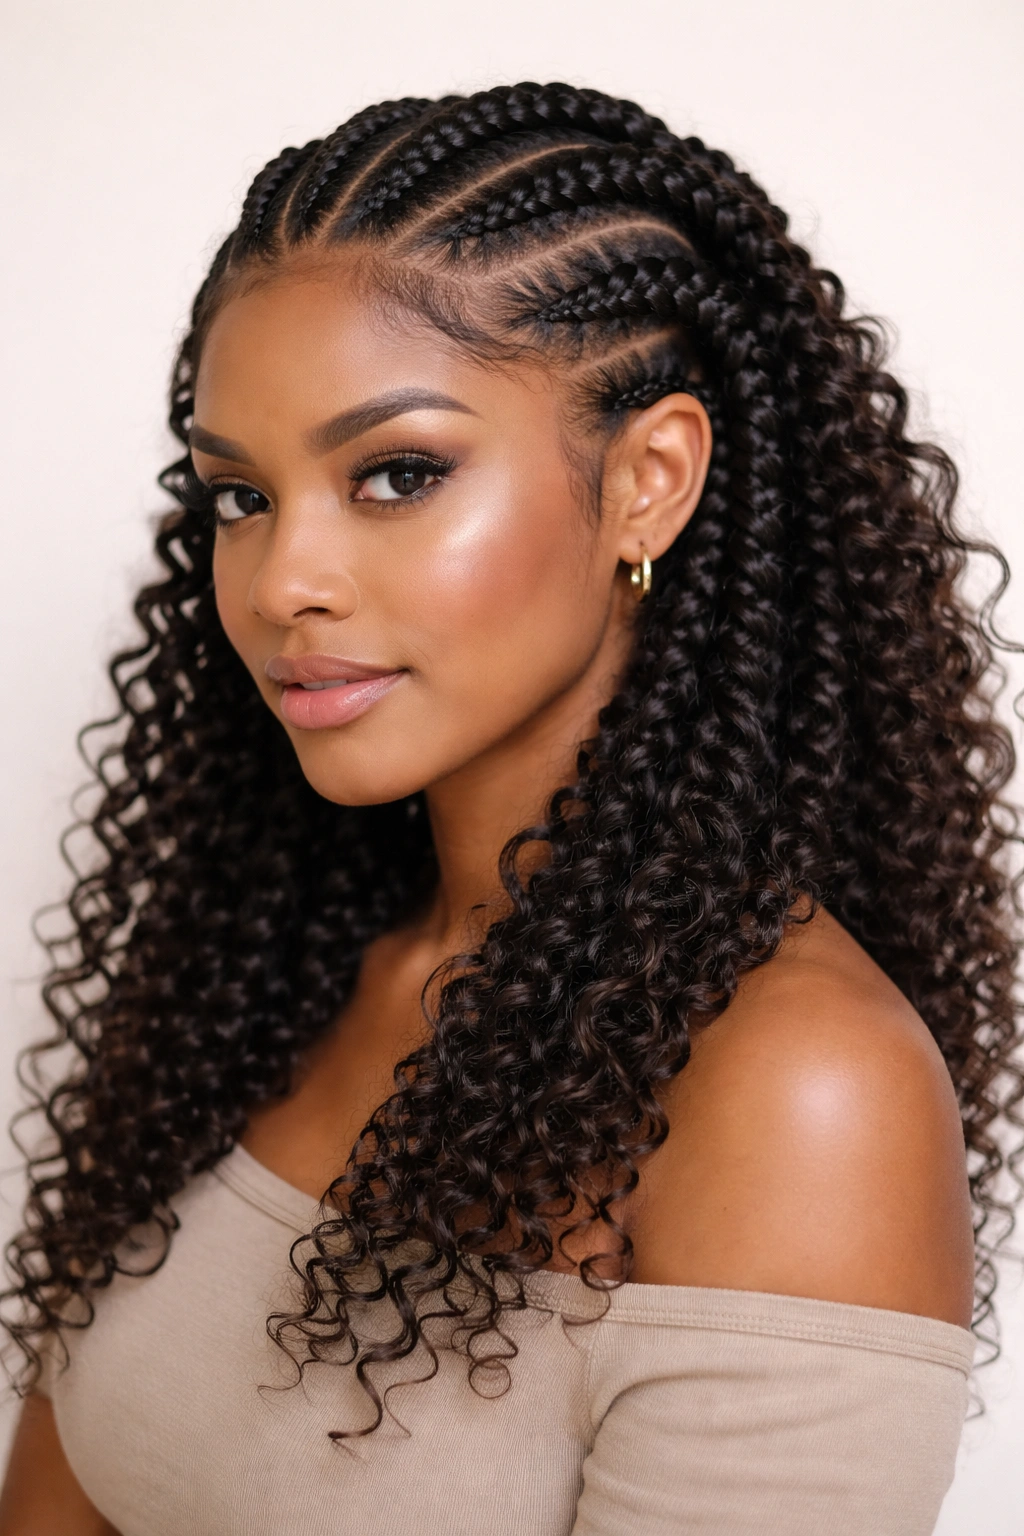
Ghana braids are thick, dimensional braids that start at the roots and typically curve or wrap around the head. They’re stunning on curly hair because the size of the braid lets your curl pattern contribute to the overall texture and dimension of the style. Unlike skinny braids, thick Ghana braids actually become more beautiful as curls begin to surface and escape along the braid structure.
Why Thickness Works in Your Favor
Thicker braids mean fewer braids overall, so less manipulation and less time under tension. More importantly, curls naturally want to push out from the braid structure, especially coily and kinky textures. A thick Ghana braid gives curls space to do this without the braid falling apart—the curls actually become part of the aesthetic instead of a problem to manage. You get a fully textured, dimensional look that moves and bounces.
Styling Ghana Braids for Maximum Impact
- Create drama by starting the braid at the temple and wrapping it horizontally across the back of the head, rather than the traditional straight-back option
- Use 5-7 braids maximum; thicker braids mean you can cover your whole head without it looking too heavy
- Curl the free ends more intentionally by finger-coiling or using a curl cream and letting them air dry, which creates a beautiful transition from braid to curl
- Pull gently on the braid to “fluff” it once it’s complete—this loosens it slightly and lets texture escape, softening the overall appearance
- Add a silk scarf or bonnet at night to protect the braids and keep curls in shape
Pro tip: Ghana braids look freshest on day one, but they actually age beautifully as curls escape. By day 3-4, they develop an intentionally textured, lived-in vibe that’s genuinely stunning.
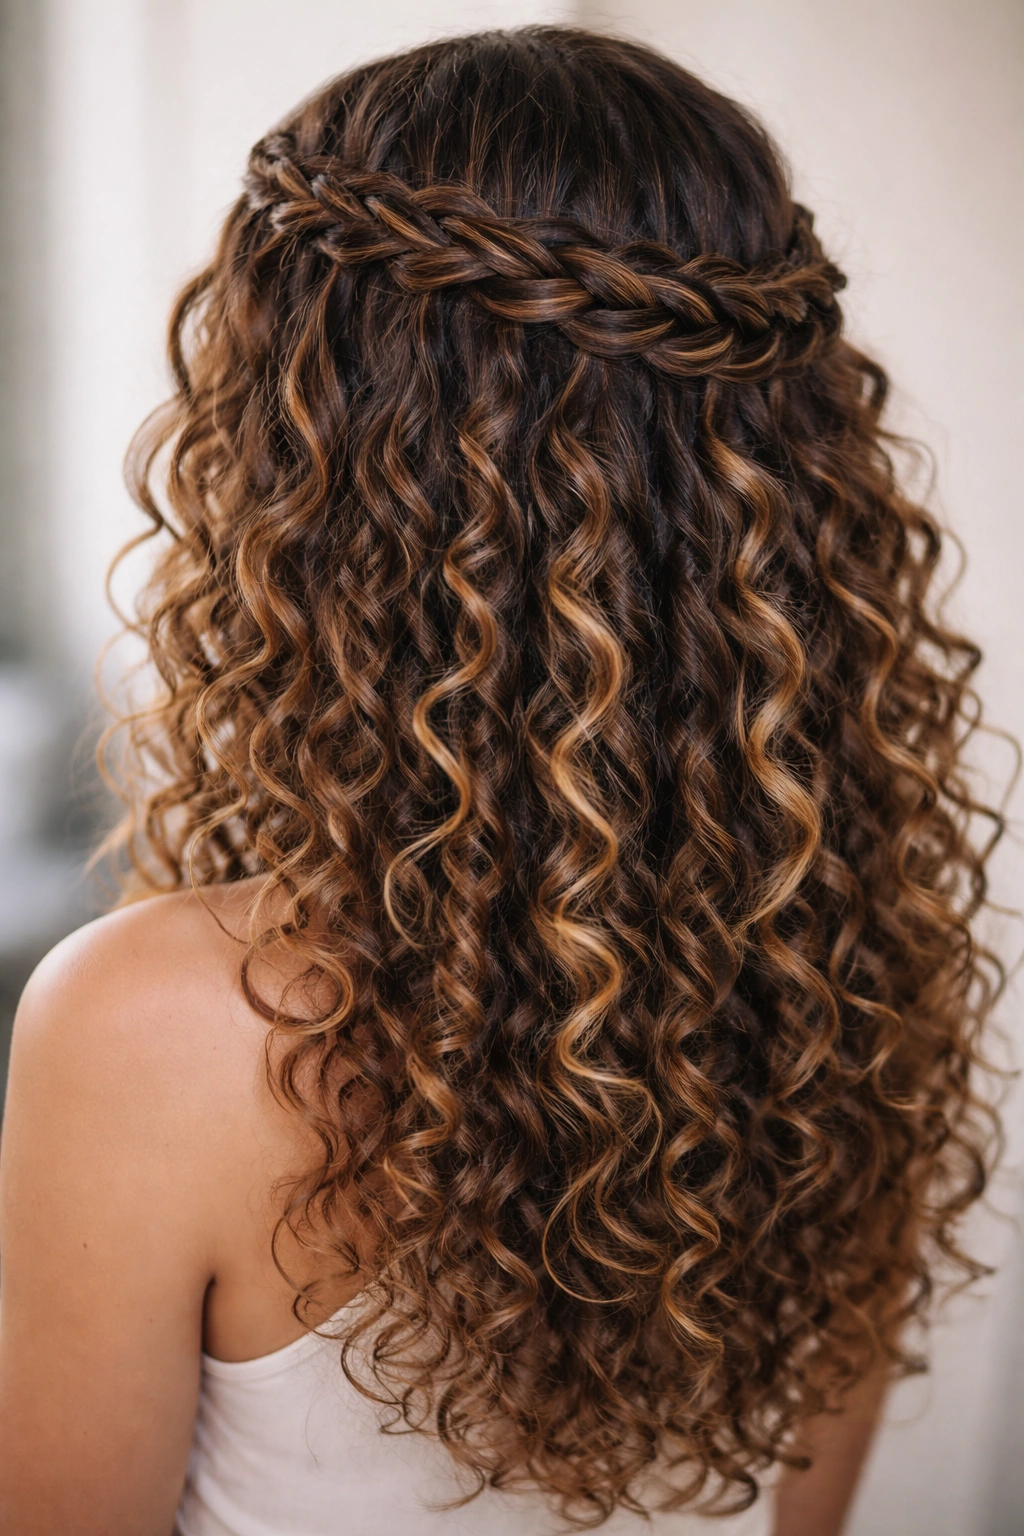
4. Halo Braids Framing Curly Hair
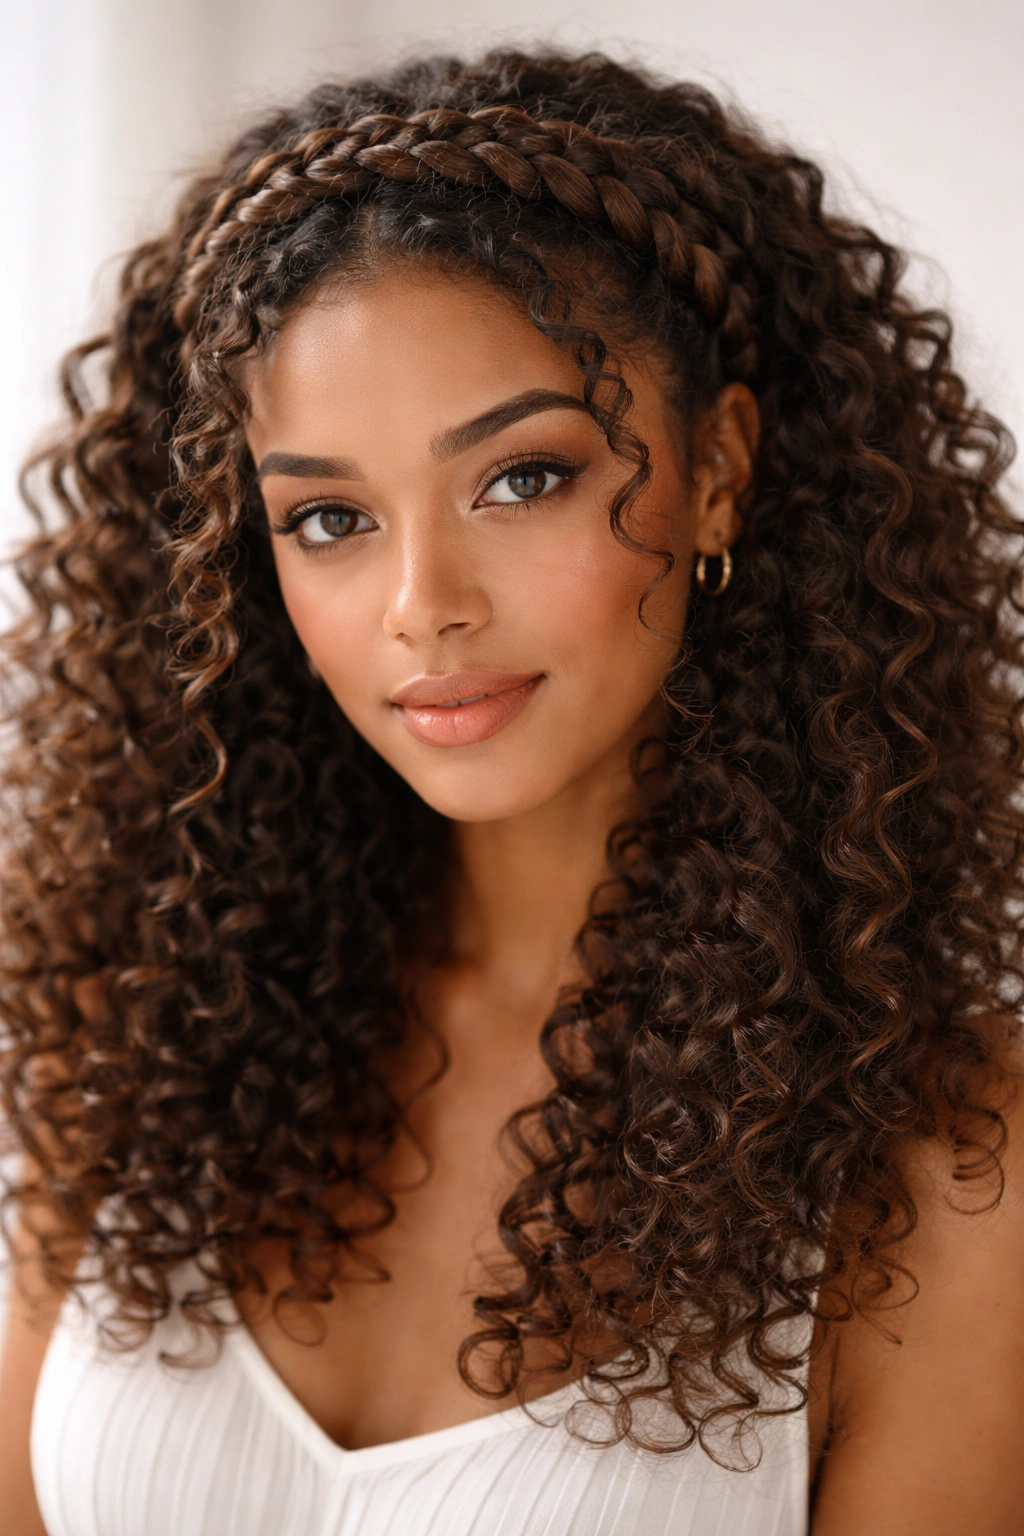
A halo braid wraps around the crown of your head, creating a crown-like effect. On curly hair, this is where you get to play with the contrast between the structured braid and the wild, free curls that spill out below and all around it. It’s romantic, protective, and way easier than it looks—perfect for curly hair because the curls do half the visual work for you.
Constructing the Crown Effect
Start with damp curls and apply a lightweight gel or curl cream so everything has grip and definition. Part your hair from temple to temple across the back of your head—this bottom section will stay down as your gorgeous curl cloud, while the top section becomes your halo. Braid the top section, starting at one temple and moving toward the opposite ear, braiding loosely enough that your curl pattern contributes texture to the braid itself. Secure with bobby pins at the other temple, tucking the end underneath so it’s invisible.
The Practical Magic
- A halo braid protects the crown area (which experiences more breakage and friction) while leaving the bulk of your curls loose and beautiful
- The style works on curls of any length, from shoulder-length to mid-back, and on any curl pattern from loose waves to tight coils
- It’s genuinely one of the easiest braided styles to execute yourself, even with one hand and no fancy tools
- The contrast between the neat braid and the textured curls below creates a polished-but-natural aesthetic that photographs beautifully
- You can wear a halo braid for 2-3 days with just a refresh spray, making it perfect for people who don’t have time to restyle daily
Worth knowing: A loose, slightly-fuzzy halo braid looks better than a super-tight, perfect one. The curl pattern you expose in the braid itself becomes the style—lean into that, don’t fight it.
5. Dutch Braids with Bouncy Loose Ends
Dutch braids (where you braid inward instead of outward, creating a raised, 3D effect) are striking on curly hair because the braids themselves get textured—your curls catch and hold the braid structure in a way that makes even a simple two-sided dutch braid look complex and dimensional. You get the neat, protective appeal of braids with the volume and movement curly hair naturally brings.
Perfecting the Dutch Braid Technique for Texture
The difference with dutch braids on curly hair is that you can braid a bit more loosely than you would on straight hair and still have excellent hold. Your curl pattern naturally grips the braid sections, so you don’t need to pull tight. Braid from the crown down toward the nape, incorporating new hair as you go, and don’t worry if sections slip slightly—that actually creates a softer, more dimensional look. At the ends, don’t seal the braid tight; let it release into curls instead.
Visual Impact and Wearability
- Dutch braids catch light in a completely different way than regular braids, and curly hair amplifies this effect—your curls make the braid pop visually
- The raised texture means this style photographs beautifully from every angle, which is why dutch braids are everywhere on social media (and in person, they’re just as gorgeous)
- Two dutch braids from crown to nape creates a mohawk-style effect that’s modern and edgy while still keeping hair protected
- The style holds beautifully for 3-5 days with minimal daily refresh, making it practical for people with busy schedules
- Dutch braids work on all lengths and all curl patterns, from loose waves to tight coils
Pro tip: After braiding, gently pull the braid to loosen it—grab small sections and pull slightly, working your way down the braid. This exposes texture and makes the braid look fuller and more dimensional.
6. French Braids Customized for Curly Texture

French braids are the classic, and they work beautifully on curly hair—you just have to adjust your expectations and technique. Instead of aiming for a sleek, tight braid, you’re creating a textured, dimension-heavy braid where your curl pattern is part of the design. A loose french braid with visible curls caught in the braid structure reads as intentionally undone and modern on curly hair.
Adapting the Classic Technique
Start at the crown with a three-strand braid, taking equal-sized sections and crossing them over each other. As you move down, incorporate new hair from the sides, but don’t pull so tight that you’re stretching or breaking texture. The goal is a braid that feels secure but gentle. If you have very curly hair, you might find it helpful to work on damp (not soaking wet) curls—damp hair has more grip and holds the braid better than bone-dry curls.
Why Loose Matters Here
- A tight french braid on curly hair can look severe and actually puts unnecessary tension on curl roots, which can lead to breakage
- A loose french braid is far more forgiving; if sections slip, it reads as intentionally textured, not like a mistake
- The looser your braid, the more your curls contribute texture and dimension to the overall style—this is a feature, not a bug
- French braids hold longer on curly hair than on straight hair because texture grips and locks everything in place
- A single french braid down the back reads as soft and romantic; two side-by-side french braids read as edgy and polished
Worth knowing: If your french braid looks “wrong” or frizzy, don’t panic—that’s just your curls. Spray a quick refresher (water and a tiny bit of conditioner) over the braid and the texture will settle into something beautiful.
7. Rope Braids with Strategic Curl Release
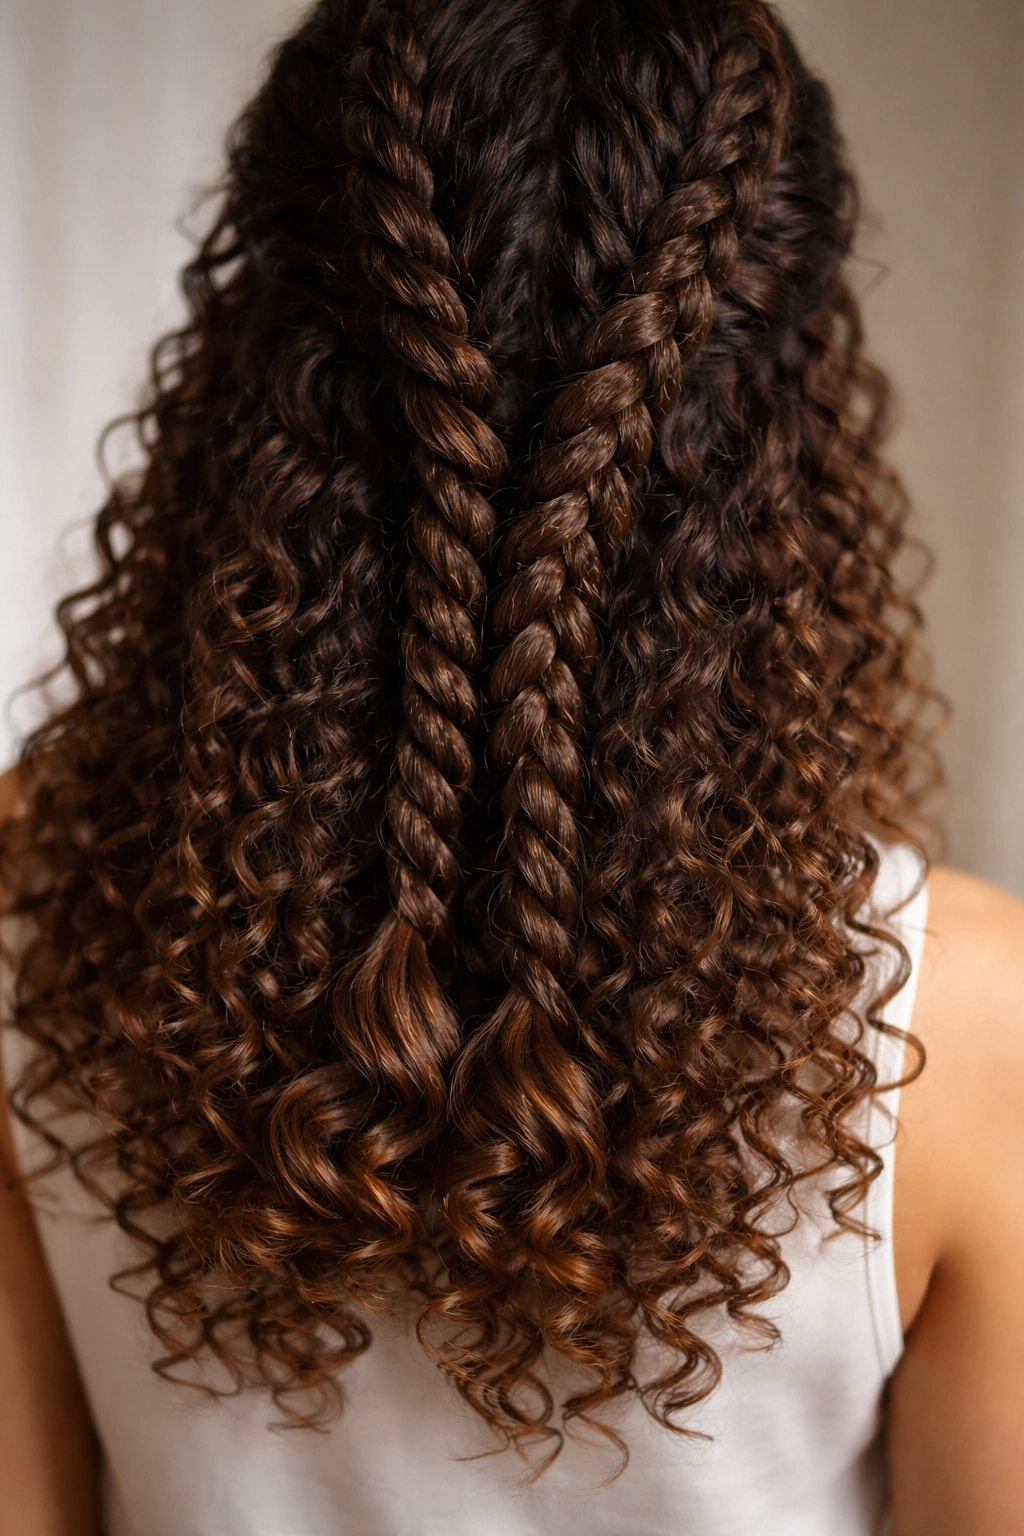
Rope braids are two-strand braids where you twist two thick sections of hair around each other, and they’re absolutely magical on curly hair. They’re faster than traditional three-strand braids, they naturally hold better on textured hair, and they look incredibly dimensional because curls escape and frame the rope structure. If you want something protective but quick, rope braids are the answer.
Building the Rope Braid Structure
Divide your hair into large sections (aim for 2-4 ropes depending on how much coverage you want). Within each section, take two strands and twist them around each other from root to end, maintaining even tension—not too tight, not too loose. The rope should feel secure in your hands but not strained. What makes rope braids special on curly hair is that you can intentionally release and curl the final 3-4 inches of each rope after braiding; just unwind slightly and finger-coil the loose strands.
The Practical and Aesthetic Benefits
- Rope braids take half the time of three-strand braids but look just as polished and protective
- They hold better on curly hair because the twisting motion naturally locks in texture, which means they last longer and require less daily maintenance
- The style is incredibly versatile—you can do thick side-by-side ropes, thin scattered ropes, or even wrap ropes around your head like a crown braid
- Curls naturally escape from rope braids, creating a soft, romantic vibe that photographs beautifully
- If one rope loosens slightly, it’s barely noticeable because the texture around it disguises any minor slippage
Pro tip: For an even more intentional, styled look, curl the loose ends of each rope by wrapping them around a curling iron or curling them by hand while damp. They’ll hold that curl for days.
8. Crown Braids with Spring Curls
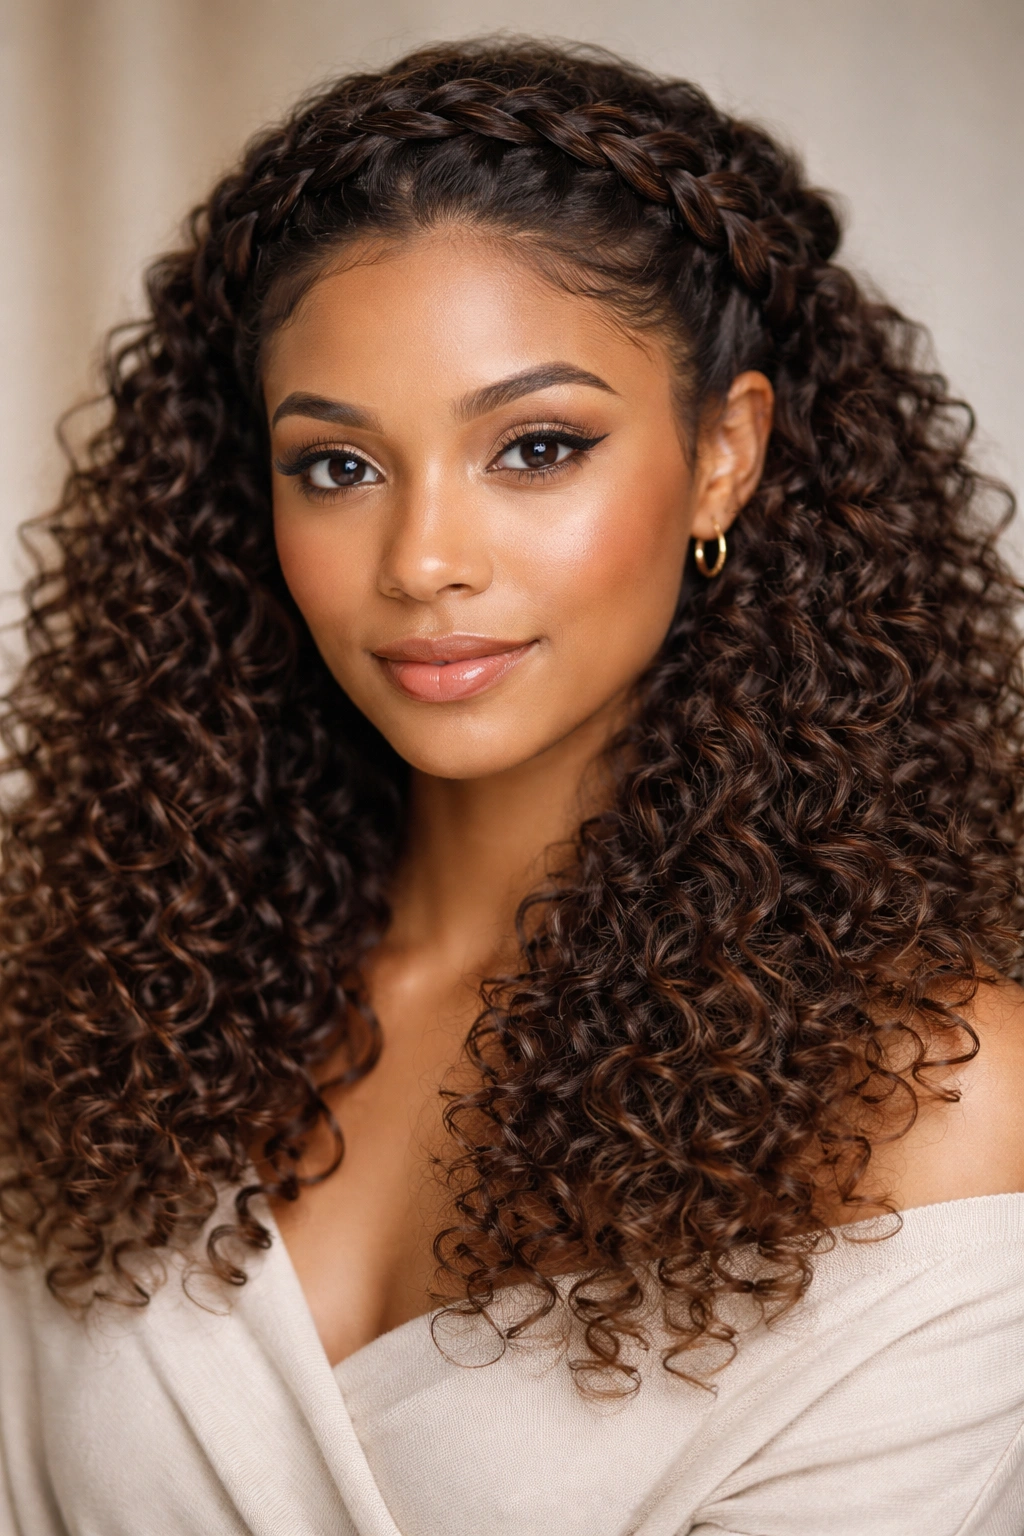
Crown braids take the halo concept and tighten it down a bit—instead of a gentle wrap, you’re creating a more structured braid that crowns the head from ear to ear, leaving all the curls loose and bouncy below. The contrast between the neat braid and the springy curls underneath is absolutely breathtaking, especially on curly hair with real dimension and bounce.
Constructing a Proper Crown
Start by parting your hair from ear to ear across the back of the head. Braid the top section like you would a halo braid, but slightly tighter and more defined. You’re aiming for a braid that sits securely on the crown and doesn’t slip backward. As you braid, don’t worry about incorporating every single hair into the braid structure—letting some face-framing pieces escape naturally adds dimension and softness.
Why This Works on Curly Hair
- The curls below the crown braid look fuller and bouncier than they would loose, because the braid anchors the hair back just enough to create volume without flattening texture
- It’s a protective style that keeps the crown area secure while celebrating the natural texture of the rest of your hair
- The style reads polished enough for work or special events but playful enough for casual wear
- Crown braids actually improve the appearance of curls over time—the slight tension encourages curls to clump and hold their shape better
- It’s one of the easiest braided styles to execute yourself and works on curly hair of any length and pattern
Worth knowing: This style shines on the second or third day of wear, when curls have fully settled and the braid has loosened slightly. Day one is fine, but day three is gorgeous.
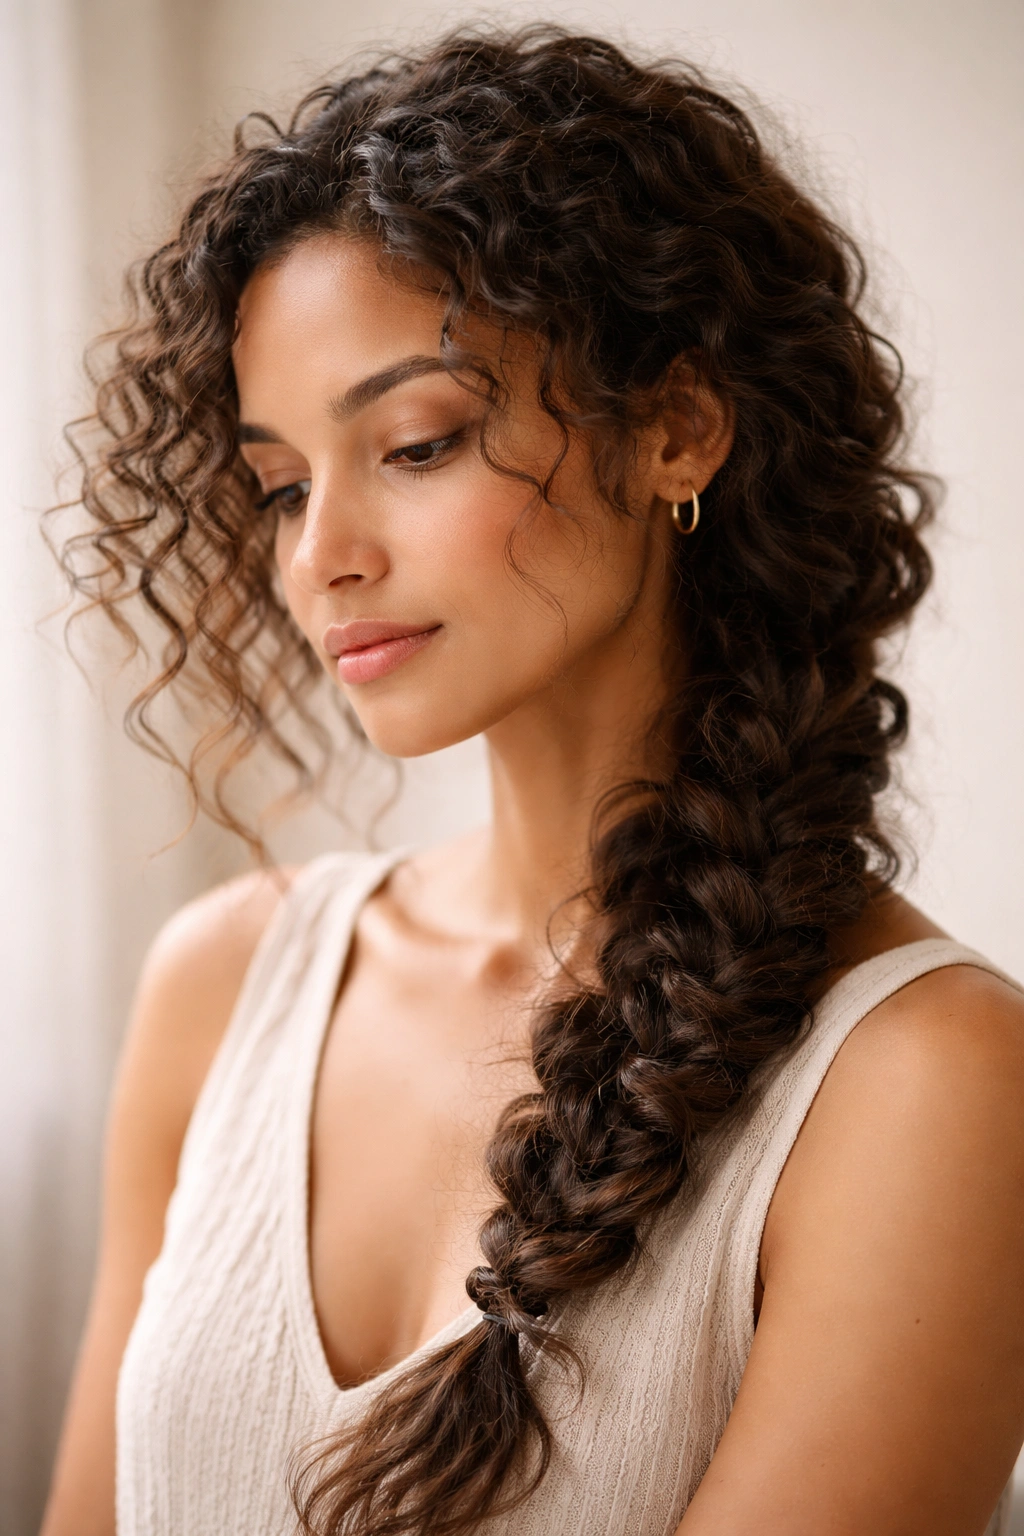
9. Fishtail Braids in Wavy and Curly Hair
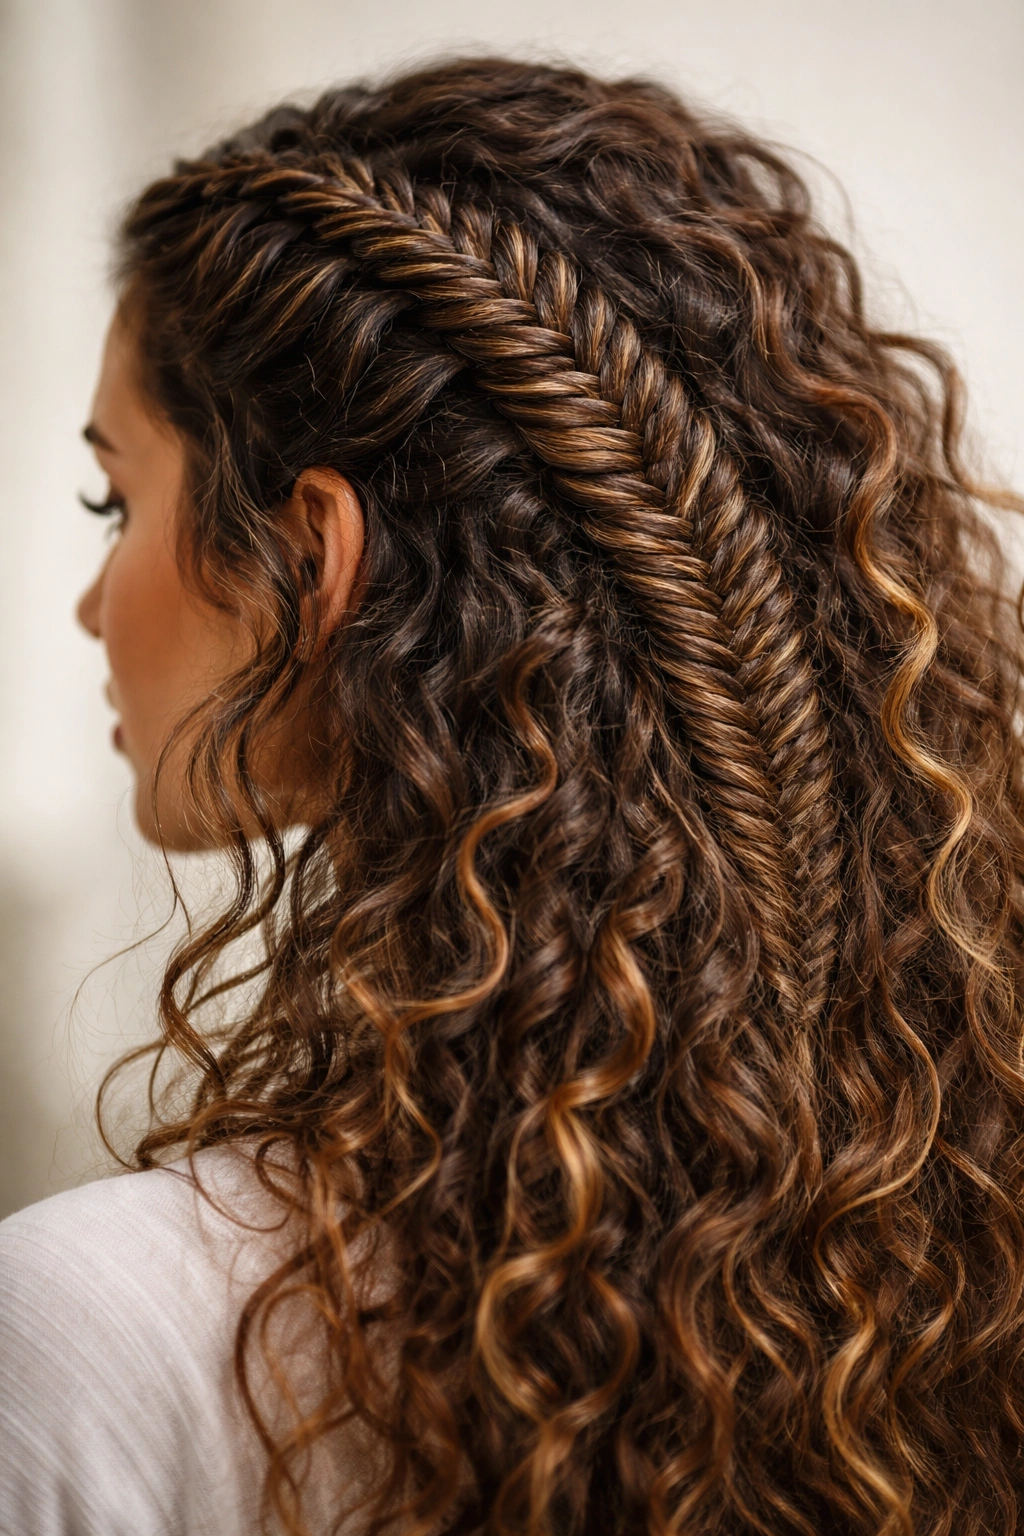
Fishtail braids are the secret weapon for making curly and wavy hair look incredible with minimal effort. Instead of three thick strands, you’re working with many thin strands, which means you’re not fully braiding all your hair—you’re creating a texture and interlacing effect. On curly hair, this makes the entire braid look intentionally textured and complex, even if you’re actually just crossing thin sections over each other.
The Simplified Fishtail Technique
Don’t overthink this—the traditional fishtail looks complicated but actually requires less precision than a french braid. Divide hair into two thick sections on either side of your head. From the outer edge of one section, take a thin strand and cross it over to the other section. Then take a thin strand from the outer edge of the second section and cross it over to the first. Keep alternating, taking thin outer strands and crossing them over, and you’ll create a fishtail pattern. On curly hair, your curl pattern does half the work, making the braid look full and dimensional.
Why Fishtail Braids Shine on Texture
- The thin-strand technique means you’re not pulling hair tight, which is better for curl health and longevity
- Fishtail braids naturally look “textured” and undone, which is the goal on curly hair anyway—a loose fishtail on curls looks intentionally bohemian and modern
- The interlacing of so many thin strands actually holds better on curly hair than on straight hair, because curls naturally grip and lock in place
- This is one of the few braiding styles that actually improves from day 2 onward, as curls settle and the braid looks fuller and more complex
- You can create a fishtail anywhere on your head: loose down the back, wrapped around the side, or even a crown fishtail (yes, it’s as beautiful as it sounds)
Pro tip: After creating your fishtail, gently pull sections of the braid to loosen it and expand it outward. This exposes more texture and makes the braid look fuller and more dimensional.
10. Waterfall Braids with Natural Curl Cascades
Waterfall braids—where you braid and let strands drop out to cascade down like water—are absolutely stunning on curly hair because the cascading sections curl dramatically rather than hanging straight. You get a braid that moves and a cascade of beautiful, bouncy curls below, creating a truly dimensional and romantic style that’s actually protective.
Executing the Waterfall Technique
Start with a french braid that runs horizontally across the back of your head from ear to ear. As you braid, each time you bring a new section in from one side, let a section drop out on the other side to cascade down. This creates a diagonal braid with sections of loose curl falling out. The loose sections curl and frame your face and shoulders beautifully, while the braid itself runs a clean line across the back.
The Stunning Visual Effect
- Waterfall braids create the most dimensional, movement-oriented look of any braided style because you have both braid and bouncy curl in action simultaneously
- The cascading curls add instant romance and visual interest, making the style perfect for events, dates, or any time you want to feel extra
- Curls actually fall in a more beautiful, defined line when you start with a braid anchoring them—the braid acts as structure and the curls add drama
- This style works on all curl patterns and lengths, though it’s especially stunning on longer hair where curls have room to cascade dramatically
- It’s protective where it matters (the crown and back of the head) while showing off the length and texture of your curls
Worth knowing: Don’t worry about the waterfall sections looking perfect. The curls are supposed to look free and romantic—the slight frizz and texture is the whole point.
11. Cornrows with Visible Curl Texture
Cornrows are experiencing a major moment and for good reason—they’re protective, precise, and absolutely beautiful on curly hair. The key is braiding loosely enough that your curl pattern remains visible in the braid itself, rather than slicking everything flat. Modern cornrows on curly hair showcase texture, not erase it.
Braiding Cornrows That Celebrate Your Texture
Traditional cornrows are braided very close to the scalp, and that still applies here, but your technique changes slightly. Braid close to the scalp but not with the kind of tension that was common in the 90s—that much tension is unnecessary and unhealthy. You want pressure and security, not pain. Incorporate your curls into the braid as you go; don’t try to smooth them away. Where the braid meets the loose curls at the end, let curls flow free or even unravel the end slightly to create a curl cloud.
The Modern Protective Style
- Cornrows distribute tension evenly across the scalp, which is actually one of the gentlest ways to protect natural hair long-term
- On curly hair specifically, the visible texture in cornrows reads as modern and intentional, not old-fashioned
- You can cornrow-braiding the entire head or just the crown, depending on your preference and how much protection you need
- Cornrows last 7-10 days easily on curly hair, making them incredibly practical for people who want protective styles but don’t want to commit for weeks
- The visible curl pattern makes cornrows on textured hair infinitely more interesting visually than on straight hair
Pro tip: Use a clarifying shampoo the night before cornrowing to remove any buildup, then moisturize heavily—clean, hydrated hair braids so much better than buildup-y hair.
12. Lemonade Braids with Textured Flair
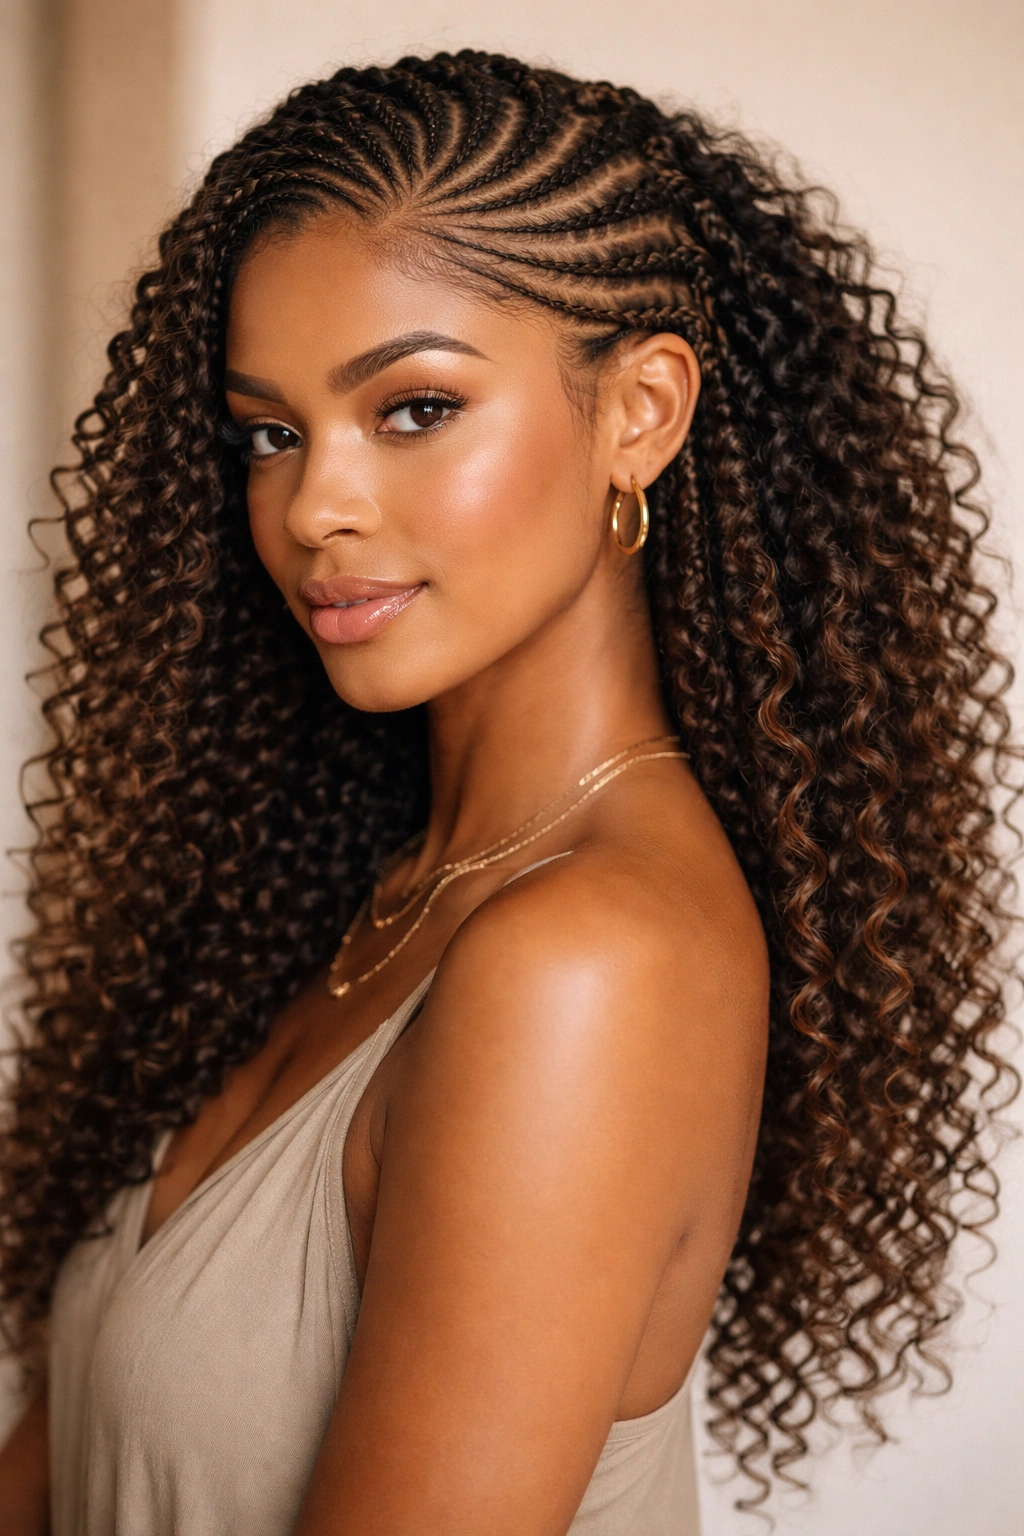
Lemonade braids are diagonal braids that run from one side of your head to the back, typically in a curved, side-swept style. They’re named for Beyoncé’s iconic look, and they’re absolutely gorgeous on curly hair because the diagonal line elongates the face while the texture of your curls adds softness and dimension.
Creating the Lemonade Effect
Start at your temple and braid diagonally toward the nape of your neck, incorporating hair as you go in a french-braid style. As you reach the nape, you can continue braiding down the length of your hair or release it into curls. The diagonal angle is what creates the lemonade look—it’s sleeker and more structured than a center braid, but the curve of the braid (and your curl pattern) keeps it from feeling severe.
Why This Works as a Go-To Style
- Lemonade braids are protective without being over-the-top—they keep hair off your neck and secured without requiring cornrows across your whole head
- The diagonal line is incredibly flattering on curly hair and actually works for most face shapes because the curve is so forgiving
- You can create a single lemonade braid for a side-swept look or two for a more protective, playful vibe
- The style photographs beautifully and has that “intentionally styled” quality that works for everything from casual to formal
- Lemonade braids age well over a week—they loosen and soften, which actually makes them look better, not worse
Worth knowing: The best lemonade braids on curly hair are slightly loose—that’s where the texture gets to show and the style looks modern rather than overly controlled. Aim for “secure but soft,” not “tight and sleek.”
Final Thoughts
The absolute best braided hairstyle for you isn’t about which style is most popular—it’s about which one makes your curl pattern look incredible, fits your lifestyle, and feels right for where you’re at with your hair. Some of these styles offer serious protection and last for days. Others are more about creative expression and how beautiful you feel in a picture. The gorgeous truth about braiding curly hair is that texture is actually your advantage—those braids that slip slightly, the curls that escape, the dimension that builds naturally—that’s not imperfection, that’s your hair being itself, and it’s stunning.
The deeper you get into braiding curly hair, the more you’ll develop your own preferences. You might discover that you love loose rope braids for everyday but lemonade braids for nights out. You might become obsessed with how lush your curls look on day three of cornrows. You might find that the effort of a detailed fishtail braid is absolutely worth it because you never get tired of how it looks. Give yourself permission to experiment, and let your curl pattern be the star—that’s where the real magic happens.