If you’ve been wearing the same curly hairstyle for the past couple of years, it’s time to shake things up. The beauty of having curls is the incredible versatility they offer — you can create texture, movement, volume, and definition in ways that straight hair simply can’t match. Yet so many people with curly hair find themselves rotating between the same three or four styles out of habit or uncertainty about what else is possible with their curl pattern.
The truth is, there are dozens of gorgeous curly hairstyles beyond the basic wash-and-go, the standard bun, or the everyday ponytail. Some of these styles work best with specific curl types, some require a little styling time and product knowledge, and others transform your curls into something you’ve never seen before. What’s exciting is that most of these styles can be adapted to work with 2A waves all the way through 4C coils — it’s just about understanding your curl pattern and adjusting the technique accordingly.
This guide walks through twelve curly hairstyles that deserve a place in your regular rotation. These aren’t basic styles everyone already knows about. They’re sophisticated, interesting, and the kind of hairstyles that make you feel like you’ve genuinely switched up your look. Some can be done on freshly washed hair, while others work beautifully on second or third-day curls. All of them prove that curly hair is anything but boring.
1. Spiral Twist-Out with Dimensional Definition
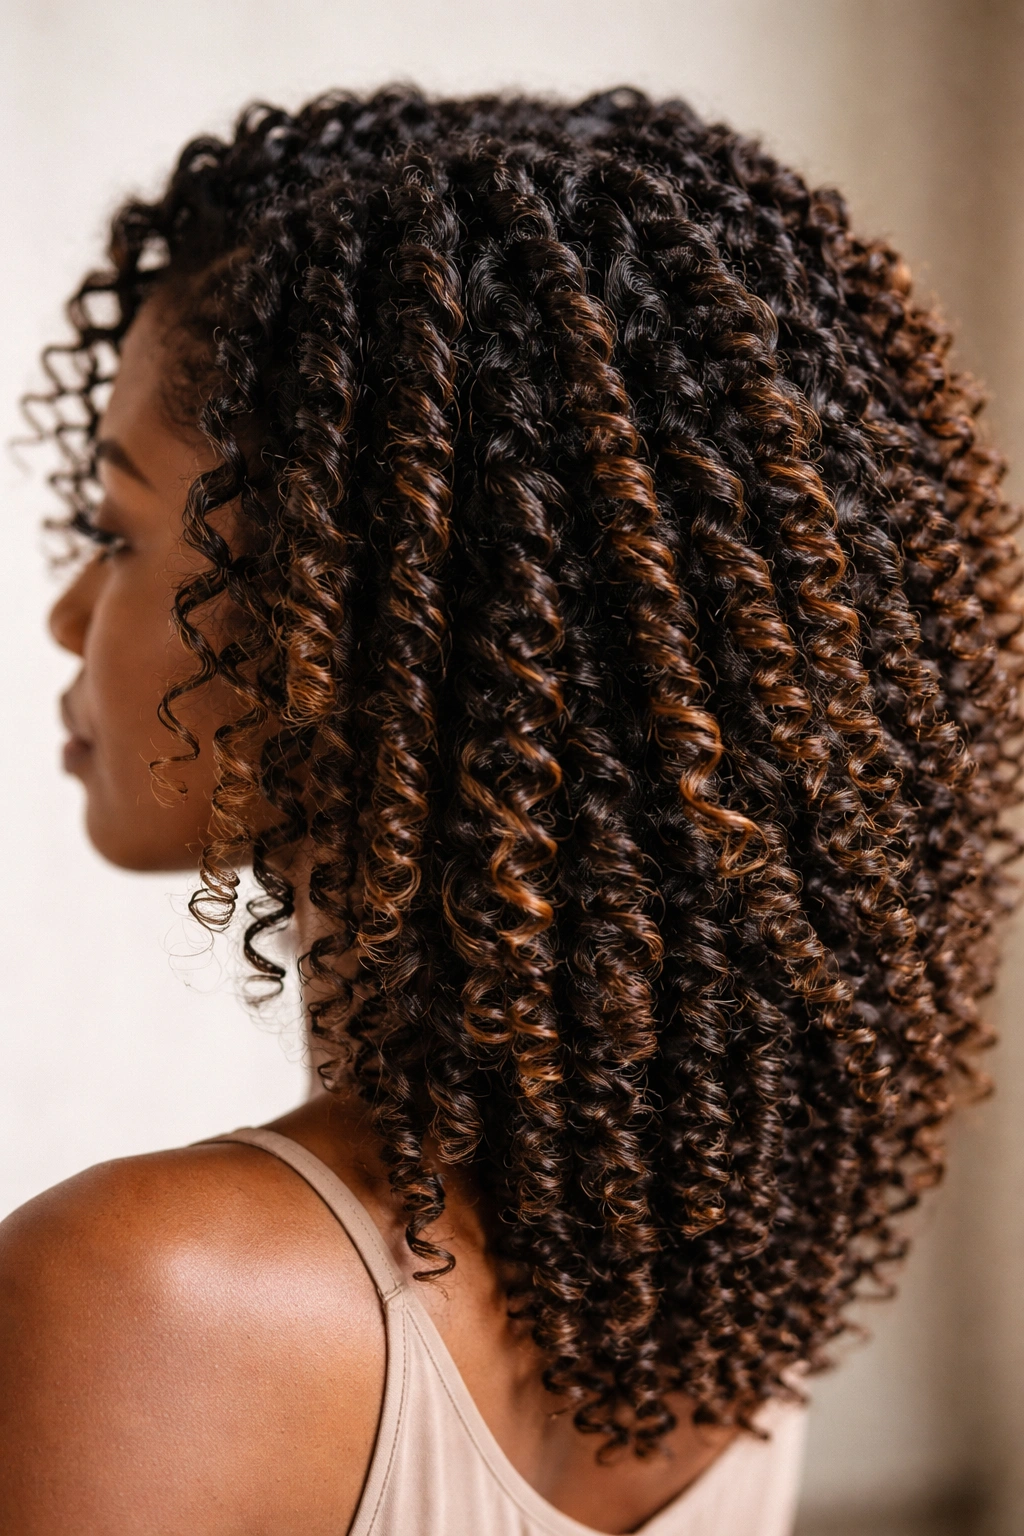
A twist-out takes the basic twisted strands you created while styling and unravels them to reveal soft, bouncy spirals that look nothing like the twisted texture you started with. The magic happens when you twist sections tightly while your hair is damp with product, allow it to dry completely, and then carefully unravel each twist to expose the spiral pattern underneath. The result is a hairstyle with incredible dimension, hold, and natural-looking curl definition that lasts for days.
Why This Creates Such Striking Results
Twist-outs work by setting your curl pattern into a specific shape while your hair is wet or damp. When you release the twists, your curls have been trained into that spiral formation, which creates texture that looks intentional and sculpted rather than just naturally curly. The twisting motion also encourages your natural curl pattern to coil tighter, giving you more defined curls with more visible separation between individual strands.
How to Execute a Twist-Out
- Divide damp hair into 8 to 12 sections depending on the thickness of your hair and how much definition you want (more sections = more defined, separated curls)
- Apply styling cream and gel to each section — a leave-in conditioner mixed with a medium-hold gel works beautifully for most curl types
- Twist each section tightly from root to tip, wrapping the strand around itself in a consistent direction (all clockwise or all counter-clockwise)
- Allow your hair to dry completely — either air dry overnight or use a low heat diffuser if you’re in a hurry
- Gently unravel each twist starting from the ends, working slowly up to the roots to reveal the spiral pattern without disrupting it
- Separate curls gently with your fingers if you prefer a lighter, airier texture, or leave them defined and compact if you want more density
Pro tip: Twist-outs look their absolute best on second-day hair when your curls have had time to settle and your styling products have fully set. Don’t be discouraged if day one feels a little stiff — the style improves as it relaxes.
2. Pineapple Updo for Nighttime Protection and Daytime Style
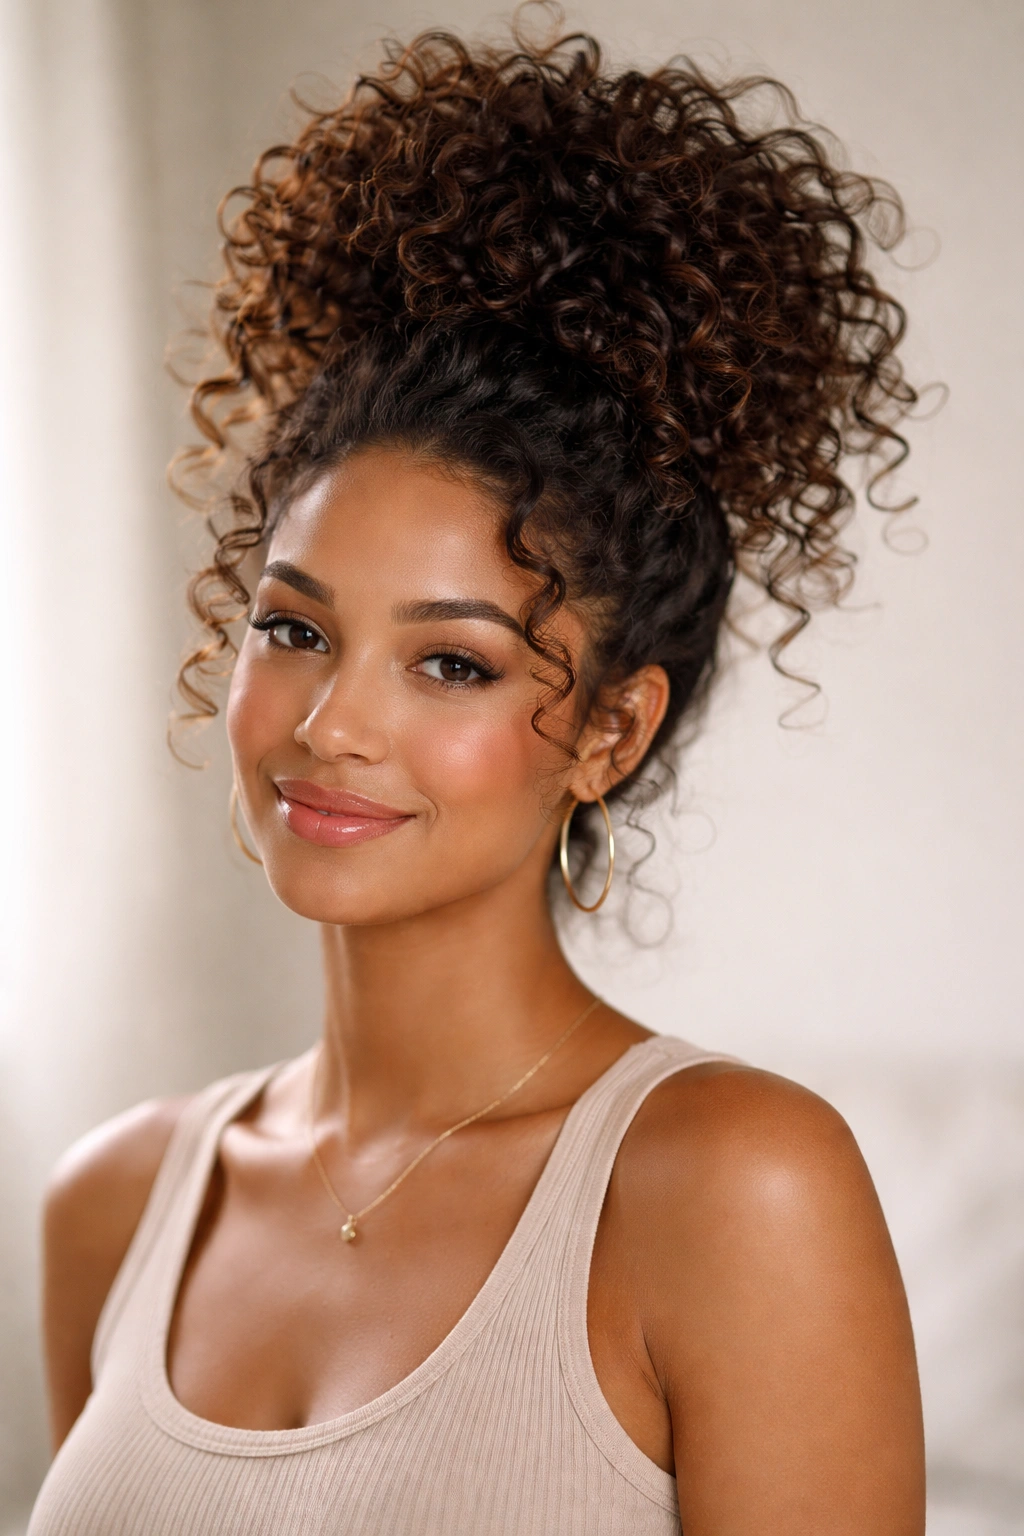
The pineapple updo isn’t just a protective styling technique — it’s actually a gorgeous, intentional hairstyle that keeps your curls safe while you sleep and looks polished enough to wear out during the day. Named for the way the gathered curls at the crown resemble a pineapple, this style collects all your hair at the top of your head, away from your pillowcase and shoulders, while keeping the length and curls relatively undisturbed.
What Makes the Pineapple Updo Different
Unlike a traditional bun that sits at the back of your head and requires twisting or tucking, a pineapple gathers your curls into a loose ponytail anchored high on the crown. Your curls stay relatively separated and loose within the ponytail instead of being compacted into a tight bun. This means you wake up with defined curls that haven’t been flattened, compressed, or tangled together overnight. It’s the rare style that genuinely improves your hair’s condition while also looking intentional and put-together.
Steps to Create a Pineapple Updo
- Start with curls that have been styled and are at least partially set — fresh wash days or second-day curls both work well
- Gather hair at the crown using a gentle hand — imagine you’re collecting all your curls into a high ponytail, roughly where a topknot would sit
- Secure with a silk or satin scrunchie rather than a standard elastic, which can cause breakage and disturb your curl pattern
- Arrange curls gently so they sit loosely inside the gathered ponytail, fanning slightly outward rather than being pulled tight
- Check the fit — the scrunchie should be snug enough to hold everything in place, but not so tight that it creates tension on your hairline or compresses your curls
- Sleep on a silk or satin pillowcase or use a silk or satin bonnet for additional protection
Pro tip: The pineapple works best when your curls are already in good shape. If your curls need refreshing before bed, use a light spray of curl refresher or water to dampen them slightly, then apply a tiny bit of styling cream before gathering into the pineapple.
3. Claw Clip Half-Bun with Textured Crown
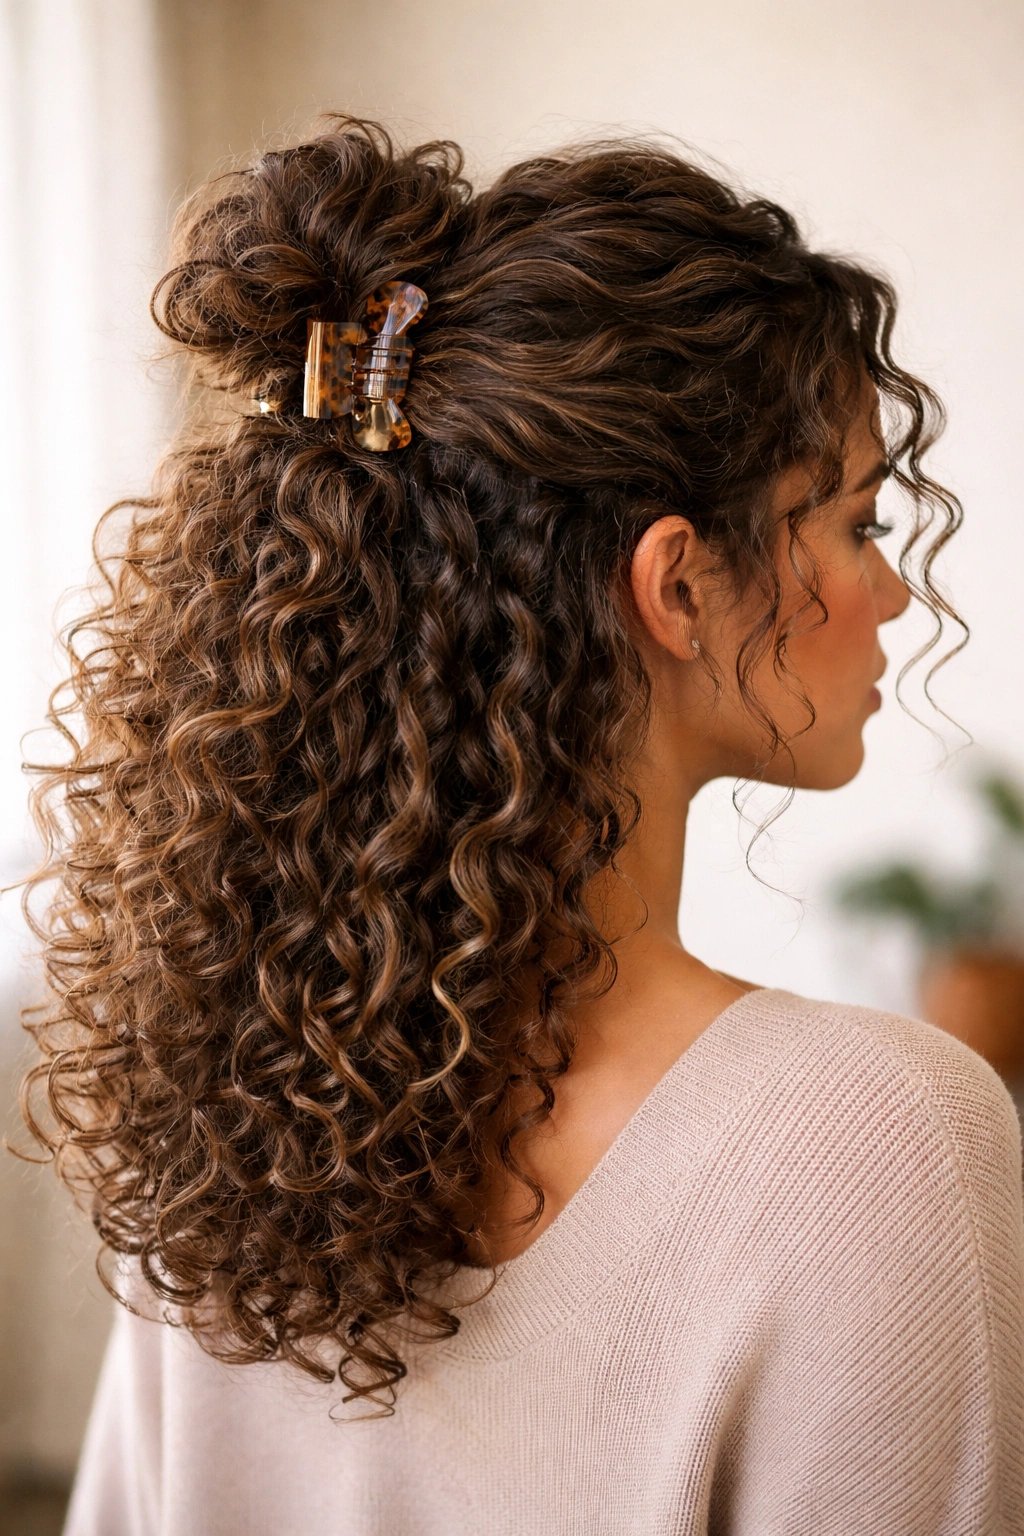
This style takes the casual aesthetic of a half-bun — where only the top section of hair is gathered up while the rest falls loose — and updates it with the surprising elegance of a claw clip. The claw clip instantly reads as more intentional and structured than a hair tie, while still keeping things relaxed and textured. It’s effortless enough for a weekday but polished enough to wear to brunch or dinner.
Why Claw Clips Changed the Game for Curly Hair
A claw clip distributes pressure across a wider area of your hair than a typical elastic, which means less breakage and less obvious creases or dents in your curl pattern. Because claw clips have an open, articulated design, they actually allow your curls to breathe and maintain their shape rather than being compressed into a tight knot. They also come in enough colors and styles that they become a genuine style choice rather than just a functional necessity.
Building Your Half-Bun with a Claw Clip
- Section off the top quarter to third of your hair by drawing an imaginary line across your head from temple to temple
- Flip your head upside down briefly to add volume at the crown, then flip back up
- Gather the top section loosely at the crown without pulling your edges or creating tension — this should feel almost accidental
- Secure with a claw clip sized to your hair thickness (larger clips for thicker or longer hair, medium clips for finer textures)
- Adjust the clip position so it sits where it feels balanced — usually slightly back from where you’d place a traditional bun
- Leave the bottom section loose so your curls can move and bounce freely
Worth knowing: Claw clips work beautifully on hair that already has texture and definition. They’re less effective on freshly washed, soaking wet hair that lacks structure, so this is best saved for second or third-day curls or freshly styled wash-and-goes.
4. Wash-and-Go with a Gel Cast and Praying Hands Application
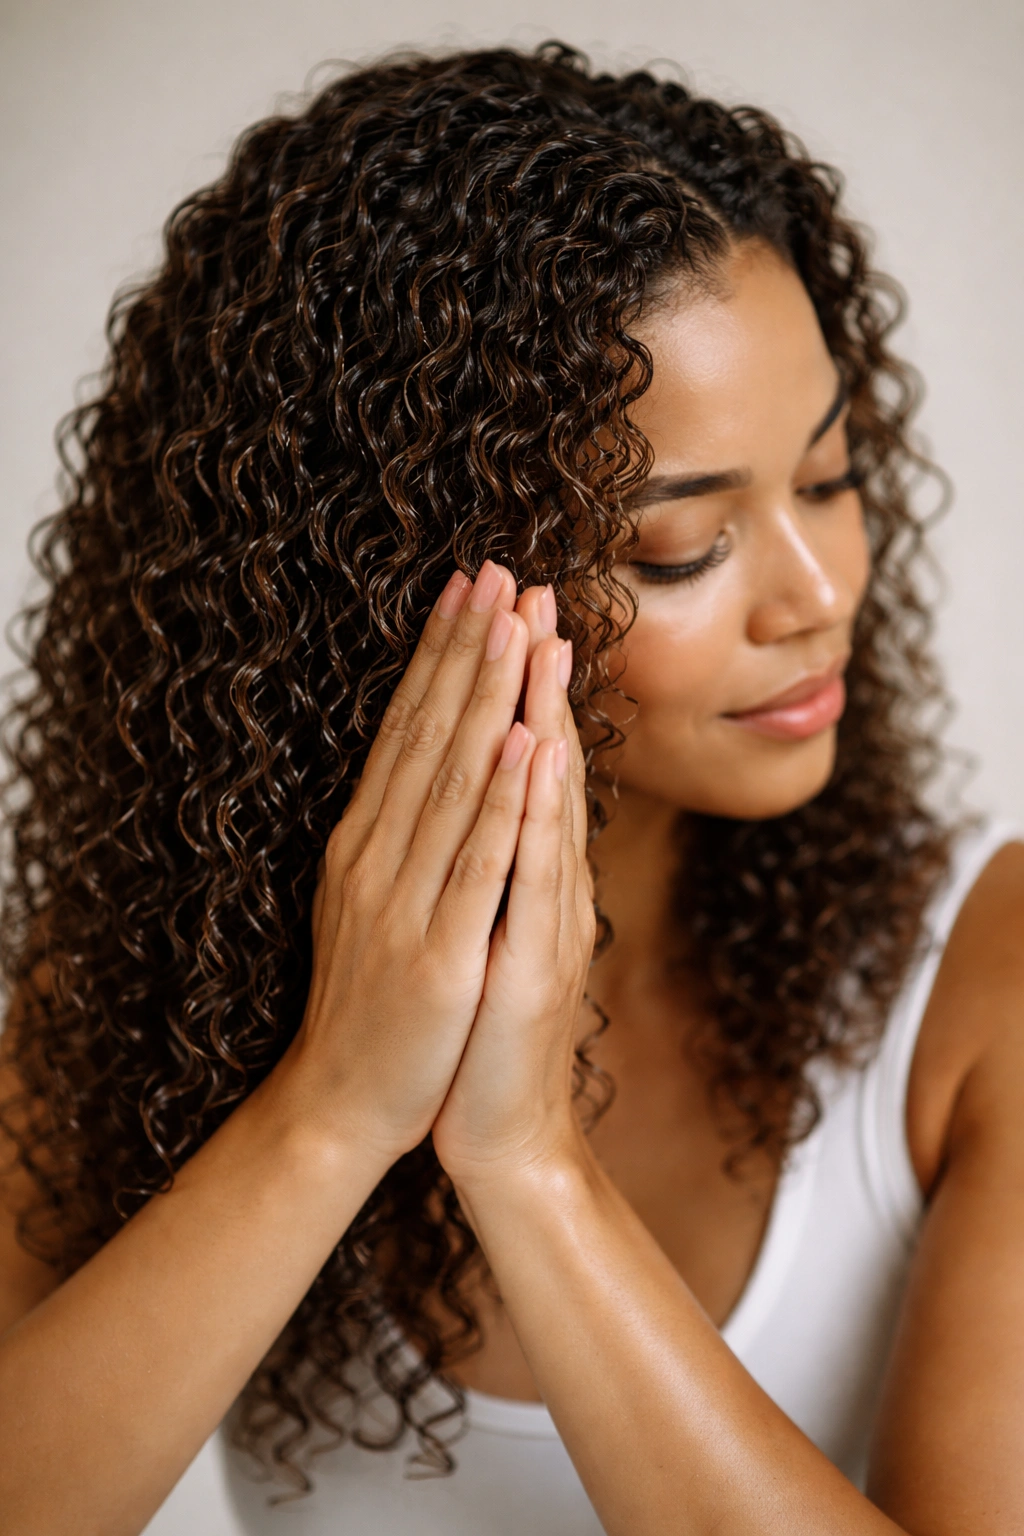
A true wash-and-go means washing, applying product, and letting your curls air dry with minimal manipulation — no twists, no braids, no special techniques required. The key to making this look intentional and polished rather than accidental is creating what’s called a “gel cast,” where a styling gel hardens over your curls as they dry, locking everything into place. Once the cast dries completely, you gently scrunch it away to reveal soft, defined curls with real hold and bounce.
The Science Behind a Gel Cast
A quality curl gel contains polymers that form a thin shell around each curl as the water evaporates. This shell holds your curl pattern in place while your hair dries, which is why curlies with a strong gel cast wake up with curls that look exactly like they did the night before — no frizz, no undefined texture, just clean curl definition. The “praying hands” application technique, where you smooth product down each curl using your palms pressed together, helps the gel coat every strand evenly and reduces frizz.
The Complete Wash-and-Go Routine
- Shampoo or rinse your curls with water — use a gentle cleanser or just water if you’re in between wash days
- Apply a curl-defining product like a leave-in conditioner or curl cream while your hair is soaking wet
- Apply gel using the praying hands method — position your palms on either side of a curl, then smooth them together from root to tip, applying even pressure along the entire length
- Work through your entire head in small sections, making sure every curl has been coated with gel
- Allow your hair to air dry completely — don’t touch it while it’s drying, as this creates frizz and disrupts the curl pattern
- Scrunch out the cast once your hair is completely dry by gently scrunching sections upward with your hands, which breaks the gel shell and releases softer curls
Pro tip: The gel you choose absolutely matters for this technique. A gel that’s too stiff creates a crispy cast that doesn’t soften nicely, while a gel that’s too light won’t provide enough hold to define your curls. Experiment with different formulas until you find one that gives you the amount of hold and softness you want in the final result.
5. Braided Crown with Loose Curls Cascading Down
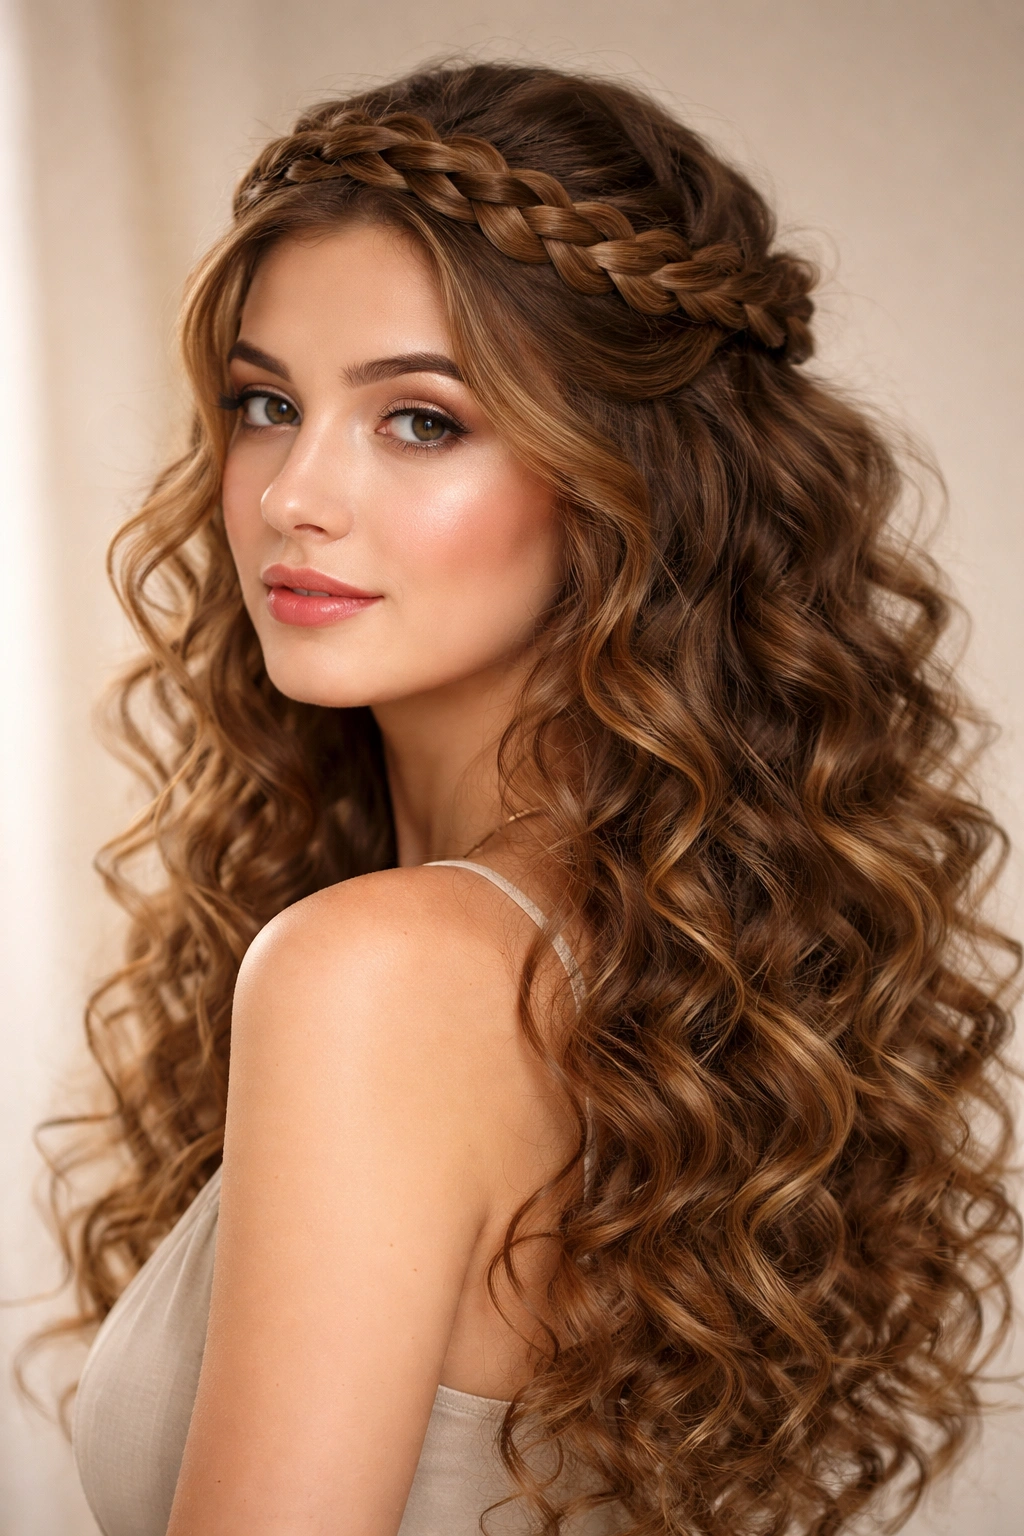
This romantic, intricate-looking style actually requires just one braid positioned along the crown of your head, with the rest of your curls left loose and flowing. The braid creates a visual focal point and adds an element of intentional styling that makes your curls look more deliberate, while the loose curls below keep things soft and romantic. It’s the kind of style that makes people assume you spent an hour on your hair when it actually took fifteen minutes.
Creating an Impact with Minimal Braiding
Braiding just one section of curly hair creates visual interest without requiring extensive time or technical skill. A single braid along the crown frames your face beautifully, creates dimension when seen from the side, and photographs beautifully from above — it’s genuinely one of the most flattering angles for curly hair. The loose curls below the braid stay full and bouncy because they haven’t been manipulated or constrained.
How to Execute the Braided Crown
- Brush or finger-comb your curls gently to remove tangles and prepare them for braiding
- Identify where your braid will sit — typically from one temple, across the crown, to the other temple, following the natural curve of your head
- Section off the top layer of hair where your braid will be, about an inch to two inches wide depending on how visible you want the braid
- Braid that section using a three-strand braid or a French braid if you prefer more intricate details — tightness is a matter of preference
- Secure the braid end with a small elastic or bobby pin, which you can tuck underneath and hide
- Leave all curls below the braid completely loose and unstyles, so they maintain their natural texture and volume
Insider note: This style works particularly well on curls that already have great definition and hold from a previous styling. Day-two or day-three curls are ideal because they’re set enough to look polished but still soft and natural-looking.
6. Curved Undercut with Voluminous Texture on Top
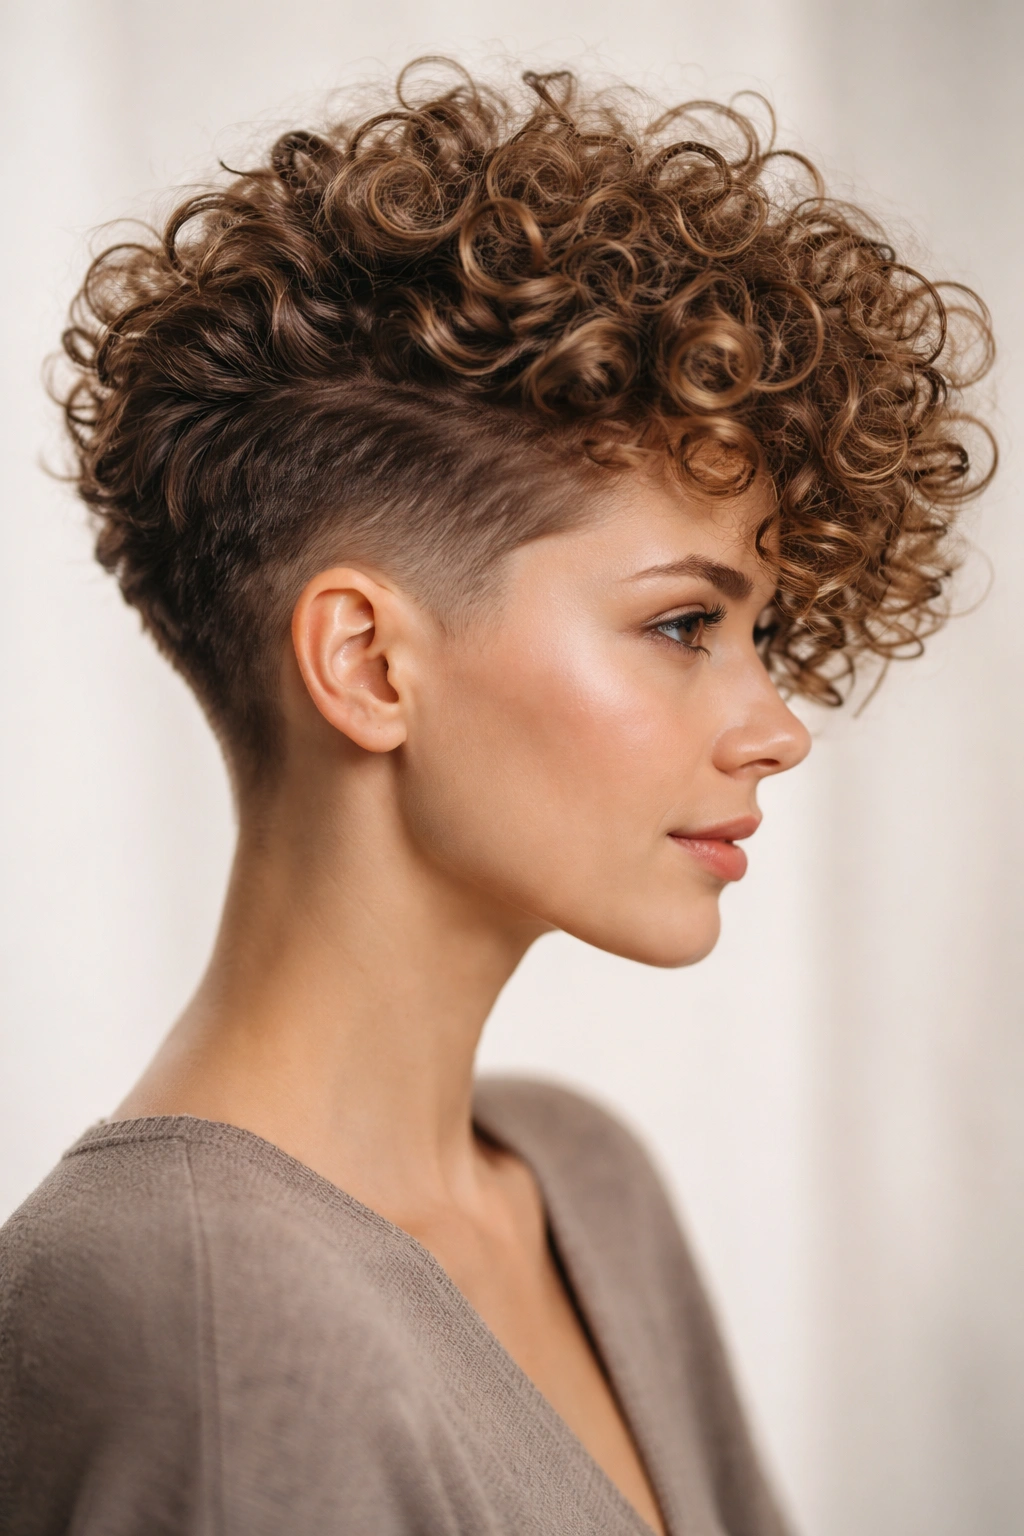
An undercut is a dramatic cut where the hair on the sides and back is cut very short — sometimes even buzzed — while the top is left significantly longer. For curly hair, a curved undercut follows the natural shape of your head, creating a sculptural silhouette that looks architectural and intentional. The volume on top contrasts beautifully with the close-cropped sides, and curls have space to expand outward without lying flat against your head.
Why an Undercut Transforms Curly Hair
For curly-haired people, an undercut is genuinely life-changing because it removes weight from the sides and back that would otherwise pull your curls down and flatten them. By cutting away the hair that was creating compression, your remaining curls have room to lift and expand naturally. You get incredible volume and bounce without styling tricks, and the shorter sides make your curls look even more voluminous and defined by comparison. It’s a bold cut that makes a genuine statement.
The Styling Advantage of an Undercut
- Your curls get more volume because there’s less weight and no sides pressing inward
- Styling time decreases significantly because you’re working with less total hair
- Products go further because you’re applying them to a smaller surface area
- Heat styling is optional — your curls will dry and define naturally without tools
- The cut works with multiple curl types — from loose waves to tight coils, an undercut enhances volume across the spectrum
Real talk: An undercut is a significant, visible change that requires commitment. You’ll need regular trims (every 4-6 weeks) to maintain the sharp definition on the sides. But if you’re looking for a hairstyle that genuinely transforms how your curls look and behave, this is it.
7. Bangs with Coils for Dramatic Face-Framing Definition
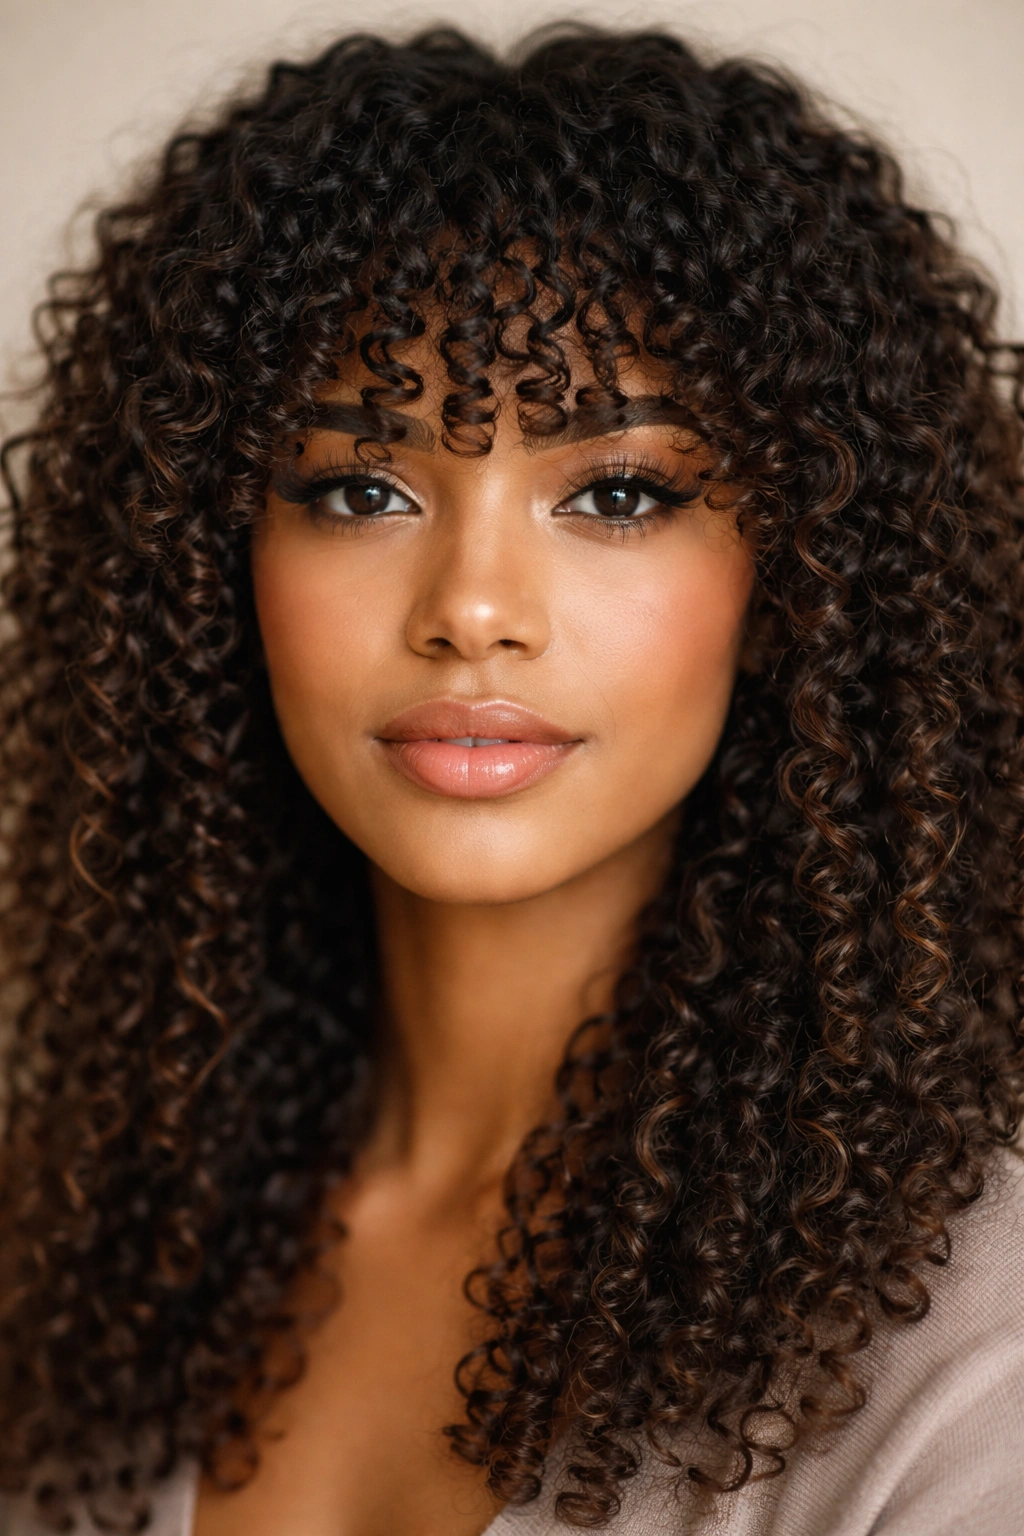
Curly bangs — specifically coily, textured bangs that sit at or slightly above your eyebrows — create an incredibly striking, fashion-forward look. Rather than trying to wear straight or wavy bangs that would require constant blow-drying and straightening, you let your bangs follow your natural curl pattern, which means they maintain texture, definition, and movement while framing your face beautifully.
Why Coily Bangs Are Bold and Beautiful
Bangs are one of the first things people notice about your face, and coily bangs make an immediate statement that says you’re confident in your texture. They frame your eyes and cheekbones, draw attention upward to your face, and add an artistic element to your overall look. Because they’re textured rather than straight, they photograph beautifully and create dimension from every angle. They also require minimal styling — just product, air dry, done.
Getting Bangs Right on Curly Hair
- Consult with a stylist experienced in cutting curly bangs — this is crucial because curl shrinkage means your wet hair length will be longer than your dry length
- Ask for a slightly longer length than you think you want, since curls shrink as they dry
- Avoid having bangs cut too thin — thicker bangs look better on curly hair and maintain their shape better than wispy bangs
- Style bangs the same way as the rest of your hair — with your regular leave-in and styling products
- Consider the maintenance — bangs do require regular trims (every 4-8 weeks) to maintain the shape as they grow
- Curl pattern matters — bangs work beautifully with tighter, more defined curls, but can look less intentional with very loose waves
Pro tip: Bangs look their absolute best when your curls are healthy, defined, and properly moisturized. Dry, frizzy curls don’t do bangs justice, so make sure your curl care routine is solid before committing to this look.
8. Layered Shag Cut with Textured, Tousled Movement
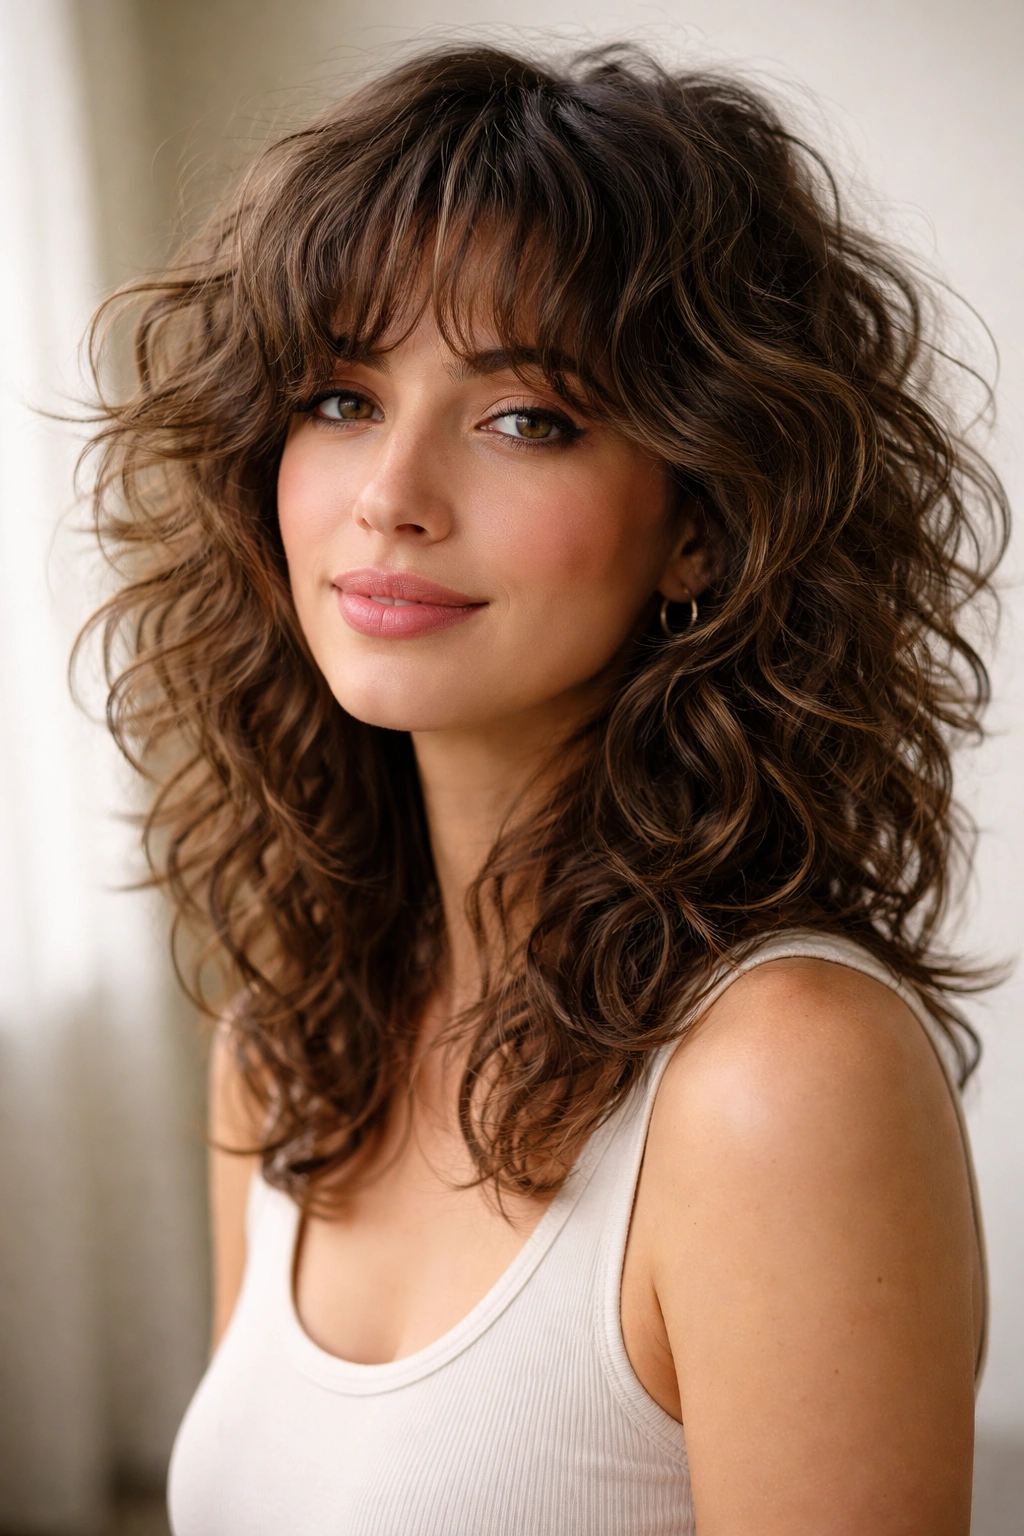
A shag cut is essentially a mullet updated for the modern era — it’s shorter and lighter on top with longer layers underneath. For curly hair, a shag creates incredible movement and texture because the layers are cut at different lengths, which encourages your curls to fall in multiple directions rather than all straight down. The result is a tousled, lived-in look that photographs beautifully and requires minimal styling effort.
What a Shag Does for Curly Hair
Layers in curly hair remove weight and bulk, which means more movement and bounce. A shag combines choppy, shorter layers on top with longer pieces below, creating volume where you want it (at the crown and around your face) while maintaining length overall. The shorter top layers dry faster and style more easily, while the longer layers give you the option to put your hair up or wear it down with equal impact.
The Shag Cut Structure for Curls
- Shorter, choppy layers on top create texture and movement while adding volume at the crown
- Longer layers underneath give you flexibility in how you style and wear your hair
- Face-framing pieces that are shorter than the rest add dimension and draw attention to your features
- Blended, not blunt — layers should be cut to work with your curl pattern, not against it
- Texture throughout — a good curly shag isn’t a dramatic length difference, but rather a gradual progression that creates movement
Worth knowing: Shag cuts require maintenance because the layers can look unkempt as they grow out. Plan on getting a trim every 6-8 weeks to maintain the intentional, textured shape.
9. Flexi-Rod Finger Waves with Sculptural Definition
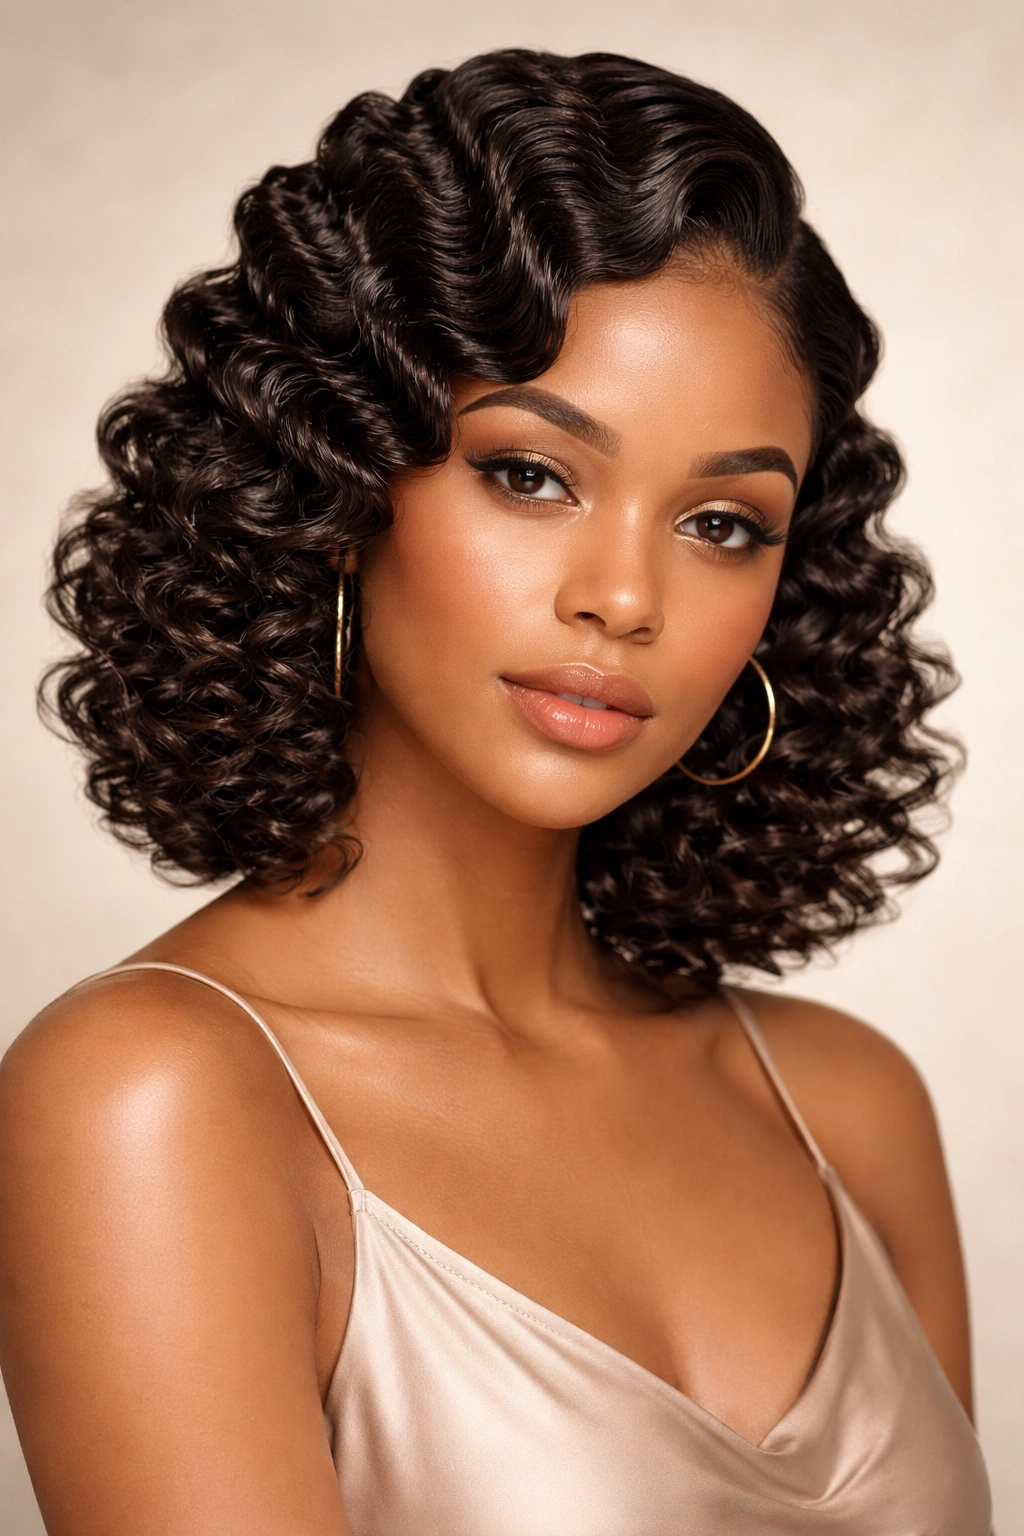
Flexi-rods are soft, foam hair rollers with a flexible rod inside that allows you to bend and shape them into waves. When you wrap damp hair around flexi-rods and allow it to dry, you get old-Hollywood-style finger waves with crisp, defined curves. This is a vintage-inspired style that reads incredibly polished and intentional, and it works beautifully on curly hair when executed properly.
The Magic of Flexi-Rod Waves on Curly Hair
Flexi-rods create waves that are more defined and structured than your natural curl pattern allows, which is why they create such an impactful, intentional look. The waves have movement and flow rather than the tight coils or spirals your natural curls might have. It’s a styling technique that transforms your hair into something dramatically different while still celebrating texture and movement.
How to Create Flexi-Rod Finger Waves
- Start with clean, damp hair — freshly washed and product-ready
- Apply curl-defining product like a styling cream or light gel to damp hair
- Wrap sections of hair around flexi-rods, starting from the ends and rolling upward toward the roots
- Ensure even, smooth wrapping — hair should be taut but not stretched, and should wrap in one smooth direction without kinks or overlaps
- Allow hair to dry completely — air dry or use a low heat diffuser to speed the process
- Carefully unroll rods by bending and gently sliding them out from each section
- Gently separate waves with your fingers to create fluidity and movement
Pro tip: The size of your flexi-rods determines the size of your waves — smaller rods create tight waves while larger rods create loose, flowing waves. Experiment with different sizes to find what works with your curl type and what look you’re going for.
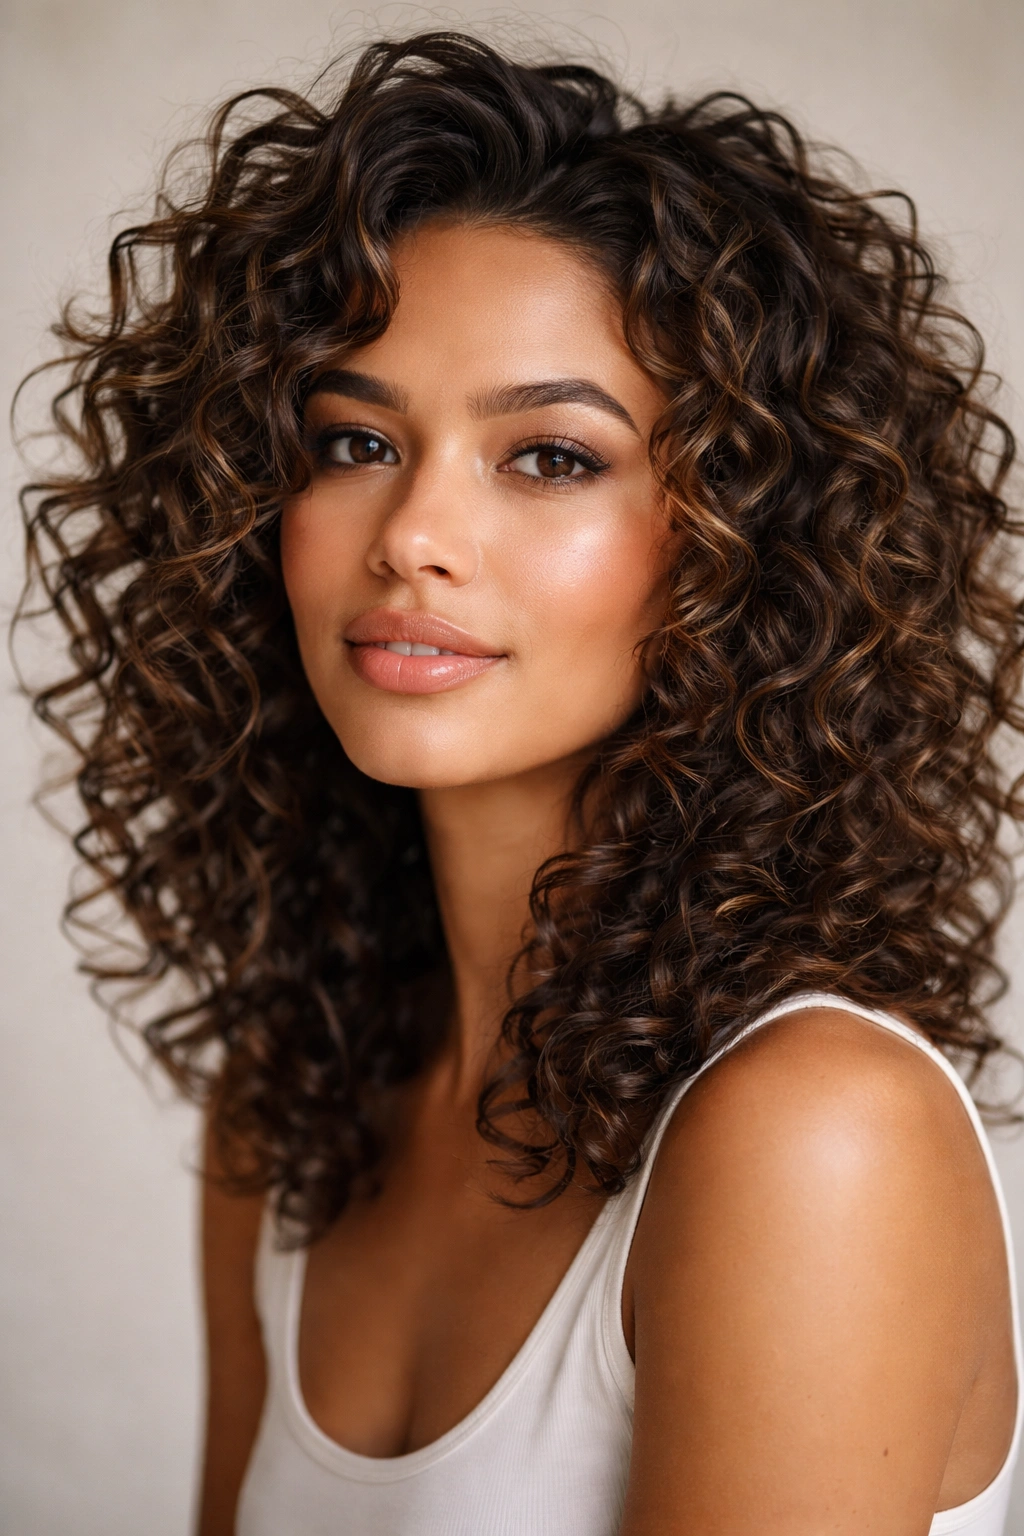
10. Stacked Curls with High-Density Volume and Texture

Stacking is a cutting and styling technique where you create multiple layers of curls that are stacked on top of each other, building density and volume at the roots and crown. Unlike a traditional shag where layers flow gradually, stacked curls are more compact and deliberate, creating a sculptural, voluminous shape that reads very intentional and modern. It’s particularly striking on tighter curl types where you can actually see the individual stacked sections.
How Stacking Creates Impact
Stacking removes weight while maintaining density, which is a careful balance. By cutting hair at different levels and angles, a stylist creates a shape where curls can lift and expand, but there’s still enough hair that the style looks full and textured rather than thin or wispy. The result is often described as looking like a cloud of curls — voluminous, soft, and incredibly photogenic.
The Technique Behind Stacked Curls
- Multiple layers cut at strategic angles to build height and volume
- Shorter on top and sides to create lift where you want it most
- Longer underneath to provide length and weight balance
- Cut to follow your natural curl pattern rather than against it
- Requires regular maintenance (every 6-8 weeks) to maintain the stacked shape as hair grows
Real talk: Stacked cuts look their best on curly hair with good moisture and definition. If your curls are prone to dryness or frizz, you’ll want to prioritize curl care so the style shows up the way it’s meant to.
11. Side-Swept Curly Fringe with Asymmetrical Balance
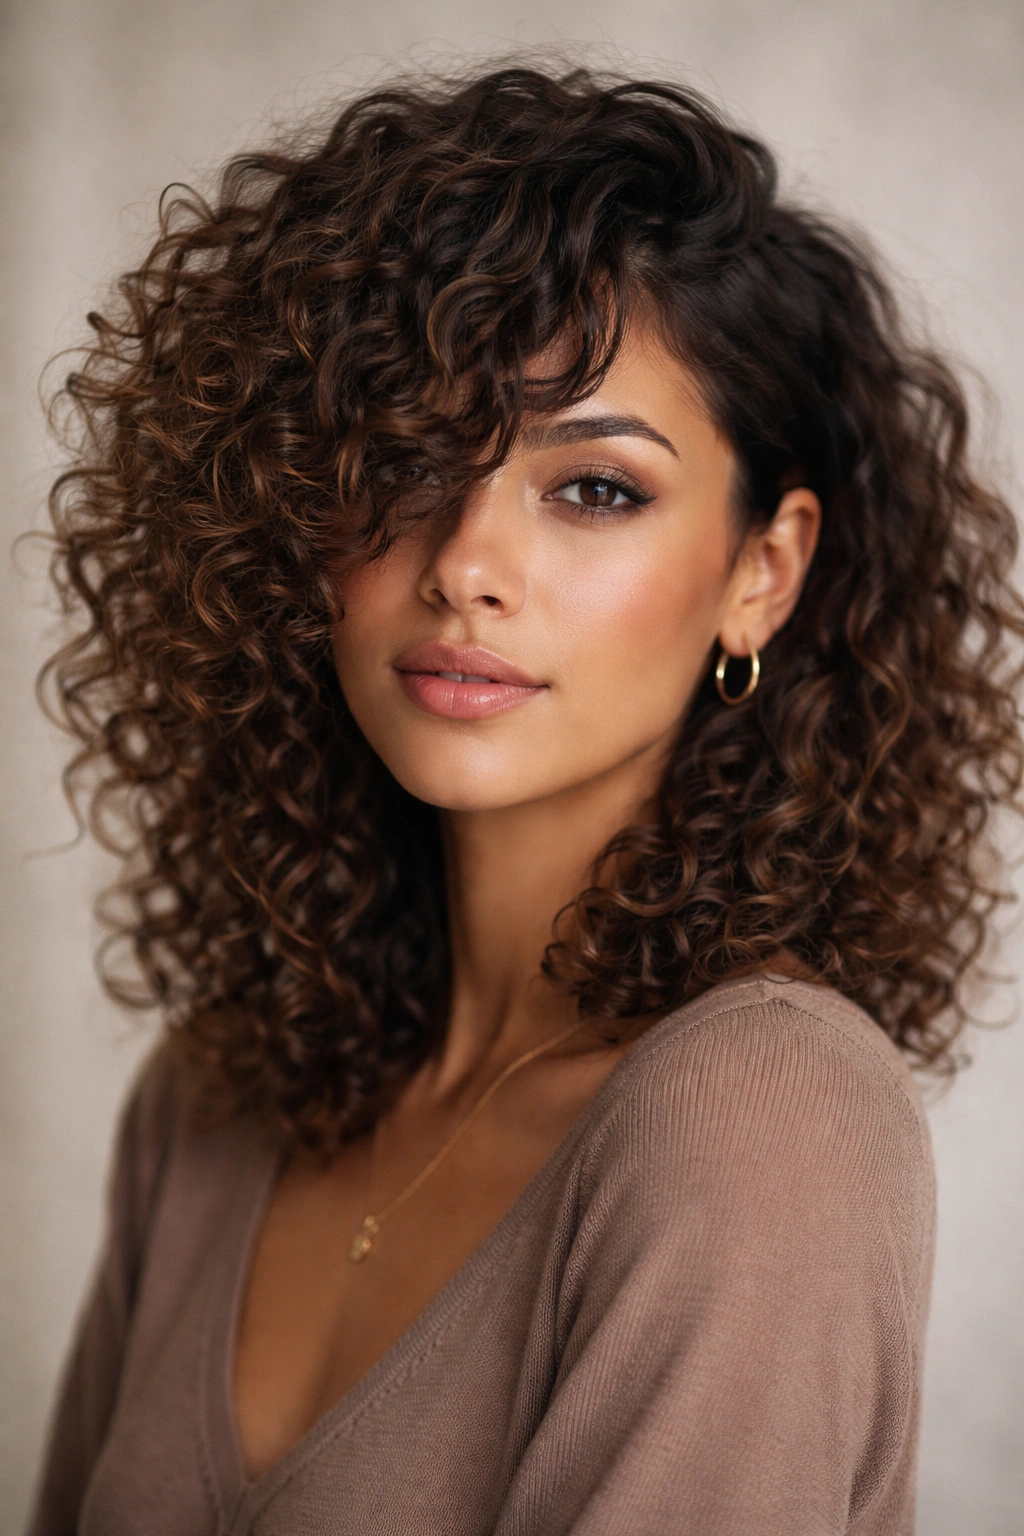
A side-swept curly fringe is a statement piece — longer, textured bangs that are cut longer on one side and shorter on the other, creating an asymmetrical frame for your face. Unlike straight-across bangs, side-swept bangs feel softer and less severe while still creating that face-framing impact. The length on one side creates an interesting visual line, while the texture keeps everything from looking too structured or severe.
Why Asymmetry Works with Curly Hair
Asymmetrical cuts work beautifully on curly hair because the natural texture and movement in your curls softens any harshness that might come from an uneven cut. The asymmetry creates visual interest and makes the style feel deliberate and fashion-forward without requiring perfect symmetry. It’s a modern way to wear bangs that celebrates rather than fights against your natural texture.
Styling Considerations for Side-Swept Bangs
- Longer on one side — typically reaches to or slightly past your cheekbone on the longer side
- Shorter on the other side — often sits at the eyebrow or slightly above
- Works with your curl pattern rather than against it — the curls will naturally follow their own path, which is part of the beauty
- Style with your regular products — no special technique or straightening required
- Can be swept to either side depending on your preference and face shape
Worth knowing: Side-swept bangs suit most face shapes, but they’re particularly flattering for round or square face shapes where the angled line creates a narrowing, lengthening effect.
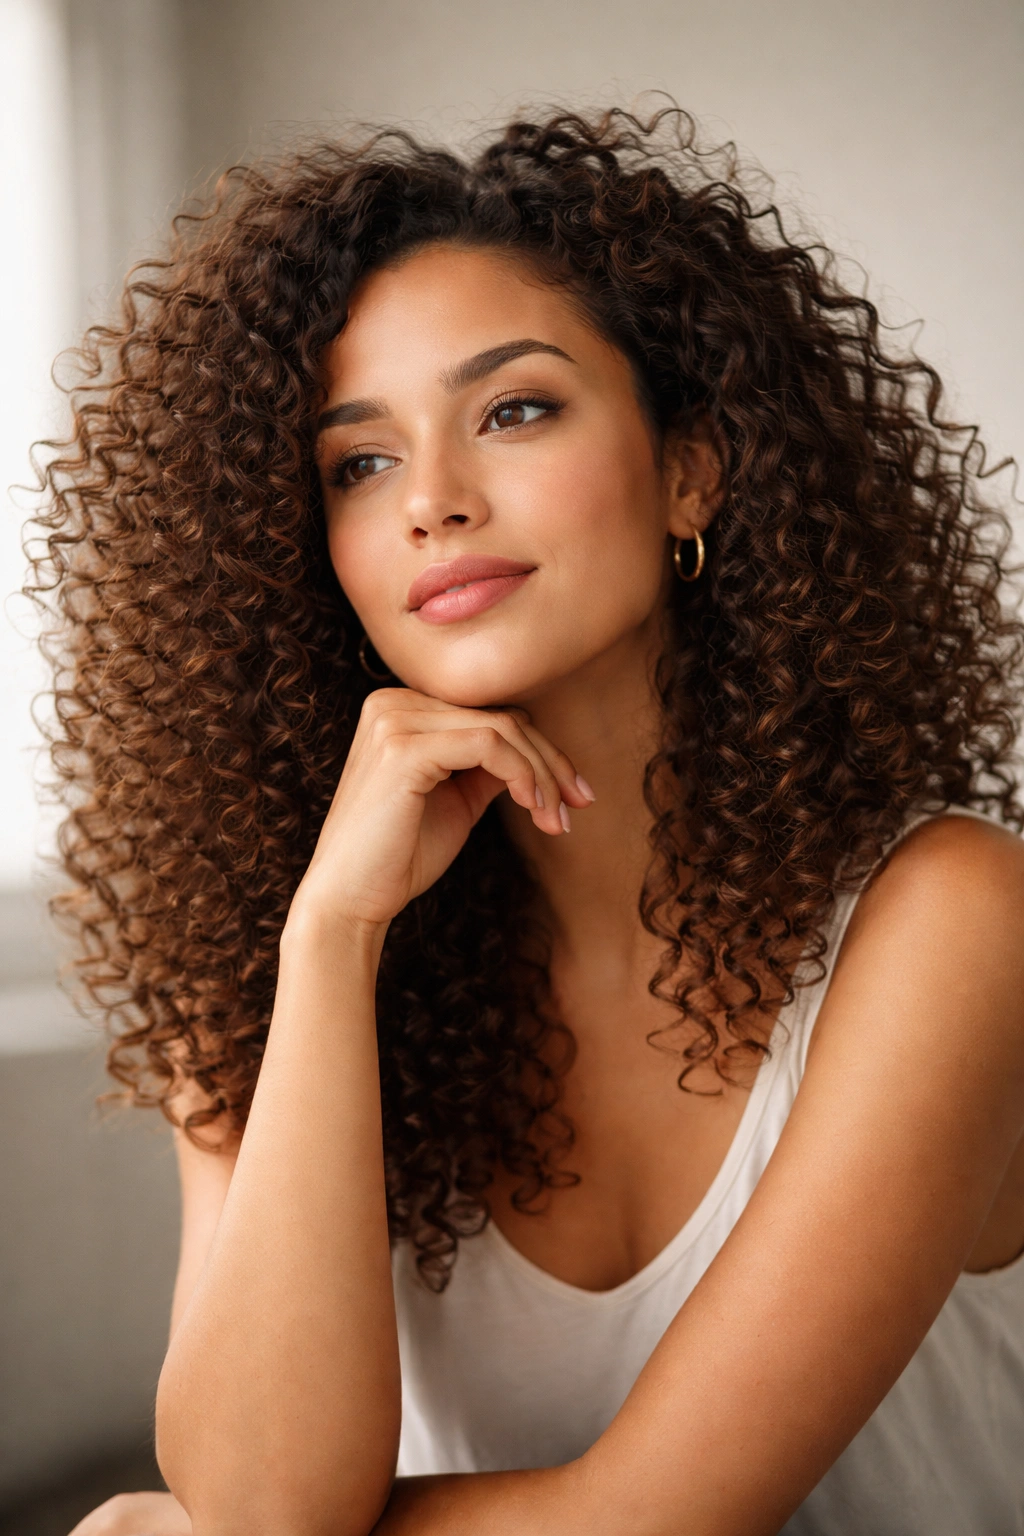
12. Curl Pattern Definition with Mousse for Feathered Texture
This style focuses on enhancing and defining your natural curl pattern without manipulating it into a different shape. Rather than twists, braids, or tools, you use a mousse-based styling routine to encourage your curls to separate, define, and feather outward, creating a look that’s fuller, more textured, and more intentional than a simple air-dried curl. It celebrates your natural pattern while making it look polished and intentional.
Why Mousse Works Differently Than Gel
A mousse has a lighter, airier texture than gel, which means it defines curls without creating a stiff cast. Mousse allows curls to move and flex while still providing enough hold to define individual curl strands. The result is curls that look separated and defined without looking crunchy or overly product-heavy. This is especially effective on curlies with looser wave patterns who want definition without the heavy feel of a stronger gel.
Creating Definition with Mousse
- Apply mousse to soaking wet hair immediately after washing, while your curls are at maximum pliability
- Work product through with a wide-tooth comb or praying hands to ensure even distribution
- Scrunch upward to encourage curl formation and encourage curls to clump together
- Allow hair to air dry completely without touching it — this prevents frizz and disruption
- Scrunch out any remaining crunch once dry to reveal soft, defined curls
- Fluff and separate gently with your fingers to create a feathered, textured look
Pro tip: The key to mousse-defined curls is allowing your hair to dry completely undisturbed. Any touching, moving, or manipulation while your hair dries will create frizz and disrupt the curl clumps you’re trying to build.
Final Thoughts
The curly hairstyles you wear should make you feel confident, beautiful, and genuinely excited about your hair. These twelve styles prove that curly hair offers far more creative possibility than most people realize — whether you’re looking for something dramatic like an undercut or bangs, something romantic like a braided crown, or something that simply celebrates your natural curl pattern in a new way, there’s a style here that’ll work for you.
The most important part of trying a new curly hairstyle is knowing your curl type and understanding what styling techniques and products work with your specific texture. A style that looks incredible on tight coils might need adaptation for looser waves, and vice versa. Don’t be afraid to ask your stylist how to adapt these styles to suit your curl pattern specifically — the best hairstyle is one that you can actually maintain and style confidently on your own.
Start with whichever of these styles calls to you most, and don’t worry if it takes a couple of tries to get the technique down. Curly hair styling has a learning curve, but once you understand how your curls respond to products, styling methods, and cuts, you’ll have the confidence to try anything. Your curls are genuinely versatile enough to pull off all of these looks — it’s just a matter of knowing how.