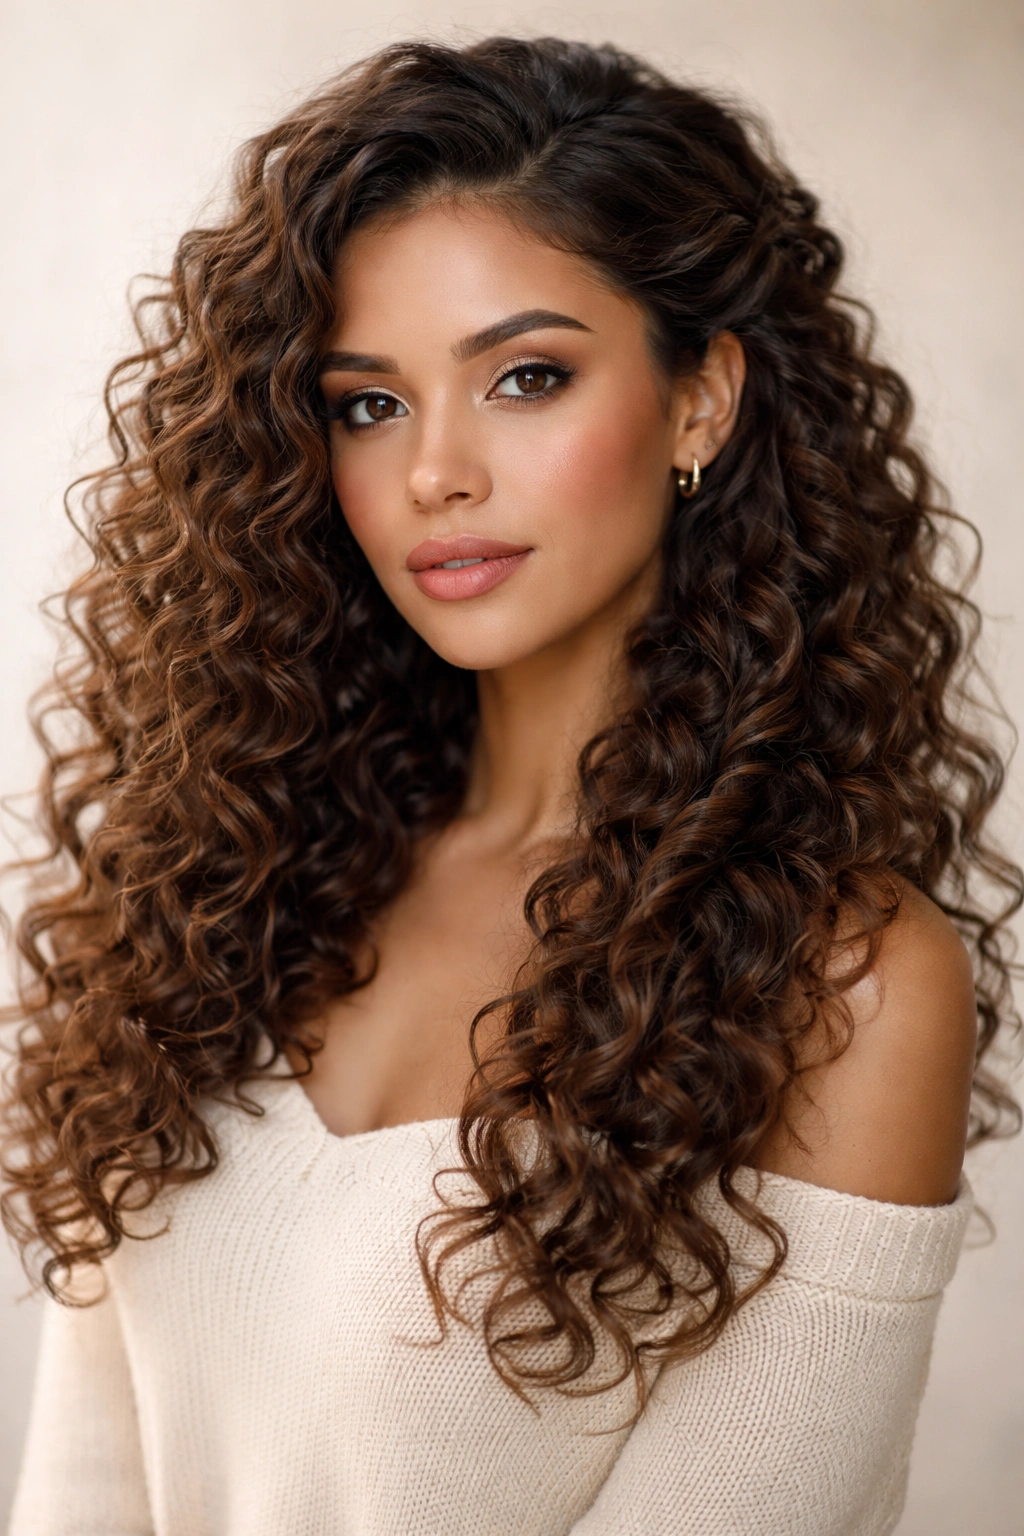
Curly hair down is its own kind of gorgeous—but getting your curls to look intentional rather than like you just rolled out of bed takes strategy. The key is embracing your natural texture while adding shape, definition, and movement that keeps your curls from frizzing into a shapeless cloud by 2 p.m. Whether you’re heading to the office, out for a night, or just want your everyday look to feel a little more polished, down hairstyles for curly hair work best when they actually work with your curl pattern instead of fighting against it.
The best down hairstyles for curly hair combine careful styling techniques—like plopping, micro-plopping, or diffusing—with strategic product layering and sometimes a few clever pin placements. These styles focus on enhancing your natural curl definition, managing volume without flattening texture, and creating visual interest through layers, twists, or braids that anchor your curls while leaving them down. They’re not the slicked-back, stick-straight looks that dominate mainstream beauty—they’re specifically designed for girls and women with actual curly hair who want to feel confident about their texture.
What makes a down hairstyle work for curly hair is understanding the difference between adding shape and adding tension. A style that looks effortlessly beautiful on you depends on your specific curl pattern—whether you’re working with 2C waves, 3A spirals, 4C coils, or somewhere in between—but the principles are universal: start with properly moisturized, defined curls, use products that enhance rather than weigh down, and anchor your style with subtle placements that create dimension without pulling your hair tight.
1. Half-Up Half-Down with Defined Curls
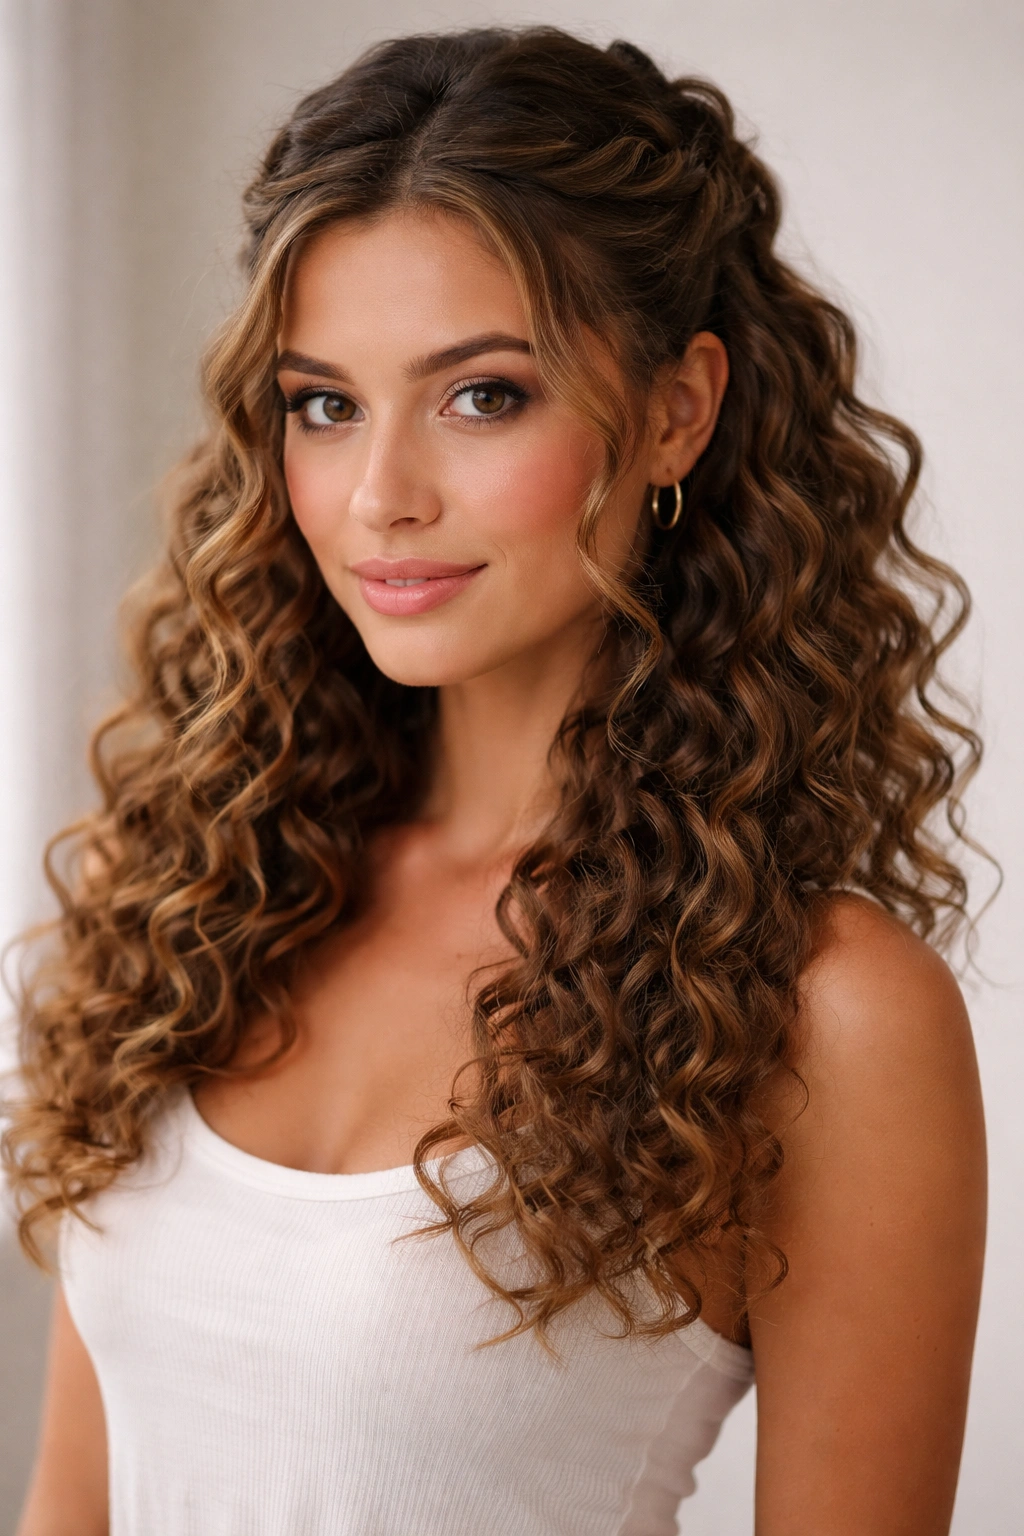
This is the no-brainer starting point if you want your down hairstyle to look intentional without requiring magic. You’re taking approximately the front third of your hair from ear to ear across the crown, twisting or braiding it loosely, and pinning it at the back while letting the rest flow freely. The result is that your face is framed, your curls get some architectural structure, and the bulk of your texture stays down where it showcases your curl definition.
Why This Works for Curly Hair
The genius of the half-up half-down style is that you’re using gravity to your advantage. The lower half of your hair is literally pulling downward, which stretches your curls slightly and prevents them from compressing into a tight frizz ball at your crown. Meanwhile, the upper section is secured just enough that you don’t get a halo of flyaways around your face. You’re also creating a visual anchor point at the back of your head that makes the entire style feel intentional rather than accidental. For curly hair specifically, this style prevents the classic problem where letting everything down creates bulk at the crown and makes your head look disproportionately large.
How to Create It
Start with freshly defined curls—ideally you’ve either diffused your hair or let it air-dry completely. Use a light, anti-frizz serum or curl cream on the sections you’re about to work with (this prevents flyaways when you’re handling the hair). Take a section from your left temple, twist it loosely toward the back of your head, and secure it with a bobby pin that matches your hair color (this is non-negotiable if you want the pins to disappear). Repeat on the right side, crossing the two twists slightly at the back so they look like they’re woven together. If your curls are particularly thick or heavy, use two bobby pins per side instead of one, crisscrossing them for better hold. The twists should be loose and airy—tight twists will create a compressed section that looks obviously pinned, which defeats the purpose.
Pro tip: Gently pull a few face-framing curls loose around your temples before you twist anything. This softens the look and prevents the styled sections from feeling too rigid. If you notice any flyaways after you’ve pinned everything, smooth them with a tiny dab of gel on your fingertip rather than trying to re-pin.
2. Side-Swept Waves
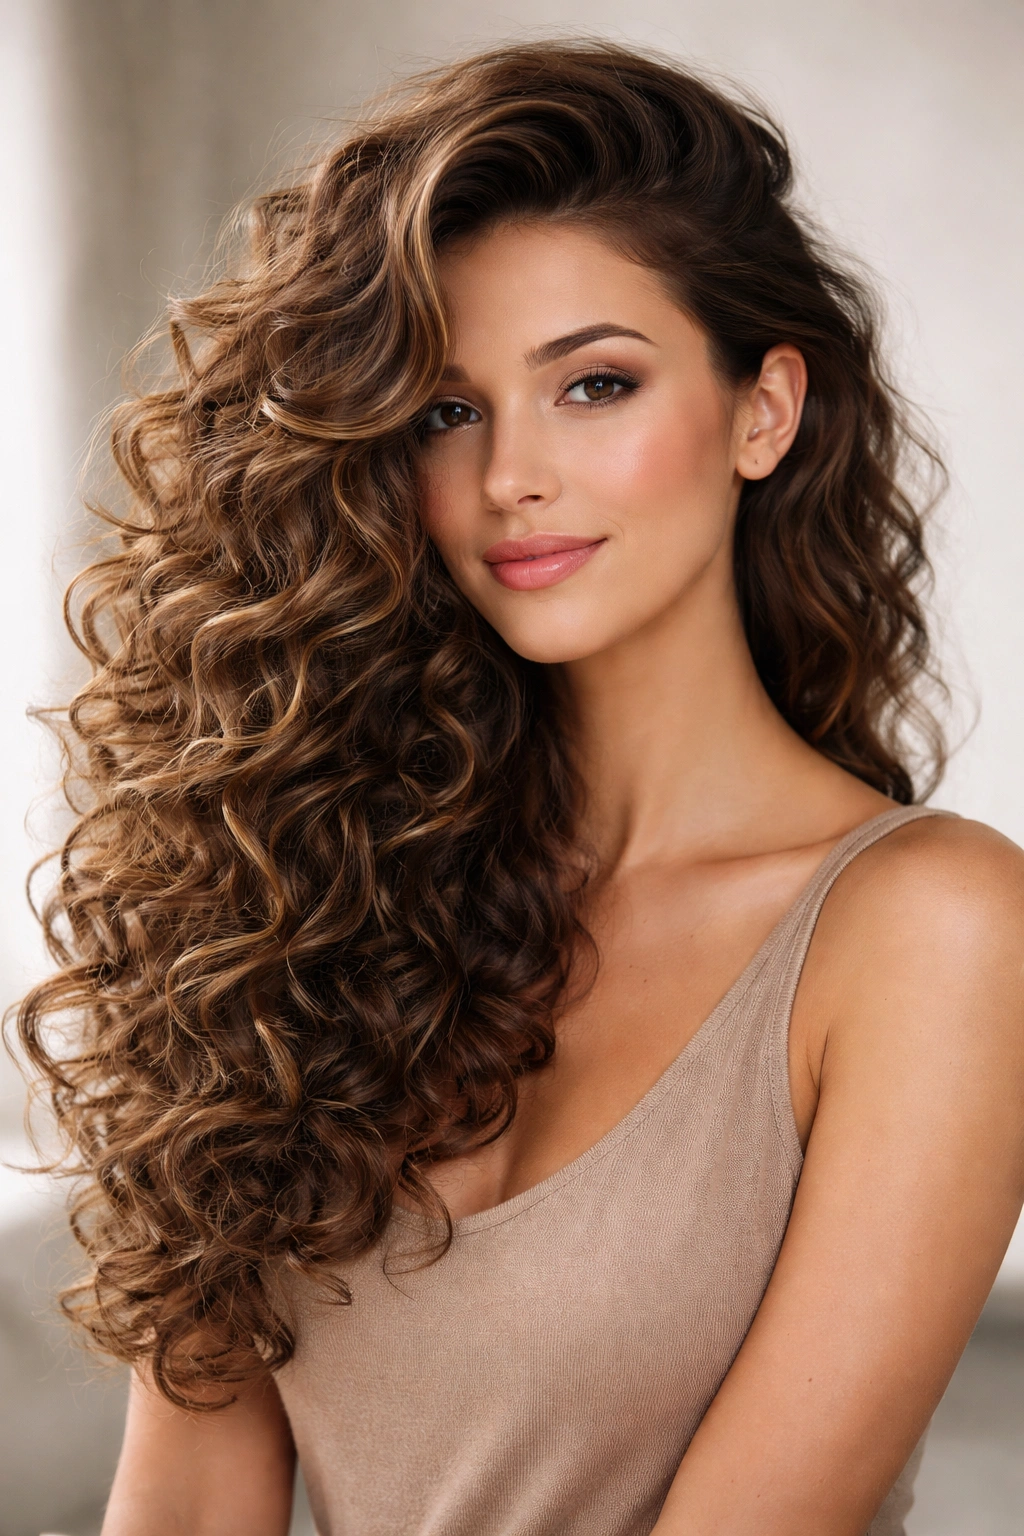
Sweeping your curls dramatically to one side creates an asymmetrical, romantic vibe that works for literally any occasion. You’re creating visual movement by encouraging your curls to flow toward one shoulder instead of sitting straight down the middle. The side sweep also automatically adds volume to one side of your head, which is flattering for most face shapes and makes a down hairstyle feel more intentional than it would if your curls just hung straight.
Why Side-Swept Curls Feel Effortless
Side-sweeping works because it uses your hair’s natural fall pattern to create dimension. Instead of your curls stacking on top of each other directly at the crown (which compresses them), they’re flowing sideways, so each curl has more space to extend and show its individual definition. The style also draws the eye horizontally rather than emphasizing height, which is a visual trick that makes even thin curly hair look fuller. For curly hair that tends to frizz outward in all directions, channeling that texture toward one side actually looks intentional and controlled rather than chaotic.
How to Create It
This works best if you blow-dry your hair with a round brush directing the curls toward your preferred side. Alternatively, if you air-dry, use a curl cream or gel and finger-coil or rake your curls in the direction you want them to flow. Once your curls are set, flip your head upside down so all your hair falls away from your scalp, then flip back and shake it out—this resets the curl pattern and prevents them from being flat against your head. Use the tail of a fine-tooth comb to gently direct the curls toward one side, then secure with a flexible hairspray that won’t feel crunchy. If you have very thick, coily curls, you can use a bobby pin behind the opposite ear to anchor the sweep in place; nobody will see it because your curls will cover it, but it keeps everything from shifting throughout the day.
Worth knowing: A side part naturally leads to a side sweep, so if you’re going for this look, make sure you’re creating your part on the side where you want your hair to flow from, not toward.
3. Layered Cascading Curls
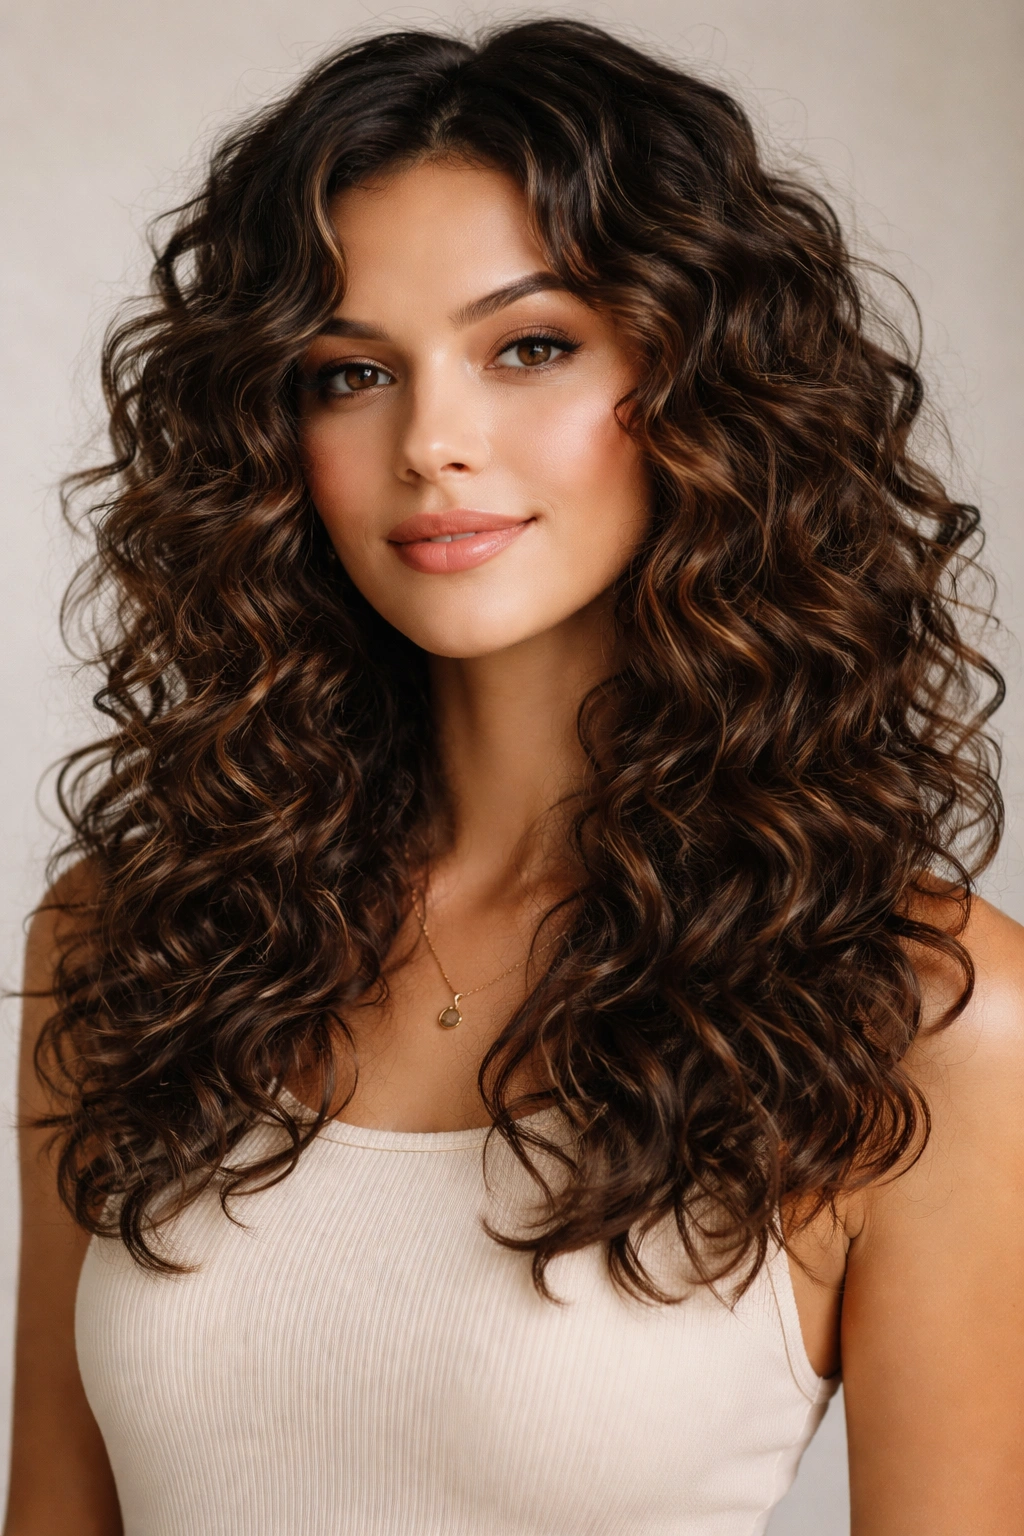
This is the style for people whose curls have enough length (usually shoulder-length or longer) to really make layers shine. By strategically cutting shorter layers throughout your hair, you create natural stopping points where curls define themselves beautifully. As your hair sits down, the shorter layers land at different heights, creating depth and visual interest that makes the style feel much more intentional than a one-length cut would.
Why Layers Enhance Curly Hair
Layers are genuinely a game-changer for curly hair because they reduce bulk while maintaining length. A one-length cut on curly hair often looks thick and heavy at the bottom, with all the weight pulling down and compressing your curls. Layers distribute that weight, so each section of hair can dry and define on its own without being weighed down by everything above it. The result is curls that feel lighter, springier, and more defined. Layers also naturally frame your face because the shortest layers sit around your cheekbones and shoulders, drawing the eye to your features. This is especially flattering if you have a square or round face shape.
How to Get Layers Right
Work with a stylist who specializes in curly hair—this is crucial. A stylist who’s trained in straight-hair cutting will butcher your curls because they won’t account for how curls shrink and stack. When you’re curly, asking for layers means understanding exactly how much length the stylist is removing at each layer. A good curly-hair stylist will cut your hair while it’s dry (sometimes called “cut to curl”) so they can see exactly how your curls fall and where to place layers for maximum definition. They’ll also angle the layers rather than creating blunt horizontal lines, which prevents that choppy look. Expect to get trims every 6-8 weeks to keep your layers sharp; once they start to grow out, you lose the definition.
Important: Layers don’t automatically fix your curl pattern. If your curls are frizzy or undefined, layers won’t solve that—that’s a routine and product issue. But if your curls are well-defined and moisturized, layers will make them look ten times better.
4. Tousled Beachy Waves
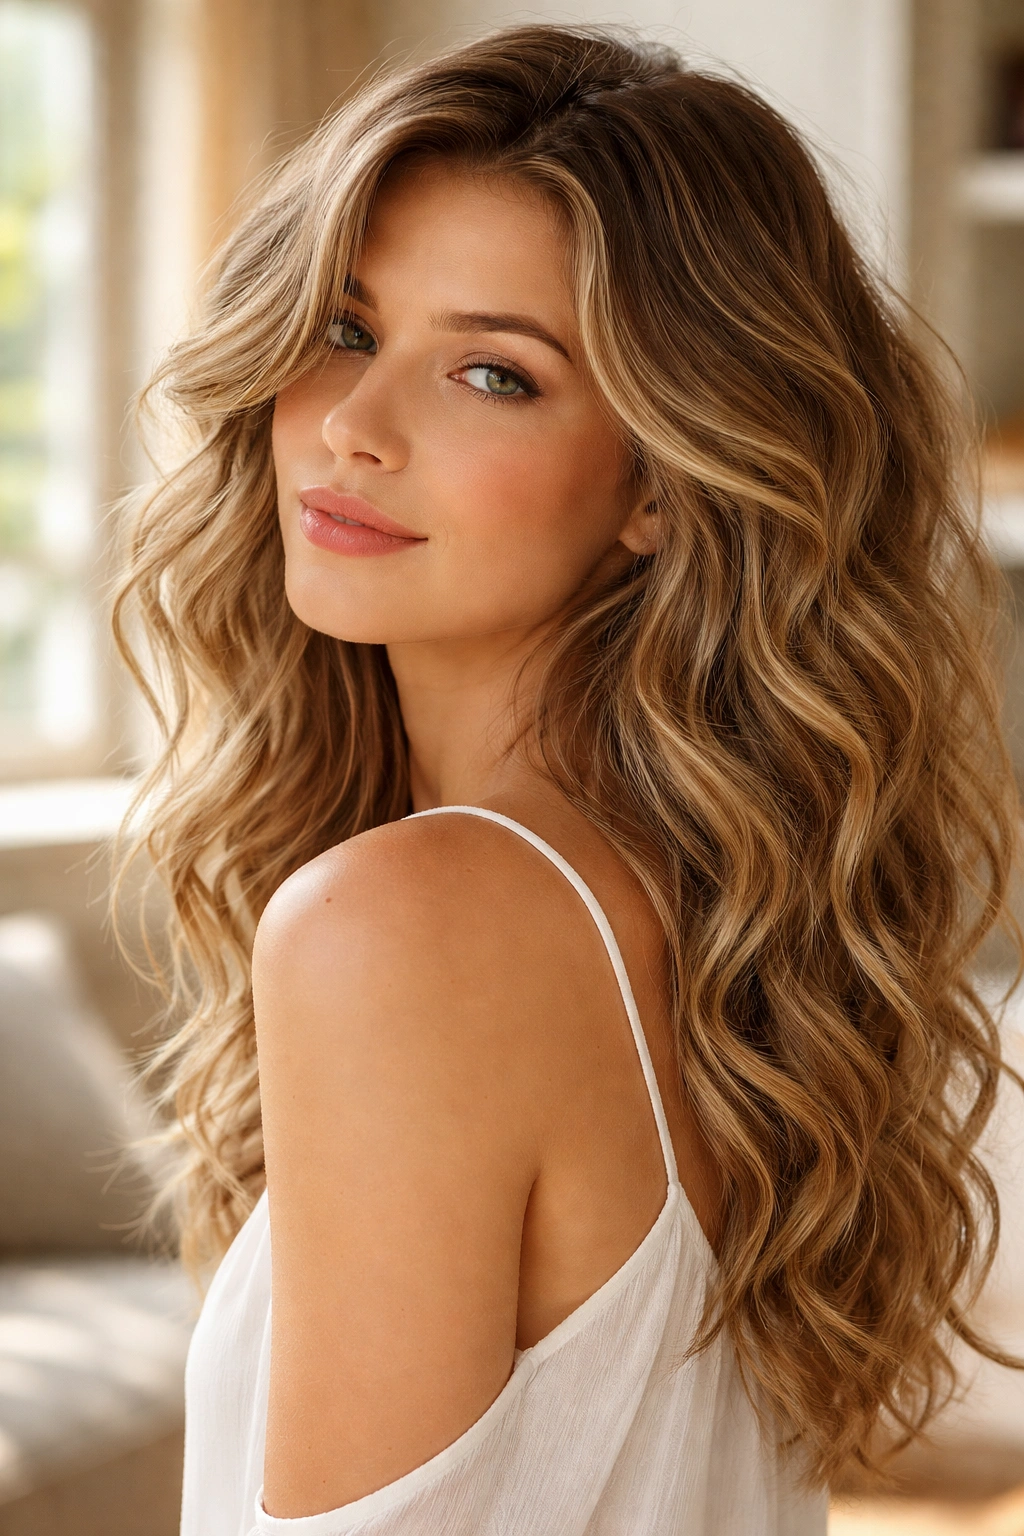
This is the “I woke up like this” look that actually requires intention, but the payoff is a soft, romantic vibe that reads as effortlessly beautiful. You’re using salt spray, light creams, and finger-coiling to encourage your curls into soft, loose waves rather than tight, defined coils. The texture is messier and more relaxed than a polished curl style, which gives the impression that you didn’t try too hard—even though you absolutely did.
Why Beachy Waves Feel Different from Defined Curls
Beachy waves are created using lighter-hold products and looser manipulation than you’d use for defined curls. Instead of using a cream or gel that creates a cast and locks your curl pattern in place, you’re using a salt spray or light mousse that gives definition without rigidity. You’re also finger-coiling much more loosely than you would for a defined curl, creating bigger, wavier sections instead of tight spirals. The result feels romantic and soft rather than structured. This style works especially well for people with 2C or 3A curl patterns who want to lean into their wave texture without fighting it into tighter curls.
How to Create Beachy Waves
Start with damp hair. Apply a salt spray (or a mousse mixed with a light curl cream) throughout, focusing on mid-length and ends. Using just your fingers, rake the product through your hair to distribute it evenly, then gently scrunch upward to encourage wave formation. You can twist larger sections loosely between your fingers—not the tight coil you’d do for defined curls, but a looser, more casual twist. Either air-dry (which takes longer but creates the softest waves) or diffuse on low heat with your head tilted sideways so waves form horizontally rather than straight up. Once dry, gently scrunch again with a tiny bit of light serum in your fingers to separate the waves and add shine. Don’t comb or brush—that disrupts the wave pattern. The whole look should feel touchable and soft, not shellacked.
Pro tip: Use a microfiber towel or cotton t-shirt to scrunch out excess water before styling. Regular towels create frizz; microfiber and cotton prevent it by disturbing your curls less.
5. Twisted Crown with Loose Curls
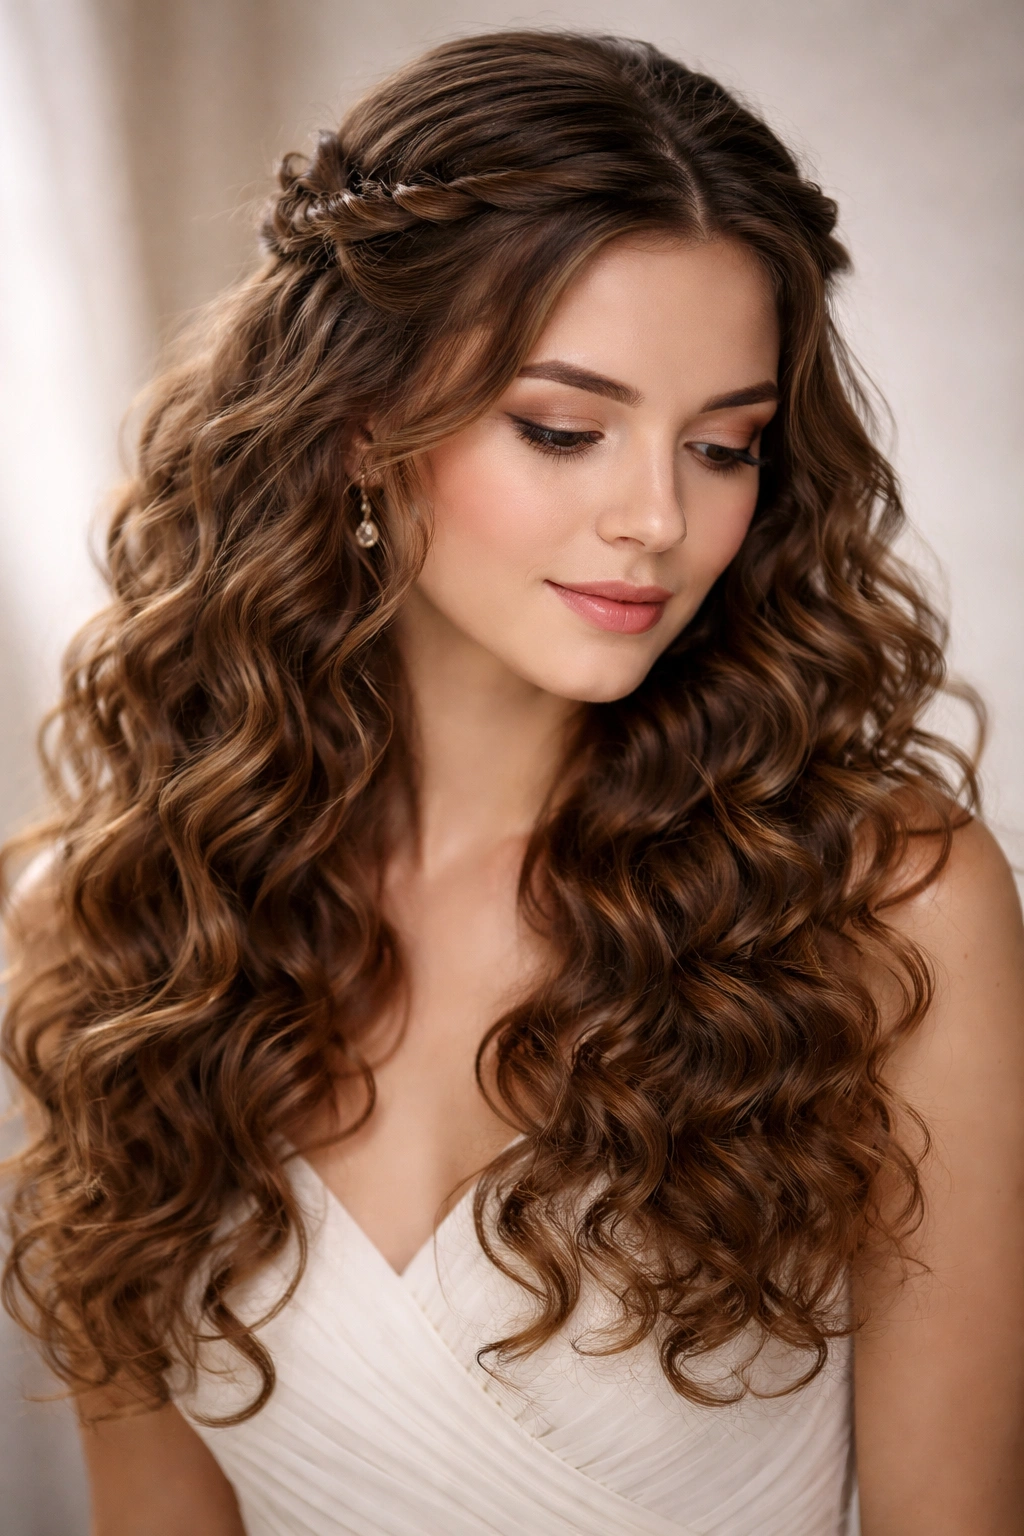
This style uses two twists that frame your face and wrap toward the back of your head, creating a crown-like effect while leaving your bulk of curls down and loose. It’s more formal than a simple half-up style because the twists wrap all the way around rather than just securing at the back. The effect is romantic and a little bit formal, making it great for events, dates, or occasions where you want to look polished without feeling overdone.
Why This Style Adds Elegance
A twisted crown works for curly hair because you’re creating a distinct visual frame that makes your face the focus, while the loose curls below read as intentional rather than random. The twists add architectural interest and prevent your hair from falling directly in your face, but since the majority of your curls are still down, you keep that romantic texture. The twists also distribute the visual weight evenly across your head, which prevents the “heavy on top” look that can happen with larger updos on curly hair. For formal events, this style telegraphs that you put effort in without looking like you spent three hours at a salon.
How to Create It
This works best if your curls are already defined and have some hold to them (so ideally they’ve been air-dried or diffused with a cream or gel). Take a small section at your temple on one side and begin twisting it loosely. As you twist toward the back of your head, gradually pick up small sections of hair from both your hairline and the interior of your twist, incorporating them as you go. This creates a thicker, more substantial twist than if you just twisted a single section. Once you reach the back of your head, pin the twisted section in place. Repeat on the other side, allowing the two twists to meet or cross slightly at the back. Gently pull the twists slightly to loosen and soften them (you don’t want them looking tight and rigid), then secure any flyaways with a flexible-hold hairspray.
Real talk: This style takes practice. Your first attempt might look awkward, but the third or fourth time you do it, your fingers will know what to do and the twists will look relaxed and intentional. Don’t give up after one try.
6. Low Defined Bun with Piece-y Curls
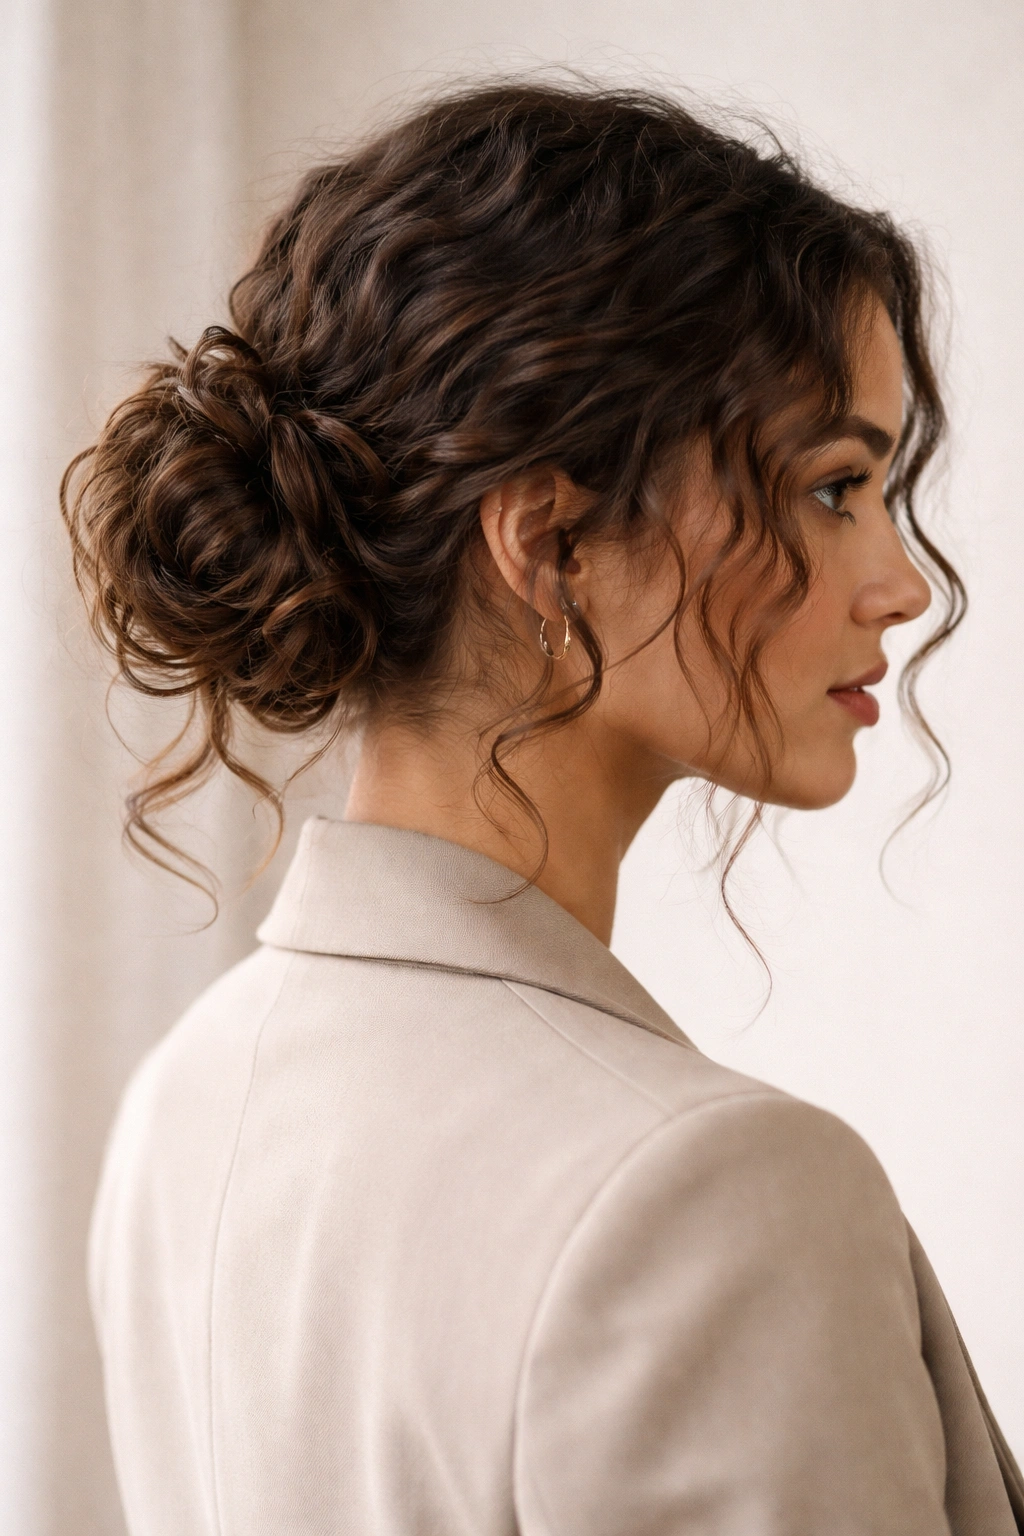
A low bun with curly hair is tricky because you don’t want it to look flat and compressed like a straight-hair bun. Instead, you’re creating a bun at the nape of your neck using loosely twisted or coiled sections, then leaving face-framing pieces and a few curls loose around the bun to soften the look. The result is “down enough” that it reads as a down style but polished enough for professional settings.
Why This Works When Done Right
A low bun keeps curly hair off your neck and face (which prevents frizz on humid days) while still allowing enough texture to show that it doesn’t feel stiff or pulled-back. The piece-y curls around the face make the bun look intentional rather than like you threw your hair in a emergency bun. The loose, undefined shape of the bun (rather than a tight, smooth bun) also means it won’t create a dividing line or dent in your curls when you take it down. This is the best bun option for curly hair because the looseness of it actually suits your texture.
How to Create It
Gather your hair into a low ponytail at the nape of your neck, but don’t pull it tight—you want it loose and relaxed. Before securing with an elastic, pull out a few face-framing pieces and a few pieces along your temples, allowing them to frame your face. Take the ponytail and loosely twist it, then wrap it around the base to form a bun shape. Instead of using bobby pins to create a tight, smooth bun, use 3-4 bobby pins to loosely hold the shape while still allowing the twisted texture to be visible. The bun should look somewhat undone, like your curls naturally coiled on themselves. Gently pull the bun slightly to make it bigger and less defined. Use a light hairspray to lock it in place, but avoid anything strong enough to create a crunchy cast—you want the bun to still look organic.
Know this: Avoid rubber bands for low buns on curly hair because they crease your curls. Use fabric-wrapped hair elastics instead, or simply secure everything with bobby pins.
7. Face-Framing Textured Layers
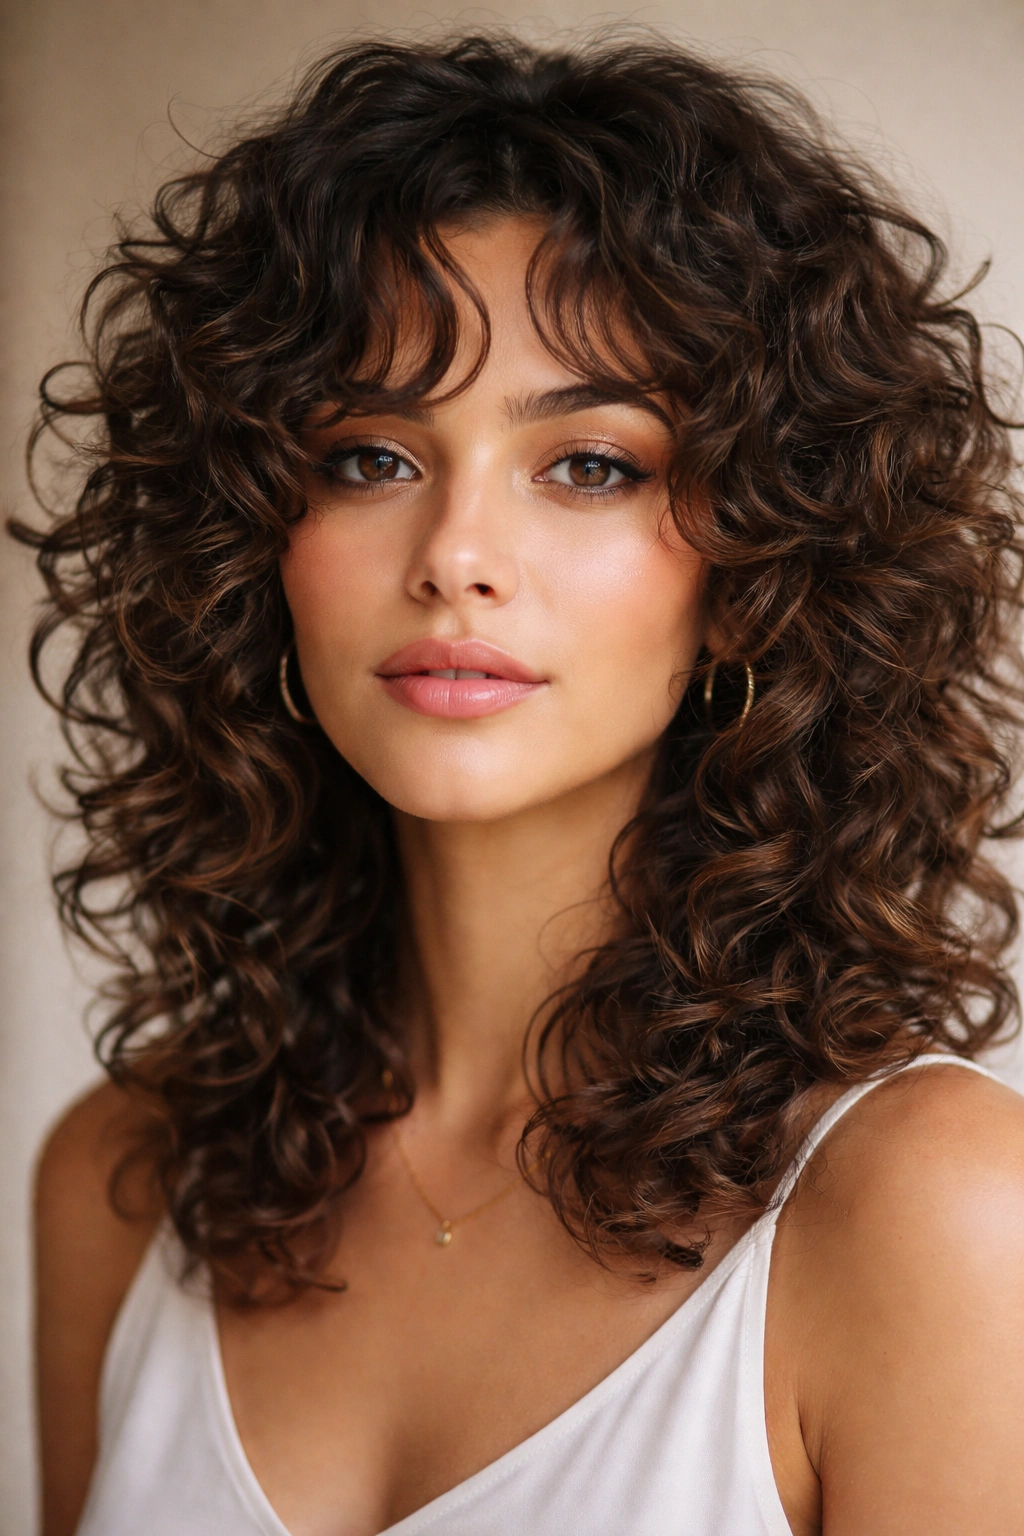
This style emphasizes shorter, choppy layers around your face that create movement and prevent your hair from hanging straight down and framing you in an unflattering way. The layers are cut shorter than the lengths in a cascading-layers cut, so they’re designed to flip and curve outward around your cheekbones and jawline rather than just sitting there. This is particularly flattering for people with round or square face shapes, and it makes even thin curls look fuller.
Why Shorter Face-Framing Layers Matter
Shorter layers around your face create visual height at your cheekbones, which is inherently flattering. They also naturally curve and flip outward when they’re curly, creating a frame effect that longer hair can’t achieve. Because these layers are shorter, they also dry faster and define more quickly than longer layers, meaning you get better curl definition around your face where people can actually see it. If you have thick, heavy curls, face-framing layers are genuinely transformative because they prevent your face from being surrounded by a wall of hair.
How to Style Textured Layers
The styling here is straightforward: apply your usual curl cream or gel to damp hair, scrunch and define your curls as you normally would, then diffuse or air-dry. Because the layers are shorter and designed to flip outward, they’ll naturally do so as they dry. Once completely dry, very gently scrunch the hair around your face upward and outward to encourage those layers to curve away from your face rather than sticking to it. Use a light serum on your fingertips to add shine and prevent frizz, then use a flexible hairspray to hold the shape. The key is not fighting the layers—let them do what they naturally want to do as they dry, then just enhance that with products.
Worth noting: Face-framing layers look best when you get trims every 6-8 weeks. As they grow out, they lose their curved shape and start to stick straight down, which defeats the purpose. If you can’t commit to regular trims, this might not be the style for you.
8. Braided Crown with Cascading Curls
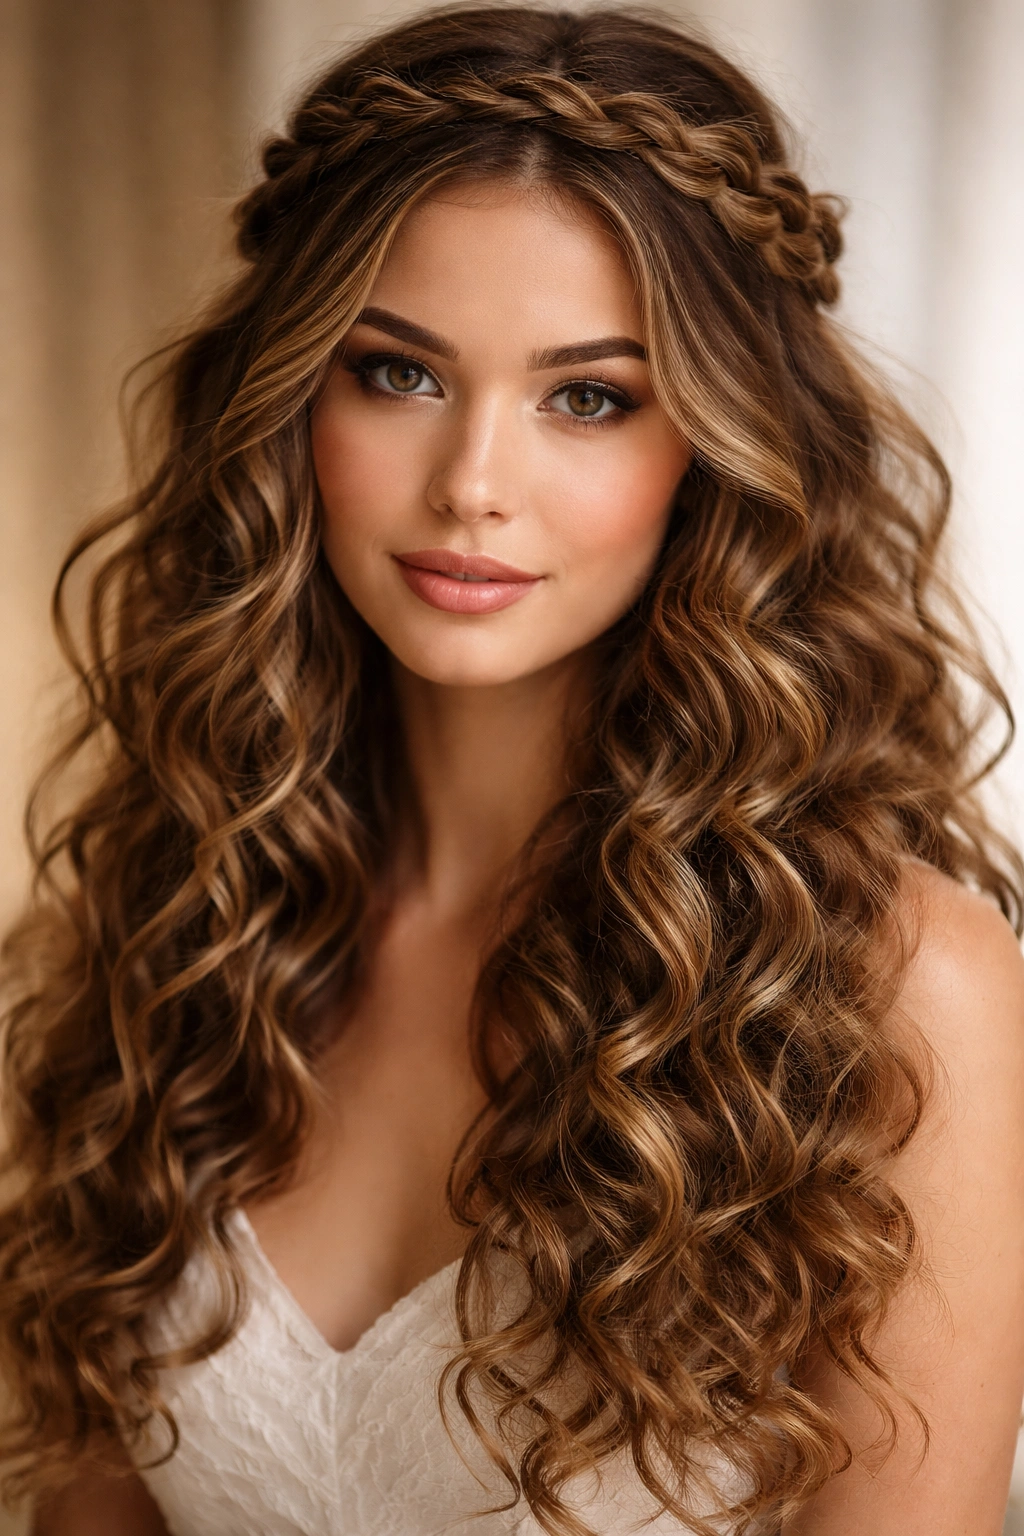
This style combines the elegance of a braid with the romance of down curls. You’re creating a loose braid that wraps partway around your head (like a halo) or travels diagonally from one side to the other, while the rest of your curls fall freely below. It’s fancier than a half-up style but still counts as a down hairstyle because the majority of your hair is down. This style is perfect for events, special occasions, or days when you want your curls to feel fancy without being fully up.
Why This Style Feels Intentional
A braid through curly hair immediately reads as “styled” because straight hair can fall out of braids, but curly hair actually holds braids better due to the natural grip texture gives. The braid creates a focal point that draws the eye and adds visual interest, while the cascading curls below maintain the romantic, textured feel that makes curly hair special. Because the braid is only partial, you’re not sacrificing volume or the ability to show off your curl pattern. This is a best-of-both-worlds style.
How to Create It
For a crown braid, section off hair from temple to temple (essentially your front hairline) and begin a loose three-strand braid at one temple. As you braid, pick up small sections from your hairline as you would with a normal Dutch or French braid, creating a braid that travels across the back of your head. Once you reach the opposite temple, secure the braid with a bobby pin that matches your hair color. Gently pull the braid to loosen and expand it (tight braids look unfinished on curly hair—you want them soft and slightly undone). For a diagonal braid, start at one side of your head near your ear and braid down toward the opposite shoulder, picking up hair as you go, then pin at the end. In both cases, allow face-framing curls to remain loose around your face.
Important: Braid your hair when it’s freshly styled and has hold to it (so after you’ve applied your curl products but before everything has relaxed completely). If you try to braid completely dry curls, you’ll disrupt the curl pattern.
9. Twisted Side Sections with Volume
This style uses two loose twists that travel from the back of your crown down toward your shoulders, incorporating texture and creating a sculptural feel. Unlike the twisted crown style, these twists don’t wrap all the way around—instead, they sit on the sides of your head, framing your face while leaving the majority of your bulk down. The twists create visual movement without requiring you to put your hair up.
Why This Adds Dimension
Two twisted side sections naturally create visual balance and symmetry while adding structure to a down hairstyle. The twists draw the eye to your face because they’re positioned close to it, and they add architectural interest that prevents your hair from looking flat. For curly hair, twists are ideal because they don’t require tight pulling—loose twists actually look better on curly hair than tight ones because the texture is visible and the style feels intentional rather than strained.
How to Create It
Section off a piece of hair from the temple region on one side of your head (roughly a 2-3 inch section). Twist this section loosely, and as you twist downward, pick up small sections of hair from around your ear area, incorporating them into the twist as you go. Stop the twist once you reach your shoulder. Secure the end with a bobby pin, hiding it behind the twist so it’s not visible. Repeat on the other side. The twists should look somewhat loose and organic, not perfectly tight. Gently pull and loosen each twist slightly by coaxing out a few curls, then use a flexible hairspray to set everything in place.
Pro tip: If you have very thick hair and the twists keep slipping, use a small claw clip to secure each one temporarily while you work on the other side, then switch to bobby pins once both are started. Claw clips grip better while you’re actively styling.
10. Undone Romantic Curls with Strategic Texture
This is the most straightforward style on the list, and it’s arguably the most beautiful when done right: you’re not pinning anything, not twisting anything, and not braiding anything. Instead, you’re focusing entirely on having gorgeous, well-defined, frizz-free curls that fall freely. The “undone” doesn’t mean you didn’t put in work—it means you’re not fighting your natural texture or adding additional styling elements. This style relies entirely on your curl routine and product game being dialed in.
Why This Is an Actual Style
For curly hair, a polished down hairstyle isn’t about manipulation or manipulation—it’s about starting with hydrated, well-defined, frizz-free curls and letting them be the statement. This approach works because it honors your natural texture instead of trying to fight it or restrain it. If your curls are genuinely beautiful, this is genuinely all you need. The “strategic” part means using a tiny bit of low-hold serum or cream to define individual curl groupings without creating a heavy cast, and maybe a light flexible hairspray to reduce frizz and motion throughout the day.
How to Perfect Undone Curls
This requires a solid curly hair routine: a hydrating, sulfate-free shampoo; a creamy conditioner; a curl cream or gel applied to soaking-wet hair; and either diffusing (on medium heat, low speed) or air-drying. Once your curls are completely set, gently scrunch them with a light serum to add shine and separate any clumped sections, then use a lightweight hairspray. The entire goal is enhancing your natural curl pattern without adding structure or definition that looks “done.” Your curls should move freely and feel soft to the touch. This style works for any curl pattern, but it looks especially stunning on people with defined, bouncy curls in the 2C to 3C range—it’s essentially just putting your curl routine on display.
Be honest with yourself: This style only works if your curl routine is genuinely working. If you’re getting frizz, undefined curls, or dryness, this style will highlight those problems rather than hide them. If that’s where you are, spend 3-4 weeks fixing your routine (deep conditioning, product layering, proper diffusing technique) before you rely on this as your everyday style.
Final Thoughts
Down hairstyles for curly hair look best when you stop thinking of your curls as something that needs to be tamed and start thinking of them as something that deserves to be featured. Whether you’re going with a structured option like a braided crown, a sculptural choice like twisted side sections, or an undone approach that’s all about your curl definition, the goal is the same: create intentional styling that works with your texture instead of against it. The common thread across all these styles is that they use gravity, loose manipulation, and strategic product placement to keep your curls defined, voluminous, and frizz-free.
The truth is that the specific hairstyle you choose matters less than the foundation underneath it. Healthy, well-moisturized, properly defined curls will look beautiful in any of these styles. If you’re struggling with your curls looking flat, frizzy, or undefined, that’s the place to start troubleshooting—invest in a better routine and the right products before you blame the hairstyle. Once your curls are genuinely healthy and gorgeous, these styles will simply be different ways to showcase what you already have.
One last thing: your curls are unique to you, and what works beautifully for someone else might need tweaking for your specific texture. Don’t be afraid to experiment with these styles, modify them to suit your curl pattern, and create your own version. The goal isn’t to replicate someone else’s down hairstyle perfectly—it’s to find the approach that makes you feel confident and beautiful in your own curls.