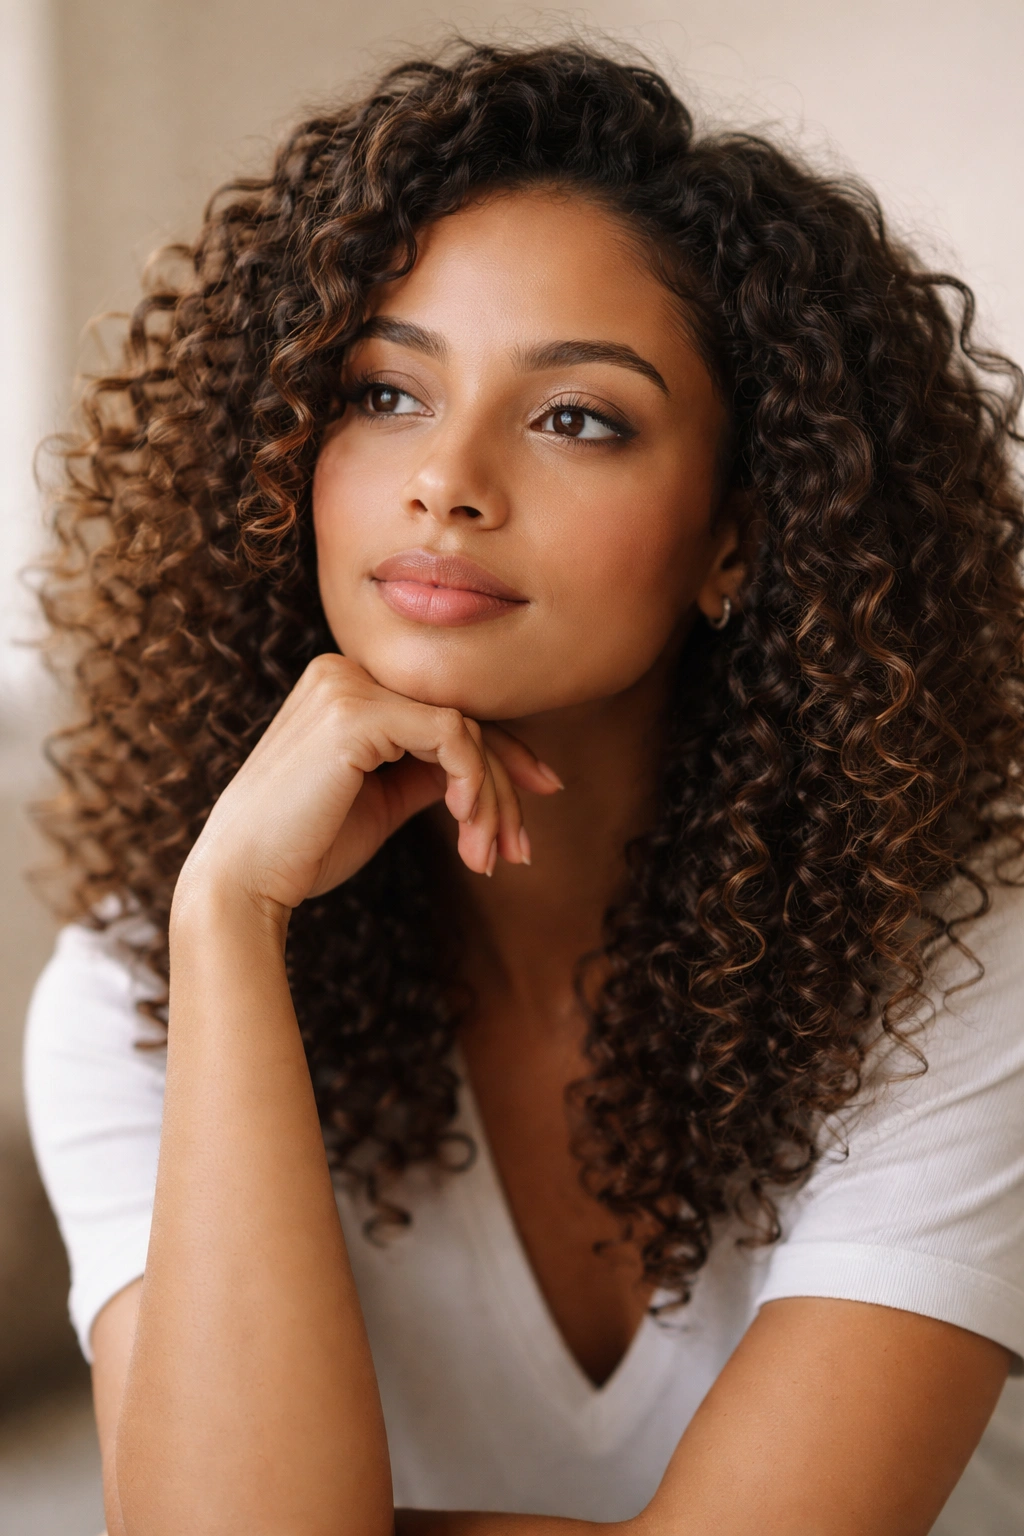
Curly hair is a beautiful canvas for creativity, but styling it doesn’t have to be complicated or time-consuming. The best curly hairstyles celebrate your natural texture while looking intentional and put-together, whether you’re heading to work, a casual weekend brunch, or a night out. The challenge many people with curly hair face is finding styles that actually work with their curl pattern instead of against it—styles that minimize frizz, maximize definition, and hold up throughout the day without requiring constant touch-ups or excessive heat damage.
What makes a curly hairstyle truly “easy” isn’t just about the minutes it takes to create it. It’s about styles that work with your curl pattern, not against it. It’s about styles that can be prepped in advance, that hold their shape naturally, and that don’t demand you fuss with them constantly. The good news? There are plenty of genuinely cute styles that check all these boxes—whether your curls are tight coils, loose waves, or somewhere in between.
The styles in this guide range from minimal-effort wash-and-gos that celebrate your natural curl without any manipulation, to protective styles that keep your curls healthy while looking polished, to simple techniques that transform your curls in minutes using just your fingers or a brush. Each style works best with specific curl patterns and occasions, and I’ll walk you through exactly how to create and maintain each one so you can confidently style your curls however you want.
1. Effortless Wash and Go
A true wash-and-go requires minimal products and zero styling time—just clean hair, a leave-in conditioner, and the natural drying process. This is the ultimate low-maintenance curly style, and it’s perfect for days when you want to celebrate your curl pattern without touching it.
What Makes This Style So Forgiving
The wash-and-go works best when your curls dry in their natural state without any hand-scrunching, twisting, or manipulating that can create frizz or weird texture. The key is using the right combination of hydration and hold in your products rather than relying on technique. Your curls should feel moisturized and bouncy when they dry, which means the heavy lifting happens in your product choice, not your styling skills.
How to Create It
- Shampoo and condition your hair thoroughly, focusing conditioner on mid-lengths and ends
- While hair is still soaking wet, apply a leave-in conditioner or curl cream to soaking-wet hair
- Add a light gel or mousse for hold if your curls need extra definition
- Gently shake your head or use your fingers to encourage your curls into their natural pattern—don’t twist or manipulate sections
- Allow hair to air-dry completely, or use a diffuser on low heat to speed up the process without disrupting curl formation
- Once completely dry, gently separate curls with your fingers if they clumped together
Why This Works for Busy Mornings
You’re not fighting your hair or trying to create a style that doesn’t naturally want to happen. You’re simply enhancing what’s already there with moisture and hold. This means it’s genuinely low-stress, it respects your curl pattern, and it looks effortlessly intentional rather than undone.
Pro tip: The quality of your leave-in conditioner matters more than any styling technique here. A rich, hydrating formula will do 80% of the work for you.
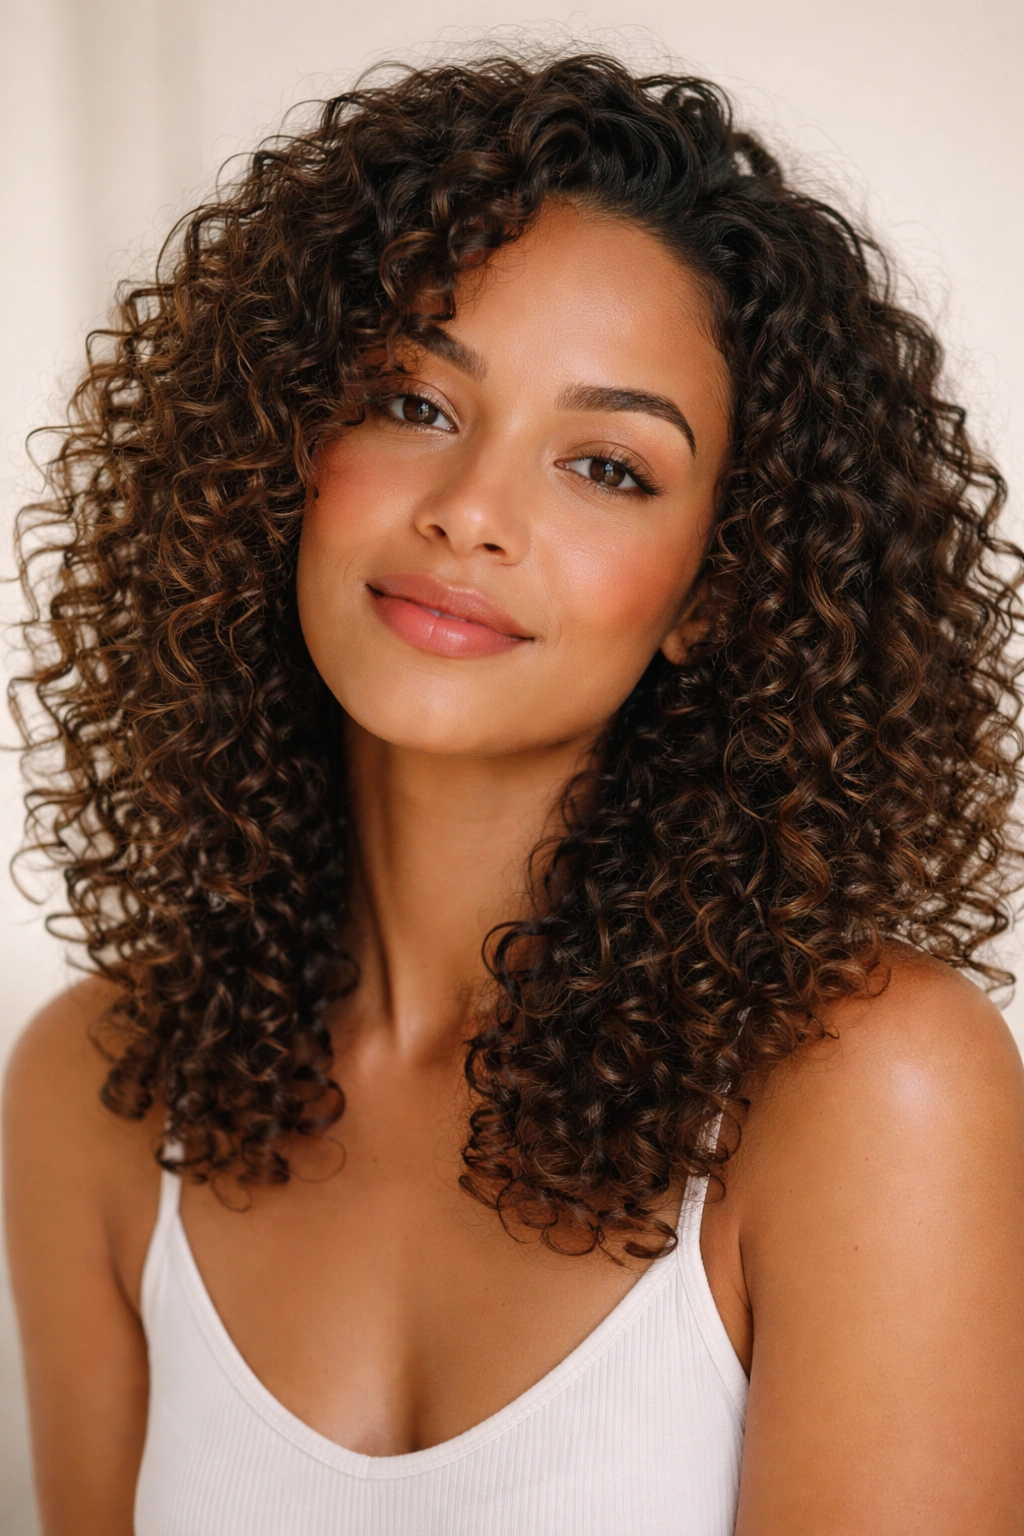
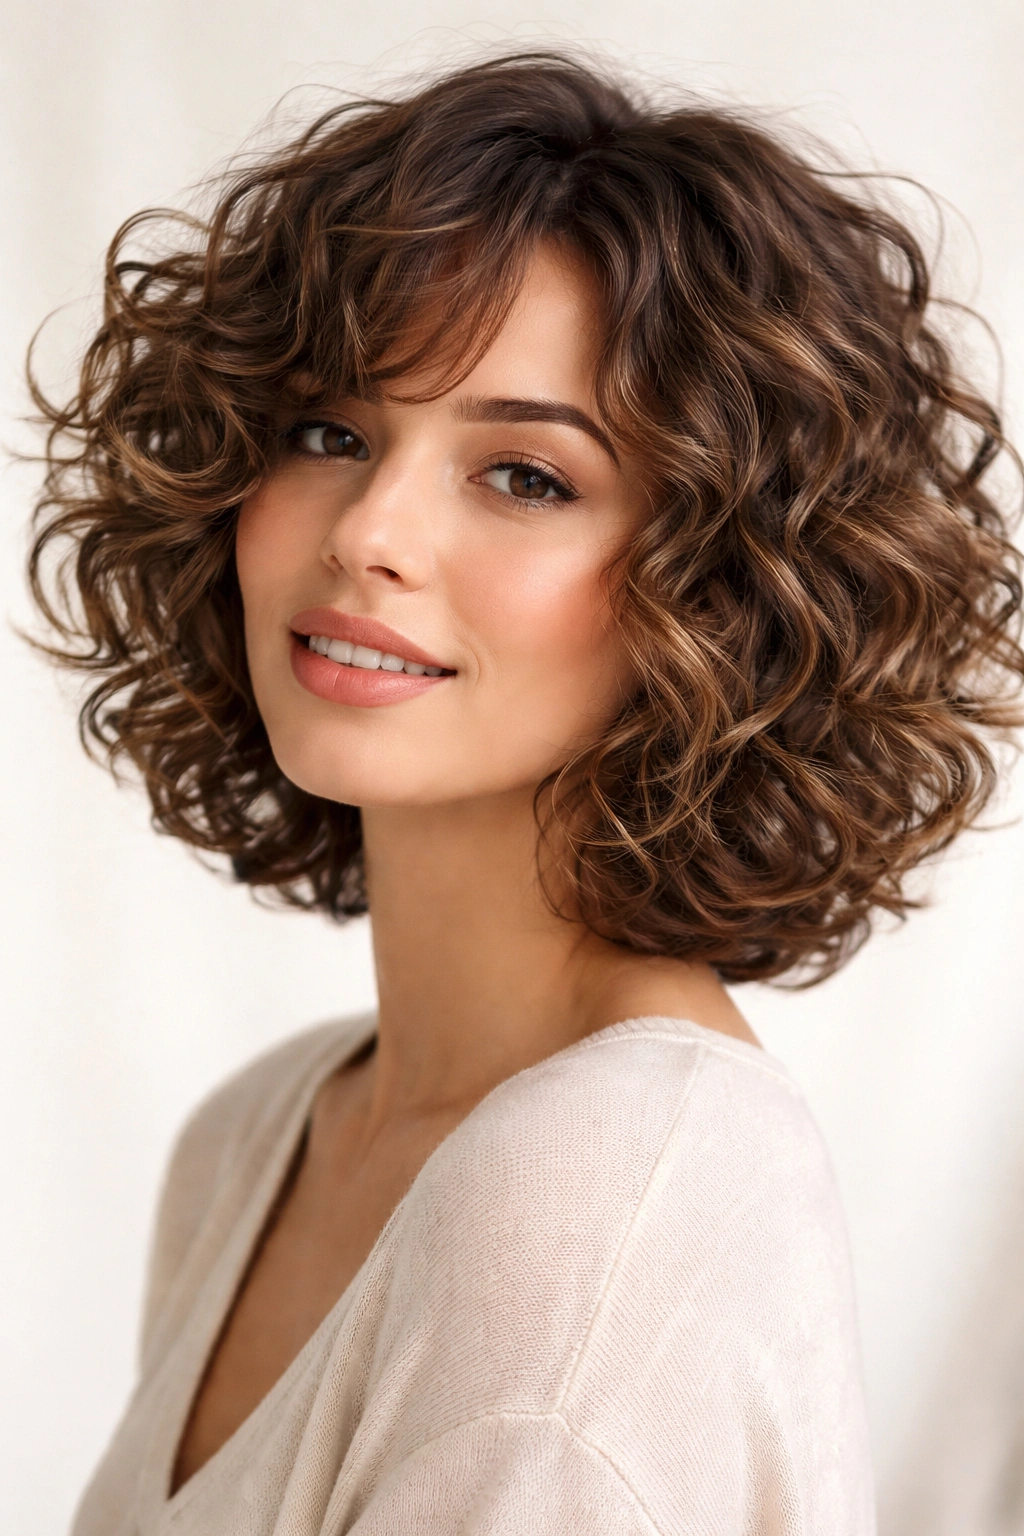
2. The Classic Defined Curl
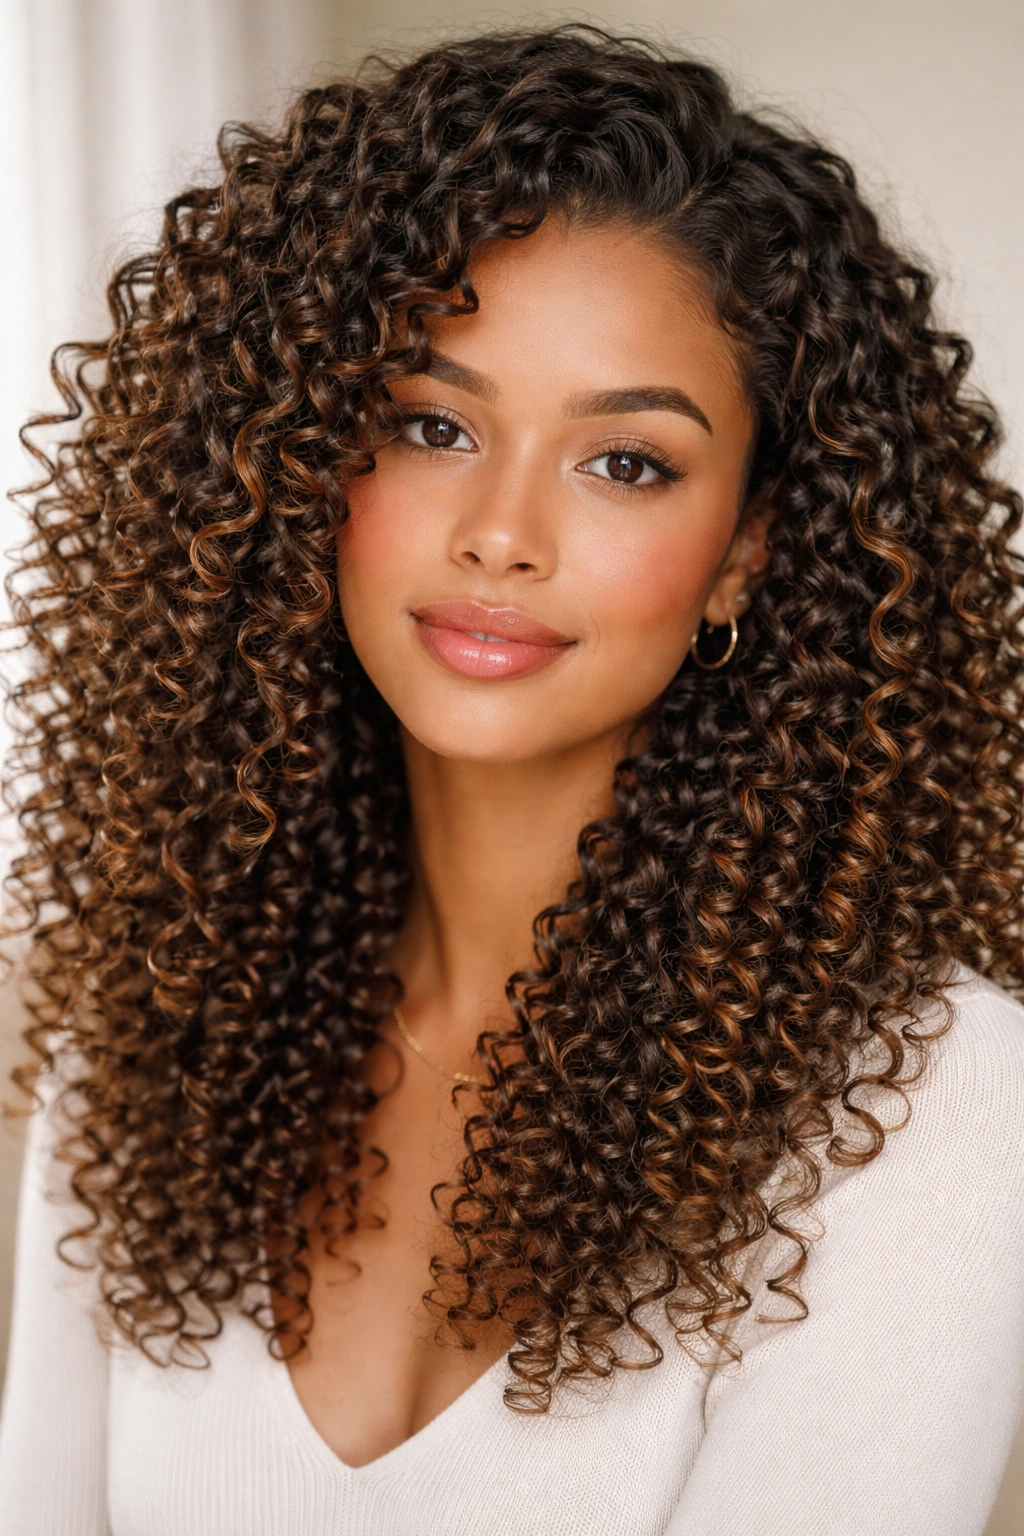
When people think of the ultimate curly hairstyle, they’re often picturing defined, bouncy curls that have clear shape and separation. This style requires a bit of intentional manipulation during the styling process, but the payoff is curls that look salon-quality and hold their shape for days.
The Technique That Creates Definition
Defined curls come from a combination of proper hydration, strategic product placement, and a styling method that encourages each curl to coil around itself rather than blend with its neighbors. The most popular methods are finger coiling (wrapping each curl around your finger as you work through your hair) or using a curl brush or pick to stretch and define each section.
Step-by-Step Styling Process
- Wash and condition, leaving your hair dripping wet
- Apply a curl cream or gel to soaking-wet sections, working through with your fingers or a wide-tooth comb
- Starting from the bottom layer of hair, take a small section and either wrap it around your finger or use a curl cream to “paint” it into shape
- Work section by section around your head, creating defined curls rather than general waves
- Allow to air-dry completely before touching—this usually takes 4-8 hours depending on hair thickness
- Optional: use a diffuser to speed up drying if needed, but be gentle to avoid disrupting the curl pattern
Long-Term Hold Without Restyling
One major advantage of the defined curl style is that it can last 5-7 days if you sleep on a silk pillowcase and refresh the curls with a spray bottle of water and a tiny bit of product every morning. You’re not restyling from scratch each day—just reviving what’s already there.
Worth knowing: Your curl might be wavier or tighter than your neighbor’s curl, which means the technique might look different on each person even though you’re following the same method. That’s exactly right and part of what makes curly hair beautiful.
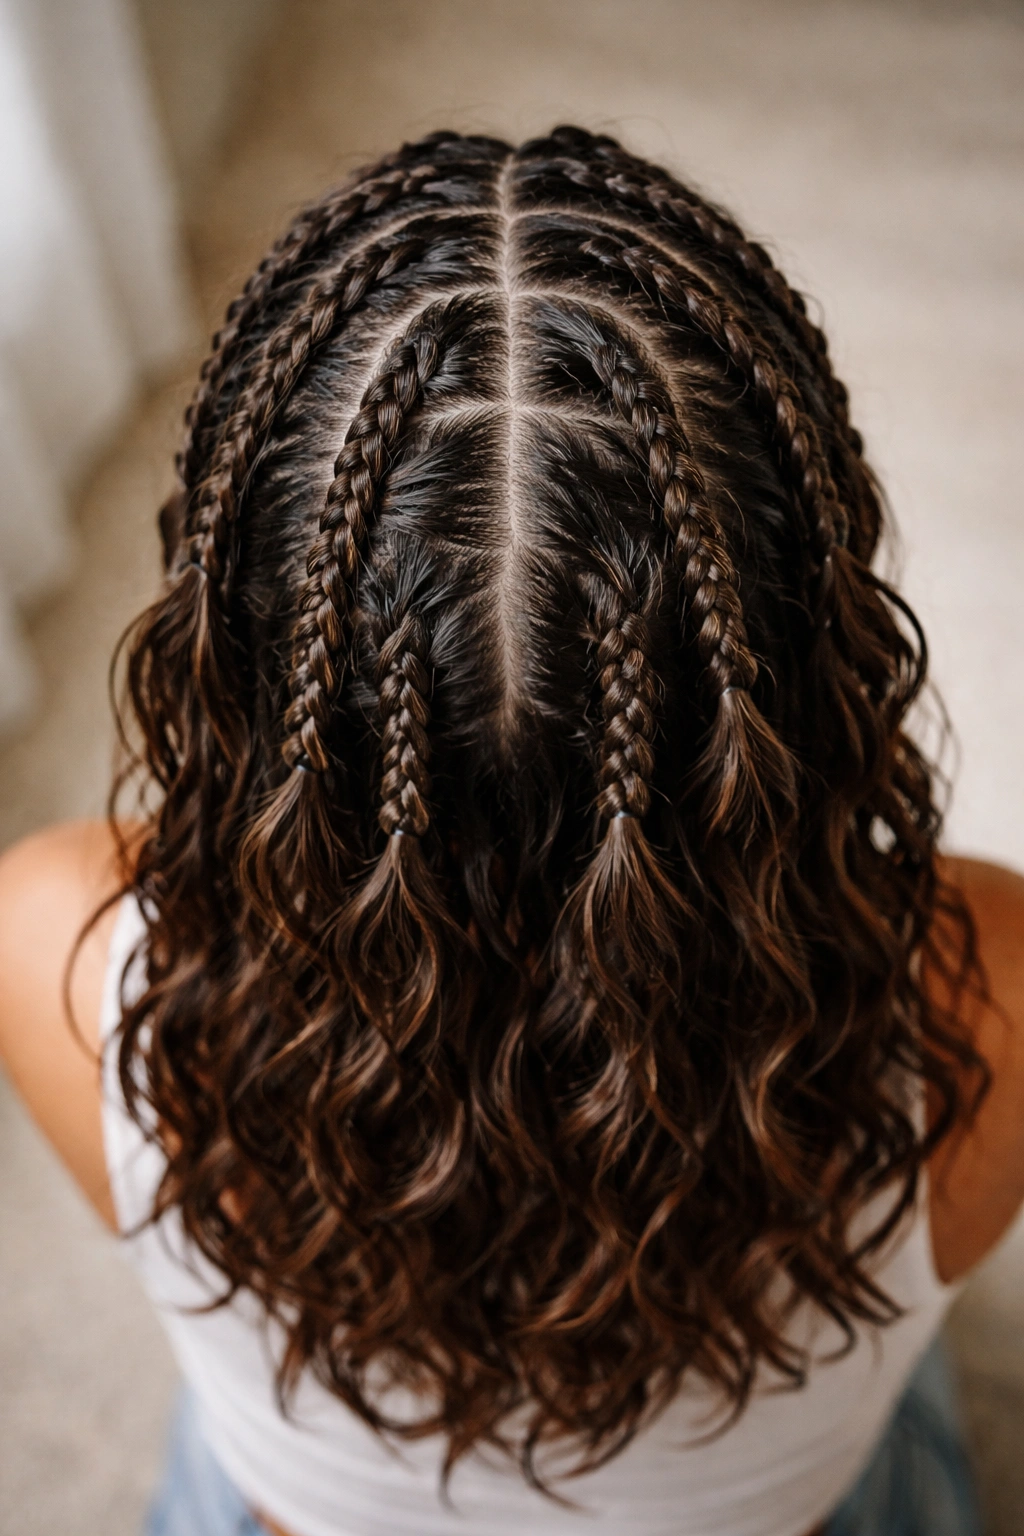
3. Bouncy Bantu Knots
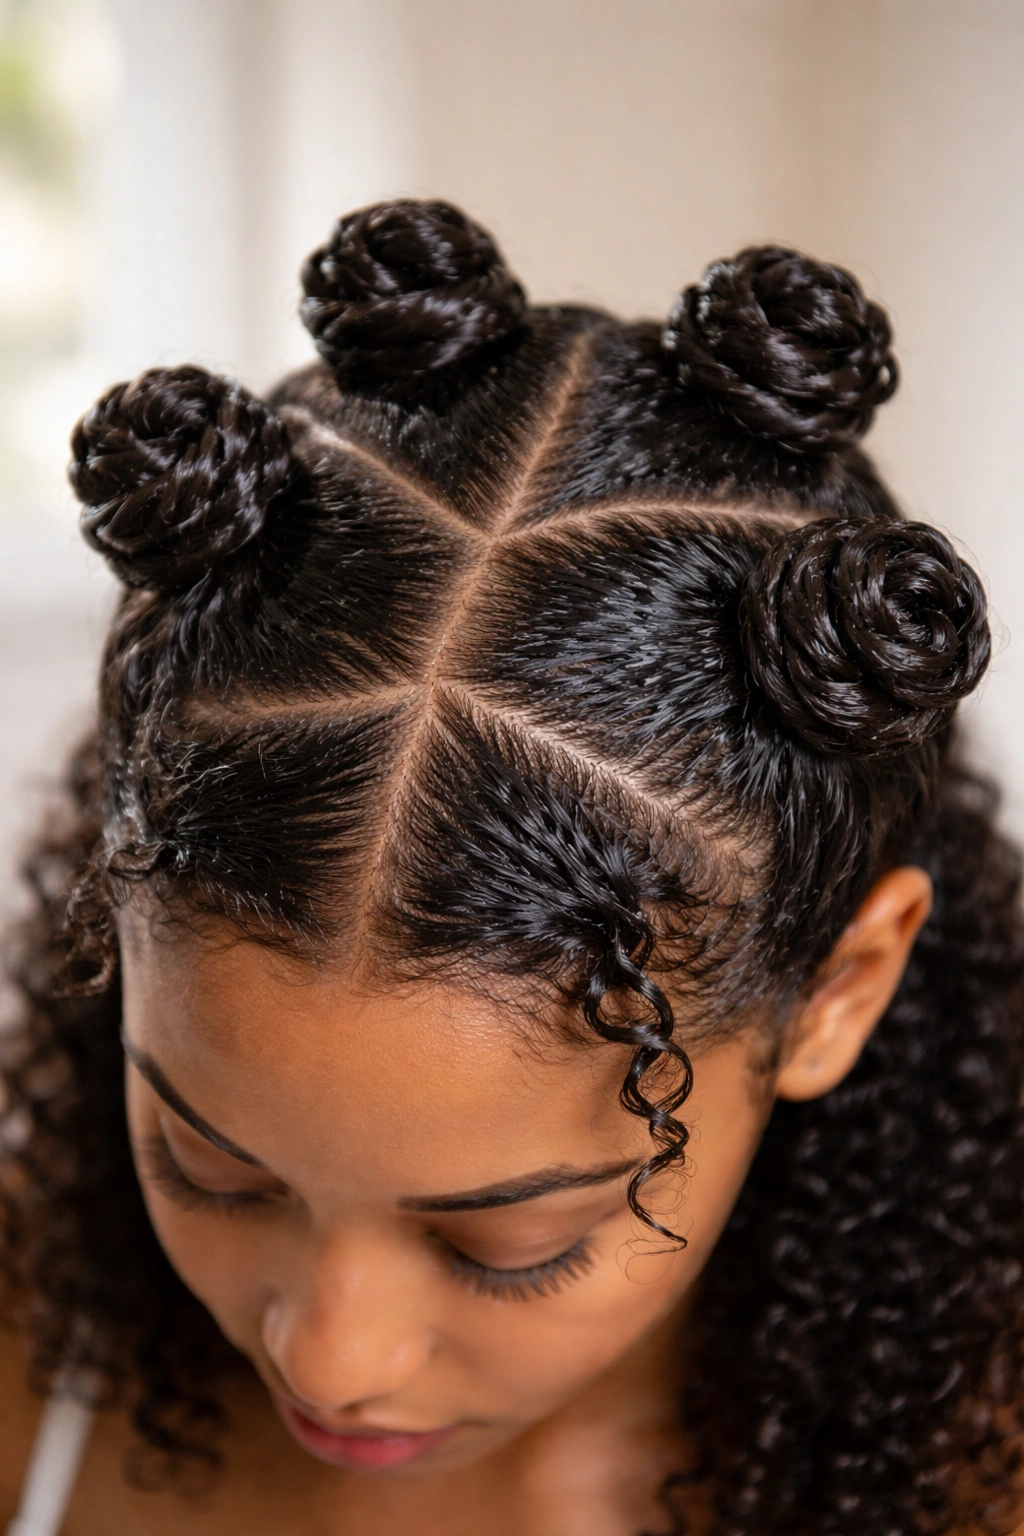
Bantu knots are a protective style and a styling tool rolled into one. You create them while your hair is damp, let them dry overnight, and then unravel them in the morning to reveal perfectly defined curls with extra bounce and volume.
Why Bantu Knots Work for Definition
Each knot concentrates moisture and product in a small section, which encourages the curl pattern to set with extra definition. As the hair dries inside the knot, it forms a tight coil. When you unravel it the next morning, you get a curl that’s bouncier and more defined than it would be with any other styling method. The style is also protective because you’re not manipulating your hair constantly—you’re just removing the knots and going.
Creating Bantu Knots That Hold
- Shampoo and apply a leave-in conditioner while hair is soaking wet
- Apply a styling gel or curl cream throughout your damp hair
- Section your hair into 4-8 main sections, depending on your curl pattern and desired result size
- Take a subsection within one main section and twist it tightly from root to tip
- Coil the twisted section into a knot at the base, securing the end with a bobby pin or by tucking it under the coils
- Repeat until your entire head is covered in knots
- Allow to dry completely—air-drying overnight is ideal, or use a diffuser for 30-45 minutes
- In the morning, gently unravel each knot by removing the pin and loosening the coil, then separate your curls with your fingers
The Curls You Get the Next Morning
When you remove the knots, you’ll have curls that are tighter, bouncier, and more defined than your natural curl pattern because they’ve been compressed and set overnight. The size of your curl depends on how many knots you create and how thick each section is—fewer, larger knots create big waves, while many small knots create tighter, smaller curls.
Pro tip: Bantu knots hold better if you knot them when your hair is about 60% dry rather than soaking wet. The hair has enough moisture to set but it’s firm enough that the knots won’t slip loose overnight.
4. Effortless Twist-Out Style
A twist-out is similar to a Bantu knot in concept—you create a structure while your hair is damp, let it set overnight, and release it in the morning—but it creates a softer, wave-like texture rather than tight curls.
How Twists Create Softer Definition
When you twist two sections of hair together, they curl around each other to form a rope-like strand. As that strand dries, it sets into a wave pattern. Unlike knots, which coil around themselves, twists create an intertwined texture that reads as waves or soft curls depending on your natural curl pattern and how many strands you twist together.
Creating a Twist-Out for Maximum Hold
- Shampoo and condition with a moisturizing formula, leaving hair quite wet
- Apply a leave-in conditioner and styling gel throughout damp hair
- Section your hair into 4-10 sections, depending on desired curl size
- Take a subsection and divide it in half, then twist one half around the other continuously from root to tip
- Secure the end with a small bobby pin or by wrapping it around itself
- Repeat for all sections, then allow to air-dry or use a diffuser
- Once completely dry, gently untwist each section starting from the ends and working toward the roots
- Use your fingers to separate the waves and create the final texture
Why Twist-Outs Look Effortlessly Styled
The texture from a twist-out has a softer, more tousled quality than defined curls. It looks intentional but relaxed, like you didn’t have to work too hard to achieve it. This makes it perfect for casual occasions, and it also requires very little daily maintenance—just a quick finger-separation and maybe a spritz of refresher spray in the morning.
Worth knowing: The longer you leave twists in before releasing them, the longer the curl or wave will last. Leaving them in for two full days will give you texture that lasts an entire week.
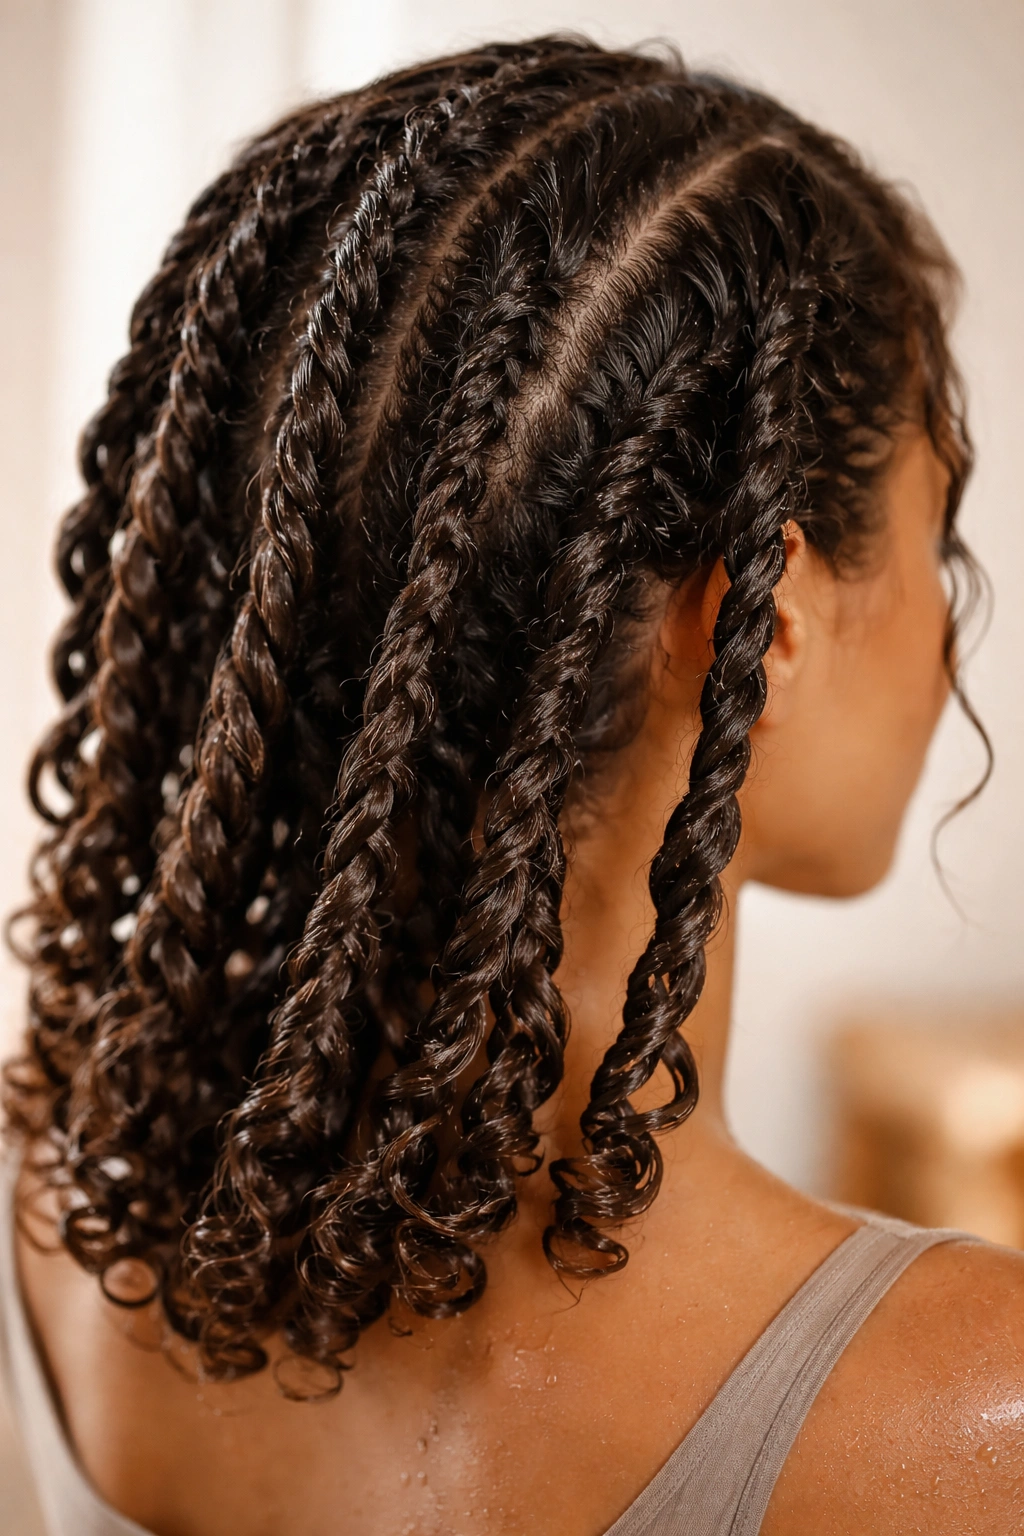
5. Playful Braid-Out Waves
A braid-out works on the same principle as a twist-out—you create a structure while your hair is damp, let it set, and release it for wavy texture. The difference is that braiding creates a different pattern, resulting in a more defined wave rather than the softer waves from twists.
The Texture You Get From Braiding
When you braid three or more strands together, the interlocking pattern creates waves with a specific shape and definition. The width of the braid determines the size of the wave—smaller, tighter braids create more wave definition, while loose, chunky braids create bigger, looser waves.
How to Create a Long-Lasting Braid-Out
- Shampoo and deeply condition, leaving your hair very wet
- Apply a leave-in conditioner and a light gel or mousse for hold
- Divide damp hair into 3-8 sections, depending on how many waves you want
- Take one section and braid it tightly from root to tip, securing the end with a small elastic or bobby pin
- Repeat for all sections, then allow to air-dry completely—overnight is ideal
- The next day, gently unravel each braid by starting at the ends and slowly loosening the braid as you work toward your roots
- Shake out your waves and use your fingers to separate them for maximum volume
Braid-Out Texture and Longevity
The waves from a braid-out have crisp definition for the first few days and gradually soften into looser waves over time. This is actually a feature, not a bug—it means you have multiple looks from one styling session. Day one has tight waves, day two has softer waves, and by day three or four, you have loose, beachy texture that’s still clearly styled but more relaxed.
Pro tip: Slightly damp hair holds braids better than soaking-wet hair, so if your braids keep slipping loose, let your hair air-dry for 30 minutes after applying products before you start braiding.
6. Voluminous High Curly Ponytail
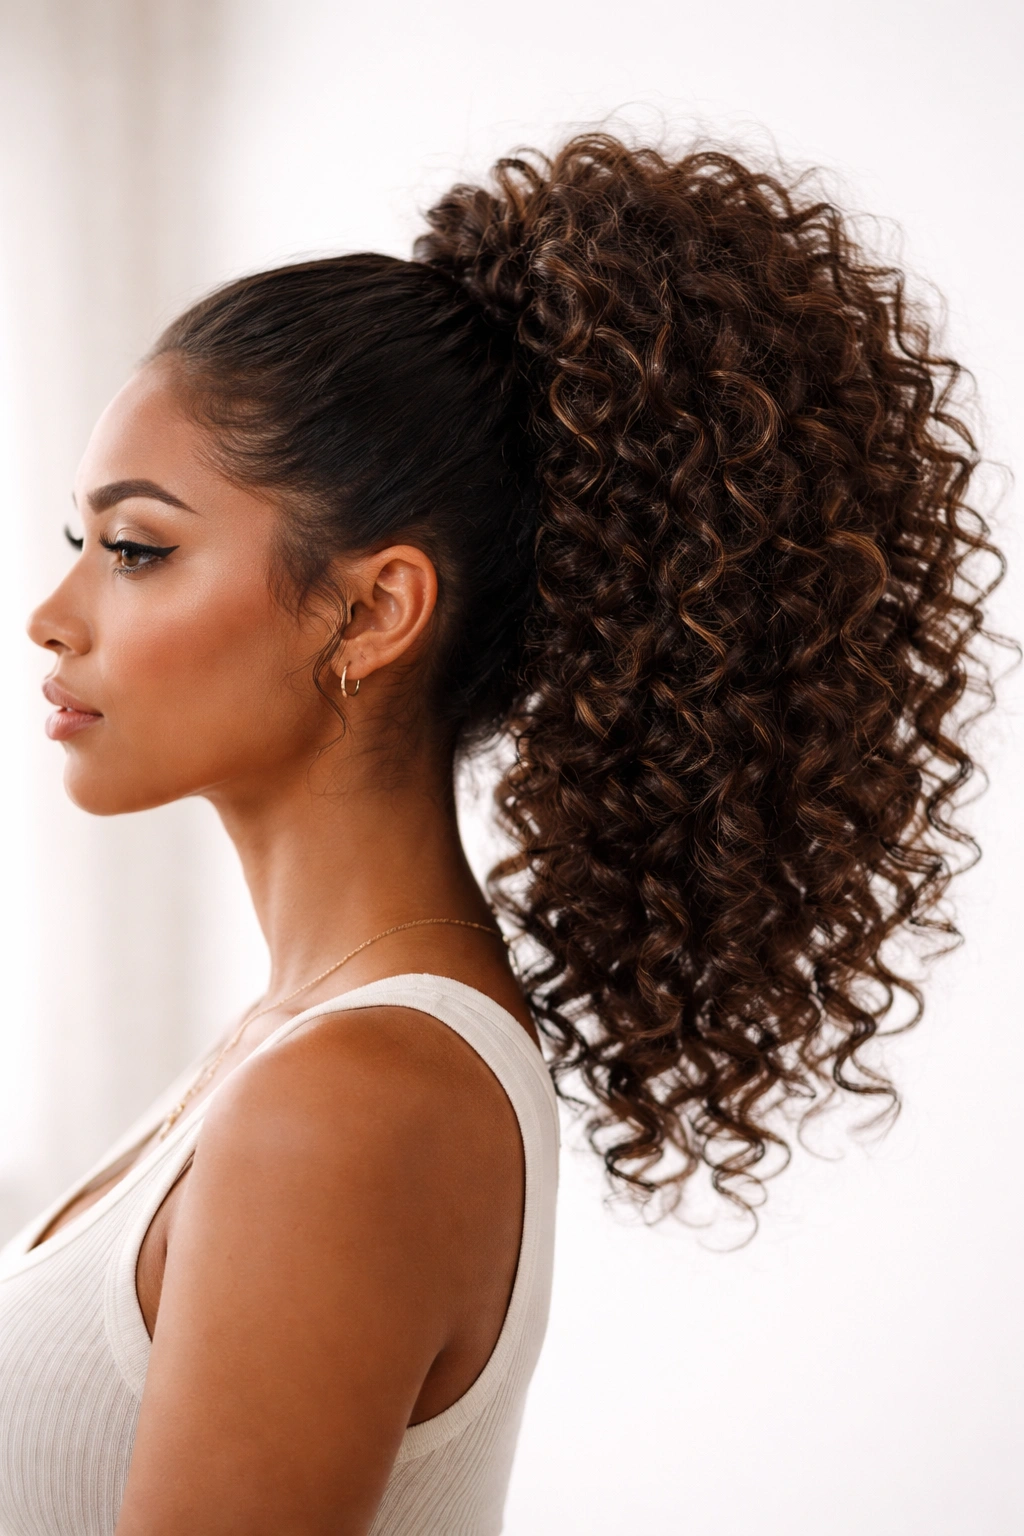
A high ponytail instantly looks polished and put-together, and when you do it with your natural curls at the crown of your head, it creates maximum volume and drama. This style is perfect for workouts, work events, or any time you want your curls out of your face while still looking intentional.
Building Volume at the Crown
The trick to a voluminous high ponytail with curly hair is twofold: first, use texture-building products and techniques to maximize volume before you tie it up, and second, position the ponytail at the very crown rather than pulling it tight against your head.
Creating Your High Curly Ponytail
- Start with curls that have already been styled—defined curls, a wash-and-go, or even day-old curls work perfectly here
- If you want extra volume, flip your head upside down and spray some volumizing spray or dry shampoo into your roots
- Flip back up and use your fingers to gently tease the crown area to build height
- Use a large, loose elastic to gather all your hair into a high ponytail at the crown—don’t pull too tightly or you’ll flatten the volume you just created
- Take a small section from the ponytail and wrap it around the base of the elastic to hide it
- Let your curls flow down from the ponytail, and gently arrange them so they frame your face if desired
- Use bobby pins to secure any flyaways
Why This Works for All Curl Types
A high ponytail works whether your curls are tight coils or loose waves because you’re not trying to force your curls into a sleek, straight style. You’re just gathering them and letting them do their thing. The height at the crown is what creates the polished, intentional look.
Worth knowing: A silk or satin elastic is gentler on curly hair than regular rubber elastics, which can cause breakage and frizz.
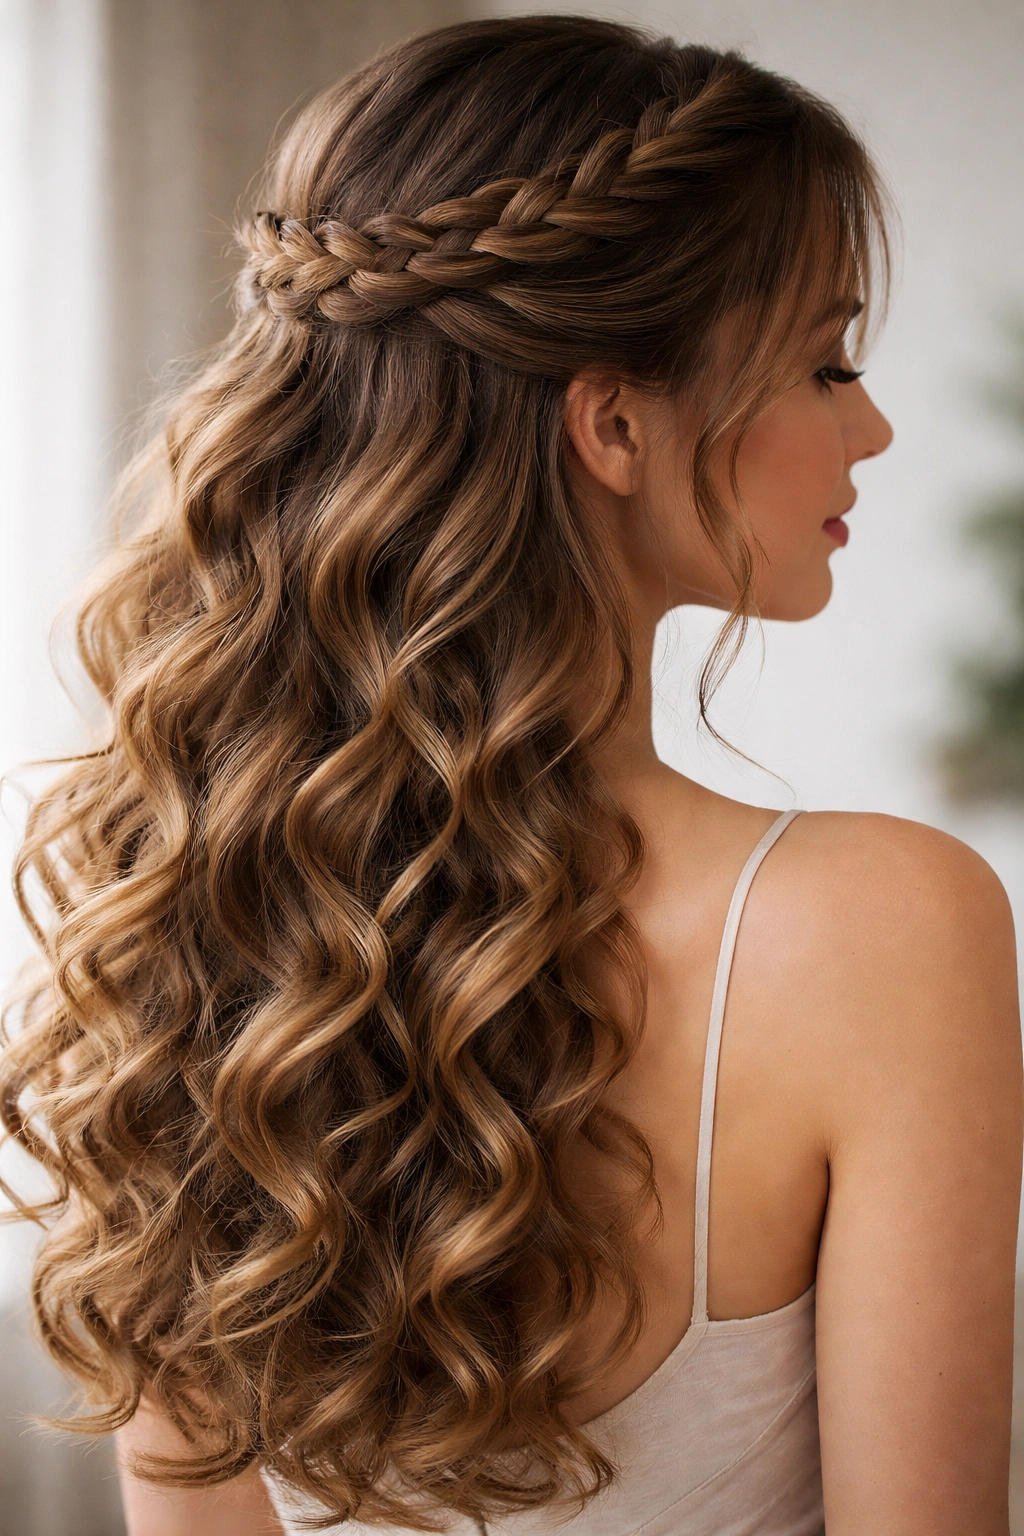
7. Romantic Half-Up Half-Down Style
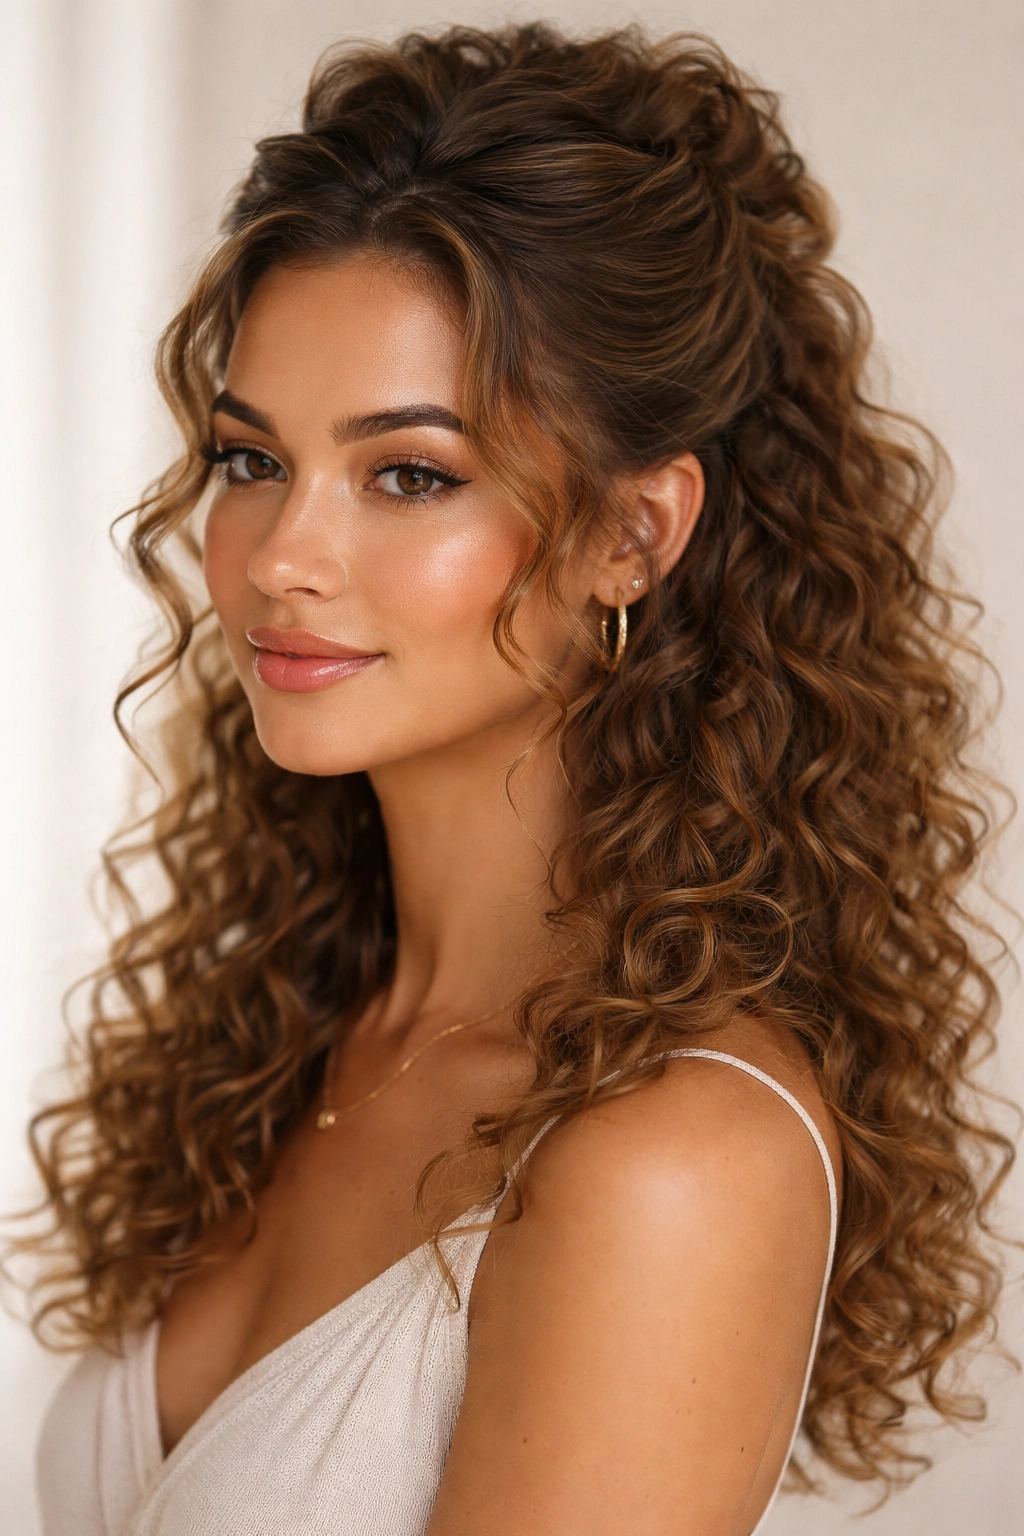
A half-up half-down style is the perfect middle ground—you get your hair partially off your face while still showing off your curls in their full glory. This style looks elegant for dressier occasions but is casual enough for everyday wear.
Creating Definition in Your Half-Up Section
The key to making a half-up half-down style look intentional rather than accidental is to create clear definition and shape in the section you’re pulling up, while letting the bottom curls be the focal point.
How to Style Your Half-Up Curls
- Start with curly hair that’s already been styled with definition—fresh curls or day-old curls both work
- Create a deep side part if you want to add drama, or a center part for a more symmetrical look
- Take a section from each side of your head at about ear level, and gently pull these sections back toward the back of your head
- Gather both sections at the crown or slightly lower, depending on your preference
- Use a decorative clip, elastic, or hair stick to secure the sections together
- Leave the back section of curls down and flowing
- Gently pull and separate the curls in both the up section and the down section to create movement and prevent a flat or stringy appearance
Styling Variations for Different Occasions
For a more formal look, you can add a braid to one or both of the sections you’re pulling up, or twist them before securing. For a casual look, just pull the sections back and secure with a clip without any twists or braids. The versatility is part of what makes this style so wearable.
Pro tip: Use a clip or decorative hair stick rather than an elastic if you want to avoid creating a crimp line in your curls. The clip holds the style while still allowing the curls to move freely.
8. Protective Pineapple Updo for Sleeping
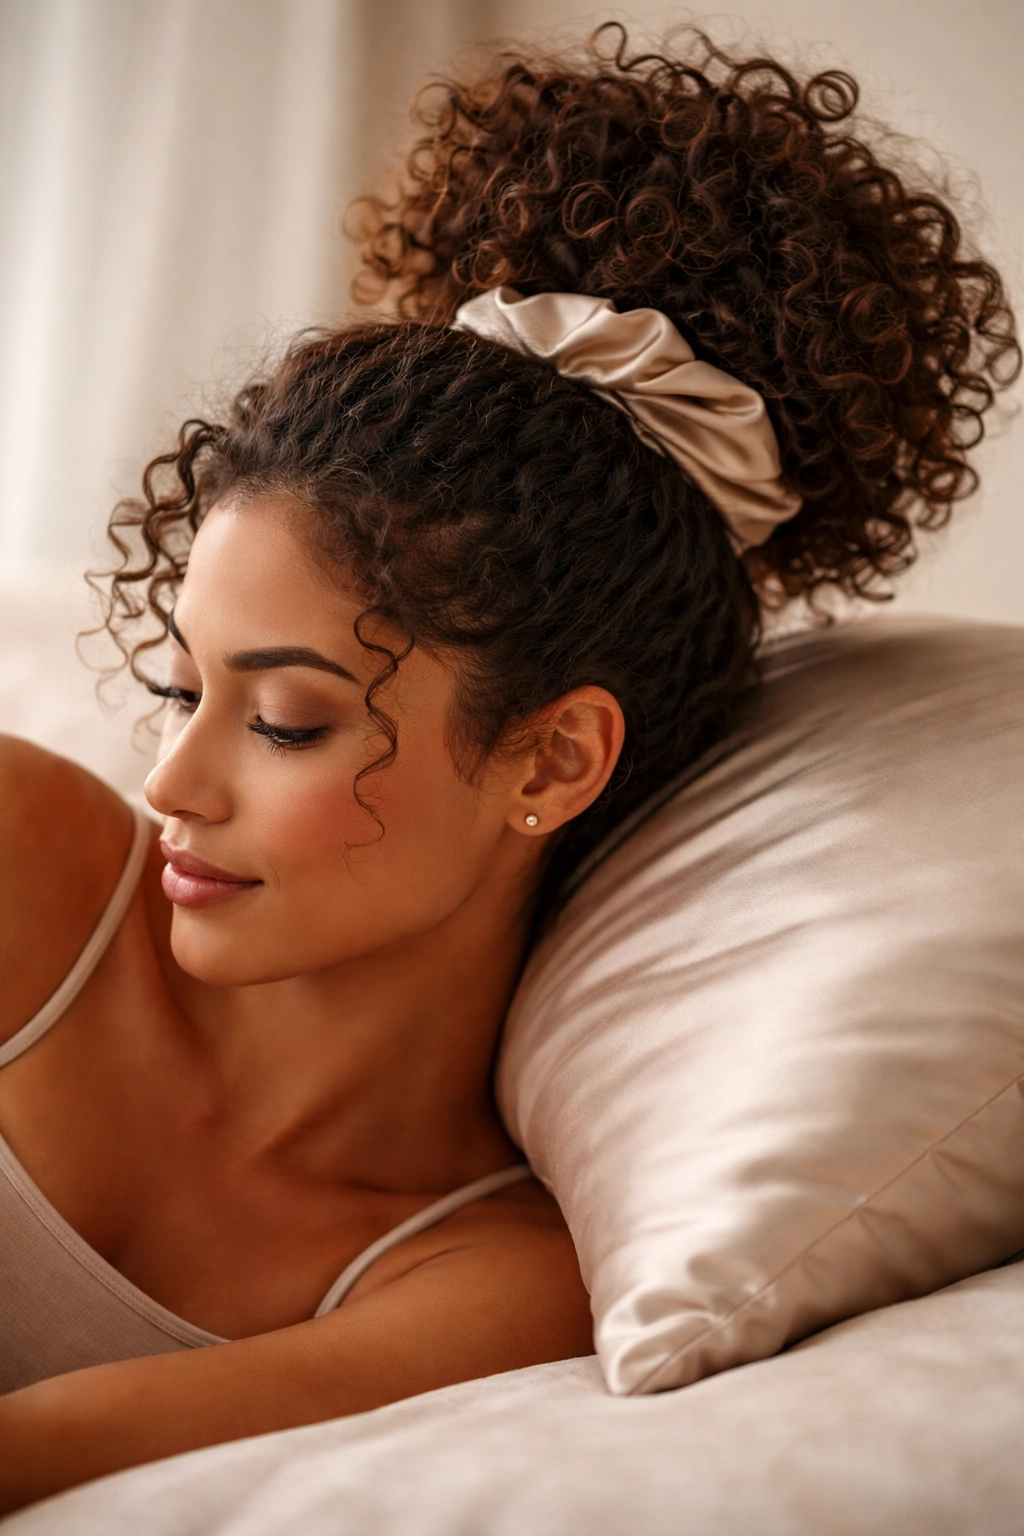
A pineapple updo is how many curly-haired people protect their curls while sleeping. You gather your curls into a high, loose ponytail or bun on top of your head using a silk scarf or a soft elastic, which prevents them from getting crushed against the pillow while you sleep. The result is curls that are just as bouncy and defined in the morning as they were the night before.
Why This Technique Preserves Curl Definition
When your curls are loose and free against a cotton pillowcase, they get flattened and creased by the friction. When you gather them into a pineapple and secure them with a soft scrap of silk or a satin pillowcase underneath, they maintain their shape and definition overnight. It’s protective styling that doesn’t require any commitment—you just release it in the morning.
Creating Your Nighttime Pineapple
- Before bed, gather all your curls into a very loose, high ponytail at the crown of your head
- Use a soft silk or satin scrunchie or elastic—nothing that will create creases or cause breakage
- The ponytail should be loose enough that you can fit two or three fingers between the elastic and your scalp
- If you’re concerned about creasing, you can secure the ponytail with a large hair clip instead of an elastic
- Alternatively, you can loosely gather your curls inside a silk or satin bonnet or wrap, which protects all of your hair at once
- Sleep on a silk or satin pillowcase for extra protection
Morning Refresh and Release
In the morning, simply remove the elastic or clip and shake out your curls. They should fall back into their previous style with barely any frizz. If they need a quick refresh, use a spray bottle to lightly mist them with water or a curl refresher spray, then scrunch gently with your hands to reactivate the curl pattern.
Worth knowing: The pineapple works best when your curls are already 2-3 days old because fresher curls are more prone to being disrupted by sleeping. Very fresh curls might lose some definition if you crush them against a pillow, even in a pineapple.
9. Playful Curly Bob with Lots of Movement
A curly bob is a cut rather than a styling technique, but once you have one, styling it is refreshingly simple. A good curly bob cut embraces your natural curl pattern and creates a bouncy, textured shape that looks great with minimal styling.
What Makes a Good Curly Bob
The best curly bobs are cut with lots of layers and texture, which creates movement and prevents the style from looking heavy or blunt. A stylist who understands curly hair will cut your bob to work with your curl pattern, so when it dries, it naturally falls into a great shape without you having to do much.
Styling Your Curly Bob for Maximum Movement
- Shampoo and condition thoroughly, focusing on hydration
- Apply a leave-in conditioner and curl cream or gel while hair is soaking wet
- Use your fingers to scrunch the product into your hair, encouraging your curl pattern to form
- Allow to air-dry or use a diffuser, gently scrunching every few minutes to keep the shape defined and bouncy
- Once completely dry, you can gently flip your head forward and shake out the curls for extra volume at the roots
- Use your fingers to separate any clumps and create movement
Why Bobs Work for Curly Hair
A bob keeps your hair at a length where the weight doesn’t pull down your curls, and the layers create movement rather than a flat, heavy look. Once it’s cut correctly, your daily styling is just products, scrunching, and letting it dry.
Pro tip: Find a stylist who specializes in curly hair cuts. They’ll know exactly how to cut your specific curl pattern so that when it’s dry, it falls into a gorgeous shape without requiring any blow-drying or heat styling.
10. Sleek Halo Braid With Cascading Curls
A halo braid creates a romantic, ethereal look—you braid a section of hair around your head in a crown shape, and let your curls cascade down from underneath. This style is elegant enough for special occasions but easy enough to create in just a few minutes.
Creating a Perfect Halo With Curly Hair
The halo braid works best when the braid is smooth and defined while the curls underneath are bouncy and free. This contrast between the sleek braid and the textured curls is what makes the style so visually interesting.
Step-by-Step Halo Braid Instructions
- Start with curls that are already defined—fresh curls from styling or day-old curls both work perfectly
- Take a section of hair from one side of your head near the temple
- Begin a three-strand braid, taking thin strands from the outside and incorporating them into the braid as you work around your head
- Continue the braid across the back of your head, gradually bringing more hair into the braid
- Finish the braid on the opposite side of your head from where you started
- Secure the end of the braid with a bobby pin tucked into the curl underneath
- Gently pull and loosen the braid slightly to make it look fuller and more romantic
- Let your curls hang loose underneath the braid
Making Your Halo Look Intentional
The key is leaving the braid slightly loose and textured rather than too tight and polished. A slightly undone halo braid looks more romantic and modern than a super-tight one. You can also add small flowers or decorative pins along the braid if you want extra visual interest.
Worth knowing: A halo braid holds best when your hair is 1-2 days old rather than freshly styled, because brand-new curls are bouncier and might fight against the braid structure.
11. Textured Spiral Curls for Maximum Definition
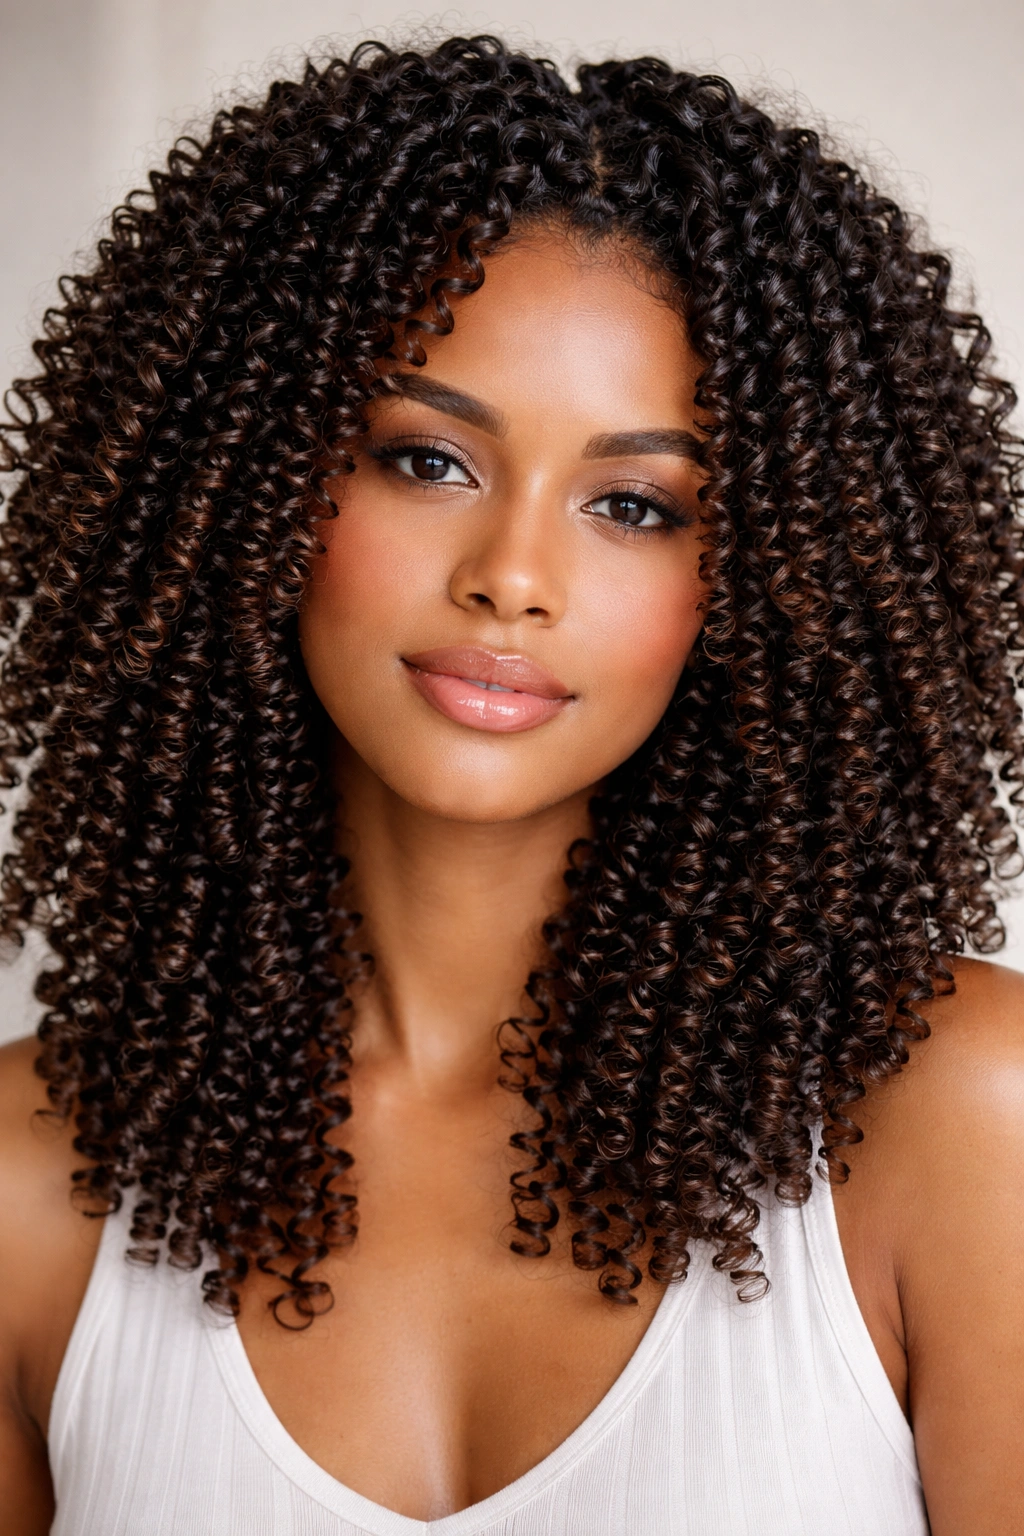
Spiral curls are the tightest, most defined curl style you can create without heat. They’re perfect when you want your curls to look polished, bouncy, and undeniably curly rather than wavy or loose.
The Technique Behind Perfect Spirals
Spiral curls come from coiling sections of damp hair around a cylinder—whether that’s your finger, a curling rod, a flexi-rod, or even a pencil. As the hair dries coiled around the cylinder, it sets into a tight, spring-like spiral. This method works on all curl types, but it’s particularly effective for naturally straight or wavy hair that doesn’t curl on its own.
Creating Spiral Curls From Start to Finish
- Shampoo and deeply condition, leaving hair very wet
- Apply a curl cream or gel throughout damp hair
- Take a small section of hair and wrap it around a rod, curling rod, or even a pencil from the ends up to the roots
- Secure the rod in place with a bobby pin or the built-in fastener
- Repeat this process for all of your hair, using as many rods as you have
- Allow to air-dry completely—this can take 4-12 hours depending on your hair thickness and the size of your sections
- Once completely dry, gently unwind each rod by carefully unwrapping the curled hair
- Don’t pull the hair straight—just let the spiral curl stay coiled as you release it from the rod
- Gently separate the curls with your fingers if they’ve fused together
How Long Spiral Curls Last
Spiral curls can last 5-7 days if you protect them while sleeping with a pineapple updo or bonnet. The tightness means they hold their shape longer than loosely defined curls, which is why this method is so popular for special events.
Pro tip: If you don’t have curling rods, you can use perm rods from a beauty supply store, or even roll hair around a regular pencil and secure it with a bobby pin. The size of the cylinder determines the spiral size.
12. Beachy Loose Waves With Effortless Movement
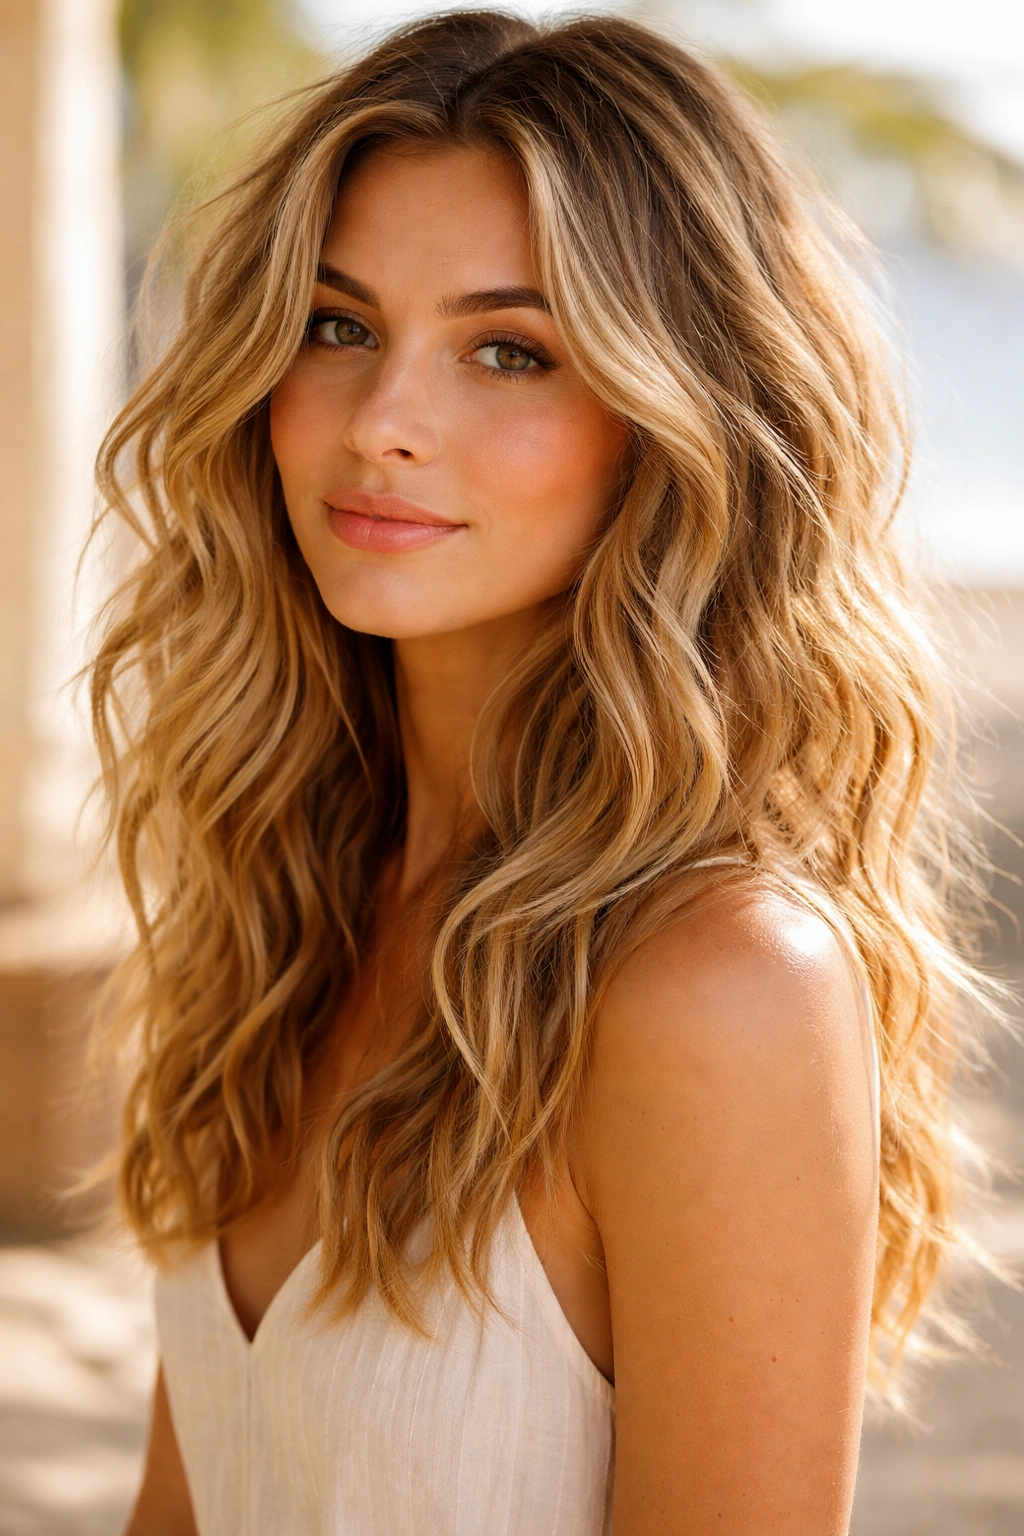
Beachy waves are the opposite of tight spirals—they’re loose, soft, and undone-looking while still being intentionally styled. This is the perfect style when you want to look like you just came from the beach without any visible effort.
Creating Effortless-Looking Waves
Ironically, effortless-looking waves do require some intention to create, but once they’re done, they genuinely require zero daily maintenance. The key is using lighter styling products that create shape without crunch, and using a styling method that creates movement without definition.
How to Create Your Beachy Waves
- Shampoo and condition with hydrating formulas, leaving your hair quite wet
- Apply a lightweight leave-in conditioner or wave cream—something that provides moisture and hold without weighing your hair down
- Use your fingers to loosely separate your hair into large sections, maybe 4-6 inches wide
- Gently scrunch the product into each section, encouraging a wave rather than a curl
- If you want more definition, you can loosely twist each section rather than just scrunching
- Allow to air-dry completely or use a diffuser on low speed
- Once dry, you should have soft waves rather than defined curls
- Use your fingers to separate and fluff the waves, creating that tousled, just-back-from-the-beach look
Making Your Waves Look Fresh Every Day
Beachy waves hold well for 3-4 days and actually look better as they age because they get progressively softer. Each morning, just spritz with a refresher spray and scrunch gently with your hands. The waves will reactivate and look intentional without any restyling.
Worth knowing: Sea salt spray is a classic product for creating beachy waves, but it can be drying. If you use it, always follow with a hydrating leave-in conditioner to prevent your curls from becoming brittle.
Final Thoughts
The beauty of having curly hair is that you have endless styling options that celebrate your natural texture rather than fight against it. Whether you’re drawn to minimal-effort wash-and-gos or more intricate styles like halos and spirals, the common thread is that all of these styles work with your curls, not against them. The right style for today might depend on how much time you have, what occasion you’re dressing for, or simply what your hair is in the mood for.
The real secret to making any of these styles work is investing in good products that hydrate and define your curls, and finding a curl-specialist stylist if you need a cut that enhances your natural pattern. Once you have those pieces in place, these styles are genuinely easy to create and maintain. Most of them can be prepped in 15-30 minutes, and many will last for days without any restyling required.
Start by trying one or two styles that appeal to you, and don’t worry if the first attempt isn’t perfect. Each time you style your hair, you’ll develop a better feel for how your specific curls respond to products, techniques, and manipulation. Your curls are unique to you—what works beautifully for someone else might need tweaking to work perfectly for your hair. That’s not a problem; that’s just part of the personalization process that makes your styling unique.