Wavy hair can feel like the Goldilocks zone of professional styling — textured enough to look intentional and polished, but relaxed enough that you don’t seem like you spent three hours at a salon before your 9 a.m. meeting. The challenge is that not every wavy hairstyle translates well to a work environment. Loose, beachy waves that look fantastic on a weekend can read as undone in a formal office setting. Conversely, many workplace hairstyles feel stiff and require daily heat styling that damages your hair over time.
The good news? There’s a sweet spot where wavy hairstyles for work deliver both professionalism and wearability. These styles look intentional and put-together without requiring an hour of blow-drying every morning or making you feel restricted during your workday. The best work-appropriate wavy styles tend to combine strategic placement — keeping some waves controlled while allowing others to flow — with smart styling techniques that read as polished rather than undone.
What makes a wavy hairstyle suitable for work comes down to a few key principles: definition and control in the crown and front, intentional texture rather than accidental frizz, and a silhouette that photographs well and holds through a full day of movement and meetings. Whether your workplace leans formal, business casual, or creative, there’s a wavy style that hits the right balance. Let’s explore eight specific wavy hairstyles that work beautifully in professional settings while still celebrating the texture and movement your hair naturally has.
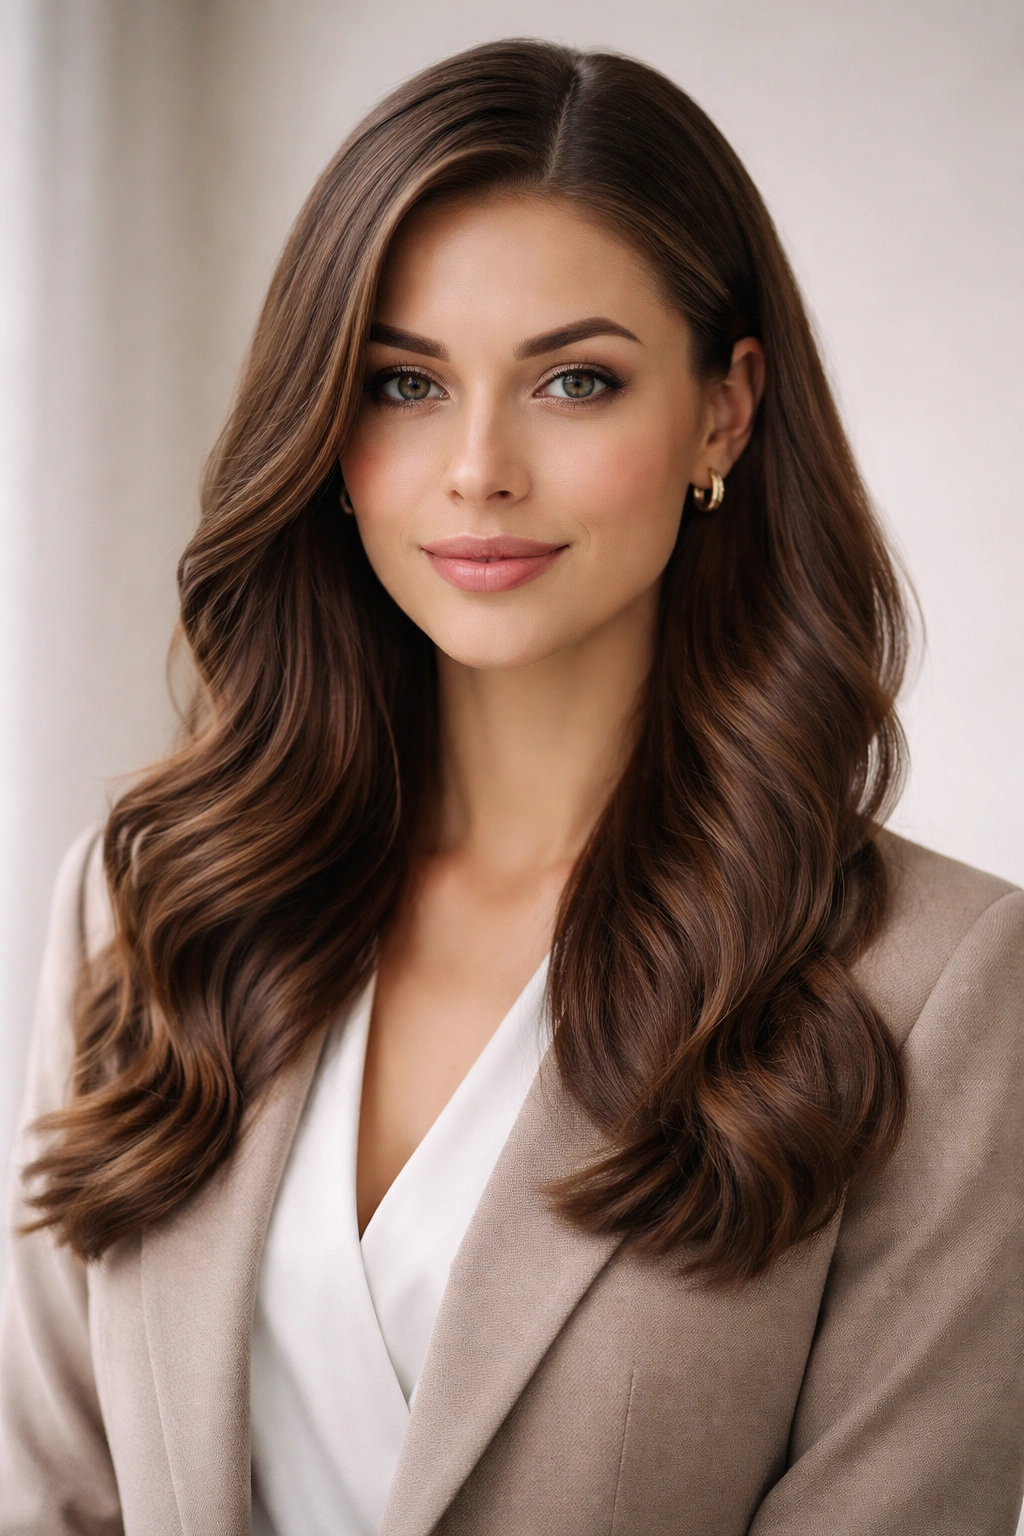
1. Soft Waves with a Half-Up Style
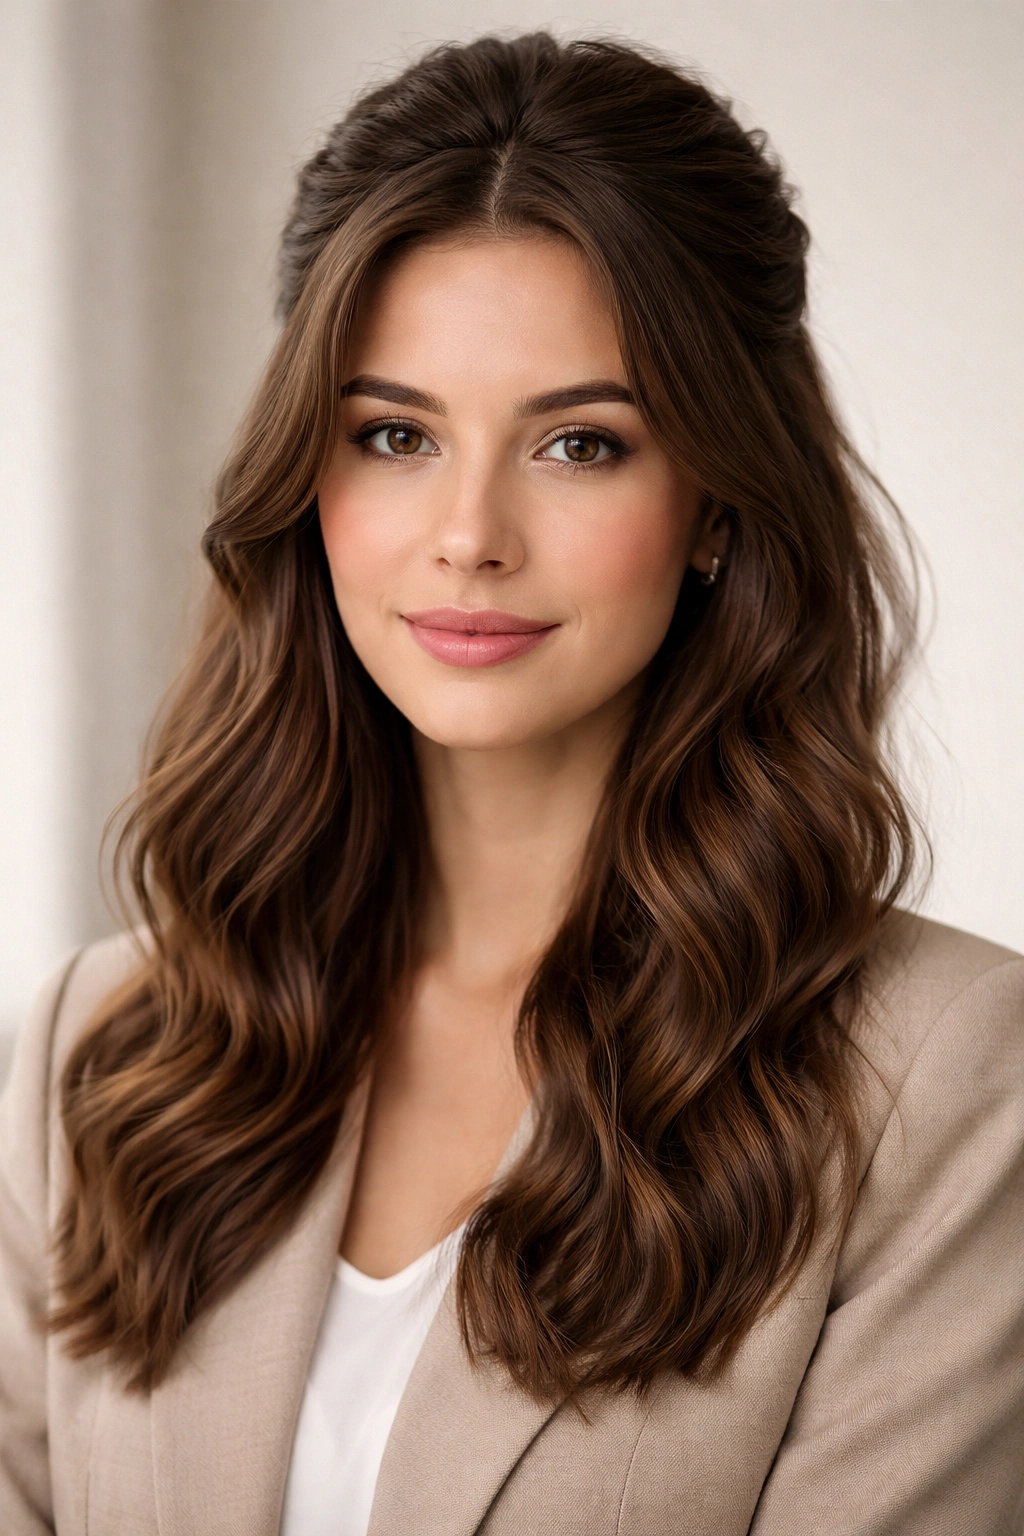
This is the workhorse of professional wavy hairstyles because it solves a fundamental workplace challenge: keeping hair partially off your face while maintaining the softness and dimension of your waves. The half-up structure reads as intentional and polished, while the released waves at the back add movement without looking casual.
Why It Works in Professional Environments
The half-up silhouette is inherently formal — it’s been used in professional settings for decades. What elevates this version is that you’re not creating tight, structured waves. Instead, you’re working with soft, piece-y waves that start around the crown and continue down the length. This approach requires less heat styling than a full blowout, which means your hair stays healthier, and paradoxically, healthier hair looks more polished at work. The face is slightly framed by soft movement rather than being completely pulled back, which photographs better in video calls and professional headshots.
How to Create This Style
Start with slightly damp hair and apply a lightweight texturizing spray from roots to ends. This product creates grip without crunchiness, making it easier to shape waves and hold the half-up section. Blow-dry your hair using a round brush, working in 2-inch sections from root to end to create smooth foundations. As you work, rotate the brush away from your face to encourage a subtle outward wave pattern.
Once your base is dry, take a section from temple to temple at about ear height and gather it into a small ponytail at the back of your crown. Don’t pull it perfectly tight — a slightly loose gathering looks intentional rather than severe. Secure it with a thin elastic, then gently pull and tease the gathered section to add subtle volume at the crown. Use a 1.5-inch curling iron to add soft waves throughout the rest of your hair, focusing on rotating the barrel away from your face and leaving the ends slightly undone rather than perfectly curled.
Tips for Maintaining This Look Through Your Workday
A texture spray used midday (yes, really) breathes new life into waves that have started to fall flat. Keep one in your desk drawer and lightly mist your waves before afternoon meetings. Avoid running your fingers through the half-up section, which loosens it over time — if you need to adjust it, use bobby pins tucked invisibly underneath to tighten the hold. The half-up style stays fresher longer than fully down waves because the gathered section doesn’t experience as much friction from moving or touching.
2. Sleek Low Ponytail with Textured Waves
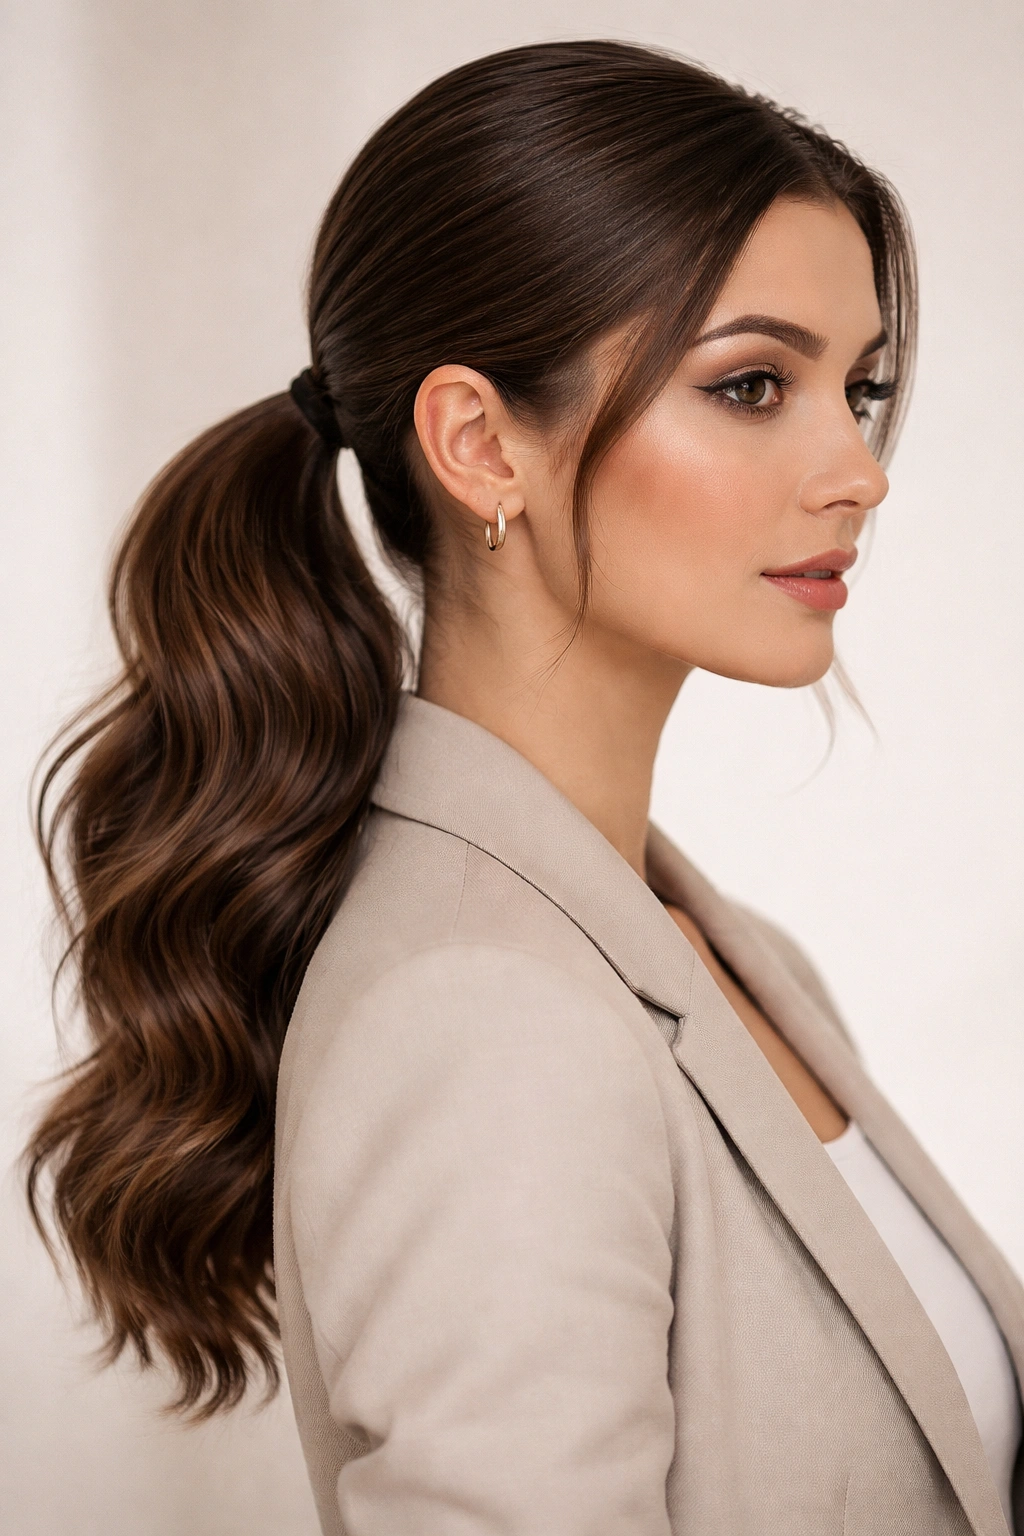
If your workplace demands clean lines and formality, this style bridges the gap between structured professionalism and the softness of waves. The ponytail itself is sleek and controlled, while the texture comes from how the waves are distributed through the tail itself — it’s polished but never severe.
The Professional Edge This Style Delivers
A low ponytail positioned at the nape of your neck automatically reads as formal and intentional in professional settings. The key difference here is that instead of making your ponytail hair completely smooth, you’re incorporating texture throughout the actual tail. This means you’re keeping the front and crown sleek (which reads professional) while still showing that your hair has movement and dimension (which prevents the look from feeling harsh).
This style photographs remarkably well in professional photos and video meetings because the sleekness at the crown photographs cleanly, and the texture in the tail doesn’t look frizzy — it looks deliberate. You’re essentially creating dimension without any hair loose around your face.
Creating the Sleek Foundation with Textured Ends
Begin with damp hair and apply a smoothing serum from mid-length to ends. Blow-dry your hair straight using a paddle brush, paying special attention to smoothing down the cuticles as you work from root to end. This creates the sleek foundation that defines the professional aspect of the style.
Once your hair is completely dry and smooth, gather it low at the nape of your neck — not at the very base of your skull, but lower, where you could fit two fingers between the ponytail and your hairline. Use a small, strong elastic designed for ponytails (avoid loose hair ties that don’t grip). Now, take a 1.25-inch curling iron and create soft waves throughout the entire tail, working in 2-inch sections. You want waves that are defined but not kinky — aim for a gentle S-curve rather than a tight coil. Leave the very ends slightly wavy rather than curled all the way through.
Professional Details That Elevate This Look
Take a small 1-inch section from the back of your ponytail, wrap it around the elastic to conceal it, and pin it underneath. This hidden detail immediately makes the ponytail look more refined and intentional. A light hairspray applied to the sleek front sections keeps flyaways controlled through your entire workday. If you have naturally fine hair, tease gently at the crown before gathering the ponytail — this creates a slightly fuller silhouette that photographs better and feels more balanced.
3. Deep Side Part with Loose Waves
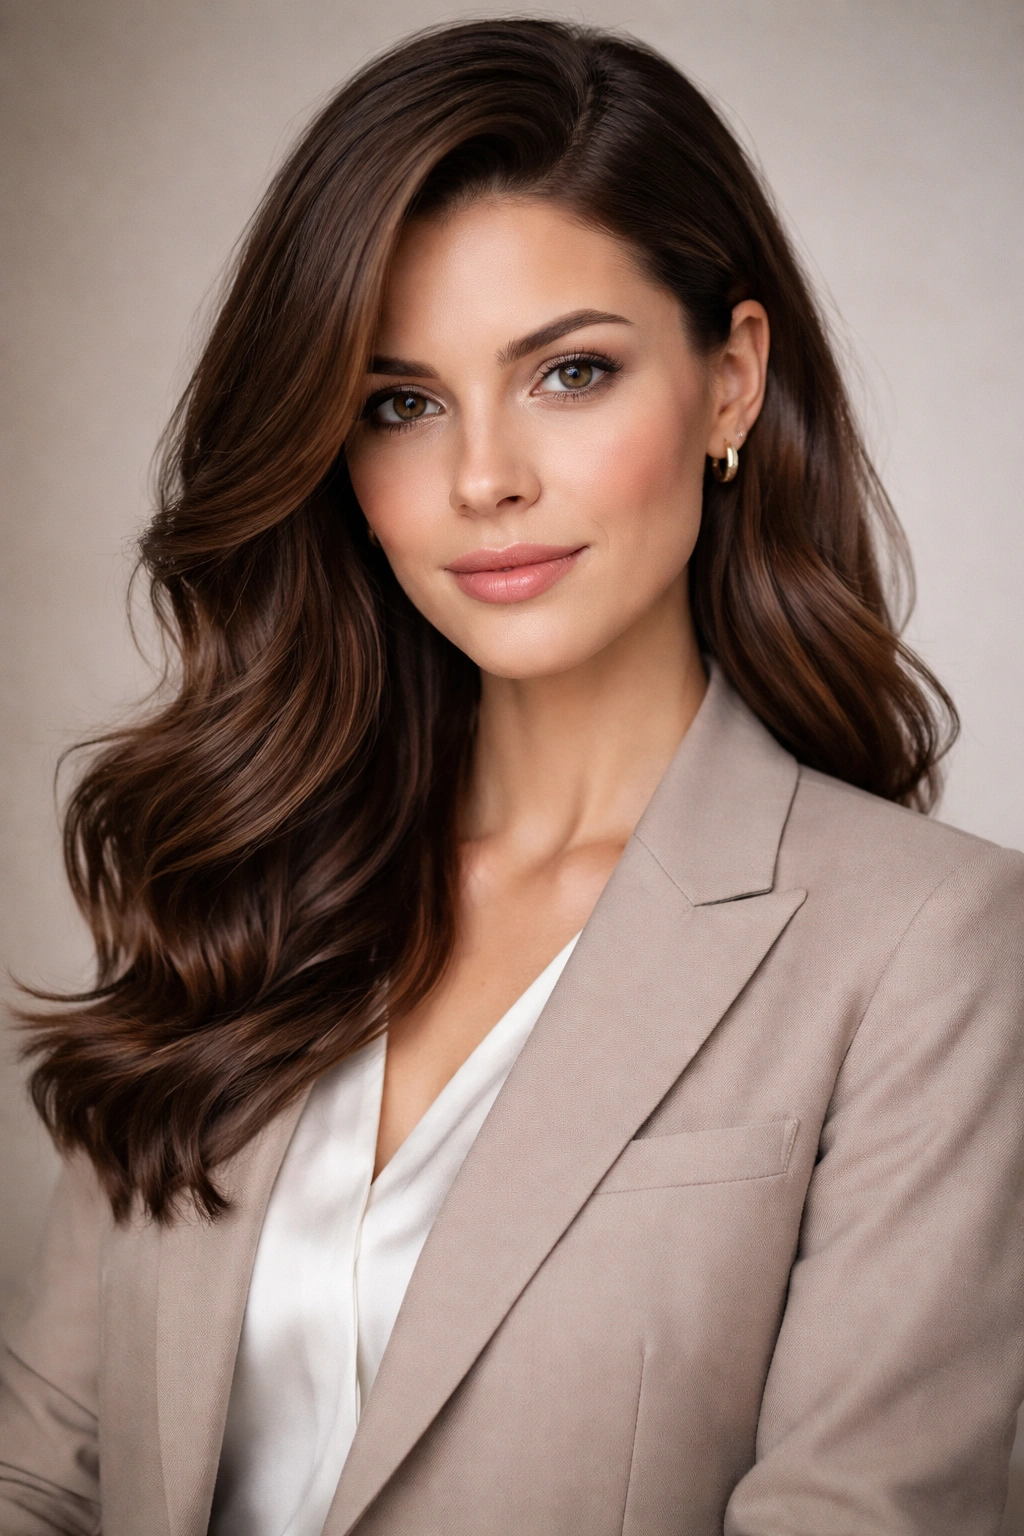
This style works exceptionally well if you want wavy texture visible throughout your entire look while maintaining clear professional polish. The deep side part creates an asymmetrical, intentional silhouette that feels modern and put-together, while loose waves add movement without sacrificing formality.
Why a Deep Side Part Commands Attention in Professional Settings
A deep side part (positioned 2-3 inches from the center of your head) instantly modernizes any hairstyle and creates dimension. One side of your face is slightly more visible, which creates visual balance and interest. When you pair this with intentional waves, the style reads as contemporary and deliberate rather than accidental or undone.
This particular style works beautifully for people with rectangular, square, or oval face shapes because the asymmetry softens angular features. The loose waves add softness to the structured element of the part, creating a balanced visual composition that translates well in professional photos and in-person meetings.
Technique for Creating Definition and Movement
Start by blow-drying your hair straight with a paddle brush, establishing your deep side part early in the process. This trains your hair to sit in that pattern and makes the final result look more intentional. Once your hair is completely dry, use a 1.5-inch curling iron to create loose waves, starting at the crown and working down.
The key difference here is the wave direction: on the side of the deep part that has more hair, curl the waves away from your face. On the smaller side, curl them toward your face. This creates visual balance and frames your face beautifully. Don’t curl all the way to the ends — stop about 2-3 inches from the tips, leaving the ends with a slight wave rather than a defined curl. This modern, undone-at-the-ends approach feels intentional and professional rather than trying-too-hard.
Managing This Style When You’re Moving Around All Day
A flexible hold hairspray (not super-strong) keeps the waves defined while allowing your hair to move naturally when you turn your head in meetings. The deep side part, once established, tends to hold throughout the day naturally. If waves start dropping by afternoon, a dry texturizing spray revives them without making your hair feel stiff. This style generally holds better than fully loose waves because the part provides structure that anchors the overall look.
4. Braided Crown with Cascading Waves
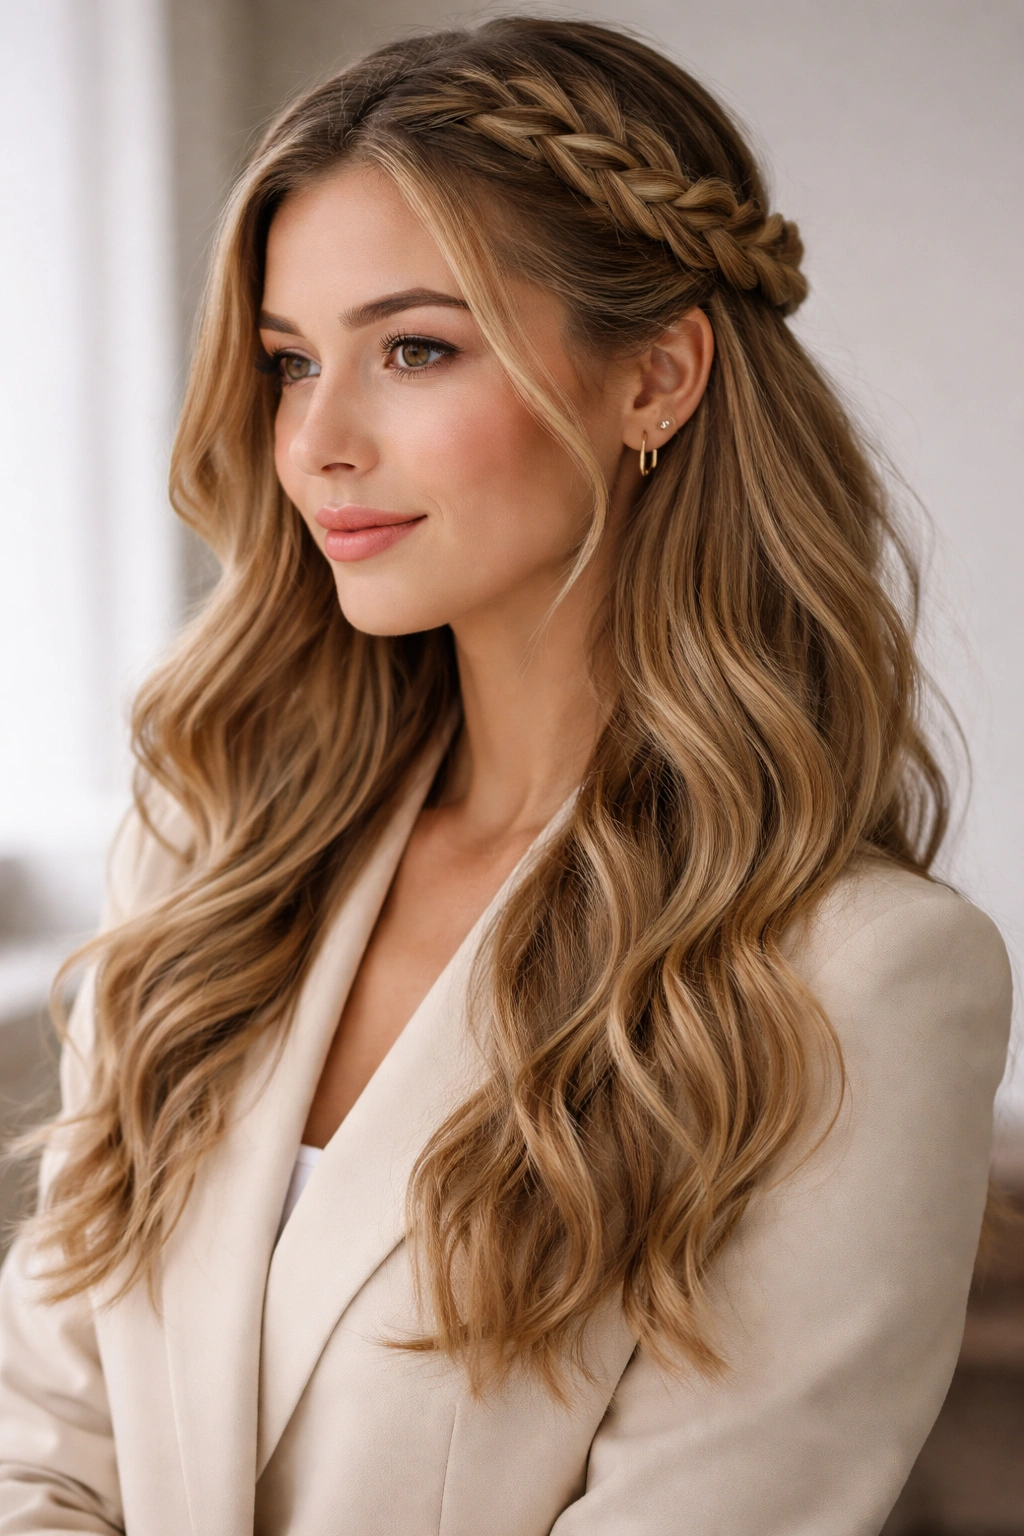
This style reads as intentional and artistic while remaining completely professional. A braid across the crown creates the perception of a structured updo, while the hair released below flows in soft waves. It’s the hairstyle equivalent of looking like you have everything together.
The Professional Psychology of Braided Detail
A visible braid creates the impression of effort and intention in a way that benefits you professionally. Interestingly, braids are formal enough for boardroom settings yet creative enough for casual workplaces. The key is keeping the braid itself neat and controlled while letting everything below it be soft and wavy. This balance makes you look polished without appearing rigid.
The braided crown also solves a practical problem: it keeps your hair partially off your face and neck, which means you’re less likely to fidget with it during the workday. Fidgeting with hair reads as nervous or distracted, while a contained braid allows you to feel put-together and move confidently.
Creating a Braid That Looks Professionally Polished
Start with hair that has a slight texture — either naturally wavy or textured with a spray. Blow-dry your hair straight first to create a smooth foundation, then apply a texturizing spray for grip. Take a section from one side of your head (starting near your temple) and begin a Dutch braid (braiding downward rather than upward) that travels across the back of your crown to the opposite side.
The braid should be relatively loose and relaxed rather than tight — tight braids read as severe in professional settings. As you braid, occasionally pull gently on the outer loops of the braid to make it slightly wider and more textured. This creates a more sophisticated, dimensional look than a tight braid.
Once you’ve braided across the crown, secure the end with a small elastic that matches your hair color. Now, take a curling iron and create soft waves throughout the hair released below the braid, curling away from your face and leaving the ends slightly undone. The contrast between the defined braid and the soft waves creates visual interest and professional polish.
Securing the Braid So It Lasts All Day
Use bobby pins tucked invisibly underneath the braid to secure it to the hair beneath, especially at the crown where the most movement occurs. A light hairspray applied to the braid itself (not the waves below) keeps flyaways controlled and the braid looking intentional. This style actually holds remarkably well because the braid provides structure that anchors the entire look. By evening, the waves may relax slightly, but the braid remains defined and polished.
5. Polished Wave Blowout with Straight Sections
This style is the ultimate professional wavy look because it combines structured straightness in the front with soft waves throughout the back and sides. It reads as extremely polished without requiring an elaborate styling routine, making it ideal for people who need to look professional but don’t have extensive styling time.
The Strategic Approach to Waves Plus Structure
The secret to this style’s professional appeal is that you’re creating intentional contrast within the hairstyle. The front sections and crown are smoother and more controlled, which reads as polished and formal. The back and sides have softer waves, which prevents the overall look from feeling harsh or overly styled. This balance is what makes the style look effortlessly professional rather than like you spent two hours styling.
This approach works well in formal workplaces because the structured elements are visible during video calls and in-person conversations, while the waves add visual interest from the side and back. You’re essentially communicating “I put thought into this” without screaming “I just came from a salon.”
Creating the Blowout Foundation
Start by blow-drying your hair completely dry using a paddle brush, working in 2-inch sections from root to end. Focus on creating smooth, straight sections in the front and crown — these are your structural elements. As you move to the sides and back, rotate your brush slightly to encourage subtle wave patterns rather than aiming for complete straightness.
Once your hair is dry, use a 1.5-inch curling iron to add intentional waves to the back and sides. Work in sections, curling away from your face and rotating the barrel to create an S-wave pattern rather than tight ringlets. You want definition without rigidity. Leave the front sections smooth and straight, and the crown area relatively controlled.
Maintaining This Look Through a Full Day
This style holds remarkably well because the straight sections act as an anchor, preventing the entire hairstyle from collapsing. A light hairspray applied throughout (heavier on the wavy sections) keeps everything in place without creating crunchiness. By midday, you might notice the waves relaxing slightly, but the straight front sections will remain controlled and polished. If you need a refresh, a dry texturizing spray revives the waves without disturbing the smooth front sections.
6. Twisted Back Half-Bun with Face-Framing Waves
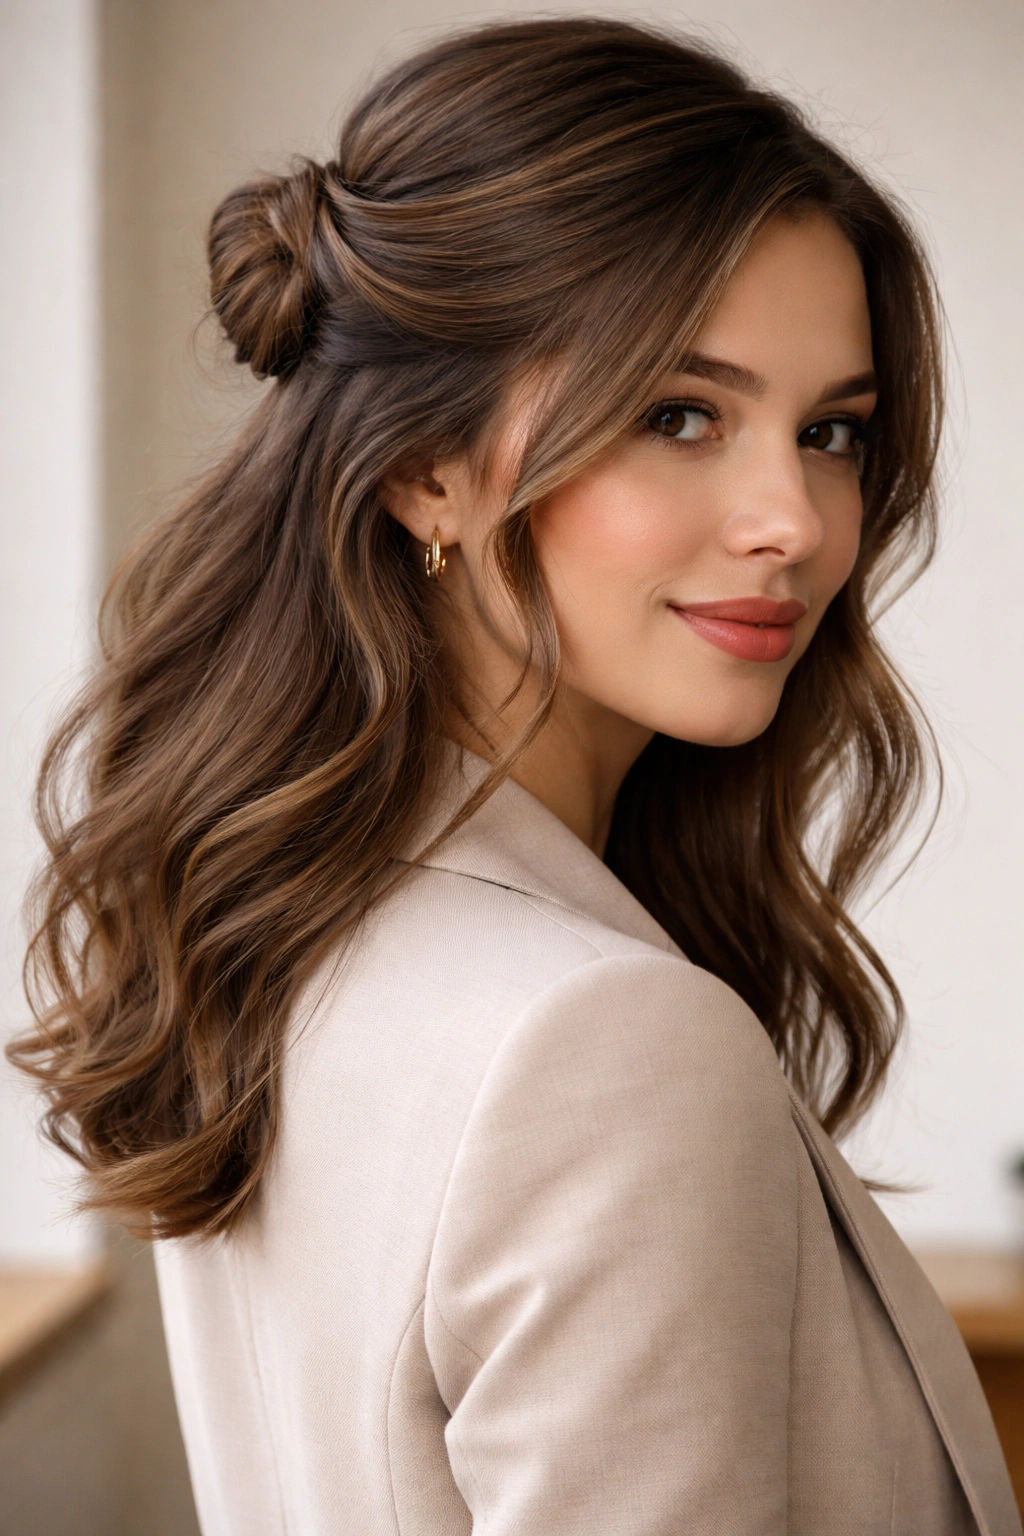
This style is a modern variation on the half-bun that feels professional and intentional rather than lazy. Instead of a simple elastic ponytail, you’re twisting sections of hair and securing them, which creates texture and visual interest. Face-framing waves add softness without sacrificing the controlled half-up structure.
Why Twisted Details Read as More Professional Than Simple Gathering
A twisted half-bun inherently looks more intentional than a basic half-ponytail. The twisting creates texture and visual complexity that reads as “I styled this deliberately” rather than “I gathered my hair to keep it off my face.” In professional settings, that distinction matters more than you might think. Twisted details signal intentionality and effort in a way that simple styles sometimes don’t.
The face-framing waves are crucial here because they soften the look enough that the twisted back section doesn’t feel too severe or overstyled. You’re creating a visual balance between structure and softness that photographs beautifully and translates well in professional environments.
Executing the Twist Properly
Blow-dry your hair with a slight texture using a round brush, creating subtle waves throughout. Take a 2-inch section from one side of your head near your temple and twist it loosely toward the back of your head. Twist it only until you reach approximately the middle back of your crown, then secure it with a bobby pin. Repeat on the other side, bringing the twist to the same location.
Now, take the hair directly at your crown and gather it loosely, adding the two secured twists to this gathered section. Twist the entire gathered section once or twice and secure it with an elastic, creating a small twisted half-bun at the back. The result should look relaxed and textured rather than tight and severe.
Adding Face-Framing Movement
Use a 1.25-inch curling iron to create soft waves in the front sections of your hair, especially around your face and temples. These waves should be looser and more relaxed than the waves in the back, creating the visual impression that your hair is naturally framing your face. Curl away from your face to create a flattering pattern, and don’t curl all the way to the ends — stop about 2-3 inches from the tips.
Longevity Through Your Workday
The twisted sections at the back hold surprisingly well because the twisting creates texture and grip that a basic elastic doesn’t provide. Bobby pins tucked invisibly underneath the bun keep everything secure, even if you’re moving around significantly. By evening, the face-framing waves may relax slightly, but the twisted bun remains defined and polished. A light hairspray keeps flyaways controlled without making the style feel stiff or products-heavy.
7. Tucked Waves with Strategic Clips
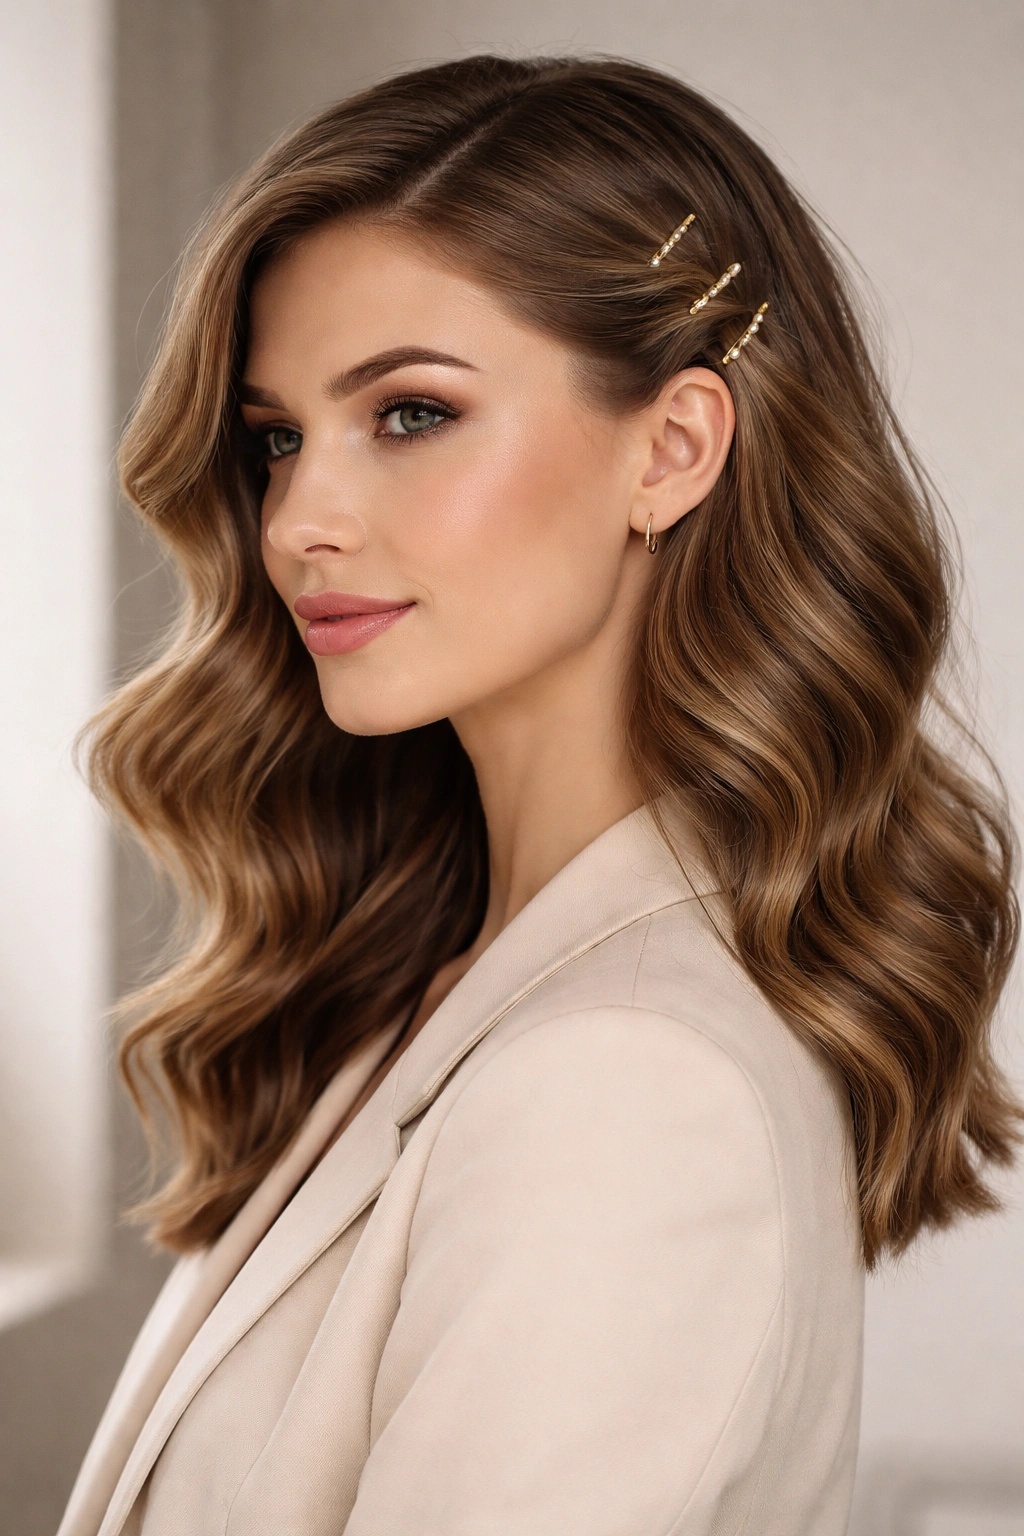
This style is distinctly modern and works beautifully in creative or contemporary workplaces. You’re creating the impression of an updo without actually putting your hair fully up — the waves are tucked and clipped strategically, creating visual interest and polish while maintaining movement and texture.
The Visual Impact of Strategic Hair Placement
Strategic tucking and clipping creates dimension that loose, fully-down waves simply cannot achieve. You’re using clips and bobby pins not just as functional tools but as design elements that create visual structure. This approach reads as contemporary and intentional in professional settings, especially in creative industries or modern offices.
The beauty of this technique is that you’re maintaining the softness and movement of your waves while creating enough structure that the style reads as professionally polished. It’s the perfect bridge between “my hair is down and soft” and “my hair is up and controlled.”
Creating Strategic Tucks and Secure Clips
Start by blow-drying your hair with soft waves using a curling iron, creating loose S-curves throughout. Once your hair is styled, take a section from one side of your head near your temple — about 2-3 inches wide — and twist it loosely. Tuck this twisted section toward the back of your head and secure it with a bobby pin that matches your hair color, tucking the pin underneath so it’s invisible from the front.
Repeat this process on the other side, bringing the twisted section to approximately the same location at the back. Now, take a small decorative clip (think tortoiseshell or metallic) and place it at the back of your head where the two tucked sections meet, securing everything and adding a visual focal point.
Adding Intentional Texture
The remaining hair should still flow in soft waves down your back and around your shoulders. Use a 1.5-inch curling iron to enhance these waves if needed, making sure they’re defined and intentional rather than appearing accidental. The combination of the tucked, clipped sections with the flowing waves creates a sophisticated look that’s professional without being severe.
Maintaining This Look Through a Busy Day
The tucked sections with hidden bobby pins hold exceptionally well because they’re secured both by the pin and by the texture of the twist. A light hairspray keeps everything in place without creating stiffness. The decorative clip at the back adds both function and style — it helps secure everything while creating a focal point. This style holds beautifully through a full workday, and the tucked sections don’t slip or require frequent adjustment because they’re properly pinned underneath the texture.
8. Wave Set with a Clean High Ponytail
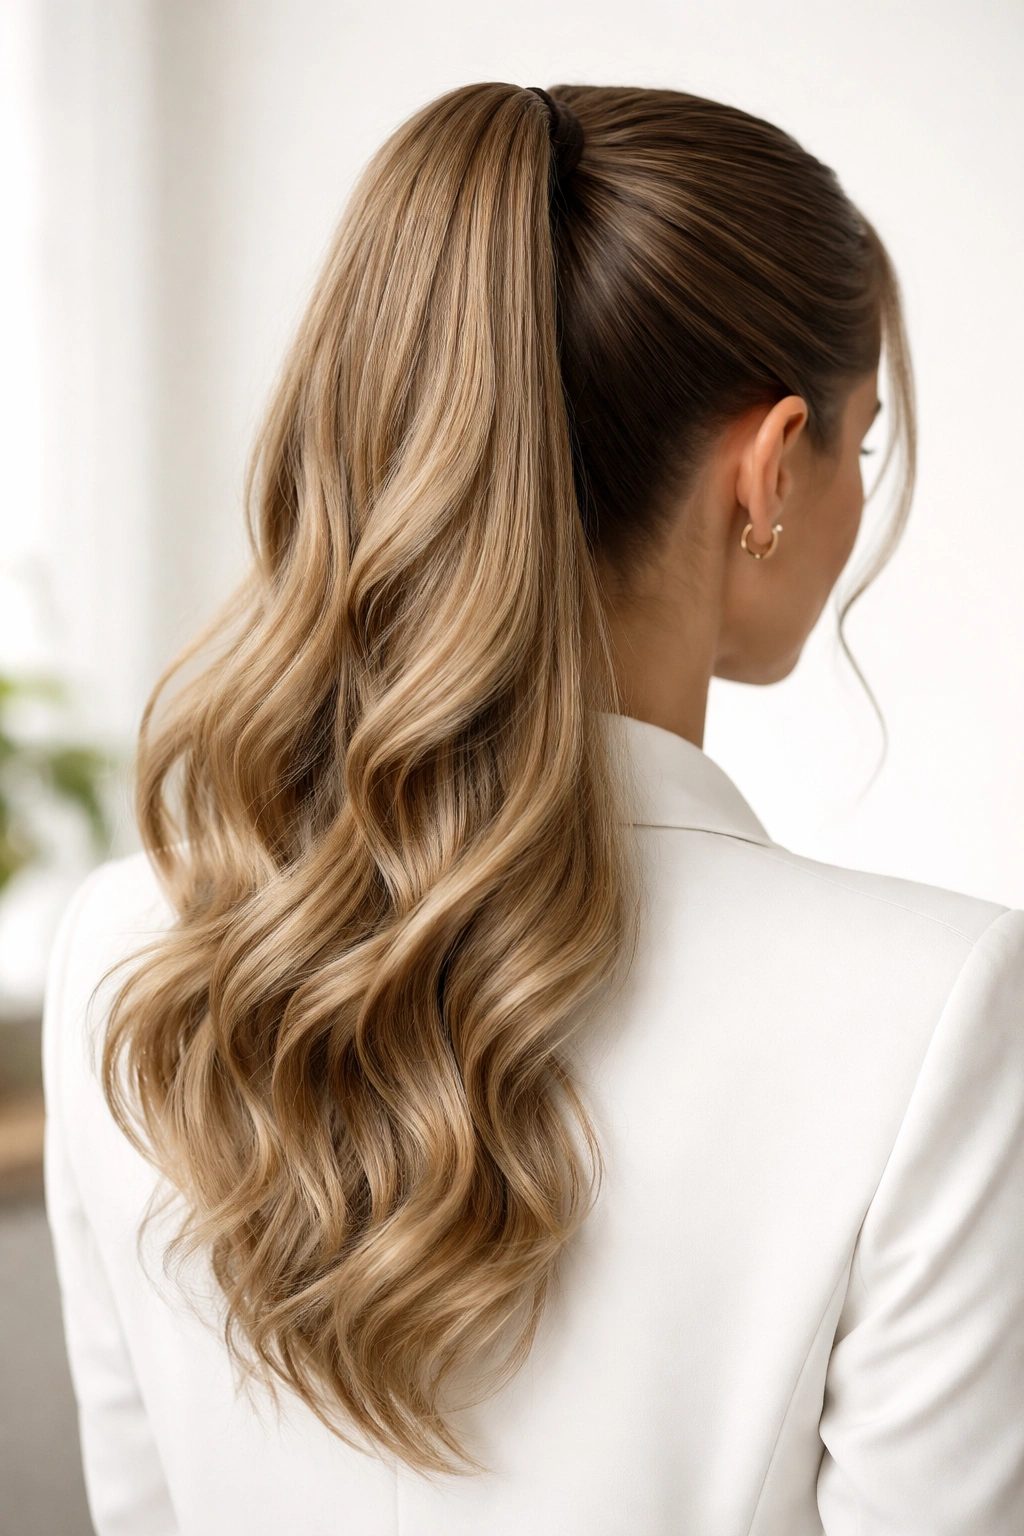
This is the style for days when you want maximum polish and absolute hair control while still celebrating your hair’s natural wave pattern. The high ponytail reads as young, professional, and energetic, while the waves within the ponytail add movement and texture without any hair loose around your face.
When a High Ponytail Reads as Professional
A high ponytail positioned at the crown (rather than at the nape) reads as modern and professional in most contemporary workplaces. It’s sleek enough for formal settings, modern enough for creative industries, and practical enough for anyone dealing with a busy day. The key is making sure the ponytail is neatly gathered and the waves within it are intentional rather than frizzy.
This style works particularly well if you have a clear complexion and confident features because nothing is framing or softening your face — the focus is on clean lines and intentional texture in the ponytail itself.
Building a Neat, High Ponytail Base
Blow-dry your hair completely straight using a paddle brush, paying special attention to smoothing the front and crown sections. These front sections need to be sleek and polished — any flyaways here will undermine the professional appearance. Once your hair is completely dry and smooth, gather it high at your crown, positioning the elastic about 2-3 inches from your hairline.
Use a strong elastic specifically designed for ponytails — a regular hair tie won’t grip securely enough to last through a full workday. Consider using a clear elastic with a small decorative wrap around it, or choose a metallic or tortoiseshell clip-style ponytail holder for visual interest.
Creating Waves Within the Ponytail
This is where the style becomes interesting. Take a 1.25-inch curling iron and create soft waves throughout the actual ponytail hair, working in 2-inch sections from root to end. You want defined but relaxed waves — think gentle S-curves rather than tight ringlets. The waves should start near the elastic and continue all the way through the length, with the ends left slightly wavy rather than fully curled.
The contrast between the sleek front sections and the textured ponytail creates visual interest and prevents the overall look from feeling severe or overly corporate. You’re essentially creating a style that photographs beautifully and reads as intentional rather than hastily thrown together.
Pro Tip for All-Day Hold
Spritz the entire ponytail with a strong-hold hairspray before you leave the house. Let it dry completely before touching it, as this sets the wave pattern and ensures that the texture lasts throughout your entire day. Take a small section from the back of the ponytail, wrap it around the elastic to conceal it, and pin it underneath — this detail immediately makes the ponytail look more refined and professionally finished.
Final Thoughts
The right wavy hairstyle for work is one that makes you feel confident without requiring an elaborate daily routine. Each of these styles trades off complexity for longevity and polish in slightly different ways — some prioritize ease of styling while others prioritize how polished they look throughout the day. The best choice for you depends on your hair texture, your workplace environment, how much time you realistically have in the morning, and which balance of structure and softness appeals to you.
What matters most is choosing a style that lets your hair’s natural texture work for you rather than against you. When you stop fighting your waves and instead lean into them with intentional styling choices, you end up with hairstyles that feel effortless and look professionally polished. These eight styles prove that wavy hair can absolutely hold its own in professional settings — you just need the right technique and the confidence to claim that texture as your asset.