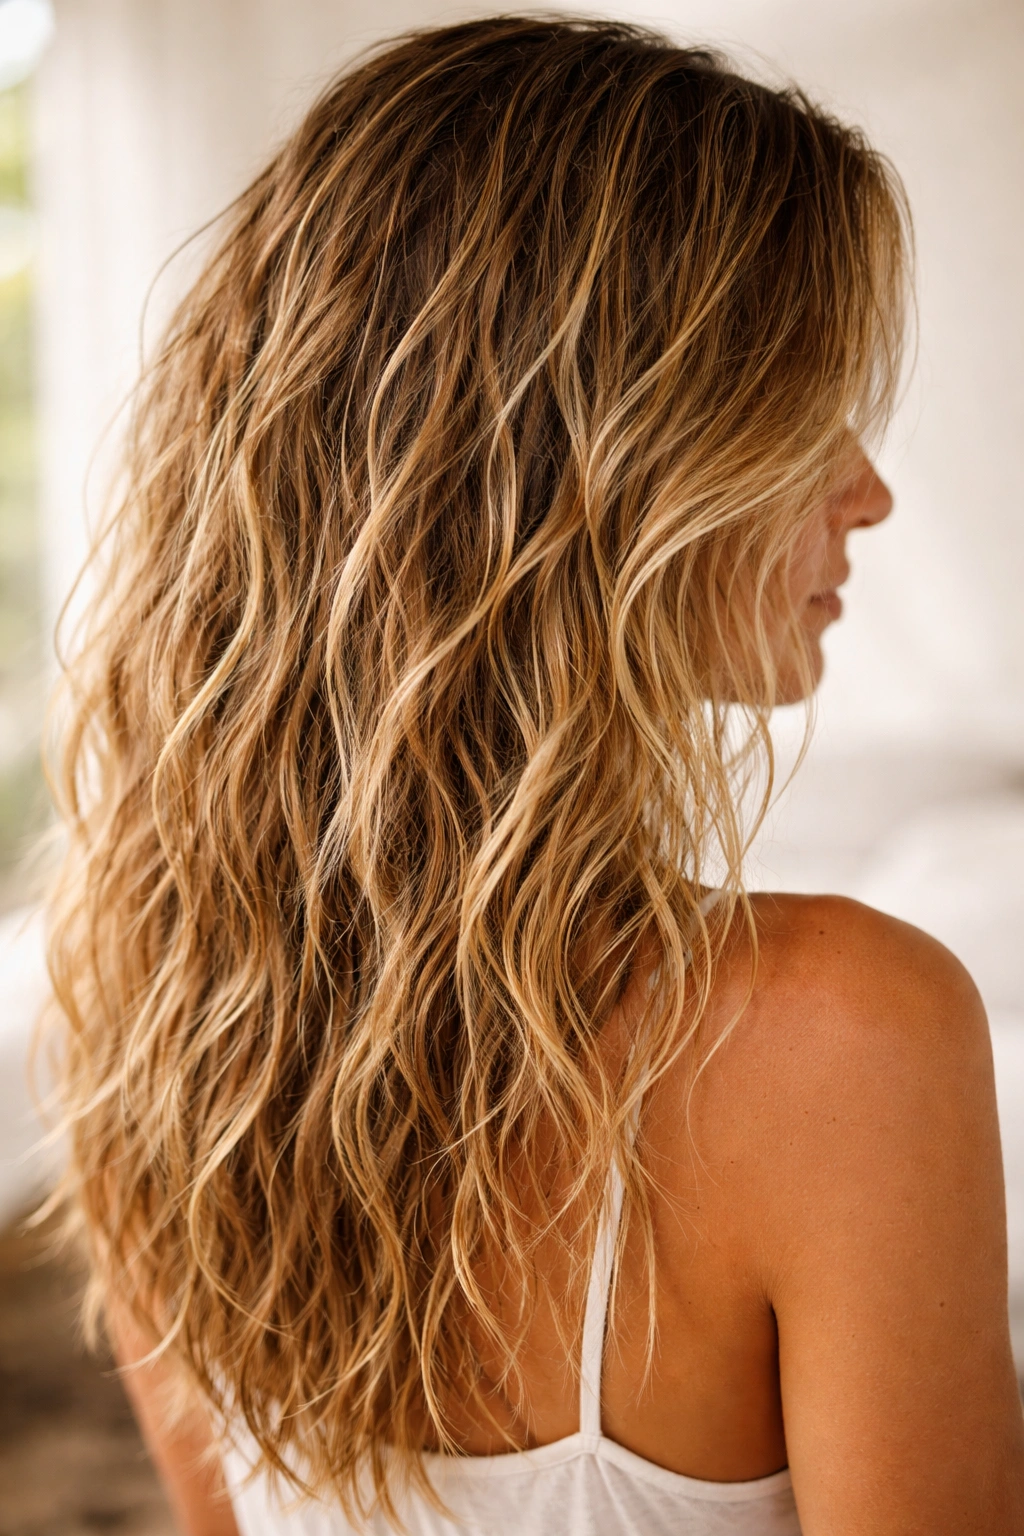
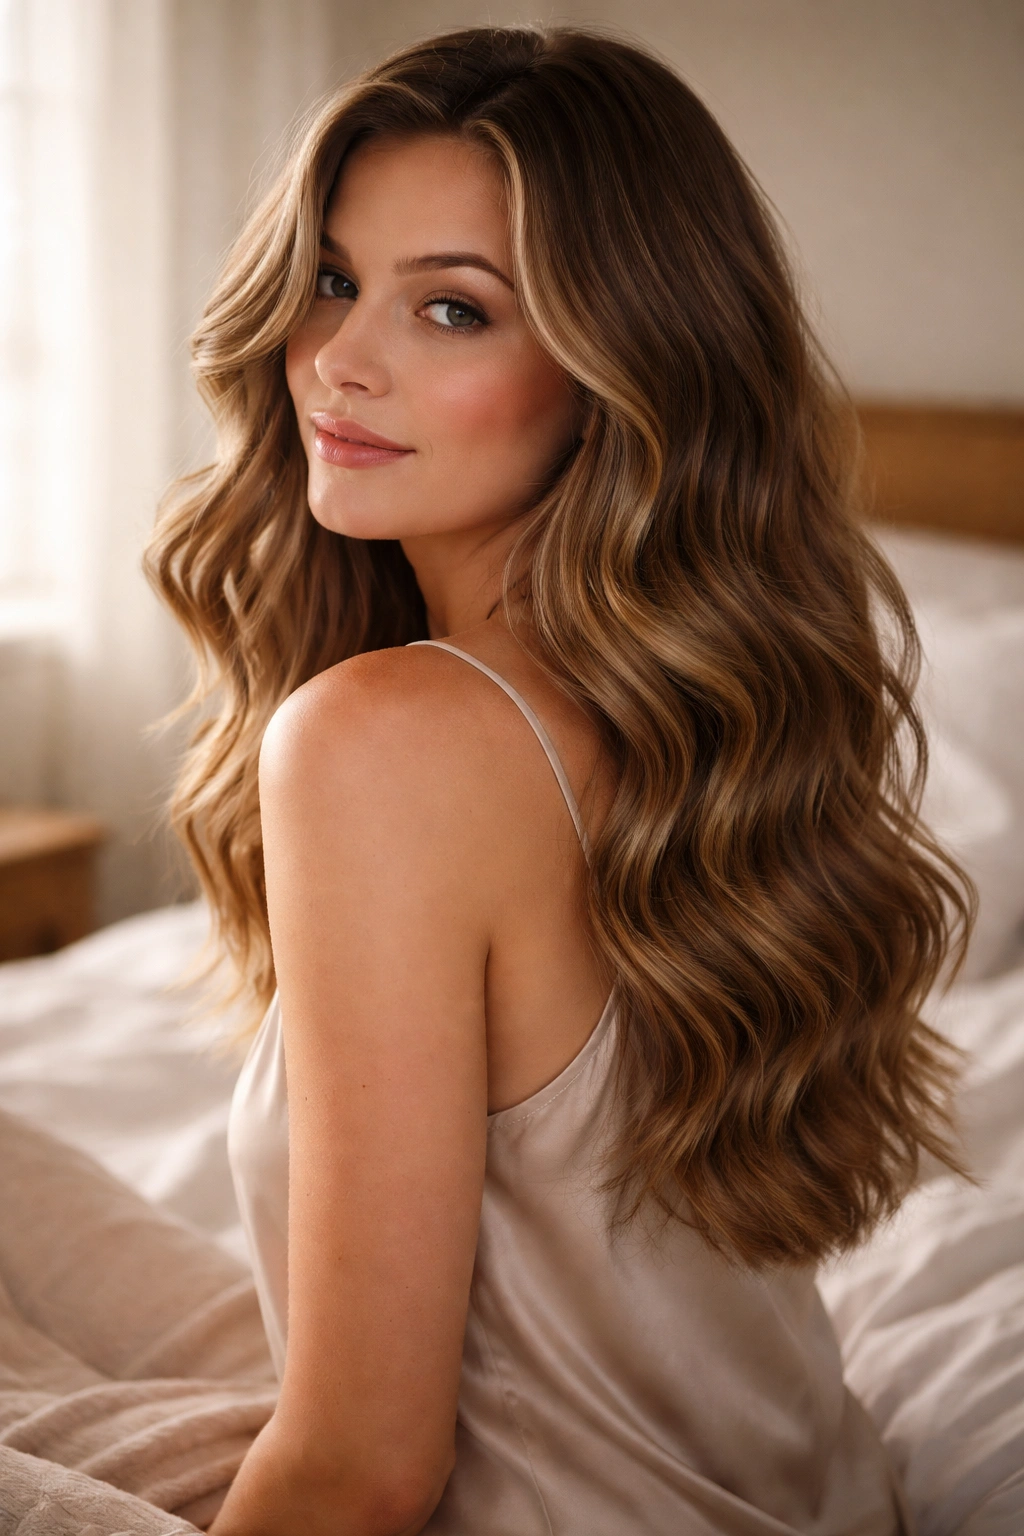
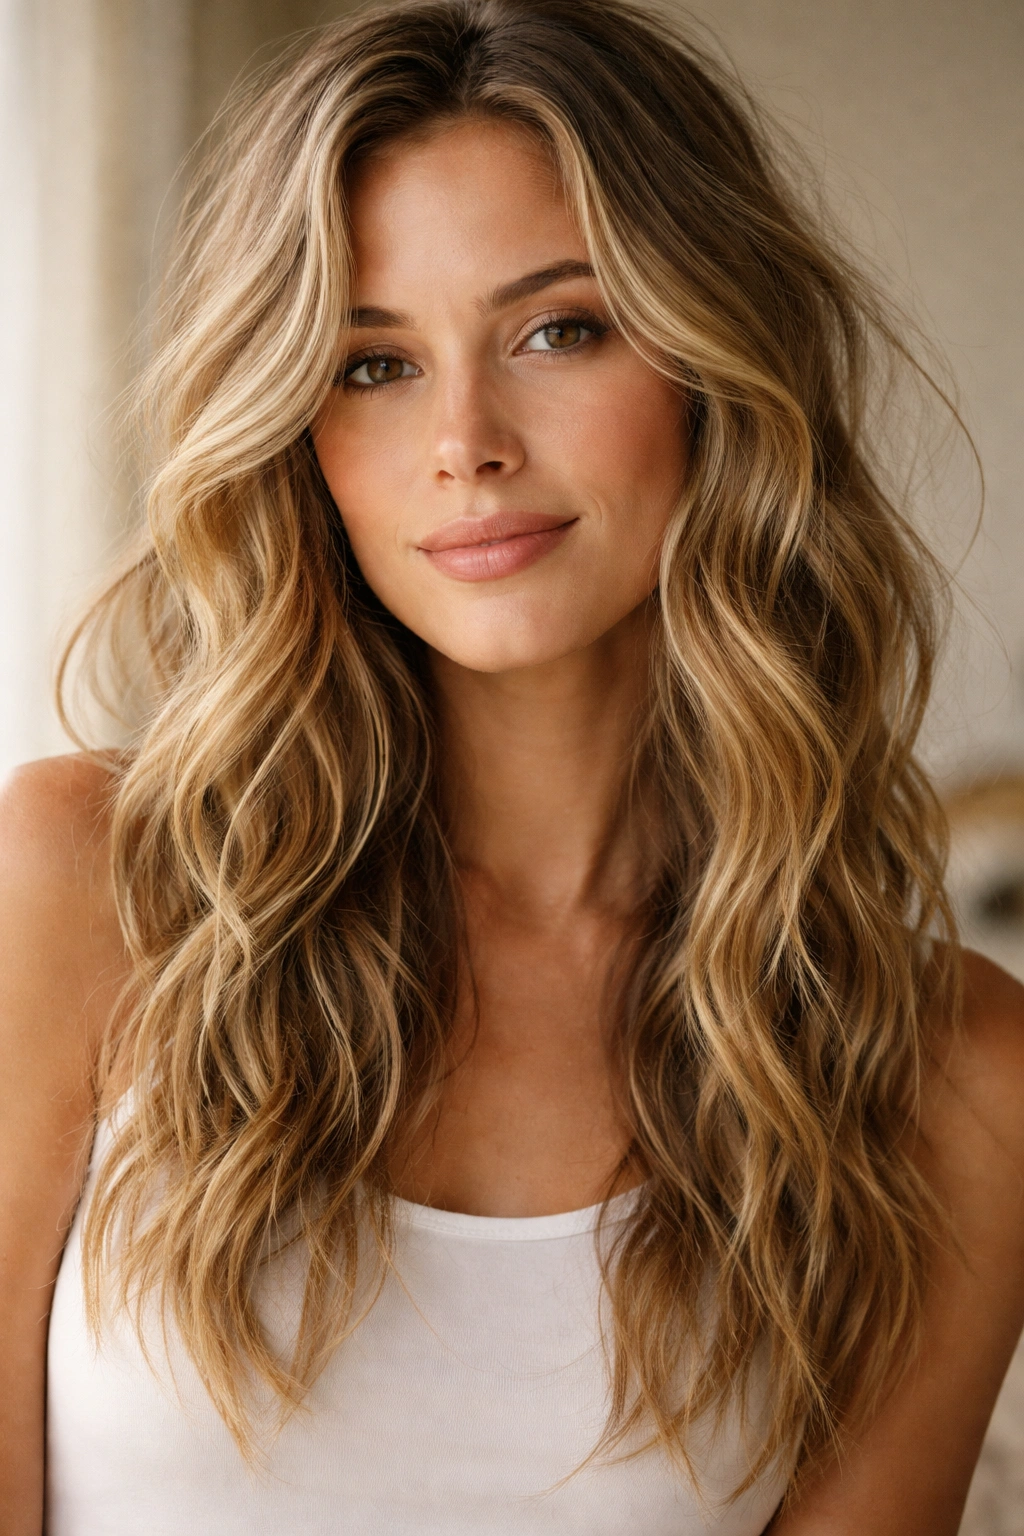
Wavy hair has this effortless, undone quality that makes you look like you just came back from the beach—even if you actually spent the last three hours at your desk. The thing is, achieving those waves shouldn’t require a professional blow-dry or a two-hour styling session. The best wavy hairstyles are the ones you can create yourself in 15 minutes or less, using techniques that don’t demand advanced skills or salon-level products.
Whether your hair naturally waves a little and you want to amplify it, or you’re starting completely straight and need a foolproof method to get texture, easy wavy styles work for nearly everyone. The key isn’t finding the “right” technique—it’s finding the one that fits your lifestyle, your hair type, and how much time you’re willing to spend. Some waves come from heat, some from braiding, and some from products alone. The best part? Once you nail one of these methods, you can repeat it consistently and build a signature look that feels authentically you.
Let’s walk through ten genuinely easy wavy hairstyles that deliver real results without the fuss. Each one works on different hair types, takes minimal effort, and looks polished enough for work, dates, or just a good hair day at home.
1. The Beachy Salt Spray Waves
Salt spray is genuinely the laziest person’s secret weapon for waves. You mist it onto damp or dry hair, scrunch slightly, and let it air dry or blow-dry loosely. The salt creates grip and texture that makes even straight hair hold a wavy shape. This method works particularly well if you have naturally wavy hair that just needs definition—the salt spray enhances what’s already there rather than forcing waves where they don’t want to go.
The beauty of salt spray waves is that they look intentionally undone. You’re not aiming for perfect, salon-styled waves; you’re going for that I woke up like this texture that actually shows more personality than rigid curls. Spray it generously through mid-lengths and ends, work it through with your fingers, then either air dry for softer waves or rough-dry with a blow-dryer for more defined texture.
Why This Works So Well
Salt spray coats each strand with texture, giving your hair something to grip onto as it dries. The salt particles create friction between strands, which prevents them from lying completely flat and smooth. On damp hair especially, this friction holds the wave shape as moisture evaporates.
Quick Application Guide
- Spray evenly through damp hair, focusing on mid-lengths and ends rather than roots
- Use your fingers or a wide-tooth comb to distribute the spray and work out any clumps
- Air dry completely, or blow-dry on low to medium heat with a diffuser attachment
- Scrunch and piece apart waves with your fingers for more separation and texture
- This style lasts 2-3 days if you sleep carefully and refresh with a light mist the next morning
Pro tip: Salt spray works best on second-day hair that already has a bit of texture. If you’re applying it to freshly washed hair, make sure it’s damp but not dripping wet, or the spray will be too diluted to be effective.
2. The Curl-Rod Overnight Waves
If you have time the night before but not the morning of, curl rods (also called flexi-rods or bendy rollers) are your answer. You wind damp hair around these soft, flexible rollers before bed, sleep on them, and wake up to waves that lasted 12+ hours with zero heat damage. This method works on all hair types and textures, and the waves you get are consistently defined without looking over-processed.
The rods come in different sizes—smaller rods make tighter waves, larger ones make looser, more natural-looking waves. For easy waves that don’t scream “I spent an hour styling,” use medium to large rods and leave them in for at least 8 hours. The longer they sit, the more set the waves become.
Why Overnight Rods Beat Heat Tools
Your hair is most pliable when it’s slightly damp and most likely to hold its new shape while drying slowly overnight. There’s zero heat damage, minimal effort in the morning, and the waves often last through the entire next day without touch-ups. Plus, rods create a wave pattern that’s different from curling iron waves—they’re more fluid and less spiraled, which reads as modern and intentional rather than dated.
How to Use Curl Rods Effectively
- Apply leave-in conditioner or a light styling cream to damp hair to help it hold the wave shape
- Divide hair into sections and wind each section around a rod, working from the bottom up
- Use rods of matching size for consistency, or mix sizes if you want a more textured, undone look
- Sleep on the rods (they flatten slightly but don’t ruin the wave)
- Carefully unroll each rod in the morning and gently separate waves with your fingers
- Waves typically last 24-36 hours and can be refreshed with a light salt spray and finger-styling
Worth knowing: If you’re new to rods, start with 6-8 rods just on the top and sides of your hair. Once you’re comfortable, you can work your way up to full head coverage.
3. The Twisted Bun Heatless Waves
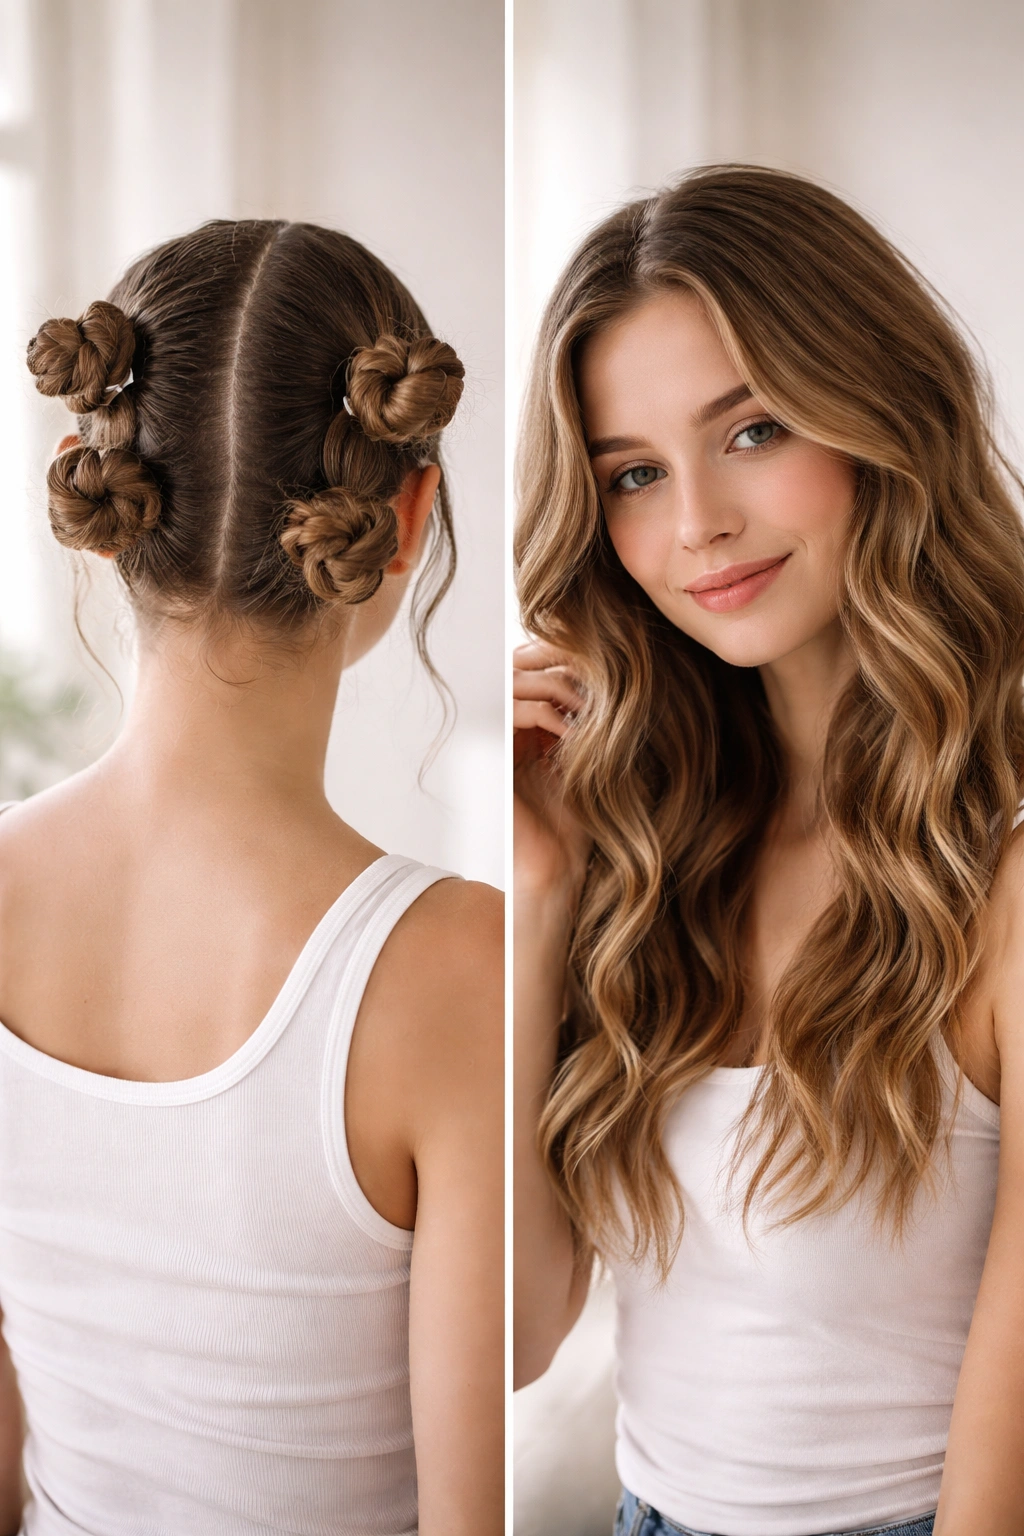
This method requires nothing but your own hands and maybe a hair tie or two. You twist damp sections of hair around themselves, coil each twist into a small bun, and either air dry or let them set for a few hours. When you unravel, you get soft, undefined waves that look completely natural. This is hands-down one of the easiest methods to execute, even if you have zero styling experience.
The key to getting waves from twisted buns is starting with damp (not soaking wet) hair, making the twists tidy enough to hold their shape, and leaving the buns in long enough for the hair to dry completely. On fine or thin hair, you might only need 4-6 hours; on thicker hair, overnight is more reliable.
Why Twists Create Such Soft Waves
When you twist hair, you’re creating a helical pattern without the rigidity of a curl. As the hair dries in that twisted state, the moisture locks the wave shape in place. When you untwist, the hair releases into a gentle, flowing wave rather than a defined spiral. The effect is effortless and suits almost every face shape because the waves are so soft and natural-looking.
Step-by-Step Twisted Bun Method
- Wash hair and leave it damp (damp, not dripping)
- Apply a lightweight styling cream or leave-in conditioner for hold
- Divide hair into 4-8 sections depending on thickness and desired wave size
- Twist each section away from your face, then coil the twist into a bun against your scalp and secure with a small hair tie or bobby pins
- Leave buns in while hair air dries (4-12 hours depending on hair thickness)
- Carefully untwist each bun and gently separate waves with your fingers
- Use a bit of serum or lightweight oil on the ends to smooth any frizz
Real talk: This method looks silly while the buns are in, but the results are worth it. If you’re self-conscious, do it overnight and wake up to waves already set.
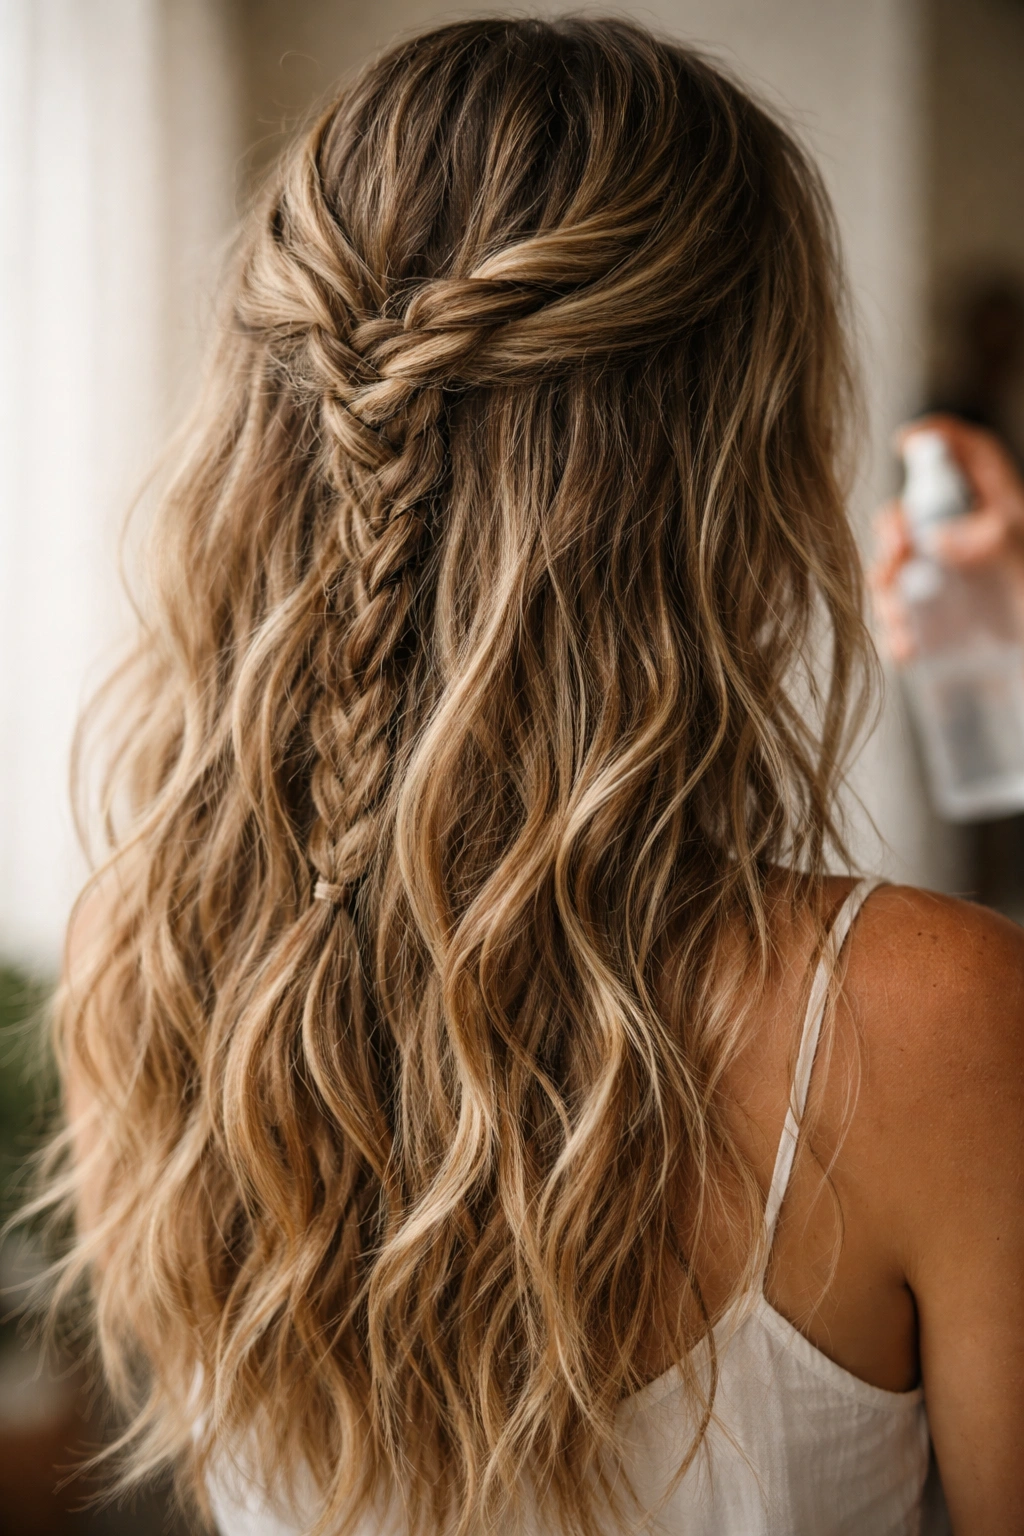
4. The Braided Waves for Maximum Hold
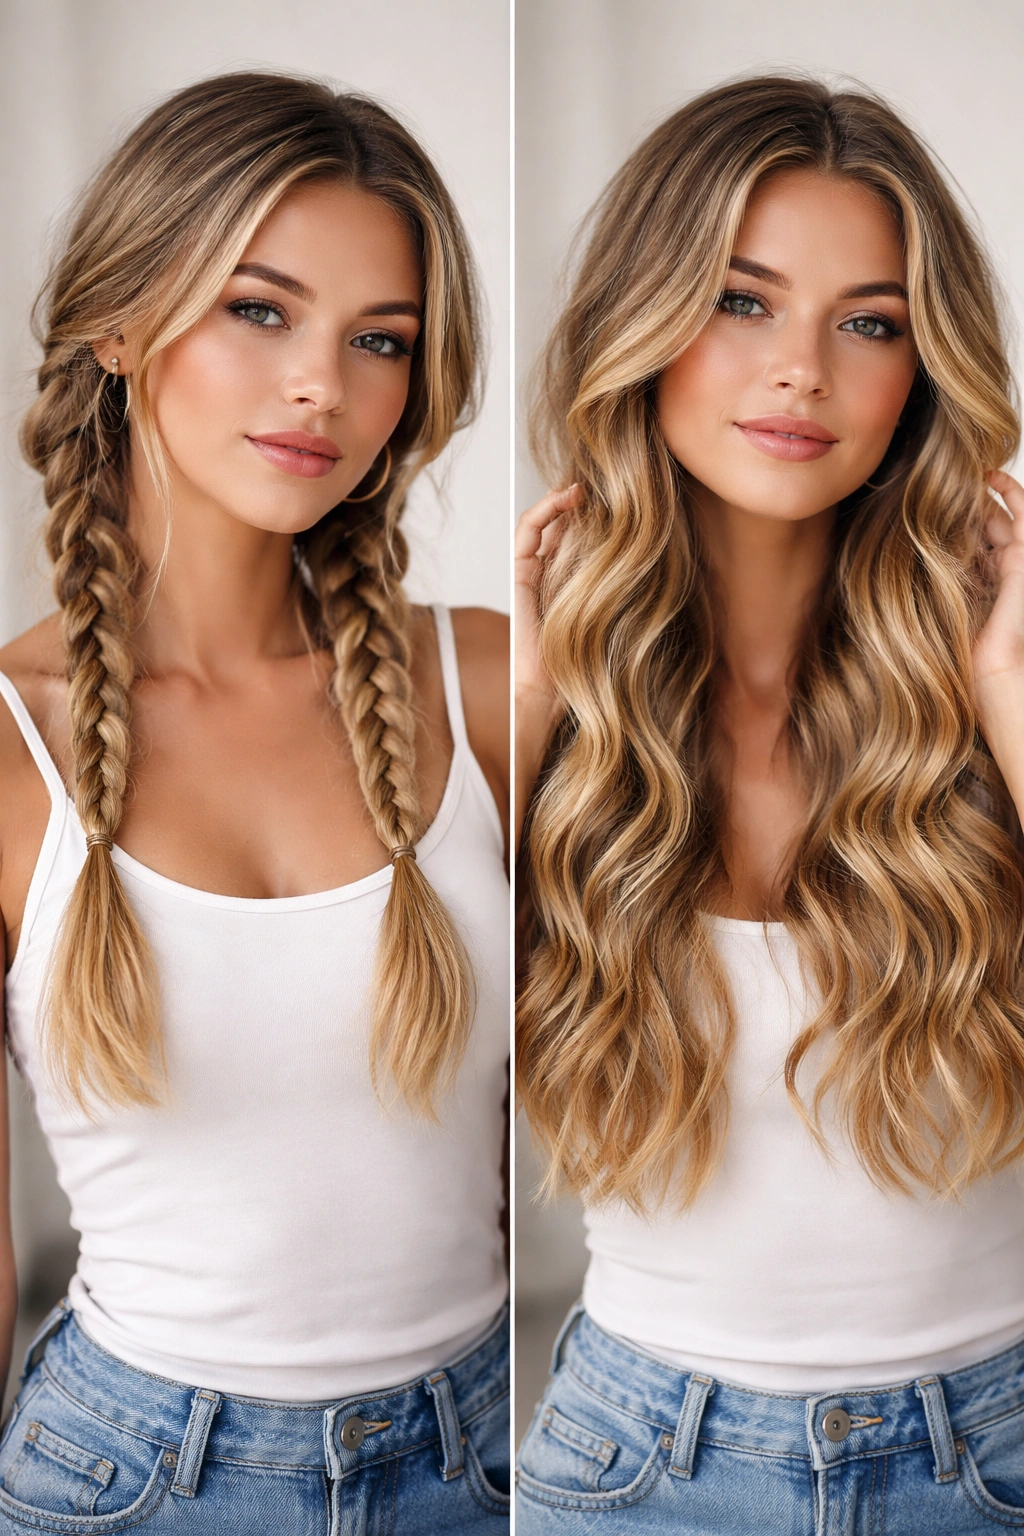
Braids hold their shape beautifully as hair dries, and when you unravel a braid, you get soft waves that have a gentle s-curve pattern rather than perfect spirals. Braiding works on all hair types, requires no products, and the waves last longer than most other heatless methods. You can braid wet or damp hair and either air dry or let it sit for several hours.
The thickness of your braid determines the wave pattern—thinner, tighter braids create more defined waves with more zigzag, while looser, thicker braids give softer, larger waves. For everyday wearable waves, aim for two or three loose braids rather than one tight braid down the middle.
How Braids Create Lasting Waves
A braid holds hair in a compressed, bent pattern as moisture evaporates. The tighter and longer you leave the braid in place, the more set that wave pattern becomes. When you undo the braid, the hair wants to spring back to the wave shape it dried in. Three braids create a more natural, broken-up wave pattern than a single braid, which can look like obvious braid waves if not softened.
The Three-Braid Wave Technique
- Start with damp hair and apply a light styling product for hold (leave-in conditioner works)
- Create three loose braids: two on the sides and one down the center, or three sections down the back
- Braid each section loosely—you want texture, not a tight rope-like braid
- Braid all the way to the ends and secure with small elastic bands
- Air dry or let sit for 4-8 hours
- Unbrraid carefully, starting from the bottom, and use your fingers to separate and soften the wave pattern
- The waves look best immediately after unbraiding; they soften slightly throughout the day
Insider note: If your braids feel too structured the first time you try them, undo them slightly earlier next time or use looser braids. The sweet spot is waves that look soft and natural, not like you’re wearing braided hair.
5. The Blow-Dryer Diffuser Waves
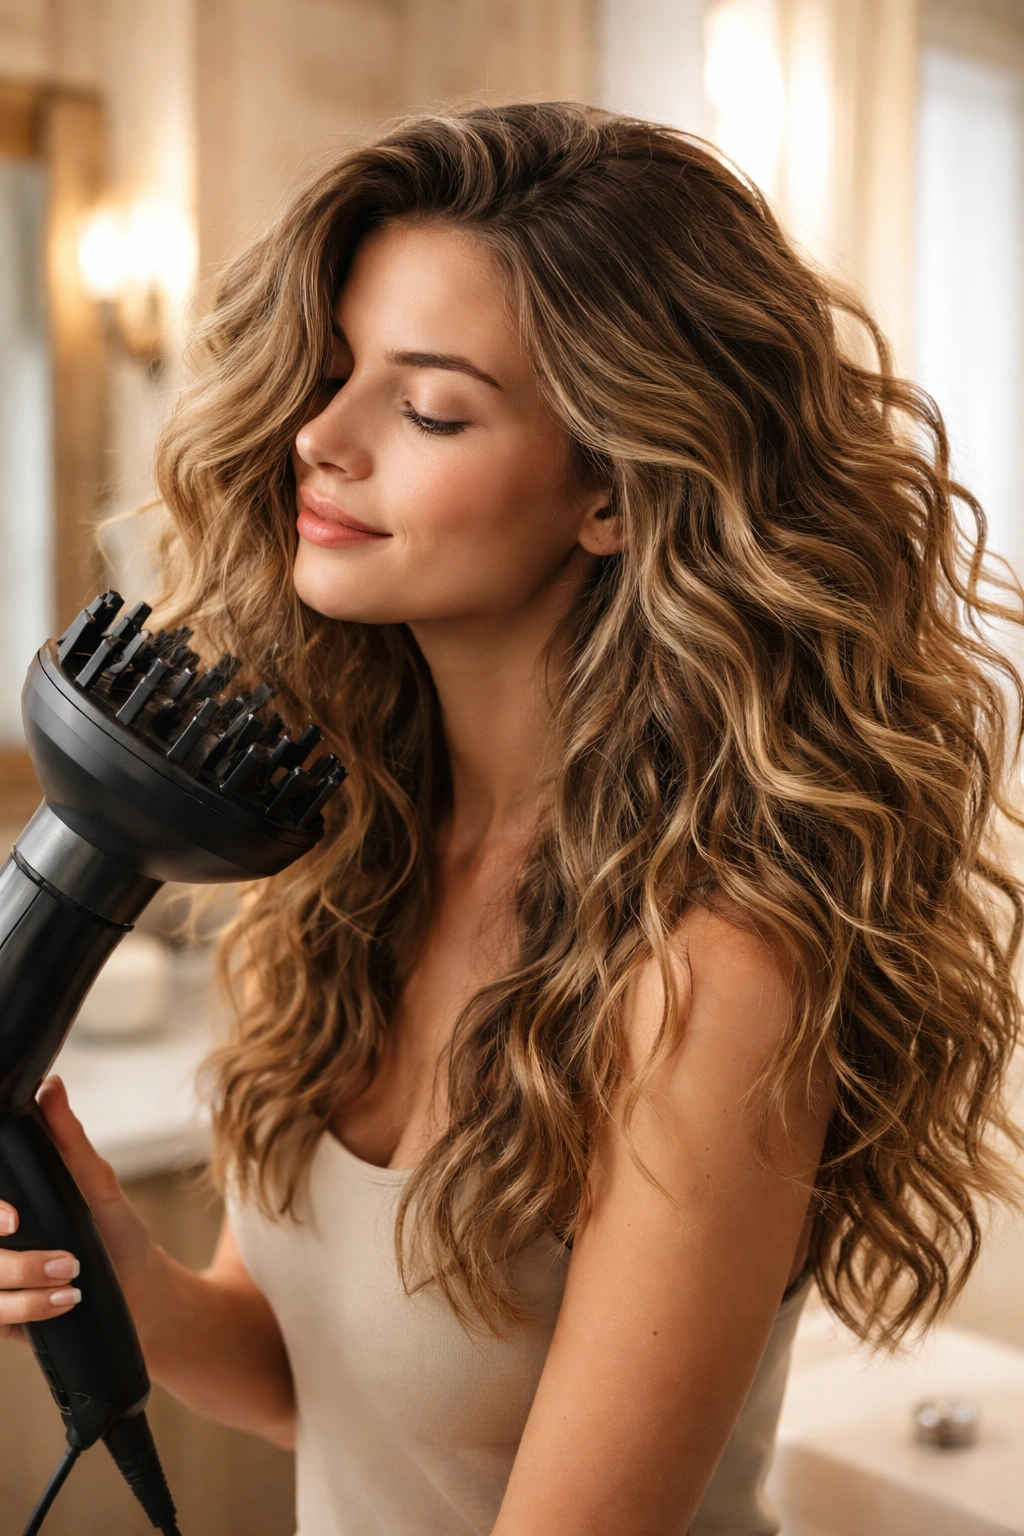
A diffuser attachment on your blow-dryer is one of the most underrated styling tools. It scatters heat more evenly than a regular nozzle and actually encourages your hair to wave rather than frizz. If your hair naturally waves even a little, a diffuser can take that texture and amplify it into beautiful, defined waves in 10-15 minutes. This is especially effective on wavy and curly hair types that respond to gentle heat.
The technique is straightforward: apply a curl-enhancing product or lightweight mousse, rough-dry your hair with the diffuser on medium-low heat, and scrunch as you dry rather than smoothing. This method gives you waves fast, which is perfect for mornings when you need to leave soon.
Why Diffusers Work Better Than Straight Blow-Drying
A regular blow-dryer nozzle directs heat in a concentrated stream, which can flatten and frizz wavy hair. A diffuser spreads that heat over a larger area and actually lifts hair away from the scalp as it dries, encouraging wave formation. The scooping and scrunching motion you do while diffuser-drying piles your hair upward, which helps waves form in a more defined, bouncy way rather than lying flat.
The Diffuser-Drying Method
- Squeeze excess water out of freshly washed hair with a microfiber towel or t-shirt
- Apply a curl cream, mousse, or styling gel focused on mid-lengths and ends
- Attach the diffuser to your blow-dryer and set it to medium heat and low to medium speed
- Cup sections of hair in the diffuser head and hold stationary for 10-15 seconds, allowing heat to work into the wave pattern
- Move to the next section without stretching hair straight
- Scrunch and push hair upward as you dry to encourage waves to form
- Finish by scrunching a tiny bit of serum or oil through for smoothness and shine
Pro tip: Apply your styling product to soaking-wet hair immediately after washing, before you start blow-drying. The wetter your hair is when product goes in, the better it distributes and the better it holds the wave.
6. The Velcro-Roller Waves
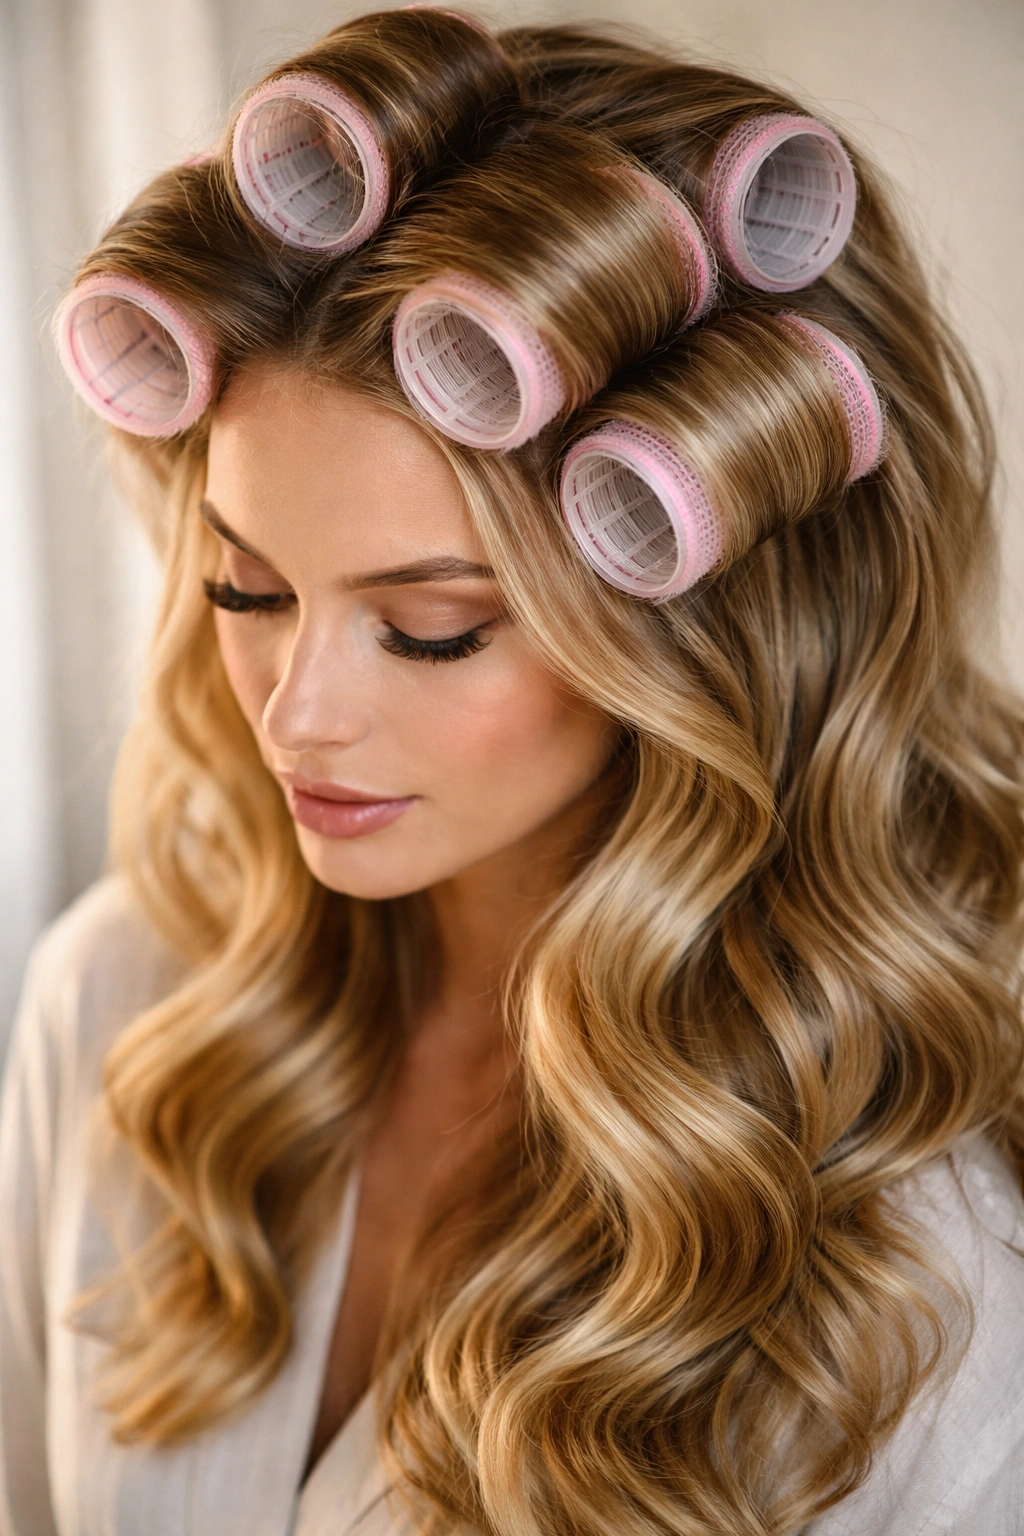
Velcro rollers create soft, voluminous waves that look salon-styled without the stiffness of heat-set waves. Unlike curl rods, velcro rollers apply heat while your hair dries on them—you can blow-dry with the rollers in—which means faster styling time. The rollers grip your hair without you needing to pin them, making them easier to work with than traditional hot rollers.
This method takes 15-20 minutes with a blow-dryer and works best on damp hair that’s been lightly dampened if it’s been a few hours since your last wash. The waves last a solid 24-48 hours depending on your hair’s wave retention.
Why Velcro Rollers Give Such Polished Results
Velcro rollers are wide and smooth, which means they create large, flowing waves rather than tight curls. The size of the roller determines wave size—larger rollers make bigger, looser waves; smaller rollers make tighter waves. As you blow-dry, the heat and air circulation around each roller sets the wave pattern firmly without the harsh crimp you sometimes get from curling irons.
How to Use Velcro Rollers
- Apply a heat protectant and light styling cream to damp hair
- Divide hair into sections roughly the size of your roller width
- Wind each section around a velcro roller, rolling upward and away from your face
- Blow-dry on medium heat, moving the dryer around each roller evenly
- Use a concentrator nozzle if available to direct heat more effectively
- Leave rollers in for 5-10 minutes after blow-drying to let waves fully set
- Carefully unroll each roller downward and use your fingers to separate and shape waves
- Waves typically last 2-3 days with minimal refreshing
Worth knowing: Velcro rollers come in sizes ranging from small (creates tighter waves) to extra-large (creates very loose, flowing waves). For a modern, everyday look, medium to large rollers are more flattering than small ones.
7. The Quick-Curl Iron Wave and Flick
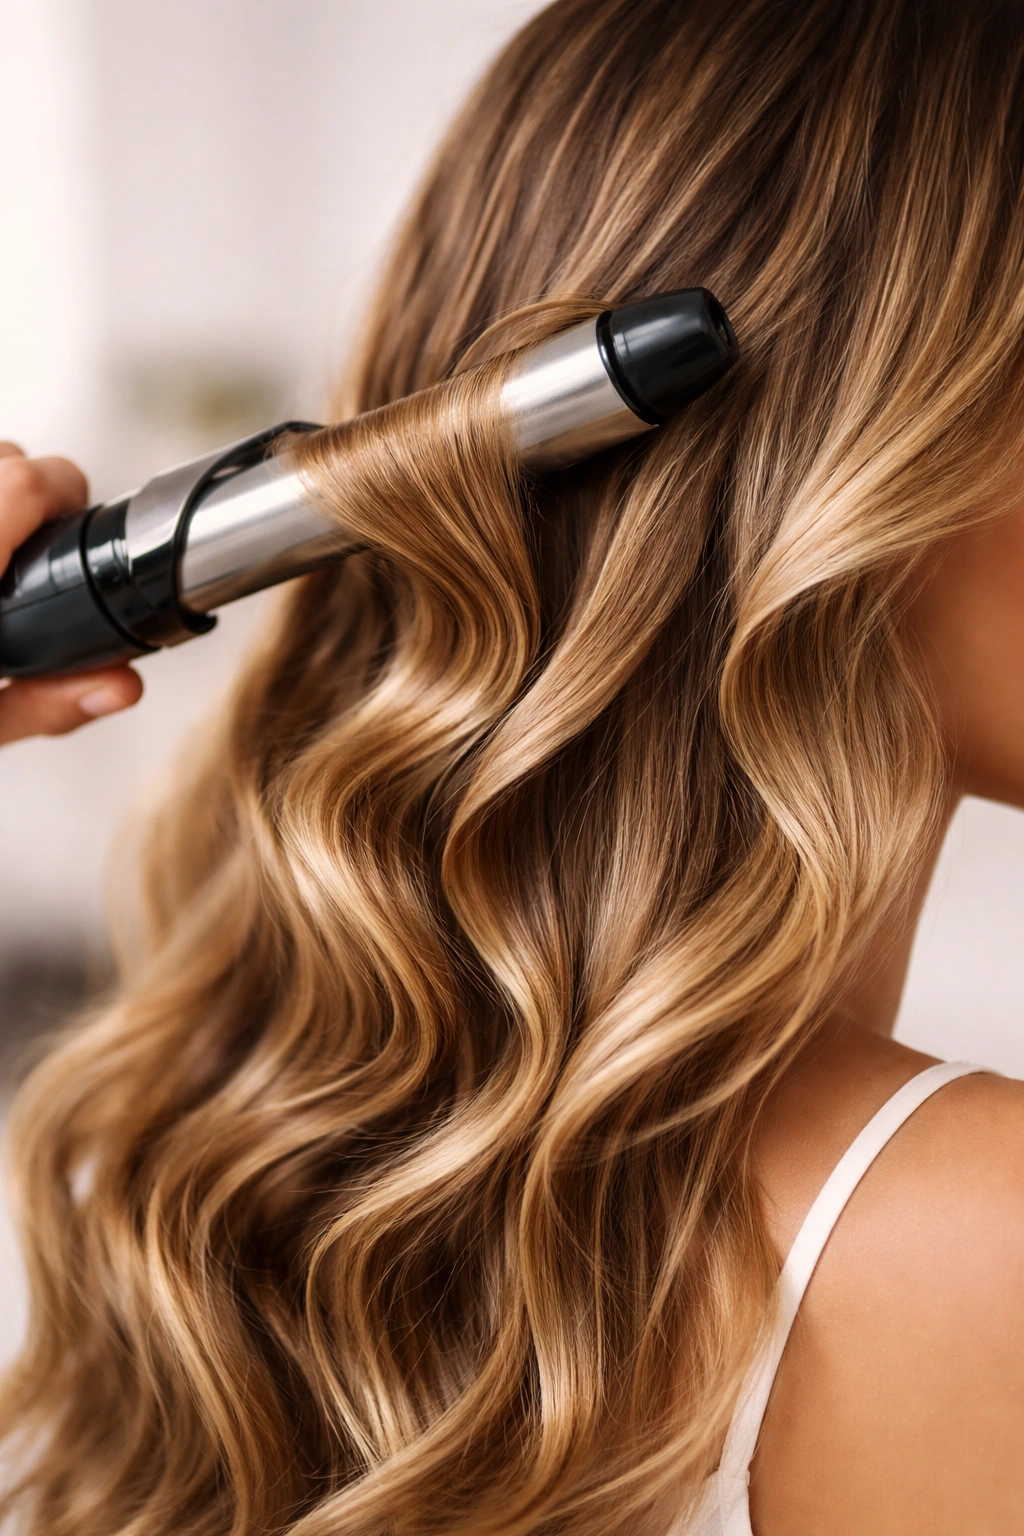
If you only have 10 minutes and you want defined, intentional-looking waves, a curling iron (not a wand—a standard curling iron with a barrel and clamp) creates beautiful waves incredibly fast. You wrap sections around the barrel, hold for a few seconds, and release. The clamp releases the curl in a smooth motion that often looks more like a wave than a spiral curl, especially if you angle the iron slightly.
This method works best on already-dry hair (blow-dried is fine) and is fastest if your hair is relatively short to medium length. The waves you create are sleek and polished, perfect for work or going out.
The Technique That Makes Curling-Iron Waves Look Effortless
The secret is not clamping too tightly and releasing the barrel at a slight angle rather than straight down. If you’re too stiff or mechanical, the waves look pageant-y. If you release with a slight twist or flick of your wrist as the curl comes off the barrel, you get a more broken-up, modern wave. Alternating which direction you curl (one section away from your face, next section toward your face) creates a more natural, dimensional wave pattern.
The Curling-Iron Wave Method
- Start with completely dry hair; if hair is still damp, blow-dry first
- Apply a light heat protectant spray
- Take a section roughly 1-2 inches wide
- Clamp the barrel near the roots and wrap the section around the barrel, working toward the ends
- Hold for 10-15 seconds (adjust based on how much wave you want)
- Release by unclamping and gently sliding the barrel out and downward with a slight twist of the wrist
- Move to the next section and repeat, alternating direction
- Once all sections are curled, gently tousle waves with your fingers to separate and soften
- Waves last all day with minimal frizz if you use a heat protectant
Real talk: Curling irons take a bit of practice to make look natural rather than ringlet-curly. The key is using a light hand, not clamping too hard, and releasing with that subtle flick rather than pulling straight down.
8. The Damp-Hair Finger Waves and Air Dry
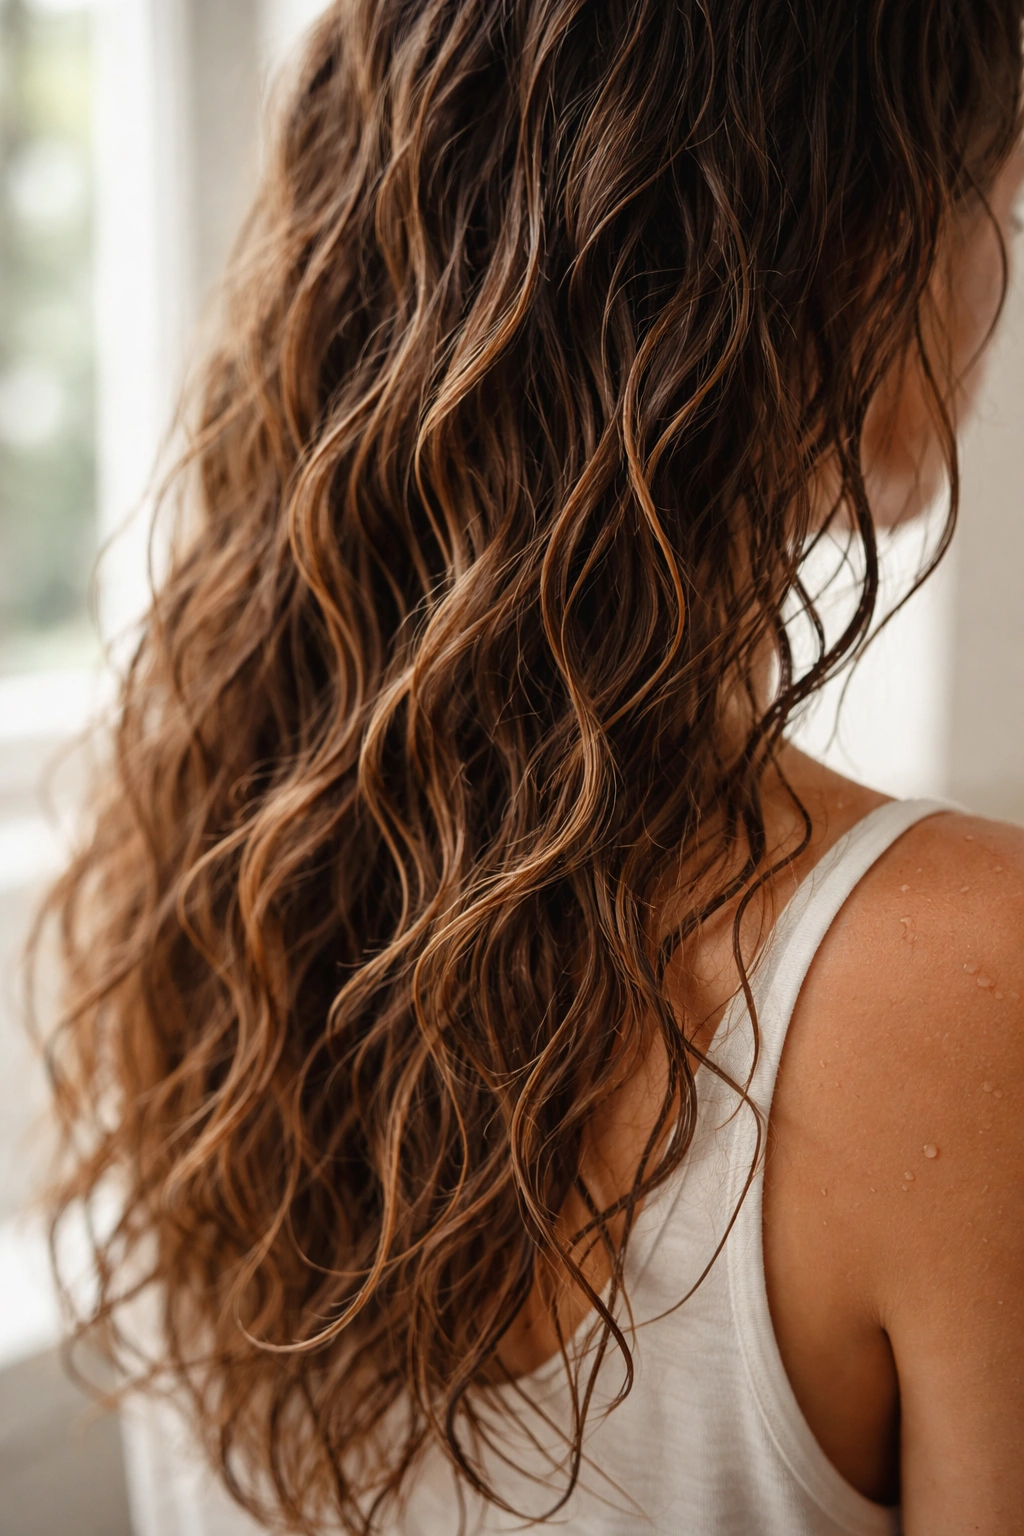
This is the most minimalist method: wash your hair, apply a styling product, scrunch with your fingers as it air dries, and you’re done. No tools needed, minimal effort, and the waves you get are soft and natural-looking. This method works best on naturally wavy hair or hair that’s been pre-textured with salt spray or a similar product the day before.
The waves you get this way look deliberately undone, which is perfectly on-trend. You can pile waves on top of your head in a scrunchie if they’re still damp, let them dry that way, and you get extra volume and texture when you release the scrunchie.
Why Finger-Scrunching Creates Genuine Texture
When you squeeze and scrunch damp hair, you’re encouraging it to dry in a bent, textured pattern rather than straight. Your fingertips create random bends and curves that, as they dry, hold that textured shape. It’s the same principle as the twisted bun method, but much faster and with less structure. The randomness is actually the whole point—you’re not aiming for perfect matching waves, but rather lived-in texture.
The Finger-Wave Air-Dry Method
- Wash hair and squeeze out excess water with a towel
- Apply a curl-enhancing cream, mousse, or sea salt spray focused on mid-lengths and ends
- Use your hands to scrunch hair upward repeatedly, working through all sections
- Either air dry completely (4-8 hours) or let damp hair sit in a loose bun while you do other things and dry partly
- Once completely dry, gently separate any clumped sections with your fingers
- The waves look best the same day; they relax slightly on day two
- Refresh on day two with a light mist of salt spray and finger-scrunching
Pro tip: Sleep on slightly damp scrunched hair piled on top of your head in a silk scrunchie. You’ll wake up with more defined waves and less frizz than sleeping on straight damp hair.
9. The Flat-Iron Wave Technique
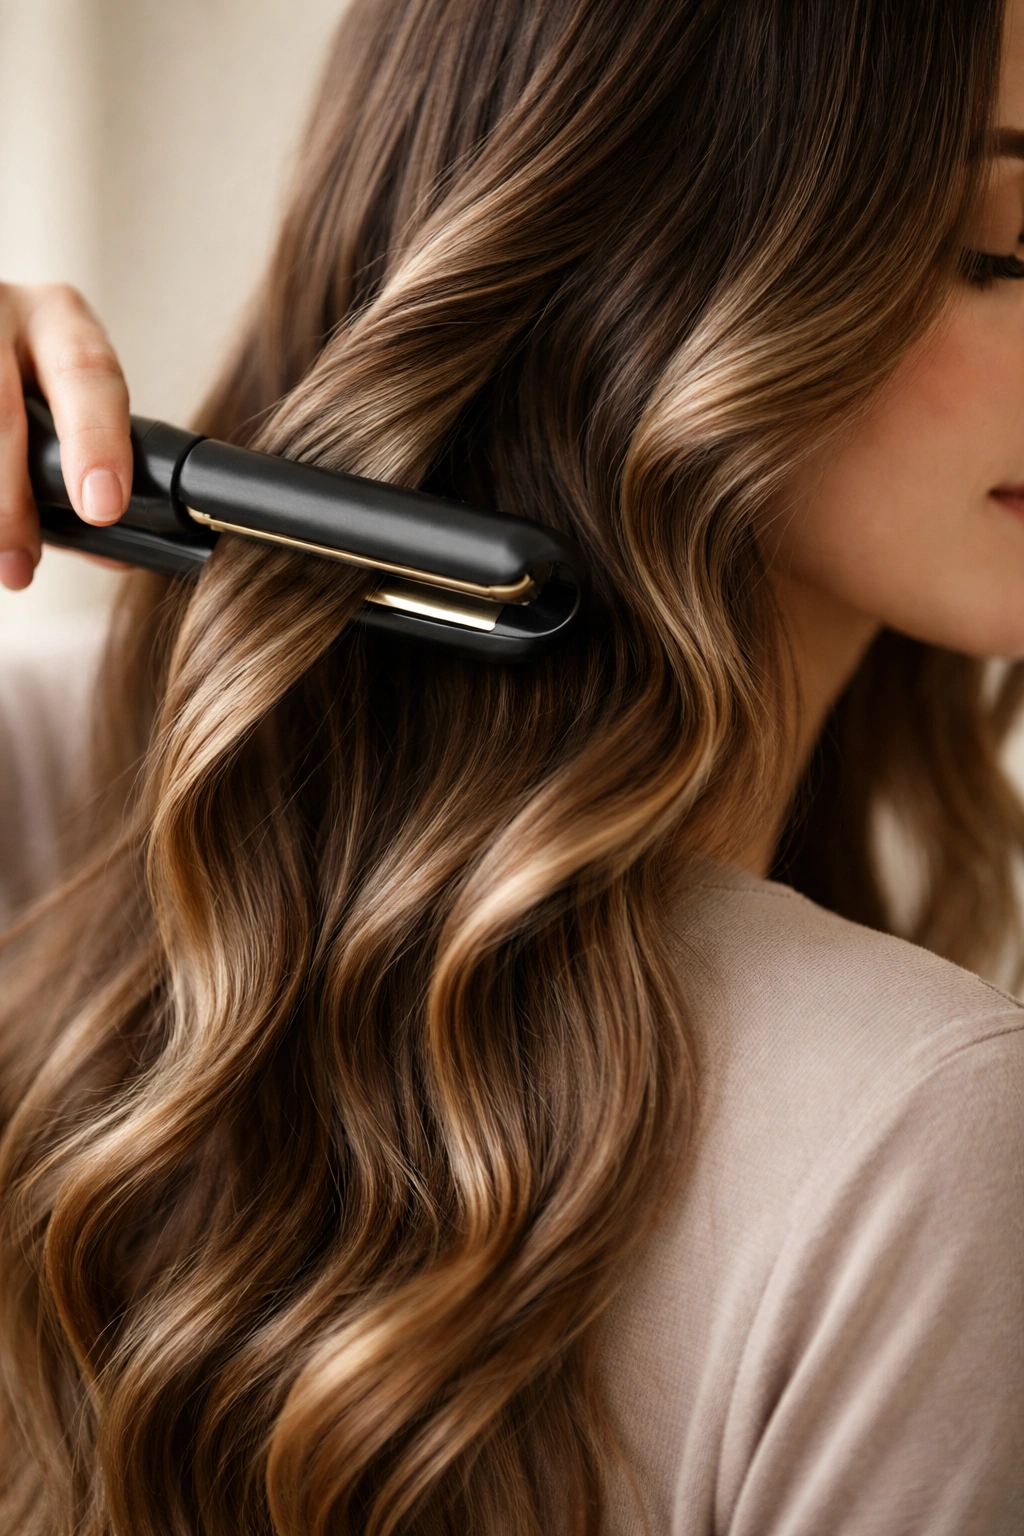
A flat iron (hair straightener) can create beautiful waves if you understand that you’re not straightening—you’re angling and twisting as you glide down each section. This method creates sleek, polished waves with a modern, slightly edgy vibe. It works fastest on already-dry hair and is perfect if you want waves that look intentional and styled rather than naturally tousled.
Flat irons are underrated for wave-making. Most people assume they only straighten, but used at an angle and with a twisting motion, they create gorgeous, defined waves in about 15 minutes.
How Flat Irons Create Waves Instead of Straightness
Instead of gliding straight down each section, you angle the iron slightly and gently twist your wrist as you move down the strand. This creates a subtle S-curve in each piece. The key is not clamping too tightly and keeping the iron moving so you don’t fry your hair. Lower temperature settings (around 350°F for most hair types) work best.
The Flat-Iron Wave Method
- Start with dry hair and apply a heat protectant spray
- Take a 1-2 inch section and clamp it near the roots
- Angle the flat iron slightly (maybe 45 degrees) rather than straight down
- As you glide the iron down the section, gently twist your wrist to create a slight S-curve
- Release at the ends and move to the next section
- Alternate which direction you angle/twist (one section curves one way, next section curves the opposite way) for a natural look
- Once all sections are done, use your fingers to gently separate and tousle waves
- These waves last the entire day and into the next day
Worth knowing: This technique takes a couple of tries to get smooth. If you clamp too hard or move too slowly, your hair will look crunchy or fried. Light pressure and smooth, steady movement are key.
10. The Hybrid Method: Braid + Salt Spray
If you want the absolute most foolproof method that works on nearly all hair types and delivers consistently beautiful waves, combine braiding with salt spray. You braid damp hair the night before, sleep on the braids, undo them in the morning, and immediately spritz with salt spray. The salt adds extra texture to the wave pattern, making waves that might otherwise be soft more defined and hold longer.
This hybrid approach combines the wave-holding power of braids with the texture-enhancing properties of salt spray. You get waves that last 2-3 days instead of just one, and they look fuller and more intentional than either method alone.
Why Braids + Salt Spray Is Nearly Foolproof
Braids do the heavy lifting of establishing the wave shape overnight. Salt spray then enhances and separates that wave pattern, making waves look fuller and more defined. The combination means you’re not relying on one method to do all the work. If your braids create slightly loose waves, the salt spray tightens them. If salt spray alone would be too subtle on your hair, the braid base gives you something stronger to work with.
The Overnight Braid-and-Spray Method
- Create loose braids in damp hair before bed (see the braided waves section)
- Sleep on the braids overnight
- Undo braids in the morning and use your fingers to gently separate the wave pattern
- Mist generously with sea salt spray throughout all sections
- Use your fingers to scrunch and piece apart waves, encouraging separation
- Air dry the spray or rough-dry with a blow-dryer on low for extra volume
- Waves typically last 2-3 days before needing a refresh
- On day two or three, simply spritz with salt spray and scrunch to reactivate the wave pattern
Insider note: This is the method that most consistently delivers salon-quality waves without actual salon effort. If you only perfect one method, make it this one.
Final Thoughts
Easy wavy hairstyles don’t require expensive tools, professional training, or an hour of styling time. The waves that work best are often the simplest ones—the ones that work with your hair’s natural texture instead of against it. Whether you’re drawn to the instant results of a blow-dryer diffuser, the overnight convenience of braids or rods, or the minimal-effort approach of salt spray and scrunching, you have options that fit your lifestyle and your hair type.
The real secret to pulling off wavy hairstyles consistently is finding the one method that feels easiest for you and sticking with it long enough to get genuinely good at it. Your first attempt at any styling technique almost never looks as polished as your fifth or tenth attempt. Give yourself permission to practice without pressure—you’re building a skill that will stay with you forever.
Start with the method that requires the fewest tools or the least amount of time. Once you’ve nailed that, try another one. Over time, you’ll develop a toolkit of techniques that work for different situations—quick waves for rushed mornings, more elaborate waves for weekends when you have extra time, heatless options for when your hair needs a break from styling. That flexibility is what transforms you from someone who wants wavy hair to someone who can create wavy hair confidently, whenever you want it.