There’s something about wavy hair that instantly elevates any outfit, making you look polished without feeling stiff or overly formal. Whether you’re heading to a wedding, gala, cocktail party, or special event, the right wavy hairstyle can transform your entire look—adding texture, movement, and undeniable sophistication. The beauty of wavy styles is that they work across face shapes and hair types, and they sit in that perfect sweet spot between effortlessly sexy and genuinely elegant.
The challenge is figuring out which wavy style actually suits your face, your dress code, and the vibe you’re going for. Not every wave pattern reads the same way. Some styles lean romantic and soft, others project pure Hollywood glamour, and some strike a balance between undone and intentional. The styling technique matters too—where you place the wave, how tight or loose you keep it, and whether you add accessories all shift how the final look photographs and how it feels when you’re wearing it.
What makes dressy wavy hair different from everyday waves is the intentionality. We’re talking about waves that have been shaped with precision, often combined with strategic styling tricks that make them last all evening. These aren’t lazy waves—they’re waves with purpose, waves that photograph beautifully, waves that make you feel confident walking into a room. The good news is that none of these styles require a salon visit, though having a stylist create the waves for you is always an option if you want to show up already half-done.
1. The Soft Romantic Waves
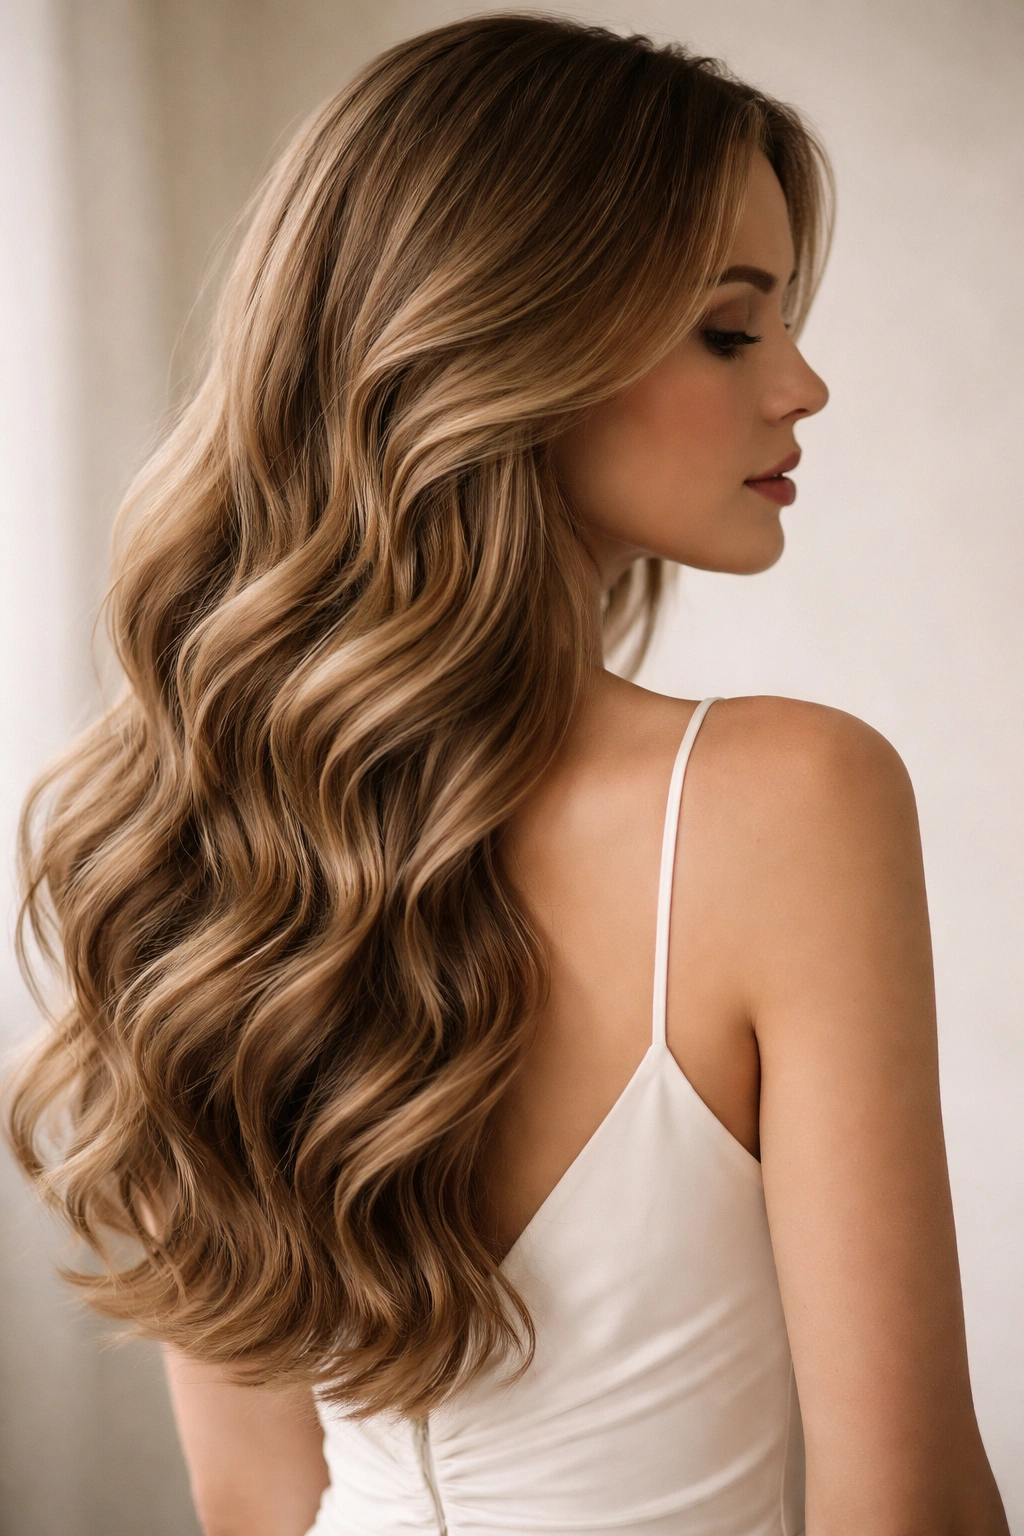
This is the hairstyle that makes people think you just stepped out of a fairytale. Soft romantic waves feature loose, flowing undulations that start around the mid-shaft of your hair and fall gently down your back. They’re not kinky or crimped—they’re smooth, defined waves with plenty of movement and a dreamy quality. The waves are typically larger and more relaxed than other styles, creating a look that feels both polished and touchable.
How to Create This Elegant Wave Pattern
Soft romantic waves work best on hair that’s at least shoulder-length, though longer hair (think collarbone and below) really showcases the full effect. Start with damp hair and apply a smoothing serum or heat protectant spray evenly through your strands. Use a large-barrel curling iron (1.5 to 2 inches) and wrap sections around the barrel, holding each section for 8-10 seconds before releasing. The key is wrapping the hair in the same direction around the barrel—this creates the wave rather than a curl.
Once you’ve curled all your hair, run your fingers through the waves gently while they cool. This breaks up the curl pattern and creates softer, more natural-looking waves. A light hairspray (not too much—you want movement, not concrete) sets the style without weighing it down. Part your hair down the middle or slightly to one side, depending on what flatters your face best.
Why This Style Steals the Show
- Creates an ethereal, romantic silhouette that photographs beautifully under any lighting
- Works with strapless, sweetheart, or V-neckline dresses particularly well
- The movement and texture add dimension to thin hair and prevent a flat appearance
- Pairs perfectly with delicate jewelry since the hair isn’t too busy
Pro tip: If you want the waves to last longer than four hours, use a firm-hold hairspray and sleep with your hair in a loose braid the night before—the braid texture acts as a base that holds wave memory, making them easier to re-set the next day.
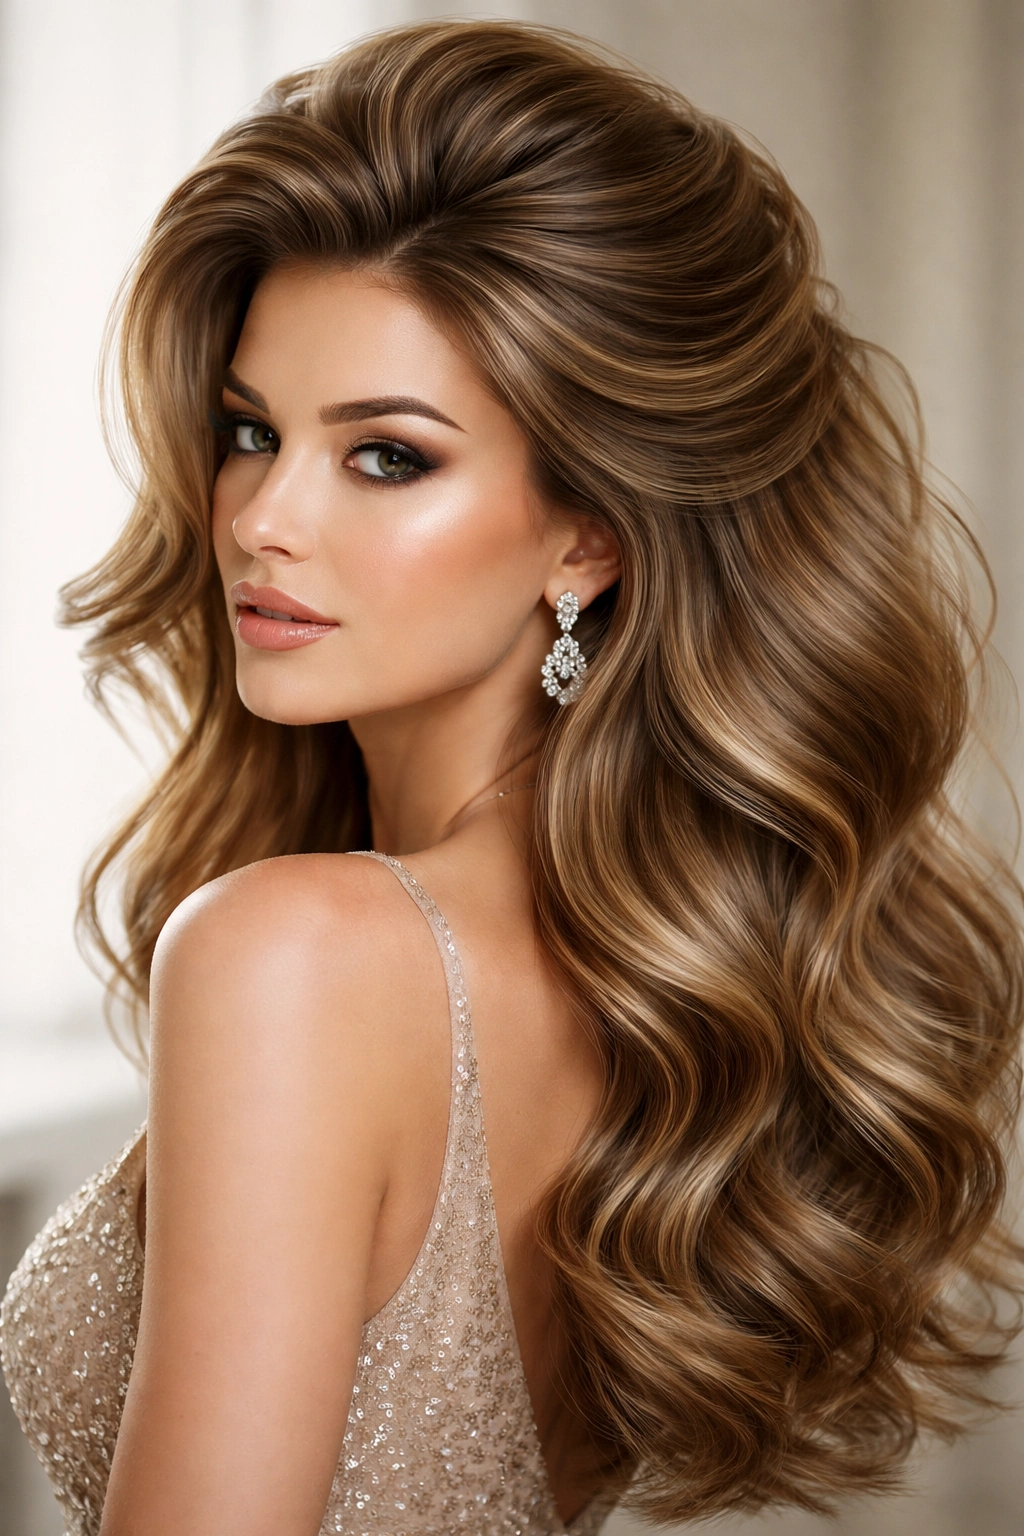
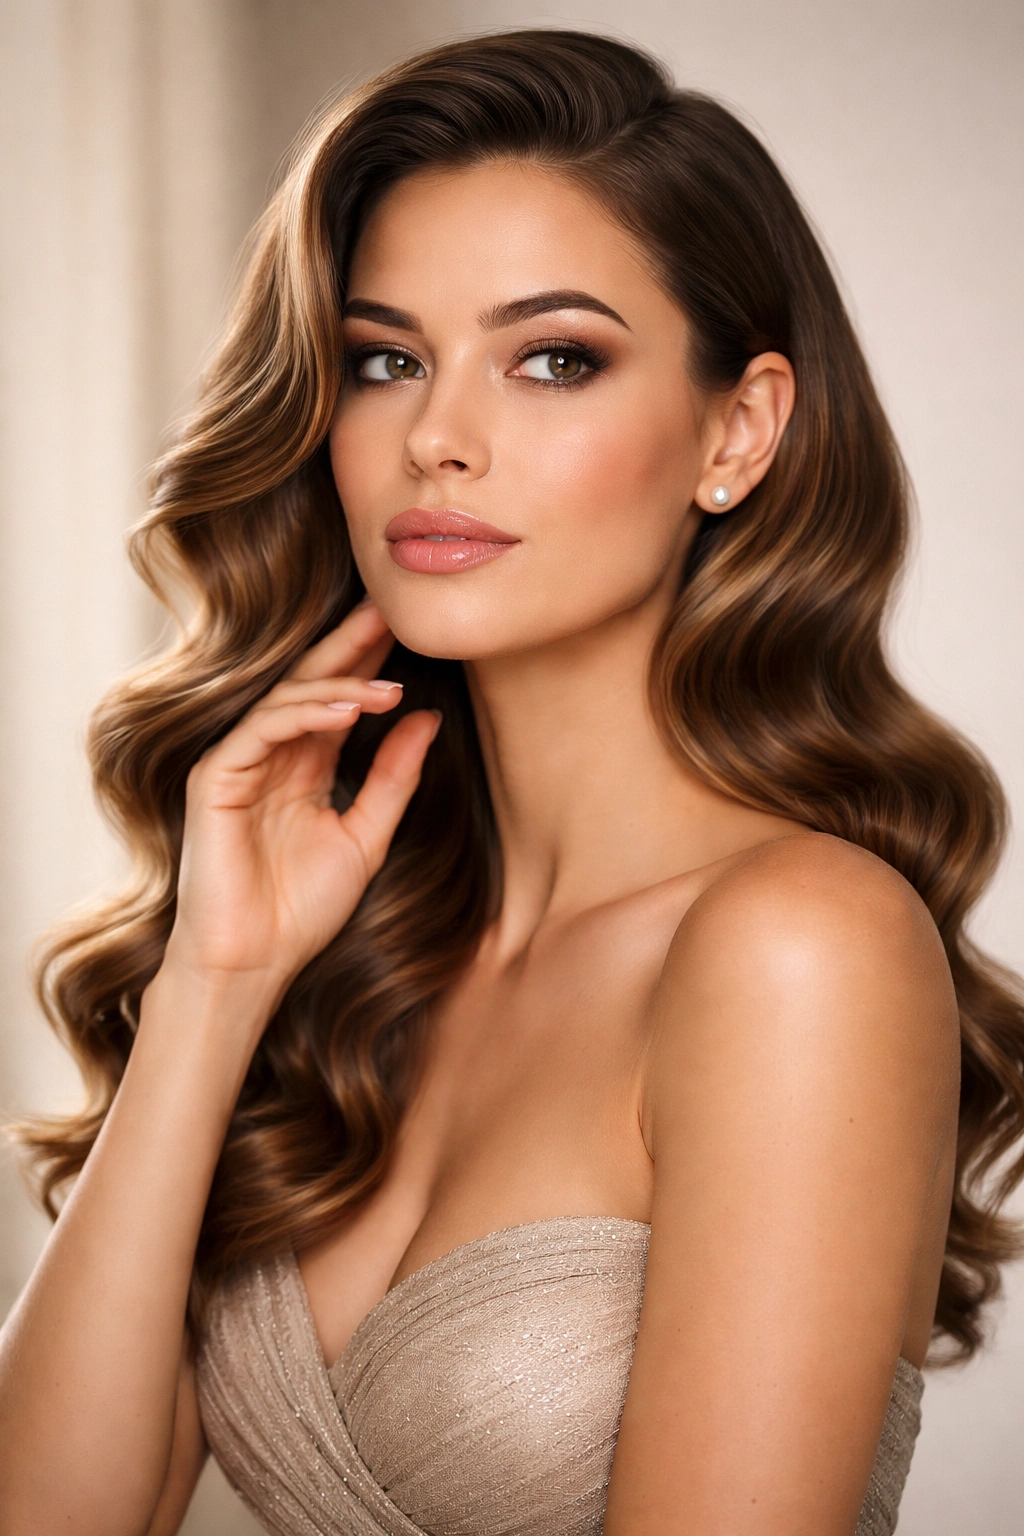
2. Hollywood Glamour Waves
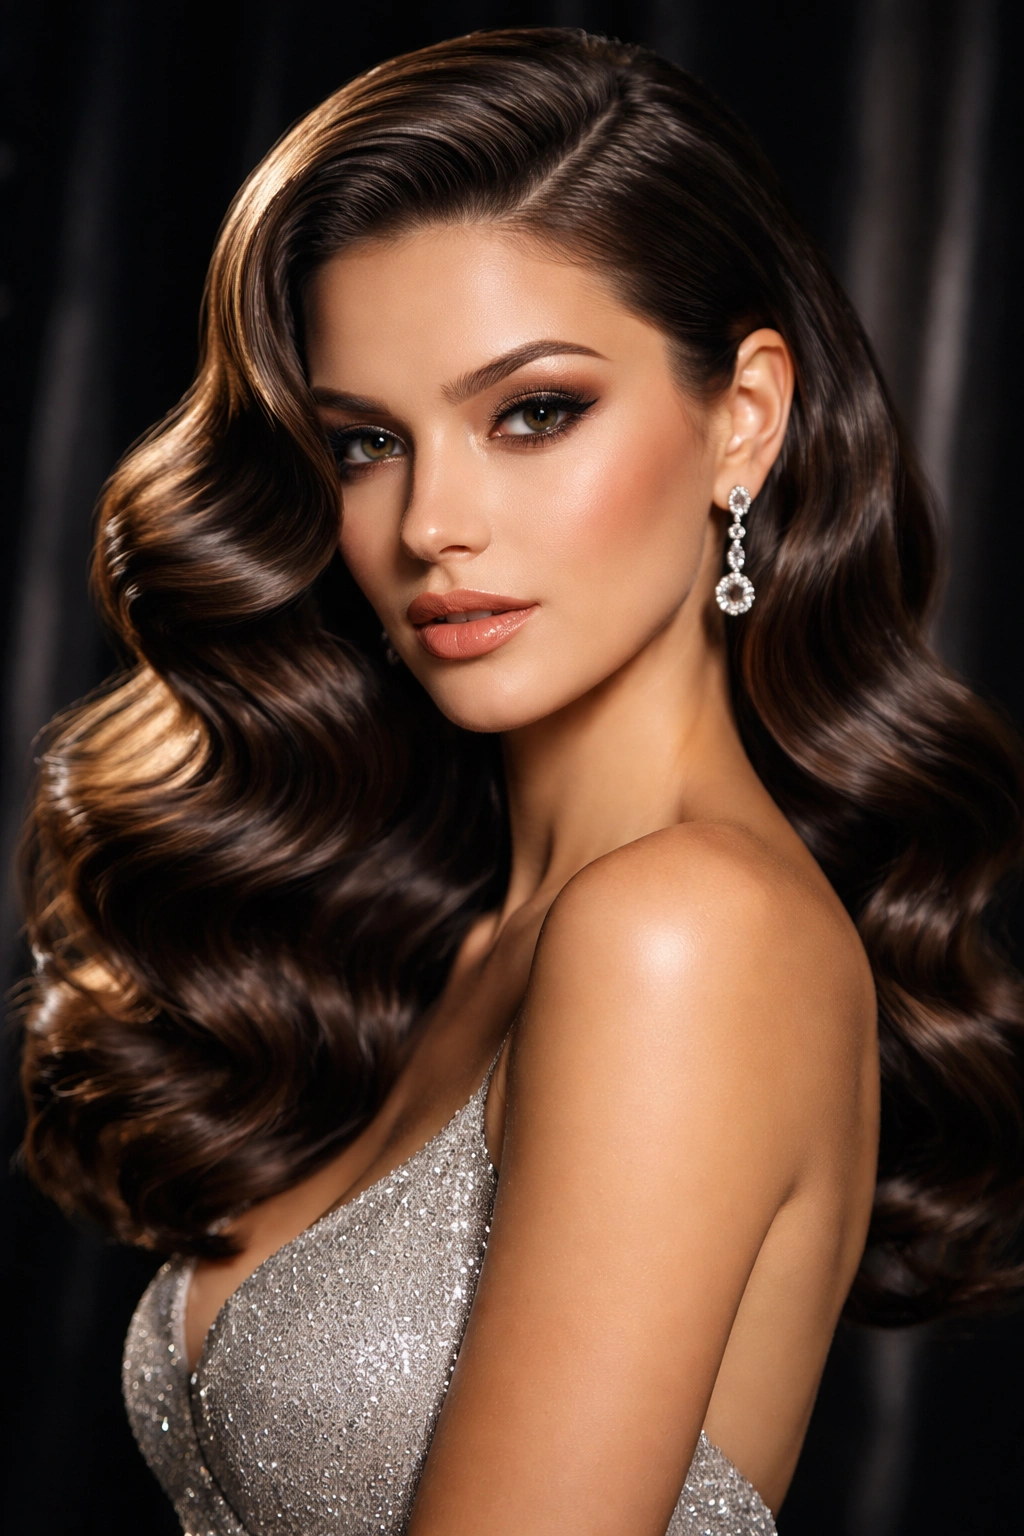
Hollywood waves are the gold standard of formal elegance. These are deep, structured waves with a liquid-silk appearance—think old-school starlet glamour meets modern polish. The waves are intentional and very visible; they’re not subtle. The hair typically gets parted deeply to one side, with waves that are tighter and more sculpted than soft romantic waves. The result is polished sophistication that screams “special occasion.”
The Art of Creating Old Hollywood Glamour
This style requires more precision than casual waves. Start with totally dry hair (wave-setting products work best on dry, not damp, strands). Section your hair into vertical subsections, about 1 to 1.5 inches wide. Using a 1.25-inch curling iron, curl each section away from the face, wrapping the hair around the barrel and holding for 12-15 seconds. You want a defined curl, not a loose wave.
Once all sections are curled, let them cool completely in their coiled state—don’t touch them while they’re warm. After cooling, gently brush through the curls with a soft paddle brush, starting at the roots and moving downward. This brushing technique converts the tight curls into smooth, flowing waves. The brushing motion is what creates that signature wave pattern rather than a curly texture.
Key Elements That Make It Hollywood Elegant
- The deep side part creates asymmetrical balance and frames one side of your face beautifully
- Waves look more voluminous and textured under evening lighting and cameras
- Pairs exceptionally well with red lipstick, drop earrings, or other statement makeup
- The structured waves complement structured, fitted dresses or bodices
Worth knowing: This style is most dramatic on hair that’s straight or slightly wavy naturally—if your hair is already curly, you’ll need a smoothing treatment or flat iron base before creating the waves, otherwise the texture gets lost in your natural curl pattern.
3. Textured Beachy Waves
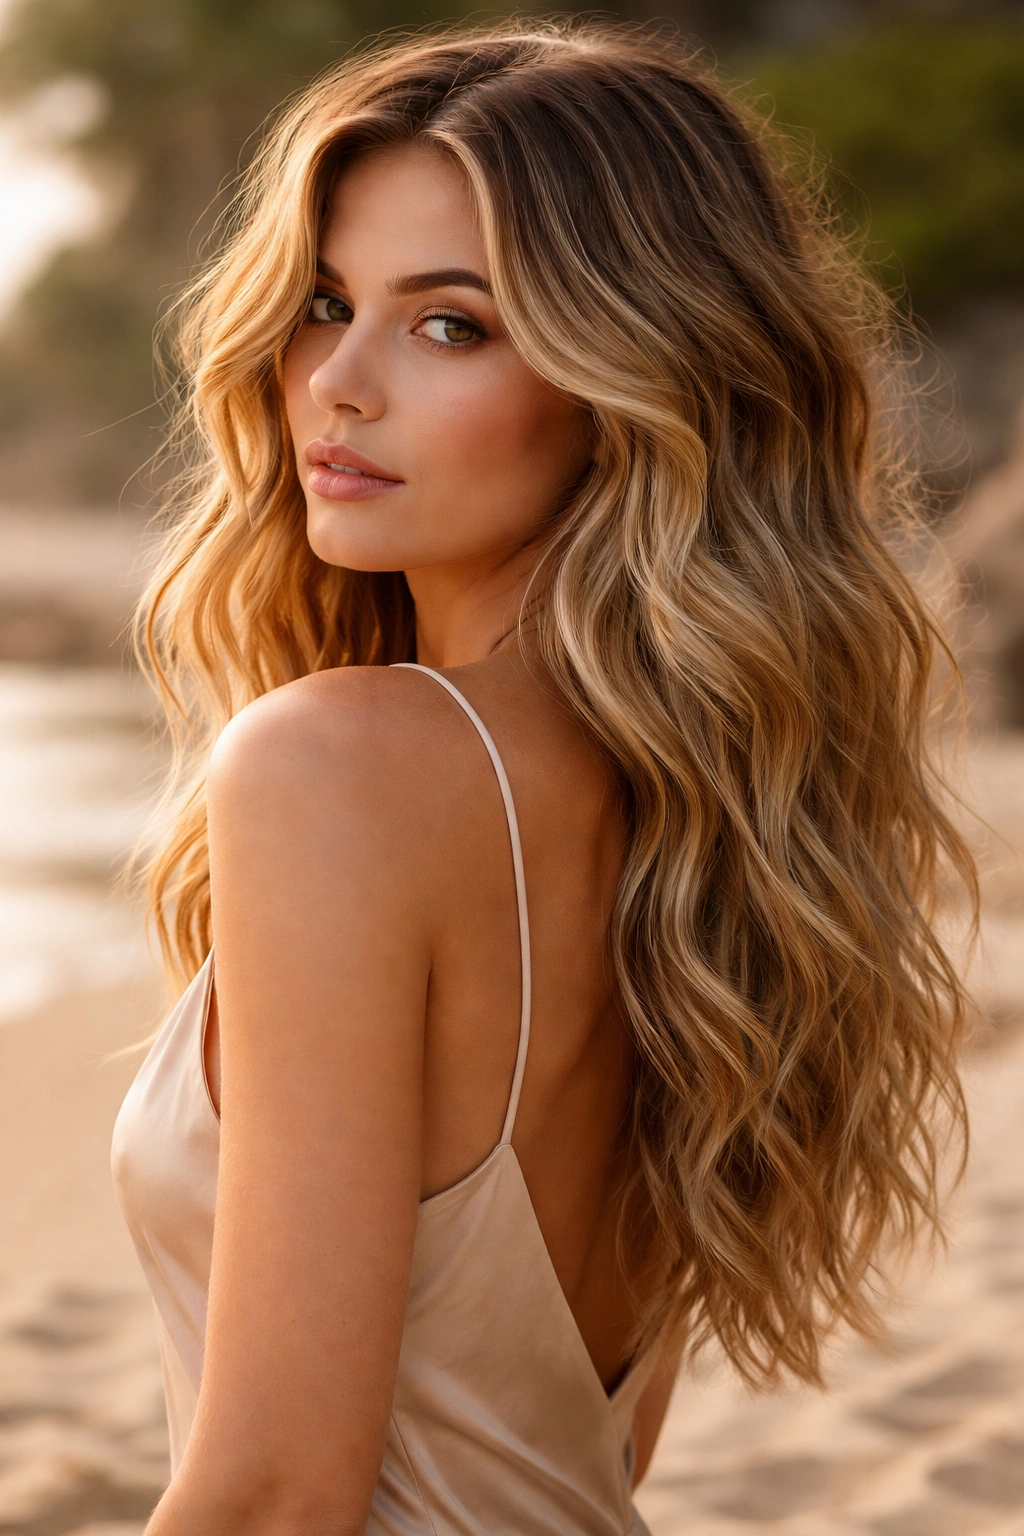
Don’t let the name fool you—beachy waves can absolutely read as formal when they’re styled with intention and paired with the right dress and makeup. These waves are looser and more carefree than Hollywood waves, with more texture and a slightly undone quality. The movement is more zigzag than smooth, creating a tousled, lived-in appearance that still feels elevated in the right context. Beachy waves work beautifully for garden weddings, beach events, or when you want a hairstyle that says “I look effortlessly stunning.”
Creating Waves With Natural Movement and Texture
Beachy waves start with a texturizing product—sea salt spray works great, but you can also use a volumizing mousse or texturizing cream applied to damp hair before styling. These products give your hair grip so the waves hold their shape without needing heavy hairspray. Use a curling iron (1.25 to 1.5 inches) but this time, don’t wrap the section all the way around—instead, wrap it partway, creating a wave rather than a curl. Alternate which direction you wrap each section to create varied, organic-looking waves.
You can also create beachy waves using the “twisting and curling” method: twist a section of hair, then wind it around the barrel of your curling iron. This creates a tighter, more textured wave pattern. Let the curls cool, then break them up significantly by running your fingers through and scrunching your hair gently. Spray lightly with a texturizing spray rather than a stiff hairspray—you want the waves to have movement and flexibility.
Why This Works for Dressy Events
- The texture adds visual interest and photographs beautifully in natural light
- Pairs well with bohemian-inspired dresses or anything with flowing fabric
- The looseness allows you to add decorative hair clips, combs, or pins without looking overdone
- Works on all hair lengths and types, including thick hair that might look too heavy in tight waves
Pro tip: Create beachy waves the night before your event and sleep on them loosely braided or in a messy bun. The overnight resting helps set the wave pattern, and you’ll need less heat styling and product on the day itself.
4. Deep Side Part Waves
A deep side part is a power move on its own, but combine it with waves and you’ve got a look that’s both glamorous and strategically flattering. This style features waves that fall predominantly to one side, with that deep side part creating drama and asymmetrical balance. The waves on the smaller side (your non-dominant side) can be pinned back slightly, while waves on the larger side flow freely. This style works exceptionally well if you have a longer face and want to add width, or if you want to show off statement jewelry on one side of your face.
Executing the Deep Side Part Perfectly
Create your side part much deeper than you normally would—ideally, it should start at a point above your ear on the smaller side, creating an extreme asymmetry. Use a fine-tooth comb and a tail comb to make a clean, precise part line. The precision matters here because the contrast between the part and the waves creates the visual drama. Curl all of your hair using the methods described in previous styles, but make sure you’re leaving the smaller side somewhat smoother and sleeker at the roots—this exaggerates the asymmetry.
You can gently pin back a few of the smaller waves on the less voluminous side using bobby pins that match your hair color, or use a decorative hair clip. This keeps the hair off one side of your face while the waves on the larger side cascade freely. The effect is romantic but also fashion-forward and architectural.
Why Deep Side Parts Upgrade Any Look
- Creates the illusion of a narrower face if your face is wider, or wider cheekbones if your face is longer
- Allows you to showcase makeup on one side of your face (one bold eye or a statement lip)
- Pairs beautifully with asymmetrical necklines, one-shoulder dresses, or dramatic side-slit skirts
- The asymmetry makes the style feel intentional and design-forward rather than generic
Insider note: If you’re nervous about the deep part looking too extreme, start by creating it about one inch less dramatically than you think you want it. You can always adjust before styling your waves, but once the waves are in, moving the part becomes complicated.
5. Voluminous Crown Waves
This style focuses on creating maximum volume at the crown and roots while the waves travel down the rest of your hair. It’s the hairstyle to choose if you want to add height to a round or short face, if you have fine hair and want it to look thicker, or if you want an overall more dramatic silhouette. The voluminous crown pairs beautifully with upswept makeup, statement earrings, or an ornate updo accessory, since the crown is the focal point.
Building Volume at the Roots and Crown
Start by blow-drying your hair with your head upside down, using a round brush and lifting the roots as you dry. This creates a volume-boosting foundation. If you have flat or fine hair, use a volumizing mousse or root-lifting spray while your hair is still damp—apply it specifically to the crown and roots, not the ends. Once your hair is completely dry, tease gently at the crown using a teasing brush, creating a cushion of texture underneath where you’ll place your waves.
Smooth the teased hair carefully so it looks polished rather than obviously teased. Now create waves as described in previous styles, but focus more energy on the waves that sit at and around the crown—make sure they’re tighter and more defined in this area. The lower waves can be slightly looser. Use a volumizing hairspray rather than a firm-hold hairspray, since you want the waves to have movement while the crown stays lifted.
Styling Principles That Maximize Height
- Tease or backcomb gently to create a foundation that holds volume longer
- Keep the widest part of your wave pattern at the crown and upper back
- Avoid sleek, flat waves at the roots—textured, lifted roots are essential
- Pair with a dress neckline that doesn’t hide your neck and collarbone, so the crown’s height is visible
Worth knowing: If you naturally have thin hair or fine texture, this style works best with a root-lifting product and light hairspray rather than heavy product that will weigh everything down. Also, keep your waves a bit more textured and less polished-looking—perfectly smooth waves on thin hair can actually make it look thinner.
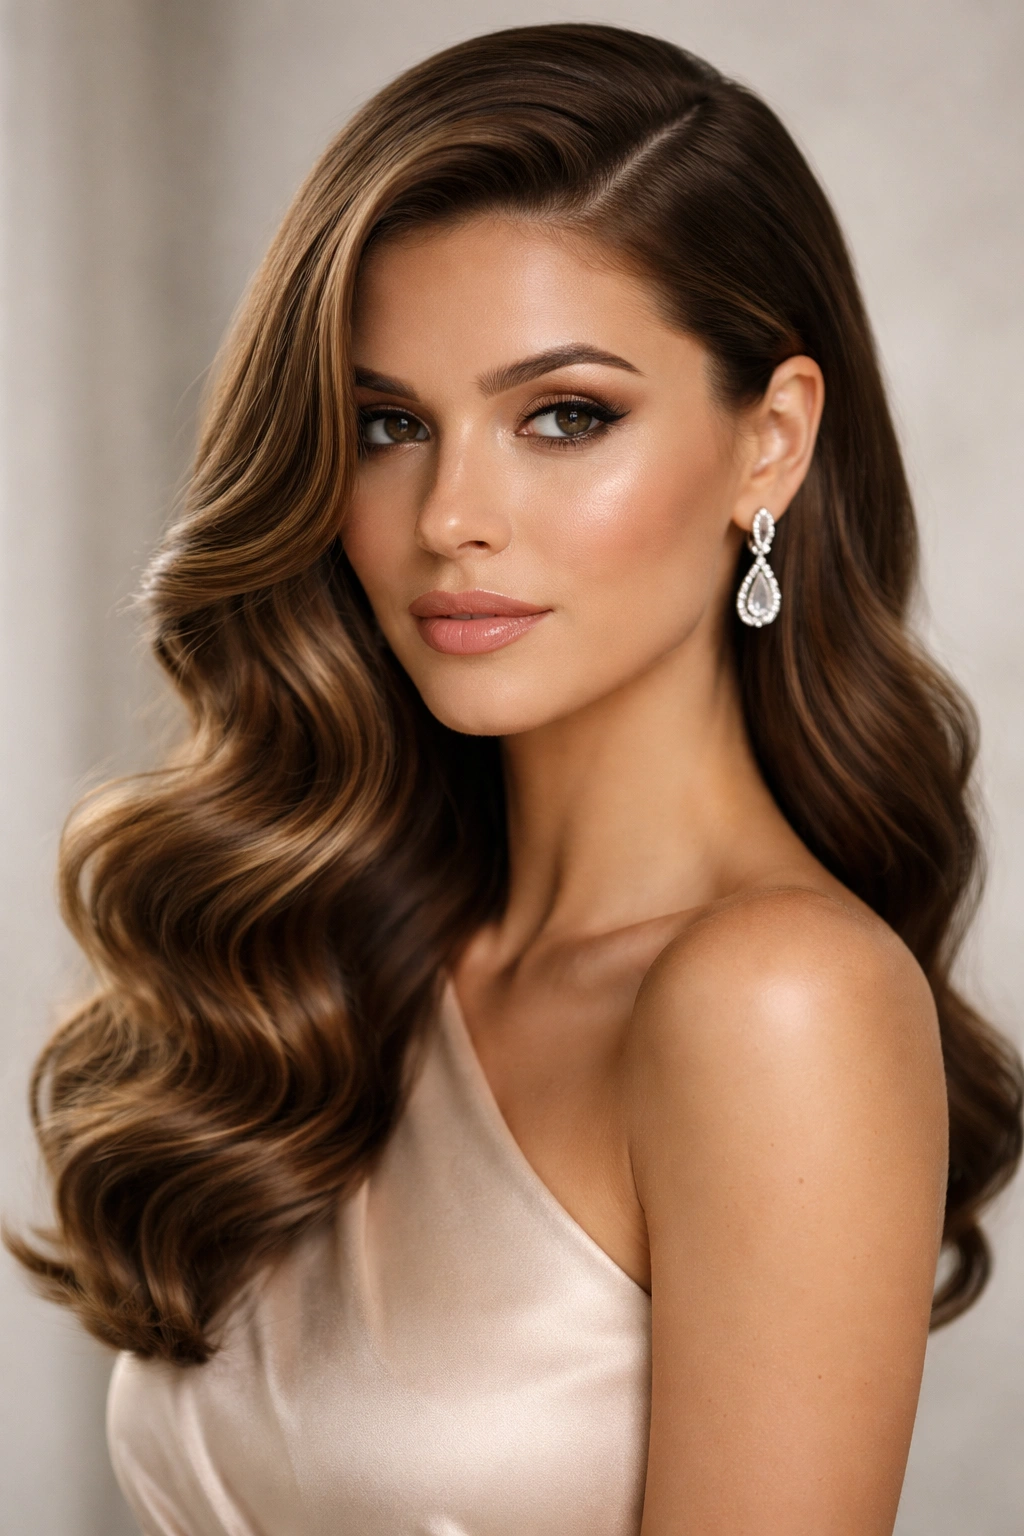
6. Sleek Waves With Accessory Detail
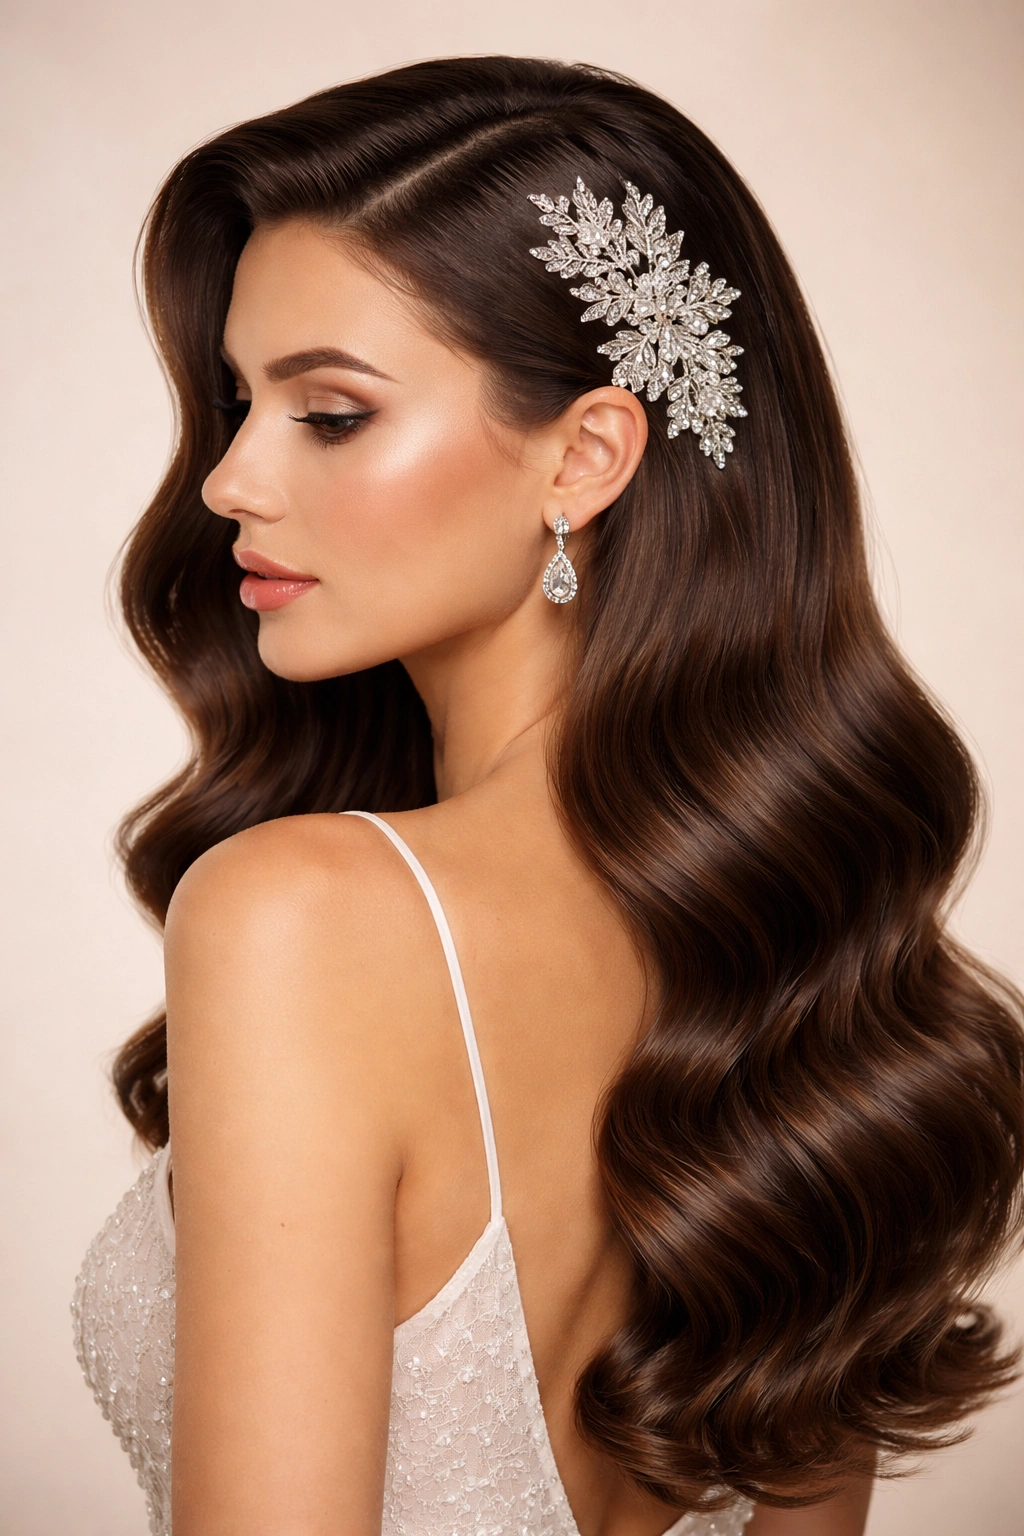
This style combines the sophistication of smooth, sleek waves with the visual interest of a hair accessory—think decorative comb, pearl-studded clip, geometric barrette, or jeweled pin. The waves themselves are similar to Hollywood glamour waves: defined, smooth, and elegant. But instead of letting the waves be the only statement, you’re adding an accessory that catches light and adds personality. This approach works beautifully when your dress is relatively simple, since the hair becomes part of the overall design.
Styling Sleek Waves as the Canvas for Accessories
Create smooth, polished waves as you would for the Hollywood glamour style, using larger or medium barrel curling irons and brushing through the curls to form waves. The goal is waves that look intentional but not overly textured. Once your waves are set, identify where you want to place your accessory—this could be the back crown, a side area, or even clipped into a small section pulled slightly back from your face.
The placement of the accessory matters as much as the waves themselves. If you’re placing a comb or pick, angle it to catch light and create dimension. If it’s a clip, position it so it clips into a subtle section without looking like you’re doing a half-up style. The accessory should feel like an intentional design choice, not a practical hair-holding solution. Use bobby pins to secure the accessory firmly if needed, hiding the pins beneath overlying waves.
Accessory Styles That Elevate Dressy Waves
- Pearl-studded combs or clips for traditional, timeless elegance
- Geometric or art deco pins for modern, architectural style
- Gold or silver filigree combs for vintage-inspired events
- Jeweled barrettes for maximum glamour and sparkle
- Silk scarves woven subtly into waves for texture and color contrast
Pro tip: Choose an accessory that either matches your metal tone (if wearing gold jewelry, use gold accessories in your hair) or intentionally contrasts it. Mixing metals—like a gold comb with silver earrings—only works if it’s a very deliberate style choice; otherwise, stick to one metal tone throughout your accessories.
7. Half-Up Wavy Style
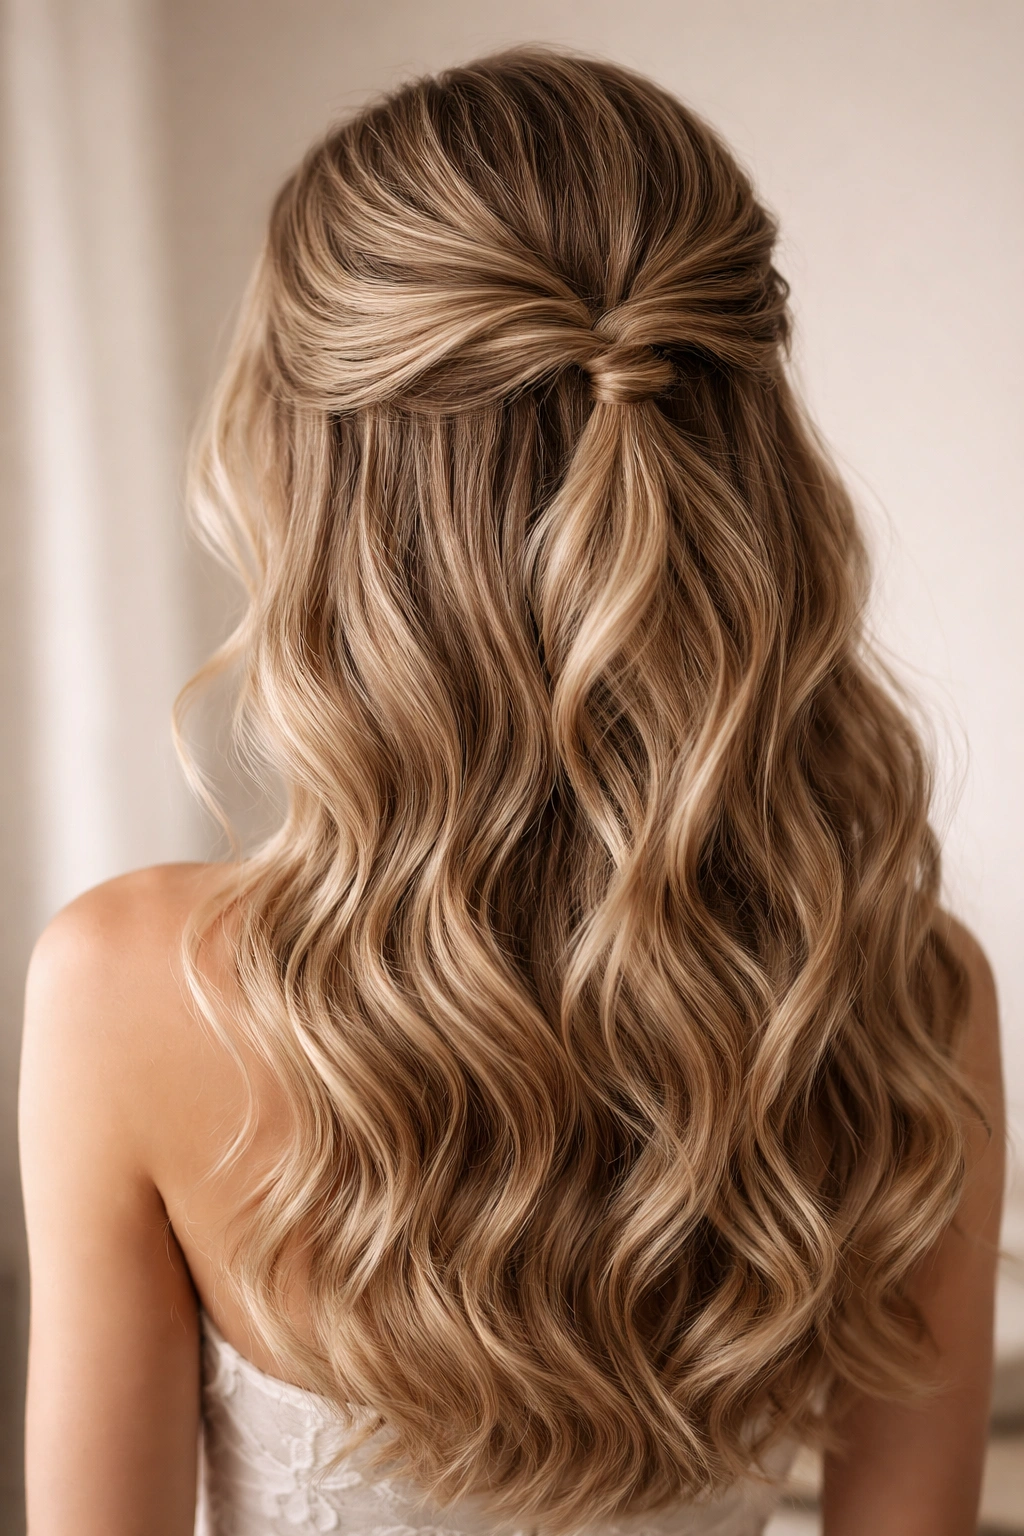
The half-up style with waves is the perfect compromise between having your hair down (so you get the glamour and length) and having it partially secured (so it doesn’t overwhelm your face or dress). Roughly half of your hair is pulled back and secured at the crown or just behind it, while the remaining half falls down your back in waves. The half-up section can be twisted, braided, or simply twisted and pinned, creating an intricate-looking style that’s actually quite straightforward to execute.
Creating a Polished Half-Up With Waves
Start by creating waves in all of your hair using any of the methods described in previous styles. Once your waves are set and cooled, section your hair horizontally from ear to ear across the crown of your head. Take this top section and gently twist it once or twice—you’re not making a tight rope, but rather a loose, wave-like twist. Secure this twisted section at the back of your crown using bobby pins that match your hair color, hiding them beneath the twist.
You can also add a small braid within that top section for extra detail, or weave a thin ribbon or decorative strand through the twist. The lower half of your hair remains down and wavy, framing your face and cascading down your back. Make sure the transition between the secured section and the loose waves looks seamless by smoothing any flyaways with a fine-tooth comb and light hairspray.
Why Half-Up Works for Formal Events
- Shows off both the detail of your face and the glamour of long hair
- Works beautifully with strapless, sweetheart, or open-back dresses
- The secured section keeps hair off your neck and shoulders while waves frame your face
- Pairs well with updos for your hair at the very crown if you want an even more dramatic look
- Easier to maintain throughout an evening than a fully-down style
Worth knowing: The key to making half-up look formal rather than casual is the precision of the twist or braid and the wave definition in the lower section. Loose, undefined waves in the bottom half can make the style read as more casual, so make sure your wave-setting technique creates clear, defined waves.
8. Cascading Waves Down the Back
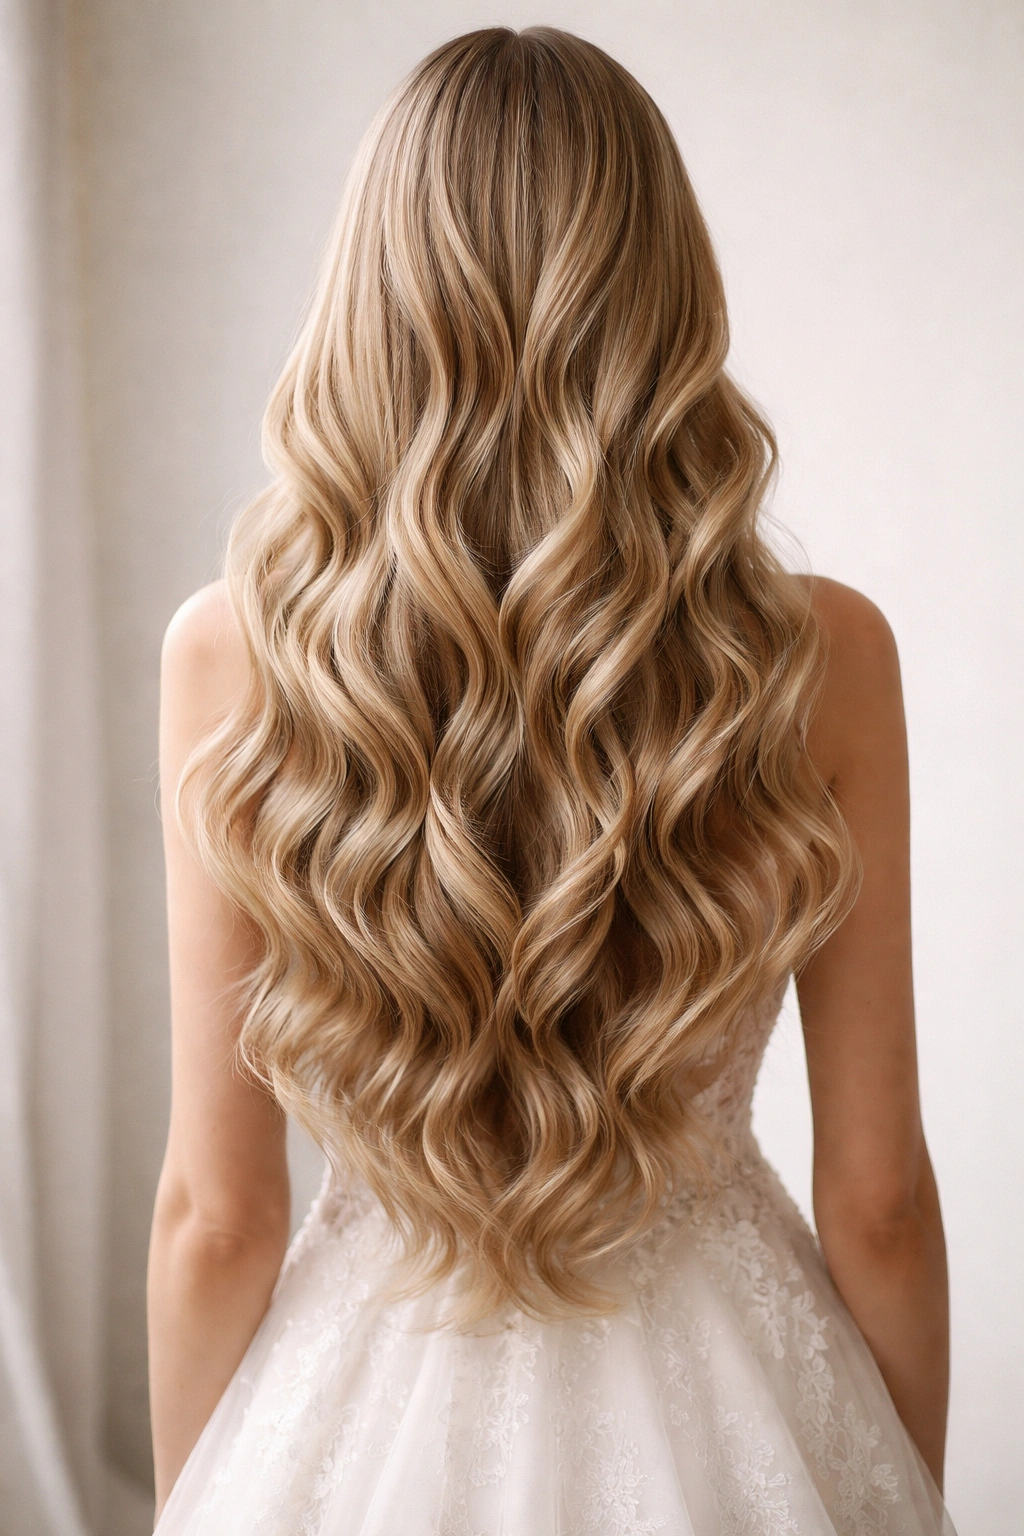
This style is all about showcasing long, flowing hair that moves beautifully when you walk. The waves start at the crown and cascade down your entire back, creating the illusion of a waterfall effect. The waves are typically loose to medium-tightness, allowing for plenty of movement and flow. This is the choice for anyone who wants the most romantic, princess-like version of wavy hair—it’s dramatic, it’s photogenic, and it works beautifully for formal weddings or galas.
Creating the Cascade Effect With Strategic Wave Placement
This style requires that your hair be quite long—ideally at least bra-strap length—for the full effect. Create waves throughout your hair, but vary the wave pattern slightly: tighter, more defined waves at the crown that gradually become slightly looser as you move toward the ends. This variation creates the illusion of waves cascading downward rather than waves that are uniform throughout.
Use a large-barrel curling iron (2 inches or larger) for much of the hair, particularly the lower half. Curl in sections, and remember to wrap the barrel in a consistent direction for the smoothest wave pattern. Don’t brush through the waves too much—you want them to maintain their definition. A light hairspray keeps everything in place while still allowing movement. Part your hair down the center or slightly to one side; the center part tends to create the most balanced, formal look for cascading waves.
Why Cascading Waves Deserve the Spotlight
- The longest, most dramatic waves photograph beautifully from behind
- Movement in the waves creates a sense of luxury and elegance as you move
- Works for any skin tone and face shape since the focus is the back of the head
- Pairs perfectly with simple dresses that let the hair be the statement
- The length and movement make even fine-textured hair look voluminous
Pro tip: If you’re concerned about your waves falling flat by the end of the night, add texture with a sea salt spray or texturizing mousse midway through styling. The texture grips the wave pattern and helps it last longer than perfectly smooth waves would.
9. Tousled Waves With Dramatic Makeup
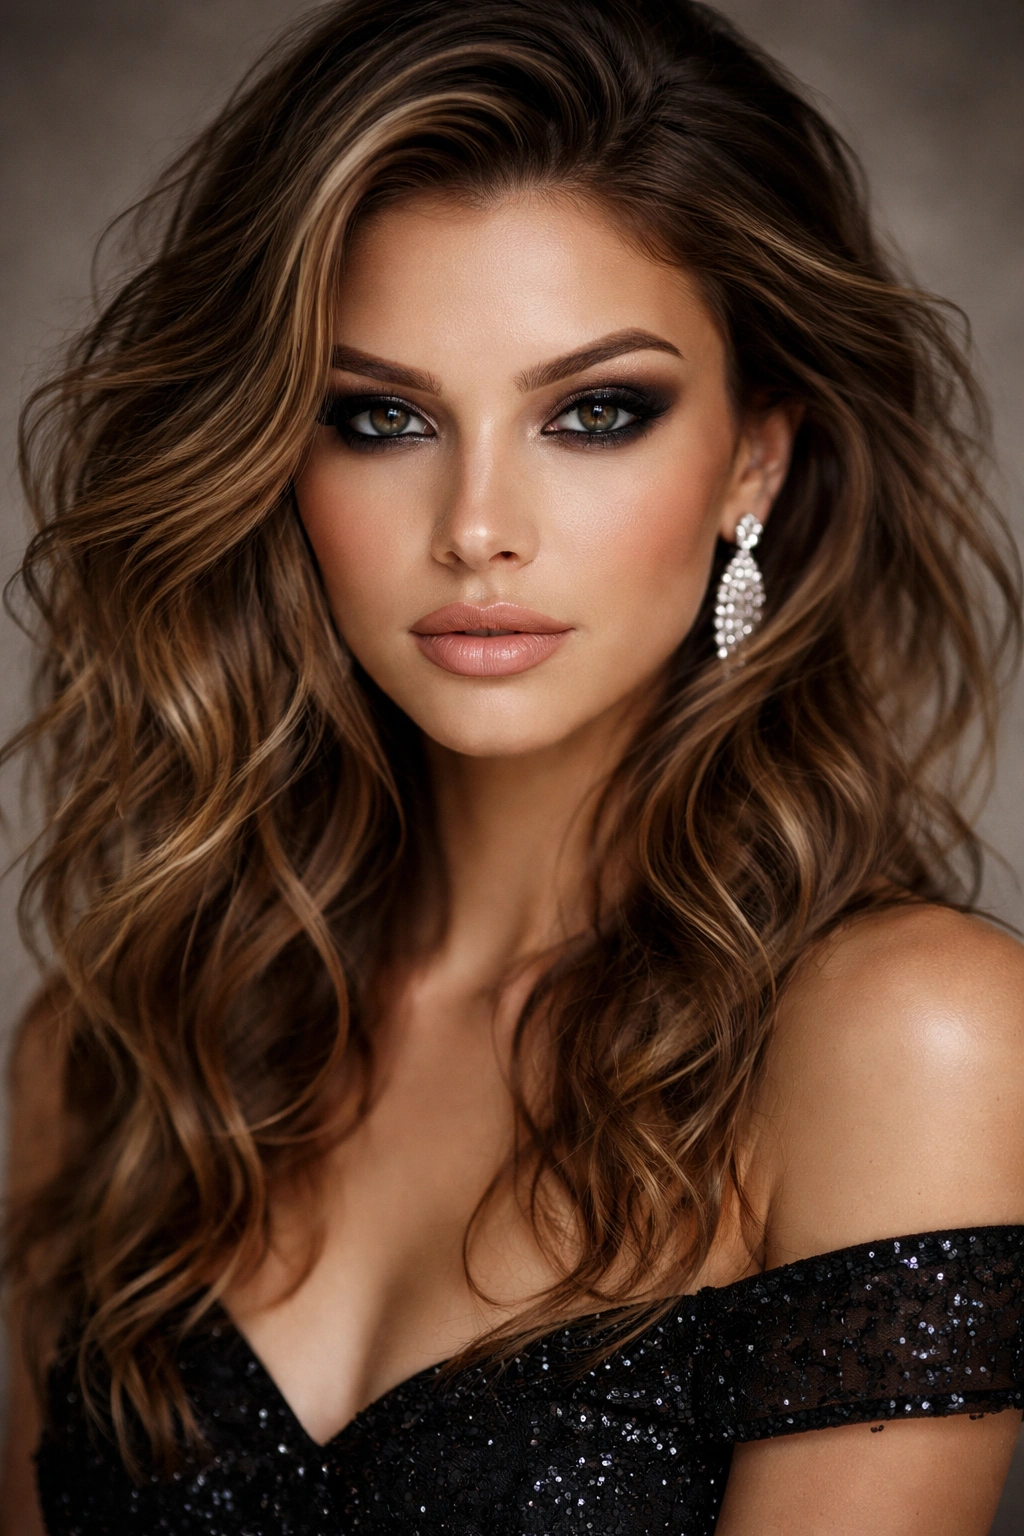
This is the style for when you want your waves to feel effortless and touchable, but your makeup is taking center stage. The waves are intentionally tousled and slightly undone-looking—more textured than perfectly polished—which creates the perfect complement to bold, dramatic makeup. Think smoky eyes, winged liner, strong brows, or a bold lip. The casualness of the waves balances the intensity of the makeup, creating a look that’s both refined and rocker-chic.
Achieving Intentionally Tousled Texture
Create waves using the twisting and curling method or salt spray method described in the beachy waves section. The goal is texture and movement, not perfect wave definition. Once your waves are set and cooled, run your fingers through them generously, scrunching and separating the waves to create a more broken-up, piecy texture. You want some wave definition, but you also want it to look like you didn’t spend three hours styling your hair.
Use a texturizing spray or dry shampoo (even if your hair isn’t oily—dry shampoo adds texture) applied directly to sections of your waves, then scrunched in with your fingers. This adds grip and texture without making hair look dirty or greasy. Keep your hair down and loose; no half-ups or pinned sections. The goal is maximum movement and a slightly undone vibe.
Makeup That Pairs With Tousled Waves
- Smoky eyes in charcoal, bronze, or navy
- Winged or graphic eyeliner
- Bold or unconventional lip colors (deep berry, true red, nude)
- Strong, defined brows
- Glowing or dewy skin texture rather than matte
Insider note: When you’re wearing tousled waves, keep your jewelry slightly more minimal than you might otherwise—let the waves and makeup be the focal points. A statement necklace can fight with both the wave texture and bold makeup, so consider dropping it in favor of statement earrings or a few delicate rings instead.
10. Vintage Pin Curls Waves
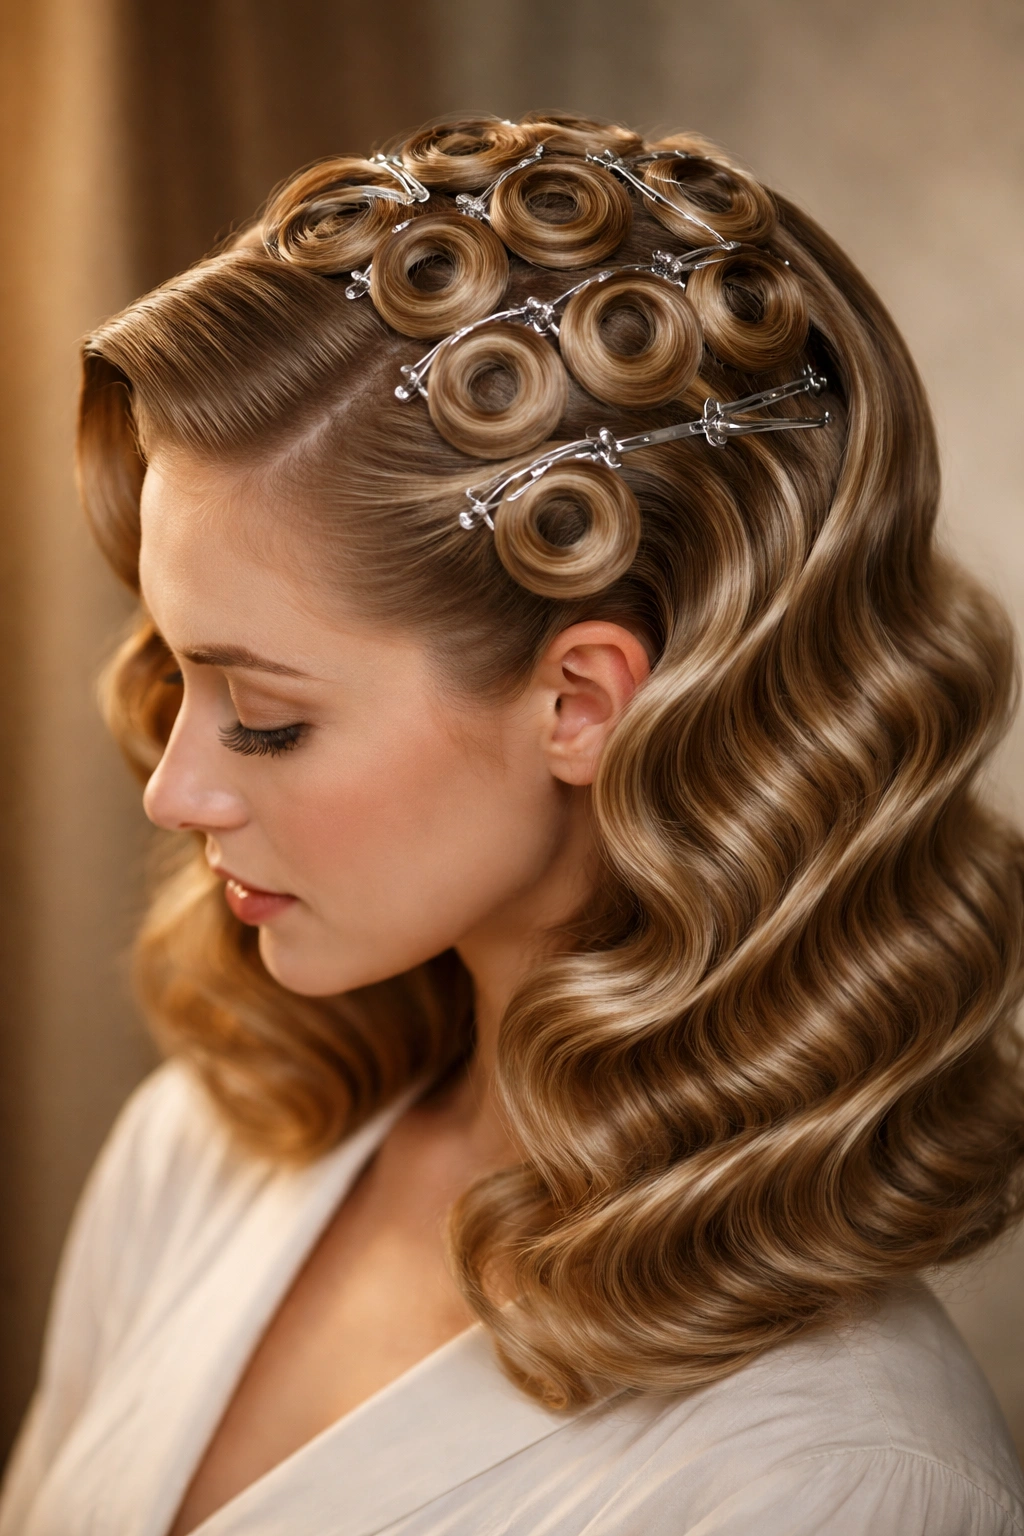
Pin curls are a classic styling technique that creates beautiful, defined waves with a distinctly vintage aesthetic. This style works beautifully for any formal event, but particularly for weddings with a vintage theme, retro-inspired events, or anyone who loves the glamour of old Hollywood. Pin curls create waves that look intentional and meticulously crafted—they’re similar to Hollywood waves but achieved through a different technique that some people find easier to execute.
Setting and Releasing Pin Curls for Perfect Waves
To create pin curls, start with damp hair and apply a setting lotion or wave-setting mousse throughout. Section your hair into 1 to 1.5-inch squares across your entire head. Take the first section, wrap it around two fingers to create a loop, then pin the loop flat against your scalp using a bobby pin. The bobby pin goes through the loop, not just beside it. Continue this process across your entire head, creating neat rows of flat curls pinned against your scalp.
Allow your hair to dry completely—either air dry, sit under a hood dryer, or use a regular blow dryer on a low setting. Once completely dry, carefully remove each bobby pin and gently unwind each curl. Don’t brush the curls out; instead, use your fingers to separate the waves slightly and arrange them as desired. The result is beautiful, defined waves with a vintage quality that feels special and intentional.
Why Pin Curls Create Unforgettable Waves
- The technique creates waves that last all evening without constant touch-ups
- Waves have a distinct, polished quality that photographs beautifully
- Works on all hair lengths and types, including thick hair
- The vintage aesthetic pairs perfectly with vintage-inspired dresses or classic silhouettes
- Gives you more wave definition than most other methods
Worth knowing: Pin curls require patience and planning—you need to set them when you have time to let them dry completely, either the night before or early in the day before your event. If you’re short on time, this isn’t the best option, but if you can plan ahead, the results are worth it.
11. Center Part Symmetrical Waves
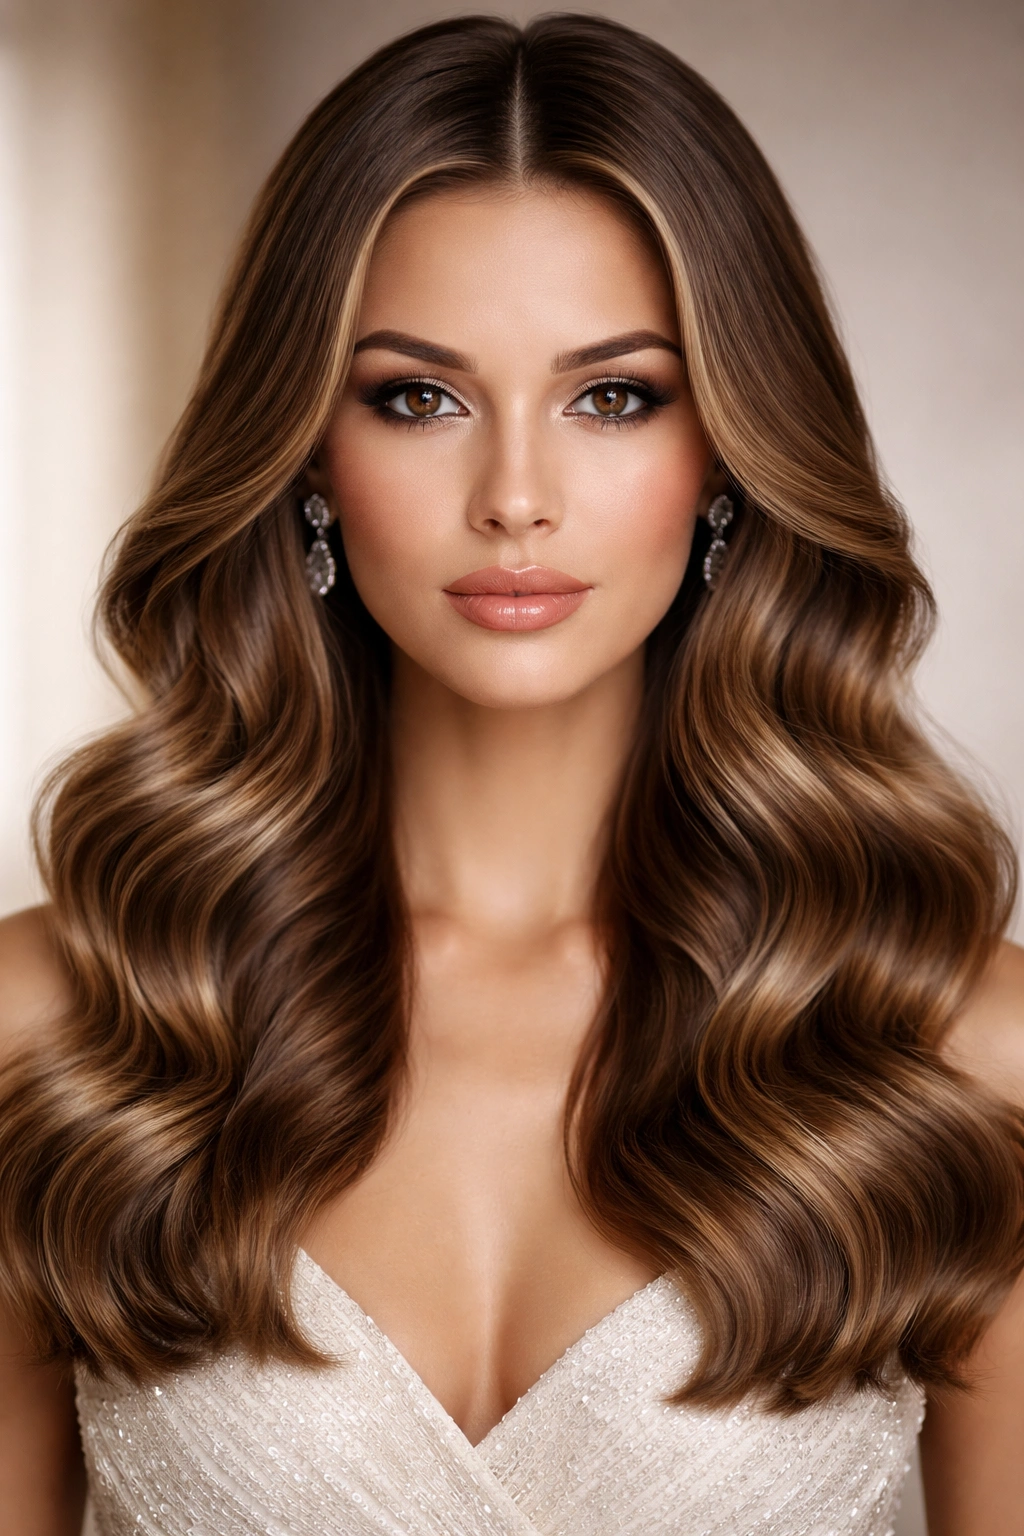
A perfectly symmetrical center part with waves on both sides creates an elegant, balanced look that suits most face shapes and works beautifully for formal occasions. The waves frame both sides of your face equally, and the center part creates a visual line that draws attention upward. This style is less about asymmetrical drama and more about serene, balanced elegance. It’s the choice for anyone who wants waves to feel classic and timeless rather than trendy or edgy.
Creating Balanced, Symmetrical Waves From a Center Part
Create a precise center part using a fine-tooth comb and a tail comb, starting at the very center of your hairline and moving straight back to the nape of your neck. Make sure the part is as straight as possible—a crooked center part undermines the entire balanced effect. Once your part is set, curl your hair in sections, making sure you’re creating waves of equal definition on both sides of your head.
The key to symmetry is consistency: use the same size curling iron, wrap your hair in the same direction on both sides of the part, hold each curl for the same amount of time, and brush through the waves with the same technique on both sides. Even slight variations will be noticeable with a center part, so precision matters. Once your waves are set, make sure they’re arranged symmetrically—the wave on the right side should mirror the wave on the left side as much as possible.
Why Symmetry Reads as Particularly Elegant
- The balanced composition feels intentional and architectural
- Works beautifully with jewelry worn at the center of your body (center necklaces, center hair accessories)
- Suits rounded, square, oval, and rectangular face shapes
- Pairs perfectly with dresses that are symmetrical in design
- Creates a focused point at the center of your face that draws attention to your eyes
Pro tip: When you’re creating a center part, slightly adjust your part if it doesn’t naturally fall in the dead center of your hairline—it’s better to have a part that starts slightly to the side if that’s where your natural part wants to be, rather than forcing an unnatural part just to achieve symmetry.
12. Statement Hair Clip Waves
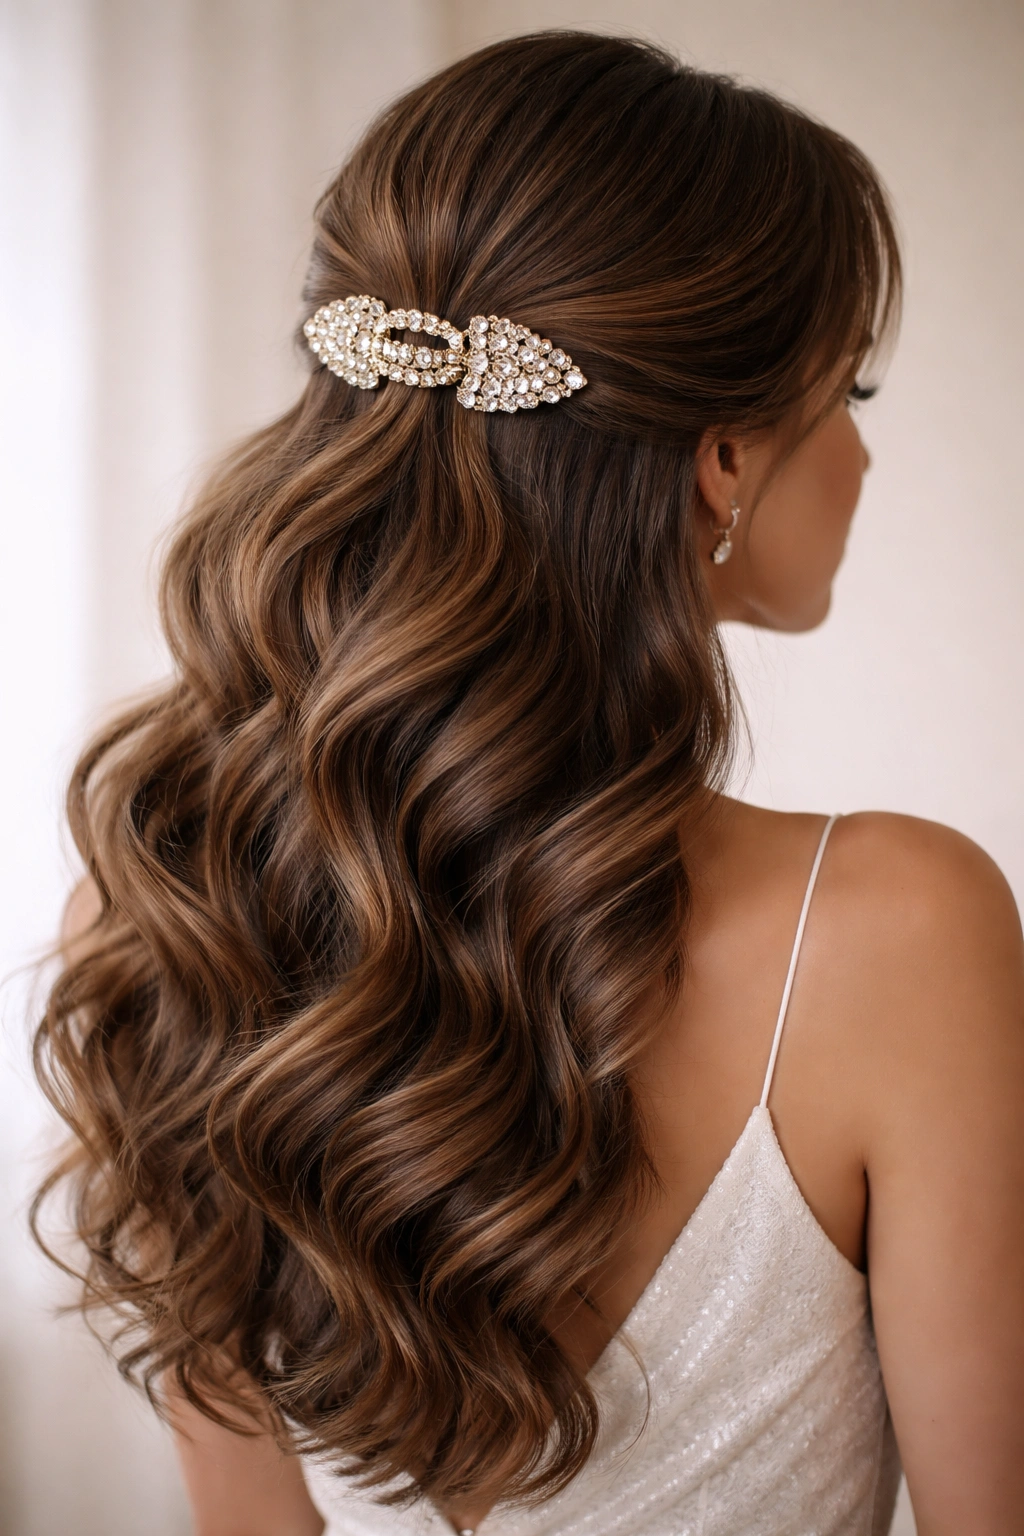
A statement hair clip with waves is similar to the sleek waves with accessory style, but the clip is larger, bolder, and more intentionally the focal point of the hairstyle. Think a large tortoiseshell claw clip, a bold geometric clip, a pearl-studded clip, or a vintage-inspired ornate pin. The waves provide the elegant base, and the clip becomes the jewelry-like accent. This style works beautifully when your dress is relatively simple—the clip serves as both a functional hair holder and a statement accessory.
Positioning a Statement Clip Within Wavy Hair
Create smooth, polished waves throughout your hair using the Hollywood wave technique or a similar method that creates clean, defined waves. Once your waves are set, create a subtle ponytail or gathered section at the back crown of your head—don’t secure it with a regular elastic. Instead, gather the section loosely and clip it with your statement clip, allowing waves to fall freely around the clip and below it. The clip should sit at the nape of your neck or just below your crown, securing the back section while the waves flow freely in front.
Alternatively, you can leave all of your hair completely down and simply clip a small section back on one side, creating an asymmetrical effect. The clip pulls back just enough hair to keep it from completely overwhelming your face, while the majority of your waves flow freely. This approach works particularly well if you don’t want any of your hair fully constrained.
Clip Styles That Create Impact
- Tortoiseshell or acetate claws for effortless elegance
- Pearl-studded clips for romantic, delicate formality
- Metallic or gold filigree clips for glamorous events
- Large geometric clips for modern, architectural aesthetics
- Vintage-style ornate pins for classic, timeless events
Worth knowing: The size of your clip matters based on your hair thickness and length. Fine or thin hair works better with medium-sized clips (about 2-3 inches wide), while thick or long hair can handle larger clips (4 inches or wider) without looking overwhelmed. A clip that’s too small for thick hair will look lost and ineffective.
13. Braided Detail Wavy Style
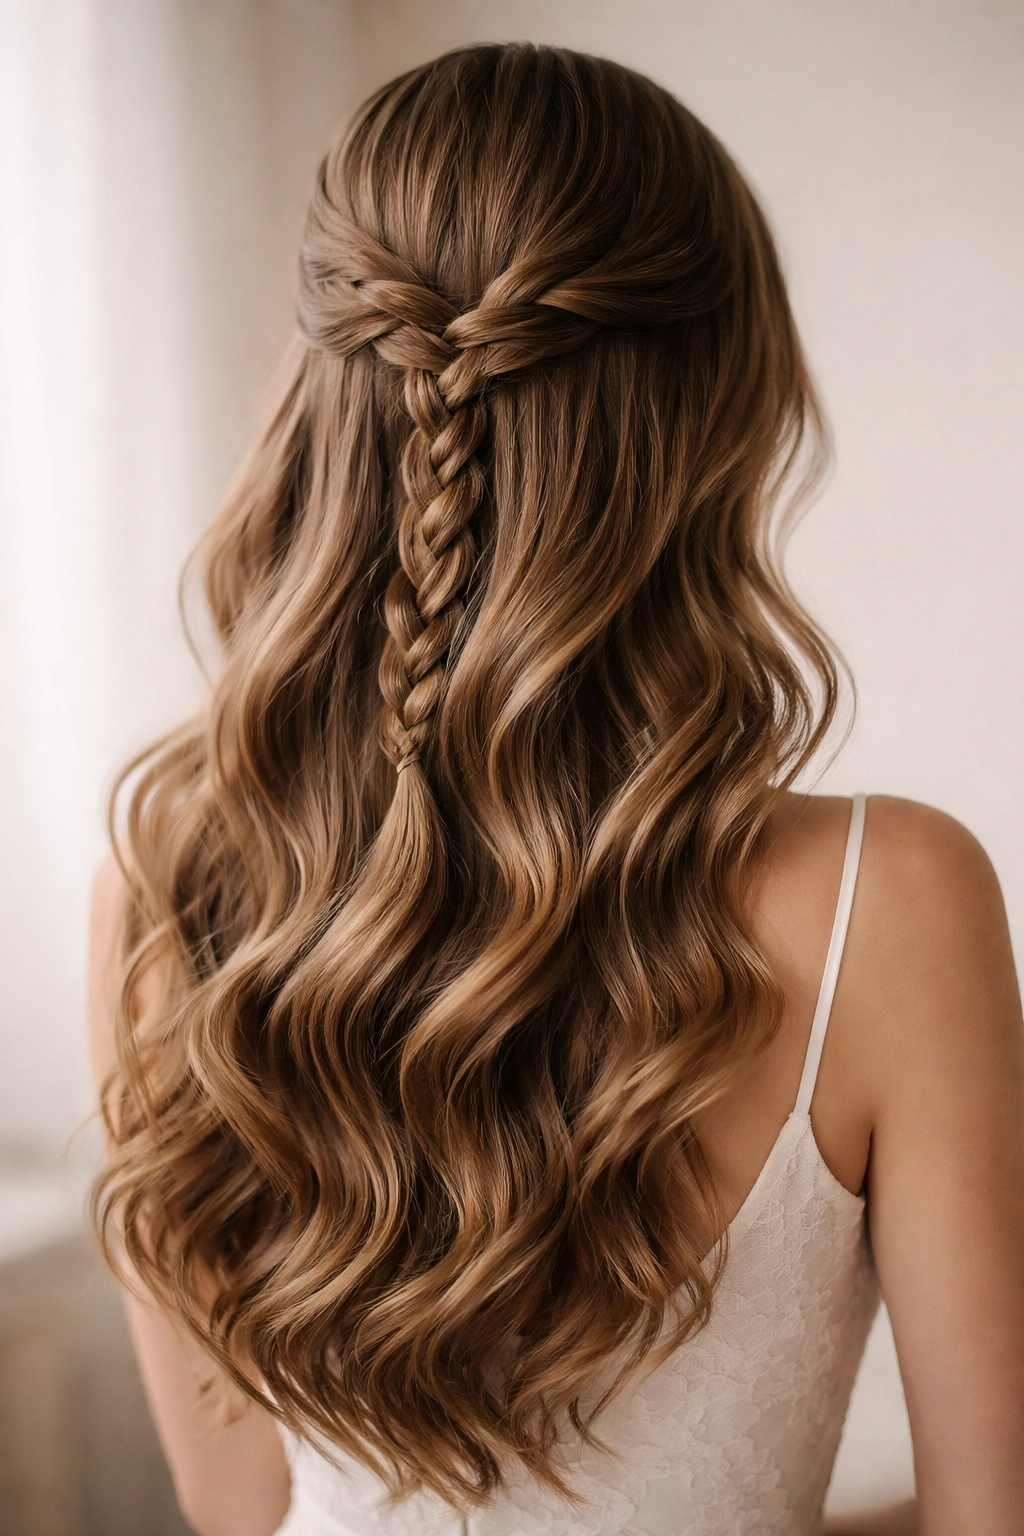
This final style combines the elegance of waves with the intricate detail of a braid, creating a look that’s undeniably romantic and meticulously crafted. A thin braid (or multiple braids) can be woven into the waves, starting from the crown and flowing down the back or incorporated into a half-up section. The braid adds visual interest and texture while the waves provide movement and romantic flow. This is the style to choose if you want something that looks professionally done and feels extra special.
Incorporating Braids Into Your Wavy Design
Create waves throughout your hair using any of the methods described in previous styles. Once your waves are set and cooled, take a thin section of hair from one side of your head and create a three-strand braid, incorporating a few waves into the braid as you go. The braid doesn’t need to be super tight—a slightly loose, textured braid looks more romantic and incorporates better with the waves. You can create one braid and weave it into the back of your waves, securing the end with a bobby pin, or create multiple thin braids on different sides of your head for more complexity.
Alternatively, create a small section at the crown and create a braid through that section before securing it with the rest of your hair. This approach creates a partial braid that’s incorporated into the overall wave pattern rather than sitting on top of the waves. The braid becomes part of the design rather than an obvious added element.
Design Combinations That Maximize the Braid-Wave Dynamic
- One thin braid down one side, waves flowing freely on the other side
- Multiple thin braids woven through the crown area, with cascading waves below
- A braid incorporated into a half-up style, with waves falling freely below
- A braid starting at the temple and flowing into the back section, integrated into the wave pattern
- Twin braids on both sides, symmetrical with symmetrical waves
Pro tip: If you’re not comfortable braiding your own hair, you can use the braiding technique as a guide for where you want to place visual interest, and instead create a twisted section that flows through your waves the same way a braid would. A twist looks very similar to a braid from a distance and is much easier to execute on yourself.
Final Thoughts
The right dressy wavy hairstyle can completely transform how you feel in a formal setting. Whether you’re drawn to the soft romance of loose waves, the sculpted glamour of Hollywood waves, or the intricate beauty of braided details, the key is choosing a style that aligns with your face shape, hair length, and personal aesthetic. The good news is that all of these styles can be created at home with a curling iron, the right products, and a bit of practice—though booking a professional stylist the morning of your event removes any stress and guarantees you’ll have waves that last all evening.
Don’t underestimate the power of preparation. Setting your waves correctly, using the right heat protectant and styling products, and giving your curls time to cool before brushing them out makes an enormous difference in how long your waves last and how polished they look. Test your chosen hairstyle ahead of time if you can, so you’re not learning the technique for the first time on the day of your event. Take photos of your reference style and bring them with you if you’re having your hair done professionally—this ensures you and your stylist are on the same page about what you’re envisioning.
Most importantly, choose a style that makes you feel confident and beautiful. You’ll be more comfortable and more present at your event when you’re wearing a hairstyle that feels authentically you—whether that’s romantic and soft, polished and glamorous, or edgy and textured. The waves are just the canvas; your confidence and personality are what truly make any hairstyle shine.