Sleek styling isn’t off-limits if you have curly hair—it just requires a different approach than the straight-haired versions you’ve probably seen. The misconception that curly hair can’t achieve polished, smooth looks often comes from trying to use straight-hair techniques without modification. When you understand how to work with your curl pattern rather than against it, you can create genuinely sleek hairstyles that look intentional, modern, and absolutely stunning.
The key difference is understanding that “sleek” for curly hair doesn’t necessarily mean perfectly straight. It means controlled, intentional, and put-together. You’re taming the texture rather than eliminating it, creating definition and shine instead of frizz and chaos. Whether you want something smooth and glossy or simply a more refined version of your natural curls, these ten styles prove that your curl pattern is an asset, not an obstacle.
What makes these styles work is a combination of the right products, proper application techniques, and styling tools designed to enhance rather than damage curls. Many of these can be done with minimal heat, and all of them celebrate the texture you were born with while giving you that coveted polished look. Let’s explore each one and show you exactly how to execute them.
1. The Sleek High Ponytail
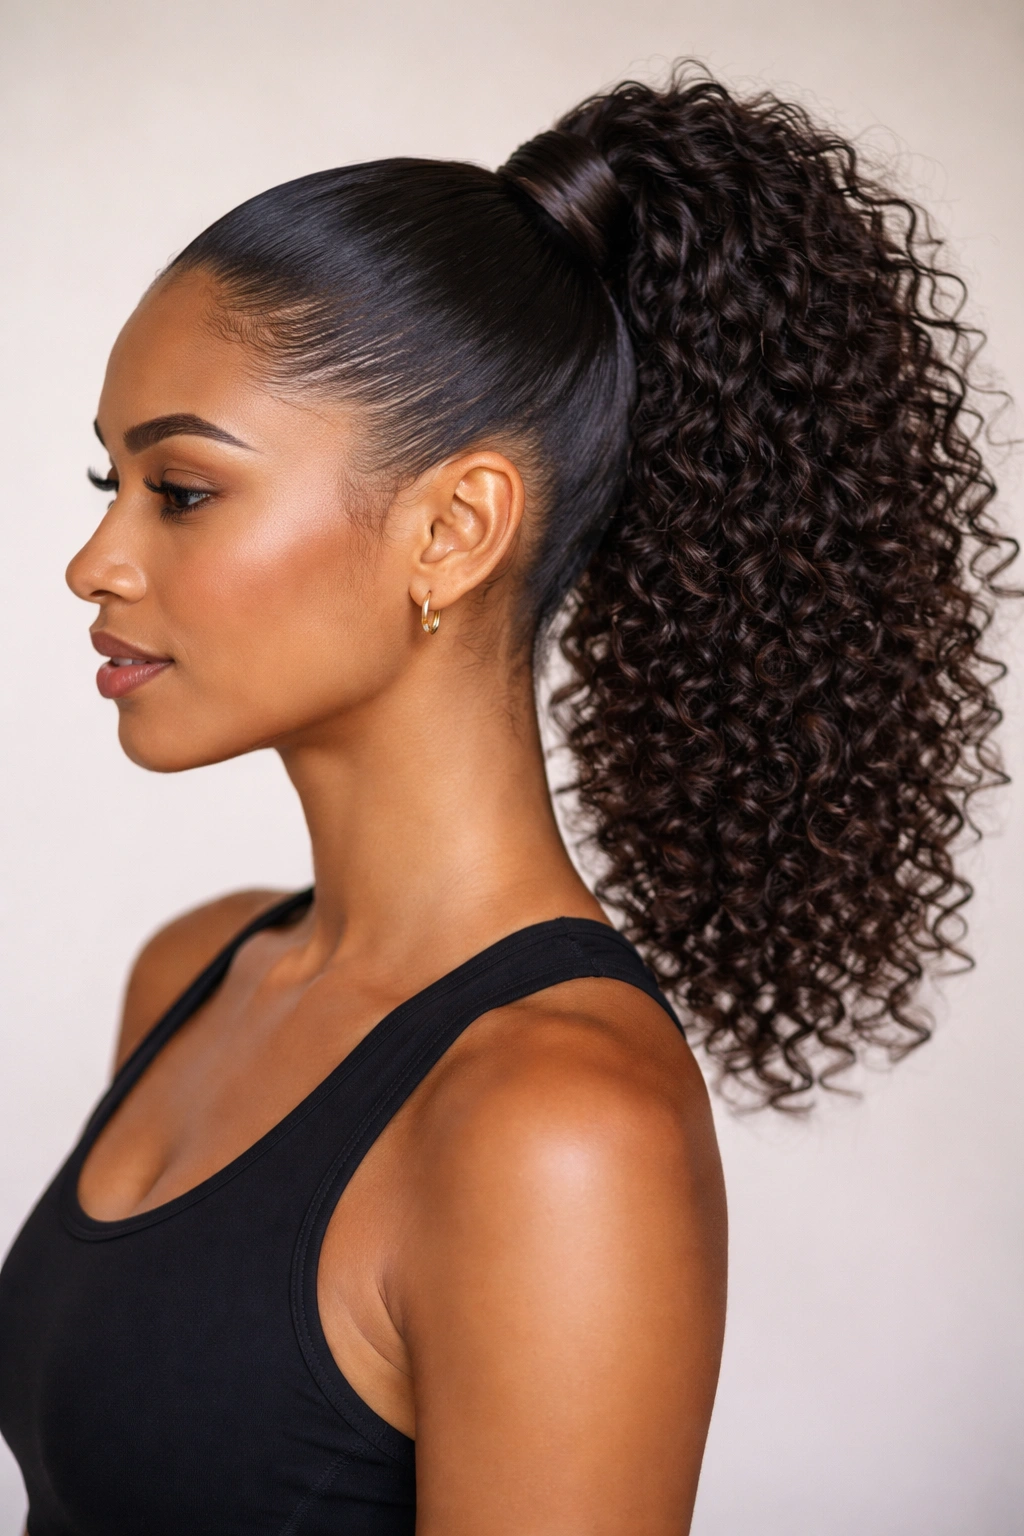
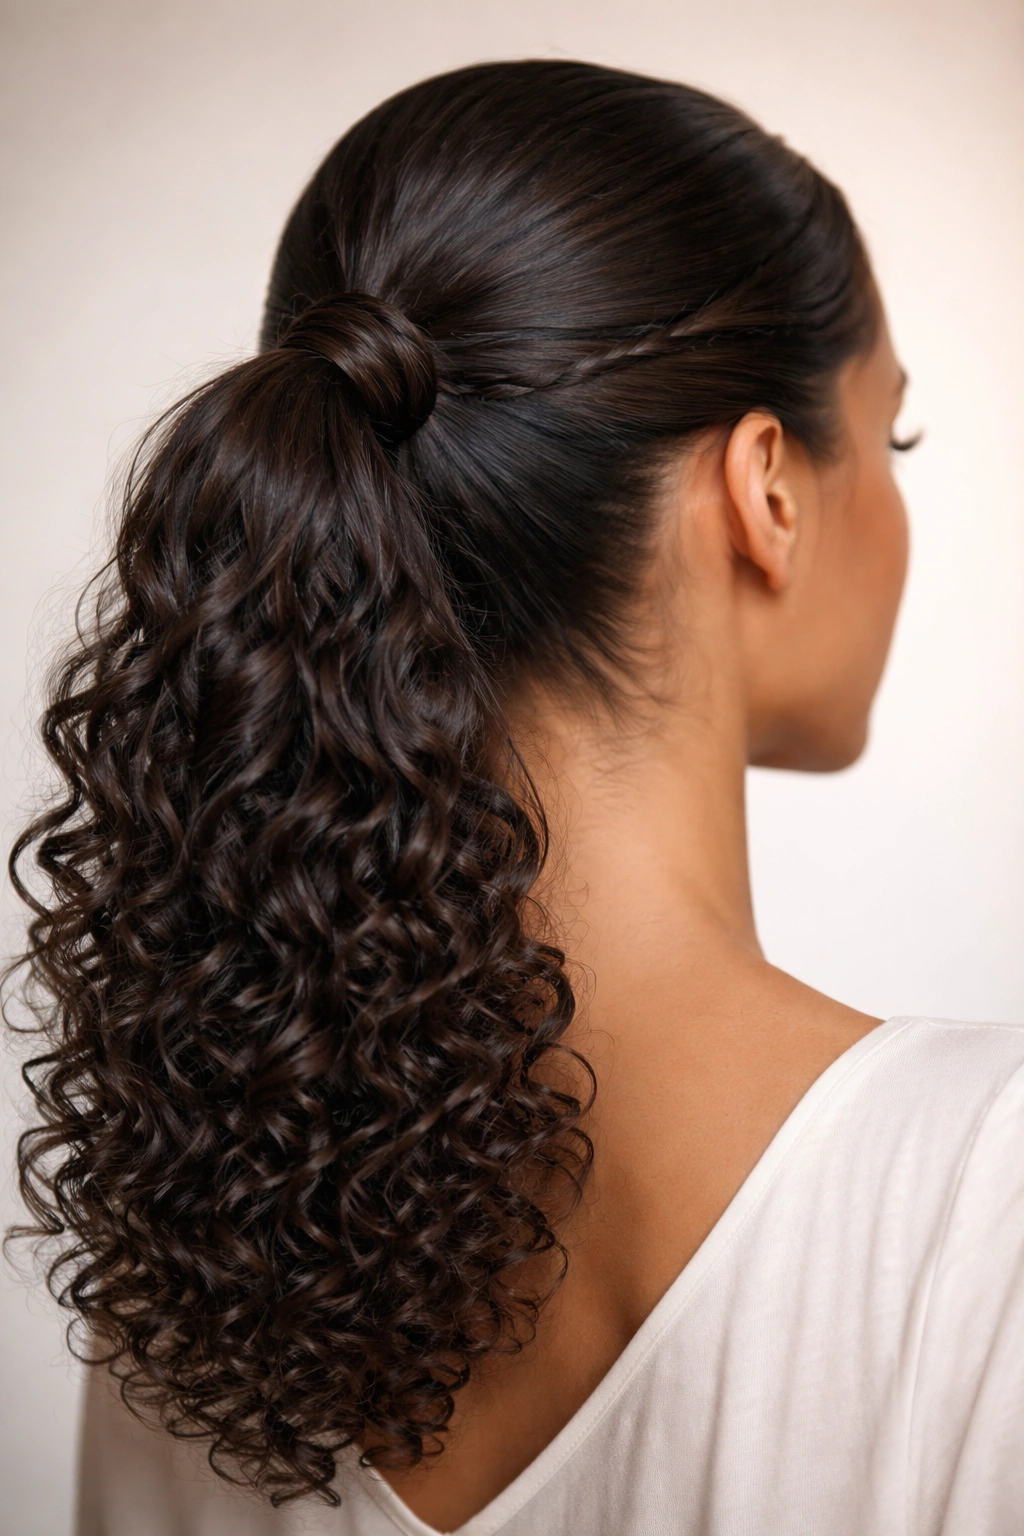
A sleek high ponytail transforms curly hair into a sharp, controlled style that works for everything from gym sessions to professional settings. The key is using styling products that smooth the flyaways and create definition, not frizz. This isn’t about making your curls disappear—it’s about pulling them back in a way that looks intentional and polished.
How to Create the Smoothest Base
Start with damp hair and apply a lightweight smoothing serum or gel to the sections you’ll be brushing back. Use a fine-tooth comb or paddle brush to gently smooth the hair toward the crown, working in small sections. Don’t pull aggressively; use downward strokes that encourage the cuticle to lie flat. A light hairspray before securing the ponytail helps keep flyaways under control without creating crunchiness.
Securing and Perfecting Your Ponytail
Use a silk or satin elastic instead of regular rubber bands—these cause far less breakage and frizz. Secure the ponytail at the crown or slightly above, then take a small section from the elastic and wrap it around the base to hide the tie and add a more finished appearance. If you have baby hairs around your face or neck, use a toothbrush dampened with a tiny bit of gel to smooth them flat. The result is a style that looks effortlessly polished rather than like you just scraped your hair back.
Pro tip: For extra shine and smoothness, apply a silicone-based serum to the ponytail itself once it’s secured. This catches light and makes the style look more intentional and polished.
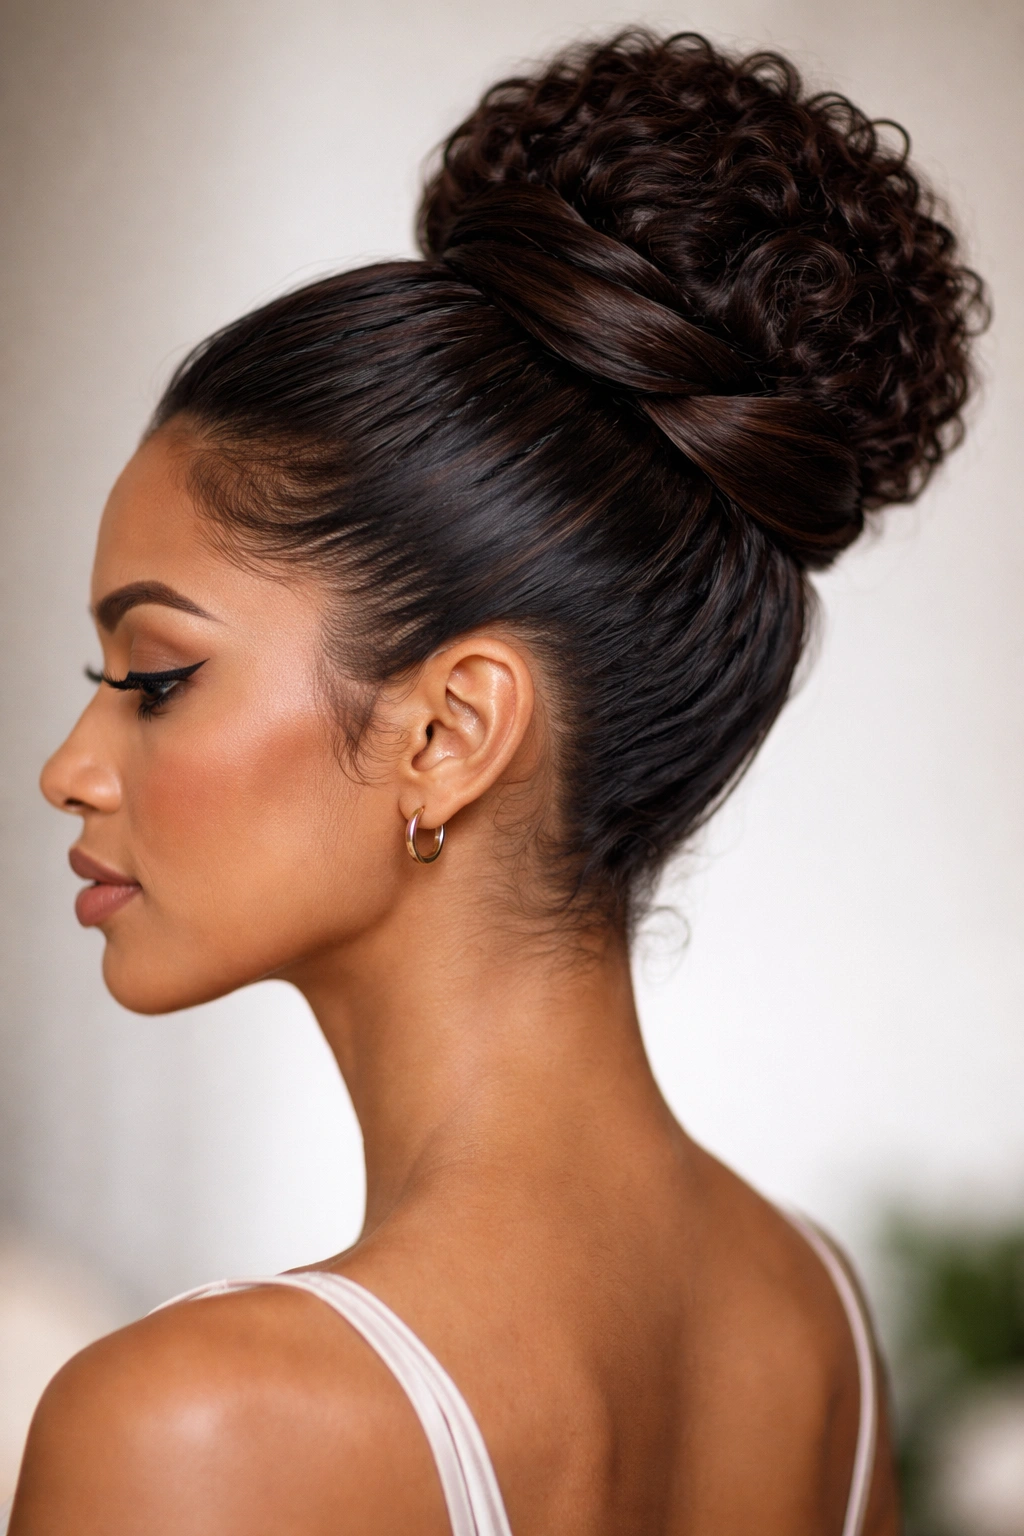
2. The Slicked-Back Bun
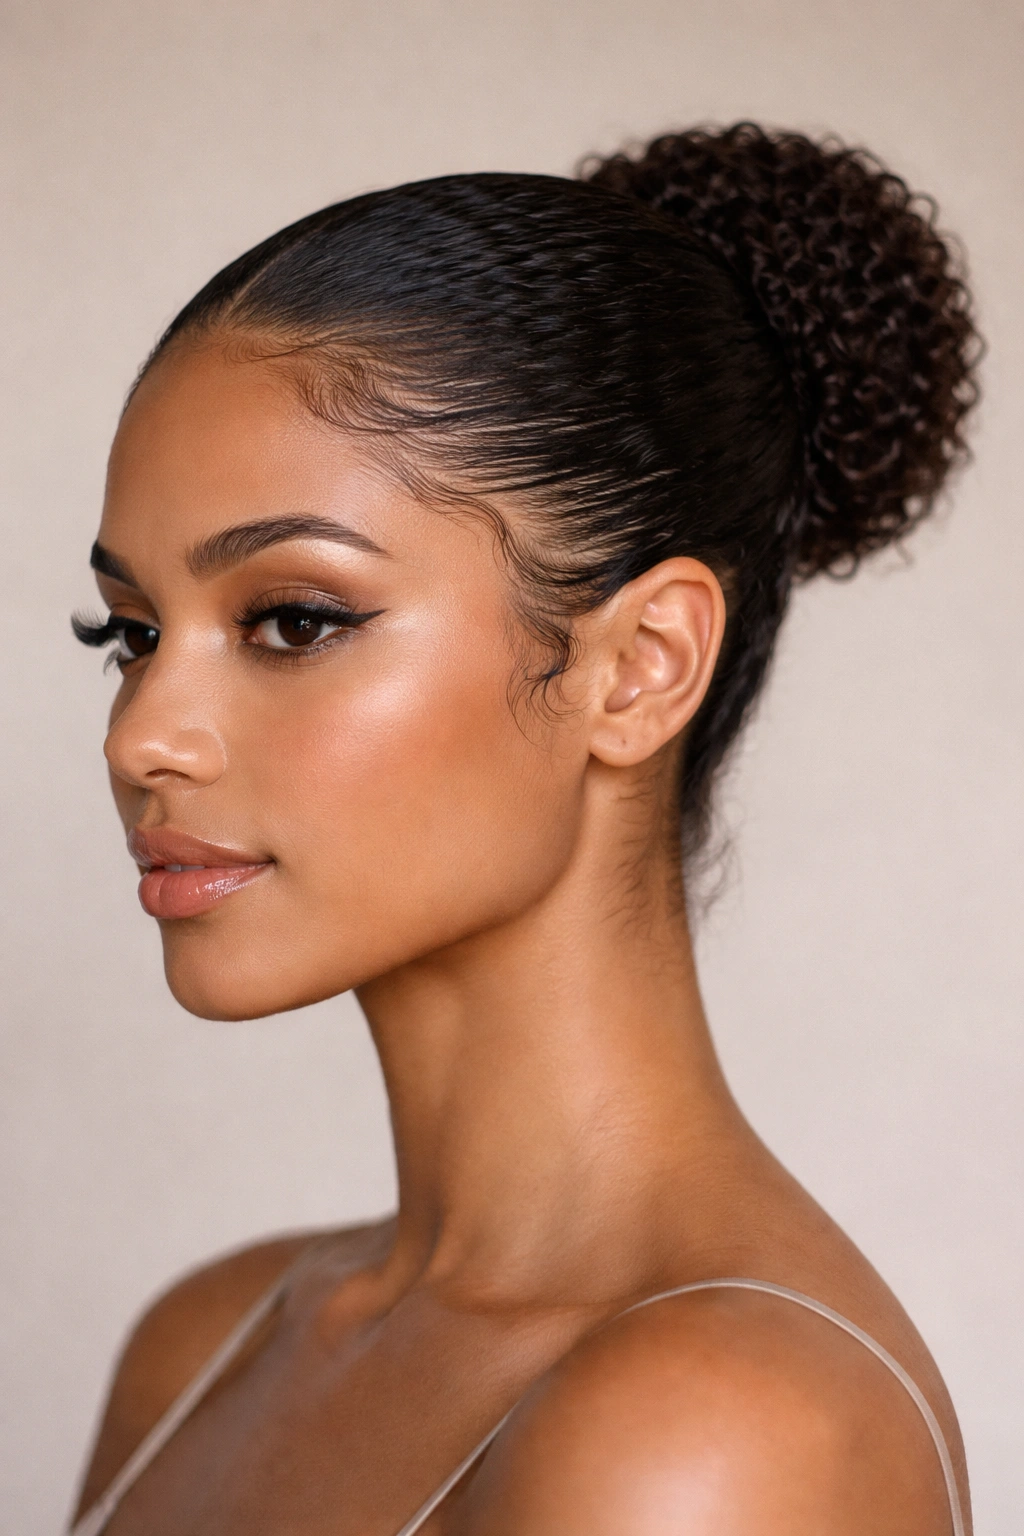
This is the ultimate sleek style for curly hair—when done right, it transforms your look into something sophisticated and runway-ready. A slicked-back bun works equally well on natural curls as it does on straight hair, and it actually looks more textured and interesting than the straight-hair version because your curl pattern still shows through slightly.
Building a Strong Foundation
The secret to a sleek bun is using enough product and applying it correctly. Start with a smoothing gel, serum, or edge control product that’s specifically designed to tame and define curls. Apply it generously to the hairline and crown, then use a fine-tooth comb to smooth the hair back from your face and sides. Work in small sections, and don’t worry about using more product than you think you need—curly hair requires more hold than straight hair.
Shaping Your Bun
Gather your hair into a high or low ponytail first (depending on the look you want), then twist it loosely and wrap it around the base to form a bun. Use bobby pins to secure it in multiple places so the bun holds its shape without slipping. Finish with a flexible hold hairspray—something that keeps things in place without making the hair hard or crunchy. A few pieces can fall around your face intentionally, or you can keep everything completely slicked for maximum polish.
Why This Works for Curls
Curly hair actually holds a bun better than straight hair because there’s natural grip and texture. Your bun won’t look as limp or see-through as it might on very fine, straight hair. This is one of the few styles where your curl pattern becomes an advantage rather than something you need to fight against.
Worth knowing: If your bun feels wobbly, use a bun shaper or donut—these tools give you a smooth, defined shape while keeping everything secure. They work beautifully with curly hair and actually make the style easier to create.
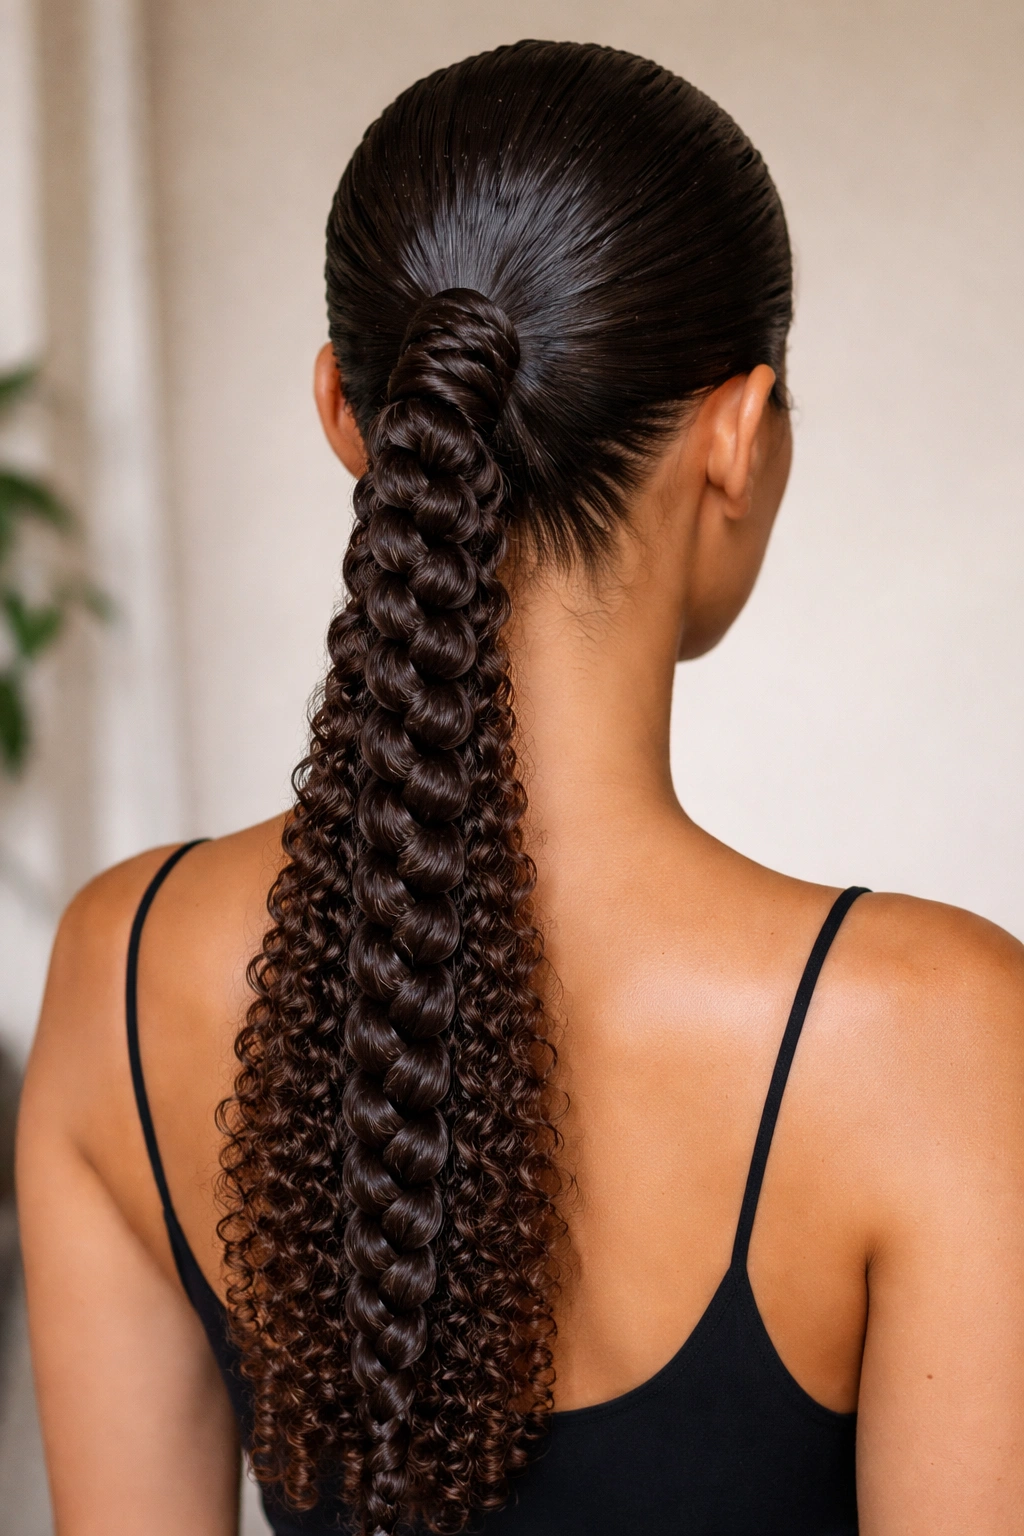
3. The Low Twisted Topknot

A low twisted topknot gives you the sophistication of a bun with a slightly more relaxed, intentional feel. This style works especially well for medium-length curly hair and creates the impression of a purposeful, styled look rather than just pulling everything back quickly.
Creating Defined Twists
Divide your hair into two sections down the middle of your scalp. Starting at the crown, twist each section downward and inward, working slowly so the twists stay tight and defined. As you twist, use a smoothing product to control flyaways and keep the twist line clean. The product helps the hair grip together, making your twists look more polished and less likely to unravel throughout the day.
Combining and Securing
Once both twists reach the nape of your neck, tie them together into a low ponytail, then wrap the combined hair around the base to form a knot shape. The twists frame the top of your head beautifully and catch light in a way that makes the style look more intentional and textured than a standard bun. Finish with bobby pins and a light hairspray.
Styling Variations for Different Hair Lengths
For longer hair, you can double-twist by wrapping each original twist around the other before securing into the knot. For shorter curly hair, you might only twist a few inches down from the crown and then gather the remaining hair into a small topknot. Either way, the twisting creates definition and control that reads as genuinely sleek.
Insider note: This style photographs beautifully and holds up well throughout the day without looking messy. The twists add visual interest that a plain bun sometimes lacks.
4. The Sleek Straight-Backed Braid
A smooth braid pulled straight down the back of your head is an understated sleek style that works for curly hair when you focus on keeping the braid tight and the flyaways controlled. This style has a completely different vibe than a loose, romantic braid—it’s clean, modern, and incredibly polished.
Preparing Your Hair for a Tight Braid
Start with slightly damp hair and apply a smoothing serum or lightweight gel throughout. Use a fine-tooth comb to smooth your hair back from your face and create a clear center part if that’s the look you want. You can also start with your hair slicked back without a part. The key is using enough product that the section of hair you’re braiding feels slightly damp and tame, not dry and frizzy.
Braiding Technique for Sleek Results
Create your braid by taking three even sections and crossing them over each other in the traditional over-under pattern. The difference between a sleek braid and a casual one is how tightly you braid. Pull each section snugly (but not painfully tight), and smooth the braid as you go using a soft brush or toothbrush. This encourages the cuticle to lie flat and reduces frizz significantly.
Finishing Touches
Once you reach the end, secure with a silk elastic. You can wrap a small section of hair around the elastic to hide it, or leave it clean and simple depending on your preference. A light smoothing serum or hairspray applied to the finished braid adds shine and helps lock in flyaways.
Quick facts about braided styles:
- Braids actually hold better on curly hair than on slippery straight hair
- You can sleep in this braid and wake up with waves that look intentional
- A slightly wet braid holds its shape better than a completely dry one
- Applying product to damp hair before braiding is crucial for curl types
5. The Sleek Half-Up, Half-Down Style
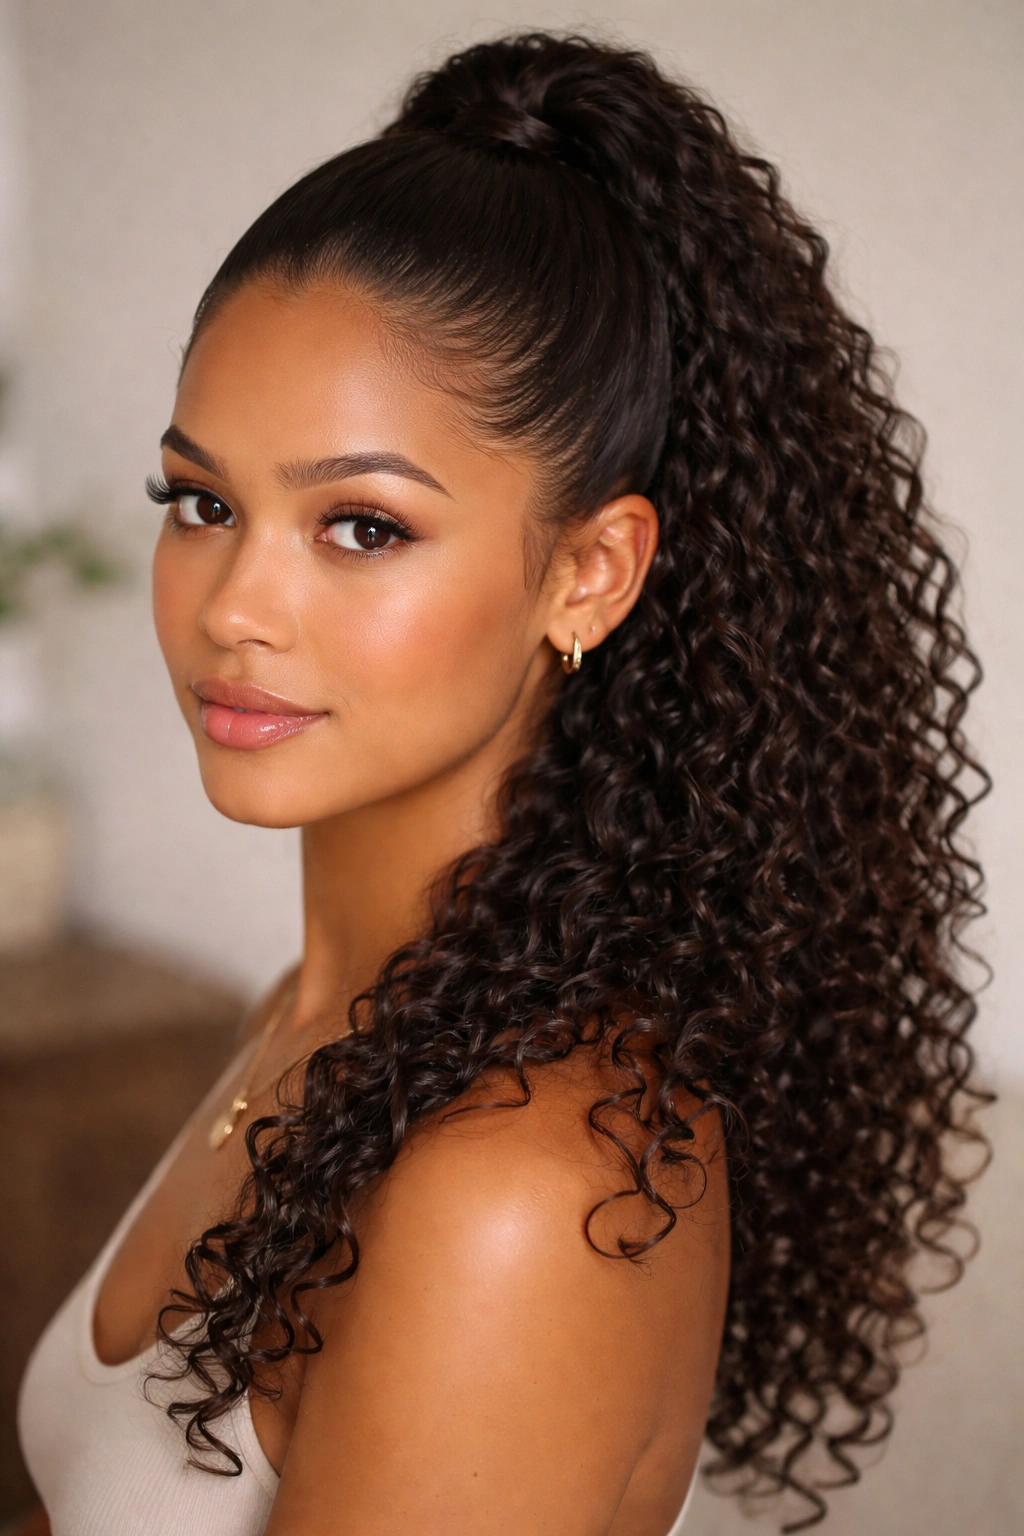
This style gives you the best of both worlds—definition and control on top, with your curl pattern showing off below. It’s less formal than a full updo but more polished than completely down, making it perfect for work, events, or anytime you want to look put-together without committing to a full style.
Creating the Smooth Upper Section
Start by smoothing the top section of your hair (roughly from ear to ear across the crown) using a serum or gel and a fine-tooth comb. You’re not trying to make it completely straight, just controlled and defined. Use a paddle brush or comb to gather this section at the back of your crown, smoothing as you go.
Securing Without Bulk
A silk elastic or small claw clip works beautifully for this style. The claw clip creates a more modern, intentional look, while the elastic gives you a cleaner line. Either way, secure firmly enough that your half-up section won’t slip out but not so tight that you’re pulling the hair painfully. Take a small section from the secured hair and wrap it around the elastic or clip to hide it completely.
Styling the Lower Half
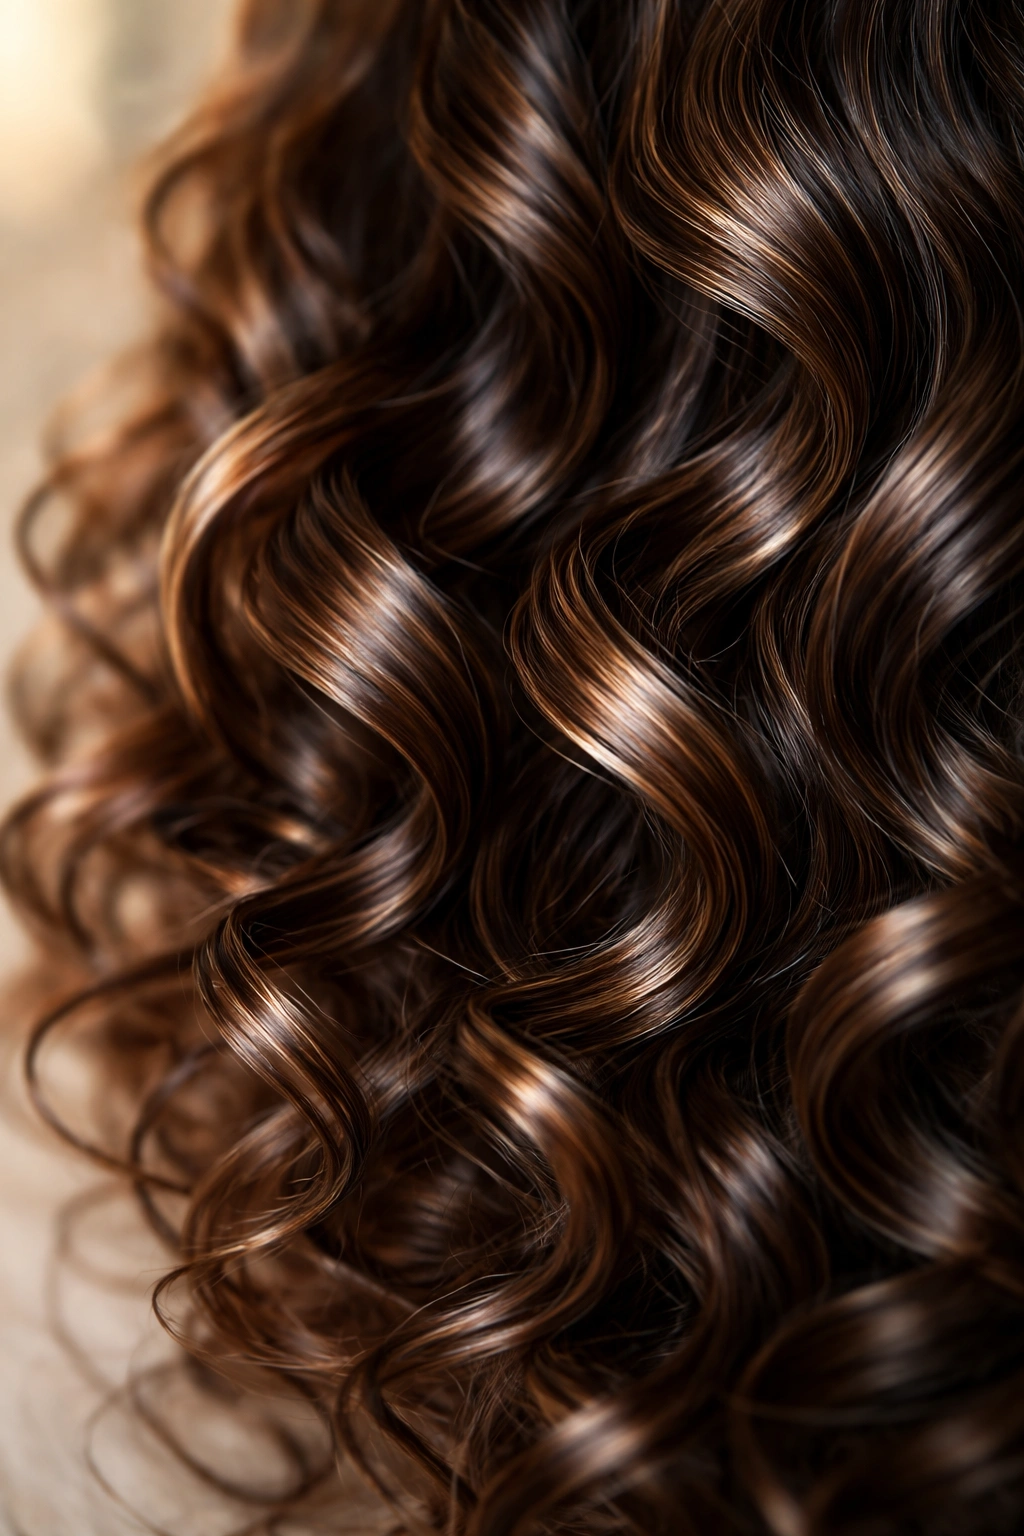
The curls hanging below should look intentional and defined, not like you just didn’t bother styling them. Enhance your natural curl pattern by scrunching a curl-defining cream or light gel into damp curls. This adds texture and definition without the crunch of a strong hold product. You can also let the curls air-dry or diffuse-dry for a more organic, natural appearance.
Why This Style Reads as Sleek
The contrast between the controlled top and the defined (but not chaotic) curls below creates a balanced, intentional look. Your hair isn’t wild or out of control, but it’s also not flattened or over-manipulated. This is what modern sleek looks like for curly hair.
Pro tip: If you want extra shine on the bottom half, apply a silicone serum to the lower curls once they’re dry. This catches light beautifully and makes the style look more polished.
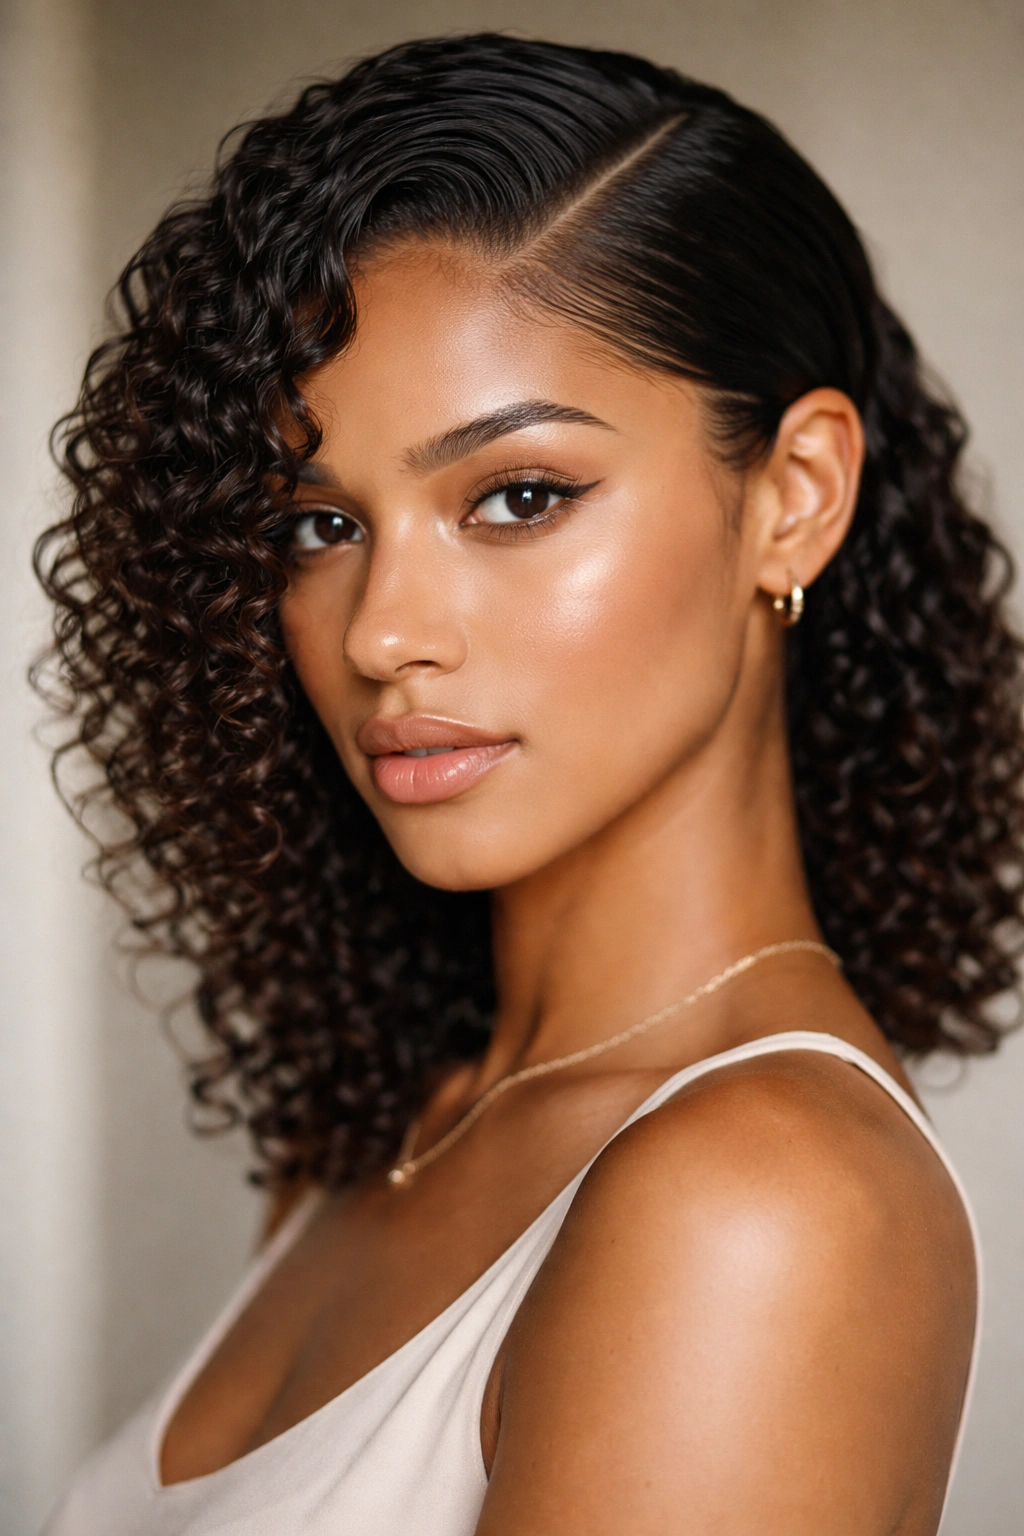
6. The Sleek Slicked Side Part with Tucked Sides
A dramatic side part with sleek sides tucked behind your ears transforms curly hair into something sharp and contemporary. This style works for both long and shoulder-length curls and creates immediate visual impact without requiring heat styling.
Creating a Dramatic Side Part
Start by creating a deep side part on damp hair, using a fine-tooth comb to separate the sections cleanly. Apply a smoothing serum or curl-defining cream to the smaller side of the part (the side that will have less volume), then comb it back and tuck it behind your ear. This section should look sleek and controlled, smoothly following the curve of your head.
Smoothing Without Frizz
Use an edge control product or lightweight gel on the hairline and the section being tucked to ensure everything stays in place and looks polished. A fine-tooth comb helps you smooth this section without creating frizz. The goal is a clean, intentional look that shows you styling intention, not chaos or bedhead.
Styling the Larger Section
The larger side of your part can show more of your curl pattern, or you can smooth it as well depending on how sleek you want the overall look. If you’re smoothing this side too, use the same technique—product, fine-tooth comb, smooth strokes. If you want texture, apply a curl cream or light gel to enhance your natural pattern.
Balance and Proportion
This style creates an asymmetrical look that’s very modern and flattering. The tucked side shows off your face shape and adds sophistication, while the fuller side maintains some texture and movement. It’s less severe than a fully slicked style but more polished than your hair completely down.
7. The Sleek Wrap-Around Bun
A wrap-around bun involves sections of hair that twist or braid around a central bun, creating a structured, almost sculptural hairstyle that looks incredibly intentional and polished. This style requires a bit more time and technique, but the payoff is a look that’s genuinely stunning.
Creating the Central Bun
Start by gathering your hair into a high ponytail and securing it with a silk elastic. Twist this ponytail loosely and wrap it around the elastic base to create a bun shape. Secure it with bobby pins placed strategically so the bun holds firm. This is your foundation.
Adding Twists or Braids
Take small sections of hair from around your head—from the sides, from behind your ears, from lower down on the back—and twist or braid them individually. Smooth each twist or braid using product to keep flyaways controlled. Then wrap these sections around the base of your central bun, securing them with bobby pins as you go. Each wrapped section adds visual interest and creates that intentional, textured look.
The Finished Effect
What makes this style look so sleek is the combination of smoothness (from the product and technique) and structure (from the wrapped sections). It’s not a random pileup of hair; it’s an intentional design. This style works for events, professional settings, or anytime you want to look genuinely polished and put-together.
Worth knowing: This style takes practice to perfect, but once you get the hang of it, you can create variations. You can do looser or tighter twists, more or fewer wrapped sections, and position the bun higher or lower depending on your preference.
8. The Sleek Low Pony with Curl Definition Below
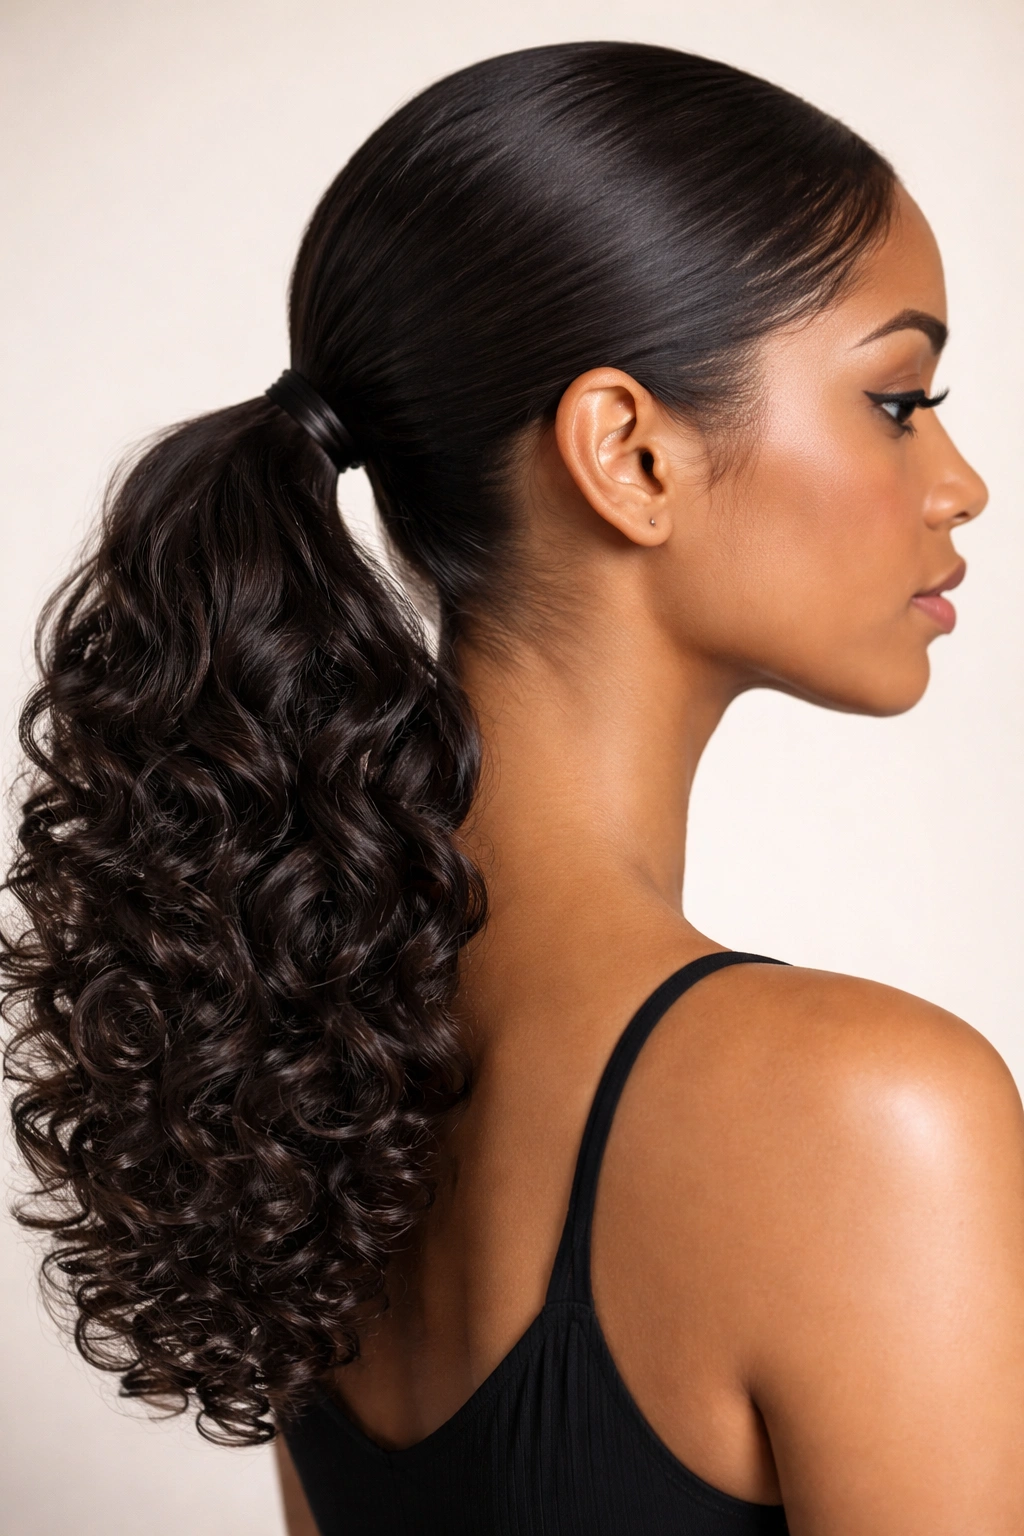
This style sits right between casual and formal—a low ponytail with the focus on keeping the top smooth and intentional while the curls below are defined and bouncy. It’s the perfect style for days when you want to look put-together without looking overdone.
Smoothing the Top Section
Apply a smoothing serum or lightweight gel to the section of hair you’ll be brushing back (from your part or hairline to the point where the ponytail will sit). Use a paddle brush or fine-tooth comb to smooth this section, working methodically to create a sleek, polished appearance. The curls underneath shouldn’t be frizzy or chaotic; they should look intentional and defined.
Creating a Strong Ponytail Base
Gather your hair into a low ponytail, roughly at the nape of your neck or just below. Secure with a silk elastic, being careful not to pull too tightly. Take a small section from the ponytail and wrap it around the elastic to hide the tie and create a more finished look. Pin this wrapped section with a bobby pin for security.
Enhancing the Lower Curls
Once your ponytail is secured, apply a curl-defining cream or light gel to the hanging curls if needed. You can scrunch this in using your hands, gently working it through the curl pattern. Let the curls air-dry or diffuse-dry for maximum definition and bounce. The result is a style where the top reads as controlled and sleek, while the bottom celebrates your curl pattern.
Why This Works for Professional Settings
This style looks polished enough for work or professional events but doesn’t feel overdone or overly formal. It shows that you’ve made an effort while still maintaining a natural, confident appearance. The defined curls below add personality and prevent the style from looking severe.
9. The Sleek Braided Crown
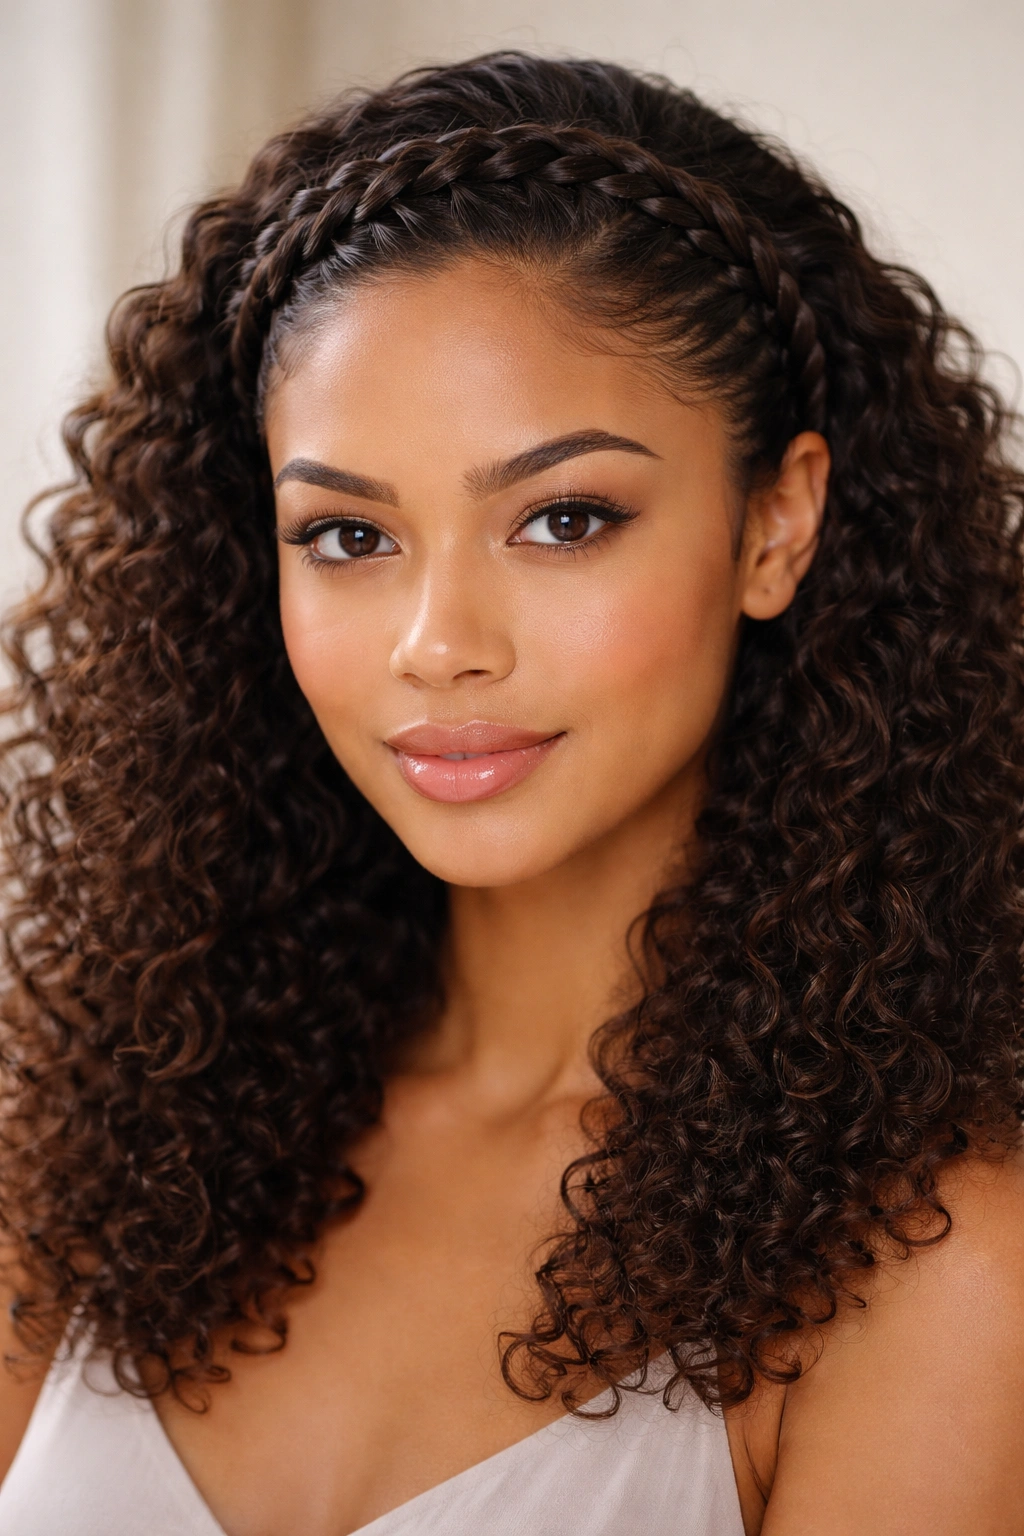
A braided crown works by taking smoothed, defined braids from one side of your head across to the other, creating a halo effect that’s both romantic and incredibly polished. This style works beautifully for curly hair because the texture of your curls adds visual interest without looking messy.
Starting Your First Braid
Begin on one side of your head, roughly at temple level. Take three sections of hair from this starting point and begin braiding, pulling each section snugly so the braid looks tight and defined. As you braid, use a smoothing serum or gel on your hands and a fine-tooth comb to keep the braid neat and reduce frizz. Braid diagonally across the back of your head toward the opposite ear.
Securing and Creating Balance
Once you reach the opposite side of your head, secure the end of this braid with a small elastic or bobby pins. At this point, you can either create a second braid on the other side going in the opposite direction, or you can let the remaining hair hang loose with a defined curl pattern. If you’re doing a full crown with two braids, repeat the process on the other side.
Creating That Polished Look
The braids should look smooth and intentional, with flyaways controlled and the braid pattern clean and visible. This is where applying product at the right time makes the difference. Use product on damp hair before braiding, and you’ll have much better control and definition. A light smoothing serum applied to the finished braids adds shine without weight.
Styling the Hair Below
If you’re letting hair hang loose below the crown, style it with a curl-defining cream to make sure the curls look intentional and defined rather than frizzy. If you’re doing a full braided crown with both braids meeting at the back, you can secure them into a low bun or leave the ends hanging.
Quick facts about braided crowns:
- They work on both short and long curly hair
- The braids can be tight and geometric or slightly looser for a softer look
- This style photographs beautifully from all angles
- It’s sturdy enough for events or a full day of wear without slipping
10. The Sleek Twisted Ponytail with Smoothed Roots
This final style combines controlled roots with defined texture in the ponytail itself, creating a look that’s sleek at the scalp but shows off your curl pattern below. It’s the perfect balance for people who want a polished look without completely flattening their natural texture.
Smoothing Your Roots and Crown
The key to this style is creating a smooth, sleek appearance from your hairline down to roughly where the ponytail will sit. Apply a smoothing serum or edge control to this section and use a fine-tooth comb to smooth it thoroughly. You’re creating a polished frame for your face while preserving the texture you’ll show off in the ponytail.
Creating Textured Twists
Divide your hair into two or three sections from approximately the crown down. Twist each section loosely—these twists should have definition and show your curl pattern, not be completely smooth. Apply a curl-defining product to these sections to enhance texture and definition. You want the twists to look intentional and bouncy, not flat or frizzy.
Gathering into the Ponytail
Gather the smoothed top section and all the twists together into a ponytail at the nape of your neck or low on the back of your head. Secure with a silk elastic, and wrap a small section of hair around the base to hide it. The contrast between the sleek top and the textured twists creates a modern, intentional look that celebrates both control and your natural curl pattern.
Why This Style Is Universally Flattering
This style works for almost every hair type and curl pattern because it doesn’t require you to completely straighten your hair or flatten your natural texture. It’s professional enough for work, casual enough for everyday wear, and flattering enough for photos. It reads as genuinely sleek because you’ve controlled the parts that matter (the frame around your face and the crown) while keeping the texture that makes curly hair special.
Pro tip: This style works beautifully on second-day hair. If your curls have already been smoothed down slightly by sleeping, this style shows off that intentional, lived-in polished look that many people actually prefer to freshly styled curls.
Final Thoughts
Sleek hairstyles for curly hair aren’t about fighting your natural texture—they’re about intentionality, product application, and understanding that smooth doesn’t have to mean straight. Every one of these styles celebrates your curl pattern while giving you that put-together, polished appearance you’re after. The key is using the right products (smoothing serums, lightweight gels, curl-defining creams), applying them to damp hair when possible, and using proper technique with fine-tooth combs and gentle hands rather than aggressive brushing.
The beauty of these styles is that they’re customizable. You can adapt any of them to your specific hair length, curl pattern, and personal style. Whether you prefer maximum sleekness or want to keep some texture visible, there’s an option here that works for you. What matters is building the skills to control your hair without damaging it, and finding the balance between polish and personality that feels authentic to you.
Start with whichever style appeals most to you, practice it a few times, and then gradually experiment with others. Your curly hair is an asset in creating these sleek styles—it holds better, it photographs beautifully, and it creates dimension that straight hair often can’t achieve. Embrace that advantage, and you’ll find that sleek styling becomes easier and more enjoyable every time you do it.