Curly hair and time constraints don’t have to be enemies. If you’ve ever stood in front of the mirror with gorgeous curls but absolutely no time to do anything with them beyond throwing them into a messy bun, you’re not alone. The good news? You don’t need elaborate techniques or a mountain of styling products to create an updo that looks intentional, polished, and beautiful. Some of the most stunning curl updos come together in under a minute once you understand the fundamentals of working with textured hair.
The secret to quick curly updos isn’t about fighting your natural texture—it’s about working with it. Curls have built-in volume, movement, and grip that straight hair simply can’t replicate. That means you can skip a lot of the teasing, pinning, and product layering that straight-haired updos demand. A few well-placed bobby pins, maybe a claw clip or hair stick, and the natural structure of your curls does most of the heavy lifting for you. The updos in this guide aren’t about making your curls disappear into a sleek style—they’re about celebrating what you’ve got while keeping it off your face and neck.
Whether you’re dealing with loose waves, tight coils, or something in between, these styles work across the full spectrum of curl patterns. They’re perfect for gym days, work meetings, casual hangouts, or any time you want your curls to look intentional without the fuss. Each updo comes together quickly, requires minimal tools, and actually lasts through the day without requiring constant adjustments. Let’s get into the styles.
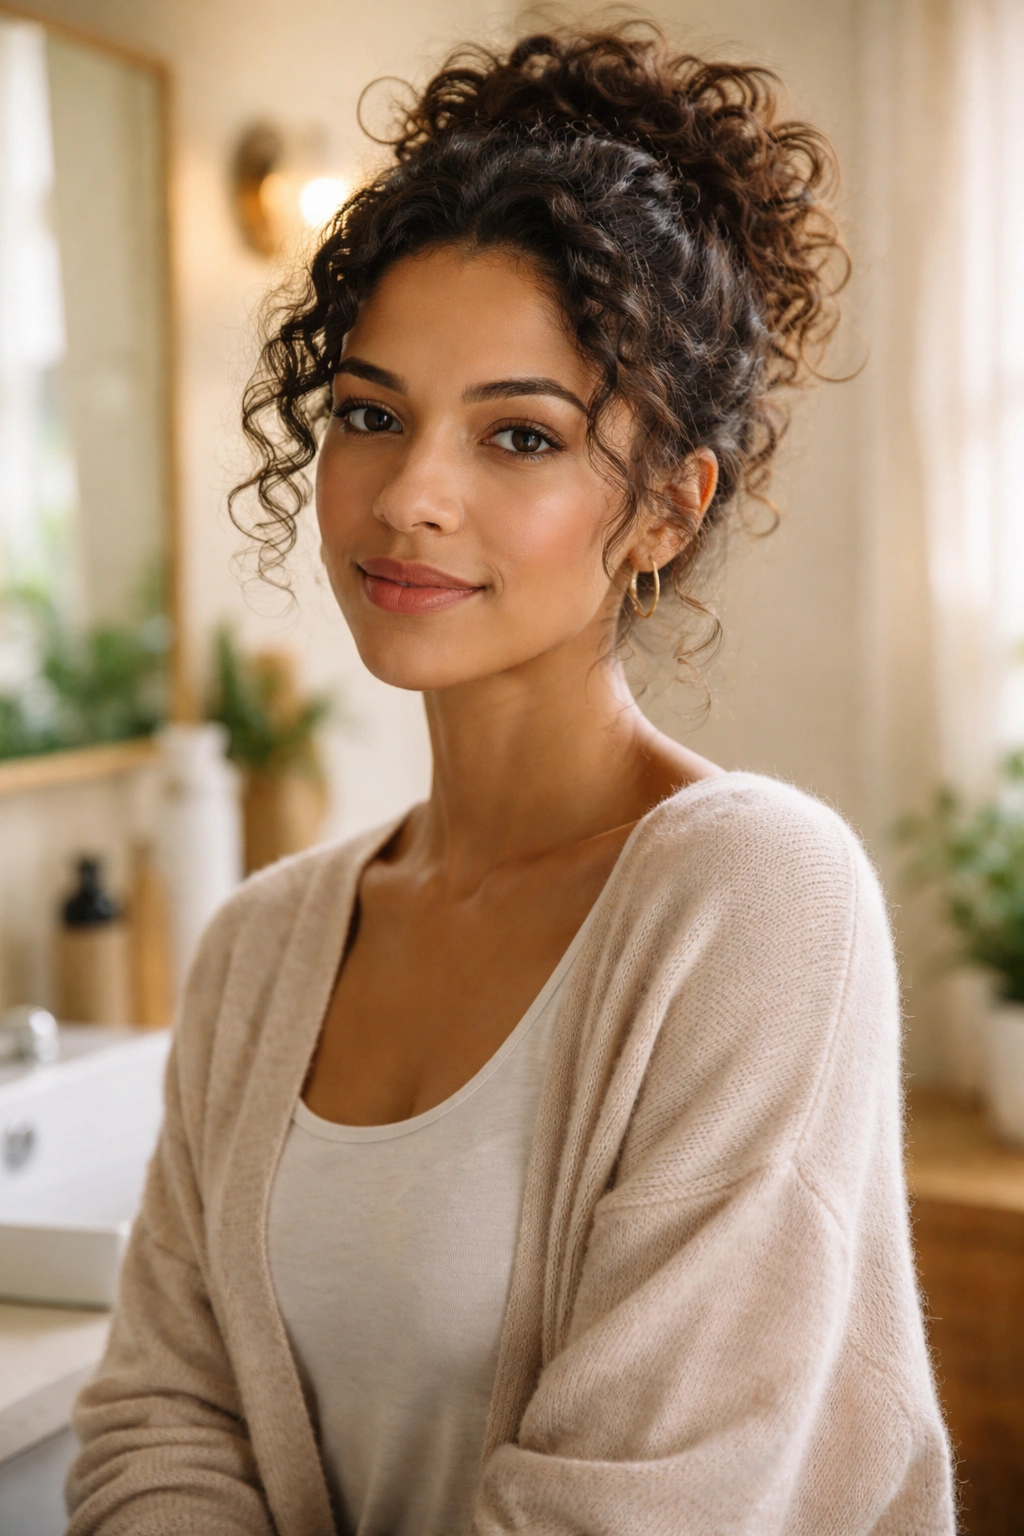
1. The Pineapple High Pony
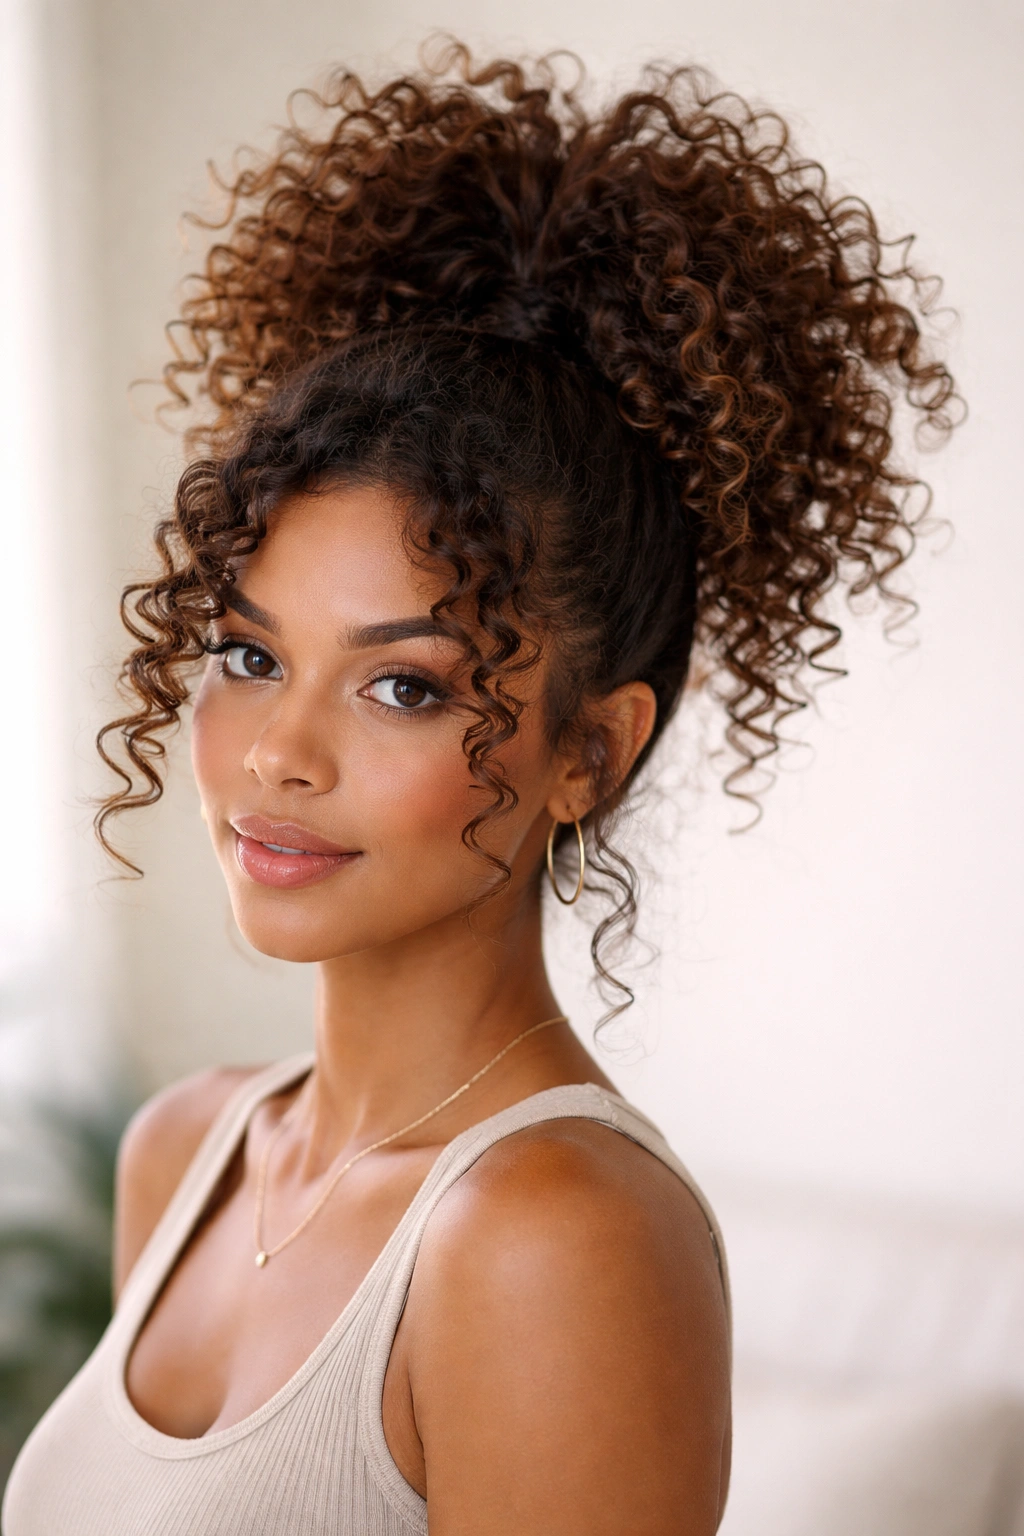
The pineapple is a staple in the curly-hair world, but most people think of it only as a sleeping hack. Styled intentionally with a high elastic and a few face-framing layers, it becomes a genuinely chic updo that screams “I have my life together” even when you threw it together in ninety seconds. The name comes from the way the ponytail sits high on your crown—loose and voluminous at the top, creating that pineapple shape if you’re sleeping in it, but sleek and elegant when it’s styled as an actual look.
Why This Works So Well for Curls
This updo plays to curls’ greatest strength: natural volume at the roots. Because you’re gathering all your hair at the crown rather than closer to the nape of your neck, the weight of the ponytail actually enhances the fullness around your face and crown instead of flattening it. The higher you position the elastic, the more voluminous and lifted the entire style appears. It’s one of those rare updos where curly hair has a distinct advantage over straighter textures.
How to Create It in Under 5 Minutes
- Start with curls that are at least partially dry—they don’t need to be completely set, but damp curls won’t hold the shape you want
- Flip your head upside down and gather all your hair at the very crown of your head, as high as you can comfortably go
- Use a strong elastic or hair tie (the thicker ones with teeth grip better) and secure it firmly—if it’s loose, the weight of your curls will pull it down within an hour
- Flip your head back up and gently manipulate the curls around your face so some frame your features while the bulk stays in the high pony
- Optional: take a small section from the elastic and wrap it around the base to hide the tie and add polish
Pro tip: If your curls are falling flat around your face by midday, flip your head forward for 30 seconds to let gravity work its magic, then flip back and re-fluff the pieces around your face.
2. The Twisted Crown Updo
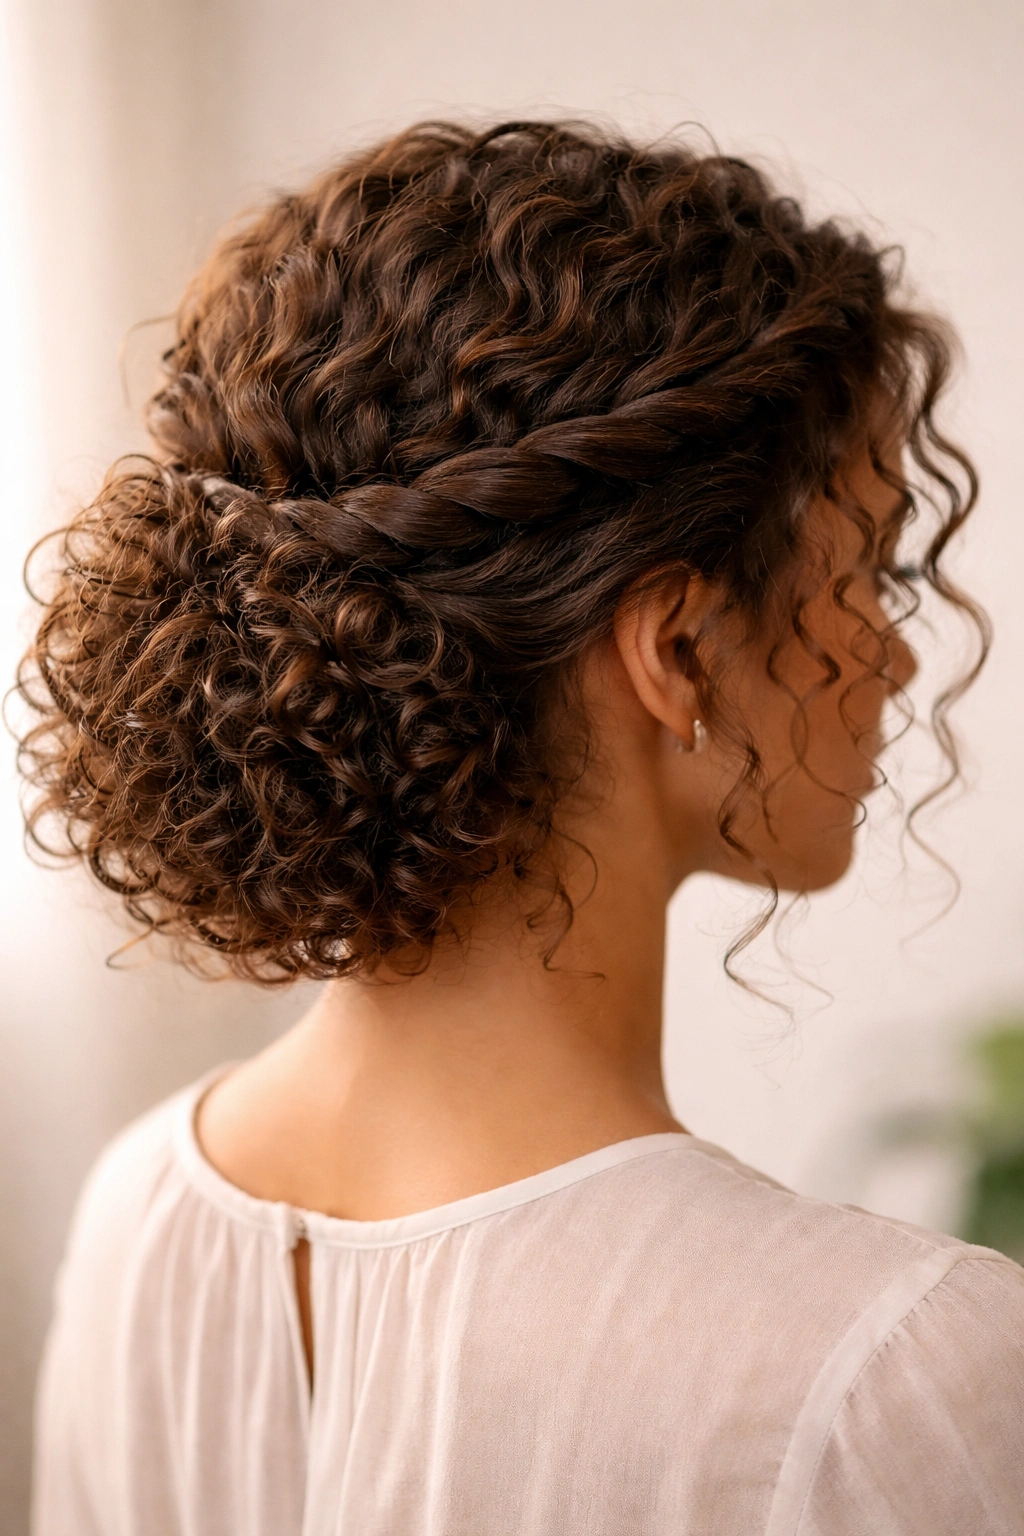
This style looks far more intricate than it actually is, which makes it perfect when you want to look like you spent an hour on your hair but really spent eight minutes. The twisted crown is essentially two loose twists that wrap around the back of your head and anchor everything with bobby pins. Because your curls already have texture and movement, the twists don’t need to be tight or perfectly smooth—in fact, they look better when they’re slightly undone and casual.
The Magic of Loose Twists in Textured Hair
With straight hair, loose twists can look limp and unfinished. With curls, they look deliberately relaxed and effortlessly put-together. The individual curl strands catch the light as they wind around each other, creating visual interest and dimension that a smooth twist simply can’t achieve. You’re essentially creating a crown that honors your natural texture rather than trying to hide it. The more texture you embrace, the better this style looks.
Step-by-Step Instructions
- Part your hair down the center from your forehead to the nape of your neck
- Take a section from one side near your temple, about two inches wide
- Twist this section loosely as you move it toward the back of your head, letting individual curls escape from the twist rather than pulling everything tight
- Secure the twisted section at the back with two to three bobby pins, tucking the end underneath so it’s hidden
- Repeat on the other side, creating a matching twisted crown effect that frames your face
- Use a lightweight hairspray if needed to keep flyaways in check, but avoid anything too heavy that will flatten your curls
Worth knowing: This style works beautifully with a day-old updo or even slightly humid curls, because the natural bend and wave actually add to the design rather than fighting against it.
3. The Bun with Face-Framing Spirals
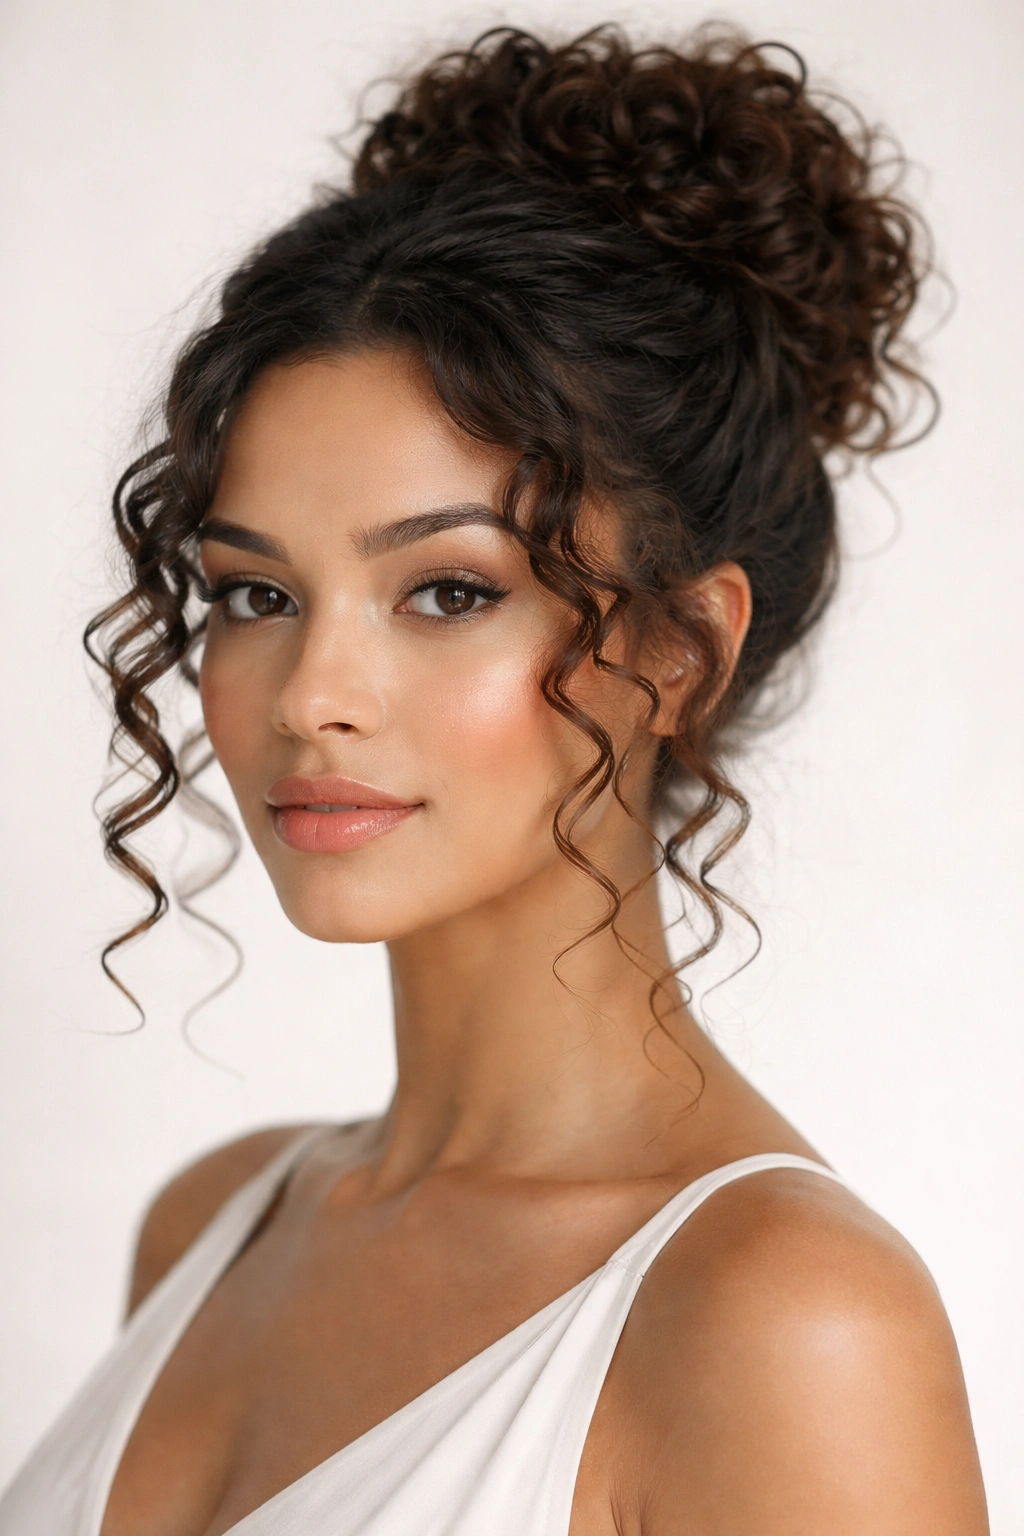
A traditional bun can sometimes look too formal or too sleek on curly hair, making the style feel disconnected from your natural texture. The solution? A bun combined with intentional face-framing spirals that wrap around the base. This hybrid style gives you the neat, polished silhouette of an updo while celebrating the curls that frame your face. It’s perfect for situations where you need to look put-together but not overly formal.
Why Face-Framing Spirals Transform the Entire Look
A plain bun on curly hair can look a bit severe or unfinished. Adding intentional spiral curls around the face softens the style and creates a visual connection between your updo and your natural curl pattern. These spirals act as a design element that says you meant to style your hair this way, rather than just throwing it up because you needed it off your neck. The spirals also serve a practical purpose: they disguise any flyaways or frizz by incorporating them into the intentional design.
How to Build This Style
- Gather your hair into a ponytail at the crown or nape (depending on how formal you want it to look—crown is more playful, nape is more polished)
- Before securing with an elastic, pull out a thin section on each side of your face and set those aside
- Secure the main ponytail with an elastic, then wrap a small strand from the ponytail around the base to hide the tie
- Take one of the face-framing sections and twist or curl it loosely, pinning it around the base of the bun
- Repeat with the other side, creating mirror-image spirals
- Gently manipulate the bun itself so it’s not perfectly smooth—let some texture show through
- Use bobby pins to secure any pieces that are trying to escape, and set everything with a flexible-hold hairspray
Pro tip: Slightly damp curls actually work better for this style than completely dry ones, because they have more pliability and will hold the spiral shape longer throughout the day.
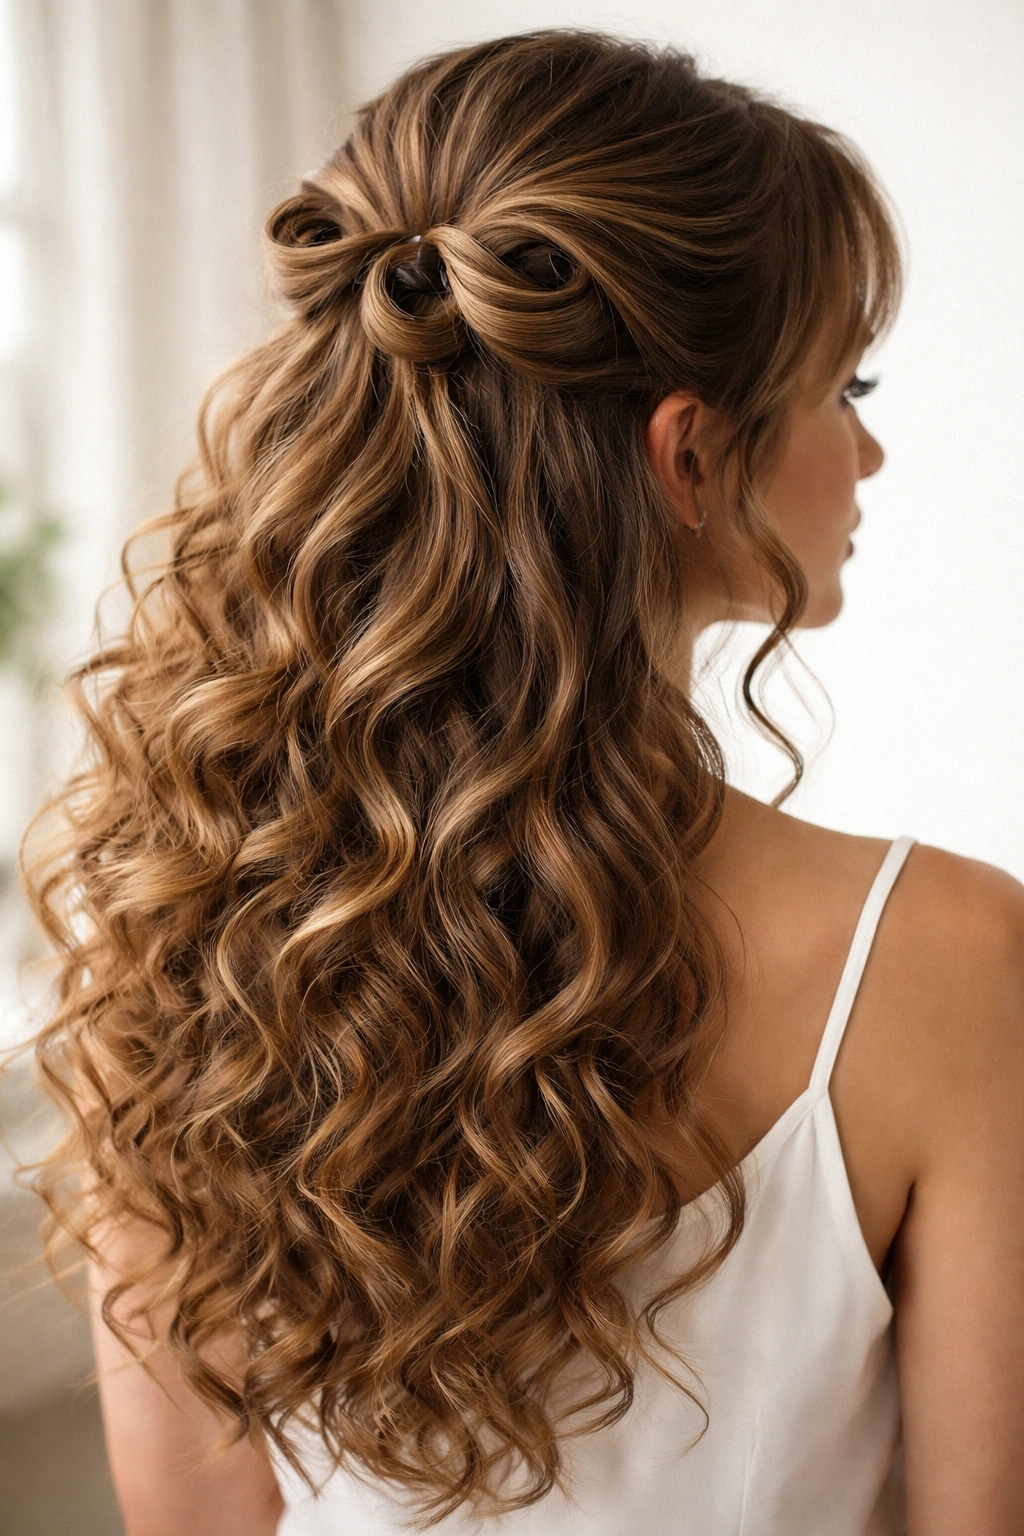
4. The Half-Up Twisted Knot
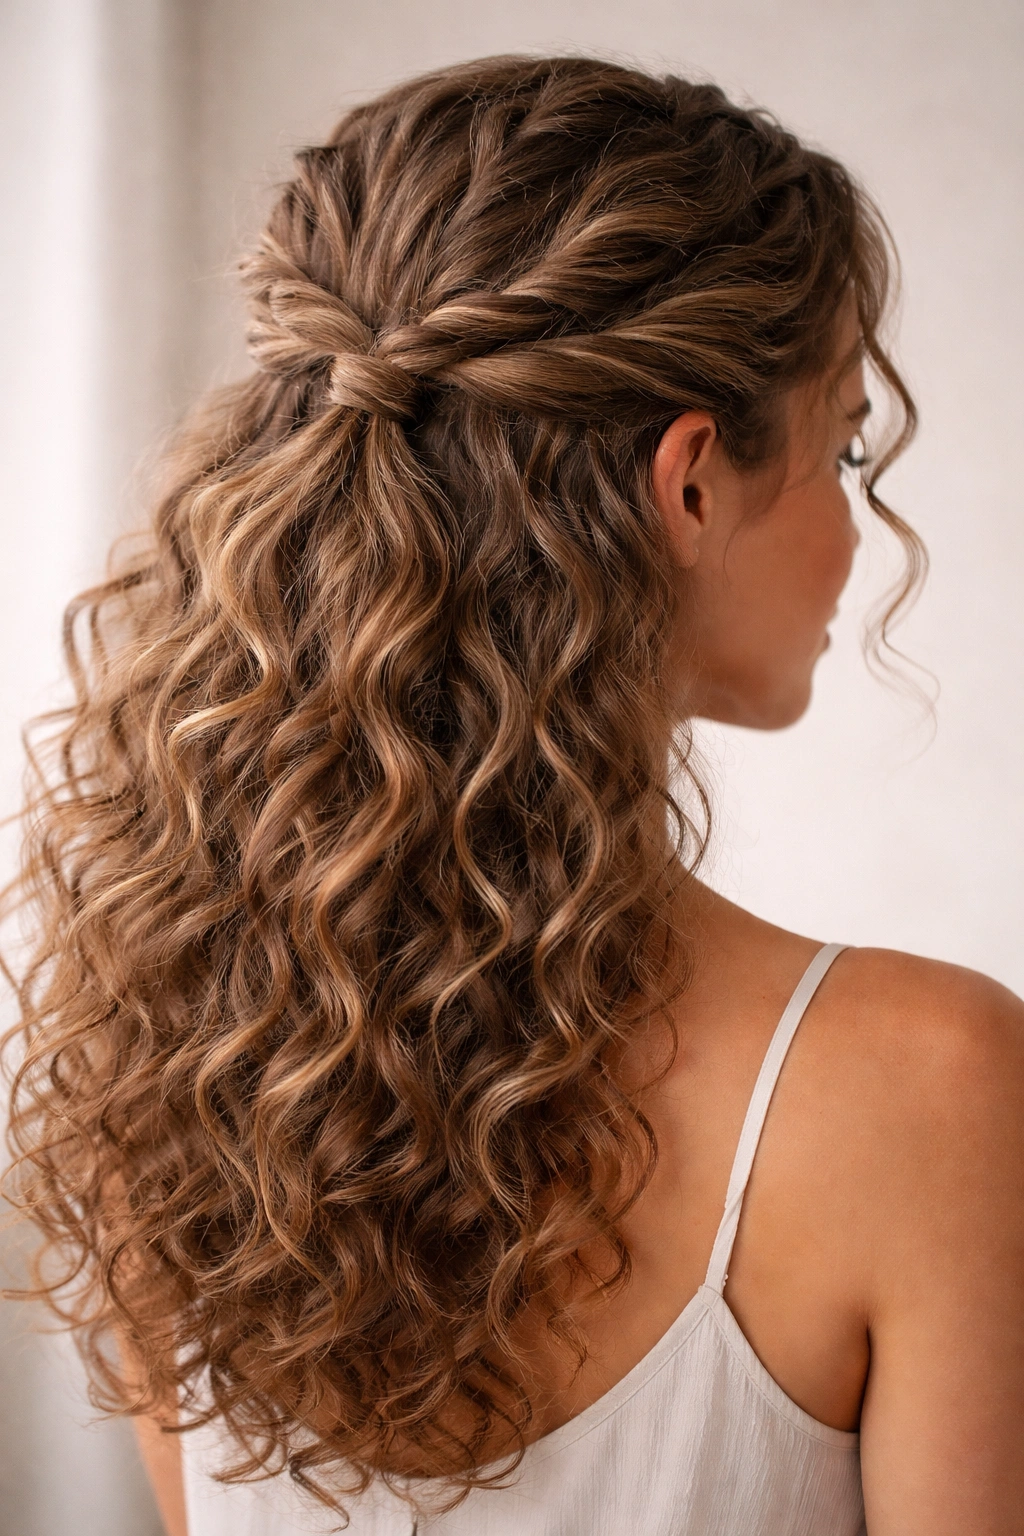
If you’re not ready to fully commit to an updo but need your hair somewhat controlled, the half-up twisted knot is your answer. It’s somewhere between wearing your hair down and wearing it up, giving you the best of both worlds. Two small twisted sections from the front meet at the back of your head and tie into a loose knot, creating an anchor point that keeps everything in place while leaving the bulk of your curls flowing freely.
Why Half-Ups Work Brilliantly with Curly Hair
Half-ups are often tricky with curly hair because without the weight of all your hair pulling down, the back section can look thin or underdeveloped. The solution is using twisted sections that create visual fullness and texture in the back. The twists themselves become a design feature rather than just a functional element. You’re not trying to minimize your curls—you’re highlighting the beautiful dimension and movement your texture naturally creates.
Creating Your Twisted Knot
- Take a small section from one side of your head near the temple, about an inch and a half wide
- Twist this section loosely as you bring it toward the back center of your head—don’t pull it tight, let it stay loose and textured
- Take a matching section from the opposite side and twist it the same way, bringing it to meet the first twist at the back
- Tie the two twisted sections together in a simple knot—you’re not going for a tight, formal knot, but a casual, slightly loose one
- Secure the knot with a bobby pin hidden underneath, and gently pull and manipulate the whole style so it looks intentionally relaxed
- Let the rest of your curls fall naturally around your shoulders and down your back
Worth knowing: This style pairs beautifully with a second-day or even third-day updo, because curls that have been set for a day or two actually hold this style better than freshly washed curls.
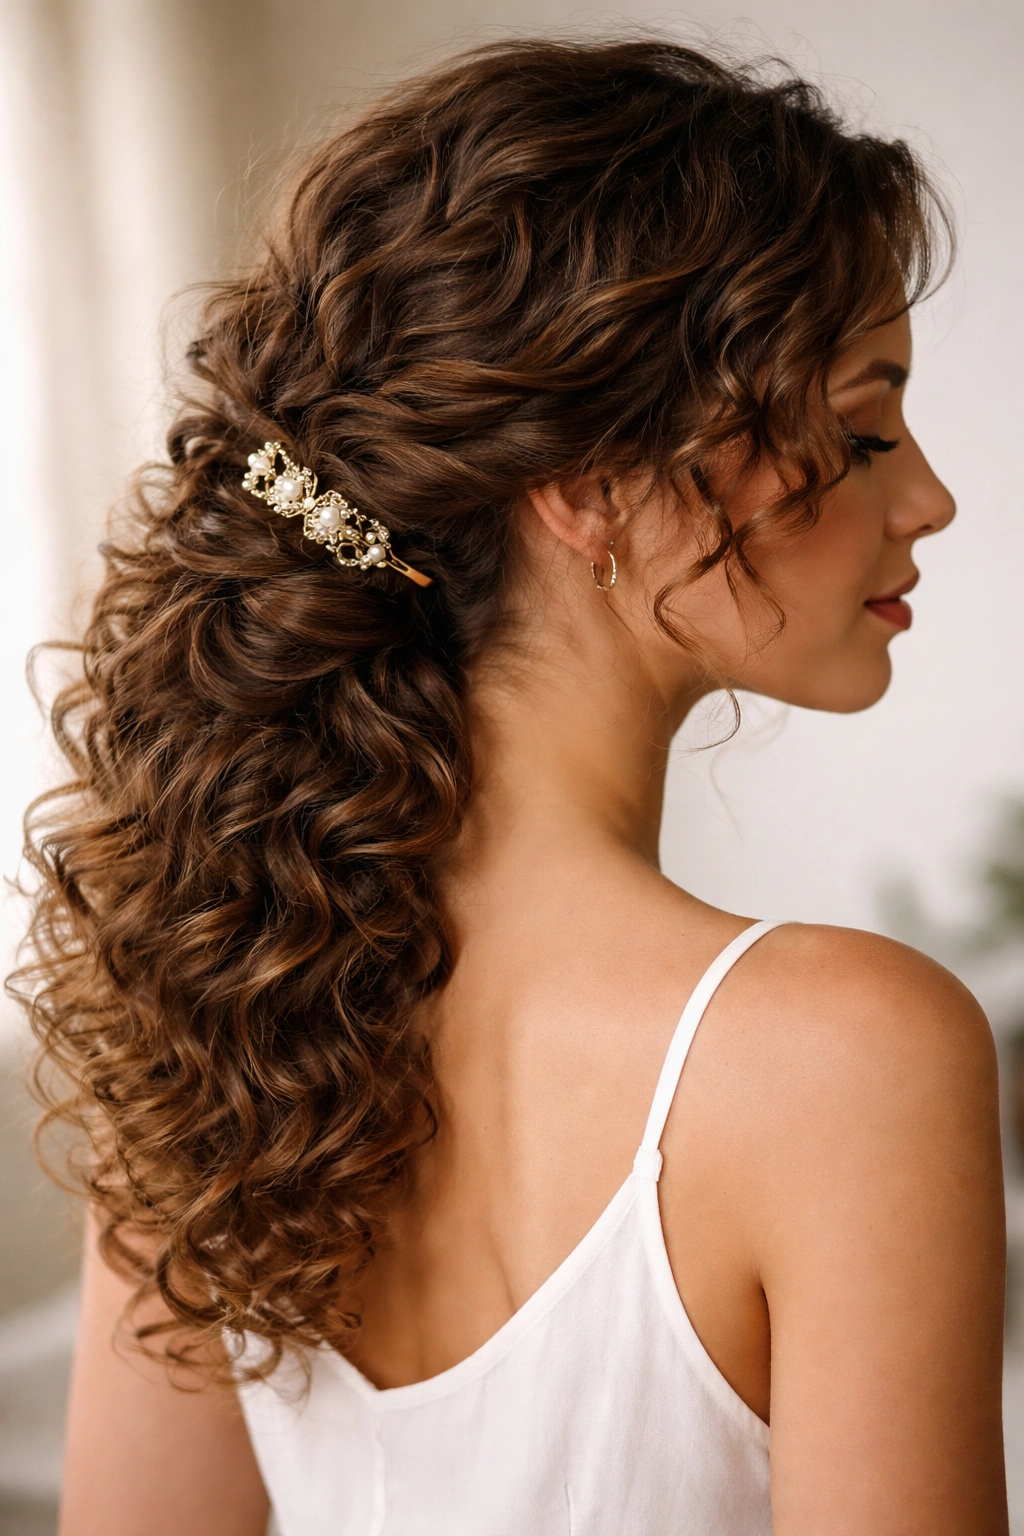
5. The Wrapped Low Bun with Curl Details
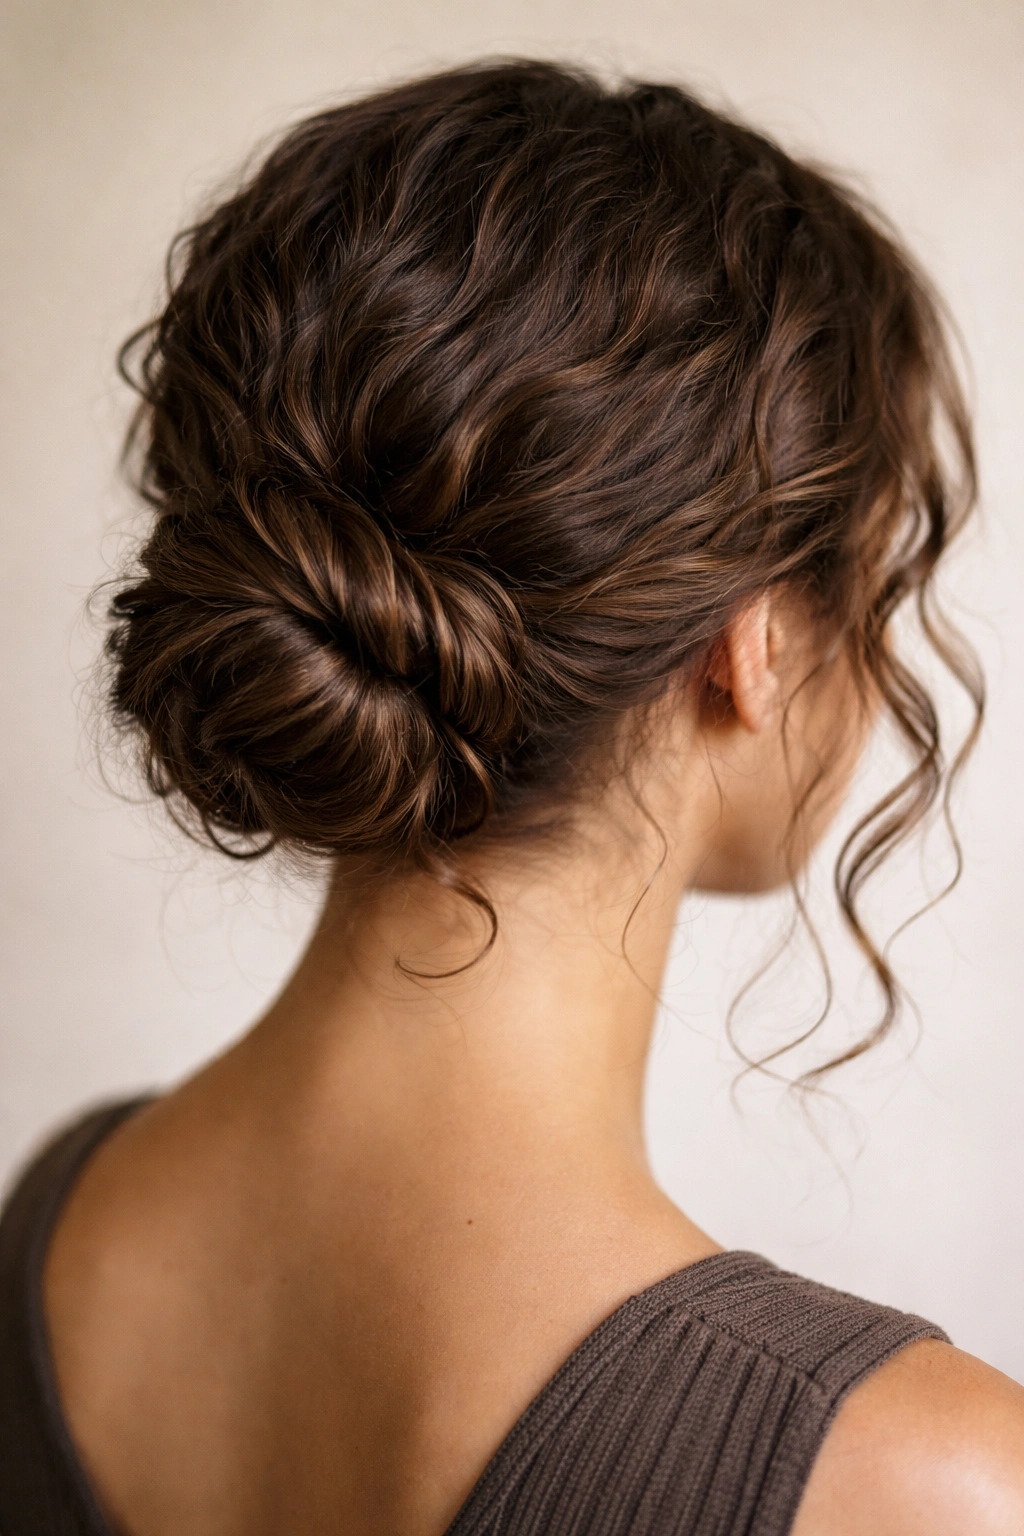
A low bun at the nape of your neck is versatile enough for everything from casual to professional settings, and on curly hair, it’s especially stunning because you can embrace the texture rather than trying to smooth it into submission. The “wrapped” element refers to taking a small curl section and wrapping it around the base of the bun as decoration and to hide the elastic. This small detail transforms a basic bun into something that looks intentionally styled.
The Elegance of Textured Low Buns
Low buns on straight hair are often sleek and smooth, which reads as very formal. Low buns on curly hair have an inherent softness and movement that makes them look polished but approachable. You don’t need to smooth every single curl into submission—in fact, the style looks better when you let some texture show through. This is one of the few updos where a little frizz or flyaway actually adds to the design rather than detracting from it.
Building Your Wrapped Low Bun
- Flip your head forward and gather all your hair at the nape of your neck
- Use a strong elastic to secure the ponytail, keeping it low and centered
- Twist the entire ponytail loosely or divide it into two to three sections and twist each one separately
- Wrap the twisted section(s) around the base of the ponytail to form the bun, securing with bobby pins as you go
- Before finalizing, pull out a small section of curl from near the elastic and wrap it around the base in a decorative spiral
- Secure this spiral with another bobby pin, letting the tail of the curl drape slightly down your neck for a romantic touch
- Gently loosen the entire bun so it’s not too tight—you want it to look soft and intentional, not severe
Pro tip: If your bun is sitting too flat, flip your head upside down while you’re securing it, then flip back up. The gravity while you’re upside down helps create a fuller shape.
6. The Double Bubble Ponytail Styled as an Updo
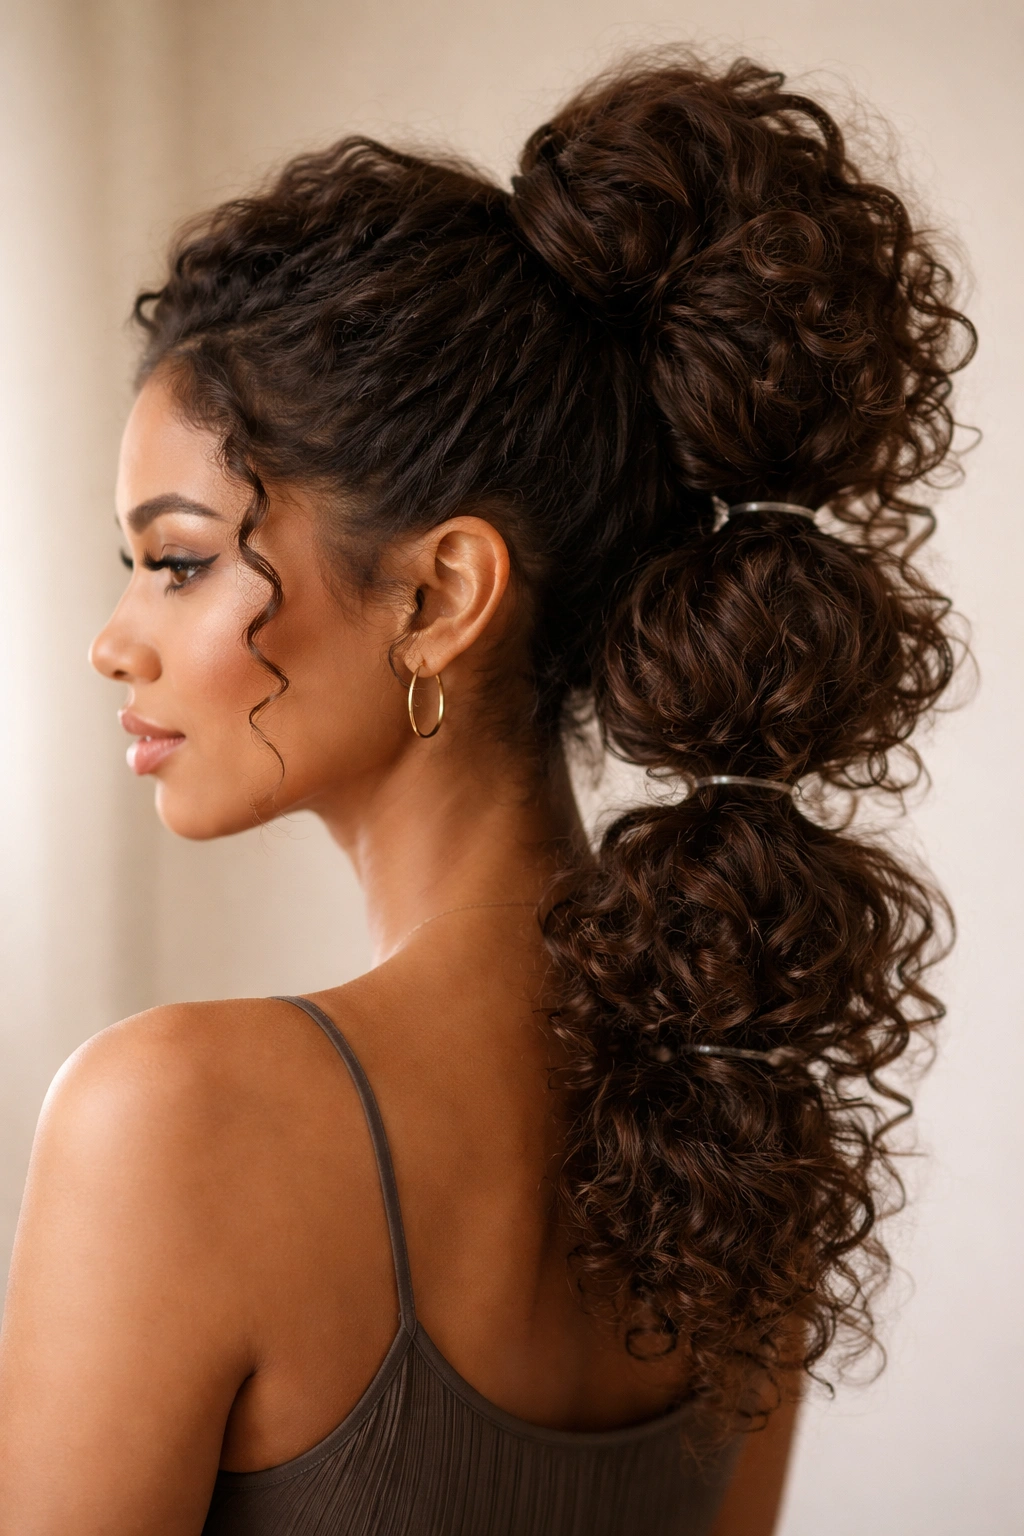
The double bubble ponytail (sometimes called a bubble pony) has become trendy, but it’s actually brilliant for curly hair specifically. By dividing one ponytail into stacked sections with elastics, you create multiple points of fullness and visual interest. On curly hair, this style celebrates every bit of volume your texture provides while creating a polished, intentional look that reads as “I actually styled this.”
Why Bubbles Enhance Curly Texture
Straight hair needs bubble ponytails to create artificial fullness and dimension. Curly hair already has both of those things in spades—bubble ponytails on curls simply showcase what’s already there. Each bubble becomes a celebration of your natural texture, with individual curls catching light and creating depth. The style is especially gorgeous with looser curl patterns, because you can see the wave and bounce in each bubble section as you move.
How to Create the Perfect Bubble Pony in Minutes
- Gather your hair into a high ponytail and secure with a strong elastic
- About two inches down from the first elastic, add a second elastic around the same ponytail, creating the first “bubble” between the two elastics
- Gently pull the bubble outward and slightly upward to create fullness and shape
- Add a third elastic about two inches below the second one, creating a second bubble
- Pull this bubble outward as well, matching the shape and fullness of the first one
- Continue adding bubbles as far down the ponytail as your hair length allows—three to four bubbles usually looks best
- Gently manipulate each bubble so it’s full and rounded, letting your curls show their natural texture
- If any sections look too tight, carefully loosen them by gently pulling small curl sections outward
Worth knowing: This style actually looks better the looser and less perfect you make it. Embrace the curl pattern showing through and don’t worry about smoothing everything into identical bubble shapes.
7. The Claw Clip Curl Knot
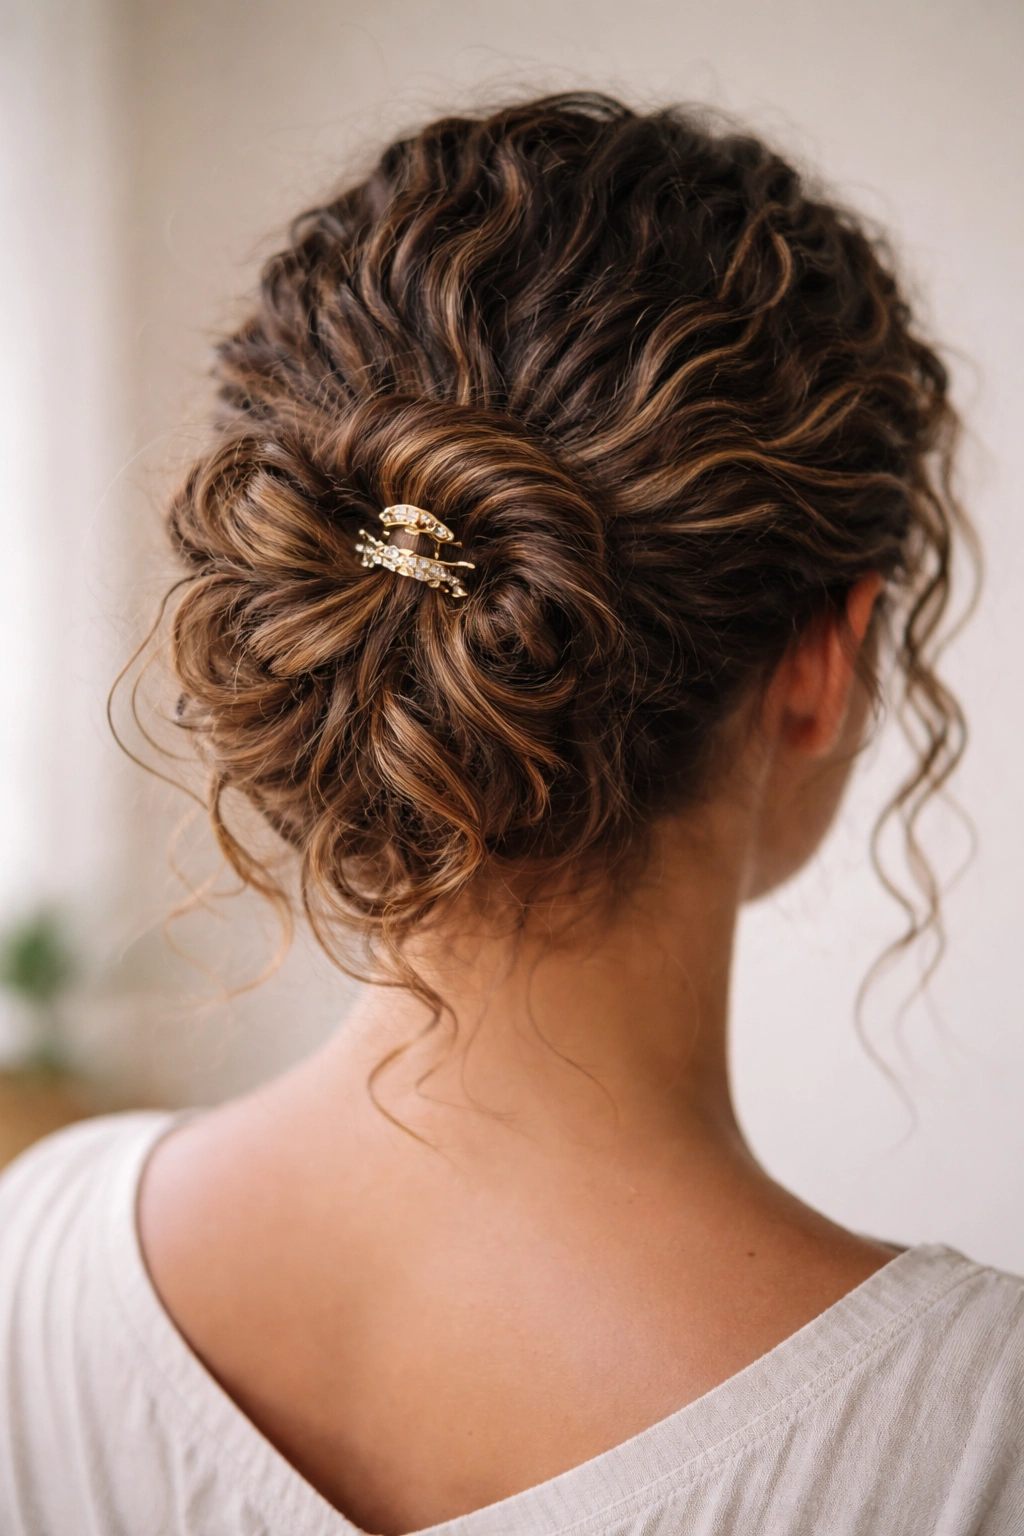
If you own a claw clip (and if you have curly hair, you absolutely should), you know they’re one of the fastest ways to secure a quick updo. The claw clip curl knot elevates the basic claw-clip look by twisting your curls before clipping, creating a more intentional and polished style. It’s the fastest option on this list—truly under five minutes, often under two if you’re practiced.
Why Claw Clips Are Perfect for Curly Hair
Claw clips grip texture beautifully, which means they actually hold curly hair better than they hold straight hair. The undulating surface of your curls naturally creates friction with the clip’s teeth, meaning you don’t need to pull everything so tight that you’re straining your hair or scalp. This also means the style is more comfortable to wear all day. Plus, claw clips come in so many sizes, colors, and styles that you can match them to your outfit or mood—they’re as much a fashion statement as a functional hair tool.
The Quick Curl Knot Technique
- Flip your head upside down to flip your curls in the opposite direction, giving the style a fresh look and adding volume
- Flip back up and use your fingers to gather your curls loosely at the back of your head, about mid-way between your crown and nape
- Loosely twist this gathered section—you’re not going for a tight twist, just a casual swirl that’s barely holding together
- Secure the twisted section with a claw clip, positioning it so the clip sits horizontal across the twist
- Gently pull some curls out around your face and neck, and slightly loosen the twist so it looks intentionally undone
- If you have any shorter layers, let them frame your face naturally rather than trying to clip them back
Pro tip: Wet your hands slightly before gathering and twisting your curls—the moisture helps them hold the twist shape without needing to be super tight, and it reduces frizz in the process.
8. The High Twisted Half-Up with Looped Curls
This style is deceptively simple to create but looks genuinely elegant, making it perfect when you want to look polished without spending much time. You’re creating a high half-up style, but instead of securing it with a standard ponytail holder, you’re using looped sections of your own hair as the anchor. This detail makes the style look more intentional and sophisticated than a basic half-up.
Creating Visual Interest Through Hair Looping
Hair looping (where you create decorative loops from your own hair as a functional and aesthetic element) is an underrated curly-hair technique. With curly hair, these loops look especially beautiful because the natural curve of your curls naturally forms attractive shapes. You’re not fighting your texture to create geometric loops—your curls want to curve and loop, so you’re just directing them intentionally.
Building the Looped Half-Up
- Take a section from one side of your head near your temple and twist it loosely toward the back
- Create a loop with this twisted section (essentially, bring the end back toward where it started, creating a loop shape) and pin it at the point where it meets
- Take a matching section from the opposite side and create an identical looped twist on that side
- These two loops should sit at the back of your head, roughly where a hair tie would normally sit on a half-up style
- Secure both loops with bobby pins hidden beneath them, ensuring they’re firmly anchored
- Let the rest of your curls fall freely, and use your fingers to gently loosen and shape the loops so they look soft and intentional
- Pull a few wispy sections around your face to frame it gently
Worth knowing: This style works beautifully with damp curls, because they’ll be pliable enough to form clean loops while holding the shape throughout the day as they dry.
9. The Side Swept Spiral Clip
Sometimes the most beautiful updos are the ones that look effortless and are worn to the side. The side swept spiral clip style works by gathering your hair to one side, loosely spiraling it, and securing everything with a clip. It’s romantic, playful, and doesn’t read as “formal updo”—it reads as “I styled my hair casually but it looks absolutely gorgeous.” It’s perfect for dates, casual hangouts, or anytime you want to look intentionally styled without appearing like you’re dressed up.
Why Side-Swept Styles Suit Curly Hair
Side-swept updos show off the profile of your curls beautifully, especially if you have a side part or asymmetrical curl pattern. Instead of gathering your hair symmetrically at the back of your head, you’re showcasing your texture from the side, which creates a softer, more romantic aesthetic. The spiral element adds visual interest and movement that makes the updo feel alive and three-dimensional rather than static.
Creating Your Spiral Clip Style
- Flip your head to one side, letting your curls naturally fall in that direction
- Gather your curls loosely at the side of your head, roughly at ear level or slightly lower—don’t gather them too tightly
- Loosely spiral this gathered section, letting individual curls escape and creating an intentionally relaxed twist
- Secure the spiral with a claw clip or decorative clip, positioning it so the spiral is visible and becomes part of the design
- Release any shorter layers or pieces around your face and let them frame your features naturally
- Gently pull and shape the spiral so it looks soft and deliberately undone rather than tight and controlled
Pro tip: This style looks especially stunning if you use a decorative clip that matches your outfit or a metallic clip that adds shine and visual interest to your curls.
10. The Twisted Crown with Flowing Curls
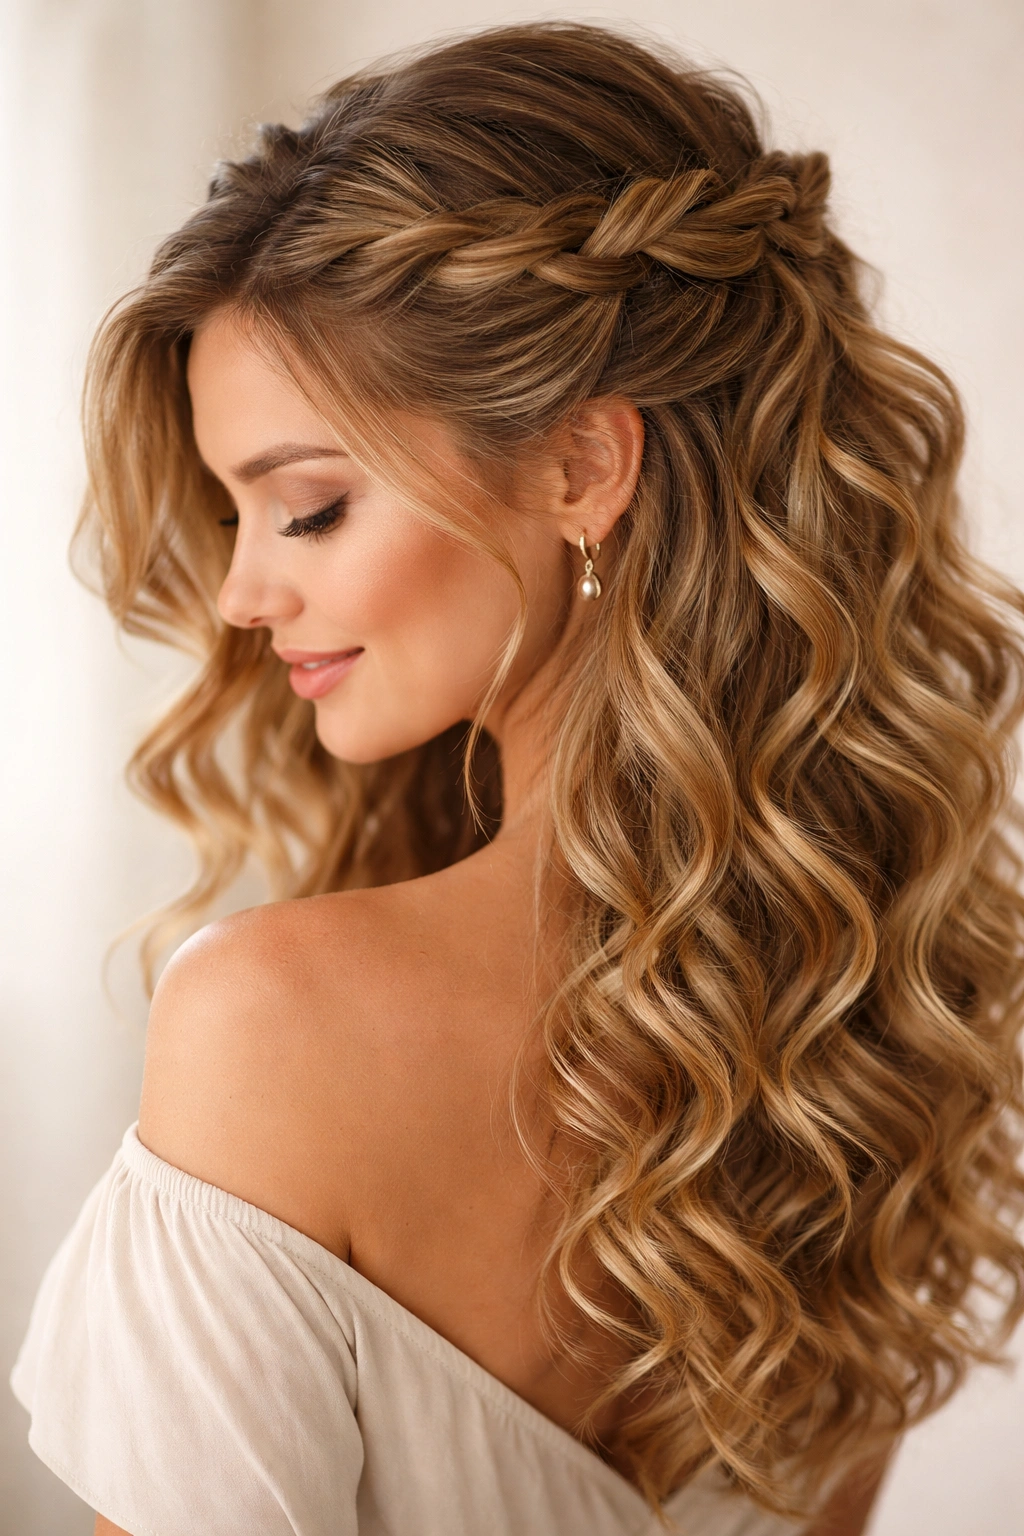
This final style is essentially a hybrid between a half-up and a full updo—it creates the appearance of an updo at the crown while letting the bulk of your curls flow freely down your back. You’re creating a twisted crown similar to the style mentioned earlier, but instead of bringing both twists to the back of your head and securing them there, you’re anchoring them higher up with bobby pins, creating a crown effect that sits on top of your head like a halo. It’s romantic, ethereal, and surprisingly quick to create.
The Ethereal Power of the Crown Effect
Crown styles work beautifully on curly hair because your natural volume at the crown means the twisted sections sit beautifully without looking thin or underdeveloped. The twisted crown doesn’t pull your hair back tightly—instead, it sits on top of your hair, which means you can achieve the look without any pulling or tension, making it incredibly comfortable to wear all day. This is one of the gentlest updo options if you have a sensitive scalp or fragile hairline.
Building Your Twisted Crown
- Create a deep side part, parting your hair from the center of your hairline toward the back of your head
- Take a section from the deeper side of your part, near your temple, and begin twisting it loosely
- As you twist, move this section across the back of your head toward the opposite side, letting the twist sit loosely on top of your hair rather than pulling it back tightly
- Secure this twisted section with bobby pins at the opposite temple, hiding the pins beneath your curls
- For added visual interest, create a second twisted crown by taking a section from the bottom of the first twist, twisting it, and bringing it across to the opposite side
- Secure the second twist with bobby pins as well, creating a double-crown effect if desired
- Let all of your curls flow freely down your back, and gently manipulate the twisted crowns so they look intentionally relaxed and romantic
Worth knowing: This style is perfect for wavy or loose curl patterns, because the weight of longer hair flowing down your back won’t pull the crown sections loose throughout the day.
Final Thoughts
The most beautiful thing about quick curly updos is that they work because of your curl pattern, not in spite of it. Every style on this list celebrates the natural texture and volume that make curly hair uniquely stunning. You’re not trying to smooth your curls into submission or create geometric perfection—you’re directing your natural movement and texture intentionally, then stepping back and letting your hair do what it does best.
The real secret to mastering these updos is practice. Your first attempt might take twelve minutes instead of ten. By your fifth or sixth time creating a style, your hands will know where to go and how to position the clips or pins without thinking about it. You’ll develop muscle memory, and what once felt complicated becomes second nature. That’s when these updos truly shine—when you can throw them together in under five minutes while talking to your kid, getting ready for work, or having your morning coffee.
The other secret is letting go of perfection. These styles aren’t supposed to look like they took two hours and a professional stylist. They’re supposed to look like you rolled out of bed, spent a couple of minutes styling your curls intentionally, and now they look effortlessly beautiful. Loose twists, escaped curls, soft texture showing through—these are features of the style, not flaws. Embrace the undone quality, and you’ll discover that some of your best curl days come together faster than you ever thought possible.