Managing curly hair doesn’t mean you’re limited to elaborate, time-intensive styles. In fact, some of the most stunning looks for curls are deceptively simple—the kind you can pull off on a regular Tuesday morning without fussing for an hour. The secret isn’t about fighting your texture; it’s about working with it, choosing styles that showcase your curls while keeping your routine realistic and sustainable.
Curly hair thrives when given enough structure to prevent frizz but enough freedom to breathe and bounce. The everyday styles that work best for curls are those that require minimal daily manipulation, rely on your natural wave or curl pattern as a feature rather than something to tame, and actually get easier to manage the longer you wear them. These are the styles that can stretch from your morning routine straight through to evening plans without unraveling or losing definition.
What makes a hairstyle truly “everyday” for curly hair comes down to three things: it shouldn’t require heat styling or chemical straightening to look intentional, it should work with your curl type rather than against it, and it should maintain its integrity through humidity, movement, and the occasional unexpected weather change. The following ten styles deliver exactly that—they’re practical, protective, genuinely flattering on multiple curl types, and built to work in real life, not just in polished photos.
1. The Pineapple Updo
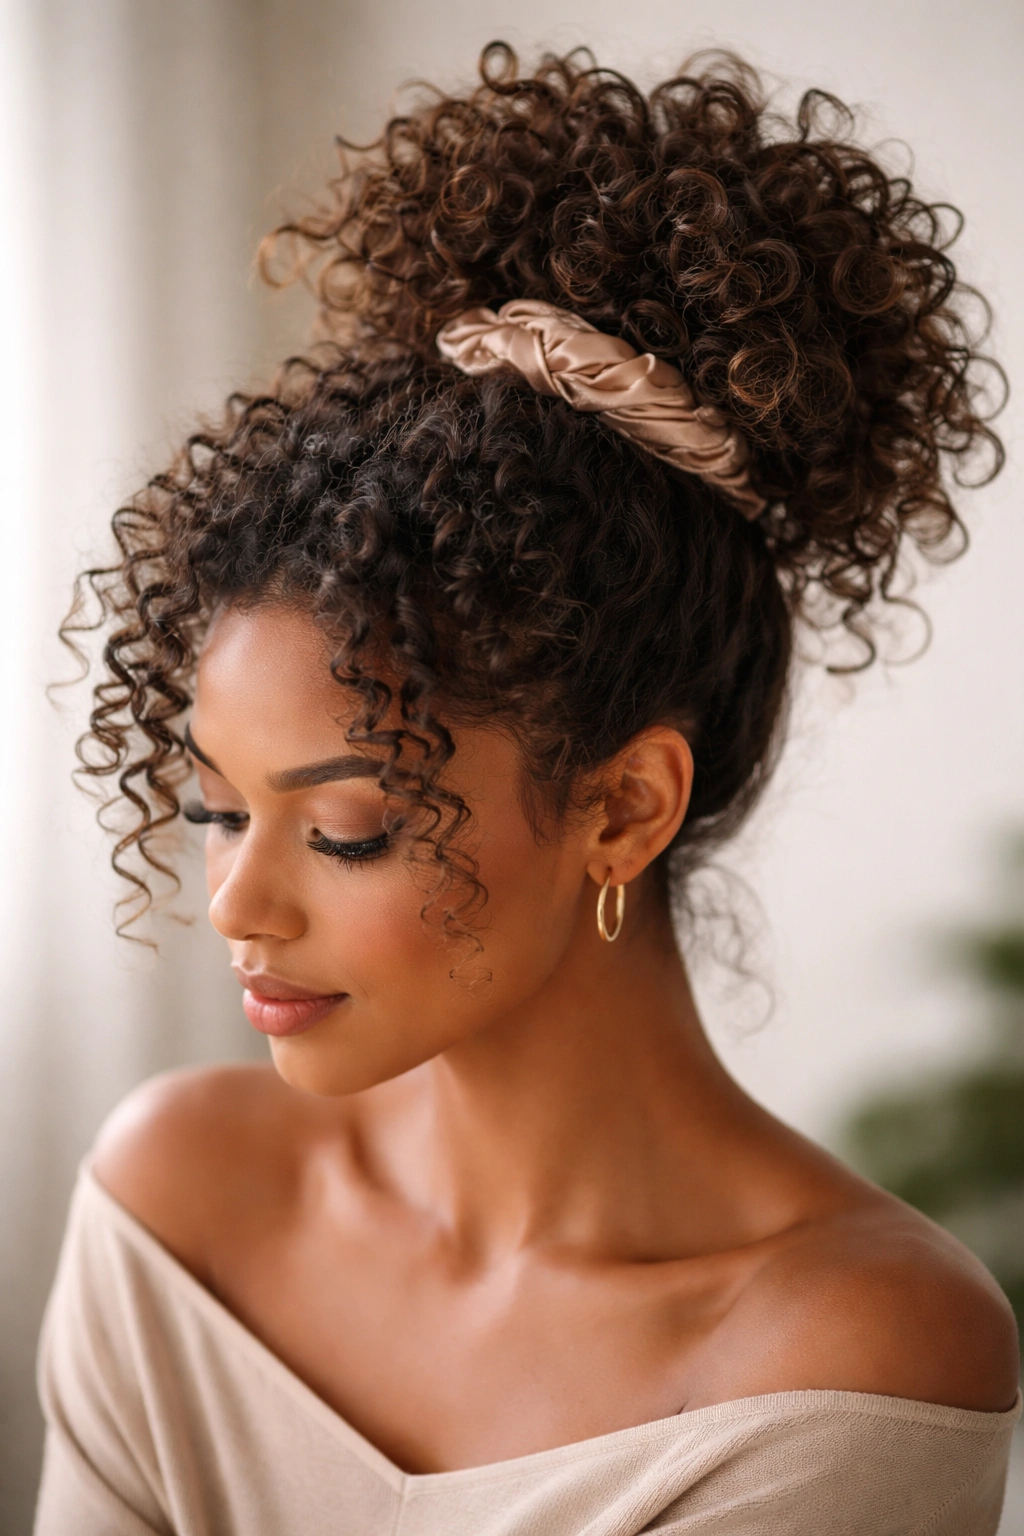
The pineapple is arguably the most genius hack curly-haired people have discovered for extending the life of their curls while getting them off the face and neck. It involves gathering your curls loosely on top of your head and securing them with a soft elastic—the “pineapple” shape that gives it its name. This style works because it positions your curls vertically rather than horizontally against your pillow or shoulders, preventing the flattening and frizz that come from pressure and friction while you move through your day.
Why It’s Perfect for Everyday Wear
The pineapple works beautifully as both a statement and a practical solution because it preserves your curl definition while creating the appearance of intentional styling. Unlike styles that require you to have perfect curls from root to tip, the pineapple actually hides areas where your curls might have lost definition—the underneath layers stay protected and separate. The beauty of this approach is that you’re not trying to achieve a polished, finished look; you’re celebrating the texture and movement of curls in their most natural state.
How to Create the Perfect Pineapple
- Use a soft silk or satin scrunchie instead of a standard elastic, which grabs and breaks curls; place it high on your head (around where you’d normally wear a high ponytail) and leave the very front sections out if you prefer face-framing
- Keep the gathering loose enough that you can slide a finger under the elastic without resistance; a too-tight pineapple defeats the purpose by creating tension that eventually flattens curls underneath
- Secure your hair gently without pulling individual curls toward the elastic; let them remain loosely gathered rather than pulled tight and smooth
- For added volume and to prevent a flat crown when you wear it down later, use a claw clip to anchor the scrunchie from underneath, taking pressure off the top section
Pro tip: Sleep in your pineapple overnight, and your curls will last several days without needing a full refresh—simply release the elastic in the morning, adjust the curls with your fingers, and go.
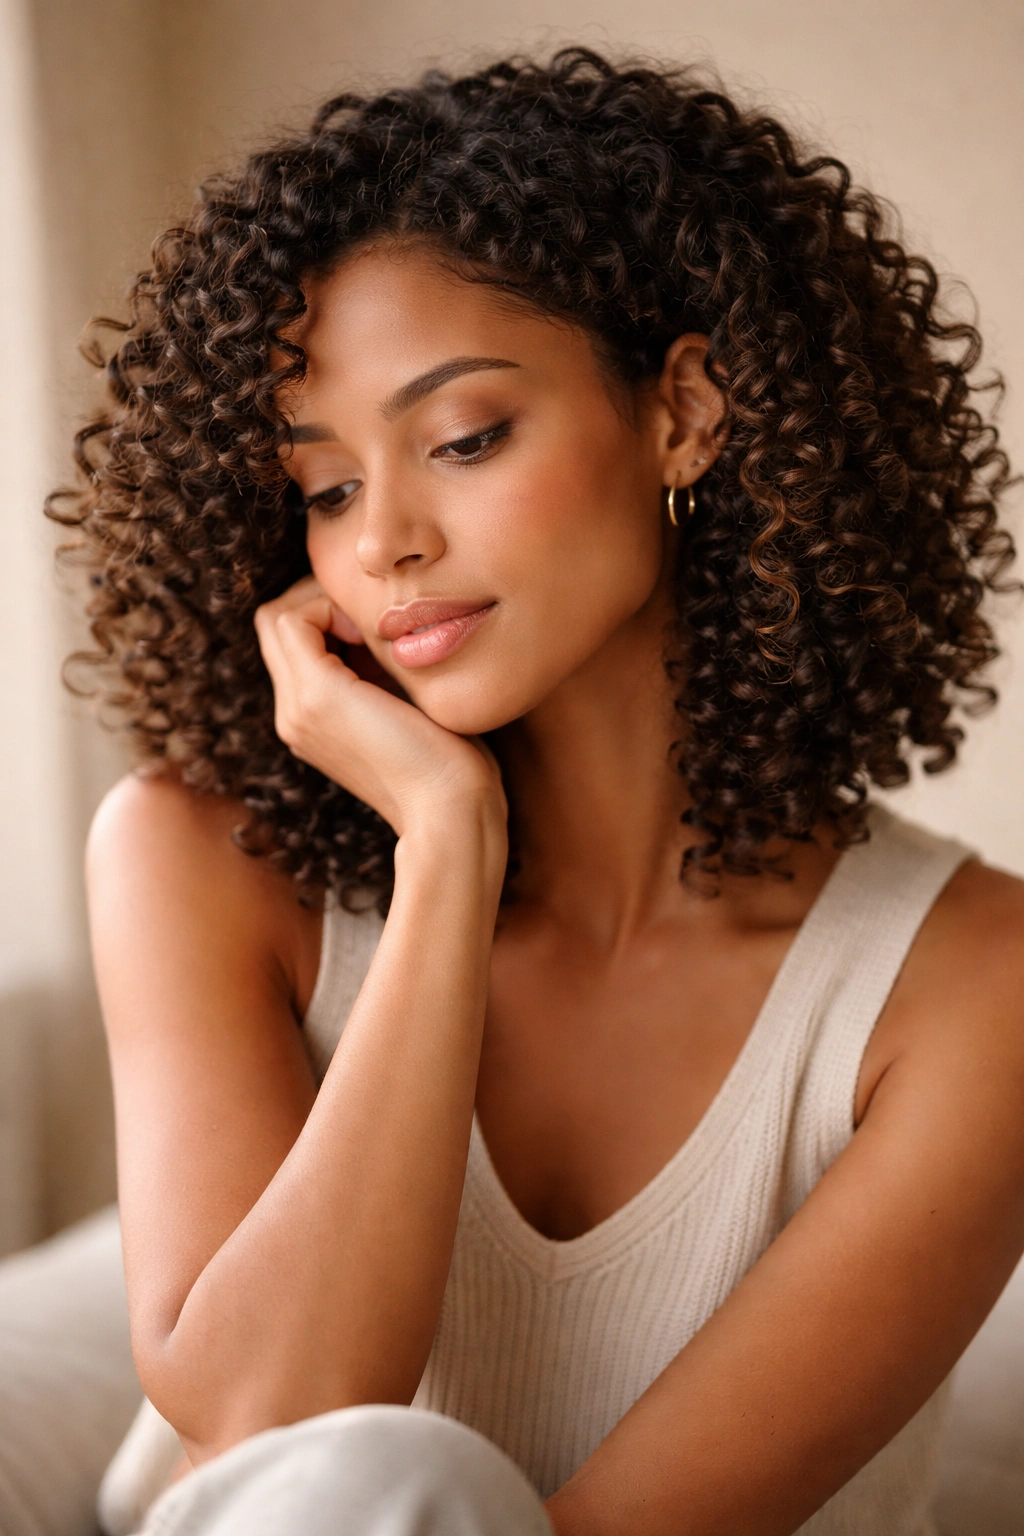
2. The Defined Wash-and-Go
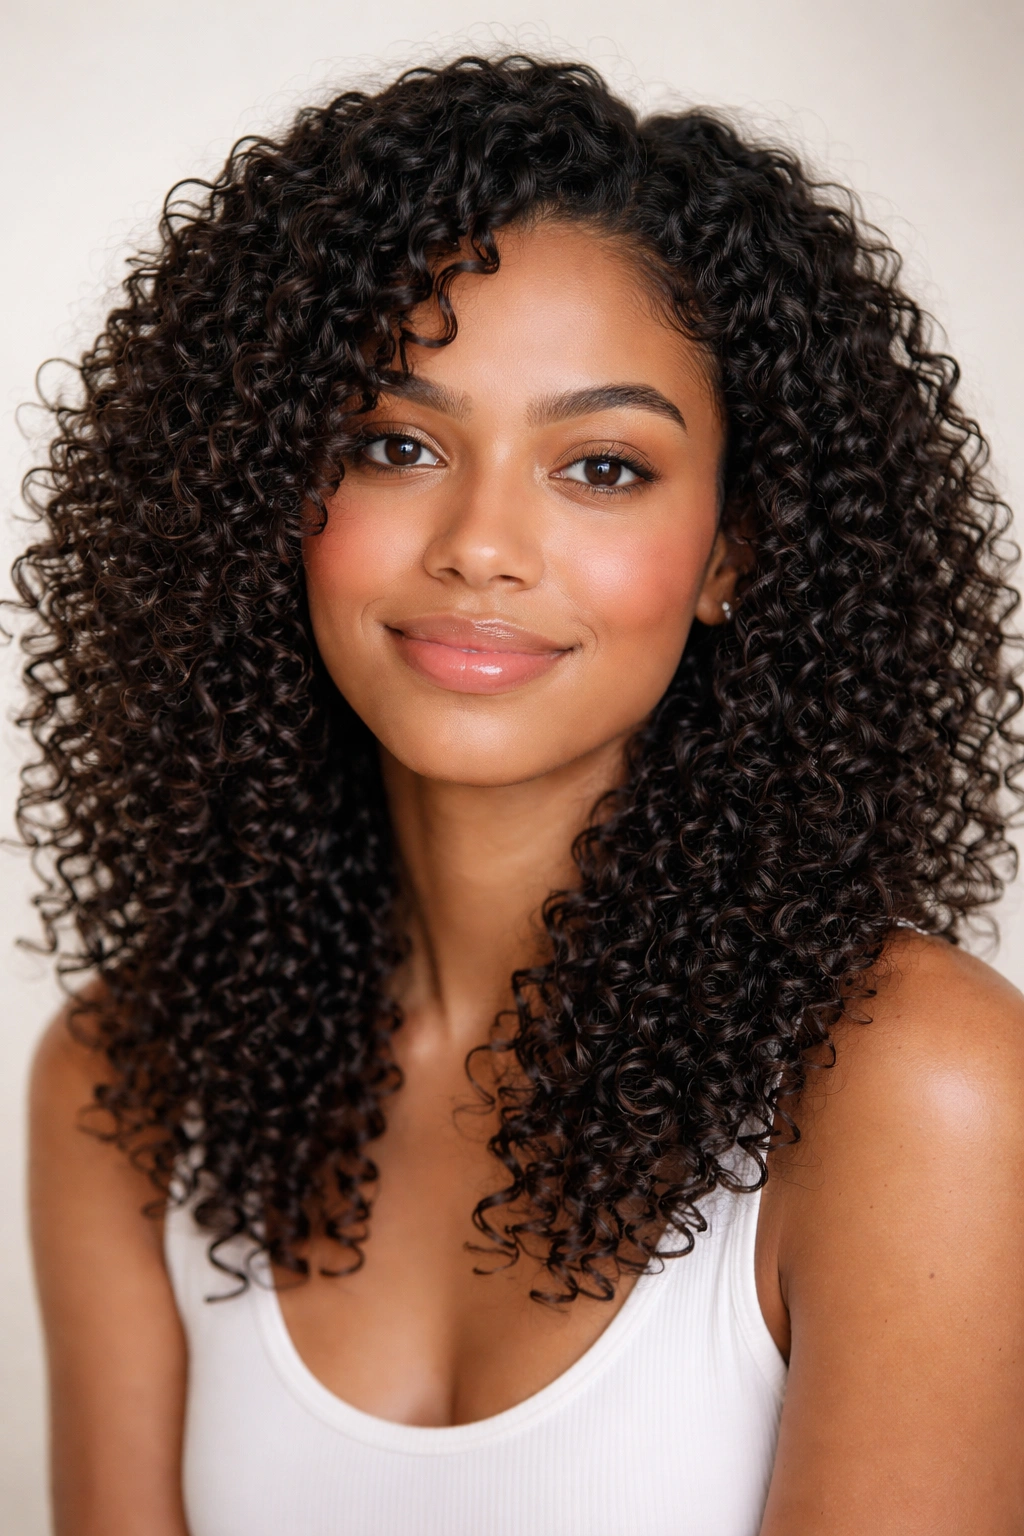
A wash-and-go means styling your hair fresh out of the shower using only product (no blow dryer, no styling tools) and letting your curls dry into their natural shape. For curly hair, this is the ultimate everyday style because it requires zero heat damage, zero manipulation, and zero restyling through the day. The catch is that your wash-and-go looks intentional and polished only when you’re using the right products and scrunching technique.
The Foundation of a Successful Wash-and-Go
Getting a defined wash-and-go to work consistently comes down to layering the right products in the right order while your hair is still soaking wet. Your curls set their pattern as they dry, so the moisture content and product weight during that drying window determines whether you’ll end up with separated, bouncy spirals or a unified, almost-wavy texture. The products need to provide enough hold to encourage your curl pattern without creating crunch or stiffness that makes your curls feel brittle.
Your Product Application Sequence
- Apply a leave-in conditioner to soaking wet hair, working it through from mid-length to ends using a wide-tooth comb or your fingers to distribute evenly
- Add a curl-defining cream or gel to your hands, then “praying hands” the product between your palms and apply to your hair in sections, using an upward squeezing motion to encourage curl formation
- Use the “plopping” technique—wrapping your wet curls in a microfiber towel or cotton t-shirt for 10-15 minutes to remove excess water without roughing up the curl pattern
- Diffuse on low heat if you’re in a hurry, or let your curls air-dry completely before touching them (moving them before they’re fully set will ruin the pattern)
Worth knowing: The right product combination is deeply individual—what works perfectly for a coily, tight curl pattern might weigh down looser waves, so don’t assume products that work for someone else’s curls will work the same way on yours.
3. The Half-Up Twist
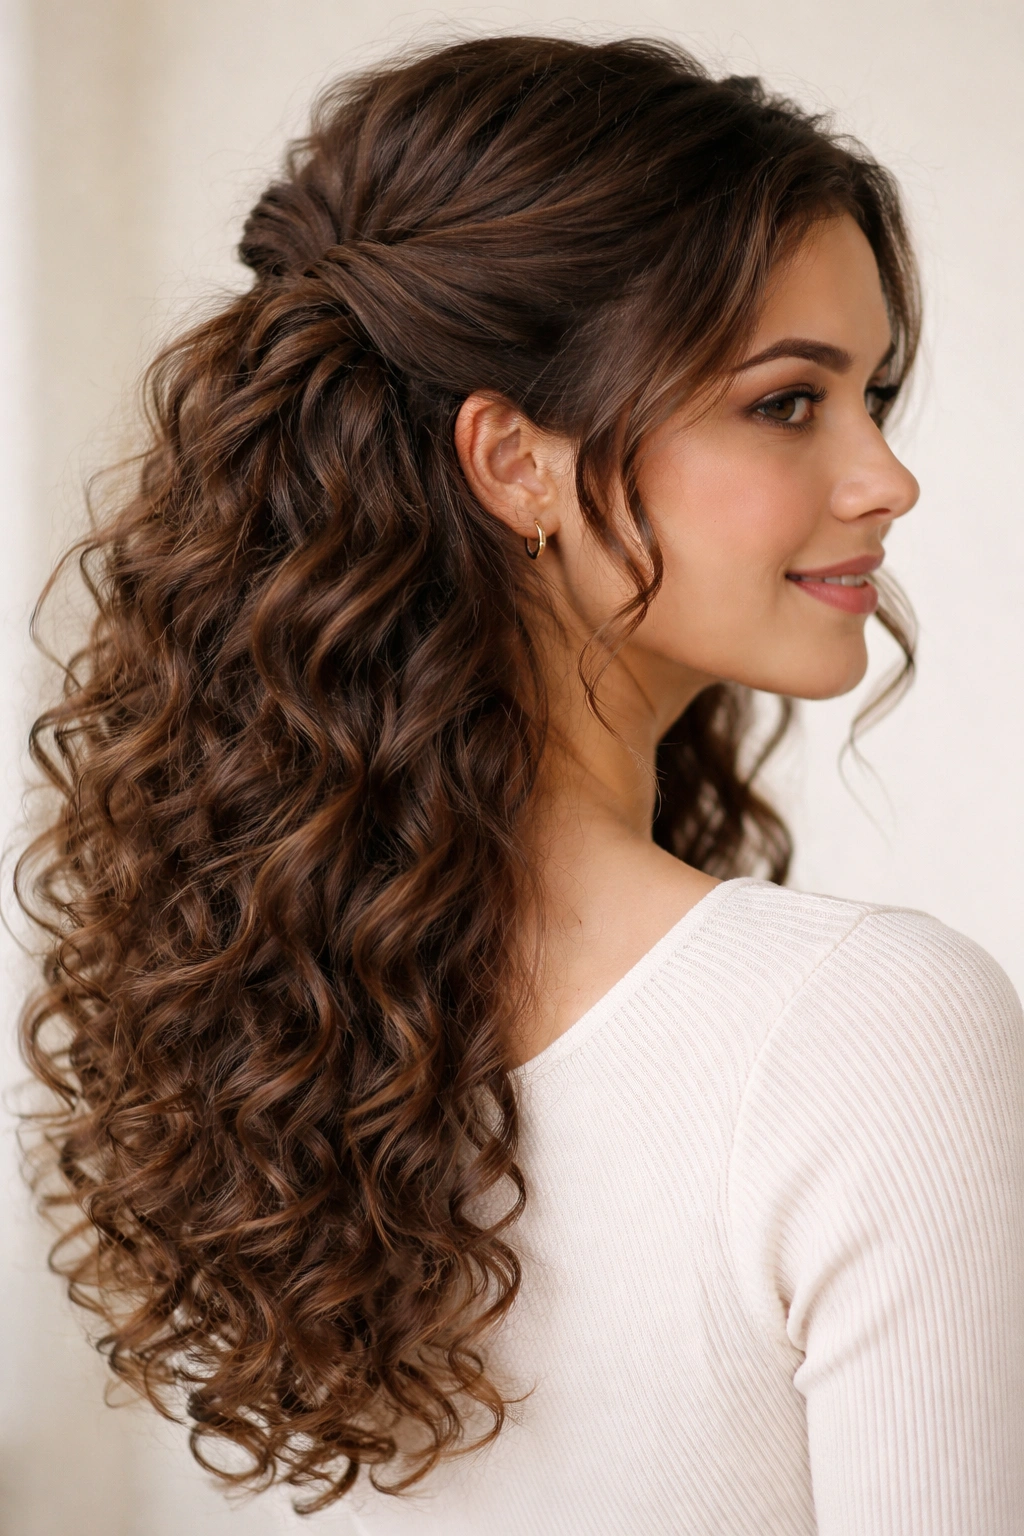
A half-up twist gathers the hair from your temples and crown area into a loose twist that’s secured at the back of your head, leaving the bottom half of your curls down and loose. It’s casual enough for running errands or a coffee date but polished enough for casual workplace settings or lunch with friends. The best part is that it requires almost no skill—you’re literally twisting sections of hair and pinning them, which is hard to mess up even on a morning when you’re rushing.
Why This Style Frames Curly Hair So Well
The half-up twist works because it removes the hair from around your face without requiring you to style all your curls into a sleek, pulled-back look. Your face gets the benefit of frame-clearing without the severity that can sometimes come with fully pulled-back styles. For curly hair, this creates the visual effect of having deliberately styled curls while actually just moving them away from your face and securing them loosely. The twisted section shows off your curl texture while the loose bottom section bounces freely.
How to Build the Twist Step by Step
- Take a section of hair from just above your ear on one side and begin twisting it loosely toward the back of your head, gathering more hair as you move (don’t twist tightly; loose, relaxed twists look more intentional and modern)
- Meet the twisted section at the back and secure with a bobby pin or small clip, then repeat on the opposite side if you want symmetry, or skip the second side for an asymmetrical look
- Gently loosen the twists slightly by tugging at the twisted section to create a softer, fuller appearance—a tight twist looks unfinished, while a slightly relaxed twist looks intentional
- Leave the face-framing pieces loose and untwisted for a softer effect; these smaller pieces catch light and add dimension
Insider note: Use bobby pins that match your hair color, and insert them underneath the twist where they’ll be hidden by your curls—from the front, people will see only the twisted curl detail, not the pin.
4. The Straightforward Low Bun
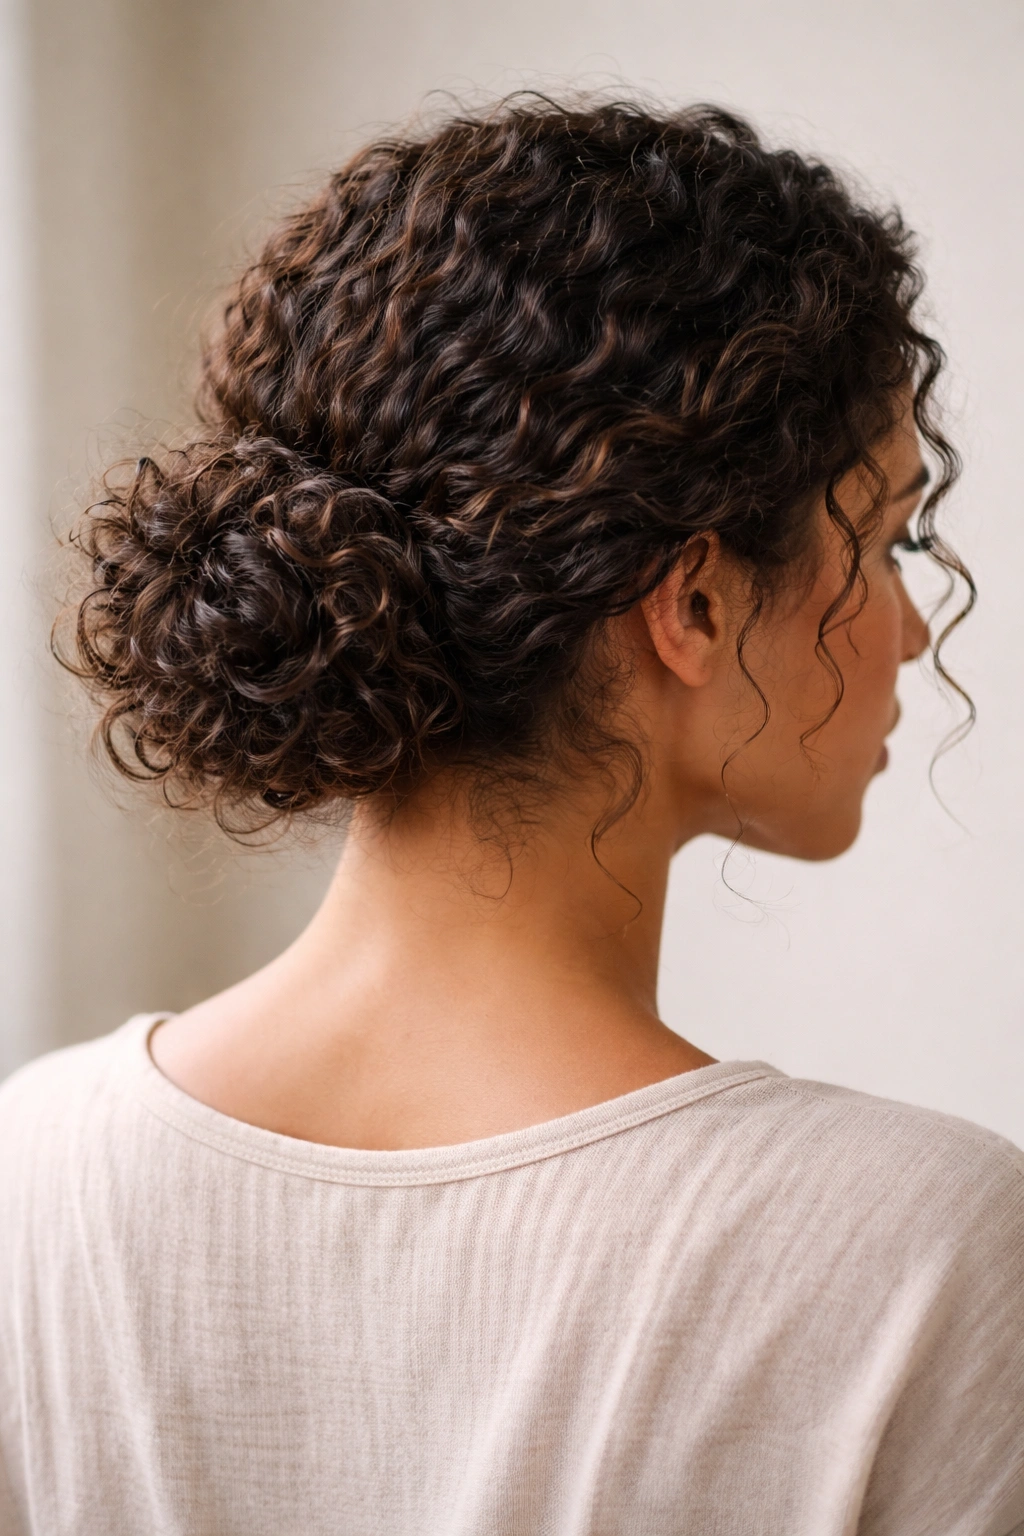
A low bun at the nape of your neck is the ultimate minimalist everyday style for curly hair. You’re simply gathering your curls into a loose knot at the back of your head and securing it with bobby pins or a hair tie. It’s protective (your curls are tucked away from friction and environmental stress), it’s appropriate for almost any setting, and it looks effortlessly put-together without requiring you to have done anything fancy.
The Magic of a Low Bun for Curly Texture
The reason a bun works so well for curly hair is that it doesn’t require your curls to be smooth, straight, or even perfectly defined. A bun actually expects texture, volume, and visible individual sections of hair—that’s kind of the point. Loose, slightly messy buns with visible curl definition are considered aspirational and intentional, whereas a loose, slightly messy straight hairstyle might read as undone. Your curls are doing the heavy lifting aesthetically while you’re barely doing anything technically.
Building a Bun That Actually Looks Intentional
- Flip your head upside down and gather your curls at the nape of your neck using your fingers (not a comb, which will disrupt your curl pattern and create frizz), then flip back upright while holding that gathered section
- Twist the gathered section loosely or leave it untwisted (both work; choose based on whether you prefer a smooth bun or a more textured one), then wrap it around itself into a knot shape at the nape
- Secure with bobby pins inserted horizontally, pushing them well into the bun so they don’t slip out or slide down through your curls
- Leave a few face-framing pieces out by releasing the smallest front sections before securing the bun, which softens the overall look and adds dimension
Pro tip: Use a satin or silk scrunchie underneath your bobby pins for added grip and protection, and never wrap a regular elastic around your curls as the primary secure method—the friction will break curls and create frizz.
5. The Crowned Braid
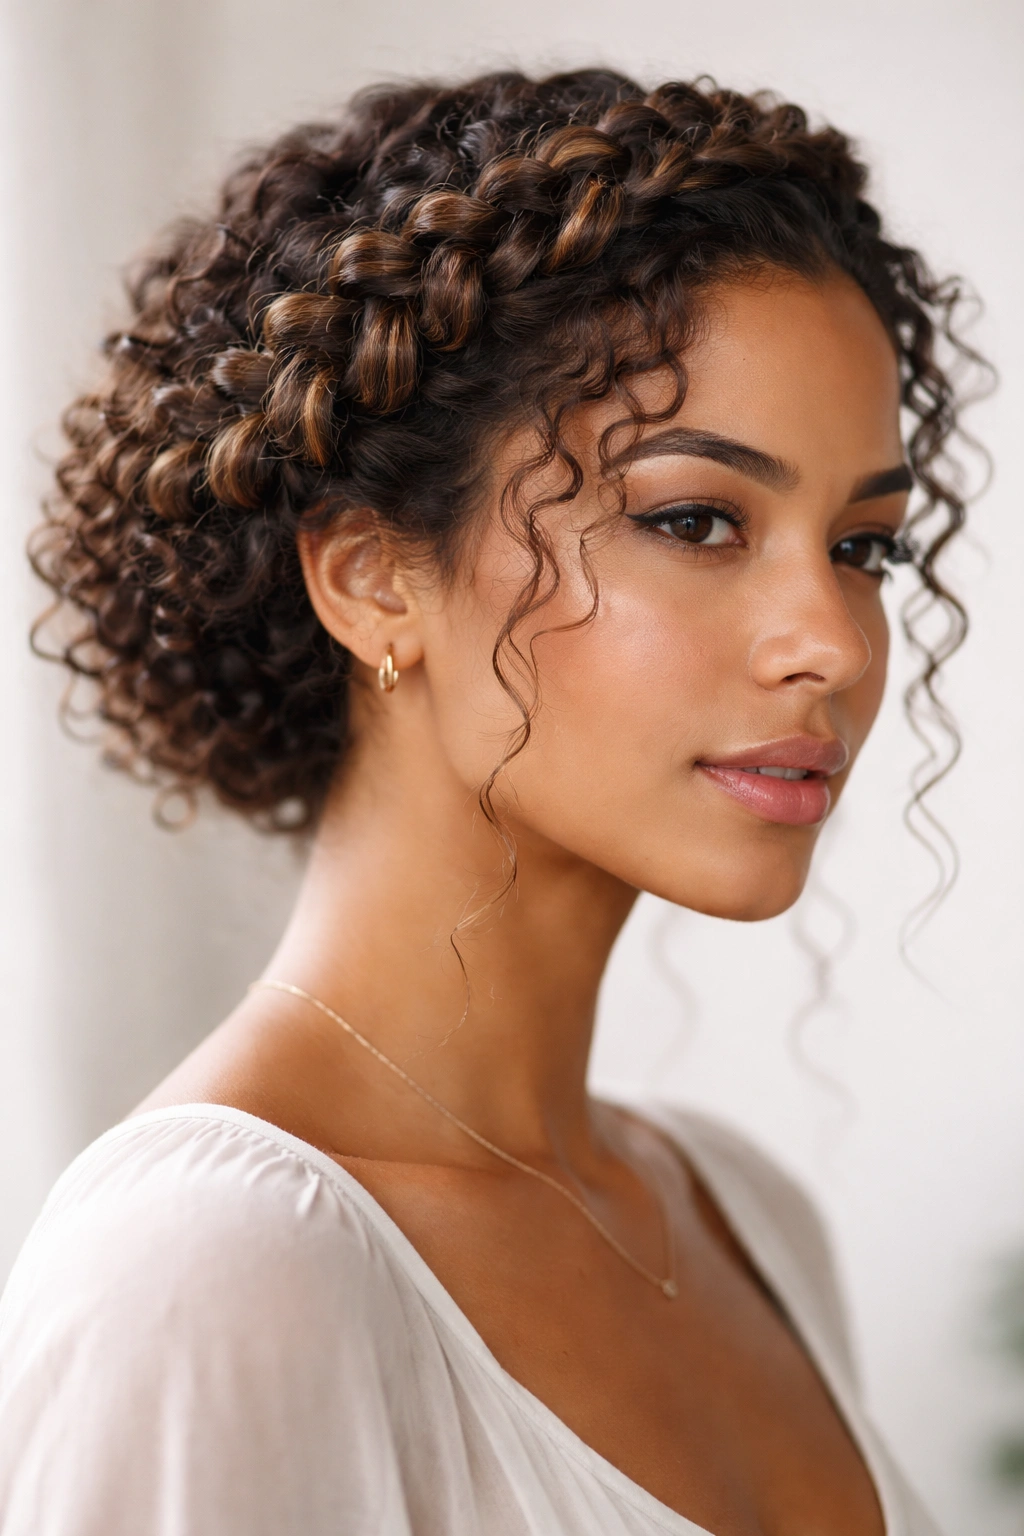
A braid that wraps around your head like a crown keeps your hair back and off your neck while creating a distinctly intentional, polished appearance. You’re essentially braiding one or more sections of your curls and positioning them to frame your face and head. It’s a bit more involved than some everyday styles, but once you’ve done it a few times, it becomes almost meditative—and the look easily carries you from morning through evening.
Why Braids Showcase Curly Hair Beautifully
Braids are inherently textured styles, so curly hair is actually the ideal canvas for braiding. Where a braid in straight hair shows as distinct sections and defined edges, a braid in curly hair shows as a beautiful, full, textured column of hair. Your individual curl pattern weaves through the braid, creating depth and visual interest that a smooth braid simply cannot achieve. The braid doesn’t have to be tight or perfectly uniform—in fact, slightly relaxed, slightly undone braids in curly hair look intentionally modern and effortlessly polished.
Braiding Technique for Curls
- Start with damp but not soaking wet hair; very wet curls are too slippery to braid, and completely dry curls will frizz as you manipulate them, so somewhere in between is ideal
- Section the hair into three strands of equal thickness (for a basic three-strand braid) and begin braiding from one side of your head, keeping tension loose so you’re not pulling your curls too tightly
- As you braid, gently tug at the edges of the braid every few inches to loosen it slightly and allow your curls to expand through the braided sections—this creates the textured, full appearance that makes curly-hair braids so striking
- Secure the braid end with a small elastic, then pin it to the back or crown of your head depending on the look you want
Worth knowing: If you’re braiding the day after styling and your curls have lost some definition, lightly spray the sections you’re about to braid with water or a curl refresher spray to add moisture and help the curls hold their shape through the braiding process.
6. The Twist-Out
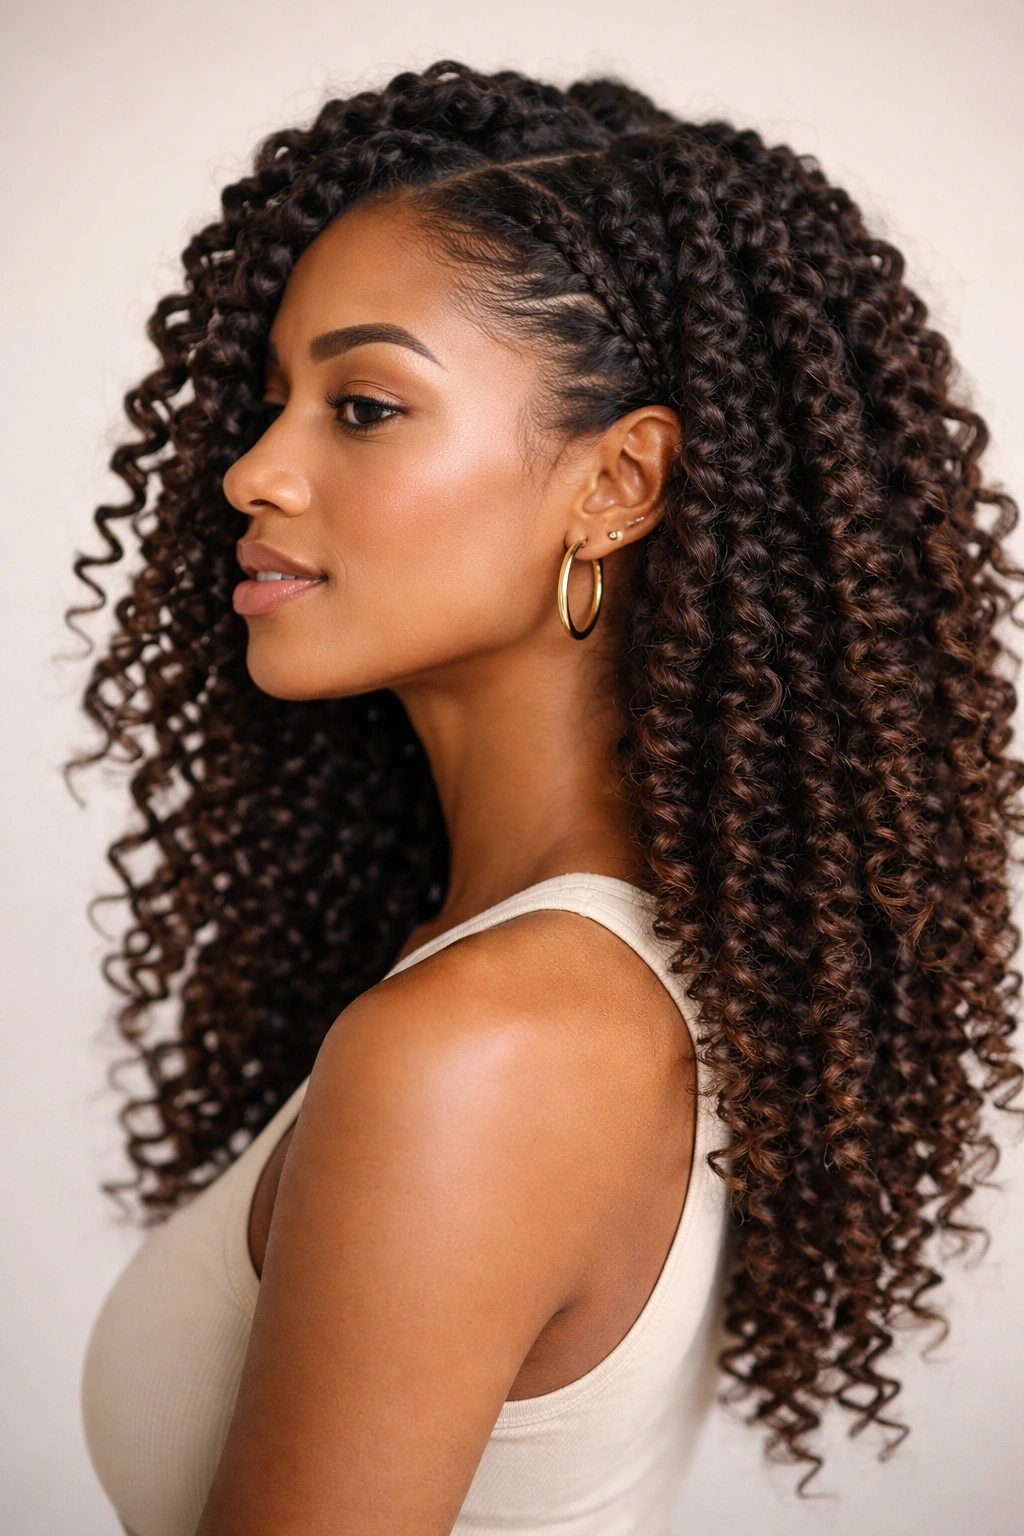
A twist-out involves twisting sections of your wet or damp hair, letting those twists dry completely (or partially), then unraveling them to reveal a stretched, defined curl pattern with increased volume and separated texture. It’s a classic protective style for curly hair that’s also genuinely beautiful—you end up with curls that look intentionally styled while requiring zero hand styling or tools during your actual day.
How a Twist-Out Creates Definition
When you twist sections of wet curls and allow them to dry in that twisted formation, the curl pattern stretches and elongates as the hair dries, creating what’s sometimes called a “stretched” curl. Once you unravel the twists, the hair springs back slightly but retains memory of that stretched position, giving you curls with more visible definition, less shrinkage, and more visible individual curl sections. The result looks intentional and polished without any of the heat damage that would come from blow-drying or flat-ironing.
Creating Twists That Develop Beautiful Pattern
- After washing, apply your styling products (leave-in conditioner, curl cream, gel) while your hair is soaking wet, working section by section through your entire head
- Divide your hair into 4-8 sections depending on your hair density and curl type (more sections if your hair is thick or very curly, fewer if it’s fine or loosely waved)
- Twist each section tightly from root to end, smoothing any flyaways as you twist, then coil the twisted section into a loop at the end and secure with a small clip or bobby pin
- Allow the twists to dry for at least 4-6 hours (or overnight is even better), then carefully unravel each twist by gently untwisting from the end upward, allowing the curls to unfurl naturally
- Use your fingers to gently separate and fluff the curls once all twists are undone, resisting the urge to run a comb through (which will create frizz and disrupt the texture)
Insider note: Sleeping in twists means you wake up with fully dried, defined curls that require almost zero styling—your entire next day is already set.
7. The Soft Scrunchie Half-Ponytail
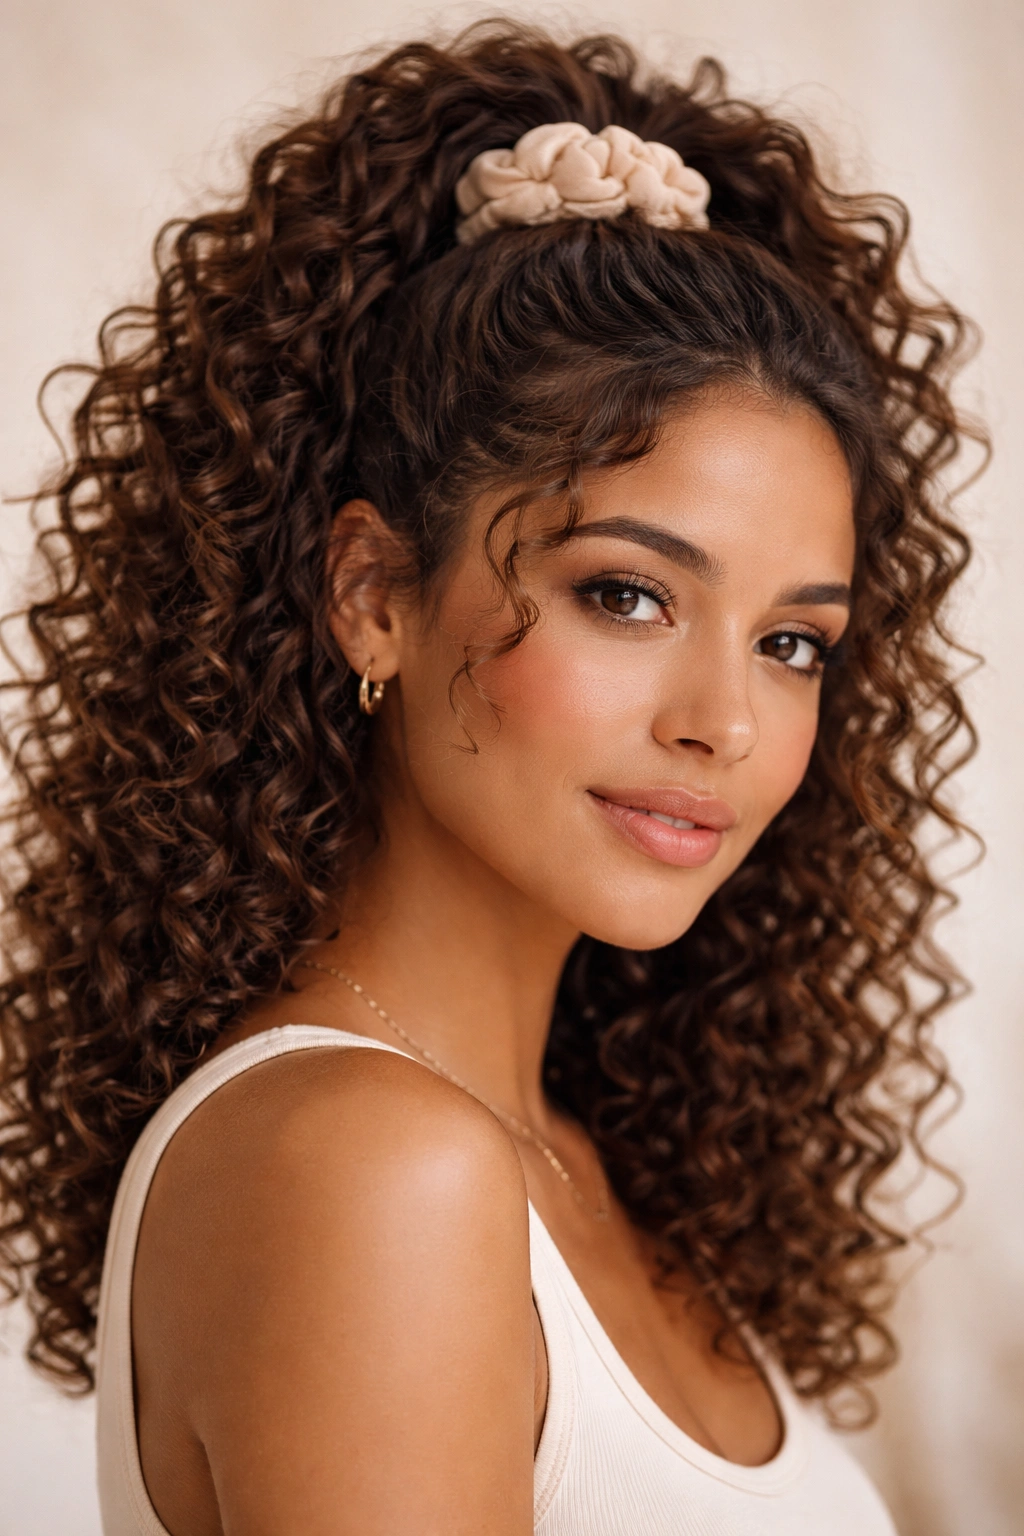
A half-ponytail gathers the hair from your crown and the sections above your ears into a single ponytail at the crown or just slightly behind it, leaving the bottom half of your hair loose. It’s more structured than a half-up twist but less elaborate than a crown braid, making it perfect for days when you want your hair clearly off your face but not fully styled. Using a soft scrunchie instead of a standard elastic prevents breakage and frizz, which is especially important for curly hair.
The Simplicity That Makes This Style Work
A half-ponytail is genuinely effortless—you’re not twisting, braiding, or creating any texture, just gathering and securing. And yet it reads as intentional and put-together because it’s removing hair from your face while still showing off your curls. The style works whether your curls are perfectly defined from a recent wash or you’re a few days into your curl cycle and they’ve lost some definition. In fact, slightly softened, less defined curls sometimes look better in a half-ponytail because the looser curl pattern reads as relaxed and intentional rather than struggling.
Getting the Proportion Right
- Gather hair from your temples and crown by using your fingers to sweep backward, being gentle so you’re not disrupting your curl pattern or creating frizz by combing through
- Bring this gathered section up to your crown (aim for the very top or slightly back of center, depending on your face shape and how much height you want), then secure with a soft elastic
- Adjust the position by gently tugging the ponytail upward or backward depending on whether you want more height at the crown or more of a swept-back effect
- Loosen the elastic slightly by tugging gently at the sides of the gathered section—you want the hair to feel loosely contained, not tightly pulled
Pro tip: If you’re concerned about the ponytail sliding down through the day, take a single small bobby pin and secure it horizontally right underneath the elastic where it’s hidden by your curls—this anchors the whole style without being visible.
8. The Space Buns (Elevated Version)
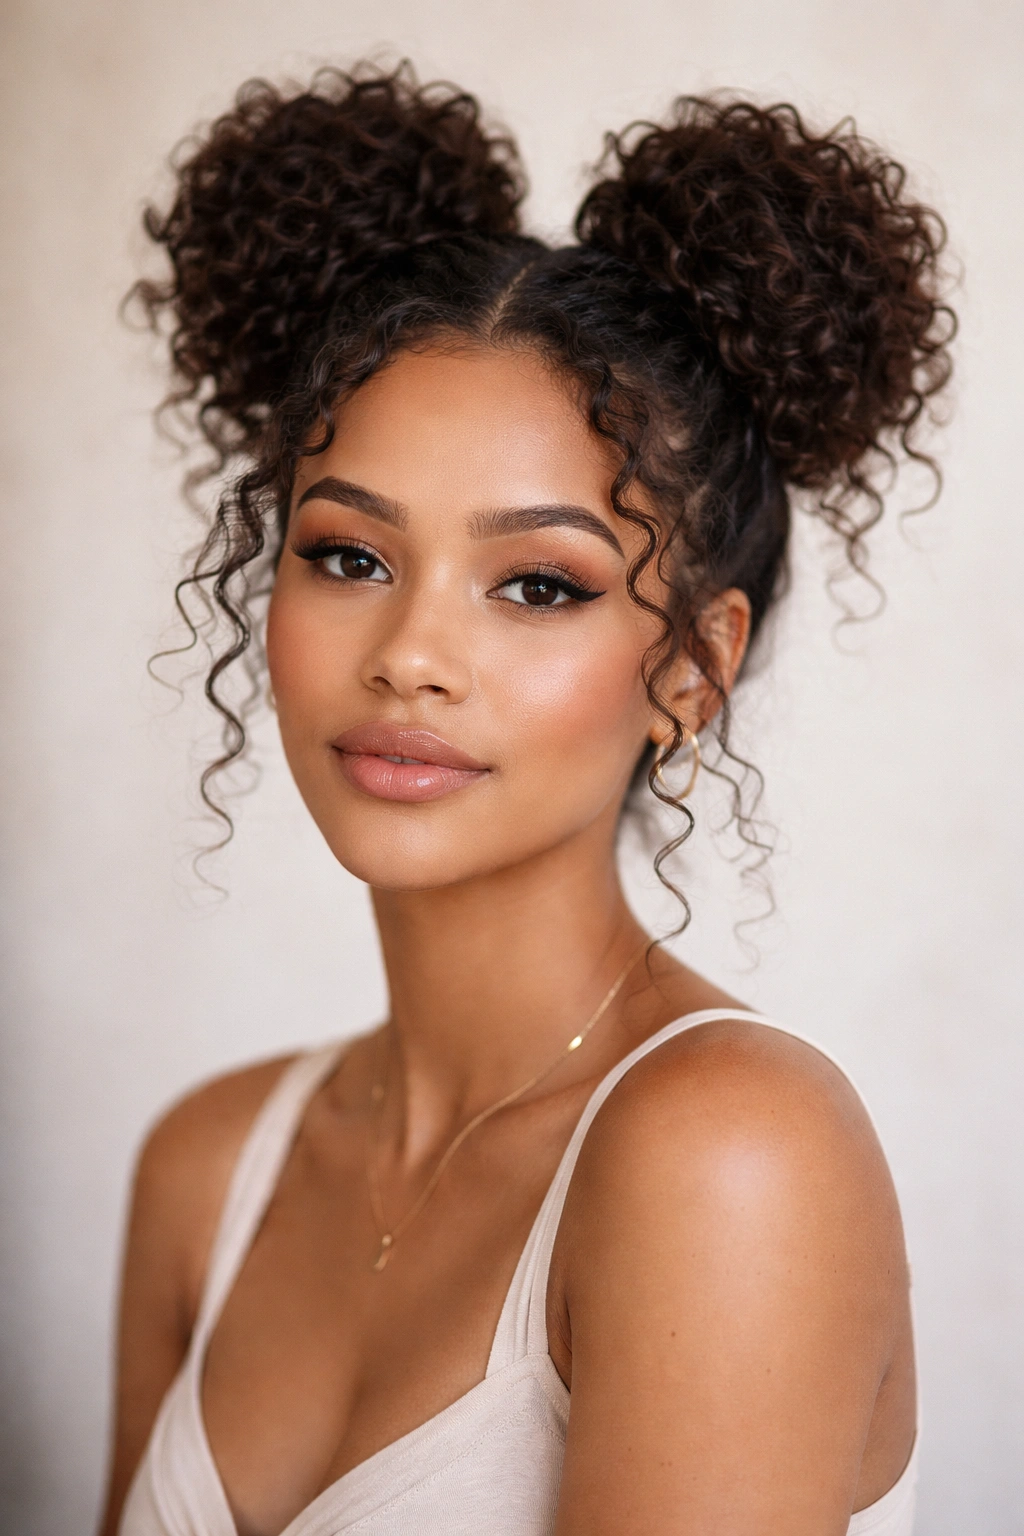
Space buns—two buns positioned on either side of your crown—can look playful and youthful, but when done with curly hair and positioned thoughtfully, they become a genuinely sophisticated everyday style that works for casual outings, casual work settings, and even date nights if you style them with intention. The key is creating buns that feel deliberately voluminous and textured rather than tight and cute.
Making Space Buns Feel Grown-Up and Intentional
Space buns get styled differently on curly hair than on straight hair, precisely because of how your curls naturally want to move and expand. Where space buns on straight hair might look deliberately cute or nostalgic, space buns on curly hair can look avant-garde and fashion-forward—your curls give them inherent texture and sophistication. The volume and definition that come naturally from curly hair elevates space buns from a very specific aesthetic to something that actually works as an everyday, any-age style.
Constructing Buns With Volume and Texture
- Divide your hair in half by creating a vertical part down the center of your head from forehead to nape, then create a second part from ear to ear across the crown to define your sections
- Gather the top section on one side of your head at the crown, then twist it loosely and wrap it around itself into a bun shape, securing with bobby pins inserted underneath where they won’t show
- Repeat on the opposite side, ensuring both buns are positioned at similar heights for balance (crown height generally looks more intentional than very high placement)
- Gently loosen both buns by tugging slightly at the outer edges to add volume and create a softer, fuller appearance
- Leave small face-framing pieces out on either side by releasing a thin section before securing each bun
Worth knowing: Space buns actually benefit from slightly older, less freshly-washed curls because older curls hold their shape better and create a fuller bun without needing to be packed tightly—freshly washed curls that are bouncier can actually make buns look too rounded and tight.
9. The Slicked-Back Curls With Accessories
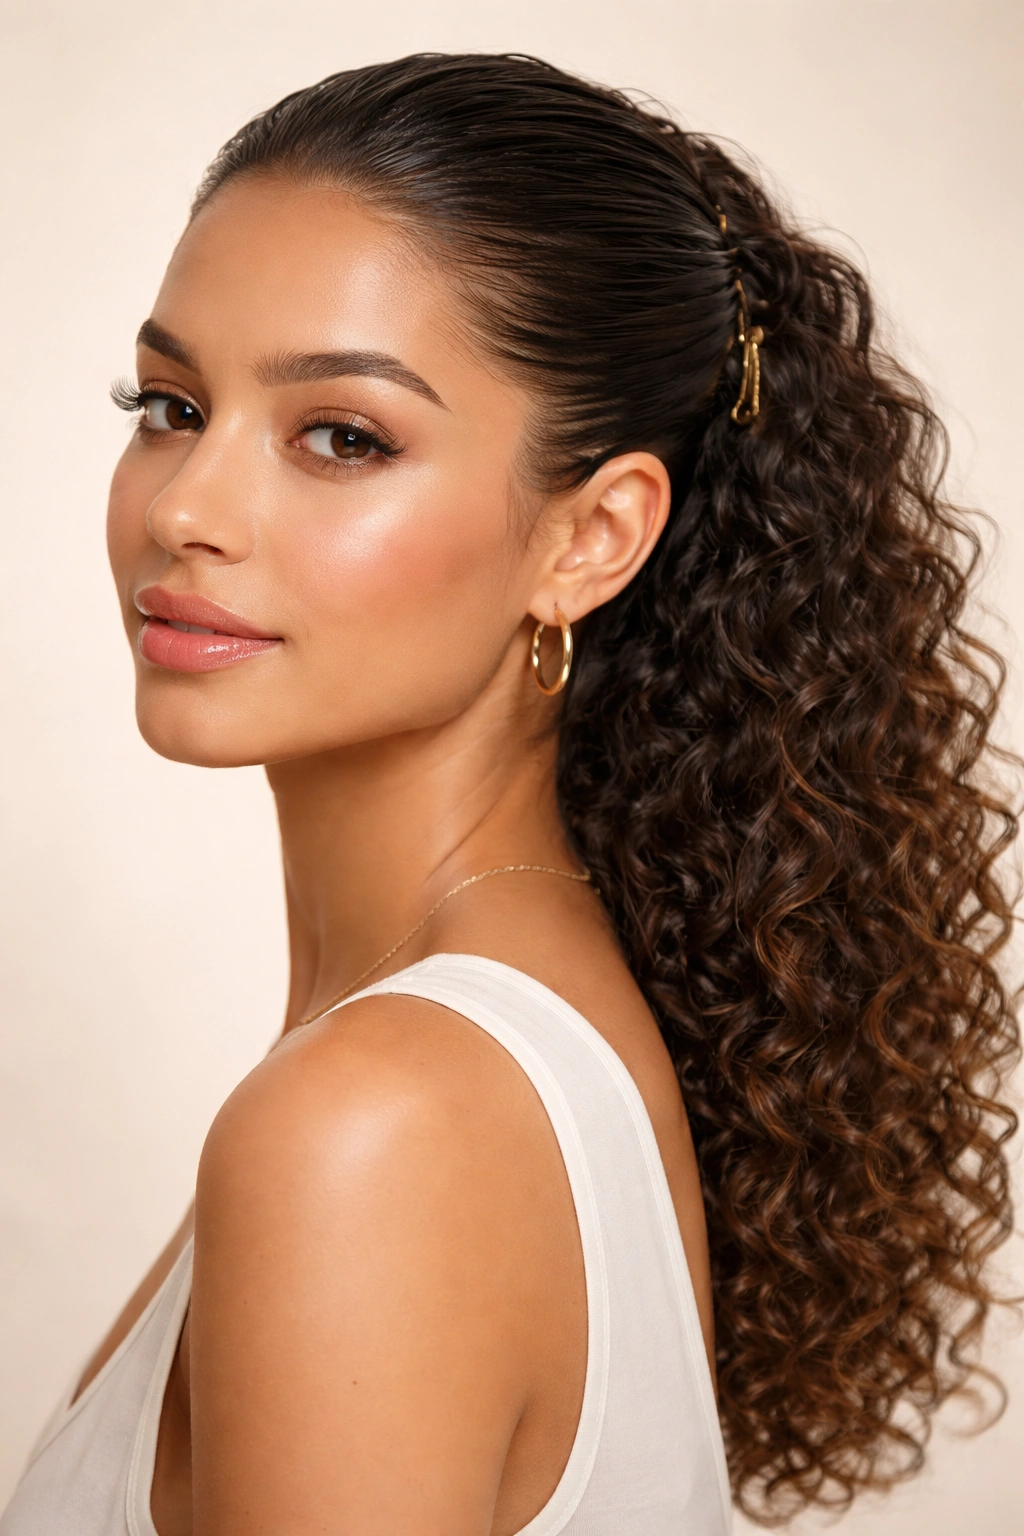
Instead of putting your curls up, you can wear them down but pull them smoothly back from your face using a strong-hold gel, creating the appearance of a slicked-back style while letting your curls bounce freely at the back and sides. Then secure the back section with a clip, claw, or hair stick for extra polish. This style works beautifully because it removes curls from your face while celebrating them at the back—you get the face-clearing benefit of a pulled-back style without actually putting your hair up.
Using Gel Strategically for Definition, Not Crunch
The key to a slicked-back curl style is using enough gel to smooth the front sections and create a defined line from your hairline backward, without creating crunch or stiffness that makes your curls feel brittle. A lightweight, flexible-hold gel works better than a heavy one for this reason—you want hold and definition without rigidity. Apply the gel only to the sections you’re smoothing back (typically the front third of your head and the sections around your ears), leaving the back sections undone.
Building the Slicked-Back Look
- Apply a flexible gel to your hands and smooth it through the front and side sections of your hair, using your fingers to push your curls backward and away from your face
- The motion should be smooth but not rough—you’re not trying to flatten these curls, just redirect them and define their shape
- Once the front is smoothed back, optional: gather the back section loosely and secure it with a decorative claw clip, tortoiseshell pin, or hair stick positioned at the nape (this adds intentionality and prevents curls from falling forward as you move)
- Allow the gel to dry completely before you leave the house, which usually takes 30-60 minutes depending on the product and your hair density
Pro tip: Pair this style with a statement clip or hair accessory in a color that contrasts with your hair—rose gold on dark curls, tortoiseshell on light curls, or silver on any color creates visual interest and makes the style feel intentionally accessorized rather than simply functional.
10. The Refreshed Curls With a Headwrap
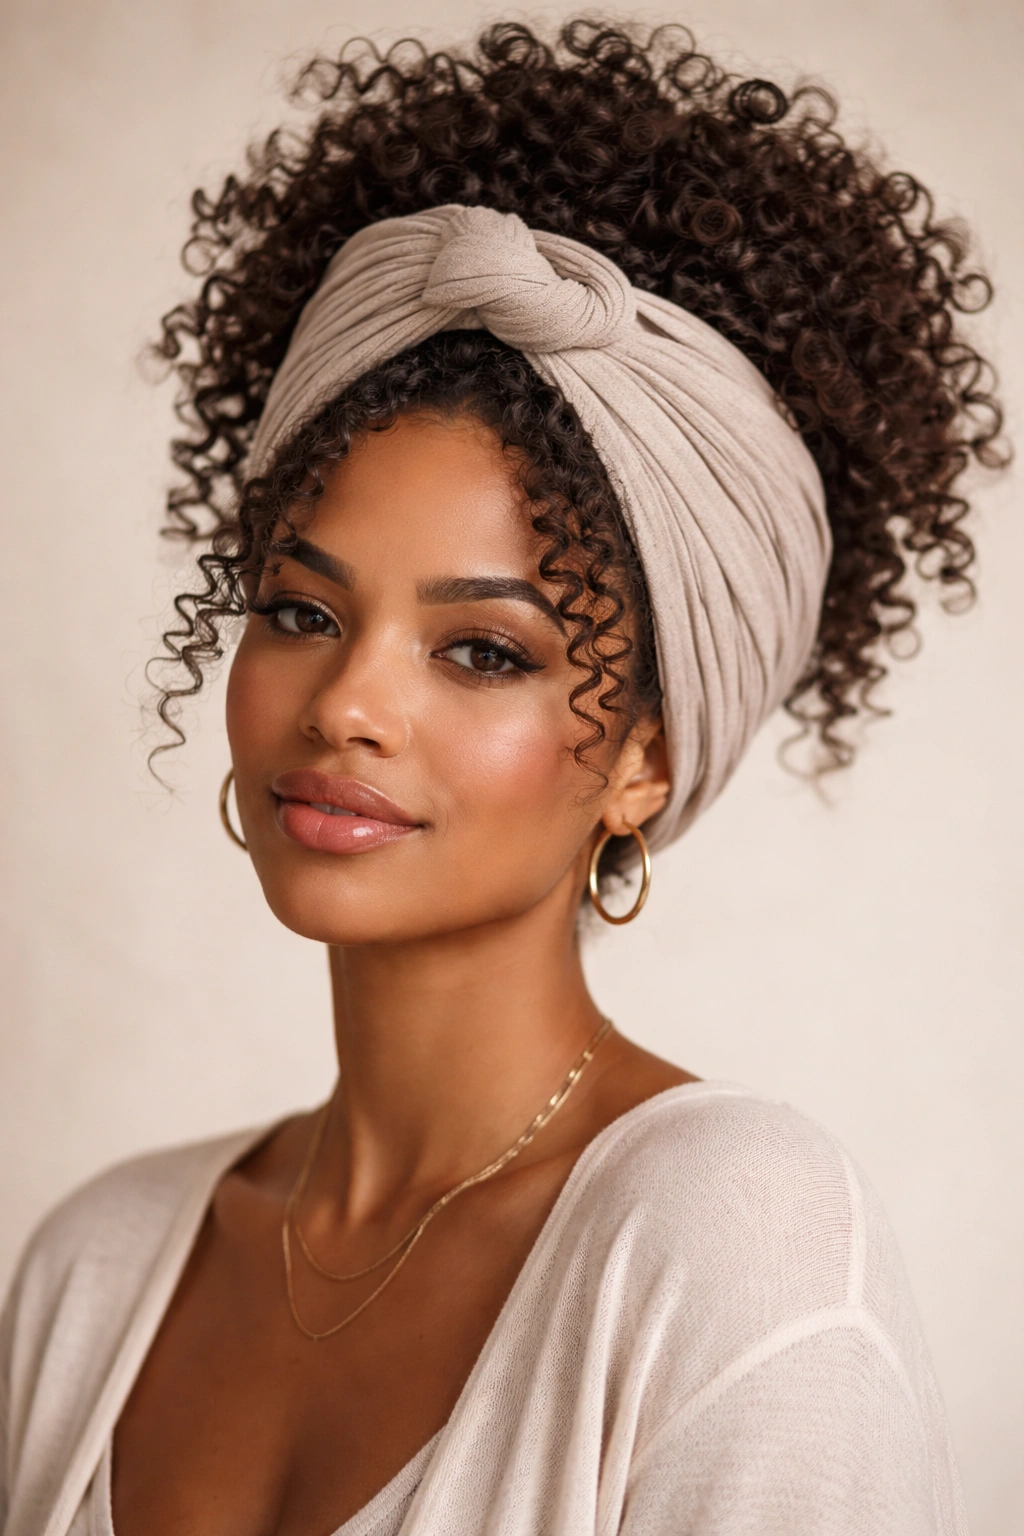
A headwrap—a soft fabric wrapped or tied around your head—is both a protective styling method and a genuinely beautiful way to wear curly hair. It works as an everyday style when your curls are a few days old and have lost some definition, or when you want a quick style that requires zero manipulation. The wrap itself becomes a statement accessory, transforming your curls into what reads as an intentional, styled look.
The Dual Purpose of a Protective Wrap
A headwrap protects your curls from friction, frizz, and environmental stressors while simultaneously creating a polished, intentional appearance. Unlike putting your hair up in a bun or ponytail, a wrap keeps your curls loose and allows them to breathe while covering and containing them. For curly hair that’s mid-cycle and losing definition, wrapping creates visual cohesion and refinement without requiring you to restyle or re-wash your curls.
Wrapping Your Curls Effectively
- Start with curls that are at least partially dry, using a curl refresher spray on any sections that look frizzy or undefined (this adds moisture and helps reset your curl pattern)
- Take a long, rectangular scarf or fabric wrap and position it at your hairline, then wrap it around your head at approximately ear height, crossing the ends at the nape and bringing them back to tie at the crown or side of your head
- Ensure the wrap is secure but not pulling tightly at your hairline; it should feel gently contained, not constrained
- Arrange any curls that fall outside the wrap—some people prefer all curls covered, others prefer a few pieces framing the face—based on your preference and face shape
- Choose a wrap fabric in a color that complements your skin tone; the wrap becomes a visible styling element, so its appearance matters
Insider note: Silk or satin wraps are gentler on your curls than cotton, reducing friction and frizz, and they’re worth the investment if you wrap your hair regularly—they also allow your wrap itself to last longer without pilling or fraying.
Final Thoughts
The best everyday hairstyle for curly hair is genuinely whichever one you’ll actually wear comfortably and consistently. If you find yourself reaching for the same style repeatedly, that’s your sign it’s working—it’s easy for you specifically, it’s flattering on your face shape, it fits your daily routine, and it looks intentional without requiring perfection. The styles above are starting points, not rules; the real magic comes when you adapt them to what actually works for your curl pattern, texture, density, and lifestyle.
What matters most is that you’re choosing styles that protect your curls, minimize heat damage and manipulation, and celebrate your natural texture rather than fight it. Every day you’re not blow-drying your curls straight or applying heat is a day they’re getting healthier, springier, and more resilient. Start with whichever style appeals to you most, practice it a few times until it becomes second nature, then branch into others as you grow comfortable. Your everyday curly hairstyle should feel like an extension of yourself—easy, effortless, and genuinely beautiful.