When you’ve got naturally curly hair and you want to serve main character energy at school, the right hairstyle can make all the difference. A “baddie” aesthetic is all about confidence, attitude, and looking intentionally put-together—which is actually easier to pull off with curly texture than you might think. The key is choosing styles that celebrate your curls rather than fighting against them, while adding those bold, polished details that scream self-assured and stylish.
The challenge most people face with curly hair is finding school-appropriate looks that don’t require an hour of styling every morning, don’t fall flat by third period, and actually look intentional rather than like you didn’t brush your hair. That’s where these ten hairstyles come in. Each one is designed specifically to work with curly hair’s natural movement and texture, they all have that confident baddie vibe, and more importantly, they’re genuinely achievable for someone balancing school life with hair care. You don’t need a blow dryer, a flat iron, or professional-level skills—just an understanding of what works with your curls and how to style them strategically.
What makes these styles particularly perfect for school is their balance of effort and low-maintenance wear. Once they’re done, they hold throughout the day, they look intentional, and they give off that polished-but-effortless confidence that defines the baddie aesthetic. Whether your curls are loose waves, tighter coils, or somewhere in between, you’ll find options here that translate to your curl pattern.
1. The Slicked-Back High Ponytail with Curly Ends
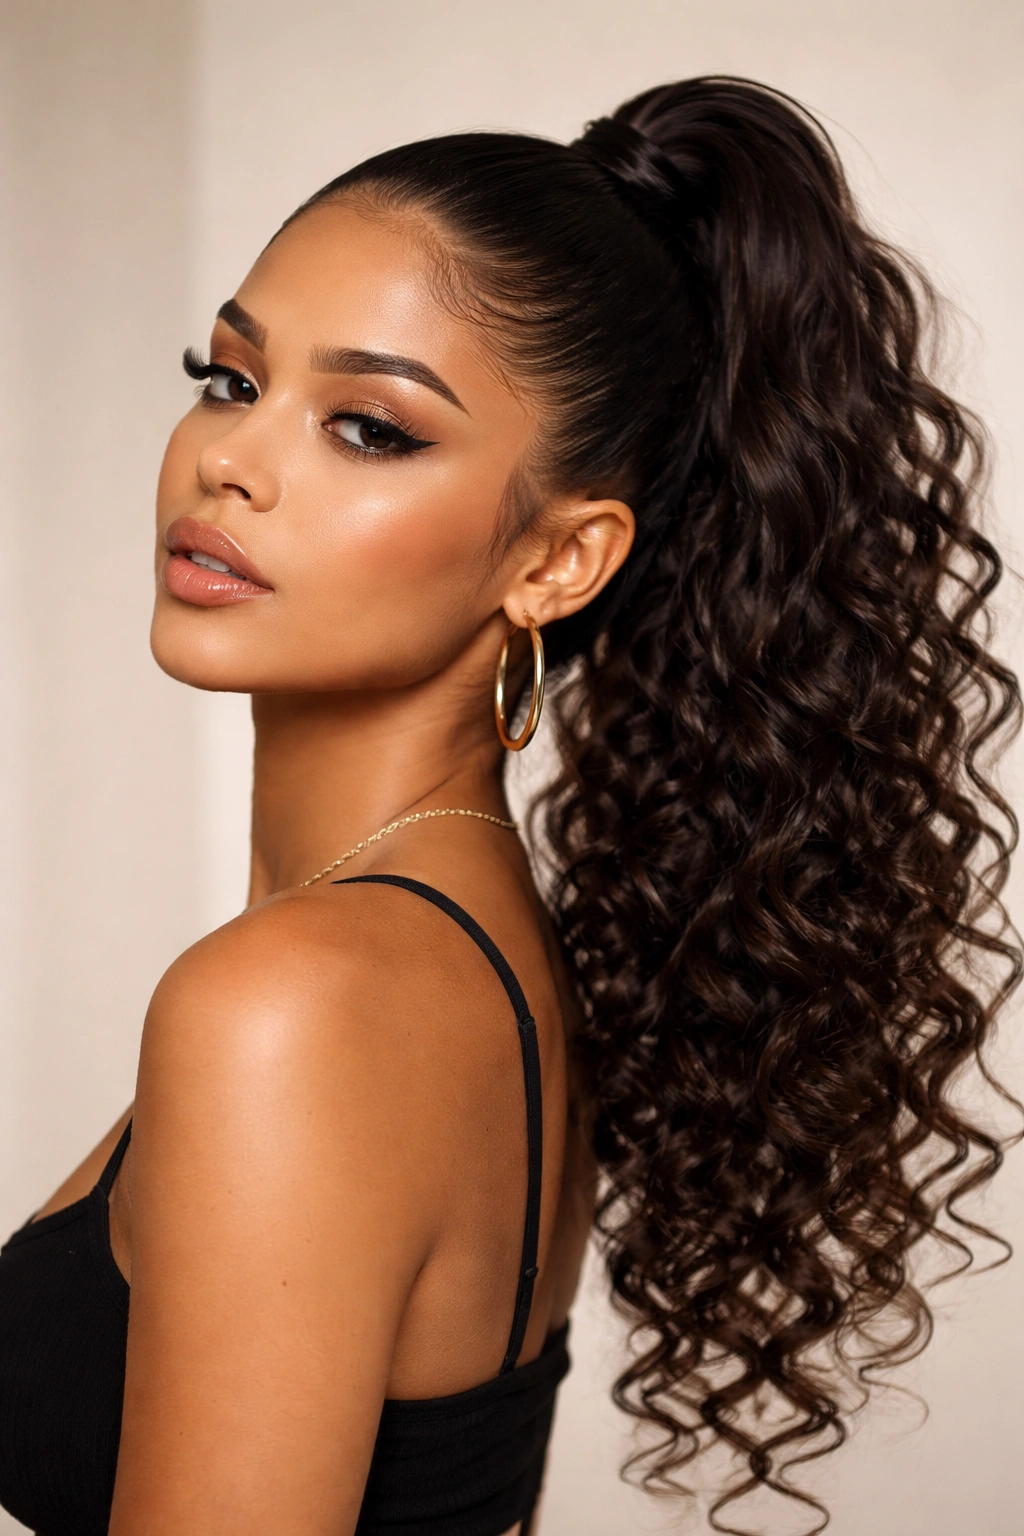
This is the quintessential baddie move that works beautifully on curly hair. The sleek, pulled-back crown creates drama and polish, while the curly ends left loose give texture and that “I woke up like this but make it fashion” vibe. The contrast between the controlled top and the free-flowing curls below is exactly what makes this look feel intentional and confident.
Why This Style Works for Baddie Energy
A slicked-back ponytail instantly elongates your face, shows off your features, and communicates confidence—you’re literally pulling your hair back and saying “I’m not hiding.” When you leave the ponytail curly rather than straightening it, you get the best of both worlds: the polished structure of a sleek base with the textural richness of your natural curls. It’s elevated without being overdone, and it photographs exceptionally well from every angle.
How to Create the Look
- Apply a smoothing gel or edge control to your hairline and brush your hair straight back into a high ponytail positioned slightly back from the crown (not directly on top)
- Use a fine-tooth comb or edge brush to smooth the sides and create a refined finish at the base
- Secure with a clear elastic, then gently pull a few curl sections through a second elastic positioned about an inch below the first to create a slight bubble effect (optional but adds visual interest)
- Let your curls do their thing in the ponytail—don’t try to straighten them out
- Finish with a light hold hairspray on the sleek parts only to keep them controlled throughout the day
Pro tip: If your hair is a bit limp after a few hours, mist the ponytail section with water and scrunch gently to reactivate the curl pattern.
2. Twisted Crown with Center Part

This style takes two Dutch or rope twists and wraps them around your head like a crown, leaving the bulk of your curls down and voluminous. The center part and twin twisted sides create geometric, fashion-forward structure that feels very current and intentional. It’s the kind of look that makes people assume you spent twenty minutes styling when you actually spent five.
The Baddie Appeal of Twisted Details
Twists feel elegant and put-together in a way that shows you care about how you look without screaming “I’m trying too hard.” They’re also incredibly flattering—they frame the face, add dimension, and work with every curl type imaginable. The center part enhances symmetry and has that confident, balanced energy that baddie style is all about. What makes this look work is that the twists stay in place while your curls move freely, creating dynamic texture.
Step-by-Step Execution
- Create a clean center part using a rat-tail comb, dividing hair from your forehead straight back to the nape of your neck
- On one side, take a section of hair at your temple and create a Dutch or rope twist, twisting it back and securing pins as you go (Dutch twist: twist sections of hair over rather than under the main twist; rope twist: twist two sections around each other)
- Repeat on the opposite side, creating a matching twist
- Bring both twisted sections together at the back of your head and secure with bobby pins tucked underneath so they’re invisible
- Leave the rest of your curls down and arrange them to frame your face and cover the pin placements
- Use a texture spray on curls for extra grip if needed
Worth knowing: This style works best on second or third-day hair when your curls have a bit of texture and grip already—fresh-washed curls can sometimes slip out of twists.
3. The Voluminous Half-Up Clip
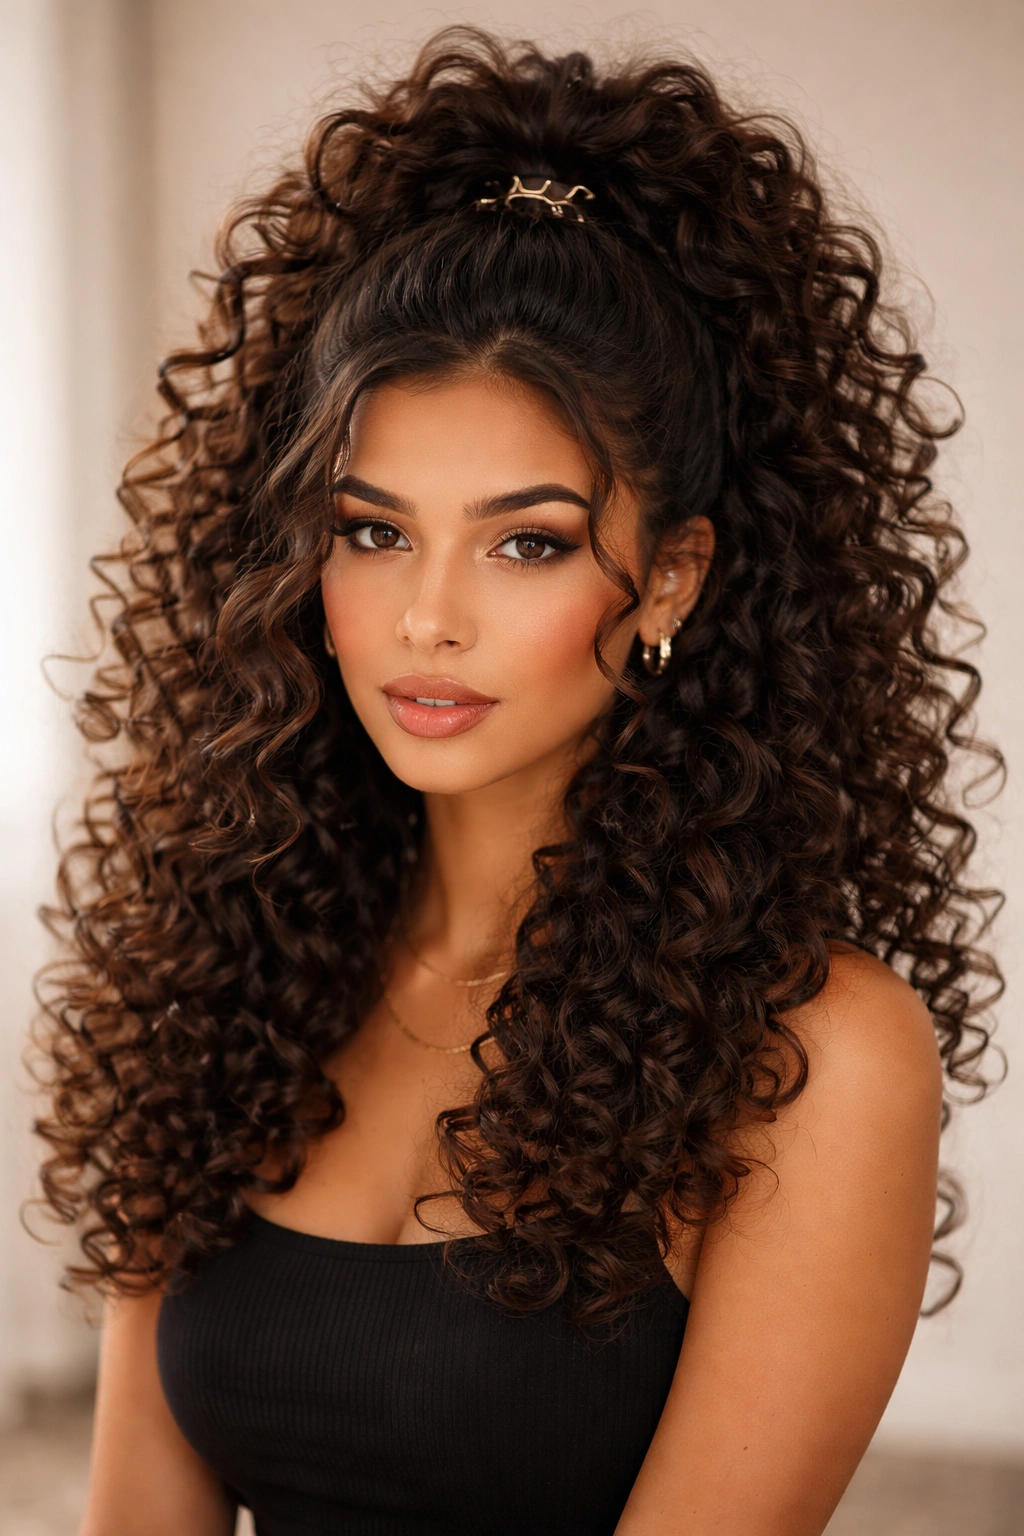
Half-up hairstyles are classically baddie because they’re balanced, flattering, and show off your curl pattern while still looking styled. With curly hair, the volume you can achieve at the crown with this look is genuinely stunning. The lifted half-section creates the illusion of thickness and height, while the bottom curls flow freely and move when you walk.
What Makes This Baddie-Approved
There’s something inherently confident about wearing your hair half-up—you’re showing off your face while simultaneously flaunting your texture and volume. It’s bold without being over-the-top, and it communicates that you’re aware of your own attractiveness. The key is making the half-up section look purposeful and textured, not flat and thin. With curly hair, this is actually easier than with straight hair because your natural texture automatically adds visual impact.
Creating Maximum Volume and Impact
- Start with slightly damp curls or curls that have been refreshed with a curl spray
- Take a section from one temple, across the crown, to the opposite temple, creating a rounded semi-circle around the top of your head
- Flip your head forward and gently lift this section upward to create volume at the crown
- Flip back to normal position and secure with a claw clip, bobby pins, or a decorative hair clip positioned at the back of the half-up section
- Leave the bottom section curly and full, allowing it to fall naturally
- Use your fingers to gently arrange curls around your face and ensure the half-up section looks textured and intentional, not smooth and flat
Insider note: The fuller your curls, the more dramatic this look becomes—it’s absolutely worth refreshing your curls with a spray or light mist of water before styling to maximize volume.
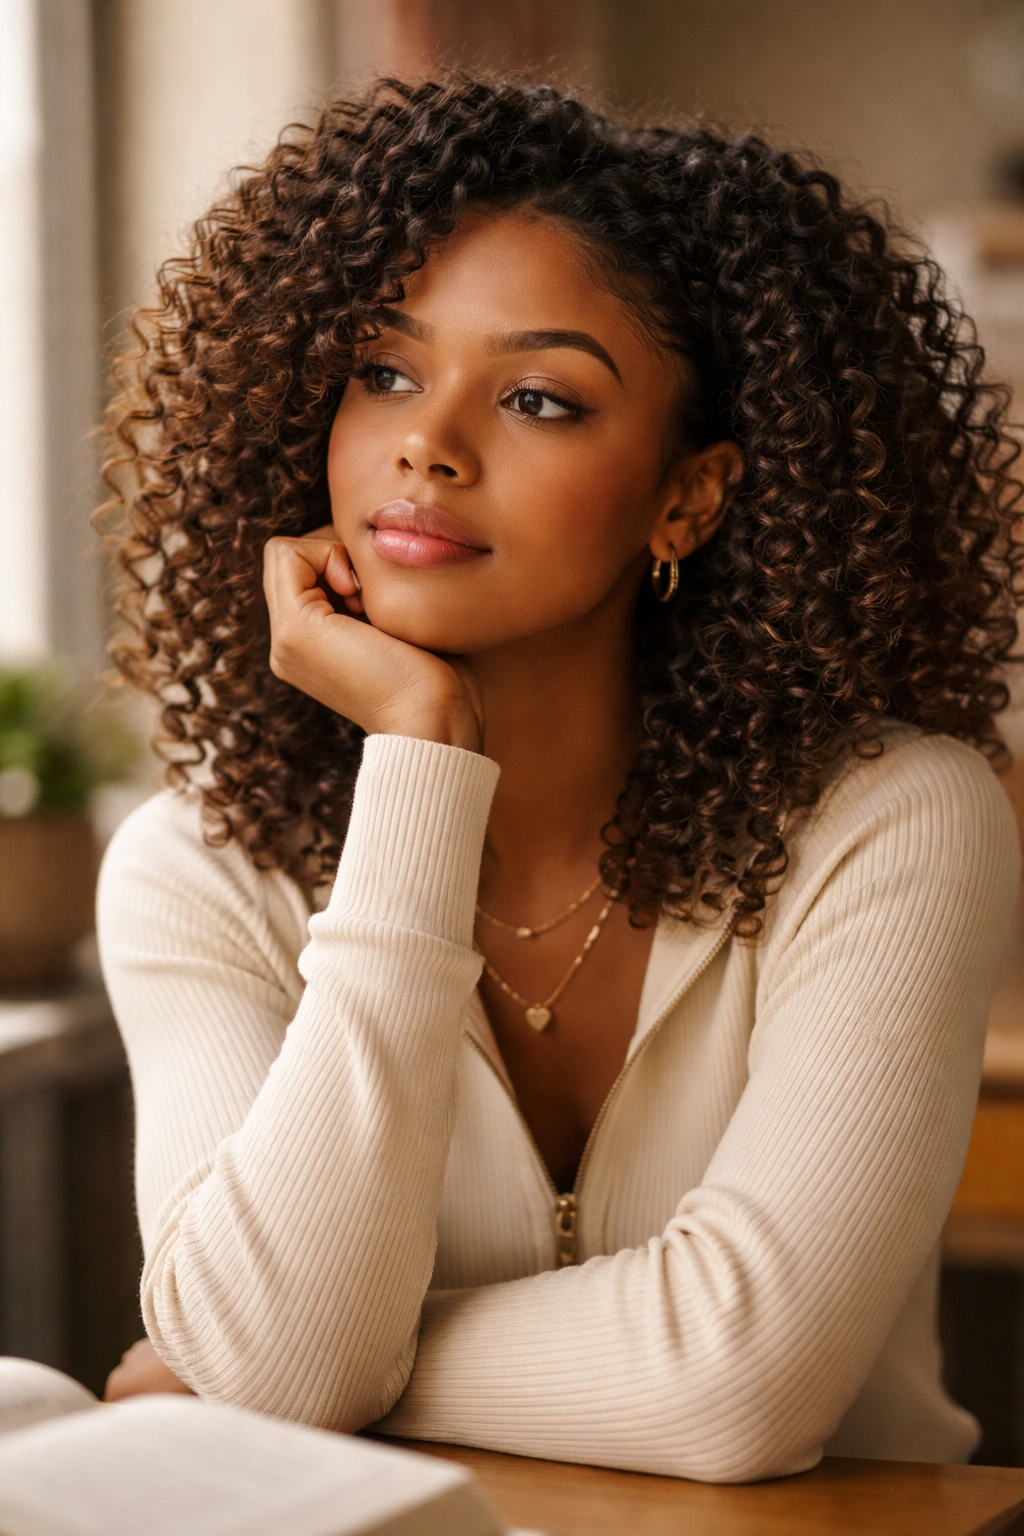
4. Spiral Curls with Sleek Baby Hairs
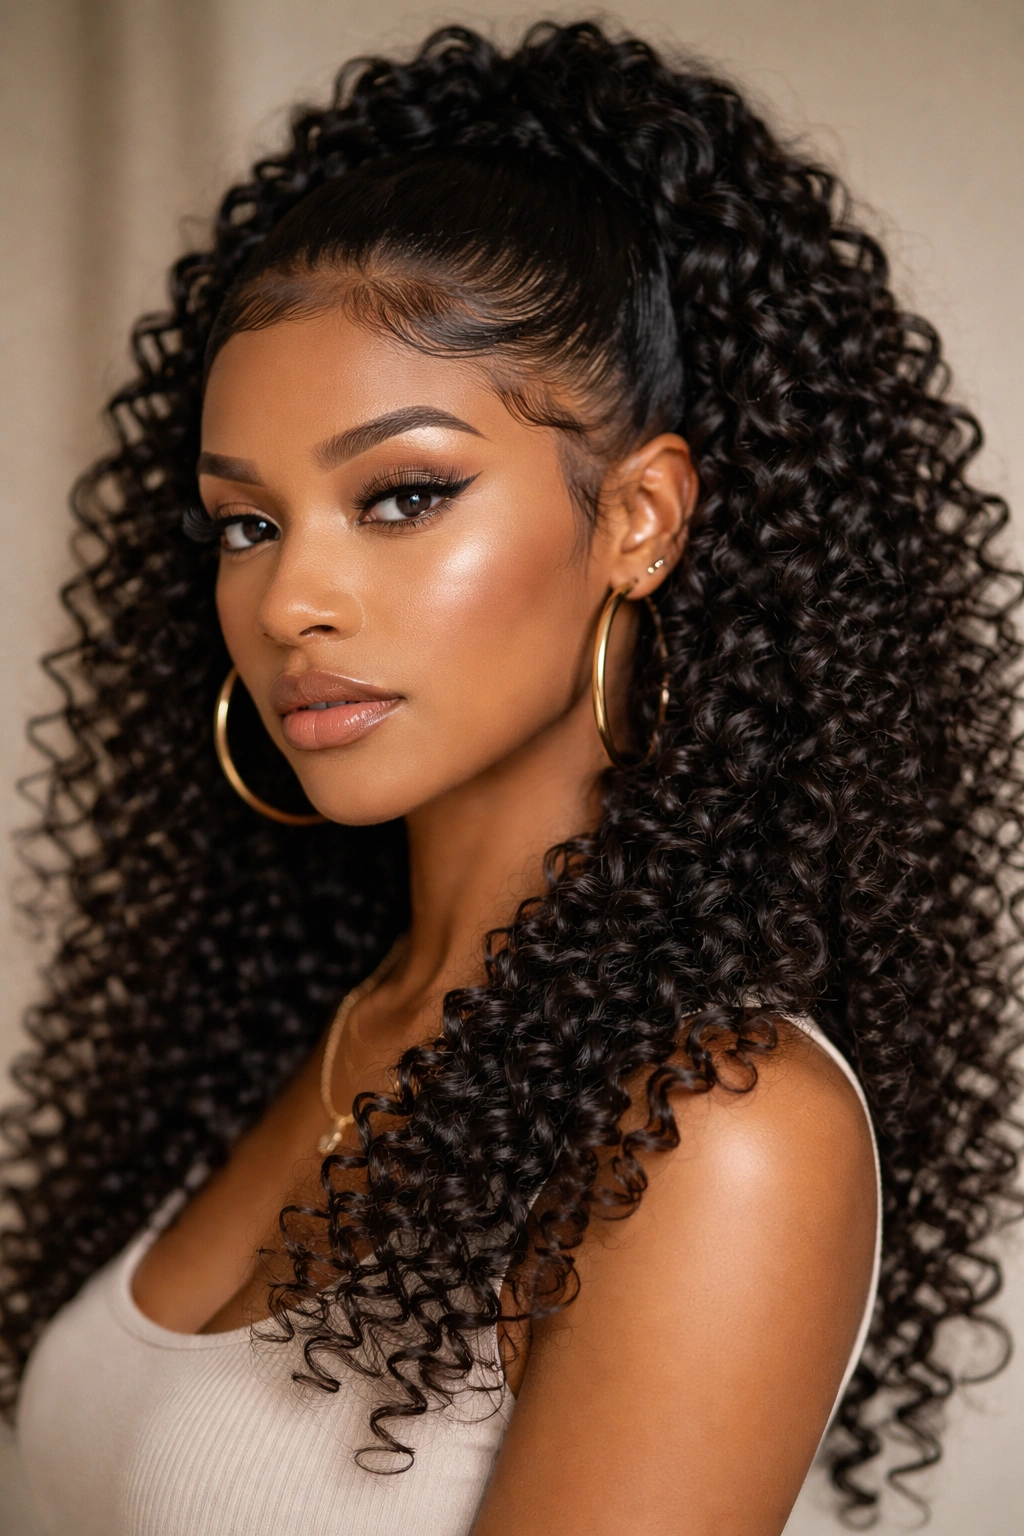
This style leans into the most dramatic, textural aspects of curly hair while maintaining a polished finish with defined spiral curl patterns and sleek, controlled baby hairs and edges. It’s the kind of look that says you understand your hair, you respect it, and you know how to make it look intentional. The combination of defined spirals and smooth edges creates a sophisticated contrast.
Why Defined Spirals Feel So Baddie
Spirals communicate intention—you’re not just wearing your hair curly, you’re wearing defined curls that show you understand texture and styling. It signals control, sophistication, and an intentional aesthetic. The sleek edges provide that polished finish that separates a “just woke up” look from a “I got ready and I look amazing” vibe. This is especially effective if your natural curl pattern tends toward looser waves; intentional definition reads as more fashion-forward.
Achieving Defined Spirals
- Apply a curl-defining cream or gel to clean, damp hair, working it through section by section
- Take small sections of hair and wind them around a curl rod, pin, or your finger to create a defined spiral shape
- You don’t need to do your entire head—focus on the front and sides for maximum impact
- Allow curls to air dry fully or use a diffuser attachment on a blow dryer set to low heat and low speed
- Once dry, gently release the spiral curls by unrolling them slowly and allowing them to set
- Apply a smoothing gel or edge control to your hairline and baby hairs, using an edge brush to create precise, sleek lines
- Set everything with a flexible hold hairspray that won’t leave flakes or crunch
Pro tip: Use a curl-defining gel that’s thick enough to create hold but light enough that it doesn’t flake when dry—the finish should look intentional, not crunchy.
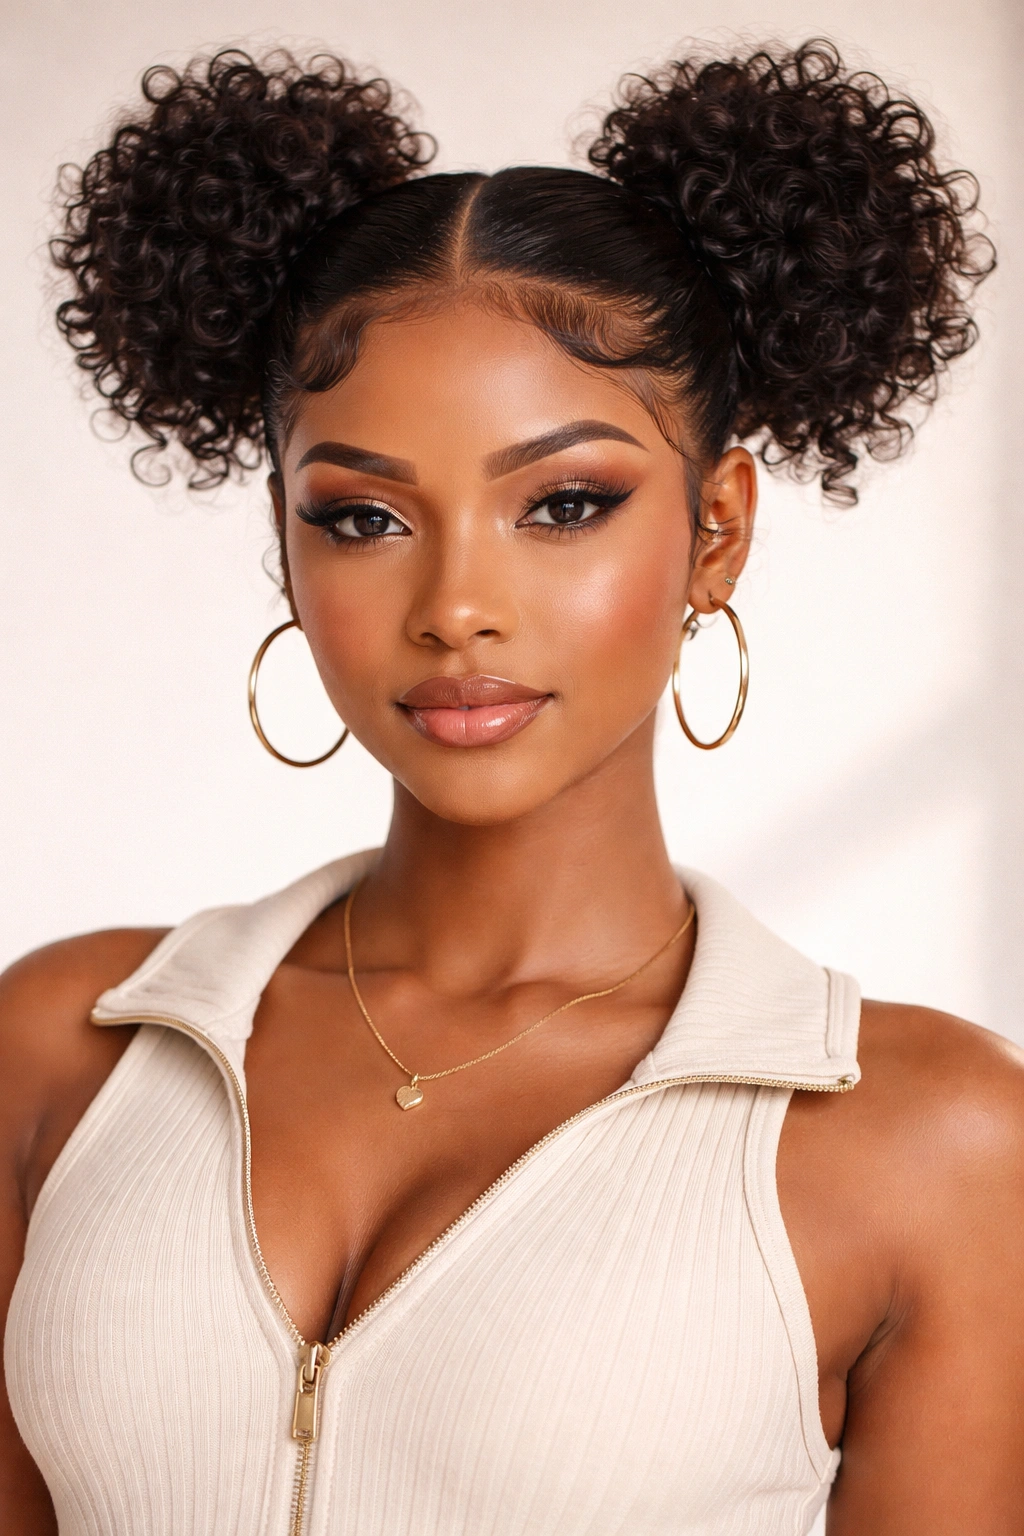
5. Double Buns with Curls
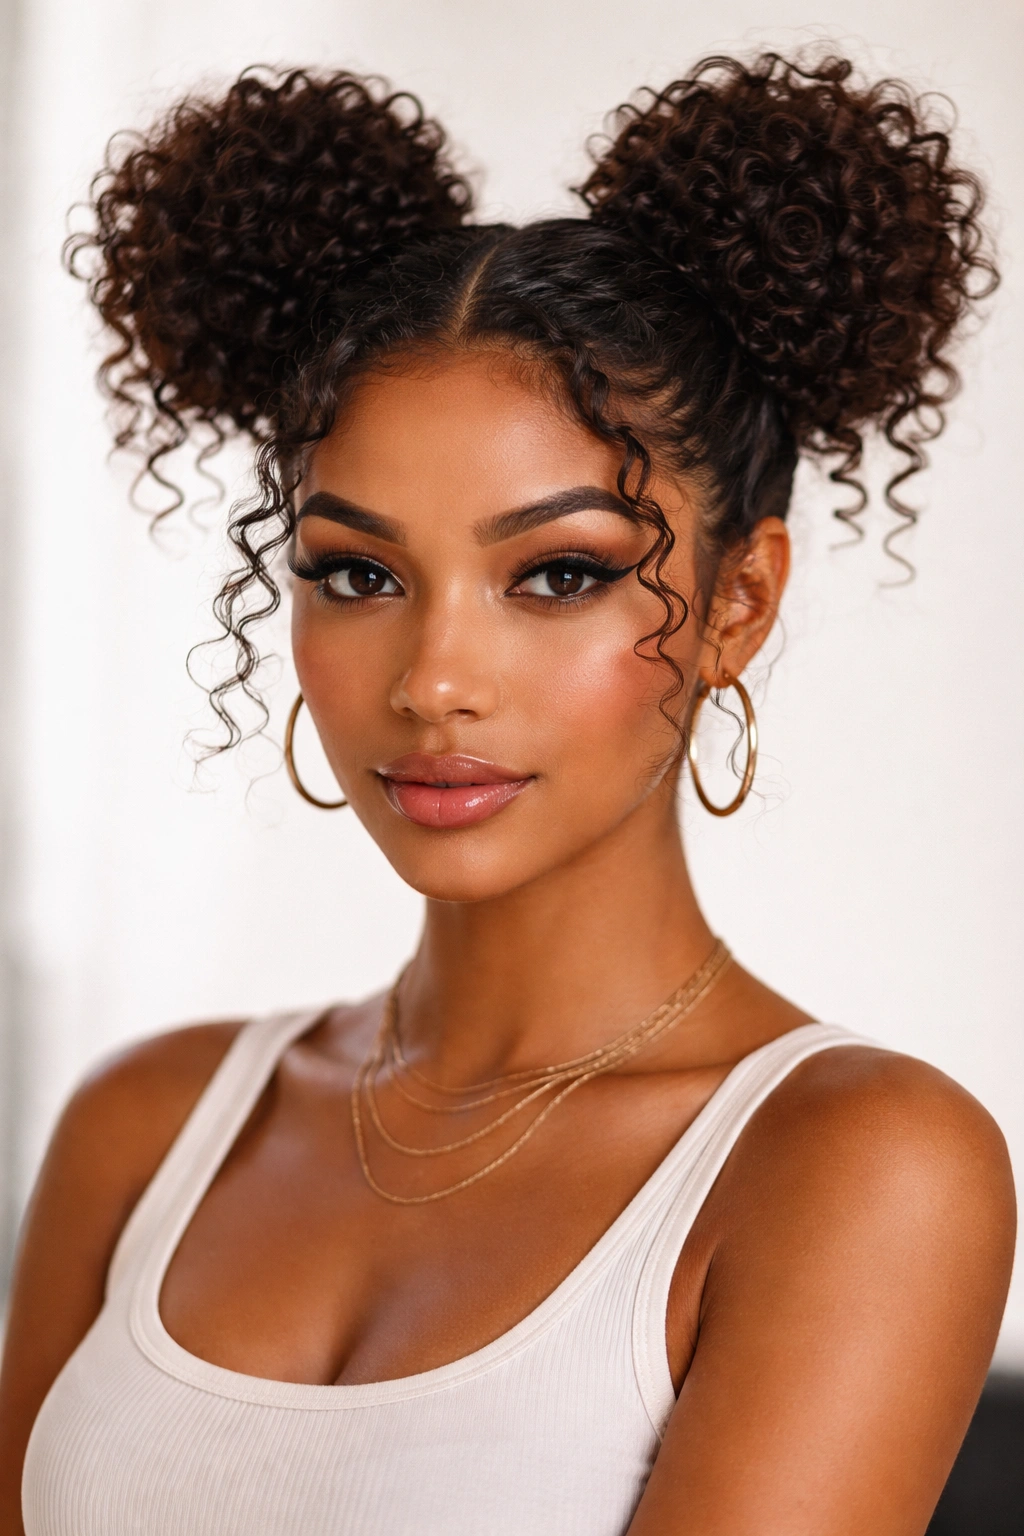
Double buns positioned high on the head are inherently playful and confident—they’re a statement that you’re not taking yourself too seriously while simultaneously looking extremely put-together. With curly hair, this look becomes even more striking because the fullness and texture of the buns add visual impact. It’s unexpected on an older student, which makes it feel even more baddie.
The Playful Confidence of Double Buns
Double buns work because they’re eye-catching, they’re symmetrical, and they read as intentional and coordinated. There’s something bold about choosing such a distinctive style—it says you have confidence in your own aesthetic and you’re not worried about blending in. With curly hair, the texture makes the buns look fuller and more interesting than they would on straight hair, creating a look that’s both playful and visually sophisticated.
Creating Perfect Curly Buns
- Create a center part using a rat-tail comb, dividing your hair down the middle from forehead to nape
- Take the left section and brush it into a ponytail positioned slightly above and behind your left ear
- Twist the ponytail around the base to create a coiled bun shape, tucking the ends underneath and securing with bobby pins
- Repeat on the right side, creating a matching bun
- Ensure both buns are positioned at the same height and distance from the center part for perfect symmetry
- Leave a few face-framing curls out if you want to soften the look, or keep it sleek for maximum impact
- Secure the buns firmly enough that they’ll hold throughout the day but not so tight that you’re uncomfortable
Worth knowing: This style works best on second-day curls when your hair has some texture and grip—fresh-washed hair might be too soft to hold the bun shape securely.
6. The Curly Mohawk (Faux Hawk with Texture)
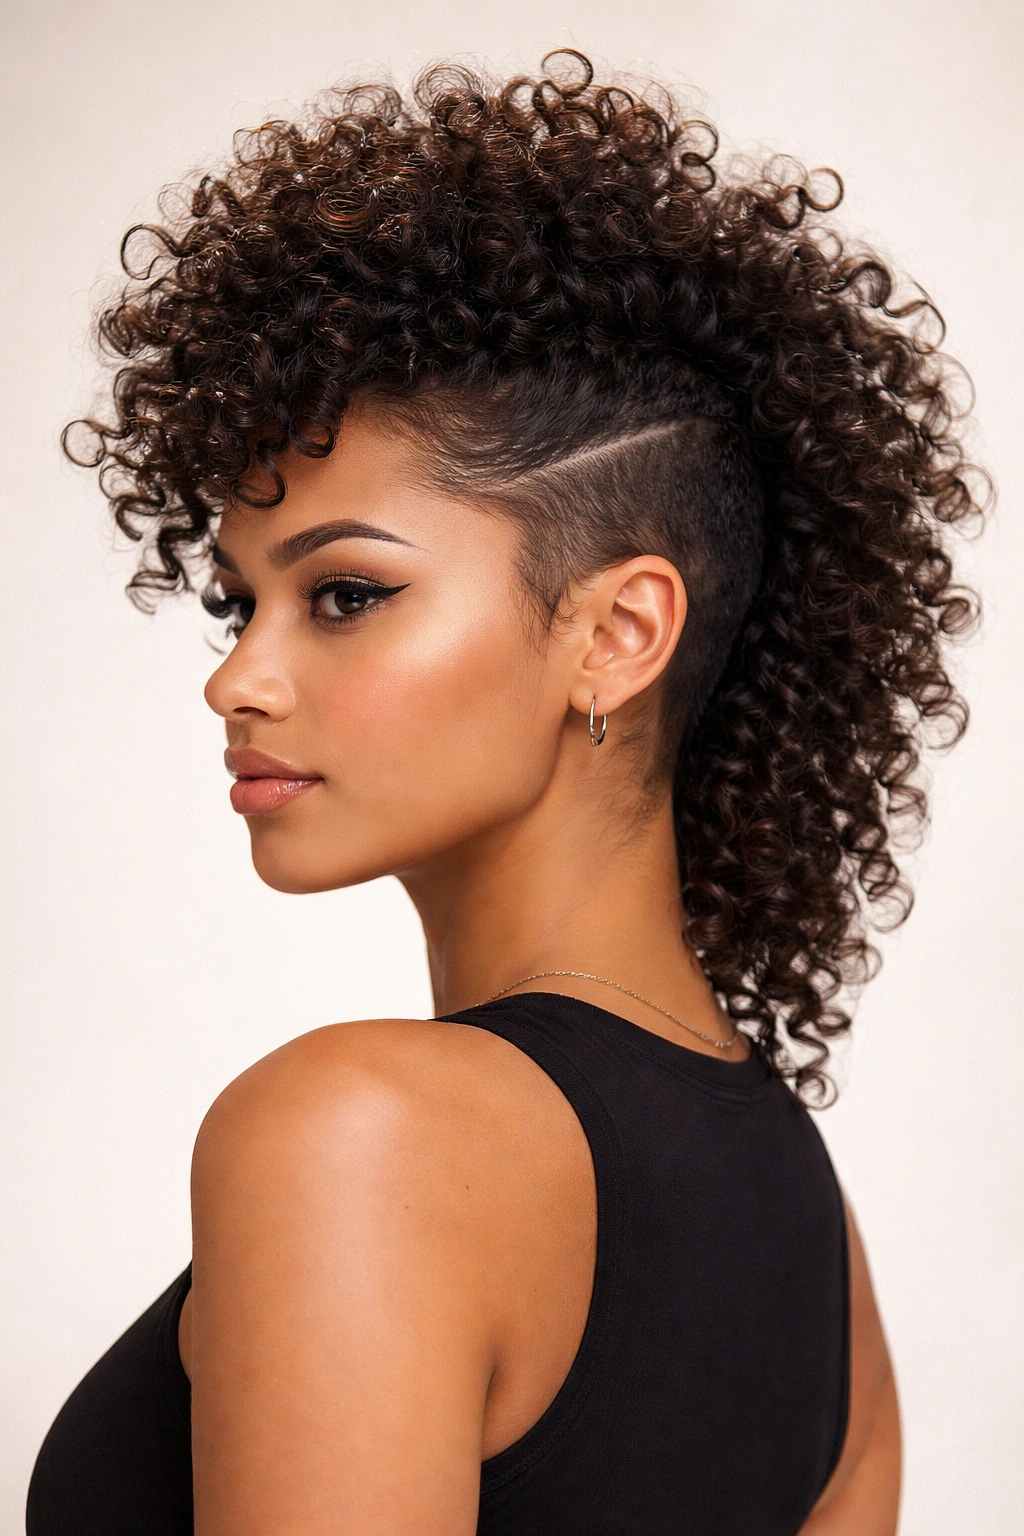
A curly mohawk is the ultimate baddie statement—it’s bold, it’s intentional, and it absolutely captures attention. Rather than slicking the sides down with gel like a traditional hawk, you’re keeping the texture on the sides (either braided, twisted, or smooth) while building height and drama in the center crown area. It’s fashion-forward, it’s different, and it photographs beautifully.
Why This Look Demands Confidence
A mohawk is inherently a power move. You’re saying that you’re comfortable standing out, that you understand fashion, and that you’re confident enough to wear something distinctive. With curly hair, the volume you can achieve naturally makes a faux hawk look incredible—you get genuine height and movement, not just slicked-down hair trying to look edgy. It’s playful without being costume-y, and it’s the kind of look that gets compliments and questions.
Building Your Curly Mohawk
- Style your curls with a curl-enhancing product and allow them to dry fully to maximize natural volume
- Section off the center of your head from your forehead straight back, about 2-3 inches wide depending on how dramatic you want the hawk
- Brush or rake this center section upward and back, using texture spray for grip
- Take the left side section and either braid it, twist it, or brush it smoothly backward, securing it out of the way with bobby pins
- Repeat on the right side, creating a mirror image
- The center section should stand up and out, creating that distinctive mohawk silhouette
- Finish with a flexible hold spray that will keep the center section lifted without flaking
Pro tip: If your natural curl volume isn’t enough, apply a volumizing mousse or sea salt spray to the center section before styling to enhance lift.
7. Sleek Low Bun with Shiny Finish
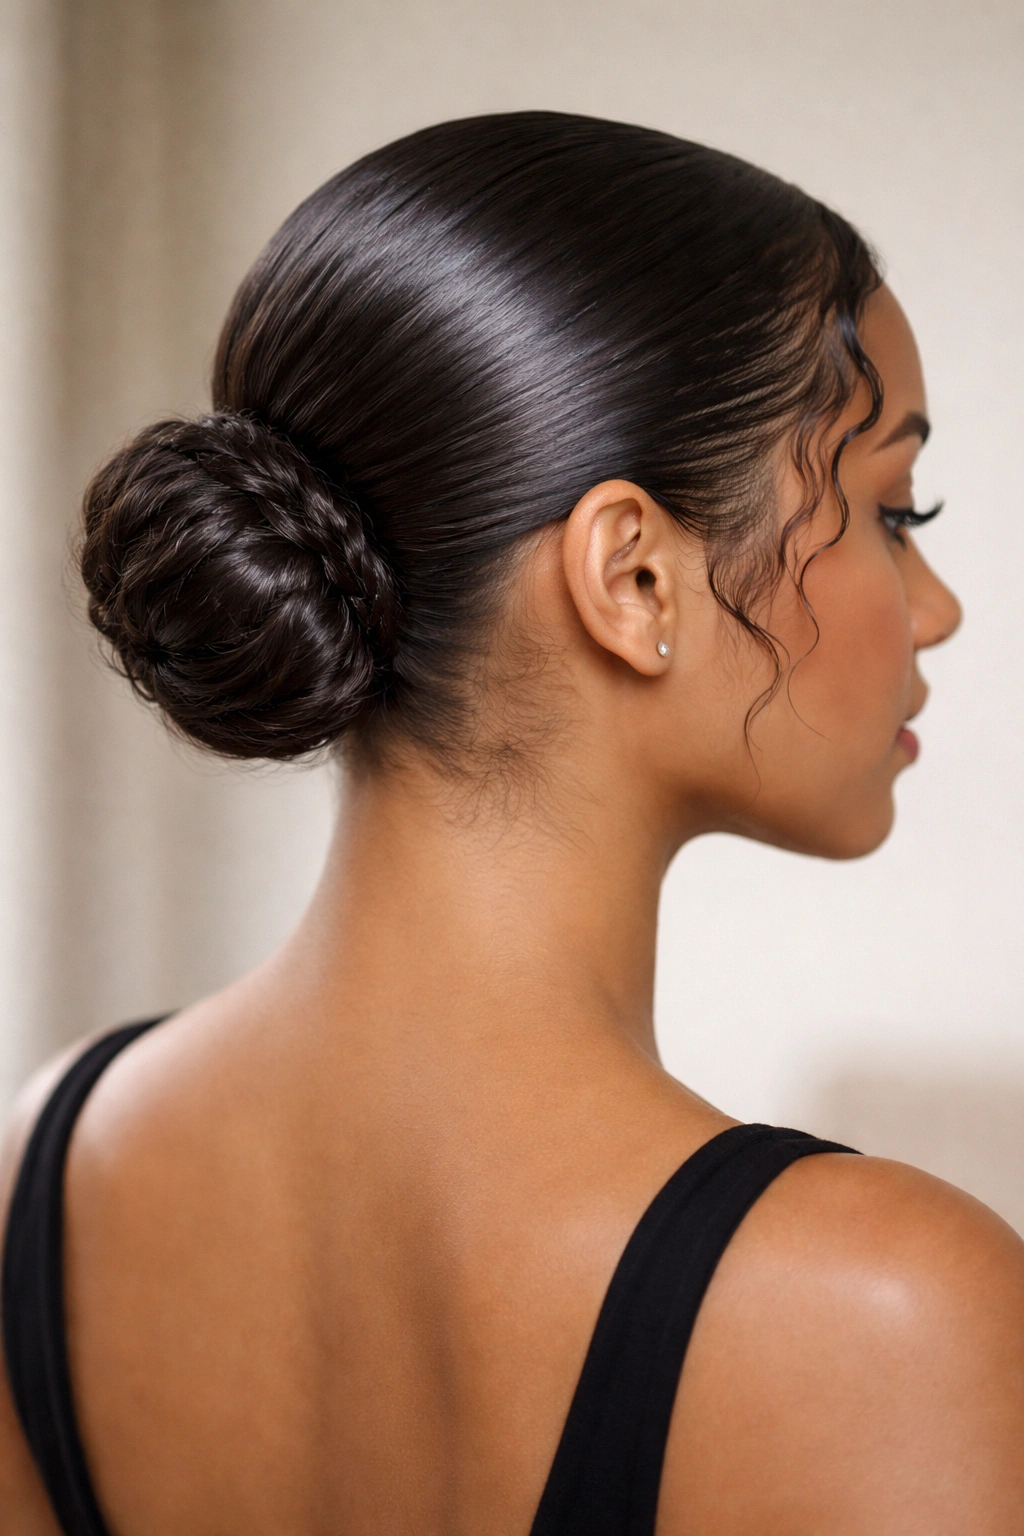
A low bun positioned at the nape of your neck is timelessly elegant and surprisingly baddie when it’s done right. Rather than a soft, romantic low bun, you’re going for a polished, sleek version with a glossy finish that shows intention and sophistication. It’s the kind of look that reads as “I have my life together” while still being practical for school.
The Quiet Confidence of a Sleek Bun
This style is baddie in a subtle way—it communicates control, polish, and sophistication without needing to be loud or dramatic. There’s something inherently put-together about a clean, sleek low bun. It’s not trying to be cute or sweet; it’s just stating facts about your competence and aesthetic sense. For curly hair, achieving a sleek bun actually shows off your styling skills and your understanding of how to work with your texture.
Creating the Perfect Sleek Low Bun
- Brush your curls back and down using a smooth brush or paddle brush, applying smoothing gel or serum as you brush to create a polished finish
- Gather all your hair into a low ponytail positioned at the nape of your neck, slightly off-center for a modern feel
- Twist the ponytail around the base to create a coiled bun, tucking all the ends underneath and securing with bobby pins
- Use an edge brush and smoothing gel or serums to define your edges and hairline, creating crisp, clean lines
- Finish with a shine spray to add a glossy, intentional finish that shows off the polish of the style
- Make sure no flyaways are visible—smooth them with a light hand and a tiny bit of edge control
Worth knowing: A serum or shine spray applied at the end makes an enormous difference in how polished and intentional this bun looks—it elevates it from “casual bun” to “I’m styled.”
8. Braided Updo with Cascading Curls
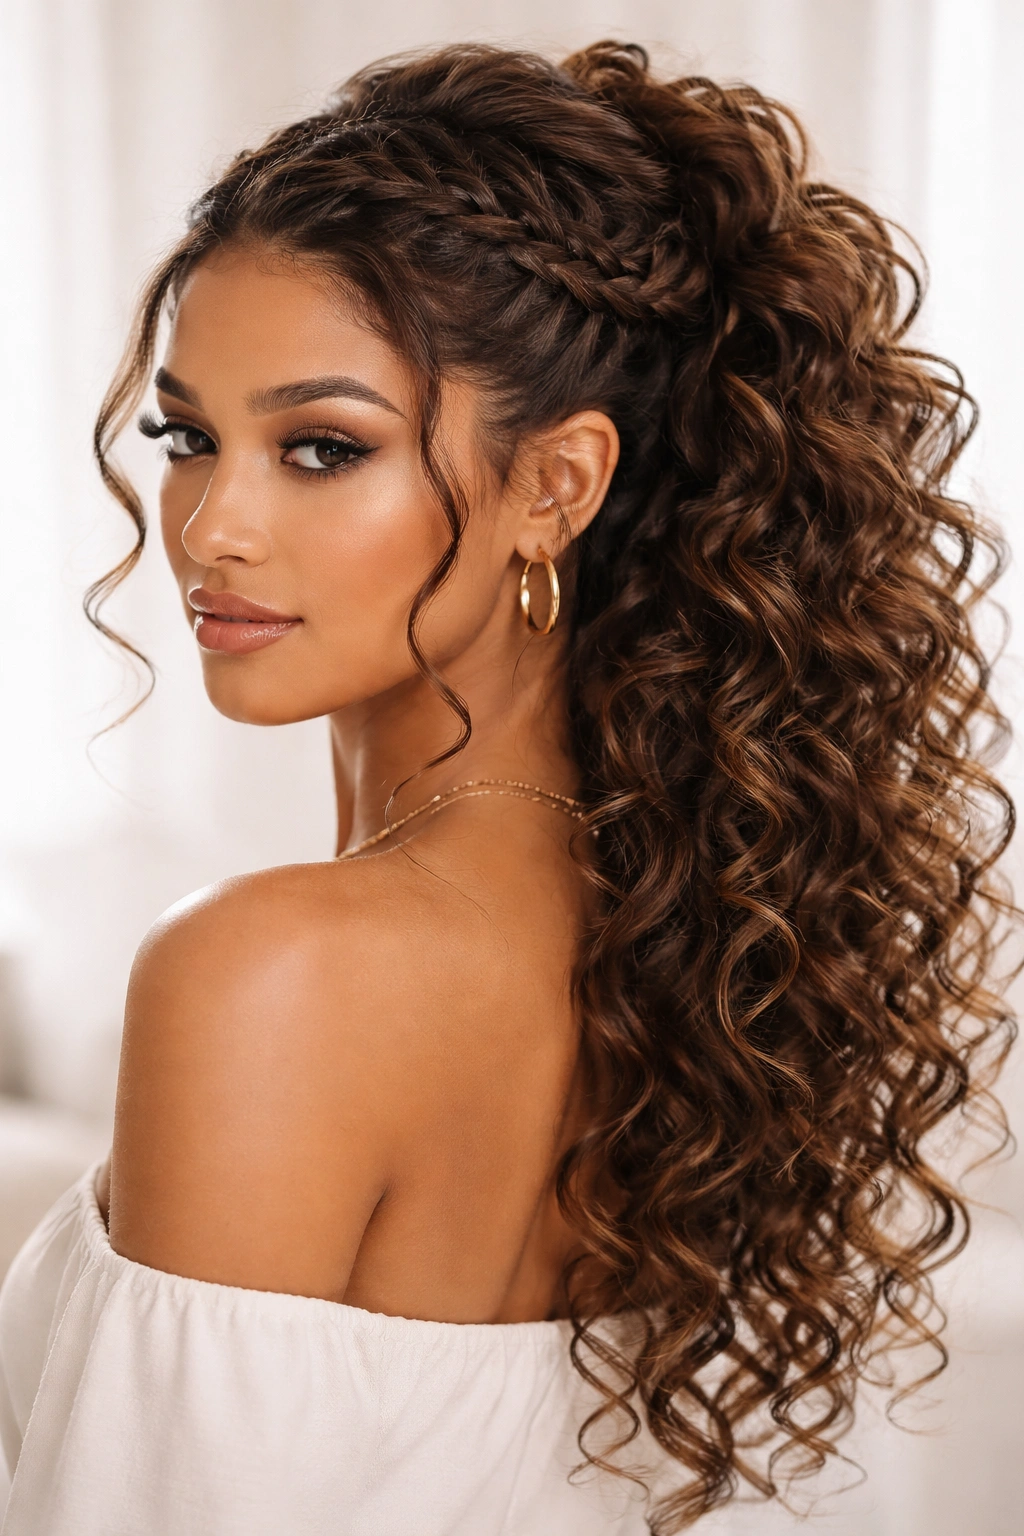
This style combines the structure of braids with the freedom and movement of curls left down. You’re creating one or more braids that start at the crown and flow backward or to the sides, while leaving the bulk of your curls free and voluminous below. It’s romantic enough to feel special but bold enough to read as intentional and fashionable.
The Intentionality of Braided Details
Braids add visual interest and demonstrate that you put thought into your styling. They also create a romantic, fashion-editorial feel that’s very much in line with baddie aesthetics. By combining braids with free curls, you get structure and polish at the top with drama and texture below. It’s a look that works for school events, everyday school days, or whenever you want to look like you made an effort.
Creating Braided Updo with Movement
- Take a section from one side of your head at the temple and create a three-strand braid, adding small sections of hair as you braid back and across the crown
- Continue braiding until you reach the opposite side of your head, positioning the braid as a crown or halo effect
- Secure the end of the braid with a small clear elastic or bobby pins tucked beneath
- Leave all remaining hair down and curly, allowing it to cascade down your back
- Gently tousle the curls and arrange them to frame your face and cover any bobby pins
- Use a texture spray if needed to enhance curl definition and ensure the style holds throughout the day
- Optional: add a small decorative clip, hair stick, or ribbon woven through the braid for extra visual interest
Insider note: This style is especially stunning if you have longer curls—the length allows the braided crown to feel elegant and the cascading curls below to create real movement and drama.
9. Curly Pigtail Buns with Edge Control
Pigtail buns positioned on either side of your head are boldly fashion-forward when done with intention and polish. This isn’t the cute pigtails look—it’s structured, high-positioned buns with sleek edges and defined curls that read as confident and intentional. It’s a look that sits at the intersection of playful and sophisticated.
Why Pigtails Can Read as Baddie
When done right, pigtail buns communicate that you’re confident enough to wear a distinctive, noticeable style without caring whether others think it’s “conventional.” They’re eye-catching, they’re symmetrical, and they photograph incredibly well. With curly hair, the texture and volume of the buns makes them look luxurious and intentional rather than childish. Pair it with sleek edges and a polished attitude, and this becomes a genuinely baddie move.
Executing Structured Pigtail Buns
- Create a center part using a rat-tail comb, dividing your hair straight down the middle
- On the left side, take all the hair and brush it into a ponytail positioned at mid-ear height or slightly above
- Twist the ponytail around its base to create a coiled bun, securing everything with bobby pins
- Repeat on the right side, ensuring both buns are positioned at the same height and distance from the center part
- Apply smoothing gel and an edge brush to create precise, sleek lines around your face, edges, and hairline
- Gently fluff the bun sections to show off curl texture and volume while maintaining the overall polished structure
- Finish with edge control and a flexible hold hairspray for lasting power
Pro tip: Position these buns slightly above your natural ear level for a more fashion-forward, intentional look rather than at ear level, which can read as less intentional.
10. Textured Half-Up Twist with Accessory
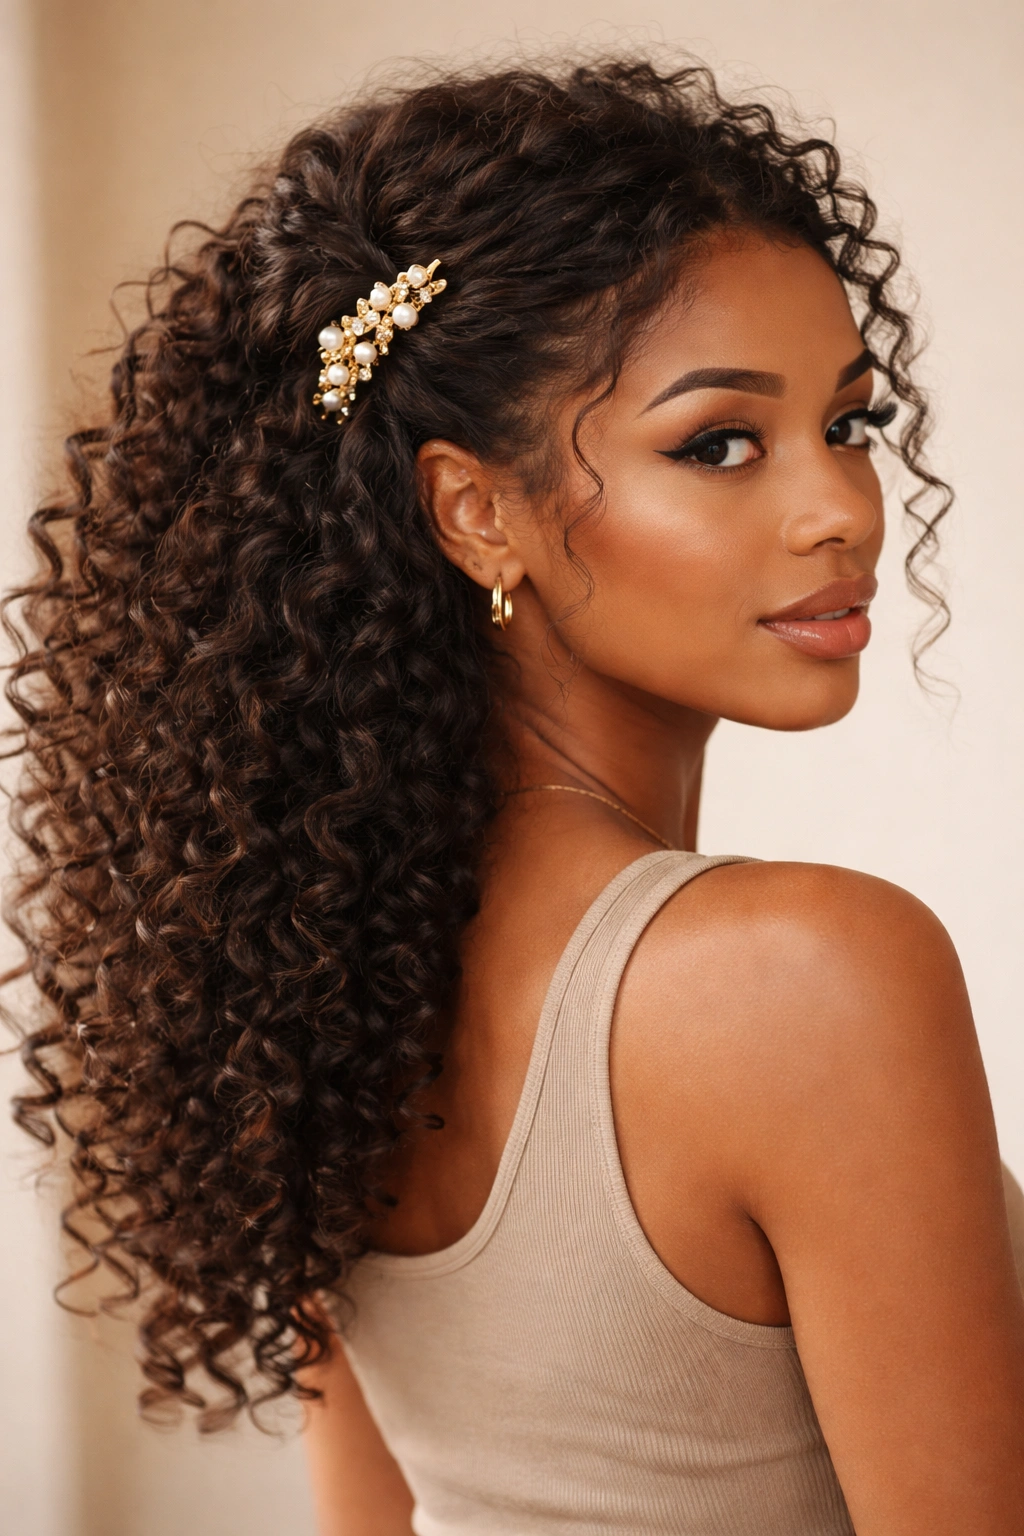
This final style combines the elegance of a half-up look with twisted texture detail and a statement hair accessory. Rather than a simple clip, you’re using a metal hair claw, decorative barrette, or statement clip that draws attention and creates visual interest. It’s polished, it’s easy to execute, and it always looks intentional.
The Power of the Right Accessory
A statement hair accessory instantly elevates any style from casual to intentional and fashionable. Pairing it with a half-up twist creates a look that reads as both playful and put-together. The twist adds texture and visual interest, while the accessory makes a fashion statement. This is baddie because it communicates that you think about details and you’re not afraid to let your accessories do some of the talking.
Creating the Perfect Twisted Half-Up Look
- Take a section from one temple and create a gentle twist, twisting sections of hair around each other as you work toward the back of your head
- Continue twisting until you reach the opposite temple, then secure the twisted section with a statement clip, claw, or barrette
- Leave all remaining hair down and curly, allowing curls to move freely
- Arrange curls around your face to frame your features and ensure the accessory is visible but not overwhelming
- Use a curl-enhancing spray to define curl texture and ensure everything holds throughout the day
- Make sure the accessory is positioned at a slight angle for a modern, fashion-forward look rather than centered and symmetrical
Worth knowing: The right accessory can completely transform a look—choose metal finishes for an edgier feel, or colorful/decorated clips for a playful vibe, depending on your personal baddie aesthetic.
Final Thoughts
The beauty of styling curly hair for that confident, baddie aesthetic is that you’re working with texture that’s naturally bold and striking. You don’t need to straighten your hair or fight against your curl pattern to look intentional and fashionable—in fact, embracing your texture and styling it with intention is exactly what makes these looks work. Each of these ten styles celebrates your curls rather than minimizing them, which is why they all feel so authentically baddie.
The key to nailing any of these looks is understanding what makes your specific curl pattern work and choosing styles that enhance rather than fight against your natural texture. A high-hold gel works better for some looks, while a lightweight curl cream or spray is perfect for others. Figure out which products give you the definition, hold, and finish you want, and keep them on hand for easy styling.
What makes these styles school-appropriate is that they’re all achievable in reasonable time, they hold throughout the day without constant touching up, and they communicate confidence and intention without looking like you’re wearing a costume or trying too hard. You’re not just showing up to school—you’re showing up styled, intentional, and completely comfortable with how you look. That’s what baddie style is really about: confidence in your own aesthetic and enough self-assurance to wear it unapologetically.