Short curly hair is deceptively gorgeous — there’s something about the natural texture and bounce that makes even a basic day feel intentional. But when you want to style it, updos can feel like a completely different challenge than what works for straight or wavy hair. Curls behave differently, gravity pulls at different angles, and a standard updo technique that works for most hair types might leave your curls flattened, frizzy, or completely undone by noon.
The good news? Short curly updos absolutely work, and they can look better than updos on other hair types when you understand the handful of techniques that actually honor how your curls naturally fall and cluster. The secret isn’t fighting your texture — it’s working with it, stacking your curl pattern intelligently, and choosing styling methods that keep the shape and definition you spent time creating.
We’re going to walk through eight specific updo styles that work genuinely well on short curly hair, each with the exact technique, product recommendations, and the real-world timeline of how long it actually holds up. These aren’t theoretical styles you’ll find on straight-haired models; these are techniques that curly-haired people have tested and proven to work on actual short curls.
Why Short Curly Hair Needs a Different Updo Approach
Short curly hair has structural advantages that longer hair doesn’t have, but it also has unique constraints. Your curls are closer to your scalp, which means they have less length to wrap, pin, or tuck — but they also have more grip and texture to work with, which is actually a major asset if you know how to use it.
The weight distribution on short curly hair is completely different. Longer straight hair can be gathered high and held by gravity and tension. Short curly hair needs strategic layering and sectioning so the updo sits properly without gaps or weird angles. Your curls want to cluster together in their natural patterns, and the best updos work with that instinct instead of against it.
Frizz and definition are your real concerns. An updo that looks polished on wavy or straight hair can end up looking stringy or unkempt on curls if you’ve smoothed the texture or used too many heavy styling techniques. The updos that work best on short curls maintain that textured, defined look even when the hair is gathered and styled.
The Role of Your Curl Pattern
Not all short curls are the same, and what works brilliantly on tight coils might need tweaking for looser waves. Tighter, more defined curls hold shape better in updos and need fewer bobby pins — your curl pattern itself becomes part of the structure. Looser waves and larger ringlets need more strategic pinning and sometimes more product to maintain shape once they’re gathered.
The updos in this guide work across the full spectrum of curly patterns, but you’ll notice which ones feel more natural for your particular curl type as you work through them. A key updo on super tight coils might need a slightly different approach if you have shoulder-length ringlets, and that’s completely fine — you’re adapting technique to your specific texture.
Essential Products and Tools for Curly Updos
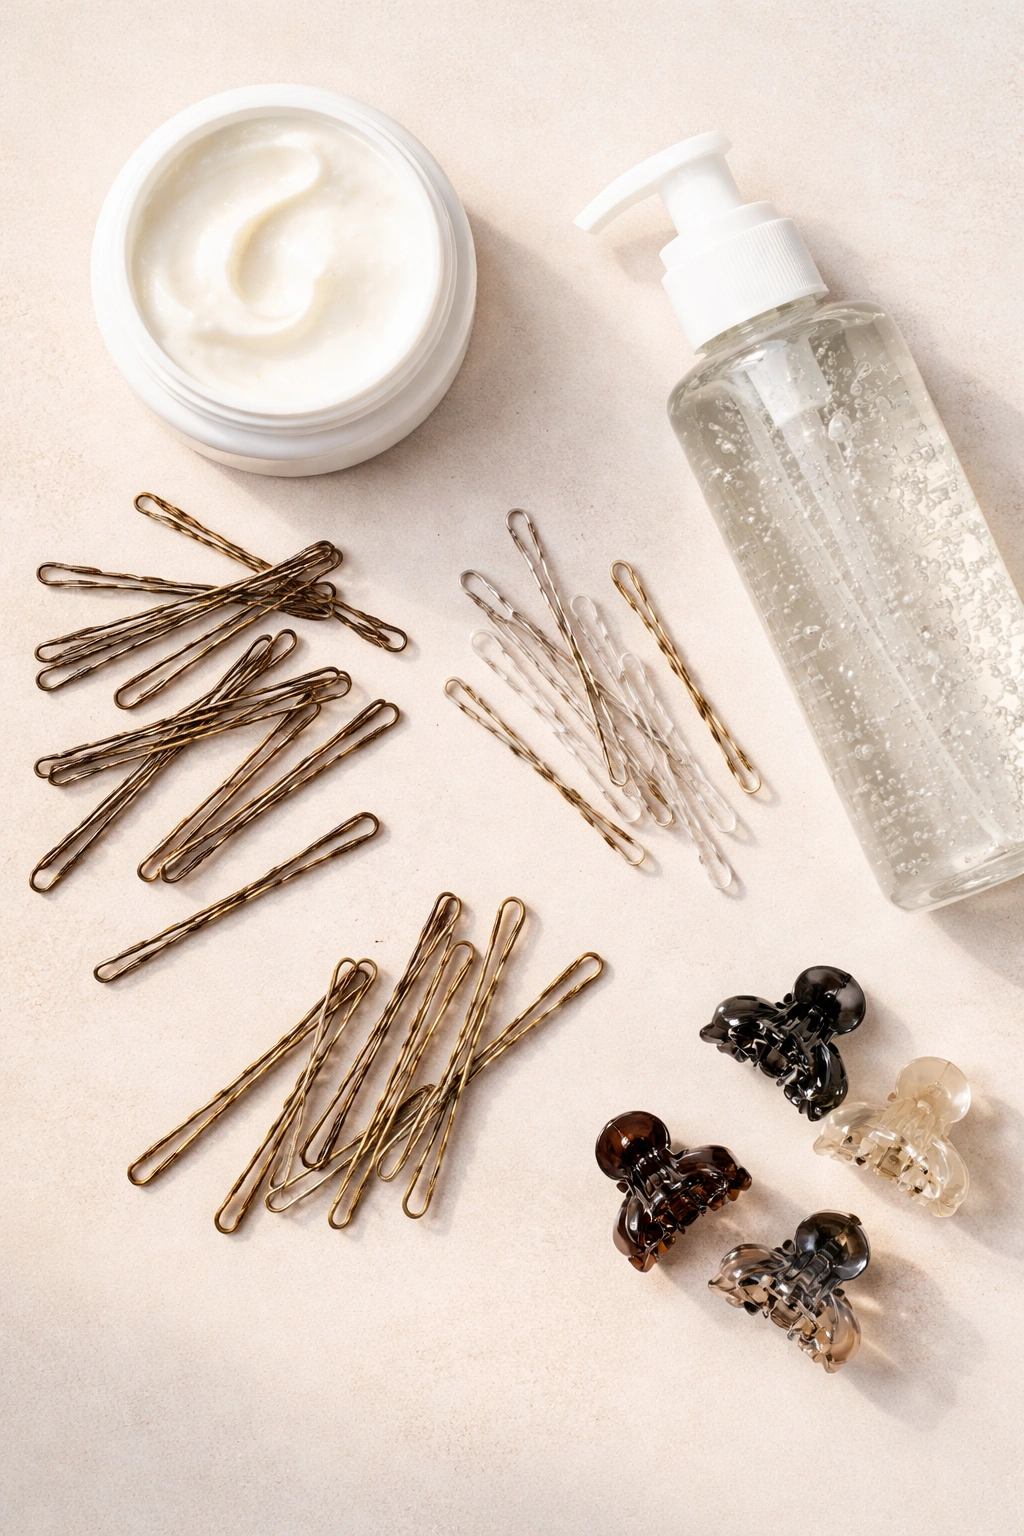
Before we get into specific styles, you need the right foundation. The difference between an updo that holds and one that falls flat by afternoon is often just having the right tools and products on hand.
Bobby pins are non-negotiable, and this is where most people with curly hair go wrong: get ones specifically designed for textured hair. They have more grip, wider spacing, and a bend that actually catches curls instead of sliding through. Clear or color-matched pins matter less than texture and grip.
Flexible hold products work better than heavy, waxy styling creams on updos. A light curl-defining cream or a styling gel with strong hold but flexible cast is your sweet spot — you want your curls to stay in place but still look like curls, not a hard, shellacked mass. Apply product to individual sections as you’re building the updo, not all at once beforehand.
Hair clips or clamps are lifesavers for holding sections while you work on other parts of the updo. Butterfly clips or medium-sized jaw clips give you hands-free sections and prevent you from accidentally unraveling what you just did.
Product Application Strategy for Longer Hold
The timing of when you apply product changes everything. Applying product, then building the updo often leads to product sitting on top of the surface and sliding during the day. Instead, section by section as you construct the updo, apply your product directly to the curl clusters you’re about to pin into place. This method embeds the product into the structure and makes the hold significantly stronger.
A light misting spray applied after the updo is constructed helps lock everything in place without adding weight. Choose a spray formula that maintains flexibility and movement — you don’t want a crunchy, stiff finish that looks unnatural on curls.
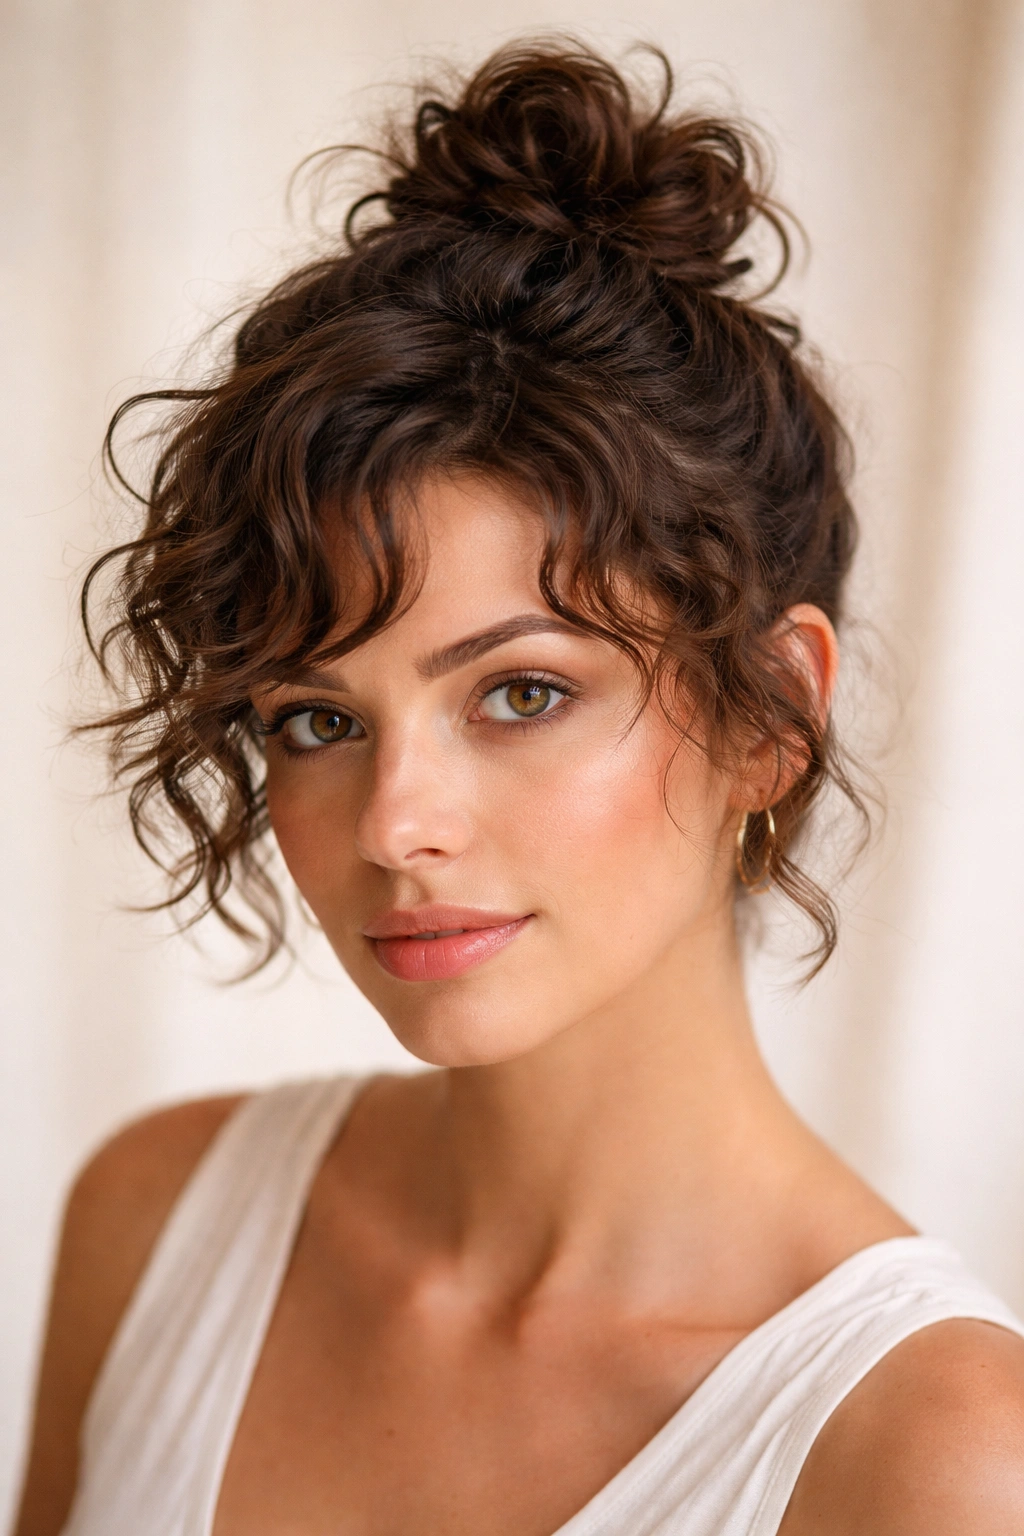
1. The High Textured Pony
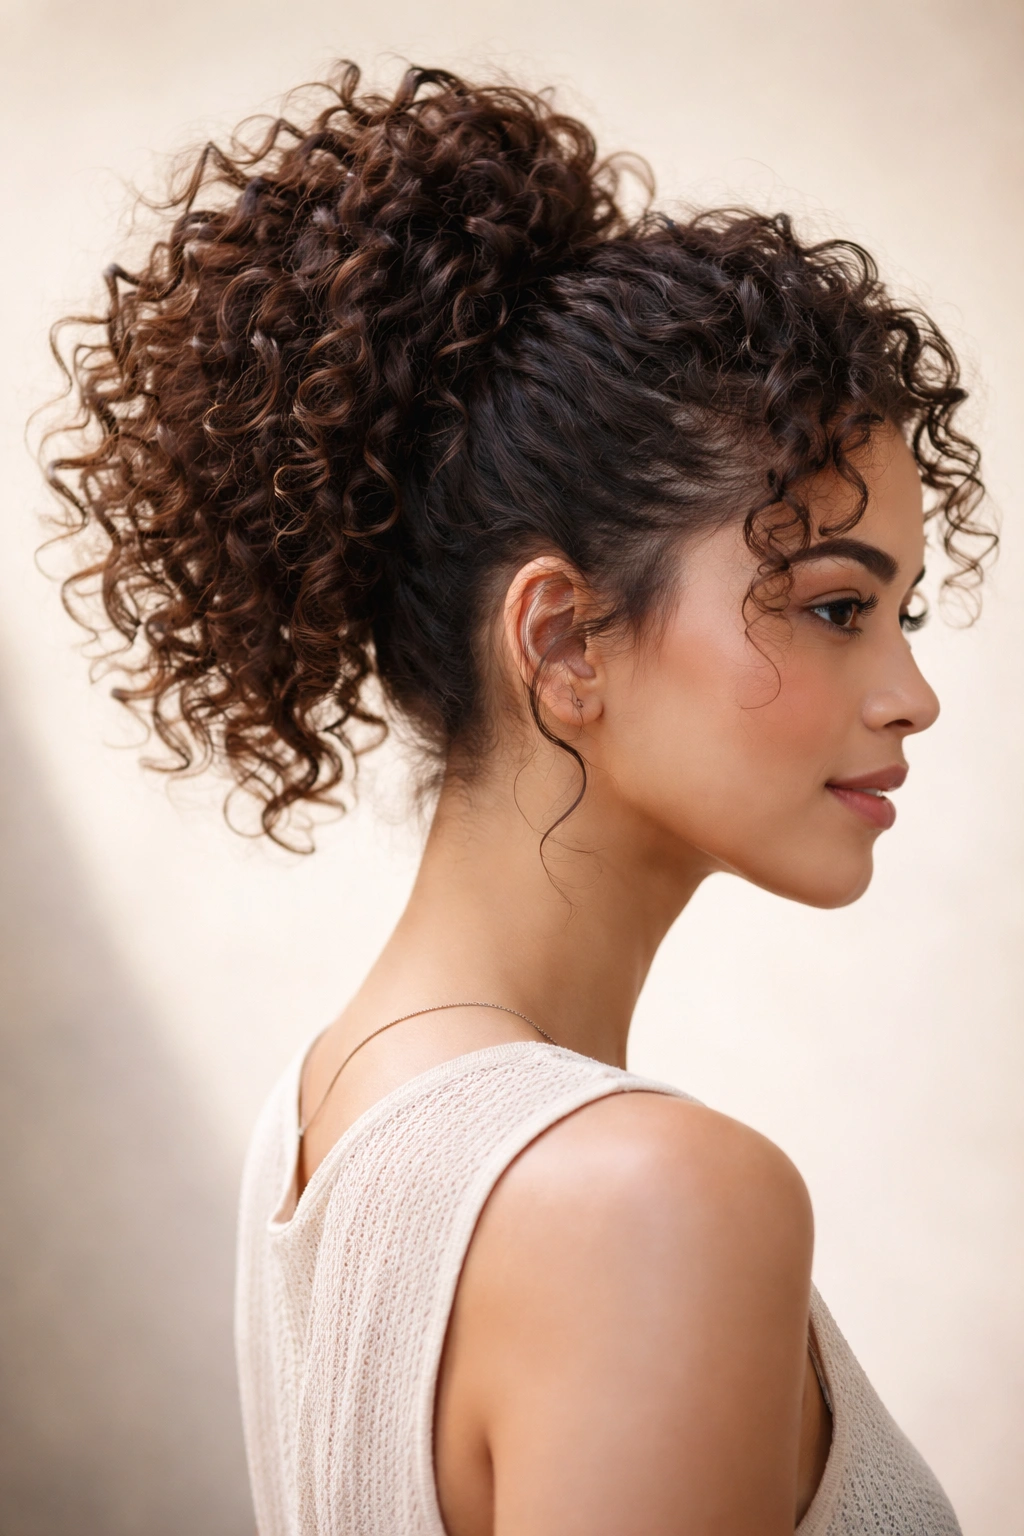
This is one of the easiest short curly updos to master, and it looks effortlessly put-together even when you’ve styled it in ten minutes. The key is gathering your curls high on your head but not smoothing or flattening them — you’re creating a textured, voluminous ponytail that sits at the crown or slightly back from it, and every curl stays defined and visible.
Start with damp or damp-dried curls that have some shape already established. Section your hair into two halves horizontally across the back of your head, just above your ears. This sectioning method is what prevents the “I-just-pulled-my-hair-back” look and instead gives you intentional texture. Apply a light curl cream to each section as you work.
Gather the top half-section first and pull it toward the crown in a loose, gathered shape — not a tight, smooth pony. The goal is to create bulk and texture, not precision. Secure this with a hair elastic, but leave it slightly loose initially. Grab the bottom half and do the same, securing it just below the first elastic with another band. Once both sections are loosely gathered, tighten both elastics incrementally, working out any odd gaps or pulls until the whole pony sits high and voluminous at your crown.
The Texture-Maintenance Trick
The real secret here is that you’re not actually making a traditional ponytail — you’re creating stacked texture. Flip your head upside down for a few seconds after tightening both bands, then flip back. This distributes the curls within the ponytail more naturally and prevents the tight, pulled-back look that can flatten curls.
Gently separate and loosen individual curl clusters within the ponytail using your fingers — don’t comb or brush through it. This keeps every curl defined while still maintaining the gathered shape. A light setting spray applied at this point locks the texture without crunchiness.
The high textured pony lasts 8-12 hours on most curl types before you see any loosening at the crown. Touch-ups are simple: gently tighten the elastics and re-fluff with your fingers.
Best for Hair Length and Curl Type
This works beautifully on curly hair that’s anywhere from chin-length to ear-length, and it’s equally successful on tight coils and looser waves. If your curls are very loose or wavy, securing with a small clip or second elastic in the middle of the ponytail prevents slipping.
2. The Twisted Side-Swept Bun
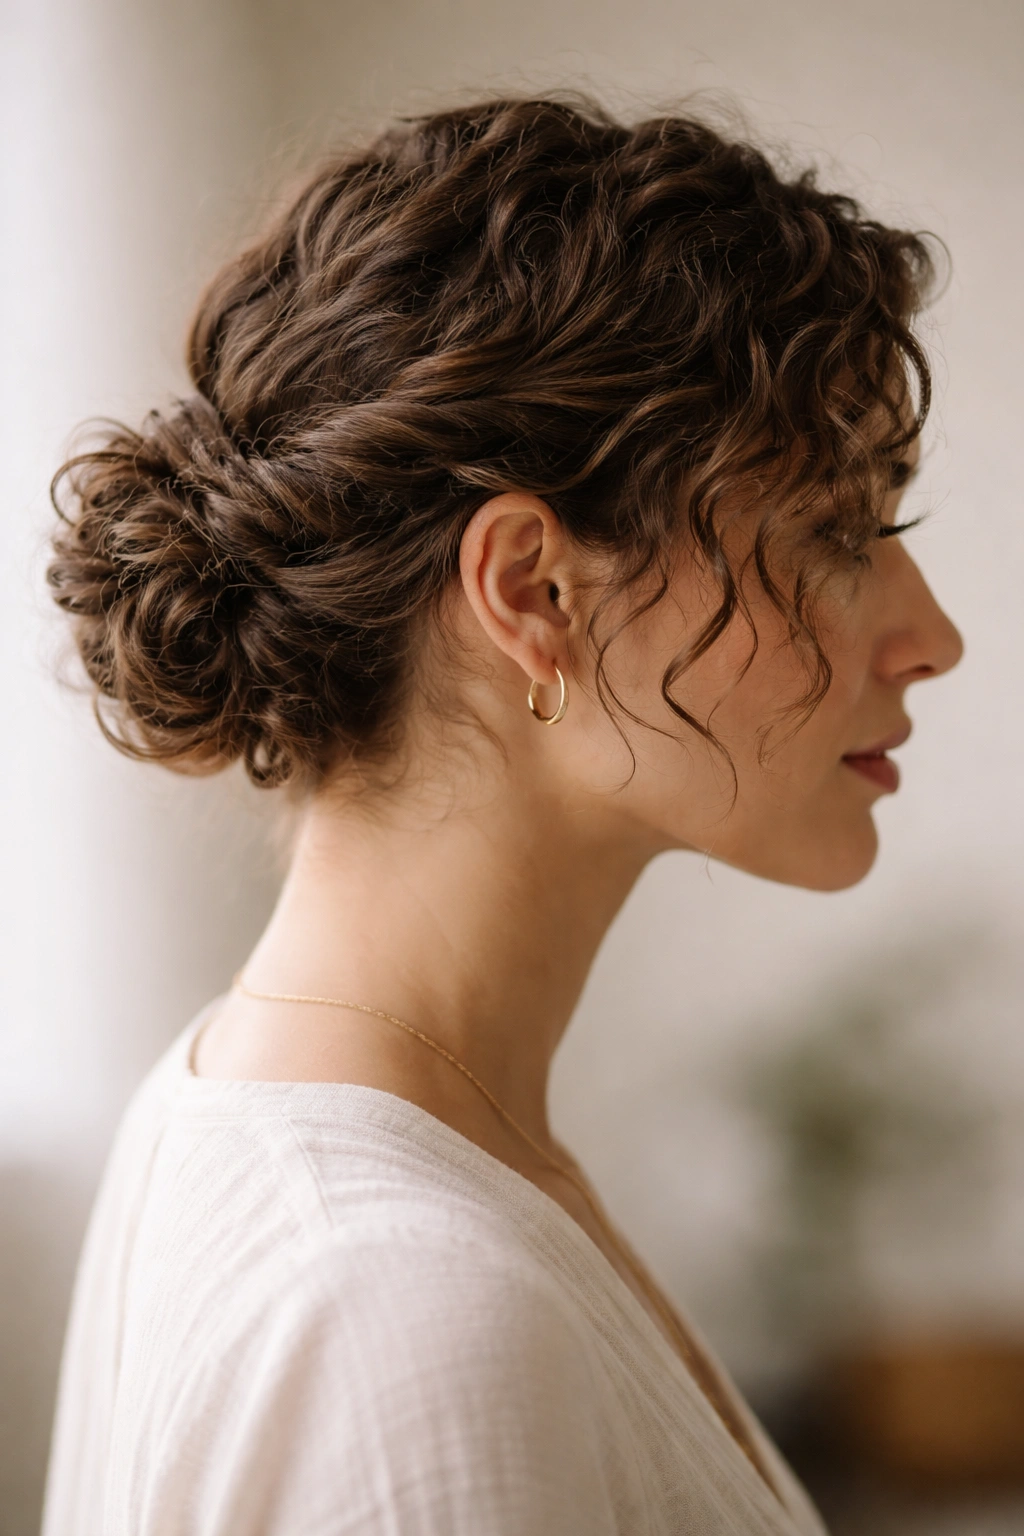
This style feels more polished and intentional than a standard side pony, and it works specifically well if your short curls have enough length to gather and twist slightly. You’re creating a soft, romantic look by sweeping curls to one side and securing them into a small, gathered bun at the side of your head near your ear or behind it.
Start with dry or nearly-dry curls (slightly damp is fine, but very wet curls won’t hold the twist structure). Section out a curved line from one temple back toward the nape of your neck on the side you want your bun — this is the section you’ll be using for the updo. Clip the rest of your hair out of the way temporarily.
Apply a flexible-hold curl cream to the sectioned curls. Loosely twist this section as you bring it around toward the side of your head where you want the bun to sit. The twist isn’t tight — you’re creating a gentle spiral that gathers the curl clusters together while maintaining their individual definition. Tuck the twisted section into a small bun shape on the chosen side and secure with bobby pins placed horizontally through the bun structure.
Creating Volume and Dimension
Here’s what makes this different from a basic twisted bun: after securing, gently pull small sections of curl out from within the bun shape. You’re not unraveling the whole thing, just extracting little loops and clusters of curls from the bun’s interior. This makes it look softer, more textured, and significantly more romantic.
Release the clipped-away section and let it fall naturally around your face and shoulders. The contrast between the gathered bun on one side and the flowing curls on the other creates real visual interest and looks intentional.
This updo typically holds for 10-14 hours and actually looks better slightly undone than it does in the first hour — as a few pieces work loose, the romantic, soft vibe intensifies rather than deteriorating.
Styling Note for Tighter Curl Patterns
On very tight, dense curls, the twist might be so compact that you lose the textured look. If this happens, skip the twist entirely and instead create loose curl clusters within the gathered section, pinning each one separately into the bun shape. This gives you the same gathered effect with more visible texture.
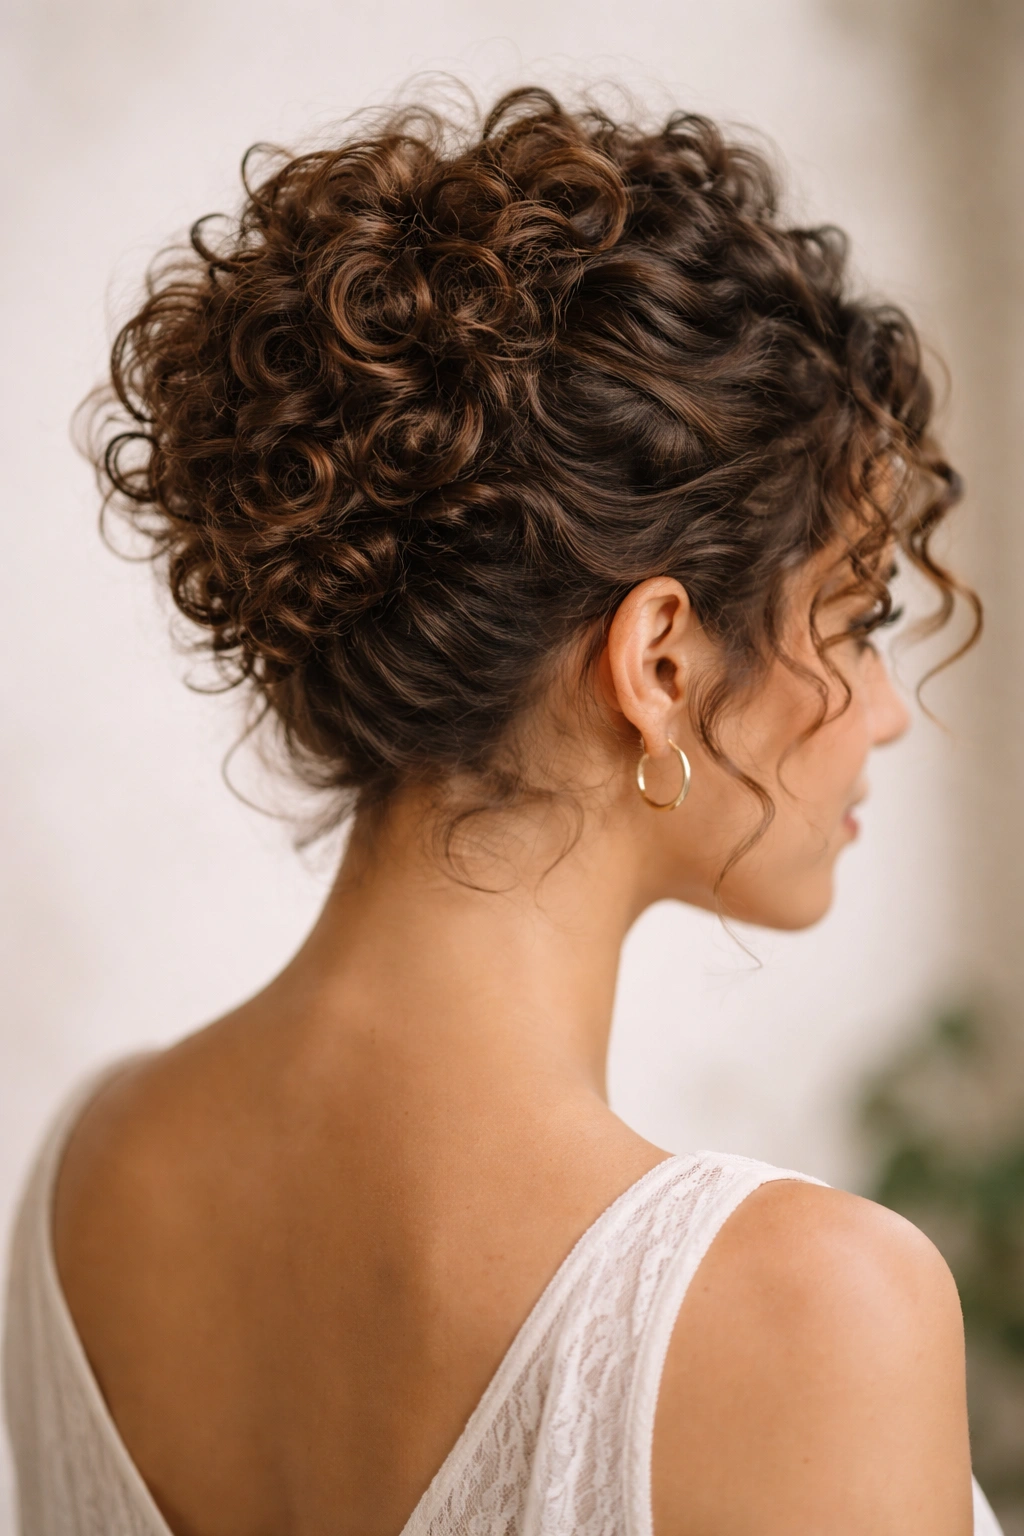
3. The Layered Pixie Knot
This is the updo for when you want something that looks intricately styled but is actually quite simple to create. You’re essentially creating a very small, high bun that sits at the crown or slightly forward, and the “layered” part comes from strategically leaving pieces out and letting them frame your face.
Section your hair into three parts: a small crown section that will become the bun, a wider mid-section for framing, and a lower back section. Clip the frame section and lower section out of the way. Apply styling cream to just the crown section and gather it into a small, tight cluster at the very top of your head. Secure it with bobby pins placed close together to create a solid structure for such a small bun.
Now here’s where the intentional framing happens: unclip the mid-section (your face-framing layer). This section should fall naturally around your face, ideally grazing your cheekbones or just barely shorter. Use a curl-defining product on this section and encourage each curl to fall in its natural pattern. The frame section is what transforms this from “tiny bun” to “intentionally styled pixie knot.”
The Asymmetrical Advantage
For extra visual interest, leave slightly more curl on one side than the other — one side more tucked behind your ear, the other side falling more forward. This asymmetry is actually very modern and looks deliberate in a good way.
The bottom back section (still clipped out of the way) can stay down and blend into your back hairline, creating an ombré effect where there’s clearly an updo at the crown but the rest of your hair remains in its natural curl pattern. This creates dimension and prevents the “all-back” severity that can make small updos look too formal.
This updo lasts 6-10 hours and looks intentionally tousled by hour eight rather than falling apart, which is the mark of a well-designed short curly updo.
Who This Works Best For
The pixie knot is especially striking on short hair in the 2-4 inch range, where your curls have enough length to gather at the crown but your face-framing pieces still feel like a deliberate style choice. On very short hair, this can look too minimal; on longer hair, you might not get the compact crown effect.
4. The Braided Crown Wrap
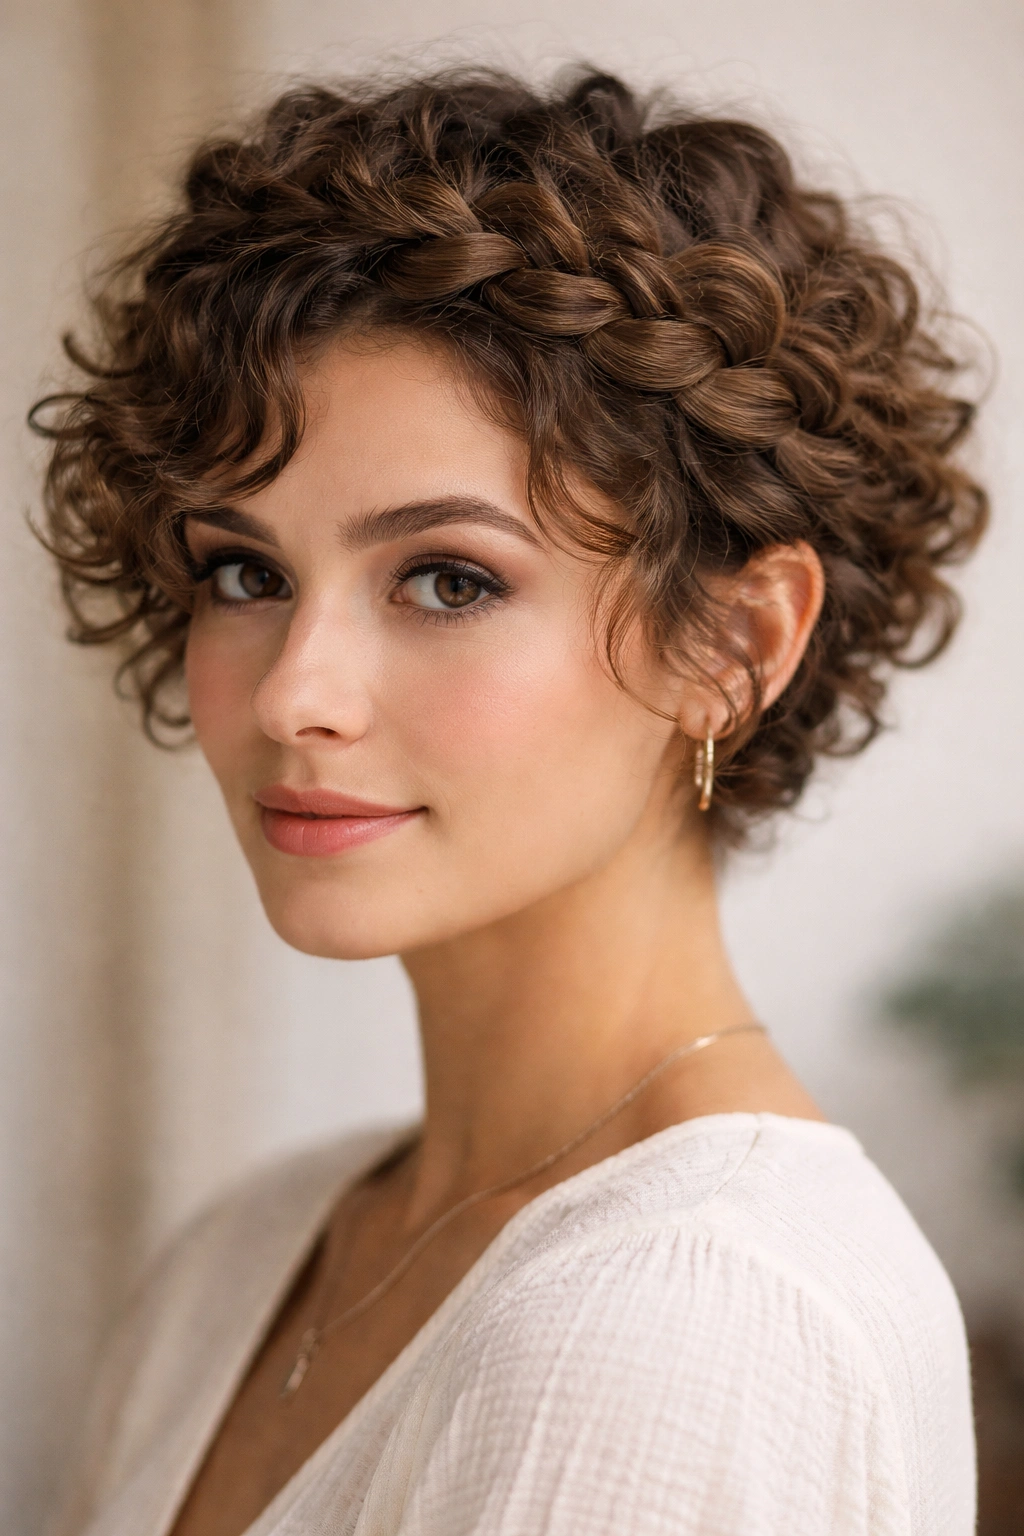
This style works when you want something that looks more elaborate and intentional than a simple gathered style, and it’s surprisingly easier to create than it looks. You’re essentially creating a Dutch or French braid using your curl clusters, wrapping it around your head like a crown, and securing it into itself at the back.
Start with curls that have been refreshed with a curl cream or light gel — you want decent hold and definition to maintain the braid structure. Create a deep side part on one side of your head. Starting at one temple, begin a loose Dutch braid (a braid that sits on top of the scalp, not underneath like a French braid). Use thick sections of curls rather than thin, precise strands — you’re braiding in clusters, not intricate thin braids.
The braid doesn’t need to be tight or perfect. In fact, looser is better for showcasing the texture of your curls within the braid structure. As you braid, move upward toward the crown. Once you’ve reached the crown area, angle the braid across the back of your head toward the opposite side. Continue braiding toward that temple.
The Securing Technique That Actually Stays
When you reach the opposite temple, you have two options: wrap the remaining braid into itself at the nape of your neck and secure with pins, or tuck the braid underneath the already-braided section and secure with multiple bobby pins strategically placed through the overlapping areas. The second method creates a more seamless, woven crown look.
Gently separate sections of the braid to create more texture and dimension — not so much that you unravel it, but enough that you can see individual curl clusters within each braid section.
Use a light setting spray to lock the structure, but avoid anything heavy that would make the braided sections look wet or flat.
Adapting the Braid for Different Curl Densities
On looser waves, you might need to tighten your braiding slightly and use a little more product to maintain the braid structure. On extremely tight coils, the braid might be so compact that it reads as a solid rope rather than an articulated braid — this is actually fine and looks very intentional on those curl types.
This updo typically holds 12+ hours and looks more polished the longer you wear it, as the movement throughout the day creates more texture and definition in the braid.
5. The Stacked Bubble Ponytail
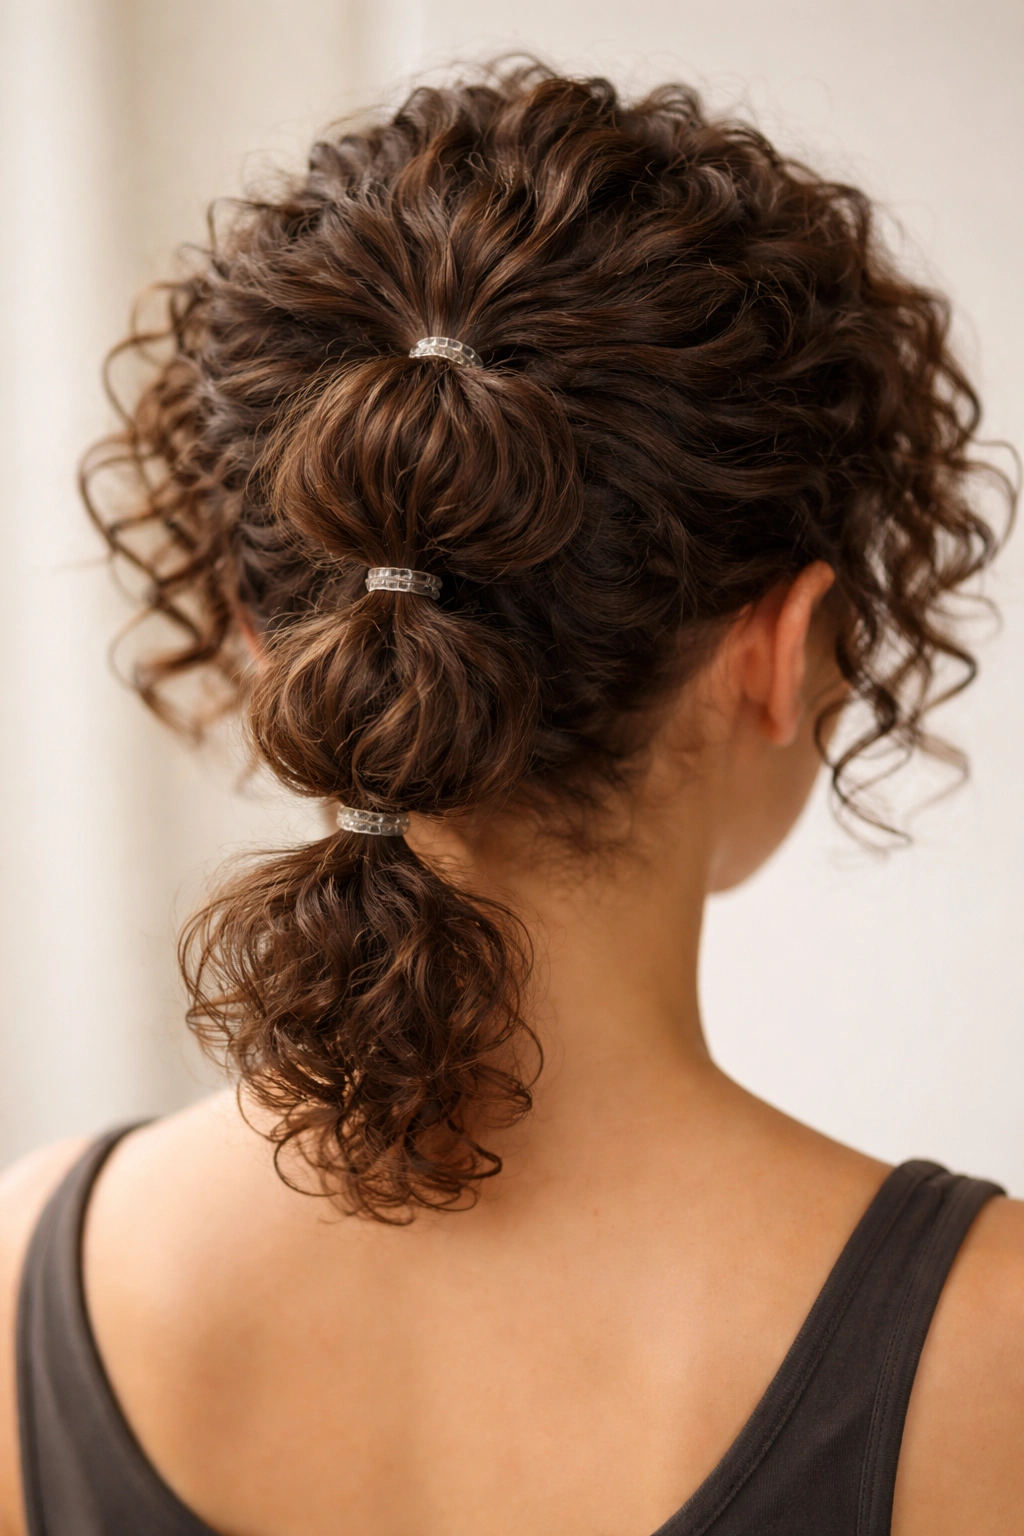
This is the playful, modern take on an updo, and it works particularly well if your short curls have enough length to create at least three distinct sections. You’re creating multiple mini ponytails stacked vertically on your head, each secured with its own elastic, which creates visual height and a fun, dimensional look.
Section your hair into three horizontal layers from crown to nape. The first (top) section should be at your crown, the second in the middle of the back of your head, and the third at the nape. Clip the lower sections out of the way. Apply curl-defining product to just the top section.
Gather the top section into a small ponytail at the crown and secure with an elastic. This first bubble is relatively high and compact. Now release the second section and gather it together, but bring it upward and into the base of the first ponytail — you’re creating the second bubble right below the first, and the two are touching or slightly overlapping. Secure this second bubble with another elastic.
Creating Volume and Texture
Here’s the key to making this look good rather than strange: after securing each bubble, gently expand it outward by loosening the elastic slightly and pulling curl clusters away from the base of the bubble. This creates a fuller, more textured look and prevents the tight, pinched appearance that can happen with bubble ponytails on very short hair.
Release the bottom section, apply product, and create the final bubble in the same way — gather upward into the base of the second bubble and secure. Expand this final bubble outward as well.
The result should look like three distinct, voluminous clusters of curls stacked vertically down the back of your head, with clear separation between each bubble but with each one slightly overlapping the next.
Hold and Longevity
The bubble ponytail typically lasts 8-12 hours before elastics start slipping, especially if you’re using them on very short hair where the distance between bubbles is minimal. Pro tip: use smaller elastics than you’d normally use for regular ponytails — they have better grip on shorter lengths.
This is the updo that works best if you’re going to be active — it’s secure, it looks intentional, and even as elastics loosen slightly, it still reads as a deliberate style choice rather than falling apart.
6. The Spiral Clip Arrangement
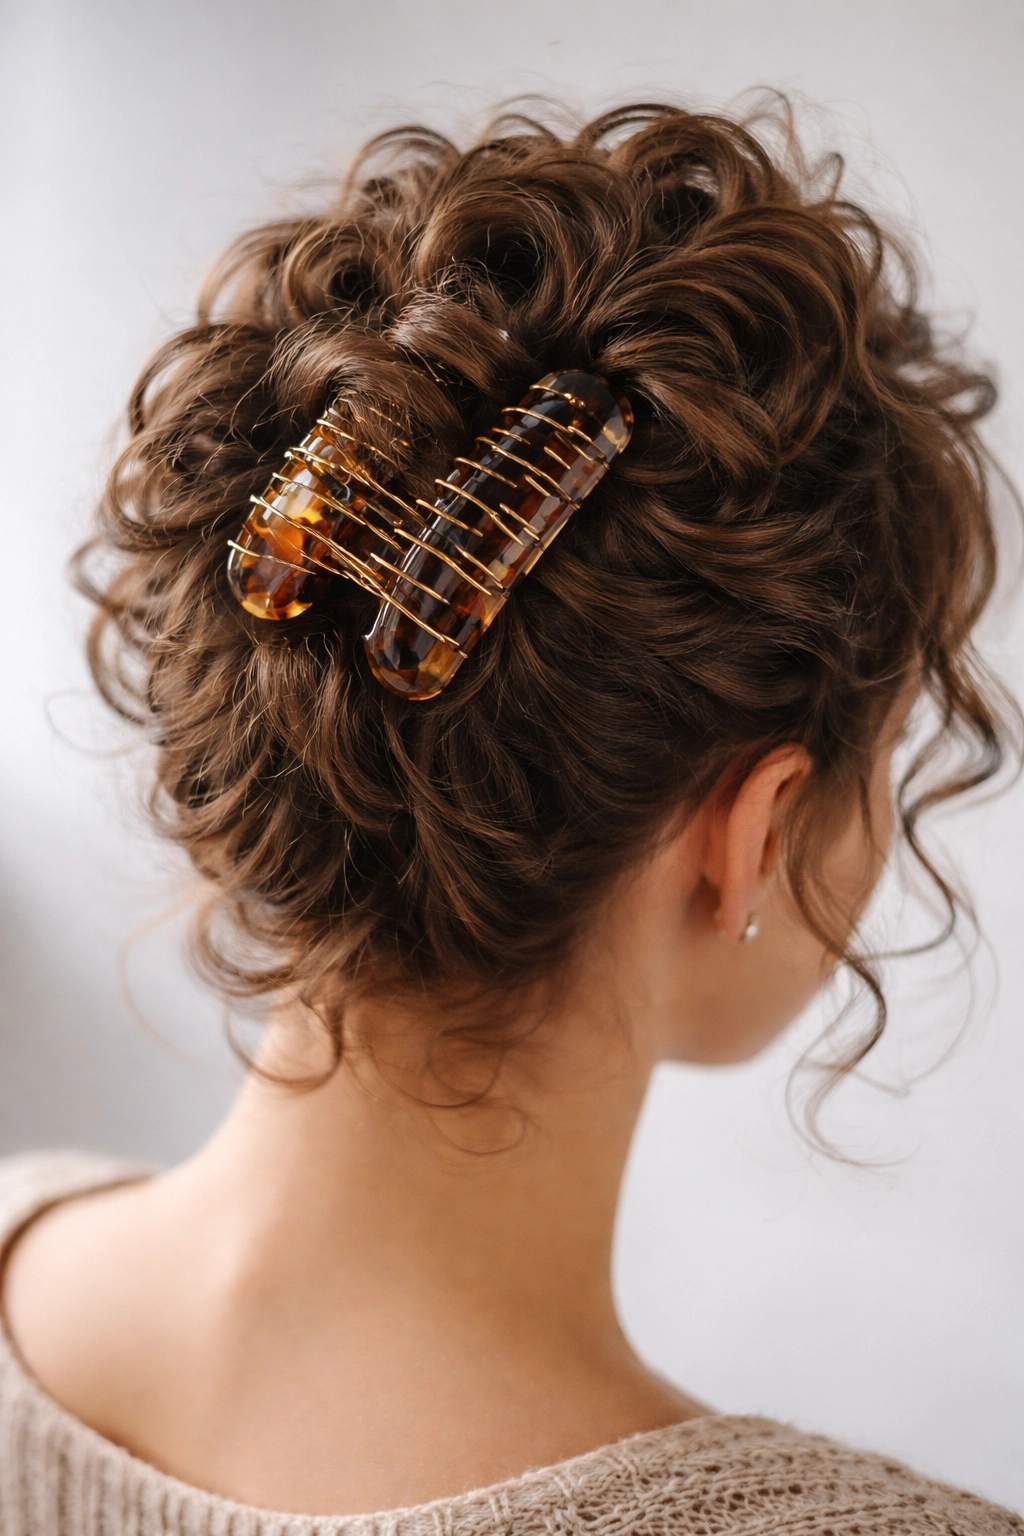
This technique uses a large claw clip or hair clip as the primary securing tool, and it creates an updo that looks elegant and sculptural without requiring bobby pins throughout. You’re gathering your curls into a high cluster and securing them with a large clip positioned strategically to create shape and visual interest.
Start with curls that have product applied and some structure already established. Gather all your hair toward the crown, but don’t smooth it down — keep the curl clusters loose and textured as you gather. Position a large claw clip at the very crown, opening the clip and inserting your gathered curls into it in a slightly twisted, spiraled arrangement.
The magic here is in how you position the curl clusters within the clip. Instead of just jamming all your hair into the clip, arrange sections of curls in a gentle spiral pattern as the clip closes around them. The clip becomes a visible design element, not just a functional fastener.
Choosing the Right Clip
Large claw clips work great, but so do vintage clip styles, tortoiseshell clips, or large barrette-style clips. The size should be proportional to your hair amount — on short hair, you’re not working with massive volume, so a medium to large clip is usually perfect. Gold, silver, tortoiseshell, or black clips all look intentional depending on your personal style.
The Partial vs. Full Version
You can do this as a full updo (all hair gathered into the clip) or as a half-up version (gathering just the top crown section while leaving lower curls down). The half-up version is excellent if your curls are very short — it creates an updo effect without requiring a massive clip to hold a tiny amount of hair.
A few loose curls falling in front of your ears or around your face make this look less severe and more romantic. Gently pull a curl or two out from the edges of the clip arrangement.
This updo lasts 6-10 hours depending on clip size and your hair’s weight, and it’s one of the easiest to adjust mid-day — you can simply loosen and retighten the clip without needing to reconstruct the whole style.
7. The Twisted Half-Up Moment
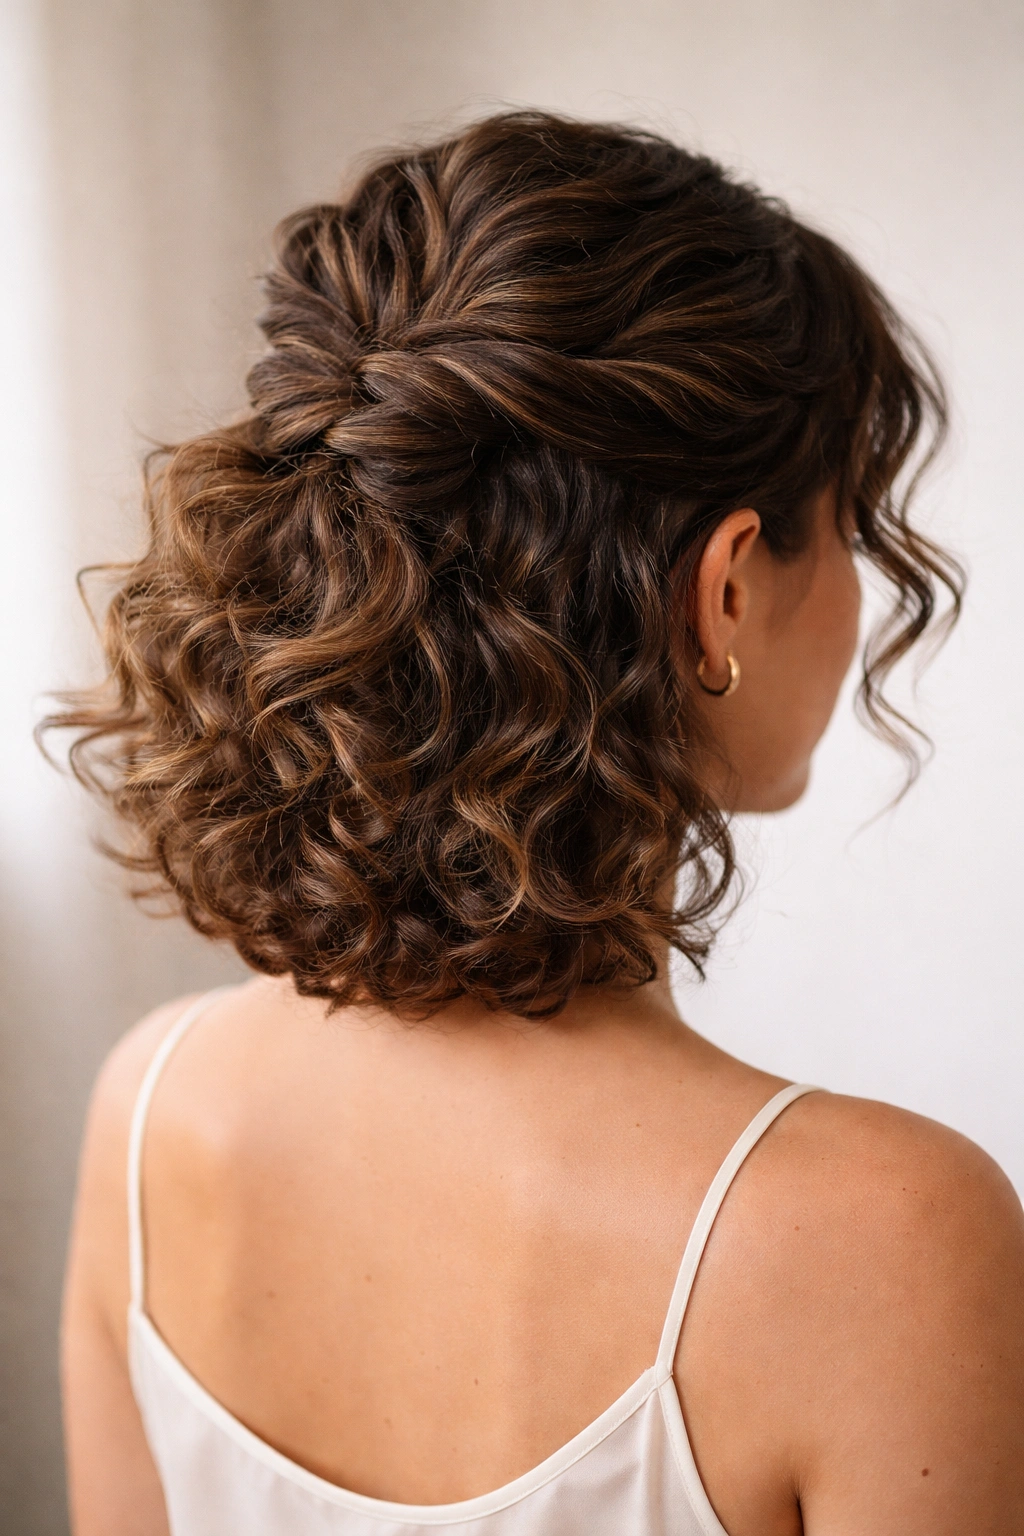
This is technically a partial updo, but it’s so effective for short curly hair that it deserves a place in this guide. You’re gathering just the top half of your curls, twisting that section gently, and securing it at the back of your head, which creates visual height and a polished look while still showcasing your curls fully.
Section your hair horizontally across the back of your head from temple to temple, creating a clear division between the top half (which will be gathered) and the bottom half (which will stay down). Clip the bottom half out of the way. Apply product to the top section.
Gather the top section as if you’re going to make a ponytail at the back of your head, but instead of securing it into a tight ponytail, loosely twist this gathered section as you’re holding it. The twist creates texture and holds the section together while maintaining curl definition. Secure this twisted section with bobby pins placed horizontally into the twist structure at the back of your head — the pins should be relatively hidden, caught within the twist rather than visible on top.
The Intentional Face Frame
Release the bottom section and let it fall naturally. You should see volume and curl definition all around your face and shoulders, plus a clear gathered-and-twisted section at the back of your crown. The contrast between the secured section and the loose curls creates a really polished, intentional look.
Gently separate curl clusters in the twisted section to add texture. This isn’t combing through it — just using your fingers to create little separations that show the curl definition within the twist.
Real-World Practicality
This half-up style is brilliant for situations where you want to look more polished than a full head of loose curls, but you don’t want the commitment of a full updo. It stays secure for 10-14 hours and actually holds better than you’d expect because the twist and pin combination keeps things in place.
It also works across virtually all curl types and hair lengths — if you have enough hair to make a visible twisted section at the back of your head, this works.
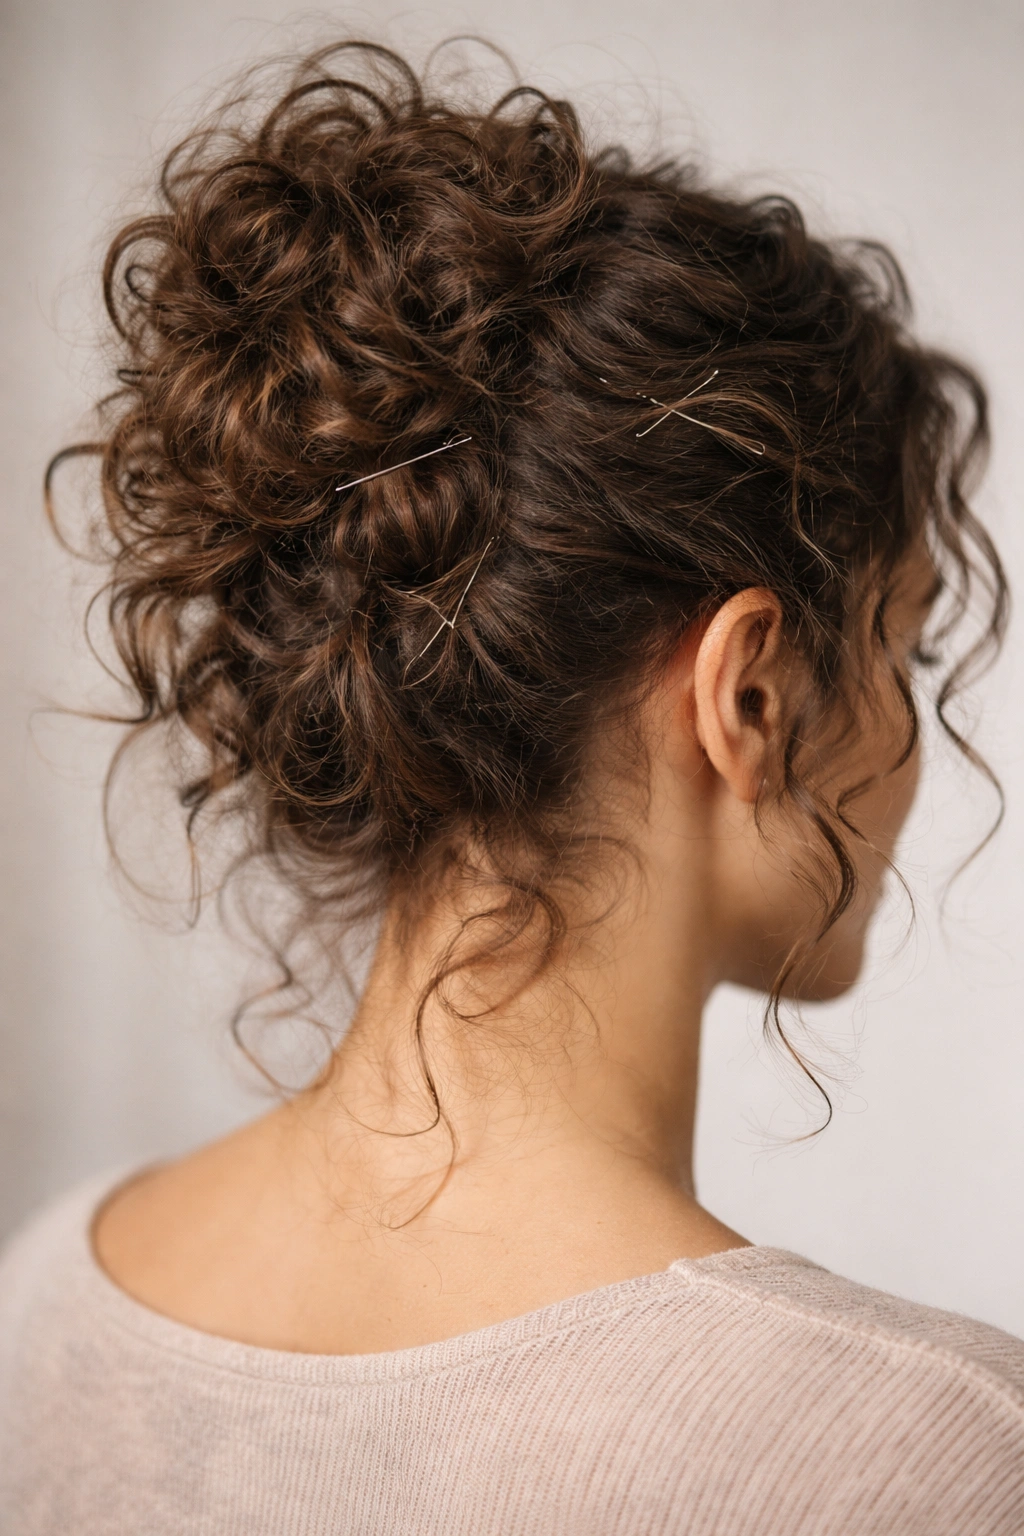
8. The Coiled Chignon

This is the most formal-looking option on this list, and despite its elegant appearance, it’s quite achievable on short curly hair. A chignon is essentially a small, tidy bun, but on curly hair, you’re not aiming for smoothness — you’re creating a coiled arrangement where your curl clusters visibly form the structure of the bun.
Start with curls that are quite dry (not damp) and have product applied for hold and definition. Gather all your hair toward a point at the nape of your neck or slightly higher on the back of your head, depending on your preference and hair length. Secure this gathered section with a small elastic band.
Now, instead of twisting this gathered section into a traditional bun, you’re going to coil individual curl clusters around each other and around the base section. Take a cluster of curls from the ponytail, coil it around the gathered base, and secure it with a bobby pin. Repeat with the next cluster, positioning each one to create a neat, compact bun shape.
The Structure That Actually Holds
The key to this working on short hair is that you’re using your curl clusters as the actual structure, not smoothing everything into submission. Each curl cluster you coil and pin adds to the structural integrity of the bun. You might use 6-10 bobby pins to complete this, depending on your hair density.
Gently smooth the overall shape with your fingers, but don’t comb or brush it — you want to maintain the texture. A light setting spray locks everything without creating that wet, flat look.
When to Wear This
The coiled chignon is perfect for events where you want something more formal or polished than your everyday updos — weddings, professional events, elegant dinners. It reads as intentional and sophisticated.
This bun typically lasts 12+ hours and is remarkably secure because of how the curl clusters naturally grip each other through the pinning process.
Common Mistakes That Derail Curly Updos
Most curly-haired people who struggle with updos are making one of the same three mistakes. Understanding what goes wrong helps you succeed with any of the styles above.
Overworking the curls while styling is the first major mistake. Curls don’t want to be brushed, combed, or smoothed excessively — this breaks up the curl pattern and creates frizz. Instead, work with sections, use your fingers to separate and arrange, and apply product directly to the sections you’re positioning. Treat your curls like clusters, not individual strands.
Using the wrong product weight causes updos to collapse or look stringy. A gel or cream that works beautifully in your daily curl routine might be too heavy for an updo that’s gathered and compact, because the product concentrates in the gathered area and weighs everything down. Similarly, a very light product might not provide enough hold. You’re looking for that sweet middle ground — strong hold, flexible cast, not too heavy.
Pinning without proper technique is the third major culprit. Bobby pins should go in horizontally or at angles that create grip within your curl clusters — not straight down vertically, which just pushes pins through without creating hold. Use multiple pins to create a secure structure rather than relying on one or two “anchor” pins.
Choosing Your Updo Based on Hair Length
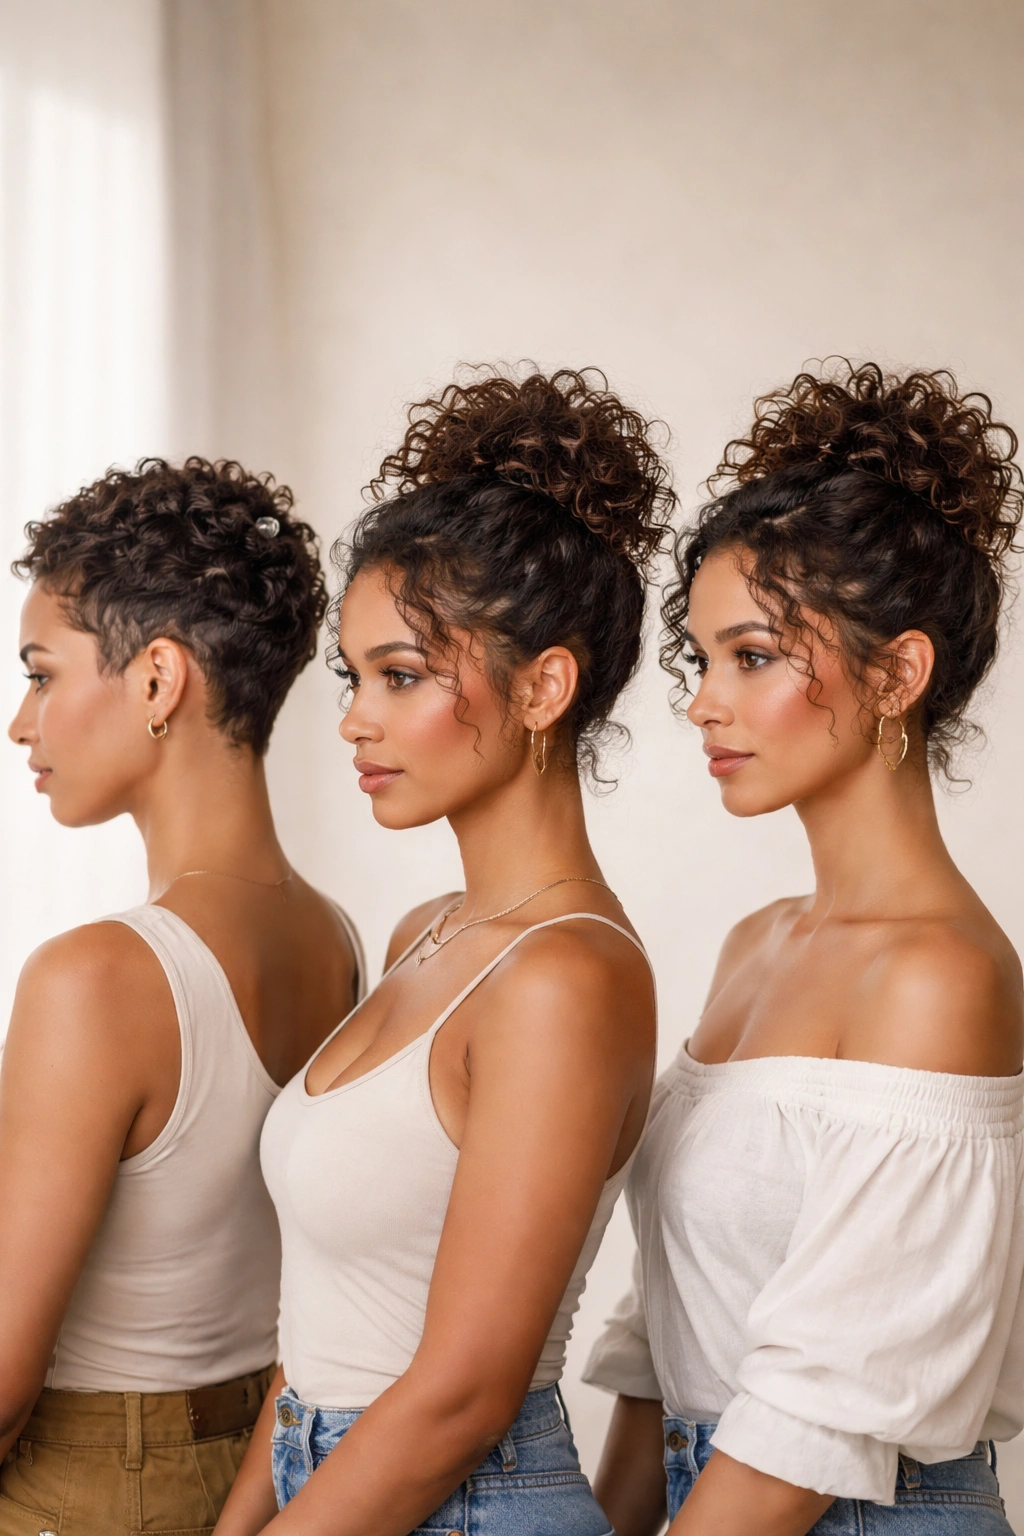
Different short curl lengths work better with different updos, so knowing which style suits your current length helps you get success faster.
If your curls are very short (under 2 inches), the spiral clip arrangement and pixie knot work best because they require minimal length to gather. If your curls are in the 2-3 inch range, almost all eight styles work, but the high textured pony and bubble ponytail are especially effective. If your curls are longer short hair (3-5 inches), you have the most flexibility — every single style works beautifully, and you can layer them or combine elements.
Knowing your range prevents you from attempting a style that needs just a bit more length than you currently have, which is often where the frustration comes in.
Products That Make the Difference
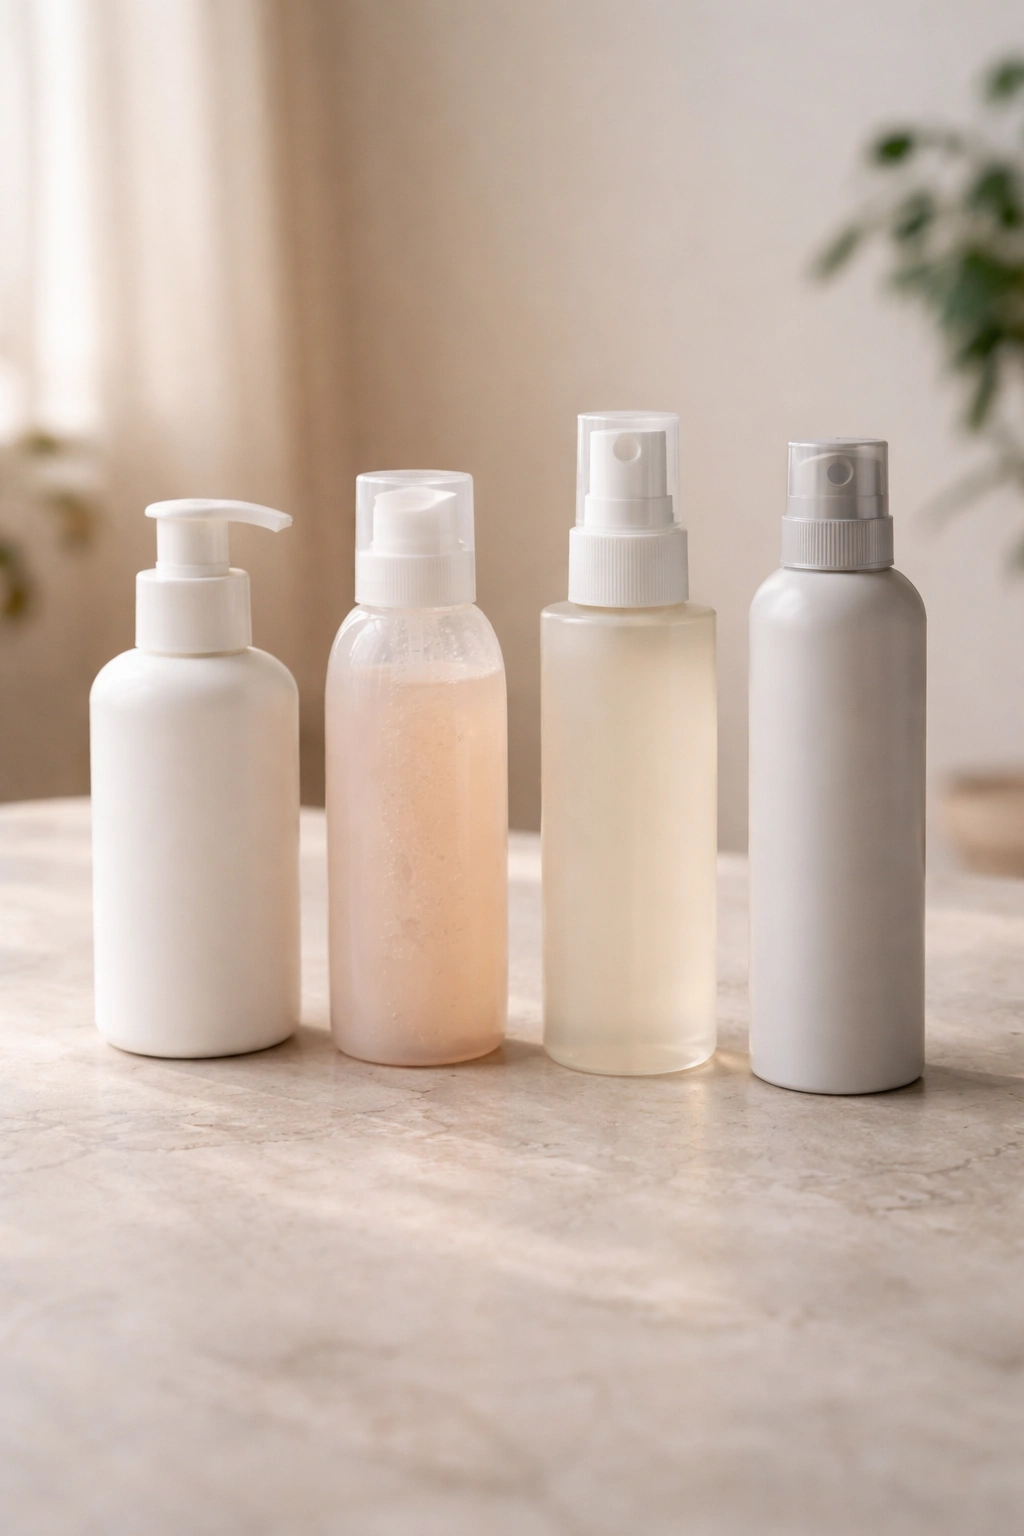
You don’t need an enormous arsenal of products for successful curly updos, but a few strategic choices matter.
A light curl-defining cream applied section by section as you style becomes your foundation. This provides hold and definition without the weight that heavy pomades or butters can add when everything’s gathered tightly. A gel with flexible hold (not a crunchy, hard-hold gel) works similarly well.
A lightweight setting spray applied after your updo is complete locks everything without adding weight or creating crunch. You’re looking for a formula that maintains curl flexibility and movement.
Dry texturizing spray applied to your hair before styling can actually help your updos hold longer, especially on days when your curls feel especially slippery. It creates micro-texture that bobby pins can grip more effectively.
These three products — in their lightest, most flexible forms — are genuinely all you need for reliable, beautiful curly updos.
Final Thoughts
Short curly updos work beautifully once you understand that you’re not fighting your texture — you’re choreographing it. Each of these eight styles works with how your curls naturally cluster, fall, and hold, rather than against those tendencies. The updo that feels secure and looks intentional is the one where you’ve worked with your curl pattern, not smoothed and forced against it.
Start with the style that sounds easiest for your hair length and curl type. Most people find that once they’ve successfully created one or two of these updos, they develop the spatial awareness and feel for how curly sections need to be positioned, and the other styles become intuitive.
The goal isn’t perfection — it’s an updo that looks like you meant to style your hair that way, that holds through your day, and that still showcases the beautiful texture of your curls. When you nail that balance, you’ve found your signature updo, and that’s when short curly hair updos stop feeling like a challenge and start feeling like one of your best styling superpowers.