Short curly hair offers a canvas for effortless, head-turning styles that celebrate texture rather than fight against it. If you’ve got that tight coil, bouncy ringlet, or springy wave texture, you already know the struggle: finding hairstyles that look intentional and polished without requiring 45 minutes and a full arsenal of products. The good news? Some of the most striking short curly hairstyles take minutes to create and actually look better the more you embrace your natural curl pattern instead of trying to tame it into submission.
The biggest mistake most people make with short curly hair is trying to style it like straight hair. Those tutorials teaching you to blow-dry and flat-iron just leave you fighting your texture every single day. What actually works is leaning into what makes your curls special—their volume, their movement, and their ability to hold shape in ways straight hair simply can’t. Once you shift that mindset, styling becomes less about wrestling your hair into compliance and more about working with what you’ve got.
The hairstyles in this guide are chosen specifically because they’re achievable without special tools, they suit the unique challenges of short curly hair, and—this matters—they look intentional and sharp. You won’t find generic “just wear your hair down” suggestions here. Instead, these are actual styles that transform your curls into something that feels styled and deliberate, whether you’re heading to work, out on the weekend, or just want to feel more put-together on a regular Tuesday.
1. The Wash-and-Go
The wash-and-go is the holy grail of short curly hair styling because it is styling—without doing anything at all. After you wash your hair with products designed to enhance curl definition (a curl-defining cream or gel that fights frizz), you apply your product to soaking wet hair section by section, scrunching upward to encourage the curl to coil up on itself rather than stretch down. The result is a full, defined, naturally textured look that shows off individual curl patterns without manipulation.
Why This Style Works Brilliantly for Short Curls
A wash-and-go takes advantage of the fact that short curly hair dries relatively quickly—usually within 2 to 4 hours depending on your curl density and porosity. Your curls have the structural integrity to hold shape on their own without needing to be stretched or set, and the shorter length means there’s less weight pulling the curl pattern down. The key is using the right product formula; heavy oils weigh curls down, but a lightweight gel or curl cream holds definition without stiffness.
How to Execute the Perfect Wash-and-Go
- Shampoo with a sulfate-free formula designed for curls (sulfates strip moisture and disrupt curl definition)
- While hair is soaking wet, apply curl-defining product section by section, starting at the roots and scrunching upward to encourage coiling
- Continue scrunching the product through each section until your entire head is saturated
- Let air dry fully (or use a diffuser attachment on low heat if you’re in a hurry) without touching or manipulating the curls
- Once completely dry, gently separate any clumped curls with your fingers for a softer, more textured look
- The curls will relax slightly as they dry—this is normal and actually creates a more refined, less tight appearance
Pro tip: The biggest factor in a successful wash-and-go is your product formula. A gel works well if you like hold and definition, but a curl cream gives softer results that still last all day and actually feel better when you touch your hair. Experiment to find which your curls respond to best.
2. Sleek Twisted Bun
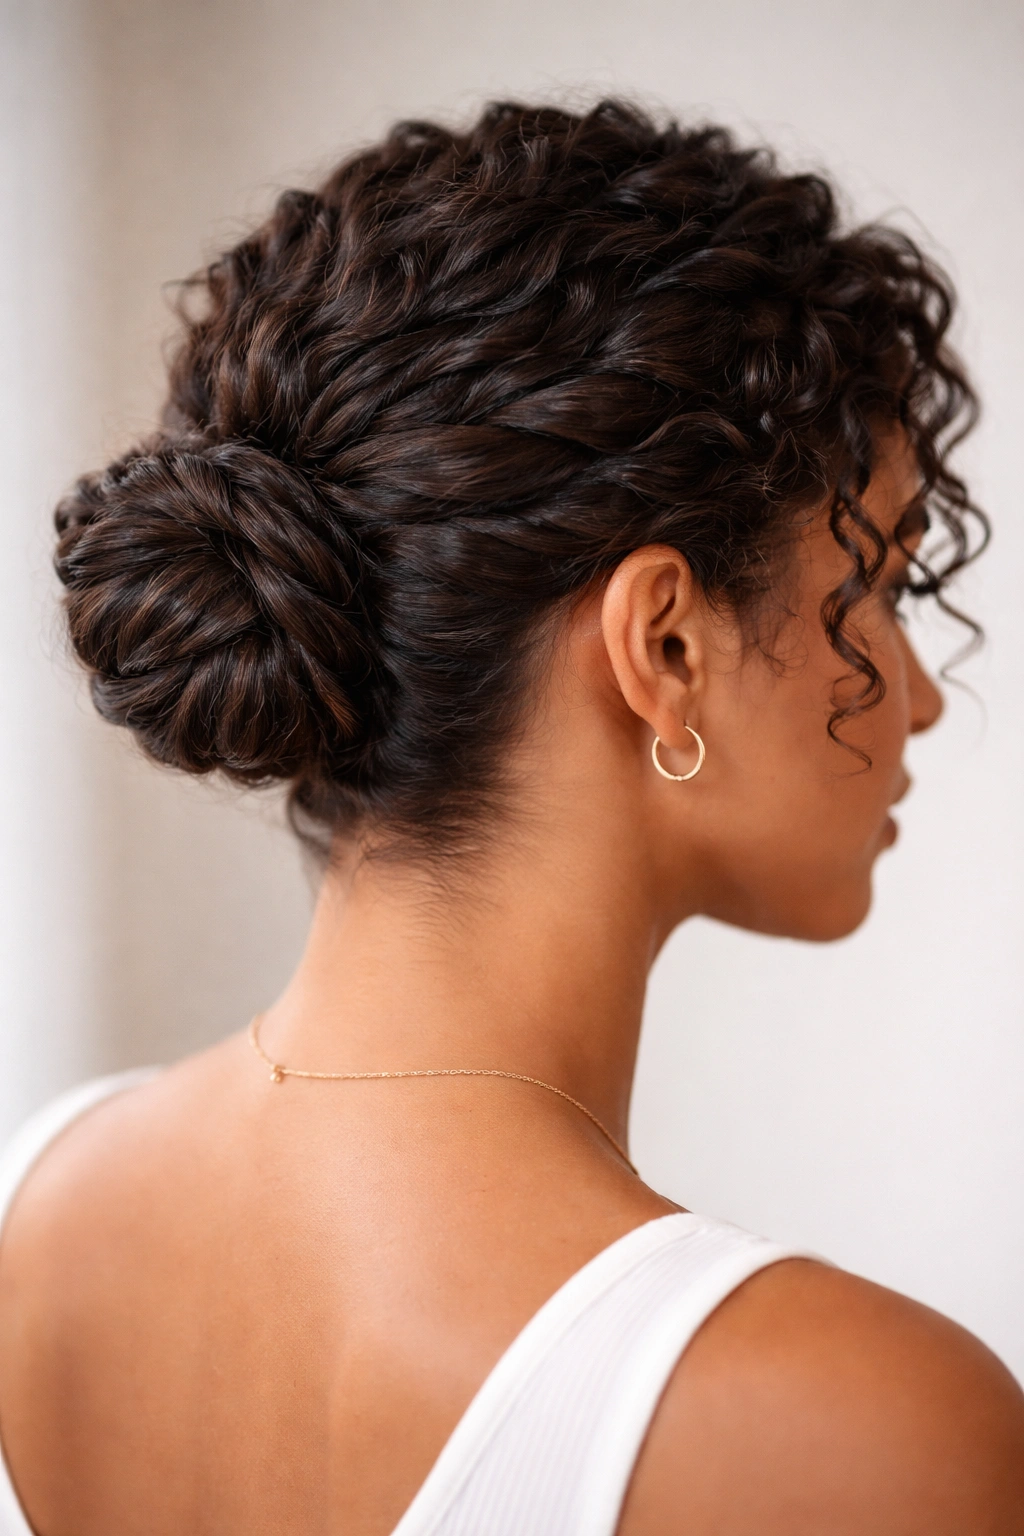
A twisted bun takes your wash-and-go texture and transforms it into something polished enough for professional settings while keeping styling time under five minutes. Instead of gathering your curls straight back into a bun (which creates a flat, unbalanced look), you twist small sections of hair as you sweep them back, then coil the twisted sections around each other at the base of your neck. This technique adds intentional structure and prevents the shapeless “just threw my hair up” appearance.
What Makes a Twisted Bun Different From a Regular Bun
The twist is everything. When you twist sections of curly hair, you’re essentially pre-styling the texture, which makes the final bun look deliberate and sophisticated rather than casual. The twists also add visual interest—someone looking at you sees the texture and technique, not just a blob of hair at the back of your head. For short curls, the bun sits lower (at the nape of your neck) rather than at the crown, which actually suits the shorter length better and creates better balance.
Steps to Create a Sleek Twisted Bun
- Start with hair that’s been styled (a wash-and-go works perfectly, or even second-day curls)
- Gather hair at the nape of your neck; don’t pull back too tightly or you’ll stretch out your curl pattern
- Divide the gathered section into 3 to 4 smaller subsections
- Twist each subsection, and as you twist, wrap it around the base of the gathered hair to form the bun shape
- Tuck the ends of each twist underneath and secure with bobby pins angled to grip through the curls
- Use a light hairspray or curl refresher spray to tame any flyaways without creating crunch
Insider note: This style works especially well if you have higher curl density. If your curls are looser or finer, the twists might unravel by the end of the day—in that case, switch to regular braids instead, which hold texture better.
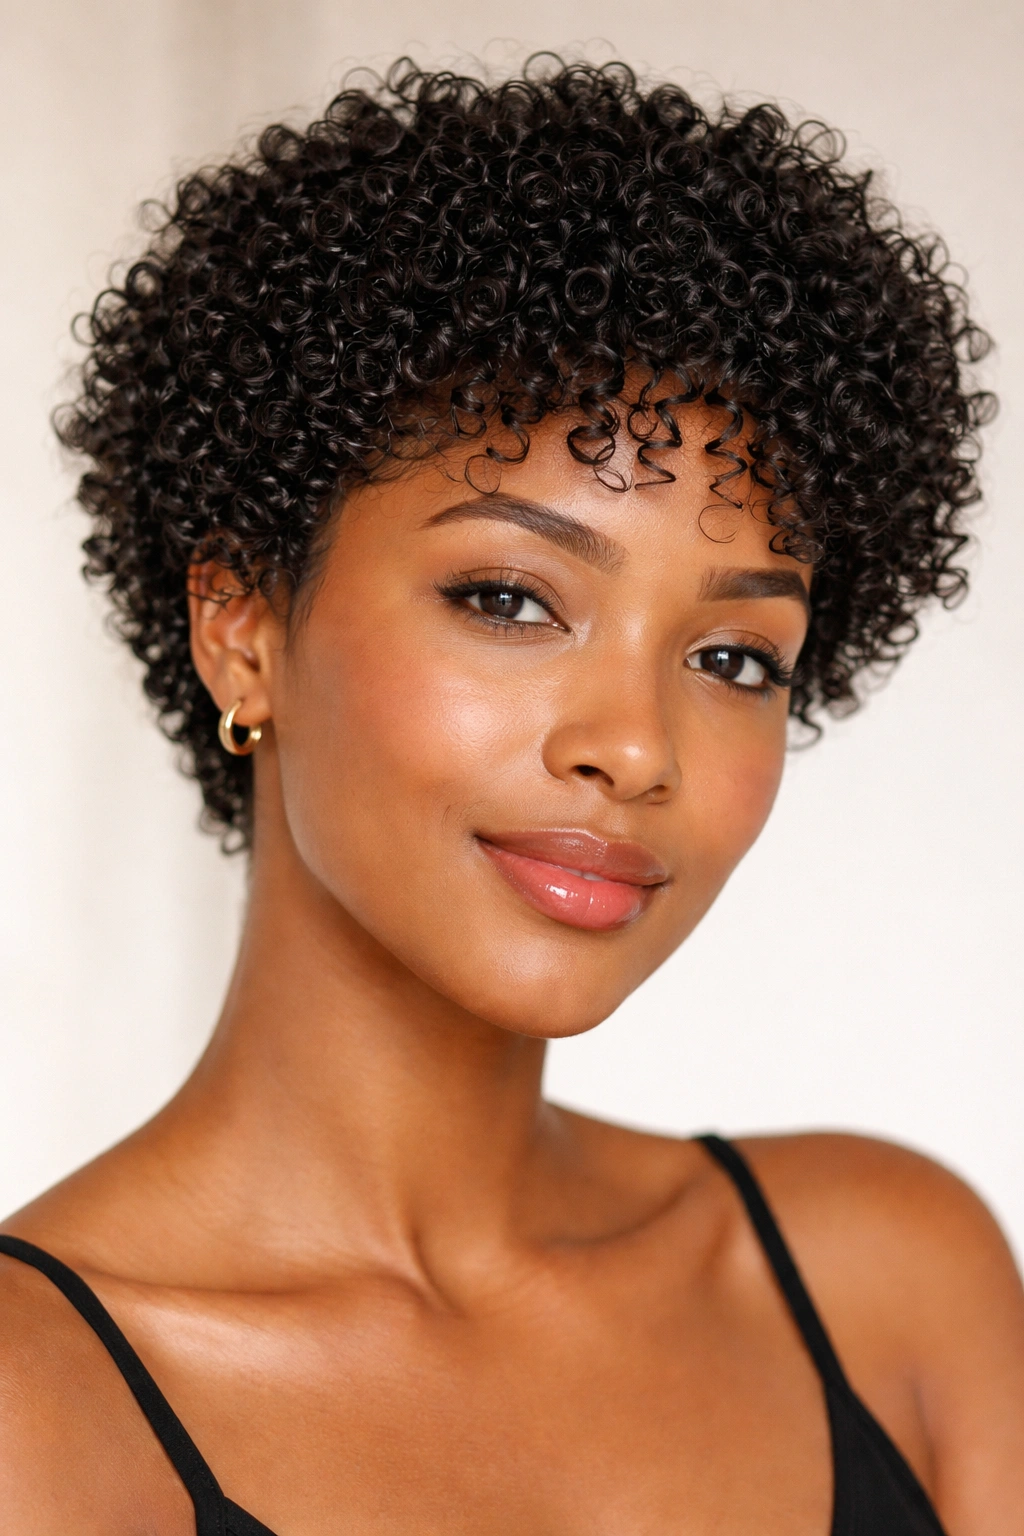
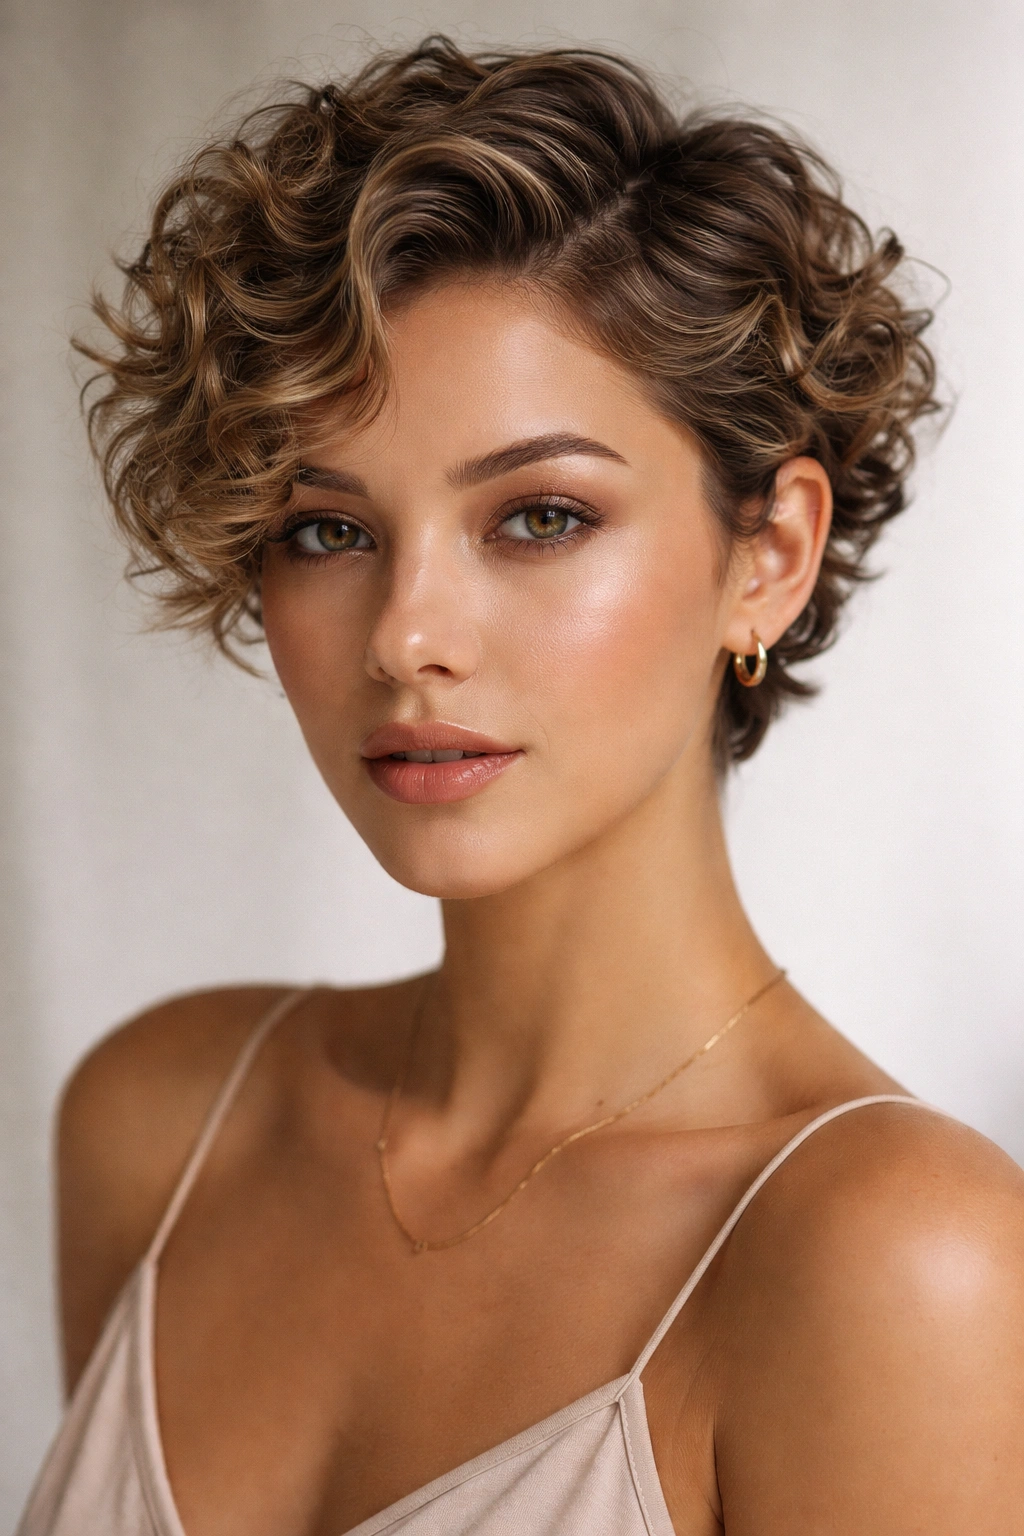
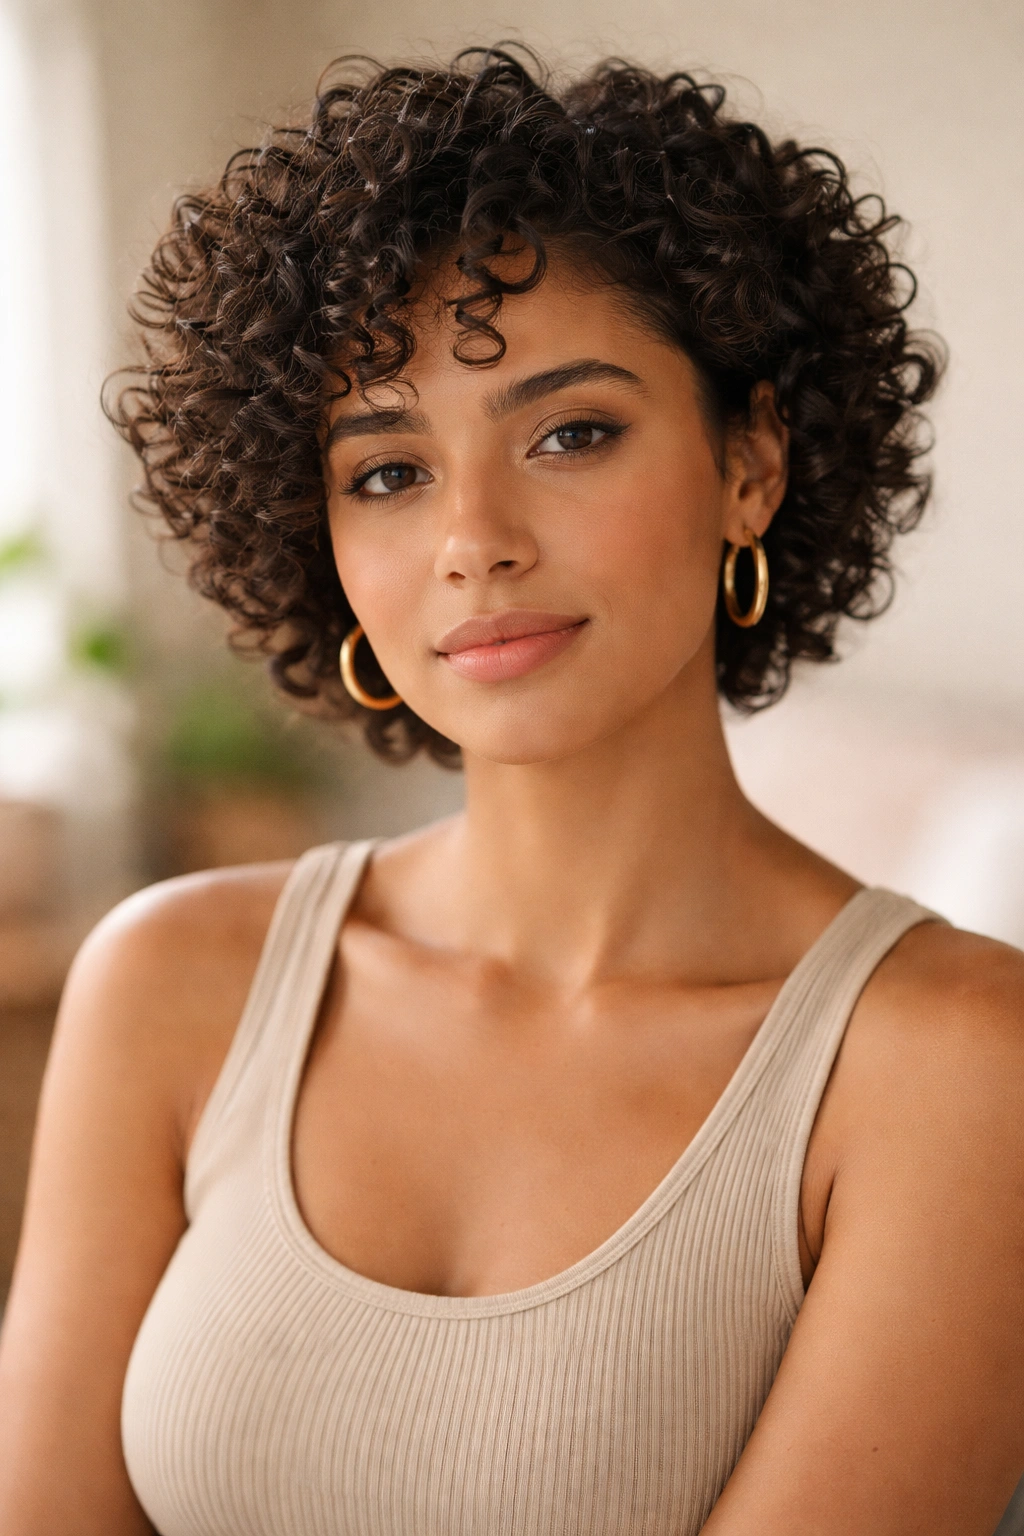
3. Side-Swept Pixie Style

A side-swept pixie with curls is the perfect balance between short and styled, giving you the low-maintenance benefits of short hair while adding enough length on top to actually work with. Rather than a traditional blunt pixie, you’re aiming for a textured pixie where the top has enough curl definition to sweep dramatically to one side, and the sides are close but not clipped all the way down to skin. The longer, curlier top creates volume and interest that reads as intentional styling.
Why Curls Make the Pixie Cut Feel Modern
A straight-haired pixie can feel severe or masculine depending on your bone structure and personal style. Curly pixies are softer and more dynamic because the curls add dimension and playfulness. The texture also means you can let curls fall where they naturally want to go—you’re not fighting the growth pattern. A curly pixie feels less like a structured crop and more like a deliberate style choice that celebrates your texture.
How to Style a Curly Pixie for Maximum Impact
- Get a cut where the top is 2 to 3 inches long and the sides fade from about 1½ inches at the sides to shorter at the neck
- On styling days, apply curl cream or gel to the top section and use your fingers to direct curls to one side
- You can part slightly off-center to create that swept look, or use a shallow side part
- Let the curls naturally fall and clump however they want—fighting them will make the style look worse, not better
- Use minimal product; overproduct will weigh down the curls and defeat the whole purpose
- As hair grows, the top curls will get longer and bushier, which is exactly when to plan your next trim
Worth knowing: This cut requires a stylist who actually understands curly hair and won’t try to thin it out too much or cut it blunt. Find someone who works with textured hair regularly.
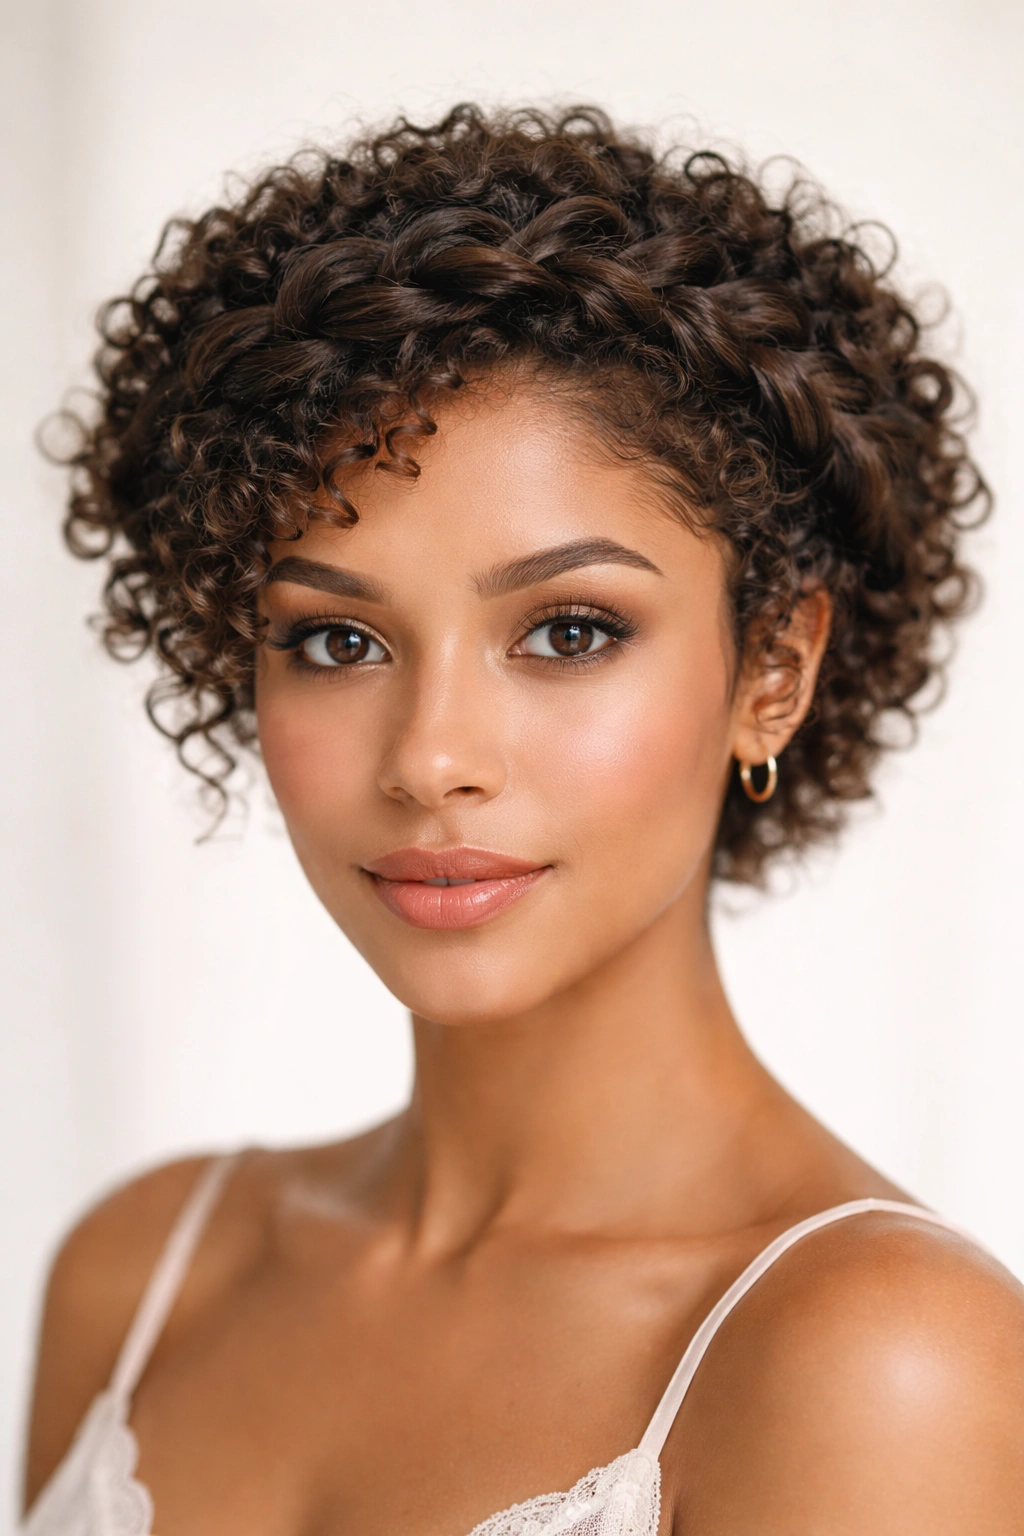
4. Curly Perm Rod Set
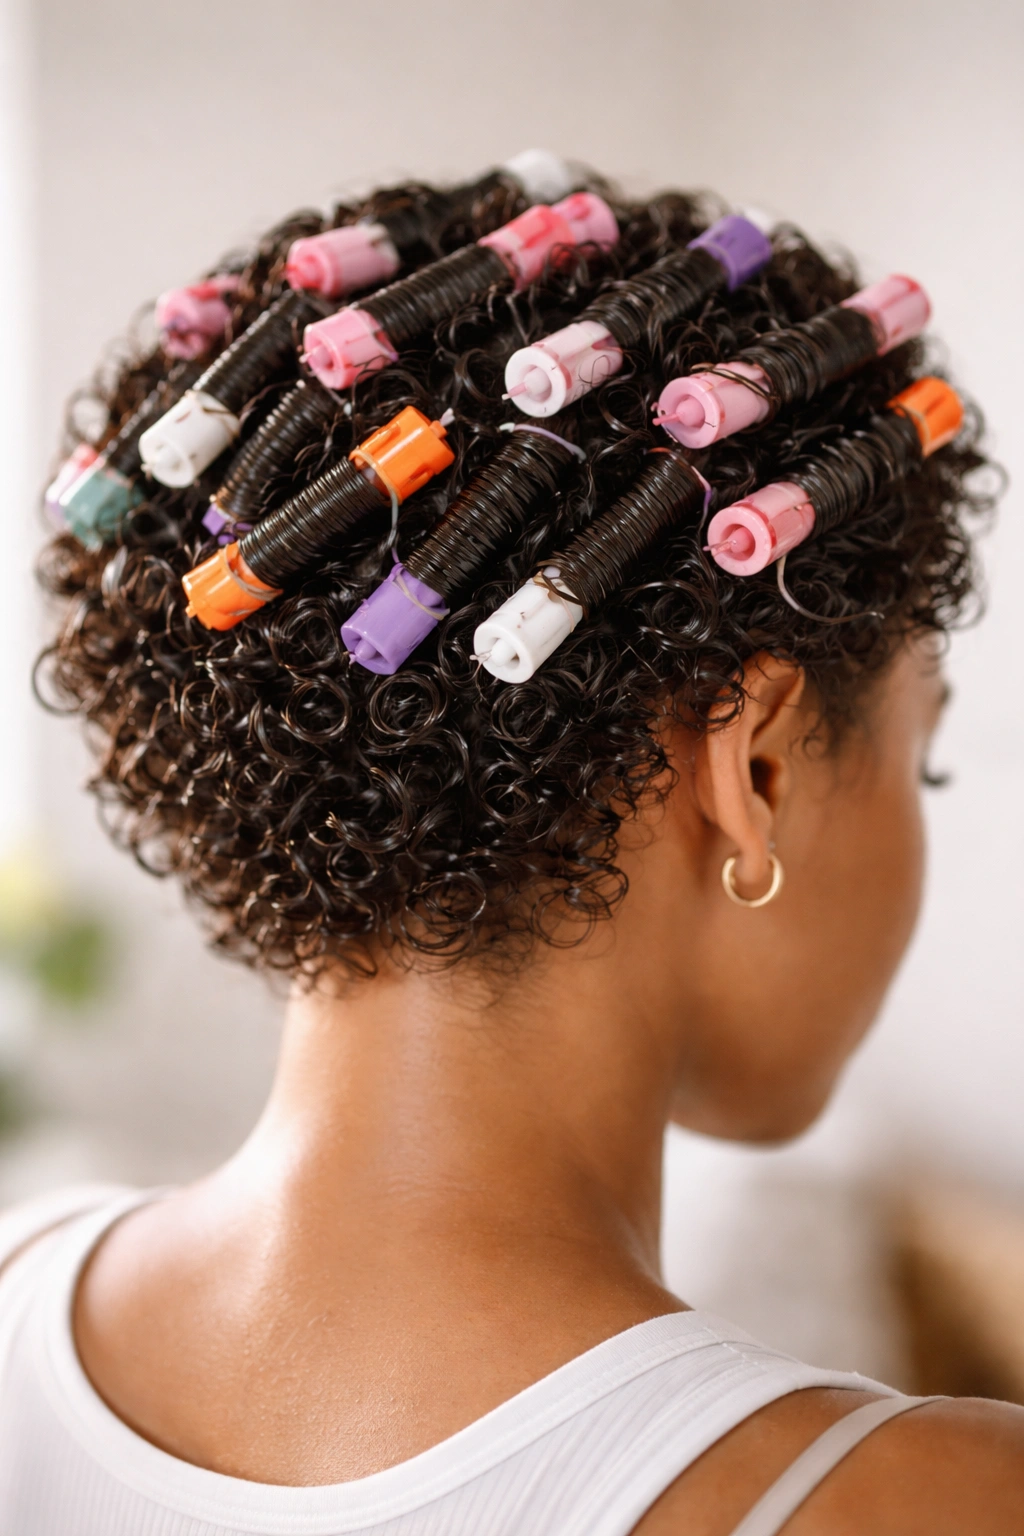
A perm rod set uses plastic rods (not heat—this is crucial) to set wet curls into a specific shape as they dry, which gives you control over curl size and definition while actually enhancing your natural pattern rather than fighting it. You roll small sections of damp hair around rods, secure them, then let your hair air-dry or use a diffuser. Once dry, you unroll the rods to reveal perfectly-formed curls with hold that lasts for days.
How Perm Rods Create Salon-Quality Curls at Home
The magic of perm rods is that they set your curl pattern without heat damage and without requiring you to manipulate wet hair roughly. Wet curls are fragile, and if you’re not careful, you can create frizz or break the curl pattern. Rods hold that wet curl gently in place while it dries into a more defined shape. For short curly hair, smaller rods (about ½ to ¾ inch in diameter) work best—they create tighter, more defined curls that complement shorter length.
The Perm Rod Set Process
- Shampoo and condition; while hair is soaking wet, apply a leave-in conditioner or curl cream
- Divide hair into small sections (roughly the width of a perm rod)
- Roll each section onto a perm rod, starting from the ends and rolling toward the roots; keep tension even but not tight
- Secure the rod with the plastic end pieces or clips
- Dry hair fully (air-dry overnight or use a diffuser for a few hours)
- Once completely dry, unroll the rods gently by turning them backward—don’t pull straight out
- Separate curls with your fingers and use a light hairspray to lock in the shape
Pro tip: For longer-lasting results, do your perm rod set on slightly damp hair rather than soaking wet—the slower drying time helps set the curl shape more permanently.
5. Twisted Crown
A twisted crown creates the illusion of length and elegance by pinning twisted sections of your curls around your head like a halo. It’s essentially a twisted updo that works on hair as short as two inches in length because you’re using the full crown of your head as the base rather than trying to gather everything at the back. This style looks especially striking with defined curls because each twist becomes a sculptural element.
Why Twists Create the Most Flattering Updo for Short Curls
Twisted styles are inherently more photogenic and detailed than simple buns or ponytails because the texture is visible throughout the whole style. Someone looking at you from the front sees a beautiful twisted halo, and from the side or back, the sculptural quality of the twists is even more dramatic. For short hair, this matters because a regular updo can sometimes feel like you’re just trying to get your hair off your face—a twisted crown feels intentional and styled.
Creating a Twisted Crown Step-by-Step
- Start with defined curls (fresh wash-and-go works perfectly)
- Take a small section from the front corner of your head (near your temple on one side)
- Twist that section toward the back of your head, and as you twist, wrap it around the back of your head like you’re creating a band
- Pin the twist in place with bobby pins as you go (pin every inch or so to keep it secure)
- Repeat with another section from the opposite temple, twisting it around to meet the first twist at the back
- Add additional twisted sections from the crown and sides if you have enough hair
- Tuck and pin all the loose ends underneath to create a seamless look
- Secure with light hairspray
Worth knowing: This style holds best on second-day hair that has a little bit of grip to it. Fresh, wet-product-slippery curls might unwind faster than you’d like.
6. Low Textured Ponytail
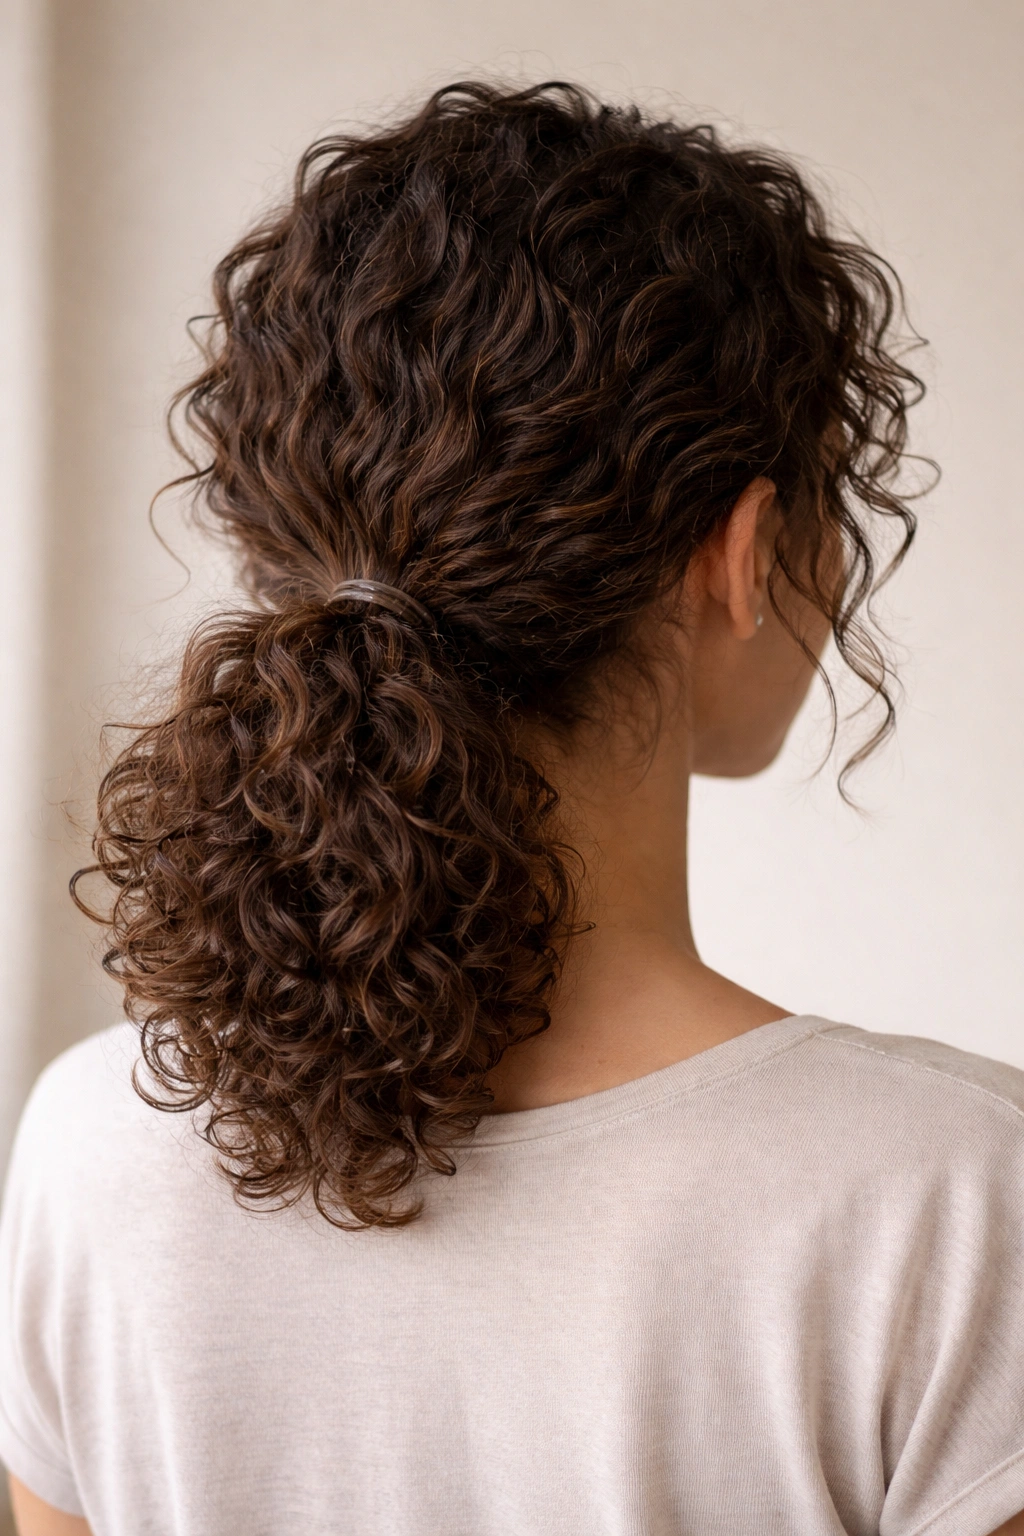
A low textured ponytail keeps your curls loose and natural rather than smoothing them into a sleek, structured look. Instead of using a brush to gather hair, you use your fingers to gently gather curls at the nape of your neck, securing them with a scrunchie or clip that sits low enough to look intentional rather than like you’re just keeping hair out of your face. The key is letting curls remain clumpy and defined rather than combining them into one smooth texture.
What Makes a Textured Ponytail Different From a Sleek One
A sleek ponytail requires brushing, products that create shine and smoothness, and often heat tools—basically erasing everything that makes curly hair special. A textured ponytail does the opposite: it emphasizes your curl clumps, celebrates the natural variation in your texture, and takes maybe two minutes to create. The ponytail doesn’t look “undone”—it looks intentionally textured because you’ve left the curls alone rather than manipulating them into uniformity.
How to Execute a Textured Low Ponytail
- Start with styled curls; use your fingers (not a brush) to gently gather the hair at the nape of your neck
- Group curls loosely so you can still see clumps and definition—don’t smooth or compress them
- Use a fabric scrunchie rather than a elastic band (it’s gentler on curls and doesn’t create creases)
- Secure the ponytail low, around 2 to 3 inches above the nape of your neck
- Take a small strand of hair from the ponytail, wrap it around the base to cover the scrunchie, and pin it underneath
- Let curls fall naturally; don’t divide them or comb through them
- If needed, use a curl refresher spray, but keep product use minimal
Insider note: This style is especially flattering if you have an oval or longer face shape—the low ponytail elongates your face and draws attention upward.
7. Defined Coil-Out
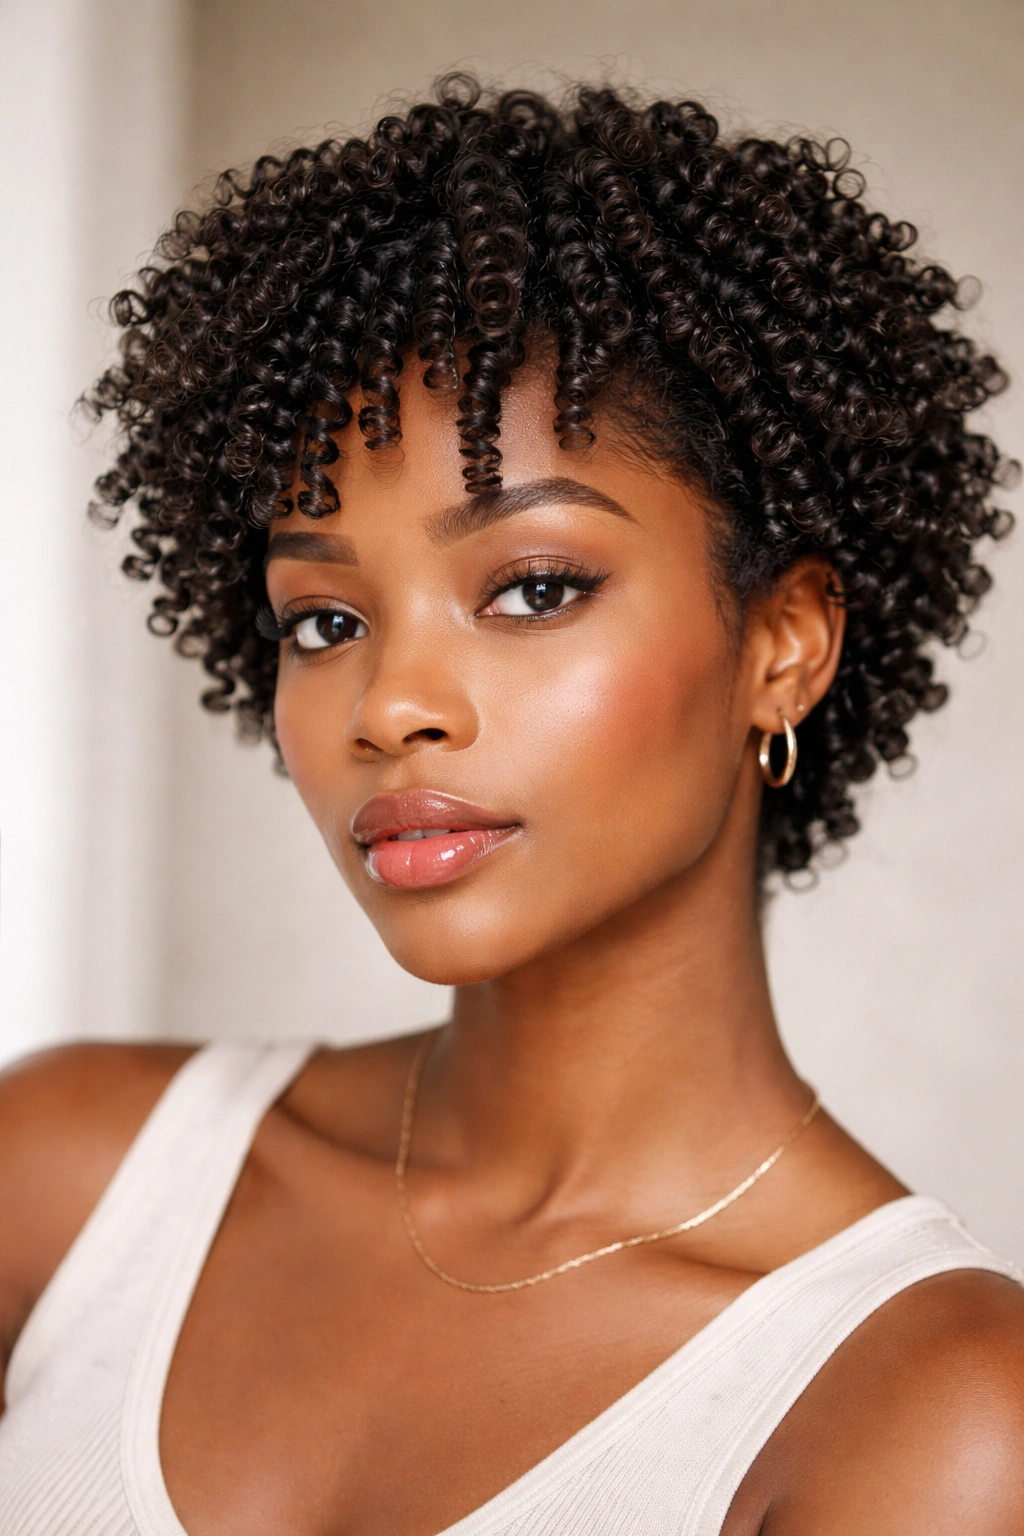
A coil-out is when you set your curls into coils using twisted sections or braids while wet, then unwind them when dry to reveal perfectly defined, separated curls. It’s similar to a perm rod set but uses your own hair twisted or braided as the “rod.” A coil-out creates the most defined, individual curl definition possible and the results last for days without any heat styling or restyling required.
The Science Behind Why Coil-Outs Create Maximum Definition
When you twist or braid damp hair and let it dry in that shape, you’re setting the curl pattern into a tighter, more defined formation. Unraveling the twist or braid reveals curls that are distinctly separated from each other rather than clumped together—each curl is its own sculptural element. For short curly hair, this means you go from looking like you have frizz or undefined texture to having clearly visible, beautiful individual curls. It’s a dramatic transformation from the same exact hair.
Steps to Create a Stunning Coil-Out
- Shampoo and condition; apply a leave-in conditioner or curl cream while hair is soaking wet
- Divide your hair into 6 to 10 small sections (the exact number depends on how much curl definition you want)
- Twist each section tightly, starting from the roots and twisting all the way to the ends
- Secure each twist with a clip or bobby pin while hair is still damp
- Let hair dry completely (air-dry overnight or use a diffuser)
- Once fully dry, untwist each section gently by turning it backward, not pulling it apart
- Separate curls further with your fingers if desired
- Use a light finishing spray to lock everything in place
Pro tip: The smaller your twists and the tighter you twist them, the tighter and more defined your coils will be when you unravel them. Experiment to find the coil size that looks best with your curl pattern.
8. Tousled Finger Waves
Finger waves are a classic style that feels vintage and polished, but when you create them on natural curls instead of straight hair, they read as modern and effortless rather than costume-like. You’re essentially guiding your curls into a wavy pattern by using your fingers and a bit of product to direct the curl direction, creating gentle S-curves that run from root to tip. The result is texture that looks intentionally waved but still natural and touchable.
How Finger Waves Complement Curly Texture
Finger waves work especially well on curly hair because your curls already have the texture and structure to hold a wave pattern—you’re just directing them, not creating waves from scratch. Straight hair finger waves require gel and setting to maintain the pattern, but curly hair finger waves stay put naturally. The waves create visual movement across your head that makes short curly hair look longer and more styled while still celebrating your natural texture rather than fighting it.
Creating Finger Waves in Your Curls
- Start with damp or damp curls; apply a lightweight gel or curl cream
- Take a section of hair from the front corner of your head
- Use your index and middle fingers to push the curl into an inward wave direction (toward your face), holding it for a few seconds
- Move down the section and create an outward wave, then an inward wave, alternating as you move down the hair
- Repeat with adjacent sections, working your way around your head
- Make sure your wave directions alternate in a consistent pattern so they flow visually
- Let hair dry with your fingers gently holding the wave pattern in place (or use clips to hold waves while drying)
- Once dry, release gently and use a light spray to set
Worth knowing: Finger waves look best when the waves are gentle and flowing rather than tight and geometric. Let your natural curl pattern influence the wave shape—work with your texture, not against it.
9. Space Buns
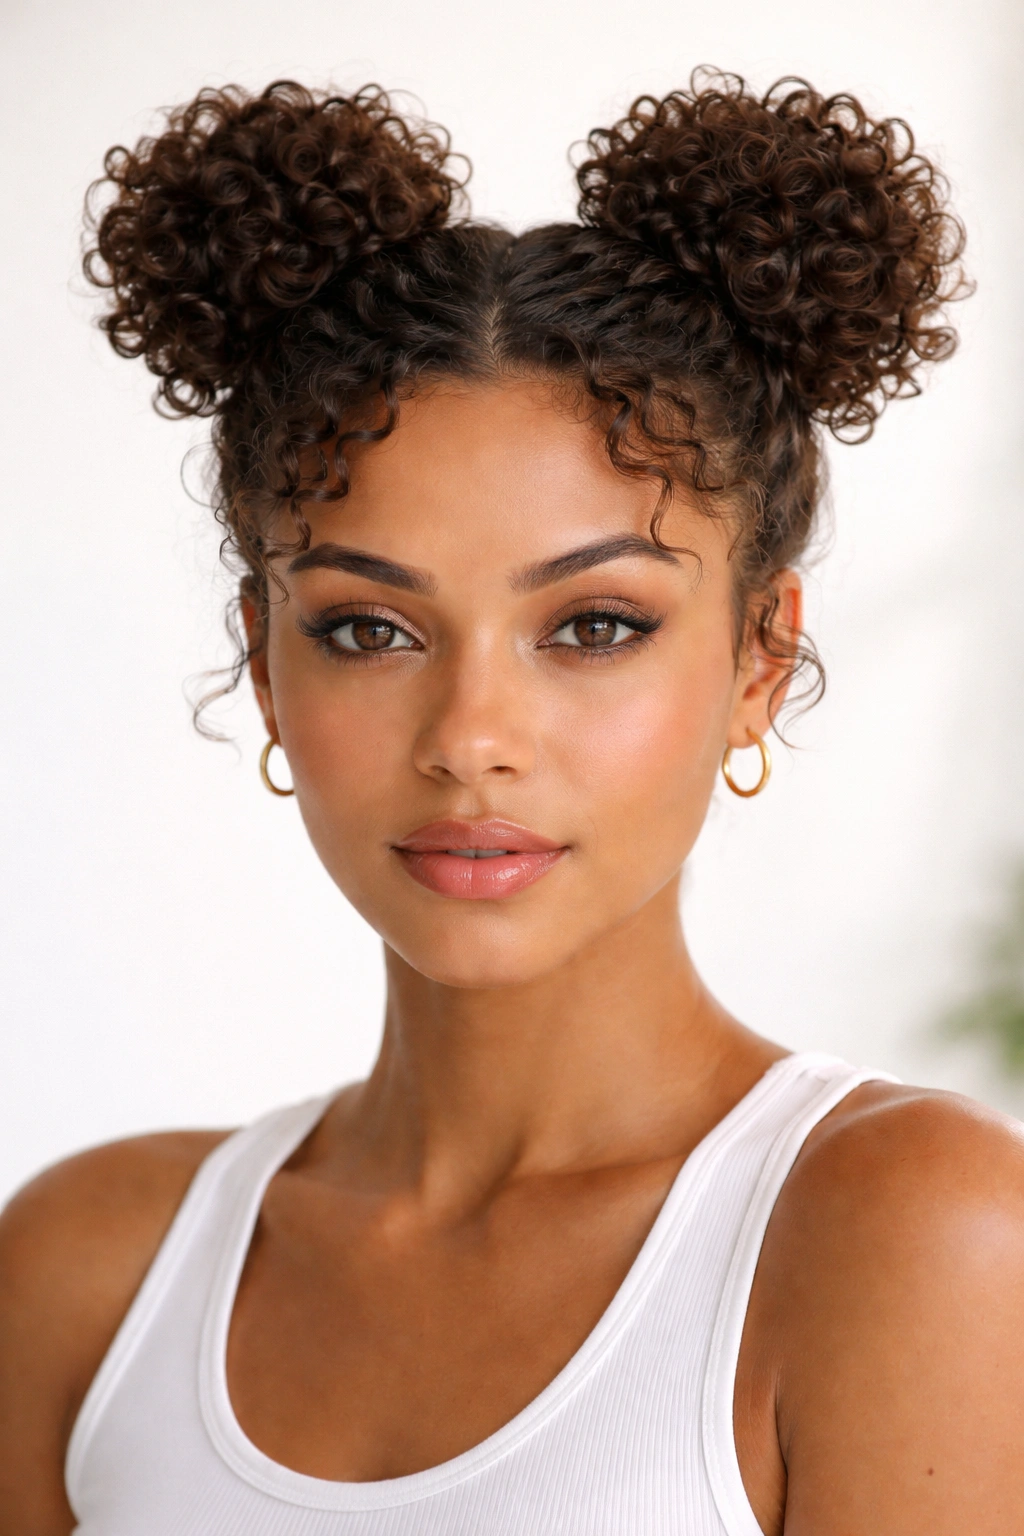
Space buns (also called double buns) are playful and whimsical while still looking intentional and styled rather than childish. You gather your curls into two separate buns, one on each side of your head toward the crown, which creates a fun, modern look that actually works on adults. The individual buns showcase your curl texture in a way that a single bun can’t, and they’re surprisingly versatile—you can dress them up or down depending on what else you’re wearing.
Why Space Buns Feel Fresh and Modern on Curly Hair
Space buns have gotten cooler over the years because curly-haired people embraced them and showed that they’re genuinely stylish, not just cute. The key is making sure your curls are defined and shapely—that visual weight and texture in each bun looks intentional and cool rather than trying too hard. On short curly hair, space buns are perfectly proportioned; they don’t look oversized or unbalanced the way they might on someone with very long hair.
How to Create Flattering Space Buns
- Start with defined, styled curls
- Part your hair down the middle from your forehead to the nape of your neck
- Create another part line on each side, running from above your ear toward the crown (you’re essentially creating two sections on the top part of your head)
- Gather the first section and twist or braid it, then coil it into a bun shape on top of your head; secure with bobby pins
- Repeat with the second section on the opposite side, creating a matching bun
- Make sure the buns are positioned symmetrically and at roughly the same height
- You can leave a little softness and flyaways for a romantic look, or smooth them down for something more sleek
Pro tip: Space buns work best if your curls have some weight to them and sit well on top of your head. If your buns keep drooping, try adding a little texture spray or dry shampoo to create grip before styling.
10. Half-Up Curl Clip
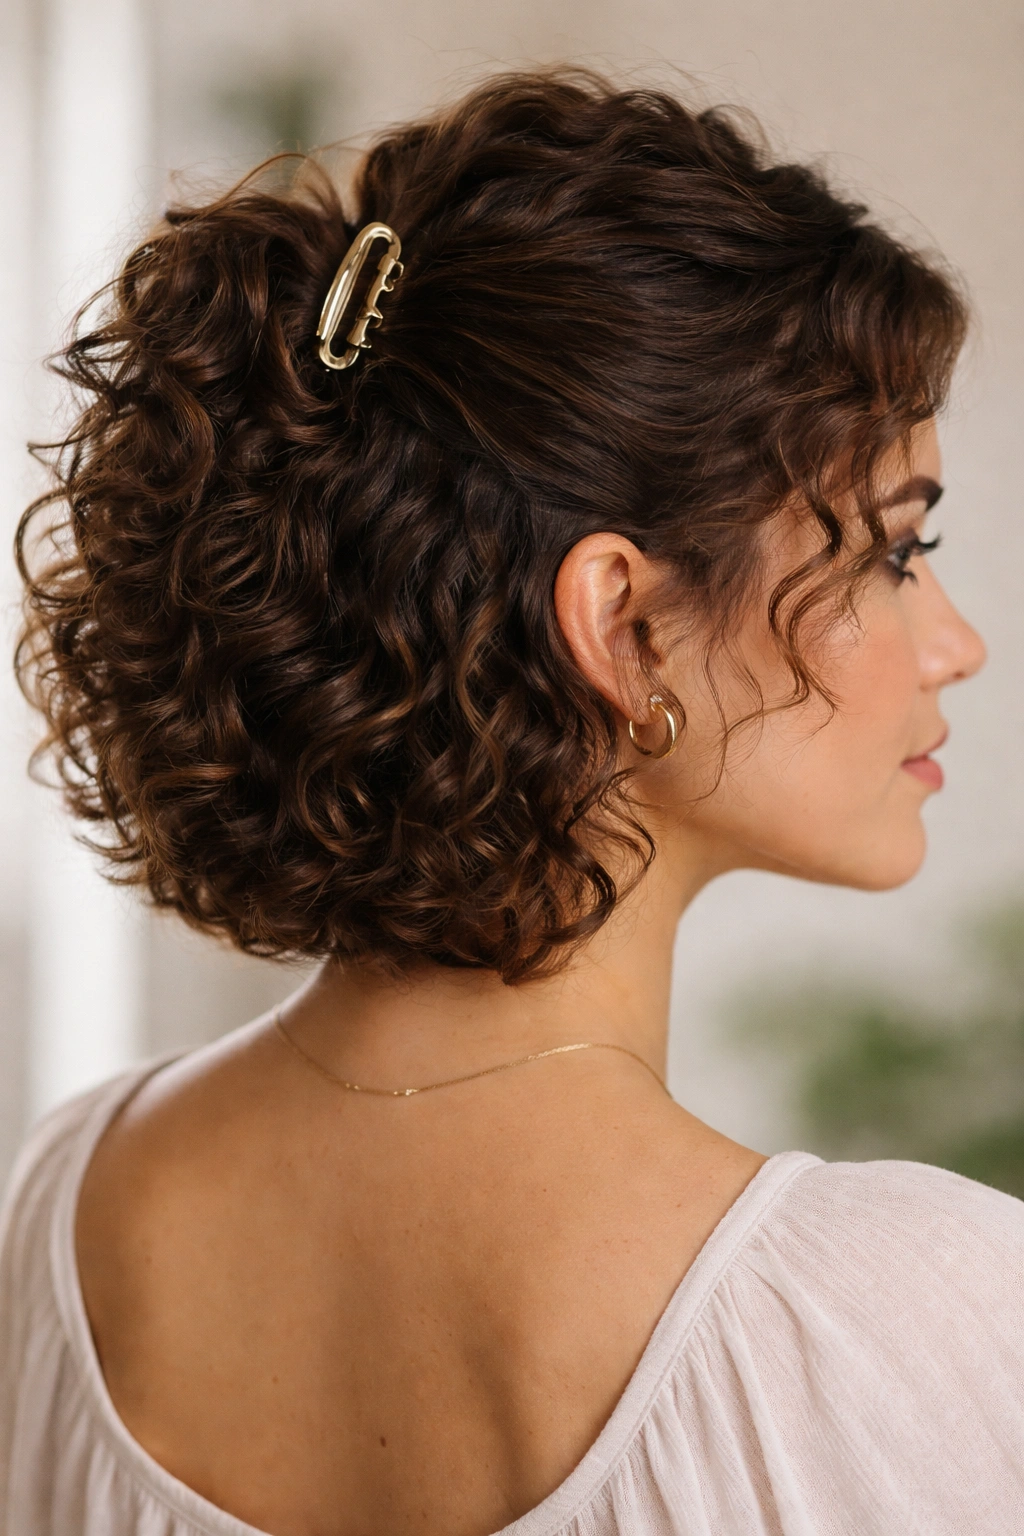
A half-up curl clip is arguably the easiest style in this entire list—you’re literally just clipping the top portion of your curls back while leaving the bottom half down. It takes maybe 30 seconds, requires zero styling skill, and somehow transforms your whole look from “just woke up” to “intentionally styled.” The magic is using a curved clip that grips through curls rather than a smooth metal clip that slides right out.
Why This Simple Style Actually Works
The half-up style creates the illusion of length, shapes your face differently than wearing your hair fully down, and shows off your curl definition on the bottom half while creating volume at the crown. It’s the kind of style that seems like you weren’t trying (because you weren’t, really), but it reads as put-together to everyone who sees you. There’s something about pulling the top back that automatically makes you look more polished, even though you’re still wearing your curls.
Executing a Perfect Half-Up Clip Style
- Start with defined curls—either freshly styled or second-day curls work perfectly
- Gather the top third of your hair gently using your fingers rather than a brush
- Pull it back away from your face, not too tightly; you want to maintain the curl shape rather than stretch it
- Secure with a large curved clip positioned at the crown; make sure the clip grips through multiple curl clumps to stay secure
- Arrange any loose curls around your face and neck however feels right
- Leave the bottom two-thirds of your curls down and loose
- This style works best if you don’t try to make it look too smooth or polished—embrace the texture
Insider note: Upgrade from basic plastic clips to a more sophisticated tortoiseshell or gold-toned clip, and this style reads less casual and more intentionally styled. The clip itself becomes an accessory.
Final Thoughts
Short curly hair is genuinely one of the easiest hair textures to style once you stop fighting your natural pattern and start working with it instead. Every single style in this guide takes less than 10 minutes to create, requires minimal product, and doesn’t involve any heat styling that damages your curls. That’s not a limitation—that’s a superpower compared to other hair textures.
The real secret to making these styles work is understanding that short curly hair doesn’t need to be perfectly smooth or geometrically perfect to look polished. Your texture is the style. Once you embrace that and choose techniques that enhance rather than fight your curls, you’ll find that “washing and going” actually looks as intentional as a style you spent an hour on. Start with whichever style appeals to you most, and then rotate through the others based on your mood and what you’re doing that day.
Your curls are already beautiful—these styles just give them a canvas to really shine.