Your prom night deserves a hairstyle that celebrates what makes your curls uniquely beautiful. The challenge with curly hair isn’t finding a style — it’s finding one that holds up through the excitement of the evening, photographs flawlessly, and makes you feel genuinely confident. Unlike straight hair that falls flat under its own weight or stays exactly where you pin it, curls have movement and personality. When you work with your natural texture instead of fighting it, the results are stunning.
The best prom hairstyles for curly hair aren’t the ones that try to tame every spiral into submission. They’re the ones that enhance your curl pattern, add strategic structure where it matters, and let your texture shine. Whether you’re drawn to romantic waves, sleek updos, or playful combinations, the key is choosing a style that suits your face shape, curl type, and the overall aesthetic of your dress.
This guide walks you through fifteen beautiful, tested options that genuinely work for curly hair. Each style includes exactly what products and techniques you’ll need, how to prep your curls the day before, what pitfalls to avoid, and how to make sure your hairstyle stays picture-perfect from the first dance to the last. Most of these styles can be recreated by a skilled stylist or mastered with practice if you’re doing your own hair. The important thing is that you choose something that feels like you.
1. High Bun with Face-Framing Tendrils
This is the elevated classic — a structured bun placed at the crown that gives you drama and polish while keeping hair off your face. The magic is in the loose, curled tendrils you deliberately leave around your hairline and temples, which softens the overall look and adds movement that keeps the style from feeling too severe.
Why This Works for Prom
A high bun is naturally flattering because it elongates the neck and showcases your face, shoulders, and the neckline of your dress. For curly hair specifically, pulling the bulk of your curls up and secure means they stay perfectly in place all evening while those face-framing pieces move and catch light. The contrast between the polished bun and the soft spirals around your face creates sophistication without looking overly formal or stiff.
How to Create and Maintain It
- Start with curls that have been scrunched with a light hold gel or mousse the night before so they’re defined but touchable
- Gather your hair at the crown of your head — not directly at the top of your head, but slightly forward
- Twist the gathered section loosely and wrap it around itself to form a bun, securing with bobby pins and a flexible hold hairspray
- Leave at least 2-3 inch sections of curls loose around your hairline, temples, and the nape of your neck
- Use a lightweight oil or serum on the loose tendrils to enhance shine without weighing them down
- Set everything with a flexible-hold hairspray that won’t create crunch
- Bring bobby pins and extra elastics in your clutch — if a tendril falls during the evening, you can quickly re-pin it
Pro tip: Practice this style 2-3 times before prom night. The tension in the bun matters — too tight and you’ll get a headache, too loose and it unravels. Finding that sweet middle ground takes practice.
2. Romantic Side Sweep
The side sweep is pure elegance for curly hair. Your curls cascade over one shoulder in a wave of volume and texture, creating an asymmetrical look that’s romantic without being fussy. This style works especially well if you have a dress with an asymmetrical neckline or dramatic details on one side.
Why Curly Hair Looks Incredible This Way
Side-swept styles showcase the fullness and movement that curly hair naturally has. Instead of fighting against your texture, you’re leaning into it. The cascading curls over one shoulder create dimension and catch light beautifully in photographs. This look reads as effortlessly romantic, which is exactly the vibe most people want for prom.
Steps to Create This Style
- Curl your hair the night before using a curling iron or by braiding damp sections and releasing them in the morning
- Create a deep side part — not a subtle one, but a part that goes all the way from one temple to the back of your head
- Use a flexible hold mousse or gel to encourage curls to fall toward the sweep side
- Smooth the smaller section (on the non-sweep side) with a light smoothing cream to create contrast with the voluminous side
- Pin the smaller section gently behind your ear with bobby pins that match your hair color
- Let the larger section fall naturally over your shoulder, arranging the curls with your fingers to create a cascading effect
- Finish with a light, flexible hairspray that allows movement
Worth knowing: The side sweep photographs beautifully from one angle but looks less dramatic from the other side. If you’ll be taking photos from both angles, consider a style that reads well from every direction.
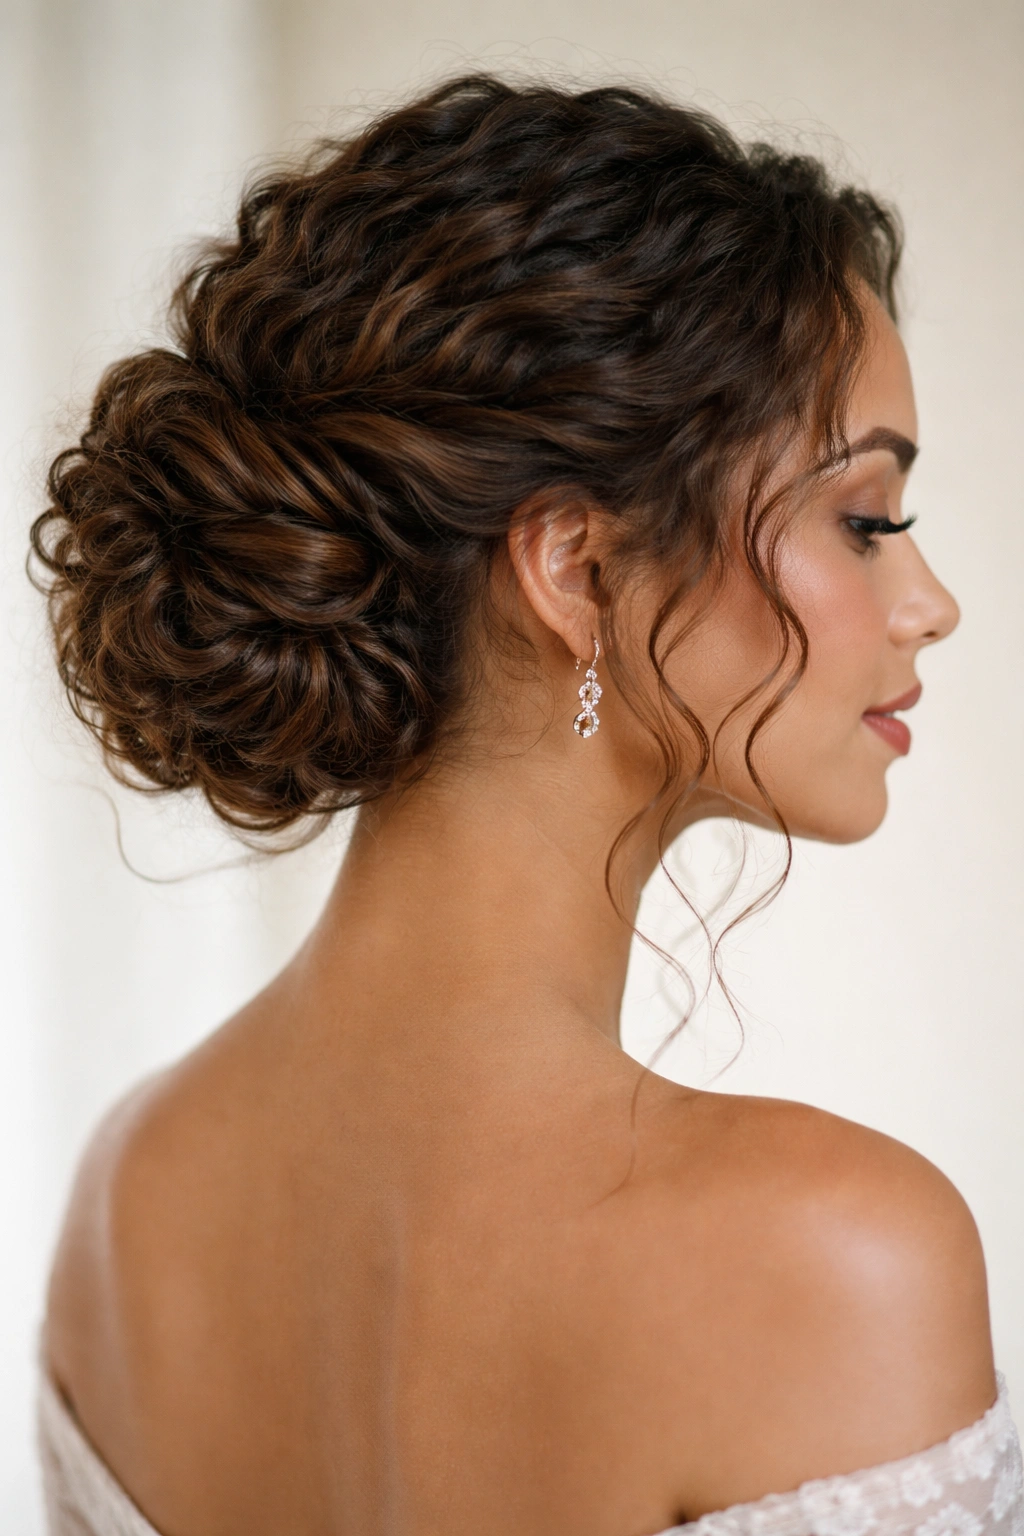
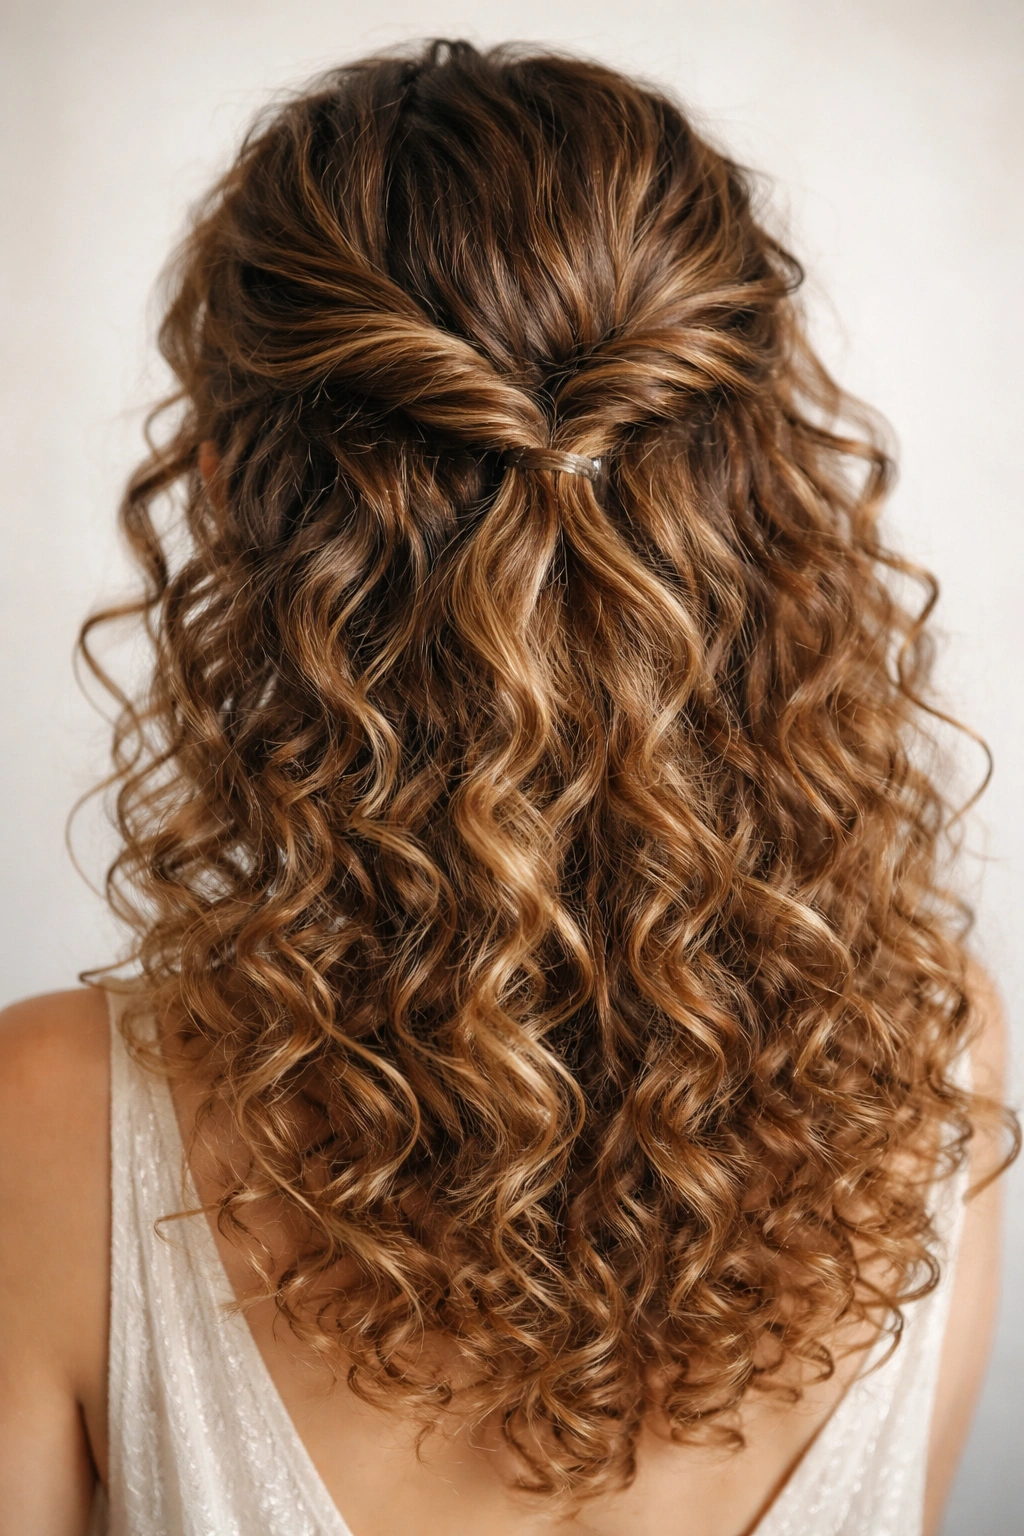
3. Half-Up Half-Down with Loose Waves
This is the style that splits the difference between keeping your hair down and pulling it up — exactly what it sounds like, but executed with intention. The top half is gathered and secured (often with a twist or braid), while the bottom half flows freely. It’s playful, romantic, and gives you the best of both worlds.
Why This is Perfect for Prom
Half-up styles are forgiving because they work with almost any face shape, any dress style, and any level of curl definition. They give you a polished, put-together appearance without the commitment of a full updo. For curly hair, this style is especially smart because the bottom half can move and show off your texture while the top half stays in place and prevents hair from falling in your face during the slow dances.
How to Execute It Well
- Start with your curls defined and set the night before — use a curling cream or gel and let them dry completely
- Take a section from one temple, twist it loosely, and pull it back toward the back of your head at ear level
- Repeat on the opposite side with another section
- Bring both twisted sections together at the back of your head and secure them with a clear elastic or decorative clip
- Leave the bottom half of your hair completely down and loose, finger-curling the ends if needed for definition
- Use a light hold product on the bottom section so curls can move without frizzing
- Anchor the whole thing with a flexible hold hairspray
Insider note: This style actually looks better a few hours after you initially style it, when the twist sections have relaxed slightly and the bottom curls have settled into their natural pattern. Don’t stress if it looks slightly different at prom than it did in your mirror — it will probably look better.
4. Sleek Low Ponytail
Sometimes the most elegant choice is the simplest one. A low ponytail at the nape of your neck, gathered sleekly but not so tight it looks severe, is sophisticated and timeless. The key with curly hair is smoothing the top section while keeping the ponytail itself voluminous and textured.
What Makes This Work for Curly Hair
A sleek low ponytail creates visual contrast — the smooth, polished top half of your head gives way to a full, bouncy ponytail. This contrast is what prevents the style from looking plain. Your curls have room to show off their texture and volume at the base of the ponytail, which is where the eye naturally looks anyway.
The Technique That Actually Works
- Blow-dry your hair smooth using a paddle brush to create a sleek canvas on top
- Gather your hair low at the back of your head, roughly where your ears line up
- Use a strong hold elastic to secure the ponytail firmly
- Smooth any flyaways at the top using a small amount of pomade or smoothing cream applied with a soft brush
- Take a small section from the ponytail and wrap it around the elastic to hide it, securing the wrapped section with a bobby pin
- Allow the ponytail itself to keep all its natural curl and volume — don’t try to straighten or minimize it
- Set the sleek top with flexible hold hairspray and the ponytail with a light mist that won’t create crunch
Pro tip: The sleeker your top section, the more voluminous your ponytail can be without looking overwhelming. That contrast is what makes this style elegant rather than boring.
5. Voluminous Curled Updo
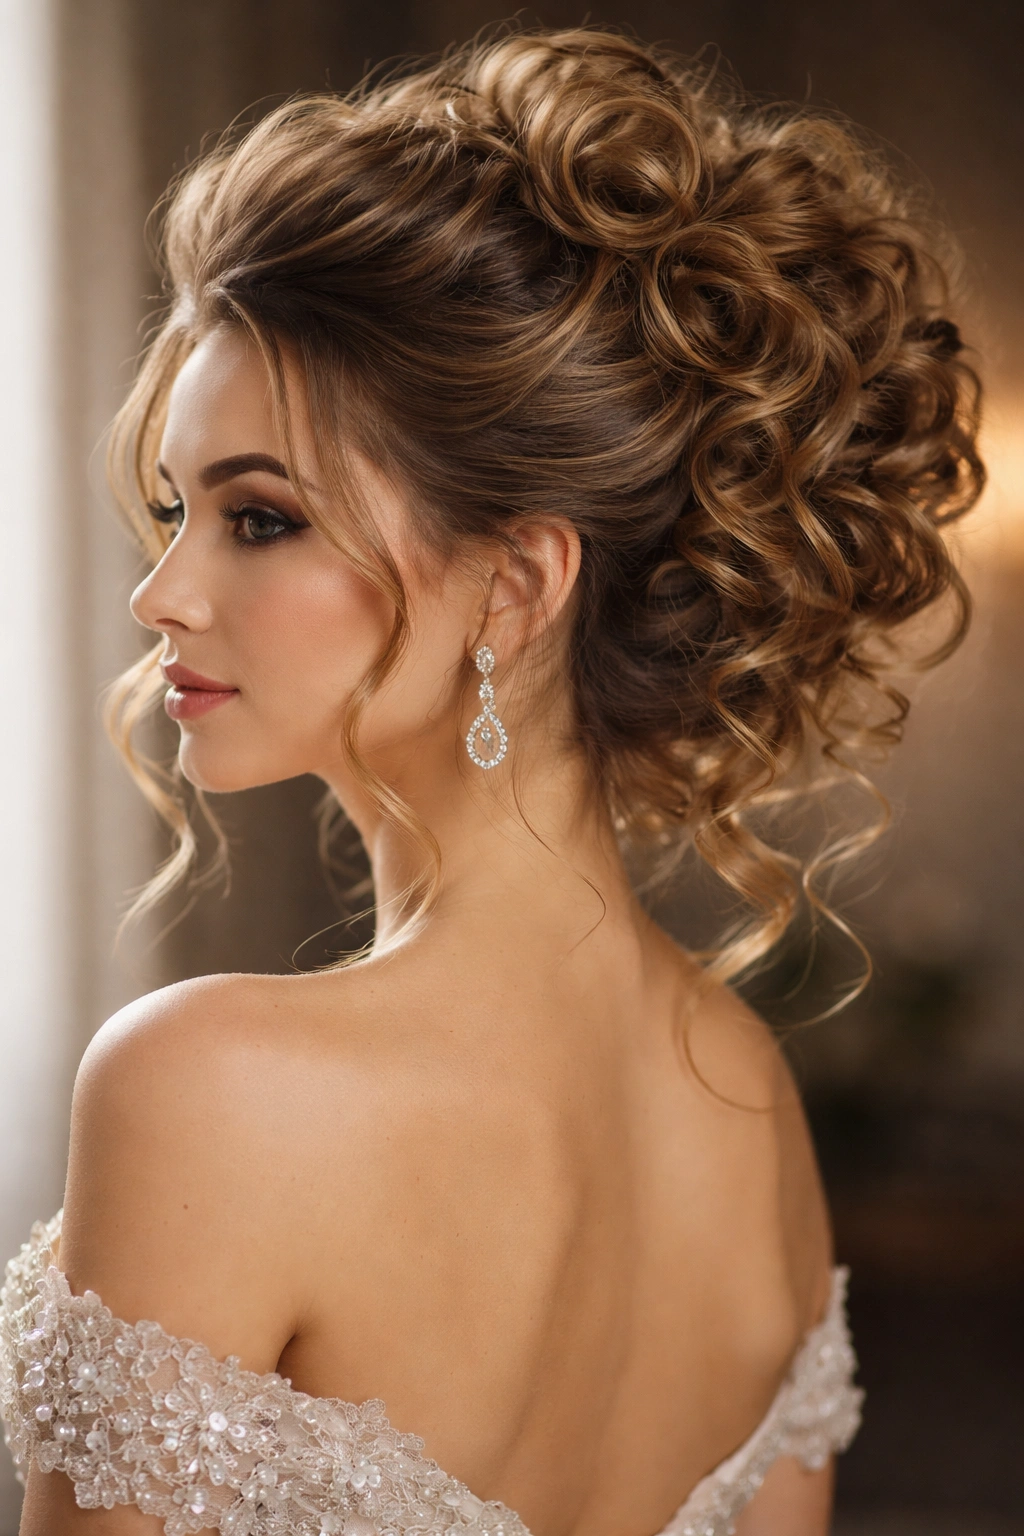
This is the full-drama option — a structured updo that showcases maximum curl volume and texture. Rather than smoothing your curls, you’re celebrating them. The curls are twisted and pinned to create a cohesive shape, but each individual curl remains visible and defined.
Why This Is Such a Statement Style
A voluminous curled updo says you’re confident in your texture. It photographs spectacularly because every curl catches light differently. This style works best if you have naturally thick or abundant curls, or if you’re willing to add extensions or use volumizing products to amp up the density. The result is truly unforgettable.
How to Build This Updo
- Start with very defined curls — use a curl-defining mousse or gel and let it dry completely
- Divide your hair into 3-4 sections
- Twist each section loosely and wrap it around itself to form a coil
- Pin each coil to your head in a way that creates an overall shape — some people prefer a round shape, others prefer a more oval or teardrop shape
- Leave some curls slightly loose and unpinned so they can escape and create softness around the edges
- Use bobby pins that match your hair color and pin strategically so the pins aren’t visible when looking from the front
- Fill in any gaps with additional curled sections or looser curls pinned into place
- Set everything with a flexible hold hairspray that won’t make the curls look stiff
Worth knowing: This style takes time to create — budget at least 45 minutes to an hour if you’re doing it yourself, or book your stylist for extra time. It’s worth it though; this is the kind of updo that makes a genuine entrance.
6. Deep Side Part with Curls
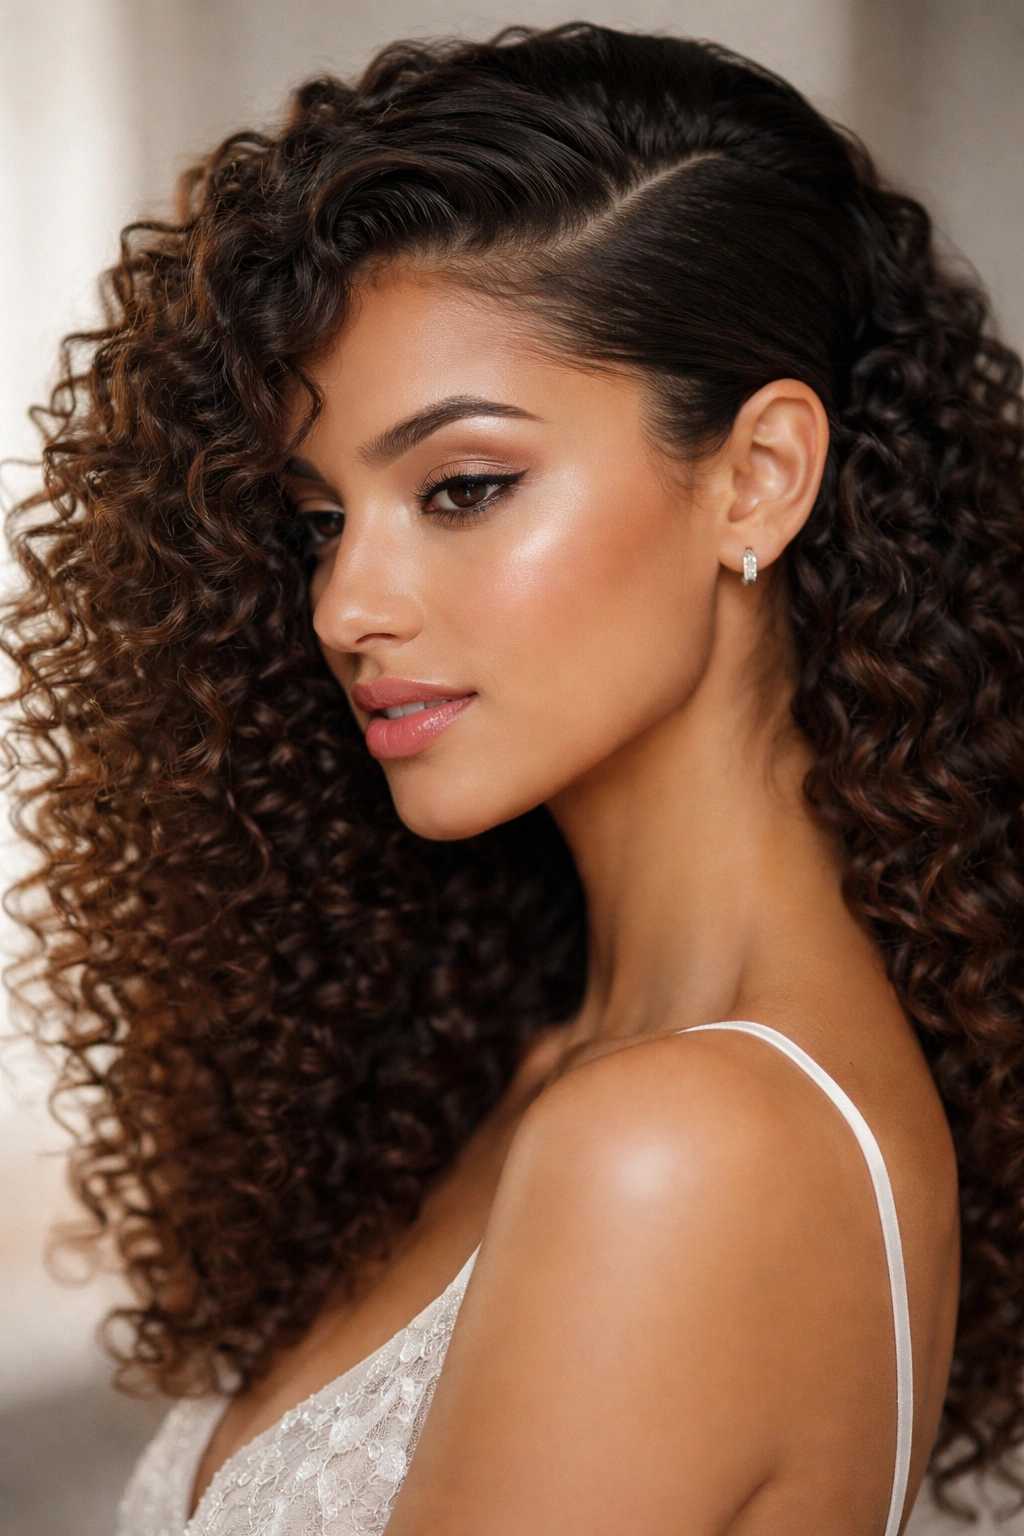
Sometimes the most impactful change is something as simple as your part. A deep side part — where your part begins at your temple rather than down the middle — can completely transform how your face looks. Pair it with defined curls and you have an instantly more sophisticated appearance.
Why This Works So Well for Curly Hair
Curly hair naturally has volume and movement, so a deep side part takes advantage of that by creating an asymmetrical silhouette that’s visually interesting. The deeper part also creates a slimming effect on the face and draws attention to your eyes. Since you’re not pulling the hair back or pinning it, this style feels effortlessly elegant rather than contrived.
Creating the Look
- Wash your hair and let it dry to its natural state, or curl it with a curling iron for more defined, uniform waves
- Create your part by starting at your temple on one side and dragging a rattail comb straight back to the nape of your neck
- Use a light hold styling cream on both sides to encourage the curls to fall away from your face and follow the part line
- Style the smaller side (the side with less hair) by smoothing it gently behind your ear and securing with a small bobby pin
- Let the larger side fall naturally, using your fingers to shape and arrange the curls
- Apply a lightweight oil or serum to enhance shine and definition
- Set with a flexible hold hairspray
Pro tip: The deeper your part, the more dramatic the effect. If you’re nervous about such a deep part, start with one that’s slightly off-center and build from there.
7. Braided Crown

A braid that wraps around your head like a crown is romantic, timeless, and works beautifully with curly hair. The braid can be loose and relaxed or tight and structured — it’s your call. What matters is that it creates a halo effect that frames your face and creates a polished look.
Why Braids Are Perfect for Prom
Braids hold curly hair in place while still showing off texture. A braided crown is especially clever because it keeps hair away from your face and neck (great for staying cool in a crowded venue) while creating a focal point at the top of your head. The braid adds a decorative element without requiring extra accessories.
How to Execute a Braided Crown
- Start with defined curls — the texture makes the braid look fuller and more interesting
- Begin your braid at one temple, taking a small section of hair and starting a three-strand braid
- As you braid, weave in additional sections of hair from the front of your head, moving across your scalp from one temple to the other
- The braid should wrap around your head like a halo, ending at the opposite temple
- Keep the braid slightly loose — tight braids look severe, and loose braids look more romantic
- Pin the end of the braid where it finishes at the opposite temple, securing with bobby pins hidden under your curls
- Leave the rest of your hair down and loose, curling the ends if needed
- Set the braid with a flexible hold hairspray and the loose curls with a light mist
Worth knowing: Practice this braid several times before prom night. Creating a braided crown is more challenging than a regular braid because you’re working in sections and at different angles. It’s doable, but it takes practice.
8. Textured Messy Bun
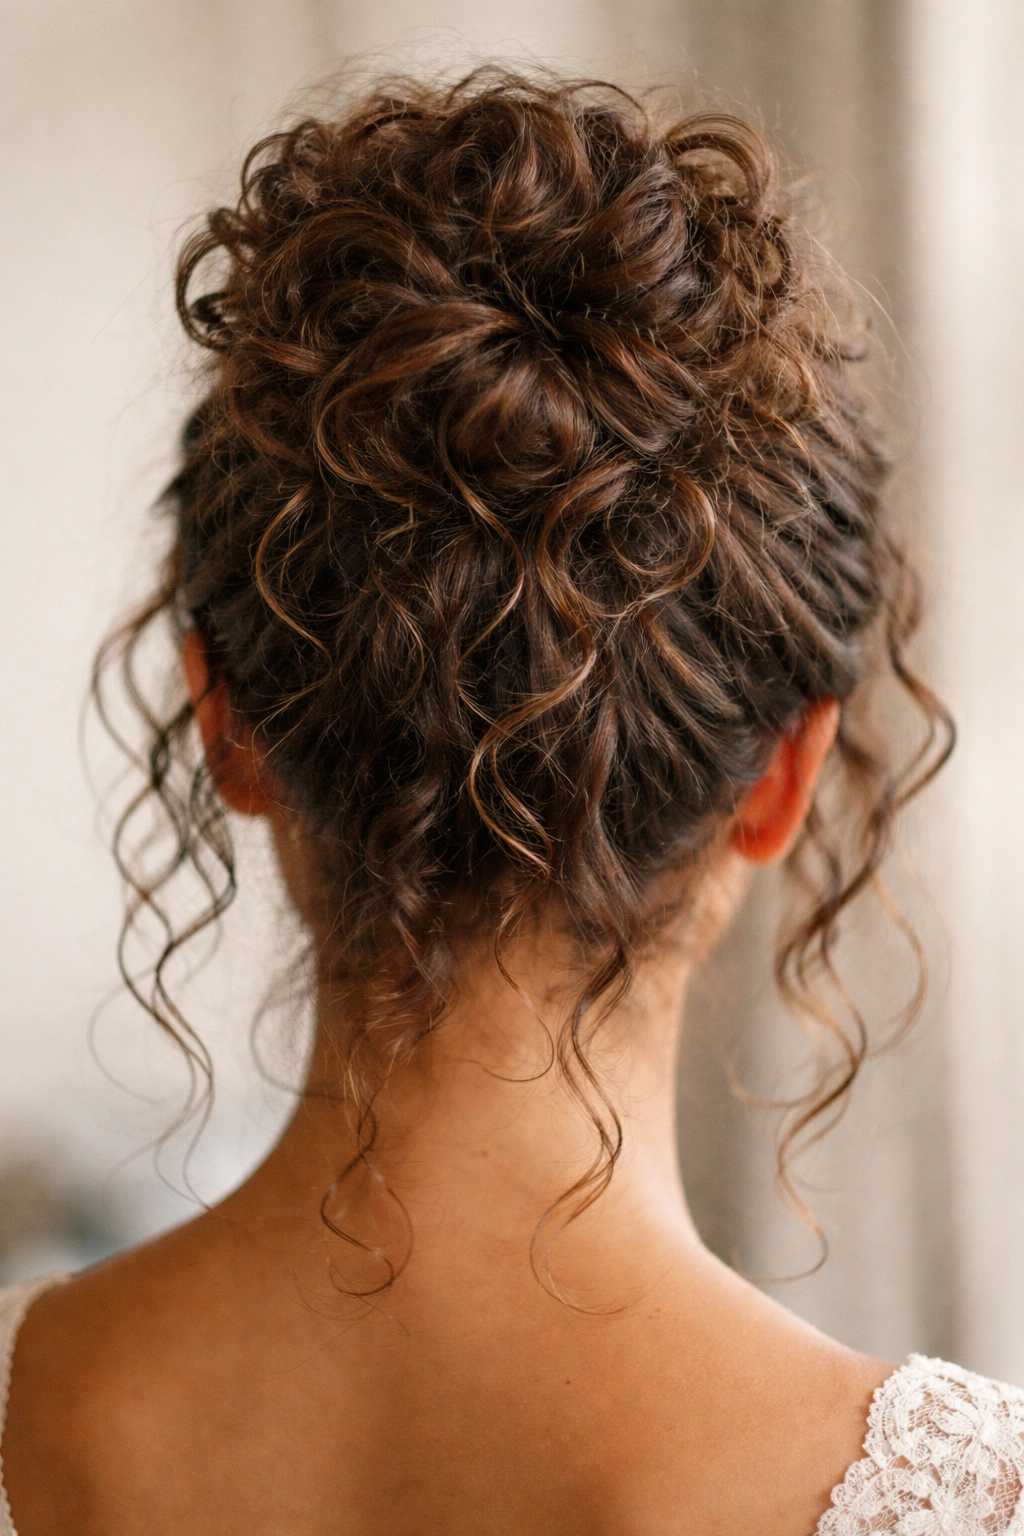
Don’t let the word “messy” fool you — a textured messy bun is intentional, sophisticated, and looks anything but careless. It’s a bun that celebrates your curl texture rather than smoothing it down. Every curl is visible and contributes to the overall shape.
What Makes This Style Work
A textured messy bun reads as effortlessly chic. It says you woke up looking fabulous, which is the best kind of energy for prom. Because the style doesn’t require smoothness or perfection, it’s actually more forgiving than it sounds. Loose pieces and imperfect sections only add to the charm.
Building Your Textured Messy Bun
- Start with curls that have been set with a light hold product the night before
- Gather your hair at the crown of your head into a ponytail — don’t worry about making it perfectly tight
- Twist the ponytail loosely and wrap it around itself to form a bun shape
- Secure the bun with bobby pins, aiming for 4-6 pins depending on hair thickness
- Gently pull and tease the bun to loosen it slightly, creating a fuller, messier appearance
- Leave several curls entirely loose around your hairline and the nape of your neck — these soften the look
- Use bobby pins to tuck loose curls back in and out as desired, creating intentional “imperfection”
- Set everything with a flexible hold hairspray that doesn’t make the bun look stiff
- Bring extra bobby pins in your clutch in case you want to adjust the messiness throughout the evening
Insider note: The beauty of this style is that it actually gets better as the night goes on. As you move and dance, more pieces naturally come loose, and it looks intentionally undone rather than like something fell apart.
9. Twisted Side Bun
A twisted side bun moves the focal point of your hair to the side of your head rather than the back or top. It’s a departure from a traditional bun, which makes it feel more fashion-forward. The side placement is especially flattering if you have an angular face shape or if one side of your dress is more detailed than the other.
Why Side Placement Changes Everything
When a bun is off to the side, it creates an asymmetrical silhouette that’s visually interesting. Your eye is drawn to the side of your head where the bun is, which creates a slimming effect on the face. The style is also more comfortable than a bun at the back of your head because the weight of your hair isn’t pulling on the back of your neck.
Steps to Create a Twisted Side Bun
- Curl your hair and let it set completely so the curls hold their shape once you pin them up
- Create a deep side part if you want extra asymmetry, or use your natural part
- Take a section of hair from the side where you want the bun and begin twisting it
- Keep twisting, gradually incorporating more hair as you move toward the side of your head
- Once all your hair is twisted together, wrap the twisted section around itself to form a bun on the side of your head
- Secure with multiple bobby pins, aiming for a bun at approximately ear level or slightly lower
- Leave face-framing pieces loose around your cheeks and forehead if you like softness
- Smooth any flyaways with a light pomade and set with flexible hold hairspray
Pro tip: This style works best if you have at least shoulder-length hair. If your hair is shorter, the side bun might not have enough hair to form a full, voluminous shape.
10. Bouncy Curls with Decorative Pins
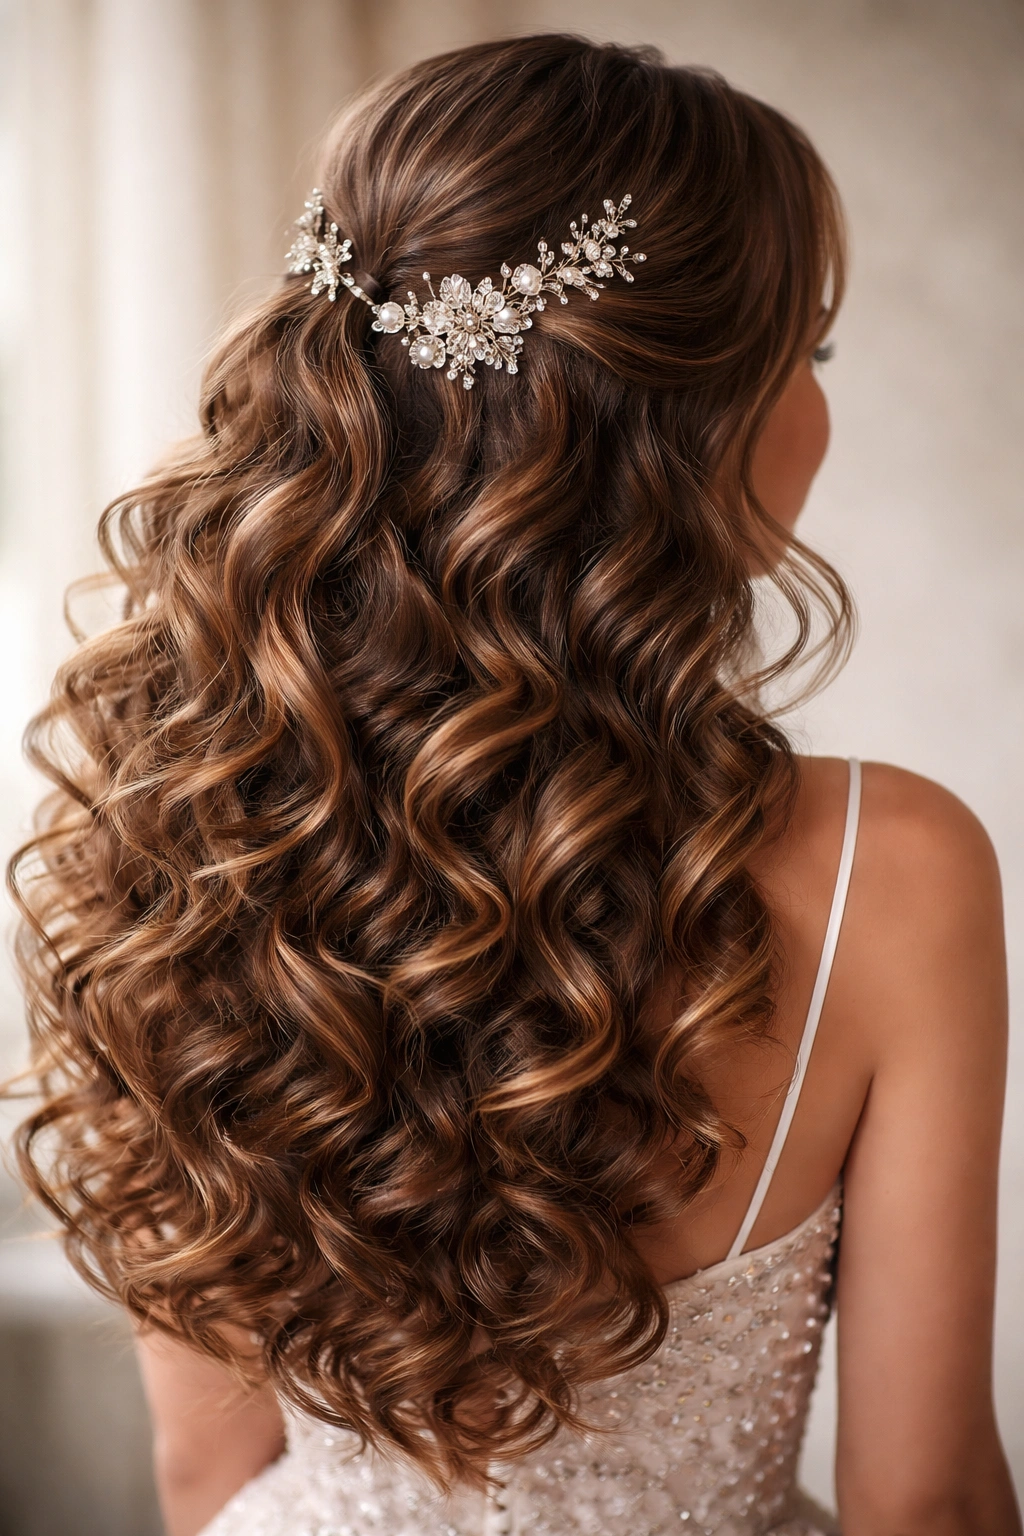
Sometimes the best prom hairstyle is simply your hair down — but styled with intention and elevated with strategic accessories. Bouncy curls with decorative pins means your hair is completely down and loose, but you’ve added one or more statement hairpins or hair jewels that make the style feel intentional and prom-worthy.
Why This Works for People Who Want Hair Down
Many people with curly hair want their hair down on prom night because they love their curl pattern and want to show it off. A style that’s simply your hair down can feel plain without an element that elevates it. A strategic decorative pin or an arrangement of small pins becomes that element, turning everyday curls into an intentional prom look.
How to Execute This Beautifully
- Curl your hair the night before and let the curls set completely
- Use a curl-defining cream or gel to enhance definition and prevent frizz
- Allow your curls to fall naturally, finger-curling the ends if needed
- Choose one or more decorative hair clips or pins that match your dress color or your skin tone
- Position the clip at the back of your head near the crown, or create a small twisted or braided section and secure it with a decorative clip
- Alternatively, create a small cluster of smaller pins — arranging them in a subtle pattern on one side of your head
- Apply a lightweight hairspray for hold without crunch, then a lightweight oil to enhance shine
- Make sure the pins are secure enough that they won’t shift during the night
Worth knowing: The decorative element doesn’t have to be expensive or elaborate. A simple gold clip, a delicate pearl pin, or even a few strategically placed bobby pins in a contrasting color can completely change how the style reads.
11. Low Braided Ponytail
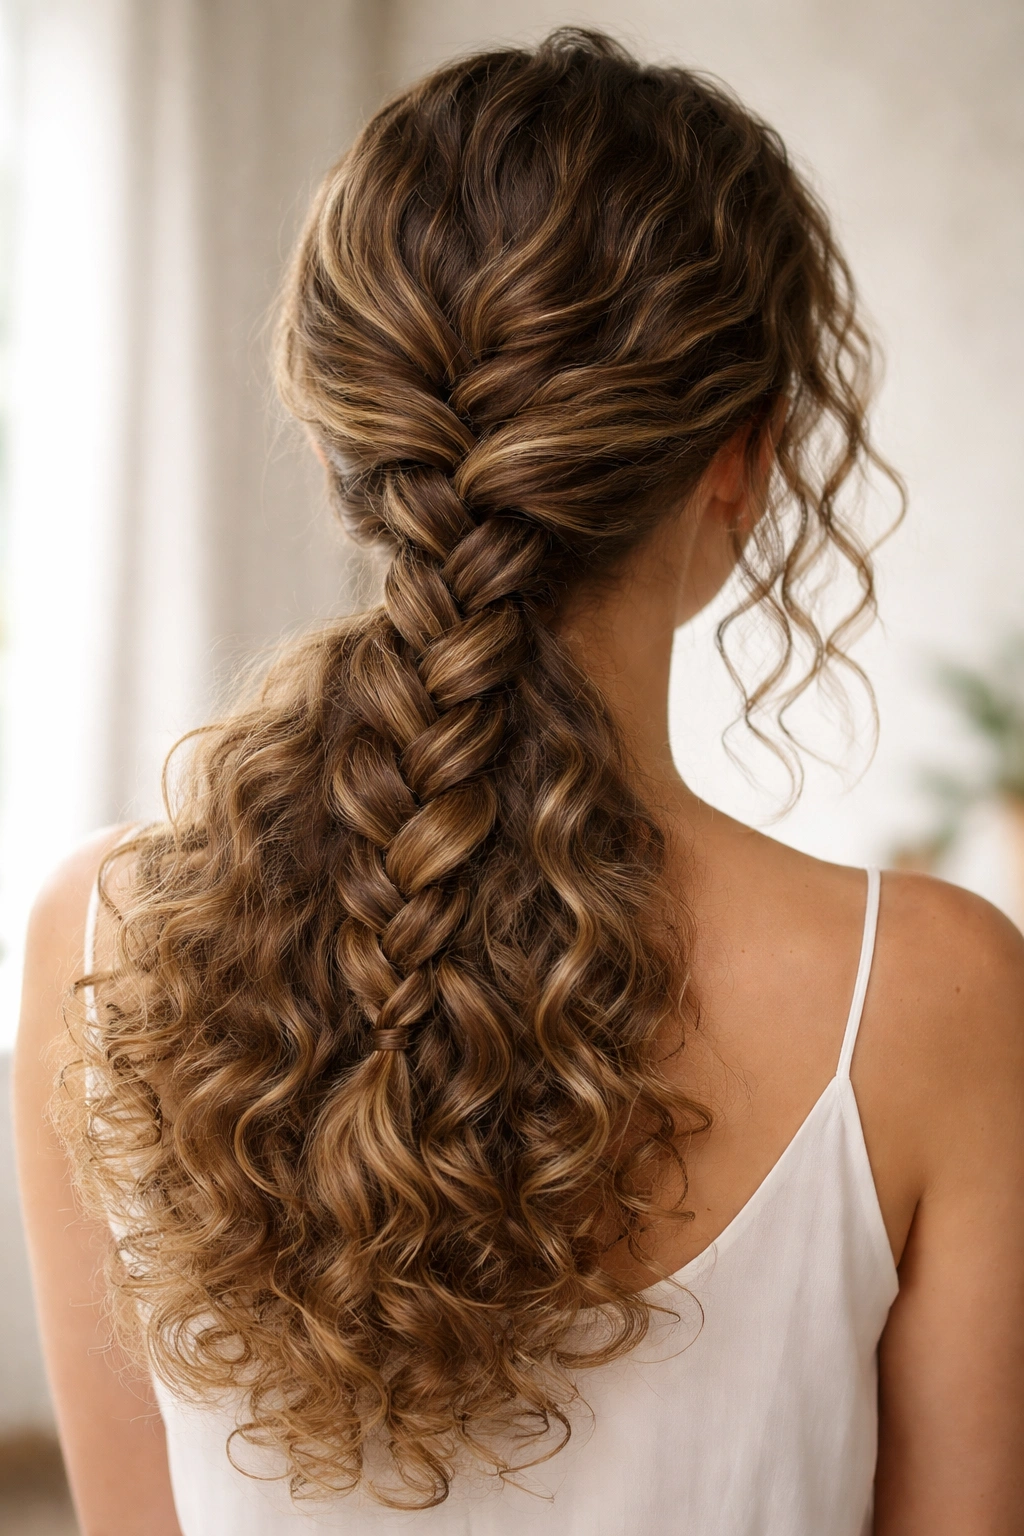
A low braided ponytail combines the romance of a braid with the practicality of a ponytail. Your hair is gathered low, and instead of just tying it off, you continue braiding from the elastic down to the ends. The result is structured, textured, and entirely prom-appropriate.
Why This Style is So Practical
A low braided ponytail keeps your hair completely off your face and neck while still looking intentional and beautiful. The braid adds visual interest and texture, so it never looks plain. The low placement is also less formal than a high ponytail, making it feel appropriate for dancing and moving around.
Creating the Low Braided Ponytail
- Start with defined curls that have been set with a curl product
- Create a deep side part if you want asymmetry, or use your natural part
- Gather your hair low at the back of your head, at approximately ear level or slightly lower
- Secure the ponytail with a small elastic
- Beginning just below the elastic, divide the ponytail into three sections and begin a three-strand braid
- Continue braiding all the way down to the ends of your hair
- Secure the end of the braid with a small elastic in a color that matches your hair
- Gently loosen the braid slightly by pulling on the outer edges of each braid section — this creates a fuller, softer look
- If you have curls at the ends, they’ll create a beautiful texture at the base of the braid
- Set with flexible hold hairspray
Pro tip: This style looks especially beautiful if you have long hair or hair past your shoulders. The braid shows off length, and you have room to loosen it without it looking like it’s unraveling.
12. Spiral Curls with Headpiece
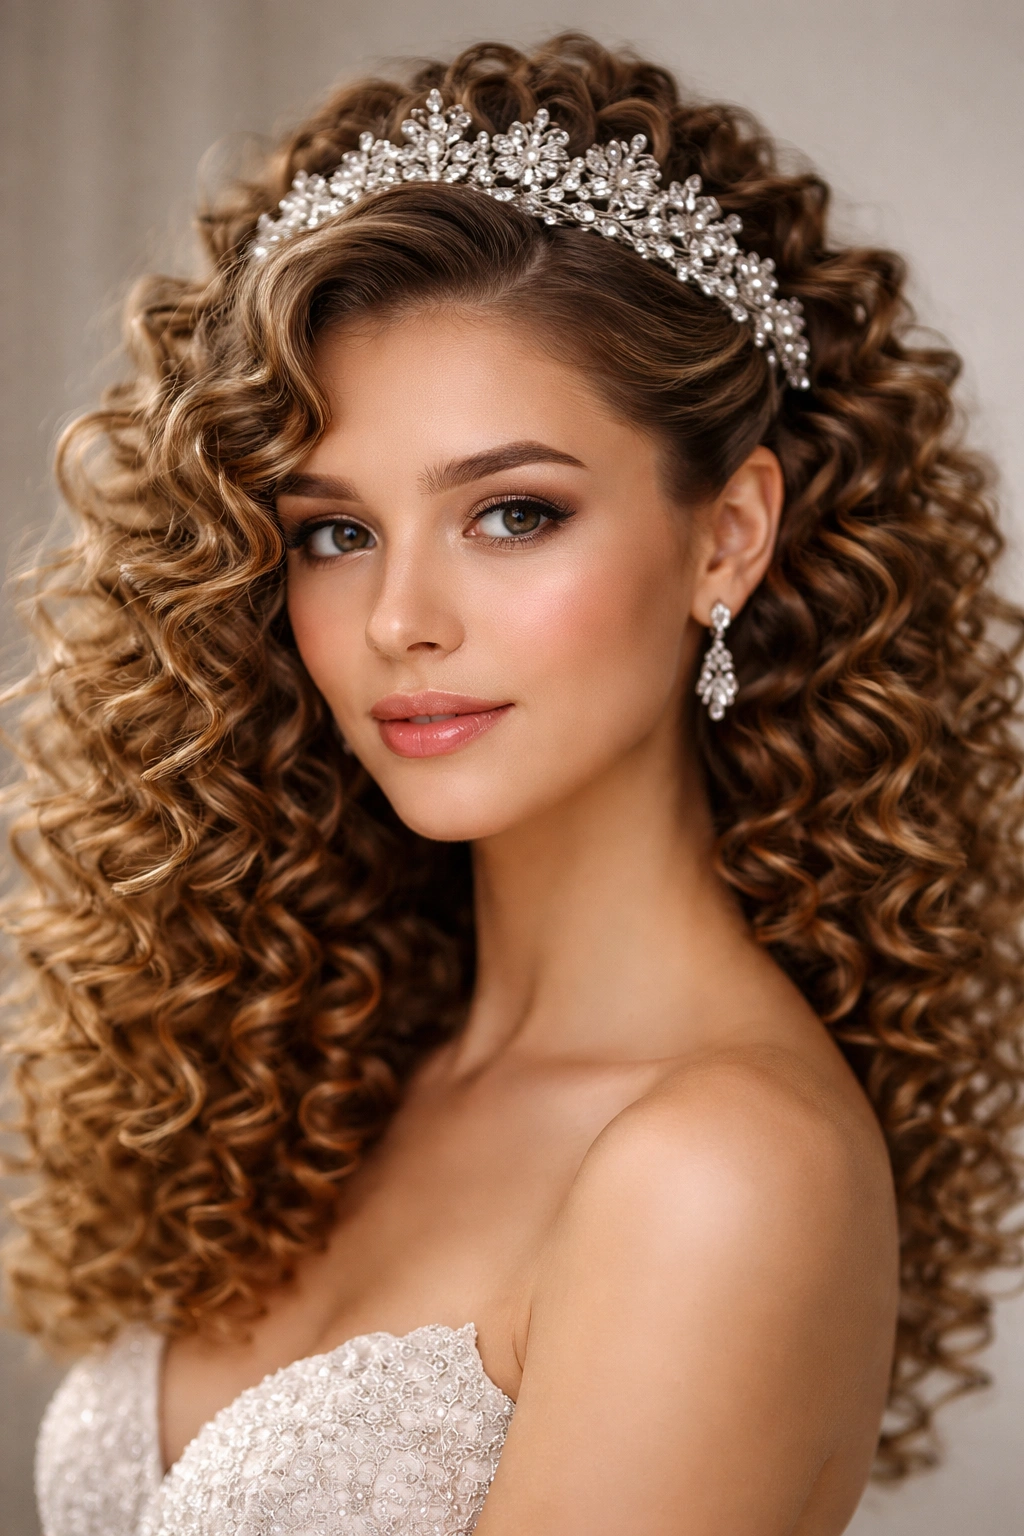
If you want to feel like royalty on prom night, consider spiral curls styled with a decorative headpiece. Tight, defined spiral curls are pinned in an intentional pattern, and then a tiara, headband, or decorative comb is positioned to create a polished, formal look.
Why This Creates Maximum Drama
Spiral curls are a statement. Each individual curl is tightly coiled and defined, creating texture and movement. When you add a headpiece on top, you’re creating a focal point at the top of your head that draws the eye upward and makes you feel genuinely special.
How to Create This Look
- Use a curling iron to create tight spiral curls throughout your hair — small barrel curling irons create tighter spirals than large ones
- Allow the curls to cool completely before touching them
- Use a strong hold hairspray to set the curls immediately after they’re cooled
- Pin curls strategically around your head to create an intentional shape — some people prefer curls pinned down the center of the head, others prefer them concentrated on top
- Use bobby pins that match your hair color and tuck them so they’re not visible from the front
- Position your headpiece — whether it’s a tiara, headband, or decorative comb — at the crown of your head or slightly back
- Secure the headpiece with bobby pins or a comb mechanism, making sure it’s positioned securely enough that it won’t shift during the night
- Set the entire look with a strong hold hairspray that will last through dancing and photos
Worth knowing: This style requires patience and some practice with a curling iron. If you’re not confident in your ability to create tight spiral curls, booking a professional stylist is a great choice.
13. Half-Up Twisted Style
A half-up twisted style is slightly different from the half-up half-down style — instead of braids, you’re using twists. Twisted sections from both sides are brought together at the back of your head and secured, creating a more textured, less structured look than a braided half-up.
What Makes Twists Different From Braids
Twists are actually easier than braids for many people — you’re only working with two sections of hair at a time rather than three. Twists also have a softer, less structured appearance than braids, which makes them feel more romantic and less formal. With curly hair, twists look incredibly natural because your curl pattern is already twisted.
Building Your Half-Up Twisted Style
- Start with defined curls set the night before
- Take a section of hair from one temple and begin twisting it — hold two sections of hair and twist them around each other
- Keep twisting toward the back of your head
- Repeat on the opposite side, creating a second twisted section
- Bring both twisted sections together at the back of your head and secure with a clear elastic or small clip
- You can tuck the ends of the twisted sections into each other or let them flow into a small bun — it’s your preference
- Leave the bottom half of your hair completely loose and curly
- Add a decorative clip over the elastic if you want to hide it
- Bring everything home with a flexible hold hairspray
Pro tip: Twist loosely rather than tightly. Tight twists can look severe with curly hair, while loose twists look soft and romantic.
14. Elegant Wavy Waves
Sometimes the most elegant choice is simply enhanced, defined waves that you’re not pinning or pulling back. Elegant wavy waves means you’ve spent time creating uniform, beautiful waves throughout your hair using a curling iron or other method, and then you’re styling them to look intentional and polished rather than casual.
What Separates “Elegant Waves” From Everyday Curls
The difference is intentionality and definition. Everyday curls might be slightly undefined or frizzy. Elegant wavy waves are smooth, shiny, defined, and have a clear pattern. Each wave is visible and individual. You’re also typically wearing the waves down and loose — completely down, not pinned or pulled back — which shows off the movement and texture.
How to Create Elegant Wavy Waves
- Start with clean hair and apply a heat protectant product to damp hair
- Use a large-barrel curling iron (at least 1.5 inches) to create smooth, even waves throughout your hair
- Curl each section away from your face and hold the iron at a slight angle rather than perpendicular to your head — this creates a wave rather than a tight curl
- Allow each curl to cool completely before releasing it
- Once all your hair is curled and cooled, gently run your fingers through the waves to break them up slightly and create a softer, less uniform look
- Apply a lightweight serum or oil to enhance shine
- Use a light hold hairspray that allows movement
- Position your waves so they cascade down your back and over your shoulders, arranging them with your fingers
- Add a decorative clip or headpiece if you want one, or leave it completely simple
Worth knowing: This style actually looks better as the night progresses and the waves relax slightly. In your first moment at prom, the waves might look overly perfect. That’s fine — they’ll settle into something softer and even more beautiful within an hour or two.
15. Bubble Ponytail with Curls
A bubble ponytail is playful and modern — it’s a high ponytail that’s divided into sections with elastics, creating bubble-like shapes throughout. With curly hair, each bubble showcases your curl texture rather than looking slick and smooth.
Why This Style Feels Different
A bubble ponytail is the style choice if you want to feel fun and youthful on prom night. It’s not overly formal, but it’s intentional and clearly styled for the occasion. The multiple elastics create visual interest, and because curly hair naturally has volume, each bubble looks full and defined.
How to Build Your Bubble Ponytail
- Gather your hair into a high ponytail at the crown of your head and secure with an elastic
- Take a second elastic and place it about 2-3 inches down from the first elastic, encircling the ponytail
- Gently push the hair between the two elastics upward to create a “bubble” effect
- Place a third elastic another 2-3 inches down and repeat, pushing the hair up to create another bubble
- Continue this process down the length of your ponytail — most bubble ponytails have 3-5 bubbles
- Gently loosen each bubble by pulling on the sides to make them fuller and softer
- The curled ends of your hair will create texture at the bottom of the final bubble
- Set with flexible hold hairspray that allows movement
Pro tip: Make sure each elastic is tight enough that it won’t slide down, but not so tight that it hurts or damages your hair. Your hair should feel secure but comfortable.
Final Thoughts
Your prom hairstyle should make you feel confident, beautiful, and like yourself — just a polished, special version. Curly hair has an advantage on prom night because texture and movement photograph beautifully, and they hide imperfections that might show on straight hair. Whether you choose a dramatic updo, a romantic half-up style, or your hair down with strategic styling, the most important thing is that you love how it feels.
Start testing styles now, not the week before prom. Try each style 2-3 times to understand how long it takes you, what products work best, and what adjustments make it feel perfect for your hair. If you’re booking a professional stylist, bring photos of the styles you’re considering and schedule your appointment well in advance — experienced stylists book up quickly during prom season.
Remember that your stylist can adapt any of these styles to work with your specific curl pattern, hair length, and face shape. Curly hair is beautifully individual, so the version of any style you create will be uniquely yours. That’s not a bug, it’s a feature. Your prom hairstyle should be something you feel genuinely excited about when you look in the mirror.