Wavy hair is naturally primed for updos that look effortlessly polished without requiring sleek, stick-straight styling or excessive heat damage. The challenge most people face isn’t whether updos are possible with wavy texture — it’s finding styles that actually work with the wave pattern rather than fighting against it. The good news? Waves create natural texture and dimension that actually make many updos look fuller, more interesting, and genuinely easier to execute than they do on straight hair.
The key is understanding how your waves interact with different techniques. Some updos look best when you embrace the wave and let it show, while others benefit from slightly damp styling or minimal product to give you control without creating frizz. Many of the easiest updos for wavy hair skip the need for teasing, backcombing, or excessive pinning — the texture does much of the work for you. You’ll want to focus on styles that use your natural grip and hold, that forgive minor imperfections, and that actually get better the second or third day after you’ve worn them, when the waves have settled and set.
The following styles range from five-minute casual looks you can throw together before work to more polished updos suitable for events. Each one takes advantage of what wavy hair does best: creating movement, texture, and volume without artifice. Whether your waves are loose and lazy or tight and defined, you’ll find updos that make your hair look intentional and put-together while requiring minimal effort and heat.
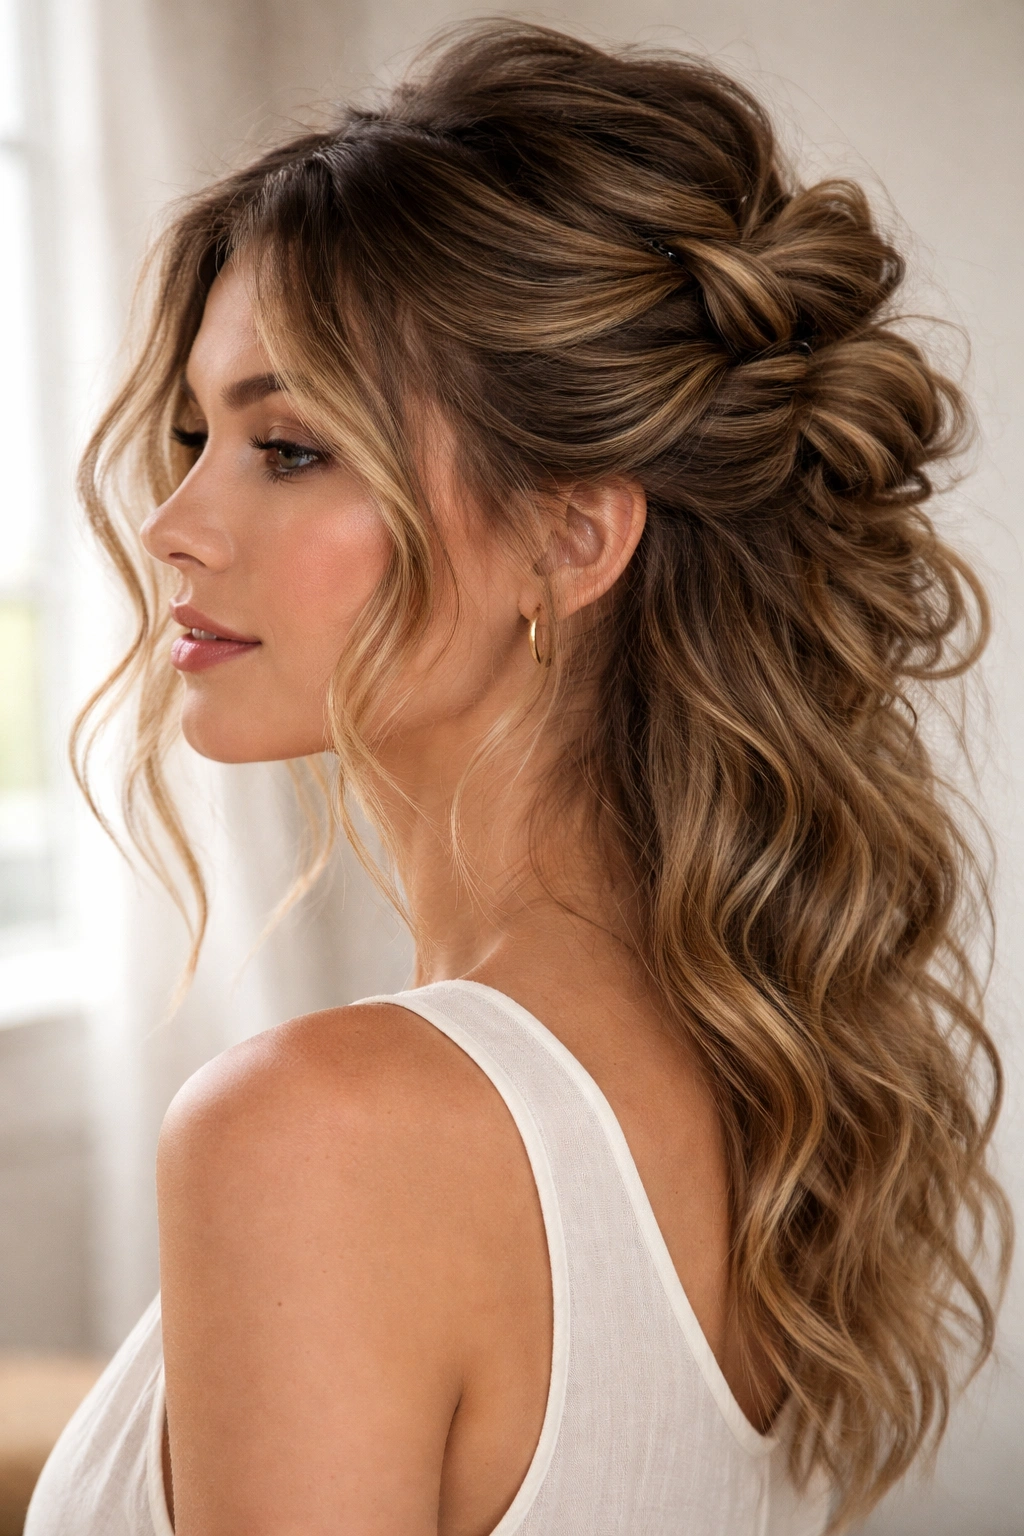
1. The Twisted Half-Up
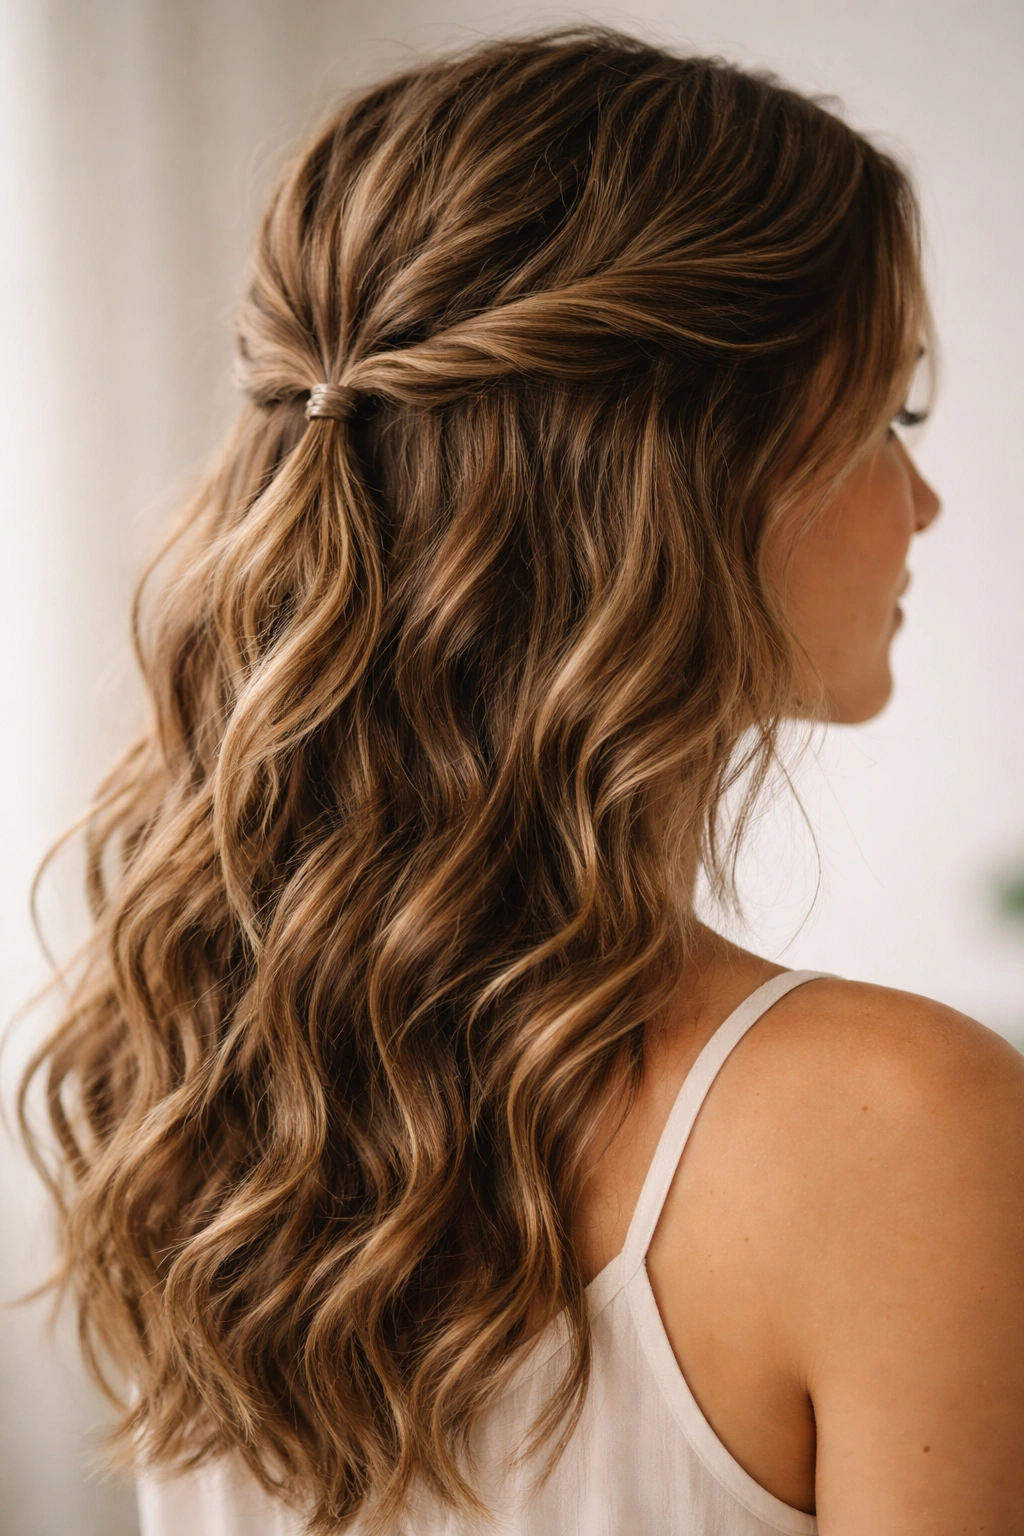
This is arguably the easiest updo for wavy hair because it requires almost no skill and works beautifully with texture. Instead of a traditional half-up ponytail where hair gets slicked back and tied tight, you’re taking two small sections from near your temples, twisting each one loosely as you bring it toward the back of your head, and securing both twists together with a single elastic.
Why It Looks So Good on Wavy Hair
The loose twists complement your natural wave pattern instead of fighting it. When you twist relaxed sections of wavy hair, the twist itself emphasizes the wave and creates a deliberately undone look that’s incredibly flattering. The style has enough structure to look intentional while still looking effortless — which is exactly what wavy texture photographs beautifully.
How to Make It Work
Start with hair that’s been air-dried or lightly dried with a diffuser — wet hair will slip too much when twisting. Take a one-inch section from just behind one temple and twist it gently as you move toward the back of your head, holding the twist loosely so the individual waves stay visible rather than getting compressed. Don’t twist all the way to the ends; stop about two-thirds of the way back. Repeat on the other side, then gather both twisted sections at the nape and secure with an elastic that matches your hair color. The key is keeping the twists loose and slightly messy.
Pro tip: Tease gently underneath each twist near the elastic to create extra grip and volume without making the twist itself look tightly wound. This prevents the elastic from sliding down throughout the day.
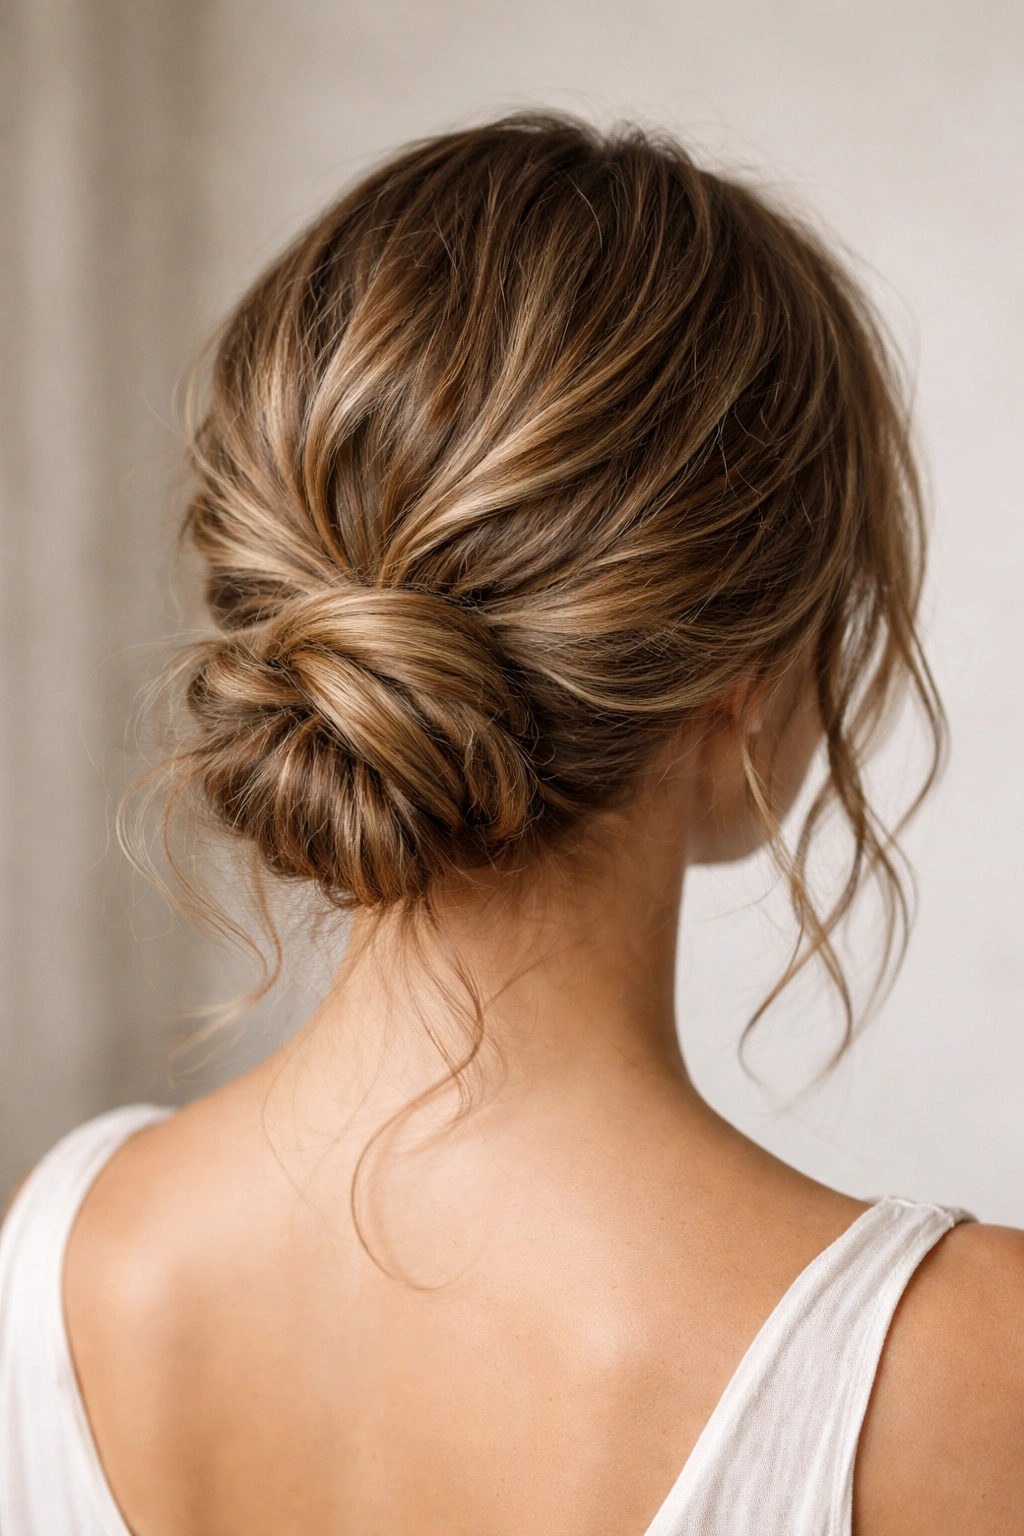
2. The Messy Low Bun
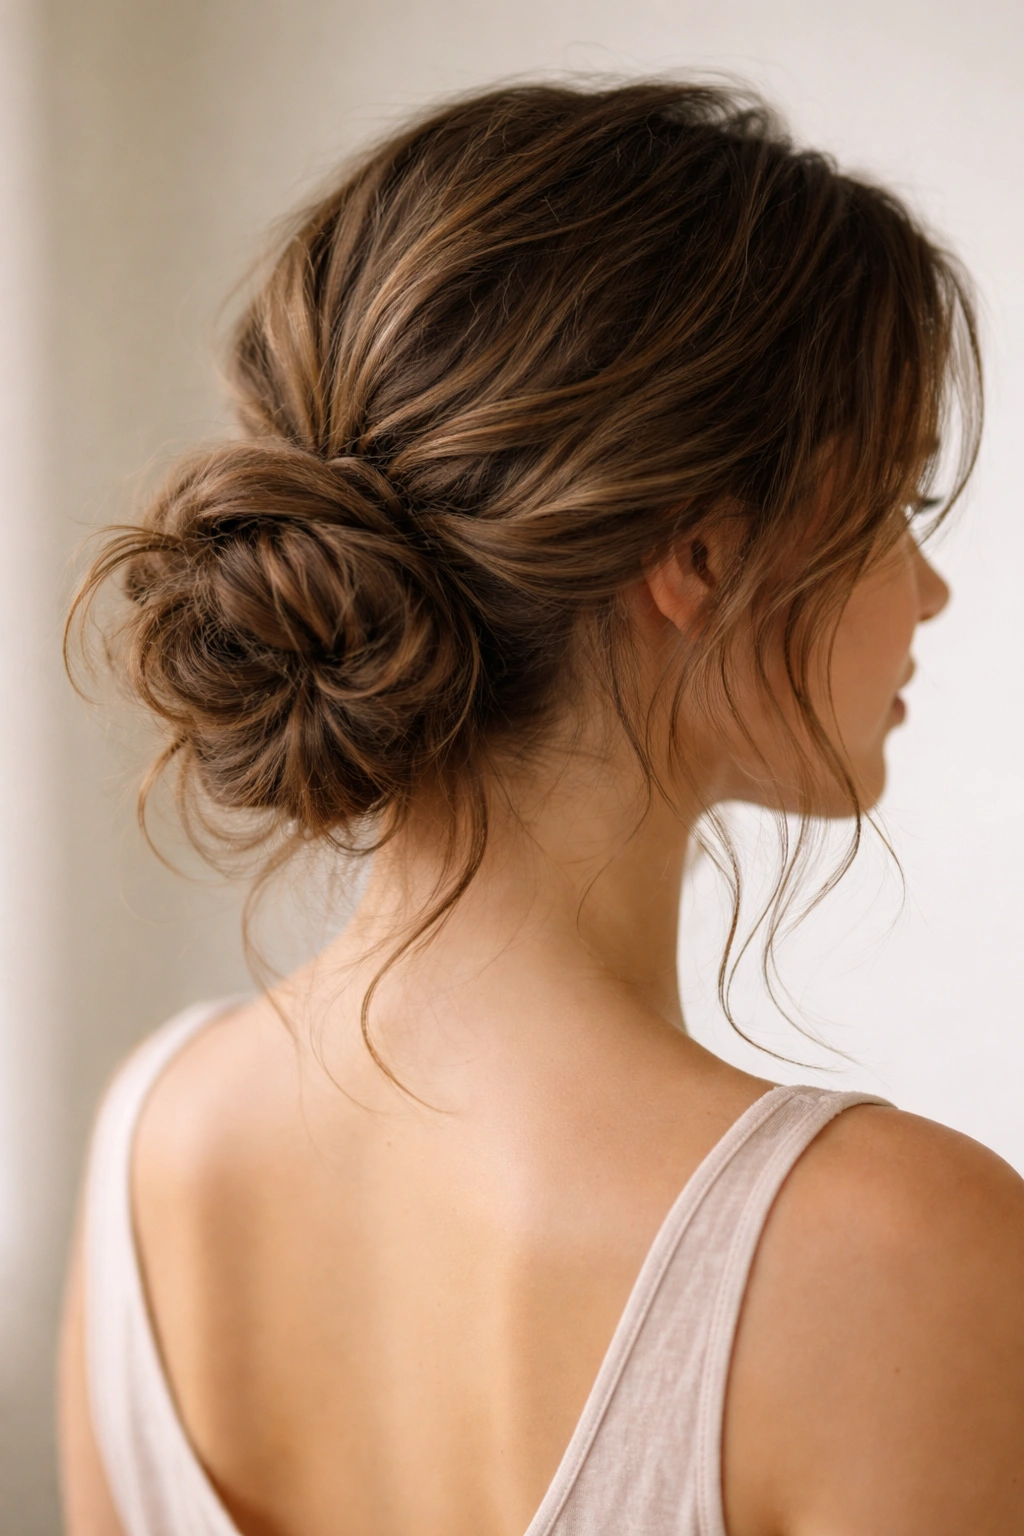
A low bun works differently on wavy hair than on straight hair — your waves naturally create the “messy” texture without you having to backcomb or deliberately pull out sections. This is one of those updos that actually looks better when it’s a little disheveled because the wave pattern shows through as intentional texture rather than as something that’s gone wrong.
Why Waves Make This Effortless
Instead of spending time creating texture where none exists, your waves are already there. All you’re doing is gathering your hair into a low ponytail and twisting it loosely around itself into a knot shape, then securing it. The texture does the visual heavy lifting — it catches light, shows dimension, and looks deliberately undone without any extra work.
How to Make It Work
Section your hair into a low ponytail at the nape of your neck using an elastic that’s not too tight. Take the ponytail tail and twist it gently around itself, coiling it into a loose, roughly circular shape. Pin it in place with bobby pins that match your hair color, tucking the pins into the coil so they’re hidden. Don’t try to smooth everything or make it perfect — the more relaxed and organic it looks, the better it suits wavy hair. Pull out a small face-framing piece on each side if you want softness around your face.
Worth knowing: This bun looks great worn low, but it also works beautifully at the very nape of your neck for a more polished feel, or slightly to one side for an intentionally asymmetrical vibe that suits wavy texture beautifully.
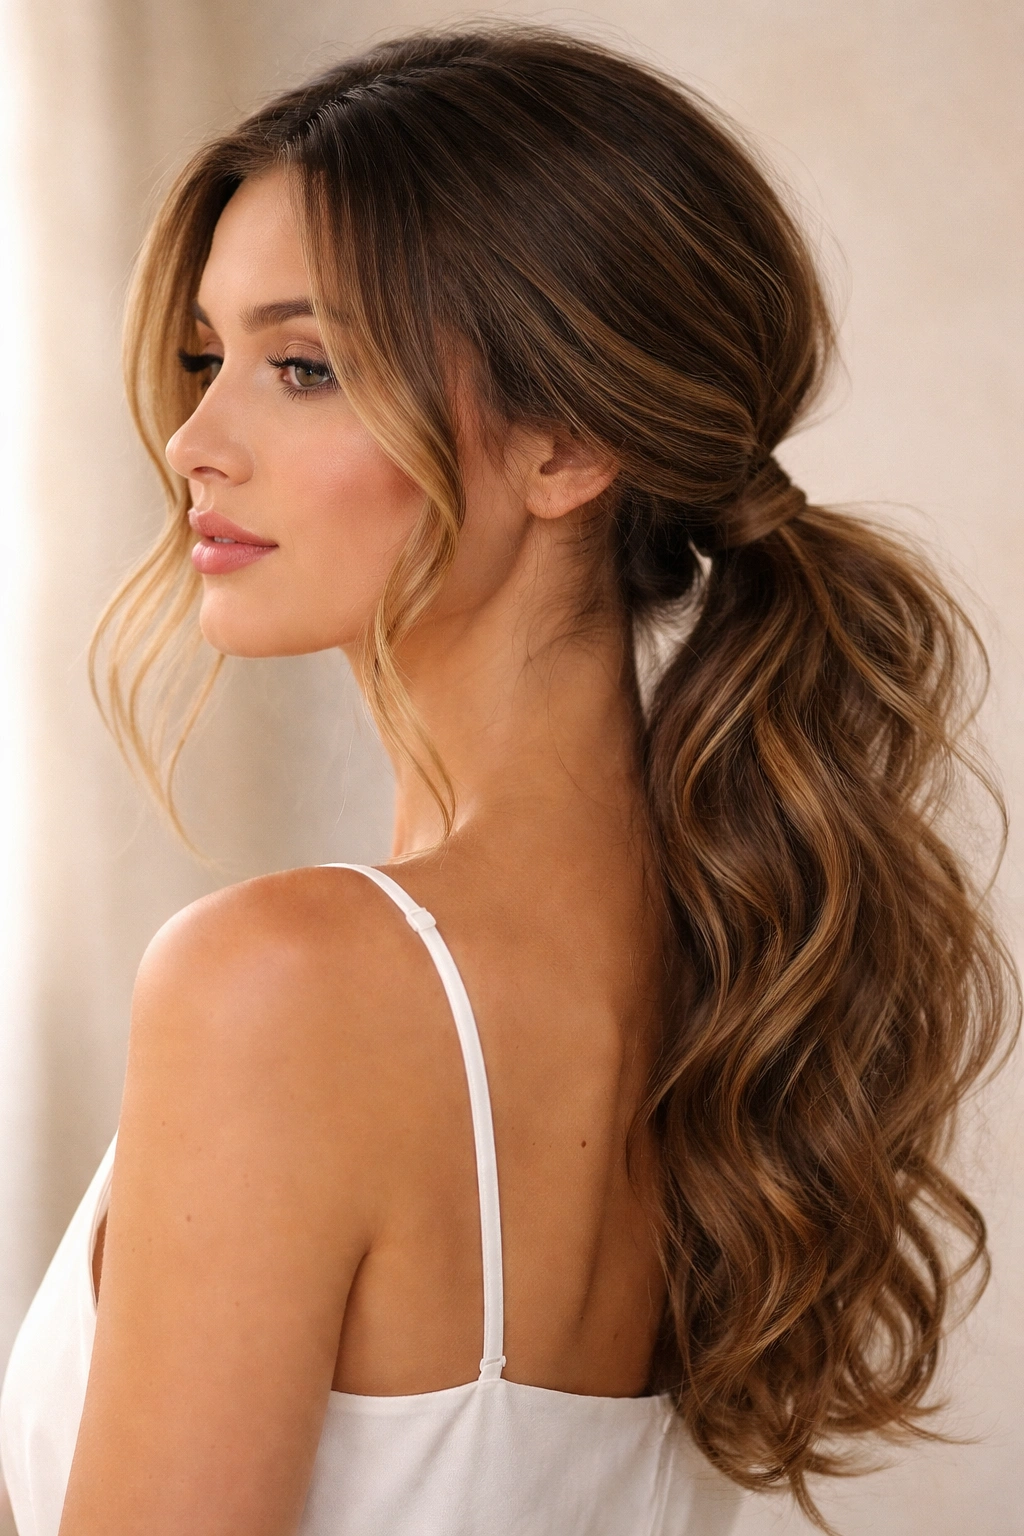
3. The Undone Ponytail with a Wrap
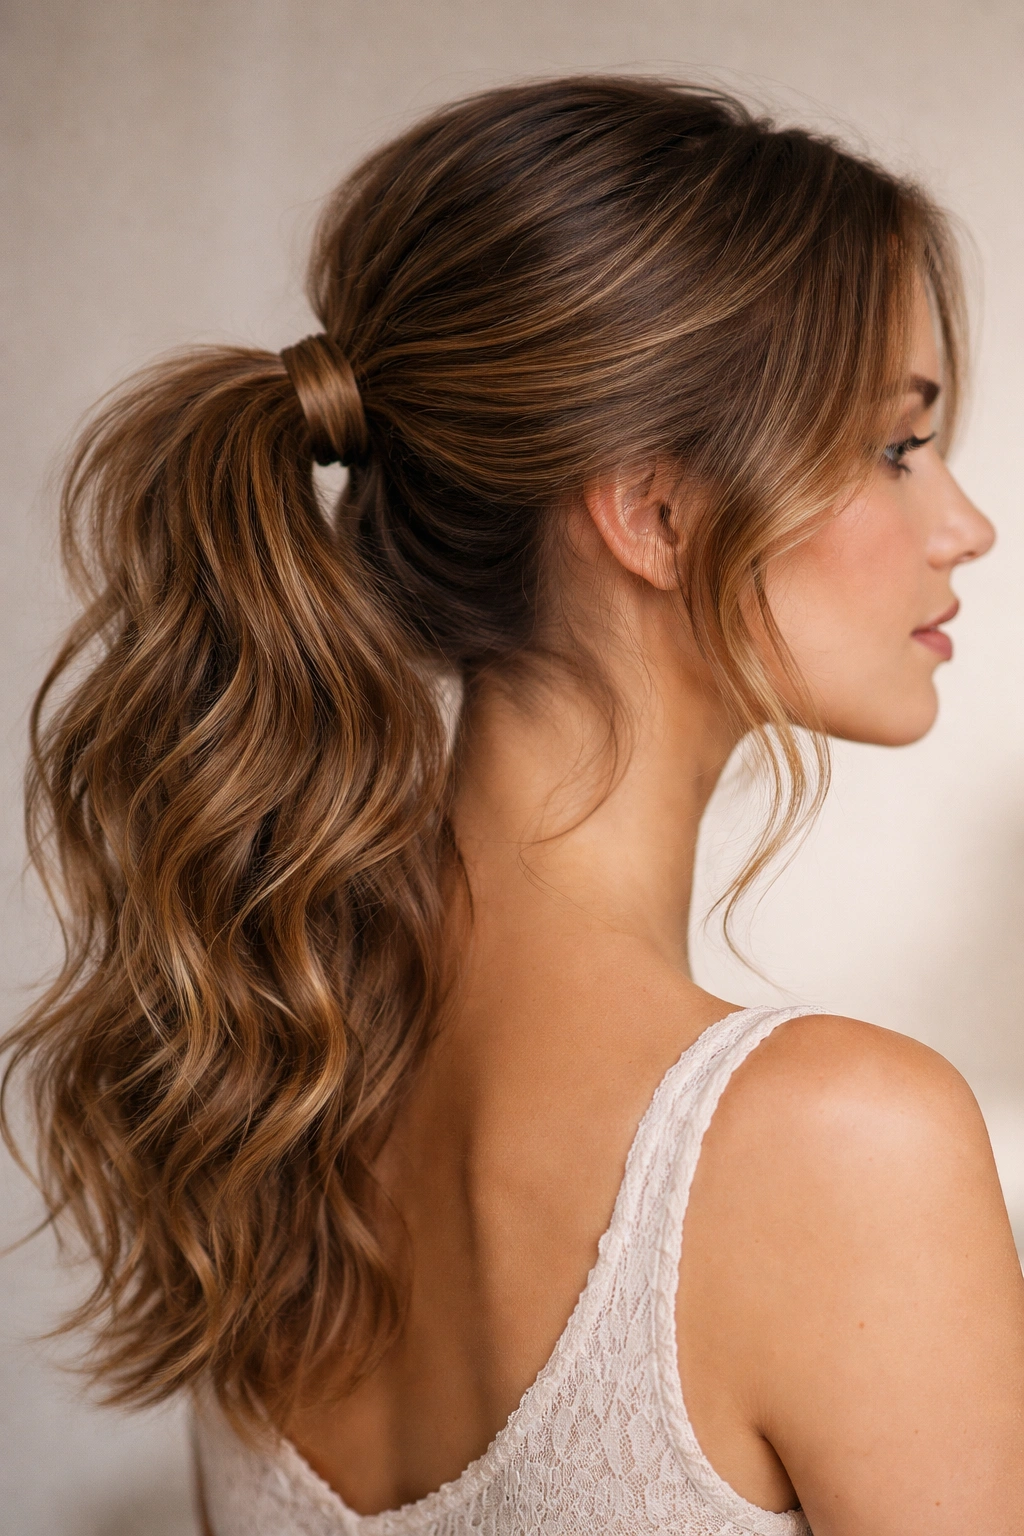
A standard high or mid-height ponytail on wavy hair can actually look a bit thin or wispy because your waves don’t have the density of straight hair compressed into a tight elastic. The solution is wrapping a small section of your own hair around the base of the ponytail elastic. This creates the visual of more volume while also disguising the elastic.
Why It Changes Everything
That single wrap of hair transforms a basic ponytail into something intentional and polished. It hides the elastic, creates dimension, and actually makes your hair look thicker at the point where you might otherwise see the rubber band cutting into thinner-looking waves. The wrap also signals that you’ve thought about your styling, which elevates even a casual ponytail.
How to Make It Work
Gather your hair into a ponytail at whatever height you prefer — high ponytails tend to work best, as they show off the full length of wrapped hair. Secure with an elastic. Take a very thin one-inch section of hair from the bottom of the ponytail and gently wrap it around the base of the elastic, covering the rubber band completely. Pin the end of the wrap underneath itself to secure it. The key is not making the wrap too thick — a thin section wrapped once or twice around the base is far more elegant than a chunky section.
Pro tip: Lightly tease the small section you’re about to wrap before wrapping it — this gives the wrap more texture and grip, making it hold in place better and look intentionally textured rather than sleek.
4. The Braided Crown
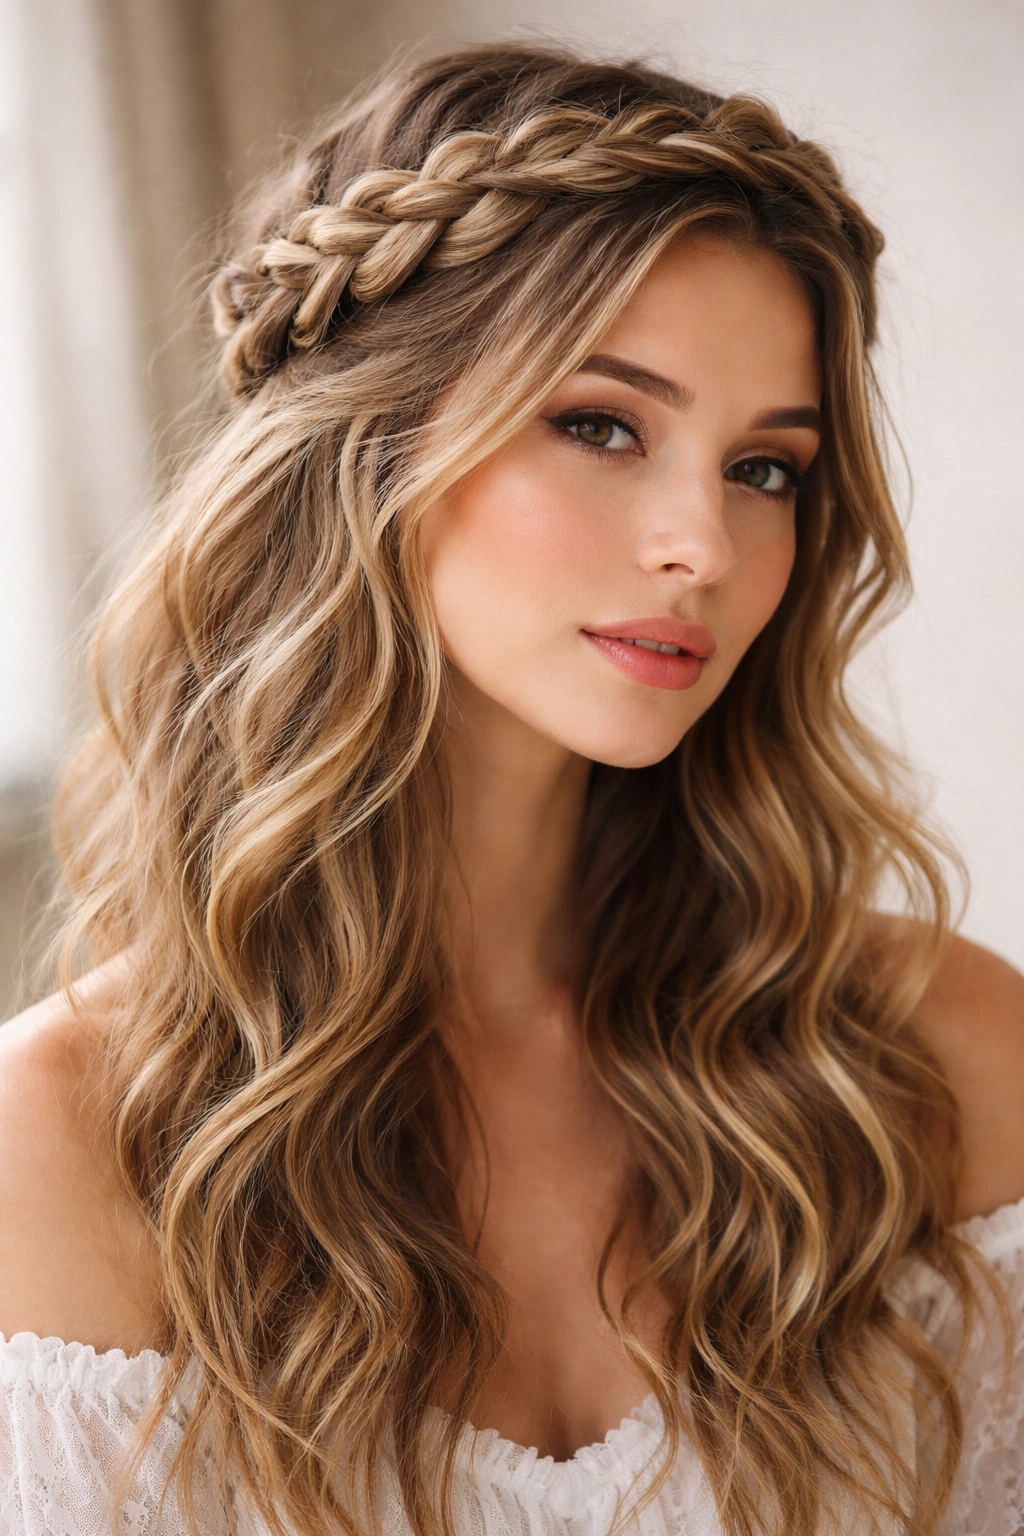
A crown braid winds around your head from one side to the other, creating a halo effect. On wavy hair, the braid sits on top of your texture rather than needing to be perfectly tight, and your waves peek through the braid creating a romantic, relaxed look that’s far easier to achieve than on straight hair.
Why Wavy Hair Is Actually Easier for This Style
Your waves naturally hold the braid in place without your having to braid extremely tightly, which means less tension on your scalp and a more romantic, softer-looking final result. The texture visible between braid sections is a feature, not a flaw — it’s what makes crown braids on wavy hair look so effortlessly beautiful and undone.
How to Make It Work
Start with your hair slightly damp or misted with water so it has grip. Section off about two inches of hair from one side of your head, roughly at temple height. Begin a three-strand braid there, but instead of braiding straight back, angle the braid gently upward toward the crown. As you braid, you’ll add small sections of hair from the top of your head as you move toward the other side, creating that crown effect. Once you’ve braided across to the opposite side of your head at roughly the same height you started, secure the braid end with a small elastic or bobby pin tucked underneath your hair. Gently pull and loosen the braid sections so they puff outward — this is what creates that soft, romantic texture.
Insider note: Don’t wash your hair the morning you want this style — second-day hair has more grip and texture, which makes the crown braid hold much better without needing to braid tightly.
5. The Soft Claw Clip Bundle
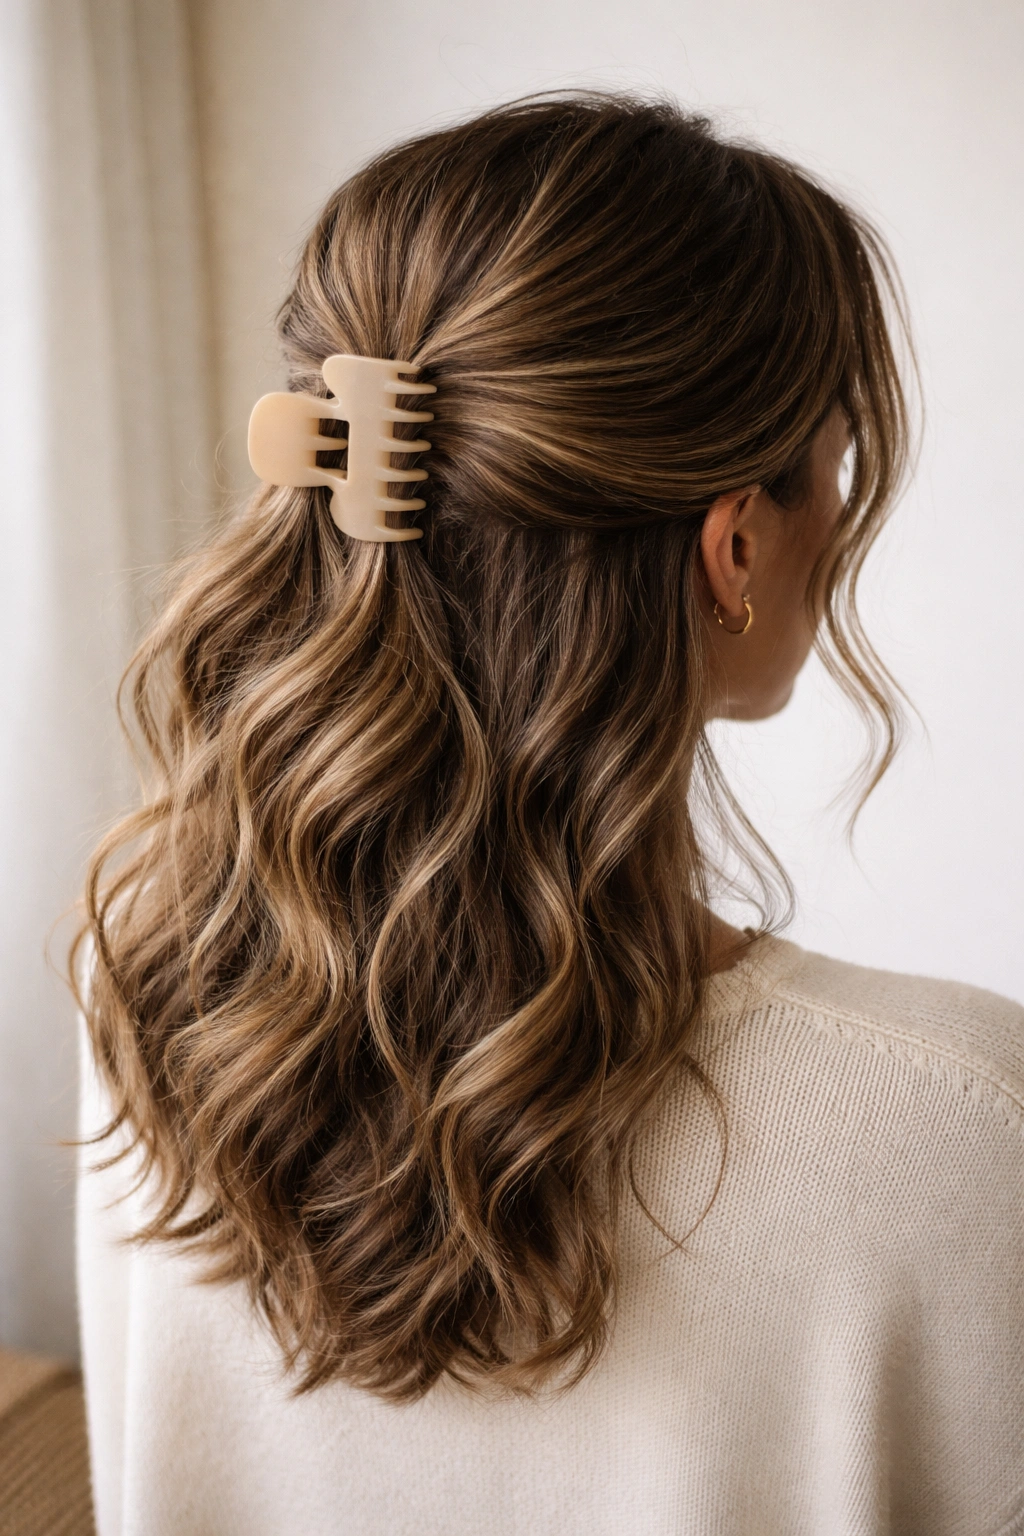
This one’s technically not an updo in the traditional sense, but it’s one of the most versatile styles for wavy hair because it’s somewhere between an updo and wearing your hair down. You’re gathering your hair loosely into a claw clip at the back of your head, creating a gathered, half-up effect that’s sophisticated enough for professional settings but casual enough for everyday wear.
Why Claw Clips Were Made for Waves
A claw clip grips texture beautifully, which means you don’t need slicked-back hair or extreme tightness to keep wavy hair in place. Your waves actually help the clip do its job, and the clip shows off the texture by gathering hair loosely rather than compressing it. This is the minimal-effort updo that still looks intentional and put-together.
How to Make It Work
Gather your hair loosely at the back of your head — not in a tight ponytail position, but more relaxed and organic, as if you’re simply gathering the majority of your length while leaving the very top and sides to fall around your face. Clip it in place with a claw clip that’s large enough to handle your hair volume. The goal is looking like you grabbed a clip when you needed your hair out of your face, not like you carefully styled an updo. Pull out a few face-framing pieces if you want, and let the ends of your hair escape the clip rather than pulling everything tight.
Real talk: This is the best updo for a humid day because you’re not fighting your waves with tight pulling and sleek products. The clip creates enough control while letting your texture do its thing, which paradoxically makes it look better as humidity increases throughout the day.
6. The Textured Low Knot
Different from the low bun in its execution, a low knot is made by creating an actual knot with your hair rather than twisting it into a coil. On wavy hair, the knot sits looser and shows more texture, creating a sculptural, interesting shape that photographs beautifully and looks far more sophisticated than it sounds.
Why This Works Specifically for Wavy Texture
A knot that would look thin and weak on straight hair looks full and intentional on wavy hair because your texture fills in the space and creates dimension. The knot also lets you show off your wave pattern in a way that fully sleek updos don’t — the texture is visible and celebrated as part of the style.
How to Make It Work
Section your hair into a low ponytail using a very gentle elastic or even a simple twist without an elastic. Take the ponytail and split it into two sections. Cross the right section over the left section, creating a simple knot shape (exactly like tying a knot in rope). Adjust the knot so it sits where you want it — you can tighten it slightly by pulling the two sections gently, or leave it very loose and relaxed depending on the vibe you want. Secure with bobby pins tucked underneath and inside the knot. Pull and loosen the knot sections so they puff outward and show your wave texture prominently.
Quick tip: This works best on second or third-day hair when your waves have settled and have slightly more texture and grip. Freshly washed and dried wavy hair is softer and may not hold the knot shape as neatly.
7. The Wrapped Spiral Ponytail
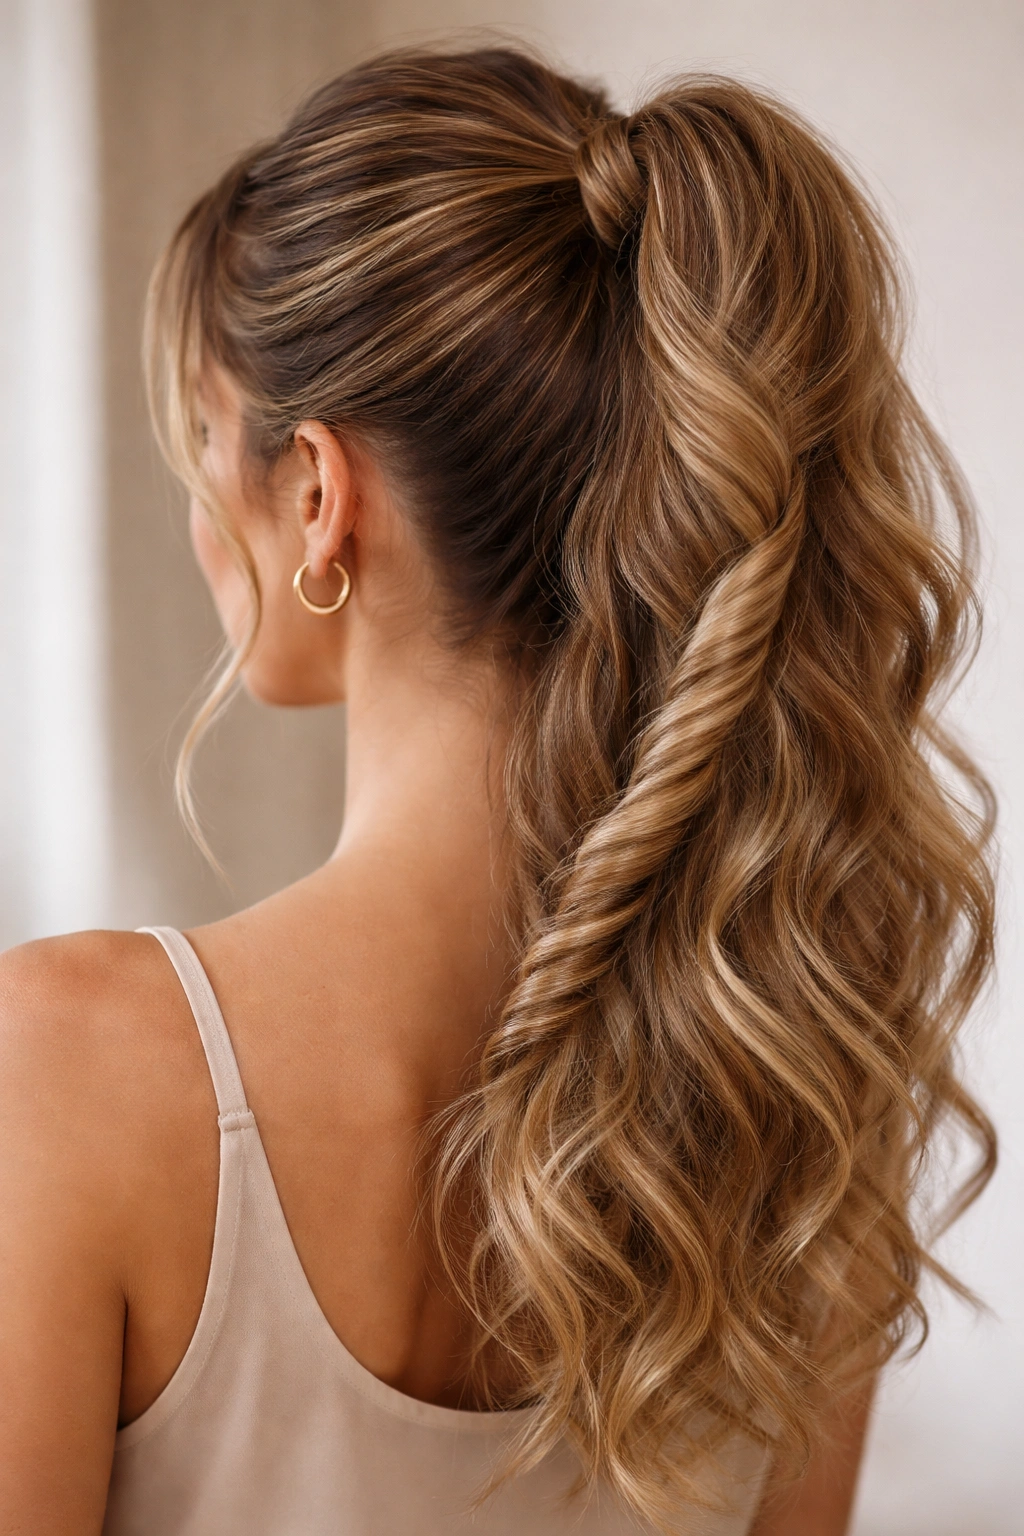
This style is built on the same concept as the wrap-around ponytail, but instead of a simple wrap at the base, you’re wrapping a thin section of hair around the entire length of the ponytail in a spiral pattern. It’s more visually complex and looks polished, but requires barely more effort than a standard ponytail.
Why It Looks So Sophisticated
The spiral wrap catches light differently than a standard ponytail, creating visual dimension and depth. What’s more, on wavy hair, the spiral wrap breaks up any limpness in the ponytail and adds a sculptural quality that’s genuinely elegant. It’s one of those updos that looks like you spent a lot of time on your hair when you actually didn’t.
How to Make It Work
Create a high or mid-height ponytail and secure with an elastic. Take a very thin one-inch section of hair from the bottom of the ponytail and begin wrapping it around the base of the elastic, just like in the wrapped ponytail style. But instead of stopping at the base, continue wrapping this thin section spirally around the ponytail itself as you move toward the ends. The thinner section naturally falls into a spiral pattern as you wrap. Once you’ve wrapped most of the length, secure the end of the wrap with a bobby pin tucked into the ponytail. The waves in your hair will show through the wrap, creating a deliberately textured look.
Pro tip: Use a thin rattail comb or styling pick to gently separate the spirals slightly as you work, creating more visual definition without unraveling the entire wrap.
8. The Pinned-Up Beach Waves
This is the style where you’re basically pinning sections of your naturally wavy hair up in a way that shows the waves rather than hiding them. It’s not tightly constructed — it’s more about selecting which parts of your wave pattern you want to highlight and securing them strategically with bobby pins so the overall silhouette reads as an intentional updo.
Why This Is Perfect for Genuinely Wavy Hair
If your hair is already beautifully wavy without much styling, you basically have a natural updo waiting to happen. By pinning strategic sections, you’re creating visual interest and an intentional vibe without imposing structure that fights your texture. This is the updo for people who love their natural waves and want to celebrate them while still having hair off their face.
How to Make It Work
After air-drying or diffuser-drying your hair to emphasize your wave pattern, loosely gather hair from the sides and back into a shape you like — not tightly or with an elastic, but more of a visual guideline of which sections you’re pinning and which you’re leaving down. Using bobby pins that match your hair color, pin sections in place in a way that creates height at the crown and shows your wave pattern. You’re looking for a shape that reads as “updo” but feels completely natural. Leave pieces around your face and throughout your hair unpinned so the waves show.
Worth knowing: This style works best when you’ve created defined waves using a curling iron, braiding damp hair overnight, or using a wave spray product. Random texture that hasn’t been enhanced reads more like “didn’t brush my hair” than “artfully pinned updo.”
9. The Half-Up Braid with Texture
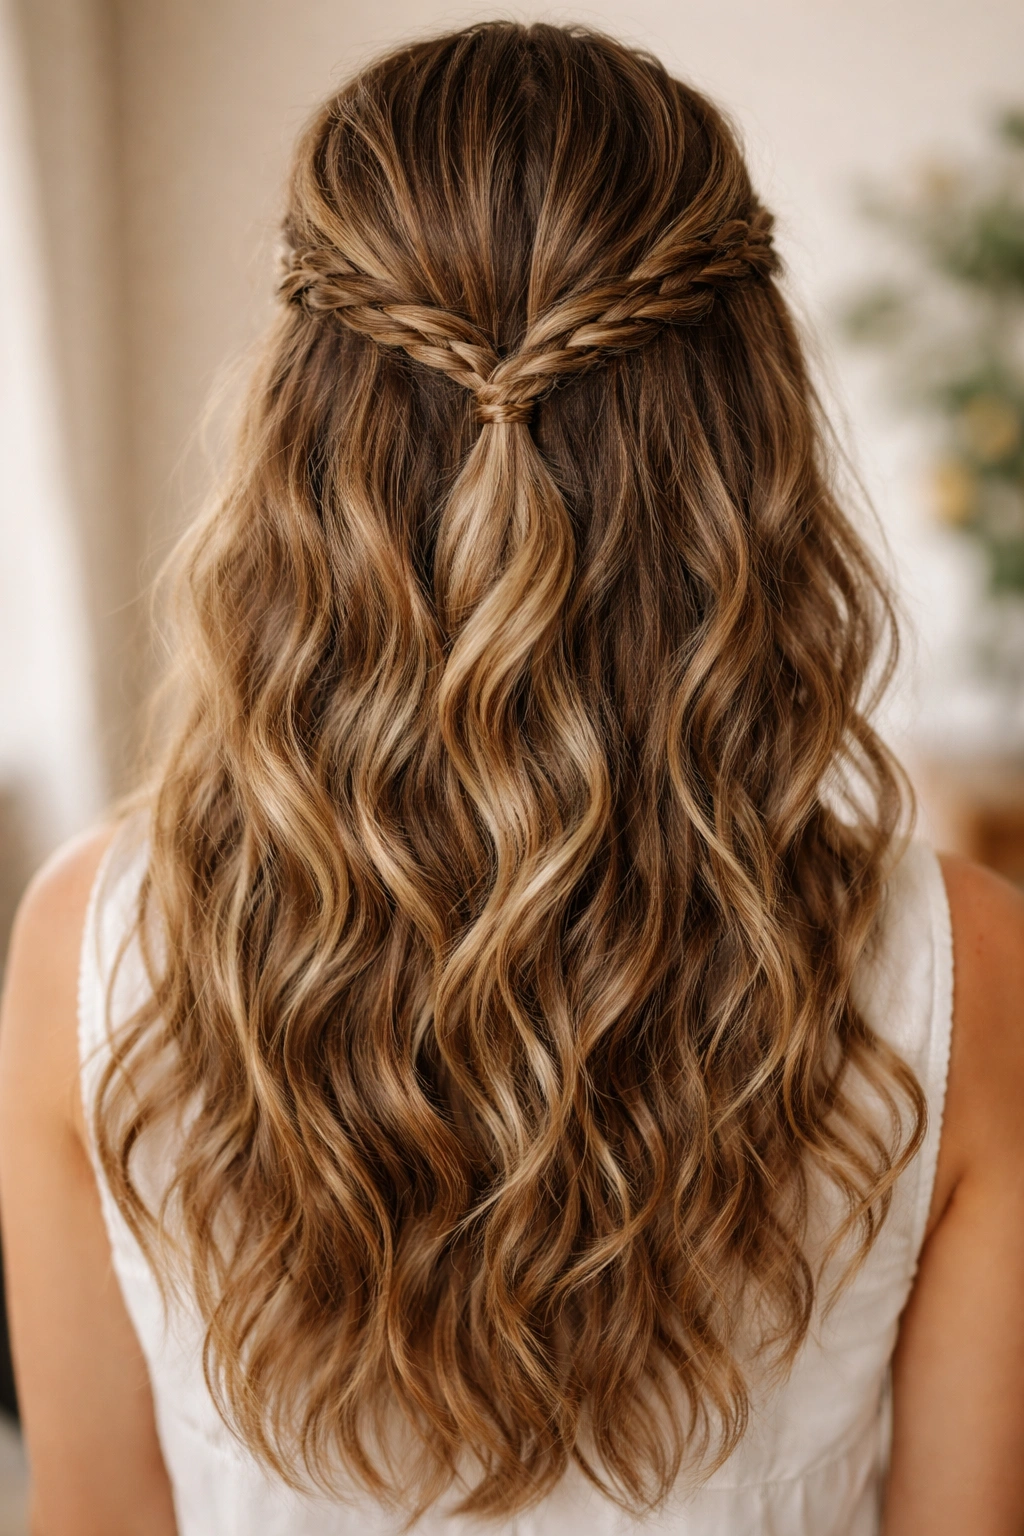
This combines elements of the crown braid with a half-up ponytail — you’re braiding two small sections from each side of your head, bringing them to the back, and securing them together in the center-back of your head, leaving the bottom half of your hair down. On wavy hair, the result is romantic and textured without looking overly done.
Why Wavy Hair Makes This Look So Good
Your waves naturally blend where the braid meets the down hair, creating a seamless transition that’s harder to achieve on straight hair. The texture in both the braided and down sections makes the whole style look cohesive and intentional rather than like you’re wearing a braid on top of separate hair underneath.
How to Make It Work
Start with your hair dry or mostly dry. Take a small section of hair from one side of your head (about one inch) and braid it loosely as you bring it toward the back center of your head. Repeat on the other side. When both braids reach the back center, gather them along with a small section of hair from the middle back section and secure everything together with an elastic or a small clip. Gently pull and loosen all the braid sections to add texture and puff. Leave the bottom half of your hair completely down and unpinned so the waves show.
Pro tip: Texturize the down portion of your hair with a salt spray or wave product before doing the braids — this helps the braided and down sections look intentionally coordinated rather than like two different textures.
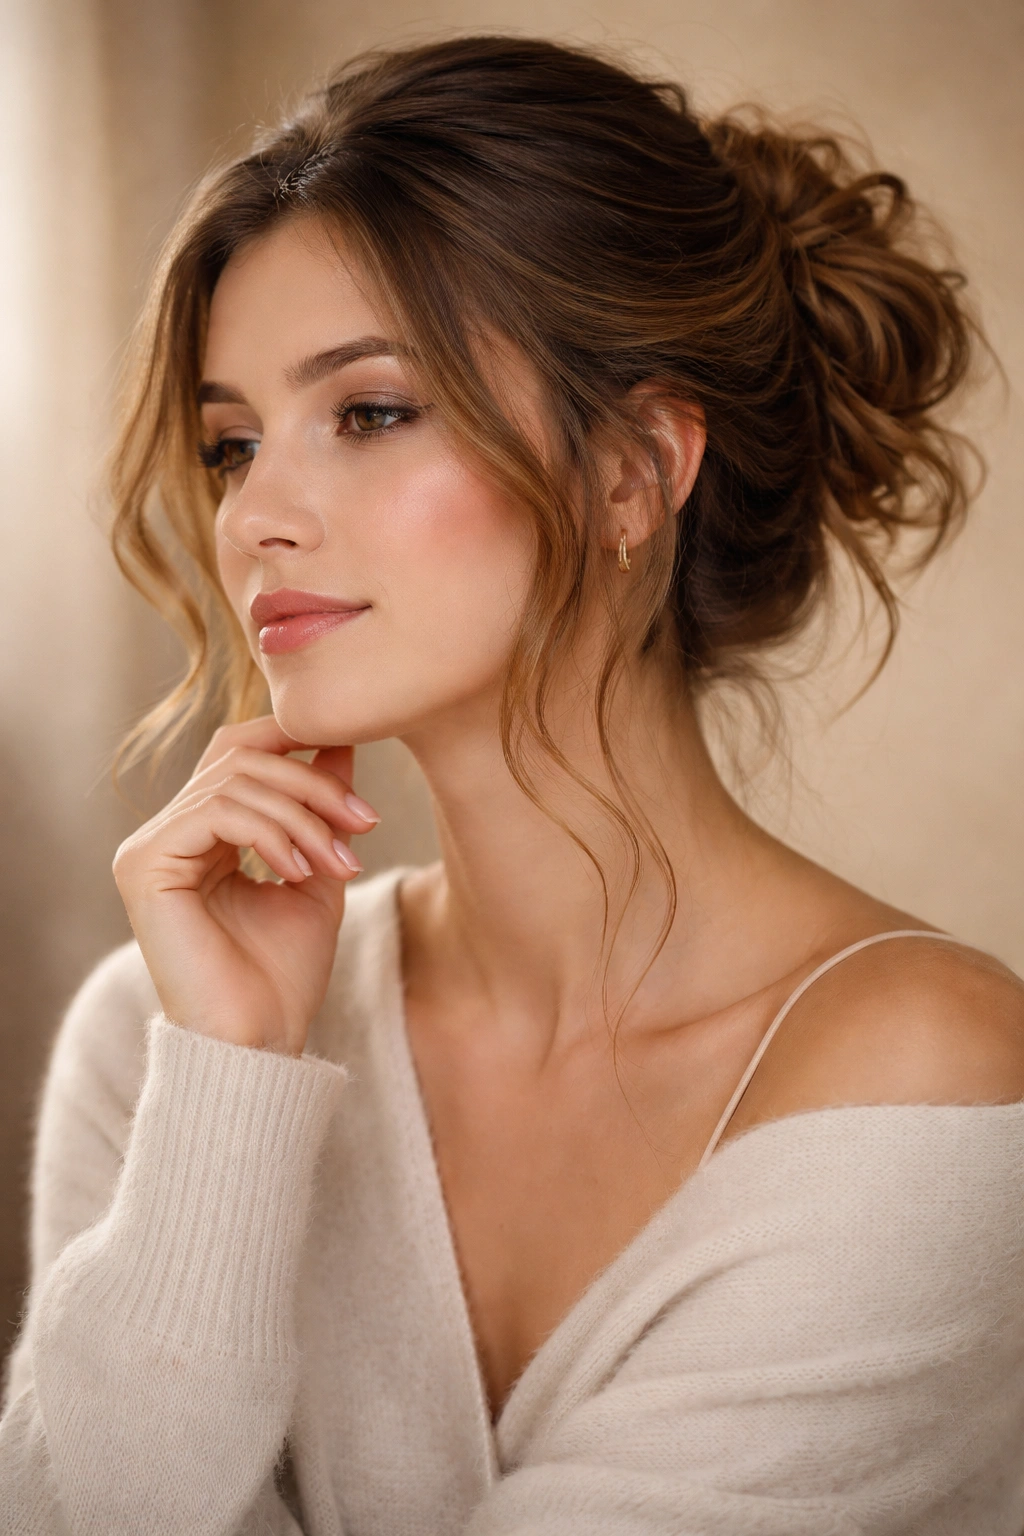
10. The Twisted Bun with Face-Framing Pieces
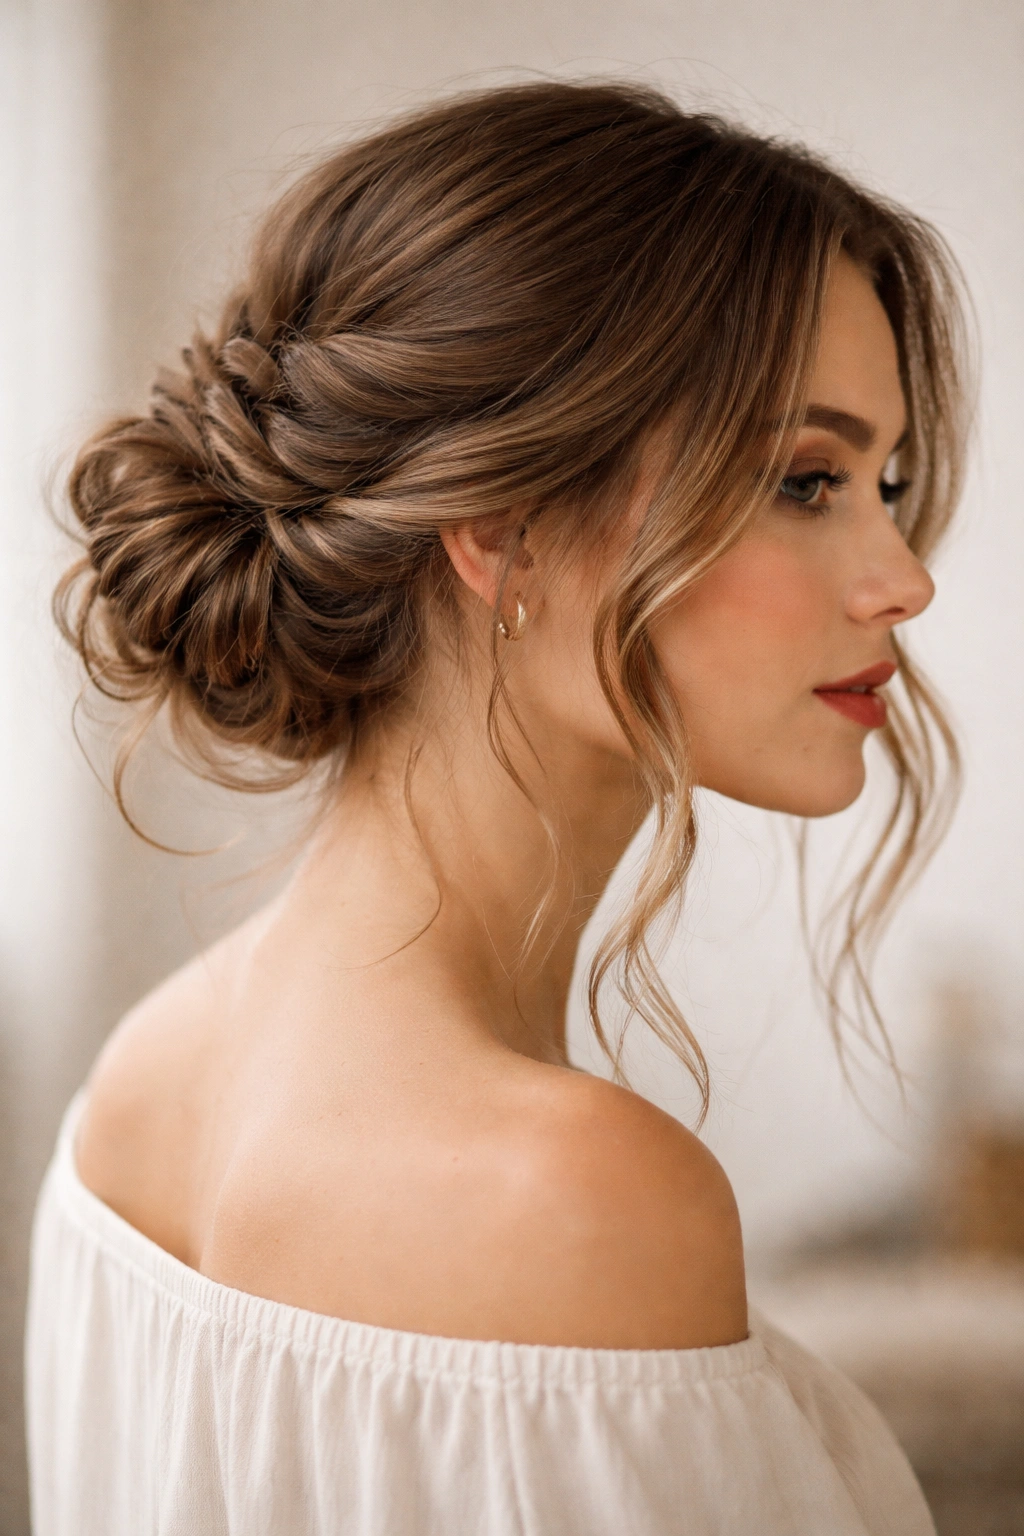
Rather than braiding or coiling your hair into a bun shape, you’re twisting your hair and wrapping it into a loose bun, which creates a dramatically different texture and silhouette than a standard bun. The twists are visible, creating a deliberately undone, romantic look that’s perfect for wavy hair.
Why Twists Look Better Than Coils on Waves
Twists create natural-looking texture that complements your wave pattern, whereas coils can sometimes look deliberately and artificially sculpted. When you twist wavy hair, the wave pattern shows through the twist, creating a texture that reads as “romantic” rather than “overly done.” This is especially true if you let a few face-framing pieces escape before twisting everything into the bun.
How to Make It Work
Gather your hair into a low ponytail using a loose elastic. Before securing fully, pull out one-inch sections from the front on each side — these will be your face-framing pieces, so keep them loose and don’t include them in the ponytail. Now secure the remaining hair into the ponytail with an elastic. Take the ponytail tail and divide it into 2-3 sections. Twist each section loosely, then wrap the twisted sections around each other and coil them into a loose bun shape at the nape of your neck. Pin securely, then gently loosen all the twisted sections so the texture shows prominently. Pull and adjust your face-framing pieces so they frame your face softly.
Insider note: Mist the entire bun lightly with a texture spray after securing it — this helps lock everything in place without making it look stiff or overproduced.
11. The Side-Swept Low Bun
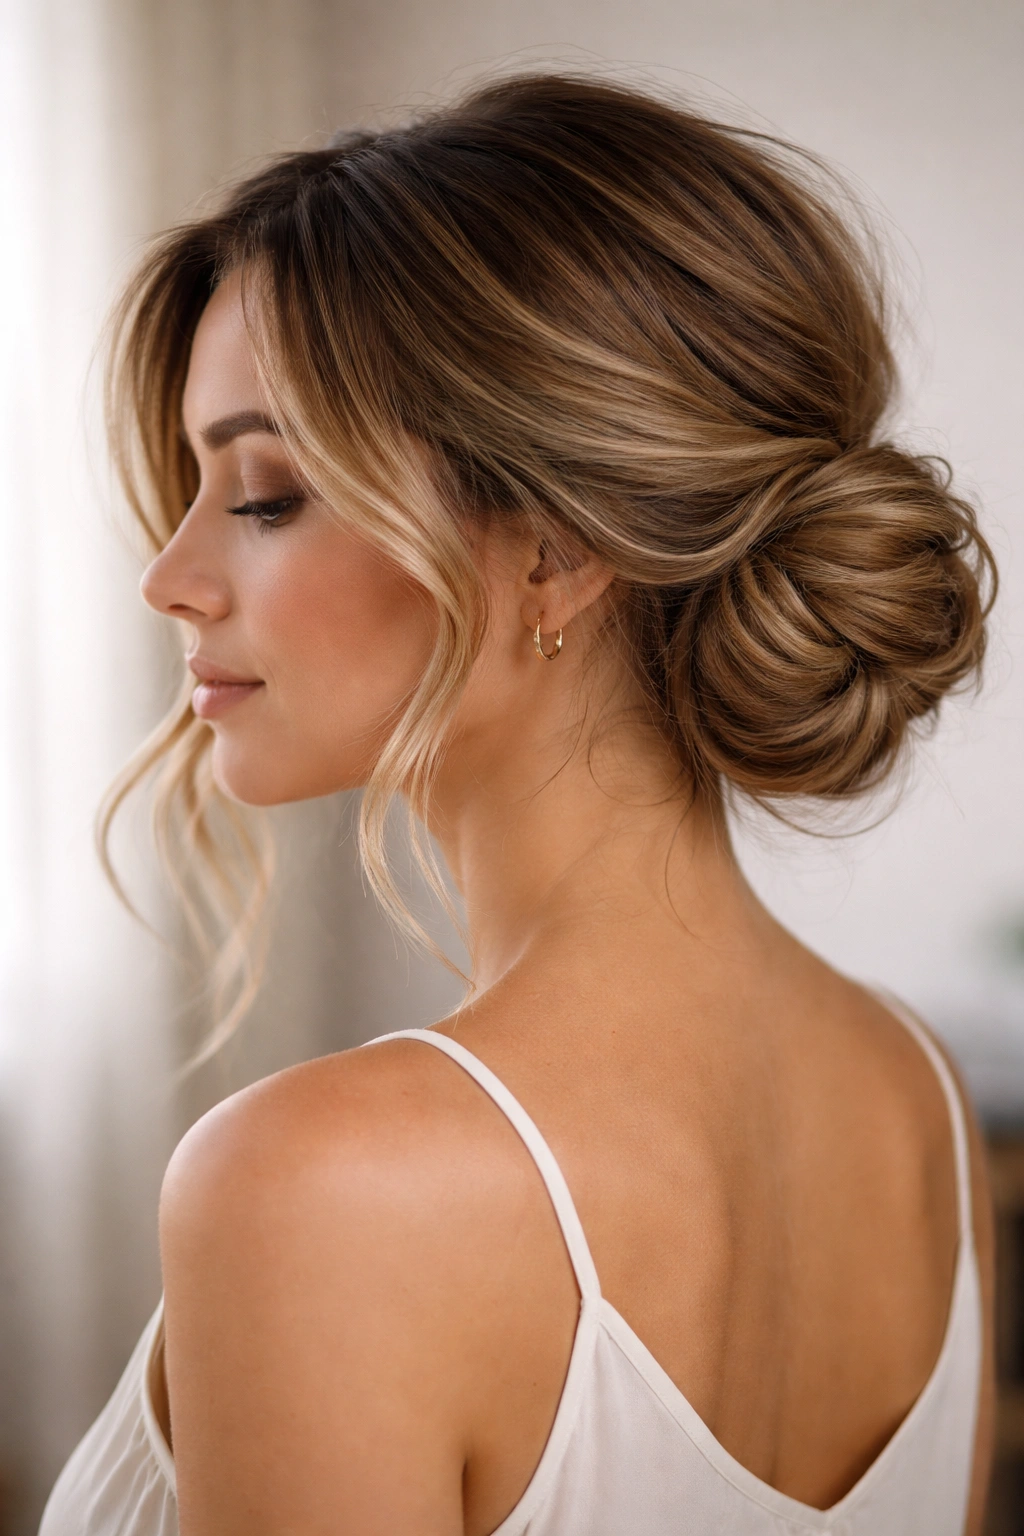
Instead of centering your bun at the nape of your neck, you’re sweeping all your hair to one side and creating the bun off-center. This asymmetrical style plays beautifully with wavy hair because it showcases the texture on one side while creating an interesting silhouette that reads as more fashion-forward than a centered bun.
Why Asymmetry Suits Wavy Hair
Wavy hair has inherent movement and direction — leaning into that by placing your bun off-center creates a style that feels intentional and modern without looking stiff. The asymmetry complements the natural movement of your waves rather than fighting against it.
How to Make It Work
Brush your hair gently to the side you want — let’s say the right side. Gather all your hair into a low ponytail positioned to the right side of the nape of your neck, toward the right shoulder. Secure with an elastic. Twist the ponytail loosely and coil it into a bun shape, still positioned to that side. Pin securely with bobby pins tucked into the bun. Leave a few pieces around your face and along the left side of your head slightly loose and undone to enhance the asymmetrical feel. The result should look like you swept your hair to one side casually rather than meticulously styling an updo.
Worth knowing: This style is particularly flattering if you have a longer face, as the side-swept nature softens your features and creates a more heart-shaped silhouette.
12. The Double-Twisted Updo
This style takes the concept of twisted half-ups but takes it further — you’re doing two sets of twists at different heights, then securing them together, creating a more elaborate updo that’s still remarkably easy to execute. On wavy hair, the multiple twists create a textured, sculptural style that looks far more complicated than it actually is.
Why Multiple Twists Create Visual Impact
One twist can look simple; multiple twists at different heights create the impression of an elaborate style without requiring braiding skill or tight pulling. Your waves naturally fill in between the twists and create dimension that makes the whole style look full and intentional.
How to Make It Work
Start by taking two small sections from near your temples and twisting them loosely toward the back of your head, just as in the twisted half-up. Secure these first twists with a small elastic at mid-height. Then, take two more sections from just below these first twists and twist them similarly, bringing them down to the back of your head at a lower height. Secure these second twists with another elastic. Optionally, you can create a third set of twists if your hair is very thick or long. The multiple twisted sections should nest together at the back of your head, creating a deliberately layered, textured look. Gently pull and loosen all the twisted sections.
Pro tip: Leave face-framing pieces loose throughout — this softens the style and prevents it from looking too tight or severe despite the number of twists you’re creating.
13. The Wrapped Low Ponytail with Loose Pieces
This is a variation on the wrapped ponytail, but with a specific attention to leaving strategic pieces of hair loose around your face and shoulders. The loose pieces break up the polished silhouette, making the updo feel more romantic and less formal while still reading as intentionally styled.
Why Loose Pieces Matter on Wavy Hair
Loose pieces frame your face and showcase your waves, which adds softness and movement to what might otherwise feel like a closed-off style. On wavy hair, these loose pieces aren’t an afterthought — they’re a key part of making the style look intentional and romantic.
How to Make It Work
Create a low ponytail at the nape of your neck, but before securing, pull out thin pieces from around your face — approximately one-inch sections from near your temples and cheekbones. Secure the ponytail with an elastic, then wrap a thin section around the base of the elastic to hide it. Now gently wave and texture the loose face-framing pieces using a curling iron or by braiding them lightly and unraveling the braid. The loose pieces should frame your face in a soft, undone way that contrasts with the controlled ponytail. You can also pull out one or two slightly larger pieces along the sides of your neck to soften the overall silhouette further.
Quick fact: This style works beautifully for both casual daytime settings and dressier occasions — the loose pieces make it feel less formal while the low ponytail and wrap read as polished and put-together.
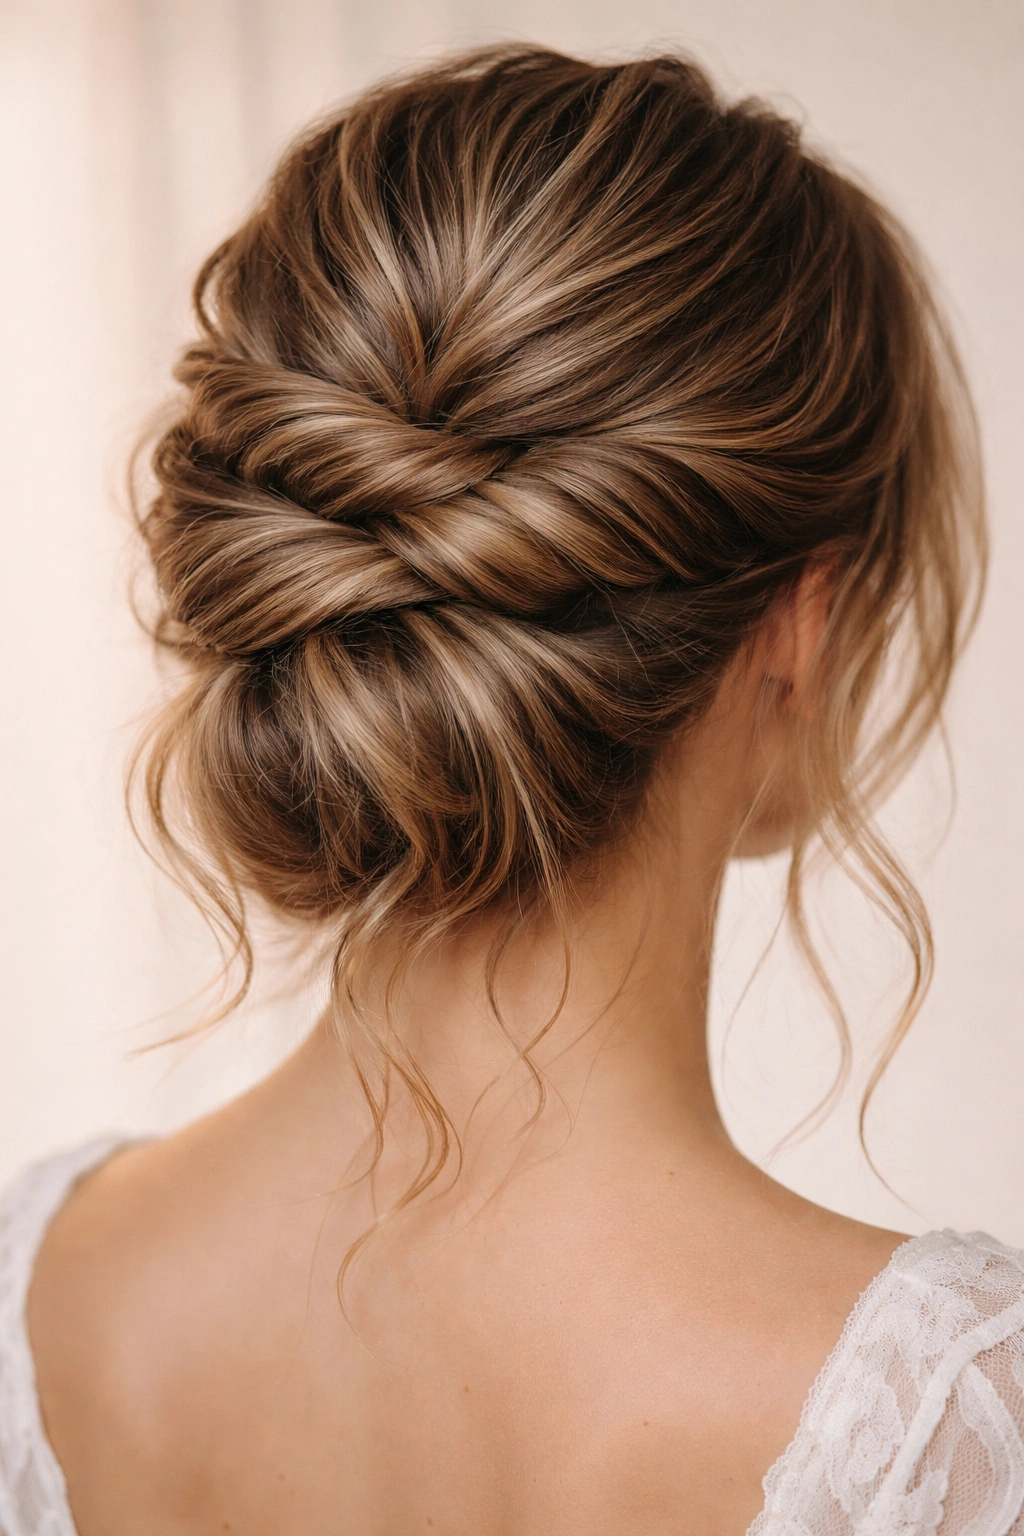
14. The Braided Bun with Undone Texture
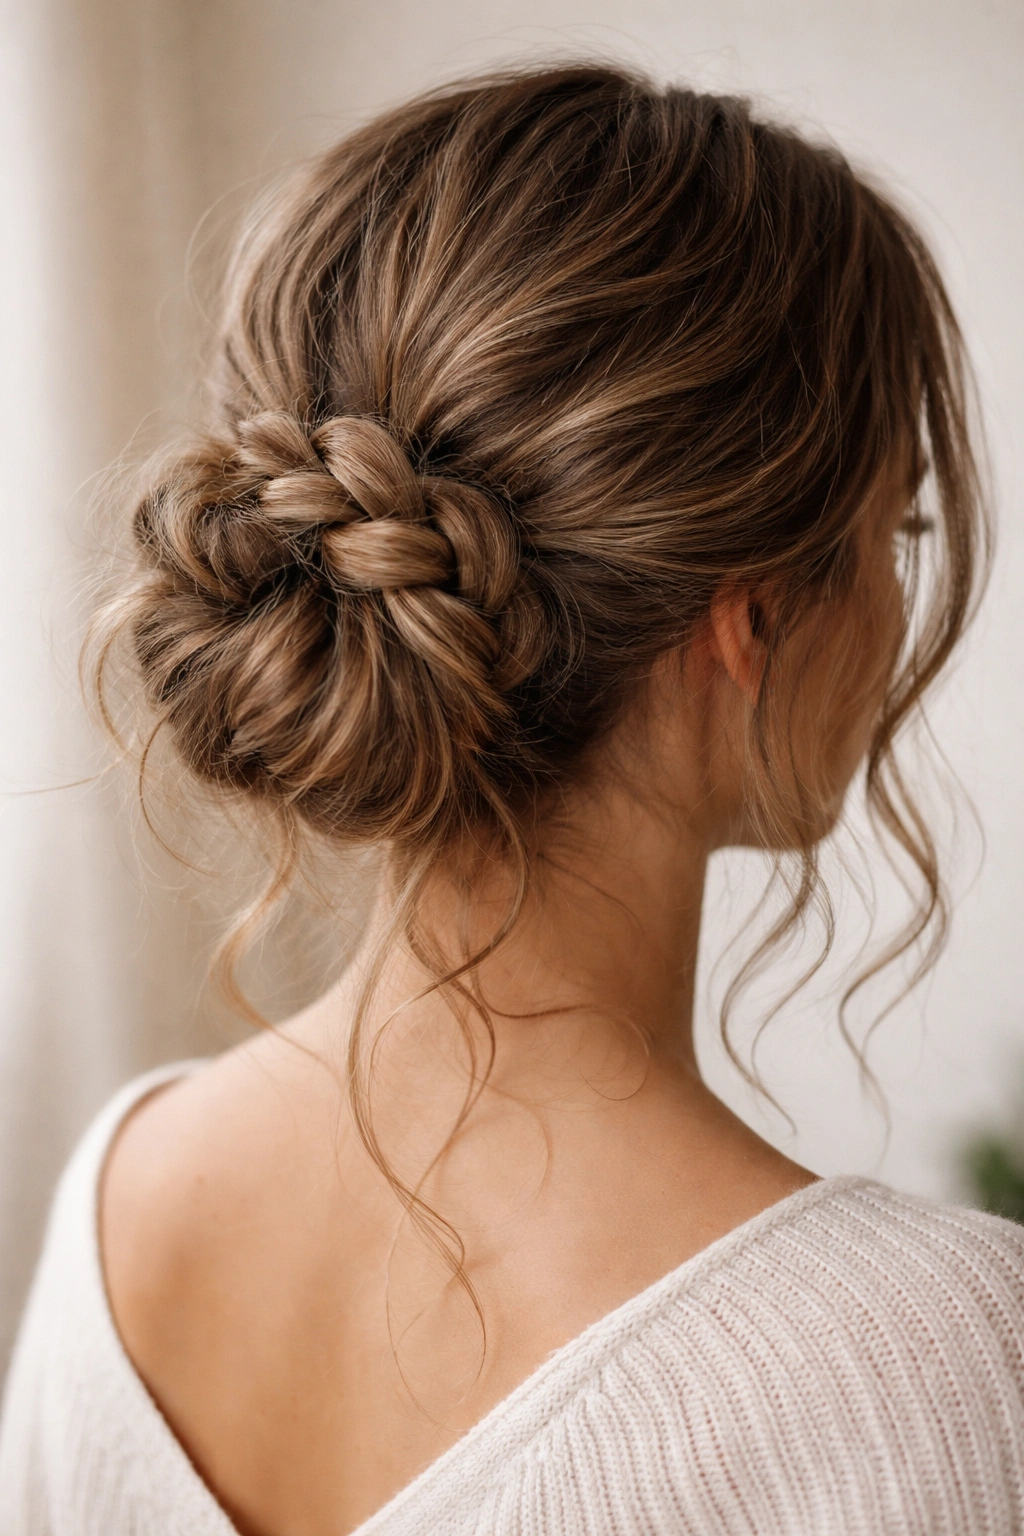
Rather than starting with a ponytail and coiling it, you’re braiding your hair loosely and then coiling the braid into a bun. This creates a bun with visible braid texture, which is far more interesting than a smooth bun and perfectly complements wavy hair. The braid structure gives the bun shape and hold while the visible braid texture looks intentional and textured.
Why Visible Braid Texture Elevates a Bun
A smooth bun on wavy hair can sometimes look a bit thin or wispy because you’re compressing your texture. A braided bun celebrates your texture by making it visible and structural — it’s no longer something you’re hiding but something you’re showcasing as part of the design.
How to Make It Work
Create a low ponytail at the nape of your neck using a loose elastic. Take the ponytail and begin braiding it loosely (either a standard three-strand braid or a looser fishtail braid if you want more texture visible). Braid all the way to the ends of your hair. Once braided, coil the braid around the base of the ponytail elastic, creating a bun shape. Pin securely with bobby pins tucked into the braid. Gently loosen and pull the braided sections so the individual braid strands puff outward and show significant texture. Leave a few wisps around the nape of your neck slightly loose for a romantic finish.
Insider note: A fishtail braid creates more visible texture than a standard three-strand braid on wavy hair, so if you prefer a more textured, romantic look, practice your fishtail braiding first.
15. The Pinned Half-Up Waves
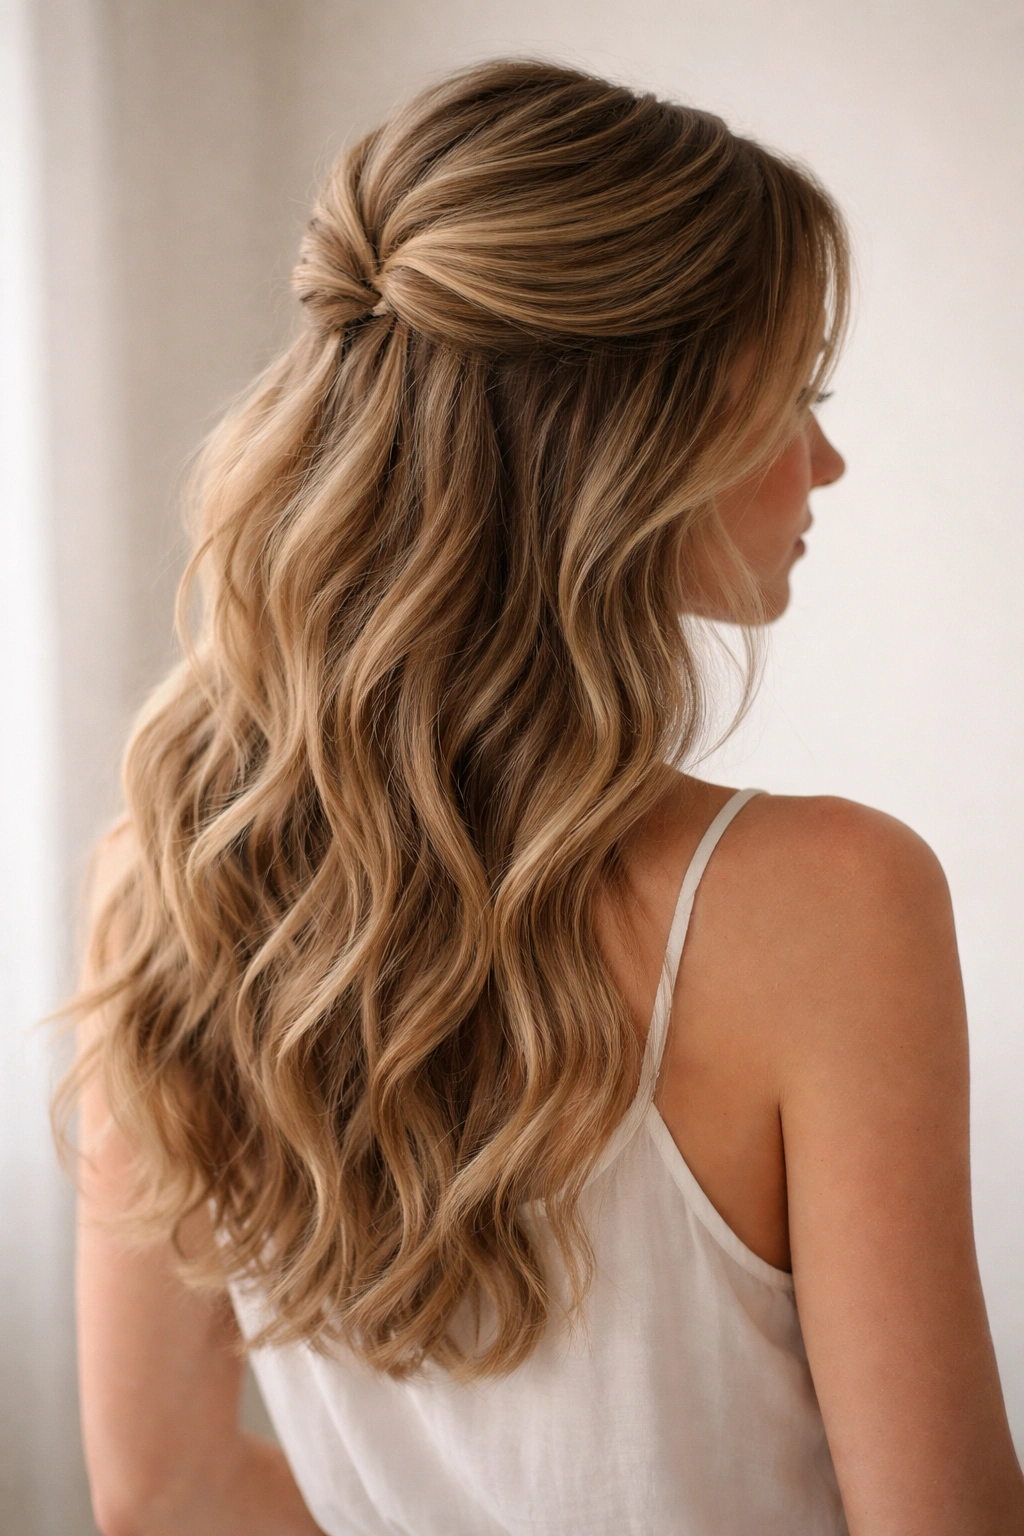
This final style is extremely simple but incredibly effective on wavy hair — you’re not braiding, twisting, or coiling anything. You’re simply gathering the top half of your hair, pulling it gently backward, and securing it with bobby pins in a way that creates height at the crown while letting your waves show throughout. It’s the minimal-effort updo that still looks completely intentional.
Why Simplicity Works Here
On wavy hair, you don’t need complex techniques to create a polished updo — your texture does most of the visual work. By simply gathering and pinning the top half of your hair, you’re creating a style that looks effortlessly put-together because the waves are doing the heavy lifting in terms of visual interest and dimension.
How to Make It Work
Brush your hair gently to create soft waves throughout. Gather the top half of your hair — roughly from your temples back to about the middle of your head — and gently pull it backward without pulling it extremely tight. Using bobby pins, secure this gathered section at the back of your head in a way that creates gentle height at the crown. The pins should be hidden underneath the gathered hair. Leave the bottom half of your hair completely down and wavy. You can create additional height by gently teasing the gathered section underneath before pinning, but the goal is a soft, undone look rather than dramatic volume.
Pro tip: This style is actually easier on second-day hair, after your waves have had time to settle and develop more texture and grip. Freshly washed and dried waves can be too soft and slippery for pins to grip securely.
Final Thoughts
The beauty of styling wavy hair into updos is that your natural texture does half the work for you. Instead of fighting your waves and trying to create texture where none exists, these styles embrace what you already have. The updos that work best on wavy hair are those that let your waves show, that don’t require extreme tightness to stay in place, and that actually look better slightly undone than perfectly polished.
The versatility is remarkable — you can go from a five-minute claw clip gather on a busy morning to a side-swept bun for an evening out, and both will look intentional and current because they play to your hair’s strengths rather than against them. Many of these styles actually improve as the day goes on, as your waves continue to set and texture becomes more pronounced. That’s a genuine advantage of styling wavy hair, not a disadvantage.
The key takeaway is this: stop viewing your waves as something that makes updos harder, and start seeing them as an asset that makes updos easier and more interesting. Your texture is doing the styling work — you’re just directing where it goes.