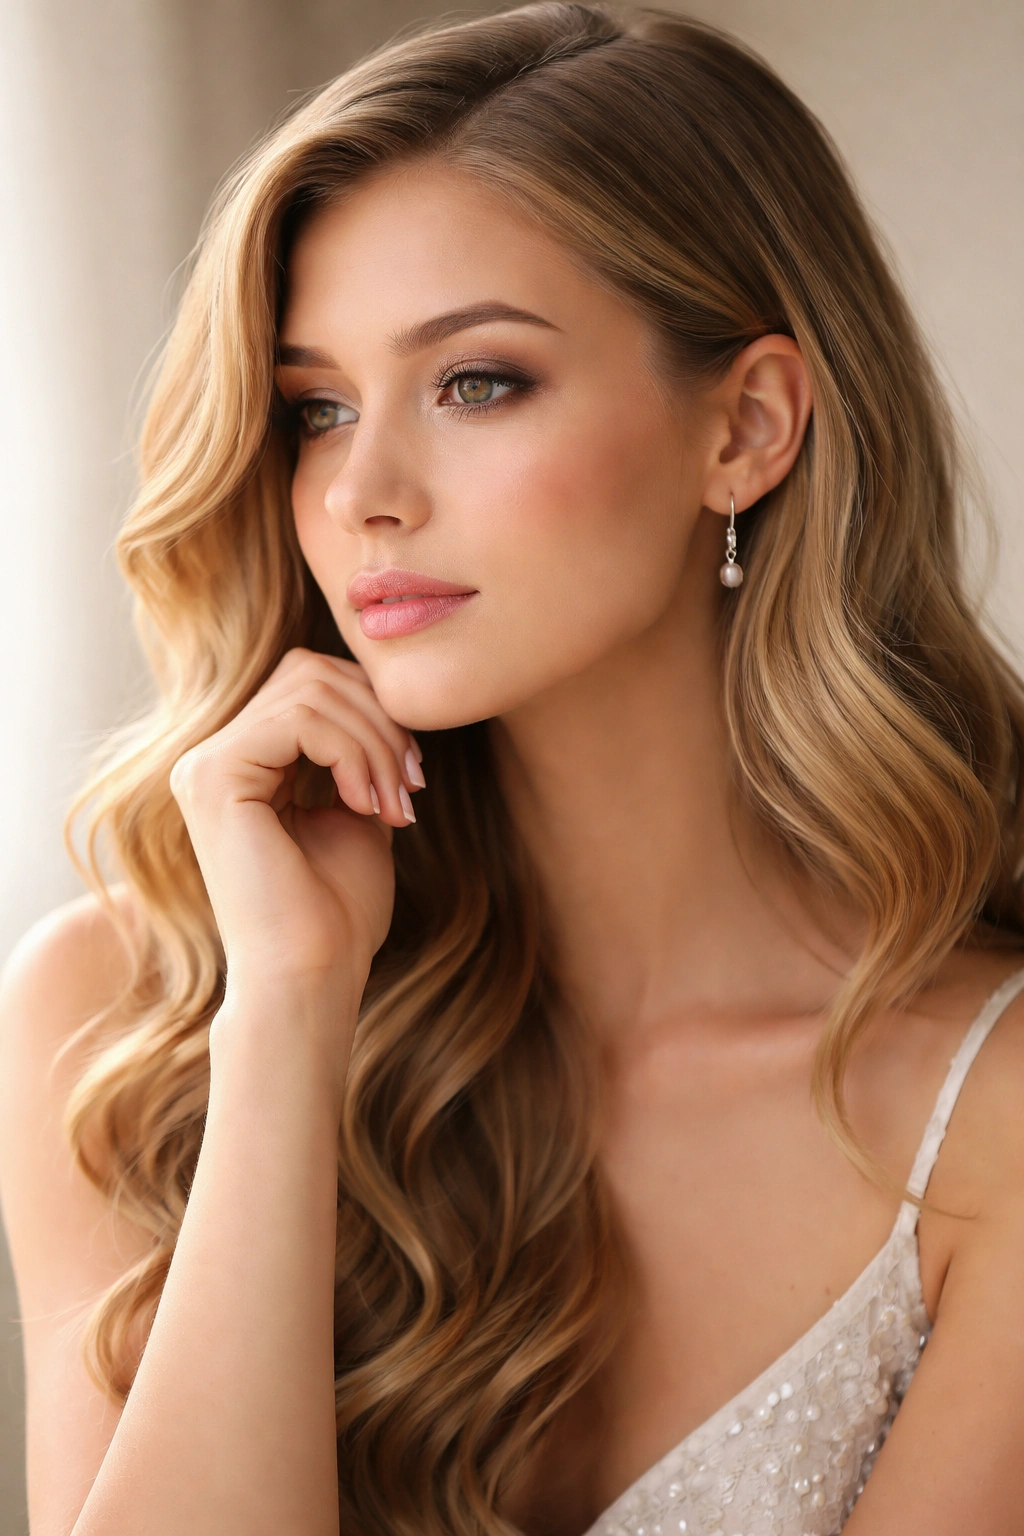
Prom night calls for a hairstyle that makes you feel absolutely confident and unforgettable. While your dress might steal the spotlight from across the room, your hair is what catches attention the moment someone looks directly at you—and wavy hairstyles have a magic all their own. Waves create movement, dimension, and a sense of effortless elegance that photographs beautifully under prom venue lighting, whether you’re dancing in an ornate ballroom or outdoors under twinkling lights.
The beauty of waves for prom is their versatility. They work with almost every dress style imaginable—from classic princess gowns to sleek modern silhouettes—and they suit every hair texture when approached correctly. Waves can look romantic and soft, edgy and dramatic, vintage and timeless, or undeniably glamorous depending on how you style them. They also have practical advantages: waves are forgiving if you need to touch them up throughout the night, they hold better than completely straight hair in humid conditions, and they’re genuinely comfortable to wear for hours without the weight and tension of a tight updo.
The key to choosing the right wavy prom hairstyle is thinking about how it complements your dress, face shape, and overall vision for the evening. Are you going for classic elegance? Playful romance? Modern sophistication? This guide covers eleven stunning wavy styles that deliver different vibes, all proven to look incredible in person and photograph like a dream. Each style includes the specific techniques and products that make it work, so you’ll know exactly what to ask your stylist or how to create it yourself.
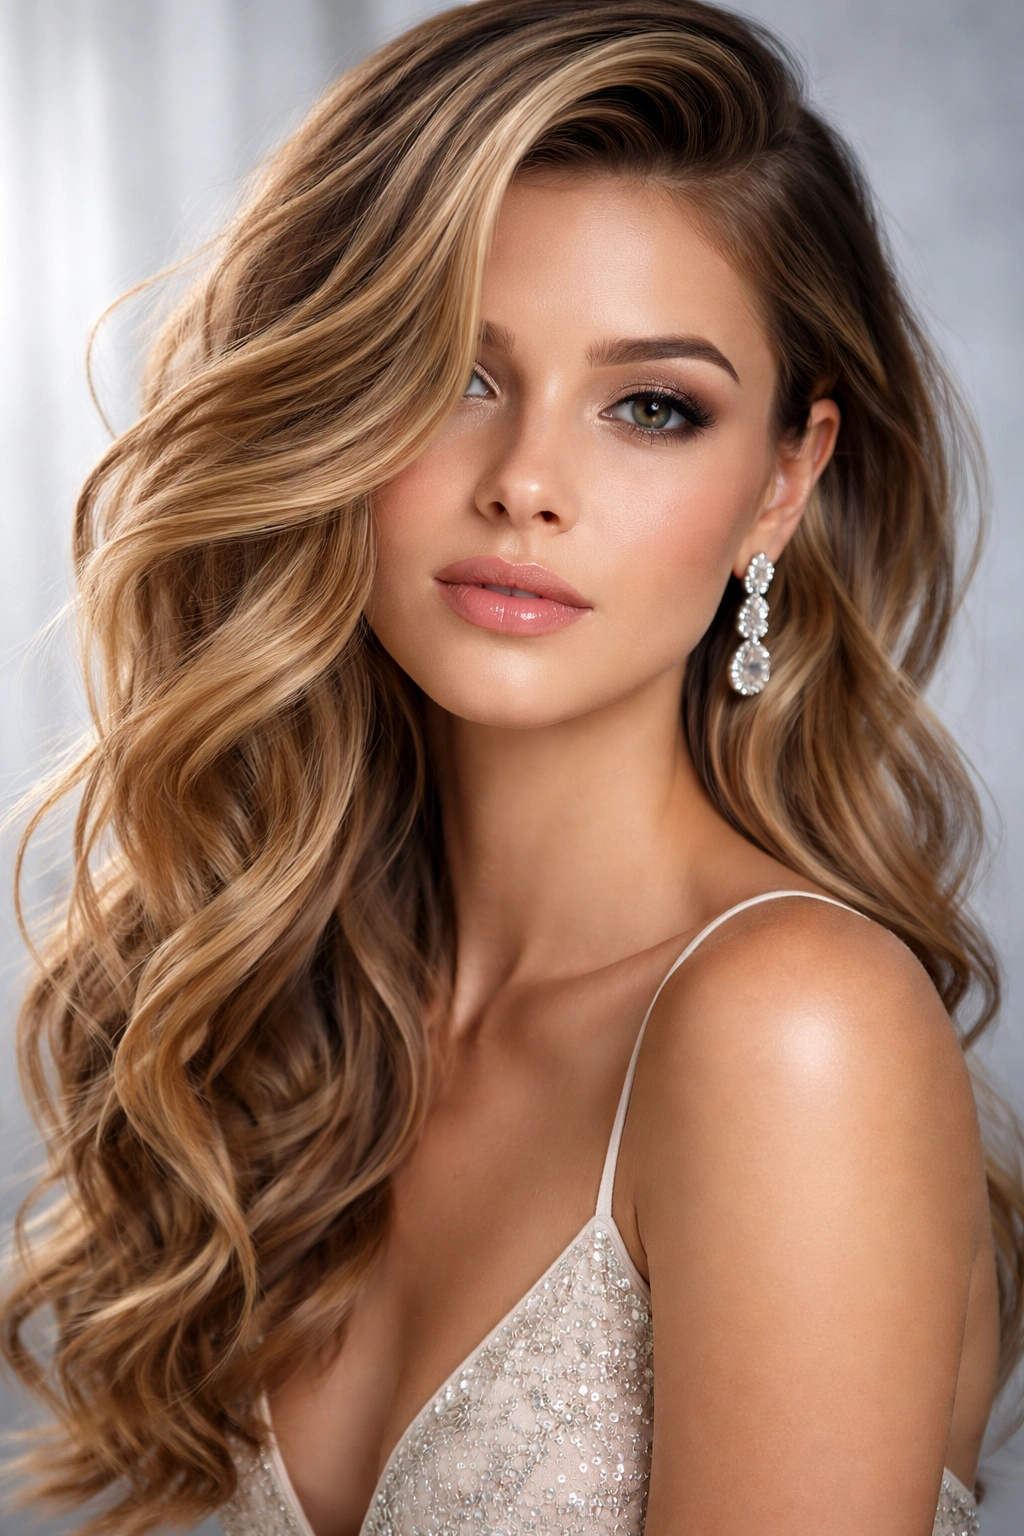
1. Loose Waves with Romantic Side Sweep
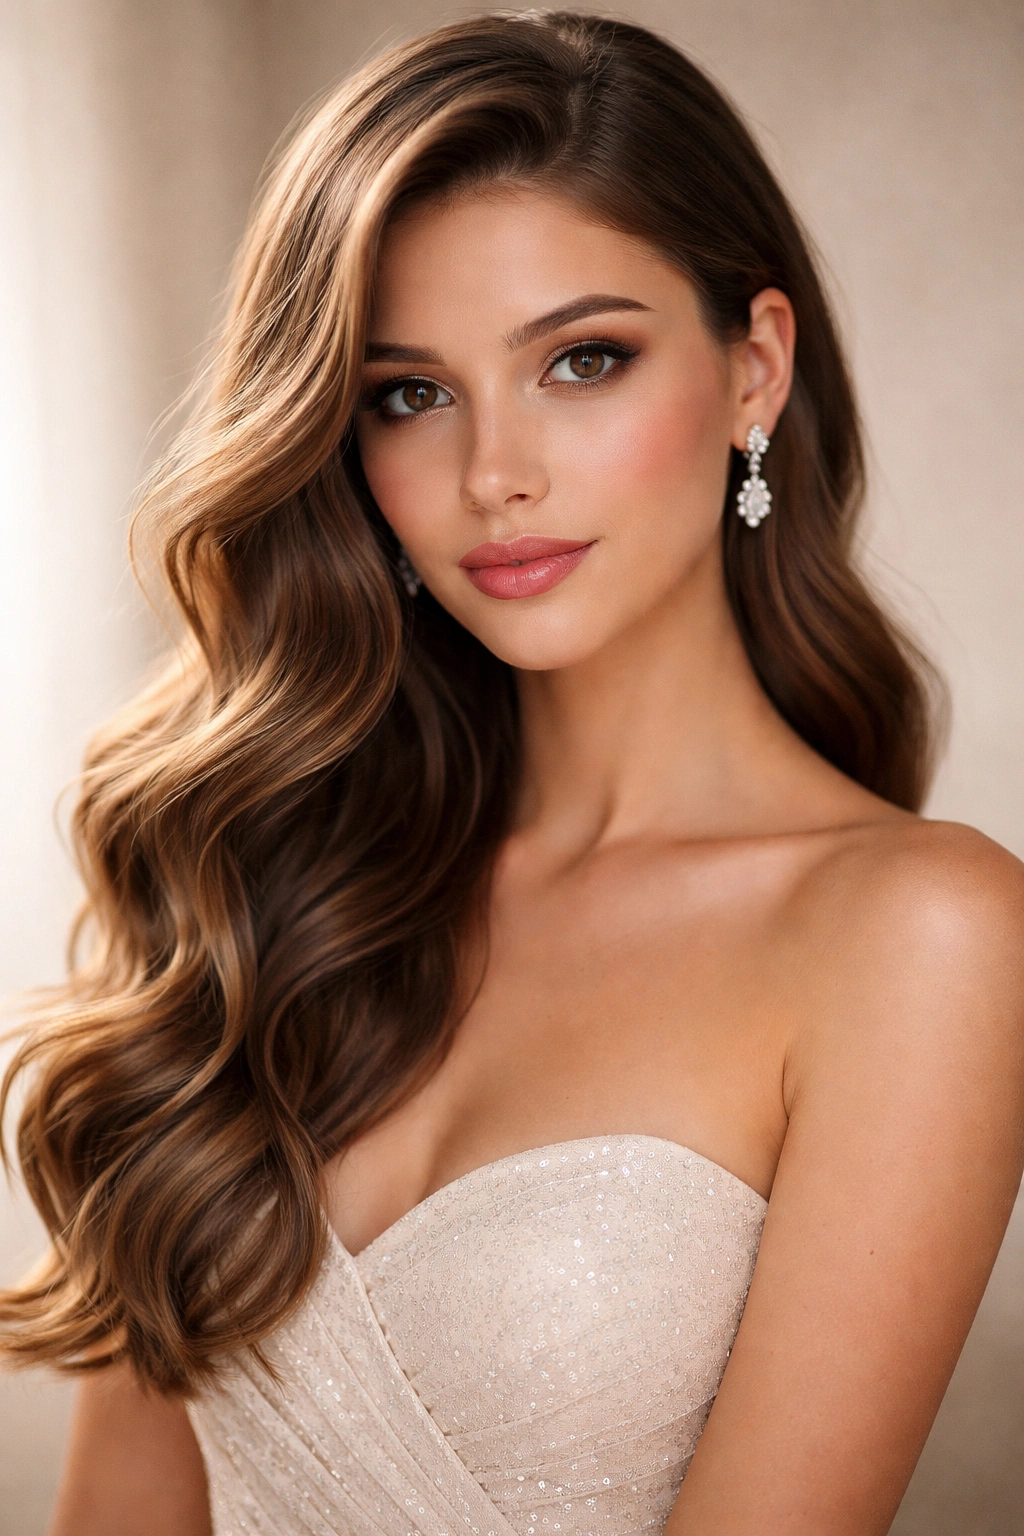
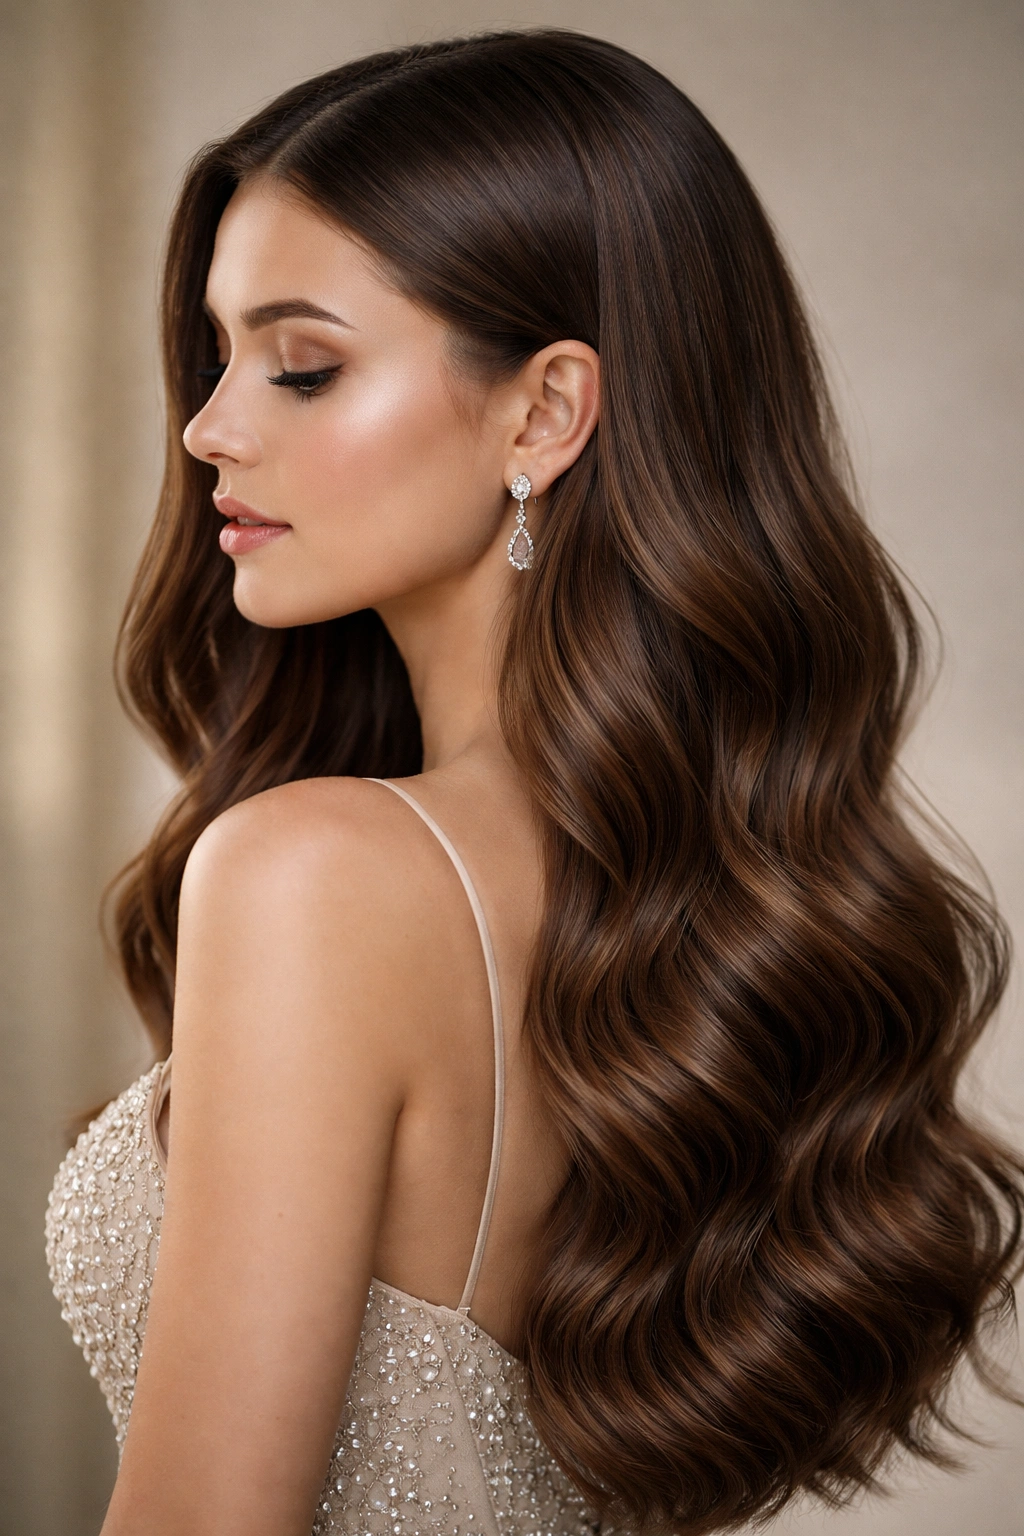
This is the quintessential prom hairstyle—soft, flowing waves that cascade over one shoulder with an elegant side-swept component that’s both feminine and flattering. The waves start at the roots with gentle curves rather than tight ringlets, creating movement that feels natural and allows your face to be beautifully framed. The side sweep means one side of your hair is pulled back slightly while the other side falls freely, creating asymmetry that’s visually interesting without feeling unbalanced.
Why This Works Perfectly for Prom
This style flatters nearly every face shape because the side sweep elongates your features while the waves soften angular bone structure. The asymmetry makes you look polished without feeling overly formal, which is ideal if you want to dance comfortably for hours. It’s also incredibly versatile—pair it with delicate drop earrings to show off your swept side, or keep your shoulders bare to let the waves be the main event. The romantic quality of loose waves photographs beautifully in both natural and flash photography.
How to Create This Style
- Start with clean, dry hair or slightly dampened hair
- Apply a heat protectant spray throughout to prevent damage from styling tools
- Use a 1.25-inch curling iron or waver tool to create waves throughout, working in 1-2 inch sections and leaving the first few inches of roots unwaved for a more natural effect
- Once all sections are curled, let the waves cool completely—this sets them and ensures they last all night
- Gently run your fingers through the waves to soften them and create that “lived-in” texture
- Use a fine-tooth comb to sweep one side of hair back smoothly, securing it with bobby pins that match your hair color
- Finish with a flexible hold hairspray that keeps waves in place without stiffening them
Pro tip: If you’re doing this yourself before prom, create the waves the day before if possible—second-day waves actually hold better and have more texture naturally.
2. Textured Waves with Half-Up Style
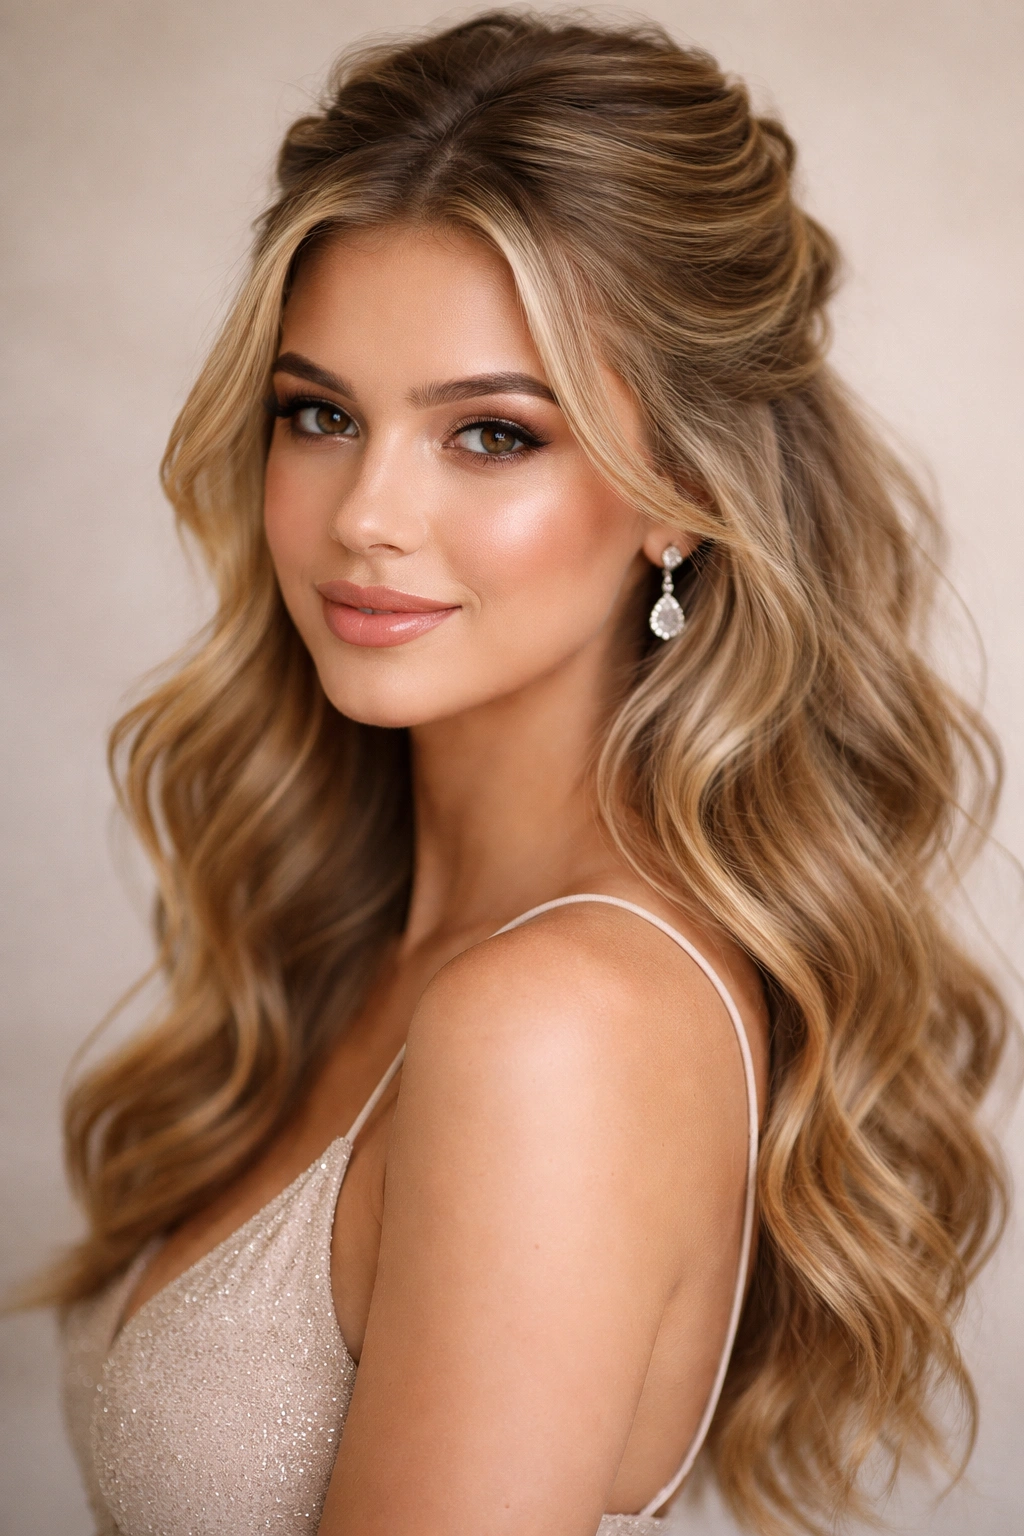
A half-up, half-down style adds architectural interest to your look while keeping hair off your shoulders and neck—practical for dancing and staying cool throughout the evening. The textured waves version cranks up the dimension by using a tousled, lived-in wave texture rather than smooth waves, creating an effortlessly cool vibe that feels current and confident. The crown portion that’s pulled up can be sleek and smooth or incorporated into the textured effect, depending on your preference and dress neckline.
Why Texture Changes Everything
Textured waves have more movement and bounce than smooth waves, which makes them catch light beautifully and creates visual fullness even with finer hair. The half-up element prevents the style from feeling too heavy or formal, making it perfect if you want to show off your dress’s back or shoulders. This style works exceptionally well with strapless or low-back dresses because it draws attention upward while showcasing your features. The tousled texture also feels modern and age-appropriate for prom without looking like you’re trying too hard.
Creating Textured Waves with Half-Up Detail
- Apply texturizing spray to damp hair for grip and hold—this product is essential for creating textured, separated waves
- Blow dry hair with a diffuser attachment to enhance natural texture, or blow dry straight and use styling tools next
- Use a 1-inch curling iron to create tighter, more separated waves rather than continuous curves
- Alternate the direction you wrap sections around the iron (some forward, some backward) to create variety in the texture
- Once all waves are complete, scrunch sections upward with your hands to separate and tousle them
- Pull the crown section back and secure with a decorative clip, elastic, or bobby pins hidden under the texture
- Break apart waves with your fingers one more time for that effortless look
- Use texture or sea salt spray to maintain separation and add grip throughout the evening
Worth knowing: Textured waves hold significantly better than smooth waves in humidity, making them ideal if your prom venue is outdoors or in a warm space.
3. Beachy Waves with Delicate Accessories
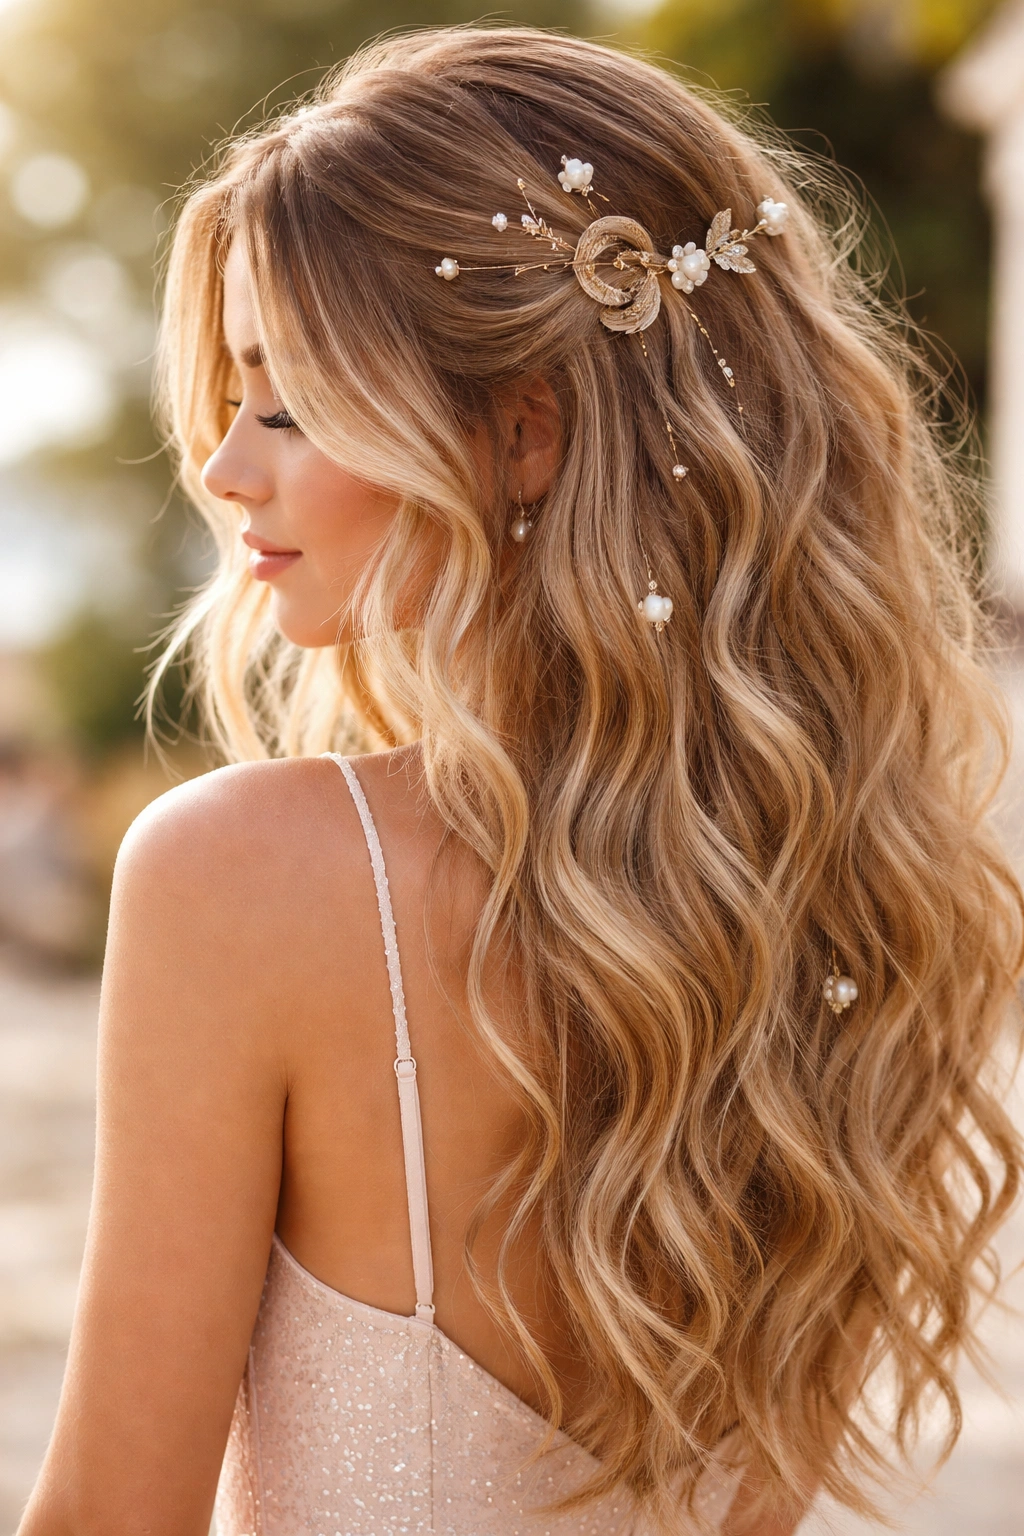
Beachy waves bring a relaxed, California-inspired elegance to prom that feels fresh and youthful without sacrificing sophistication. These waves are intentionally undone and organic-looking, with varied wave sizes and soft, separated texture throughout. When paired with delicate hair accessories—think thin gold pins, pearl bobby clips, or a delicate hair vine—the casual vibe becomes instantly prom-appropriate and romantic. This style particularly suits outdoor or garden prom venues where it enhances the natural, ethereal aesthetic.
The Power of Accessorizing Beachy Waves
Hair accessories transform beachy waves from “I-just-came-back-from-vacation” into “I-planned-this-sophisticated-look.” Delicate pieces add intentionality without heaviness, and they’re an opportunity to incorporate your dress color, skin tone metals (gold, silver, rose gold), or meaningful symbols. Accessories also help secure the casual waves in place, preventing them from becoming completely chaotic throughout the night. The key is using multiple small pieces rather than one large statement accessory—scattered pearl clips or thin gold pins feel more elevated and considered than a thick headband or tiara.
Building the Beachy Wave Look
- Start with hair that’s been washed 1-2 days prior—second or third day hair holds beachy waves better than freshly washed hair
- Apply sea salt spray or texturizing spray generously throughout damp hair
- Blow dry with a diffuser or use a flat iron to create loose, undone waves by wrapping sections loosely and letting them fall away naturally
- For more defined but still relaxed waves, use a 1.5-inch curling iron and twirl sections loosely rather than tightly
- Once waves are cool, break them apart completely with your fingers until they feel soft and separated
- Dry shampoo can be used sparingly in roots for texture and grip, but don’t overdo it
- Place delicate accessories strategically—one or two pieces framing the face, a small cluster near the crown, perhaps one at the side
- Set with a light hold spray that won’t make hair feel stiff or heavy
Insider note: Beachy waves look better in photos if you photograph them in natural light shortly after styling, before wind or dancing relaxes them further.
4. Hollywood Glamour Waves
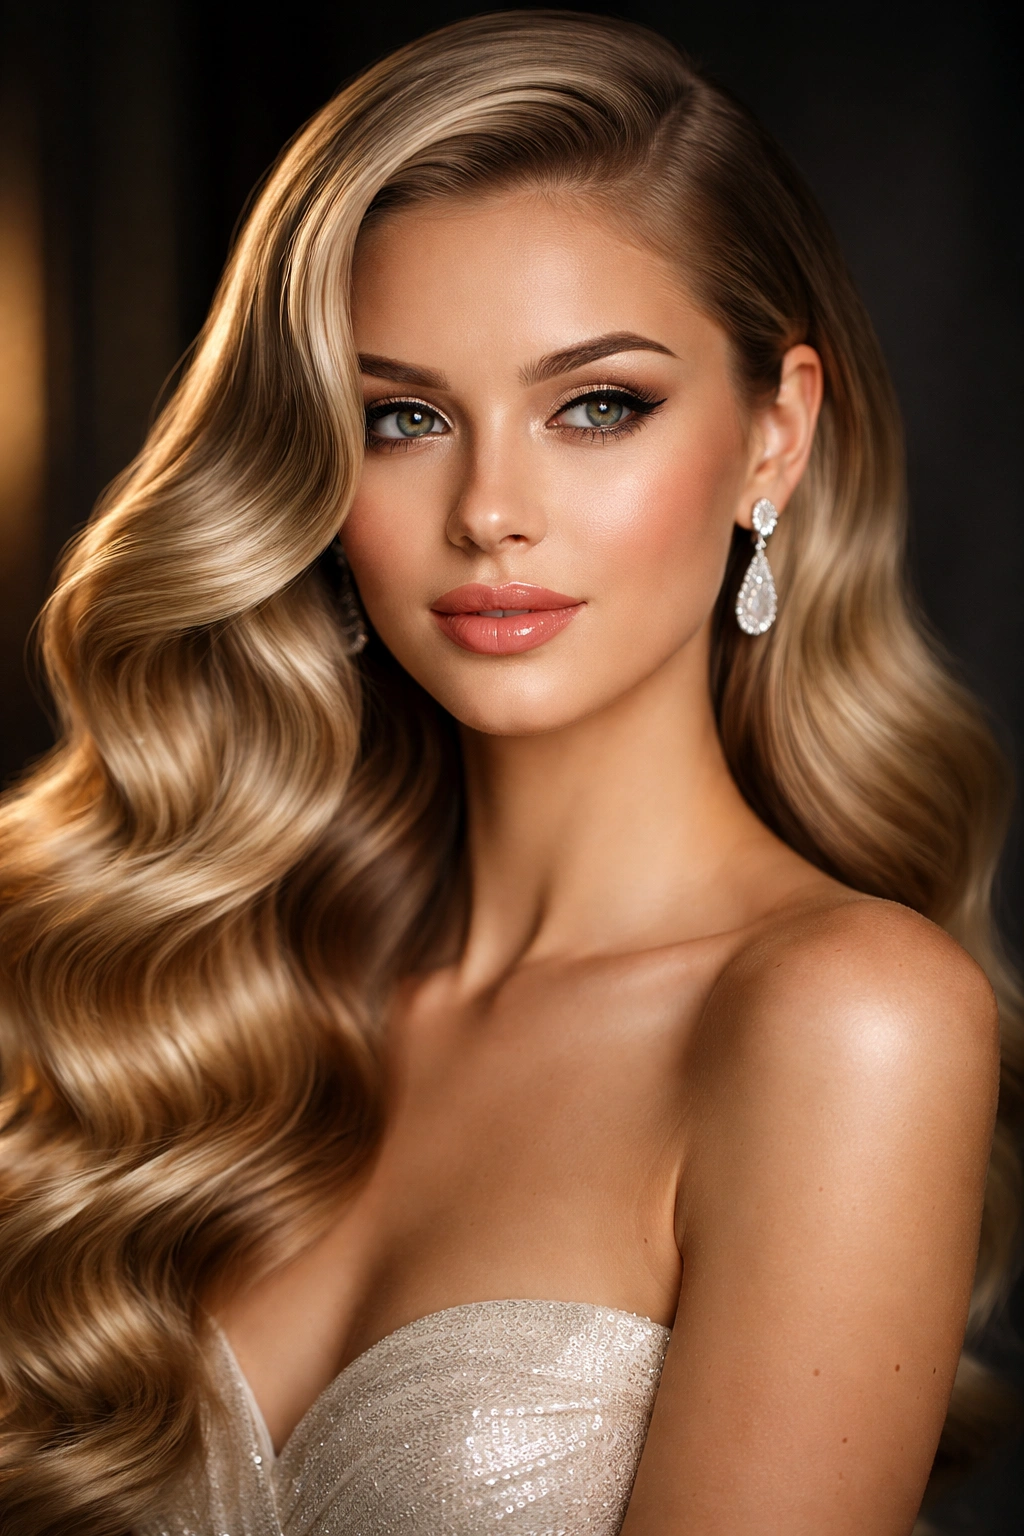
If you want unapologetic elegance and drama, Hollywood glamour waves are the answer. This classic style features deeply curved, sculpted waves that are smooth and shiny rather than textured—think Old Hollywood starlets and red carpet sophistication. The waves are intentionally symmetrical and polished, creating an air of timeless glamour that photographs like a dream and makes you feel like the absolute star of the night. This style pairs perfectly with classic, elegant dresses and formal updos if you’re planning to pin it up later.
What Makes Hollywood Waves Different
Hollywood waves are all about definition and shine, which requires different technique and products than casual waves. They’re created with precision using hot tools and are meant to look intentional and structured rather than organic. The depth and dimension come from the contrast between lit and shadowed areas of each wave, not from separated texture. This style demands smooth hair as a starting point and benefits from professional styling or significant practice before prom night. The payoff is a look that’s unmistakably elegant and instantly recognizable as intentional glamour.
Creating Authentic Hollywood Waves
- Start with smooth, polished hair—blow dry straight first with a paddle brush for a sleek base
- Section hair carefully into 1-inch sections and clip up everything except the section you’re working on
- Use a 1.25-inch curling iron to create waves, wrapping the section around the iron completely and holding for 3-5 seconds
- Wrap each subsequent section in the opposite direction from the previous one—right, left, right, left—to create the classic alternating Hollywood wave pattern
- After curling each section, let it cool in a wave shape before releasing (you can hold it in place with a clip or your fingers)
- Once all sections are curled and cooled, gently brush through waves with a soft paddle brush to blend and smooth them
- Use a fine-tooth comb to refine the wave pattern and ensure clean lines
- Finish with a light hairspray that adds shine rather than matte finish
- A smoothing serum can be applied sparingly to enhance the shine and smooth flyaways
Pro tip: Hollywood waves last longer if you sleep on them gently on a silk pillowcase the night before prom, refreshing them with a curling iron the day of rather than creating them fresh.
5. Tousled Waves with Deep Side Part
A deep side part instantly adds sophistication and dimension to any wave style, and when combined with tousled, undone texture, it creates a look that’s simultaneously polished and playful. The deep side means your part line begins at or very close to your temple on one side, creating dramatic volume on the opposite side and a distinctly styled appearance. Tousled waves throughout add movement and texture that prevents the style from feeling heavy or overdone, keeping it wearable for an entire evening of dancing and socializing.
Why Side Parts Elevate Wavy Hair
A deep side part creates immediate asymmetry that’s flattering on most faces and feels more intentional than a center part. It also creates the visual illusion of fuller hair because of how light hits the volume on one side, making this style excellent for fine or thinner hair. The side part draws attention to whichever side of your face is showing more, so position it to frame your better side or to show off makeup you’re particularly proud of. This style also gives you flexibility—if you want to sweep hair back later in the night, the existing side part provides a natural guide.
Styling Tousled Waves with Dramatic Side Part
- Blow dry hair with your head tilted to the side that will have more volume—this naturally creates lift where you need it
- Create your deep side part by combing hair to one side and using a fine-tooth comb to establish a clear line starting at your temple
- Use a 1.25-inch curling iron to create waves throughout, focusing on creating variety in wave size and direction
- Emphasize the tousled texture by scrunching waves upward as they cool, breaking apart larger waves into smaller pieces
- Flip your head upside down and gently massage your scalp to create lift at the roots, especially on the side with the deeper side part
- Flip back over and use a wide-tooth comb to gently separate waves while maintaining their texture
- Style the deeper side by smoothing hair back slightly and securing any shorter pieces with small bobby pins hidden under the texture
- The other side should fall freely and tousled over your shoulder
- Use a flexible hold spray that maintains movement
Worth knowing: This style works beautifully with one-sided makeup emphasis—heavier contour, more dramatic eyeshadow, or a bold lip draw all the attention to the side of your face that’s more visible with the deep part.
6. Braided Waves with Soft Texture
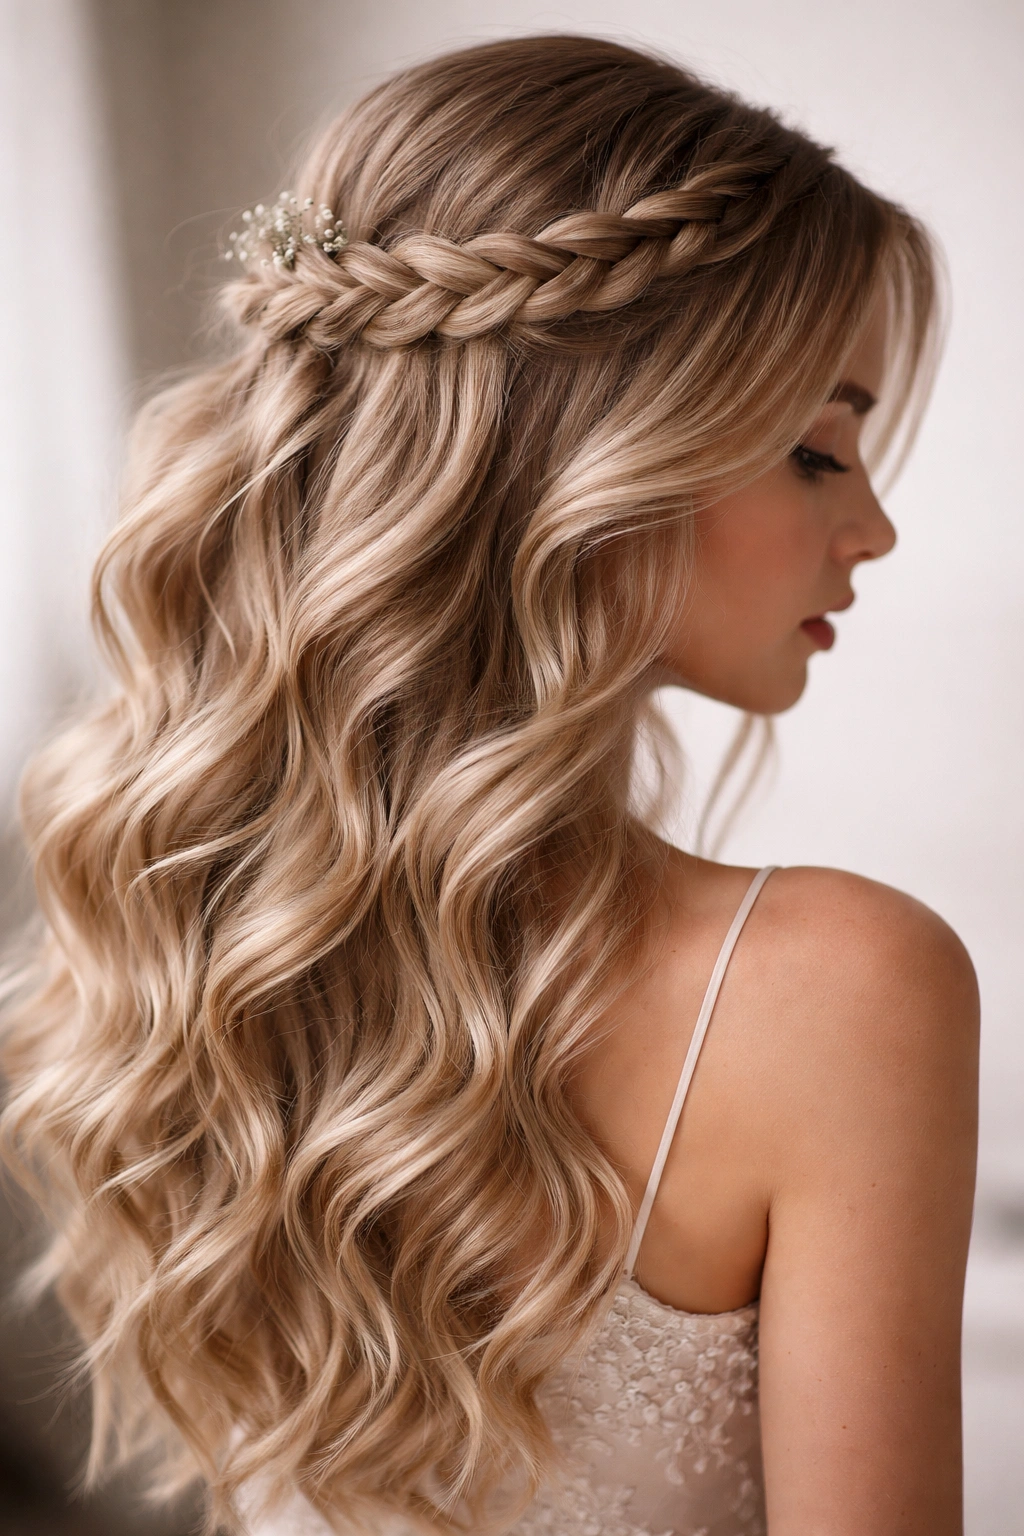
Incorporating braids into your wavy prom hairstyle adds an element of craftsmanship and intentionality that elevates the look significantly. Braided waves combine the structural beauty of a braid with the softness and movement of waves, creating something that’s both intricate and wearable. You might incorporate a single braid through the crown, smaller braids woven throughout, or use braids as anchors to hold portions of hair in place while waves flow freely. This style appeals to anyone who wants something more complex than loose waves but still wants that romantic, flowing aesthetic.
Why Braids Add Dimension to Waves
A braid catches light differently than unstructured waves, creating visual interest and movement that makes your hairstyle feel three-dimensional. Braids also serve a practical purpose—they anchor portions of your hair, keeping it off your face and neck while still allowing waves to flow. A braid also signals intentionality and effort, elevating the style to something that feels special and prom-worthy. The combination of structured and unstructured elements creates visual balance and prevents your look from feeling either too casual or too formal.
Building Braided Waves
- Start with clean, blow-dried hair with subtle texture or waves already in place
- Create your braid(s) first—whether a crown braid, Dutch braid on one side, or small accent braids depends on your vision
- Braid while hair is still slightly damp or use texture spray to give braids grip and prevent slipping
- Once braids are complete and secure, use a curling iron to add or enhance waves in the unbraided sections
- The braids can be kept tight and refined, or you can gently pull on the edges to make them slightly looser and more romantic
- Allow waves created after braiding to fall naturally against and around the braids
- If braids are meant to hold sections back, use bobby pins and a flexible hold spray to secure them
- Consider adding small accessories like pearls or metallic clips where braids meet other sections of hair
- Finish with a spray that’s flexible enough to allow movement while maintaining the braid structure
Pro tip: Practice your braided wave style at least once before prom—braiding while creating waves requires coordination and planning that benefits from rehearsal.
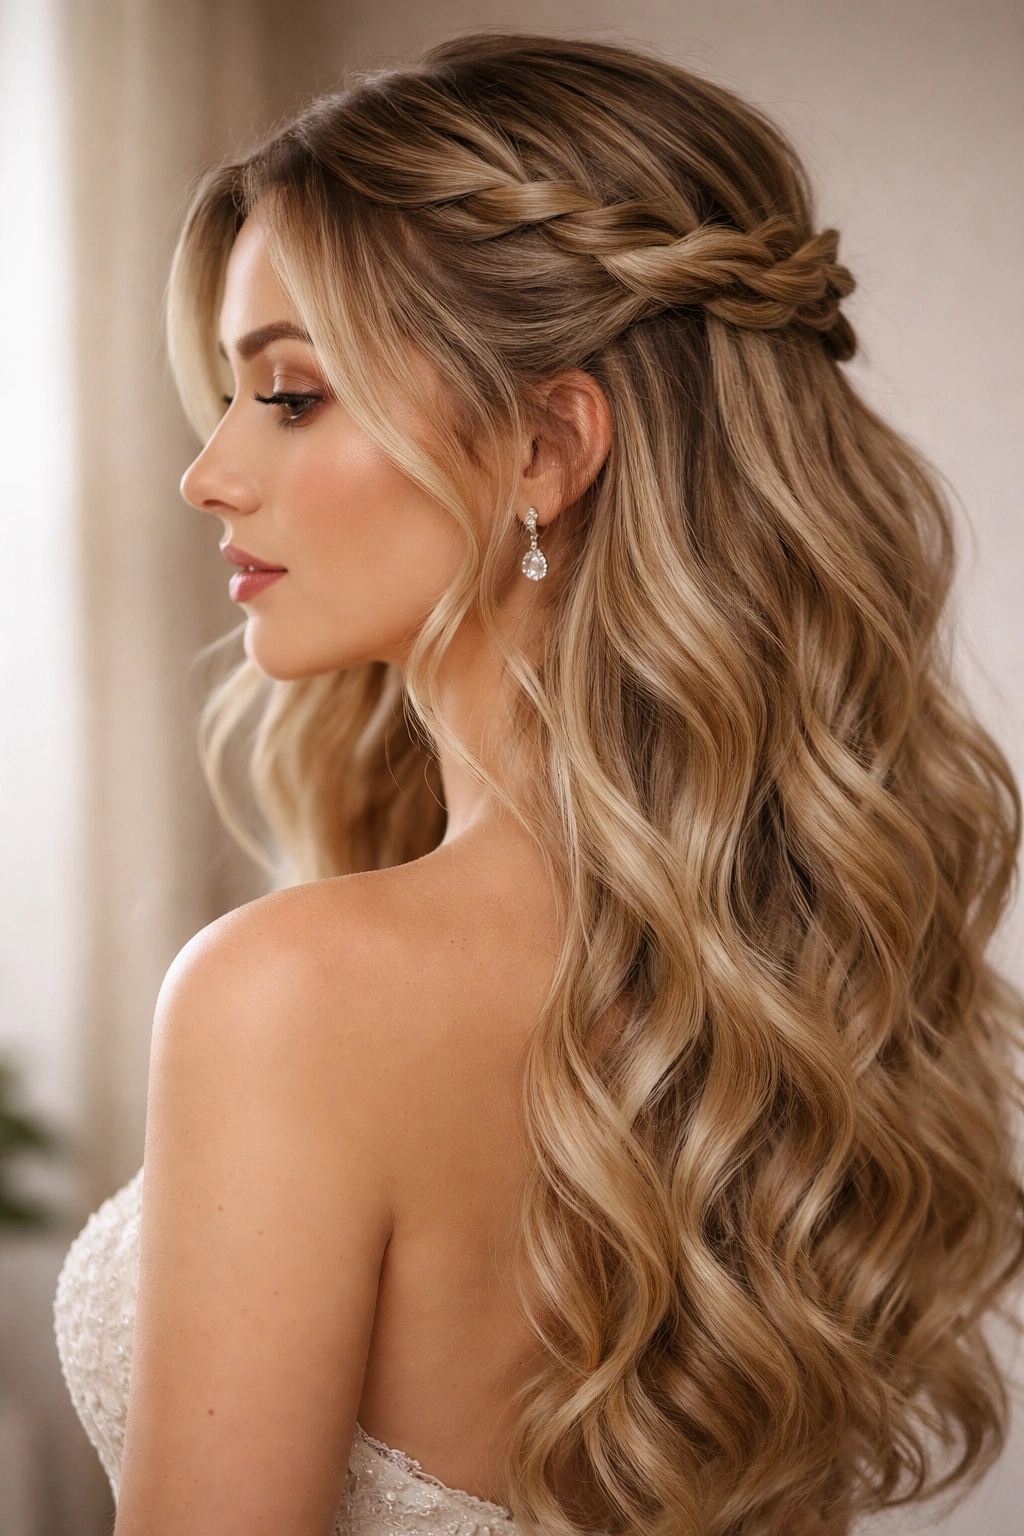
7. Voluminous Waves with Updos
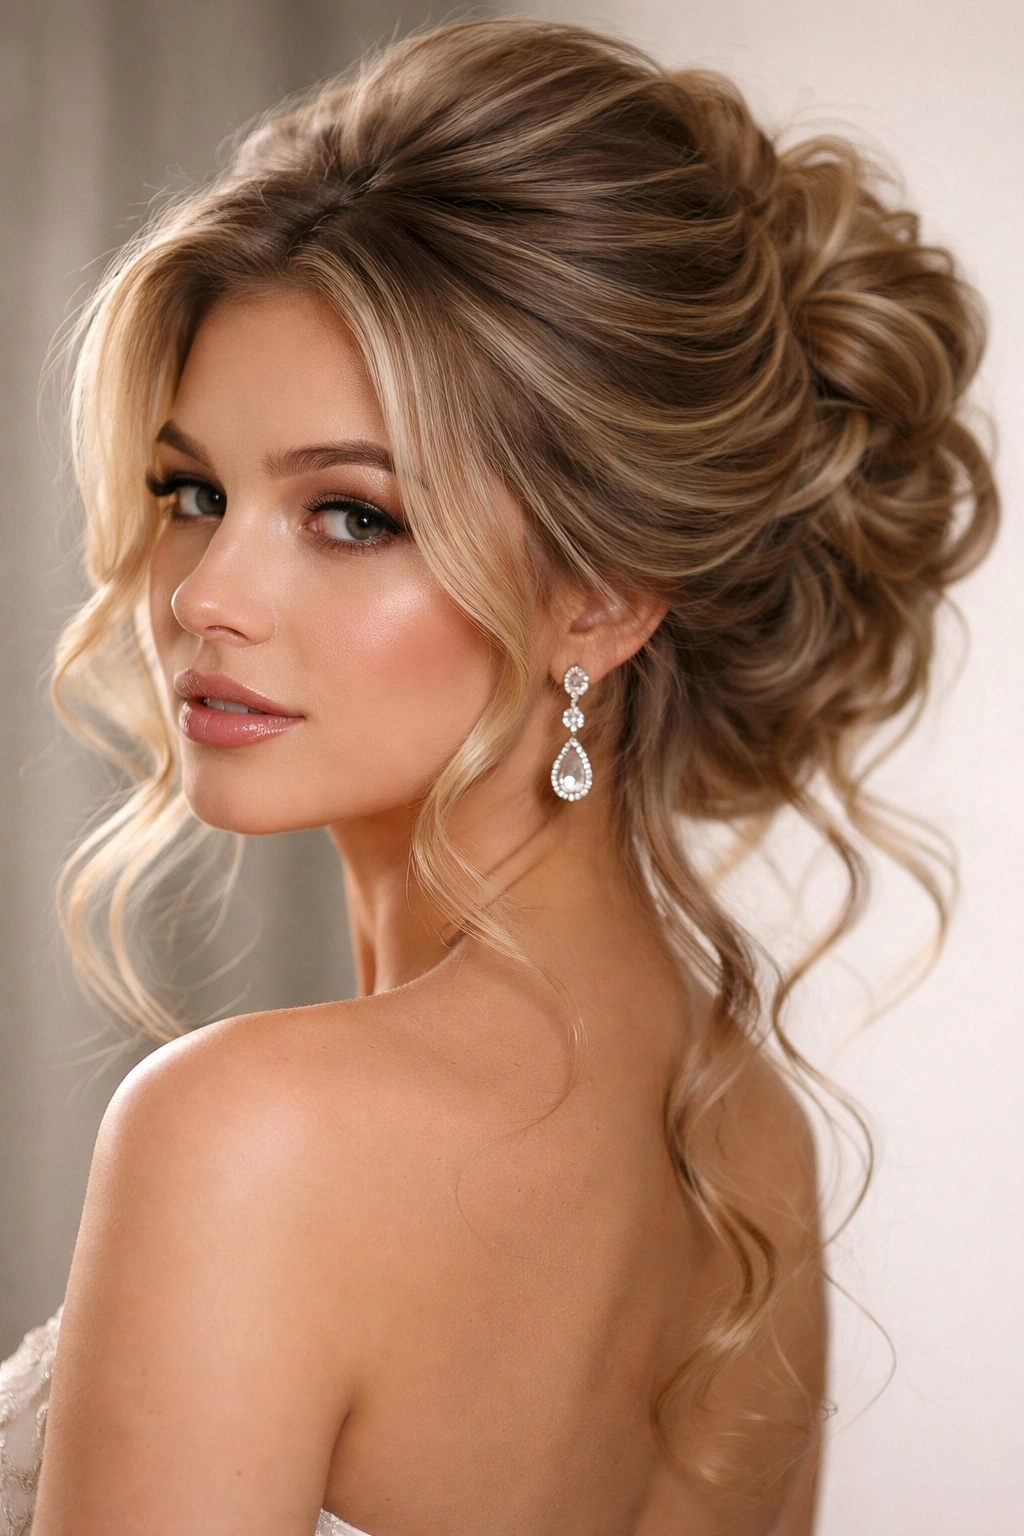
If you want maximum drama and the option to transition your look throughout the night, voluminous waves styled into an updo is your answer. You create full, bouncy waves throughout your hair, then pin sections up to create an updo that’s textured and romantic rather than slicked-back and severe. This style gives you flexibility—you can wear it fully down for dinner and early dancing, then pin it up partially or completely if you want to cool off or change your vibe later. Voluminous waves also photograph brilliantly because the dimension catches light beautifully whether worn down or partially up.
The Flexibility Factor
This style is genuinely practical for prom because your comfort level and preferences might change throughout the evening. Some venues are warm, some are cool. Some people love dancing with hair down; others prefer it up. With voluminous waves styled into an updo, you have options without requiring a complete re-style. The updo is intentional and polished enough for formal moments, while the waves keep it romantic and youthful. You can pin up just the crown, just the back, or create a more complex updo that still showcases the waves throughout.
Creating Voluminous Waves Ready for Updo Styling
- Start by blow drying hair with a round brush, directing the brush in different directions to create volume throughout
- Use a curling iron or waver to create waves in all sections, using hot tools to create tighter, bouncier waves than you would for a purely down style
- A volumizing mousse applied to damp roots before blow drying significantly increases bounce and body
- Tease gently at the crown and roots of the wave sections to build volume and texture
- Once waves are set and cooled, style them in their full, down position—they should feel bouncy and have noticeable movement
- Keep several bobby pins, small clips, and a clear elastic band nearby so you can pin sections up on a whim
- Practice pinning up different sections before prom so you know how your hair responds and what looks good
- Use styling wax or texture spray to help secured waves hold their shape when pinned
- If you do pin sections up, leave face-framing pieces down to maintain the soft, wavy aesthetic even with some hair up
Worth knowing: Volumizing products (mousses, root-lifting sprays, volumizing dry shampoos) are essential for creating waves that stay bouncy for hours—without them, waves flatten progressively throughout the night.
8. Waves with Decorative Clips and Pins
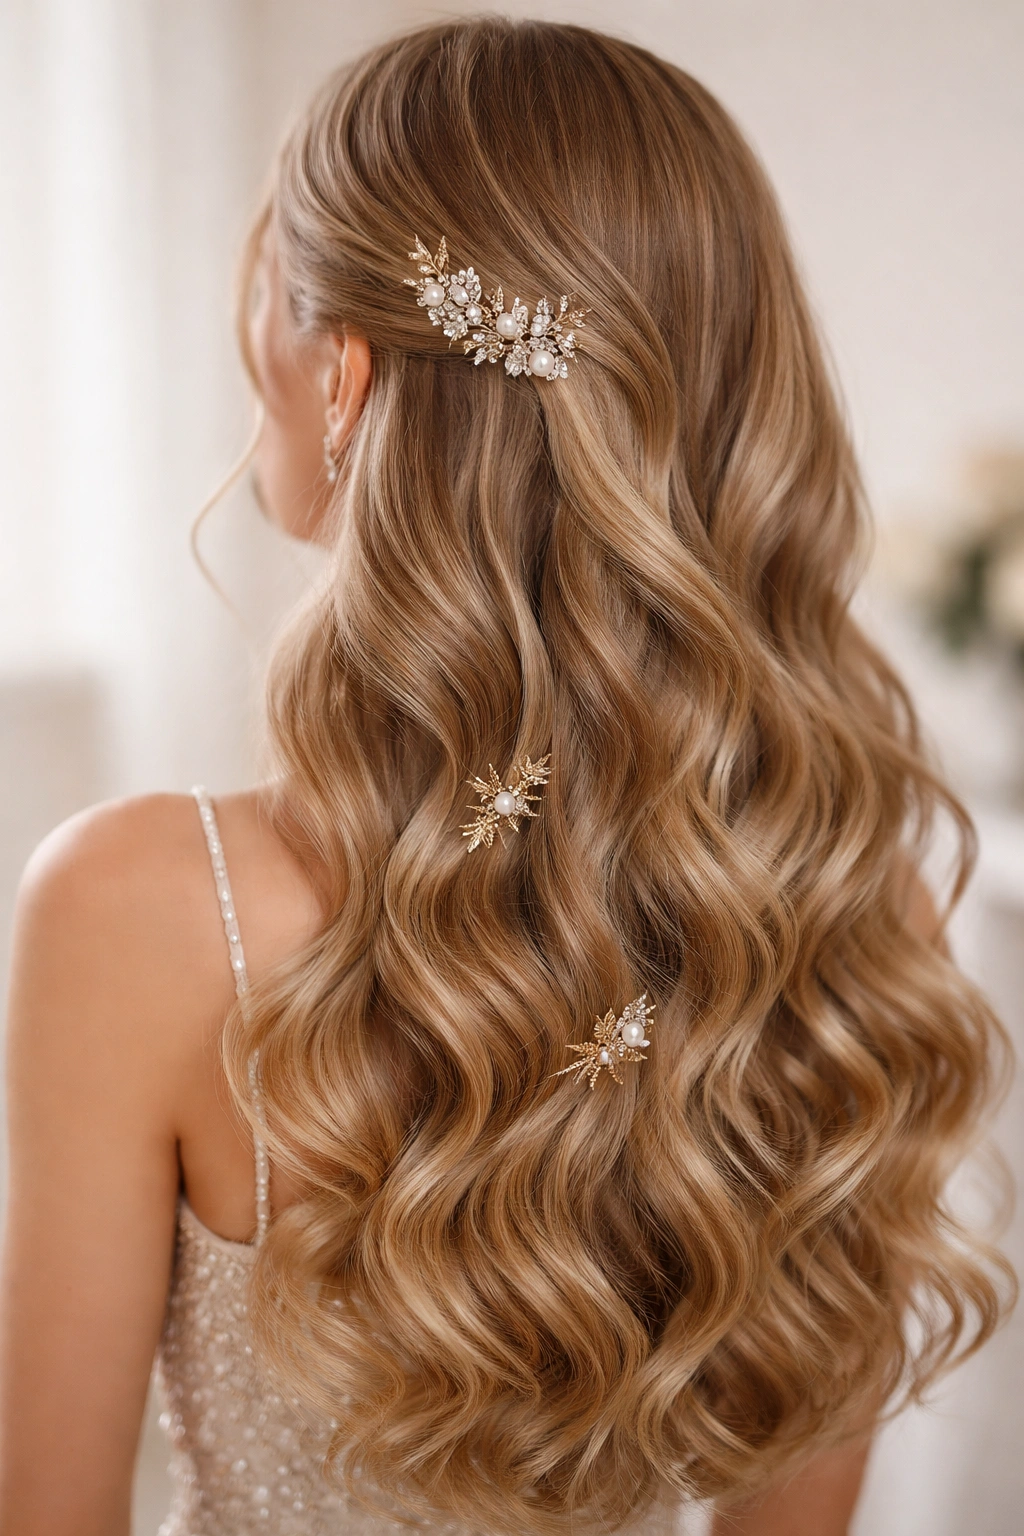
Decorative hair clips and pins are having a major moment, and prom is the perfect occasion to use them generously. You create soft, romantic waves throughout your hair, then use strategically placed clips and pins to add sparkle, color, and visual interest. Whether you choose delicate gold bobby pins scattered throughout, a statement claw clip holding a section back, pearl clips, or metallic barrettes, accessories transform simple waves into something intentional and special. This approach also works beautifully if your dress is relatively simple—the hair accessories become a focal point and design element.
Choosing Accessories That Elevate Your Look
The key to using hair clips and pins effectively is avoiding the appearance of wearing them out of necessity rather than as intentional styling. Multiple smaller pieces scattered strategically feel more sophisticated than one large clip. Metallic finishes (gold, silver, rose gold, bronze) complement wave texture better than matte finishes because they catch light. Pearl, crystal, or rhinestone-embellished clips add luxury and photograph beautifully. You can also choose clips in colors that complement your dress—a blush clip with a blush dress, a gold clip with a gold or champagne dress—or contrast intentionally with a color from your accessories or makeup.
Styling Waves with Hair Accessories
- Create your base wave style first—soft, loose waves work best with decorative clips rather than tight, defined waves
- Once waves are set and cooled, decide on your clip placement—consider balance and asymmetry
- Clip placement options: one side swept back with a clip, a cluster of small clips at the crown, clips framing the face on both sides, or scattered throughout for a more bohemian feel
- Small clips can be used to secure shorter pieces that might otherwise fall in your face, serving a practical function while looking intentional
- Larger statement clips work best if placed at a focal point—one side of the head, at the back crown, or pulling a section to one side
- Avoid placing clips in a straight line or grid pattern—stagger them for a more natural, intentional appearance
- Make sure clips are secure enough to last through dancing—test by moving your head and dancing a little before you leave home
- Use bobby pins under clips to reinforce security if needed
- Balance decorative clips with other accessories—if you’re wearing a statement necklace, keep clips more minimal, and vice versa
Insider note: Tortoiseshell and metallic clips photograph beautifully and work with virtually every dress color, making them safe choices if you’re uncertain about specific styling decisions.
9. Sleek Waves with Straight Sections
This modern, sophisticated style combines smooth, straight sections with soft waves, creating visual contrast and dimension that photographs exceptionally well. You might have straight hair framing your face with waves in the back, a straight crown section with wavy lengths, or strategic straight pieces interspersed with waves throughout. The combination feels contemporary and intentional without being trendy in a way that might feel dated. This approach works beautifully if you want something that’s elegant and fashion-forward rather than classically romantic.
Why Contrast Creates Visual Interest
The contrast between straight and wavy sections creates movement and depth that single-texture hair can’t achieve. Straight sections appear shinier and sleeker, highlighting your hair quality and the shine of your styling products. Waves in other sections maintain softness and femininity. Together, they create a look that’s polished but not stiff, modern but not edgy. This style also works well for people with thick hair who might find all-over waves too voluminous, since straight sections allow some areas to be more controlled.
Creating Sleek and Wavy Contrast
- Start with smooth, blow-dried hair as your base
- Identify which sections will remain straight and which will be waved—plan this before you start with hot tools
- Straighten your selected sections using a flat iron, working for shine and smoothness rather than just eliminating curl
- Use a straightening serum or smoothing product on these sections to enhance shine and prevent frizz
- In your designated wave sections, use a curling iron or waver to create soft waves
- The transition between straight and wavy sections should be intentional—avoid having the boundary be too abrupt by allowing some waves to start slightly before the straight section ends
- Use a brush or comb to blend the boundary slightly so it doesn’t look like two different hairstyles
- Apply shine spray or light hairspray to enhance the contrast between the sleek and wavy sections
- Consider how this style will look when you move—waves in the back will flow and move while straight face-framing pieces stay in place
Pro tip: This style photographs beautifully in both natural and flash photography because the straight sections catch light differently than wavy sections, creating visual dimension in photos.
10. Cascading Waves Down the Back
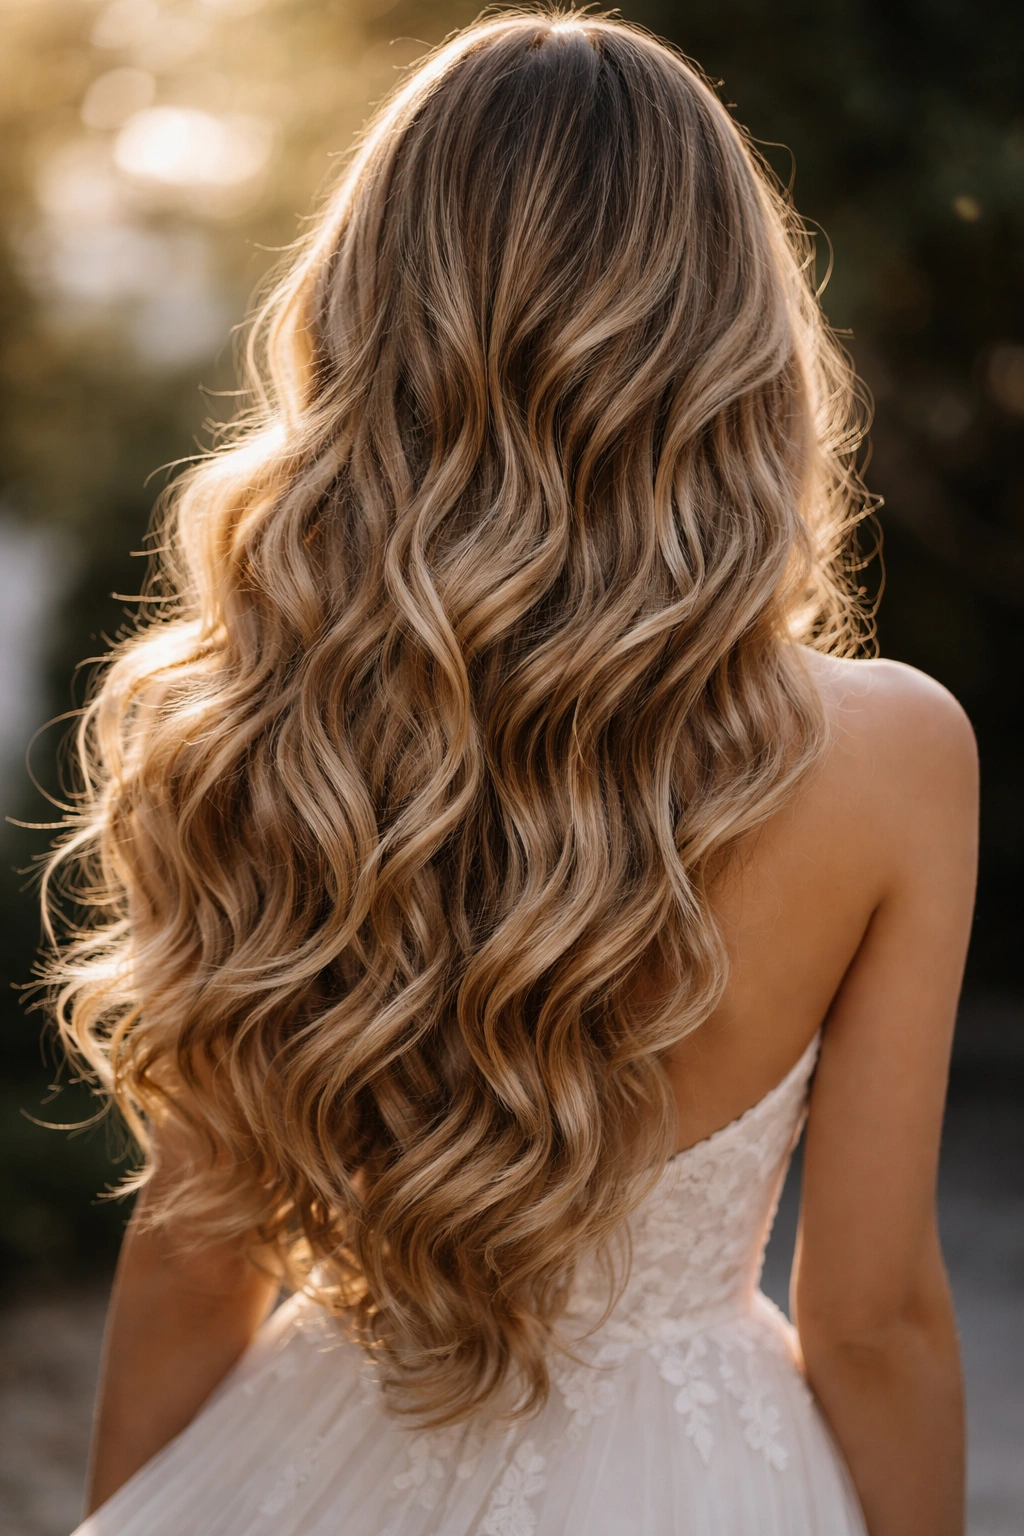
For maximum romance and drama, cascading waves that flow freely down your back create an undeniably stunning visual impact. This style features waves that are intentionally longer and more flowing, styled so they move and cascade rather than staying in tight, structured waves. The waves begin at the roots or crown and extend fully down the length of your hair, creating a waterfall effect. This approach works best with longer hair and is particularly striking with strapless or low-back dresses because the waves become the focal point of your entire look from behind.
The Power of Long, Flowing Waves
Cascading waves create a sense of movement and elegance that’s particularly flattering in photographs and video. When you move—walking across a room, dancing, sitting down—cascading waves flow and create the impression of motion even when you’re standing still. This style makes hair feel like part of your overall aesthetic rather than a separate element. The full length of waves also creates more volume and presence than waves that are pinned or styled up. For prom, where you’ll be photographed extensively and will want to feel confident from every angle, cascading waves deliver drama and elegance.
Achieving Cascading Waves
- Start with hair that’s at least shoulder length, preferably longer for maximum cascading effect
- Blow dry hair smooth and straight as your base
- Use a large-barrel curling iron (1.5 inches or larger) to create loose, flowing waves
- Work in larger sections than you might for other wave styles—bigger sections create bigger, more cascading waves
- Curl sections loosely rather than tightly, wrapping hair around the barrel only once rather than multiple times
- Allow curled sections to cool before releasing them—this sets the wave shape for longer hold
- Once all sections are curled and cooled, gently run your fingers through waves to separate and soften them
- Flip your head upside down and gently massage your scalp to create lift and movement at the roots
- Use a lightweight texture spray rather than heavy hairspray, which would weigh down cascading waves
- When standing, position yourself so waves fall freely—avoid tucking them behind your shoulders or pinning sections back
- Test movement by walking and dancing slightly before leaving home to ensure waves cascade naturally with your movement
Worth knowing: Cascading waves look stunning in candid photography and video, making this style particularly good if you want your prom to look beautiful in social media posts and professional photos.
11. Twisted Waves with Crown Detail
For a look that’s intricate without being overly complicated, twisted waves with crown detail offer the best of both worlds. You create soft waves throughout your hair, then twist sections at the crown to create a crown-like detail that’s both decorative and functional. This could be a twisted halo that goes partially around your head, twisted sections framing your face, or twists woven throughout the crown area. The twisted detail adds three-dimensionality and a sense of intentionality that elevates simple waves into something special and prom-worthy.
Why Twists Add Sophistication
Twists catch light differently than straight or simply wavy hair, creating visual texture and dimension. Twists also allow you to incorporate waves while keeping some hair slightly back from your face, which is often flattering and prevents waves from completely obscuring your features. A twisted crown detail has romantic, almost ethereal quality—it feels both modern and timeless. Twists are also more achievable for most people than complex braids, making this style accessible whether you’re doing it yourself or having a stylist create it.
Building Twisted Waves with Crown Detail
- Start with soft, cascading waves throughout your hair—these are your base texture
- Once waves are set and cooled, select which sections will become twists (typically sections from temple to temple across the crown, or sections framing the face)
- Take a 1-2 inch section of hair at your starting point and twist it gently—not tightly, but with enough tension to hold the twist structure
- Twist the section from roots to ends, or just from roots to mid-length if you want waves to flow freely below the twist
- Secure the twisted section with bobby pins that match your hair color, hiding them under the twist
- Continue with additional twisted sections according to your design—you might do just one twisted section, a few scattered sections, or a full crown
- As you create twists, you can pull gently on the edges of each twist to make it slightly looser and more romantic
- The twisted sections should blend with surrounding waves rather than looking completely separate
- Use a flexible hold spray to secure twists while still allowing waves to move freely
- Add small accessories like pearls or delicate clips to twisted sections if desired
Pro tip: Practice creating twists in your hair the week before prom so you understand how tightly to twist for a look that lasts all night without becoming uncomfortable or feeling tight.
Final Thoughts
Choosing a wavy hairstyle for prom is about finding the combination of texture, styling approach, and details that makes you feel absolutely confident and beautiful. Whether you go for classic Hollywood glamour, romantic cascading waves, modern sleek contrast, or intricate twisted detail, your choice should reflect your personal style and complement your entire prom look. The eleven styles here offer variety in romance level, complexity, and aesthetic—giving you options whether you’re a minimalist or someone who loves detailed, intentional styling.
The practical reality of prom is that you’ll wear your hairstyle for several hours while moving, dancing, and potentially dealing with temperature changes. Test your chosen style at least once before the actual event, time how long it takes to create, and make sure you have the right products and tools on hand. If you’re having a stylist create your prom hair, bring photos of your chosen style and discuss timing, product choices, and any concerns you have about how it will hold up throughout the evening.
Remember that wavy hairstyles are forgiving and flexible—if something shifts slightly during the night, waves actually become more beautiful and romantic as they loosen and move. Your prom hair should enhance your confidence, not add stress. With proper styling, products that actually work, and a style that genuinely suits you, your waves will look stunning from the moment you arrive until the last dance of the night.