If you’ve been scrolling through style inspiration and keep landing on the same couple of wavy looks, you’re missing out on the incredible versatility that medium-length wavy hair actually offers. The sweet spot between short and long, wavy hair at shoulder length or slightly longer gives you texture, movement, and styling flexibility that feels both effortless and deliberately put-together. The thing is, medium wavy hair has evolved far beyond the basic beachy wave — there are now dozens of sophisticated, trendy, and genuinely wearable styles that work whether you’re heading to work, out to dinner, or just running errands.
The beauty of modern medium wavy hairstyles is that they work with your hair’s natural texture rather than against it, which means less heat damage, less styling time, and honestly, better-looking results. A lot of people assume they need to commit to one specific look, but what really makes wavy hair shine is having a rotation of styles that feel fresh and intentional. Some days you want something polished and structured; other days you want effortless texture that looks like you didn’t try. The right medium wavy haircut and styling technique gives you all of that in one versatile length.
Whether you’re growing out a shorter cut, thinking about a trim to refresh your current length, or just looking for new ways to style what you already have, these nine modern medium wavy hairstyles will give you concrete ideas with actual styling guidance. Each one works specifically with medium length and wavy texture — not forced or fighting against your hair’s natural pattern, but celebrating it.
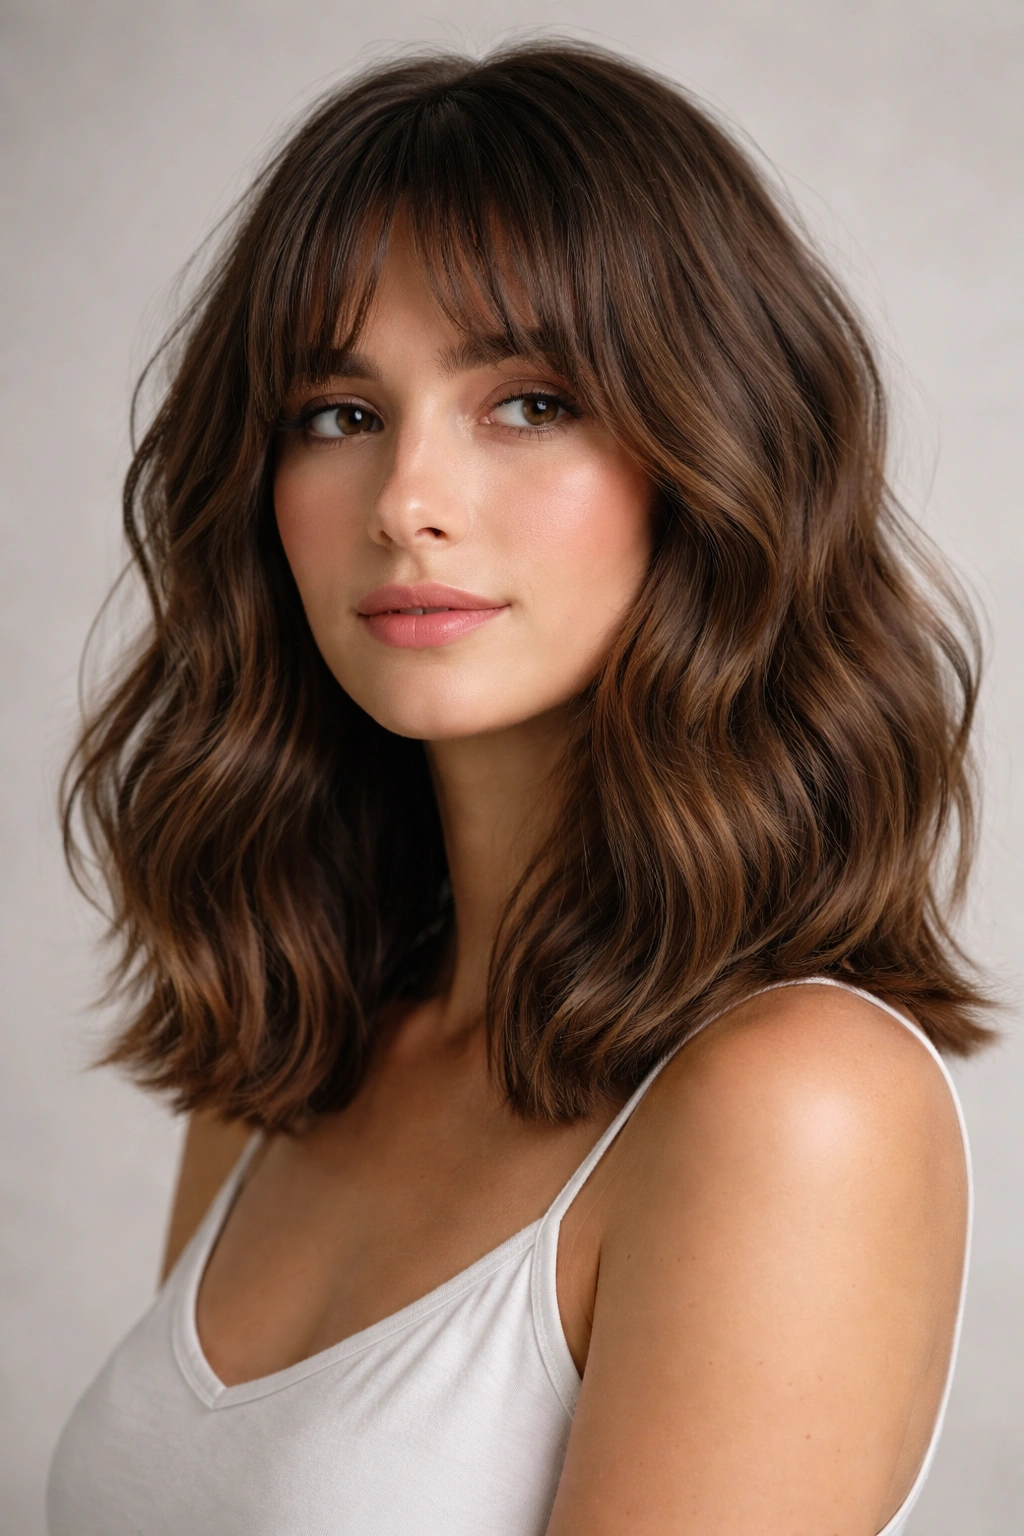
1. The Textured Lob With Soft Layers
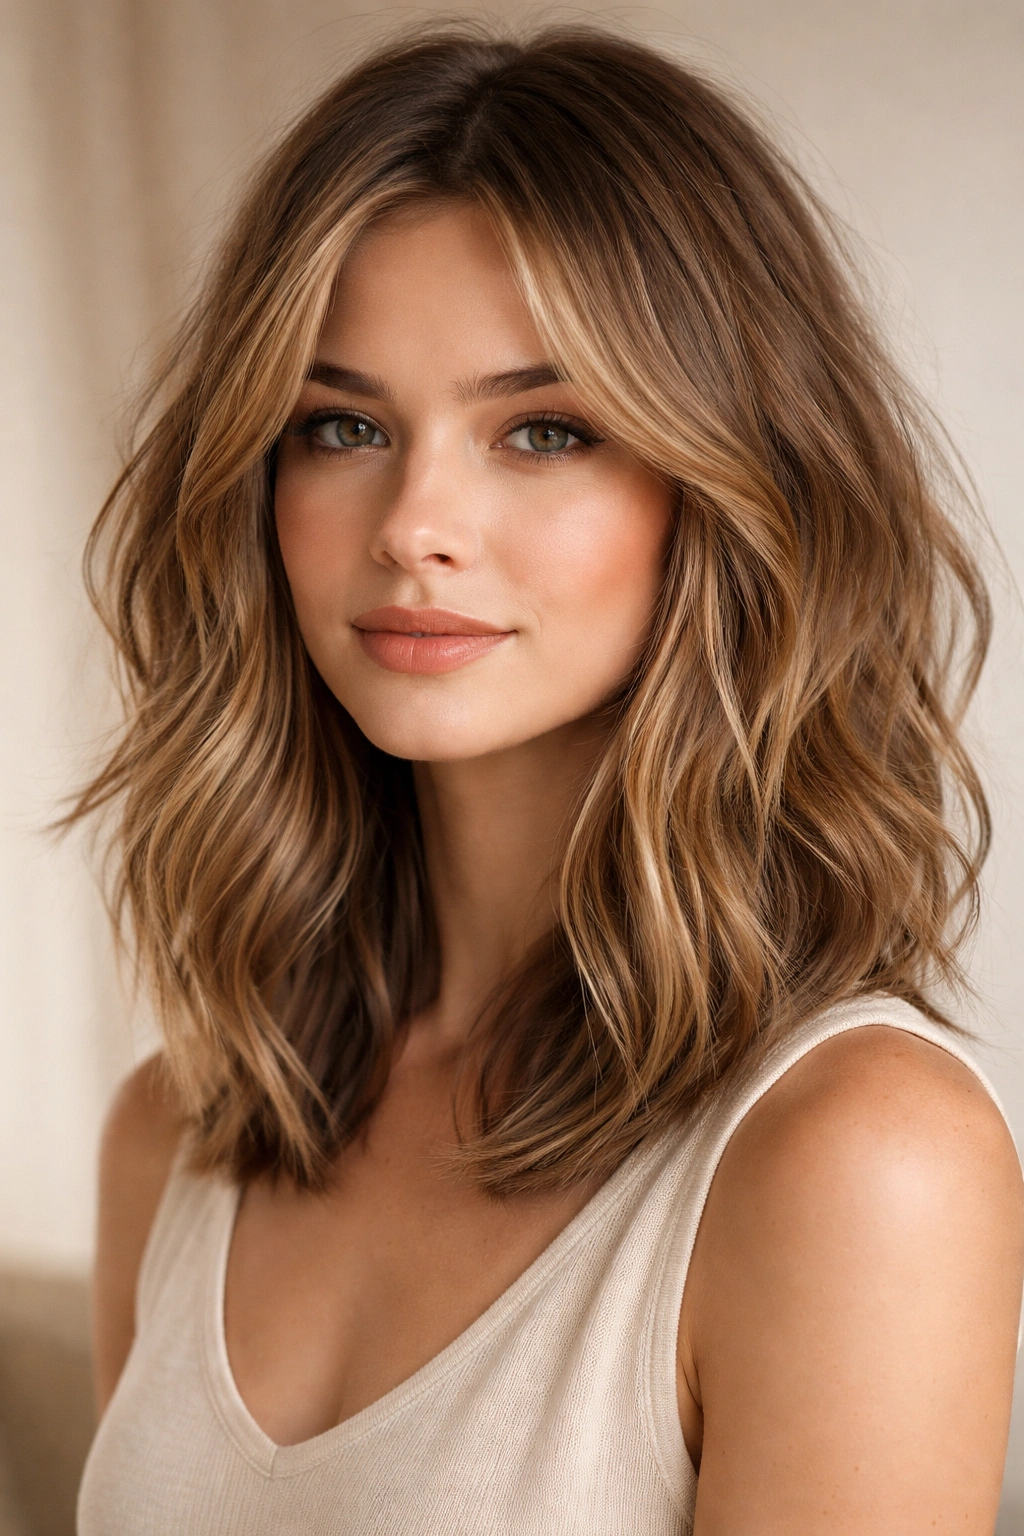
This is the haircut that launched a thousand pins, and for good reason. A textured lob sits right at or just below the shoulder, and when it’s cut with choppy, deliberate layers throughout (especially around the face), it creates movement and dimension even when your hair is completely straight. With wavy hair, this cut is absolutely stunning because the layers catch and emphasize the wave pattern naturally.
Why This Cut Works for Wavy Hair
The textured lob thrives on medium-length wavy hair because the layers give you built-in movement without requiring tight curls or extreme texture. The choppy cuts mean that even if your waves are subtle, each layer catches light differently and creates visual texture. The face-framing layers are especially clever — they angle outward with the wave pattern, which actually makes your face look more contoured and interesting. You’re not fighting against your hair’s natural fall; you’re designing a cut that works with it.
How to Style It for Maximum Impact
- Wash and apply a leave-in conditioner or lightweight styling cream to damp hair
- Use a diffuser attachment on your blow dryer set to medium heat and low speed, scrunching your hair upward to encourage wave formation
- Alternatively, air-dry with the leave-in product, then use a 1.25-inch curling iron on the face-framing pieces if you want more defined waves
- Finish with a flexible hold spray that won’t crunch your layers or weigh them down
- The key is keeping the layers separated and visible — don’t brush through when dry, just use your fingers to break apart any clumps
Pro tip: Schedule your cut for a day when your hair is freshly washed and wavy, so your stylist can see exactly how your natural texture falls and cut accordingly. A stylist who understands how your waves behave will cut this style perfectly; one who doesn’t might cut it too bluntly.
2. The Sleek Straight-Through Style With Wavy Ends
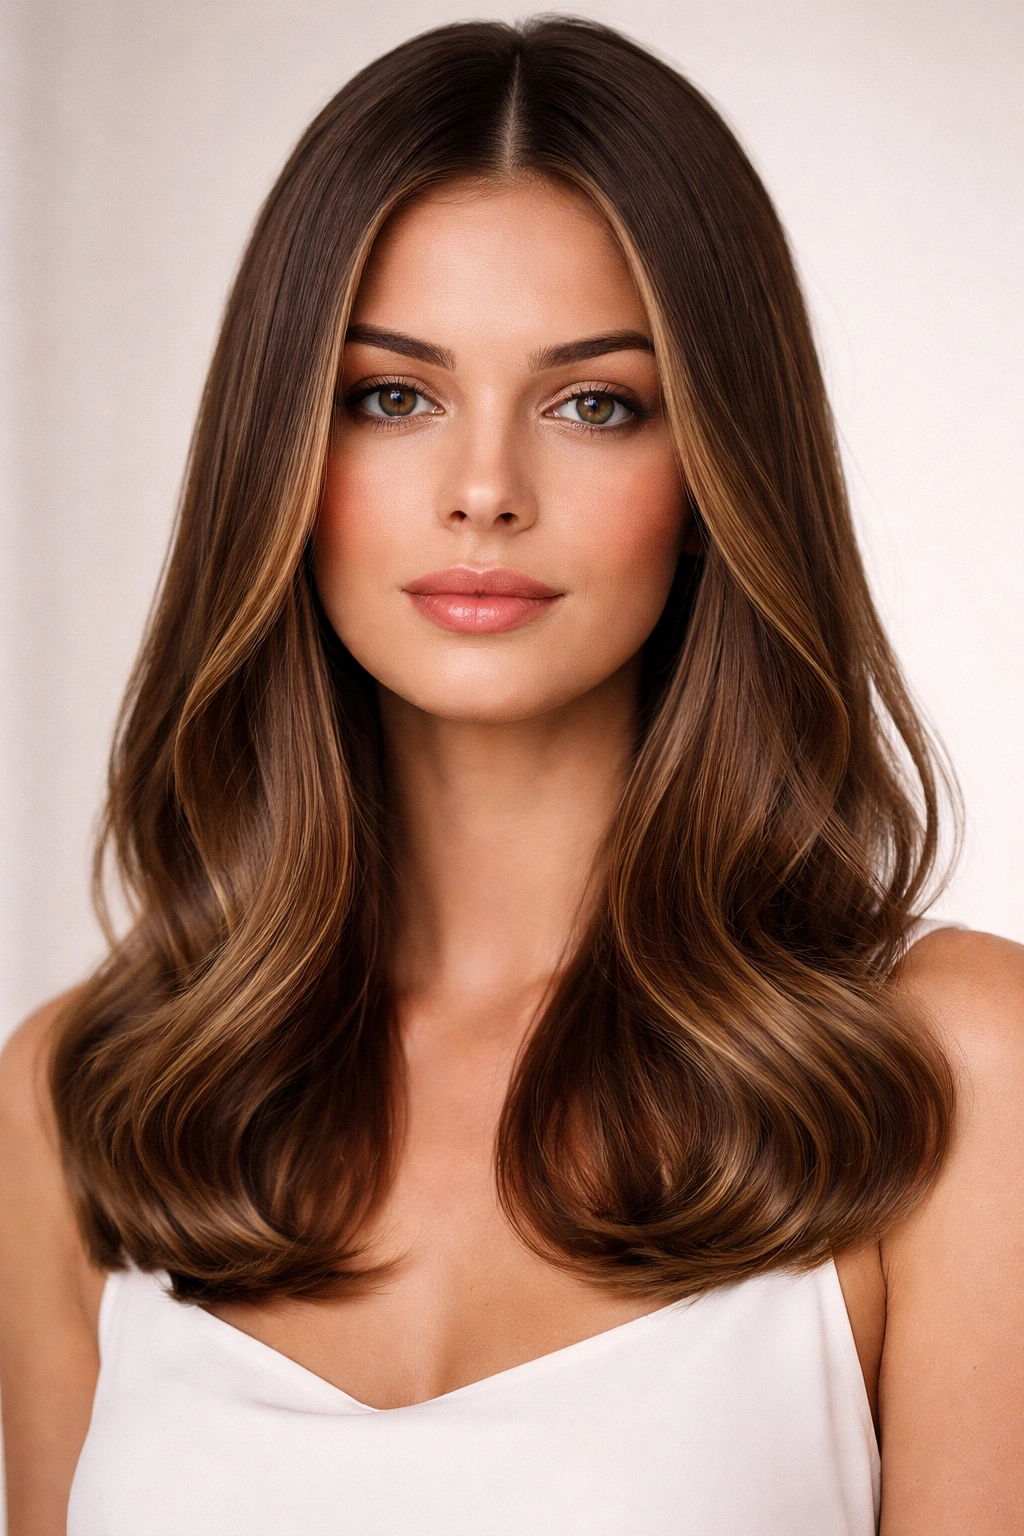
Don’t let the name fool you — this is a deliberately modern contrast style where the hair is straight and smooth from the roots through the mid-length, then transitions into soft waves or curls at the ends. It’s an intentional, sharp look that feels editorial and intentional rather than like you just couldn’t decide which way to style it.
What Makes This Style Stand Out
This style works because it creates visual interest through contrast and control. The straight portion gives you polish and sophistication, while the wavy ends add movement and personality. It’s especially flattering if you have a longer face, because the smooth hair through the cheekbones actually elongates your face, while the wavy ends at shoulder length add width and softness where you need it. The style also photographs beautifully because it reads as intentional rather than accidental.
Achieving the Smooth-to-Wavy Transition
- Start with damp hair and apply a smoothing serum or anti-frizz cream
- Blow-dry your entire head using a paddle brush or round brush for maximum smoothness through the roots and mid-lengths
- Once your hair is fully dry and smooth, take 1.25-inch or 1.5-inch curling iron and curl the bottom 3-4 inches of hair away from your face
- You don’t need tight curls — loose waves that just add movement are perfect
- Brush through gently with a wide-tooth comb to soften and blend the waves into the straight section
- Set with a light spray that adds hold without crunch
This style takes about 20-30 minutes to execute and holds beautifully throughout the day. It’s especially good on days when you want to look polished but not overdone.
3. The Lived-In Tousled Wave
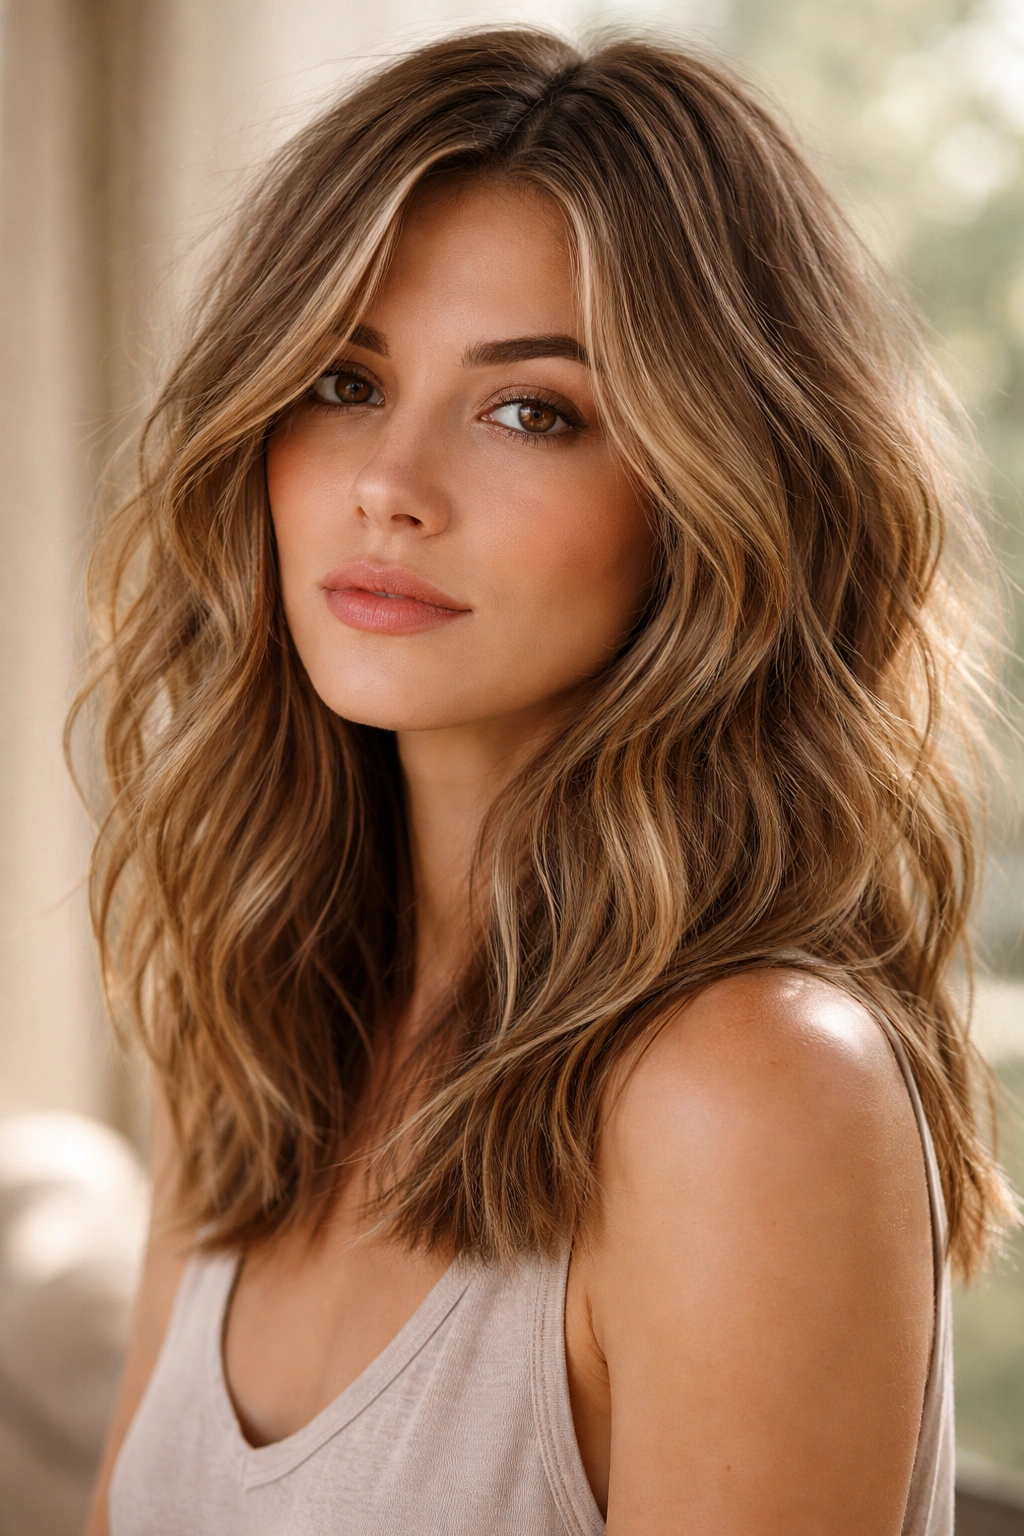
This is textured, undone, and deliberately messy in a way that’s actually sophisticated. Think of it as your hair after a beach day, but refined and intentional rather than actually bedhead. The cut is medium length with subtle layers, and the styling emphasizes texture and separation rather than uniform waves or curls.
Why Tousled Waves Feel So Modern
The tousled wave is everywhere in contemporary styling because it hits the sweet spot between effort and effortlessness. It looks like you didn’t spend two hours with a curling iron, but it also clearly reads as an intentional style choice rather than just… unwashed hair. For wavy hair, this is actually the easiest style to achieve because you’re working with your natural wave pattern and just exaggerating it slightly. The key is making sure the texture reads as intentional and separated, not clumpy or undefined.
Creating Tousled, Piece-y Texture
- Wash your hair and apply a texture spray or sea salt spray to damp roots and mid-lengths
- Blow-dry on medium heat, using your fingers rather than a brush to encourage separation and texture
- While hair is still slightly damp, use a curling wand (not a curling iron with a clamp) to wrap sections loosely around, leaving the ends out for a more broken-up texture
- Flip your head over and hit the underneath layers with the wand too — this adds volume and makes the texture look more organic
- Once fully dry, run your fingers through your hair and gently tousle sections to separate the waves
- Finish with a flexible, matte-finish spray (not a shiny spray, which will make tousled waves look greasy)
Worth knowing: This style actually looks better on day-two or day-three hair than freshly washed hair. After a day or two, the texture sets in and the tousled look becomes even more defined and structured.
4. The Wet-Look Defined Wave
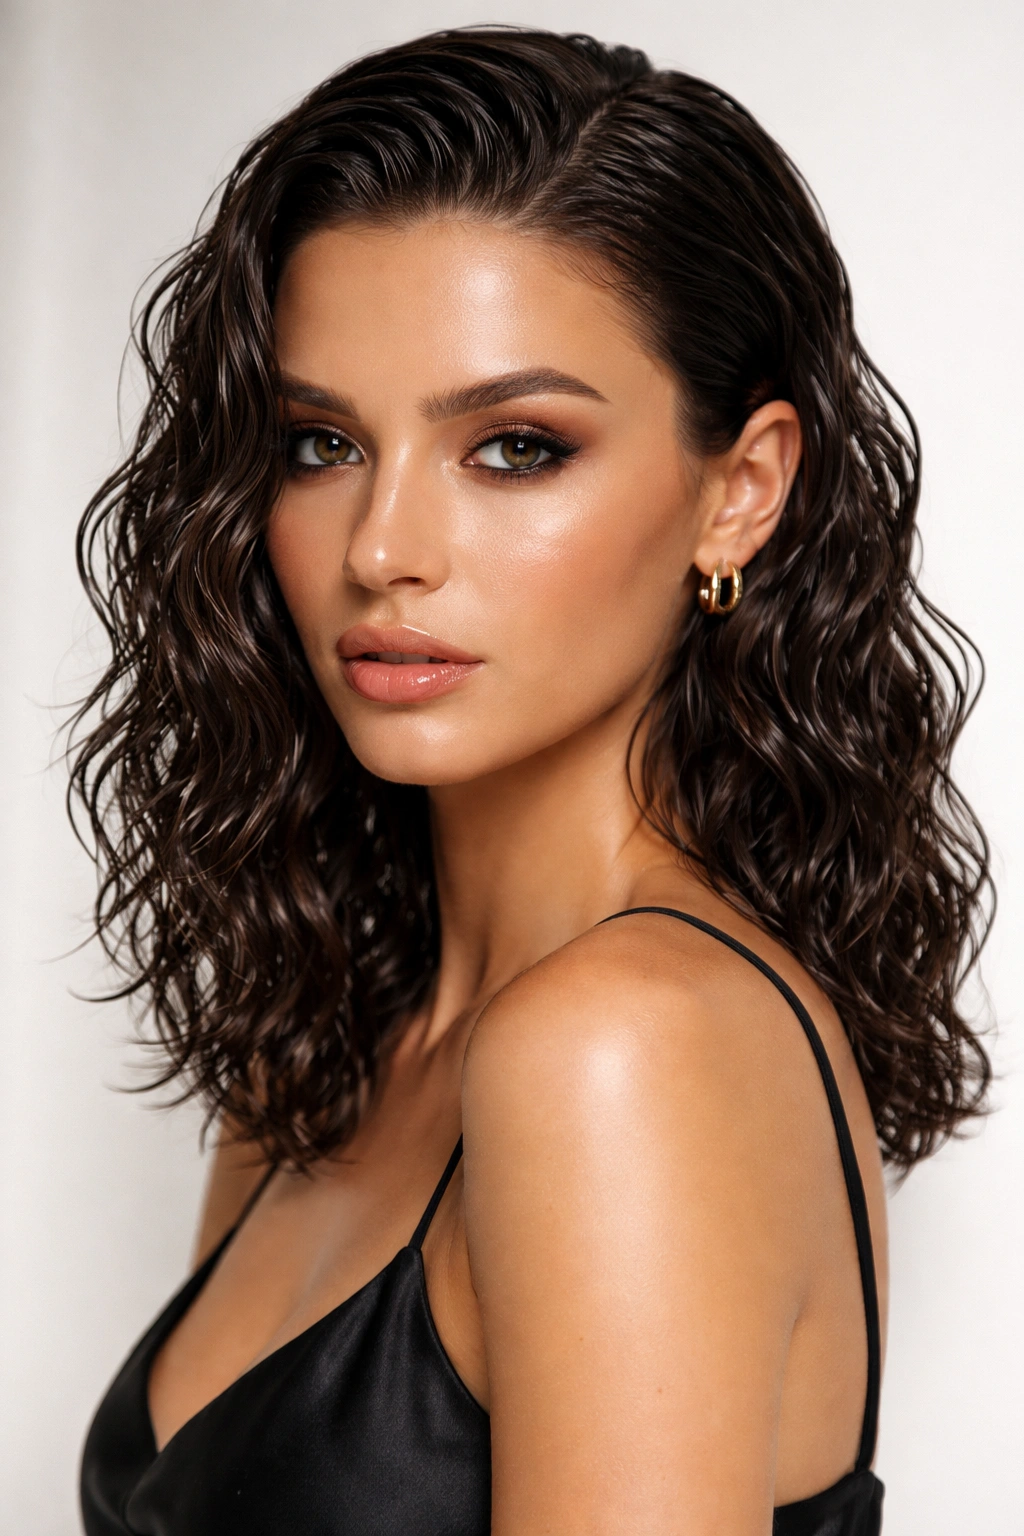
This is a bold, fashion-forward style where the waves are tight, sculpted, and shiny — almost like you’ve got product-defined curls but without the ringlet effect. The wet look creates a dramatic silhouette while still maintaining that modern, intentional aesthetic. It’s less about looking natural and more about making a statement.
The Modern Appeal of Sculpted Wet Waves
Wet-look waves are having a major moment in fashion and editorial styling because they’re dramatic, they photograph beautifully, and they read as very intentional and high-fashion. The defined wave pattern is almost architectural, and the glossy finish (created with product rather than actual water) gives it a high-impact, editorial vibe. For special occasions, date nights, or any time you want to look noticeably styled, this approach is incredibly effective.
Technique for Sharp, Shiny Waves
- Start with clean, damp hair and apply a volumizing mousse to the roots for lift
- Blow-dry completely straight using a paddle brush
- Section your hair and use a 1.25-inch curling iron to curl each section away from your face, holding the curl for 3-4 seconds and then releasing
- The size of the iron determines the tightness of the wave — smaller iron = tighter waves
- Once all sections are curled, let the curls cool for a few minutes (this helps them hold their shape)
- Apply a shiny, lightweight hair oil or serum to the surface of the waves — don’t saturate or the waves will lose definition, just create a glossy finish
- Set with a strong-hold hairspray (you need medium to strong hold for this style to last all day)
This style holds beautifully for 8-10 hours and is worth the 25-30 minute styling time when you want to look intentional and polished.
5. The Shoulder-Grazing Choppy Shag
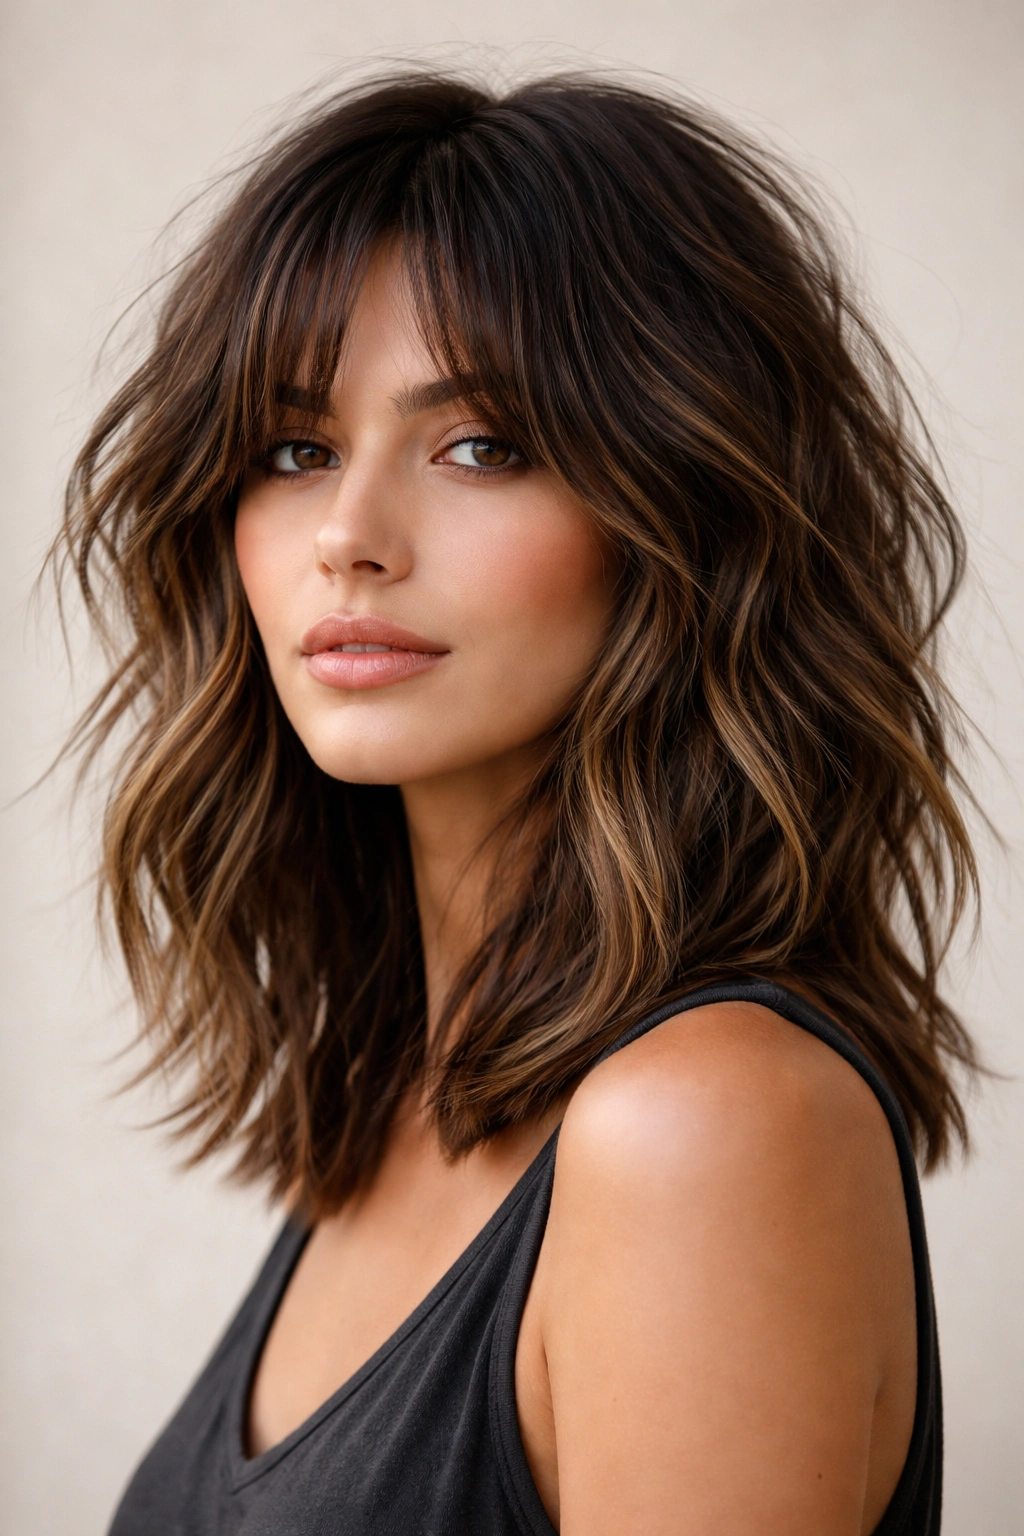
The shag is officially back, but in a modern, refined version that looks nothing like the 1970s iterations. This cut is shoulder-length or slightly longer, with choppy, disconnected layers throughout that create tons of movement and a bit of a rock-and-roll edge. On wavy hair, a modern shag is incredibly flattering because the natural texture plays perfectly into the choppy, layered structure.
Why the Modern Shag Suits Wavy Hair
A choppy shag cut lives on texture. The whole point is that the layers are disconnected and move independently, which means wavy hair is literally the perfect base for this cut. You’re not fighting against your natural texture; the cut is designed for movement and separation. The style reads as intentionally edgy and contemporary rather than retro because the layers are cut at varied angles and the overall shape feels modern and refined.
Styling the Shag for Definition
- Apply a curl-defining cream or gel to soaking wet hair, scrunching it in by the handful
- Use a diffuser attachment on a blow dryer set to medium heat, scrunching and lifting as you dry
- The diffuser helps encourage your natural wave pattern and distribute the cream evenly
- Once hair is about 60-70% dry, you can switch to a regular blow dryer on low speed to finish drying without disrupting the waves
- Once fully dry, use your fingers to gently break apart any clumps and define individual sections
- A light or medium-hold hairspray is perfect — you want the shape to hold but still allow for movement
Insider note: The modern shag works best when you get a cut every 6-8 weeks to keep the layers sharp and defined. As the cut grows out, you lose some of the choppy structure, and the style can start to look shaggy in a less-intentional way.
6. The Face-Framing Waves (Curtain Bangs Included)
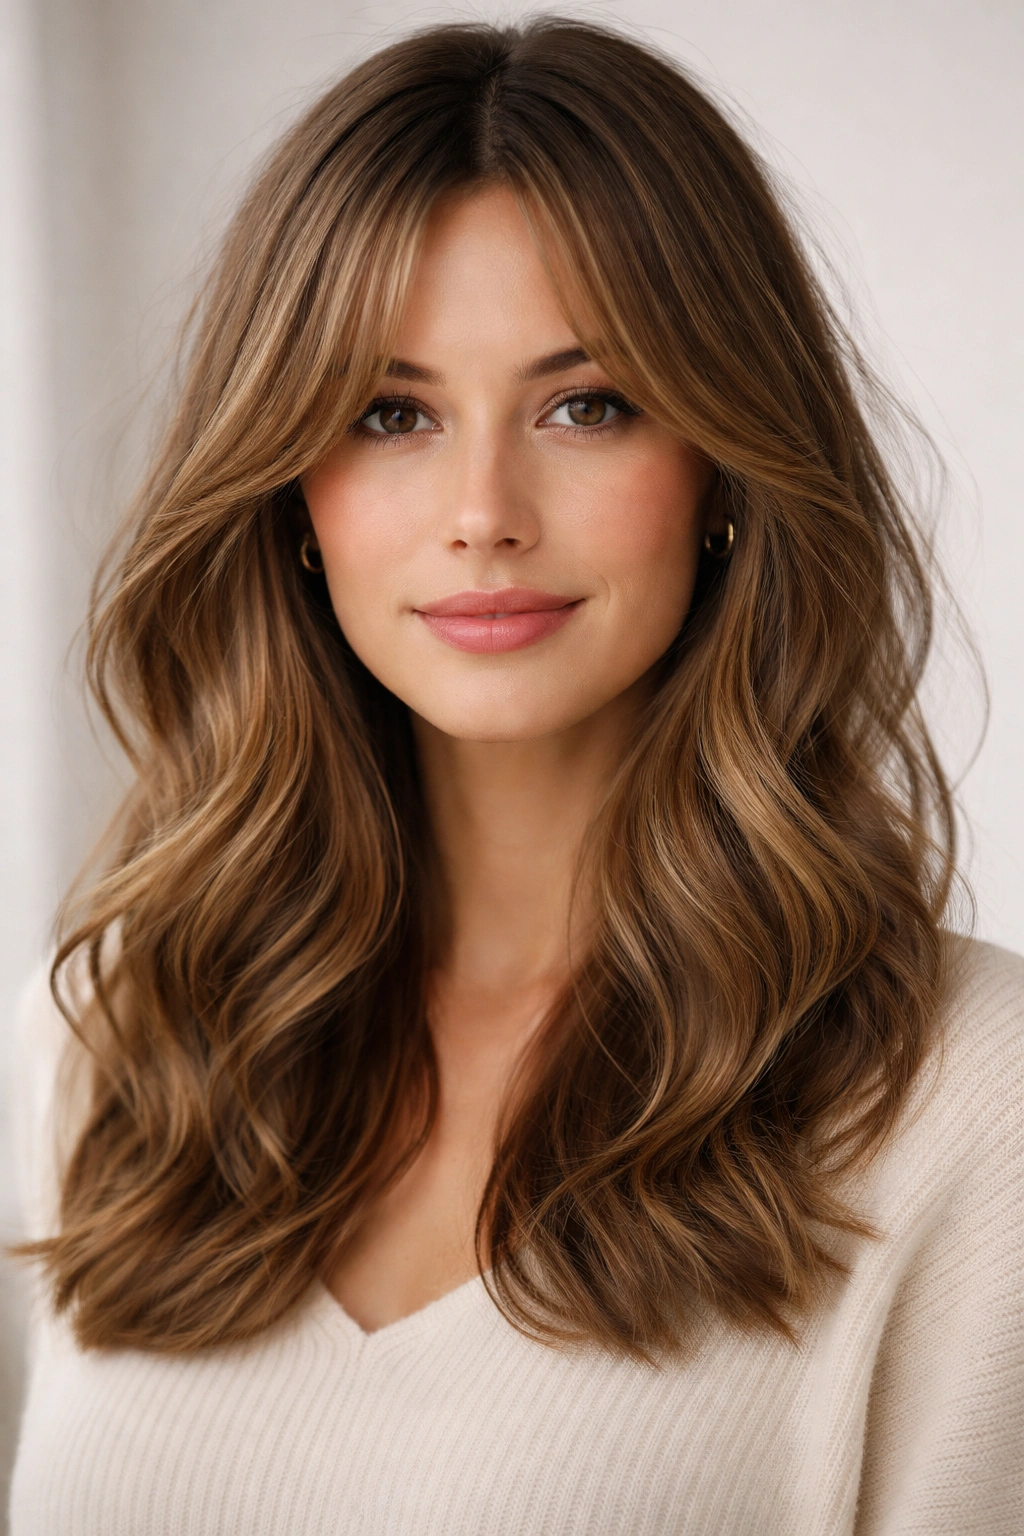
This style focuses on creating waves specifically around the face — think longer, softer waves that frame your cheekbones and add dimension to your face shape. If you want bangs, soft, wispy curtain bangs that part in the middle pair perfectly with this look, but you can absolutely do it without bangs too. The back can be straight, wavy, or a mix — the focus is on those face-framing pieces.
The Strategic Advantage of Face-Framing Waves
Face-framing waves are incredibly flattering because you’re intentionally adding waves right where they make the biggest impact on how your face is perceived. The waves draw the eye inward and softly frame your features, which is universally flattering regardless of face shape. If you have a rounder face, the vertical movement creates the illusion of length. If you have a longer face, waves at the cheekbones add width where you need it. This style also works if your natural wave pattern is inconsistent — you’re only emphasizing the waves where they matter most.
Creating Perfectly Placed Face Framing
- Section off the hair around your face — roughly from your temples back to your ears, on both sides
- Blow-dry these sections smooth using a paddle brush
- Using a 1.5-inch or larger curling iron, curl these sections loosely, away from your face
- The key is loose waves rather than tight curls — you want soft movement, not bounce
- For curtain bangs specifically, curl them away from both sides of your face in gentle waves
- Once the face-framing sections are curled, you can style the rest of your hair however you want — wavy, straight, tousled, doesn’t matter
- The face-framing waves hold the entire look together
This style is especially good if you don’t want to commit to styling your entire head but still want to look intentional and polished.
7. The Blunt-Cut Medium Wave With Minimal Layers
This is a deliberate contrast to the textured, choppy looks — a clean, blunt line at the bottom with minimal internal layers, and your natural waves doing all the work. The cut is geometric and modern, and the lack of choppy layers means the wave pattern is the star rather than the cut itself.
The Modern Minimalist Appeal
Minimalist cuts are having a major moment, and a clean, blunt medium cut with minimal layers reads as very contemporary and intentional. By cutting bluntly (the entire bottom is the same length), you actually emphasize your wave pattern more because there’s nothing interrupting or fighting it. The simplicity of the cut allows the waves to be the focal point. This works especially well if you have naturally textured, wavy hair and you want to showcase that texture rather than manipulate it into a specific shape.
Styling for Clean, Defined Waves
- Wash and apply a wave-enhancing mousse or cream to damp hair
- Use a diffuser to blow-dry, scrunching to encourage wave formation
- The key is drying completely — damp waves will fall and lose definition
- Once dry, if you want more defined waves, use a medium-size curling wand to wrap loose sections around, leaving ends out
- Finish with a flexible spray that’s not too heavy
Pro tip: This cut benefits from visiting your stylist every 6-8 weeks just to trim the blunt line and keep it sharp. Even slight growth can soften the blunt line, so regular trims maintain that intentional, clean aesthetic.
8. The Half-Up, Half-Down Textured Style

This is a hairstyle rather than a haircut — you’re keeping your medium wavy hair down but pinning up a section from the crown area, creating a romantic, sophisticated look that’s somewhere between completely down and a full updo. It’s incredibly versatile, works for casual and formal occasions, and looks great on wavy hair because the texture creates visual interest both in the pinned section and the loose waves below.
Why Half-Up Works So Well With Waves
The half-up style is perfect for wavy hair because the texture makes the pinned section visually interesting even though it’s actually quite simple. The waves create a cloud-like effect in the pinned section, and the loose waves below add movement and softness to the entire look. You also get the benefit of looking more polished than wearing your hair fully down, but without the commitment of a full updo.
Executing the Half-Up Texture Style
- Start with wavy hair that has some texture and definition — fresh waves work, or waves you’ve added with a curling iron
- Section off a portion of hair from just above your temples, across the crown, to the opposite side (roughly 1/3 of your total hair)
- Pull this section up and secure with a claw clip, elastic, or bobby pins placed strategically so they’re hidden in the texture
- For a softer look, don’t pull the section too tight — let it be a bit loose and textured
- Gently pull a few face-framing pieces out to soften the style
- Optional: use a small curling iron to add waves to any straight sections or enhance existing waves
- A light hairspray keeps everything in place without looking stiff
This style takes about 5 minutes once you’ve created your base wave, making it perfect for busy days when you want to look polished without spending forever styling.
9. The Balayage-Enhanced Wavy Style (The Styling Angle)
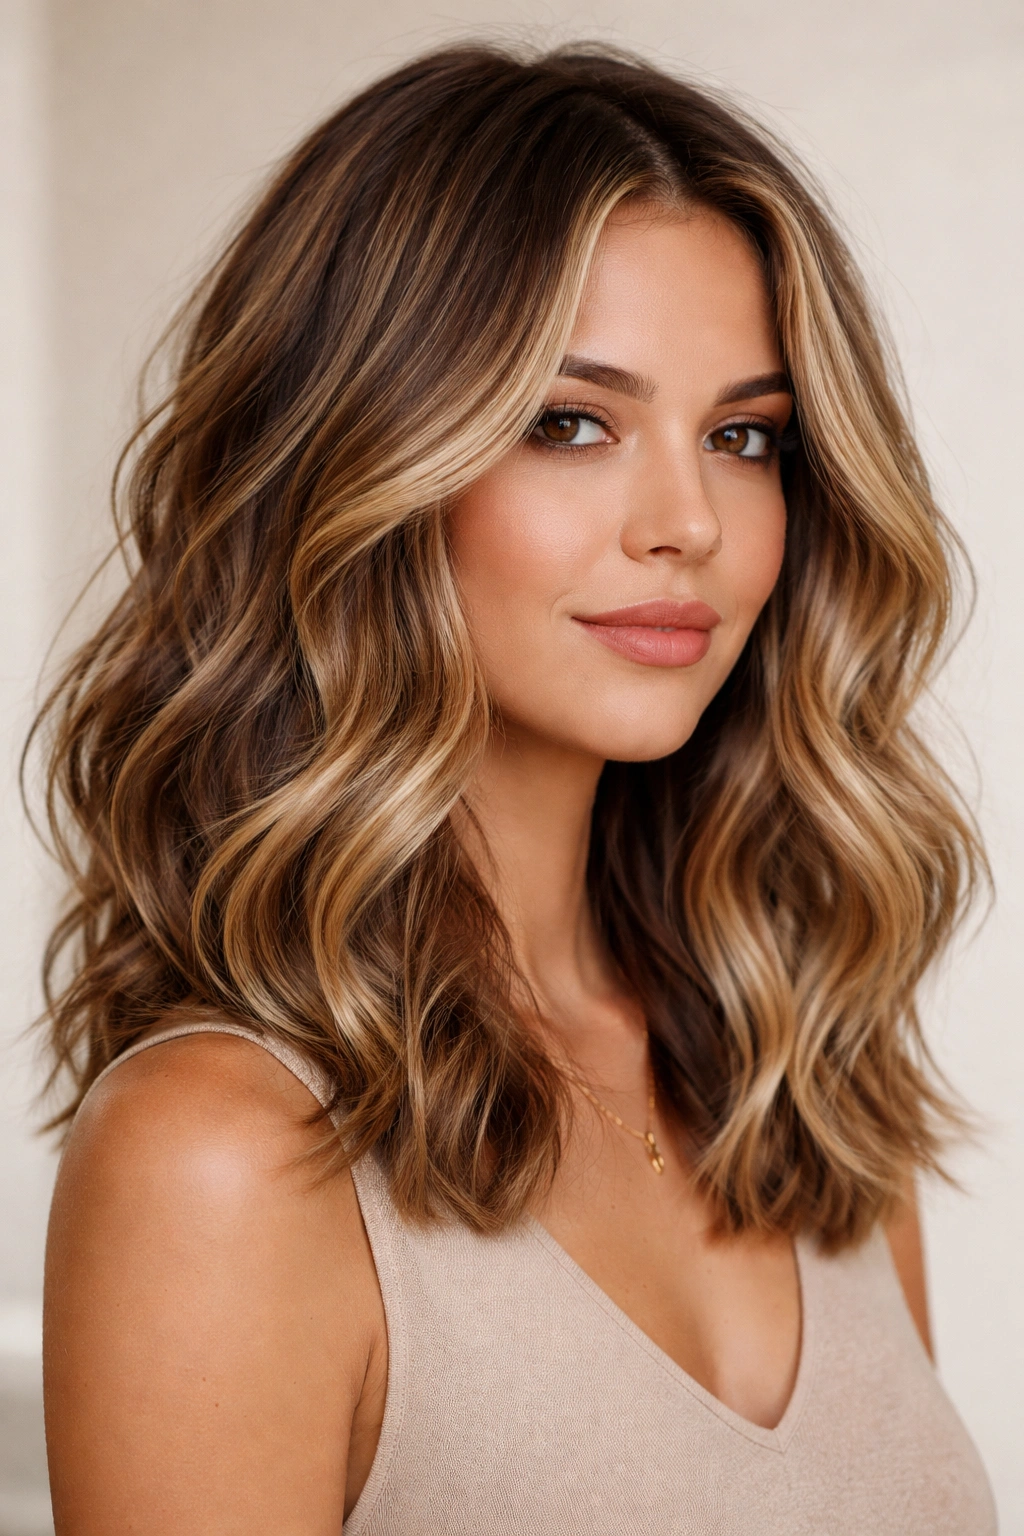
This is the eleventh-hour addition to our list, and it’s important because styling and color are absolutely intertwined. While balayage is technically a coloring technique, the way you style wavy hair when you have dimensional color is completely different from styling single-tone hair. Balayage (hand-painted highlights that create movement and dimension) makes waves look more sophisticated and intentional because the color creates highlights and shadows that emphasize the wave pattern.
How Color and Wave Work Together
When you have dimension in your hair through balayage or similar techniques, the wave pattern becomes more visually interesting because light and shadow play across each wave. A subtle wave in single-tone hair might read as just texture, but the same wave with dimensional color reads as deliberately styled. This is why so many stylists recommend balayage for wavy hair — it’s not gimmicky; it’s actually strategic visual enhancement.
Styling Wavy Hair With Dimensional Color
- The same wave-creating techniques work, but the impact is magnified by your color dimension
- Apply a moisturizing leave-in conditioner before styling — this adds shine and brings out the dimensional color
- Use a diffuser to blow-dry and enhance your natural waves
- If adding waves with a curling iron, use slightly larger waves than you might on single-tone hair — the color will create enough visual interest that you don’t need the tightest possible wave
- Finish with a flexible-hold spray that won’t dull your color or create crunch
- Consider a weekly glossing treatment or color-safe serum to keep your color vibrant — faded dimension looks less intentional than fresh balayage
The beauty of this style is that balayage-enhanced waves actually require less precise styling because the color is already creating movement and dimension. Your waves can be softer and still look intentional and interesting.
Wrapping Up
The modern medium wavy hairstyle landscape is far more diverse and versatile than it probably seems when you’re scrolling past the same handful of styles online. These nine approaches give you concrete options whether you want to commit to a new cut or just try different styling techniques on what you already have. The key across all of these styles is that they work with your hair’s natural texture rather than forcing it into an unnatural shape — which means less damage, less styling time, and ultimately, better-looking results that actually last.
Pick one style that resonates with your lifestyle and face shape, and commit to learning it well. Get a cut from someone who specifically understands how to work with wavy hair and can cut in a way that complements your natural texture. And remember that the styling technique matters just as much as the cut itself — even the most beautiful cut will fall flat if you’re not using products and methods that enhance your waves rather than fighting them.
Your medium wavy hair is actually an asset, not a limitation. The right cut and styling approach will make you look intentional, polished, and put-together without requiring you to spend an hour every morning with a blow dryer and flat iron.