Bridesmaids often get less attention than the bride when it comes to hairstyling, yet their look sets the tone for the entire wedding aesthetic. Wavy hairstyles are a bridesmaid favorite for good reason—they’re romantic, versatile, flattering on nearly every face shape, and photogenic enough to hold up beautifully in pictures. The key is finding a wavy style that complements both the wedding’s vibe and each bridesmaid’s individual features without requiring constant touch-ups or complicated styling throughout the day.
A truly successful bridesmaid wave isn’t just about throwing curling irons at hair and hoping for the best. It’s about understanding which wave patterns work with different dress styles, how to build waves that last through ceremony, reception, and dancing, and what products actually keep those waves from falling flat by hour three. The best bridesmaid waves feel effortless and romantic without looking overdone or fragile—they should feel like the bridesmaid can actually move her head and hug people without worrying the whole style will collapse.
What makes wavy bridesmaids’ hairstyles work across different weddings is their flexibility. A soft wave reads romantic at an evening garden wedding, beachy at a destination ceremony, and modern when styled with clean lines and strategic volume. The same wave foundation can be dressed up with elaborate accessories or dressed down with minimal adornment. That’s why understanding the foundational wave techniques—how to build them, what products anchor them, and which variations suit which occasions—matters more than memorizing one specific style.
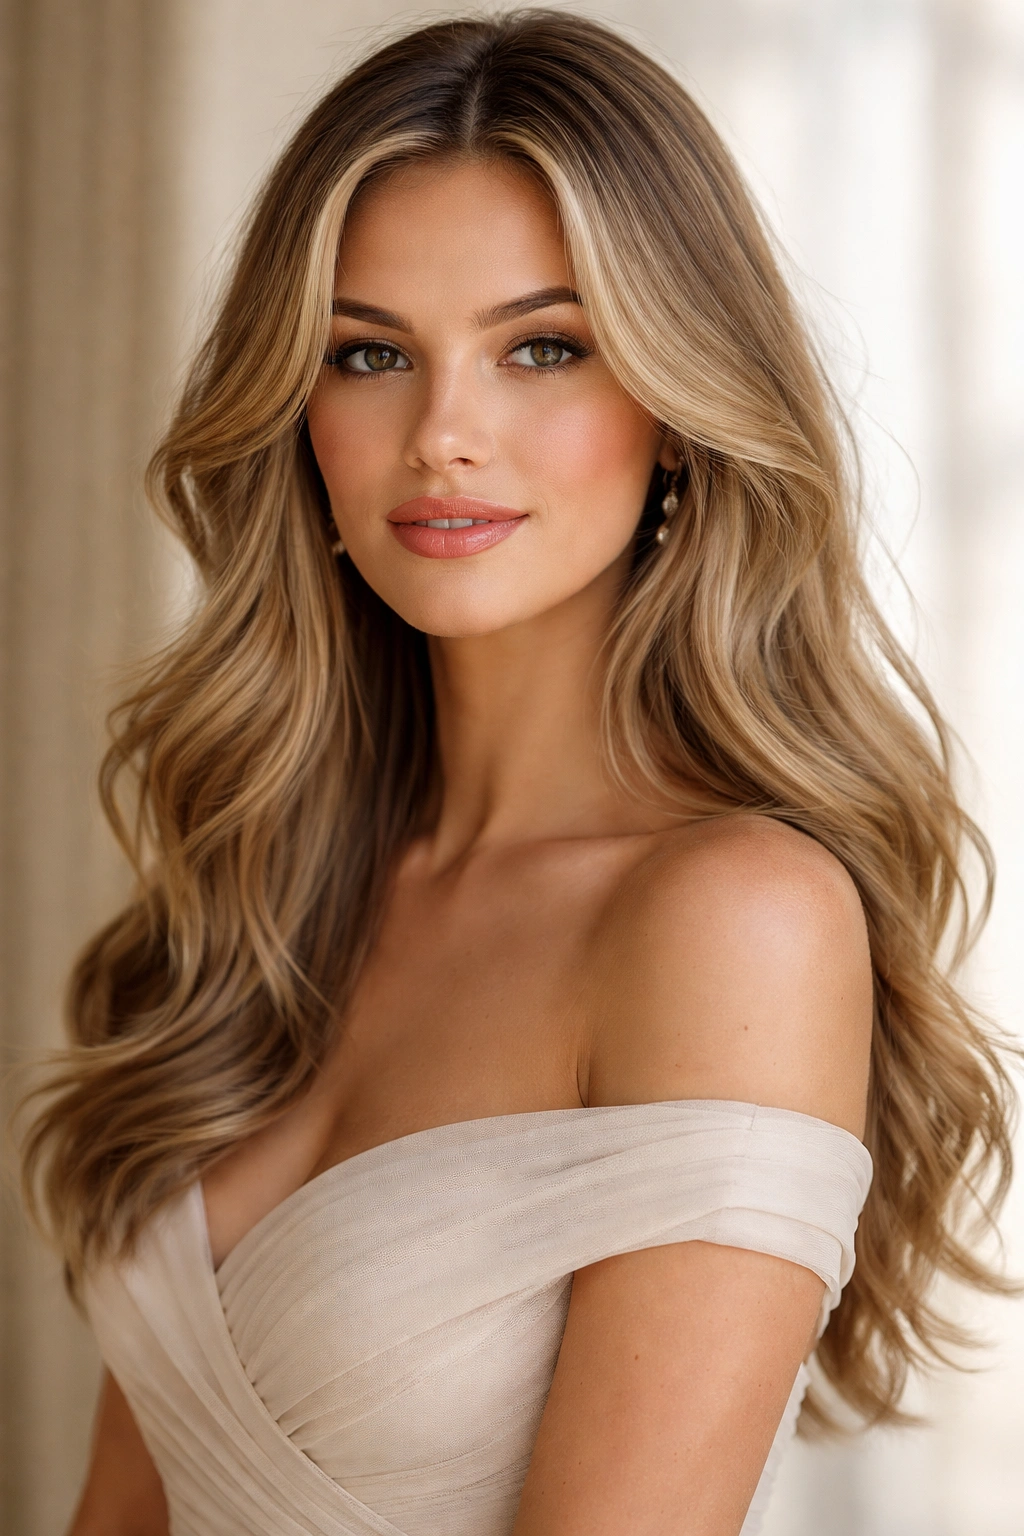
1. Soft Romantic Waves with a Deep Side Part
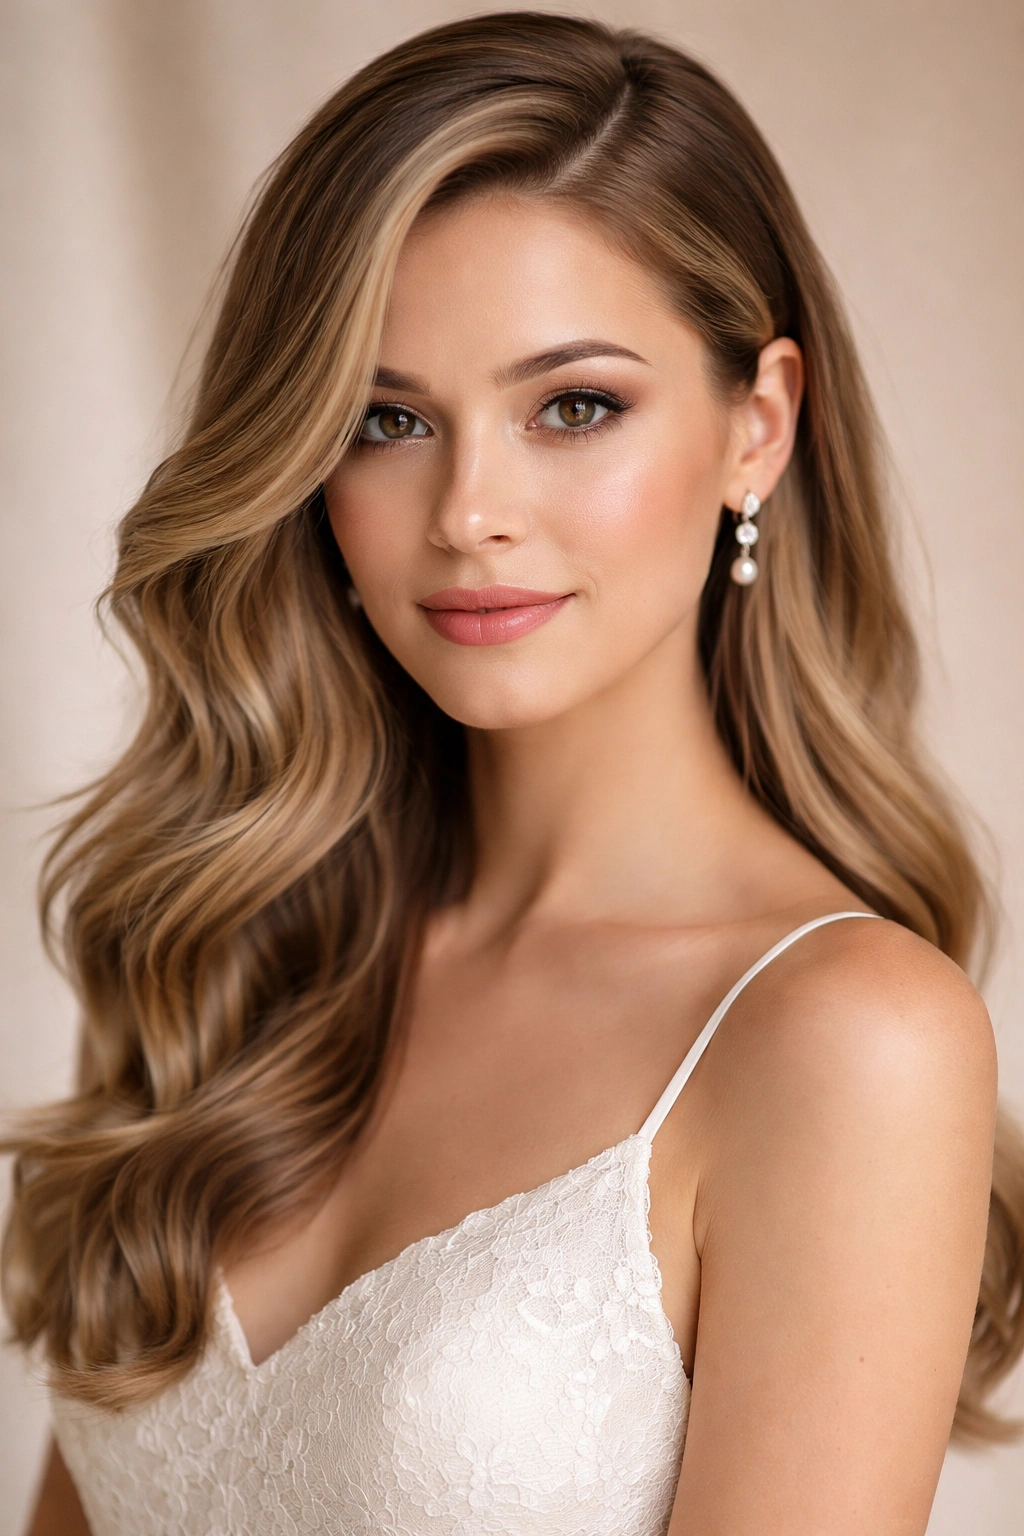
Soft romantic waves are the quintessential bridesmaid look—they feel timeless, feminine, and work equally well at formal black-tie weddings or casual outdoor celebrations. This style relies on loose, flowing waves that begin roughly at the mid-length of the hair and flow downward with gentle movement. The deep side part adds sophistication without the severity of a middle part, and it naturally creates an asymmetrical frame that’s flattering on most face shapes.
Why This Works for Bridesmaids
Soft romantic waves photograph beautifully in both daylight and flash photography because the gentle movement catches light naturally, creating dimension without looking contrived. The style works with nearly every dress neckline—it doesn’t compete with elaborate jewelry or intricate dress details, but it’s substantial enough that bridesmaids don’t look washed out or underdressed. The deep side part also creates the illusion of more volume, which helps the style last throughout the entire event without looking deflated by the end of the reception.
How to Achieve This Look
- Blow-dry hair with a volumizing mousse applied to damp roots, directing the brush away from the scalp to build height
- Create the deep side part while hair is still slightly damp, as this helps set the part direction
- Section the hair into three parts (top crown, left side, right side) to make waves manageable and ensure consistent texture
- Using a 1.25-inch curling iron, curl each section away from the face, wrapping hair loosely around the barrel and holding for 8-10 seconds
- Allow curls to cool completely on the iron before releasing (this sets the wave pattern)
- Gently brush through curls with a wide-tooth comb or soft paddle brush, starting from the ends and working toward the roots to create waves rather than ringlets
- Finish with a light-to-medium hold hairspray that won’t create a stiff, shellacked appearance
Pro tip: Apply a smoothing serum to the ends before curling to prevent frizz and add shine—this is especially important for bridesmaids wearing their hair down, where end texture is highly visible.
2. Beachy Waves with Textured Layers
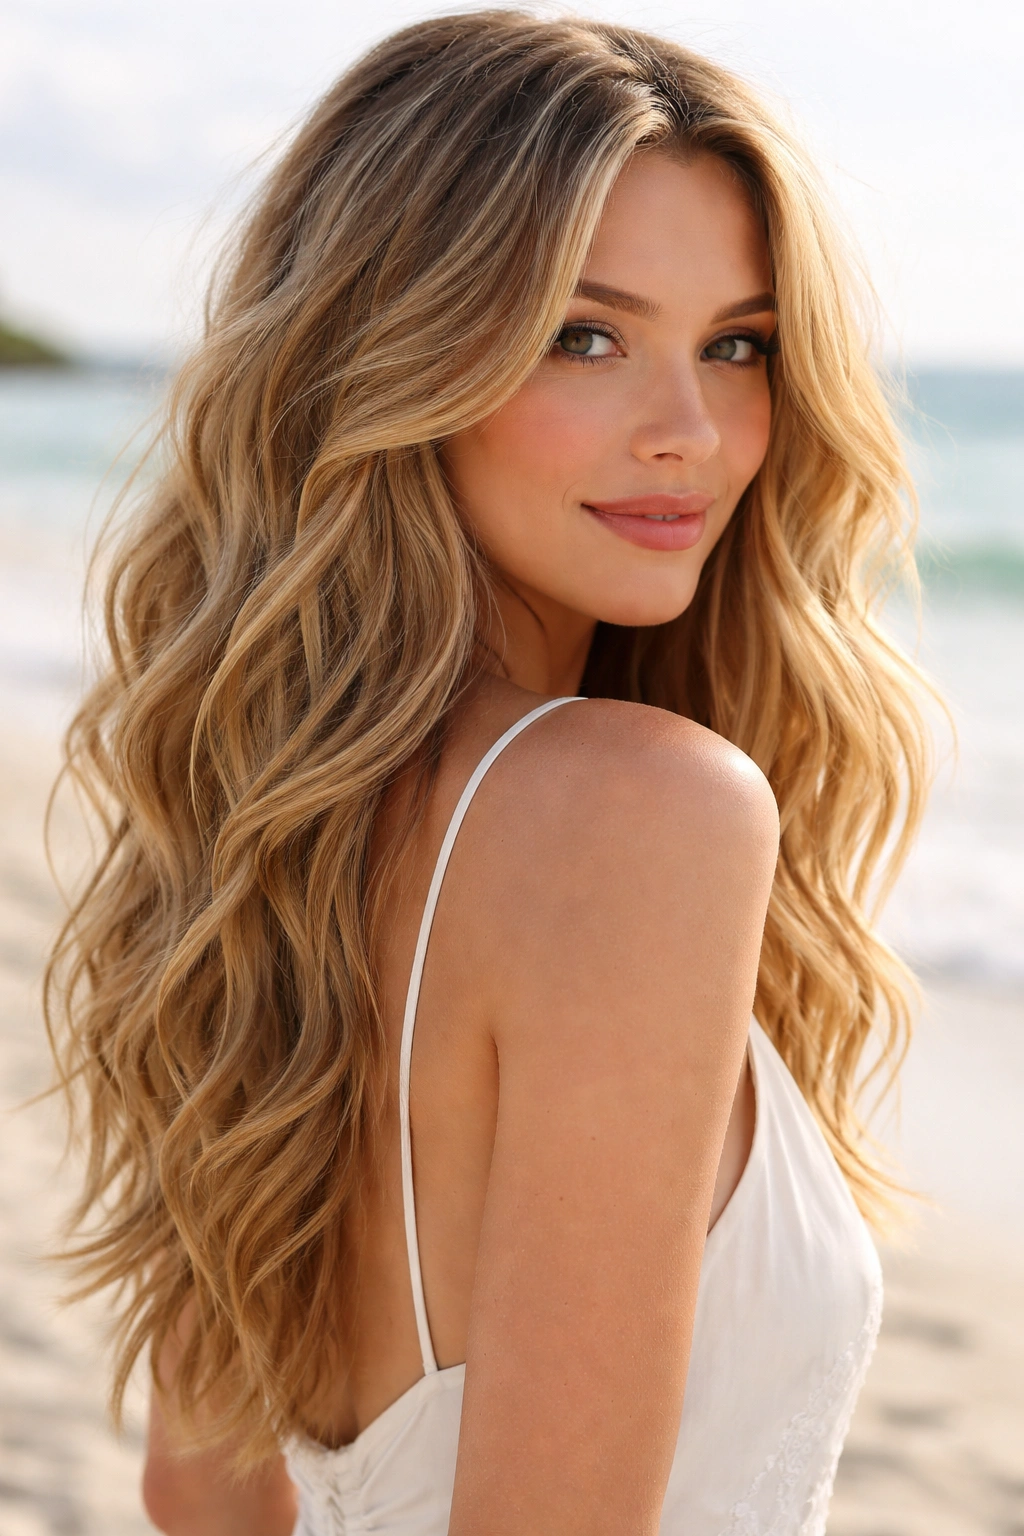
Beachy waves bring an effortless, undone quality that reads as modern and relaxed without sacrificing elegance. This style works particularly well for destination weddings, outdoor ceremonies, or any wedding with a casual-to-moderate dress code. The texture comes from purposefully irregular wave sizes and placement, creating movement that looks natural rather than styled. Shorter pieces around the face add dimension and soften the overall look without requiring face-framing layers cut into the hair.
Why This Works for Bridesmaids
Beachy waves actually hide imperfections better than perfectly uniform waves because the irregularity is intentional. They’re forgiving of heat, humidity, and wind—all the enemies of structured waves—because they’re designed to look slightly tousled. A bridesmaid wearing this style can safely hug the bride multiple times, move around the dance floor, and deal with wind for outdoor photos without the entire style deflating. This style also reads younger and more relaxed than formal romantic waves, making it ideal for younger bridesmaids or very casual weddings.
How to Achieve This Look
- Apply sea salt spray to damp hair (or create your own with saltwater and texture spray) to add grit and help waves hold
- Blow-dry hair straight or with minimal volume—the texture comes from the waves themselves, not root lift
- Use a 1-inch curling iron or wand and curl alternating sections away and toward the face to create the undone look
- Curl some sections tightly and others loosely; skip curling some face-framing pieces entirely for that “some waves, some texture” feel
- Run fingers through curls immediately after releasing from the iron to break up the wave and create that beachy texture
- Scrunch the ends gently with sea salt spray or texturizing spray to amplify the tousled effect
- Use a dry shampoo designed for texture (not just volume) to add grip and matte finish
Worth knowing: This style actually improves as the day goes on—waves relax slightly, and the style looks even more effortlessly undone by evening, which many bridesmaids prefer to the rigid perfection of structured waves.
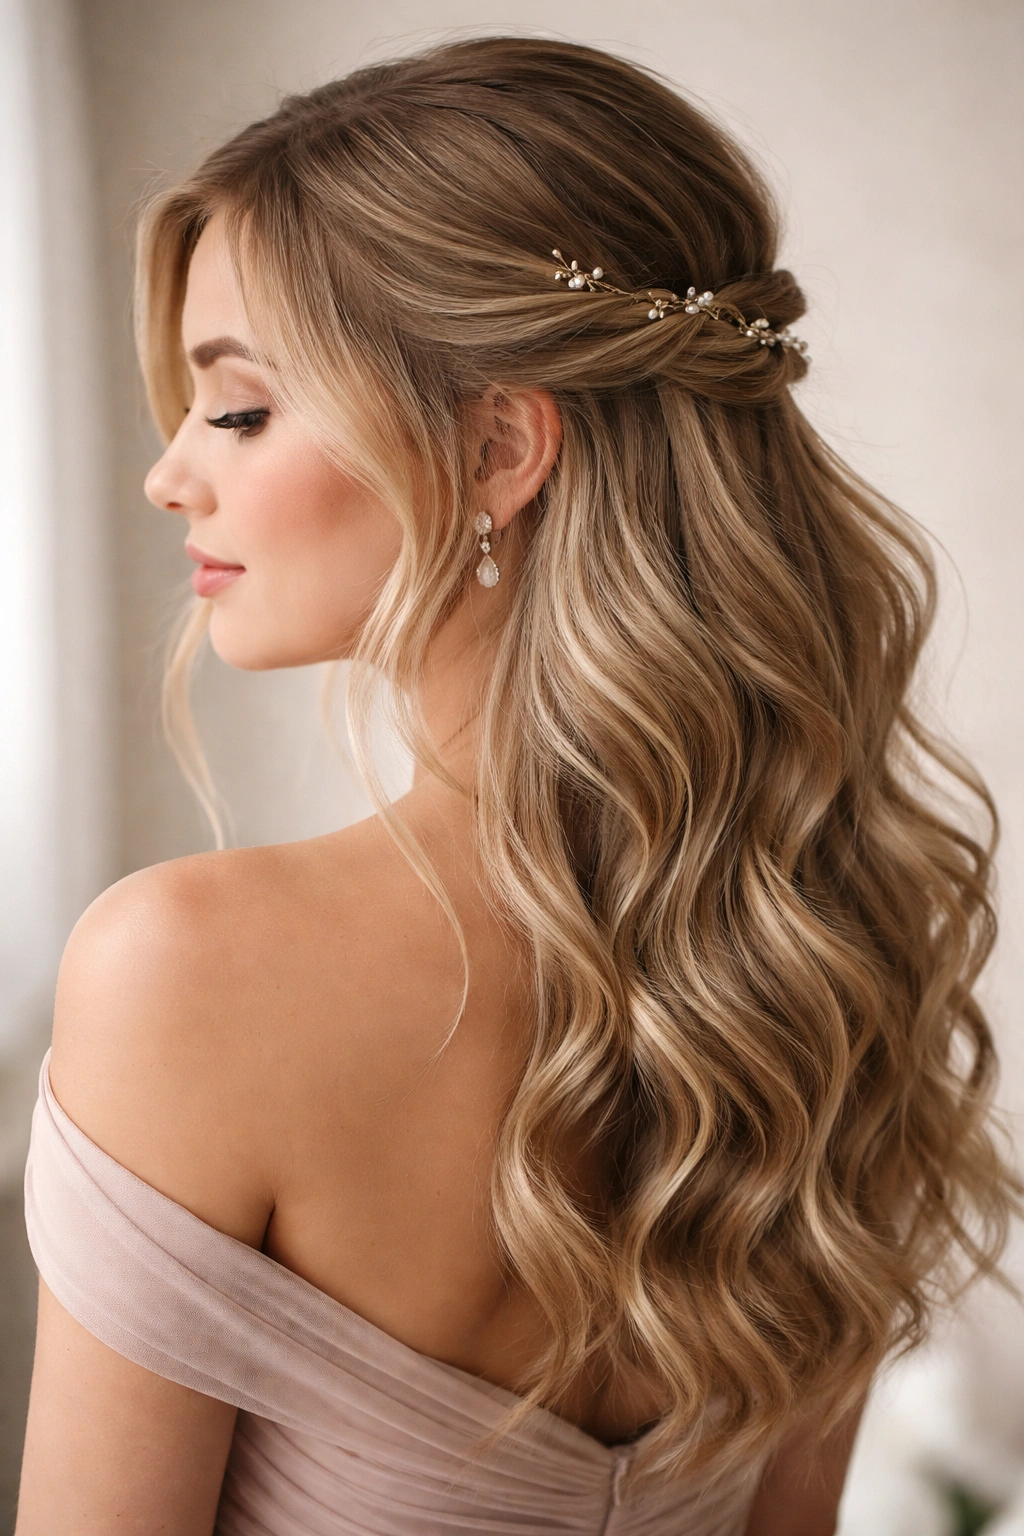
3. Half-Up Waves with a Romantic Twist
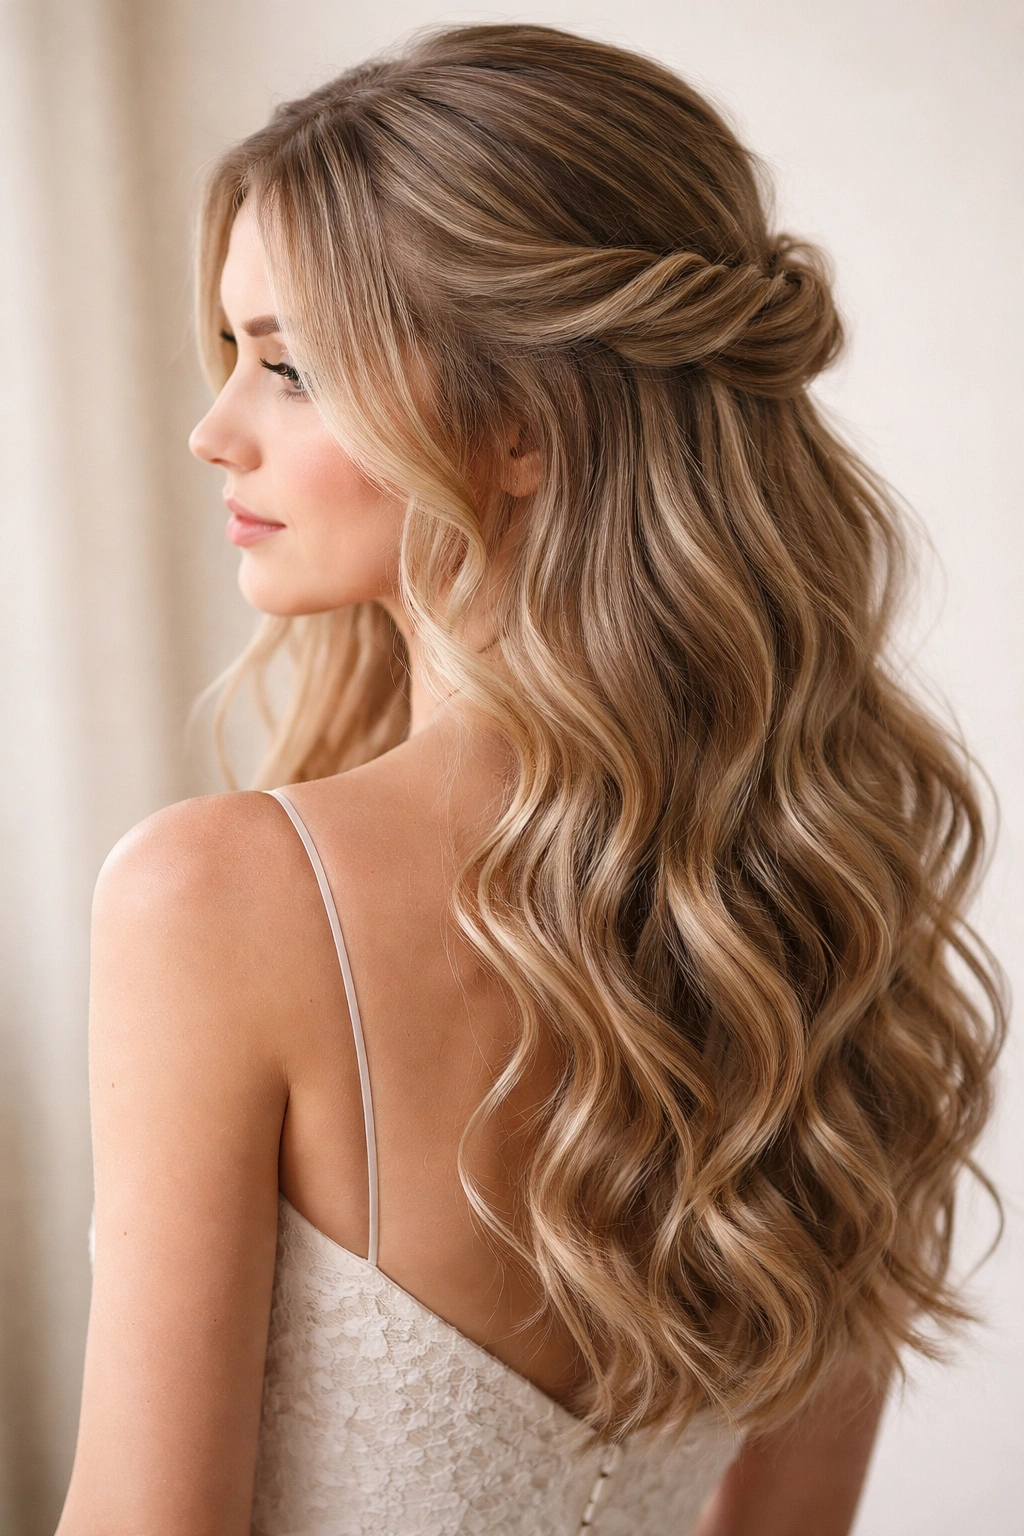
The half-up style offers the best of both worlds: it shows off the bridesmaid’s face and shoulders while keeping hair partially off the face for a polished look. Adding waves to a half-up style prevents it from looking too severe or childish—the waves soften the line where hair is pinned and add movement to the upper portion of the style. This versatile option works with virtually any dress style and gives bridesmaids the security of knowing their hair won’t fall in their face during the ceremony while still maintaining a romantic, soft appearance.
Why This Works for Bridesmaids
Half-up styles distribute visual weight evenly—they’re neither as casual as completely down nor as formal as a full updo, making them a safe middle ground for weddings with mixed dress codes or varied bridesmaid aesthetics. They’re exceptionally practical for ceremony-focused moments (the hair won’t obscure the bridesmaid’s face in photos) while still feeling special enough for a formal event. The style is also easier to coordinate across multiple bridesmaids because minor variations in how tightly hair is pulled or where exactly the section begins won’t create obviously mismatched looks.
How to Achieve This Look
- Curl the entire head with a curling iron, creating waves that will remain even after partial pinning
- Once curls have cooled, gently brush through to convert curls into soft waves
- Take a section of hair from temple to temple across the crown (roughly 2-3 inches wide depending on head size)
- Gently twist this section or create a loose braid, curving it slightly toward the back of the head
- Secure the pinned section with bobby pins matching the bridesmaid’s hair color, hiding them underneath the twisted or braided section
- Pull gently on the twisted/braided section to loosen it slightly—this creates softness and prevents a severe appearance
- Pin any flyaways with bobby pins and finish with hairspray
Insider note: Using a clear or velvet-covered elastic at the base of the half-up section (hidden by the waves) rather than relying on bobby pins alone prevents the style from slipping as the bridesmaid moves and dances throughout the event.
4. Deep Side-Parted Waves with Dramatic Volume
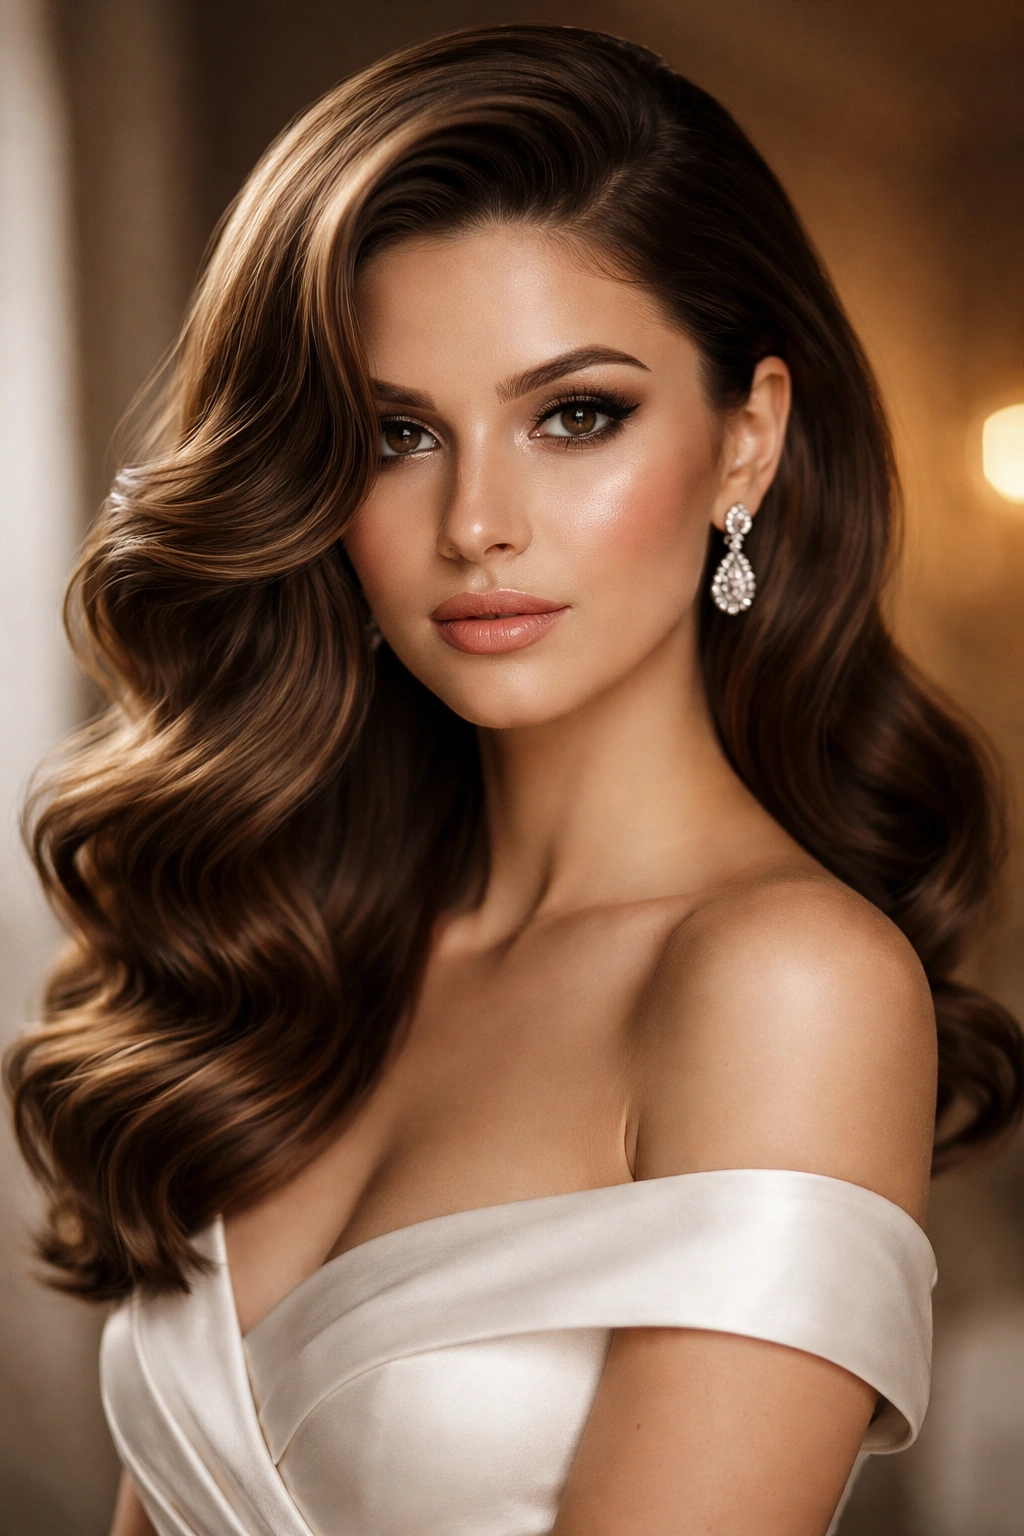
This style takes the soft romantic wave and amplifies it with serious, structured volume at the crown. The deep side part skews dramatically to one side, creating an almost Old Hollywood glamour effect while the voluminous waves add presence and sophistication. This look works beautifully for formal evening weddings, black-tie events, and weddings where the bridesmaids’ styling should rival the bride’s in drama and elegance (without competing, of course).
Why This Works for Bridesmaids
Structured volume reads expensive and formal—it’s the styling choice for bridesmaids who want their hair to be a visible component of the wedding aesthetic. The deep side part creates an asymmetrical, modern silhouette that photographs exceptionally well from certain angles, making it ideal for weddings where professional photos will be heavily edited and displayed. The style also suits formal dress fabrics like silk or taffeta and pairs beautifully with statement jewelry without looking overdone. Bridesmaids with thinner hair will particularly appreciate how this technique creates the appearance of density and fullness.
How to Achieve This Look
- Use a volumizing mousse on damp roots and blow-dry hair with a round brush, directing the brush upward and away from the scalp to build height at the crown
- Once hair is mostly dry, use a paddle brush and blow dryer to smooth the hair while maintaining root volume
- Create an exaggerated deep side part, sweeping one side significantly to the side (the side part should start about an inch to the side of center)
- Use a 1.5-inch curling iron to curl large sections of hair away from the face, holding each curl on the iron for 10-12 seconds for a pronounced wave
- After curling, don’t brush through—instead, gently shake out curls with your fingers to loosen them into waves while preserving volume
- Backcomb or tease the crown gently to lock volume in place without creating an obviously textured appearance
- Smooth the outer layer of the crown area with the brush to create a polished surface while keeping the volume underneath
- Use a flexible hold hairspray that won’t weigh hair down—apply to the crown area to set volume and to the wave areas to set the wave pattern
Pro tip: A light texturizing powder applied to the crown right before the ceremony “locks in” the volume better than hairspray alone, and it won’t create the stiffness that multiple coats of spray can cause.
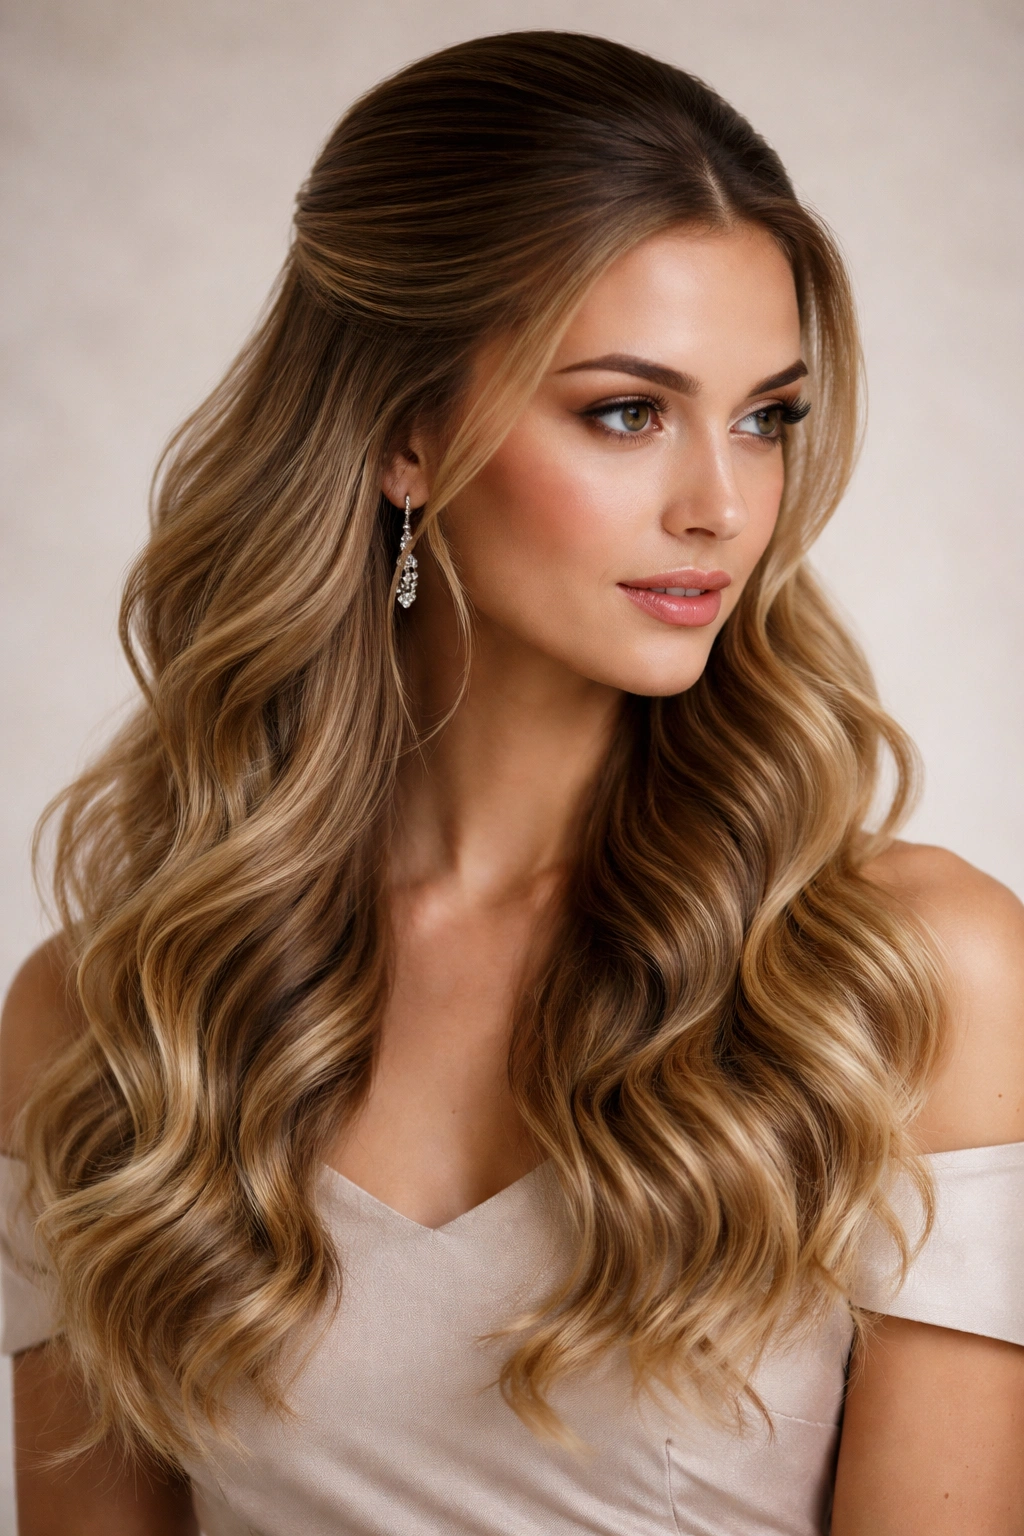
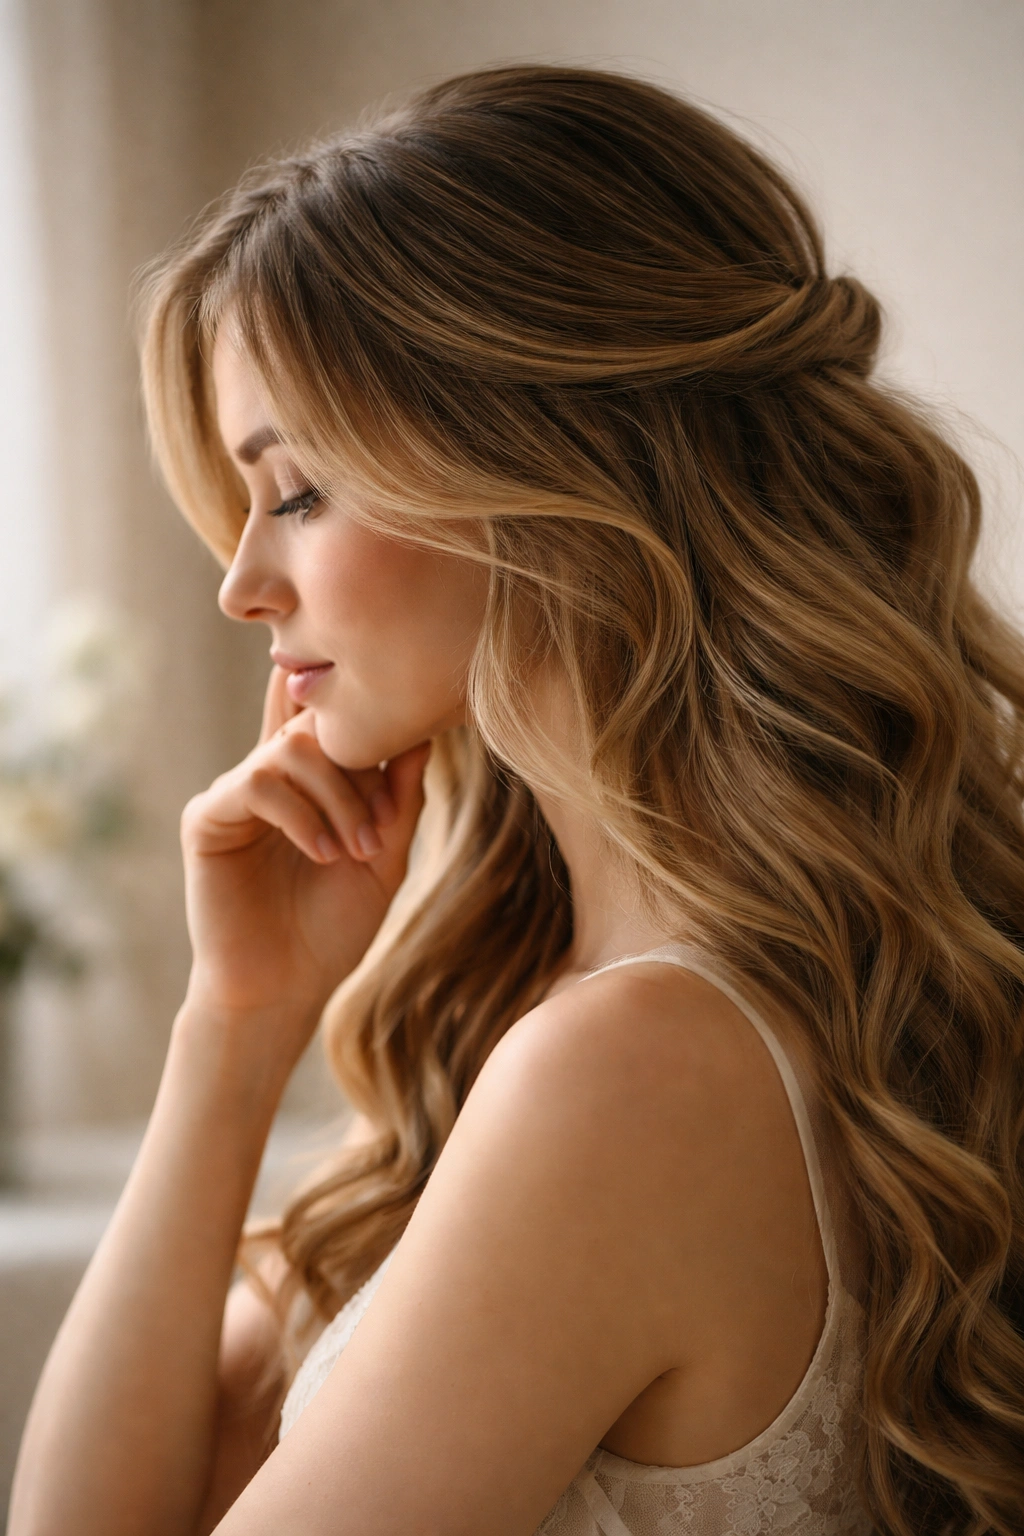
5. Face-Framing Layers with Soft Waves
This style brings attention to the bridesmaid’s face by incorporating shorter, wavier pieces around the face and temples while keeping the bulk of the hair at full length. The face-framing layers create movement and softness that prevents the overall look from feeling heavy or severe. This approach works beautifully when bridesmaids have different face shapes or features that benefit from different amounts of face-framing—some bridesmaids might have shorter layers while others have slightly longer ones, and the variation looks intentional rather than mismatched.
Why This Works for Bridesmaids
Face-framing waves are exceptionally flattering because they draw attention upward to the face rather than emphasizing the weight of long, heavy hair. The shorter pieces around the face add movement and catch light beautifully in photographs, creating a luminous quality. This style is particularly effective for bridesmaids with longer faces or prominent foreheads because the layers and waves create horizontal visual interest that balances vertical face proportions. The style also reads younger and fresher than longer, heavier hair might appear, which can be particularly flattering for older bridesmaids.
How to Achieve This Look
- Curl the entire head with a 1.25-inch curling iron, paying special attention to the face-framing pieces by wrapping them loosely for a softer, bouncier wave
- Brush through curls gently with a wide-tooth comb to create soft waves rather than ringlets
- Tousle the face-framing pieces specifically—these shorter pieces should look slightly more undone than the rest of the hair
- Gently pull and separate waves with your fingers in the face-framing area to increase movement
- Use a light hairspray on the face-framing pieces to keep them from falling flat, even though the rest of the hair uses medium-hold spray
- Consider adding subtle highlights or lowlights to the face-framing pieces before the wedding (done several weeks in advance) to add dimension and draw attention to the face
Worth knowing: This style actually photographs better when the face-framing pieces aren’t perfectly smooth or uniform—slight texture and movement in these shorter pieces creates a more flattering, less severe appearance.
6. Braided Waves with Romantic Details
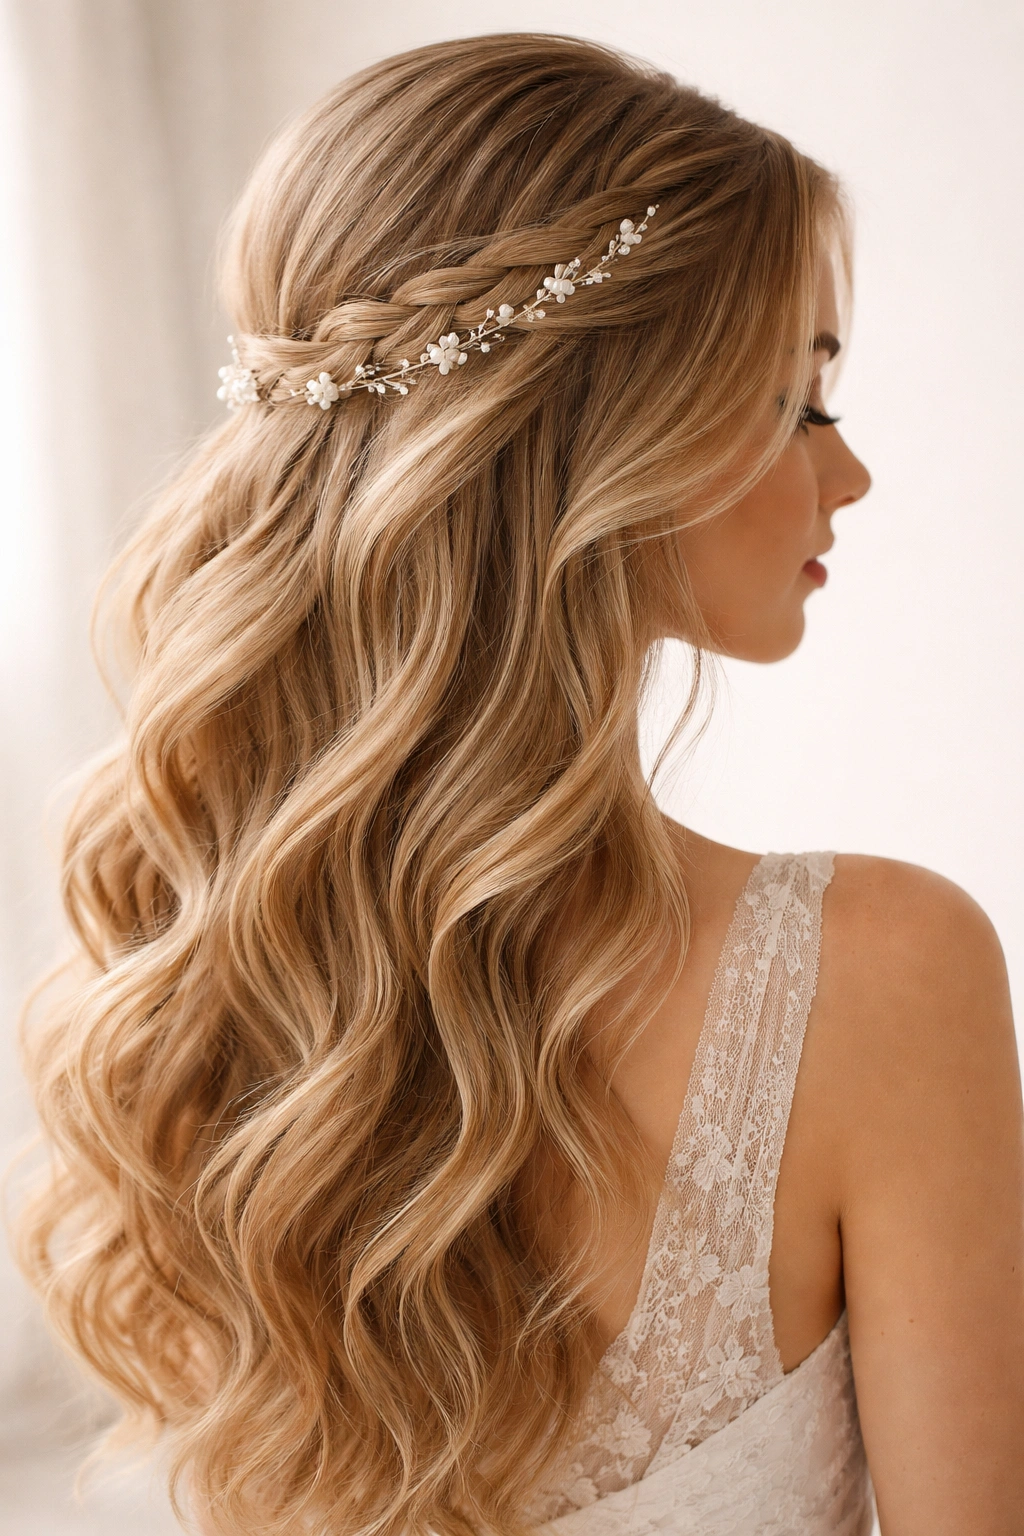
Combining braids with waves creates visual interest and a more fashion-forward aesthetic than waves alone, while still maintaining the romantic bridesmaid vibe. A thin braid woven through the side of the hair or incorporated into a half-up style adds intricate detail without requiring a complicated updo. The braid serves as a visual anchor point that makes the waves feel more intentional and designed, rather than simply curled and left loose.
Why This Works for Bridesmaids
Braids add a handcrafted, personalized quality that reads as high-effort and special—perfect for a wedding. The combination of braids and waves bridges casual and formal, making it ideal for weddings where the bridesmaids need to look polished but not overly structured. Braids also serve a practical function: they help keep hair partially in place, which means waves are less likely to fully collapse if a bridesmaid spends time dancing or moving around. The braided element also creates more visual separation and definition between the bridesmaids if they’re wearing the same hair style but have different hair colors or textures.
How to Achieve This Look
- Curl the entire head with a 1.25-inch curling iron, creating uniform soft waves
- Once curls have cooled and been gently brushed into waves, identify where you want the braid element (options: along the side of the head, down the center back, or incorporated into a half-up style)
- Take a thin section of hair (about 1 inch wide) from the selected starting point
- Create a three-strand braid, incorporating the waves as you go (the braid doesn’t need to be tight or perfect—a slightly loose braid looks more romantic)
- Secure the end of the braid with a small elastic or bobby pin, hiding it underneath surrounding hair
- Gently pull on the edges of the braid to loosen it and create a soft, romantic appearance
- You can also weave a thin ribbon or pearl strand through the braid for added detail if the wedding aesthetic supports it
Pro tip: Practice the braid on hair that’s already wavy—braiding straight hair and then curling tends to create a different effect than creating the braid in already-wavy hair, where the waves naturally soften the braid structure.
7. Voluminous Waves with Texture and Grip
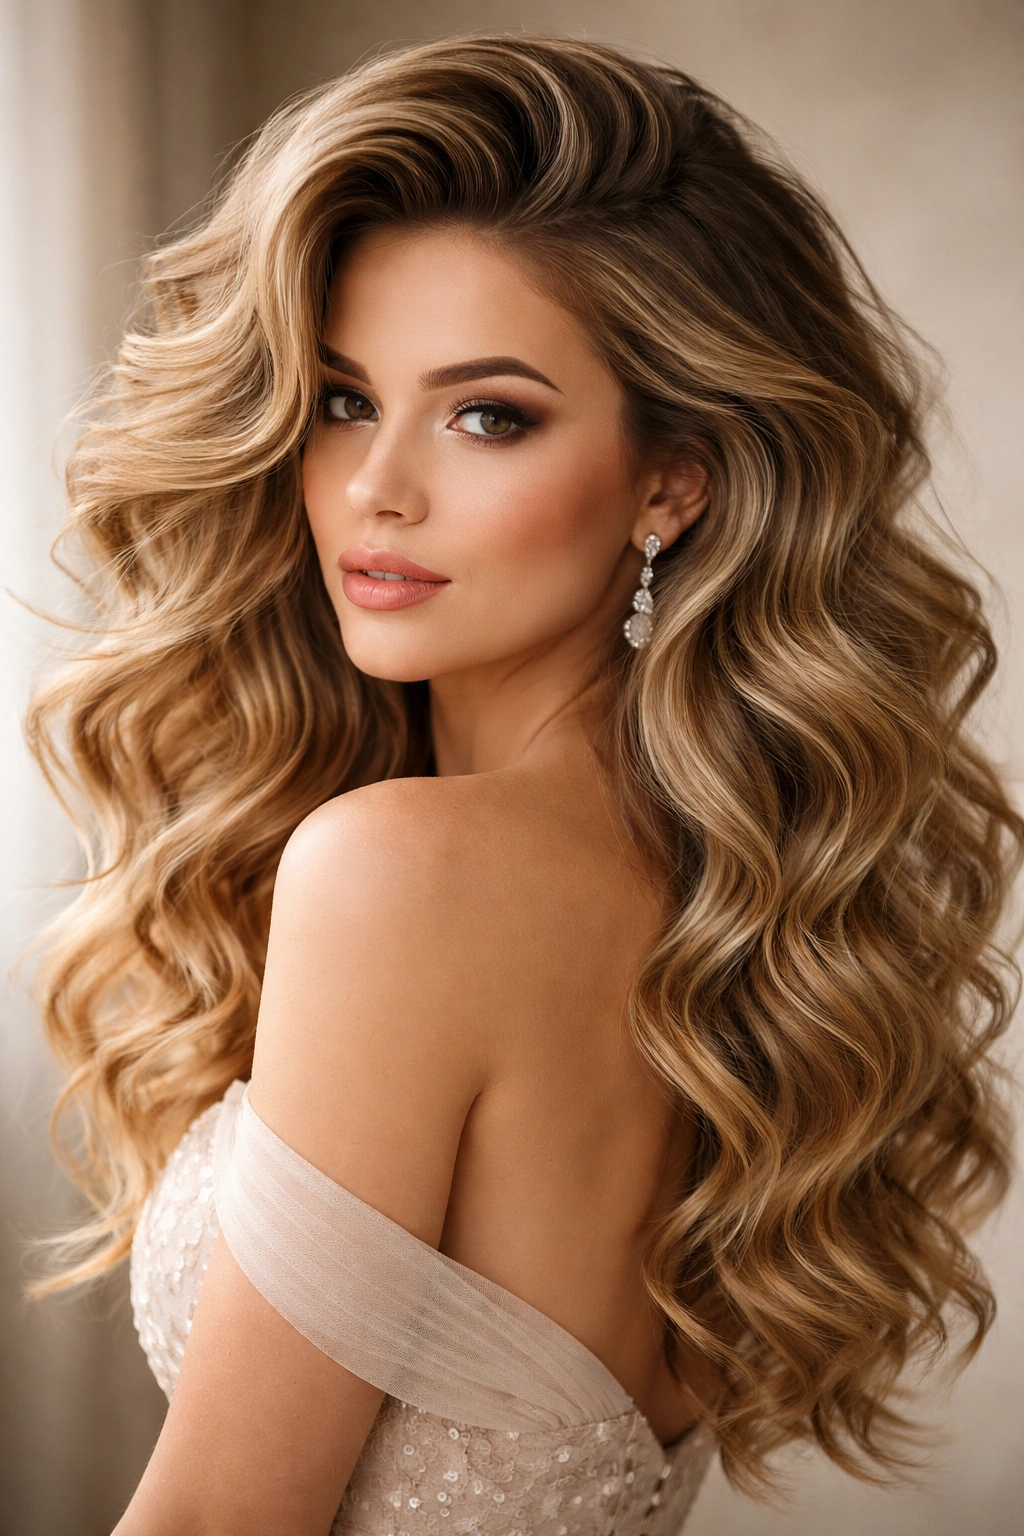
This style prioritizes maximum volume, texture, and hold—it’s for bridesmaids who want their hair to be an obvious, significant part of their overall look. Voluminous waves create presence and elegance without requiring an updo, and they read as both modern and timeless. This approach works beautifully for weddings where the bridesmaids are wearing statement jewelry, dramatic dress fabrics, or colors that demand strong, confident styling to match.
Why This Works for Bridesmaids
High-volume waves make bridesmaids look more polished, more put-together, and frankly more glamorous than softer, gentler waves. The style is particularly effective in photographs where the volume reads as luxury and intentionality. Bridesmaids with naturally fine or thin hair will appreciate how layered curling techniques and proper products can create the appearance of substantially more hair. The style also photographs consistently across different lighting conditions—whether photos are taken indoors or outdoors, in daylight or with flash, voluminous waves maintain their visual impact.
How to Achieve This Look
- Apply volumizing mousse to damp hair and blow-dry with maximum attention to root lift—use a round brush or a blow dryer with a concentrator nozzle to direct air upward
- Once mostly dry, use a fine-tooth comb to backcomb small sections throughout the crown and sides, creating texture without making it look matted
- Smooth the outer layer of backcombed sections so the style looks polished, not messy
- Using a 1-inch curling iron, curl large sections of hair away from the face in vertical sections (this creates more voluminous waves than wrapping hair around the barrel horizontally)
- Hold each curl on the iron for 12 seconds to create a defined, lasting wave
- After releasing from the iron, allow curls to cool completely in your hand before releasing—this sets the wave structure
- Do not brush through curls; instead, gently shake them out with your fingers to maintain wave definition and volume
- Finish with a medium-hold hairspray designed for volume; apply to the crown and wave areas but avoid the underneath layers to prevent weighing the style down
Insider note: Velcro rollers left in the hair for 5-10 minutes after curling with the iron (while curls are cooling) will lock in maximum volume and create waves that hold for the entire event.
8. Textured Waves with a Sleek Top Section
This hybrid style separates the hair into distinct regions: a sleek, smooth top section and highly textured, waved bottom section. The contrast creates modern visual interest while the sleekness on top prevents the overall look from feeling too casual or undone. This approach works particularly well for bridesmaids with thicker or denser hair, where too much texture throughout can overwhelm the face.
Why This Works for Bridesmaids
The contrast between sleek and textured creates a contemporary, fashion-forward look that reads expensive and intentional. The sleek top section keeps visual focus on the face while the textured waves add movement and interest lower down. This style is particularly effective for bridesmaids wearing sleek, modern dresses or strapless necklines where an all-textured style might feel too soft or romantic. The technique also allows for versatility—the sleek top can be styled with a middle part, side part, or even a slicked-back appearance depending on the wedding’s aesthetic.
How to Achieve This Look
- Blow-dry the entire head smooth, using a paddle brush and concentrator nozzle to create a sleek base
- Apply a smoothing serum or anti-frizz cream throughout the hair to ensure the top section stays sleek without flyaways
- Using a flat iron on medium heat, smooth the top 2-3 inches of hair (from the crown backward) to create a deliberately polished appearance
- Flip your head forward and curl the bottom 2-3 inches of hair (from mid-length to ends) using a 1.25-inch curling iron, working in vertical sections
- Return your head to normal position and gently brush through just the bottom section’s curls to create waves
- The dividing line between the sleek top and textured bottom should feel natural—there shouldn’t be an obviously harsh line
- Use a flat iron on the middle section where sleek and textured meet, blending the two areas together slightly
- Finish the top with a light hairspray and the textured bottom with a medium-hold spray
Worth knowing: This style looks best with strategic hair color or highlights that emphasize the contrast—having slightly lighter pieces in the textured bottom section adds dimension that makes the textured waves more visually interesting.
9. Loose Waves with Strategic Pinned Pieces
This final style combines the softness of loose waves with subtle pinning that creates dimension and prevents the style from looking formless. Small sections of hair are curled, waved, and then pinned at the back or sides, creating the appearance of a style that’s more put-together than completely loose waves while still maintaining an intentionally soft, romantic appearance. This approach offers bridesmaids the best of both worlds: romantic softness with just enough structure to feel intentional.
Why This Works for Bridesmaids
Strategically pinned pieces elevate loose waves from casual to occasion-appropriate without requiring the full commitment of a half-up or updo style. The pinning creates visual interest from the back view, which is important in ceremony and group photos. This style is particularly effective for bridesmaids who prefer the feel of their hair down but want something more special than just curled and brushed-out waves. The selective pinning also creates visual dimension that flatters most face shapes, and the strategic placement can be adjusted to suit each bridesmaid’s unique proportions and preferences.
How to Achieve This Look
- Curl the entire head with a 1.25-inch curling iron, creating uniform soft waves throughout
- Once curls have cooled, gently brush through with a wide-tooth comb to create soft, flowing waves
- Take a small section of hair from one side (about 2-3 inches) and gently twist it, curving it toward the back of the head
- Pin this twisted section at the back of the head with bobby pins, leaving the waves of this section visible (don’t hide it completely)
- Repeat on the other side if desired for balance, or create one pinned section for asymmetrical interest
- Alternatively, take small sections from the crown and pin them loosely at the back, creating the appearance that waves are being gently held back without looking like a formal style
- Gently pull on the pinned sections to loosen them, creating softness and preventing a tight, severe appearance
- Use hairspray to set the waves and hold the pinned sections in place without creating visible rigidity
Pro tip: Use clear bobby pins for blondes and dark bobby pins for brunettes to ensure pins blend seamlessly with the hair, making the pinned sections feel intentional rather than like the bridesmaid’s hair is falling down and pinned back in desperation.
Final Thoughts
The perfect wavy bridesmaid hairstyle isn’t just about finding a beautiful style—it’s about choosing one that will feel comfortable, last throughout the entire wedding day, and photograph beautifully across multiple settings and lighting conditions. Every style covered here can be customized for individual bridesmaids’ hair textures, face shapes, and personal preferences while still maintaining cohesion across the wedding party.
What makes these styles work for bridesmaids specifically is that they balance romance and practicality. A bride’s hair can be more delicate or require more maintenance because she’s primarily standing in one spot for the ceremony and sitting for much of the reception. Bridesmaids, by contrast, move constantly—they’re hugging guests, adjusting dresses, sitting and standing, potentially dancing. The waviest, most romantic bridesmaids’ styles are those that incorporate enough texture, hold, and strategic styling that they look beautiful whether the bridesmaid is standing still for photos or actively moving and engaging with wedding guests.
Start by considering the wedding’s overall aesthetic, the season and location (heat and humidity affect wave longevity), and whether the bridesmaids will be wearing their hair down or have options for partial updos. Then select the specific wavy style that aligns with these factors, and invest in a good trial appointment so you can test the style, confirm it holds well throughout the day, and make any adjustments before the actual wedding. A successful bridesmaid wave is one that looks intentional and beautiful in photos, feels comfortable throughout the event, and requires minimal maintenance or touch-ups as the day progresses.