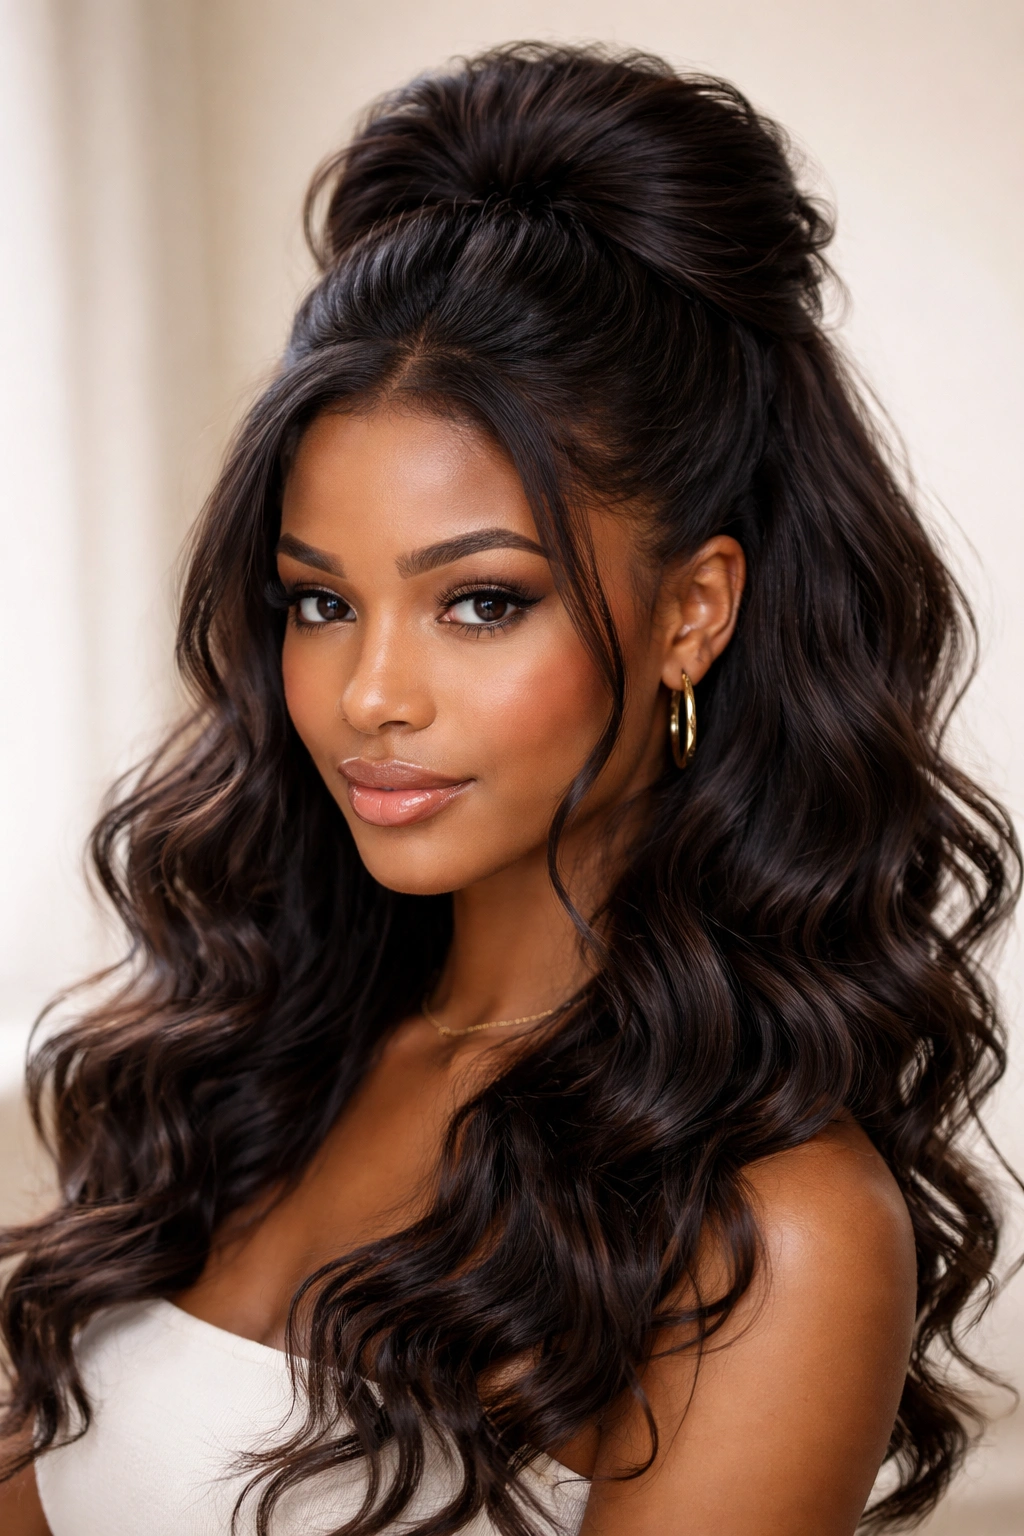
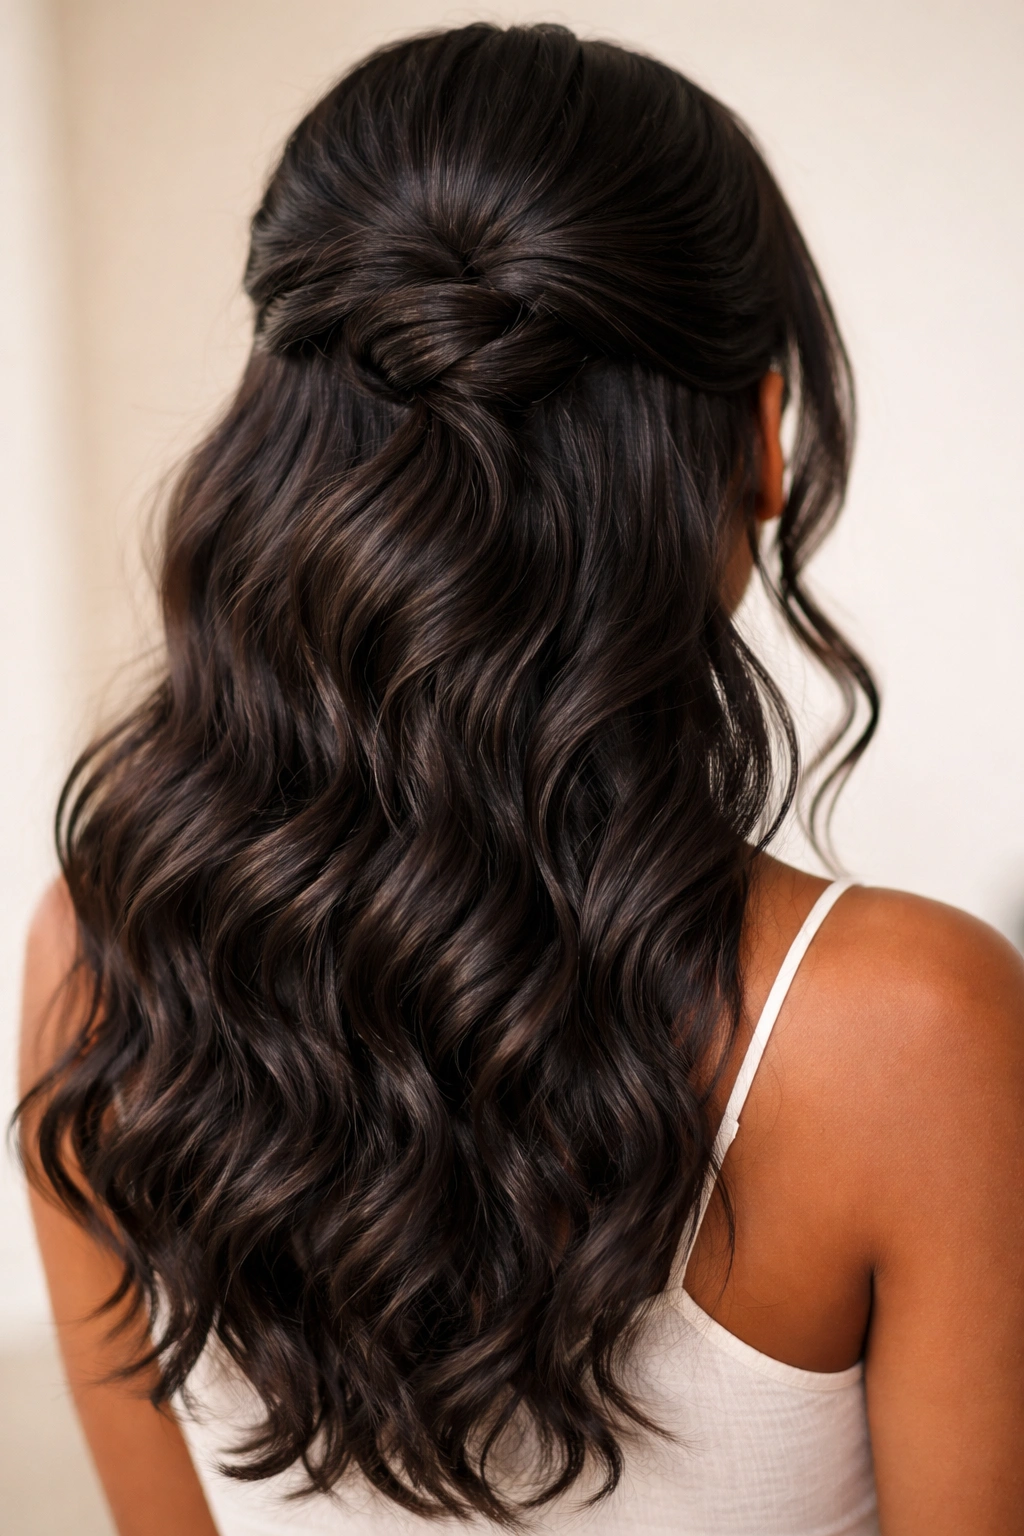
Black wavy hair has a natural texture that begs for versatility, and half-up styles deliver exactly that energy. They sit at the sweet spot between fully down and completely secured—giving you movement and volume where you want it while keeping hair off your face and neck. Whether you’re heading to work, a social event, or just looking for a refresh on a regular day, half-up styles work with your hair’s natural wave pattern rather than fighting against it, which means you spend less time fussing and more time feeling confident.
The beauty of half-up styling is that it celebrates the natural texture you’ve got while offering endless creative possibilities. You can dress them up with intricate braiding, keep them sleek and minimal, add sparkle with pins and clips, or blend different techniques for something truly unique. The key is understanding how your waves move, where you place the foundation section, and which accessories and finishing techniques amplify your hair’s natural dimension rather than flatten it.
What makes these styles especially perfect for wavy hair is that they work with your curl pattern instead of demanding perfection. A slight frizz or undone wave adds character to a half-up style rather than detracting from it. You’re not trying to achieve a severe, immaculate finish—you’re creating intentional texture and movement that looks effortlessly polished. That’s the real power of half-up styling for Black wavy hair.
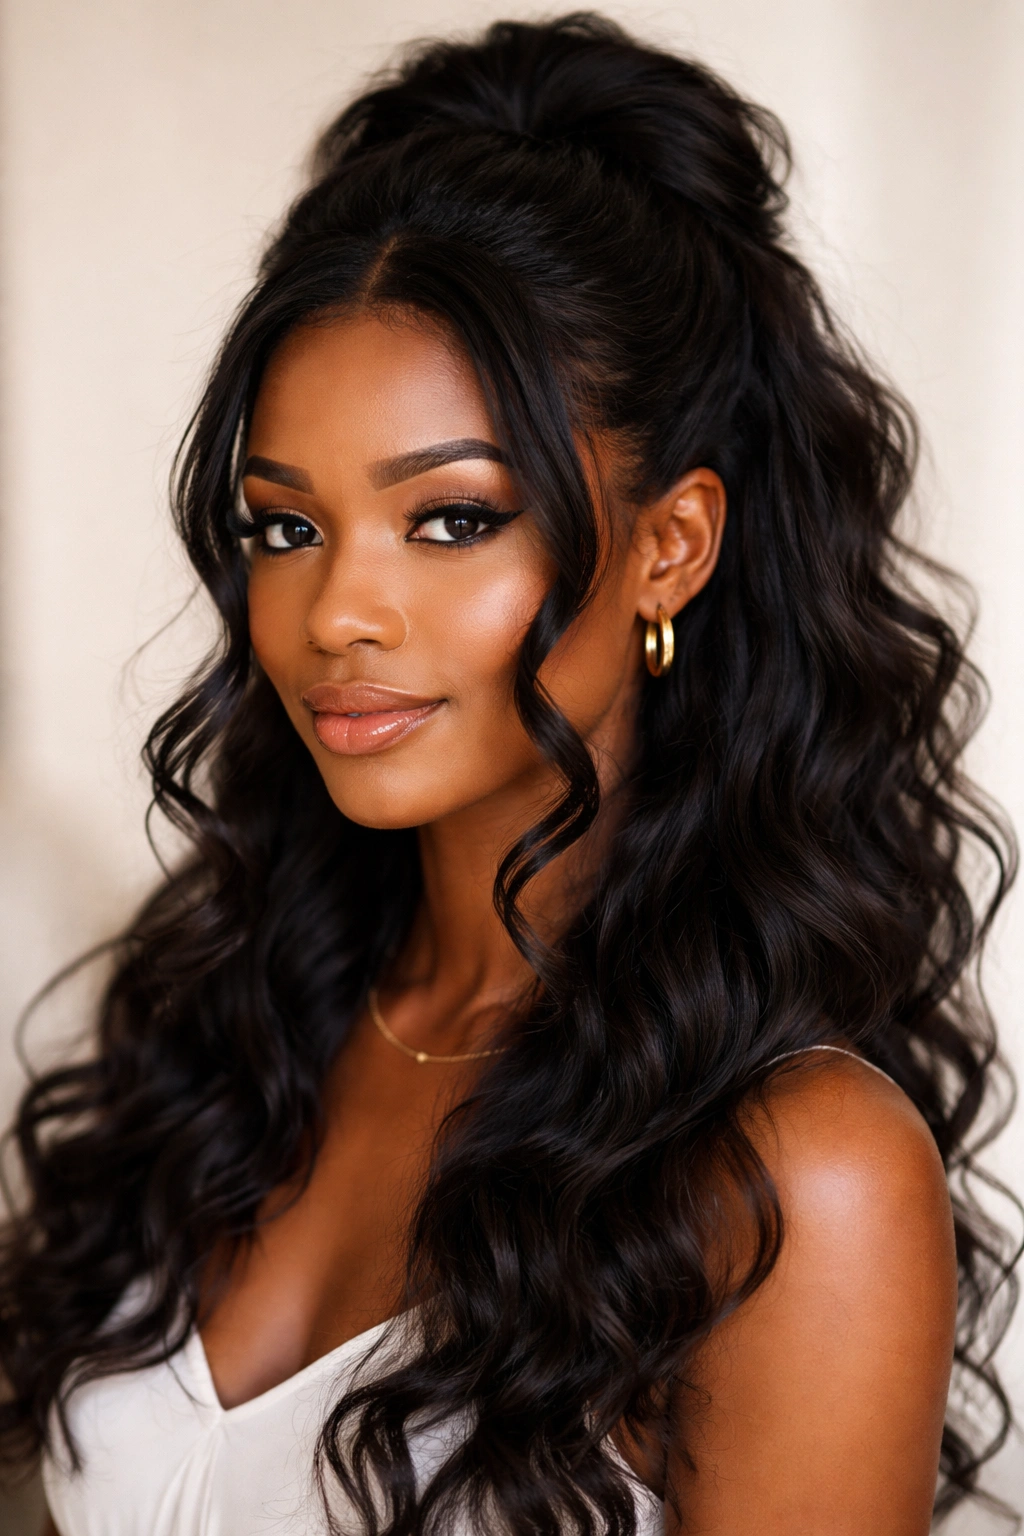
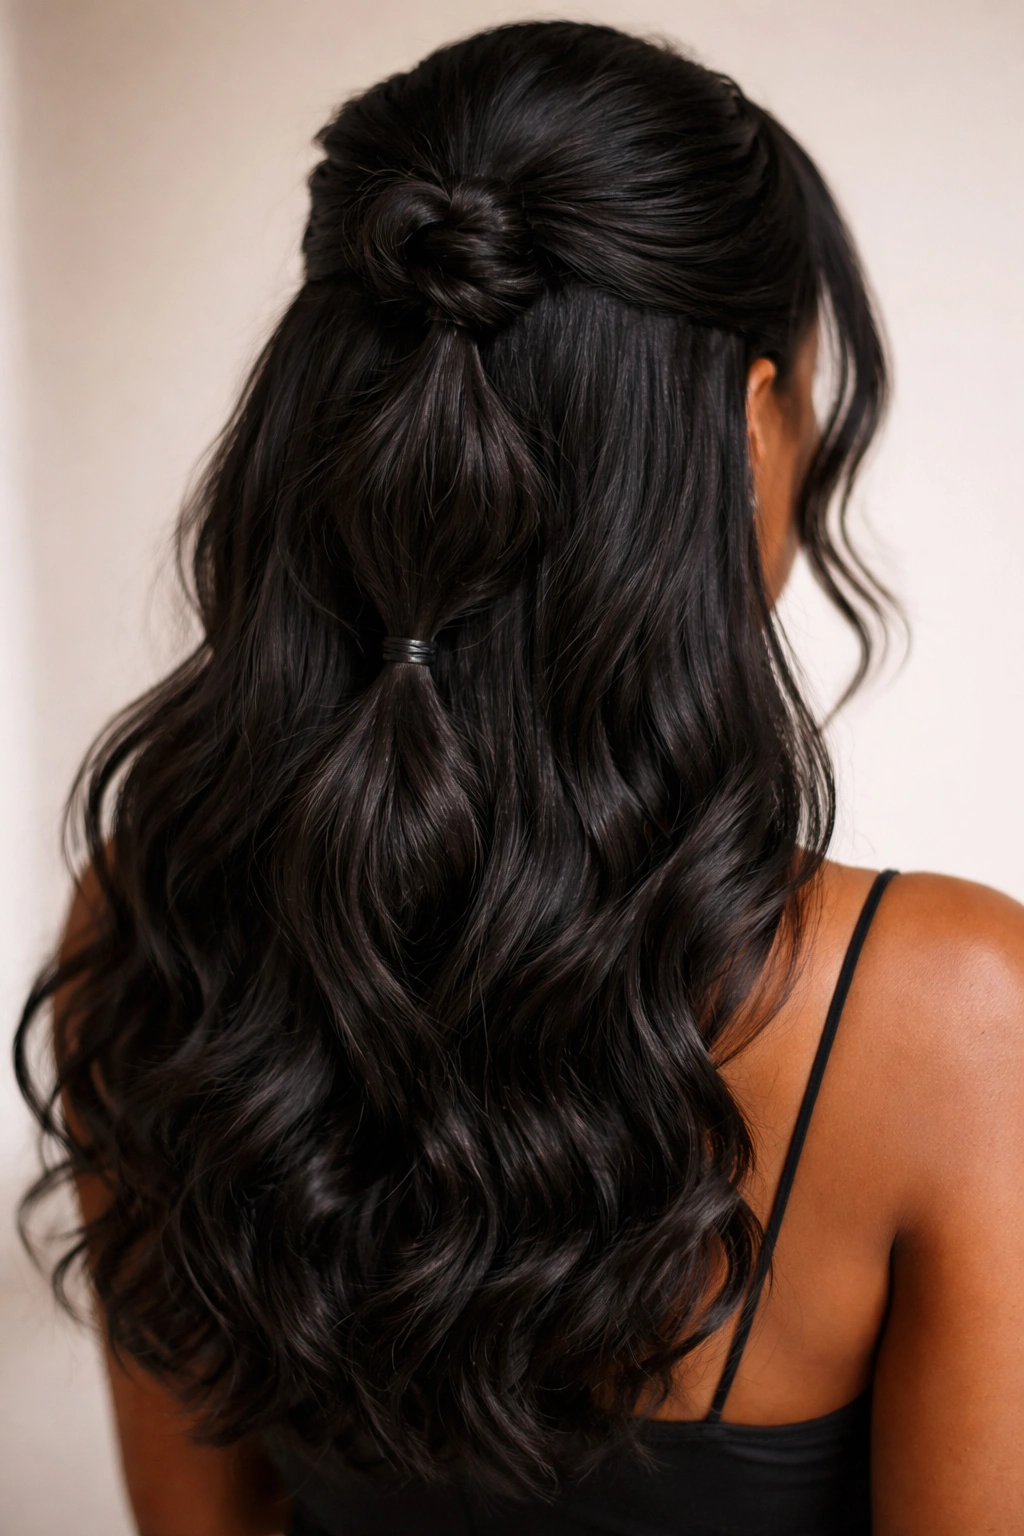
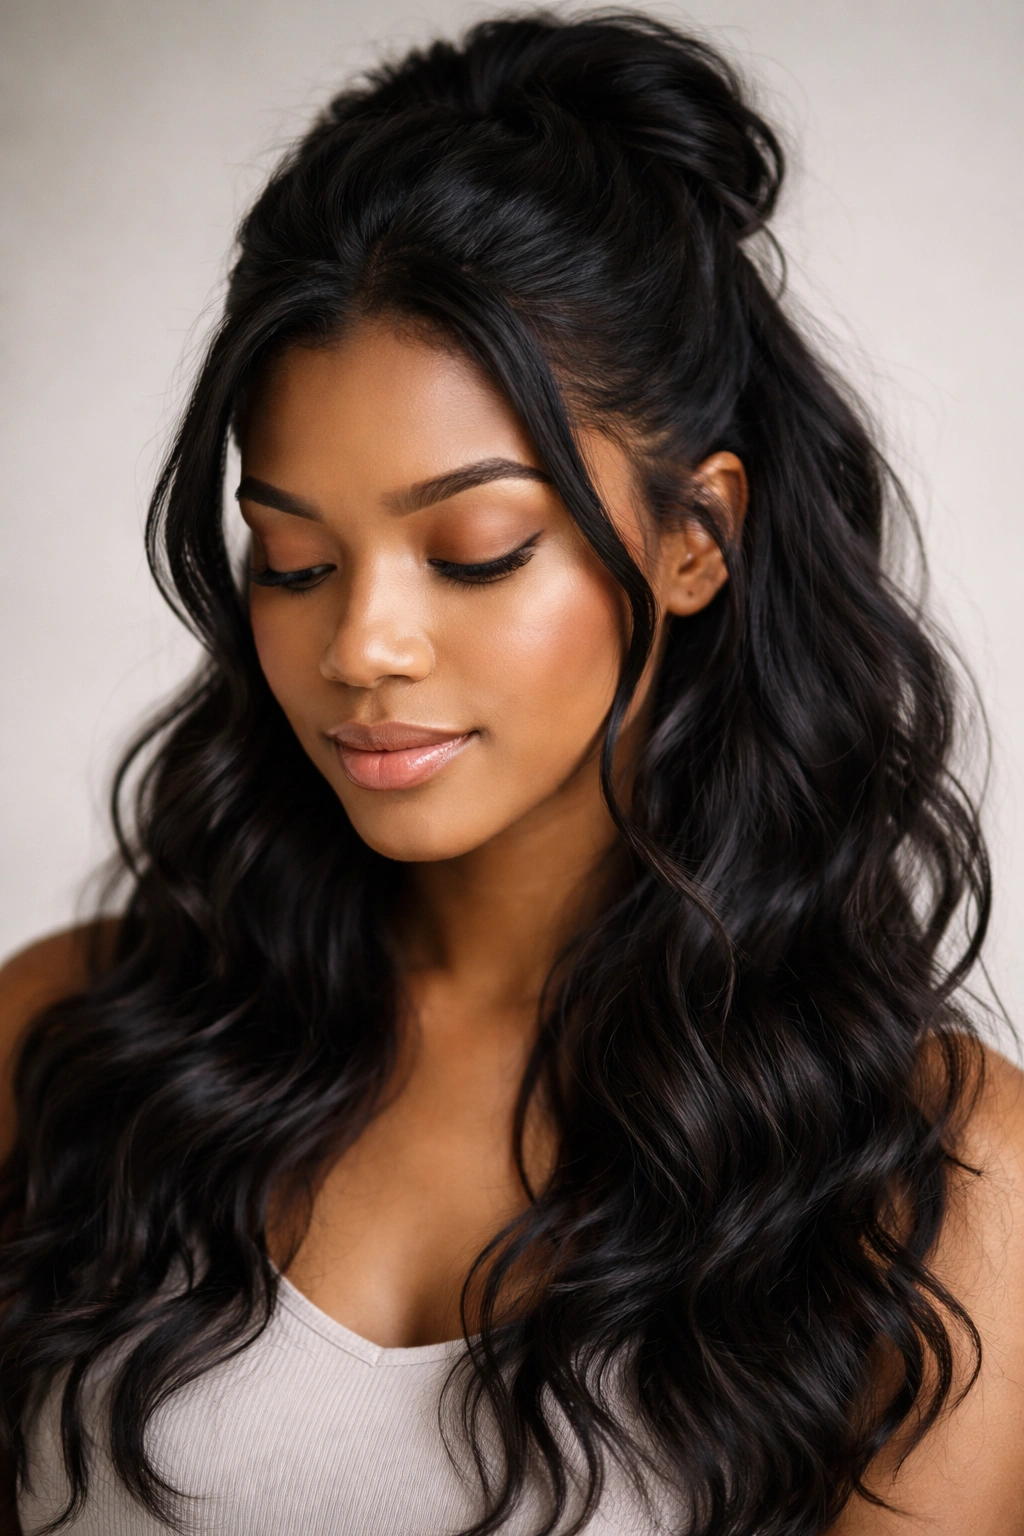
1. Classic Half-Up Twist
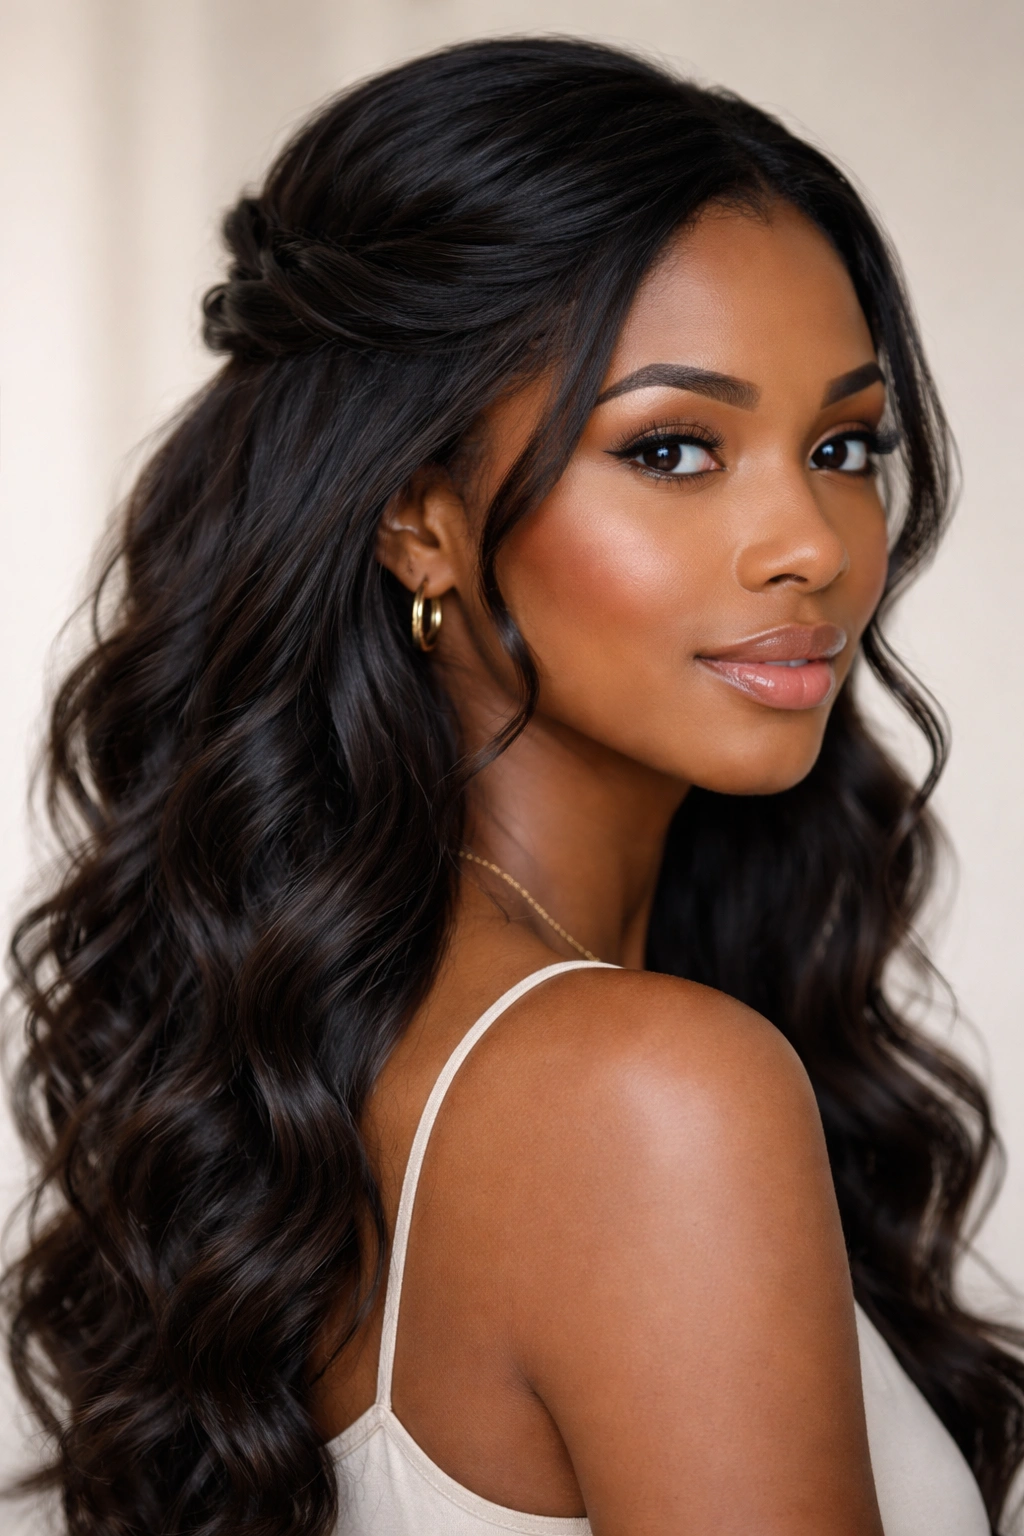
The half-up twist is your foundation style—the one you’ll return to again and again because it’s sophisticated, quick, and works whether your waves are soft or dramatic. Grab a clean section from one side of your head at ear level, twist it gently as you bring it back toward your crown, and secure with a bobby pin or small elastic. The twist itself becomes the visual anchor, and your lower waves fall freely underneath with full movement.
Why This Timeless Approach Works
The beauty of a simple twist is that it relies entirely on the texture you already have—no braiding skill required, no complex technique. Your waves do the heavy lifting, framing your face while the twist keeps hair from falling forward. This style looks intentional whether your waves are defined or soft and tousled, and it reads equally well in casual and professional settings.
How to Perfect Your Twist
- Section from your temple to just behind your ear on one side—the thickness of a pencil or slightly wider depending on your hair density
- Twist gently away from your face, moving toward the back of your head at a slight angle
- Pin the twist underneath so bobby pins stay hidden within the twisted section
- Leave face-framing pieces loose if you want softness around your features
- Mist with a light hairspray to keep the twist intact without crunchiness
- Add a metallic cuff or decorative pin at the base for evening events
Pro tip: Twist in the direction your hair naturally wants to go—if your waves curve away from your face on one side, twist that direction to work with your hair’s pattern rather than against it.
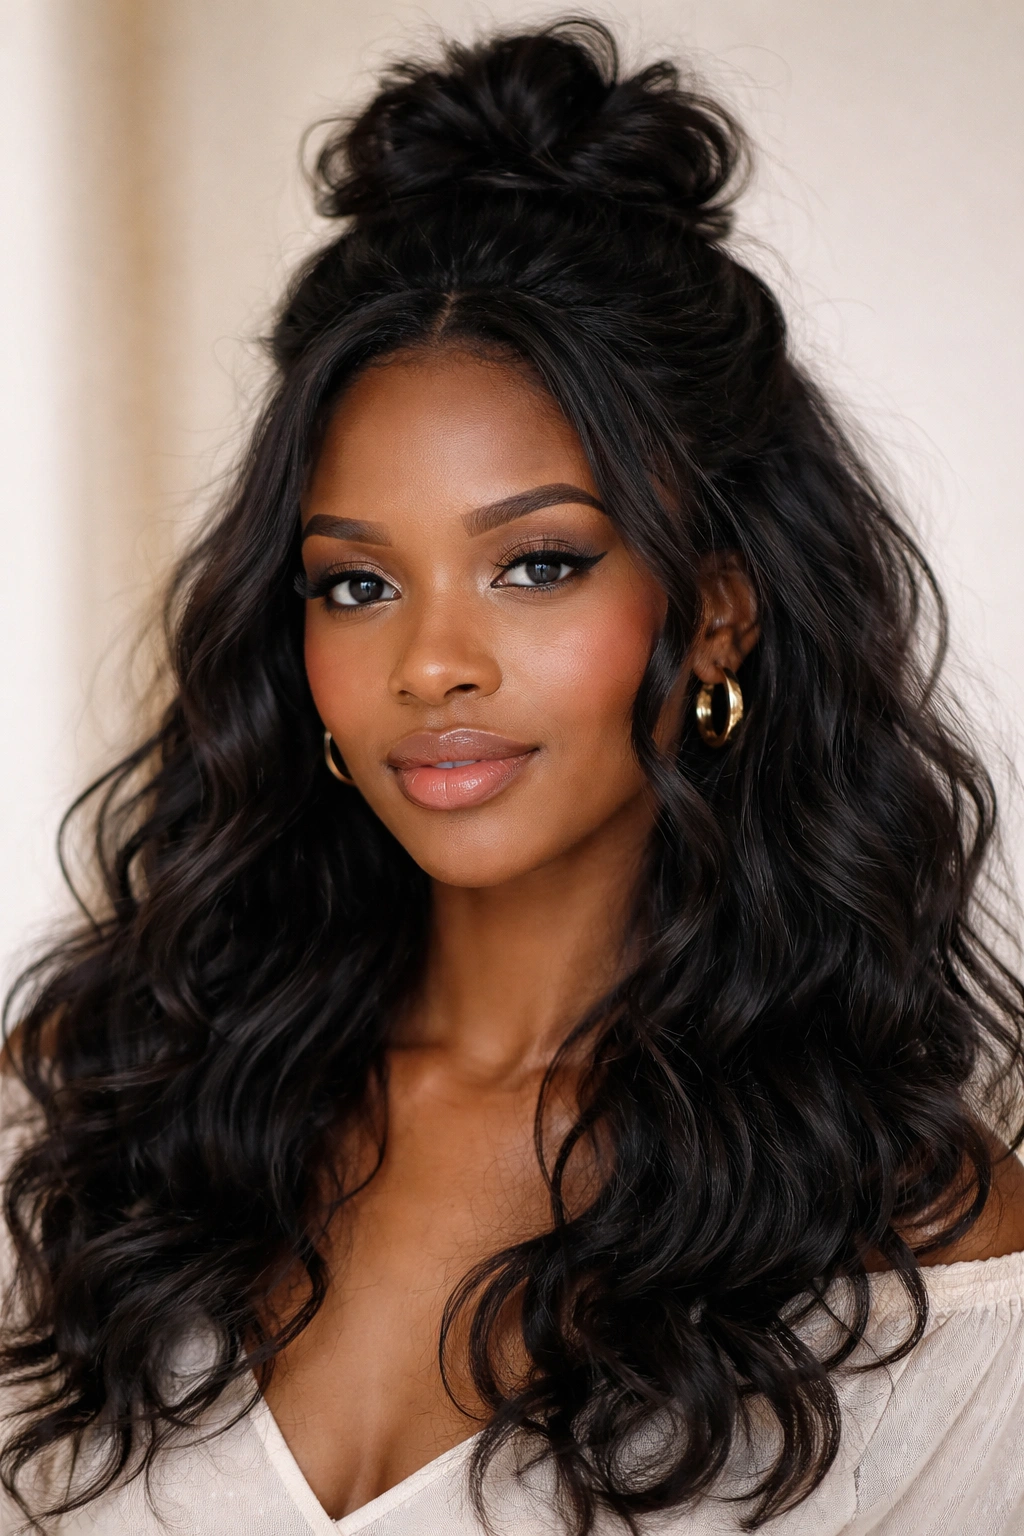
2. Half-Up Top Knot
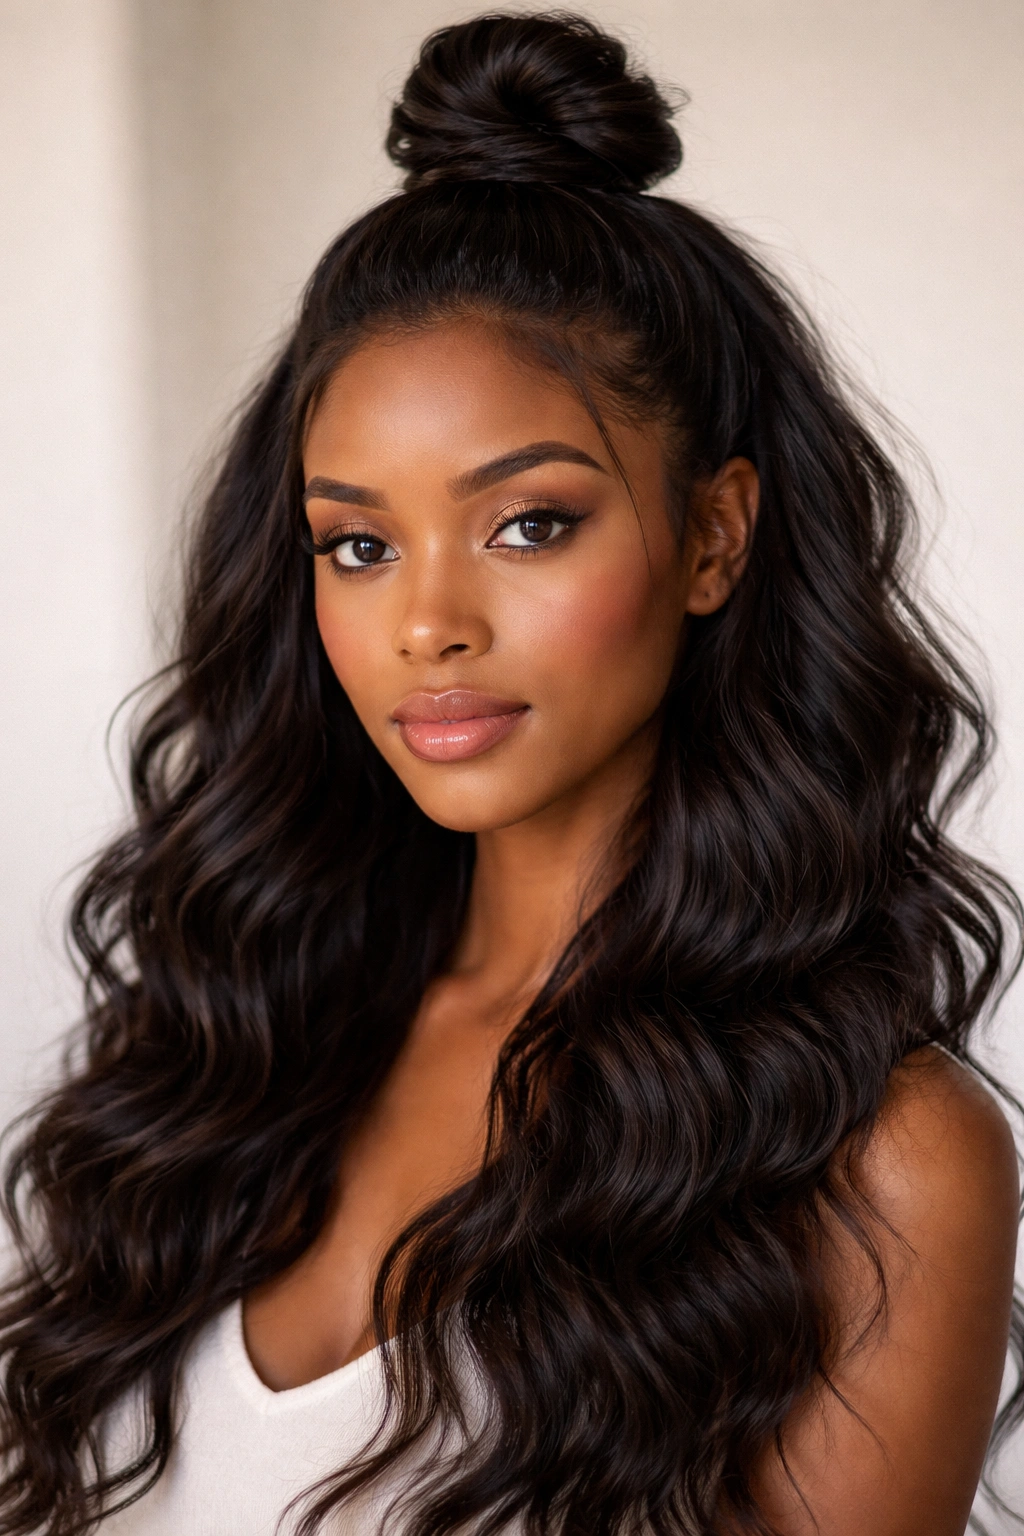
A half-up knot adds height and drama while keeping your waves visible and free-flowing. Section from both temples and gather them toward your crown, then twist or braid as you bring the sections together. Secure the gathered hair into a small, neat knot at the crown using bobby pins, and let your back and lower waves cascade down from underneath. The knot itself becomes the focal point while your length provides the visual weight and movement.
The Height and Proportion Question
A top knot works best when you size it proportionally to your face and hair length. If your knot is too small, it looks skimpy against thick, voluminous wavy hair. Too large, and it overwhelms your features. Aim for a knot that’s about the width of a quarter to a half-dollar—substantial enough to be striking but not so large it looks cartoonish. The knot should sit right at your crown, not too far back where it creates an unflattering angle.
Creating a Half-Up Knot That Lasts
- Tease the crown area lightly to create grip for the knot
- Gather your half-up section and twist it once or twice before coiling it into a knot shape
- Use 4-5 bobby pins inserted at different angles to anchor the knot securely
- Pin directly through the knot so pins are hidden within the twisted hair
- Smooth the outer layer slightly if you prefer a polished look, or embrace the textured, slightly undone vibe
- Finish with hairspray to prevent pieces from slipping throughout the day
Worth knowing: The looser you twist before coiling, the softer and more romantic the knot looks. Twist tighter for a sleeker, more structured finish.
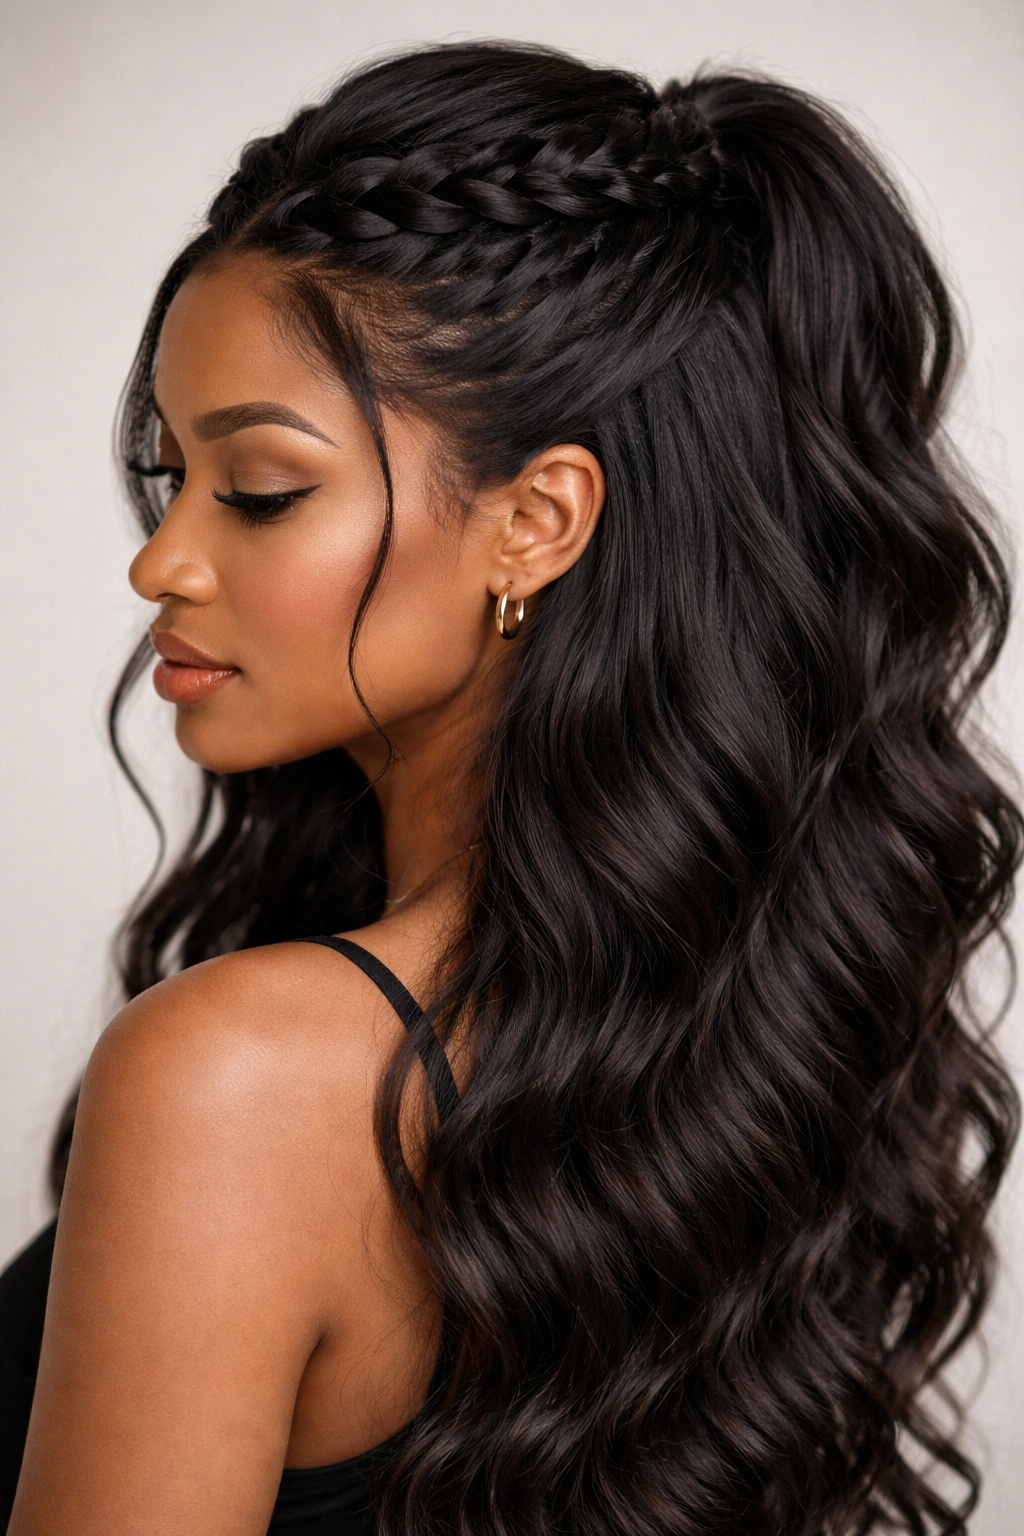
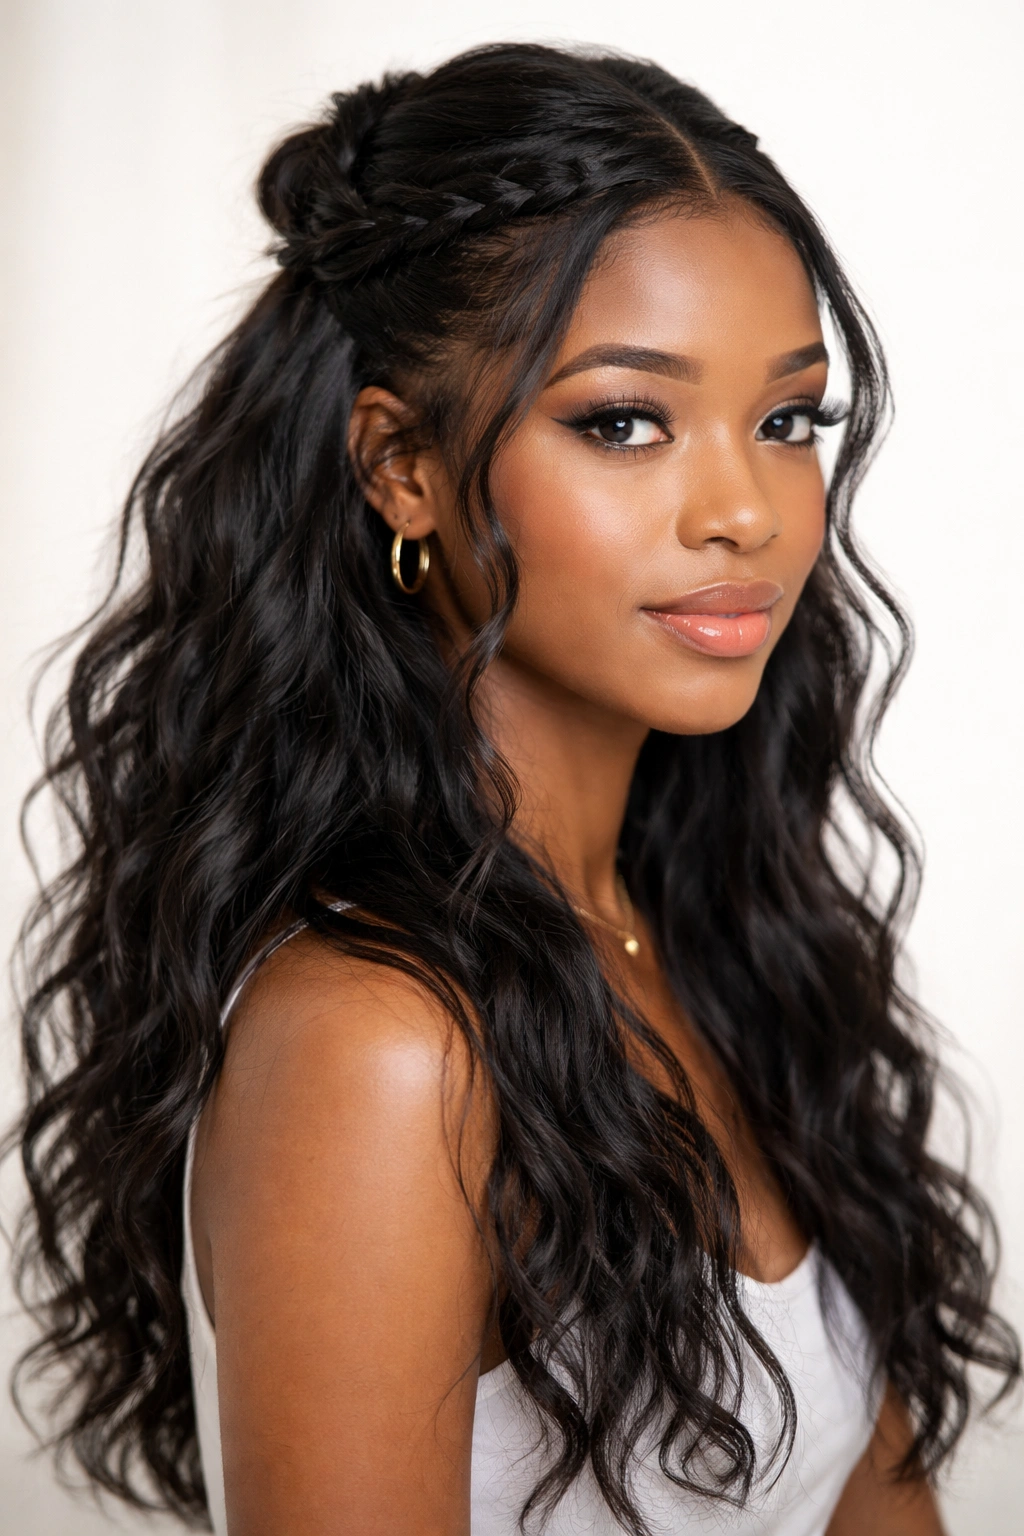
3. Half-Up Braided Crown
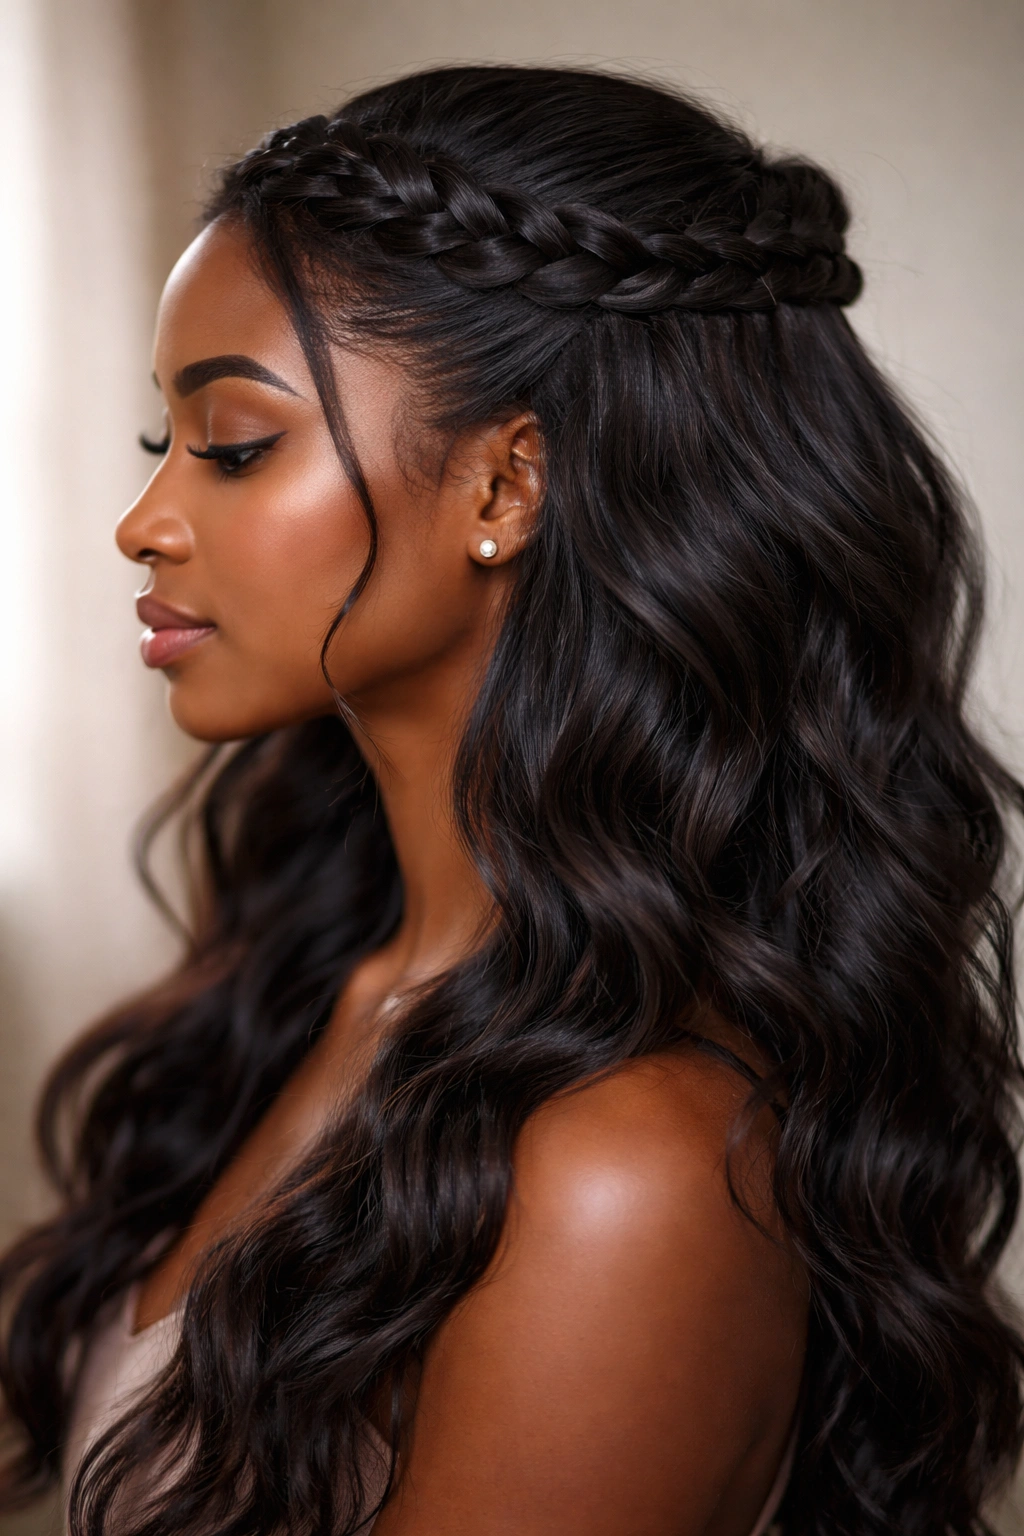
A braided crown elevates your waves from casual to intentional and polished. This style works beautifully on black wavy hair because the braid texture contrasts with and complements the waves underneath. You can French braid, Dutch braid, fishtail, or use a simple three-strand braid—the key is starting the braid at one temple, bringing it across the back of your head, and pinning the end near the opposite ear so the braid frames your crown like a tiara while your lower hair remains free.
Why a Braid Transforms Your Entire Look
A braid is a visual statement. It shows intentionality and effort even if you braided while half-asleep. The contrast between the structured braid and your natural waves creates dimension and interest. Because you’re not pulling hair back tightly—the braid sits at crown level—you avoid the tight, strained appearance sometimes associated with pulled-back styles. Instead, you get softness and movement paired with the polish of a braid.
Braiding Techniques for Maximum Impact
- French braid (three-strand braid incorporating new hair as you go) creates a woven, intricate appearance
- Dutch braid (reverse French braid) sits on top of your hair instead of sinking in, and creates more visible texture
- Fishtail braid uses two sections instead of three and creates a lacy, delicate look that pairs beautifully with voluminous waves
- Looser braids enhance the romantic, effortless vibe—tight braids read more formal and structured
- Pin the braid end near the opposite ear so it curves across your crown rather than dropping to your neck
- Leave face-framing pieces out before you start braiding for a softer frame
Insider note: Dutch braids show more texture and definition than French braids on black hair, so they photograph better and look more striking in motion.
4. Half-Up with Face-Framing Curls
Sometimes the most impactful styling choice is what you don’t pin back. This style takes the half-up concept and intentionally leaves face-framing sections loose and curl-enhanced. Gather your half-up section from ear to ear across the crown, secure it with a pin or elastic, then take the loose sections at your temples and enhance their natural curl with a curling iron, curl cream, or by finger-coiling to define the wave pattern. Your face-framing curls become the focus while the pinned section keeps hair from obstructing your features.
The Science of Strategic Face-Framing
Face-framing pieces soften your entire face and draw attention to your features rather than your forehead or hairline. They also give you movement and dimension in the front while maintaining the sleekness of a half-up style in the back. On wavy hair, subtle face-framing curls look intentional rather than accidental—people notice the styling choice.
Creating Frame-Worthy Curls
- Define your face-framing curls after you’ve pinned back your half-up section so they don’t get caught up
- Use a 1.25-inch or 1.5-inch barrel curling iron on medium heat to enhance (not create from scratch) your natural wave
- Curl the front sections away from your face so they frame rather than obscure
- Set curls with a hold product while they cool—don’t touch them while they’re warm or they’ll relax too quickly
- Use a curl-enhancing cream on damp hair before curling for defined, long-lasting curls
- Leave sections of hair fully wavy rather than tightly curled for a dimensional, effortless look
5. Half-Up Bubble Ponytail
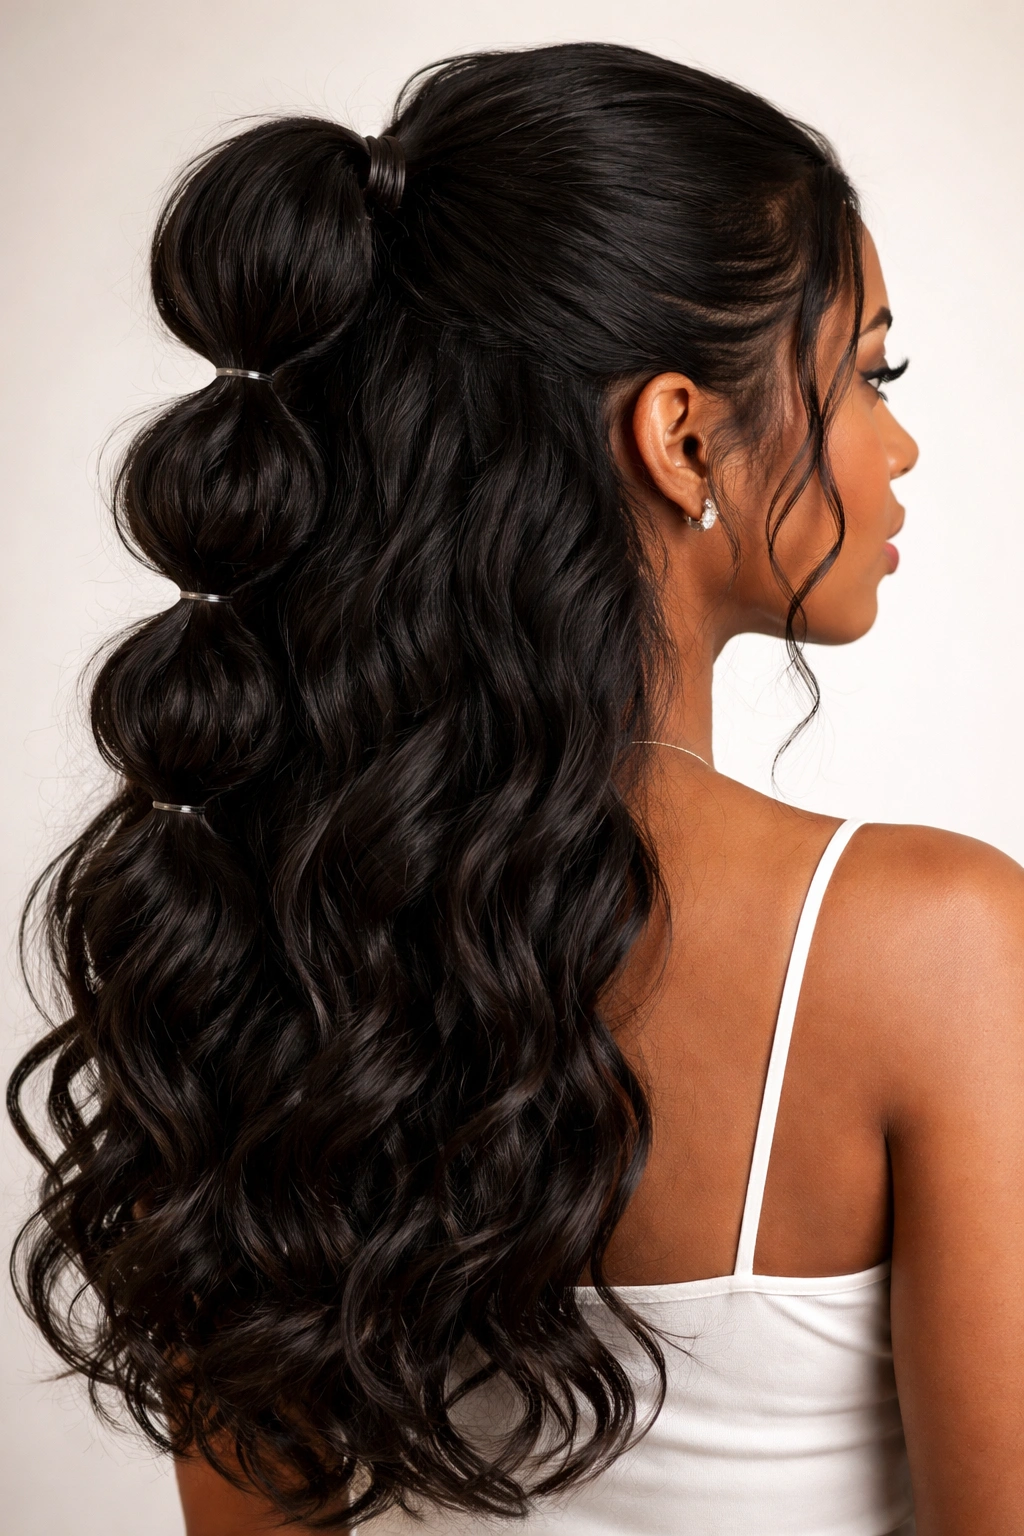
A bubble ponytail is pure playful energy, and it works brilliantly on wavy hair because the natural texture creates the “bubbles” almost automatically. Create a half-up base by gathering hair at your crown and securing with an elastic. Then, using small elastics, create separate sections down the length of that ponytail, spacing them about 2-3 inches apart. Between each elastic, gently fluff and tease the hair section outward to create rounded “bubbles” of texture. Your waves form natural pillows of fullness that make the bubble effect look effortless rather than overly constructed.
Why Bubbles Work on Textured Hair
Bubble ponytails require fullness and dimension to look right—two things your wavy hair naturally provides. Where bubbles might look thin and sparse on straight hair, they look abundant and voluminous on waves. The texture of your hair fills out each bubble section, so you don’t need to tease aggressively to create volume. This style celebrates natural texture instead of working against it.
Building Bubbles That Last
- Start with a secure half-up elastic at your crown—test it by pulling gently before moving forward
- Create bubbles with small, clear elastics or hair-colored ties so they’re less visible
- Space bubbles evenly, or vary spacing slightly for a more organic look
- Tease gently between elastics rather than aggressively—you’re enhancing texture, not creating false volume
- Fluff each bubble by finger-combing upward and outward before securing the next elastic
- Use a light hold hairspray to keep bubbles defined without looking stiff
- Add small clips or pins at the bubble points for extra visual pop and security
Pro tip: Bubble ponytails photograph beautifully from behind, so this is perfect for that angle if you’re doing content creation or heading to an event where you’ll be photographed from multiple angles.
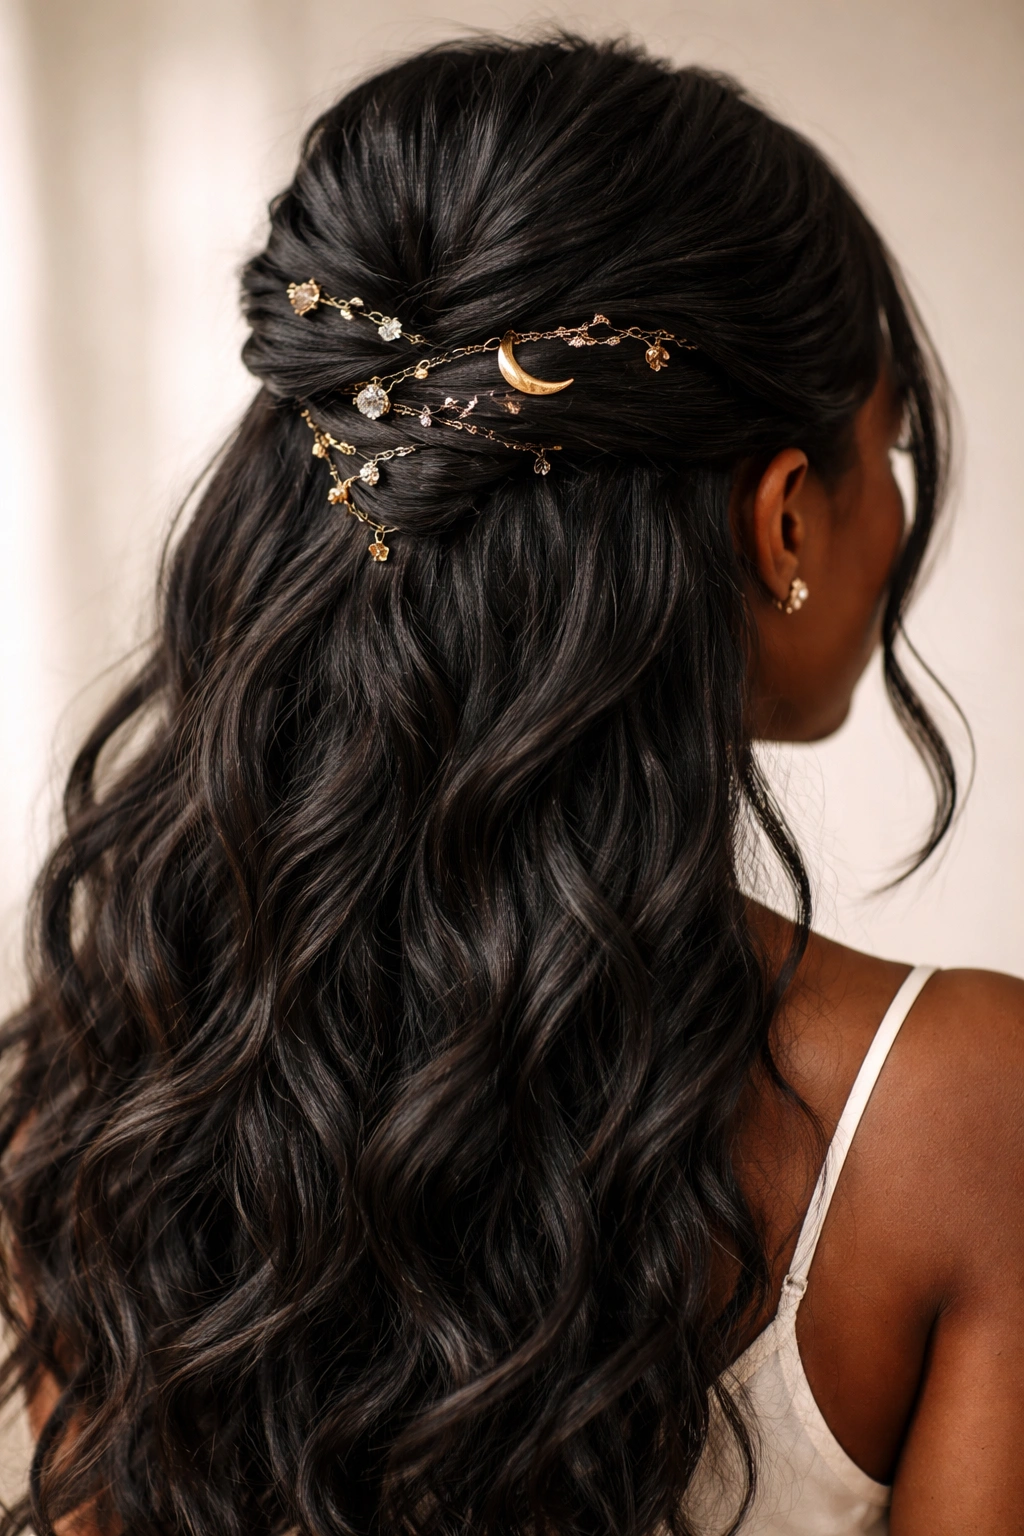
6. Half-Up with Pearl Pins
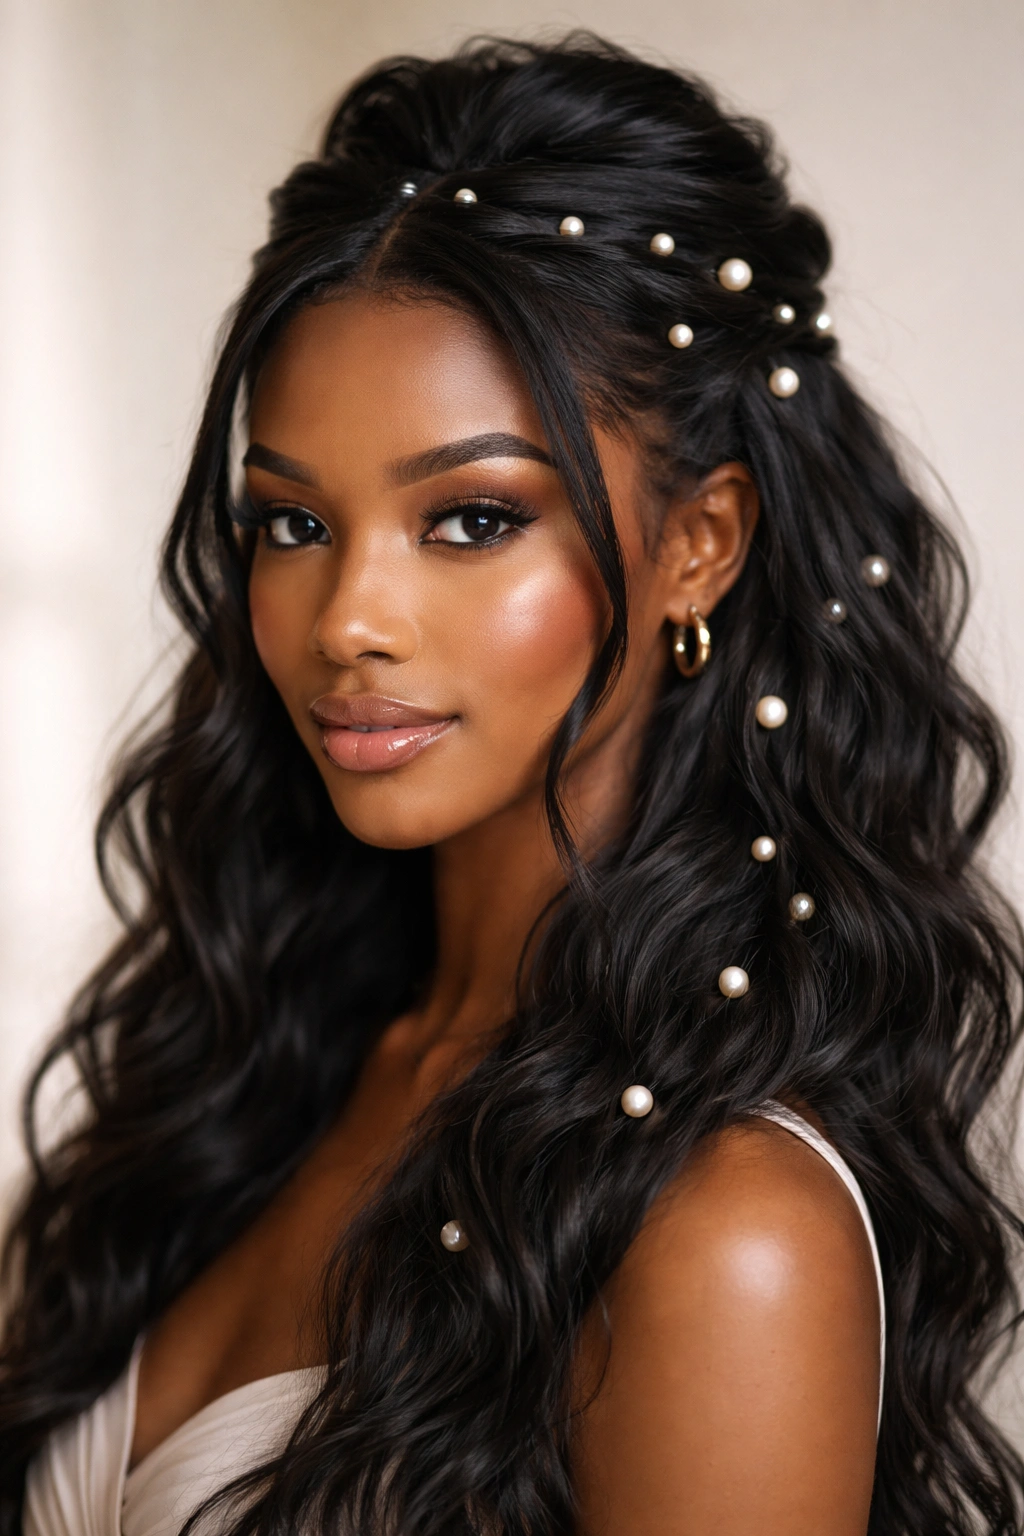
Sometimes the styling statement isn’t what you do with your hair—it’s what you add to it. This ultra-elegant approach takes a simple half-up base and anchors it with pearl pins scattered throughout. Gather your half-up section and secure it simply, then insert pearl bobby pins or decorative pearl clips throughout the pinned area and even into your loose lower waves. The pearls catch the light and create a sophisticated, jewelry-quality finish that transforms a basic half-up into something special.
Accessorizing as Your Main Styling Technique
Pearl pins work because they’re visible—you’re not trying to hide them. They become part of the design. Black hair as a canvas makes pearls, especially vintage or creamy-toned pearls, absolutely stunning. The contrast is striking without being jarring. This approach suits professional settings, special events, date nights, or whenever you want to feel elevated without doing complicated styling.
Using Pins as Statement-Making Accessories
- Start with a simple half-up base—a twist, a small ponytail, or a low knot
- Choose pearls in sizes from small (about the size of a pea) to larger statement sizes
- Distribute pins throughout the pinned section in an intentional but not rigid pattern
- Add a few pearl pins down into your loose waves for visual flow and dimension
- Mix warm-toned pearls with warm gold metallics, or cool-toned pearls with silver for cohesion
- Keep the rest of your styling simple so the pearl pins remain the focal point
7. Half-Up Dutch Braid
A Dutch braid sits on top of your hair, creating visible texture and definition that’s more striking than a French braid. The reverse braiding technique (adding hair underneath rather than on top) creates a raised braid that photographs beautifully and provides a bold visual statement. On black wavy hair, a Dutch braid’s texture pops—it’s not subtle, and that’s the whole point. Start the braid at one temple, Dutch-braid across to the crown, then secure the end with a pin or small elastic and let your waves flow freely beneath and below.
Dutch Braids vs. French Braids: When to Choose Each
Dutch braids are best when you want visibility and impact—they sit proud of your head rather than sinking into your hair. French braids are better for a seamless, woven appearance. For half-up styling, Dutch braids create more interesting texture contrast with your waves underneath. The raised braid becomes the visual anchor while your natural waves provide softness and movement.
Creating a Show-Stopping Dutch Braid
- Start the braid at your temple, taking a section about the width of your thumb
- Dutch-braid (reverse French braid) toward your crown, adding hair from underneath as you go
- Keep the braid relatively loose so it maintains dimension and shows the texture of each hair strand
- Secure at your crown with a bobby pin inserted horizontally through the braid
- Tease the braid lightly for more visible texture, or leave it smooth for a sleeker look
- Leave small face-framing pieces loose before braiding for softness around your features
- Finish with flexible hold hairspray so the braid maintains shape without looking rigid
8. Half-Up with Textured Clip

A decorative clip that matches your hair texture—tortoiseshell, wood-tone, or metallic finishes—becomes the hero of this style. The approach is refreshingly simple: gather your half-up section and secure it with a statement clip rather than a bobby pin or elastic. The clip becomes visible and intentional rather than a hidden fastener. Tortoiseshell clips especially complement black hair’s richness, creating warmth and dimension. Choose a clip that’s substantial enough to feel design-forward without being so heavy it pulls your hair down.
Clips as Intentional Design Elements
Clips have returned as styling statements rather than merely functional hair holders. A beautiful clip says you’ve thought about your look—it’s visible evidence of style. Where bobby pins try to disappear, clips are meant to be noticed and appreciated. This approach is especially effective if your clip has interesting texture, color, or pattern that reflects light and creates visual interest.
Selecting and Using Clips Effectively
- Choose a clip size proportional to the thickness of your gathered hair—too small looks skimpy, too large looks unbalanced
- Position the clip at the back of your head so it’s visible from certain angles but not obtrusive from the front
- Use a clip with teeth or grip rather than smooth clips, which slip on textured, wavy hair
- Tortoiseshell, gold, silver, and wood finishes work beautifully with black hair
- Textured clips add visual interest—avoid smooth, plain clips that blend in
- Consider a vintage or artisanal clip that makes a statement about your personal style
9. Half-Up Puff with Waves
A half-up puff is a protective, celebratory style that works beautifully with your natural texture and creates instant volume and dimension. Gather your half-up section from both temples, tease it gently at the crown, and coil it into a rounded, puffed shape at the very top of your head. Secure with bobby pins, then allow your lower waves to flow freely underneath. The puff sits like a crown while your wavy length provides movement and visual weight. This style is joyful, celebratory, and completely yours.
The Puff as a Style Statement
A puff celebrates natural texture unapologetically. It’s a powerful, proud style that says you’re embracing your hair exactly as it grows. On black wavy hair, a half-up puff is absolutely stunning—the volume and dimension read as luxurious rather than undone. The contrast between the lifted, rounded puff and the looser waves underneath creates dynamic visual interest.
Creating a Structured Yet Soft Puff
- Tease your crown area thoroughly to create the foundation for the puff
- Gather your half-up section and twist or fold it into a rounded shape
- Pin the puff securely with multiple bobby pins angled in different directions
- Don’t over-smooth the puff—some texture and looseness actually enhances the style
- Allow some smaller pieces to escape the puff for a softer, lived-in look
- Use a curl cream or wave-defining product on your lower waves for contrast and dimension
- Finish with a flexible hold hairspray that maintains shape without crunchiness
Worth knowing: The puff doesn’t have to be perfectly round—slightly asymmetrical puffs often look more modern and intentional than geometric perfection.
10. Half-Up Sleek Low-Knot Combo

This style combines two techniques for a polished, dimensional finish: a sleek gathered section at your crown paired with a soft, twisted knot lower down. Instead of pinning your half-up directly at the crown, smooth the gathered section back and secure it low, closer to the nape of your neck. Before you finish the low pony with an elastic, twist the gathered hair and coil it into a soft knot. Secure the knot with bobby pins. Your loose upper waves stay visible while the low knot provides structure and polish.
Layering Techniques for Dimension
This style works because it creates visual interest through varying heights and textures. Your loose upper hair provides movement, the gathered-back section creates a smooth line, and the low knot adds dimension and a polished finish. The contrast between the soft waves and the structured knot is what makes this work. It reads professional yet interesting, polished yet not overdone.
Building Your Low-Knot Half-Up
- Brush your half-up section smoothly toward the back without teasing—you want a sleek foundation
- Secure the gathered hair with a small elastic placed lower than typical, closer to your nape
- Before finalizing the ponytail, twist the gathered hair once or twice
- Coil the twisted hair into a knot shape and secure with bobby pins
- Keep bobby pins inserted at angles so they remain hidden within the knot
- Smooth the outer layer of the knot, or leave it slightly textured for a softer look
- Leave face-framing pieces loose for a softer frame
11. Half-Up Layered Look
This sophisticated style creates the illusion of multiple layers by combining a small half-up knot with a lower second section that’s gathered separately. First, create a small half-up knot or twisted section at your crown—keep it modest in size. Then, below that, gather a second section of hair (starting just above your ears) and secure it with a separate elastic, creating a “layered” effect where your half-up knot sits above a second gathered section. Your lowest waves remain free. This approach creates visual complexity and dimension without being labor-intensive.
The Visual Impact of Layering
Layered half-up styles read as intentional and thoughtful. The eye travels down your hair following each section, creating visual interest and movement. On wavy hair, this layering plays beautifully with your natural texture—each section has its own dimension and movement. The layered approach also gives you options: you can match the layers in style (both twisted, both braided) or contrast them for more interesting texture.
Creating a Cohesive Layered Style
- Keep the crown knot or twist relatively small so the lower section remains visually dominant
- Space your sections about 2-3 inches apart vertically so they’re clearly distinct but not separated so much they look disconnected
- Use matching elastics or keep them neutral so they’re less visible
- Vary the techniques: try a twist at the crown and a simple gathered section below, or braid the top and knot the bottom
- Allow some loose wavy pieces between sections for visual flow
- Use a light hold product so each section maintains shape without looking stiff or constructed
12. Half-Up with Gold Cuff
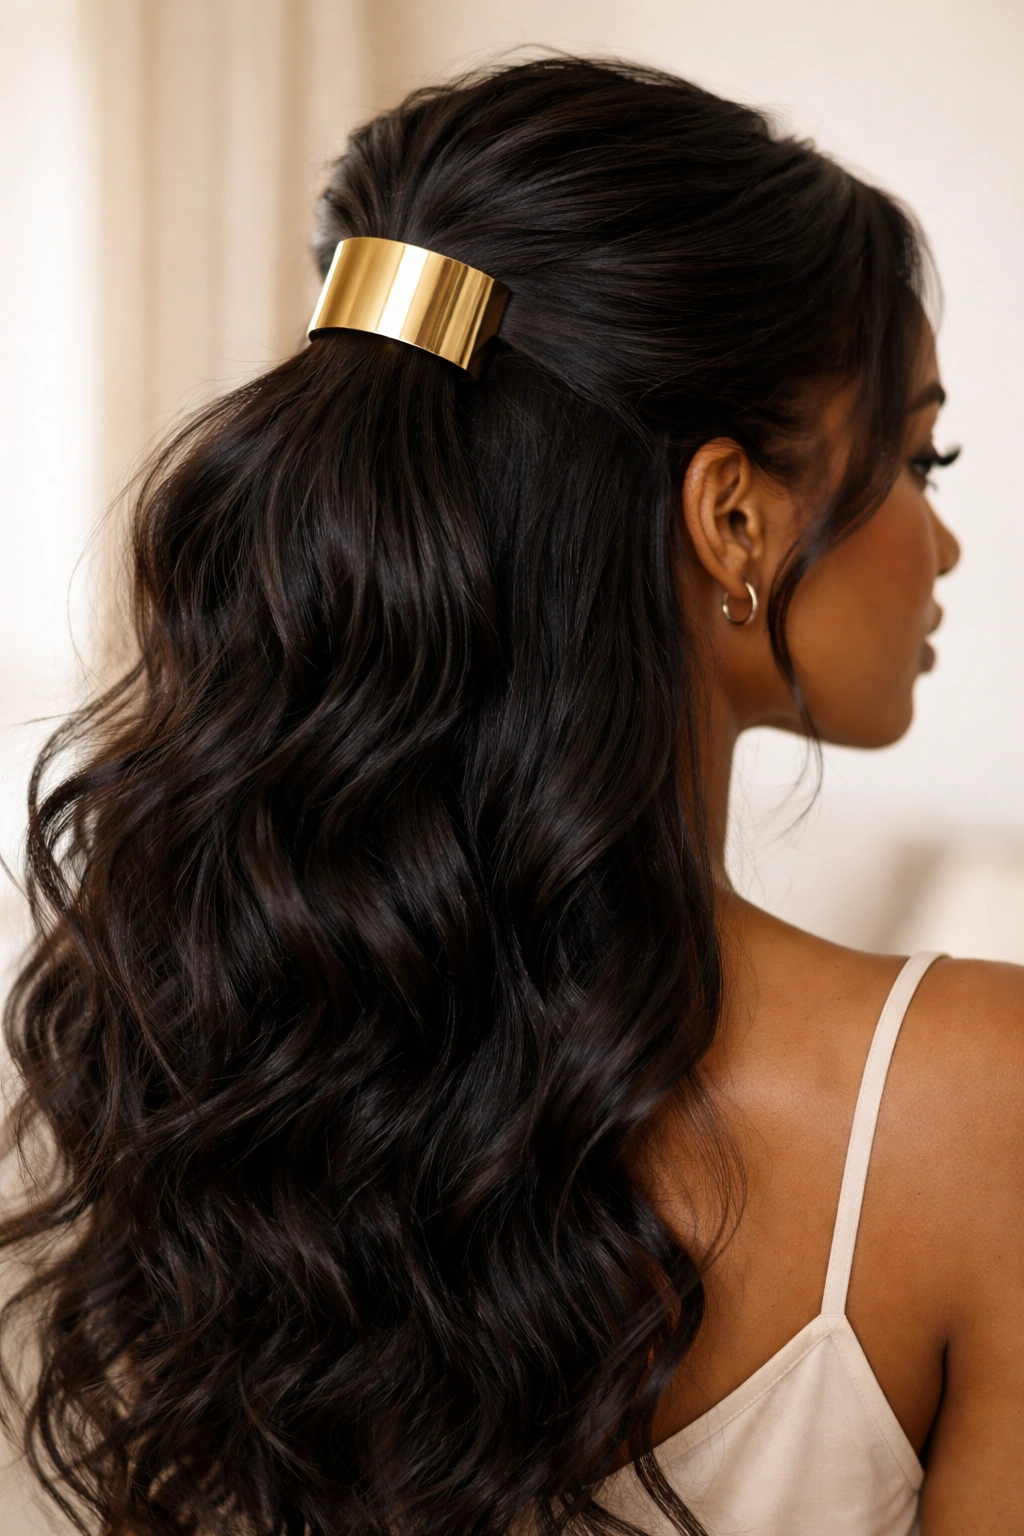
A metallic cuff—especially gold, which glows beautifully against black hair—transforms a simple half-up into something luxe and intentional. Gather your half-up section into a small ponytail at your crown, then slide a wide gold cuff or decorative band over the elastic base. The cuff hides the elastic while adding a jewelry-quality finish. The metallic catches light beautifully, creates dimension, and reads as elevated. This is an effortless way to add polish and personality to your styling.
Metallic Finishes as Styling Statements
Gold is the ultimate complement to black hair—the warmth of gold against the richness of black creates an elegant, luxurious contrast. Cuffs are visible, wearable art. They’re practical (they hide elastics) and beautiful (they catch light and draw the eye). A good metallic cuff can elevate even the simplest styling.
Choosing and Using Cuffs Effectively
- Look for cuffs made from actual metal or high-quality metal-finish materials—cheap-looking cuffs cheapen your entire look
- Wide cuffs (about 1-2 inches) make more of a statement than thin ones
- Gold tones warm up your complexion and work beautifully with deeper skin tones
- Rose gold and copper create a slightly warmer tone than traditional gold
- Fit the cuff snugly but not tightly—it should be easy to slide onto your ponytail without struggle
- Position the cuff at the base of your half-up ponytail so it’s visible and centered
- Keep the rest of your styling simple when using a statement cuff so the cuff remains the focal point
13. Half-Up Twisted Knot
A twisted knot is the elevated cousin of a simple twist—it adds complexity while remaining entirely manageable. Instead of securing your twisted section with a single bobby pin, coil the twist itself into a knot shape at your crown before pinning. This creates a dimensional, sculptural look that reads as more polished than a basic twist. The coiled knot becomes a textural focal point while your loose waves provide movement and softness underneath.
Knots as Dimensional Design Elements
A knot has dimension and depth that a twist alone doesn’t. It sits proud on your head rather than blending into your hair. Twisted knots work beautifully on wavy hair because the texture of the twist is already visible—when you coil it into a knot, that texture becomes three-dimensional. The result looks intentional and artfully styled without being overly complicated.
Perfecting Your Twisted Knot
- Gather your half-up section from one side of your head, starting at temple level
- Twist the gathered hair as you bring it toward your crown—twist firmly enough that it holds but not so tightly that you strain your scalp
- At your crown, coil the twisted hair into a knot shape, keeping the twist visible and textured
- Pin the knot securely with 3-4 bobby pins angled in different directions
- Leave small pieces loose around your face before twisting for a softer frame
- Tease the knot lightly after pinning if you prefer texture and dimension, or leave it smooth for a sleeker look
- Use flexible hold hairspray to maintain the knot’s shape throughout the day
14. Half-Up with Accessory Blend
This style celebrates layering multiple accessory types together for a rich, collected look. Start with your half-up foundation—a twist, braid, or gathered section—then add multiple complementary accessories: small clips, pins, or cuffs placed throughout. A pearl clip might sit at the base of your twist, a gold cuff might wrap around the elastic, and a few delicate pins might trail through the twisted hair. The combination creates a curated, jewelry-like finish without looking costume-y.
Accessorizing with Intention
When mixing multiple accessories, the key is intentionality and cohesion. All your metallics should coordinate (all gold, or all silver, or all rose gold—not a mismatched mix). Your other accessories should complement rather than compete. The overall effect should feel like you’ve curated your look with thoughtfulness, not thrown every hair accessory you own into one style.
Blending Accessories Seamlessly
- Choose a unifying metal color (all gold, all silver, or all copper) so accessories feel coordinated
- Vary the types of accessories: mix clips, pins, and cuffs for visual interest
- Place larger statement pieces where they’ll be most visible, and tuck smaller pieces subtly
- Ensure accessories complement but don’t compete—if your cuff is bold, keep pins delicate
- Test the combination before settling on your final look to ensure it feels balanced
- Secure everything thoroughly so nothing shifts during the day
- Use a light hand—the goal is “curated” not “overdone”
15. Half-Up Soft Bun
A soft, undone bun paired with free-flowing waves creates romantic, effortless polish. Gather your half-up section and create a loose, slightly messy bun rather than a tight, precise one. Leave small pieces free around your face. The softness of the bun pairs beautifully with your natural waves, creating a cohesive, intentionally casual look that reads as elevated and thoughtful rather than undone.
The Power of “Softly Undone” Styling
Soft, slightly imperfect styling reads as more modern and interesting than geometric precision. A perfectly smooth, tight bun might look overdone on wavy hair. A soft, slightly textured bun that echoes your natural wave pattern feels like you’ve made a styling choice rather than fought against your hair’s nature. This approach celebrates your texture rather than working against it.
Creating a Bun That’s Soft But Holds
- Gather your half-up section at your crown and secure with a small elastic
- Rather than pulling tightly through the elastic to create a ponytail, loop the gathered hair through only once, creating a bun loop
- Leave the ends of your hair loose—don’t wrap them around the elastic
- Tease the bun loop gently for texture and dimension
- Let small pieces fall loose around your face and neck
- Pin any sections that feel unstable, but embrace some looseness
- Use a flexible hold hairspray that maintains shape without crunchiness or stiffness
Pro tip: The softest, most romantic buns come from slightly damp, freshly washed hair—the moisture gives the hair grip so the bun holds without being pulled tight.
16. Half-Up with Undercut Detail
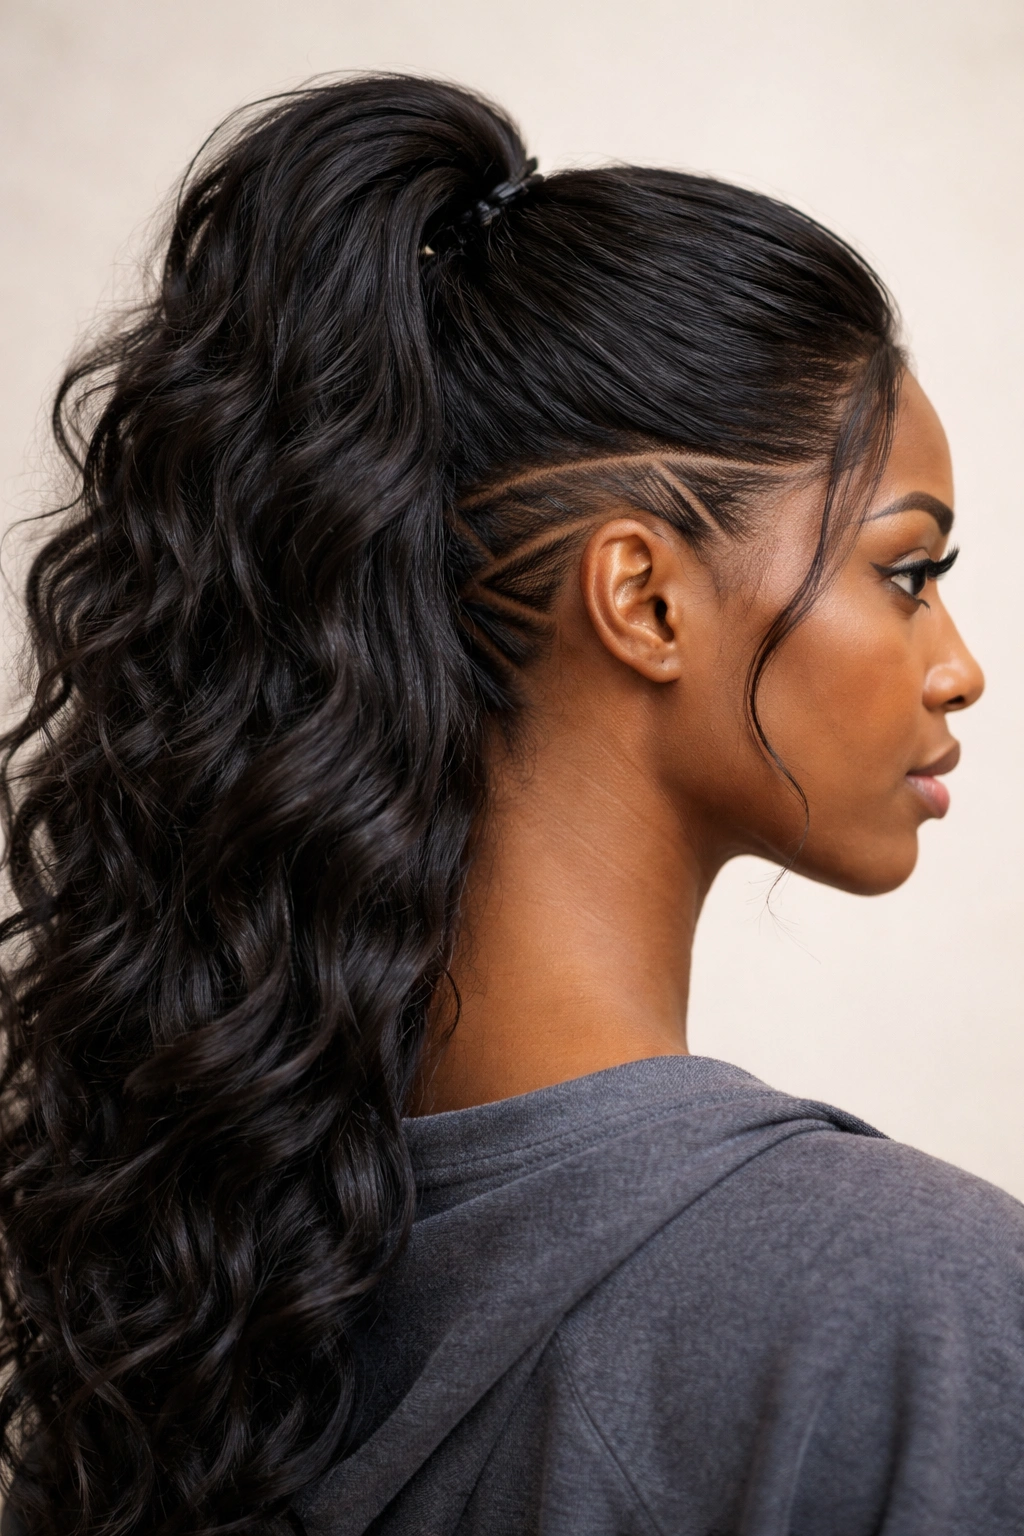
If you have an undercut or shaved detail at your nape or temples, a half-up style showcases it beautifully. The contrast between your gathered upper hair and the clean lines of your undercut creates edgy visual interest. This works especially striking with intricate undercut designs—geometric patterns, lines, or detailed shaving—because the half-up style frames and highlights that artwork. Your gathered section provides polish while your undercut provides edge.
When an Undercut Becomes the Focal Point
An undercut is a bold styling choice that deserves to be shown. A half-up style keeps your upper hair gathered and polished while allowing your undercut to peek through and be appreciated. This creates a stunning balance: conservative and edgy, polished and bold. It’s particularly striking on black hair where the contrast between the hair and the clean-shaved skin is sharp and graphic.
Styling to Highlight Your Undercut
- Keep your half-up style relatively simple so it doesn’t distract from your undercut detail
- Use a sleek gathered section or smooth twist—nothing too textured that competes visually
- Wear your undercut side visible; don’t let your half-up gathering cover it
- Consider your undercut design when choosing your half-up style—simple undercuts pair with complex braid styles, while detailed undercut designs pair better with simple gathers
- Style your undercut freshly (touching up shaving as needed) if you’re showing it as part of your styling statement
- Use a firm hold product on your undercut area so it looks intentional and precise, not grown-out
17. Half-Up Space Buns
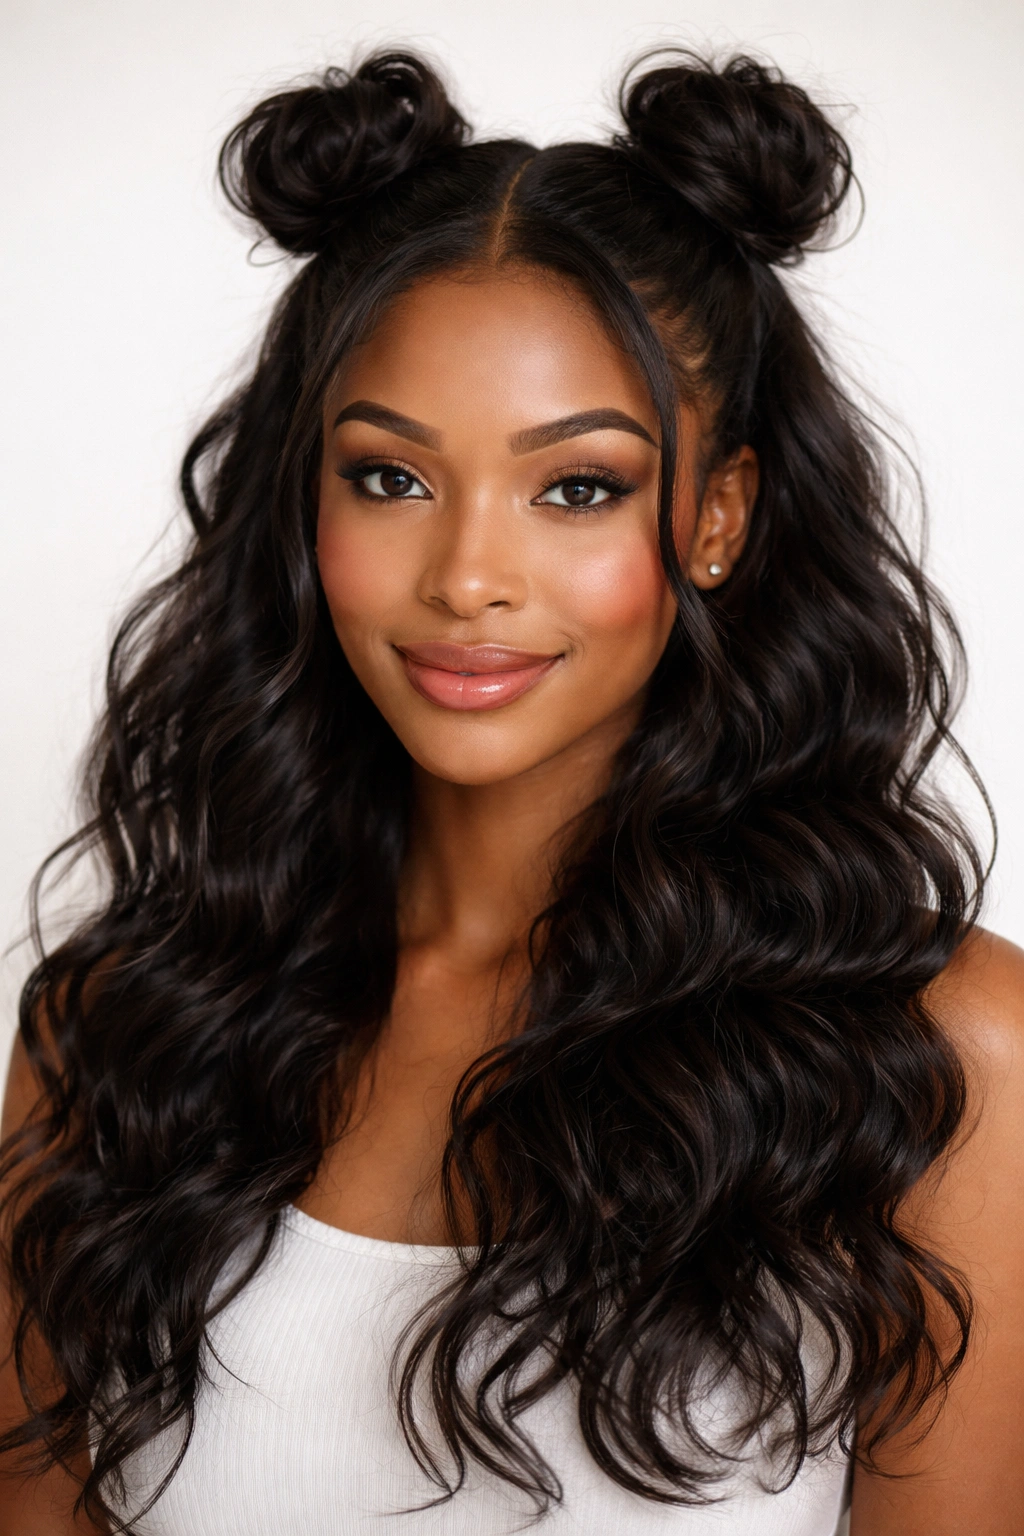
Space buns—two small buns placed symmetrically at the crown—create playful energy while remaining sophisticated when done on wavy hair. Gather the top half of your hair from both sides of your head, then divide that gathered hair into two sections. Coil each section into a small, soft bun and pin each one on either side of your crown. Your lower waves remain completely free. The dual buns create instant dimension, the playful asymmetry reads as intentional, and your waves provide the movement and softness that keeps this from looking juvenile.
The Playfulness of Space Buns
Space buns are joyful and celebratory without being costume-y when executed with intention. The key is keeping the buns soft and imperfect rather than geometric and precise. Symmetrical placement grounds them, while texture and looseness adds sophistication. On wavy hair, space buns become a genuine style choice rather than a throwback trend.
Creating Space Buns That Work
- Divide your hair into two equal vertical sections from your crown toward your temples
- Gather each side and secure temporarily with small elastics to keep them separated
- Tease each gathered section lightly for volume and grip
- Coil each section into a soft bun shape—don’t aim for perfect symmetry, embrace slight variation
- Pin each bun securely with multiple bobby pins
- Leave small pieces loose to soften the overall look
- Allow some texture to remain visible rather than smoothing the buns completely
- Vary the size slightly if you prefer—same-sized buns read as more playful, varying sizes read as more intentional
Worth knowing: Space buns work especially well if your hair is on the fuller side—thinner hair can look wispy with this style.
18. Half-Up Protective Style Hybrid
This style thoughtfully combines protective styling with the open, air-drying benefits of a half-up style. Create a half-up base using a low-tension braid or gathered section that doesn’t pull at your hairline or edges. Then, style your lower waves loosely—either air-dried, enhanced with curl cream, or styled with a diffuser. This approach protects your upper hair and hairline while allowing your lower waves to breathe and dry naturally. It’s a smart styling solution for protecting your hair while celebrating your natural texture.
When Protective Styling Meets Texture Celebration
Protective styles typically mean bundling all your hair away, which can limit your ability to showcase your natural waves. This hybrid approach allows you to be protective where it matters (reducing manipulation, protecting edges, minimizing heat) while celebrating your texture where it works best (your freely-falling waves). It’s a practical, beautiful solution that prioritizes both hair health and self-expression.
Building Your Protective Hybrid Style
- Use a low-tension braid or soft twist for your half-up base—avoid tight tension that strains your scalp or hairline
- Position your gathering at or slightly behind your crown, not tightly pulled back
- Style your lower hair with low-manipulation methods: air-drying, finger-coiling, or diffuser-drying
- Use curl-defining cream or leave-in conditioner on your lower waves for definition and hydration
- Keep the rest of your styling gentle—no tight clips, no heavy accessories
- Plan to refresh your style every 2-3 days rather than sleeping in it to minimize frizz and stress
- Use a silk or satin pillowcase to protect both the half-up section and your lower waves overnight
Final Thoughts
Half-up styling for black wavy hair is about working with your texture, not against it. Each of these eighteen styles celebrates the natural movement and dimension you already have while giving you the practical benefit of keeping hair off your face and neck. The beauty of half-up styling is its versatility—you can dress the same base style up for evening or down for everyday, add accessories to transform your look, or keep it minimal and clean depending on your mood and setting.
The real secret isn’t complicated technique or expensive products. It’s understanding your hair’s natural pattern, respecting your texture by not fighting it, and choosing styling approaches that enhance rather than diminish your waves. When you let your hair do what it naturally wants to do—move, wave, shine—every style becomes more beautiful. The half-up styles that work best are the ones that feel effortless because they’re aligned with your hair’s natural tendencies, not opposing them.
Your wavy hair is an asset, not something to overcomplicate or mask. Whether you choose a simple twist, an intricate braid, a statement-making knot, or any of the styles in between, you’re creating a look that’s entirely yours—uniquely shaped by your texture, your face, your style preferences, and the way your particular waves move and catch light. That’s the real magic of half-up styling.